8. Wearables
Wearable refers to the set of electronic devices and devices that are incorporated in some part of our body continuously interacting with the user and with other devices in order to perform some specific function, which may be movement, sound, light, etc.
For this assignment, we experiment with,
- Heat
- Movement
- Lights
All of this experiments came with the programming part sooo....here we go!
Movement + Heat
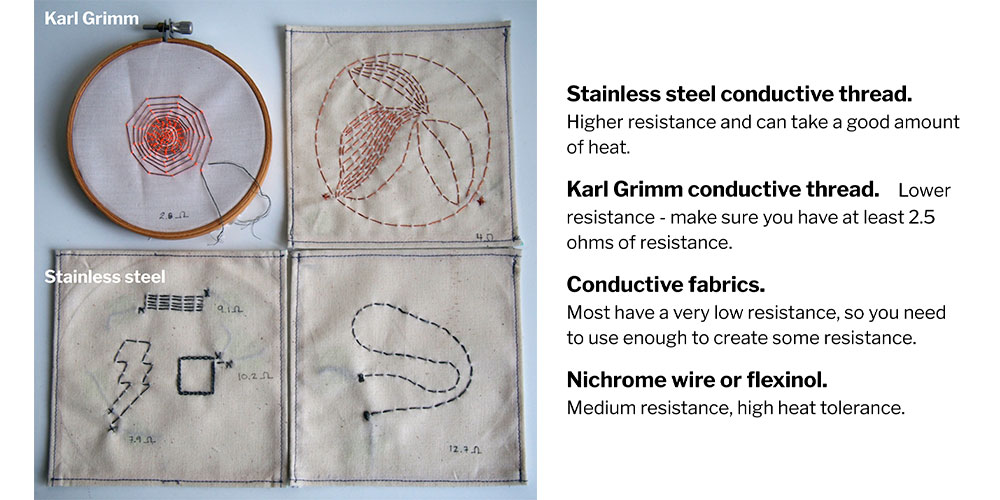
As heating needs a lot of power, Arduino pins can't provide the power we need for a conductive thread. To make it work, we decided to create a circuit where we can add a secondary power source for this heating element to work.
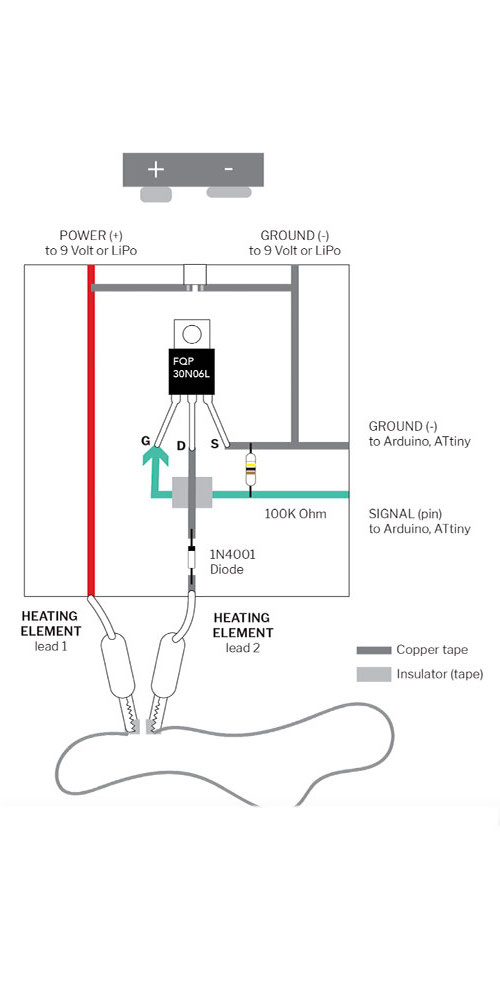
We use the transistor as an electrical switch, by applying voltage to the gate using the Arduino. With this current can flow between the drain and the source.
// the setup function runs once when you press reset or power the board
void setup() {
  // initialize digital pin LED_BUILTIN as an output.
  pinMode(13, OUTPUT);
  pinMode(3, INPUT);
}

// the loop function runs over and over again forever
void loop() {
  if (digitalRead(3) == LOW){
    digitalWrite(13, HIGH);
  }
  else {
    digitalWrite(13, LOW);
  }
  delay(5 00);                       // wait for a second
}
Video of the circuit working
Heat
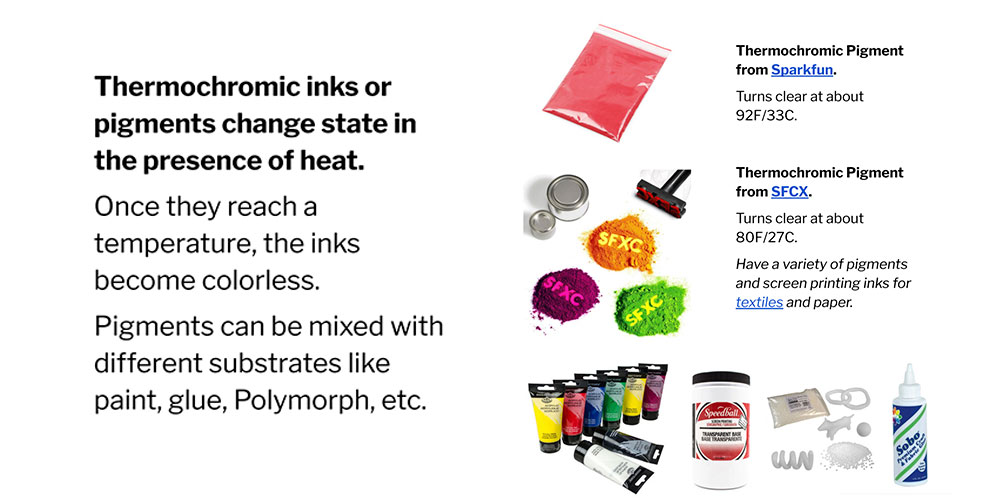
For this exercise we use the same circuit that we have from the last example, the difference now is the outcome, now we're gonna try with Thermochromic Inks.
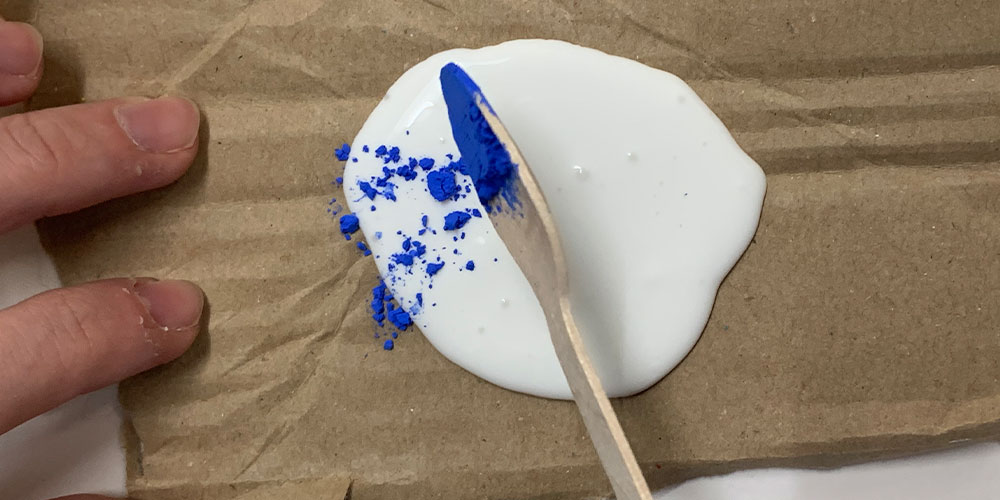
This time we use the blue pigments, to turn it into the "ink" we have to mix it with a bit of white glue.
For this wearable programming part, as is the same circuit, we use the same code as the SMA sample,
// the setup function runs once when you press reset or power the board
void setup() {
  // initialize digital pin LED_BUILTIN as an output.
  pinMode(13, OUTPUT);
  pinMode(3, INPUT);
}

// the loop function runs over and over again forever
void loop() {
  if (digitalRead(3) == LOW){
    digitalWrite(13, HIGH);
  }
  else {
    digitalWrite(13, LOW);
  }
  delay(5 00);                       // wait for a second
}
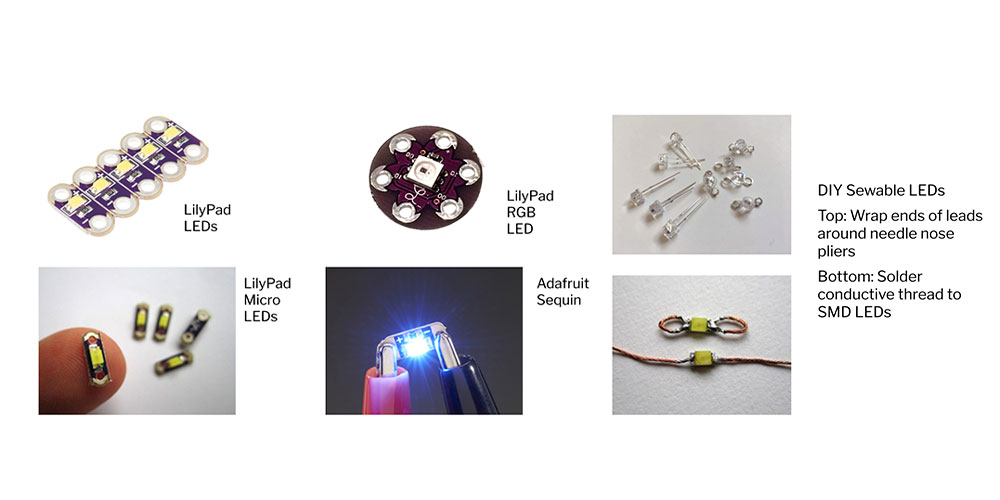
Lights - LEDS
You can check the video here
Thanks for reading! See you next week :)