II. | DIGITAL BODIES

| INSPIRATION |
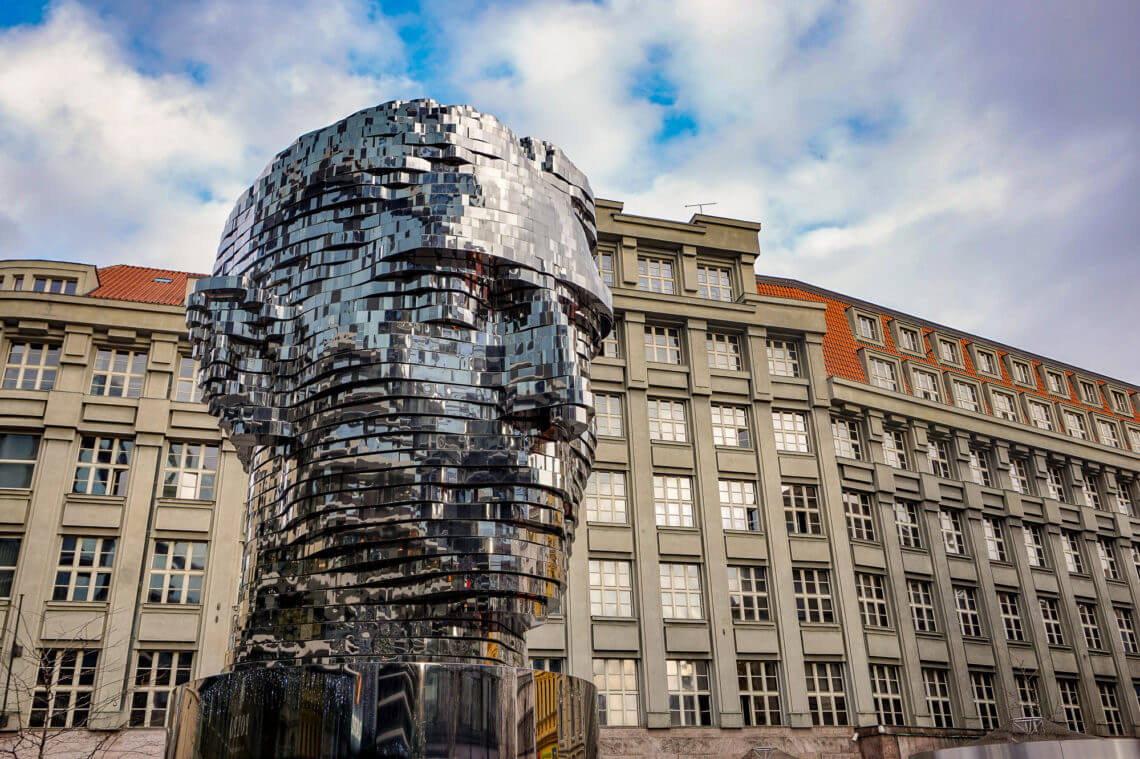
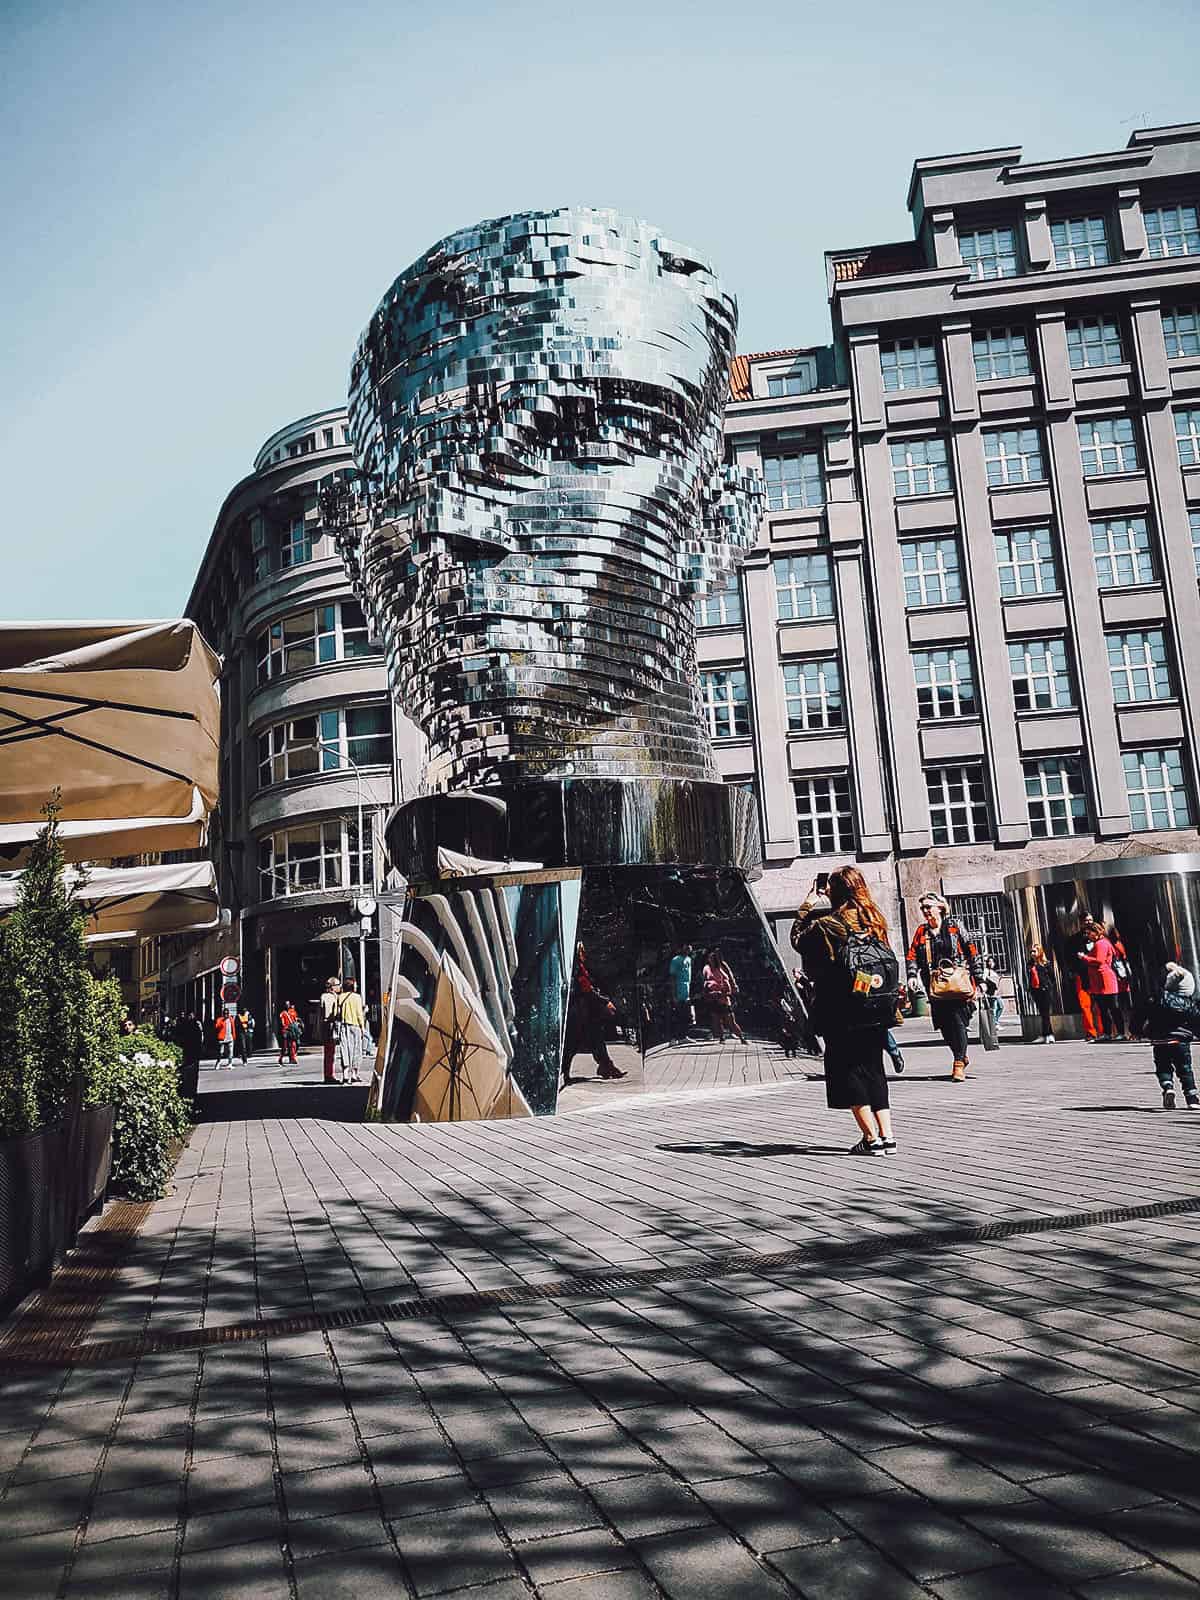
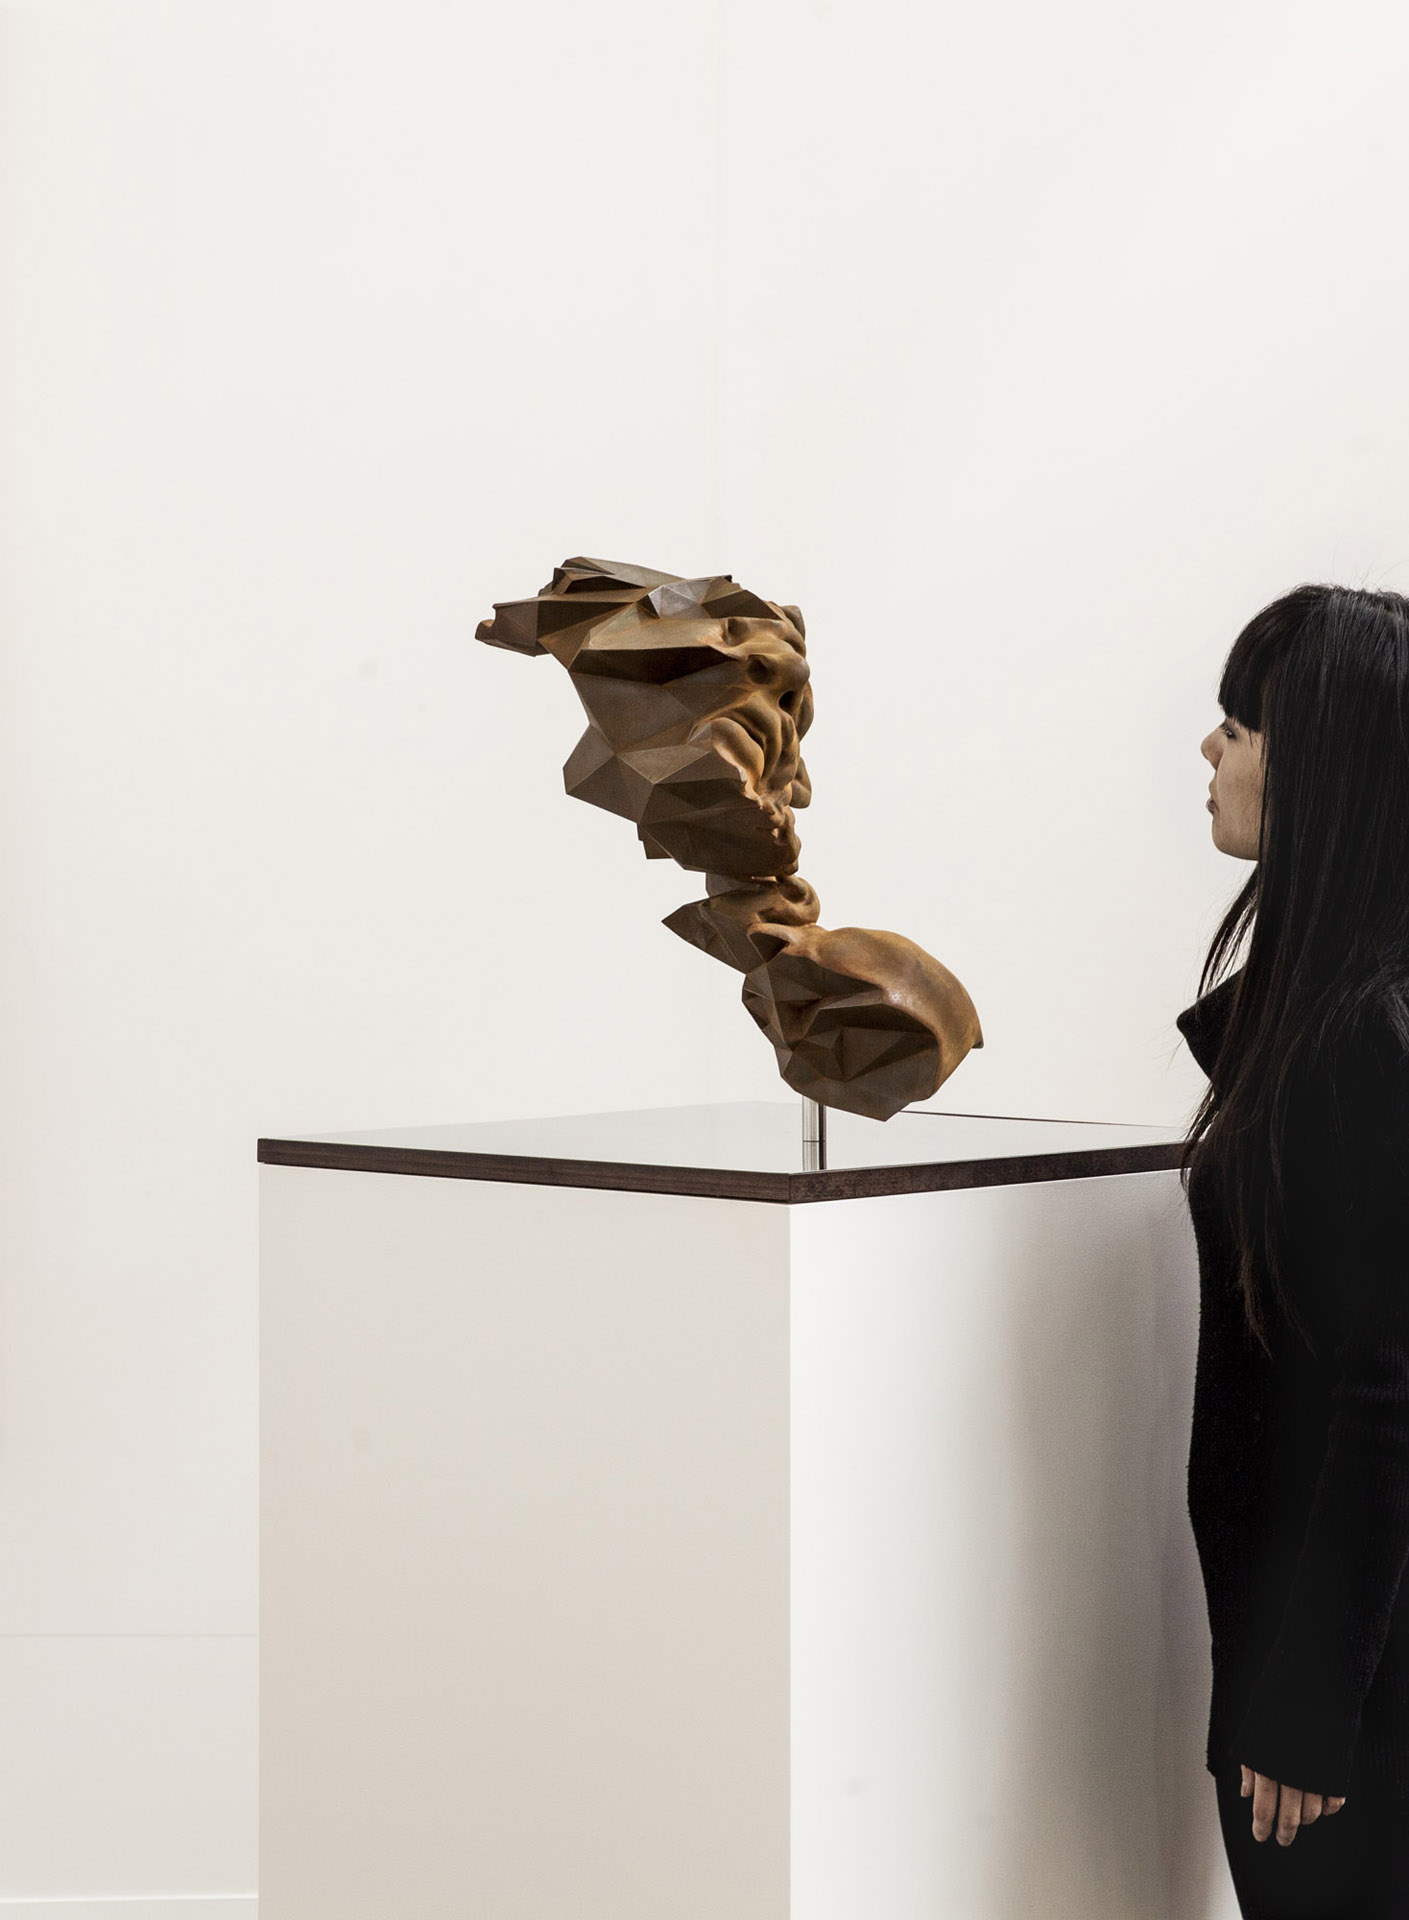
DAVID ČERNÝ | METAMORPHOSIS / HEAD OF FRANC KAFKA
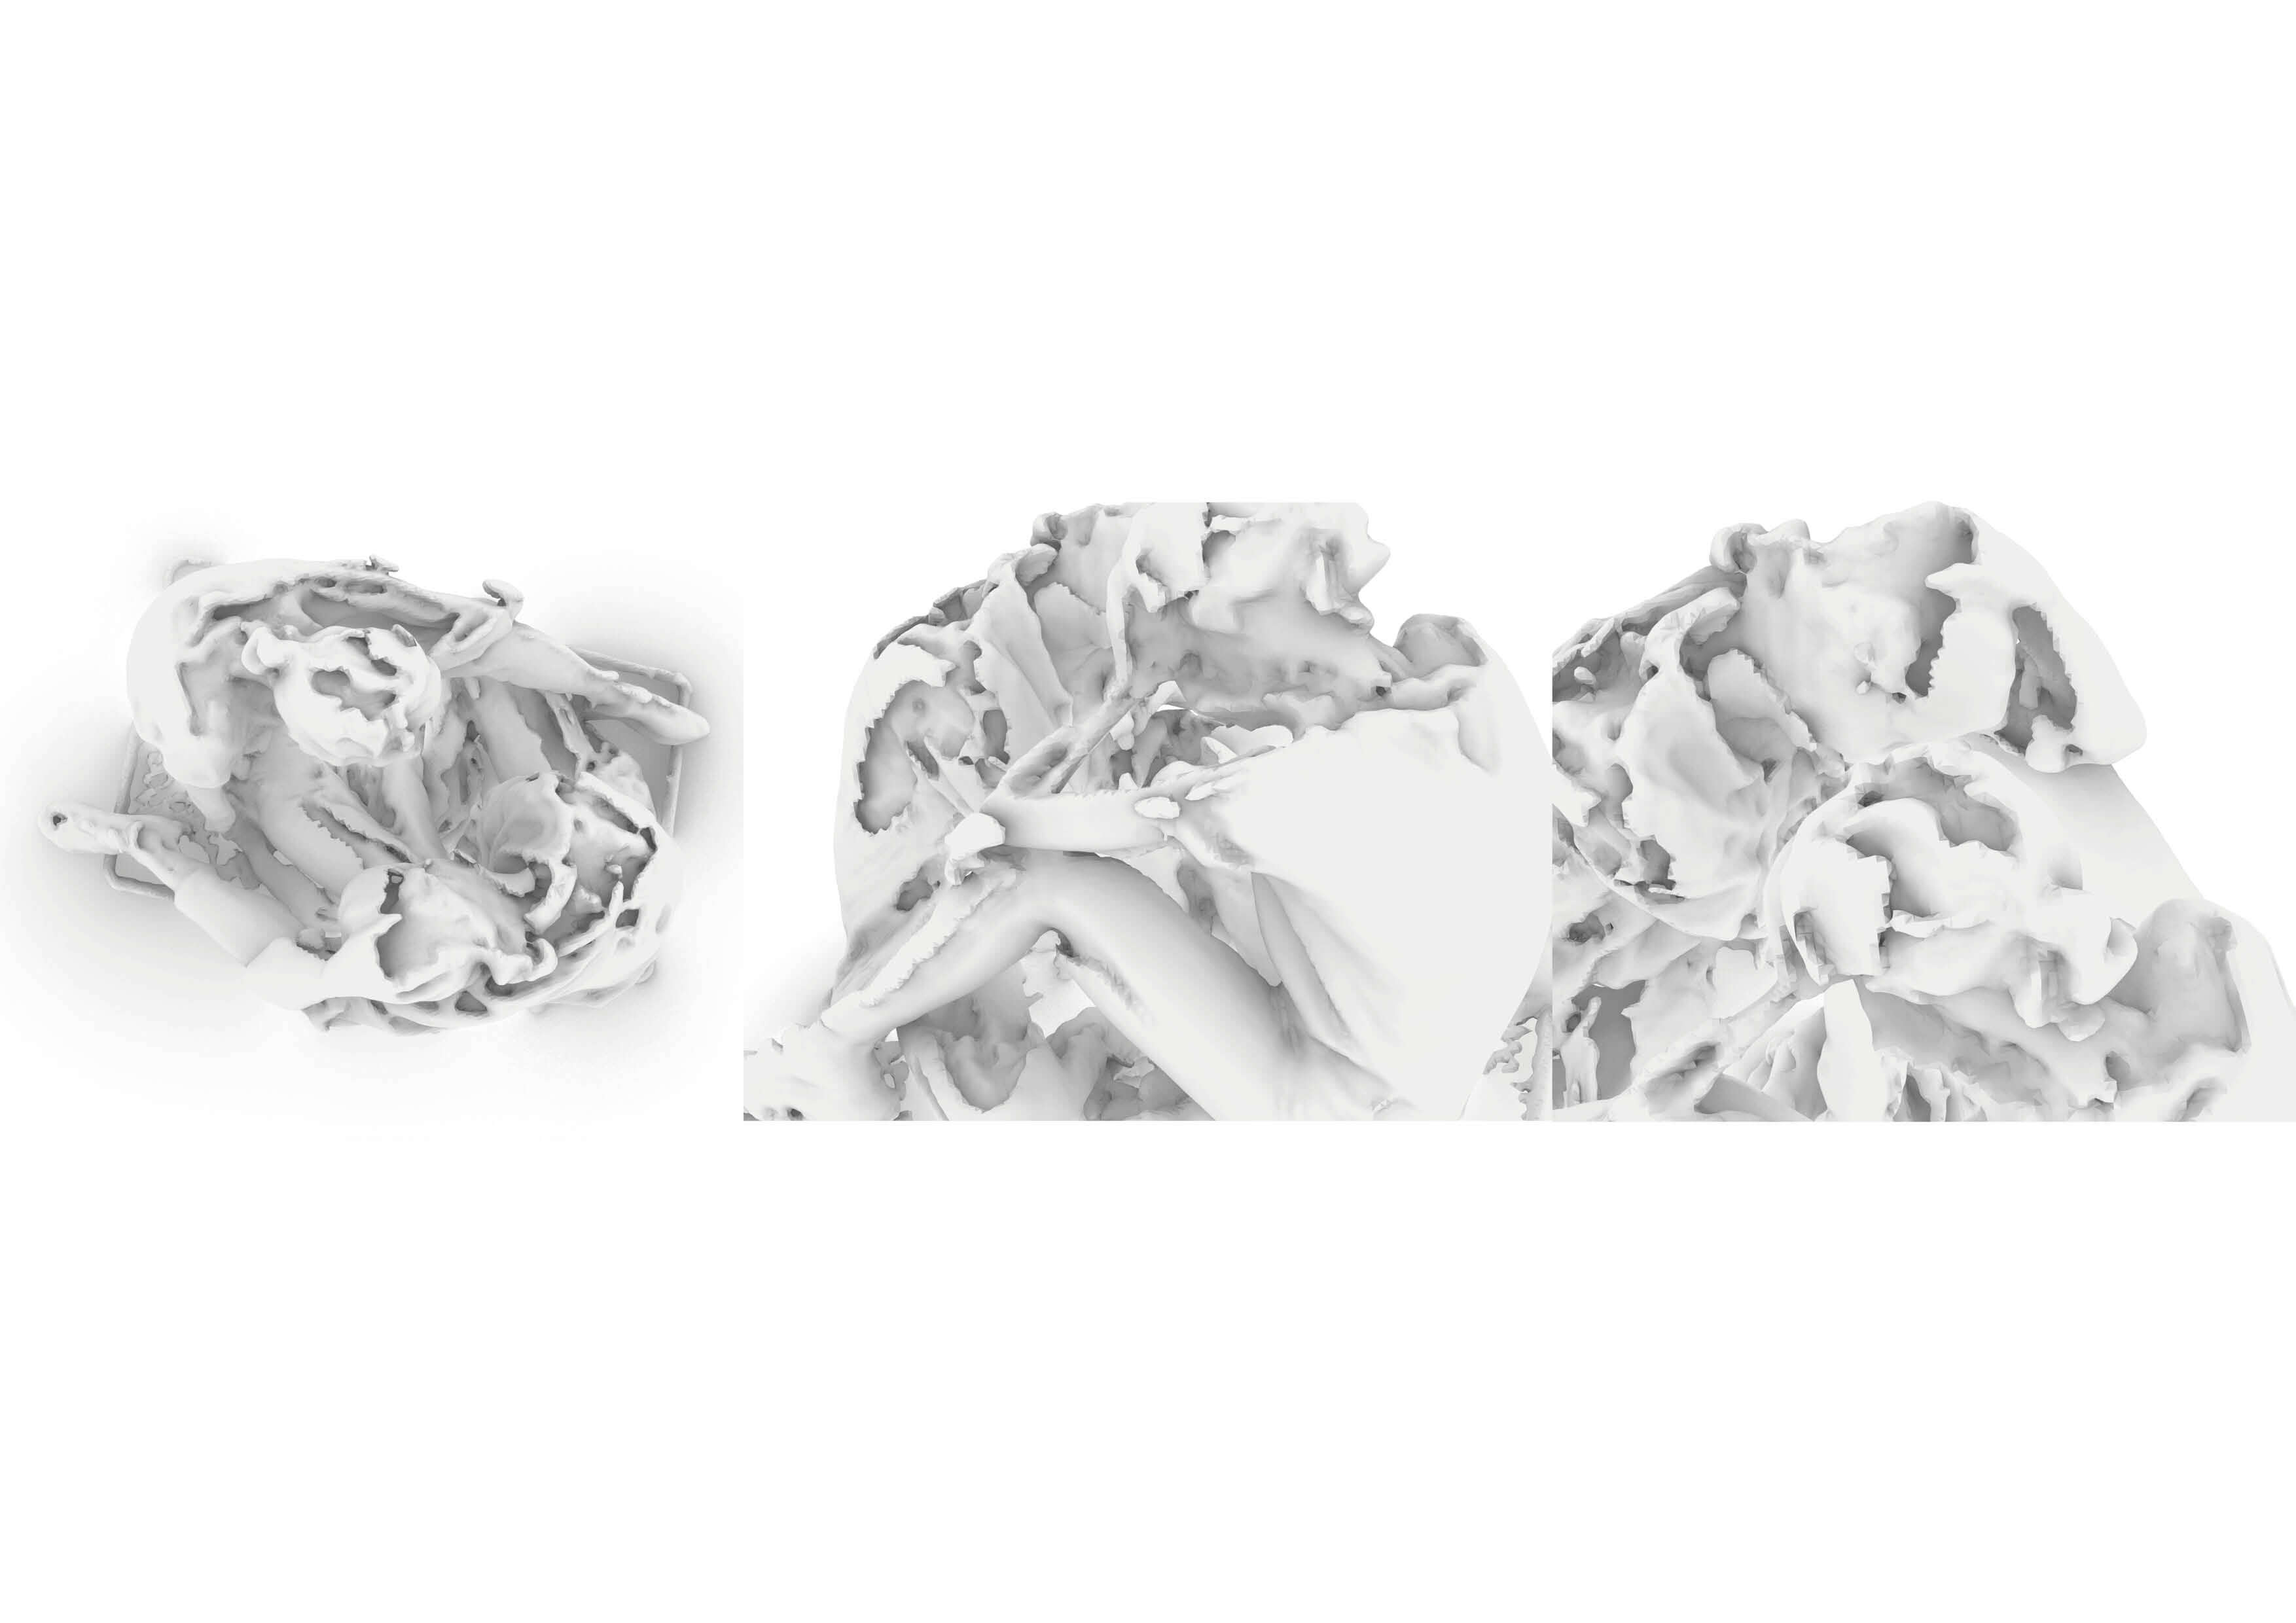
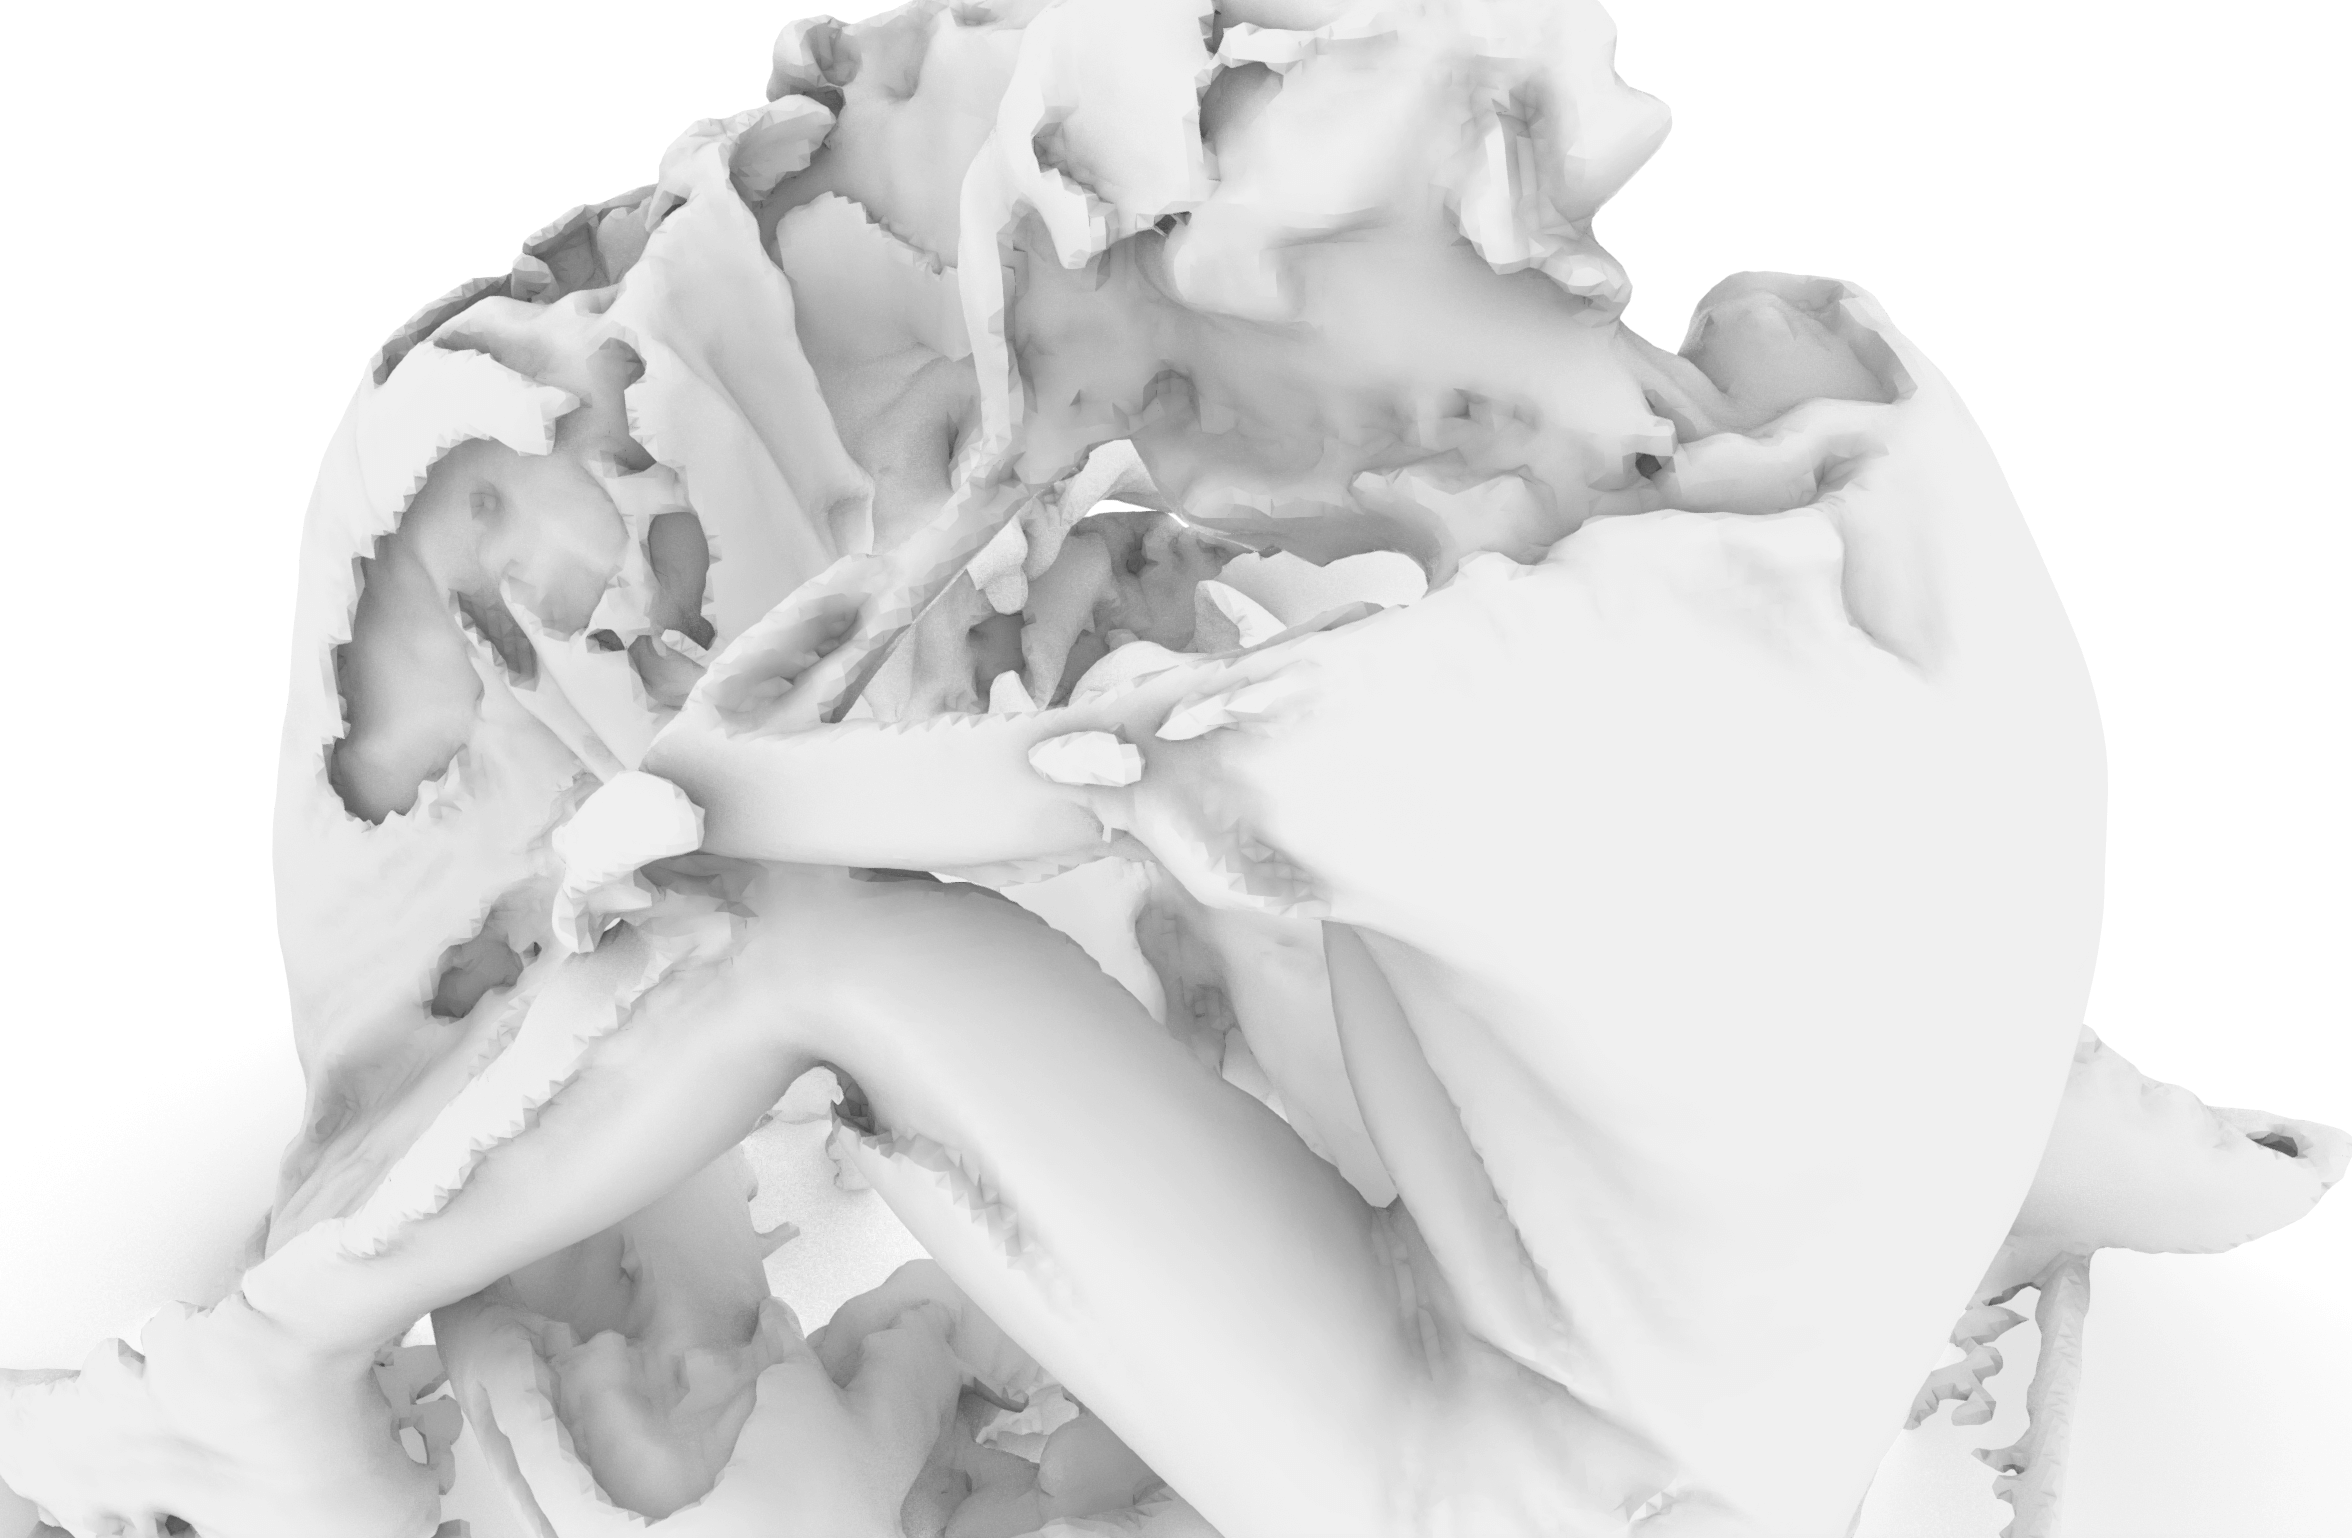
QUAYOLA | LAOCOON
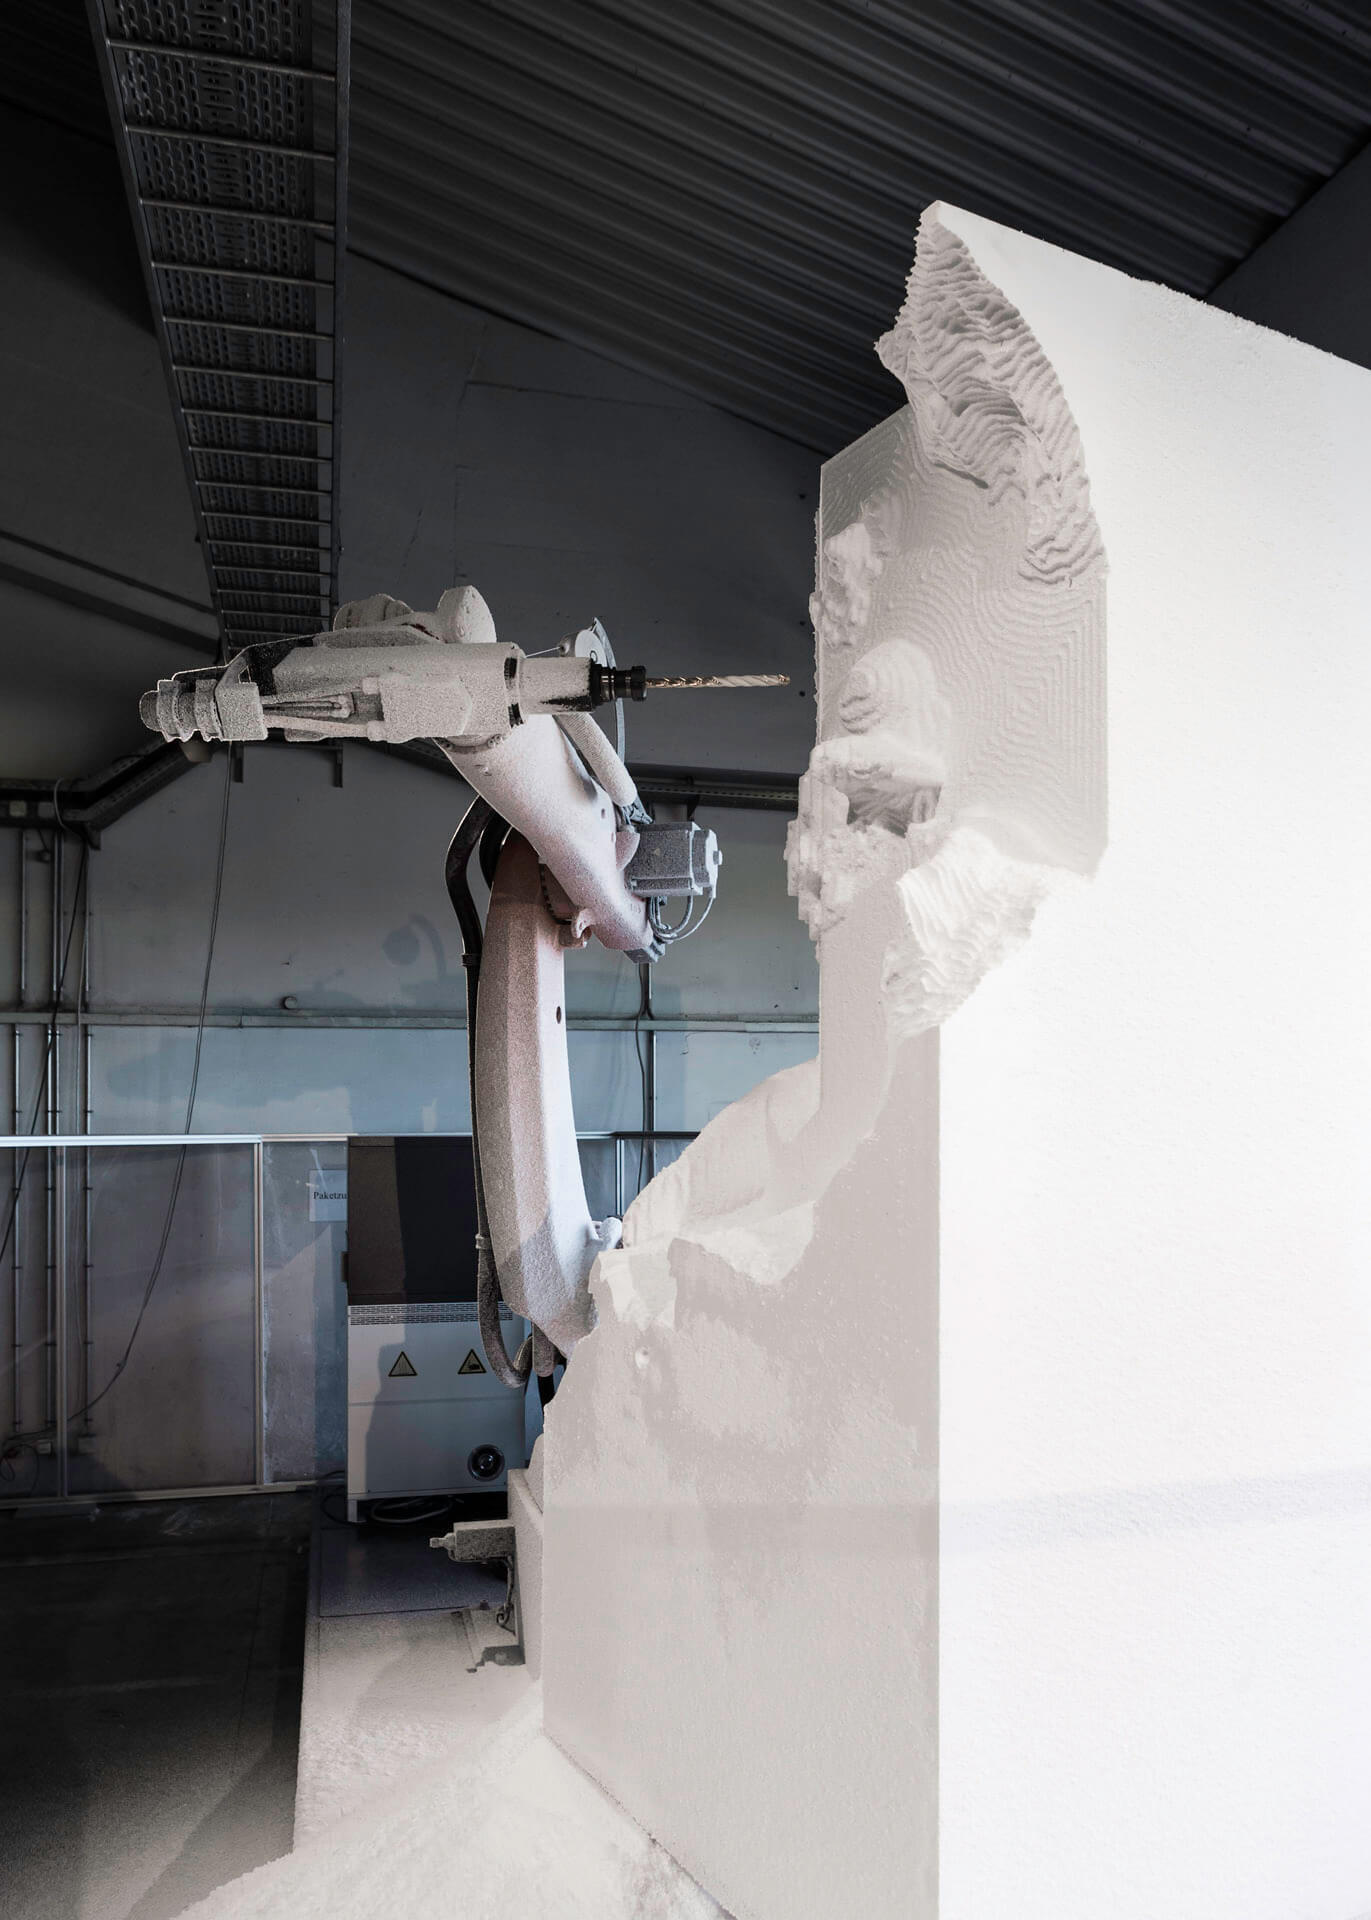
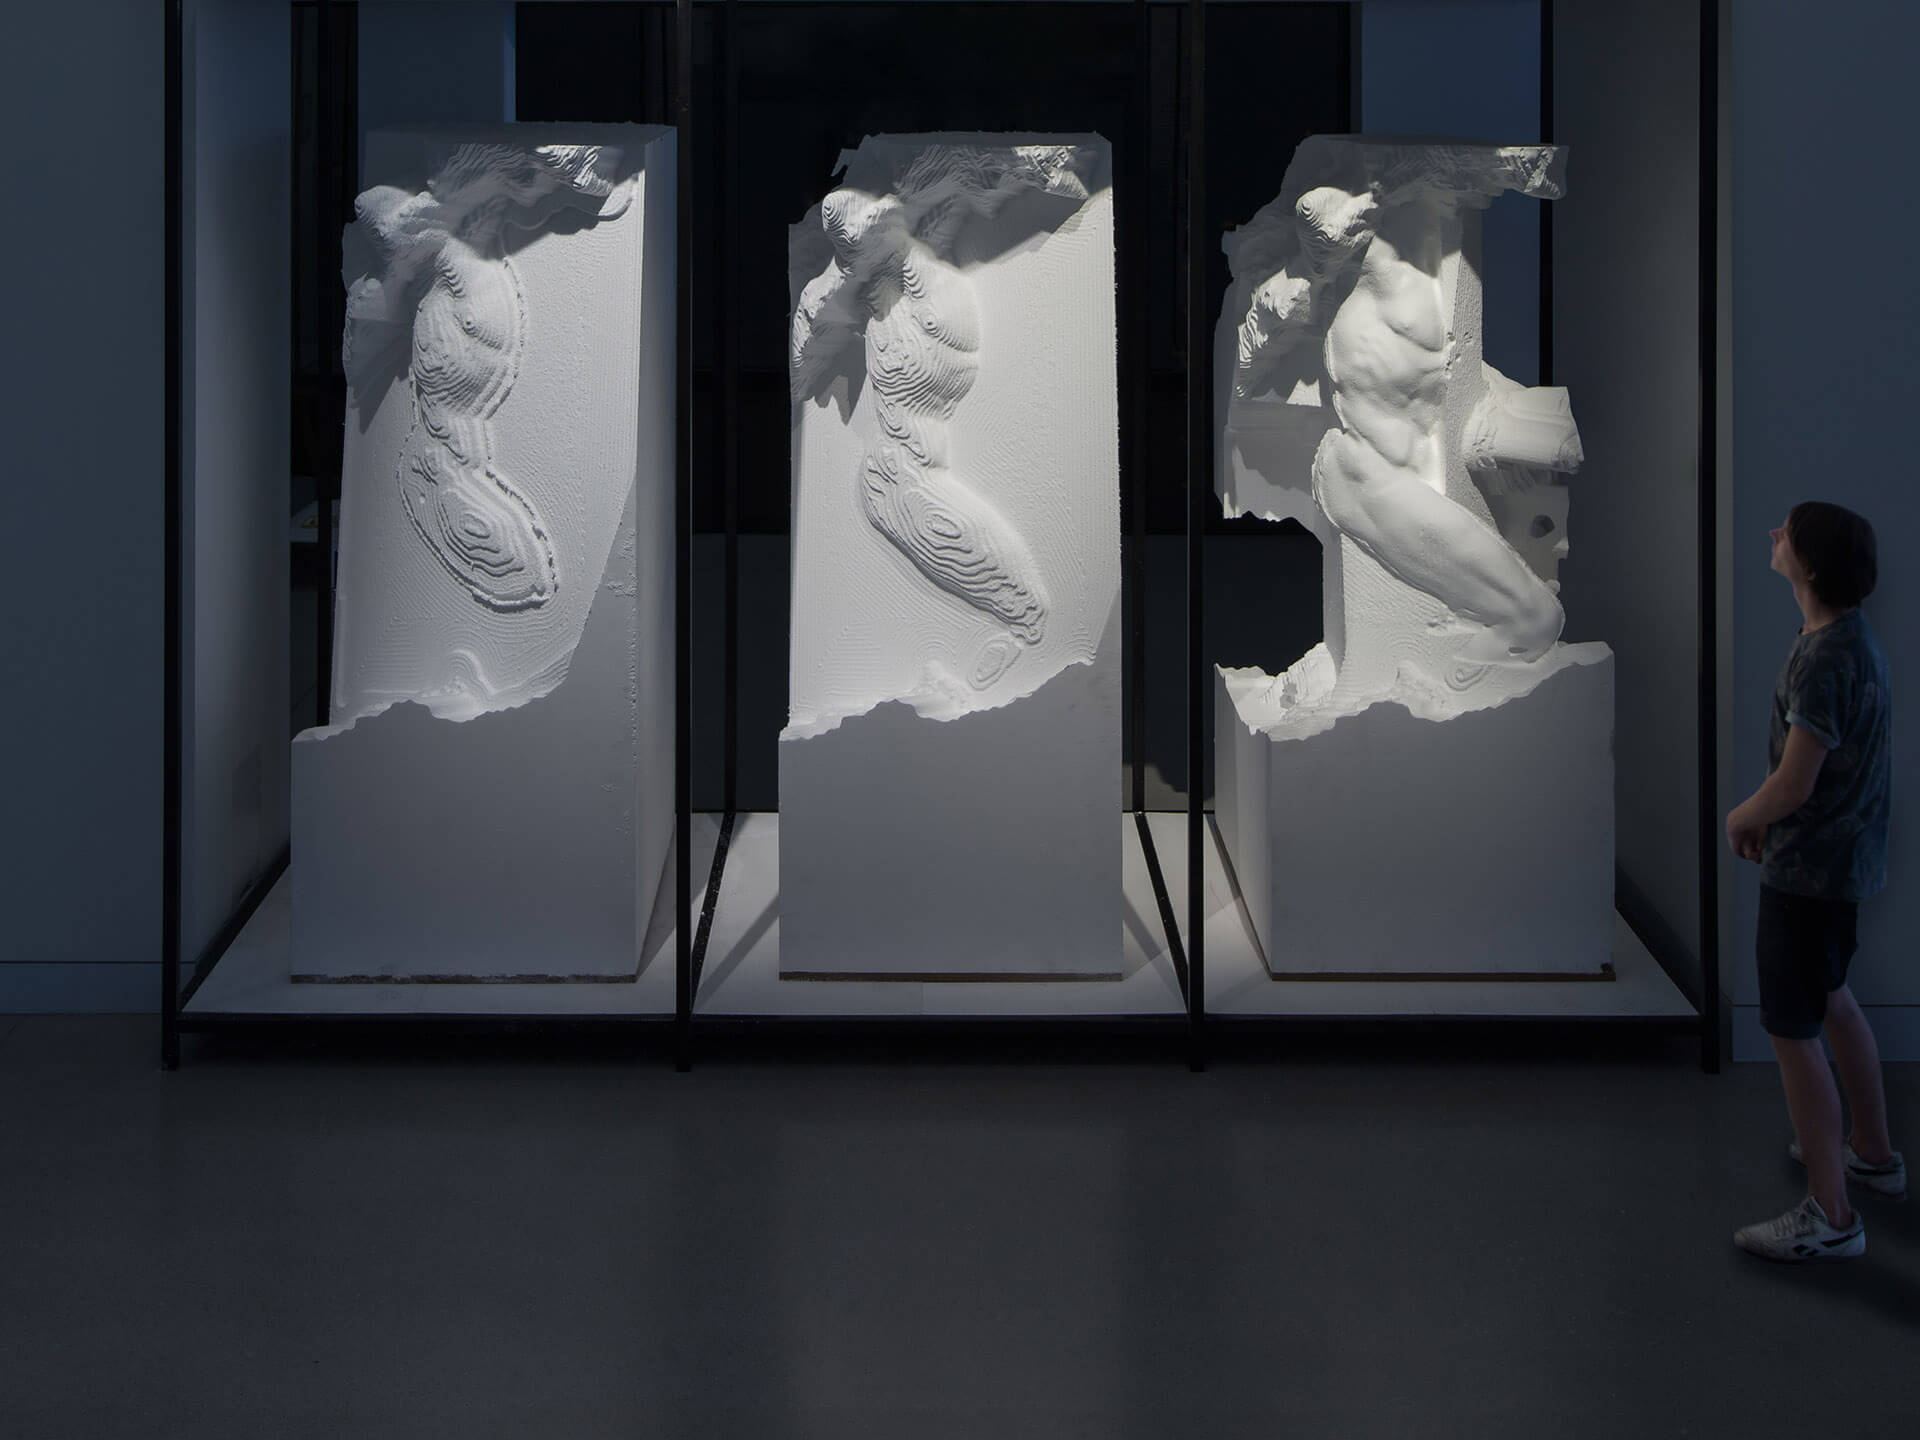
"Sculpture Factory is an ongoing research on classical sculpting via robotic means. Inspired by Michelangelo’s technique of non-finito (the “unfinished”), the installation explores the tensions between form and matter, the real and the artificial, the old and the new. A large industrial robot live-sculpts endless variations of Ancient Greek masterpiece Laocoön and His Sons. While never completing the full figure, each attempt discovers new articulations of matter. The result is a hybrid vision – a slow process of discovery not focused on the original figure but on the infinite possibilities of how to reach it. Guided by a sequences of algorithms, the robot finds its way through matter using unfamiliar strategies and patterns. The original artist’s hand and unique craftsmanship are eclipsed by the truly disinterested intelligence of the machine, and a surplus of viable possibilities."
| 3D SCANNING |
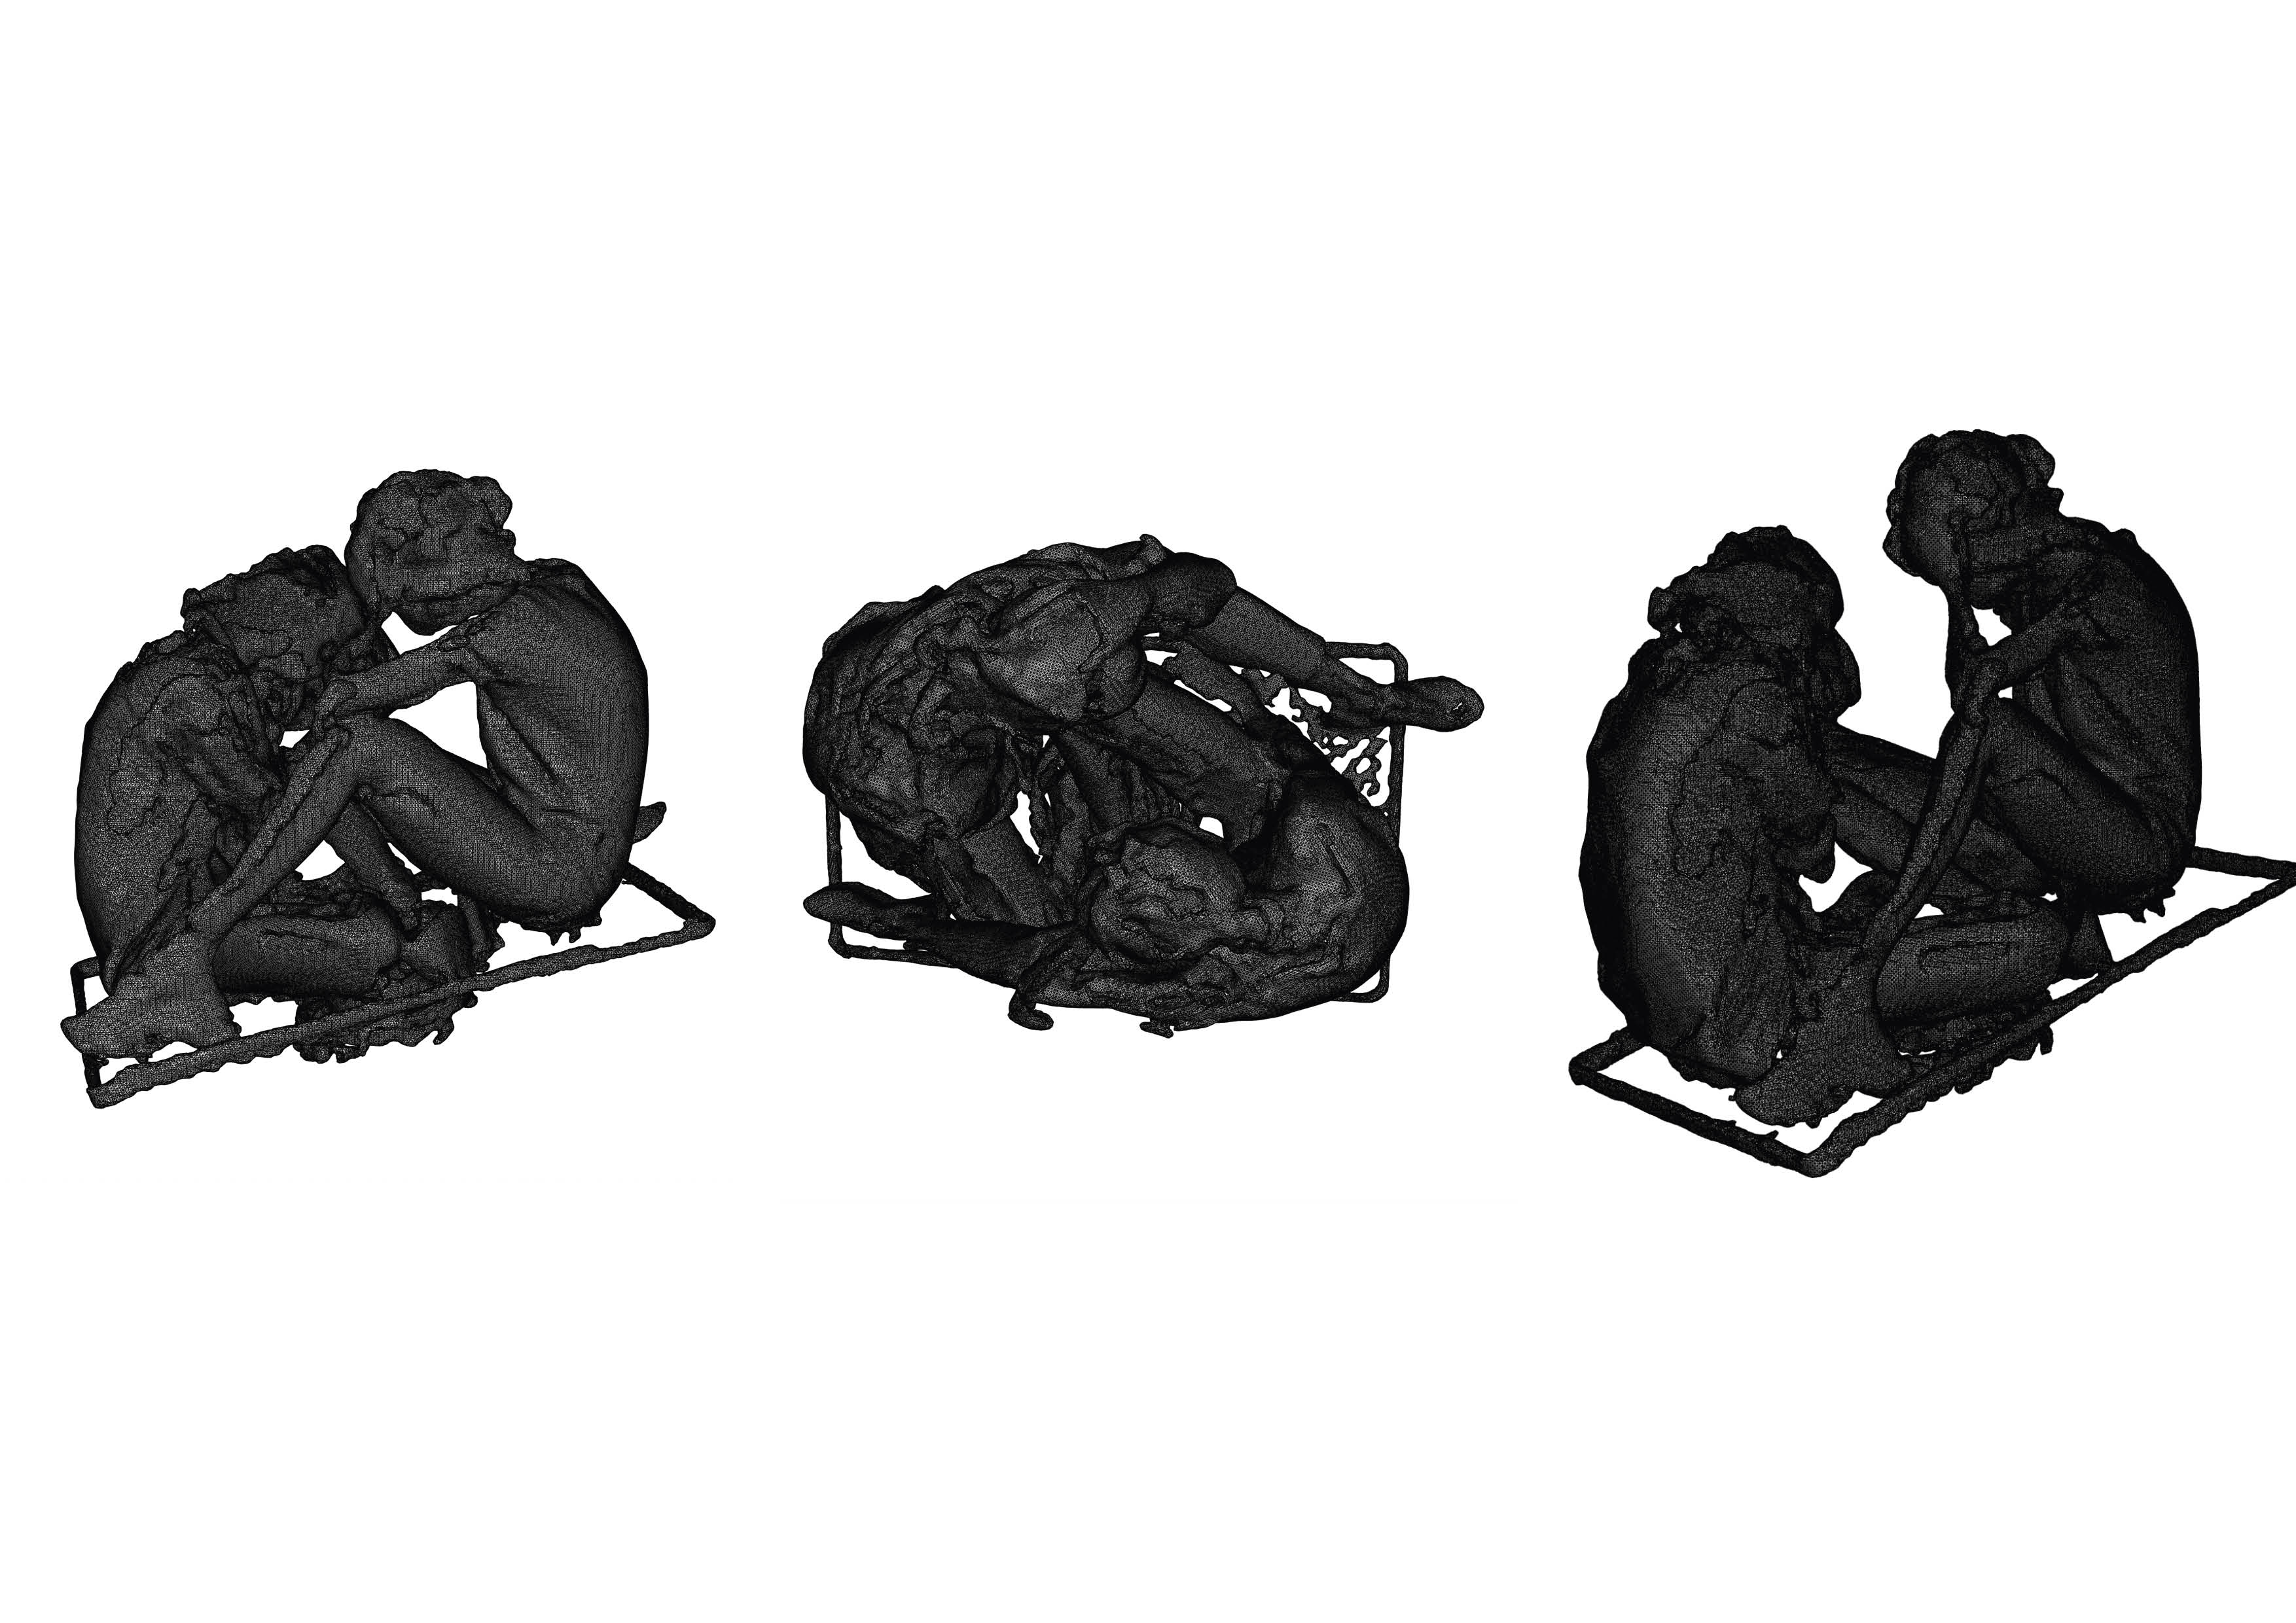
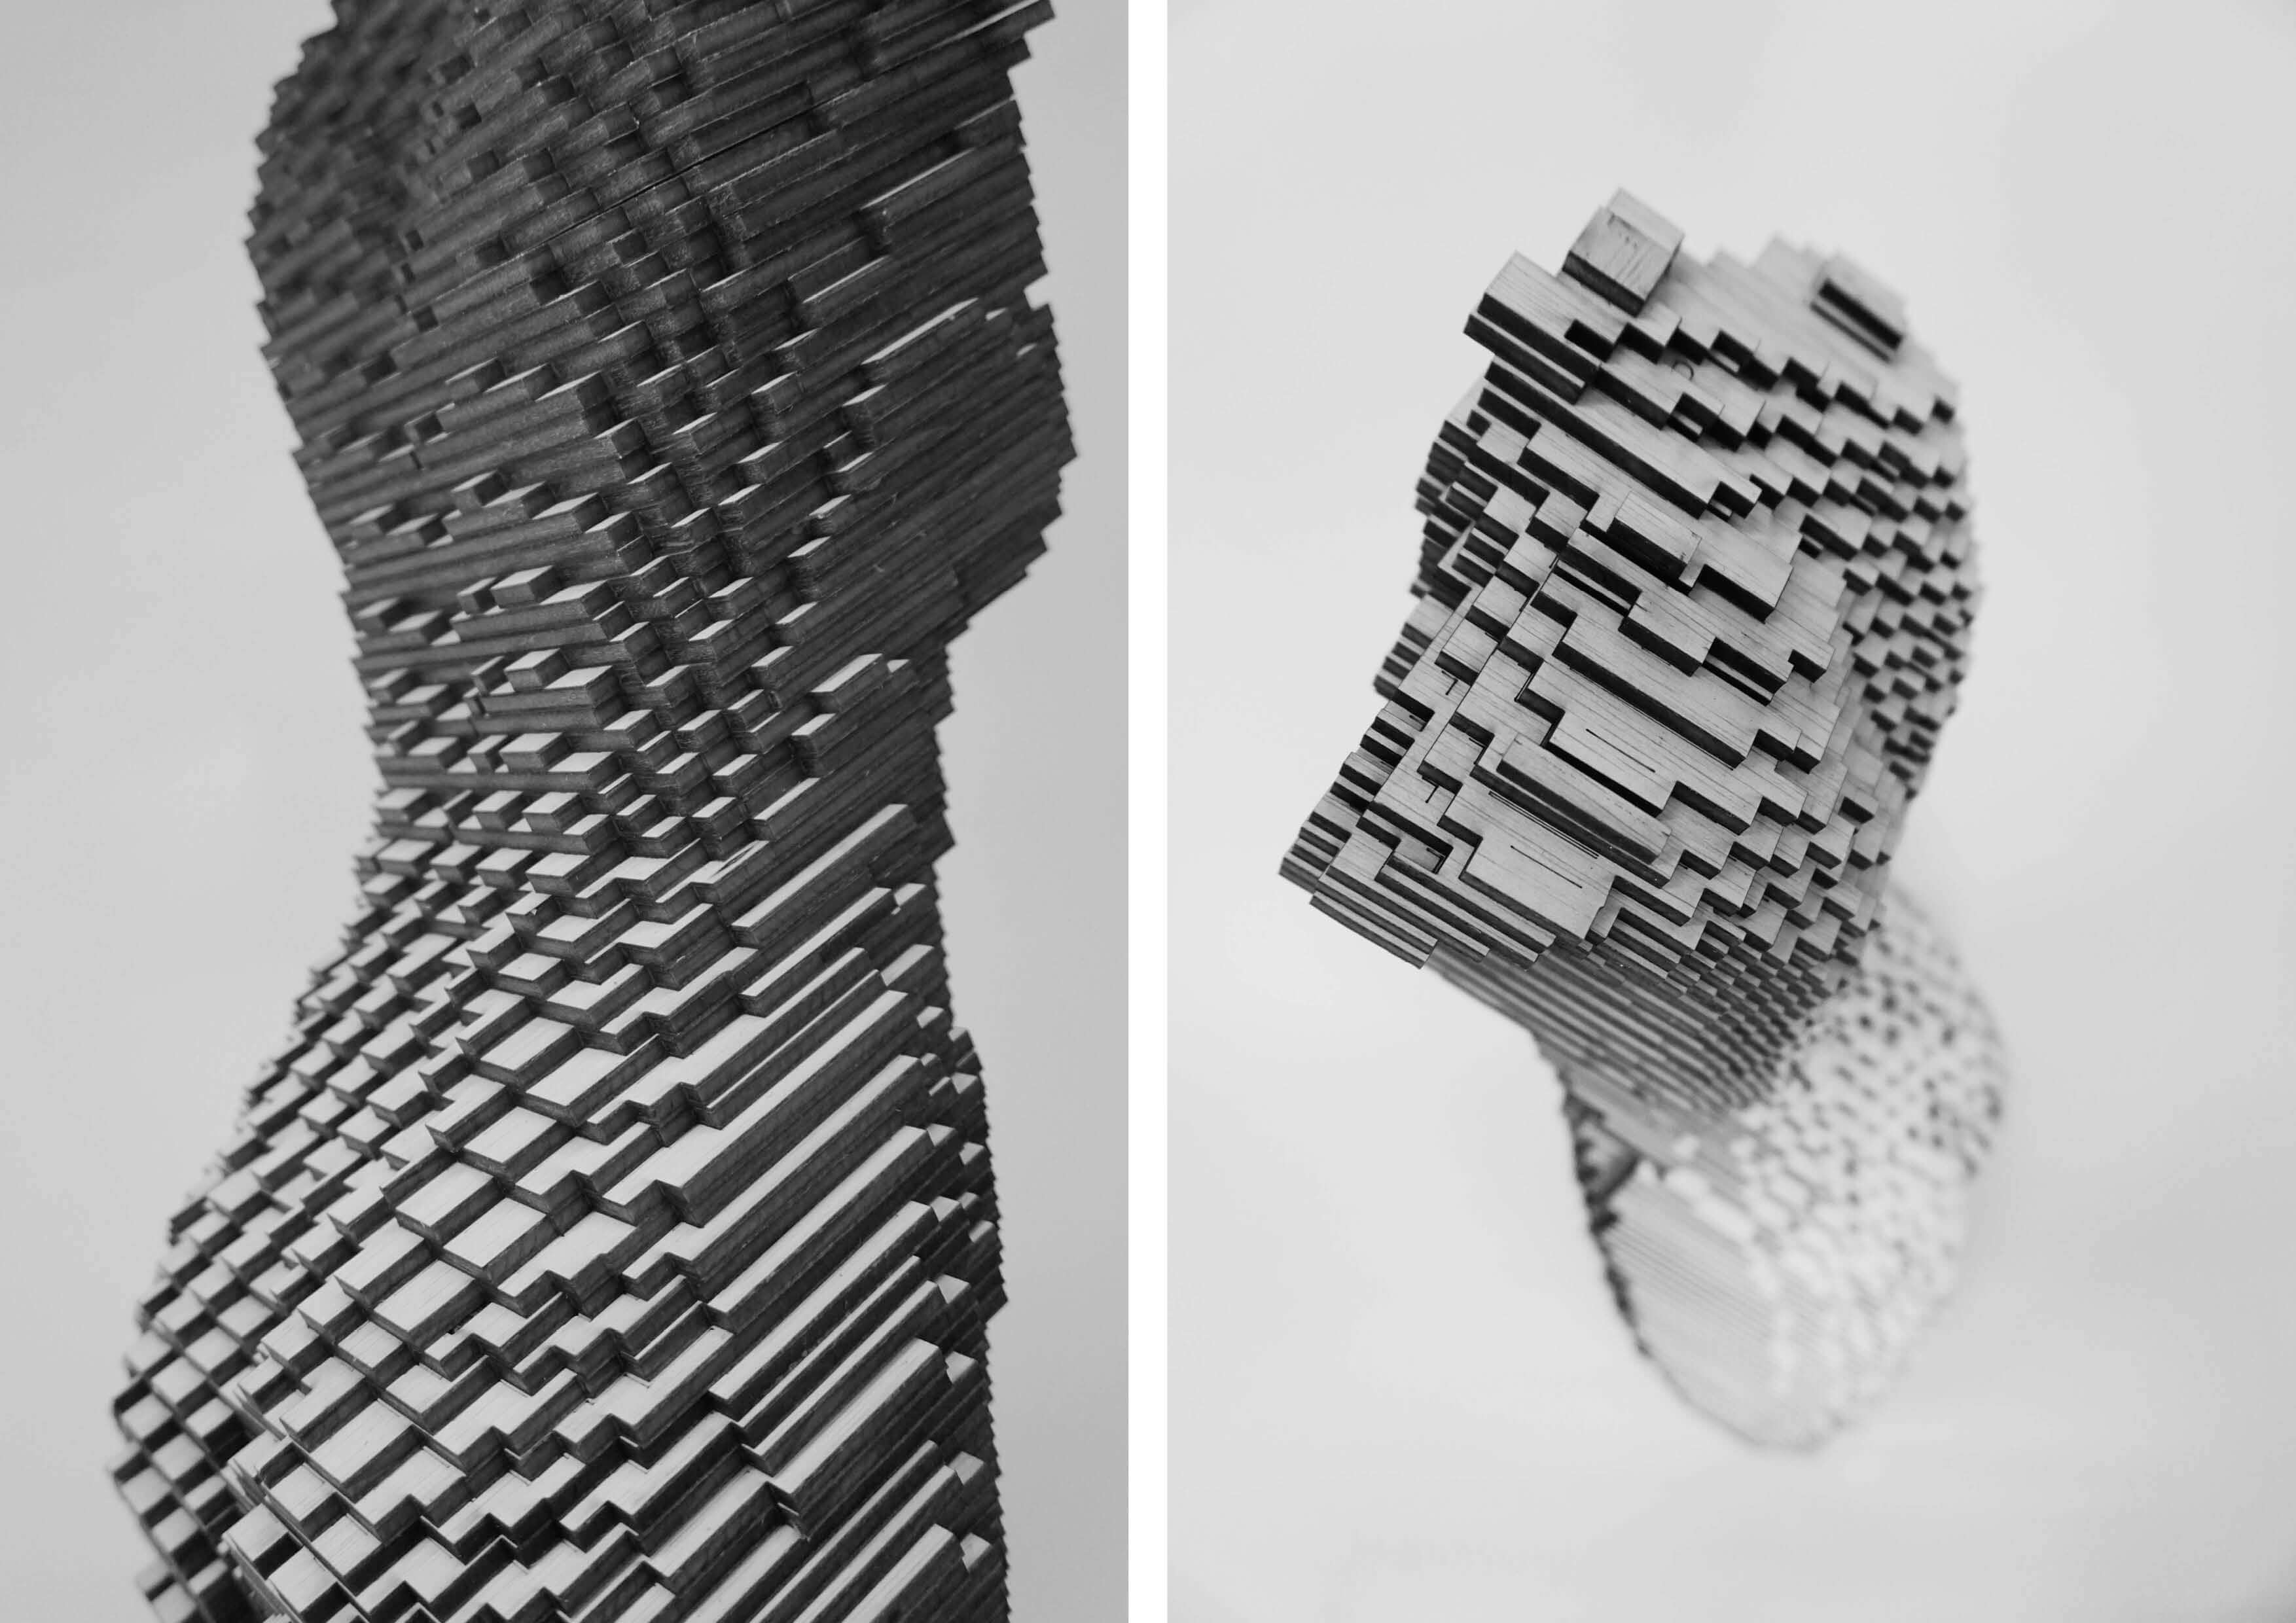
"The process of scanning allow us to shape the human body from a different point of view of materialization. It creates a new layer of skin which can be seen only through digital media. The pictures below show us the imperfection of the scan and the human body, where two human beings are united into one form using a 3D scan and a robotic arm."
3D scanning is the process of analyzing a real-world object or environment to collect data on its shape and possibly its appearance. The collected data can then be used to construct digital 3D models.
TOOLS & SOFTWARE
Tools
- Kinect (double check)
- Rotating pad or stand
Software
- Scanect
- or 3D scanning apps for cell phones - iPhone / Android
Refenreces
- SKANECT for Kinect
- Accommodating the Kinect
- 3D scan with a phone: Tips
- 3D Scanning with your phone - Apps
PROCESS
Steps
- Connect the kinect to your computer and set up Skanect app.
- Your object or geometry has to be very static during all the process.
- In Skanect you will see - depeding on colors (green-red) how far away or close you are from your obejct.
- Move very slowly, check every angle and take a look on the computer and its visualization how much from your scanning is missing.
Final formats
- .OBJ
- .STL
The OBJ file format is a simple data-format that represents 3D geometry alone — namely, the position of each vertex, the UV position of each texture coordinate vertex, vertex normals, and the faces that make each polygon defined as a list of vertices, and texture vertices.
An STL file describes a raw, unstructured triangulated surface by the unit normal and vertices (ordered by the right-hand rule) of the triangles using a three-dimensional Cartesian coordinate system.
Tips
Before you export the geometry from Rhino make sure that is a closed mesh - join it, double check duplicates and make sure there are no holes or open edges. For this you can use one of the softwares below which can help you to prepare the final geometry.
- Meshmixer (Mac / Windows)
- 3D Builder (Windows)
- Prusa Slicer (Mac / Windows) - sometimes you can use a slicing software to fix or edit your geometry.
References
VISUALIZATION
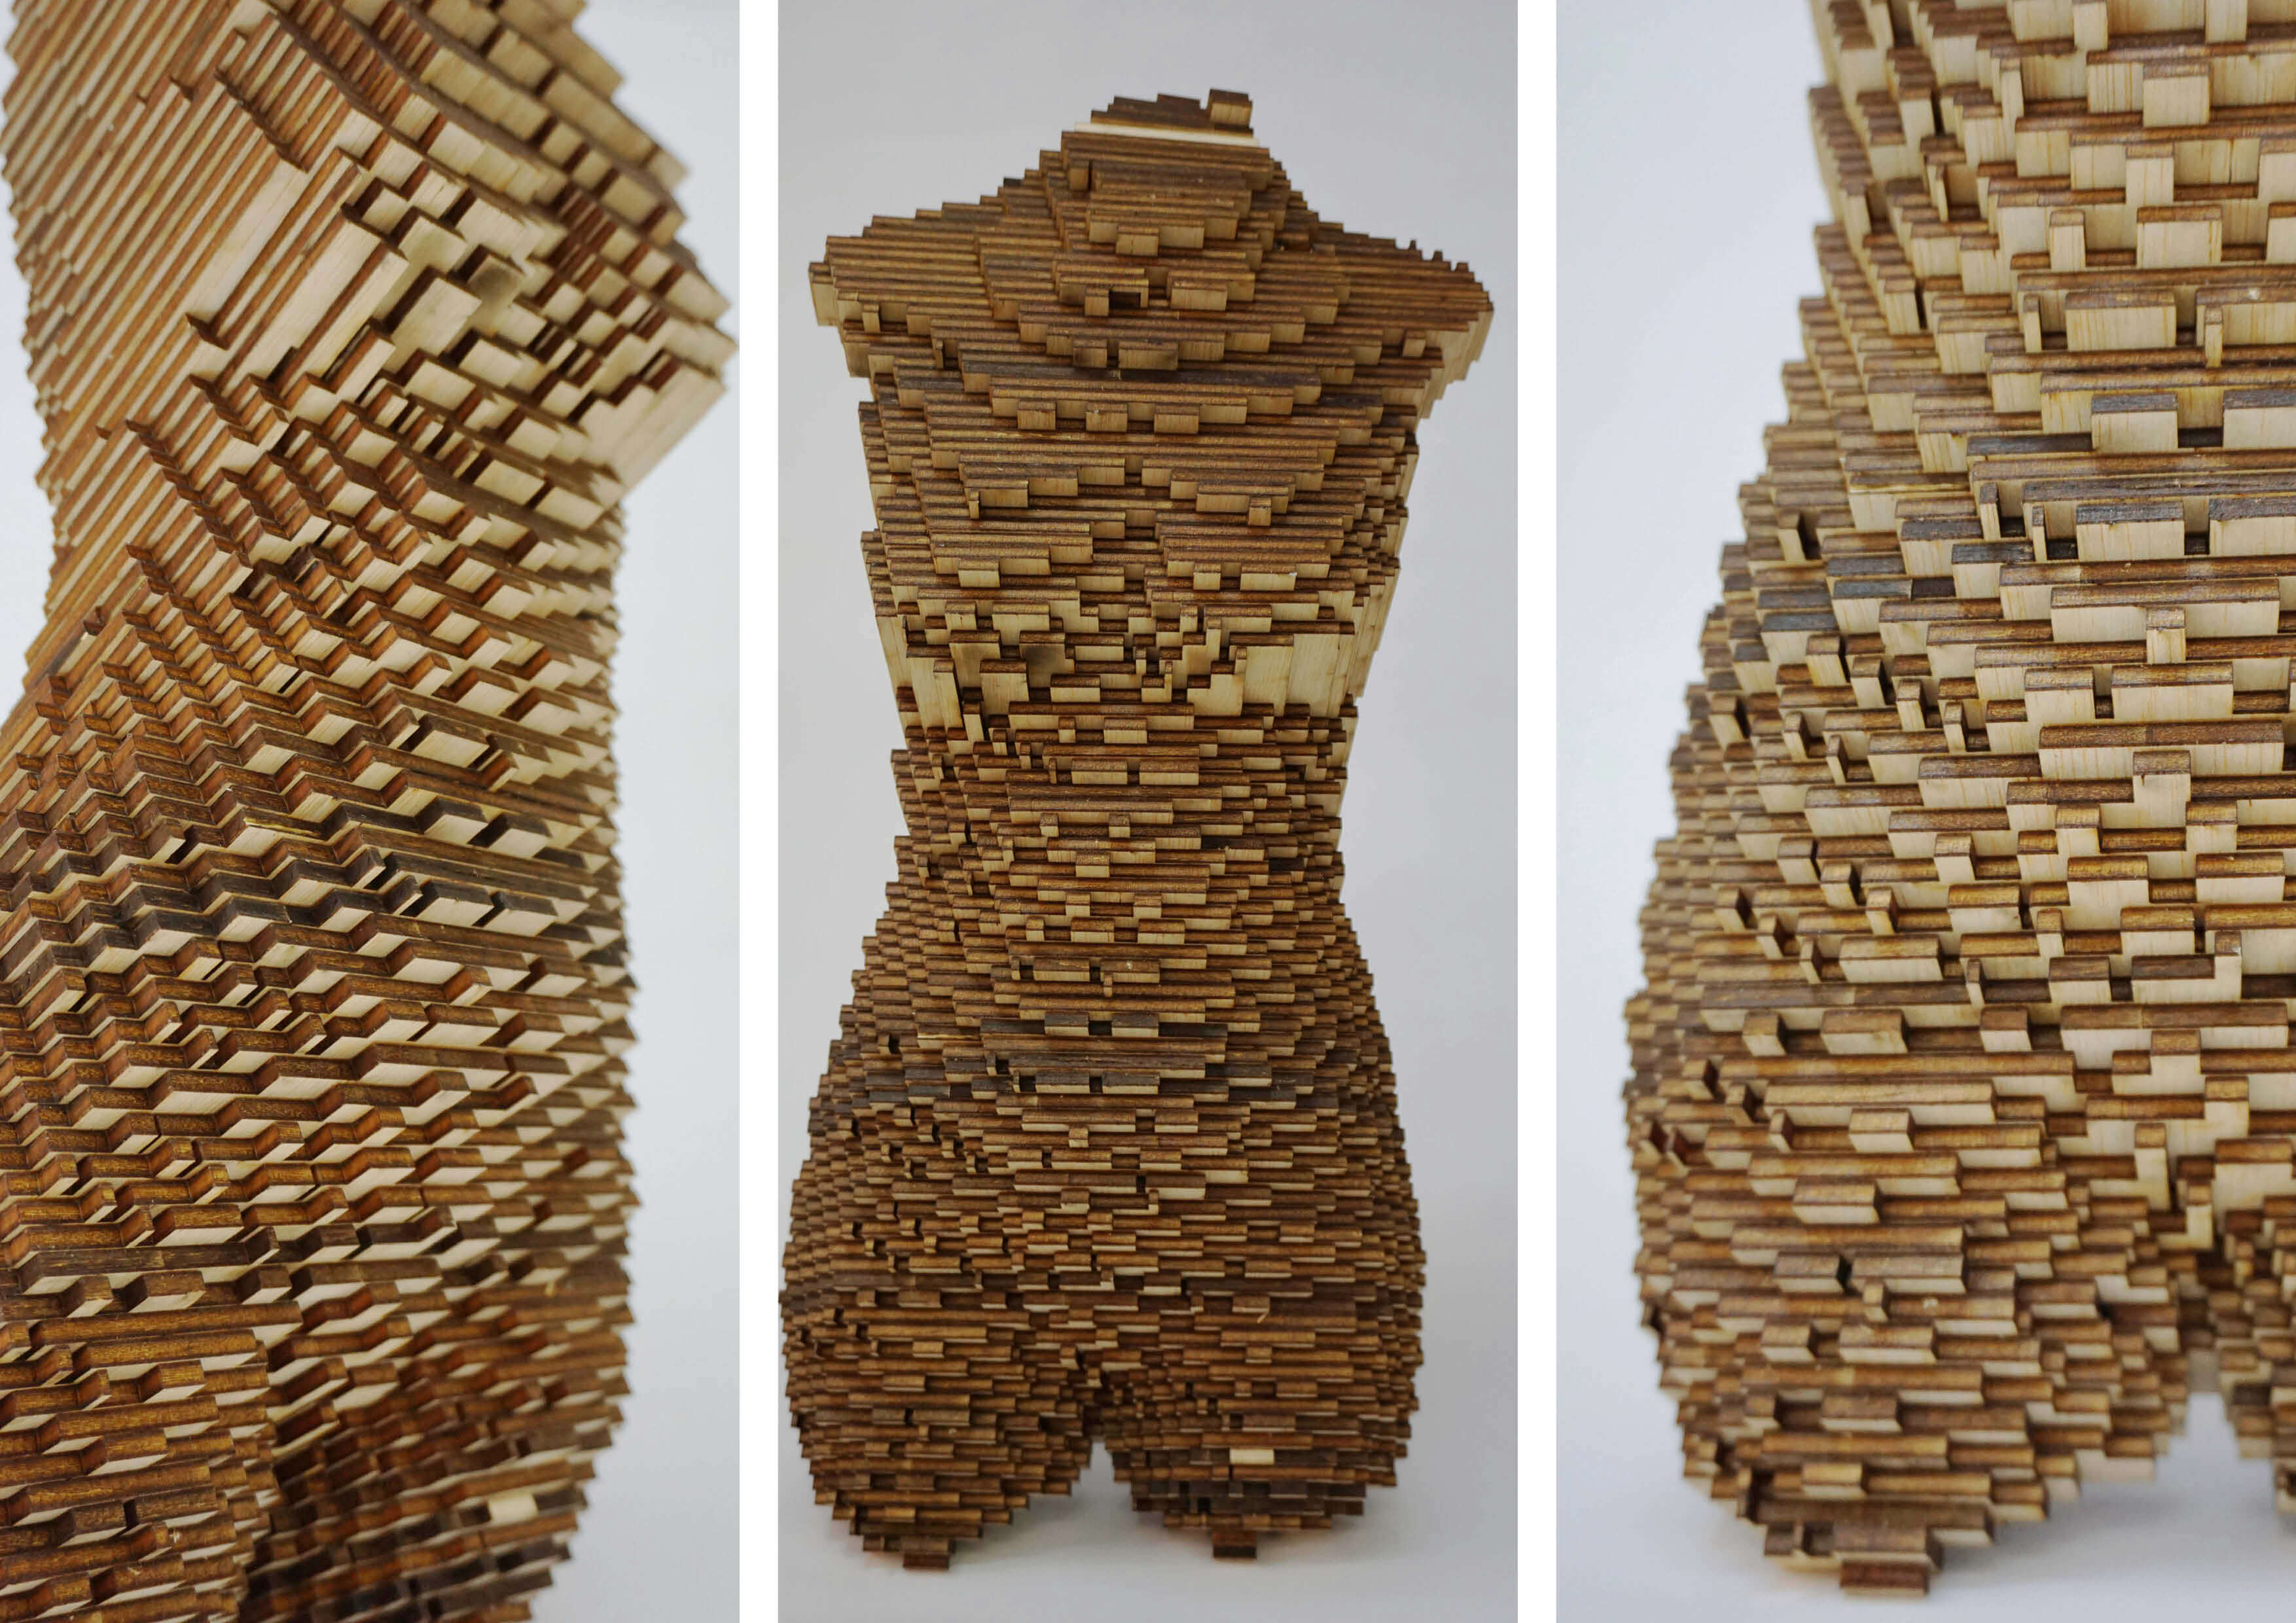
| CONCEPT IDEA |
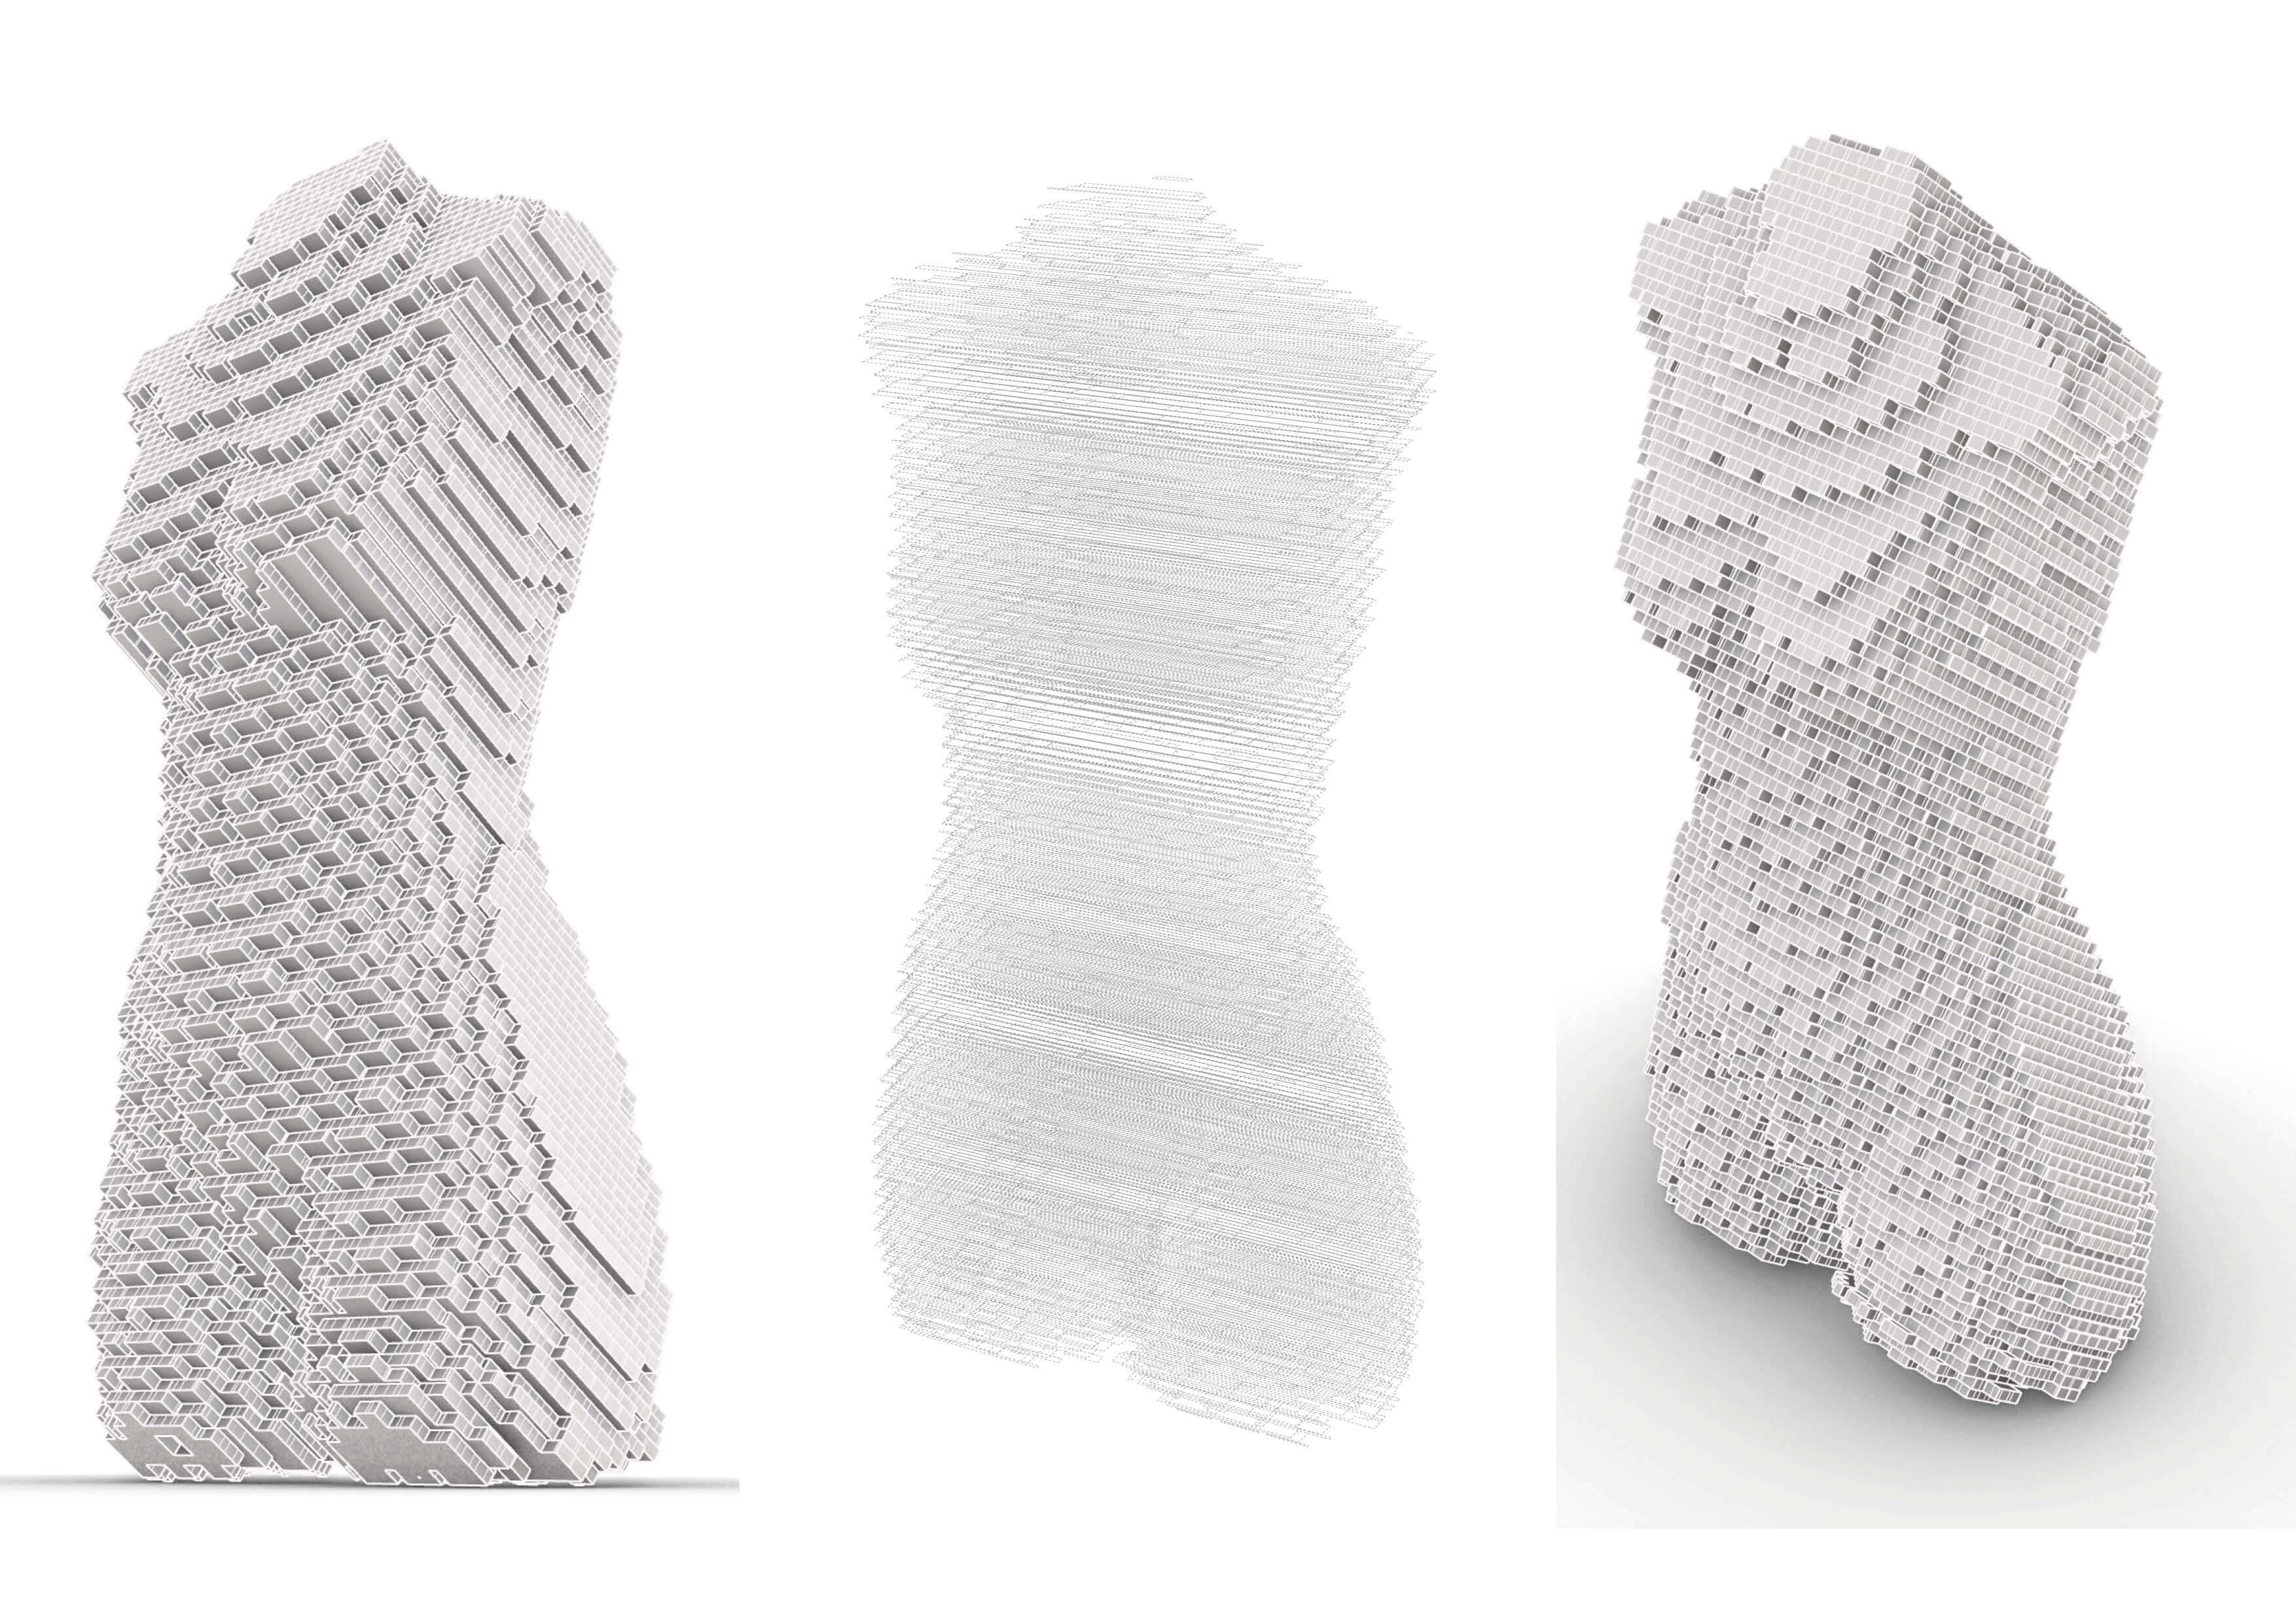
"What actually shape us? How to visualize something what does not physically form us? Not only our body but also our personality. Invisible forces such as culture, education, enviroment or experiencies - each of them sculpt our perception and intepretation which define us. Especially, what makes us so unique."
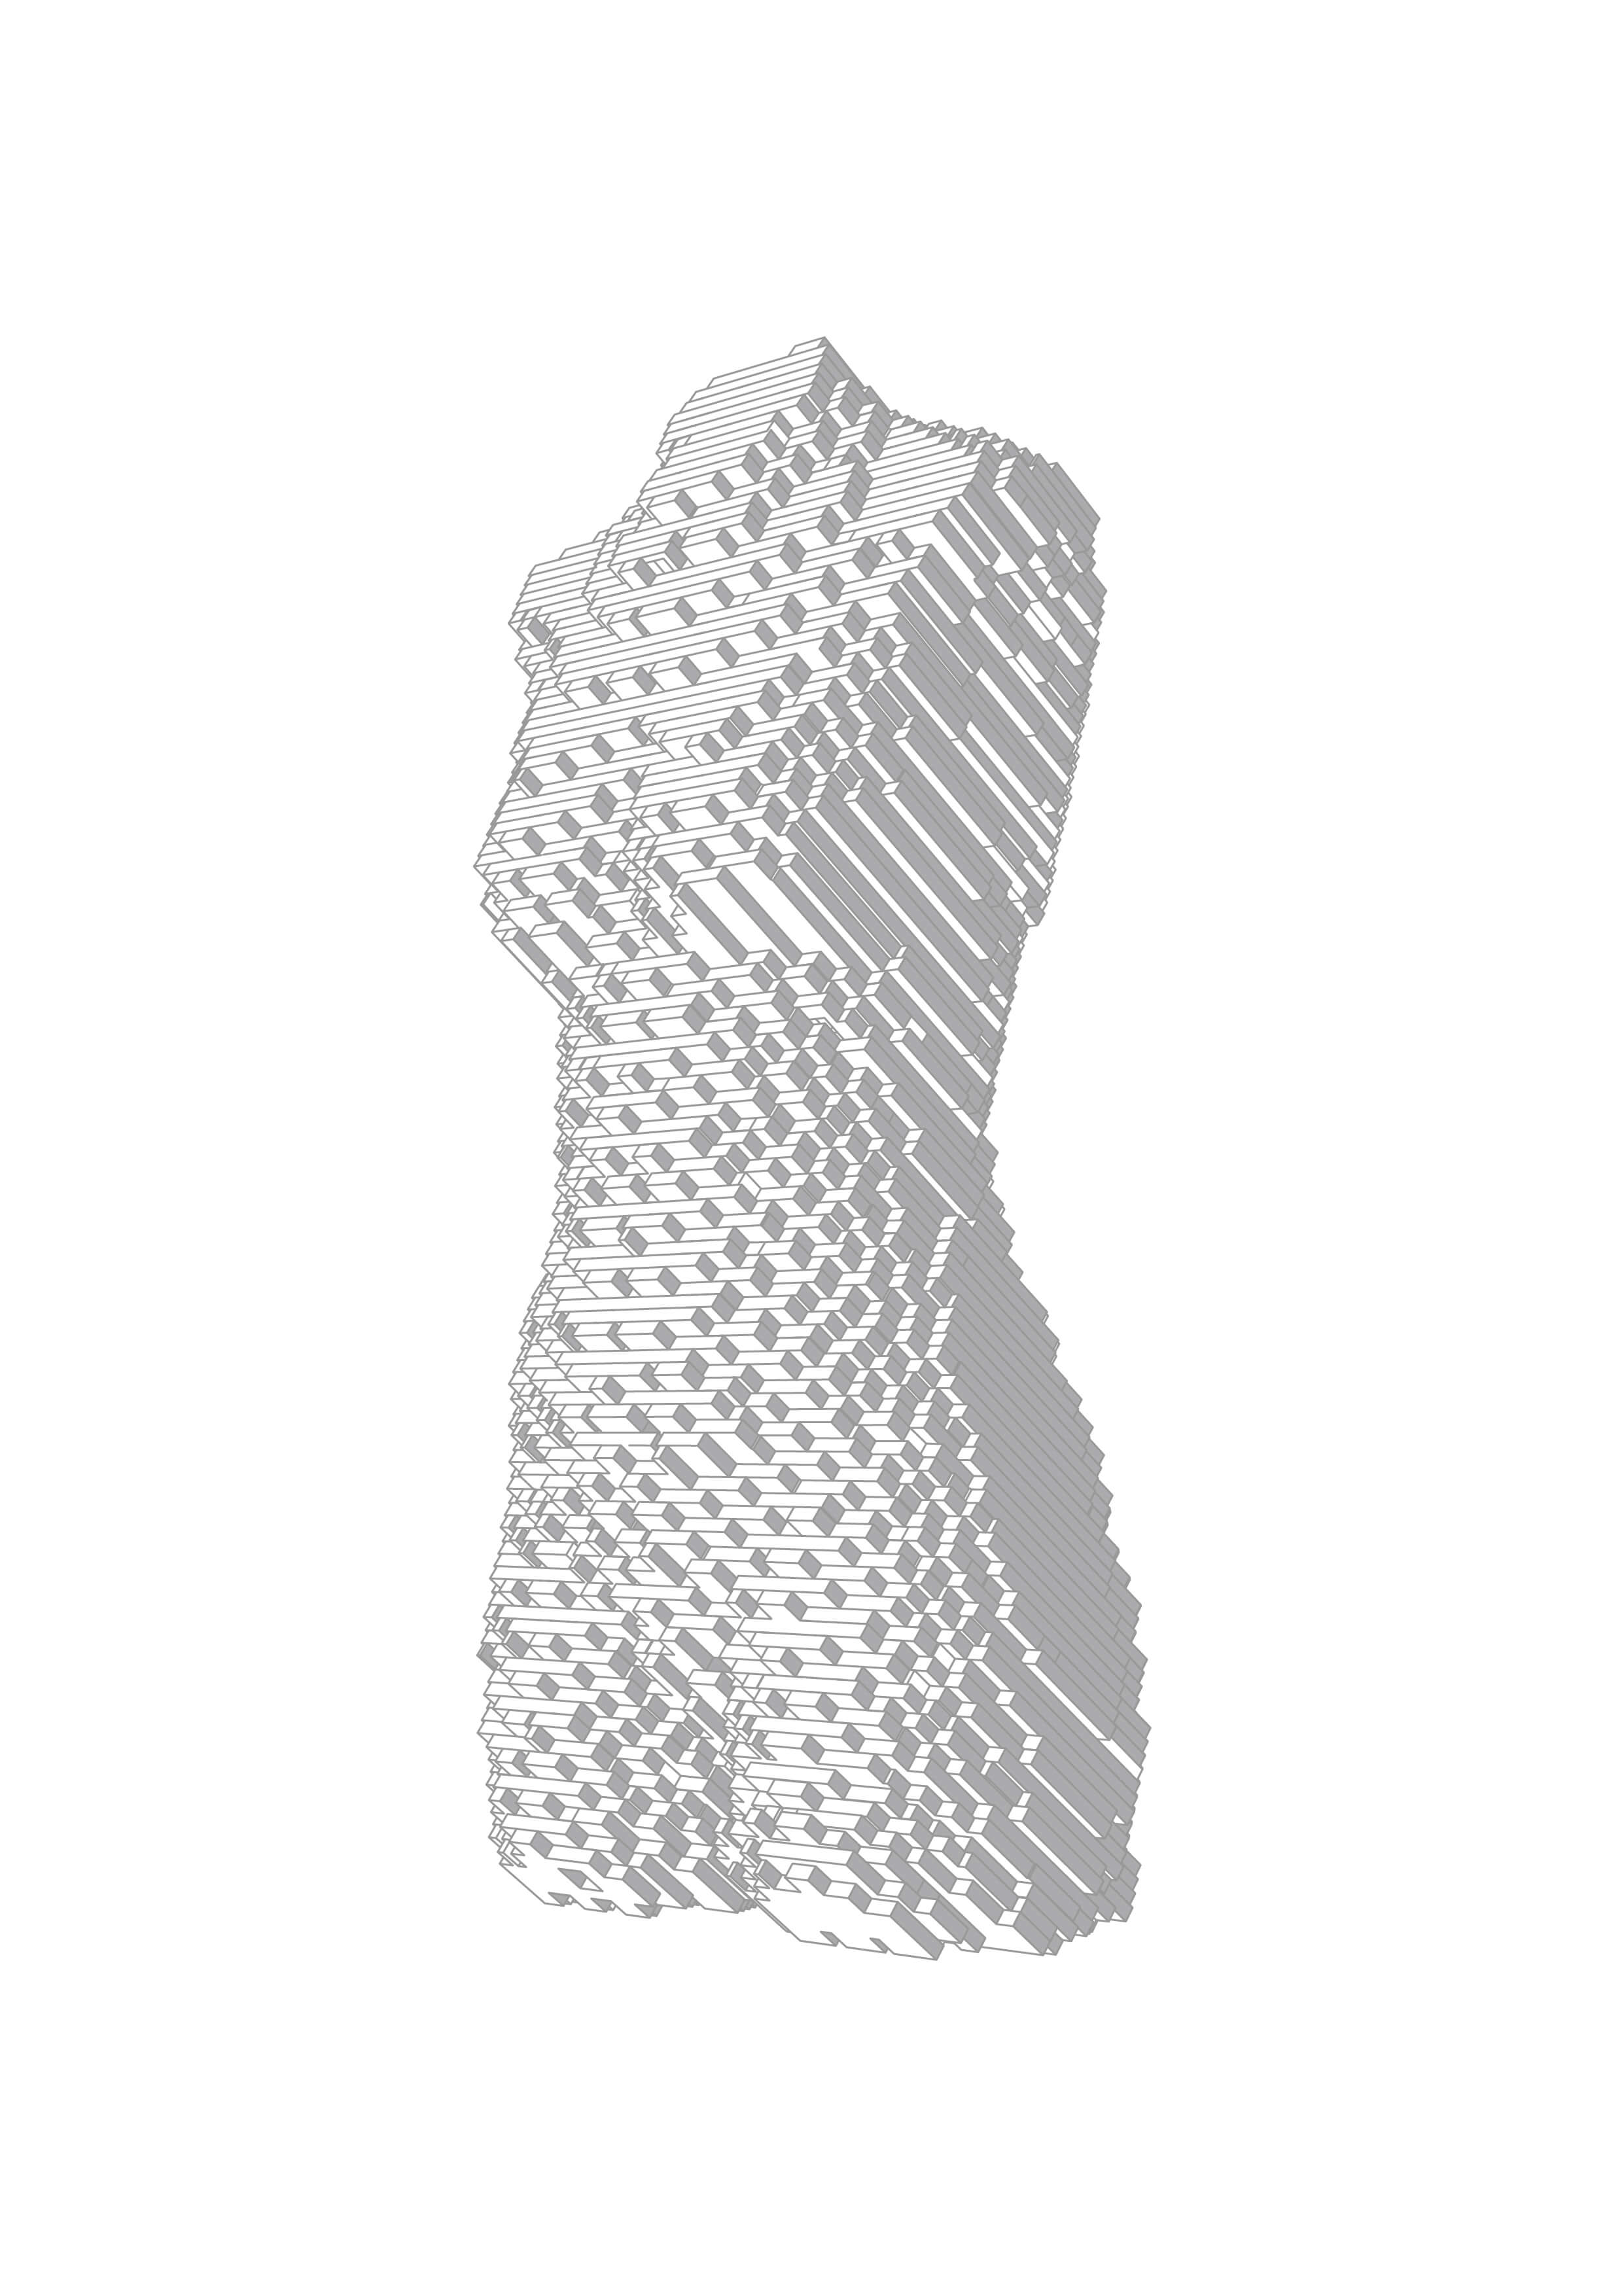
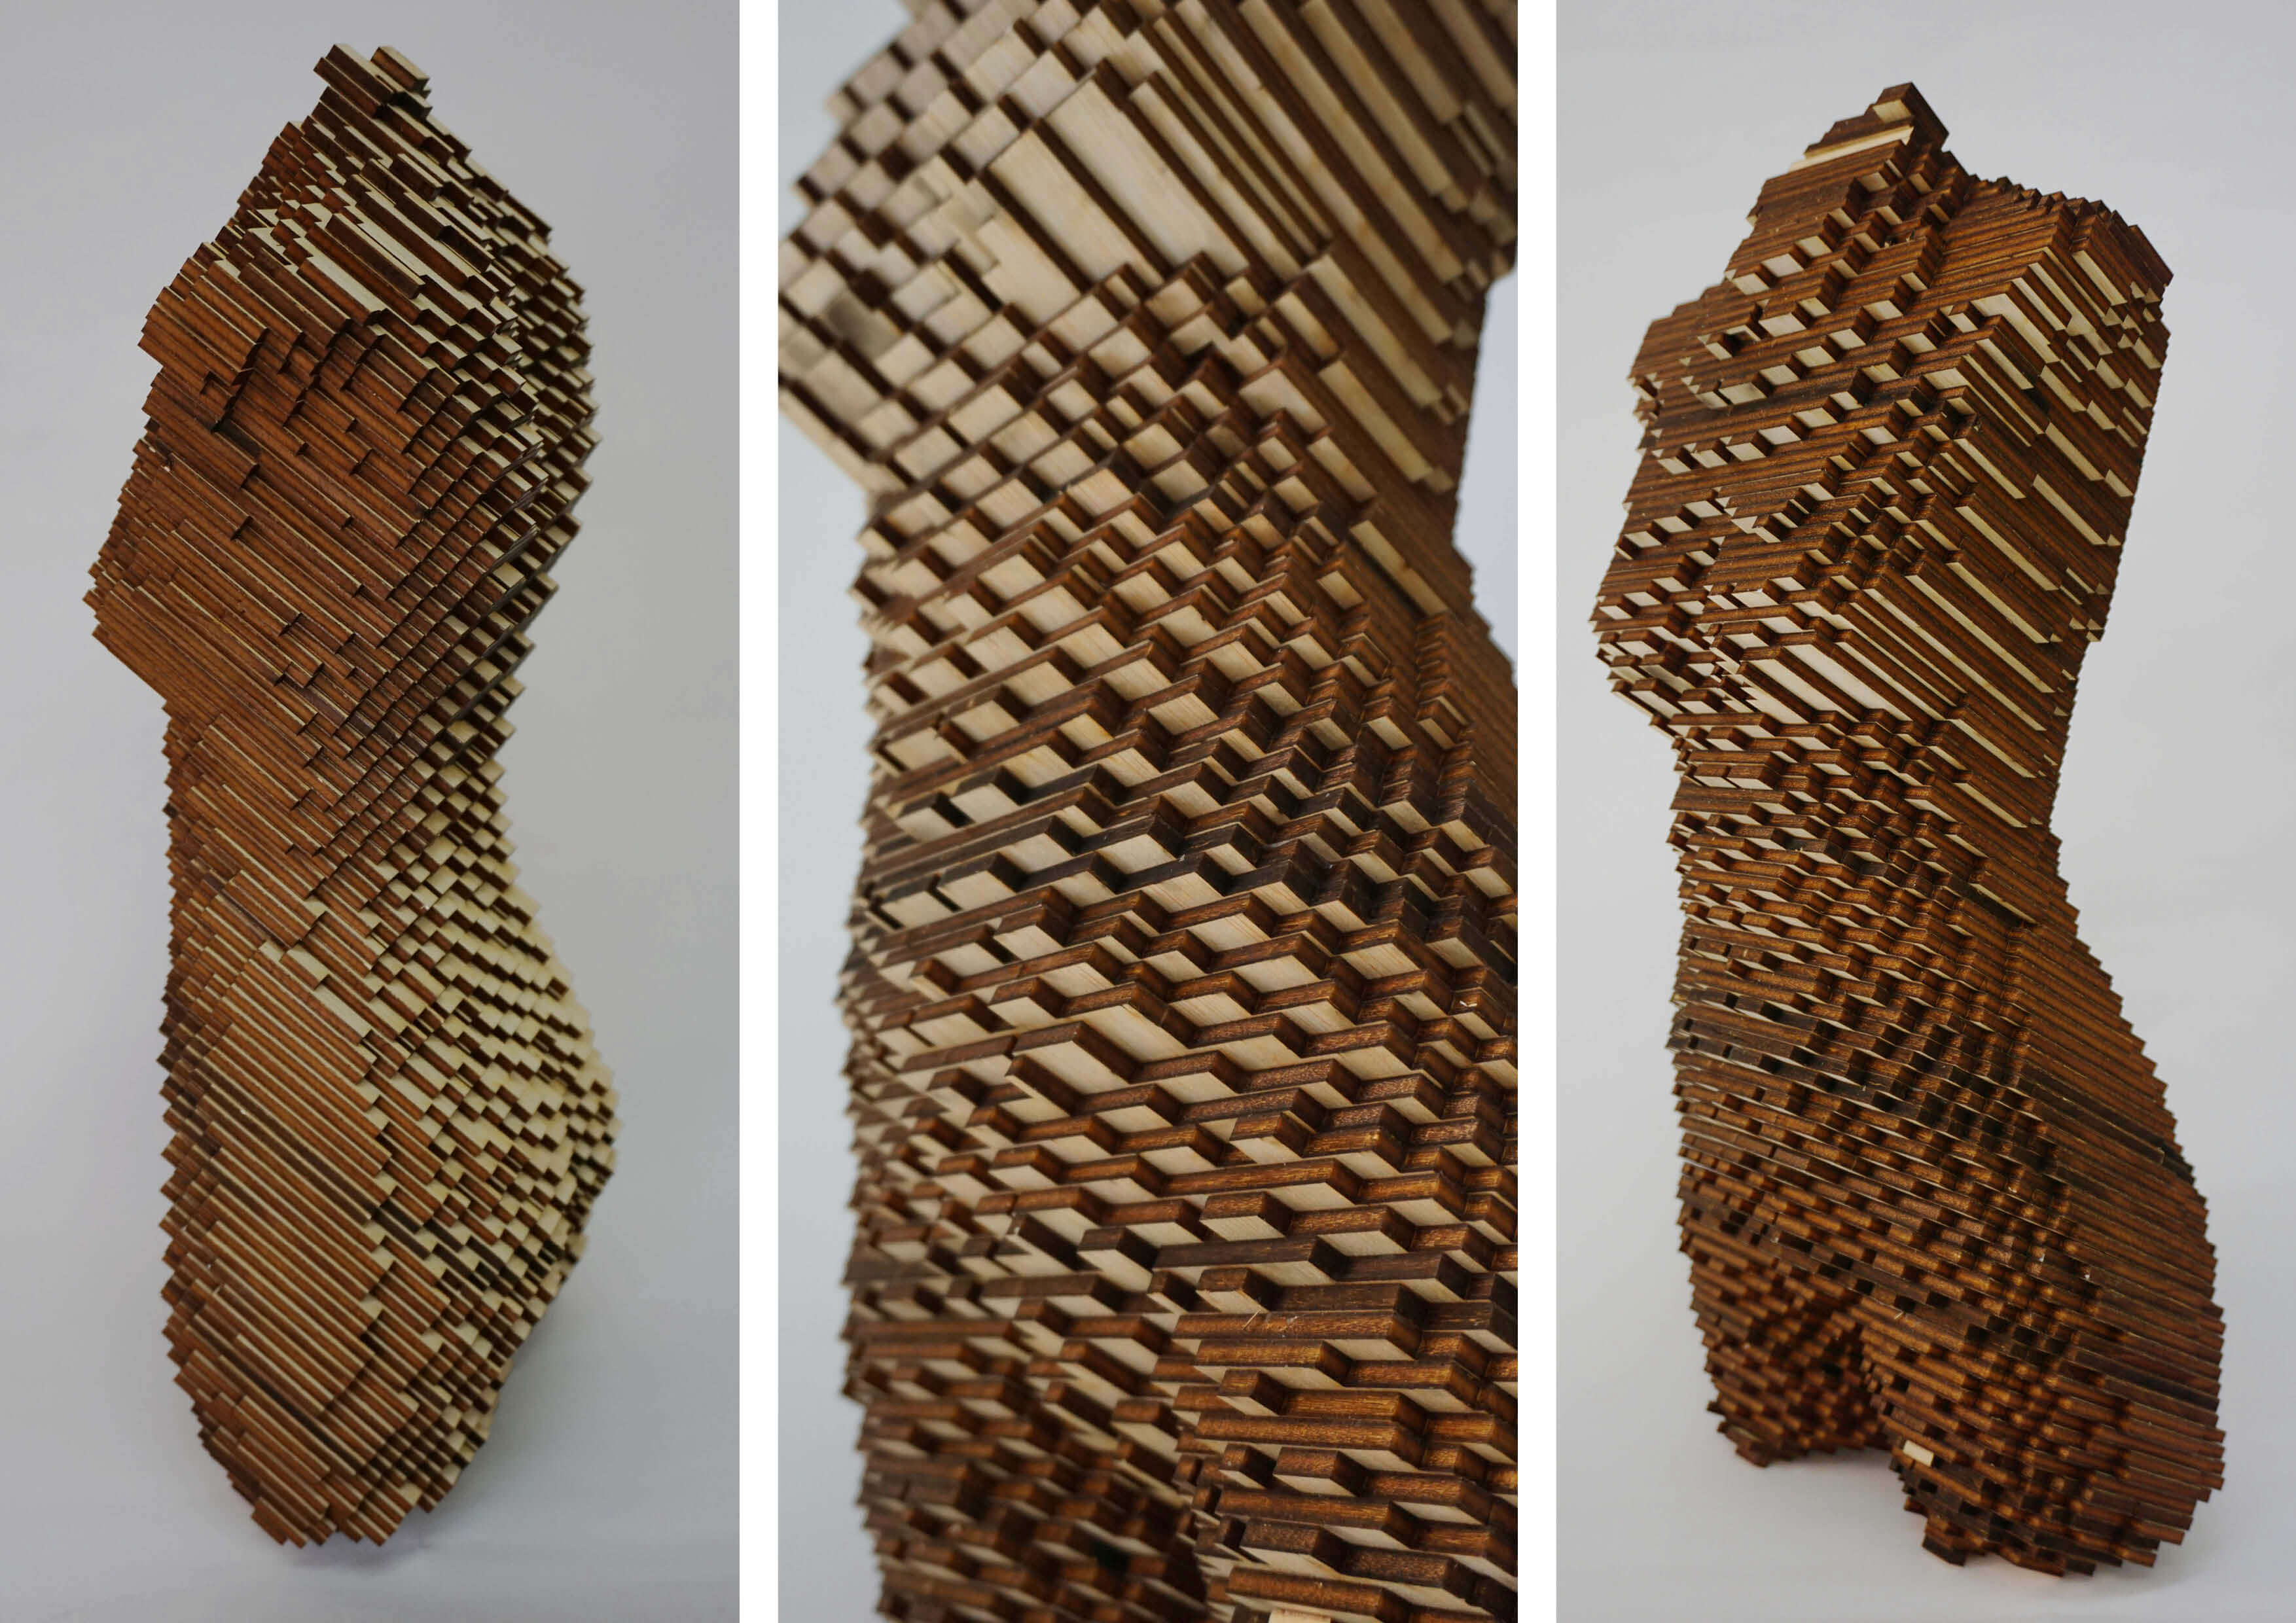
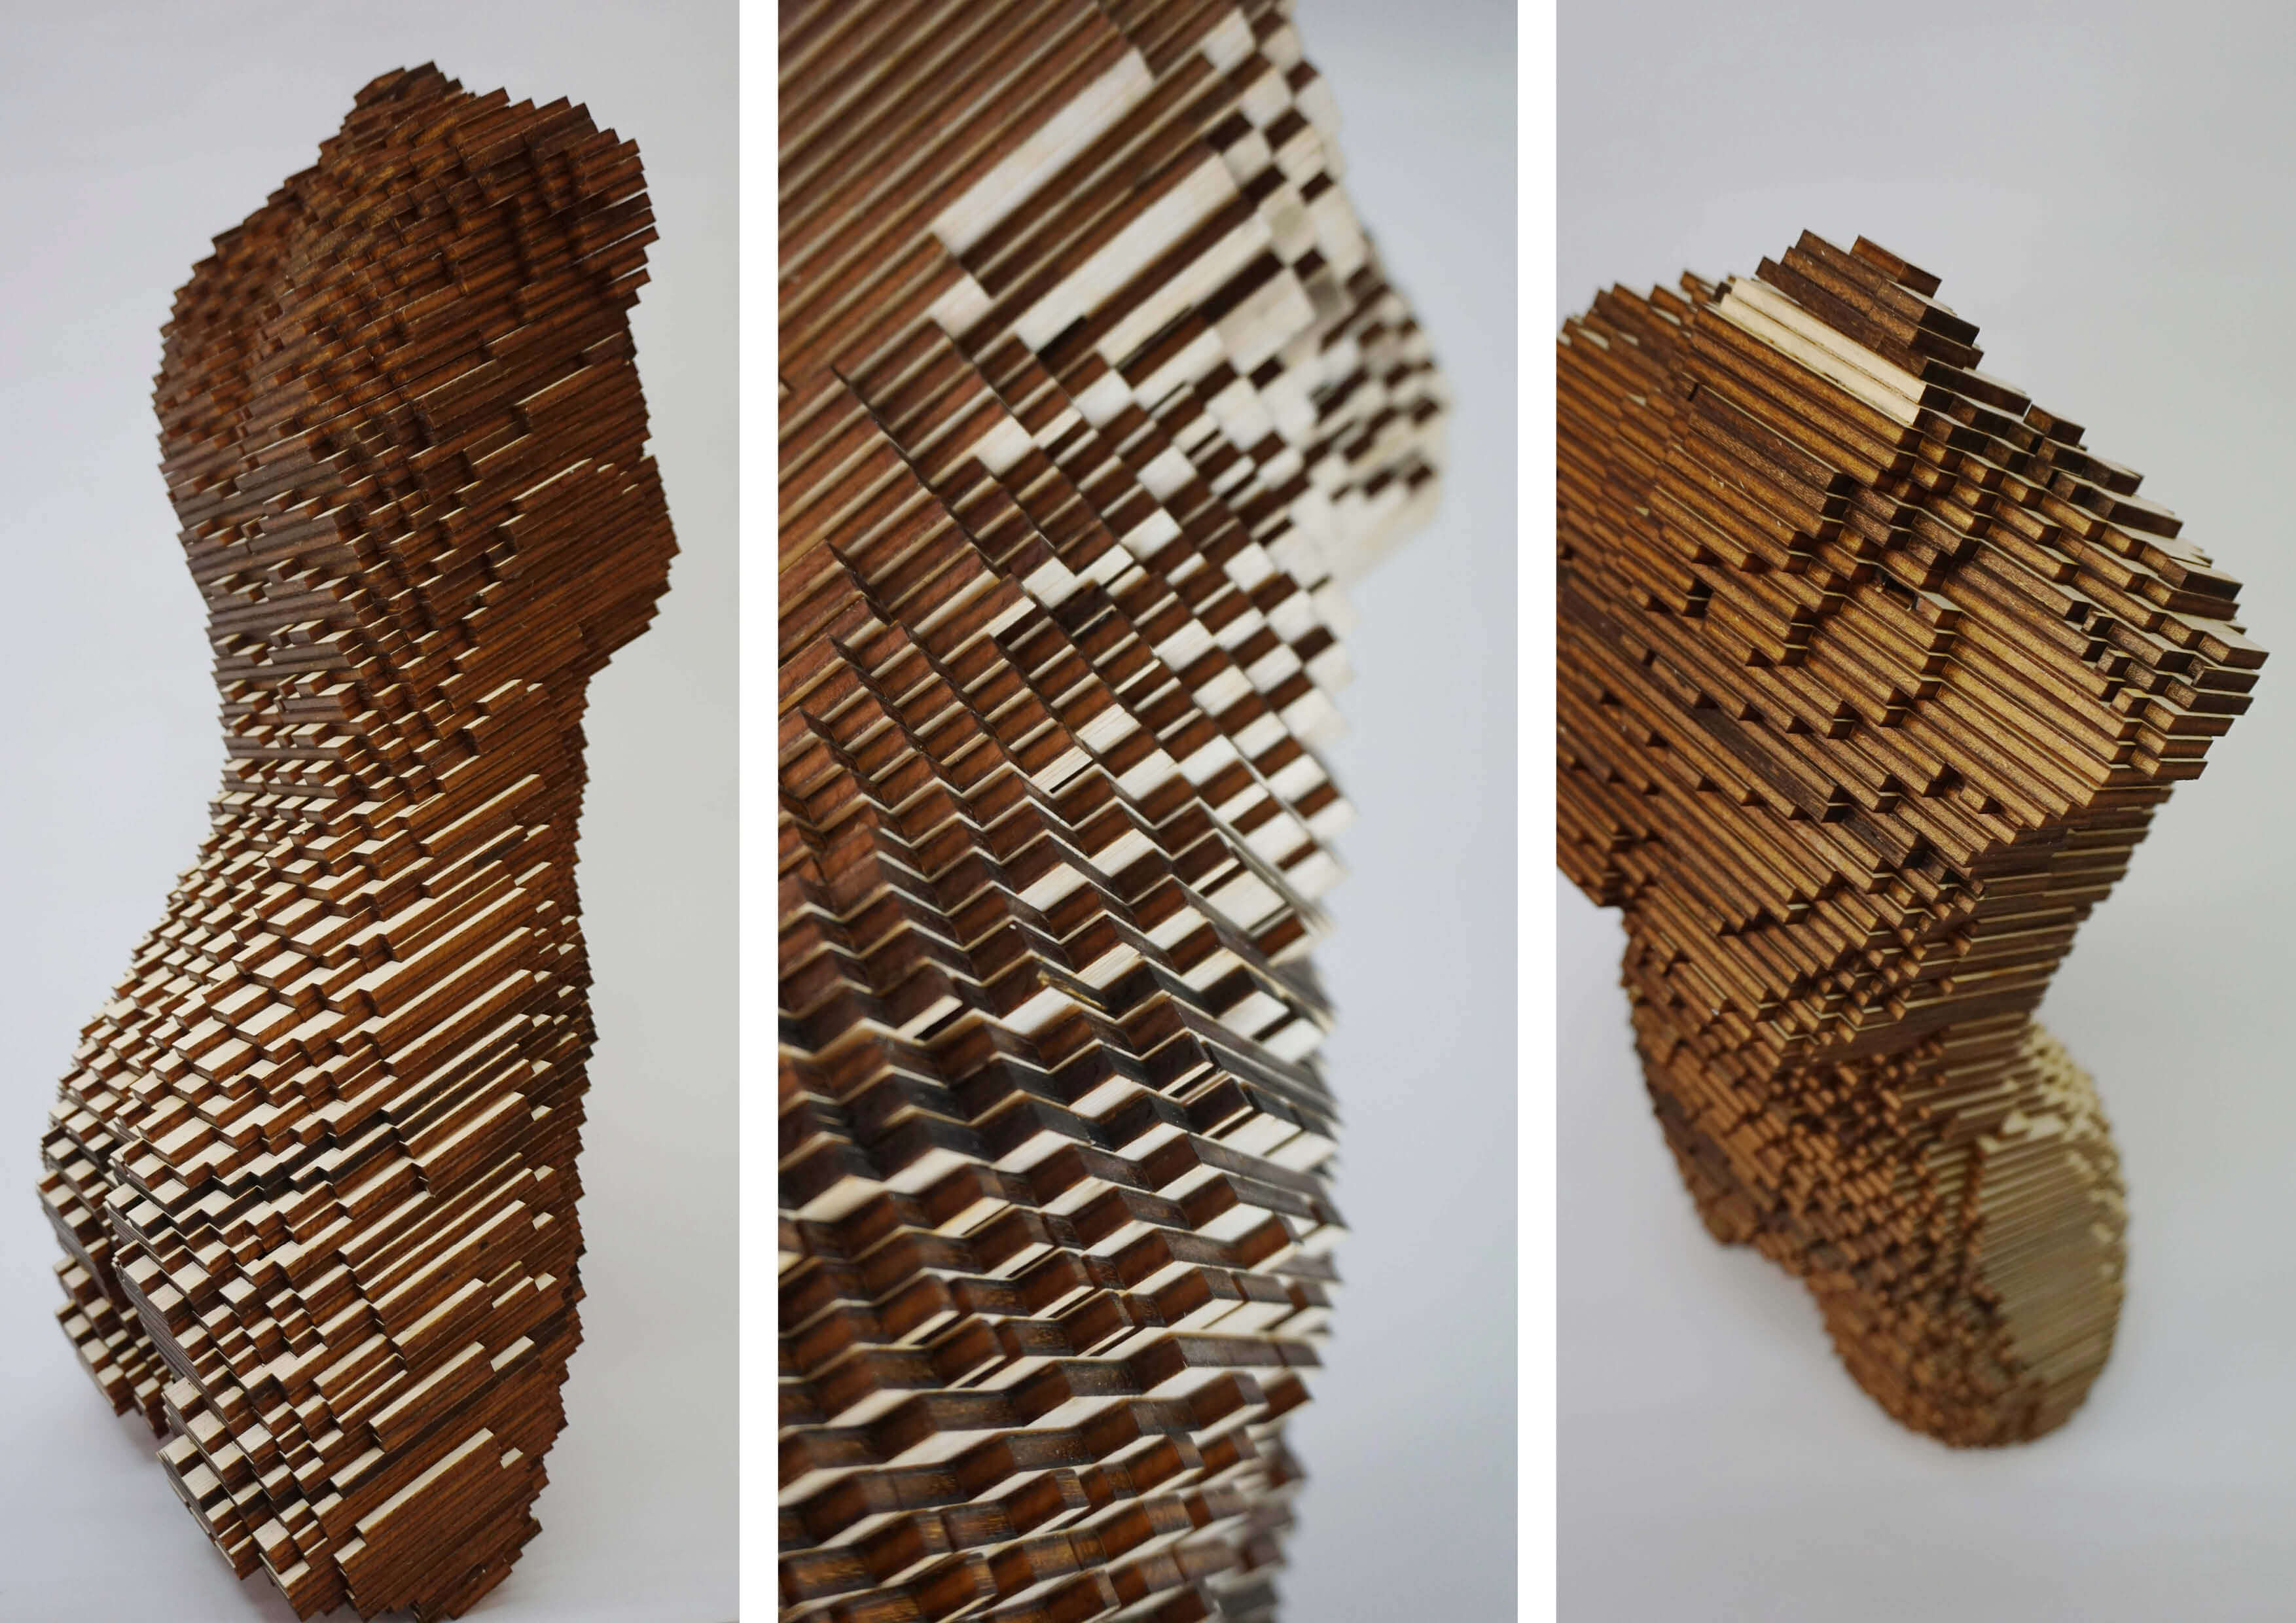
| DIGITALIZATION |
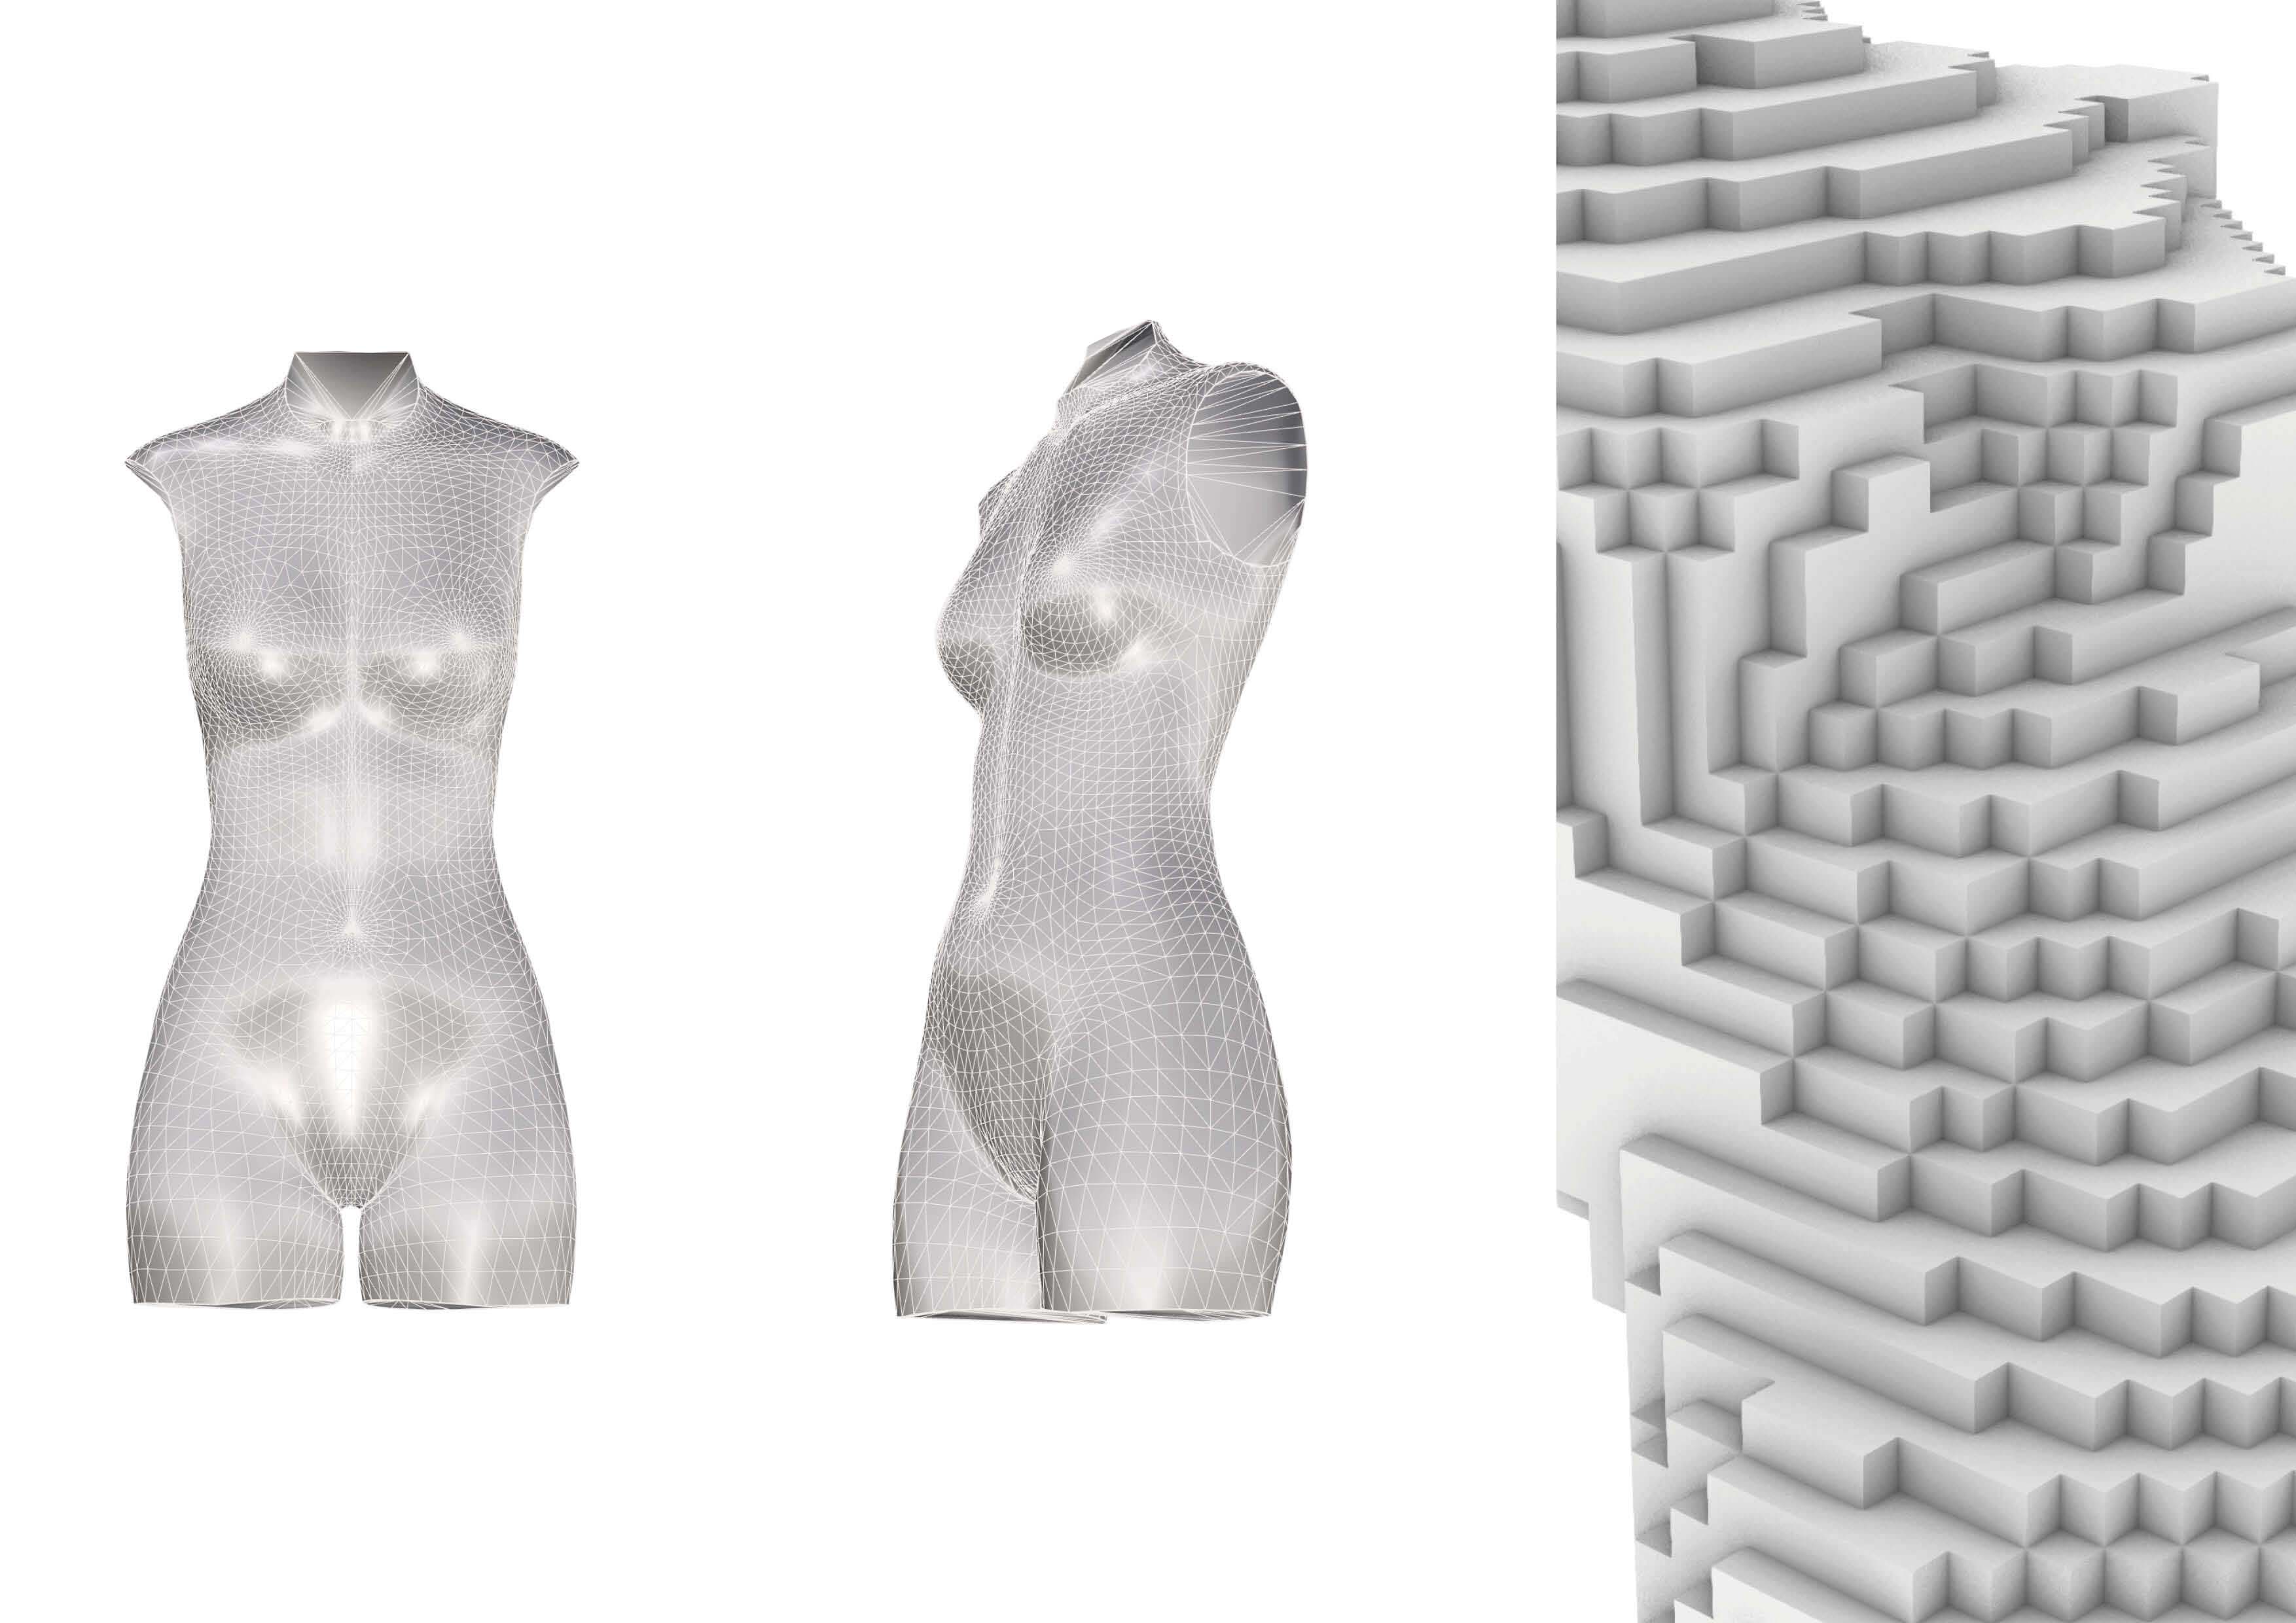
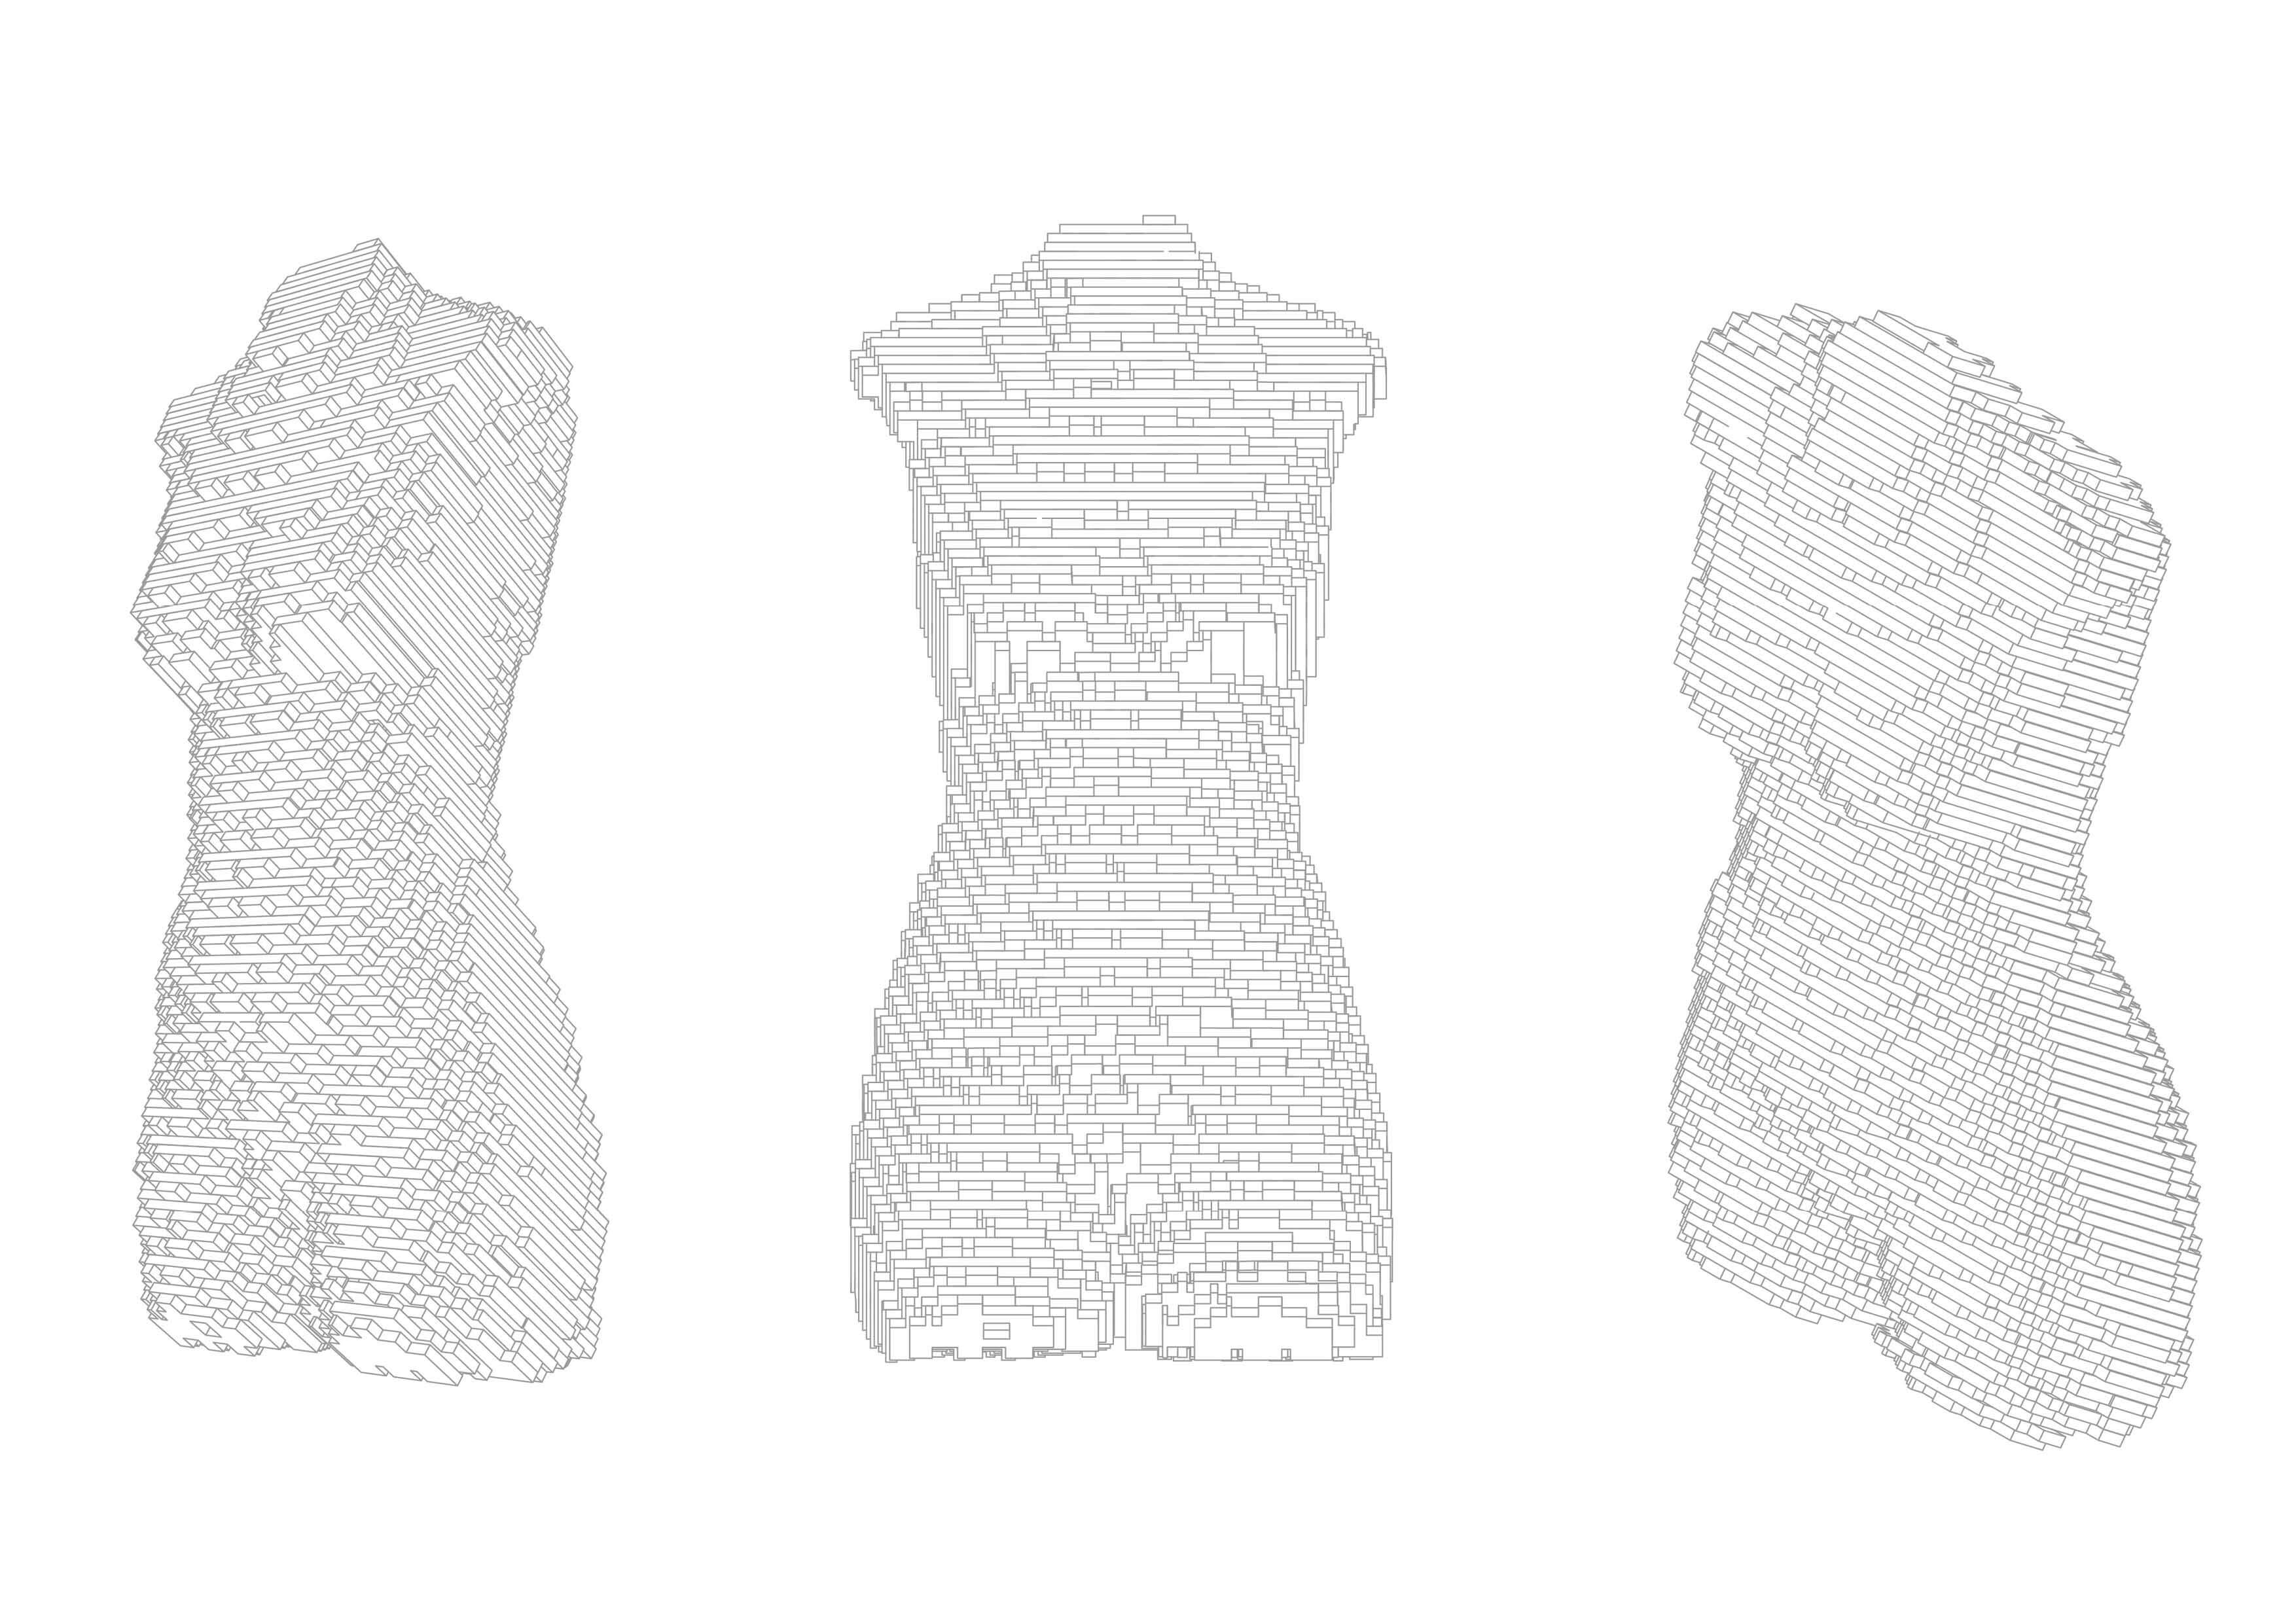
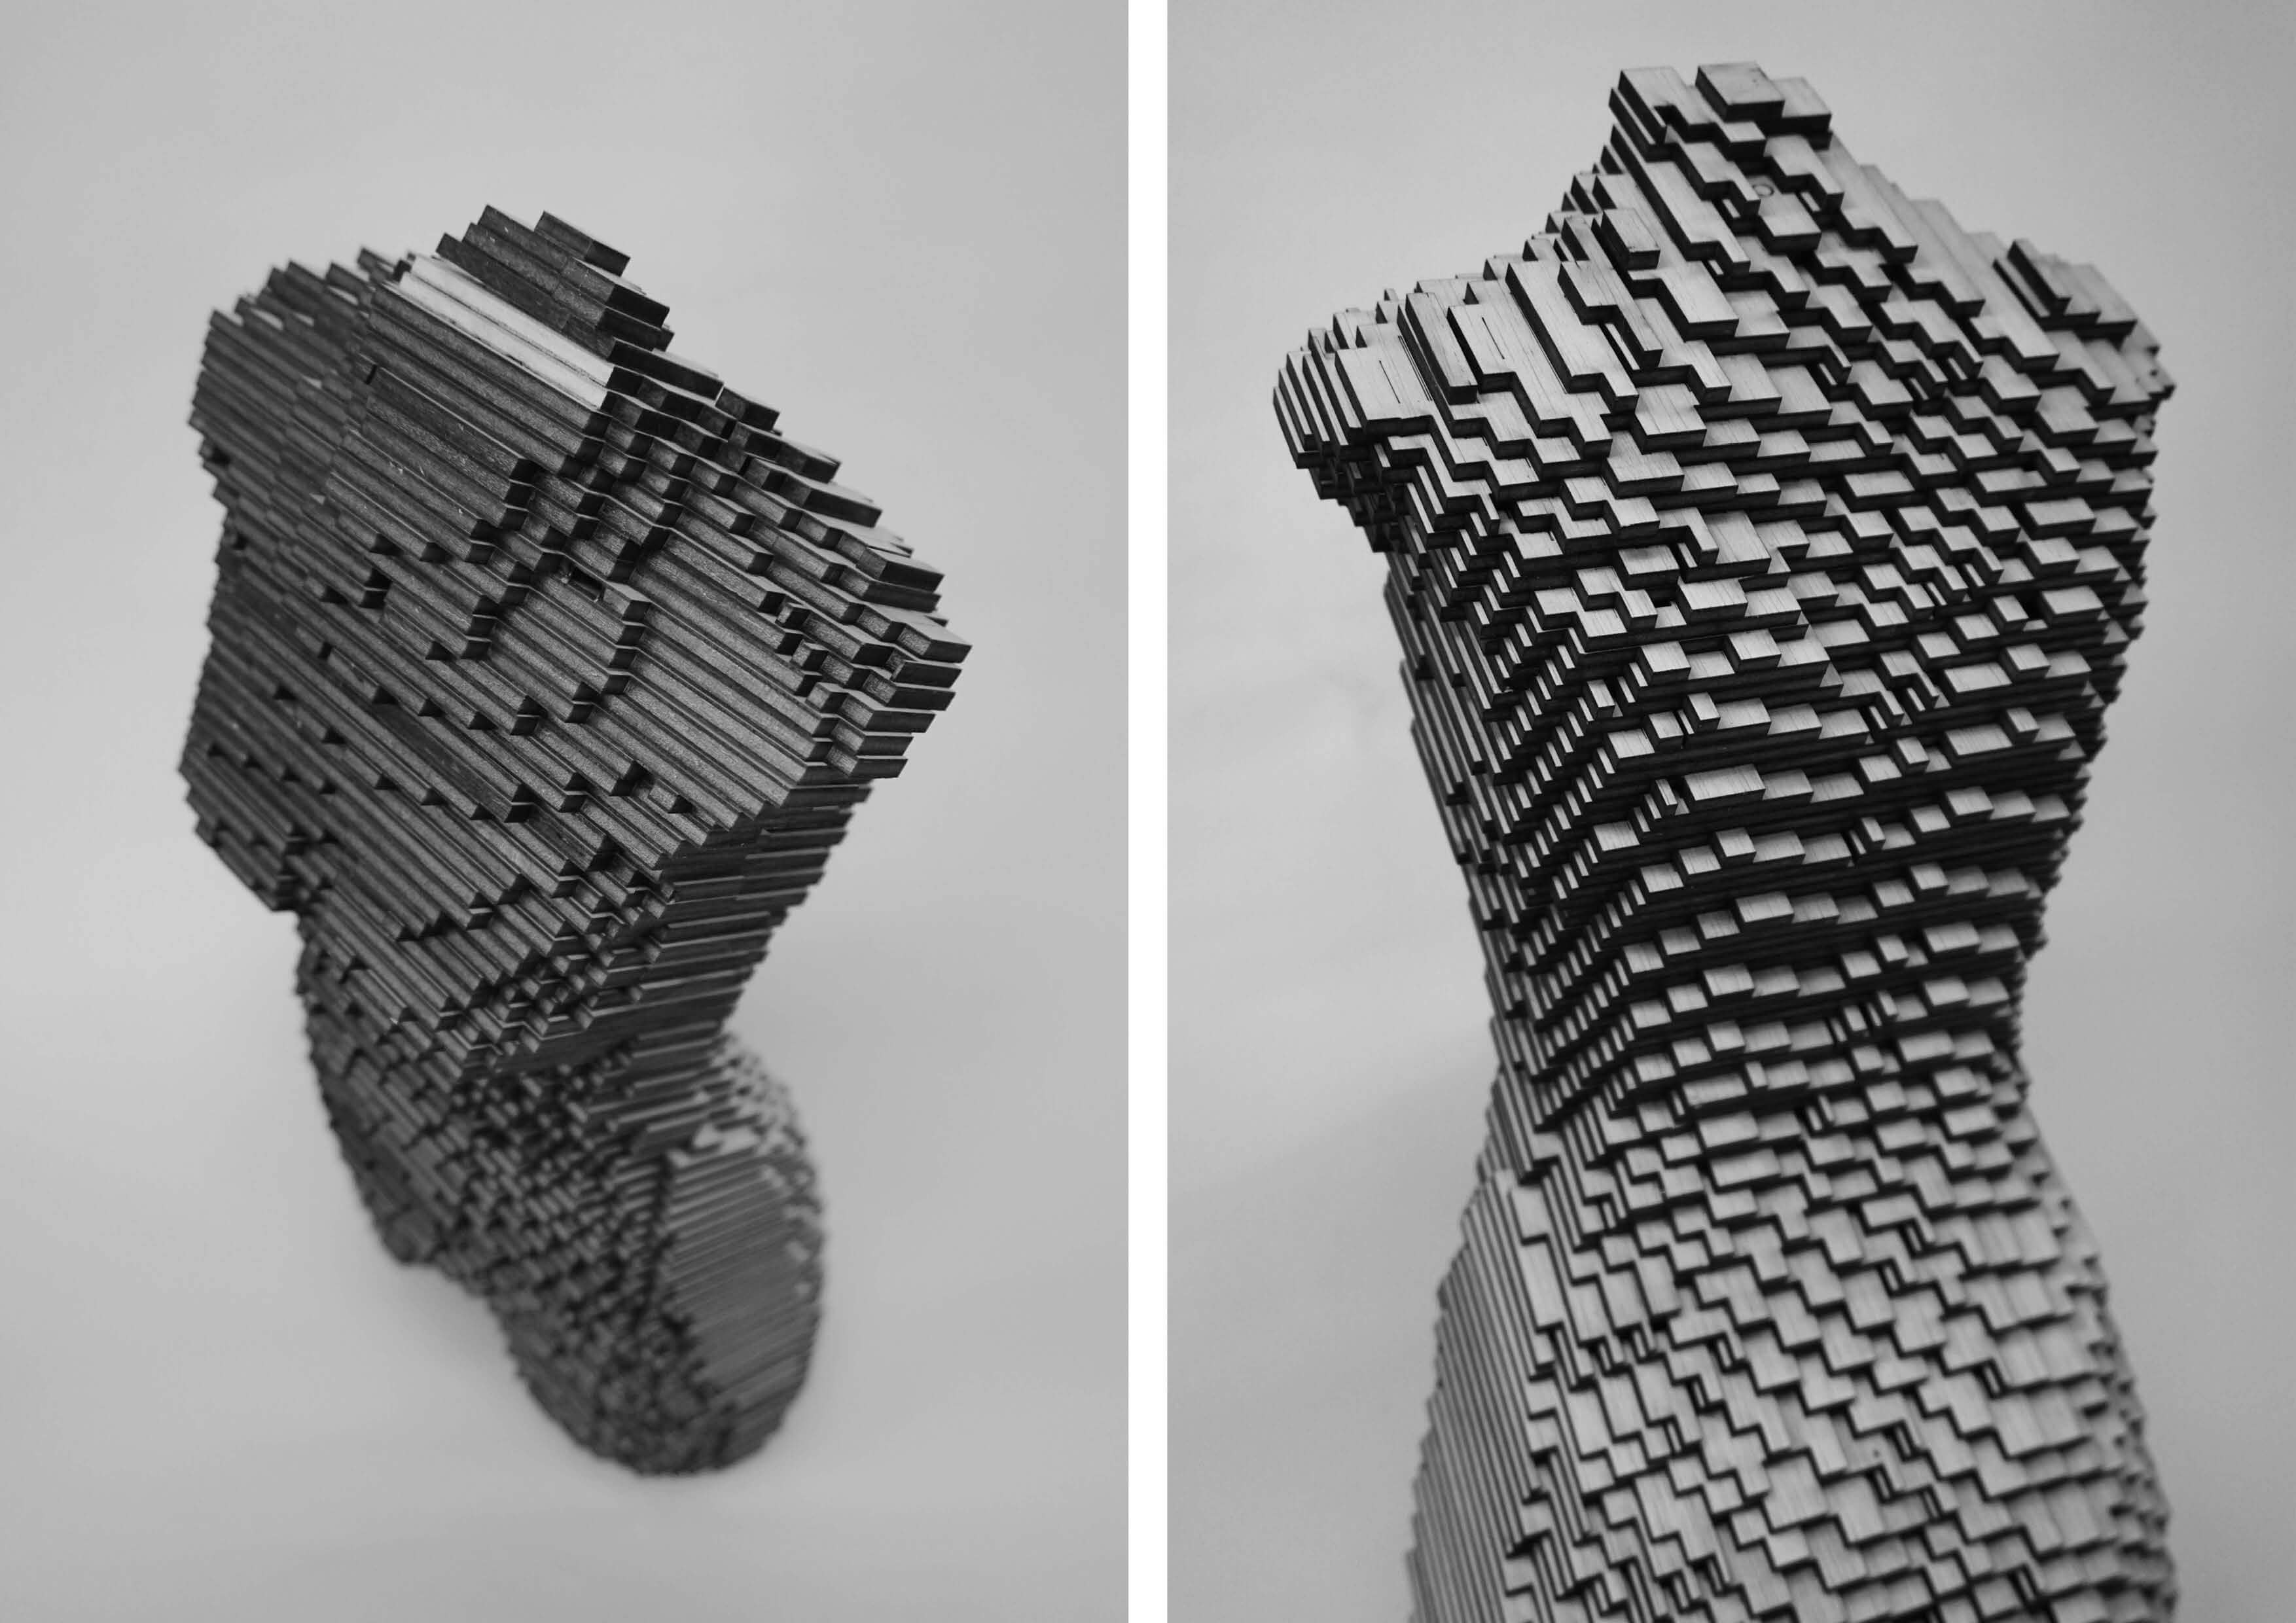
- In this case, a human torso was used as the basics geometry which was shaped and colonized by mesh boxes. The tangle of sharp edges creates a digital landscape of experiencies.
3D MODELING
Software
- Makehuman (Mac / Windows)
- Rhinoceros & Grasshopper (Mac / Windows) - (Grasshopper is included in Rhino, other plugins you will find here)
- Slicer for Fusion 360 (Mac / Windows)
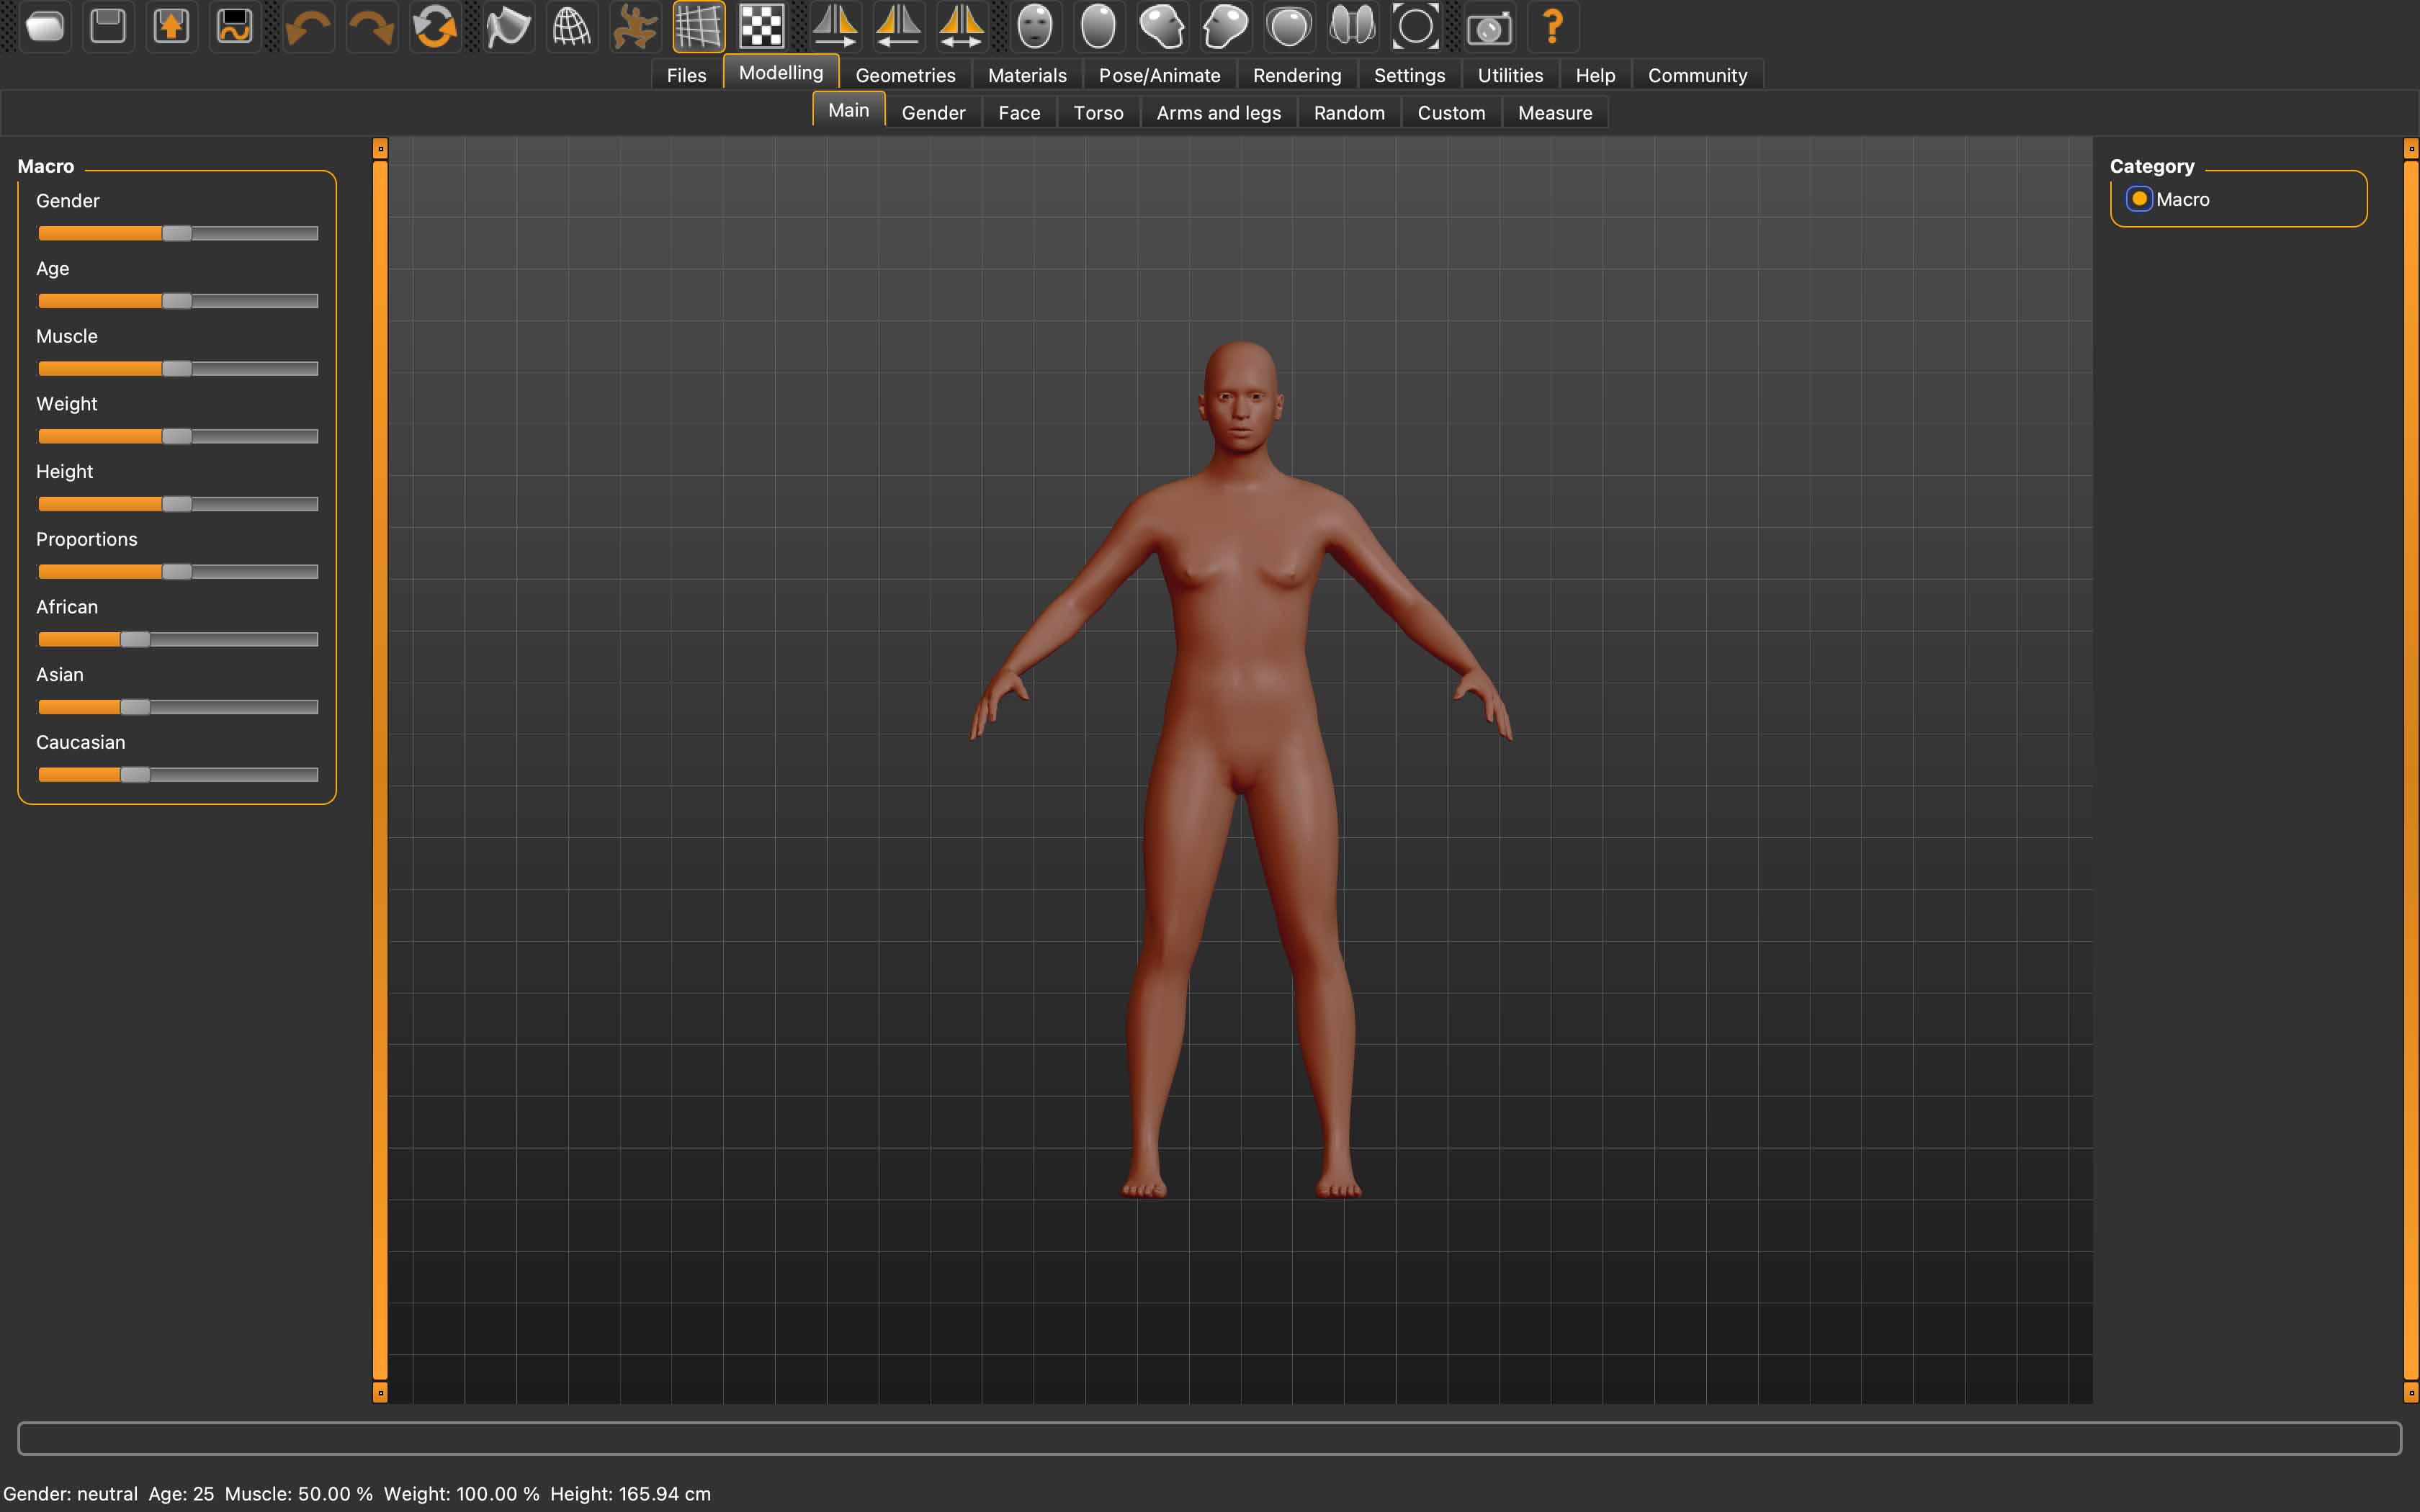
MakeHuman is a free and open source 3D computer graphics middleware designed for the prototyping of photorealistic humanoids. It is developed by a community of programmers, artists, and academics interested in 3D character modeling.
- We used MakeHuman to generate a digital file of the human body. You can play with different parametres of 3D modeling - gender, positions, textures and other features.
Rhinoceros is a commercial 3D computer graphics and computer-aided design (CAD) application software. Rhinoceros geometry is based on the NURBS mathematical model, which focuses on producing mathematically precise representation of curves and freeform surfaces in computer graphics (as opposed to polygon mesh-based applications). Rhinoceros is used for computer-aided design (CAD), computer-aided manufacturing (CAM), rapid prototyping, 3D printing and reverse engineering in industries including architecture, industrial design (e.g. automotive design, watercraft design), product design (e.g. jewelry design) as well as for multimedia and graphic design.
- I imported the 3D model from MakeHuman into Rhino and removed some parts of the human body to create an abstract sculpture. Using a grasshopper script, I generated a new layer of body skin consisting of "boxes". The human body should be a land of experiences that we will experience throughout our life time.
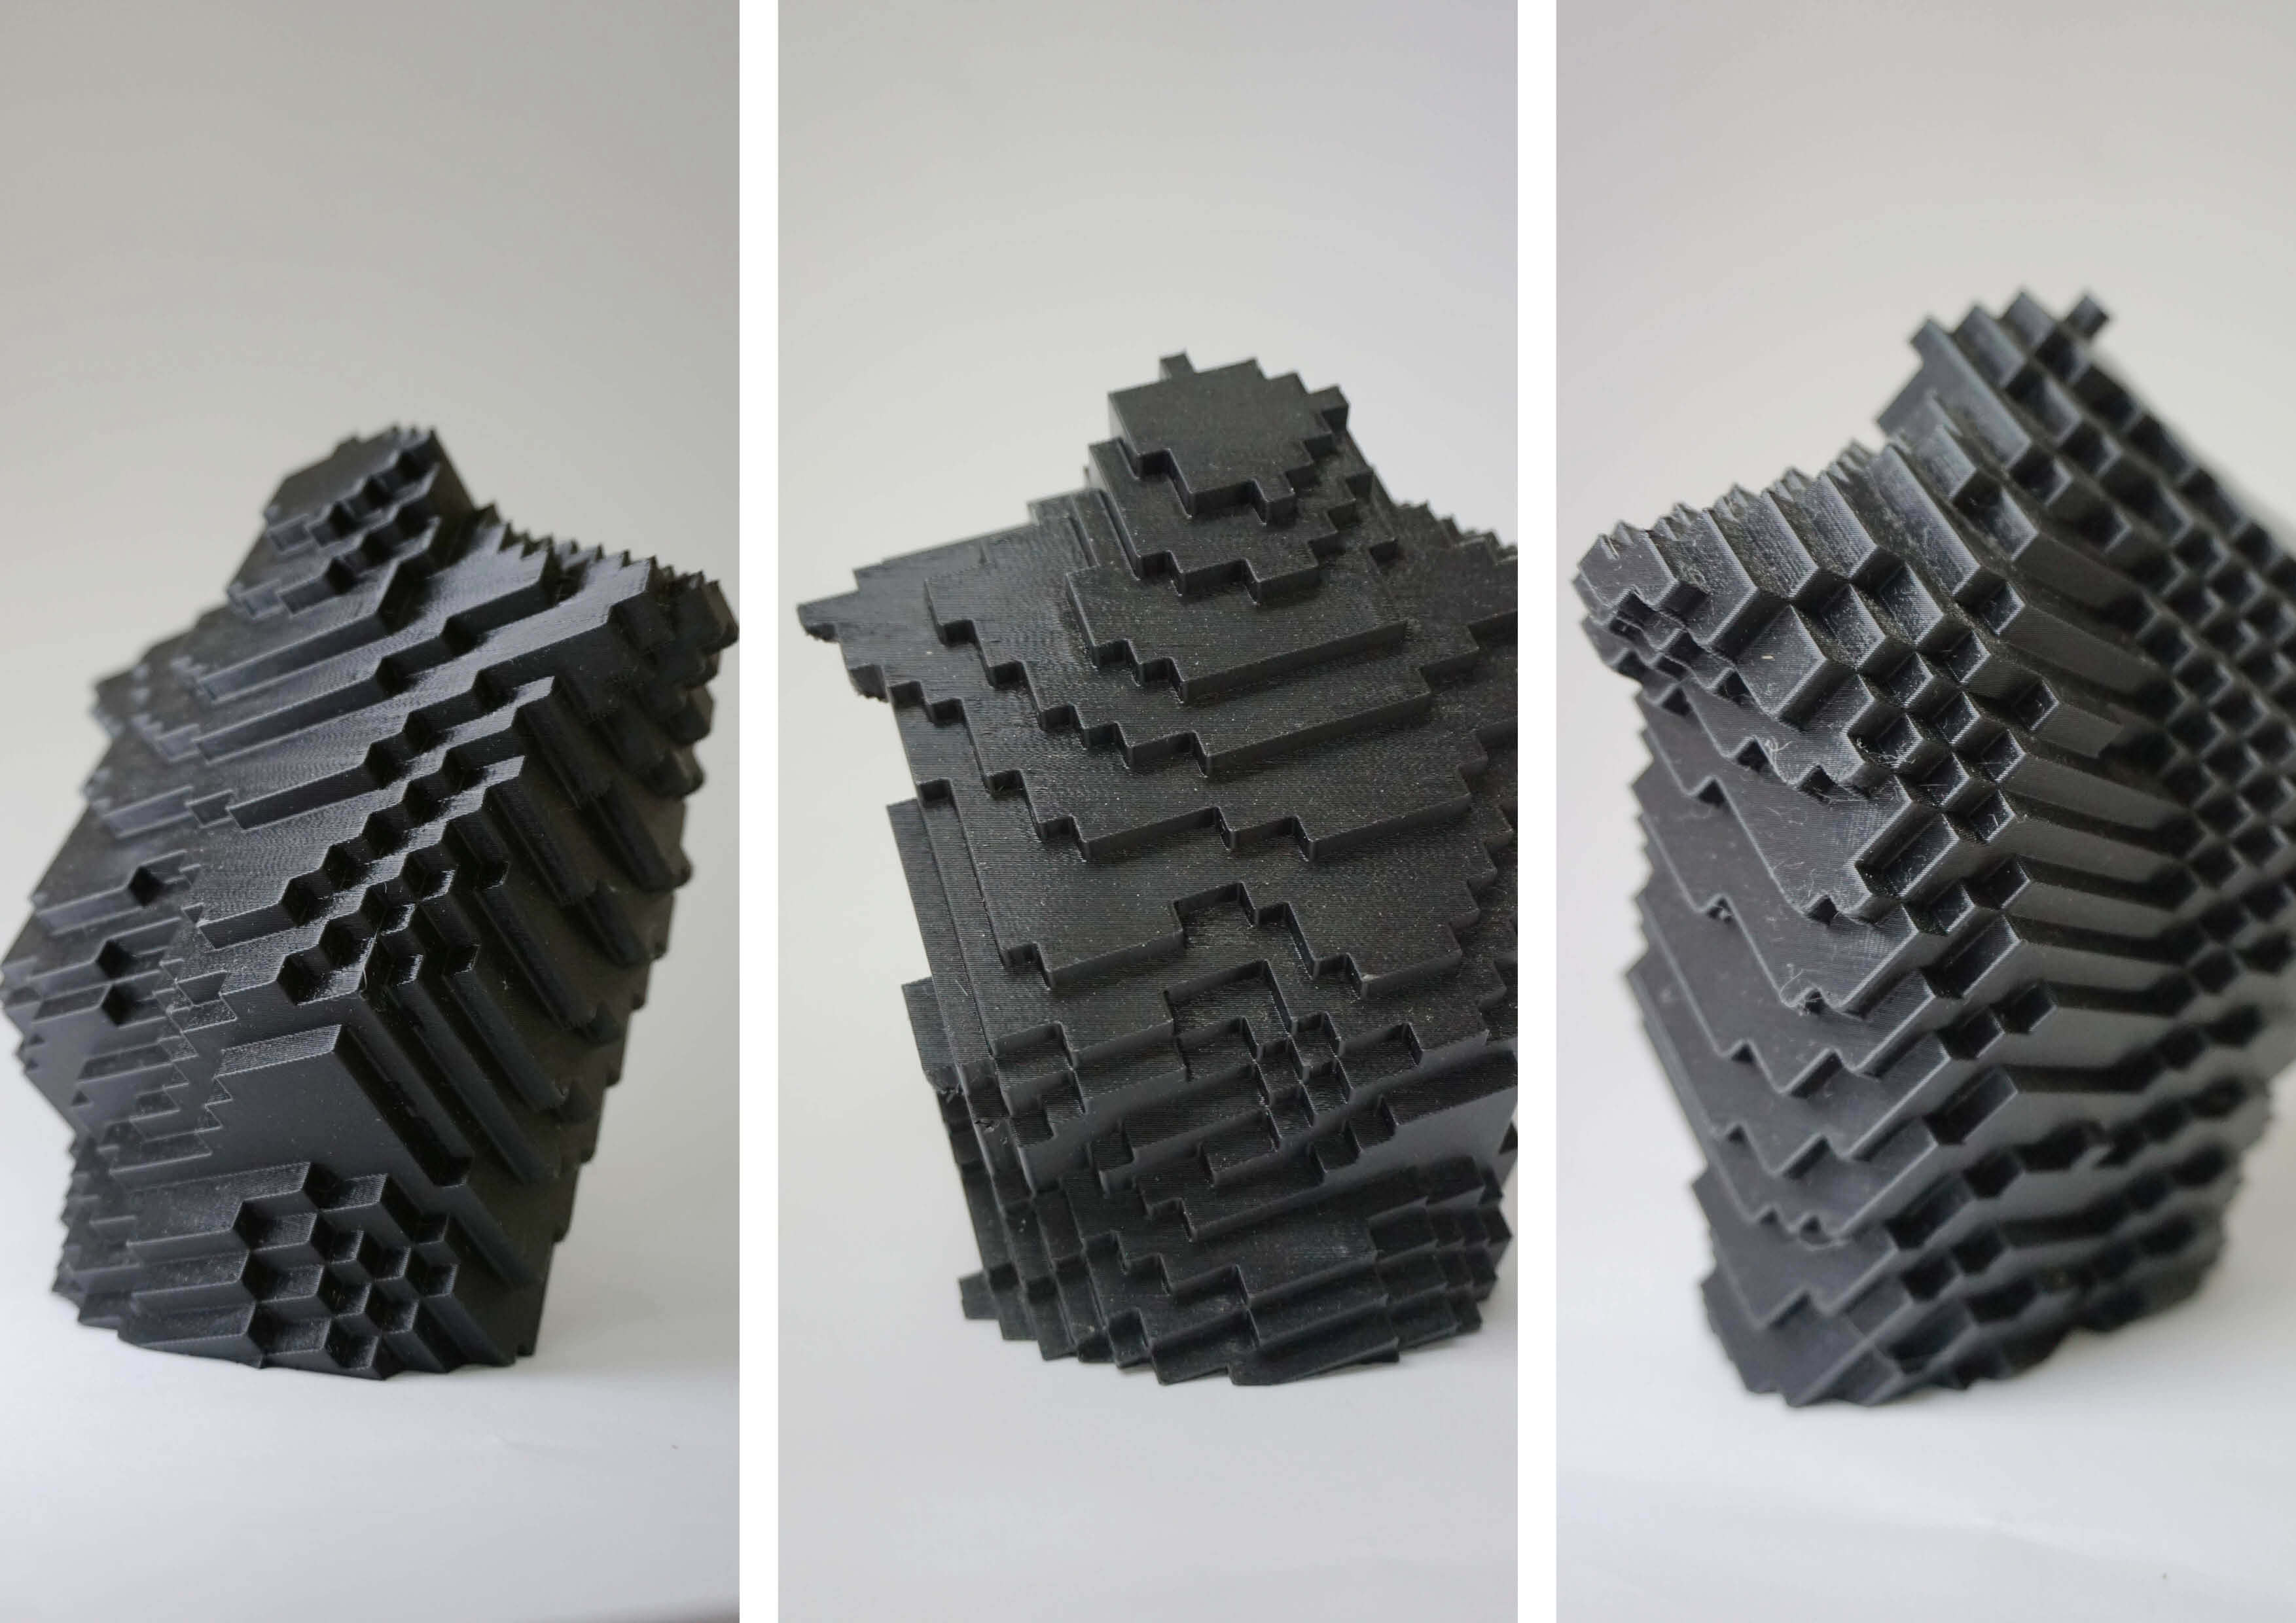
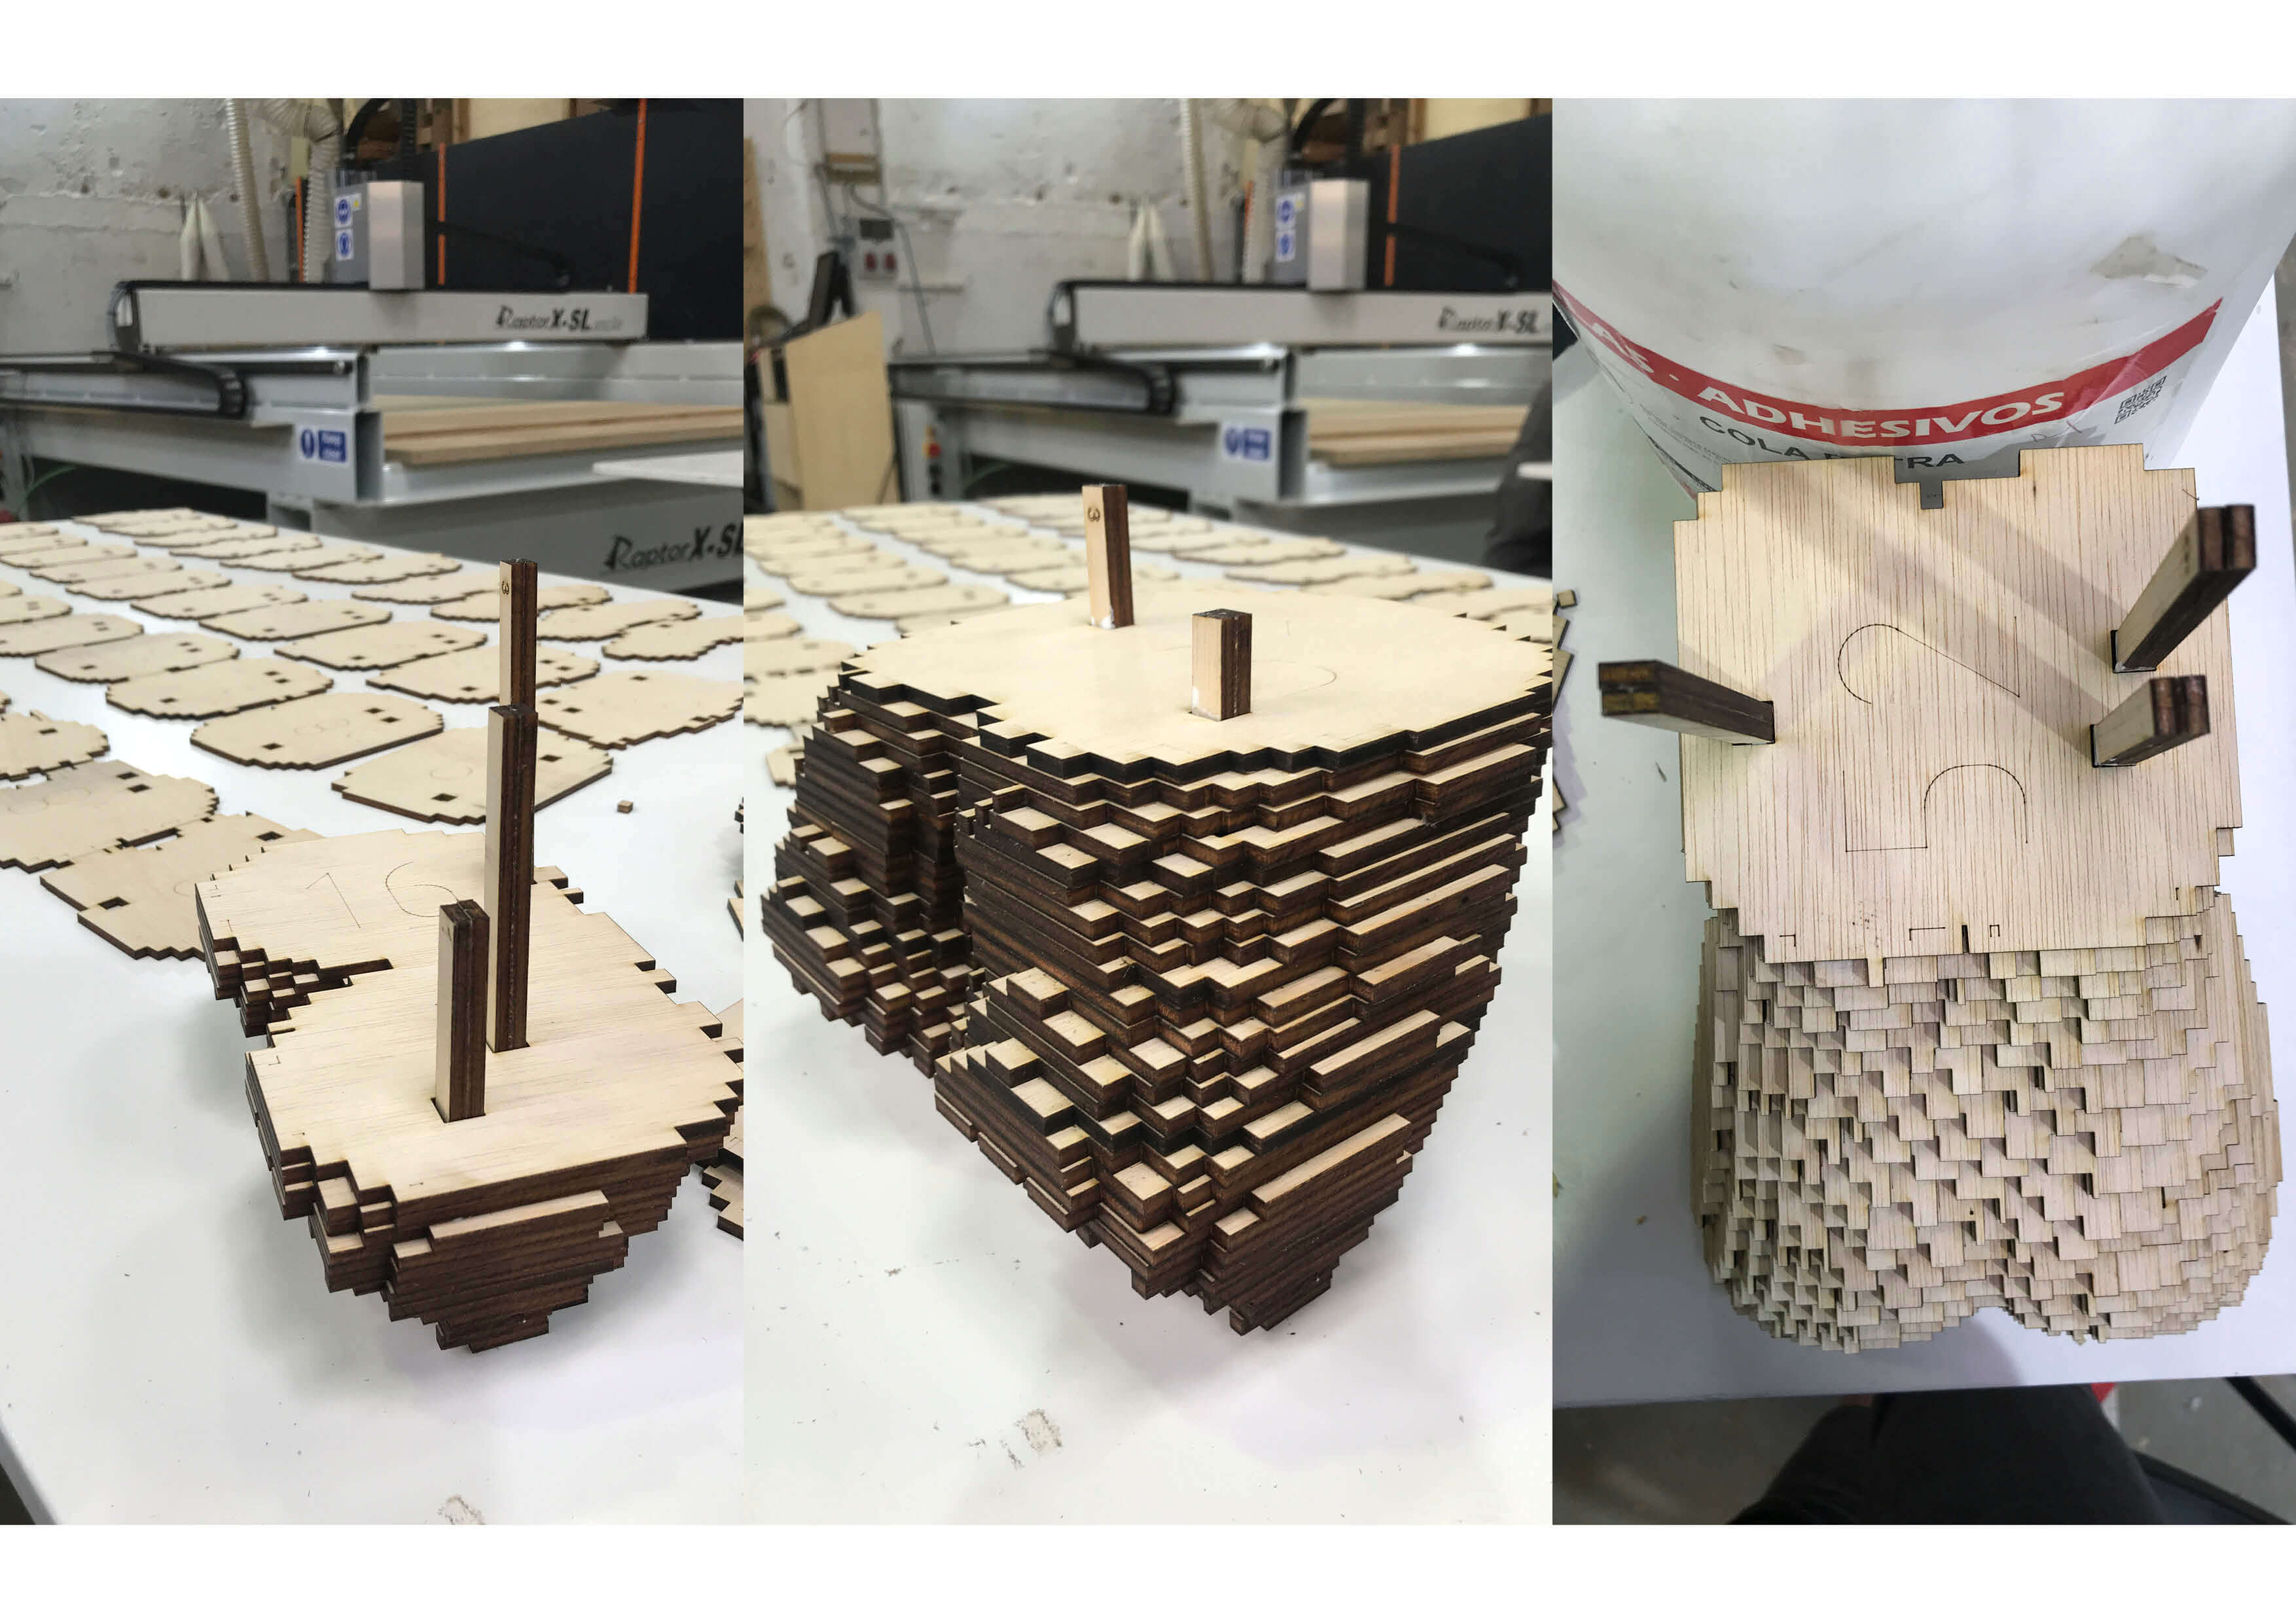
| FABRICATION |
MakeHuman
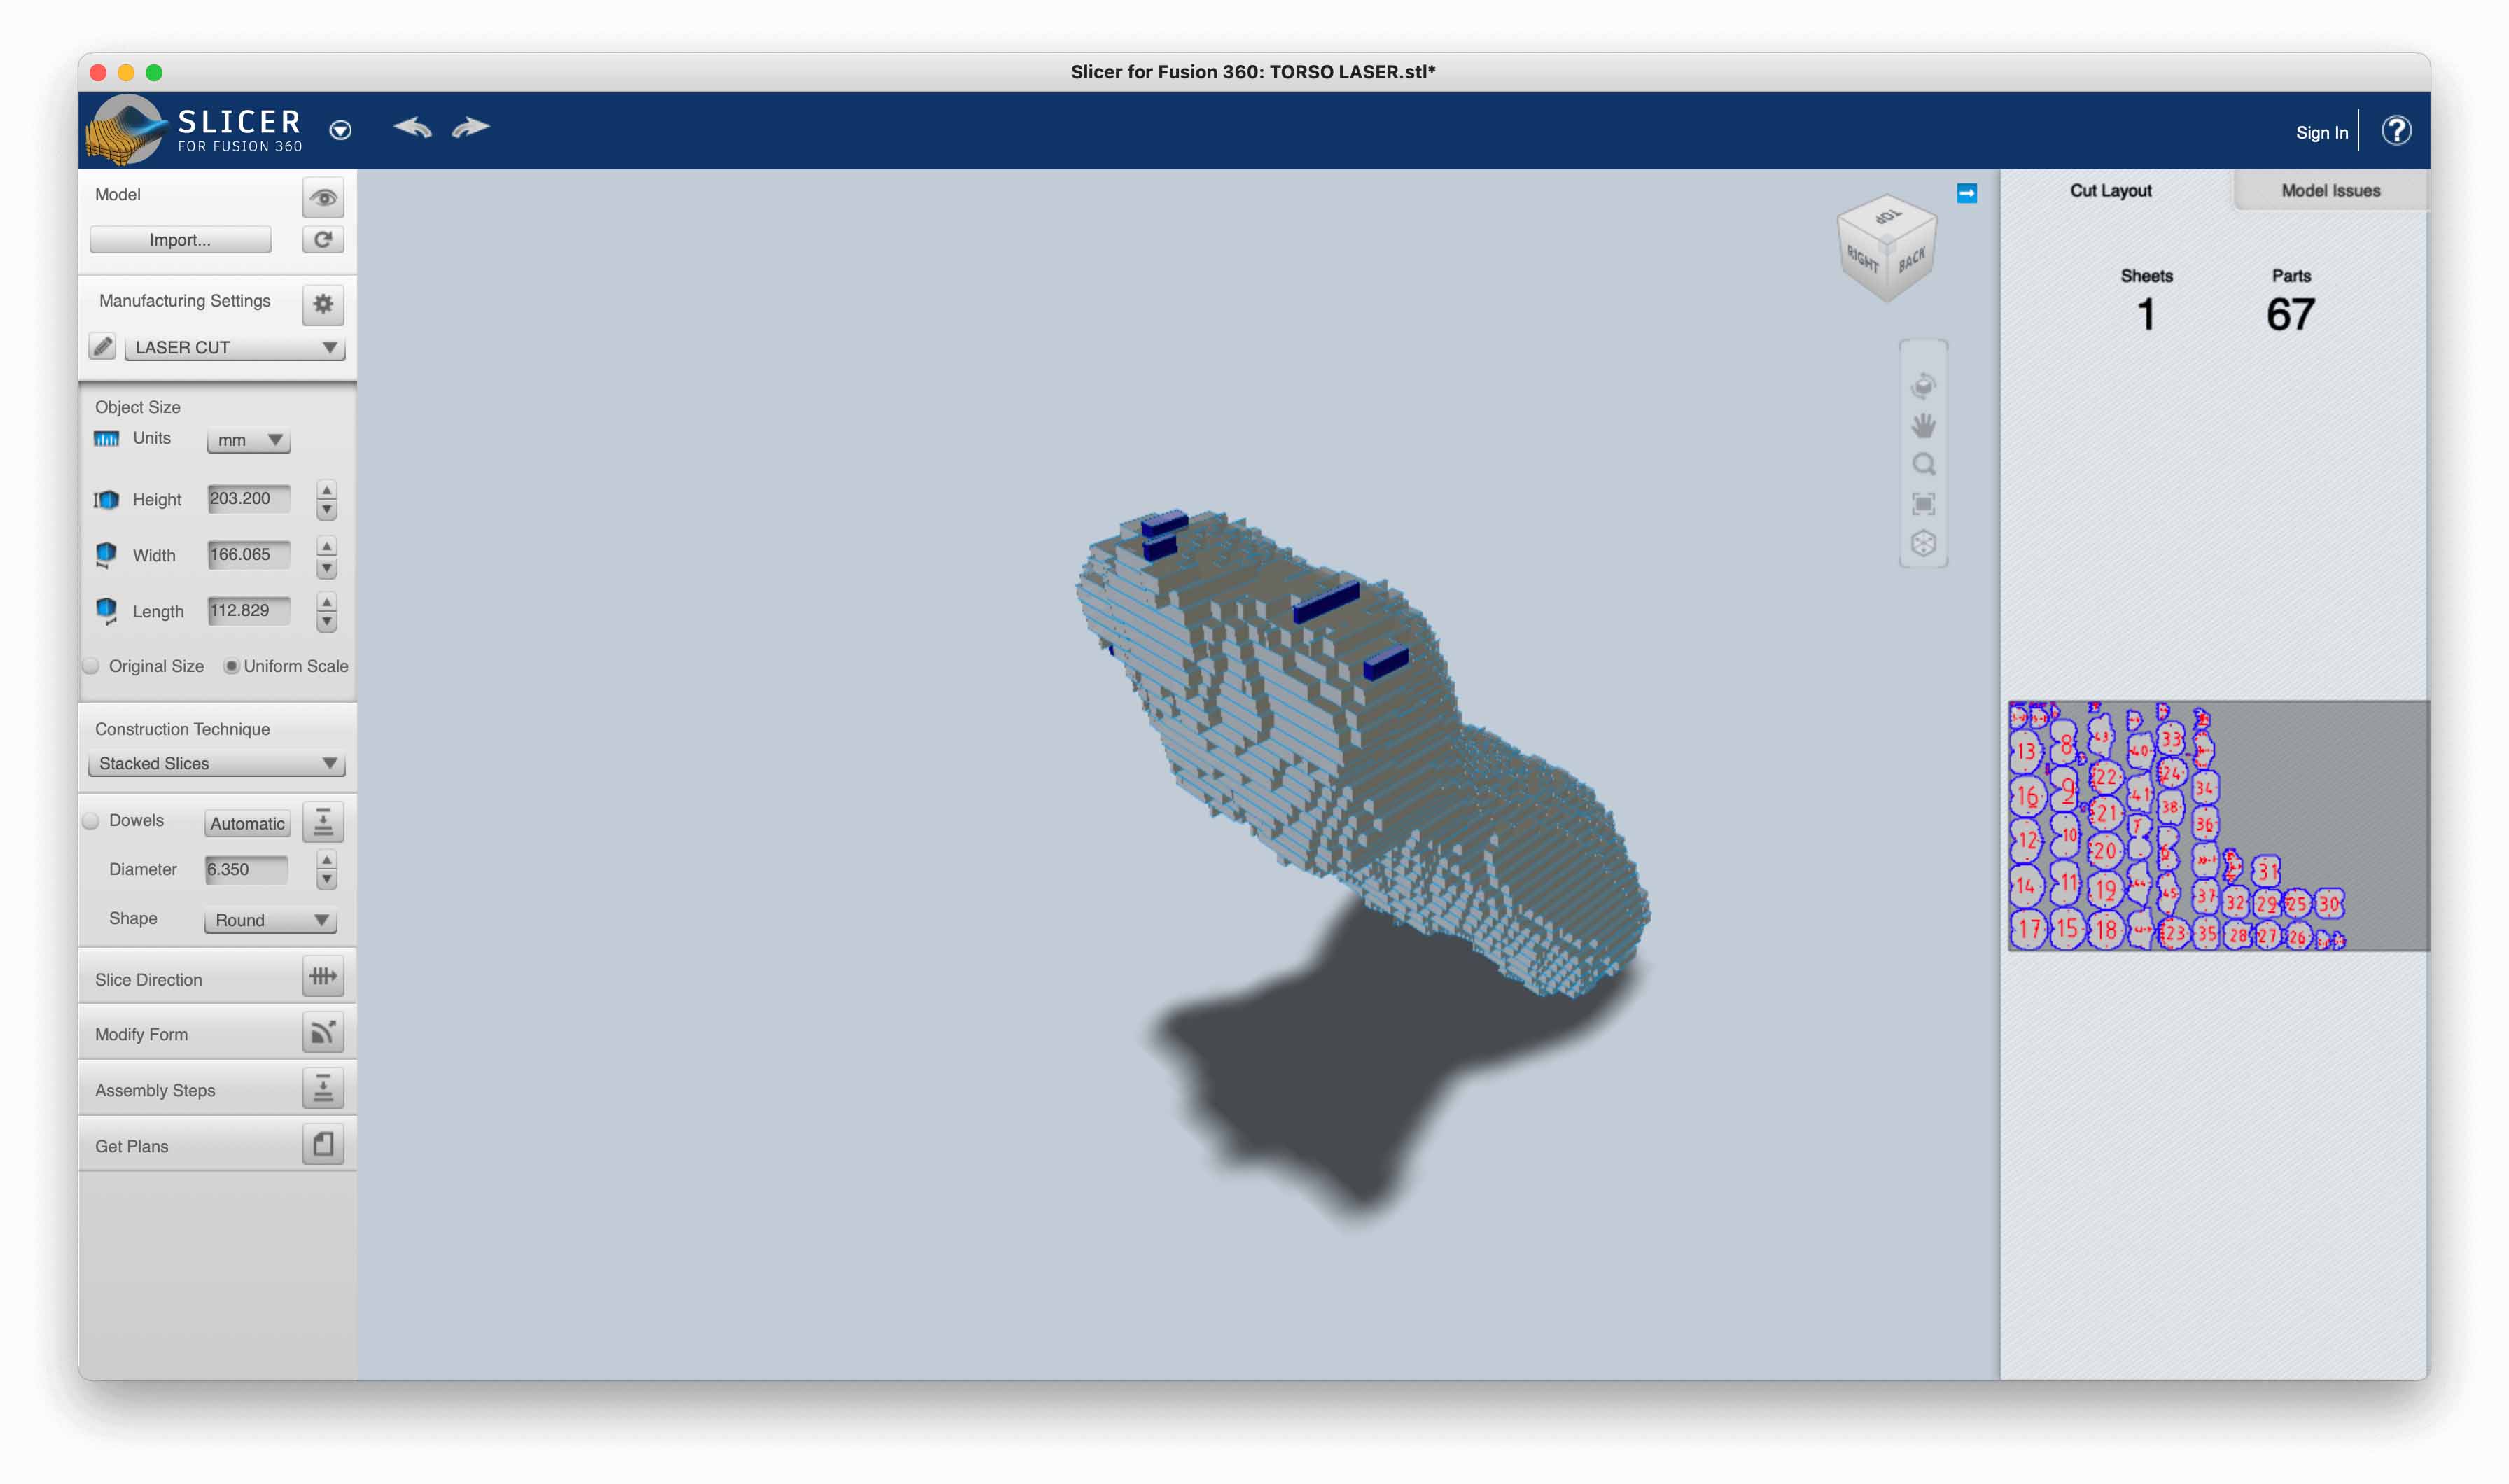
Slicer for Fusion 360
The 3D program generated layers of polywood that are stacked on top of each other to create the structure of the designed human skin. The structure is supported by internal columns.
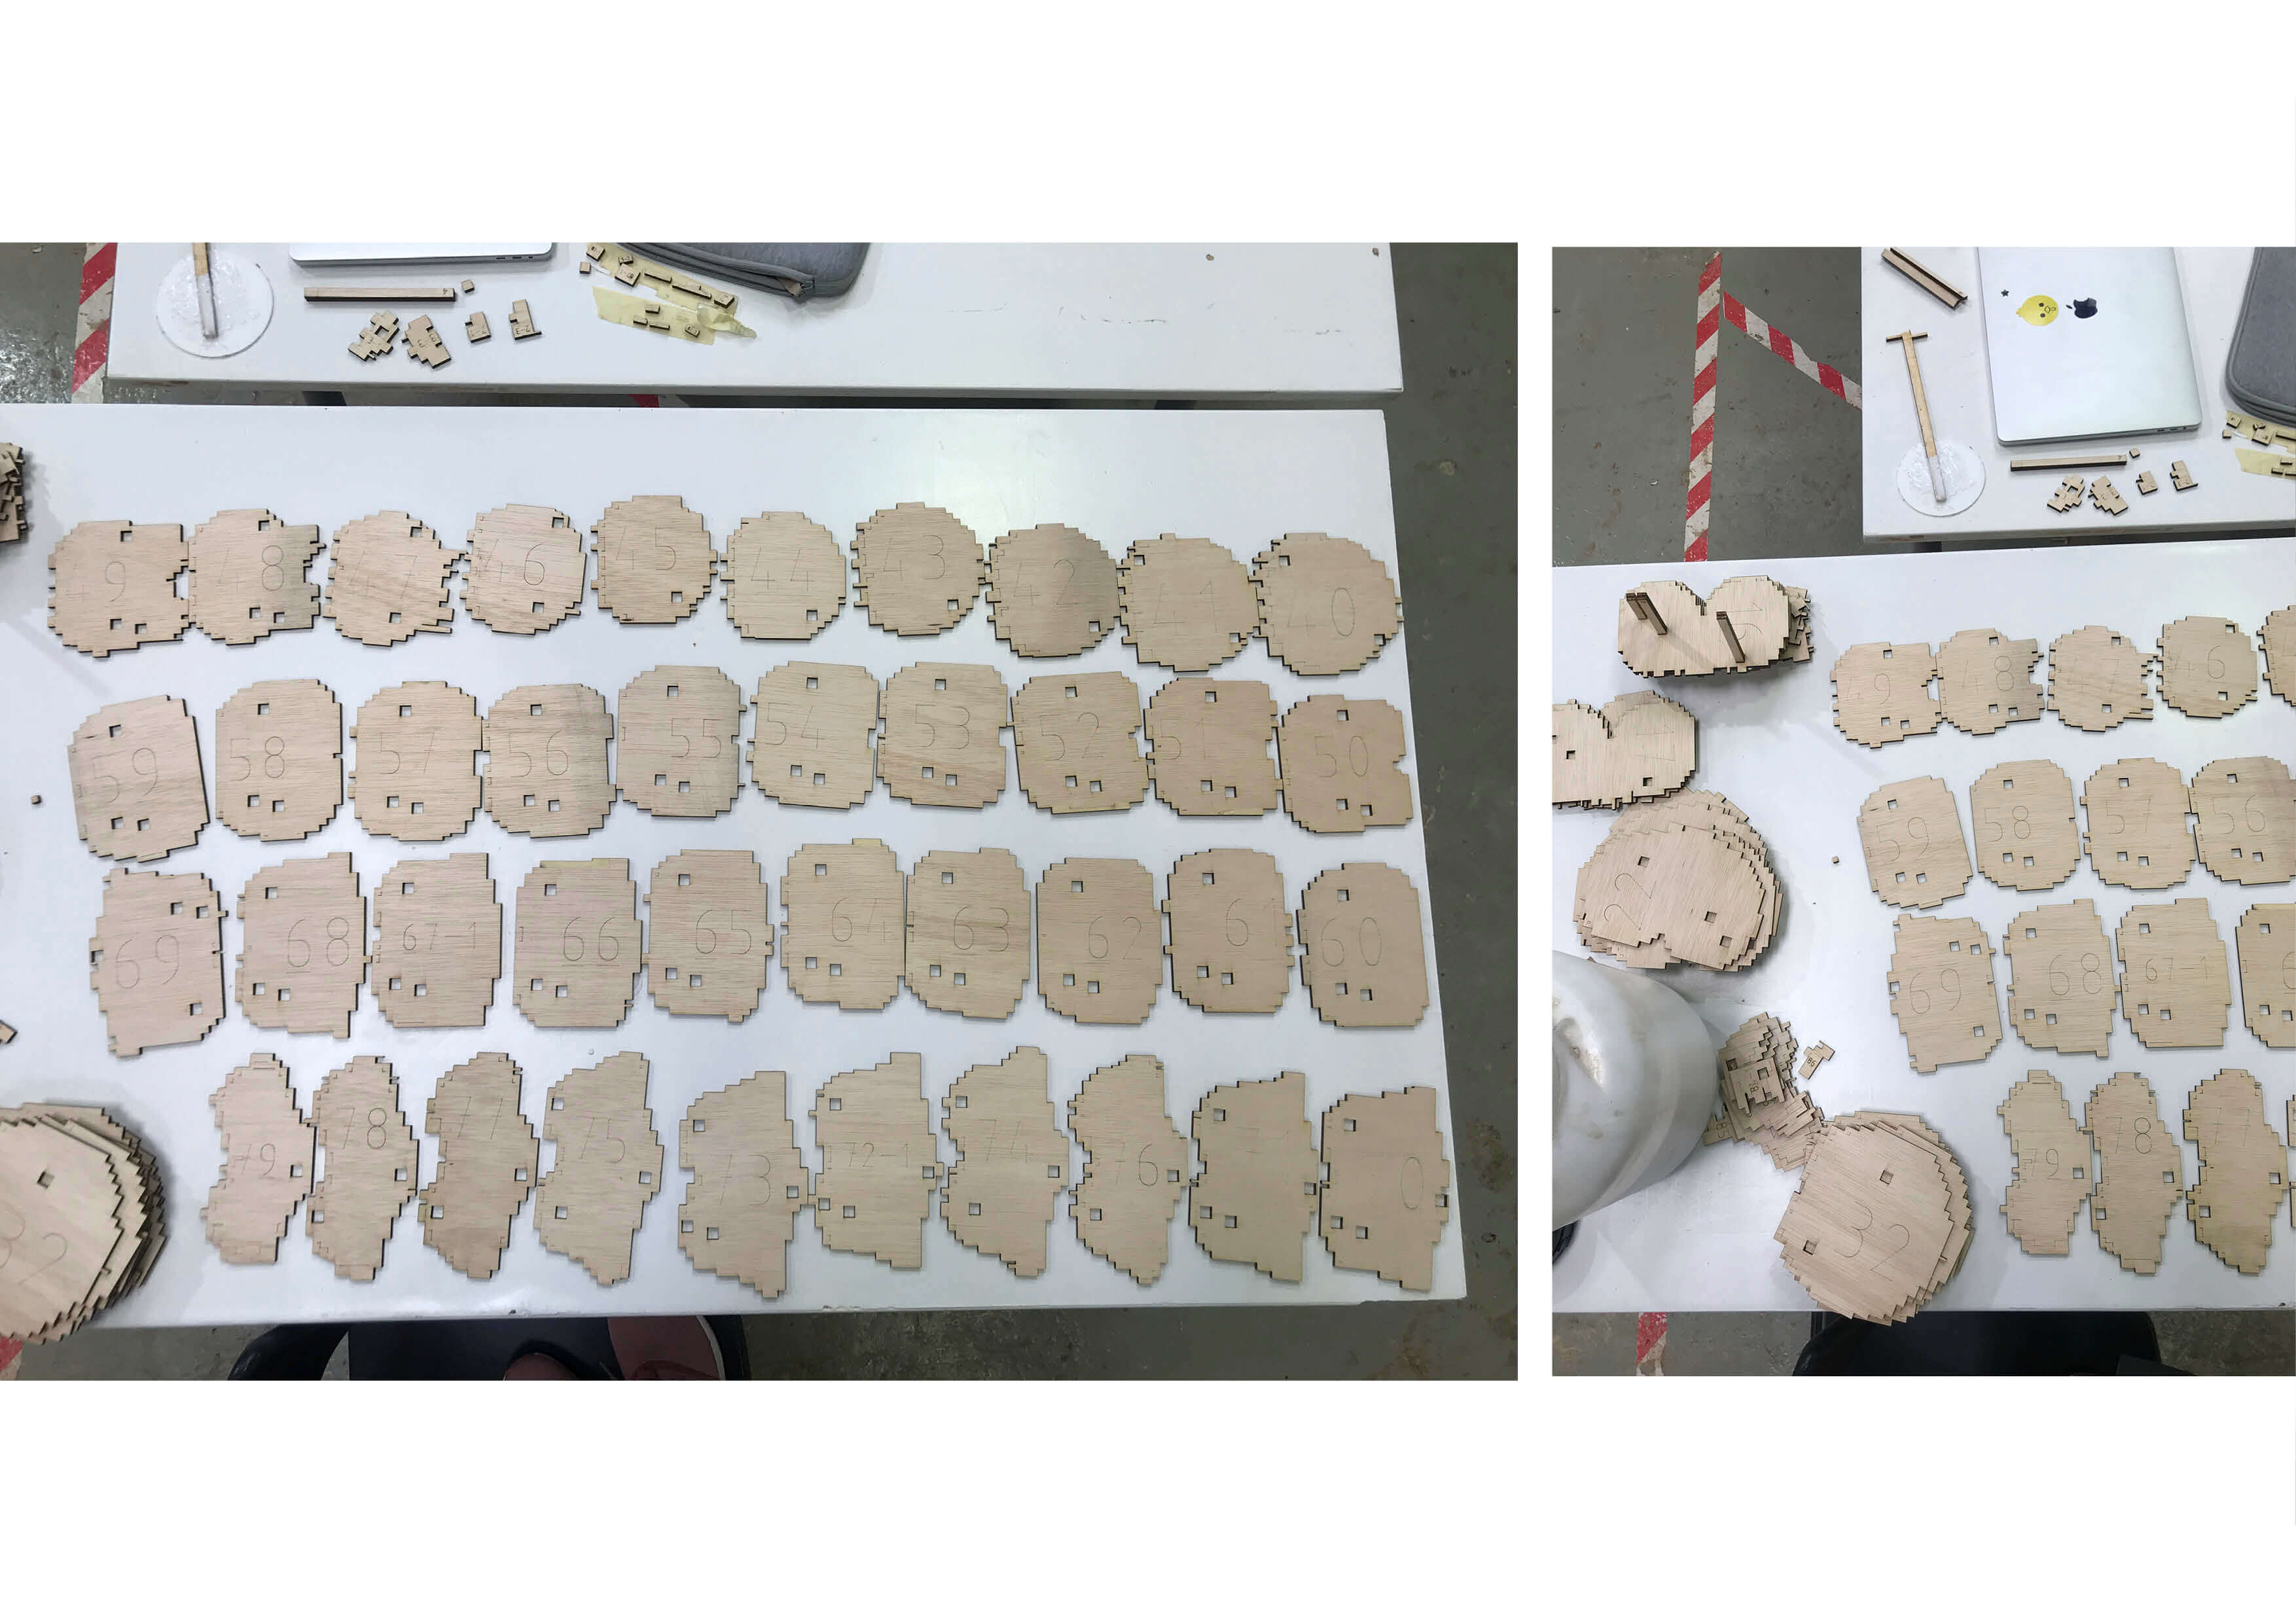
LASER CUTTING
Parameters (three layers)
| 1. layer | 2. layer | 3. layer |
|---|---|---|
| Engraving | Inside cut | Outside cut |
| Power: 70, Speed: 100 | P: 60, S: 2 | P: 60, S: 2 |

| 3D PRINTING SETTINGS |
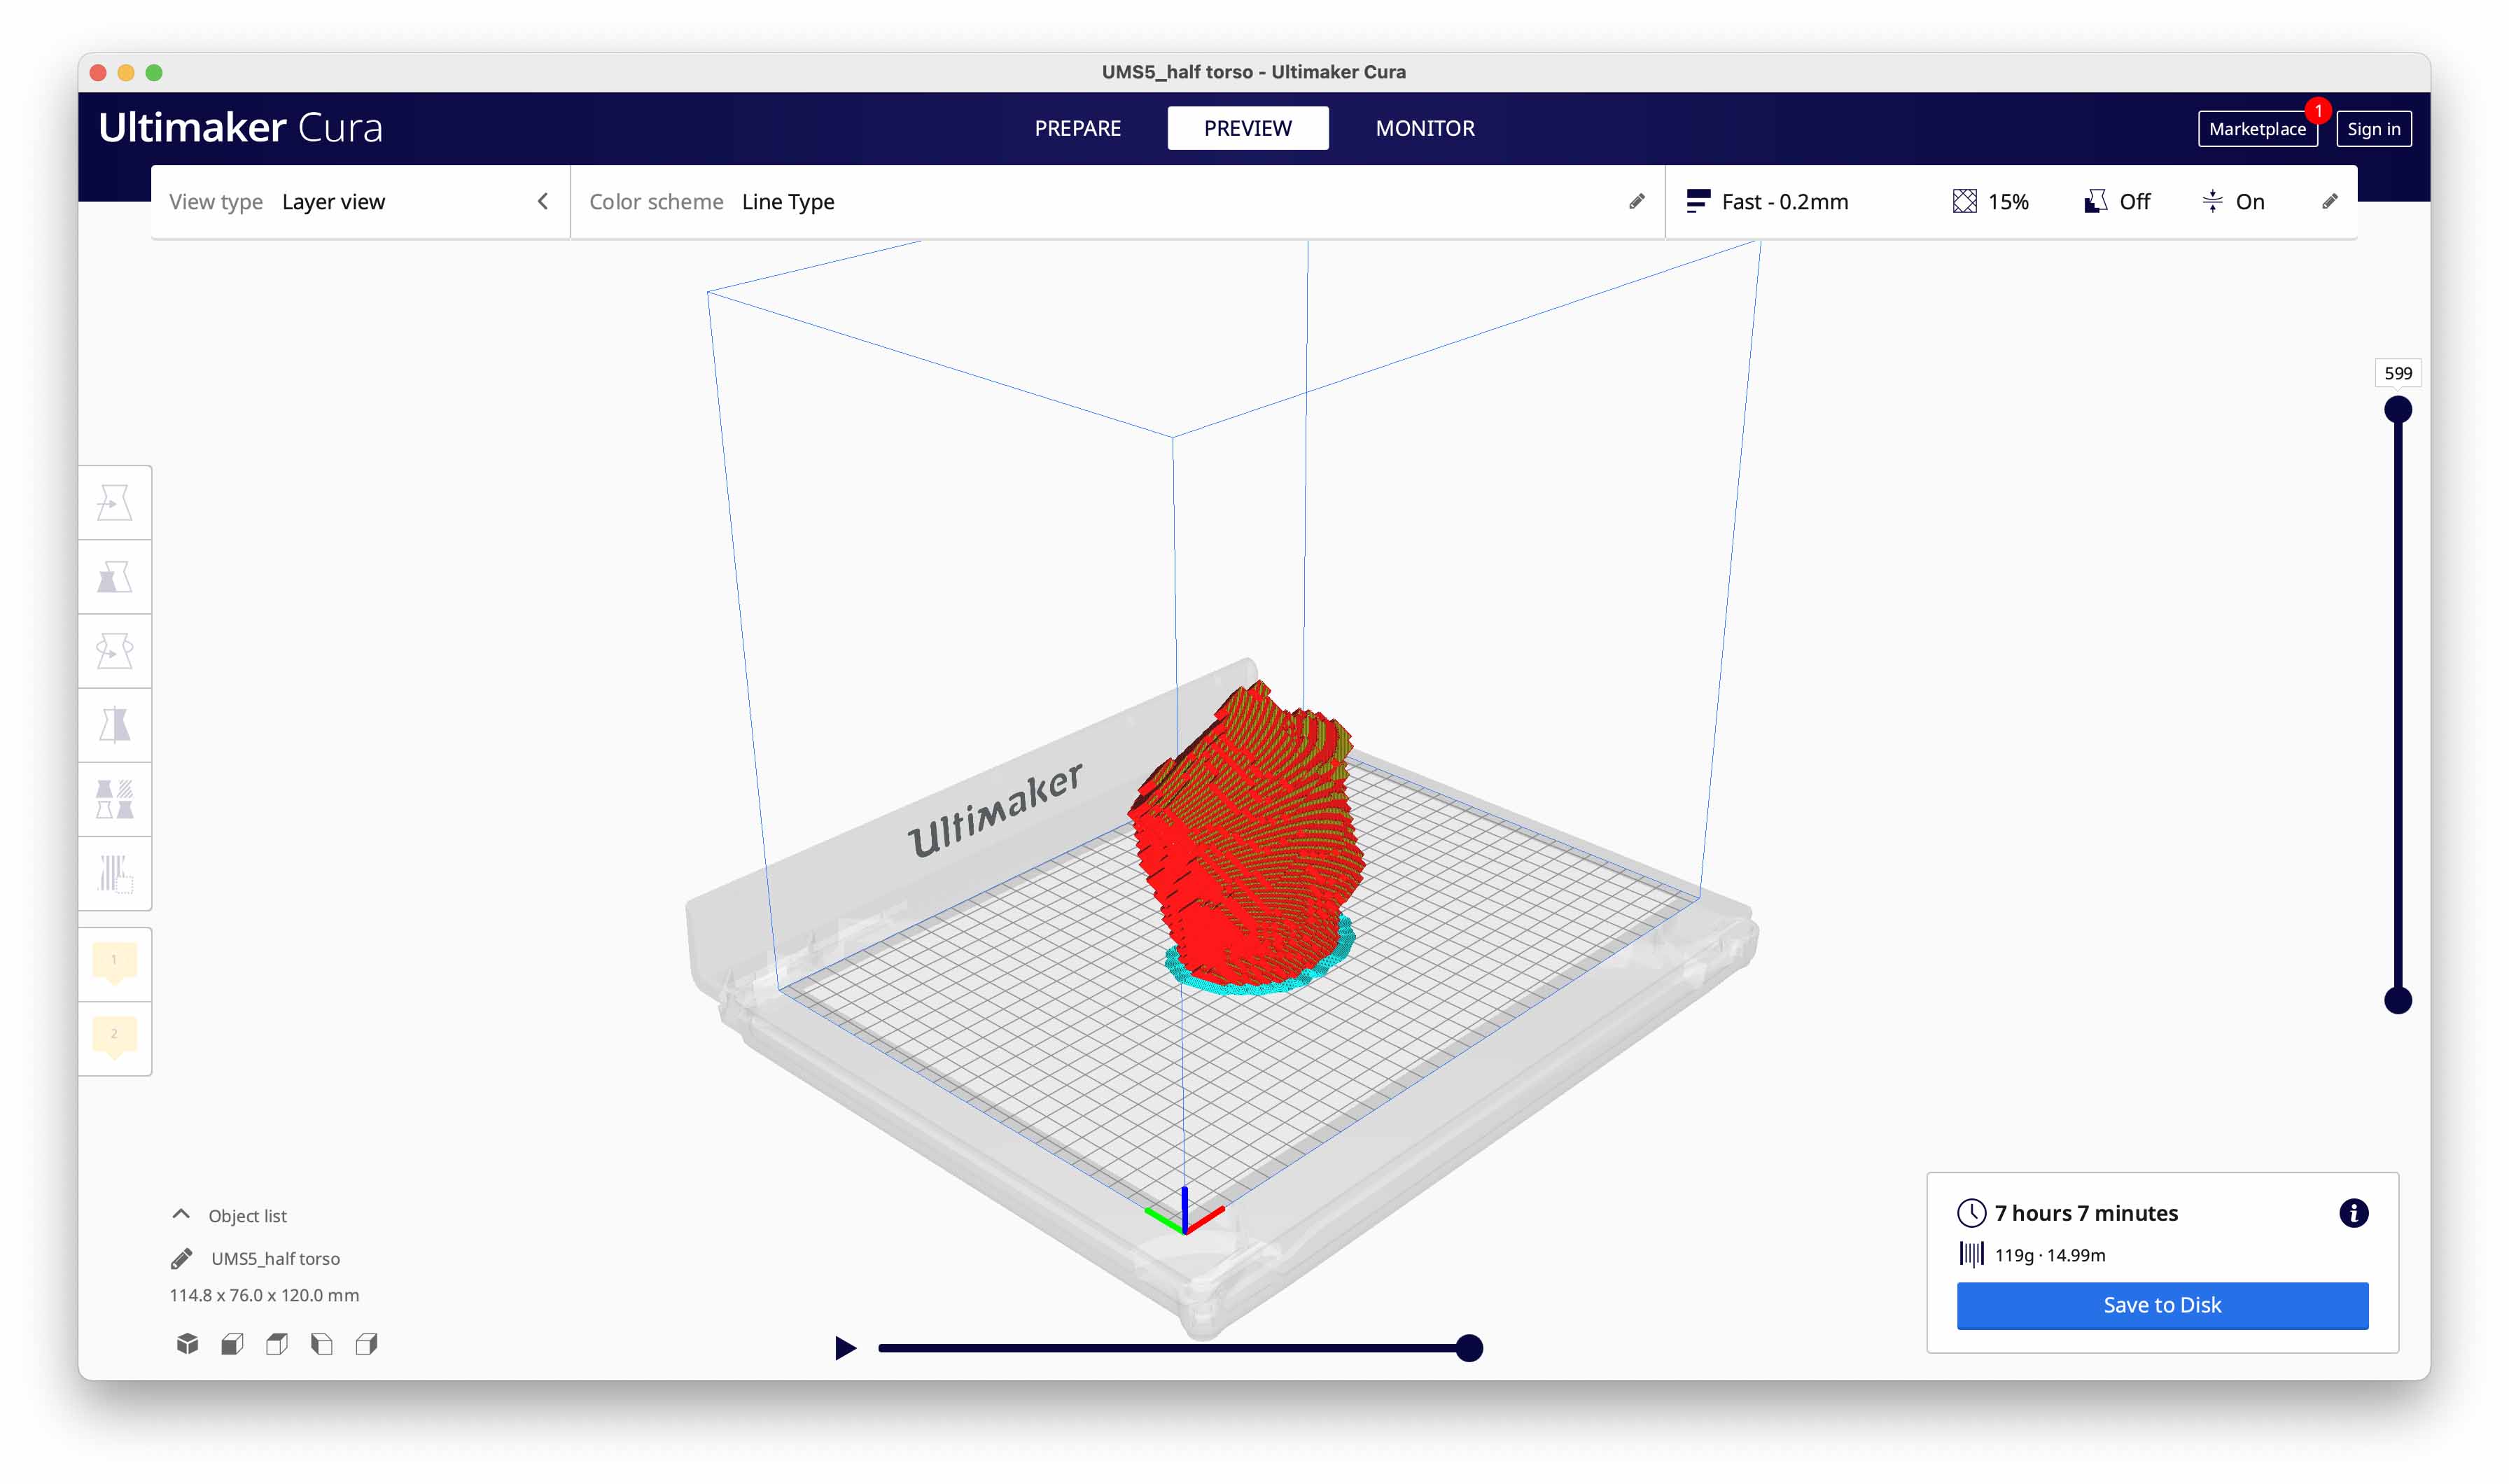
Slicing
INFILL - Fill density
0% - 100% - higher number means more material and more 3D printing time. Fill density or infill is a measure of how much material will be printed inside the outer shell of the object in question. Fill density is usually measured as a percentage of whole, as opposed to a unit of measure. This means that if 100% fill density is selected, the printed object will be solid, with no empty space inside the outer shell. Likewise, if 0% is selected, the printed object will be empty inside. In this case select SPIRAL VASE MODE. Fill density is used to conserve filament while printing and speed up printing times.
LAYER
0.10 - 0.15 - 0.20 - 0.30 - lower number means better quality - more details. Layer height is the setting that establishes the height of each layer of filament in your print. When you choose a thicker layer height, your object will have less fine detail and the layers will be more viable. When you choose a thinner layer height, a higher level of detail is possible and your layers will tend to blend into one another.
SHELL THICKNESS
1-2 mm < thickness of your format. If the shell thickness will be too thin it will not be printed probably. A shell is the outer wall of a designed object. Shell thickness refers to the number of layers that the outer wall will have before infill printing will begin. The higher the setting is for shell thickness, the thicker the outer walls of your object will be.
SKIRT / BRIM
Skirt usually consists of the first two layers around your geometry. We use this at the beginning of the print so that the material flows correctly to the nozzle and you can check other errors. Brim will help your geometry to stick to the printing bed. You can use it for higher objects.
SUPPORTS
Supports can ge generated automatically, support on build plate only or you can reinforce your geometry with reinforces. Removing them is sometimes painful and do not be scared if you can not see your geometry through all the supports. It is okay, just be careful to remove them.
MATERIAL SETTINGS
If you forget to change the material parameter in Slicer, do not panic. You can still do this manually during 3D printing.
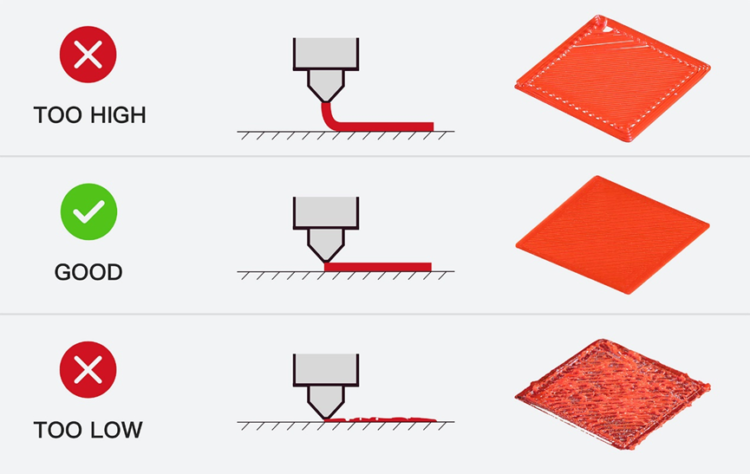
Z-OFFSET
During 3D printing you have to controll the height of the Z-axis. It may be too high to stick to the bed. Or it may be too high to squeeze printed layers. You can edit everything in Slicer or manually on a 3D printer.
TIPS
FABRICATION
| Material | Printer | Speed | Infill | Printing time |
|---|---|---|---|---|
| Prusament PLA | Original Prusa i3 MK3S | 100 % | 5 % | 6 h 30 min |