VIII. | WEARABLES

| MOODBOARD |
-
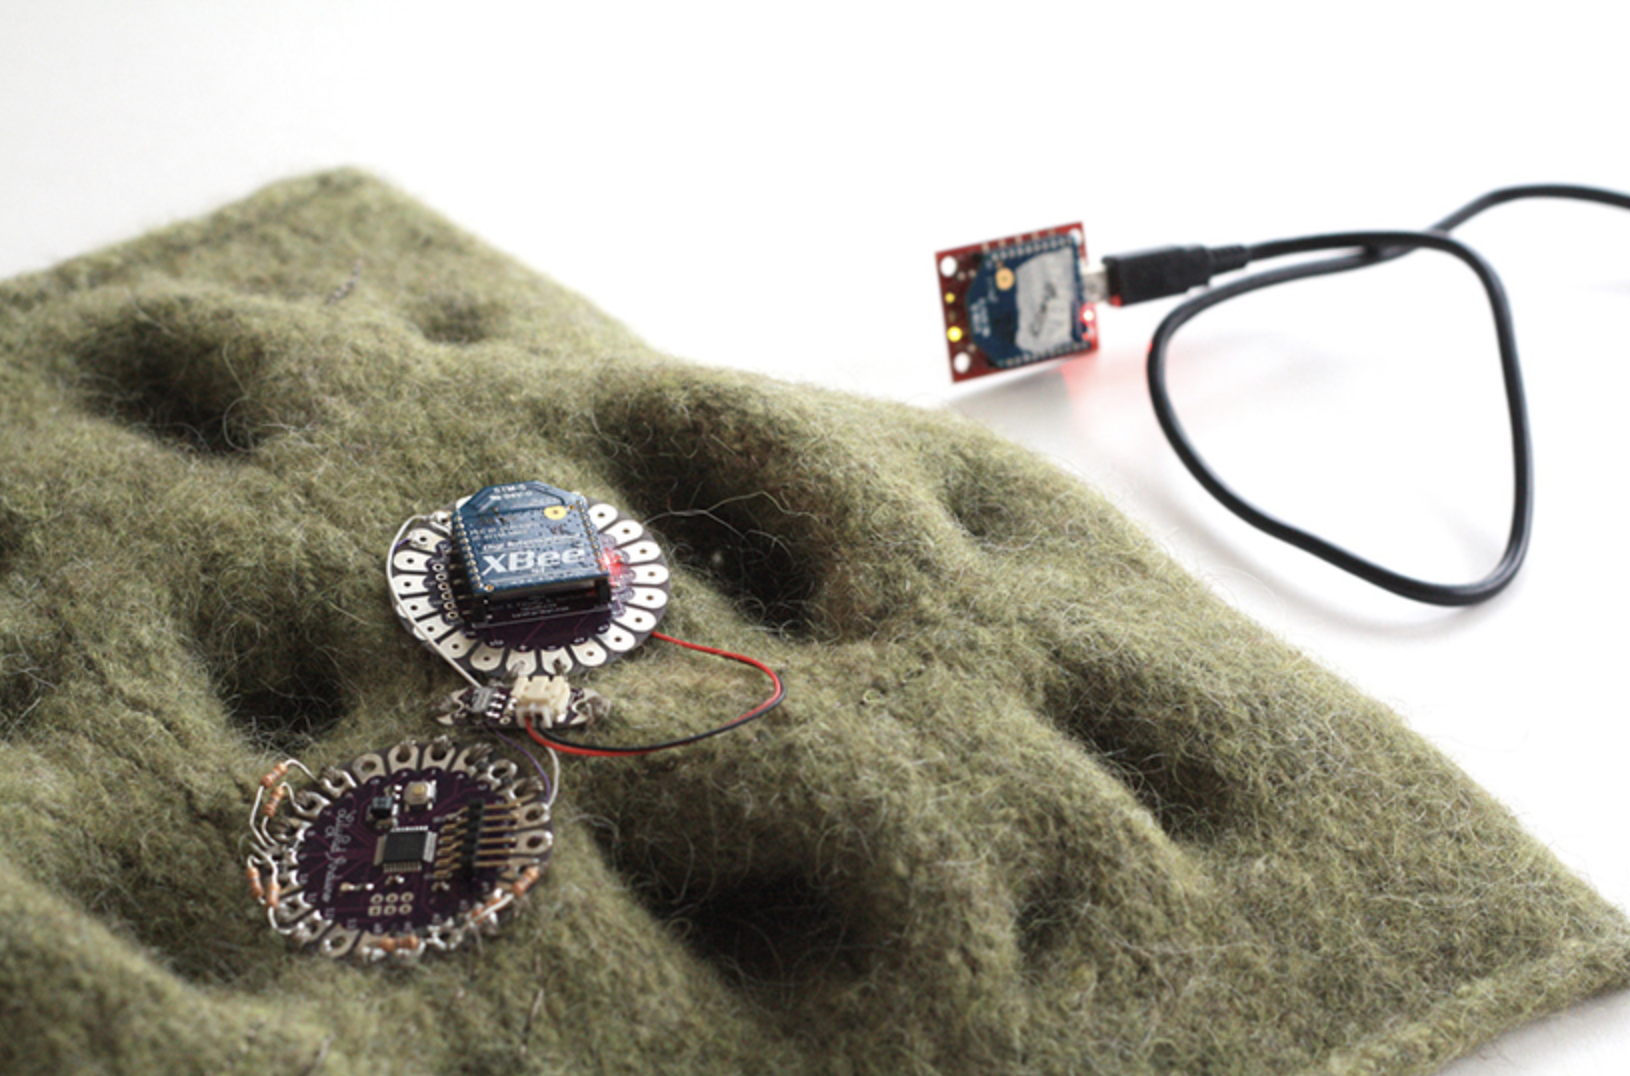
Yihyun Lim, Interactive wool landscape, 2015
-
Express
- Communicate
- Protect
REFERENCES
| WEARABLES - ACTUATORS |
an actuator is a component of a circuit that moves or controls another part based on input.
- Visual: LEDs, fiber optics, thermochromic inks
- Sound
- Motion: vibration motors, flip dots
| PROGRAMMING |
- Arduino
- AVR programmer
| CIRCUITS |
- Touch and sensing
- Sound
- EMFs
| WOOL PROPERTIES |
- Absorbancy - moisture
- Insulating - optimal temperature controling
- UV protection
- Water repellent
- Wrinkle resistance
- Resilient and durable
- Non-allergenic
- Fire-retardant
- Resists dust, dirt, mildew and mold * Renewable
Wool fabric properties
| Material name | Fabric composition | Breathability | Moisture-wicking abilities | Heat retention abilities | Stretchability | Washing temperatures |
|---|---|---|---|---|---|---|
| Cashmere, fleece, fur, hair, tweed | Hair animmal fibers | Moderately breathable | High | High | Medium | Cool or warm |
| TECHNIQUES |
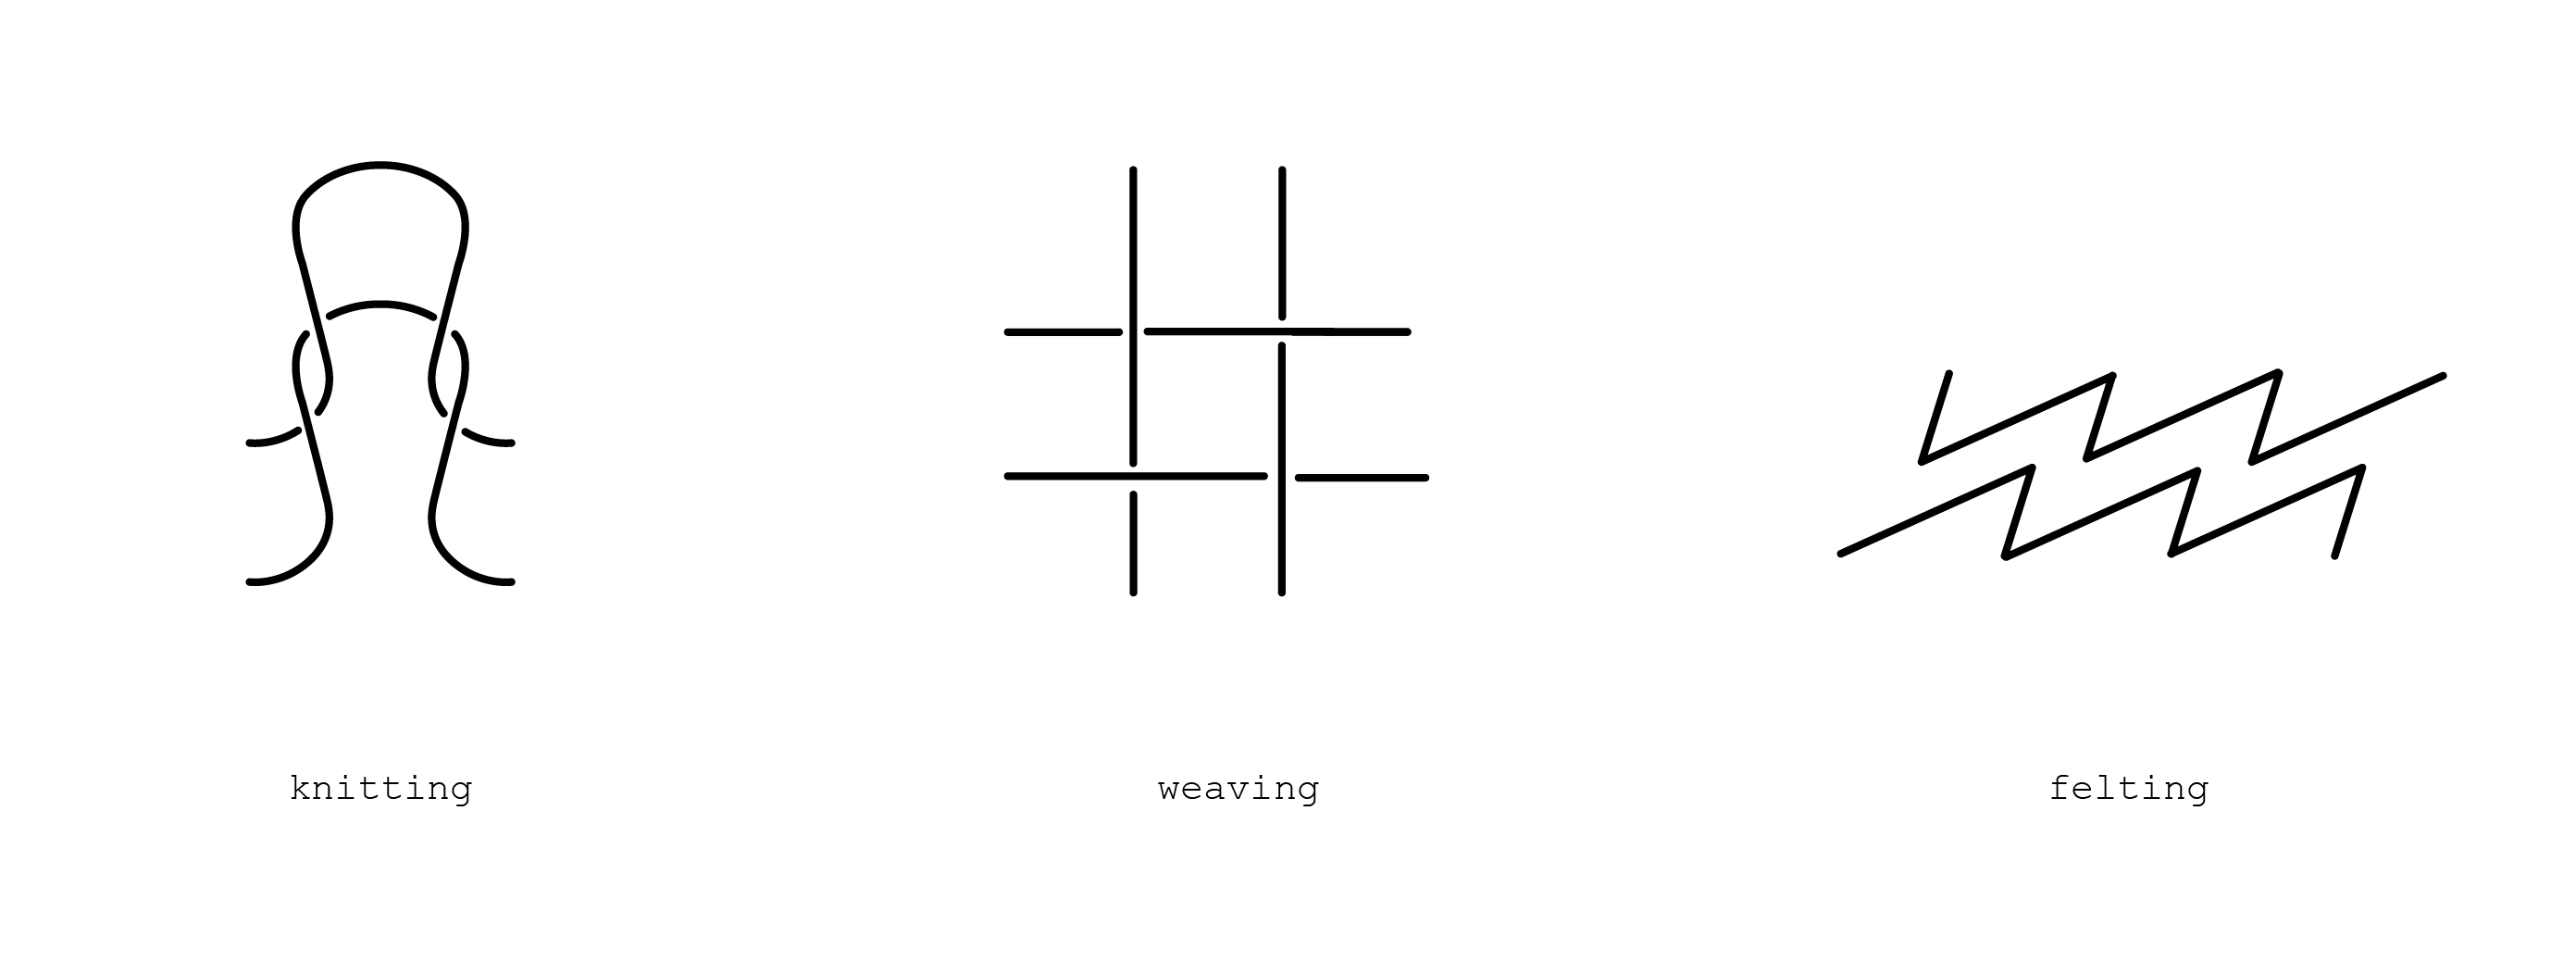
- Weaving
- Knitting
- Felting
It is the process of turning a protein - animal fiber such as sheep wool, alpaca, mohair, yak, etc. into a piece of fabric by connecting the individual fibers. Also you can describe it as is the process of producing a textile or fabric by combining and compressing the loose fibers, wool or hair. To produce a piece of felt, you have to cause the hair or fibers to interlock with each other creating a matted fabric. This can be accomplished by applying water and agitation or by physically tangling the wool using special felting needles.
FELTING
WET FELTING
Hot water, sometimes with added soap, is sprayed onto layers of wool, while repeated agitation and compression causes the fibres of the wool to hook and weave together into a single piece of fabric.
NEEDLE FELTING
This method does not require any water. You use a special needle that has notches along its shaft; these catch the wool fibres and tangle them with other fibres to produce felt.
CARROTING
A Method of felting, primarily utilised to make hats. Beaver, rabbit, or hare skins were treated with a dilute solution of the mercury compound mercuric nitrate, or Hg(NO3)2, serving as the “agitator”. The name comes from the fact that the skins were dried in an oven where the thin fur at the sides turned orange.
REFERENCIES
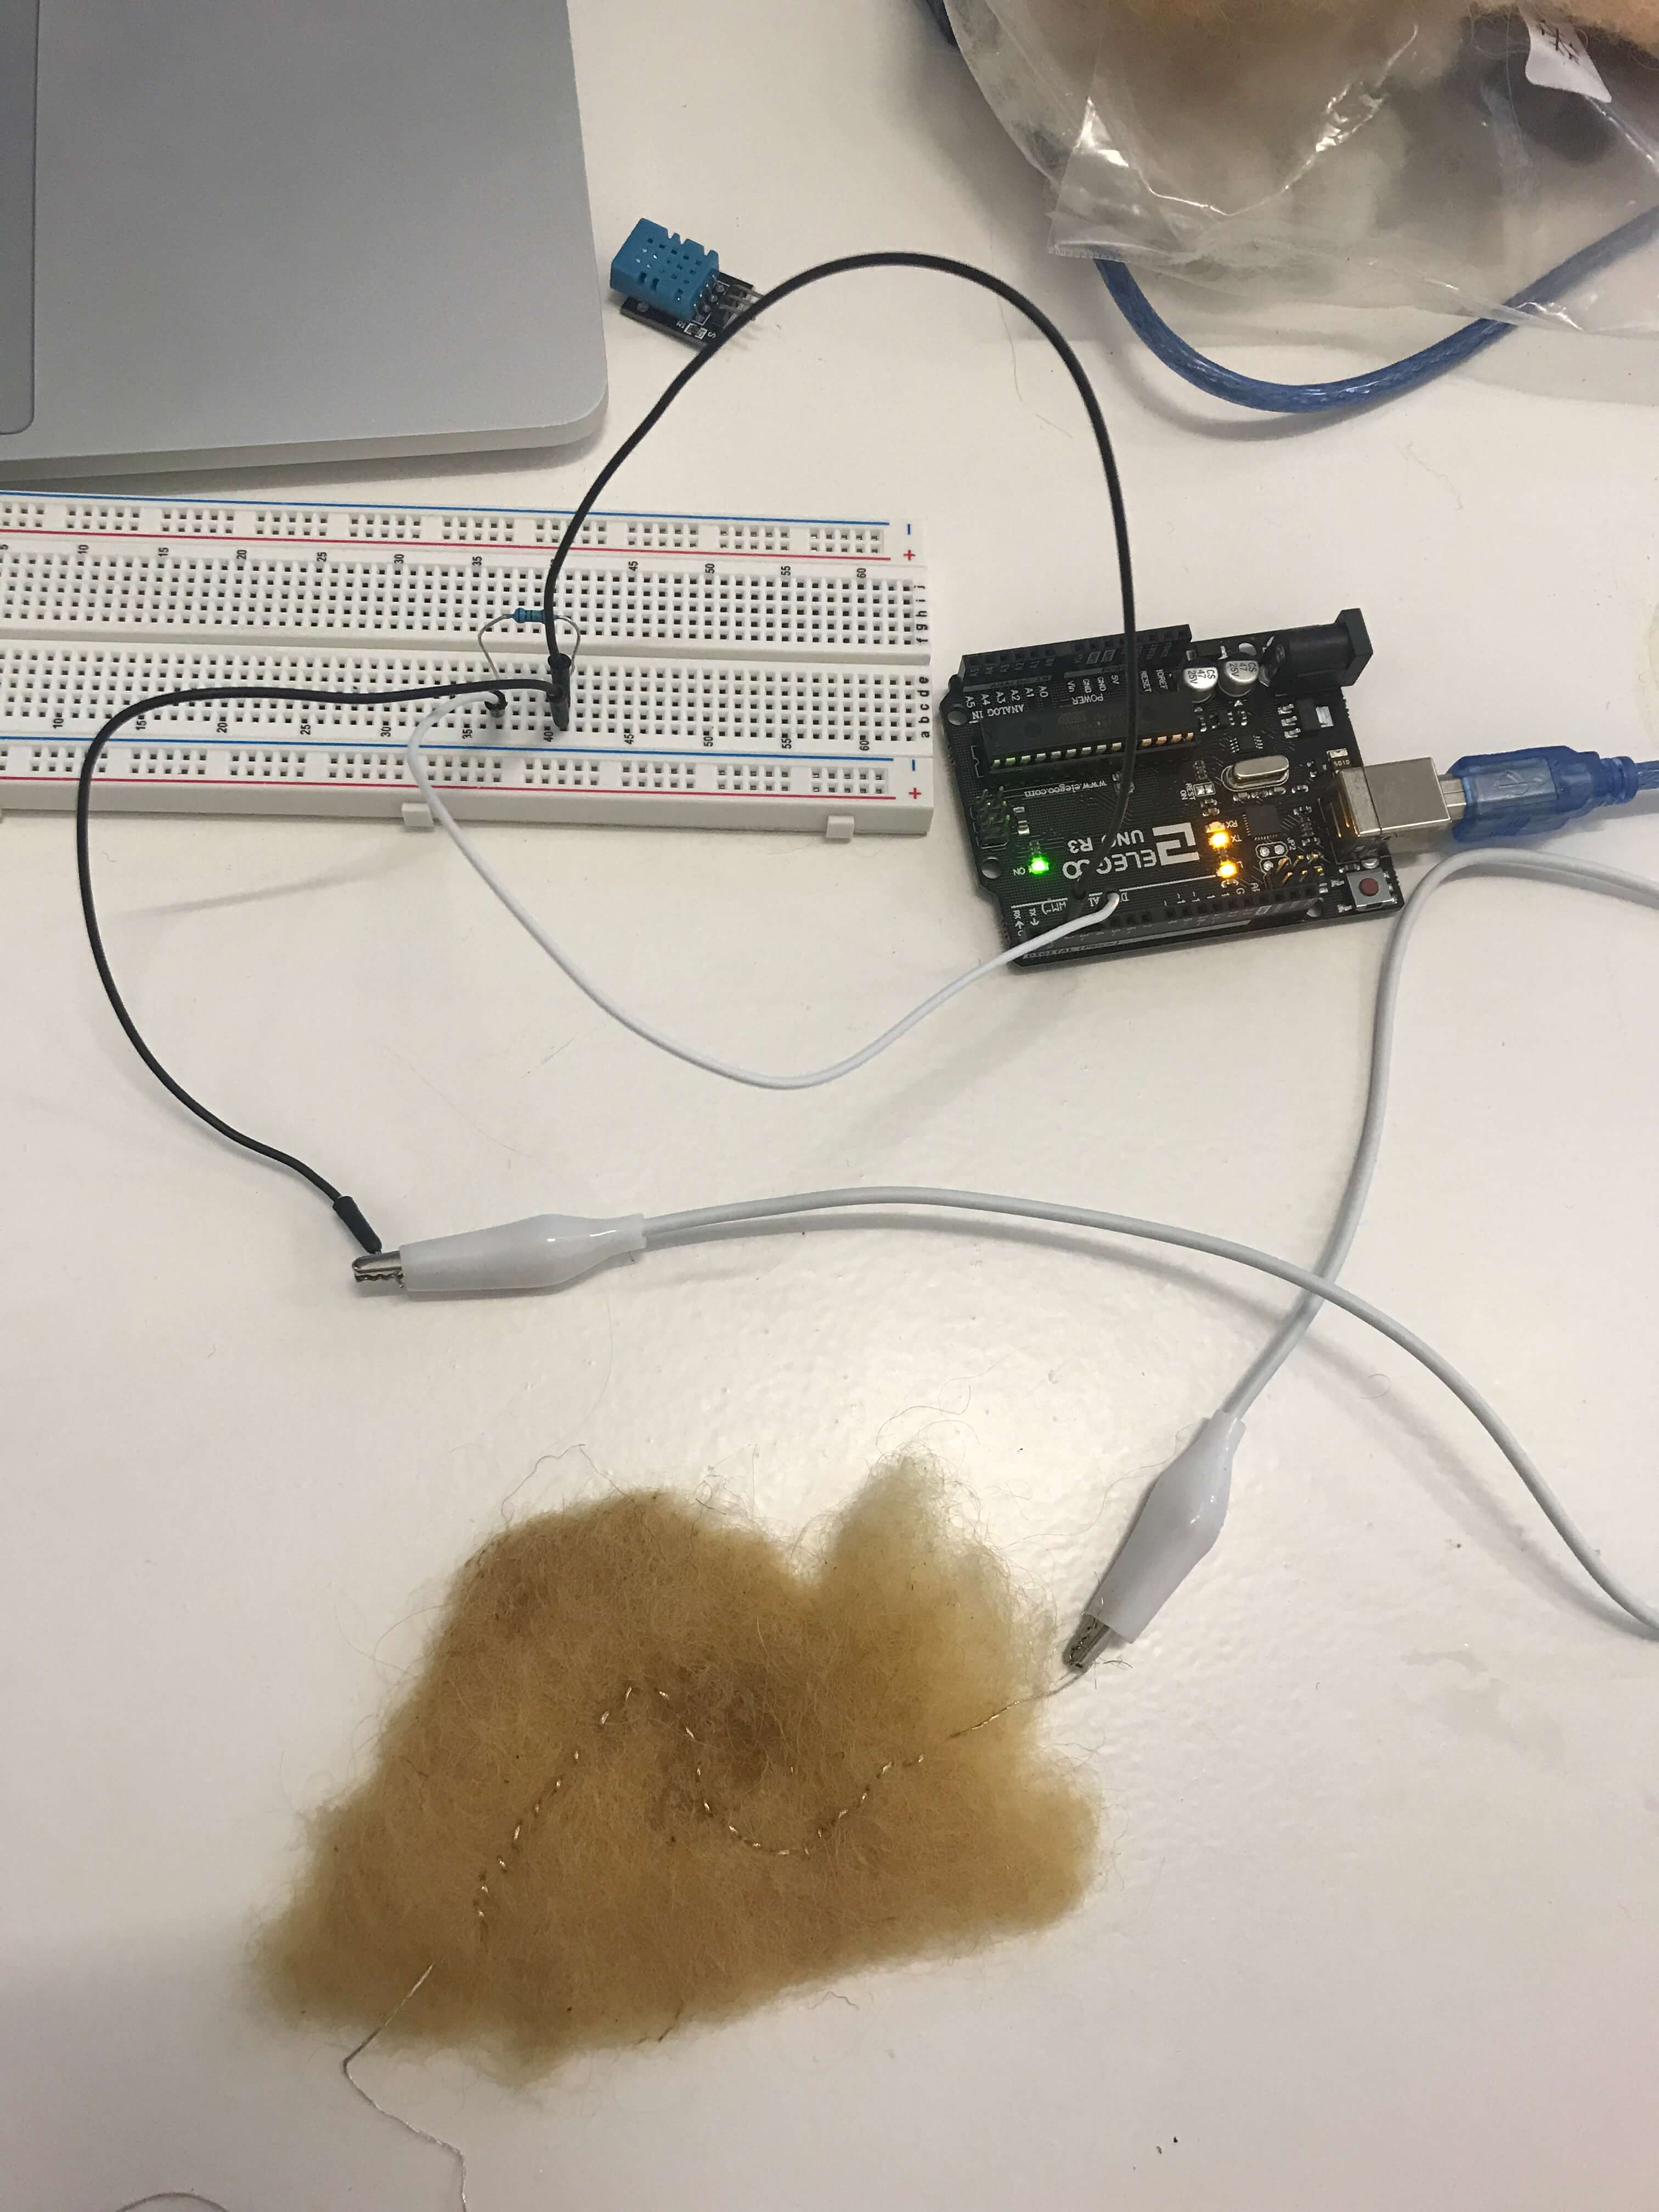
| HUMIDITY SENSOR |
CIRCUIT DIAGRAM
PROGRAMMING
#include "DHT.h"
#define DHTPIN 2
#define DHTTYPE DHT11

DHT dht(DHTPIN, DHTTYPE);

void setup() {
  Serial.begin(9600);
  dht.begin(); // initialize the sensor
}

void loop() {
  // wait a few seconds between measurements.
  delay(2000);

  // read humidity
  float humi  = dht.readHumidity();
  // read temperature as Celsius
  float tempC = dht.readTemperature();
  // read temperature as Fahrenheit
  float tempF = dht.readTemperature(true);

  // check if any reads failed

    Serial.print("Humidity: ");
    Serial.print(humi);
    Serial.print("%");

    Serial.print("  |  ");

    Serial.print("Temperature: ");
    Serial.print(tempC);
    Serial.print("°C ~ ");
    Serial.print(tempF);
    Serial.println("°F");

}
CAPACITORS - HUMIDITTY
REFERENCES
| ELECTRONICS - COMPONENTS |
ATtiny
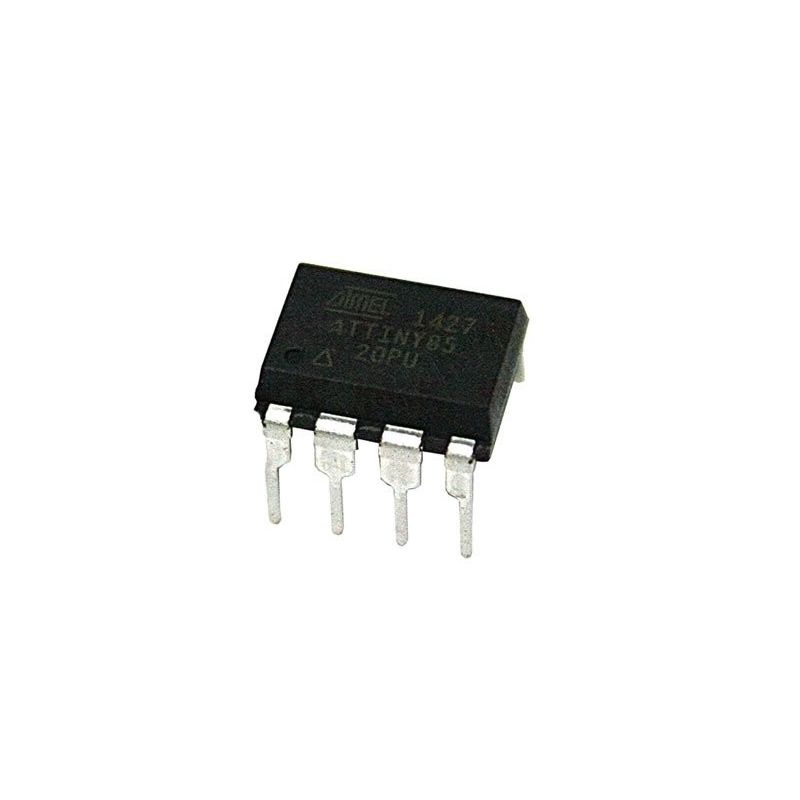
- Microcontroller ATtiny85
ATtiny85 microcontroller is one of the small and high-performance AVR microcontroller, which is based on RISC CPU. It is one of the 8-pin microcontrollers that comes in two packages, used to control and interfacing between different devices and sensors.

REFERENCES
- Arduino - Attiny installation
- Arduino - code
- Mark Olson's Lab & Tutorial Repo
- Tracking Watch
- Tracking Watch
- Filipe Magalhaes, Chromatact, 2021
ATtiny85 Breakout Board
- ATtiny85 Breakout Board
This ATtiny85 Breakout Board is THE SMALLEST Arduino-compatible board measuring less that 1 square inch.
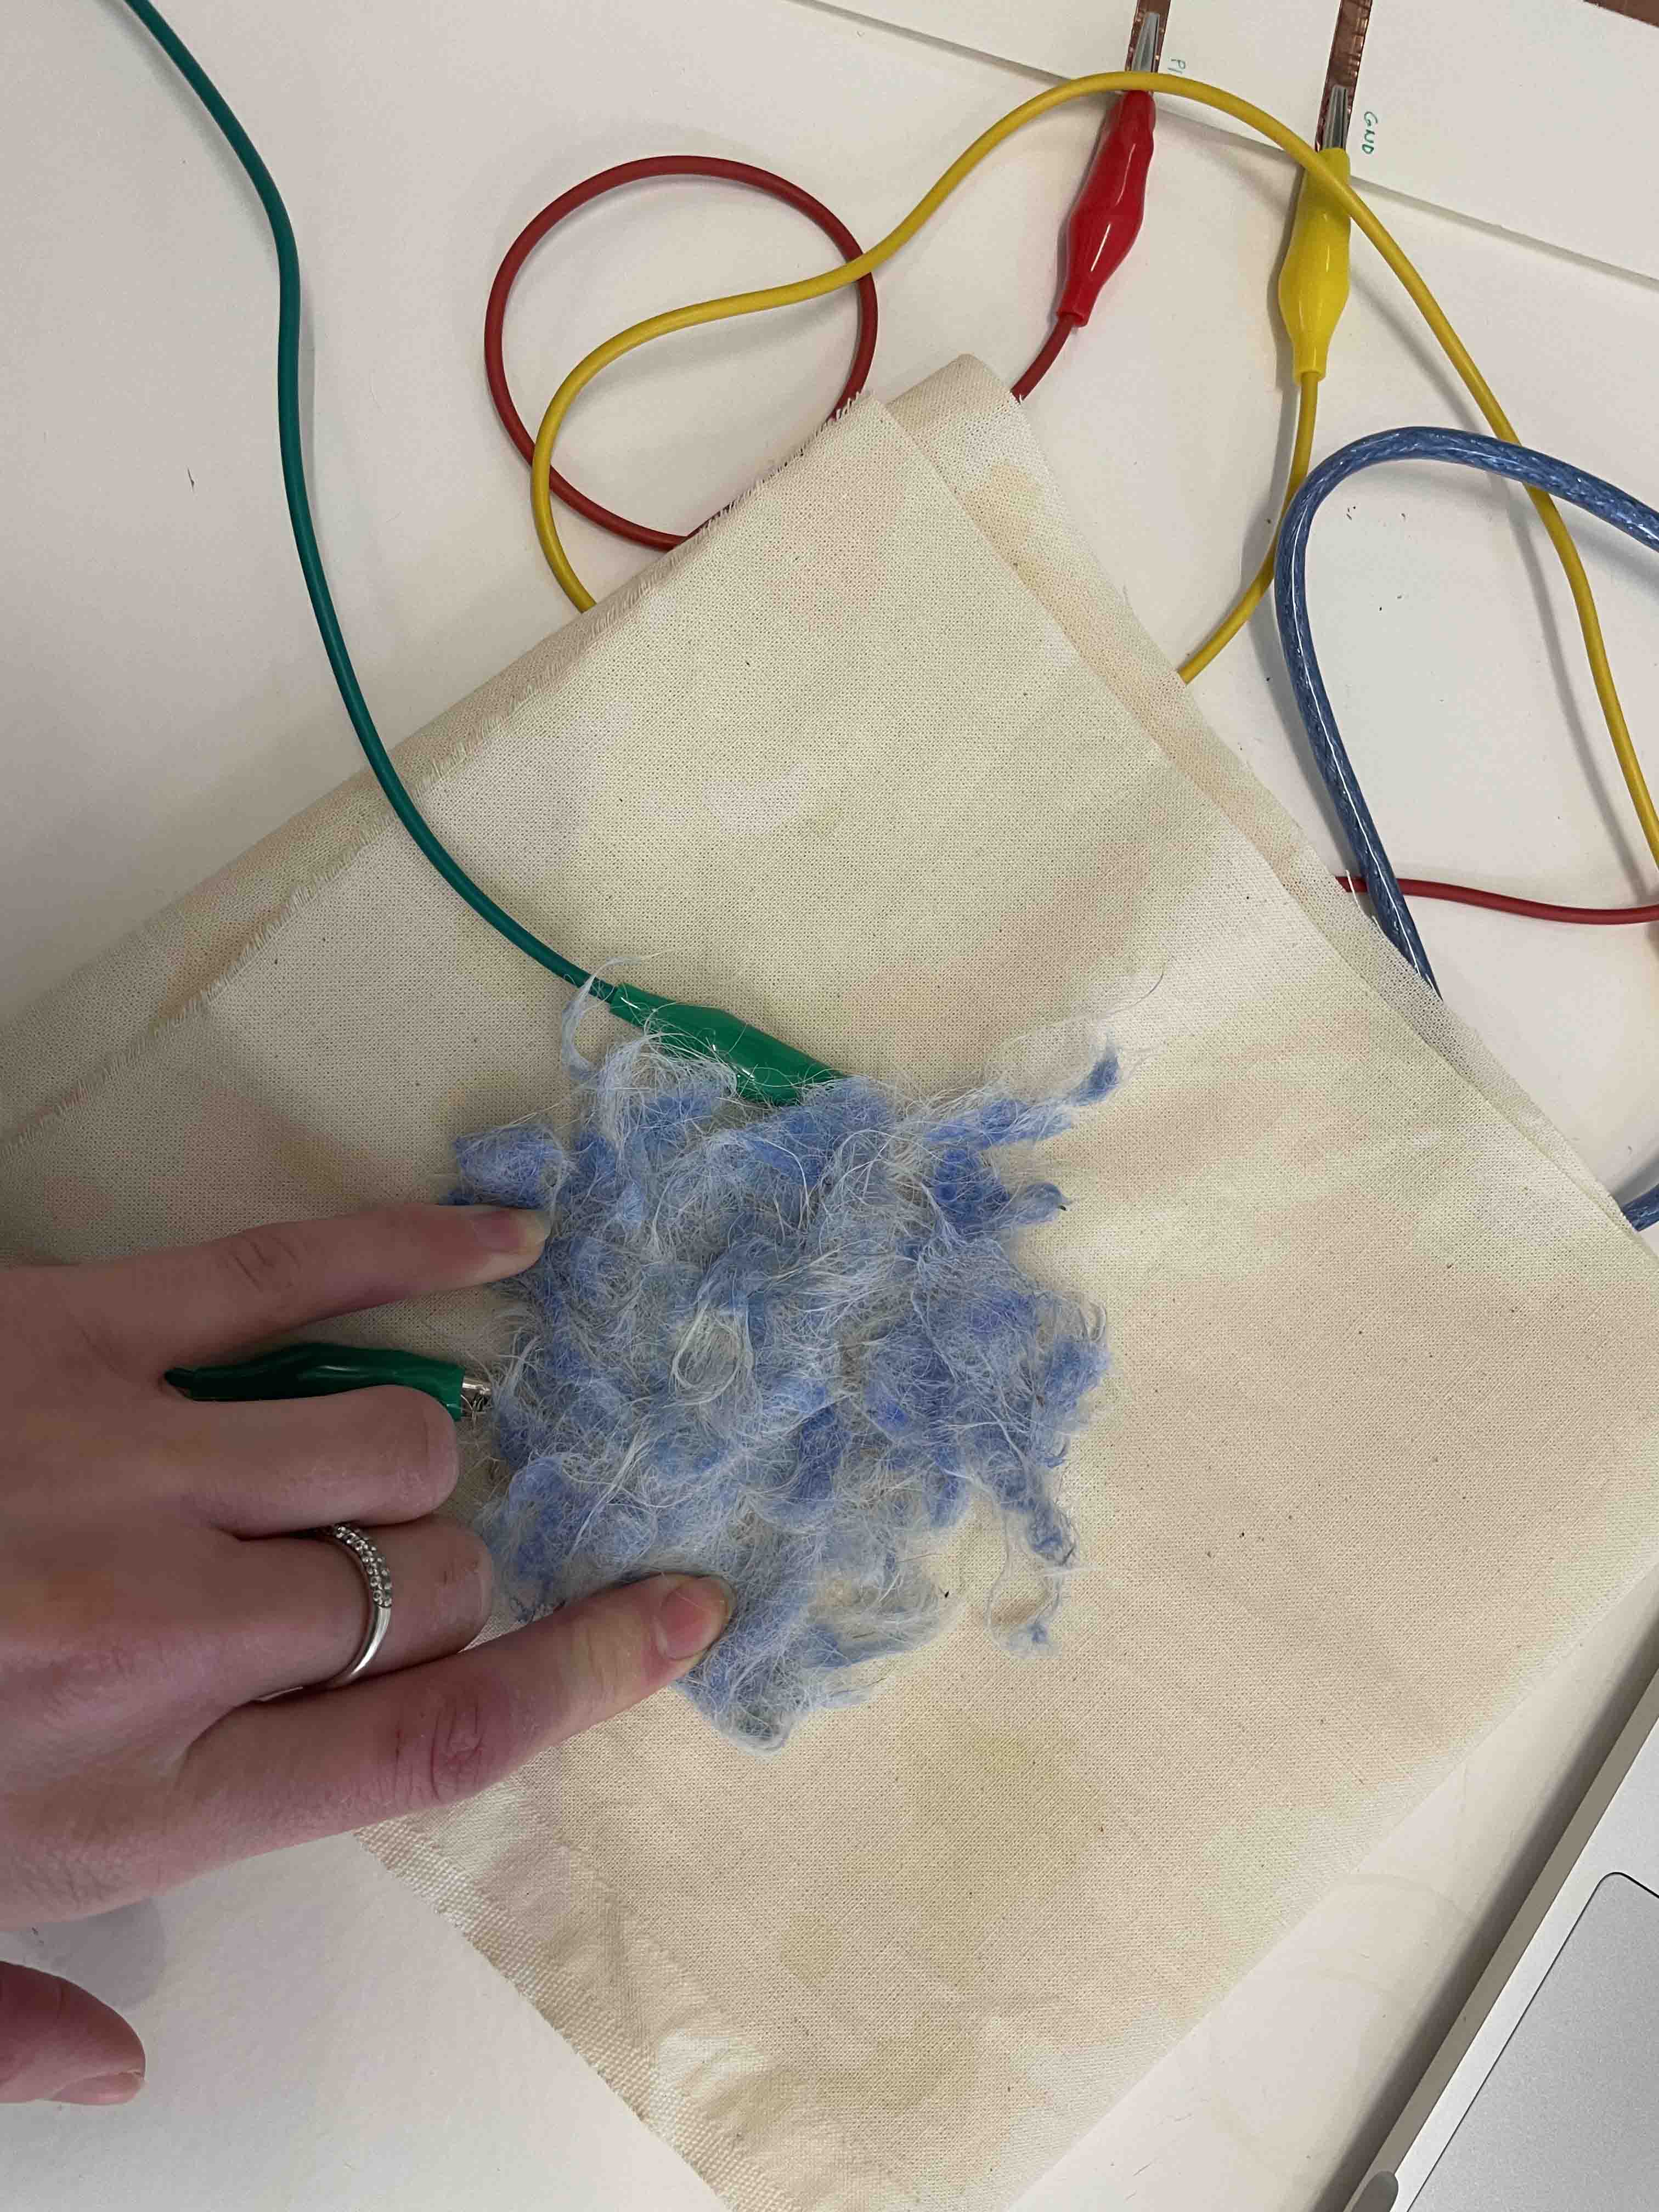
| PREHEAT |
HEATING ELEMENTS
CONDUCTIVE THREAD
Conductive yarn materials are the basic requirement for the production of heating textiles.
- Hybrid Conductive Threads
- Textile Conductive Thread with Permanent and Uniform Electrical Properties in the High-OHM Range, Antje Krahmer and Julia Ullrich
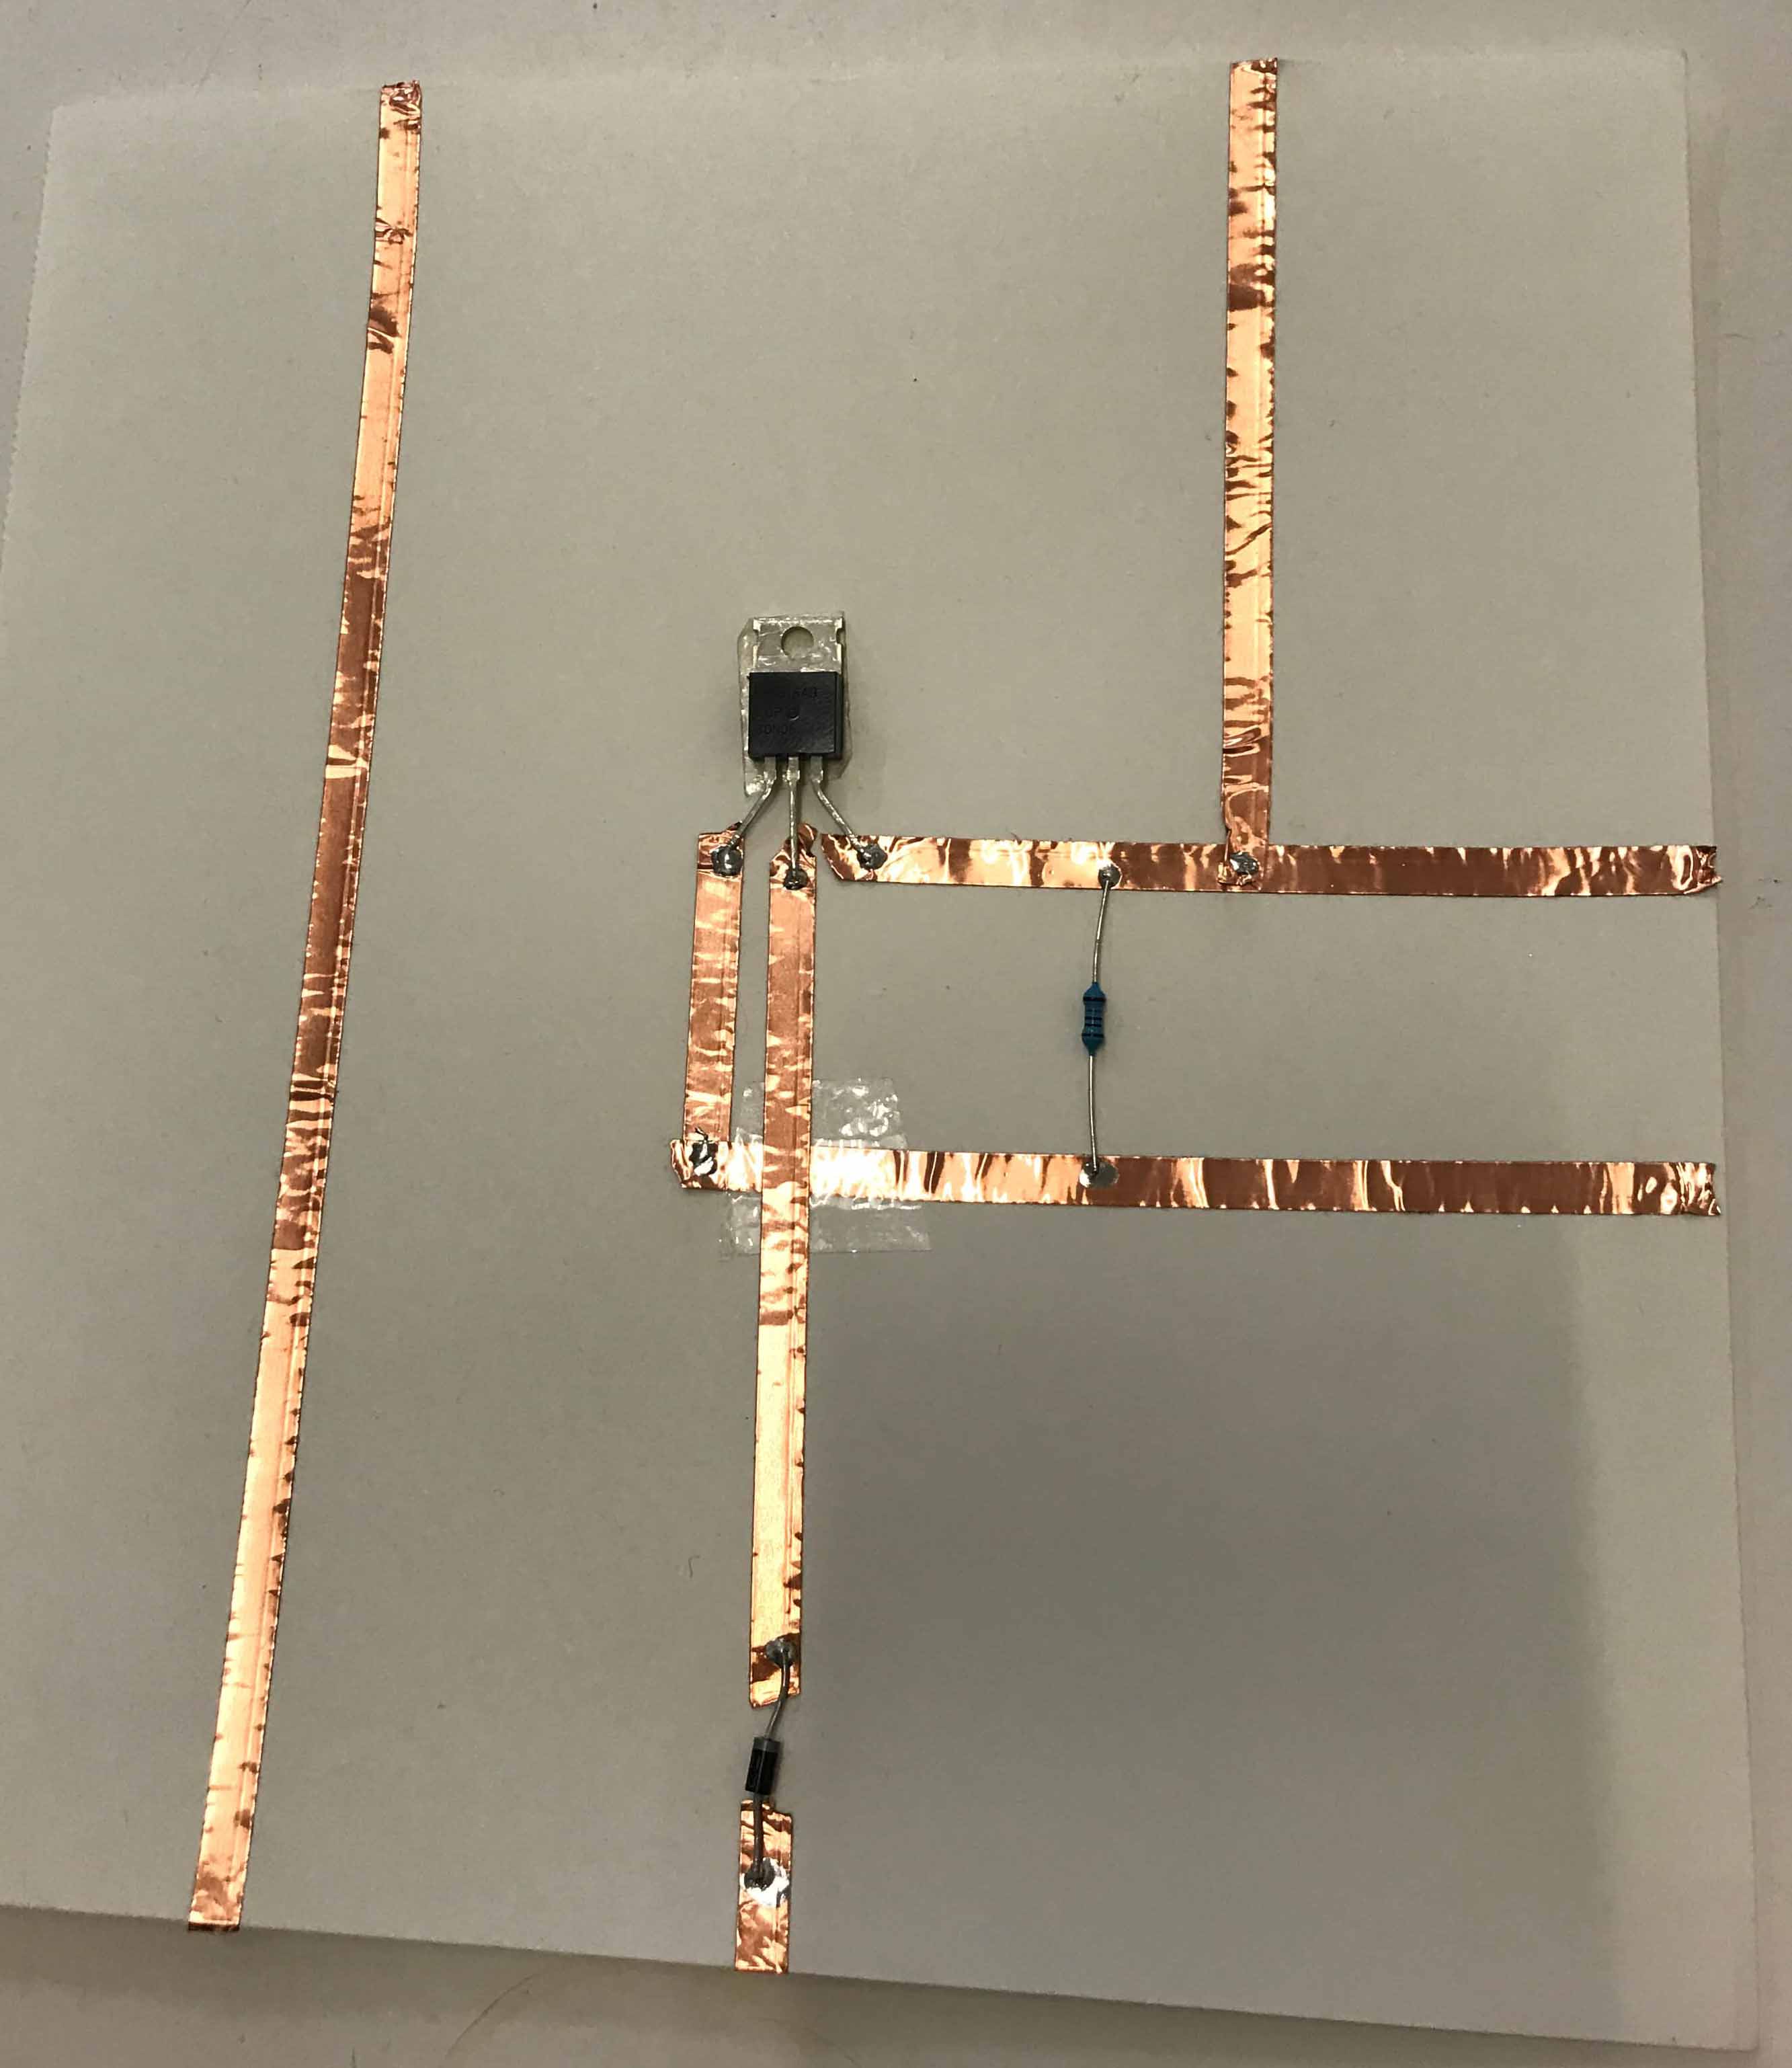
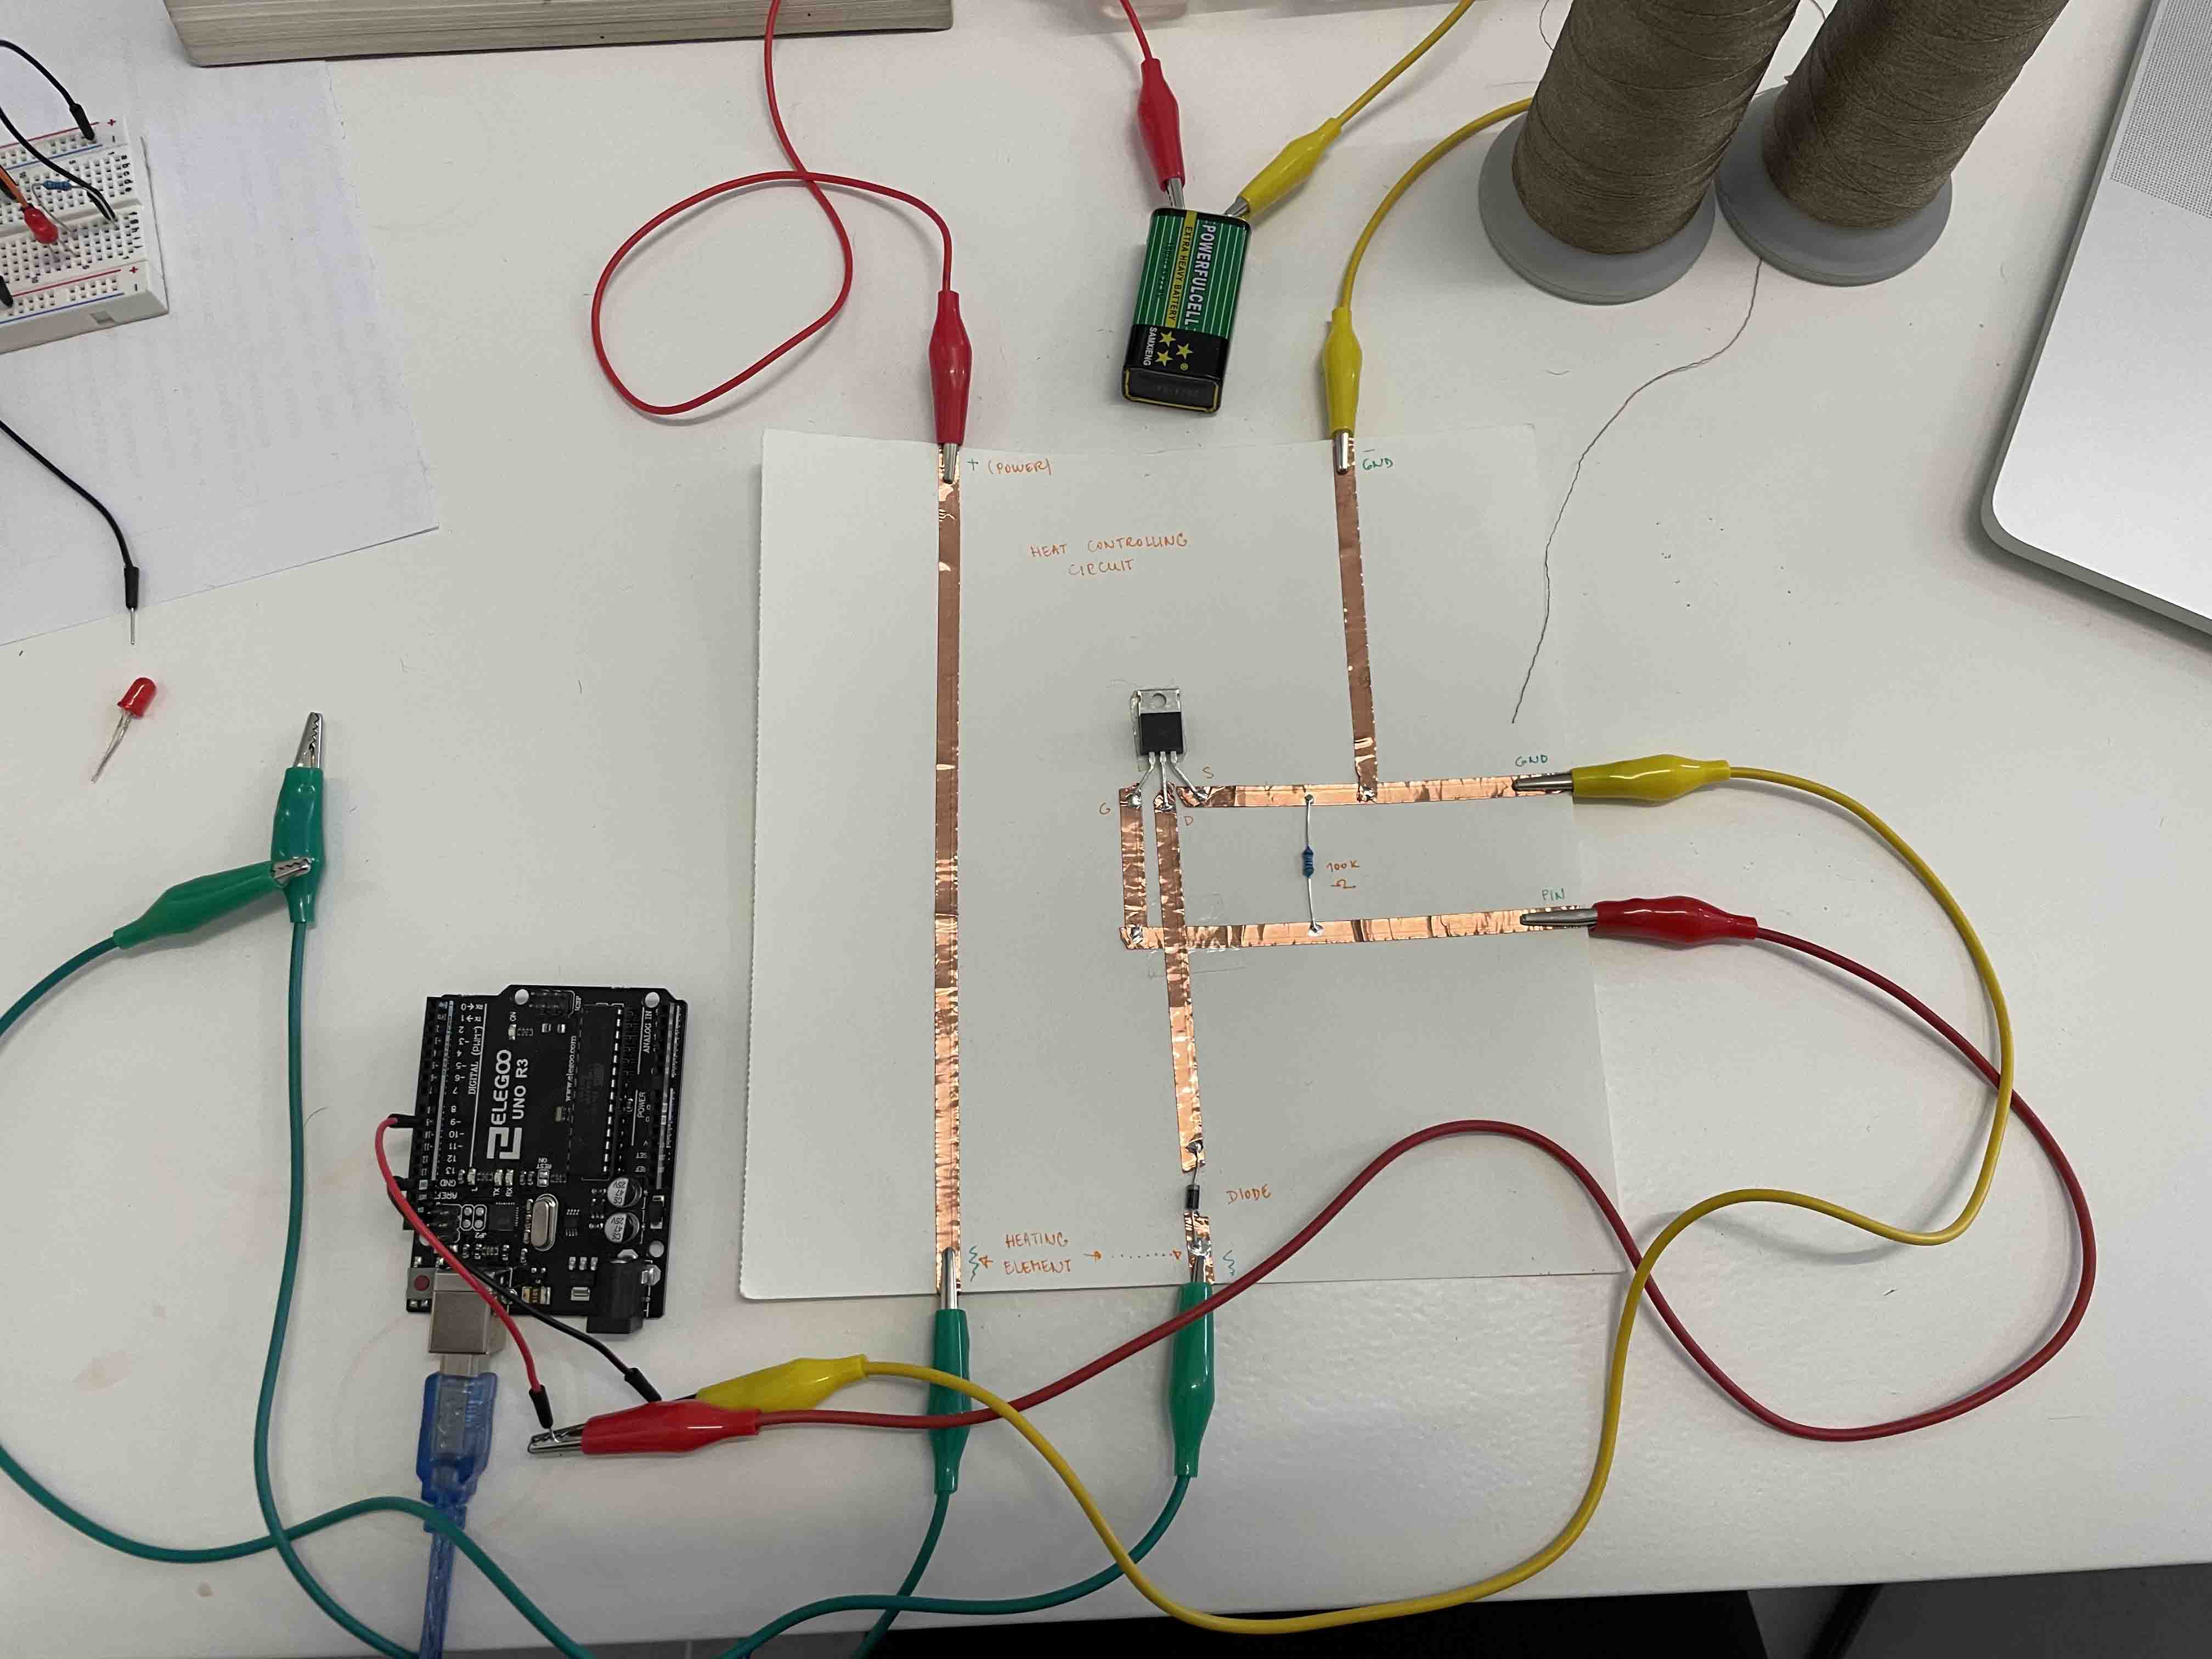
COPPER TAPE
Copper tape refers to a thin strip of copper, often backed with adhesive. Copper tape can be found at most hardware & gardening stores and electronic stores. It is also used for other applications in electronics. It comes in two forms - conductive adhesive and non-conductive adhesive (which is more common).
CIRCUIT DIAGRAM
height

N-channel MOSFET FQP30N06L
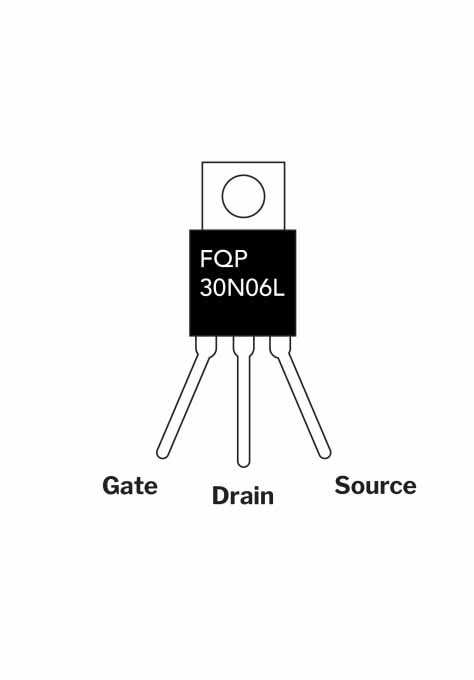
An N-Channel MOSFET uses electrons to create a current channel. This allows electrons to move quickly and easily through the current when the MOSFET is activated and switched on.
MATERIALS
| N. | Material name | Quantity | Source |
|---|---|---|---|
| 1. | Arduino UNO | 1 | UNO R3 Kit |
| 2. | USB cable | 1 | UNO R3 Kit |
| 3. | Battery 9 V | 1 | UNO R3 Kit |
| 4. | Resistor 100K Ω | 1 | UNO R3 Kit |
| 5. | Crocodiles | 6 | Fab Lab BCN |
| 6. | Jumpers | 4 | UNO R3 Kit |
| 7. | USB cable | 1 | UNO R3 Kit |
| 8. | Diode 1N4001 | 1 | Fab Lab BCN |
| 9. | Plastic tape | - | Fab Lab BCN |
| 10. | Breadboard | 1 | UNO R3 Kit |
| 11. | Conductive thread | - | Fab Lab BCN |
| 12. | Paper | - | Fab Lab BCN |
| 13. | Wool | - | Fab Lab BCN |
PROGRAMMING

REFERENCES
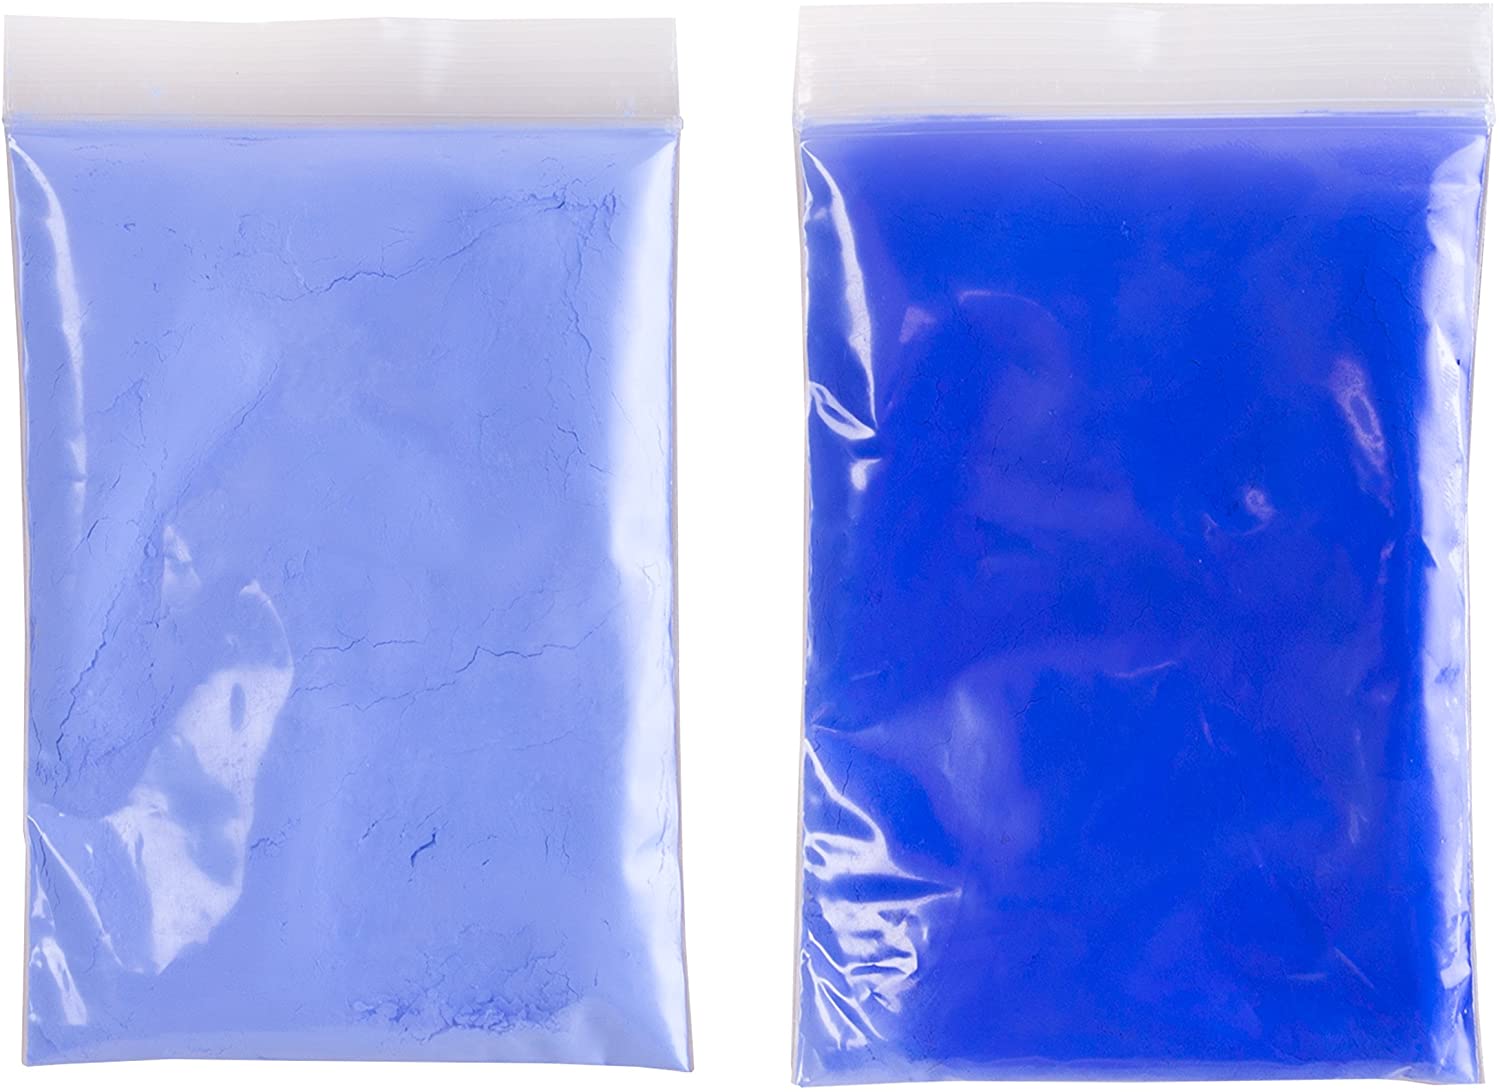
| THERMOCHROMIC INK |
- Thermochromatic ink is a type of dye that changes color when temperatures increase or decrease.
- Two major categories of these inks: thermochromatic liquid crystals (TLCs) and leuco dyes.
- Common uses: in the manufacture of many toys or product packaging, as well as thermometers.
DYEING WOOL
Ingredients
| a. | b. | c. |
|---|---|---|
| Guar gum | Water | Ink |
| 4 g | 100 ml | 4 g |
Tools
- stirring spoon, weight, measuring cup, hand blender, glass jar, gloves, plastic foil, brush, whisk
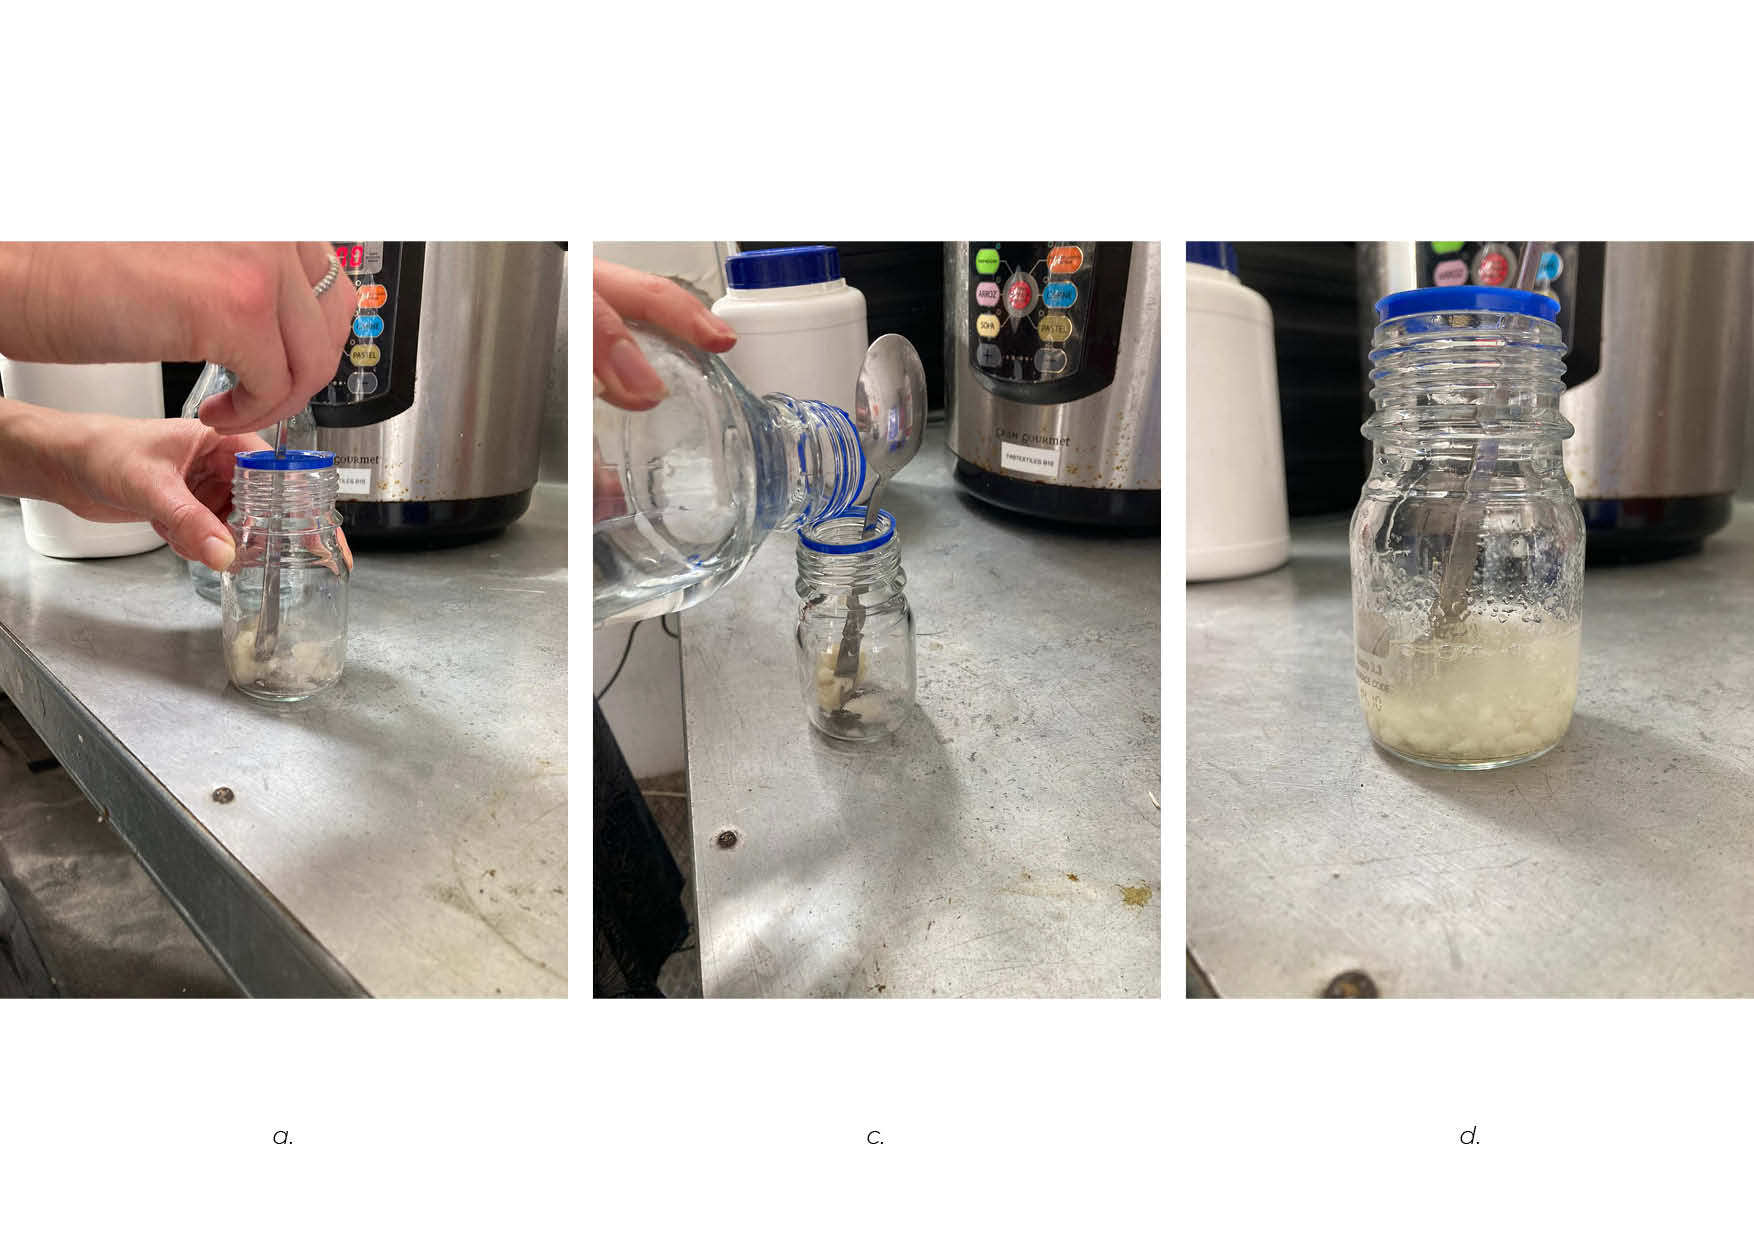
Process
- Add 4 g of guar gum to a glass jar (a.) and add a little water (not all at once - b.). Mix it with a spoon and add a little water (c.).
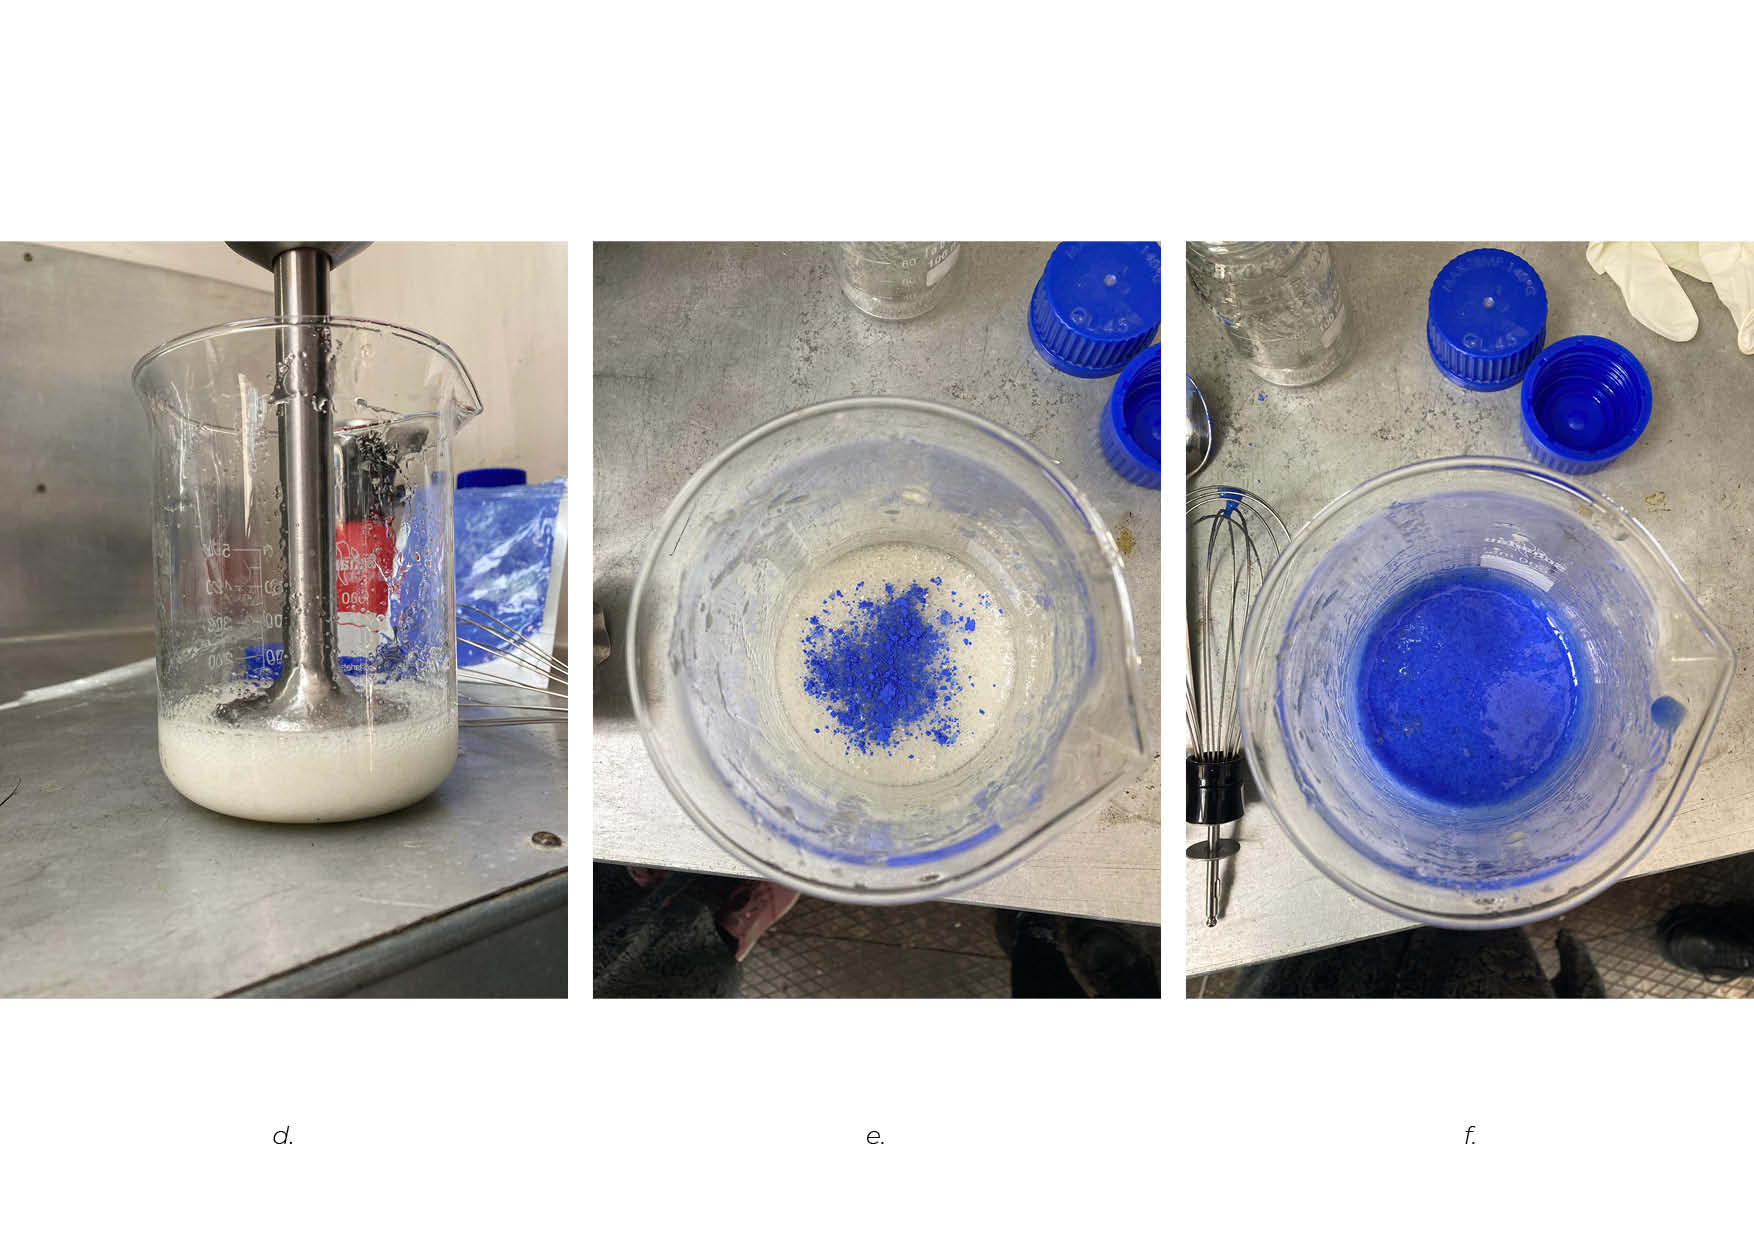
- Mix the guar gum thoroughly with water using a hand blender (d.). Avoid lumps and let it rest for a while.
- Add 4 g of ink to the mixture (e.) and mix it with a whisk (f.). Use a glass jar with a lid so you can use it again later (g., h.).
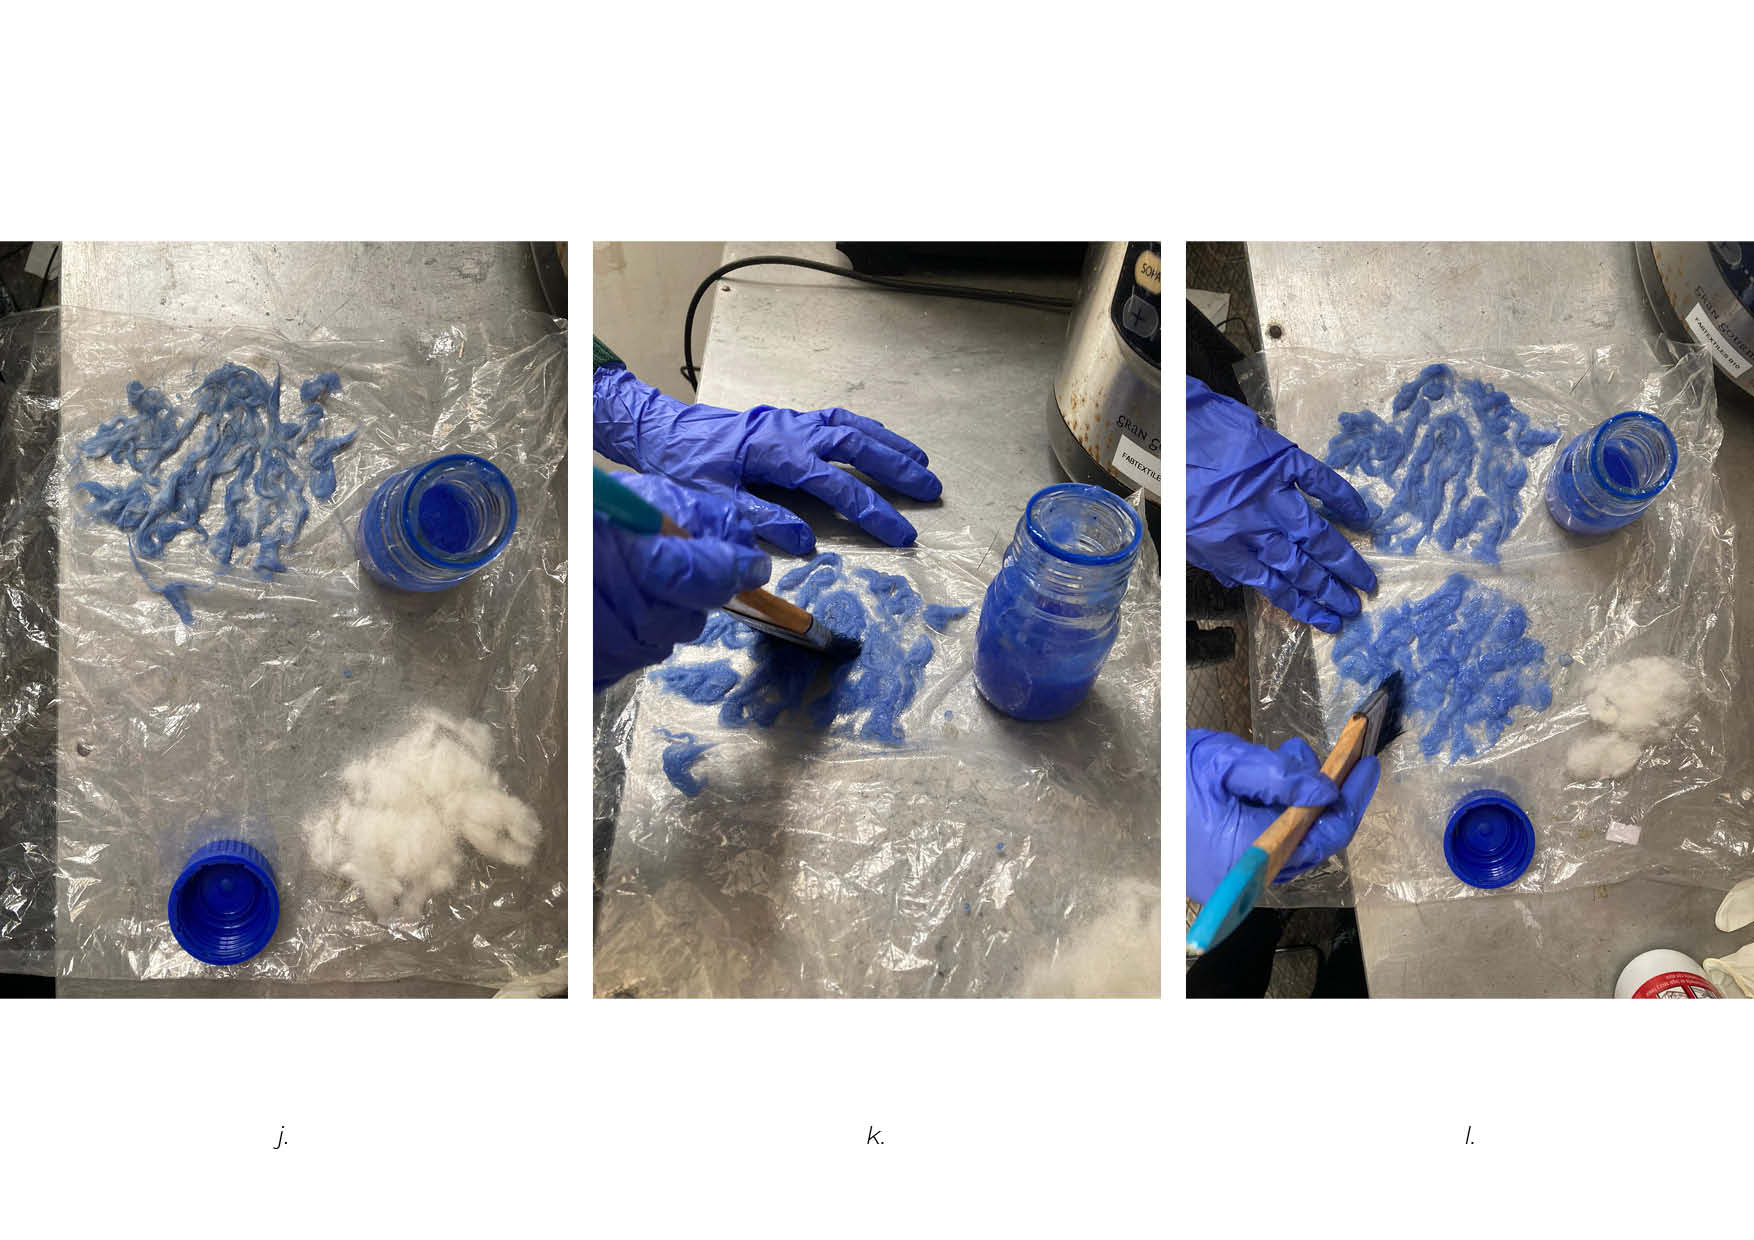
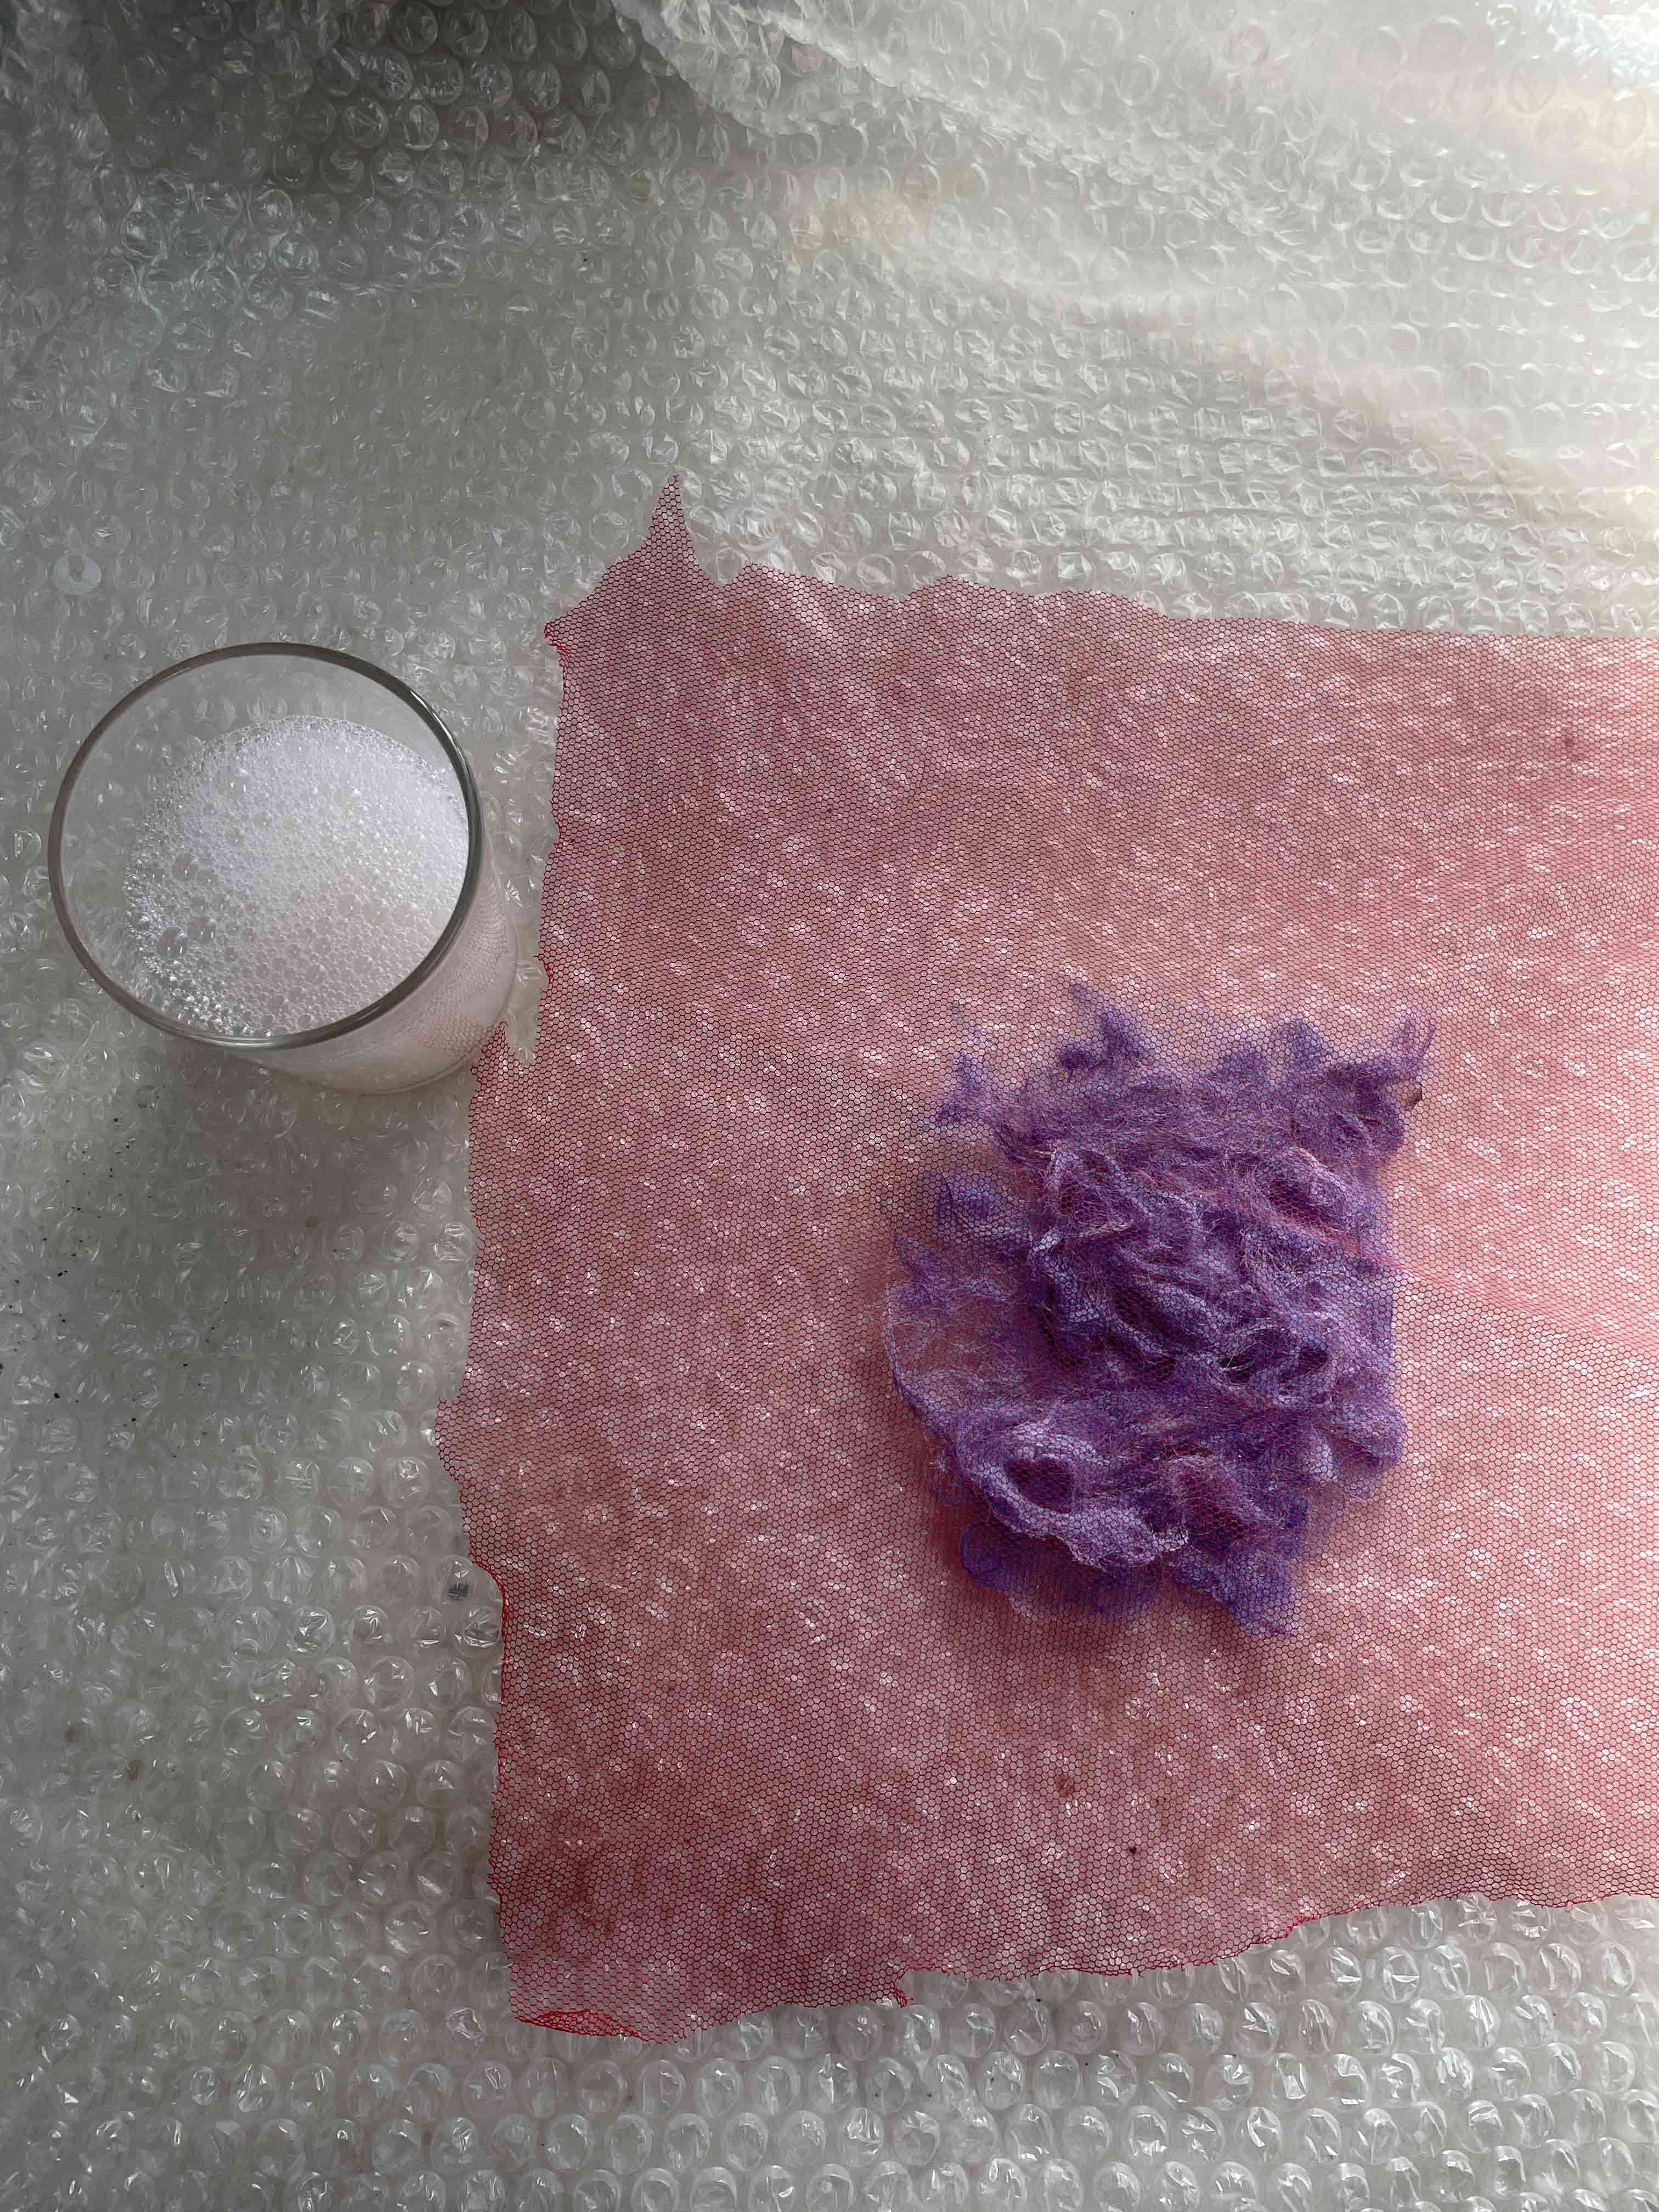
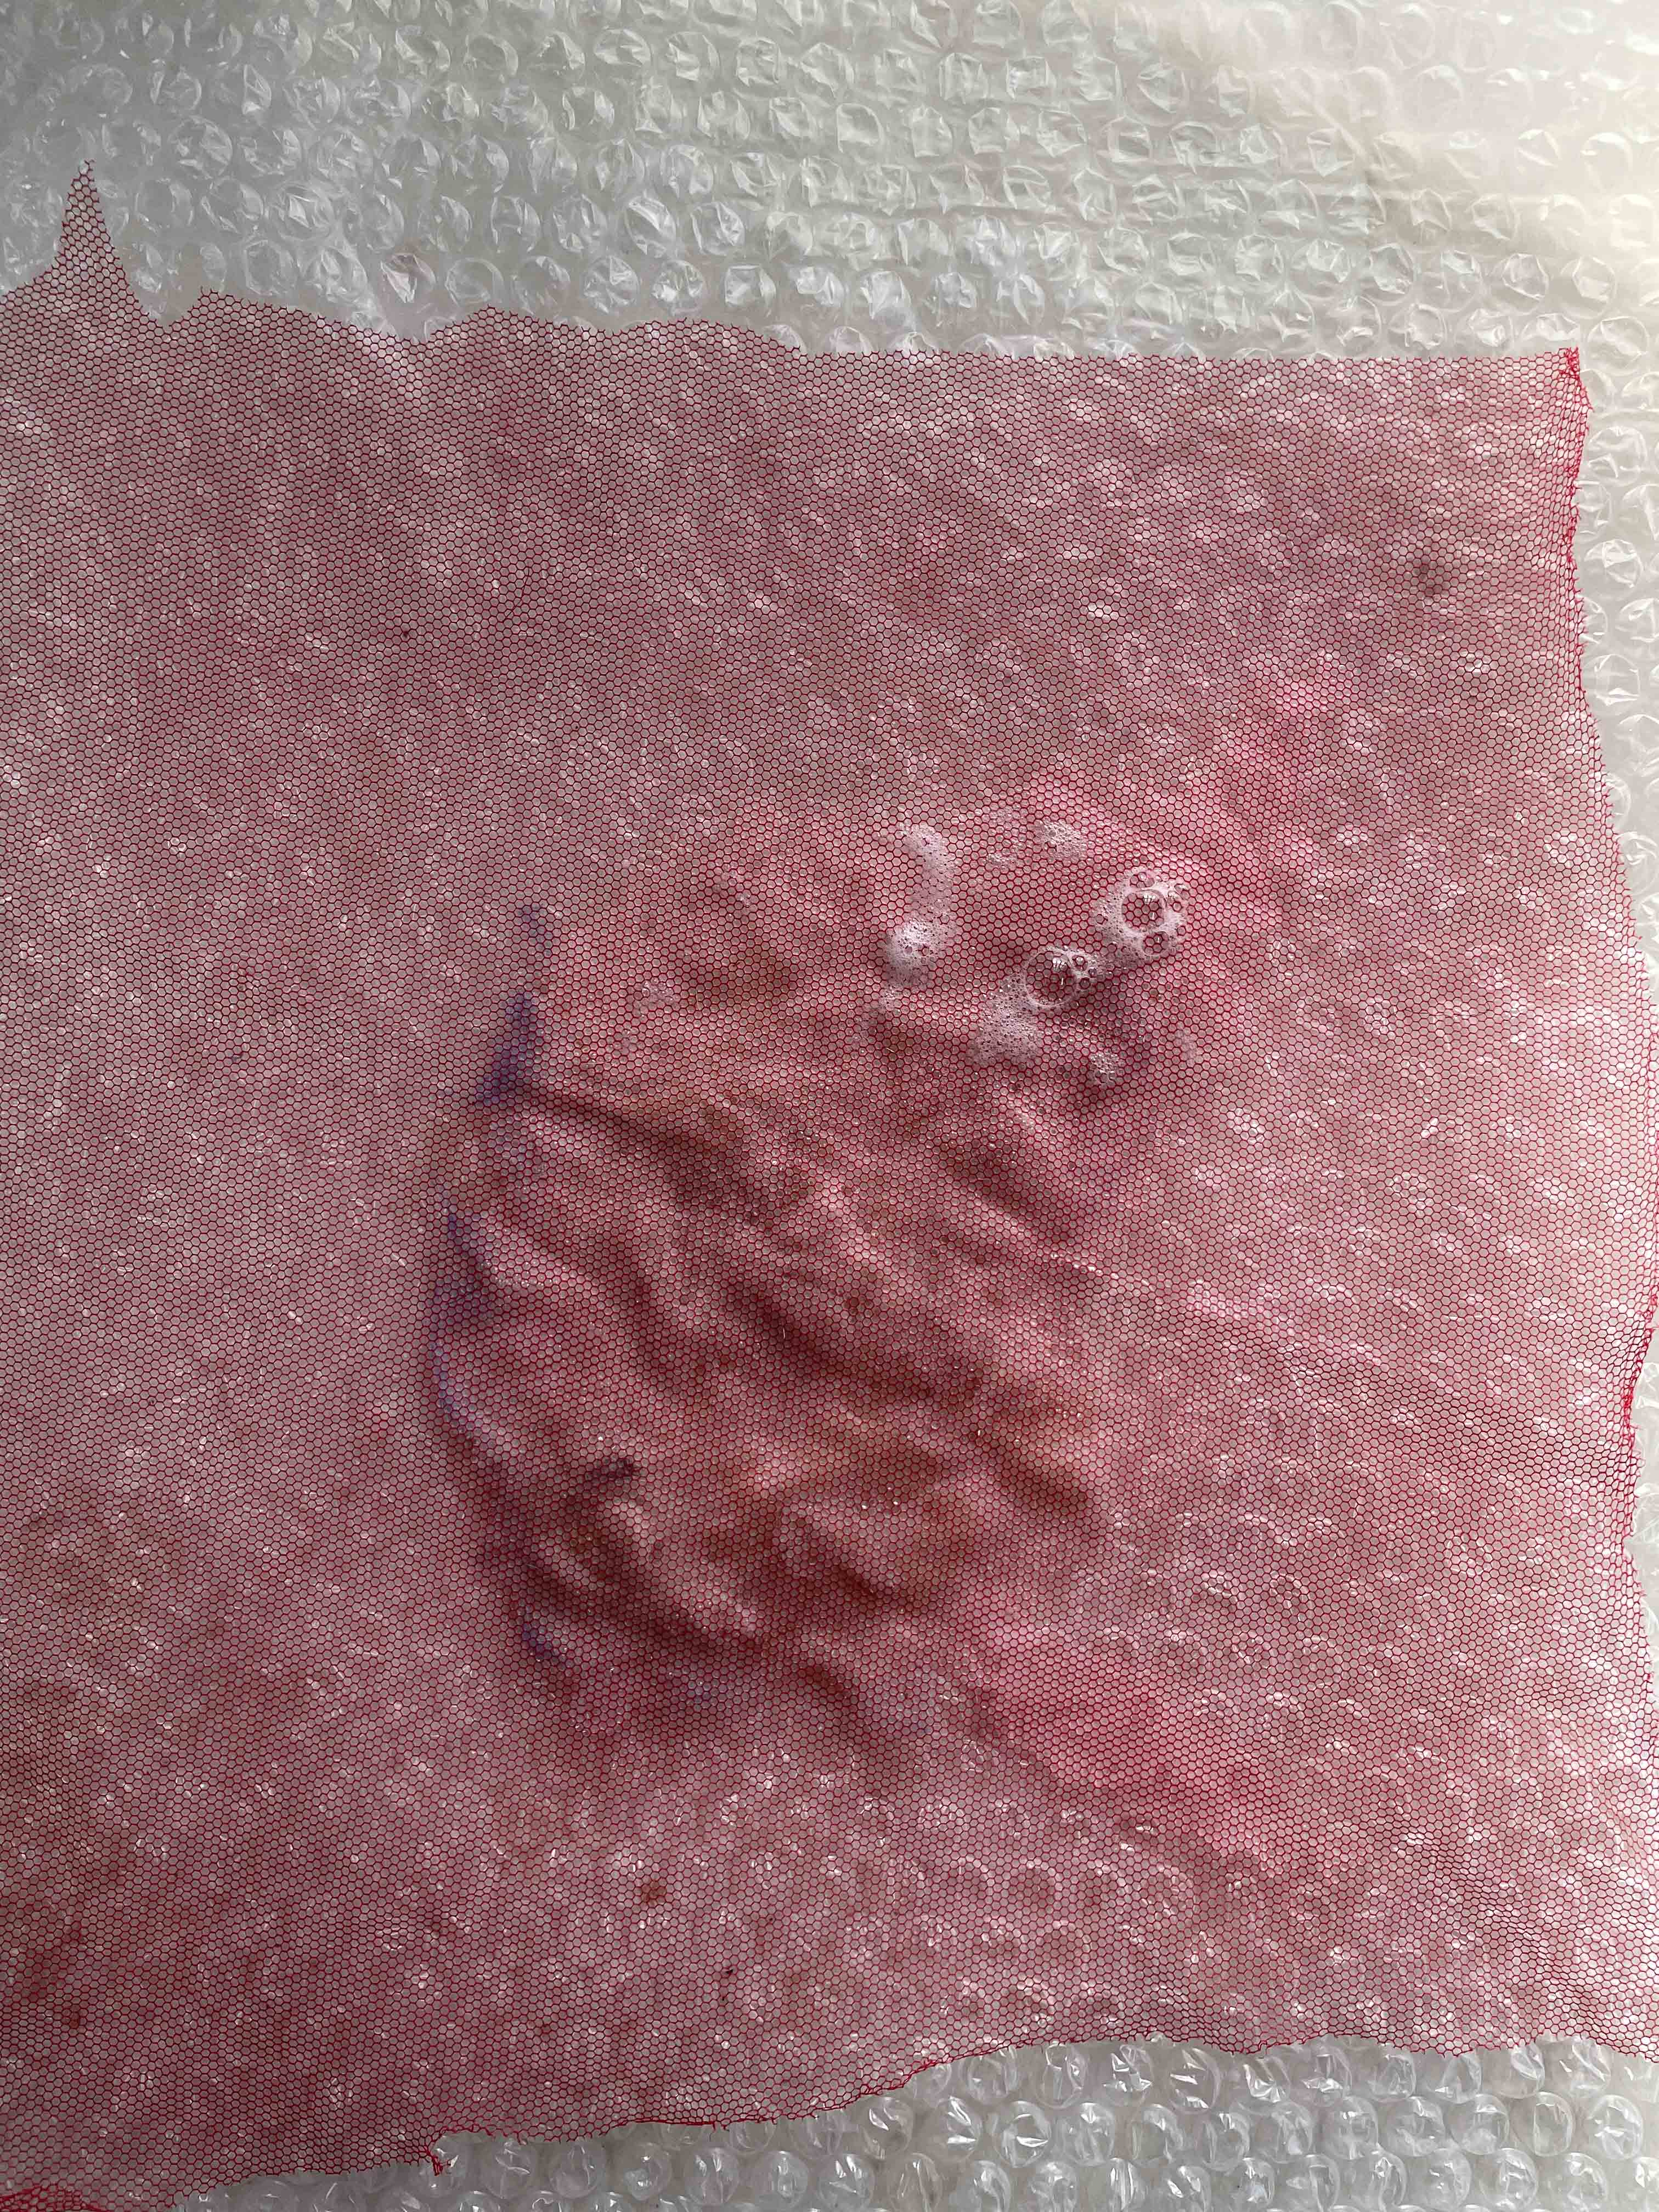
- Place the plastic foil under the wool (i.). Stretch the wool with your hands and apply the ink mixture to it.
- You can use a brush to add more liquid to help you color the wool (j., k., l.).
- Let it dry in a safe and dry place.

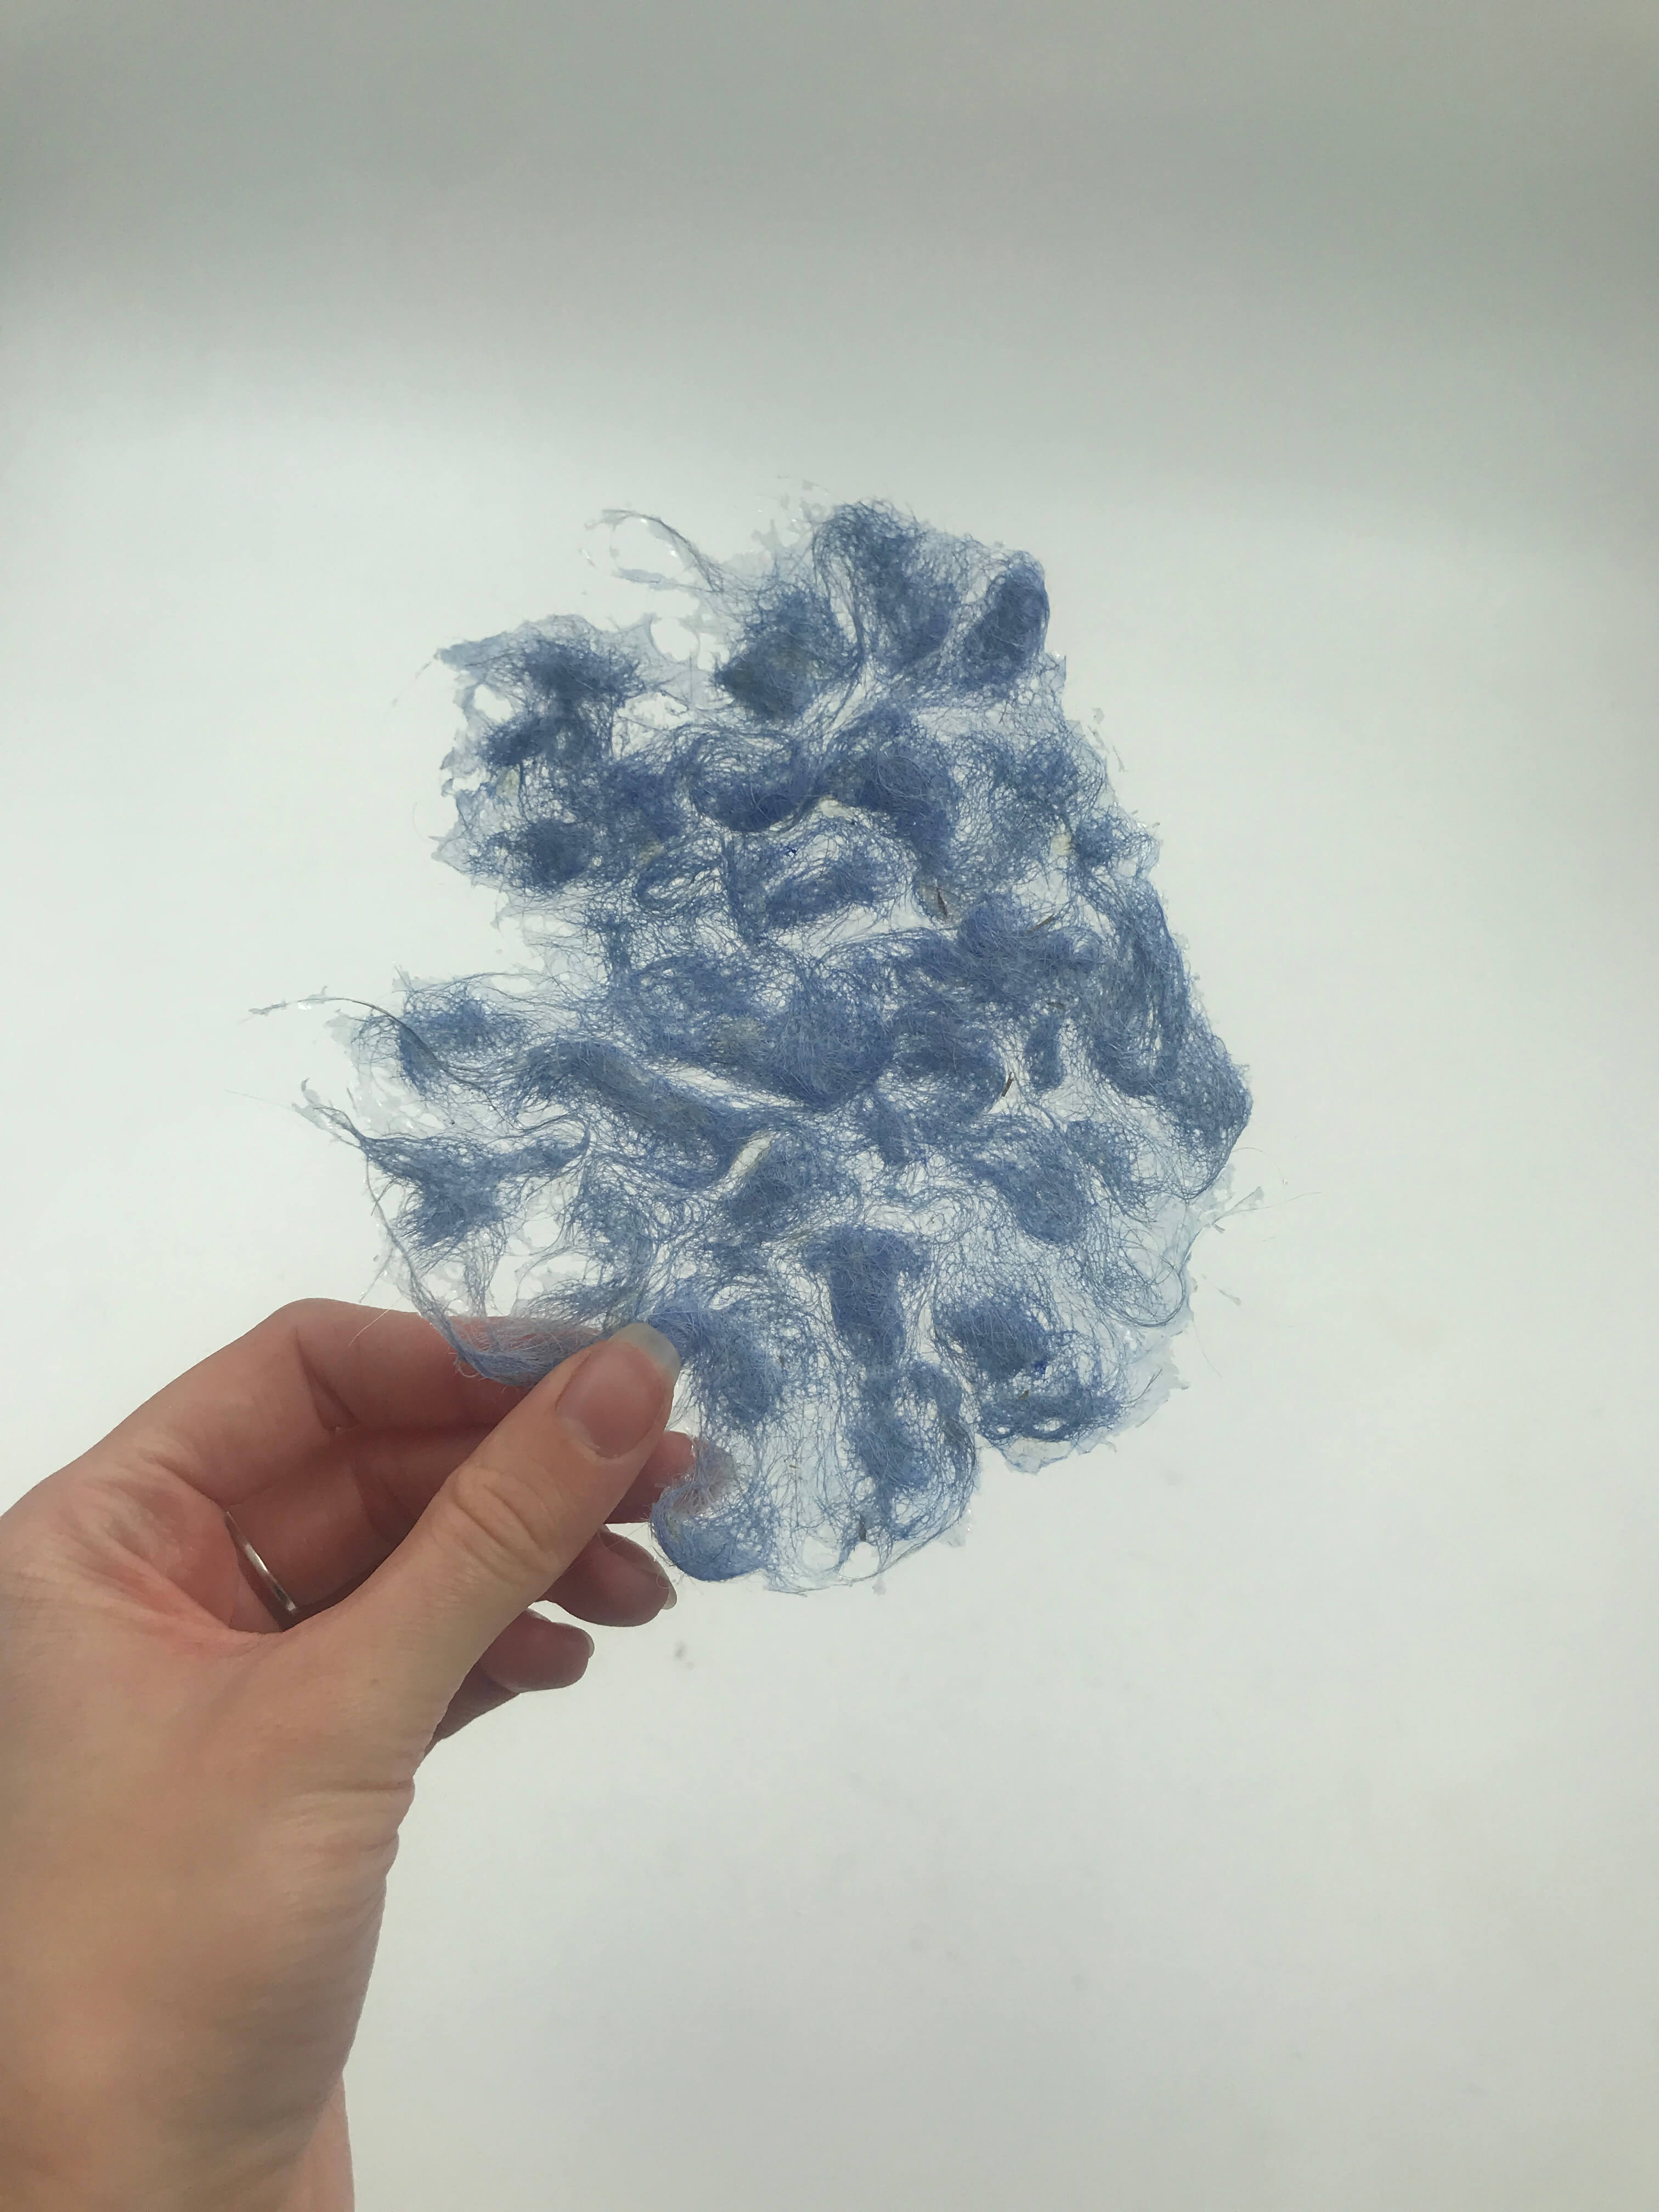
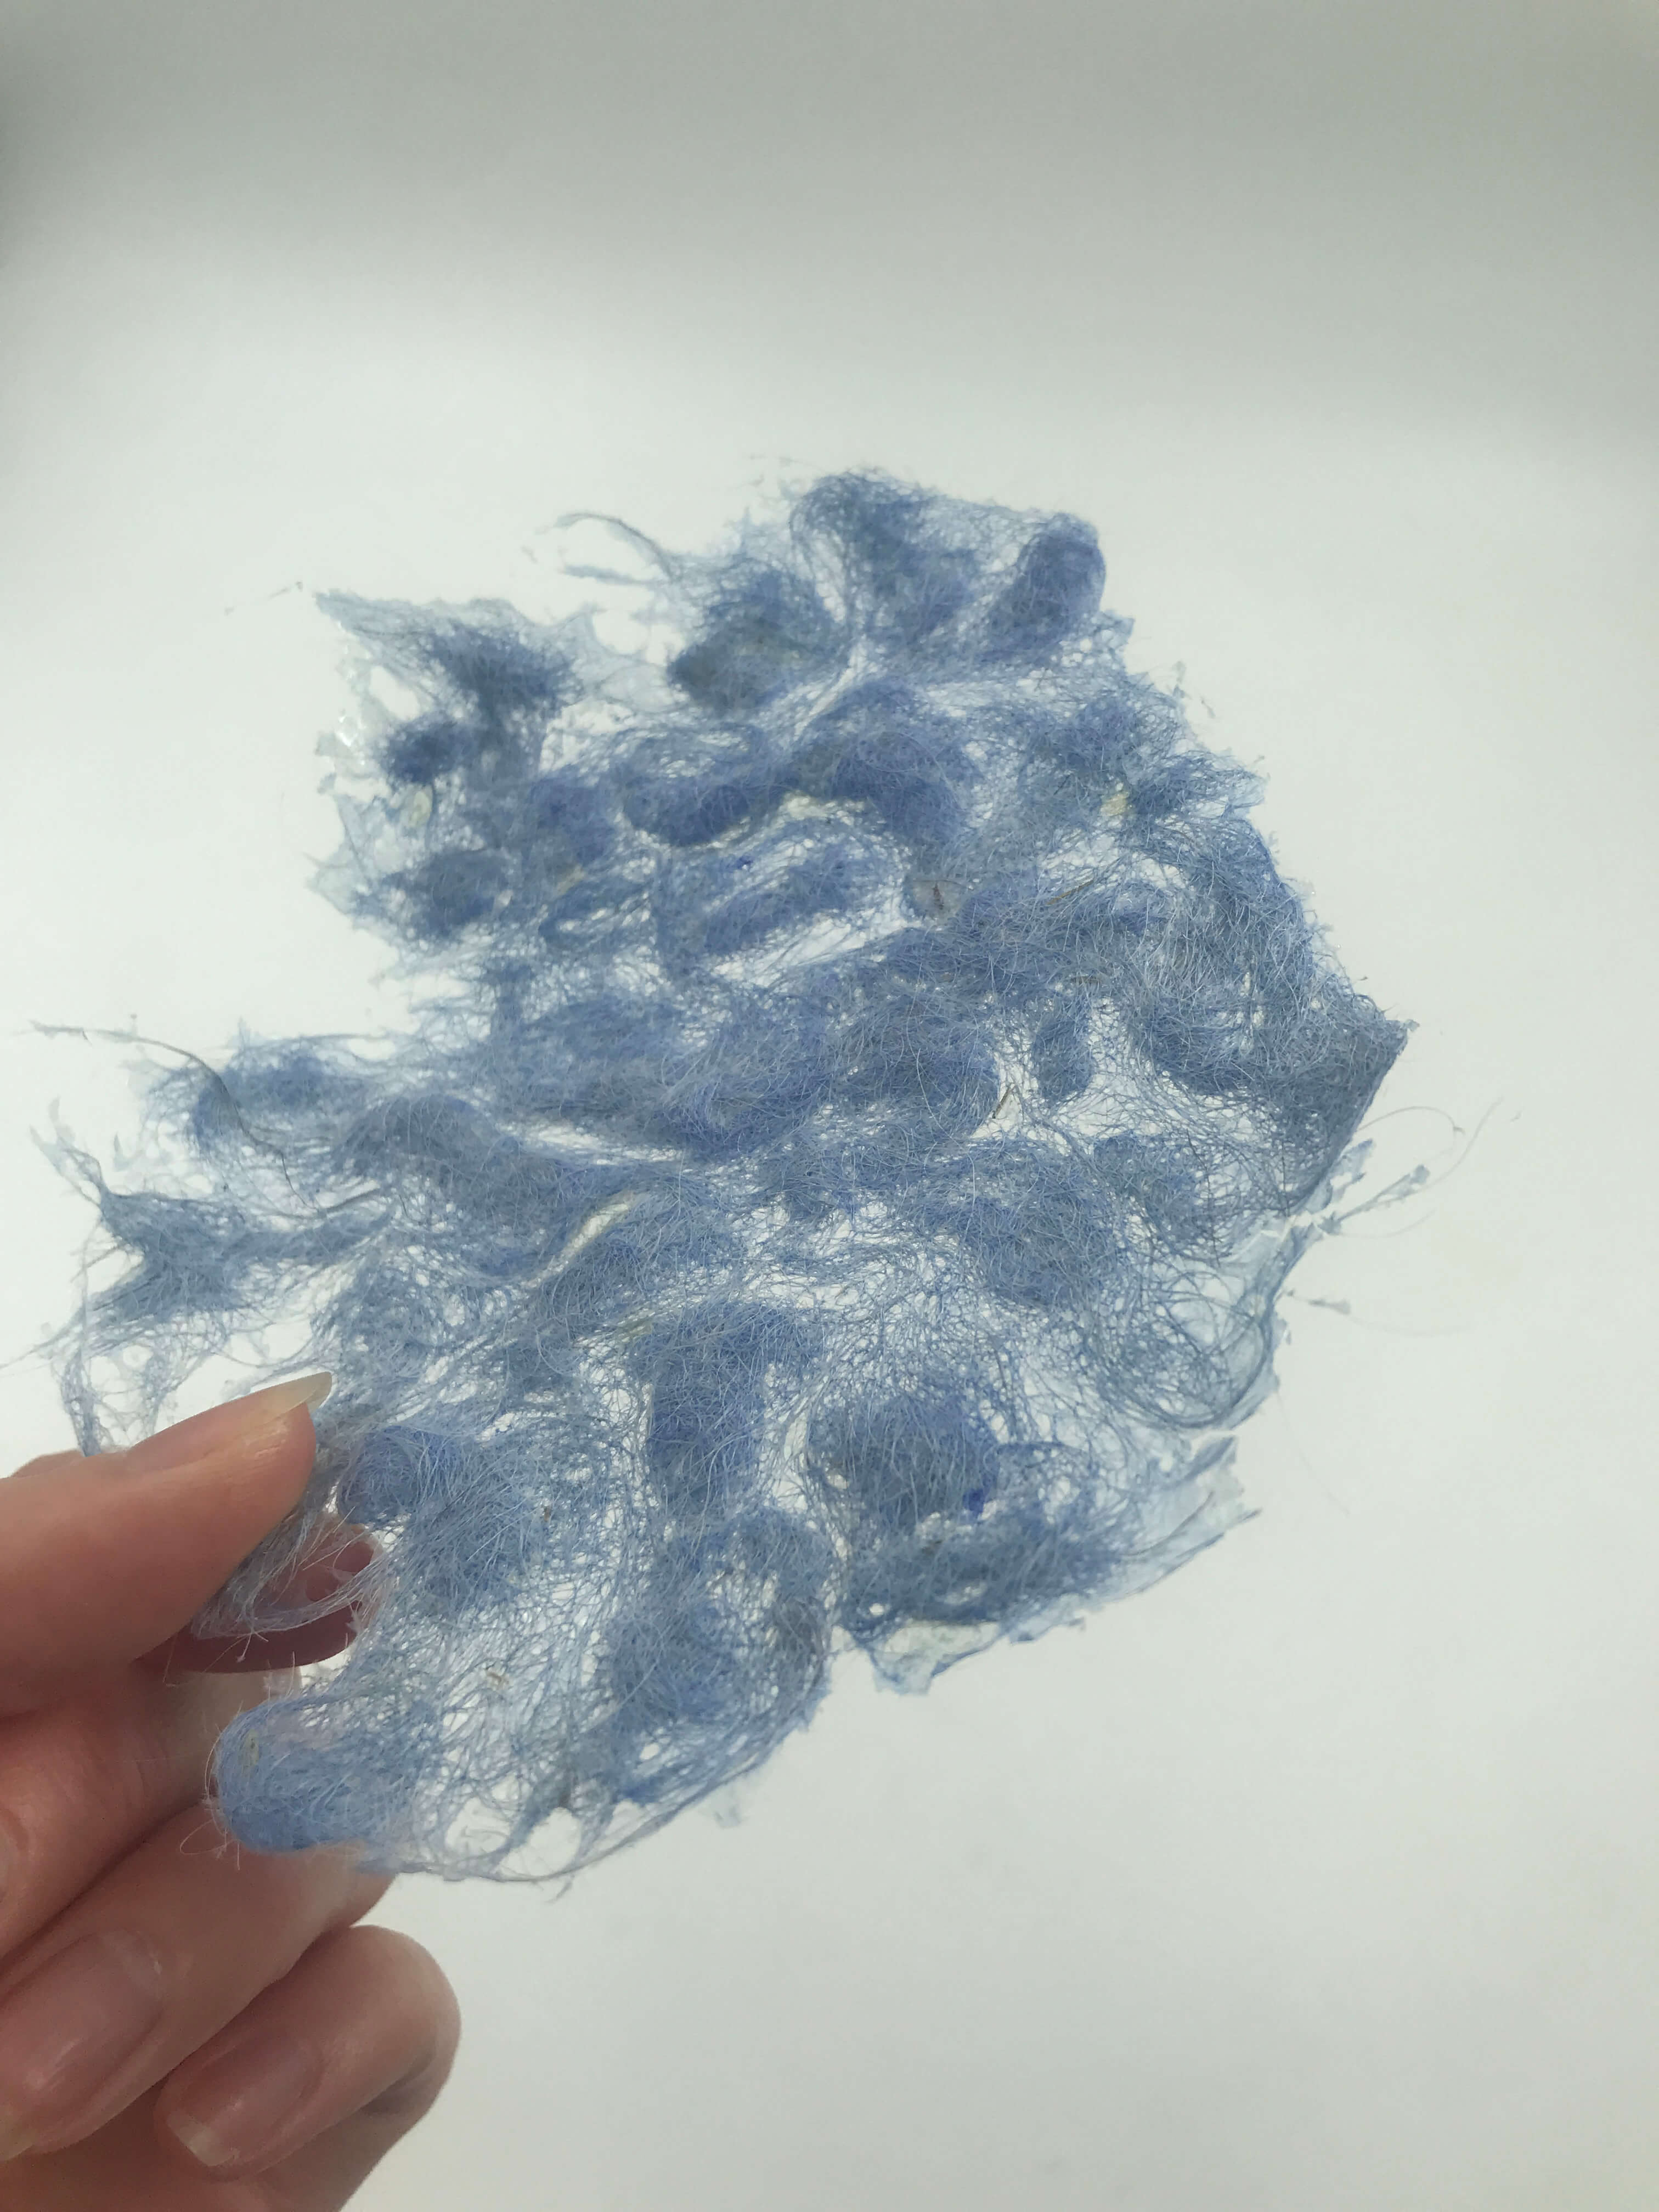
Result
REFERENCES
CONCLUSION
NEEDLE felting
Wool after dyieng with pigment and guar gum lost the property (softness) for needle felting. It has become hard and resistant.

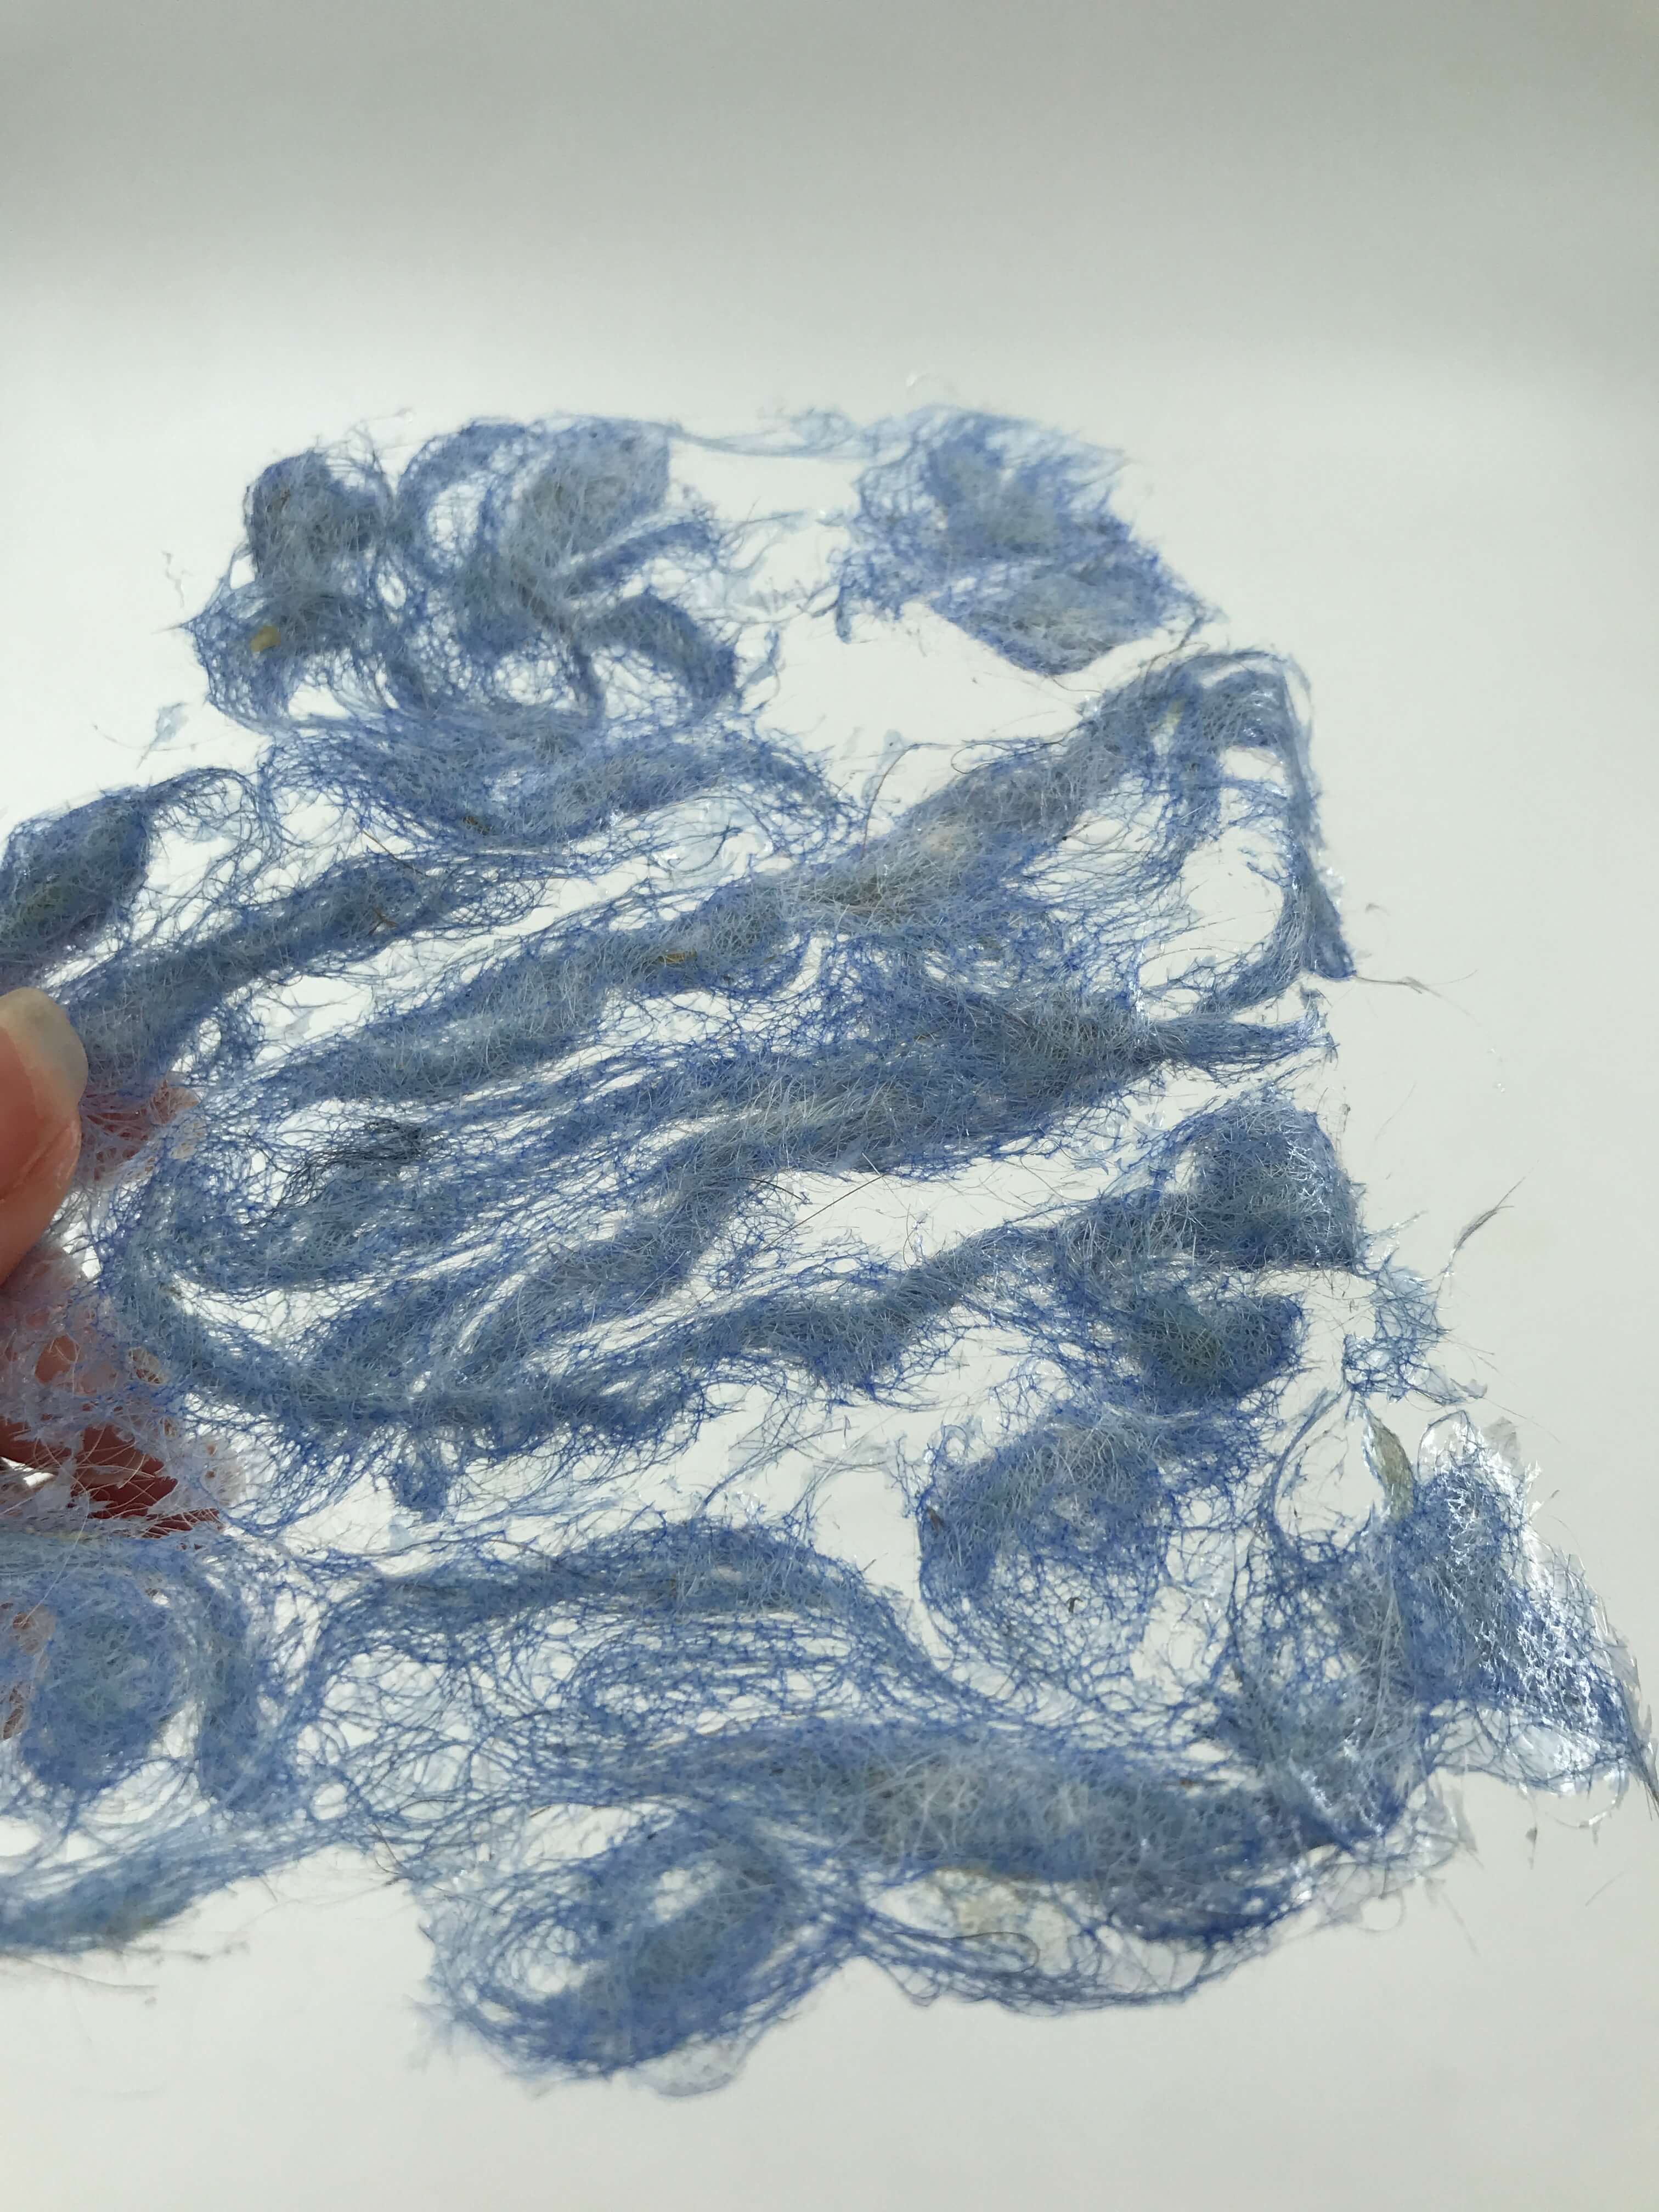
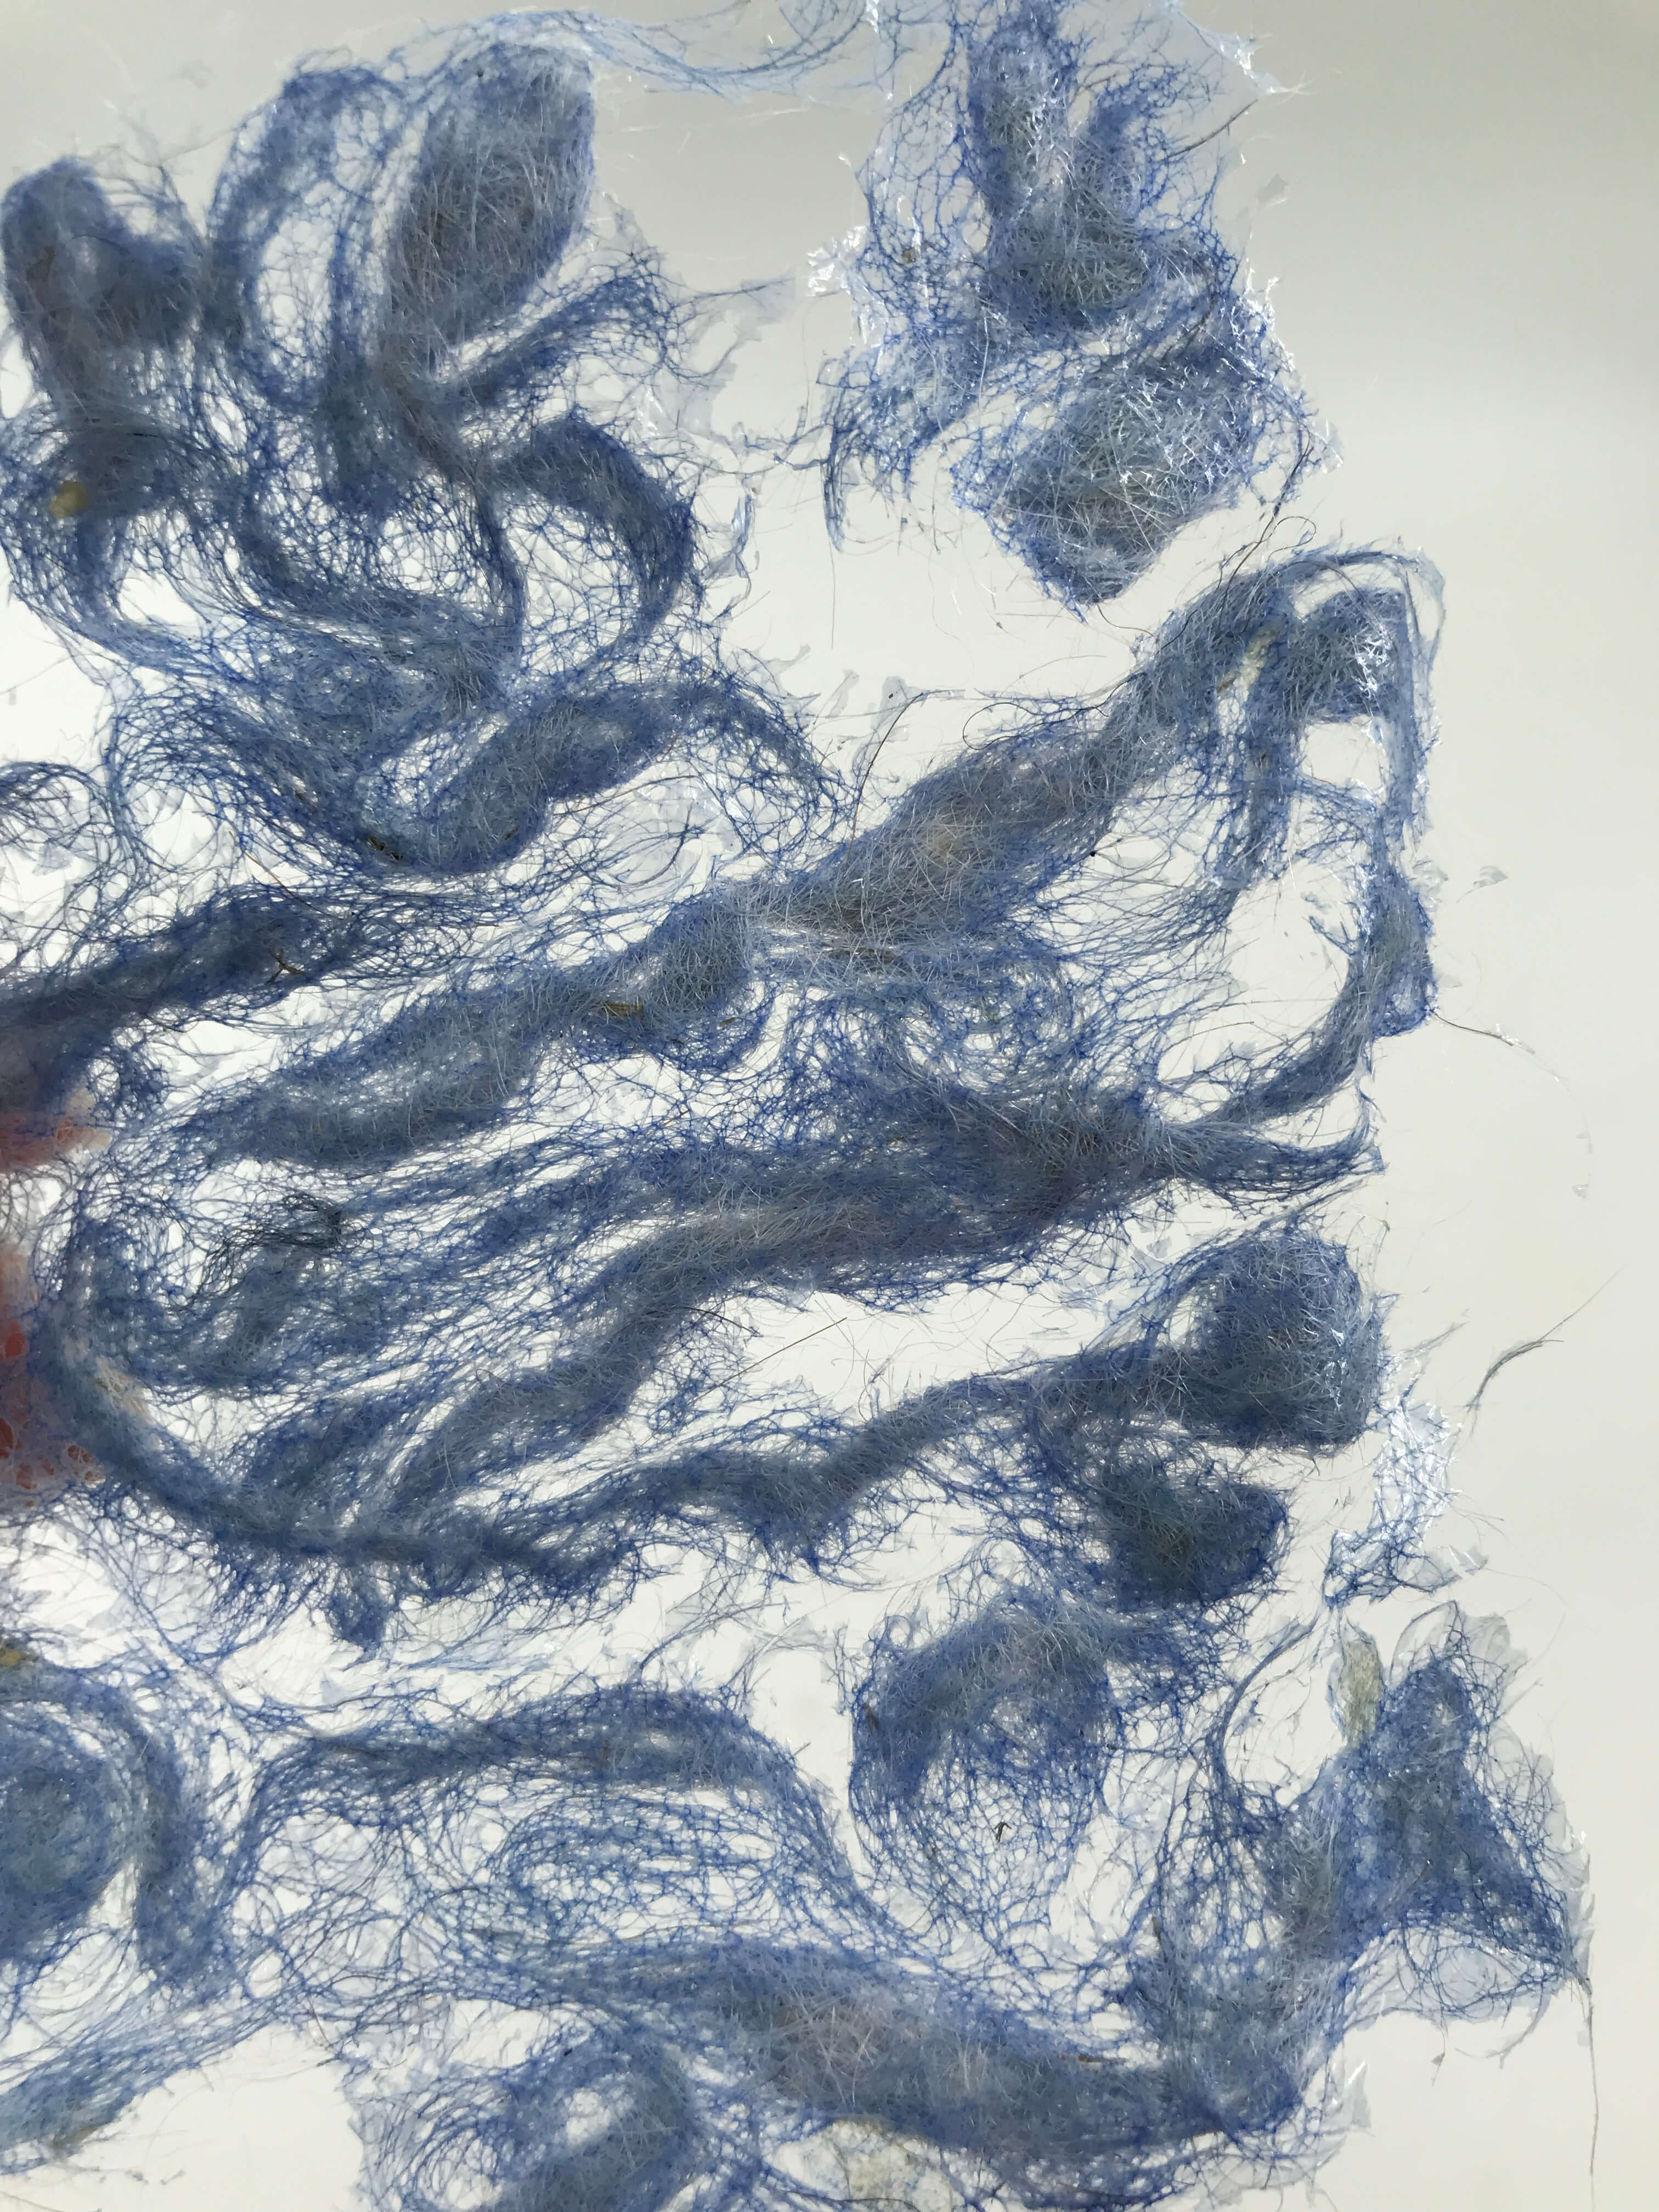
WET felting
It worked better than the previous method however it started losing a bit of pigment and the fibers are not well felted - they peel away from each other.
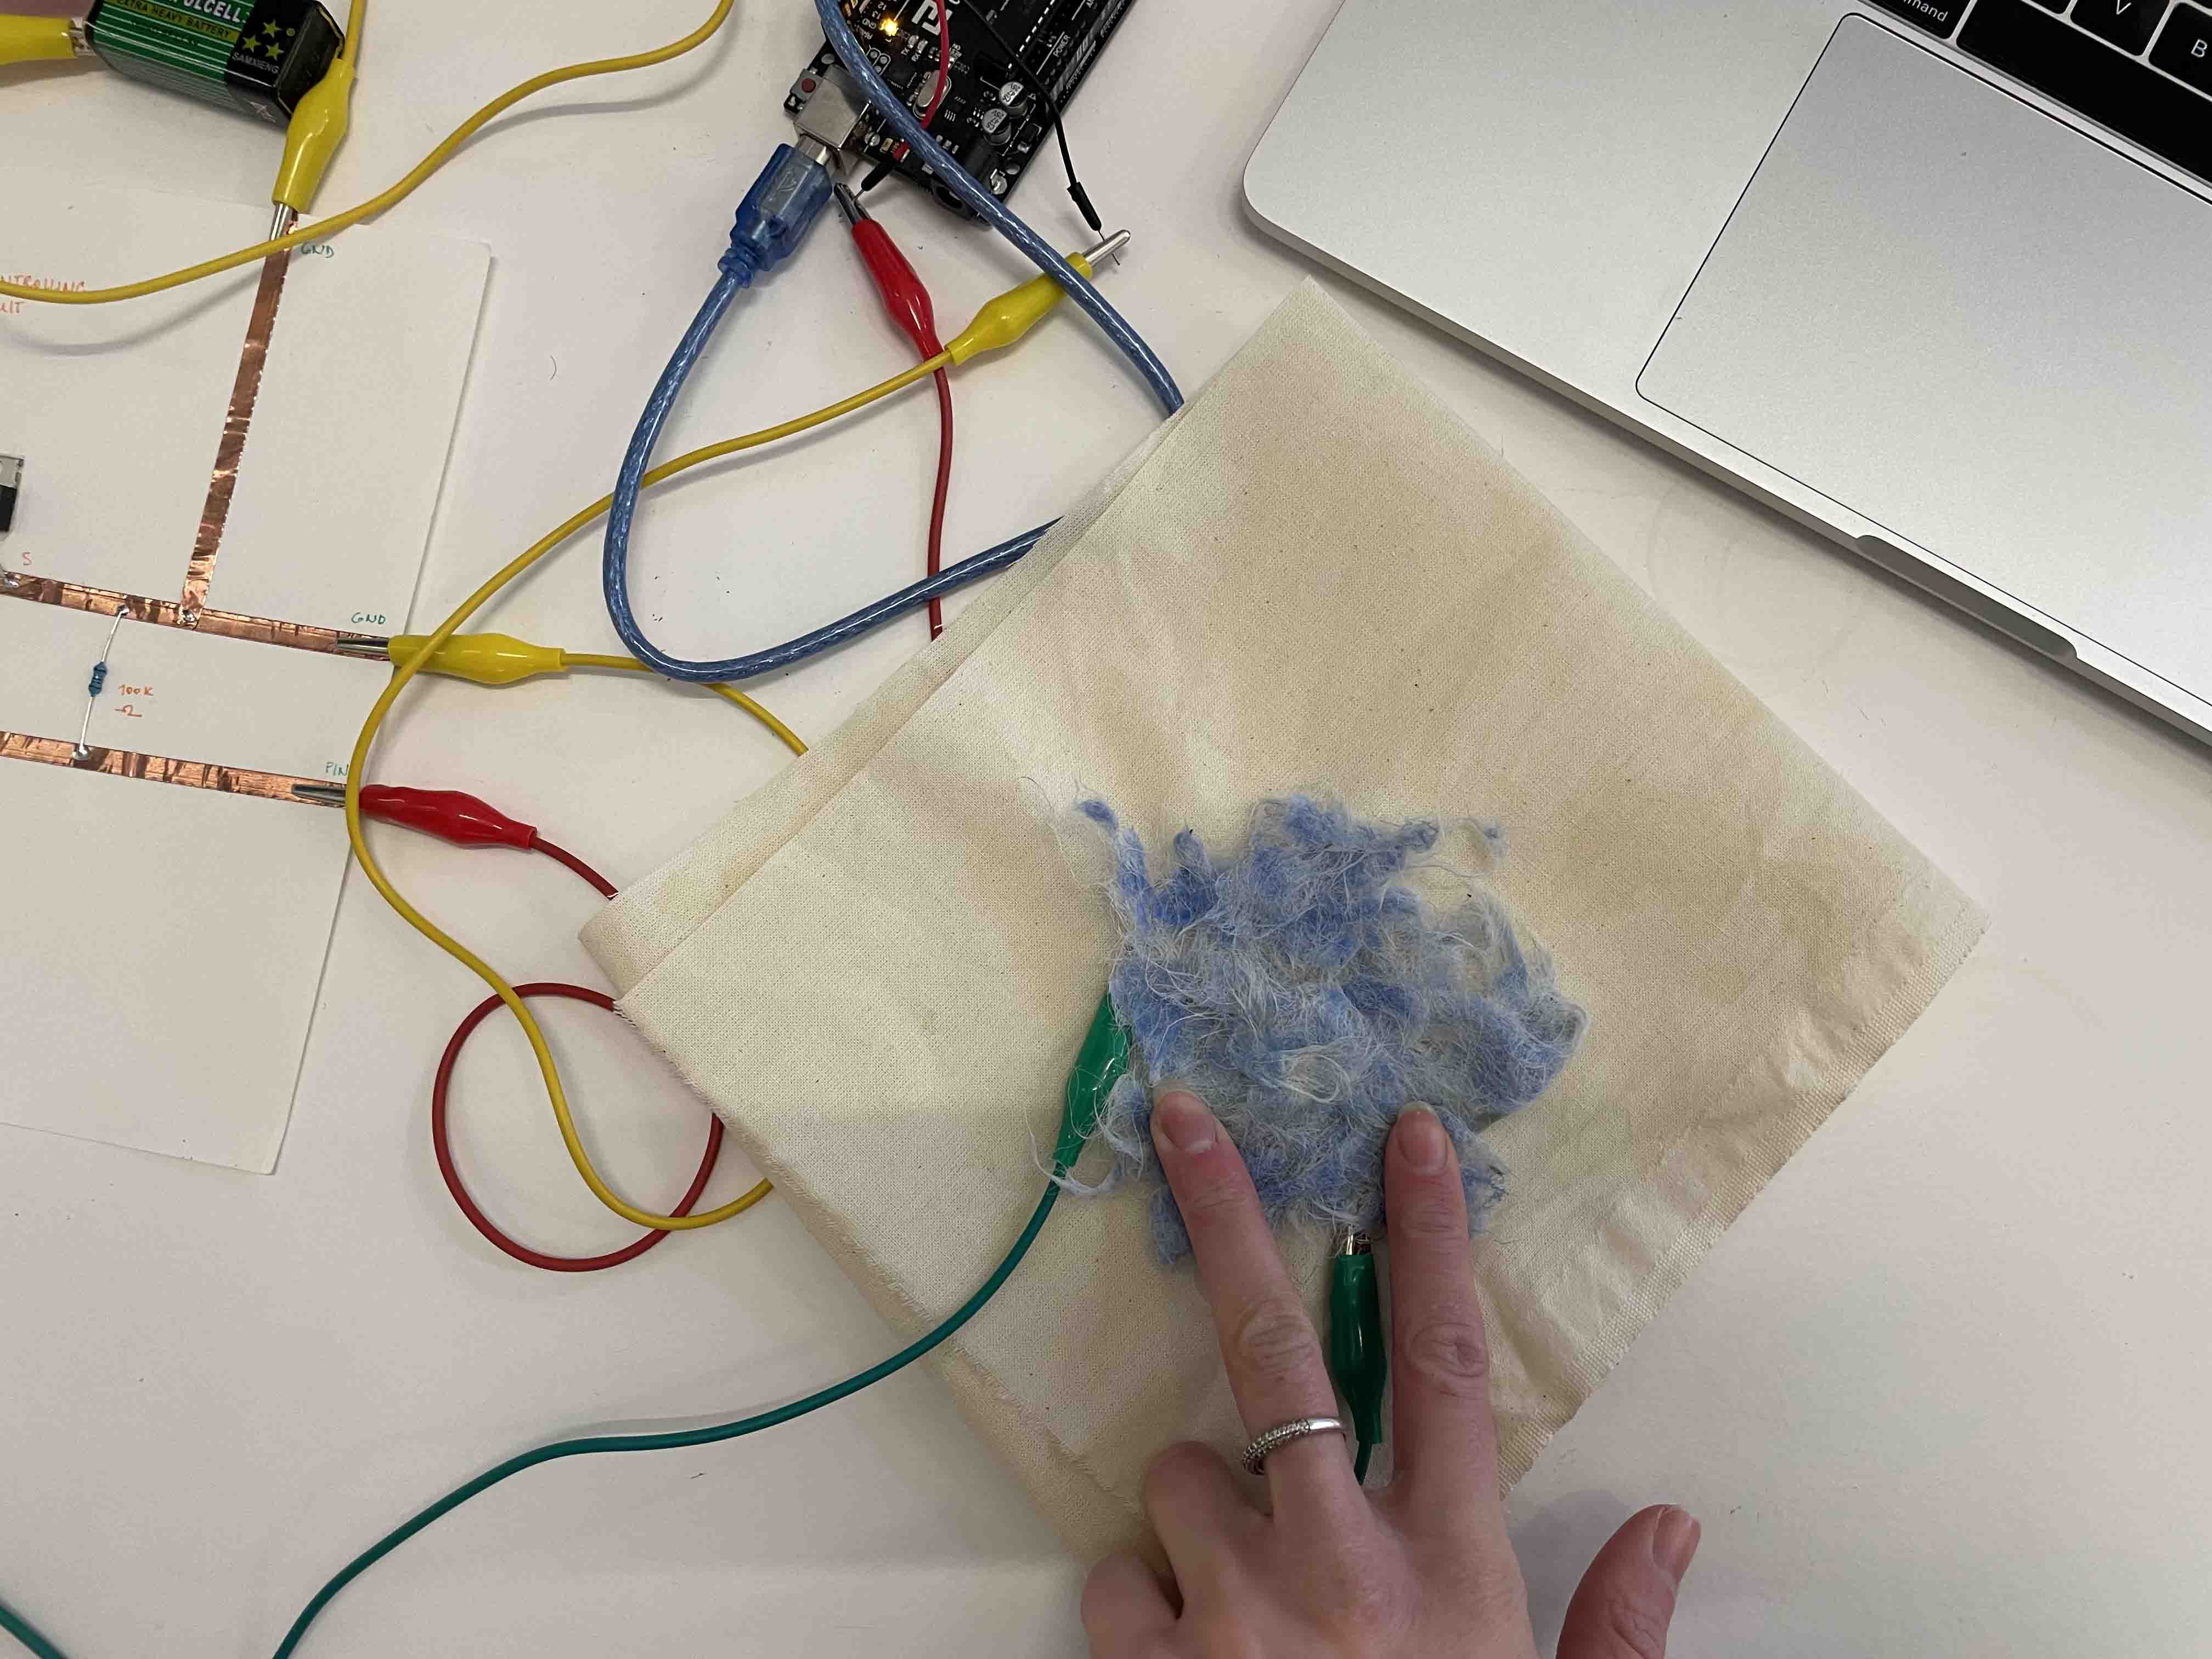
| PREHEAT - HEAT PAD |
- Thread: Stainless steel
- Resistance: 12.7 ohms
- Code: Bellow
MATERIALS
| N. | Material name | Quantity | Source |
|---|---|---|---|
| 1. | Arduino UNO | 1 | UNO R3 Kit |
| 2. | USB cable | 1 | UNO R3 Kit |
| 3. | Battery 9 V | 1 | UNO R3 Kit |
| 4. | Resistor 100K Ω | 1 | UNO R3 Kit |
| 5. | Crocodiles | 6 | Fab Lab BCN |
| 6. | Jumpers | 2 | UNO R3 Kit |
| 7. | USB cable | 1 | UNO R3 Kit |
| 8. | Diode | 1 | Fab Lab BCN |
| 9. | Plastic tape | - | Fab Lab BCN |
| 10. | Copper tape | - | Fab Lab BCN |
| 11. | N-channel MOSFET FQP30N06L | 1 | Sparkfun |
| 12. | Conductive thread | - | Fab Lab BCN |
| 13. | Paper | - | Fab Lab BCN |
| 14. | Textile | - | Fab Lab BCN |
| 15. | Needle | 1 | Fab Lab BCN |
Tips
- Use a soldering machine to connect better N-channel MOSFET FQP30N06L, resistor, diode and other connections for better flow.
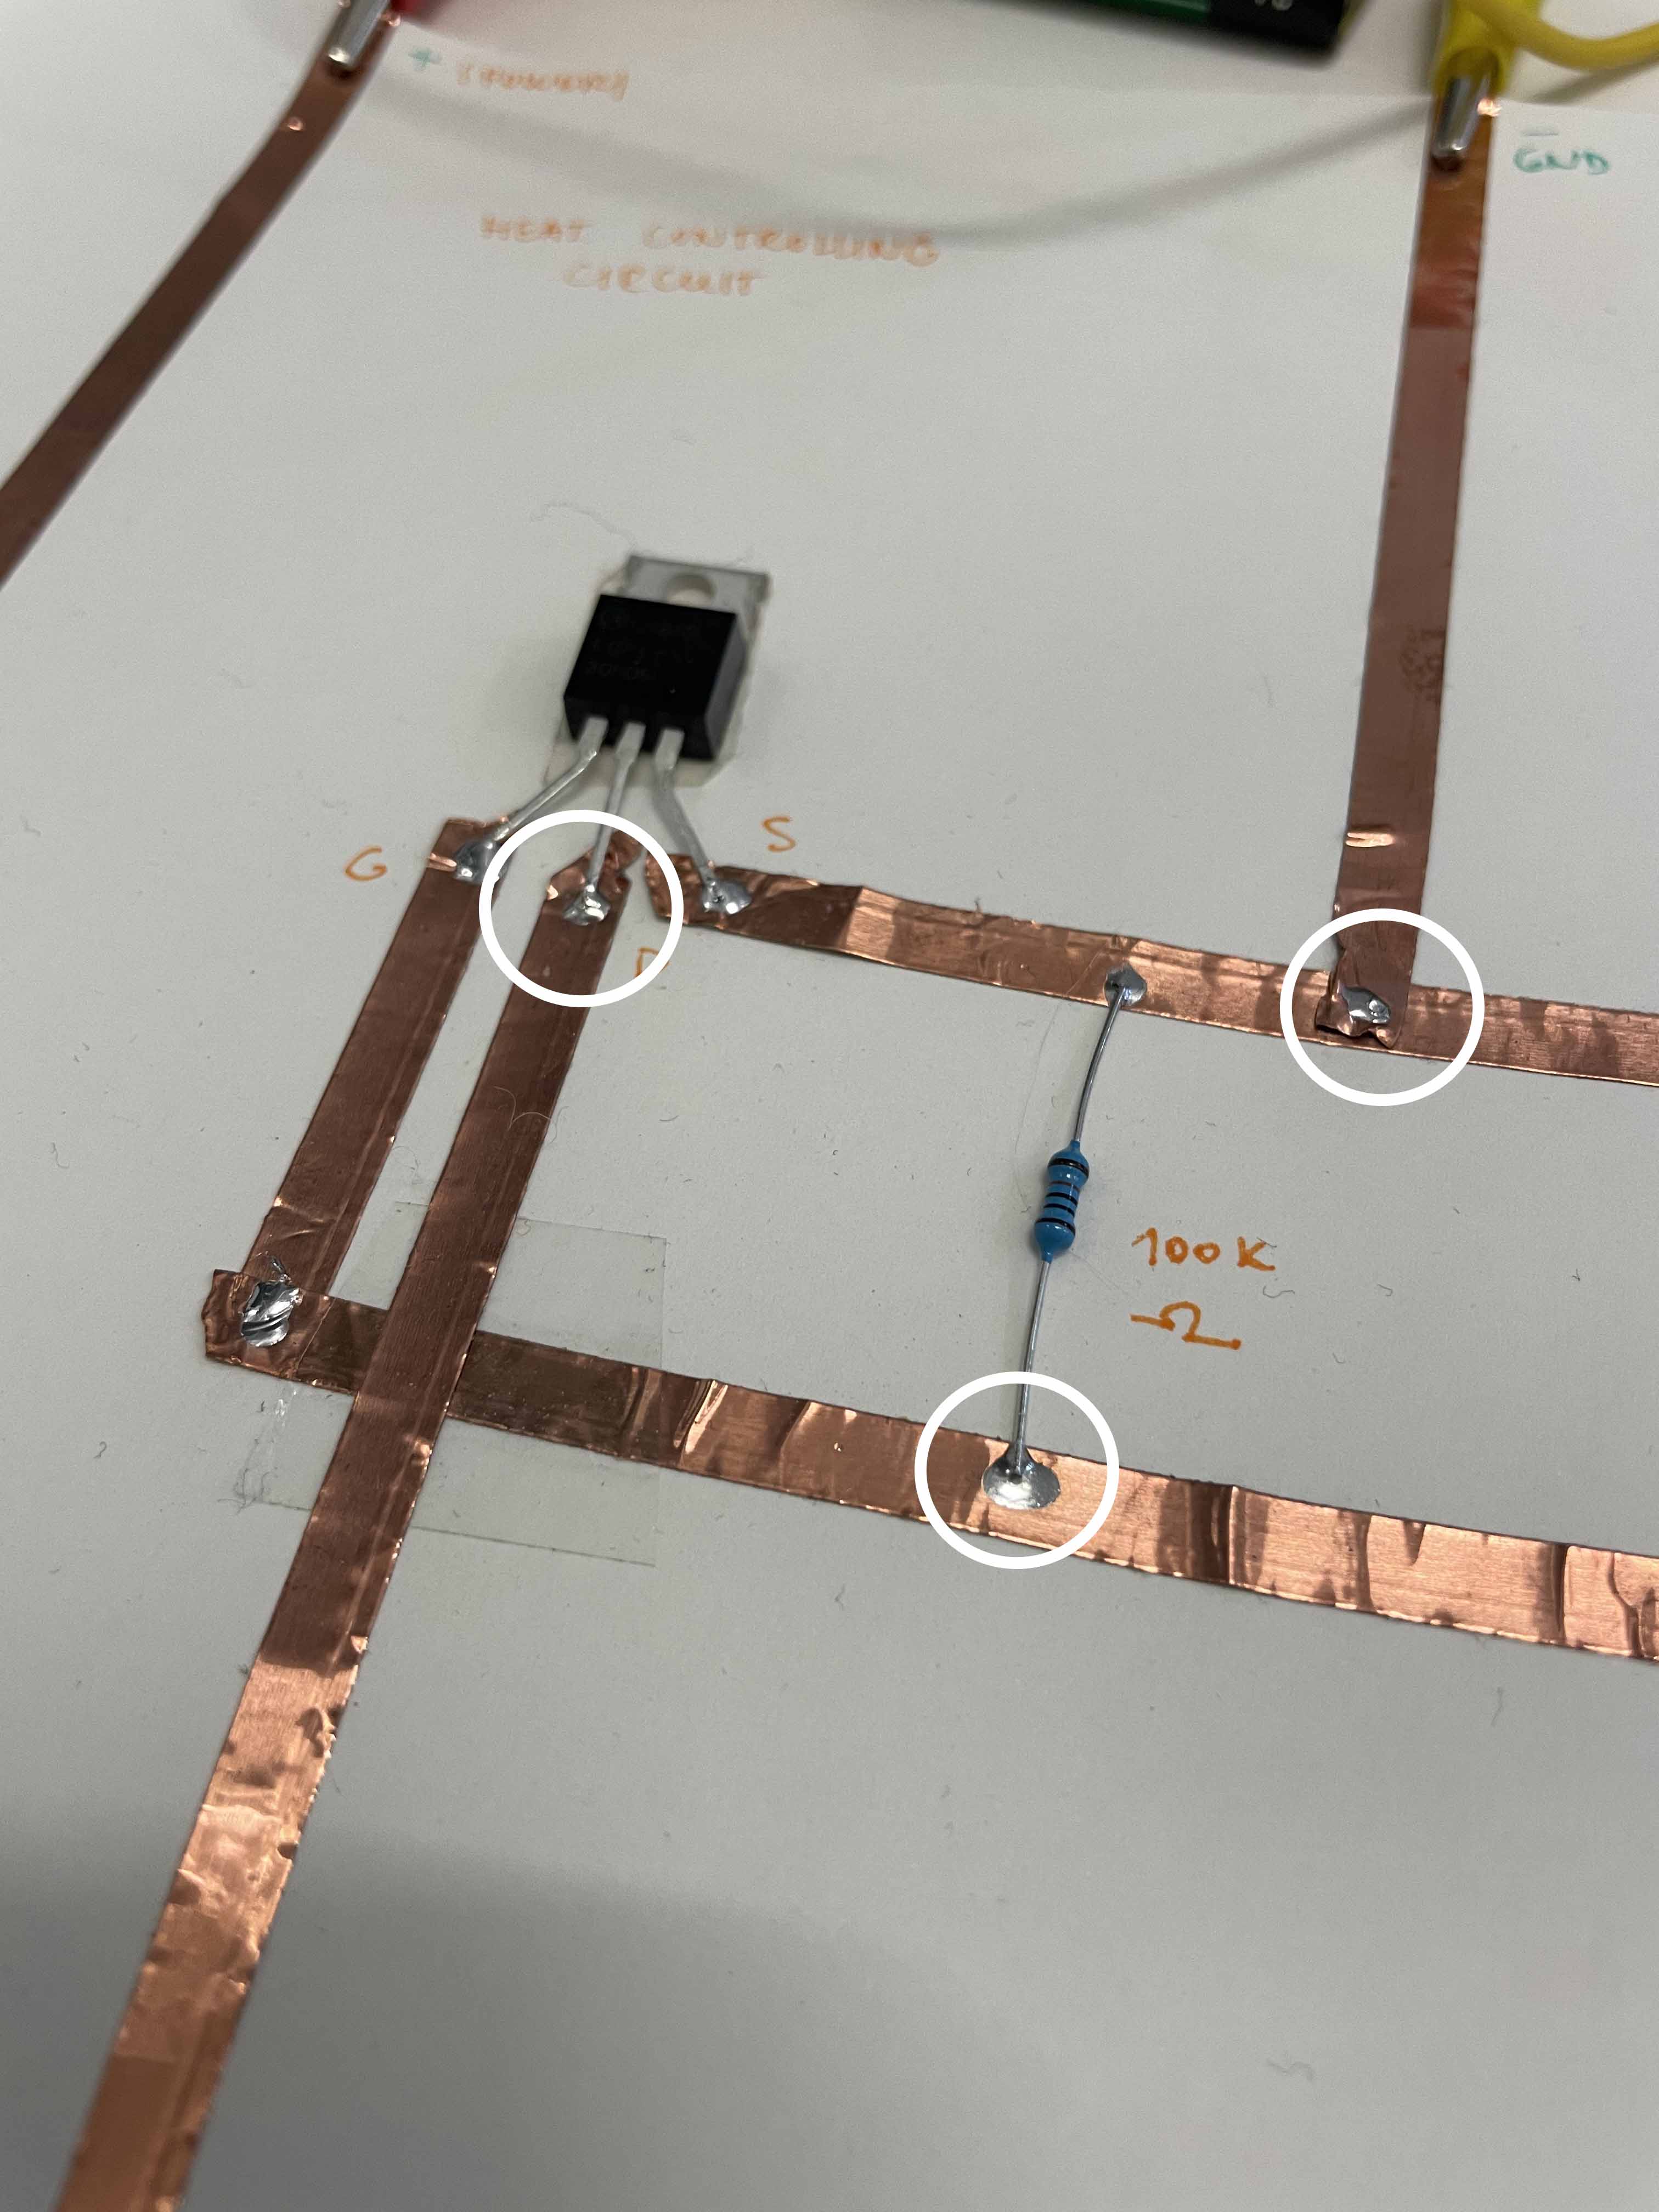
- Do not forget to place a piece of plastic tape between copper paths - from Gate to Pin and from Drain to diode.
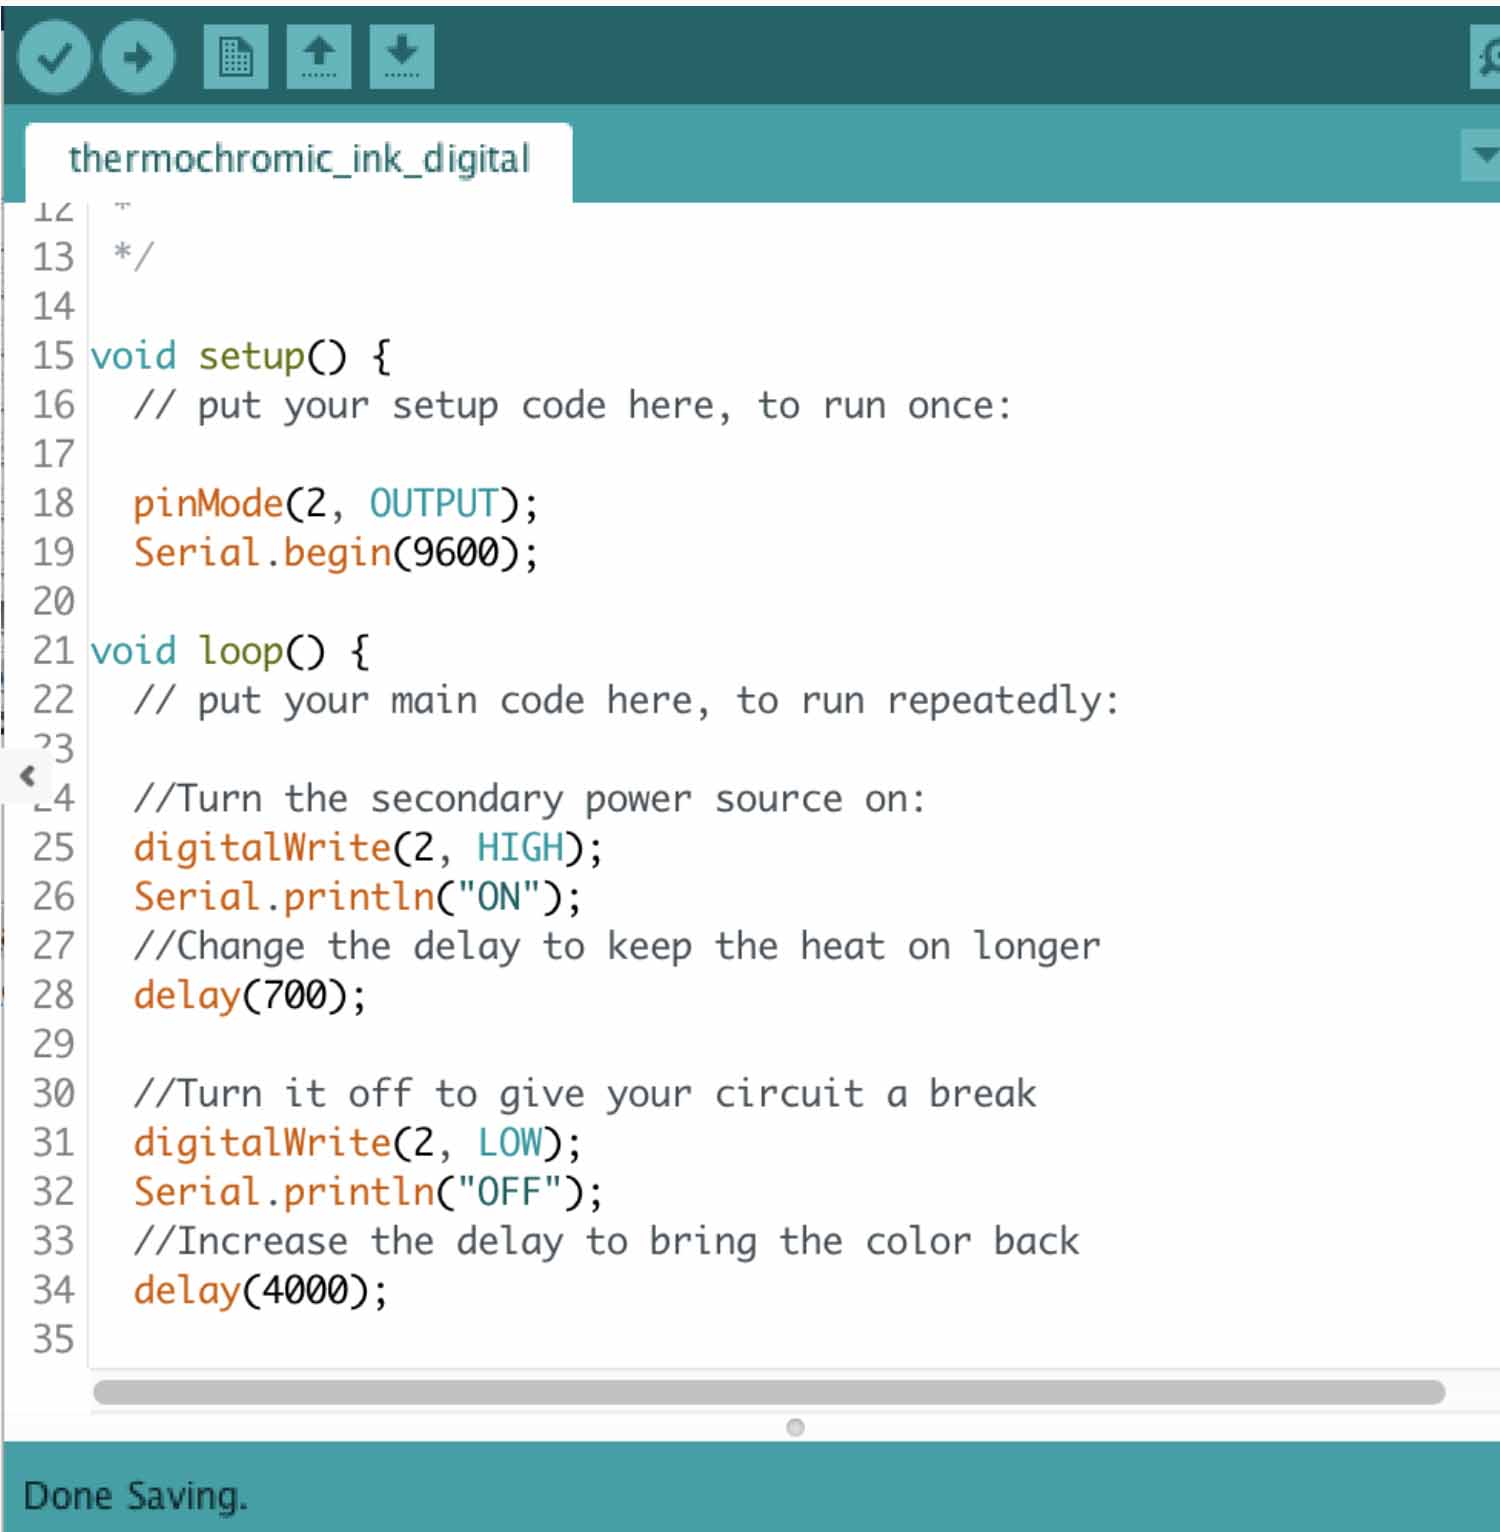
CODE
- DigitalWrite
- AnalogWrite - better to control the amount of current
void setup() {
  // put your setup code here, to run once:

pinMode(9, OUTPUT);
Serial.begin(9600);
}

void loop() {
  // put your main code here, to run repeatedly:

digitalWrite(9, HIGH);
Serial.println("ON");
delay(700);

digitalWrite(9, LOW);
Serial.println("OFF");
delay(4000);
}
void setup() {
  // put your setup code here, to run once:

pinMode(9, OUTPUT);
Serial.begin(9600);
}

void loop() {
  // put your main code here, to run repeatedly:

analogWrite(9, 200);
delay(2000);

analogWrite(9, 0);
delay(200);
}
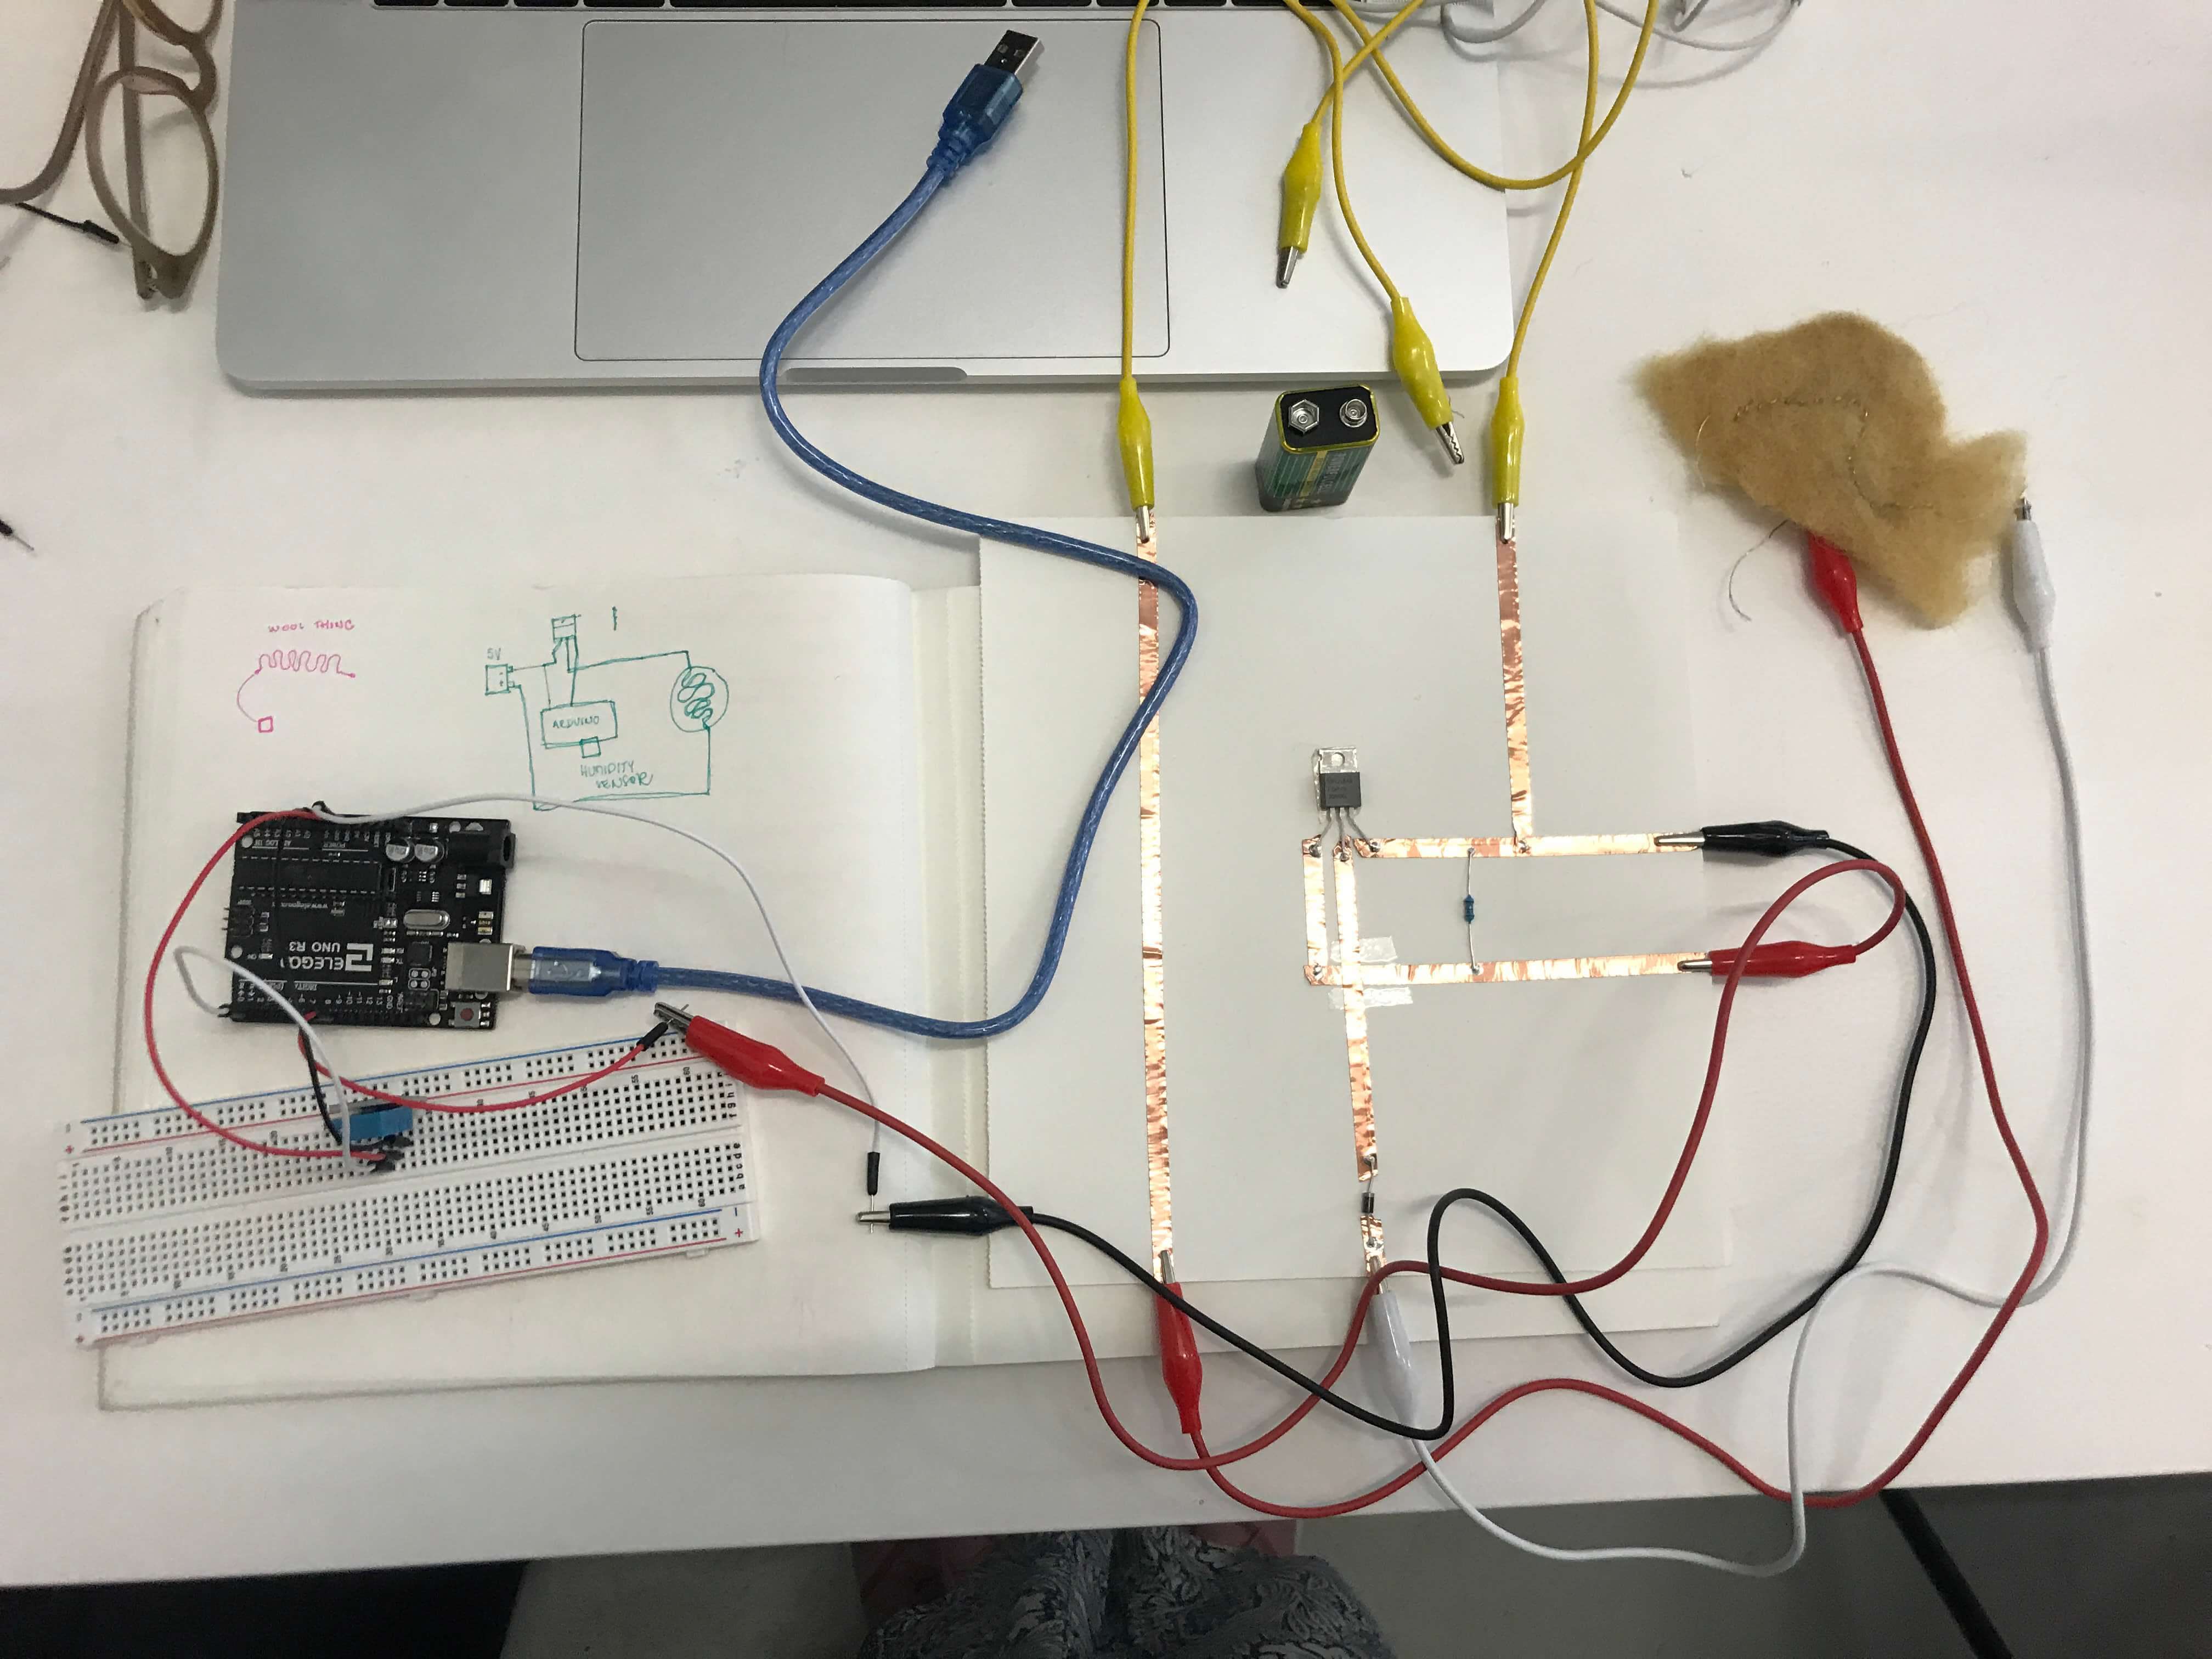
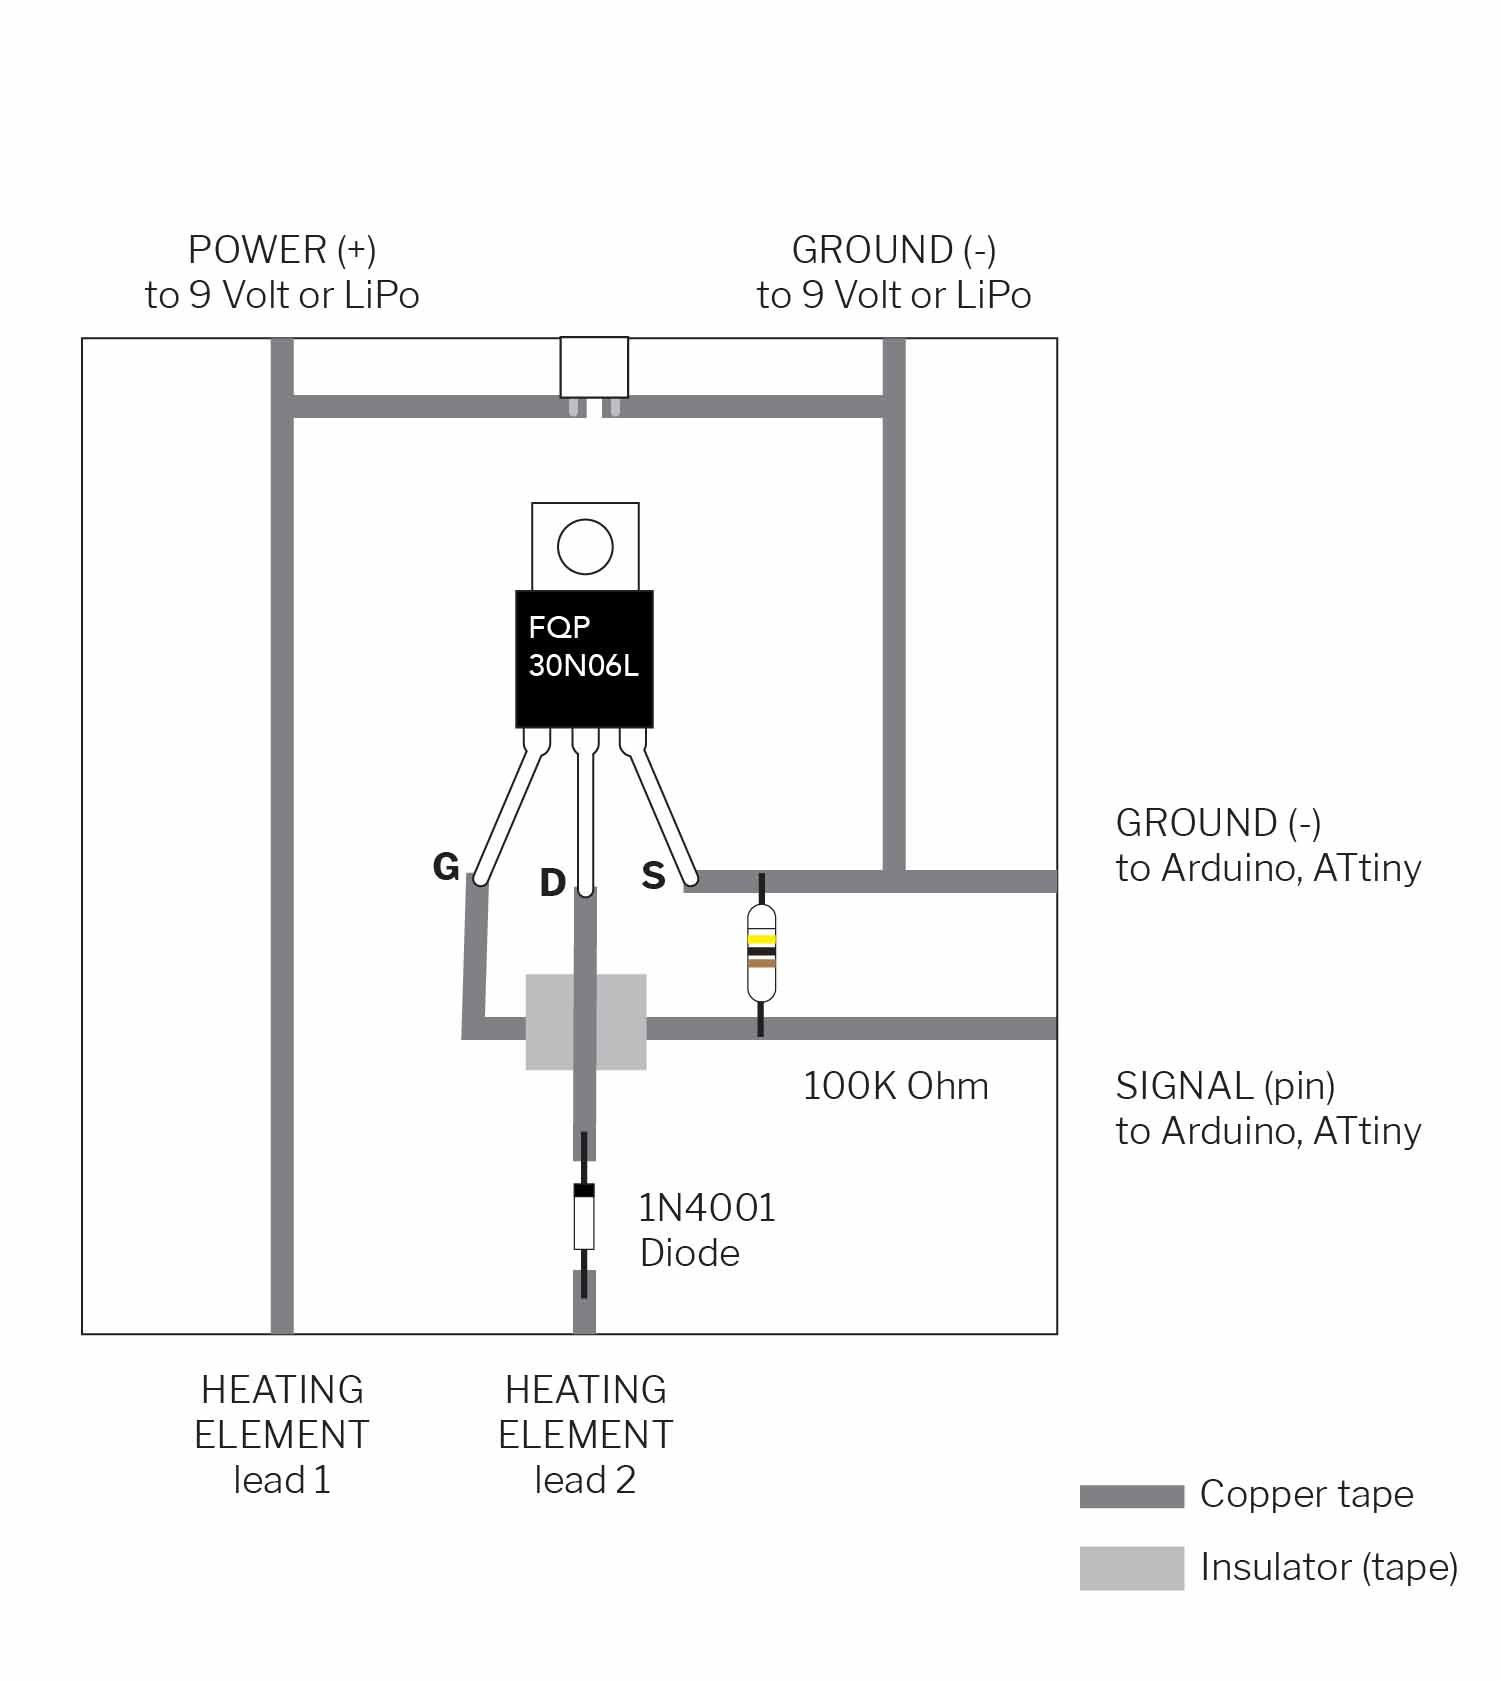
HEAT CONTROLLING - DIAGRAM
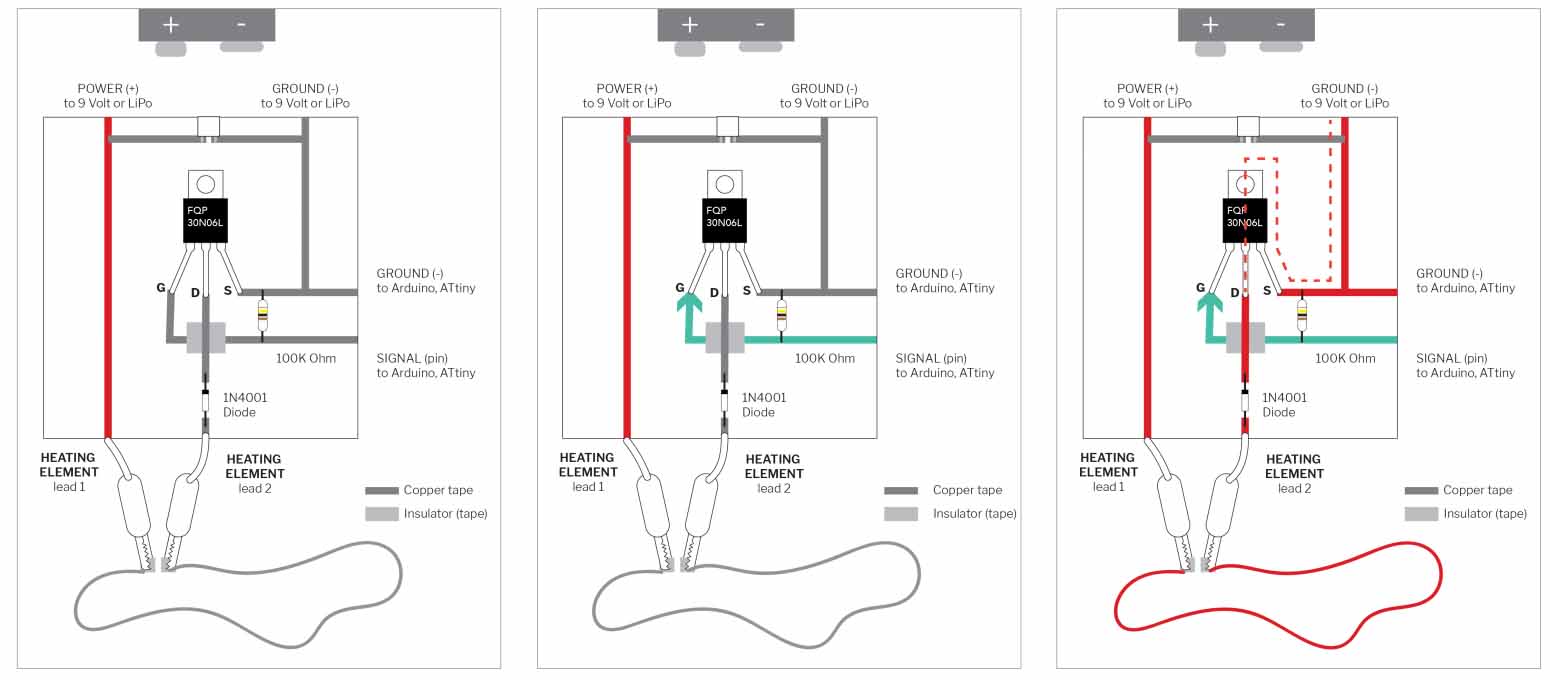
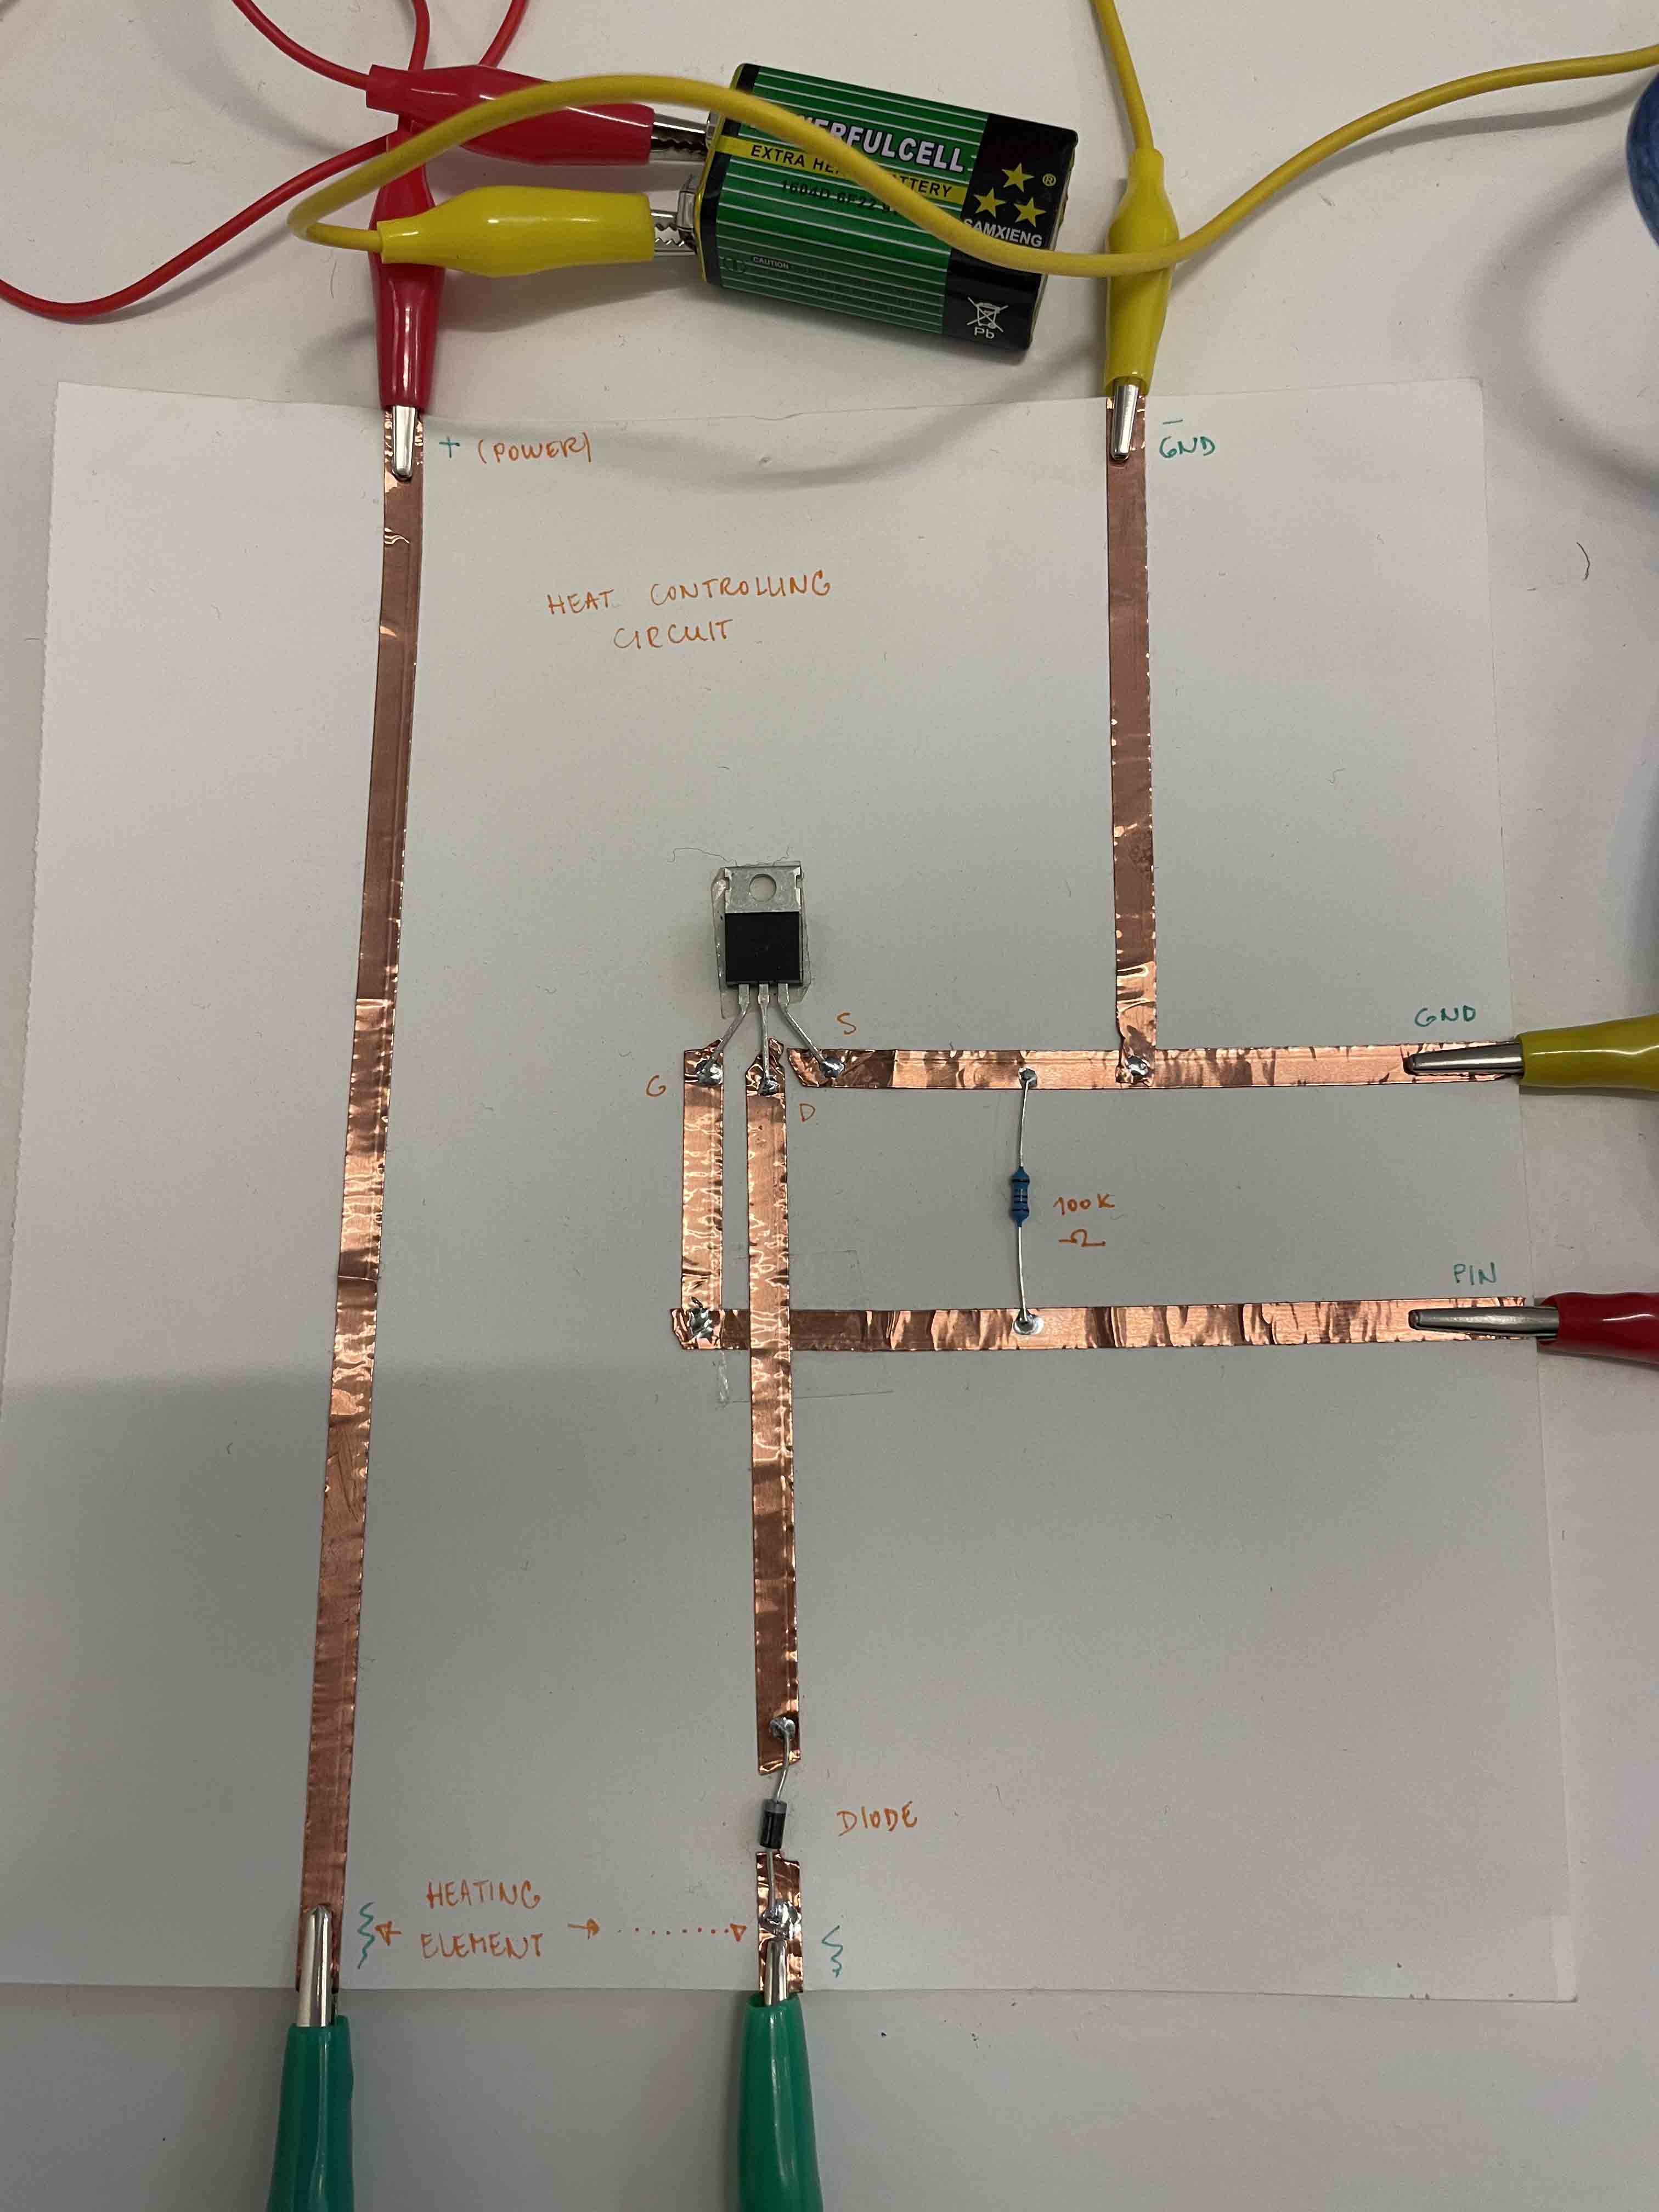
PROCESS
CONCLUSION
It didn't work 100%. In my opinion, the mistake was to make a felt process after dyeing with thermochromic pigment. Next time, the wool must be felted first and then dyed. In this case, the fibers are not connected and the preheating effect is almost invisible. I did not see any effect on the fibers during needle felting. Unlike wet felting, the change was visible due to the hot water.
REFERENCES
- Thermochromic tests by Liza Stark
- Thermochromic tests (YTB) by Liza Stark
- Heating Circuits for Thermochromic Inks by Liza Stark
| SHEMAKES - INTERACTIVE MONSTER |
MATERIALS
| N. | Material name | Quantity | Source |
|---|---|---|---|
| 1. | LED Light (4 legs) | 1 | UNO R3 Kit |
| 2. | Velostat | 1x 10x50 mm | Fab Lab BCN |
| 3. | Battery 3 V | 1 | Fab Lab BCN |
| 4. | Copper / Conductive tape | 10x stripes | Fab Lab BCN |
| 5. | Goma Eva | 2x 50x80 mm, 1x 10x50 mm | Fab Lab BCN |
| 6. | Textile (for example: felted wool) | - | Fab Lab BCN |
PROCESS
- Cut two pieces of Goma Eva cca 50x80 cm and 4 slices of the copper or conductive tape - cca 8 cm long.
- Each piece of the copper tape will belong to one of the legs of the LED light. And only one of them will be connected to the battery.
- Stick three of the slices to the cutted piece of Goma Eva and fold the ends of the tape on the otherside of the base. Fix it with a plastic tape.
- Pierce the rubber in the four places where you will put the light. Each hole is for one foot LED light.
- Stick the fourth piece of the copper tape to the longest leg of the LED light and to the place for the battery. Add one other piece of copper tape to make sure it will not move.
- Repeat it again for the each leg of the LED light.
- Cut another small piece of Goma Eva for a battery holder. You can picture it as a kangaroo belly.
- Place the battery on top of the cutted piece - (+) facing upwards. With the copper tape fix it to the previous piece of Eva with the LED light. Place it on the middle of the shape.
- On the top of the battery place a piece of Velostat - the same size as was the second Goma Eva. Fix it with plastic tape on the sides.
- Fold and roll the bottom part upwards.
- With the other textile you can create a shell for the part you just did.
- Whole tutorial with pictures can be found here - Tutorial by Nuria Robles, Fab Lab León
RESULT
