Week 02 | Digital Bodies
Week 02 Goals:
- Usa a 3D scanner
- Learn the basics of Rhino
- Use Slicer to make laser cut files
- Learn to use laser cutter
- Build 3D model
Inspiration
1|Alison Martin, 2|Clara von Zweigbergk, 3|Anna Kruhelska, 4|Uauproject, 5|Phil Cuttance, 6|Alison Martin, 7|Phil Cuttance, 8|false face, 9|Jovaney, 10|get it studio, 11|Katy/Katrinkles, 12|36daysoftype
3D Scan
We took a field trip over to the next fjord to visit the Sauðárkrókur Fab Lab to learn how to 3D scan and get a tour of the facilities we will be able to use for future projects.
There was a lot of trial and error in learning how to properly scan each other. First with needing to wear light colored clothes, then to make sure the scanner wasn't too close or too far away, and going slow enough, but not too slow when scanning. The scanner did best when focusing on one's upper body, but the moment it tried to scan one's head it would loose track and result in some interestig disformities. We found more space and artifical light with a contrasting background helped have a better scan.
Here is my 3D scan after I cleaned it up a bit in Rhino:
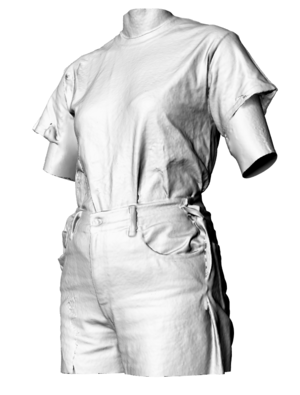
It was so cool to see how much detail was picked up with the scanner.
Make Human
After a wonderful tutorial by Diane, I was able to make a model in Make Human to bring into Rhino and slice up.
For the model above I used polylines to then meshslice the model to remove its extremities and end up with a bust.
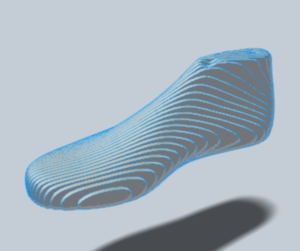
3D Model
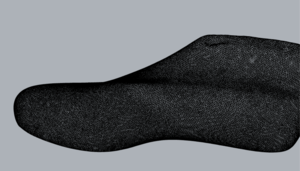
For a while now I have been wanting to have a shoe last to play around with my knit swatches and found objects. And so I found a shoe last on Thingiverse
I downloaded the .stl for it and brought it into Rhino to scaled it to a W38 or 235mm
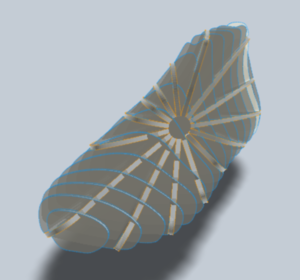
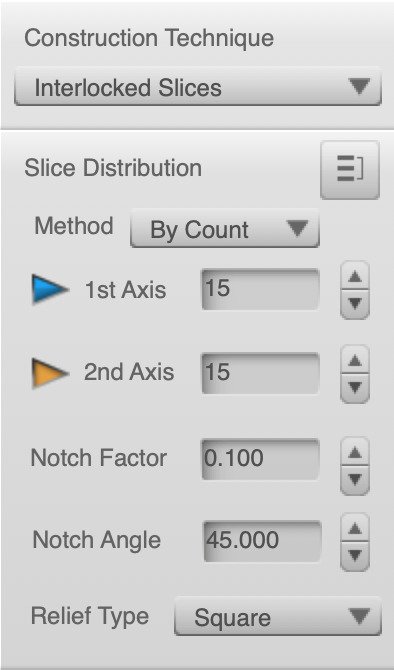
And then I brought it into Slicer to play around with different slicing options:
Round 1
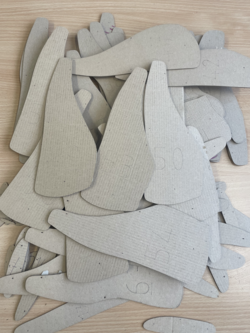
I made my laser cut file in illustrator after exporting a PDF of my plans from Slicer and made custom artboards to fit all the pieces to the varrying sizes of cardboard I had. However, because I had many samll pieces of cardboard I was cutting, that ment I had many artboards. And in the laser cut program that ment realigning each art board when it was time to cut it.
Below are the laser settings and pile of cut pieces:
Cardstock Etching Settings:
Speed: 100
Power: 10
Frequency: 10

Cardstock Cutting Settings:
Speed: 70
Power: 40
Frequency: 10
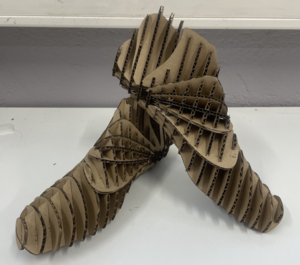
Below are the top and front view of the final assembly:
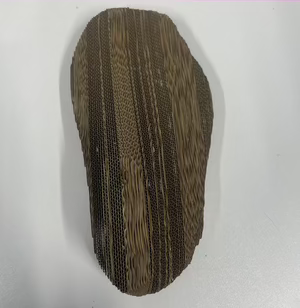
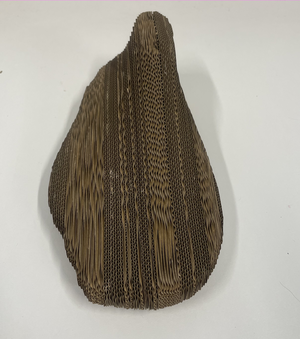
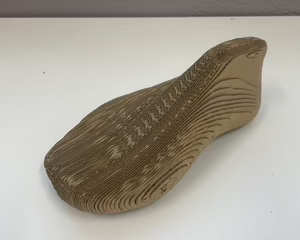
Round 2

I did a second round with innerlocking pieces after the proportions of the first attempt didn't work out that well. In my laser cut file I was able to fit both the left and right feet into the material I would be cutting with. To make the other foot I selected all the pieces, copied/pasted them, and then mirrored them.

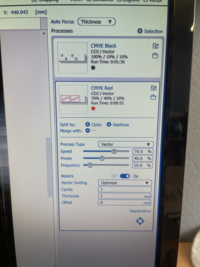
Cardboard Etching Settings:
Speed: 100
Power: 10
Frequency: 10
Cardboard Cutting Settings:
Speed: 60
Power: 40
Frequency: 10