Final Process
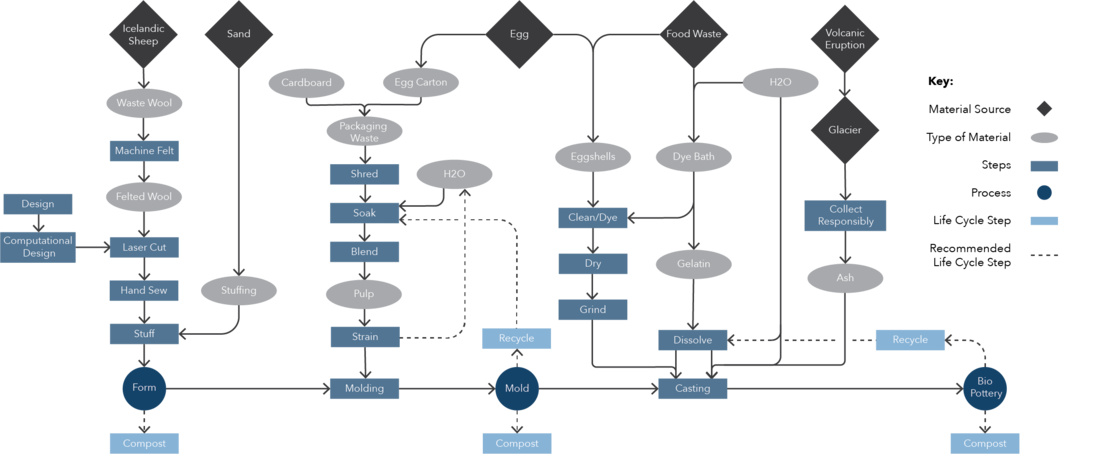
The final process I followed when making the final pieces.
Materials | Tools | Machines
Though I was based at the Textile Lab in Blöndúos for the making of my final pieces, my process is adaptable to the nomadic creative. Below is the list of materials, tools, machines, and the costs of the materials and tool I personally had to purchase in addition to what the fees for using the TextileLab's machines would've been.
Materials
Materials
- Eggshells
- Gelatin
- Ash
- Cardboard
- Paper pulp
- Baking Soda
- Wool
- Yarn
- Sponge
- Scissors
- Tape
- Sand
Bill of Materials
| Item | Price in ISK | Quantity | Price | Sourced |
|---|---|---|---|---|
| Eggshells | free - 659ISK/10 egg carton | 1.7KG | NA | Kjörbúðin, Blöndúos |
| Gelatin | 159ISK/17g | 230g | 2150ISK | Kjörbúðin, Blöndúos |
| Cabbage | 489ISK/KG | .755KG | 369ISK | Kjörbúðin, Blöndúos |
| Ash | 750ISK parking fee | 2 | 1500ISK | Sólheimajökull |
| Wool | 1500ISK/KG | 1KG | 1500ISK | TextileLab |
Tools
Tools
- 2+ burners
- at least 2 pots, 1 big and 1 smaller
- Drying rack
- Oven or dehydrator
- Freezer
- Funnel
- Spoons
- Scale
- 2 Bowls
- 2 Cups
- 1 small container
Bill of Tools
| Tool | Price in ISK | Quantity | Price | Sourced |
|---|---|---|---|---|
| Hand Mixer | 1995ISK | 1 | 1995ISK | ELKO, Kópavogi |
| Coffee Grinder | 5895ISK | 1 | 5895ISK | Reikingur, Kópavogi |
| Scale | 2390ISK | 1 | 2390ISK | IKEA, Garðabær |
| Strainer | 295ISK | 1 | 295ISK | IKEA, Garðabær |
| Sponge | 295ISK | 1 | 295ISk | Reikingur, Kópavogi |
Machines
Machines
- Carding Drum
- Felting Loom
- Laser Cutter
Machine Fees
| Machine | Price in ISK | Time | Price | Lab |
|---|---|---|---|---|
| Laser Cutter | 1000ISK/HOUR | 1 HOUR | 1000ISK | TextileLab |
| Felting Loom | 500ISK/HOUR | 3 HOURS | 1500ISK | TextileLab |
Form Development
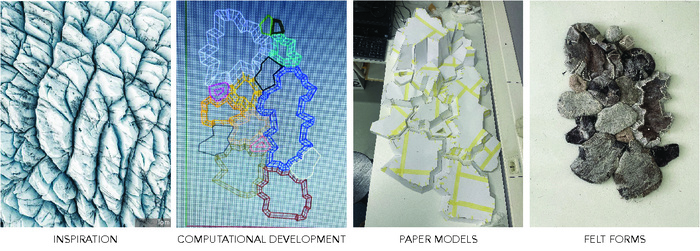
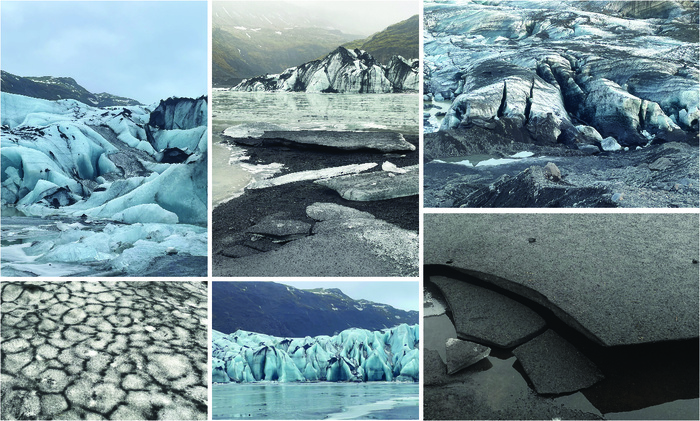
Inspiration
Iceland's ashy glaciers were my source of inspiration for form, material, and storytelling. The desire to create a dish set came from wanting my pieces to embody objects that are "used" in a communal, but intimate space like when you share a meal with someone. Also how dishes are a type of vessel or resevoir like glaciers are. For more information about Iceland's glaciers and volcanos to go my Research section.
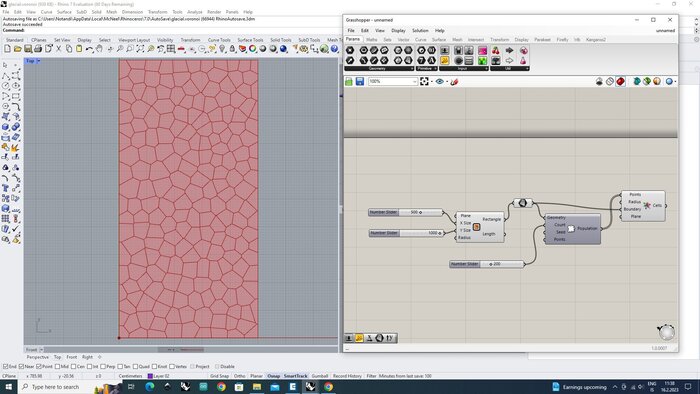
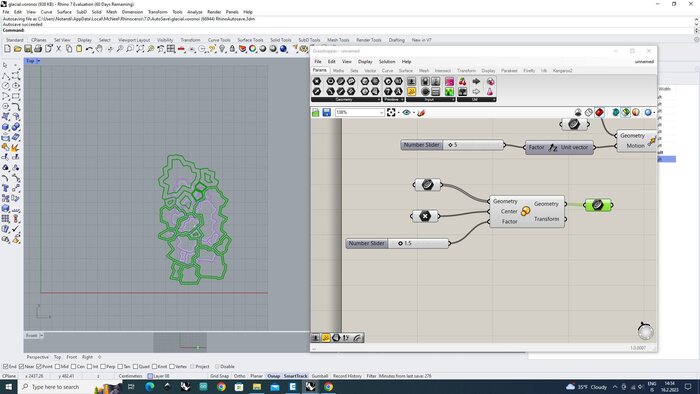
Computational Form
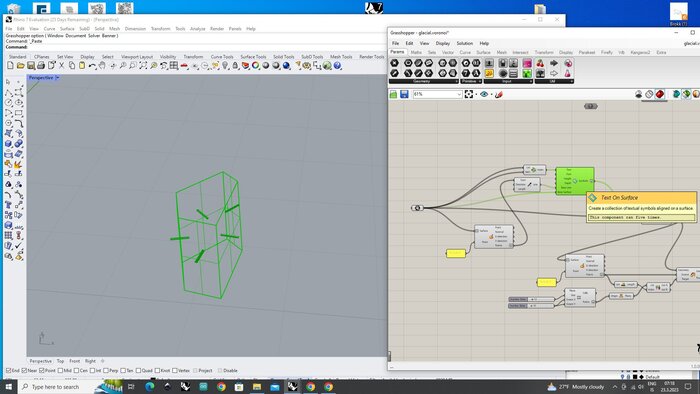
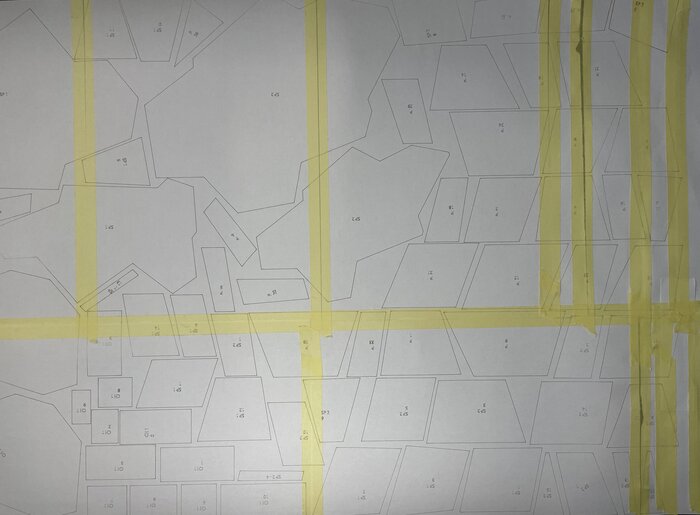
The crevases of Iceland's glaciers intrigued me the most and were the the basis for creating my dish set computationally with Rhino/Grasshopper and Illustrator.
Below is the definition I made with the help of this Veronoi Youtude Tutorial:
After creating the voronoi pattern I took a screenshot of it and brought it into Illustrator to "join" the veronoi shapes into the puzzle like dish set I had the goal of making:
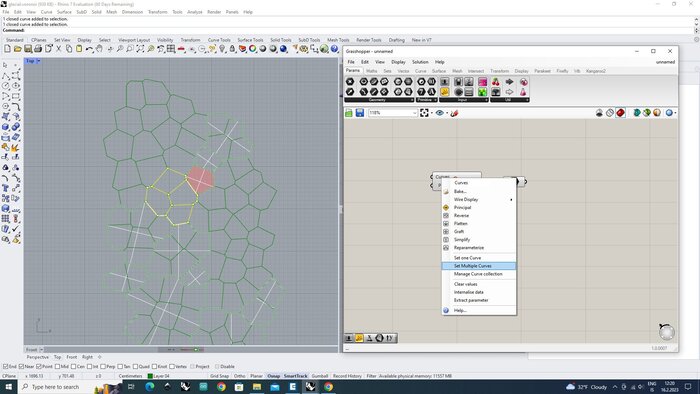
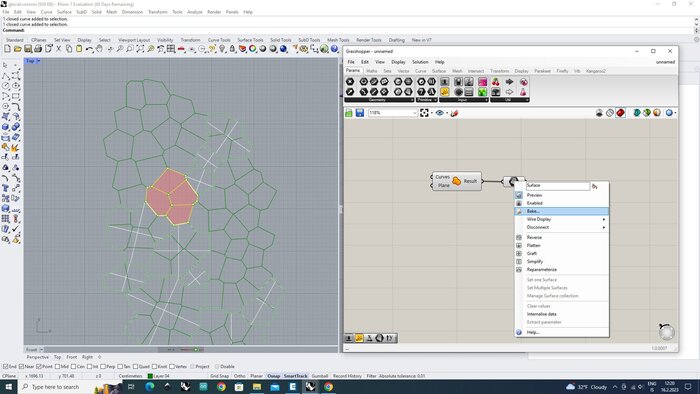
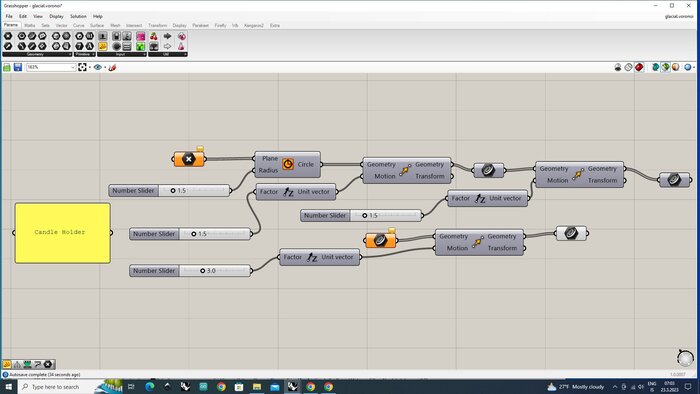
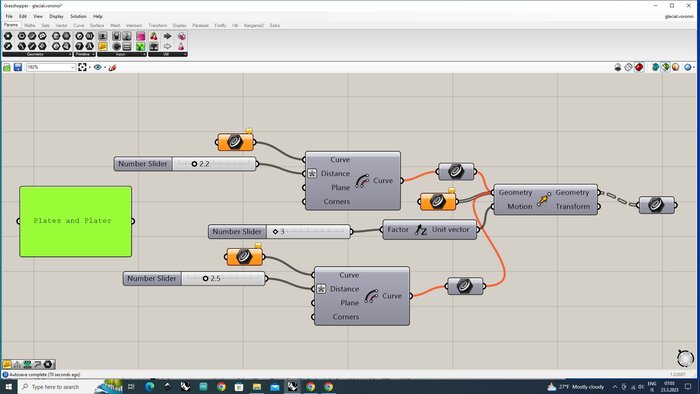
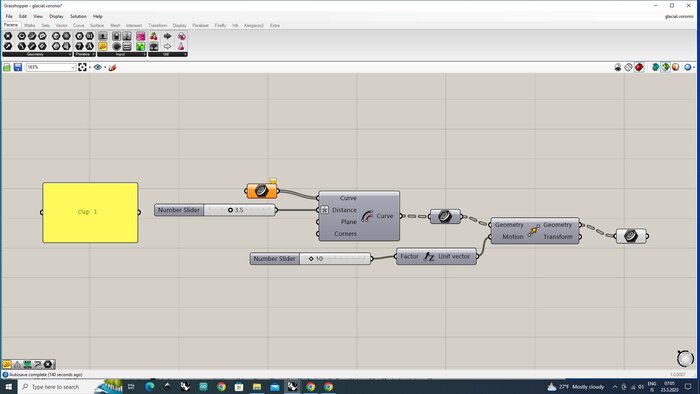
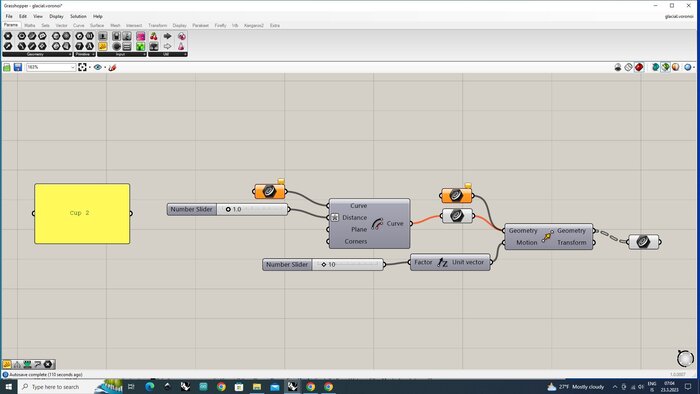
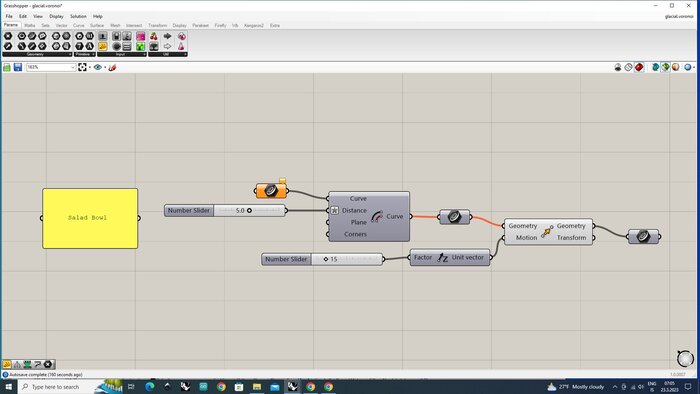
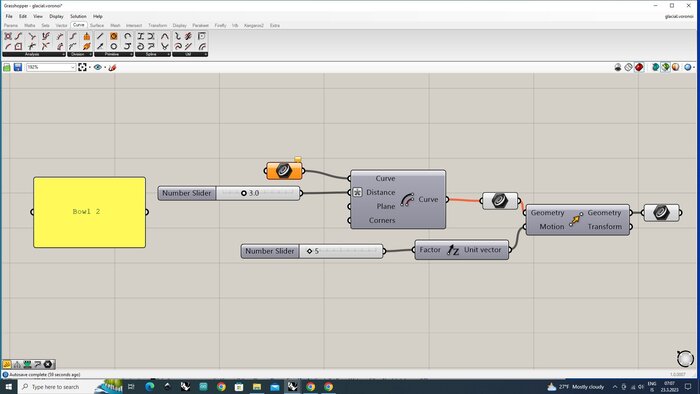
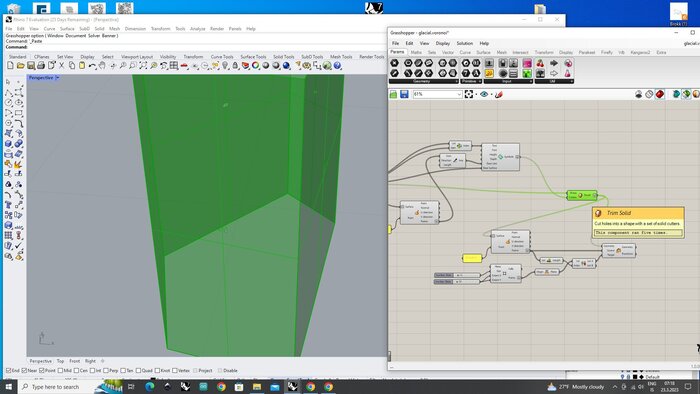
I then brought the file back to Rhino and used Grasshopper to join the voronois with the below definition:
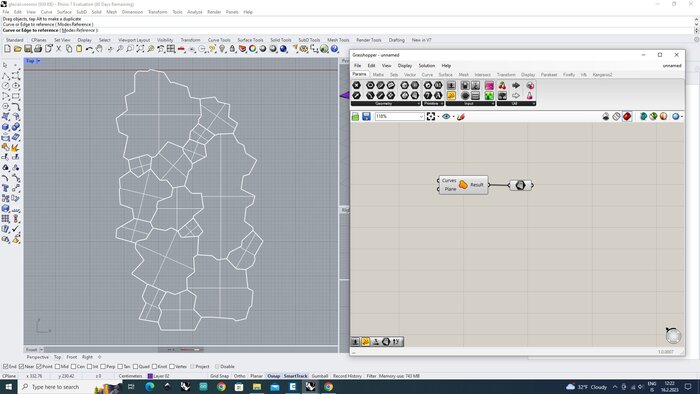
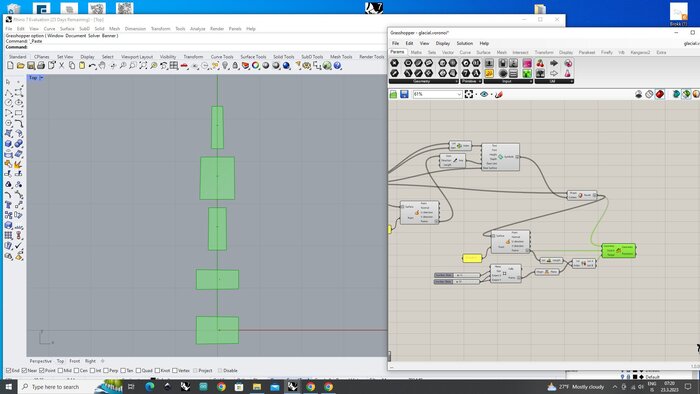
I then scaled the curves to the size I wanted my final pieces to be:
After copying the curves I offset them and moved them to have the depth I wanted for each dish piece:
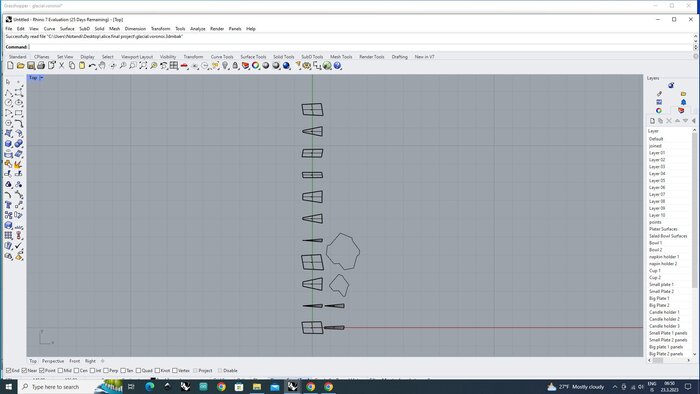
In Rhino I then traced the curves/panels of the pieces.
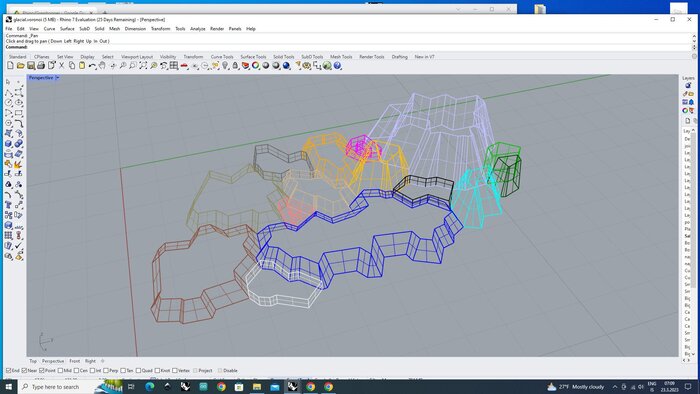
After the curves/panels were made I labeled and unfolded the panels to make the individual pieces to laser cut.

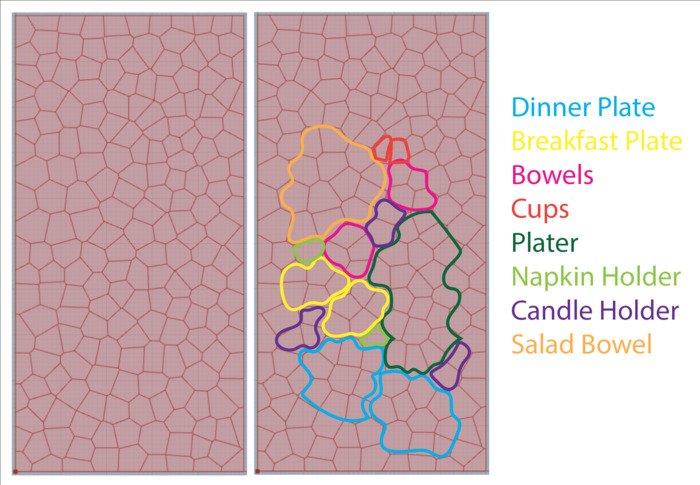
From Rhino I reworked the PDFs in Illustrator to have them with the correct line weight and color for laser cutting the paper and felt pieces. I also added lettering for each dish to help with organizing the pieces once cup.
  Dish Set Labeling:
  BP - Big Plate
  SP - Small Plate
  P  - Plater
  B  - Bowl
  SB - Salad Bowl
  C  - Cup
  CH - Candle Holder
  NH - Napkin Holder
In hinde sight I should've made the lettering be more different as when it was etched on to the felt it was pretty hard to read and distinguish between S B and P.
The individual dishes and Rhino/Grasshopper files can be found HERE
Trying Clo3D
To help visualize the forms in digitally I tried modeling them in Clo3D, but failed miserably and didn't give myself the time to troubleshoot. Below is my sad attempt at "sewing" the panels together.
Paper Models
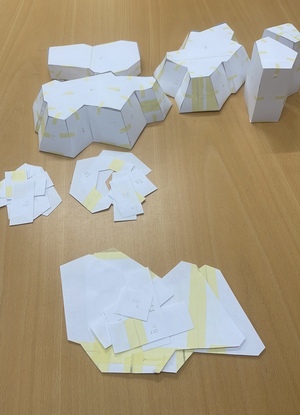
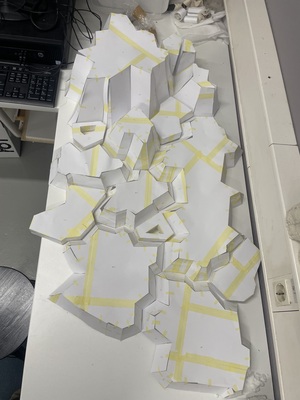
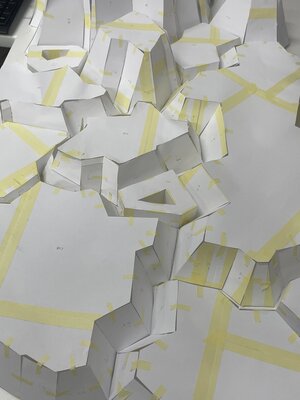
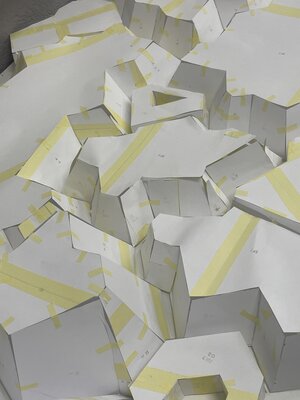
To get an understanding of the amount of felt I would need and the overall physical scale of the pieces I made paper models of all the pieces of the dish set.
We didn't have large enough sheets of paper to fit the whole lazer bed and so I cut and taped together sheets of A4 paper to make bigger sheets to laser cut out.
The files for the laser cutting the paper models can be found HERE
  Paper Laser Etching Settings:
  Speed: 100
  Power: 1
  Frequency: 2
  Paper Laser Cut Settings:
  Speed: 100
  Power: 10
  Frequency: 10
Assembling and assembled:
Felt Forms
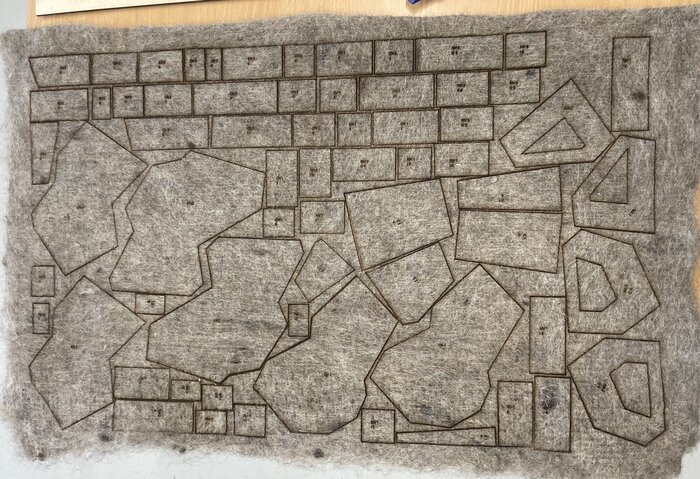
After having a good idea of how much wool I would need to felt with the paper models I got started on felting 7 laser bed sizedish panels. The wool I used was from the TextilLab as it was most convient for timing. However, I would've liked to have used waste wool, but due to the timing of the project, end of winter shearing didn't take place until mid March. I also would've have had to wet felt instead of machine felt resulting in a longer more labor intensive processes.
Before laser cutting the felted wool panels I did a test swatch to determine the correct settings for etching and cutting.
The test file can be found HERE
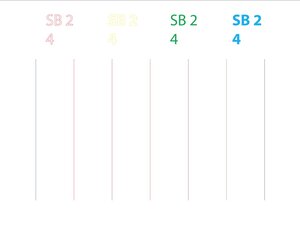
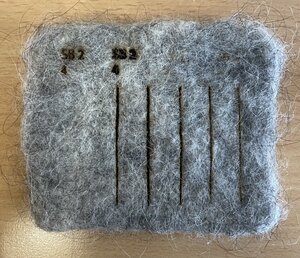
Wool Swatch Etching and Cutting Settings Test:
| Color | Speed | Power | Frequency | Result |
|---|---|---|---|---|
| RED SB2 4 | 100 | 30 | 10 | Ledgible |
| YELLOW SB2 4 | 100 | 50 | 10 | Not Ledgible |
| BROWN | 100 | 50 | 10 | No Cut |
| GREY | 70 | 50 | 10 | No Cut |
| PURPLE | 50 | 50 | 10 | No Cut |
| ORANGE | 40 | 50 | 10 | No Cut |
| RED | 30 | 50 | 10 | Yes Cut |
With the setting figured out I was able then able to make the correct files to fit with in the felted wool panels.
  Felted Wool Laser Etching Settings:
  Speed: 100
  Power: 30
  Frequency: 10

  Felted Wool Laser Cut Settings:
  Speed: 30
  Power: 50
  Frequency: 10
The files for laser cutting the felted wool panels can be found HERE
The hand sewing of the forms took a lot longer then anticipated. I tried sewing in the car, but the smell of the laser cut wool made me car sick. Then there was needing the paper models as reference for the orientation and placement of some of the pieces as the labeling of many of the pieces wasn't very ledgible. I also had to be mindful to keep a slit open to be able to fill it with sand.
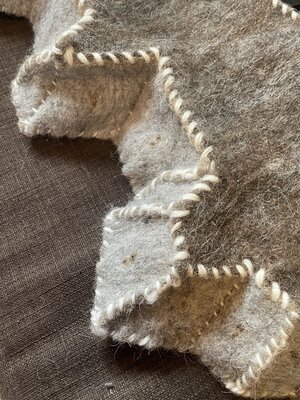
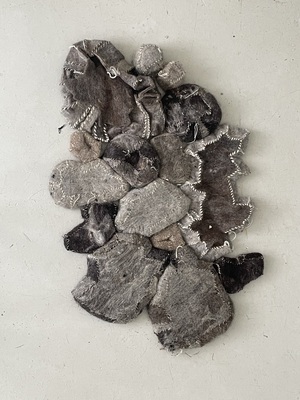
Left: Sewn Plater, Right: Sewn and Sand Stuffed Dish Set
Mold Making
The mold making process was a time consuming, labor insentive, but meditative part of the whole process. It involved paitence and intimate interaction with the paper it its recycling and mold making process.
Pulp
I didn't do the math before hand, so I had no idea how much recycled paper pulp I was going to need. In total I probably used the equivalent of about 20 wine boxes worth of paper and cardboard to make all the molds I needed.
When testing the nomadic part of my research down in the South East of Iceland at my boyfriend's apartment I was fortunate to have some assistance in shredding the paper and cardboard down.
Preparing the pulp for the mold making involved ripping or cutting down the paper/cardboard and then letting it soak in warm water or over night to then get blended up with a hand mixer.

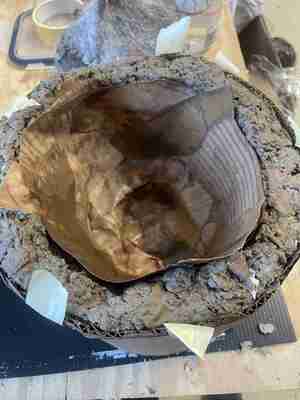
Mold
Making the molds is maybe my favorite part of the process as it involves getting very intimate with the pulp from is soggy wet state, to wringing it out, and then compacting and pressing it. It's like working clay in some sense, but with a lot of different characteristics and properties.
To make the mold it needs a frame to support itself while its being made. I used excess cardboard to make my frame to press the paper pulp into and around the stuffed felted form. With the cardboard frame I was able to customize the frame to control the wall thickness of the mold more. I wring the water out of the pulp by placeing cup fulls of it in a strainer and letting the excess water drip down into a bucket as I press it into the strainer. The water can then be collected and reused to soak more pulp.
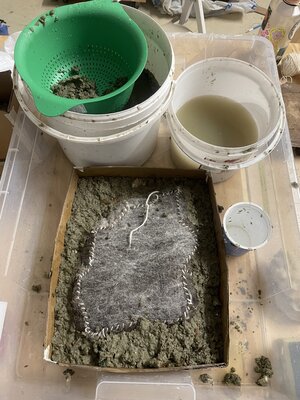
The felt form is placed bigger end down, then covered and compacted with the pulp. Another piece of cardboard is then used to help flip the mold over. The bottom panel that has now become the top is removed so that the felted form can be taken out of the pulp mold.
The mold is then linned with strips of cardboard paper (the outside layers of the cardboard) and gently pressed into the mold so it can freeze without any holes or gaps.
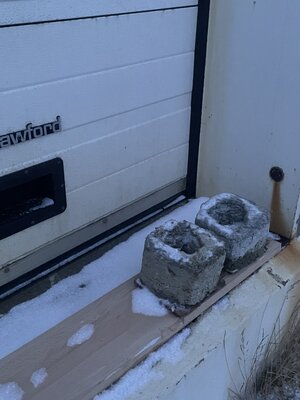
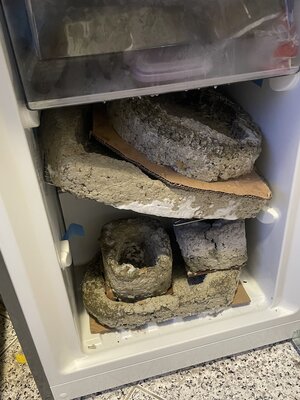
Since it has been below freezing outside for the past few weeks I have been putting my molds to freeze outside. It was funny to find snow in them, but all I had to do was brush it out. I would then brind the ones I would be casting into the kitchen and in the freezer so I would have quicker access to them.
Casting
Casting was probably the most intense part of the process as it was all very time and heat sensitive, but each casting was a learning opportunity and created some beautifully unexpected results. Gauging the amount of material that is needed for a casting is still something I am testing out at having a more reliable formula as there are many factors that change the biomaterial qualities as you scale up. But a way to get an idea of how much material you'll need is to work backwards essentially and fill the mold with water on a scale to dictate how much liquid it holds. Then use that as a reference to how much volume the mold holds for a casting. This is just the theory of what can be done, as the few times I have done it like this I used it as a reference for how much water to use and had way too much to pour with which ended up going into a recycling cup. But with more tests on the volume of the bio material itself will help with better calculations and effeciency with ingredients.
Eggshell Prep
The eggshells I collected throughout the research of my project came from donations from the Textile Residency, the Blönduós community, Húnabúð Cafe, Cafe Vatnajökull, Framhaldsskólinn í Mosfellsbæ, and my own consumtion of eggs. The eggshells used in this process where the white ones as they could be dyed in the cleaning process.
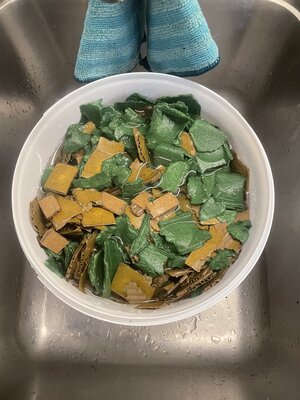
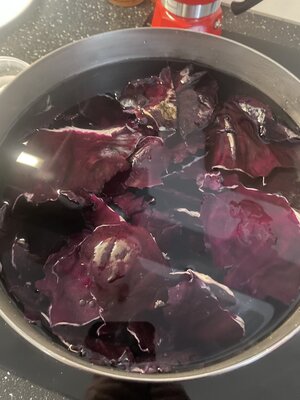
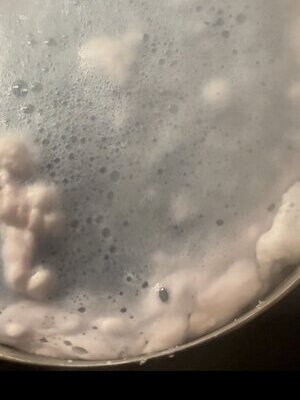
Cleaning
The cleaning process of the eggshells also happened to be the dyeing process for them too. In a big pot I put 4 big leaves of cabbage and filled with tap water. The water quality here is basic enough to turn the water blue as it gets to a boil. After the desired blue shade is achived remove the cabbage skins and add in the eggshells to boil for 15 minutes. Optional, but not what I did, you can remove the inner skin of the eggshells as it is what carries Salmonella. I didn't do that as my pottery pieces wouldn't be eaten off of. After a good 15 minute boil pour the eggshells into a strainer and shake to remove any excess water.

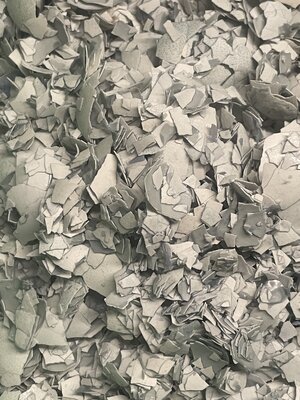
Drying and Grinding
Drying the eggshells were done in 2 different ways; the dehydrator and the oven and resulted in different colorations of the eggshells. The dehydrator was the most reliable for consistent colors, But due to it being over used in the studio it wasn't working as well.
| Machine | Temperature | Time | Results | Notes |
|---|---|---|---|---|
| Dehydrator | 70C | Overnight | Clean | Thinner layer of eggshells on tray worked best |
| Kitchen Oven | 200C | 30min | Discolored | Mix eggshells on tray every 10 min to avoid burning |
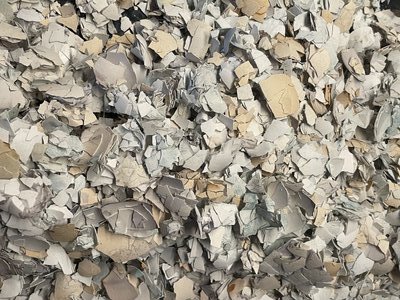
After drying the eggshells, they need to ground down into a fine powder with a coffee grinder.
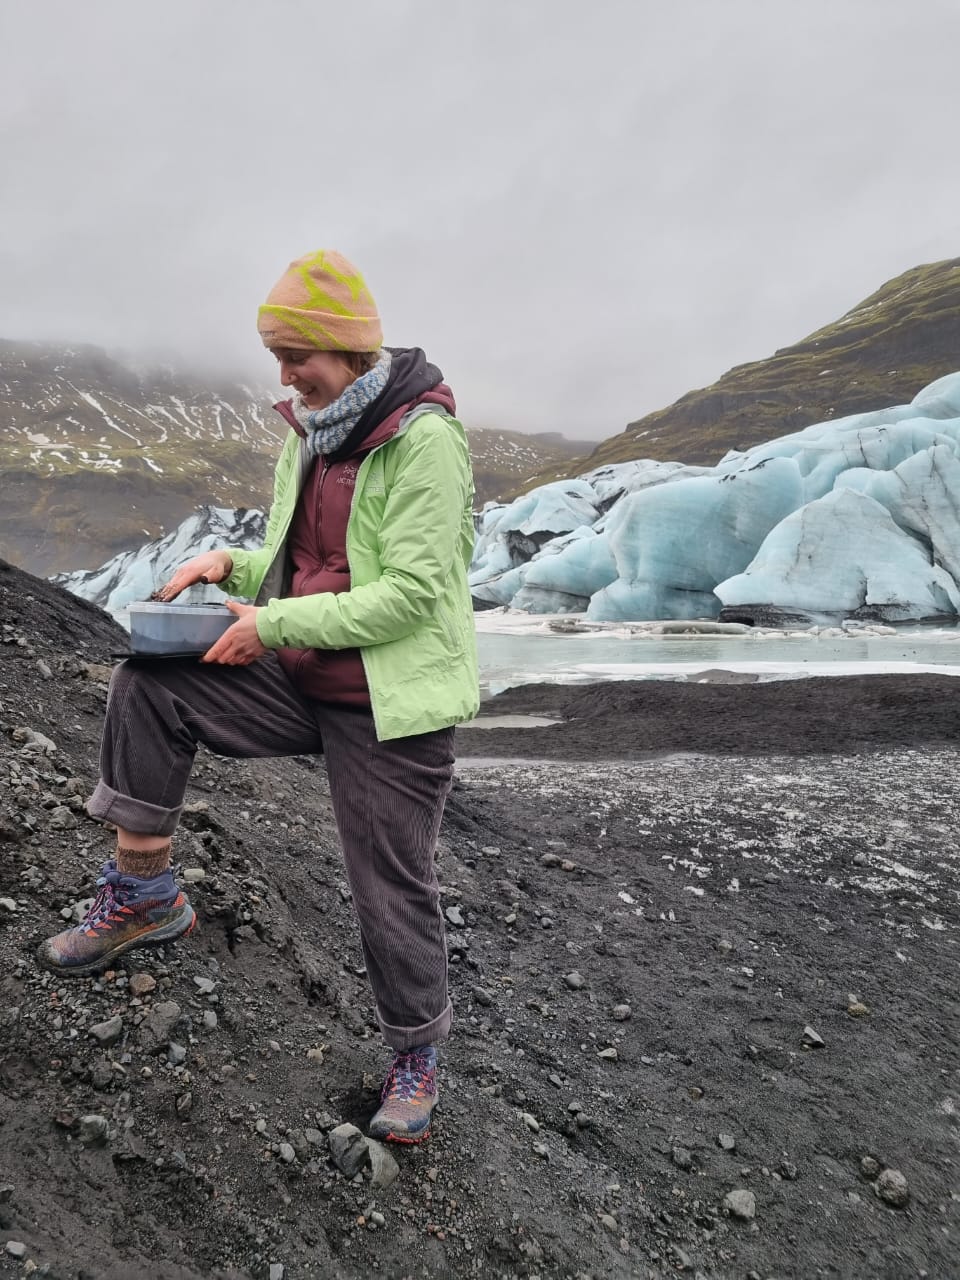
Ash Collecting
The ash was collected from Sólheimajökull in the South of Iceland. I had brought some used ice cream containers to fill with ash and only took about what I knew I would need. I made a point to collect the finer ash as I wanted to skip the step of needing to grind it down. For more information on Iceland's ash go to my Research
Recipies
There's a bit of multitasking that happens when preping and pouring the casting. I would recommend making the dye bath first along with the Ash Bio-Materail. Once the dye bath is ready it should be pretty quick for the gelatin of the Eggshell Bio-Material is melt as the Cabbage bath water will be warm. Also these recipes are only enough material to pour and cast 2 cups, 2 small plates, and 2 bowls as that's all the eggshells I had.
Make dye water:
Ingredients
- 1 pot
- 3-4 Leaves of purple cabbage
- 1L of tap water
Process
- Add 1L of water and purrple cabbage into pot
- Bring to boil
- Let sit until ready to use later
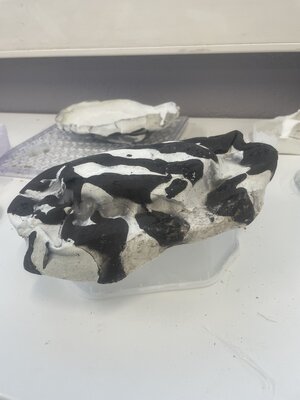
Ash Bio-Material:
Ingredients
- 30g Gelatin
- 180ml H2O
- 750g Ash
- 1 Pot
- 1 Spoon
Process
- Add ml of water and g of gelatin into pot
- Set the stove top to low heat
- Let gelatin disolve fully
- Add Ash and mix thoroghly
- Remove molds from fridge
- With spoon scoop and pour bio-material into molds and create desired pattern
- Set patterned mold aside until Eggshell Bio-Material is ready to pour for casting
Eggshell Bio-Material:
Ingredients
- 200g Gelatin
- 1200ml Cabbage Bath H2O
- 1700g Eggshells
- 1g Baking Soda
- 1 Pot
- 1 Spoon
Process
- Add ml of cabbage bath water and g of gelatin into pot
- Set the stove top to low heat
- Let gelatin disolve fully
- Add 1g baking soda to pot
- Mix until solution becomes blue again
- Add Eggshells
- Mix thoroghly
- Pour Bio-Material into mold
- Let sit for 5 minutes
- Pour excess Bio-Material into another mold
- Let sit for 5 minutes
- Pour excess into pot and save it to be recycled later
Demolding
After the casting has sit for about 30 minutes you should be able to pull the paper linning out of the mold. At this point the bio-pottery is still pretty fragil so handle with care. Use cups padded with a towel to support the casting so you can peal off the paper.
Drying
After removing all the paper strips. Let sit in a well ventilated space on a drying rack. Flip over after 1 night to allow even drying of the piece.
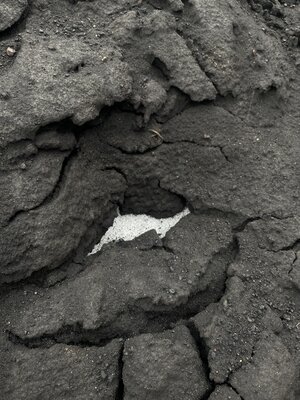
I had some particulary thick areas in my castings so they cracked as they dried. The temperature also fluctuated a lot in the room they were drying in as it would get very warm during the day and cool off during the night.
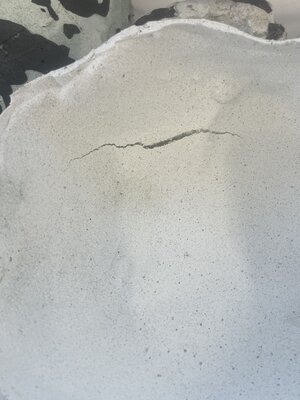
Left: Drying, Right: Crack in Bowl
How To Booklet
There was some weird reformating that happened when I put my PDF into Canva. For the correct version of the PDF click the link below.
Glacial Bio-Pottery.pdf by Alice Sowa