Week 09 | Textile Scaffold
This week was a fun exploration and manipulation of form. I didn't fully understand what the week would entail being called textile scaffold, but after the first presentation got very excited and my ceramics background was very happy to be of use this week. There have been many 3D form techniques from different creatives that I have been wanting to try to understand and enjoyed scratcing the surface of beginning to experiment with them.
Inspiration
I have been following a lot of creatives practicing many different techniques that fall under the textile scaffolding category, but narrowed it down to the one's I have found most inspirational and inspried my exploration of form this week.
Esna Su
Esna Su sculpts knit hand cut pieces of leather with water and objects of importance. Her work fascinates me in how elegant and dynamic her sculptures turn out and her use of color to emphisize and transform the forms.
Mimmi Blomqvist
Mimmi Blomqvist is a ceramist that merges concepts of utilitarian objects and sculpture into common design. I only recently discovered Mimmi Blomqvist thanks to Louise and have been fascinated by her use of textiles to create form for slip casting porcaline.
Cameron Luft
Cameron Luft is an artist that explores the phenomenon of crafting objects with "trash" to make work that takes on a life of their own to challenge the contradiction between what is discarded and what is desired. Cameron Luft's work really resonated with me in the humor he brought into his work, but also the resourcefulness and dynamic forms he has created.
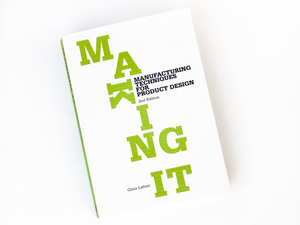
Making It: Manufacturing Techniques for Product Design
During my Industrial Design studies at MassArt we took a class about manufacturing practices and refered to the book Making It: Manufacturing Techniques for Product Design by Chris Lefteri. It is a nice book that talks about the many different manufactering techniques with a lot of visual support. This article gives a good overview of the book.
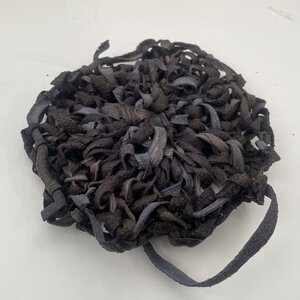
Gravity Mold
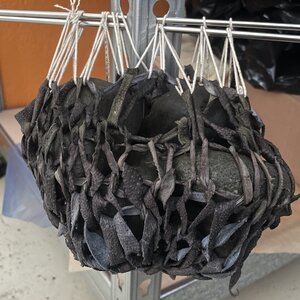
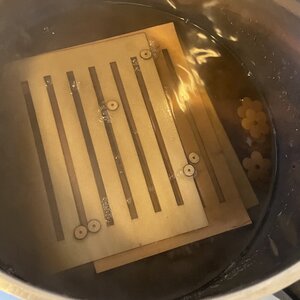
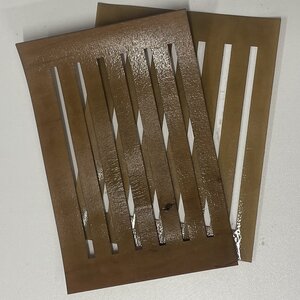
Inspiried by Esna Su's work, I found some fish leather laser cut scraps to cut into a "yarn" to knit a form. I cut the "yarn" using the below guide as the cutting pattern rather then cutting along the perimiter of the material like Esna does to make her "yarn". For soaking the fish leather, I igornatly pouring boiling hot water over the knit form which causeed it to shrink more then 50%. However, with the use of some rocks outside I was able to stretch it out and get a molded fish leather knit form. I had knit the "yarn" in the round with needles that were way to small and so the next time I attempt this technique I will use larger needles, knit a flat piece were I manipulate the increase and decrease for the form and use cold water to soad the knitting in.

Materials
- Fish Leather Scraps
- Scissors
- Knitting Needles
- Scrap Yarn
- Heavy Rocks
- Pot
Process
- Collect fish leather scraps
- Use the reference template to dictate how you will cut the fish leather scraps
- Knit fish leather "yarn"
- Soak the knitted "yarn" in cold water (hot water will cause it to shrink)
- Remove from water after its become fully saturated
- Fill with heavy rock
- Tie up to hang dry with scrap yarn
- Let dry overnight
- Remove scrap yarn and rocks
- Est Voilà!
Fabric Mold
Inspired by Mimmi Blomqvist work of casting fabric forms, I played around with making "3D quitls" to cast in plaster. I first started out by testing different fabrics to see how they would hold the shape or leak. I only had enough plaster to do 2 tests at first with a neoprene like material and denim. The Neoprene like material had very crisp lines and was super nice to work with. The denim pour had some issues as the plaster started to set before I could pour it into the deniem "3D quilt" and so it wasn't as detailed as the neoprene like "3D quilt". For the last one I made a new version with it had the corduroy texture be on the inside of the "3D quilt" form to give it more texture. With these shapes I would like to cast them to have molds of them to either slip cast with porcaline or bio materials.
Materials
- Fabric
- Sewing Machine
- 500g Plaster
- 350ml Water
- Disposable Conatiners
- Plaster safe working space
- Hanging mechanism
- Mask
Process
- Cut out pieces of fabric
- Sew fabric pieces together
- Hang "3D quilt" in linned pot
- Put on face mask
- Slowly mix plaster into water
- make sure there are no clumps
- Pour plaster mixture into "3D quilt"
- Tap the side of the quilt to get an air bubbles out
- Let rest until it starts to not feel hot anymore
- While settling clean area making sure to not put any plaster down the drain. So if wanting to reuse anything whip down and dipose of paper towels.
- Once fully cured, remove from "3D quilt" or cut away fabric
- Let dry fully overnight
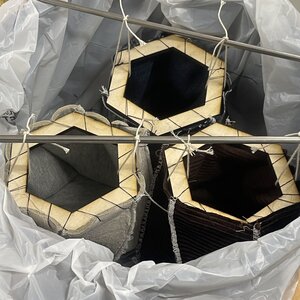
Created a hanging system in a pot to avoid any mess with the plaster and to allow the weight of the plaster to stretch the "3D quilt" out when filled:

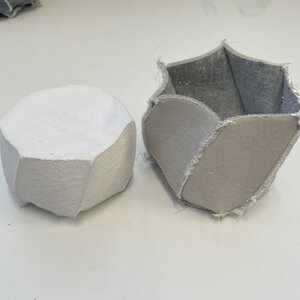
The results from the first pours in the neoprene and denim molds:

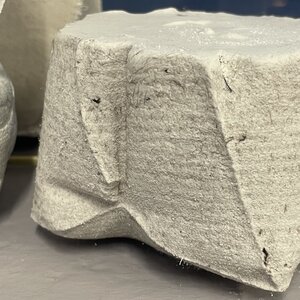
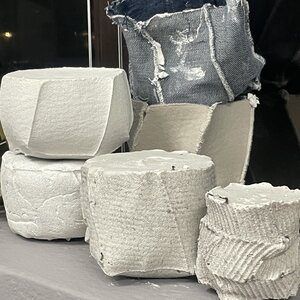
The results from the corduroy and overall pours tested:
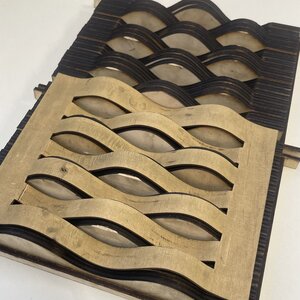
Wood Bending Mold
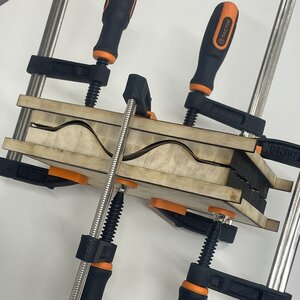
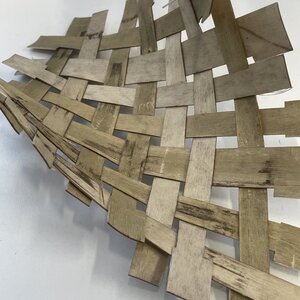
I have always been super fascinated by bent wood furniture and lighting. The two part molds are pretty straight forward to design and after brainstroming with Louise came up with a modular wood bending mold. I was first going to have it be my CNC project, but that wouldn't have made it modular. So instead I designed a laser cut mold with interchangeable parts. The mold works by having a positive and negative top and bottom with the shaping components being interchangeable to have different thickness of the mold shape. When doing my first test I used 3mm plywood and when boiling it the plywood sheets seperated giving me 1mm sheets to work with. I also used some leftover red onion dye bath to boil the wood in to give it some color. What I learned with the seperated sheets is that the wood has a grain direction that makes it more flexibl/bendy in a certain direction. And so my first test was with one of the pieces that was in the wrong direction for the mold. And I couldn't change the direction I was putting it in the mold because of how I had laser cut the wood before boiling it. However, the middle piece of the 3 sheet was in the correct direction and dried very well!
Files:
- 3mm Mold Frame
- 6mm Mold Parts
- 3mm Bend Wood Panel
Materials
- 6mm Plywood
- 3mm Plywood
- Wood glue
- Left over dye bath
- Pot
- Clamps
Process
- Laser cut bend wood panel
- Add cut piece to left over dye bath pot
- Boil for about 1.5 hours
- Laser cut mold frame and mold parts
- Assemble mold frame
- After mold from is dry arrange mold parts to match the "ribbons" of the bend wood panel
- Remove bend wood panel from pot
- Sandwich bend wood panel between positive and negative mold frames
- Use clamps to secure mold together
- Let dry overnight
- Remove now bent bend wood panel
Boiling the laser cut wood piece and seperation:
Clamped mold with wet laser cut wood piece sandwiched inbetween parts:
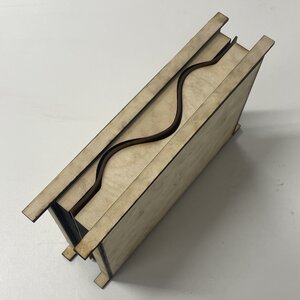
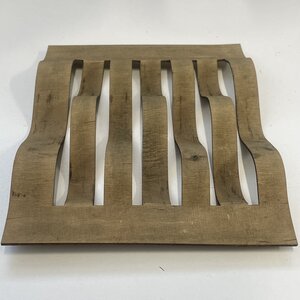
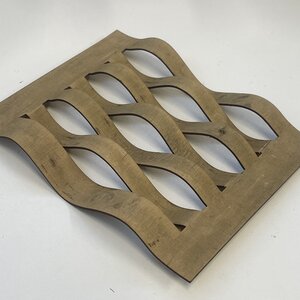
Mold open with now dry bent wood panel:
Different views of bent wood panel:
Broken laser cut panels woven and dried:
CNC Mold
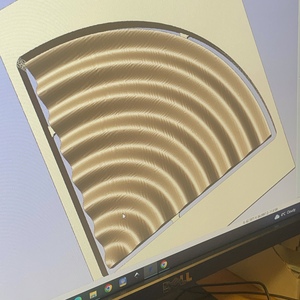
My CNC project has been delayed at the moment as we ran out of time on Friday to mill it out. But I give most of the credit of my final file's credit to Louise for helping me get the tile shape that I wanted. I had used the youtube tutoral Creating a Ripple Effect to make the base of the definition that Louise then helped me with resizing and cutting for my final tile. Making the gCode from for milling was on a private program called Vectric so we could only do it on the computers at the Sauðárkrókur Fablab. It was interesting to understand the rouhging process where the machine uses a bigger drill big to do a rough mill and then a smaller bit to do the more detailed milling.
Files:
- Rhino + Grasshopper Files
- CNC Files
- gCode File
Tile model in Rhino and in the CNC program:

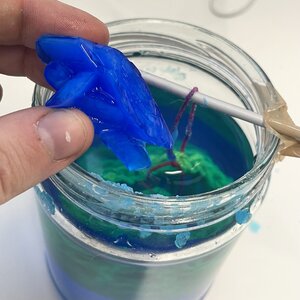
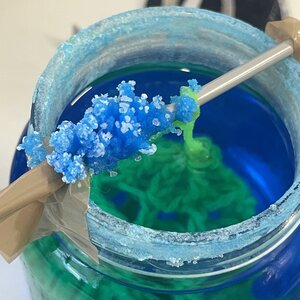
Crystals
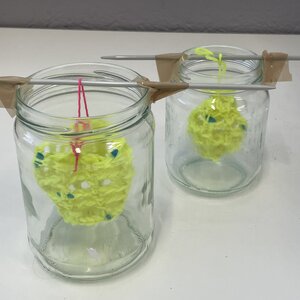
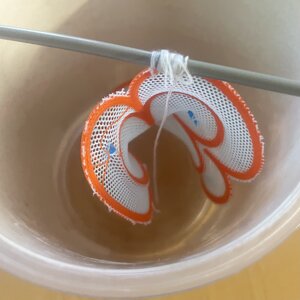
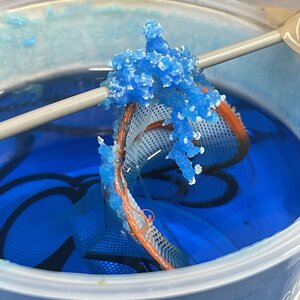
The crystals took me back to when my brother and I would make rock candy at summer camps with sugar and water. For this week I went with making copper sulfate crystals and after almost a week of letting them grow they have grown everywhere but in the solution that I have a textile hanging in. The photos below shoe the beautiful crystal forms, but also how they're not on the textiles.
Materials
- 200g Copper Sulphate
- 300ml Water
- Container
- Spoon
- Chopstick
- String
- Some type of textile
Process
- Make your textile form
- Hang from chopstick in container making sure it doesn't touch the bottom or sides
- Add Copper Sulphate to water and mix
- Pour Copper Sulphate solution into textile container
- Do not disturb the container for a few days
- Remove textile from container
Preparing the textiles by hanging and embeding some crystals in them:
Growth of crystals outside of solution:
Giant crystal that formed at the bottom of one of the containers: