Week 07 | Computational Couture
Grasshopper | 3D Printing
This was probably the hardest/most frustrating weeks so far for a variety of reasons, but mostly because I overwhelmed myself with all the things I wanted to do with the beginner skill set I had to the programs we were using. I have a pretty indepth understanding of Solidworks which added to the frustration of not having access to that program as I am working on a Mac. However, I got a basic understanding as to how Grasshopper works as a plug in for Rhino and the really cool things you can do with it. I look forward to playing around some more with the program and creating files to interagrate 3D printing with bio materials or ceramics one day!
Inspiration
There were MANY sources of inspiration for this week that added to over abmitions goals of what I wanted to do ranging from 3D printing fabrics, to 3D printing on fabric, to exploring Auxetic Structures, buttons and more.
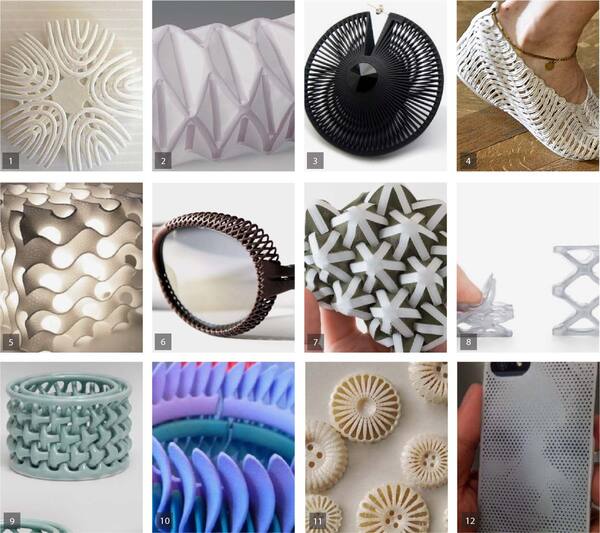
1|Unknown 2|Cristophe Guberan 3|Lynne Maclachlan 4|Stella Mcarthy 5|Bathsheba Grossman 6|Bieke Hoet 7|Gabe Fields 8|Formslab 9|Travis Fitch 10|Peggy Bannenberg 11|Studio Femke Roefs 12|Ingenerum
Natural parametic pattern inspiration:
Grasshopper
Our first tutorials of Grasshopper were really hard to follow and learn from. I dove into rabbit hole after rabbit hole of tutorials on Youtube of all the things I wanted to try out. But slowed myself down as I realized I wasn't getting anything done other then over hyping myself and focused on the basics:
Rodrigo did a pretty thorough tutorial explaining all the componets and feautures that are used in Grasshopper Until then here is an amazing PDF that Birdy made of her notes from his lecture.
Mobius
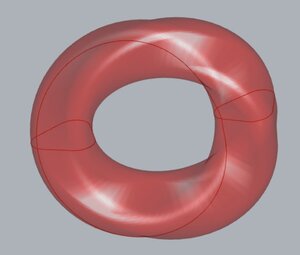
I came across a Mobius tutorial on youtube which I got overll excited to try out as it is a shape that is very difficult to achive in Solidworks. I made it through the tutorial only pausing 78 times to catch up with each step, but had fun playing with the number swtiches to change the number of sides and twists the Mobius shape had.
Mobius form from Grasshopper (left), Mobius form "baked" in Rhino

Domain Basics
After spending too much time making the Mobius form I refocused and found a super easy to follow tutorial on domain basics:
In this tutorial I learned the super easy way to array a circle, make a curve impact the size of the circles, and from what I leanred figure out on my own own to use the same process, but for changing the hight of the extrusion of the circles. You can find my file here

Parametric Pattern
After having fun with some dots and curves I came across a tutorial on how to make a parametric pattern that was very easy to follow:
What I found most interesting about this tutorial was how you could imput a grey sale image to change the pattern flow to recreate the image with line density. My files can be found in this folder.
Optical Illusion Pattern
Parametrichouse has a wealth of amazing tutorials to make some epic things in grasshopper while learning new features of the program. When scrolling through I came across the tutorial Optical Illusion that reminded me of the flowers I would doodles in math class when I was younger:
I then 3D printed my optical illusion flower on fabric to see how it would react when the fabric relaxed.
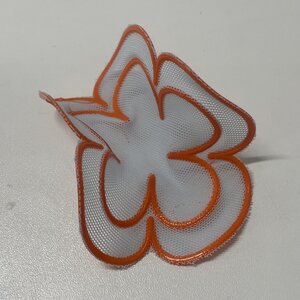
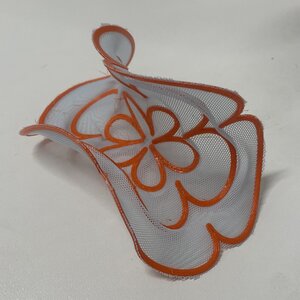
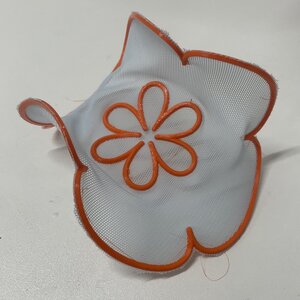
My files for this tutorial and 3D printing can be found here.
3D Printing
It's been a few years since I have played around with a 3D printer. We had the Ultimaker S5 at MassArt which was super fun to use as it had two nozzels that would let you use a water disovable support fillament. Talk about opportunity for bio materials to get involved! Any way, a lot came back to me in how to set up the Gcode, which is the file type that a 3D printer reads. It has all the info from temperature of the bed, fillament type, the sliced 3D model, and speed/density of the print. I have been having issues downloading and opening Cura to slice my models in, but luckily Birdy and Louise let me use their laptops to make the Gcode quickly to be able to print a few things out.
Infill Tests
I came across this super interesting youtube video by Sew Printed that gave me some insporation to play around with testing the infill properties of our Prusa:
When making my models I got pretty frustrated when trying to make some very basic shapes to test the densities of the parametric infill patterns of our printer. So instead of making my simple 3D modles in Rhino I went on to Tinker CAD and made my 2 .stl files. My .stl files and gcode I tested can be found here.
In addition, I came across this fasinating research summary of 3D printing fabric from the MIT Media Lab; DefeXtiles: 3D Printing Quasi-Woven Fabric via Under-Extrusion. I did't want to mess around with how the fillament of our Prusa extruded, but found the video super inspiring and facinating:
Trouble Shooting
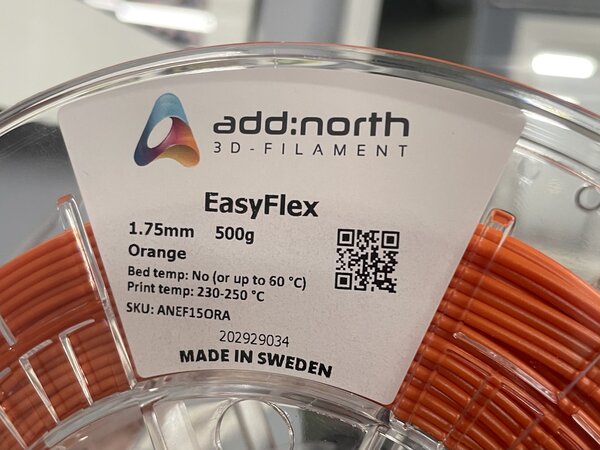
After setting up the printer and getting a file started we noticed that there wasn't any fillament coming out of the nozzel. We stoped the print and let the nozzel heat up to about 230 C which is what the minimum fillament temperature is:
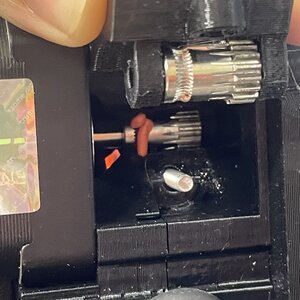
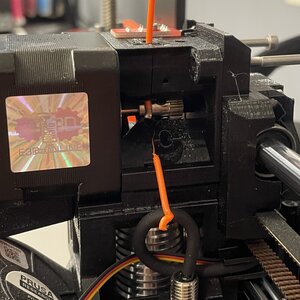
When nothing started to ooze out of the nozzel we bosted the temperature to 240 C. And when still nothing happened we turned off the printer and opened up the compartment that the fillament goes through. Below is the blurp build up of the fillament on the left and to the right is the snipped fillament pulled out and now unclogged compartment:
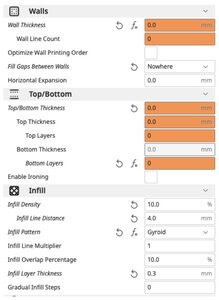
Infill Fabric Tests
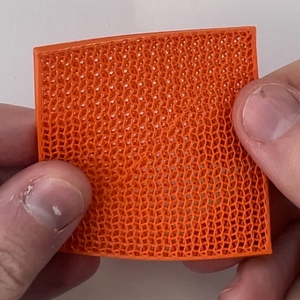
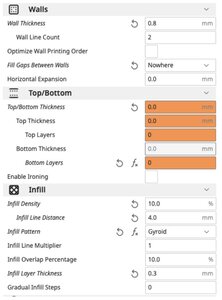
Once the printer was back up and running started the infill fabric tests of using the Gyroid infill option. In order to make the fabric the top and bottom walls were removed. My .stl files and gcode I tested can be found here
Gyroid Fabric 30%

Gyroid Fabric 10%
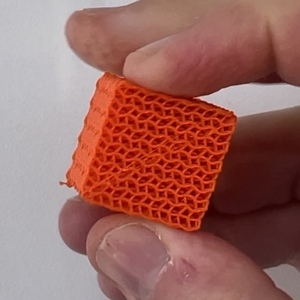
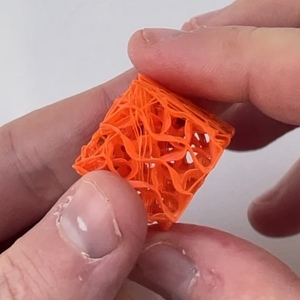
Infill Cube Tests
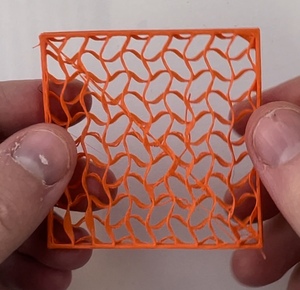
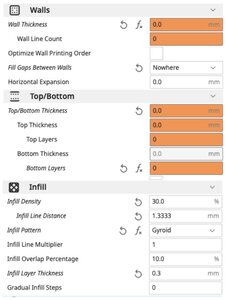
For the cubes I did no bottom, top, or side walls to test the density of the gyroid infill in different densities. My .stl files and gcode I tested can be found here
Gyroid Cube 30%
Gyroid Cube 20%

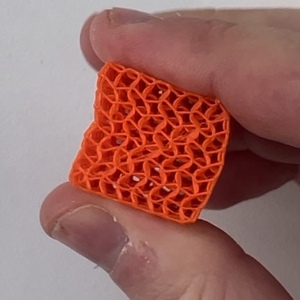
Gyroid Cube 10%
Auxetic Patterns
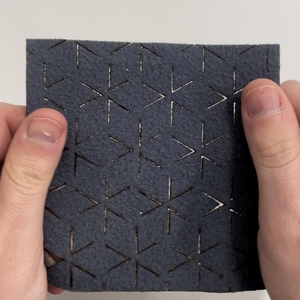
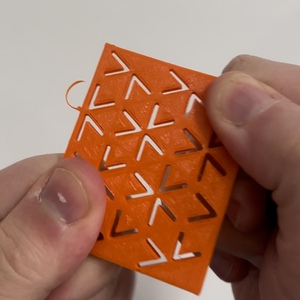
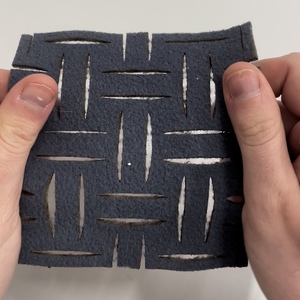
For fun I wanted to play around with Auxetic patterns, but couldn't understand how to 3D print them. Louise shared an awesome link of how to "make" your own Auxetic pattern here. There's also a plug in for Grasshopper called Linketix and it lets you animate and visualize your Auxetic pattern. And you can make your own Auxetic Tristar Pattern by using the files amazing poeple have made on this Discourse thread. Here is the file I made to laser cute my Auxetic pattern I made on the Bistable Auxetic Kirigami site.
Felt Laser Cut Settings
  Speed:  100
  Power:  50
  Frequency: 10
Triangular Pattern
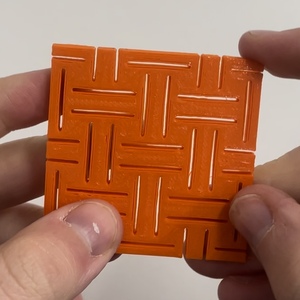
Square Pattern
Files
Domain Basics
Parametic Pattern
Optical Illusion
Auxetic Pattern