Week 04 | BioChromes
Natural Dyeing | Pigments | Inks | Indigo | Bacteria Dyeing | Bundle Dyeing
Inspiration
I first started playing around with the concept of natural dyeing when I was 10 and since then have only scratched the surface of its endless possibilities.
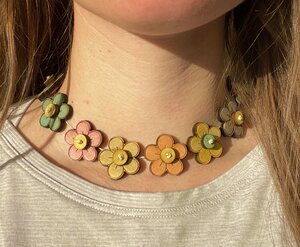
Below is an example of some swatches I did during the early months of COVID19 where I was playing around with hot water soaking and solar dyeing with food waste and local plants around my mom's house:
My biggest source of inspiration for natural dyeing comes from Botanical Colors and they're Feedback Friday videos that originally started as a blog and during COVID19 became a weekly gathering opportunity for creatives to share their passion for natural color. Below are my top 3 favorite calls they held covering seaweed, mushroom, and indigo dyeing:
Studio Nienke Hoogvliet:
Mushroom Color Atlas Founder, Julie Beeler
Indigo Dye Master Aboubakar Fofana:
I had the AMAZING opporunity this summmer to work with Amy DuFault the Sustainability + Communications Director at Botanical Colors and co-runner of the Southern New England Fiber Shed on a waste water porject at the The Massachusetts Alternative Septic System Test Center. This project involved testing the use of waste water for growing natural dye plants. Below is the recap Amy did of the results from the first summer's run at the project and article on the Southern New England Fiber Shed site:
Playing with Color
Natural Dyeing
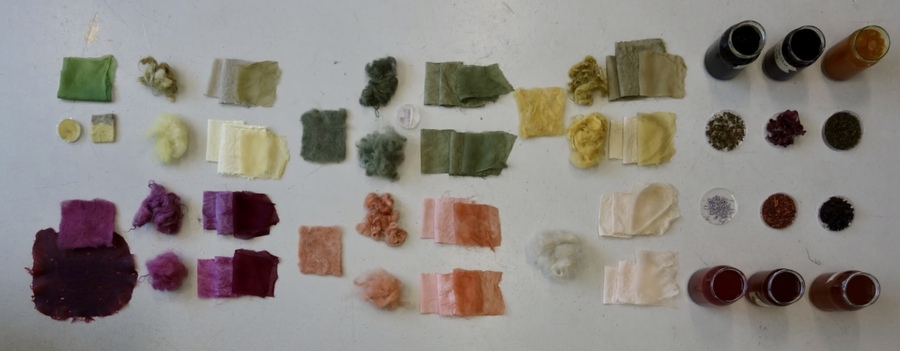
The extraction of natural color from botanicals, minerals, and other organisms has a varriety of processes, but can be summariezed with these general steps:
1. Scouring - the process of using Soda Ash to "clean" or scour the fiber to remove any oils or dirt from the fiber.
2. Mordanting - the process of using a mordanting agent to allow the dye to bond to the fiber on a molecular level and have longer lasting color.
3. Dyeing - the process of extrating color from a dye material to then have a fiber absorb.
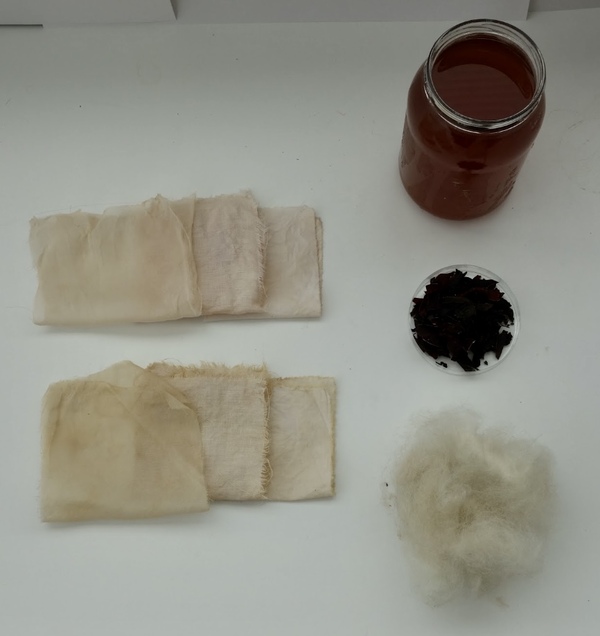
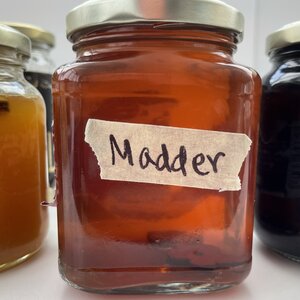
Materials
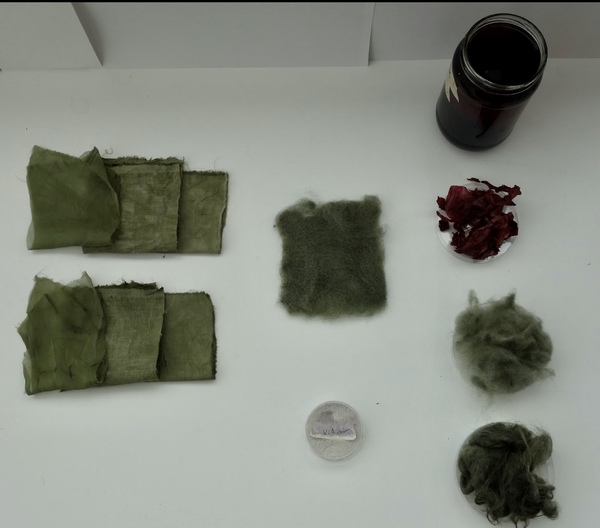
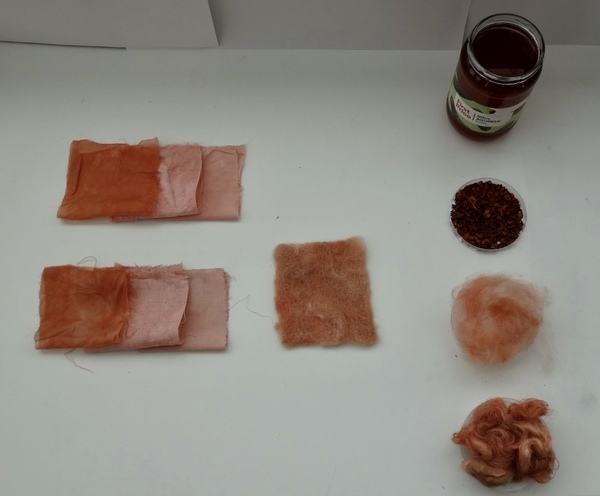
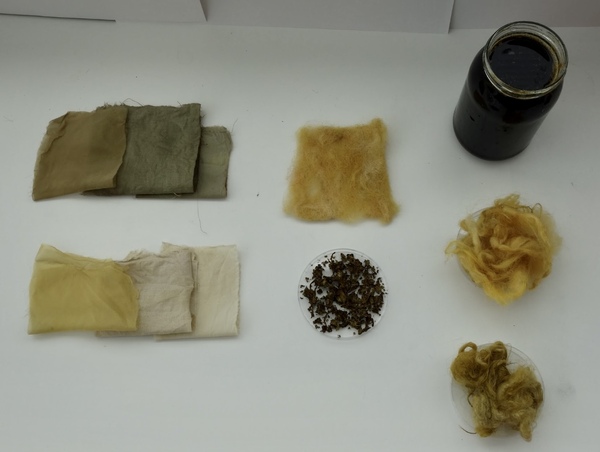
Dye material
- 50g Madder Root
- 160g Rhubarb Leaves
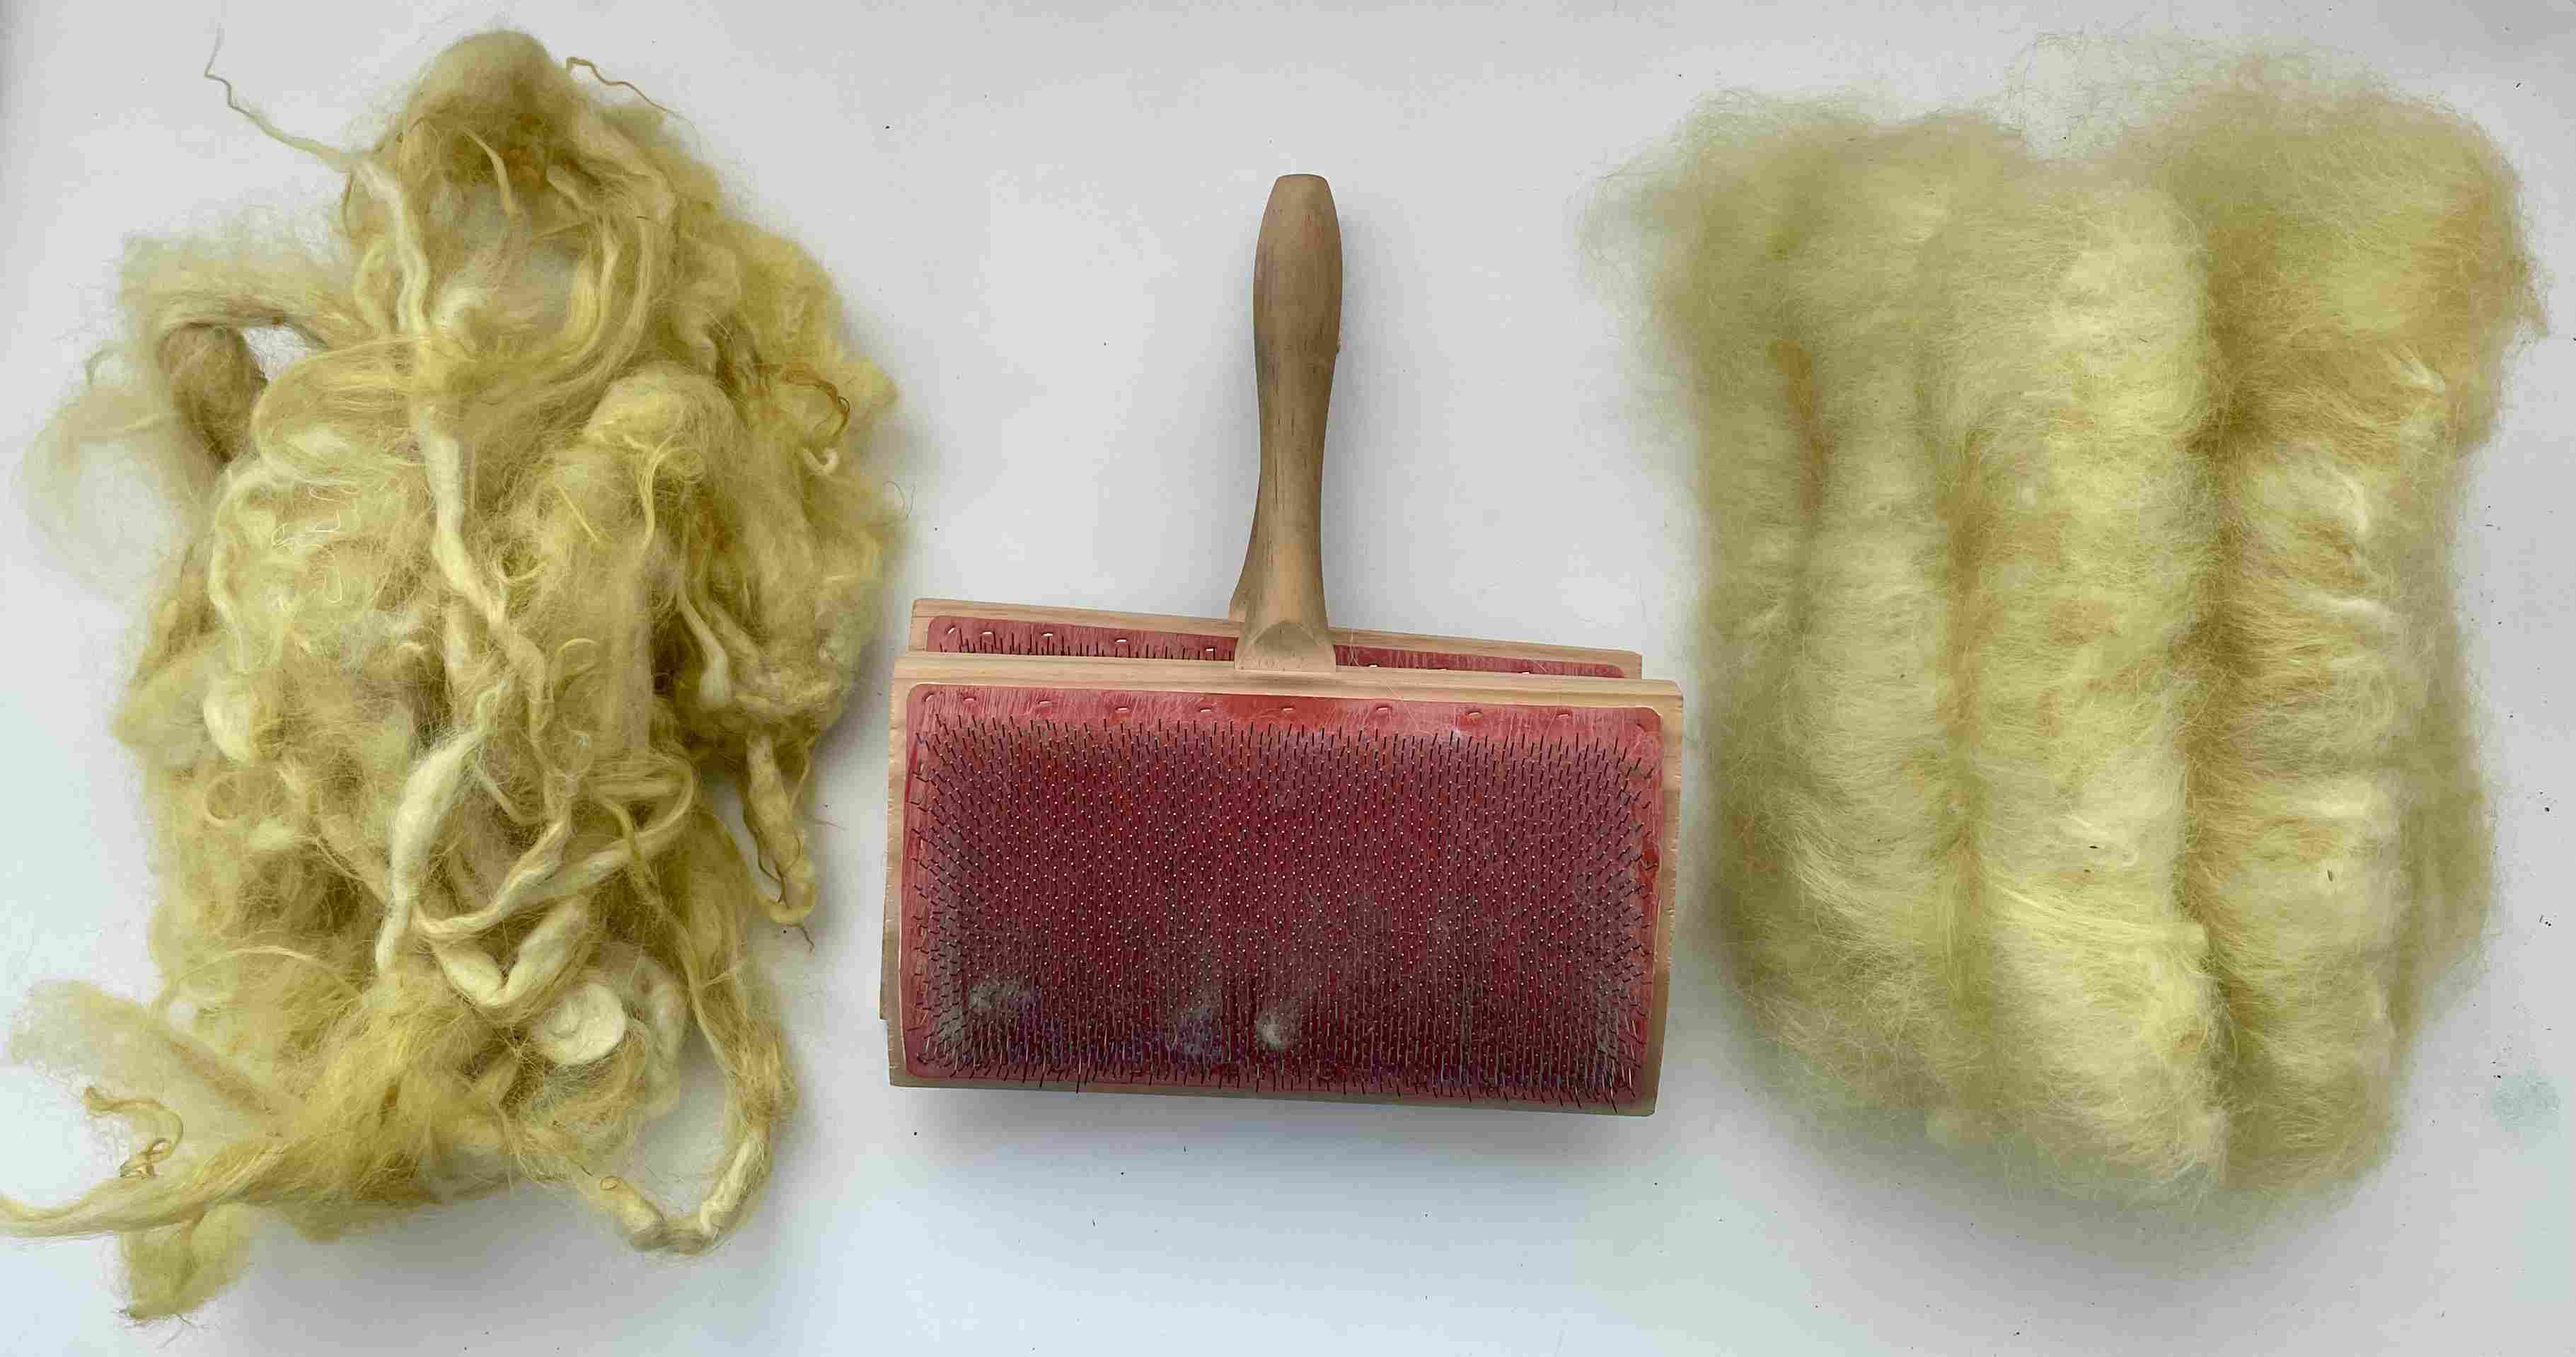
- 320g Lupin Leaves
- 75g Red Onion Skins
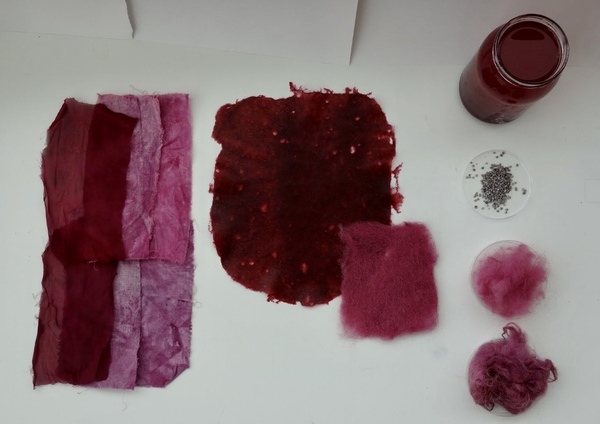
- 10g Cocheniel
- 310g Seaweed, Fucus serratus
Fibers
- 810g Wool
- 5-6g Silk
- 18g Cotton
- 60g Linen
Other
- ~18g Soda Ash
- Alum Sulfate
- Cooking pots
- Spoons
Scouring
Wool:
1. Measure out WOF (wight of fiber dry)
2. 2% of WOF = amount Soda Ash
3. Disovle Soda Ash in hot water
4. Add Soda Ash solution to large pot
5. Add Wool (careful to not aggitate the fiber too much)
6. Add enought water for fibers to be able to move freely
7. Heat to a low simmer
8. Hold temperature for about an hour
9. Turn off the heat
10. Let cool enough to touch
11. Prepare mordant bath
Linen, Cotton, Silk:
1. Repeat steps 1-10, replacing 5 with adding Linen, Cotton, and Silk
Mordanting
Wool, Linen, Cotton, Silk
1. Measure 12% of WOF = Alum Sulfate
2. Disolve Alum in hot water
3. Add Alum to new pot of water
4. Add fibers to pot (careful to no aggiate the wool)
5. Add enought water for fibers to be able to move freely
6. Heat to a low simmer
7. Hold temperature for about an hour
8. Turn off heat
9. Let cool and sit over night
10. Prepare dye bath
Dye
- Measure out dye stuff
- Add to cooking pot
- Fill pot with water
- Heat slowly
- Let rest for about an hour at a simmer
- Turn off heat
- Let cool over night
Dyeing
- Add scoured and mordanted fiber to dye bath
- Heat slowly
- Hold at a low simmer for about an hour
- Turn off heat
- Let cool overnight
- Rinse in water
- Hang to dry
Shifting
The process of modifying the dye to either make the color bloom, sadden it, or alter it by adding iron or something to change the PH of the bath.
Materials
- 200ml Vinegar
- 2g Iron
- 1g Sodium Carbonate (Na2CO3)
- Jars
- Pipet
- Water
Process
- Add Vinegar to jar
- Add Iron to jar
- Add sodium Carbonate to jar
- Mix
- Make diluted portion in seperate jar
- Use pipet to extra X amount of iron solution
- Add to X amount of water for calculated dilution
- Mix
- Dip fibers into diluted solution
- Or add to made dye bath
NOTE: Iron is corrosive to fibers. Make sure to use only in diluted solutions
Above you have a bath of Dock, Rumex longifolius, an invasive species here in Iceland that we shifted with 1.5ml of 100% Iron solution.
Natural Dyeing Wood Experiment
I had come across Rebecca Desons book Botanical Dyes on Wood a couple years ago after playing around with her soy "mordanting" recipes in her other books and was excited to get the time to play around with dyeing wood. I took inspiration from a recipe Anna published on Salt in my Coffee on how she made plant dyed wooden beads.
Materials
- Plywood pieces
- Soy Milk
- Alum Sulfate
- Water
- Jars of Dye bath water
- Extra jars
Process
- Measure out about 1 Tablespoon of soy milk to 1 cup of water in an extra jar
- Put 1/2 of your wood pieces into the soy milk jar
- Measure out about 1 teaspoon of alum to 1 cup of water in another extra jar
- Put the remaining 1/2 of wood pieces into the alum jar
- Let them soak for several hours
- Remove them and let them dry
- Put them back in their respective jars and let soak for several more hours
- Remove from jars and pat dry
- LABEL WOODEN PIECES AND WHICH "MORDANTING" THEY HAVE (unlike me)
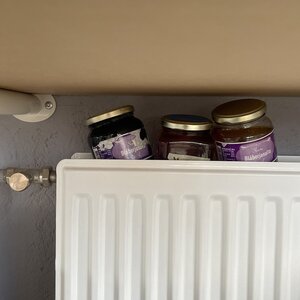
- Divide wooden pieces between dye bath jars
- Place jars ontop of radiator
- Let them rest for the weekend
- Remove from jars
- Let them dry
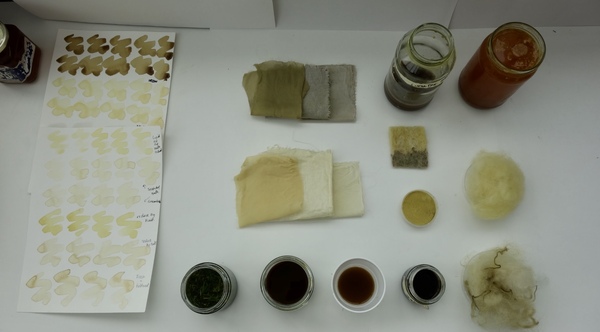
Pigments
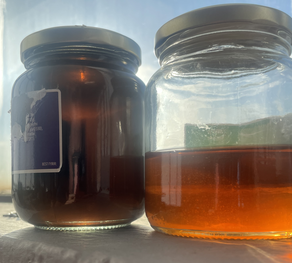
Using fresh or exhausted dye baths to create dry pigments for future uses of new dye baths, pastes, watercolors, inks, and more.
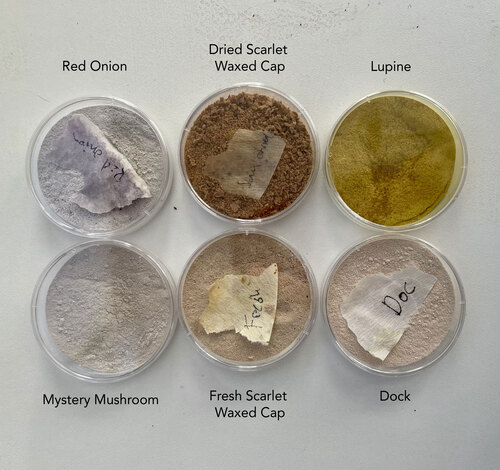
When we went to visit the BioPool Lab to do some bacteria dyeing prep work we had a break to go foraging for some mushrooms on the hill outside. We collected a lot of Scarlet Waxcap, Hygrocybe coccinea. We dried half of them and kept half of them fresh when we made out baths. The dried ones gave a more redish color surprisingly and the fresh ones a darker sadder color. We then used the baths to create some pigments.
Materials
- 200ml of Dye Bath
- 20g Alum
- 5g Sodium Carbonate
- A Jar
- Container
- Coffee filter
- Coffee strainer
- Face Mask
- Morder and Pestle
Process
- Heat water
- Dissolve Alum in hot water
- Dissolve Sodium Carbonate into hot water
- Add Dye Bath to Jar
- Add Alum to Jar
- Mix
- Add Sodium Carbonate to Jar in small quatites while mixing
- Let mixutre rest and seperate
- Once pigment has settled pour out excess water
- Place coffee strainer over the Container and add the coffee filter
- Pour remaining pigment into coffee strainer
- Let liquid drip into the Container
- To speed up the drying process place coffee strainer with the pigment into a deyhrator
- Once dry wear face mask and grind pigment in a Morder and Pestle
- Store or add water/xanthan gum in their respective containers to make a paste for watercoloring
Inks
There are multiple ways to make inks, however the simplest way is to use the dried and ground up pigments plus some water to make some watercolor inks/paints. In my test I used lupin pigment and couldn't find a paint brush so I used some wool and printer paper.
Materials
- 5g Lupin Pigment Powder
- 1ml H20
- Paper
- Mark making tool
Process
- Add water to pigment powder
- Use markmaking too to mix water and pigment
- Use saturated markmaking to mark paper with watercolor ink
Indigo
Indigo is a distinctive blue color extracted from Inidofera plants, most commonly Inigofera tinctoria and uses a vat system to bind the color to the fiber.
There are various ways of making an Indigo Vat. We made a 1:2:3 fructose vat to play around with. A 1:2:3 vat means that Indigo is 1, the base measurment of what then doubled for Lime/Calcium Hydrooxide, and tripled for Fructose. Our Indigo extract takes 1L of H20 per 10g of extract.
Materials
- 1.5L Boiling hot H20
- 15g Indigo
- 30g Lime/Calcium Hydroxide
- 45g Fructose
- Tall Container
- Wooden or Metal Spoon
- Vinegar
- Bowl
- PH Strips
- Gloves (optional)
Making
- Boil water
- Dissolve Indigo in seperate container
- Add boiled H20 into Tall Container
- Add Lime/Calcium Hydrodixe into Tall Container
- Mix
- Add Fructose into Tall Container
- Mix
- Add disulted Indigo into Tall Container
- Mix for a long time, making use to not whisk or add any air
- Continue mixing until a good froth builds on the surface and a rainbow/oily shean develops
- Let rest overnight before dying
Dyeing
- For any resist sections fold and/or wrap with eastics/string, use clothes pins, wooden blocks, etc.
- Soak fiber in water for about 15 minutes
- Wring out water
- Remove the foam/froth ontop of vat and set it aside
- Dip fiber into Vat gently making use it doesn't touch or get too close to the bottom
- While fiber is inside the vat message the fiber gently moving your fingers around to allow to color reach all the surfaces of the fiber
- Remove the fiber from the vat keeping it close to the surface to not have any drips add oxygen to the vat
- Wring out any excess liquid very close to the surface
- Open up fabric to allow it to oxidize
- Repeat 4-8 as many times as desired to get darker shades
- After the final dip place fiber into bowl with water and vinegar to stop oxidation process
- Wring out excess liquid
- Remove any resists or unfold to see pattern
- Hang to dry
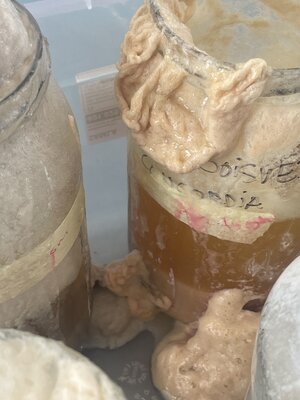
Bacteria Dyeing
We went up to Biopol, a marine biotechnology research company, in Skagaströd to visit their biolab and prep some plates and make some nutrient agar and LB broth. Catherine Euale flew up form Barcelona to show us the process from creating a sterile environment to prepping the dishes, to setting the plates, and transfering the bacteria.
Materials
- Janthinobacterium lividum sample
- Two 250ml glass bottles
- Pipette
- Inoculation loop
- Pressure cooker
- Steril or glass petri dishes
- Camping stove
- Propane canister
- Lighter
- Ethanol
- Autoclave bag
- Facemask
- Incubator
- Inoculation Loop
- Ethanol
- Parafilm Tape
- 5g Nutrient Broth (LB)
- 5g Nutrient Agar
- Glycerine
- 200ml Tap H2O
- 200ml Distilled H2O
- Silk Fabric
- Sharpie
- Stove top
Prep
-
Agar Plate
- Fill 250ml glass bottle with 200ml tap H20
- Add 5g of nutrient agar
- Close lid and mix
- Unscrew lid to release any pressure and to not have it be completely sealed
- Label bottle with sharpie
-
Nutrient Broth (LB)
- Fill 250ml glass bottle with 200ml distilled H20
- Add 5g nutrient broth
- Close lid and mix
- Unscrew lid to release any pressure and to not have it be completely sealed
- Label bottle with sharpie
Sterilize
- Add glass petri dishes to autoclave bag and filled bottles to pressure cooker
- Add water
- Put pressure cooker on stove top to get to high pressure
- Put the pressure cooker temperature on low for about 30min
- Take pressure cooker off the heat and allow steam to release
- When cool enough tighten lids of bottles
Plating
- Put on facemask
- Set up camping stove, lighter, dishes, and nutrient agar
- Sterilize area with ethanol
- Turn on burner
- Carefully open lid of nutrient agar towards the flame
- Quickly pour a .5cm layer of nutrient agar in each plate having the open lid face the flame
- Close the lid of the nutrient agar towards the flame
- Turn off burner
- Sterilize area with ethanol
- Let dishes settle before Inoculating
Innoculating
- Nutrient Agar Dishes
- Put on facemask
- Set up camping stove, lighter, nutrient agar dishes, inoculation loop, and Janthinobacterium lividum sample
- Sterilize area and tools with ethanol
- Turn on burner
- Heat inoculation loop to bright orange
- Open Janthinobacterium lividum sample towards the flame
- Place hot loop in agar to cool
- After a sizzle sound remove from agar and collect bacteria
- Close Janthinobacterium lividum sample dish
- Quickly transfer bacteria to fresh agar plate spreading it out in a zip zag and up/down fashion
- Close new transfer plate
- Heat inoculation loop to bright orange
- Repeat 5-12 with each fresh nutrient agar dish
- Turn off burner
- Sterilize area with ethanol
- Use parafilm tape to seal new transfer plates
- Keep dishes in a warm area or place in incubator
-
Check on dishes everyday to monitor growth and if any contamination has happened
-
LB
- Put on facemask
- Set up camping stove, lighter, LB bottle, inoculation loop, and Janthinobacterium lividum sample
- Sterilize area and tools with ethanol
- Turn on burner
- Open LB bottle, but keep the cap on
- Heat inoculation loop to bright orange
- Open Janthinobacterium lividum sample towards the flame
- Place hot loop in agar to cool
- After a sizzle sound remove from agar and collect bacteria
- Close Janthinobacterium lividum sample dish
- Remove cap of LB bottle and add inoculation loop with collected Janthinobacterium lividum sample
- Stir to remove sample
- Remove inoculation loop
- Close LB bottle
- Heat incolulation loop to a bright orange
- Turn off burner
- Sterilize area with ethanol
- Keep LB Bottle in warm area or place in incubator
- Check on bottle everyday to monitor growth and if any contamination has happened
Dyeing
- Make a new 250ml bottle of nutrient agar
- Fold silk fabric
- Place in petri dish
- Add petri dishes to autoclave bag
- Add autoclave bag and 250ml bottle of nutrient agar into pressure cooker to sterilize
- Once cool enough to touch remove autoclave bag and 250ml bottle of nutrient agar
- Put on facemask
- Set up camping stove, lighter, inoculation loop, a new bottle of nutrient agar, aged transfer dishes, and sterilized silk fabric petri dish
- Sterilize area and tools with ethanol
- Turn on burner
- Open new bottle of nutrient agar towards the flame
- Open silk fabric petri dish
- Pour nutrient agar over silk fabric, turning dish to fully saturate the fabric and have a thin layer cover the bottom of dish
- Close silk fabric dish
- Close nutrient agar bottle towards the flame
- Heat inoculation loop to bright orange
- Open aged transfer dish towards the flame
- Place hot loop in agar to cool
- After a sizzle sound remove from agar and collect bacteria
- Close aged transfer dish
- Open silk fabric dish
- Quickly transfer collected bacteria to silk, placeing it in multiple areas and in thin layer on the bottom
- Repeat 16-22 to add more
- Close silk fabric dish
- Heat inoculation loop to a bright orange
- Turn off burner
- Sterilize area with ethanol
- Keep silk fabric dish in warm area or place in incubator
- Check on dish everyday to monitor growth and if any contamination has happened
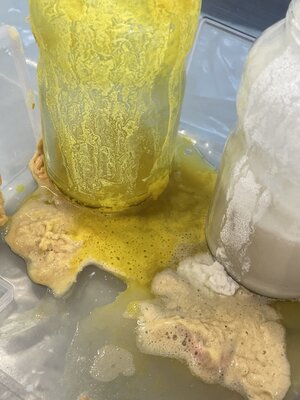
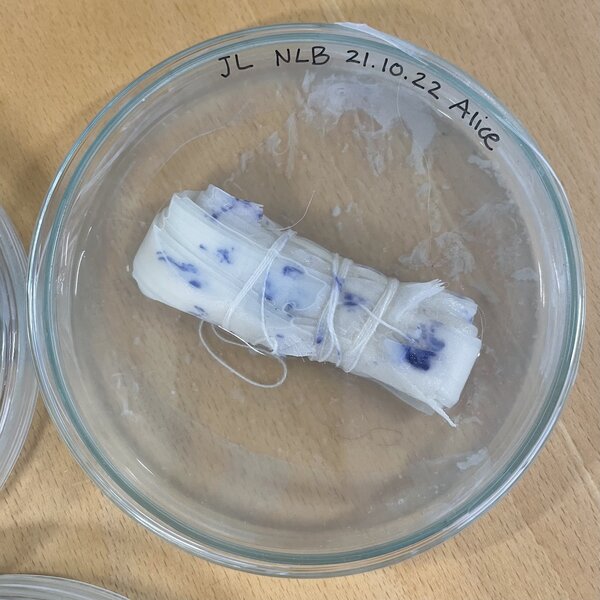
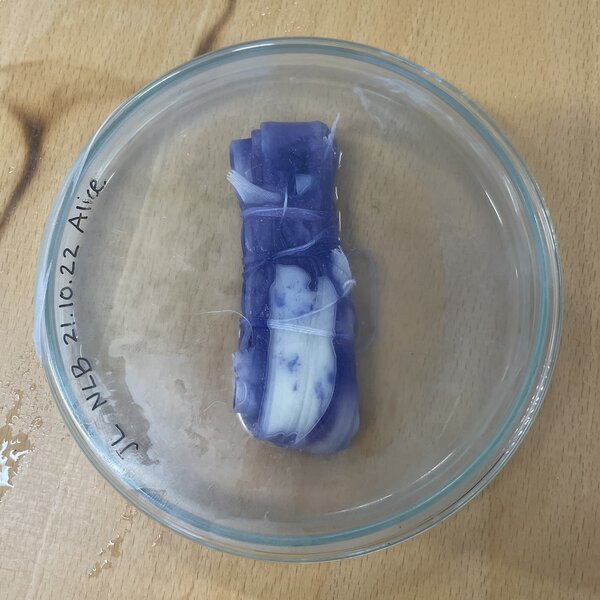
Day 1 - Day 3 there was no growth as it wasn't in a warm enough environment. We then moved the dishes to a warmer place and then over night the bacterial bloomed to what you see in the right photo.
Sterilizing
- After about a week or noticable bacteria growth your textile has been dyed
- Add glass petri dishes to autoclave bag
- Add water
- Put pressure cooker on stove top to get to high pressure
- Put the pressure cooker temperature on low for about 30min
- Take pressure cooker off the heat and allow steam to release
- When cool enough remove the dish from the pressure cooker
- Fill a pot or tub with water to open the dish inside
- Rinse textile
- Undo shibori to reveal dyeing
- Hang to dry
Bundle Dyeing
The process of extracting natural color from bio materials with steam.
Inspriation for this project came from Kaliko's article on Bundle Dyeing and wanting to play around with shifting the color with lemon juice or baking soda.
Materials
- Dried Rose Petals
- Fresh Rose Petals
- Tumeric Powder
- Dried Black Beans
- Mordanted Fiber
- Baking Soda
- 1/2 Lemon
- 4 jars/cups
- Cooking pot with lid
- Steam Basket
- Cord
Process
- Juice Lemon and divide juice into to jars
- Add warm water to dilute juice
- Add dried rose petals to one of the jars
- Add fresh rose petals to the other jar
- Add a spoonfull of baking soda to both of the remaining two jars
- Add dried rose petals to one of the jars
- Add fresh rose petals to the other jar
- Let petals soak for about an hour
- Lay out premordanted fiber
- Wring out your choice of rose petals before placing on fiber
- Sprinkle tumeric powder
- Add black beans
- Roll up fabric as tightly as possible
- Wind tightly with cord
- Repeat with remaining fabric and materials
- Either place in steam basket or make a hanging system for bundles in cooking pot
- Add water to pot
- Add bundles
- Put on heat and let water boil to steam bundles
- Check on bundles after 30 minutes
- Rotate bundles
- Add water if needed and let steam for another 15-30 minutes
- Take the pot off the heat
- Let the bundles cool
- Cut cords and unroll bundles
- Remove biomaterial
- Rinse
- Hang to dry