06 BioFabricating Materials
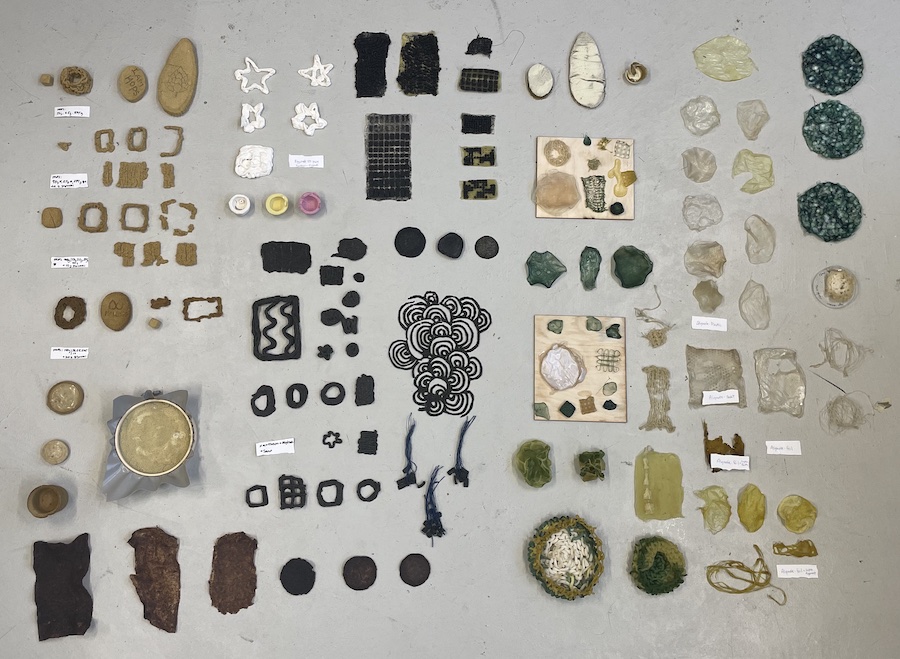 Some of the Materials Made by The Icelandic Team.
Basic Recipe Exploration
Normal Plastics that are damaging the world so greatly are polymers made from hydrocarbons. In the world of biomaterials we are looking at polymers that we can use from a more sustainable and importantly biodegradable process.
This week we decided to work as a team to get the most amount of materials to experiment with. We organised making basic recipes from 3 of these natural polymers, Agar, Alginate and Gelatin to test different properties of each.
Other Ingredients... * A plastisiser in this case mainly Glycerol, to increase the flexability of some of the materials where desired. * Various fillers from hops and coffee to eggshells to avoid shrinkage, to improve structure and to reinforce. * Emulsifiers or soap to expand the material to make foam.
We made a uniform material recipe library for us to input our recipes, tools and techniques. We also made some other individual explorations and I have gone more into these that I have personally done below. I have made some photo slideshows of all of the recipes of the materials that we made that are detailed throughout my documentation. The PDF version will be available for download HERE
Agar Agar
Properties
Agar is vegan and naturally occuring in red algae. it can make a very clear glass like material.
Agar starts to melt after a couple of hours in water but will dissolve quicker in water in higher temperatures meaning that Gelatine it is not very heat resistant. without filler it is very prone to shrinkage.
Recipes
- Below you can find all the recipes and processes our team used when working with Agar.
Work From The Icelandic Node, Fabricademy, 2022.
Gelatin
Properties
Gelatin is a versatile material that is able to form a variety of forms from very flexible to very stiff.
Gelatine Bioplastic starts to melt after a couple of hours in water but will dissolve quicker in water in higher temperatures meaning that Gelatine Bioplastic is not very heat resistant although it can be reused by reheating the material and adding water/glycerol
Recipes
- Below you can find all the recipes and processes our team used when working with gelatin.
Work From The Icelandic Node, Fabricademy, 2022.
ALginate
Properties
Alginate bioplastic is made by combining two separate mixtures: one containing sodium alginate, water and glycerine (as a base)
Alginate Bioplastic, once dipped in calcium chloride, is water proof with PH neutral or acid water. It starts dissolving in a couple hours when the PH of the water it is submerged in, is alkaline. It is also very heat resistant and can be heated up to 150°. It shrinks massively when dried so you should make the pieces way bigger that you need to in order to get a sizable sample.
The mixture is made the day before you use it to remove bubbles. You can leave it in the frigde and also spray the surface with alcohol to remove more of them then cover with a lid.
Recipes
- Below you can find all the recipes and processes our team used when working with Aginate.
Work From The Icelandic Node, Fabricademy, 2022.
Other Recipes
- Here you will find other explorations with other materials.
Work From The Icelandic Node, Fabricademy, 2022.
Individual Experimentation
Hops
I´ve been thinking about possible things too work on in Bio Materials for a while after having a very brief introduction in the 2019 Boot Camp here in Iceland. I knew I wanted to explore something I knew alot about and thats beer.
 The Process of Making Beer.
In the process of making beer there is the product, beer, and the waste products of spent grain, hop residue and yeast. The grain in most instances is used to feed pigs here in Iceland but there has been a few interesting projects using beer grains as filler, like this project by Mater Design, made in collaboration with Carlsberg.
 Mater Design Stools Made with Leftover Grain from Carlsberg Beer and Plastic Insulin Pens.
The hops that essential for bittering and preserving beer are mainly thrown away here in Iceland. There are no hop varieties indiginous to Iceland so they are imported here from abroad in pellet form so the hope biomass does not come with it. I wanted to see if I could make this more sustainable by using these waste products in bio materials crated here in Iceland.
The type of hops, where they are grown as well as the water types were fundamental to creating the traditional beer styles but now with the advent of the Craft Beer Revolution in recent years these different styles are made worldwide. Iceland is well placed to made every style as we have the cleanest water in the world so you can make every beer by adding some changes into the water to adapt.
 The Anatomy of the Hop Cone. The Part of the Plant that is used to Make Beer.
As I worked in the Beer Industry for 26 years and in the Icelandic Beer Industry for 9 years, I have some amazing contacts in the community. I spoke to the Master Brewer at Ölvisholt, Valgeir Valgeirsson about the potential for using hops for Biomaterials. If informed me that hops are known to be very strong when compressed so they should be good for making more solid and sturdy materials. He suggested I contact Malbygg about their waste hops due to their brewing system.
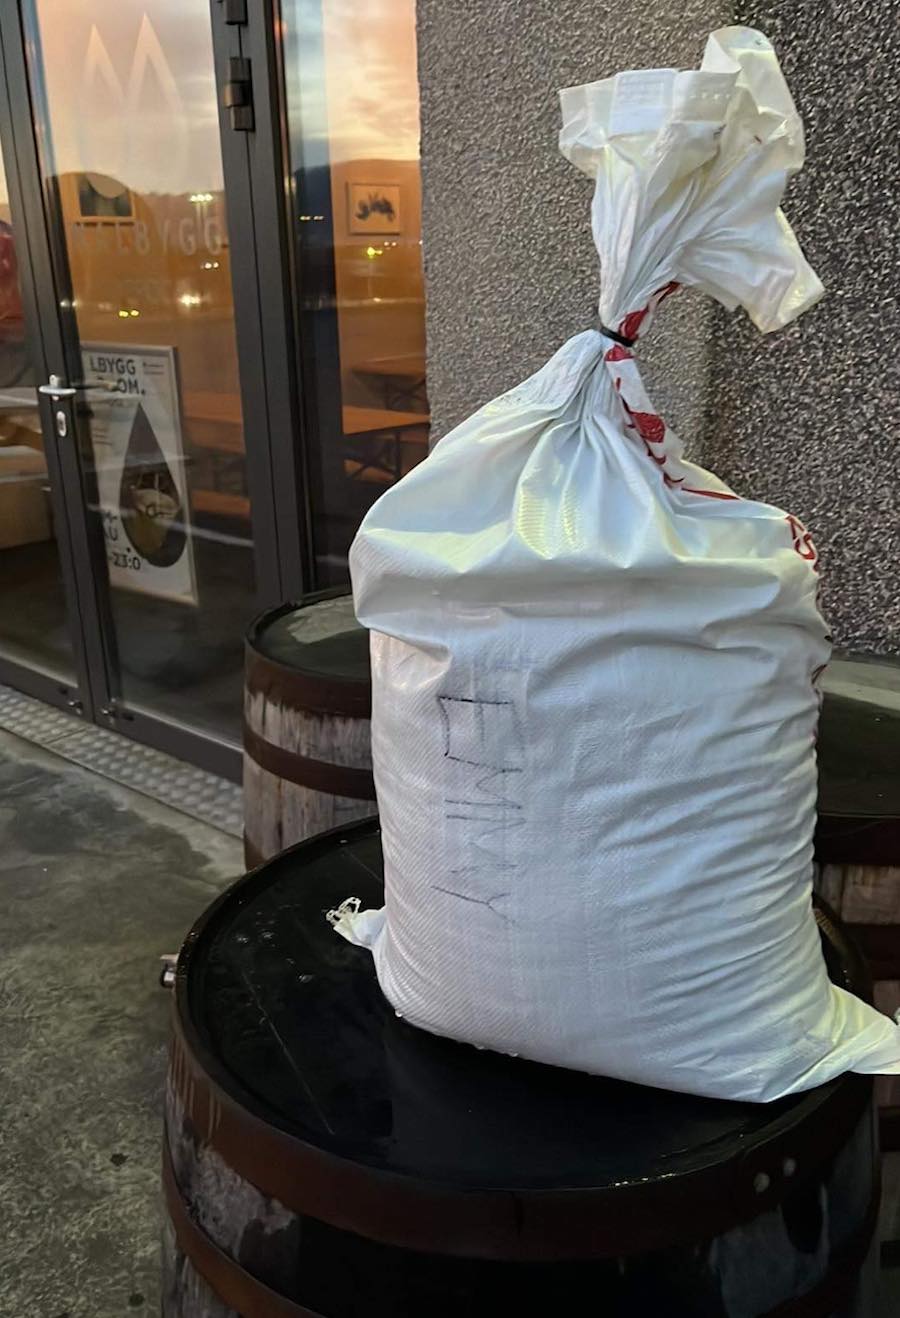
Frozen Hops Being Picked up at the Malbygg Brewery and Tap Room Malbygg are particularily known for their Hoppy and Hazy New England IPAs. This style is known for being very juicy and tropical tasting using hops from the new world. To acheive this they are often dry hopped with some of the hops being added to the beer late in the process to release the most intense flavors into the beer. At Malbygg they have a different system to the other breweries in Iceland where the hops are just added into the main tank. They actually have a small area on the side of the brewing system when only some of the freshly brewed malts or wort is passed through the hop mixture. This allows for a cleaner waste product that is separated from the grains that can be used for feed. It also means there is less yeast in the mix and therefore less chance of secondary fermentation. I spoke to my good friend Magnús Már Kristinsson (#takkmagnus) there who very kindly froze a huge bag of fresh hops from the first batch of the 7% New England IPA Christmas Beer Jólakisi which I transported as much as I could of to Blönduós on a 4 hour bus from Reykjavik. Thankfully, for the sake of the passengers, I could put them in the hold underneath as I was literally smelling like a brewery.
Obviously the pecentages of the ingredients are a secret as its this blend that give the beer its distinctive characteristics. I was told that there was a blend of 3 hops used for this particular beer, Simcoe, Mosaic and Citra
Other Ingredients of Jólakisi
Icelandic Water
Yeast
Malt Bill -
- Pilsner Malt
- Wheat
- Oats
- Carapils
Process
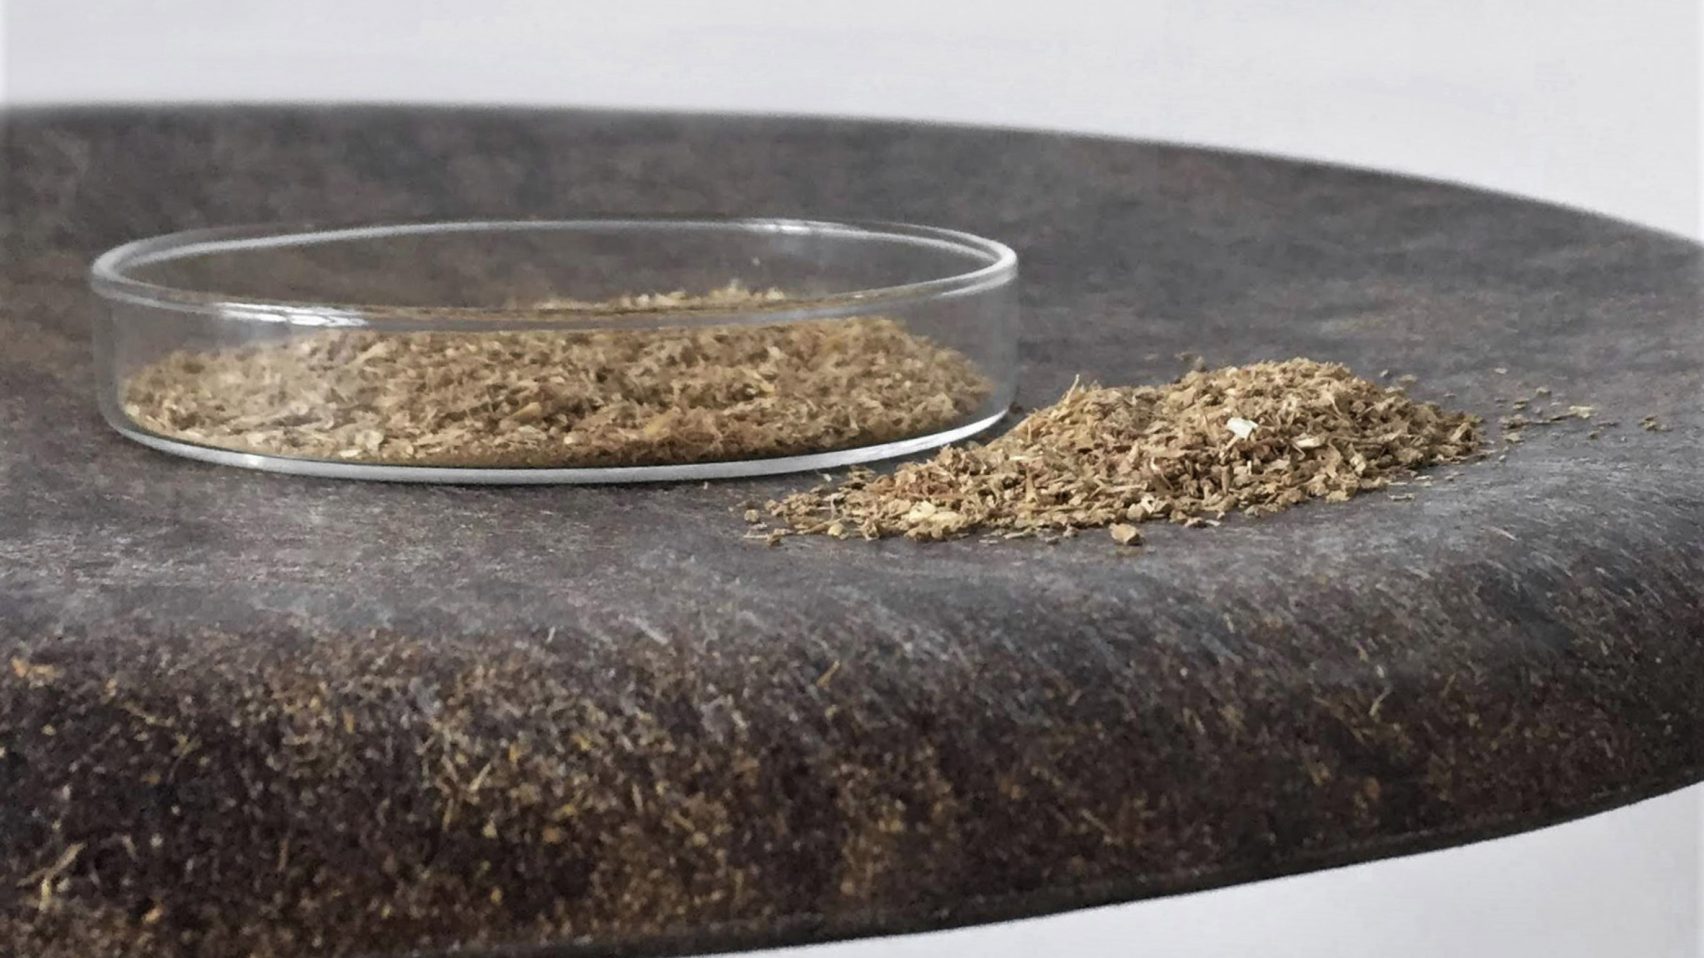
The first day of work with the hops was in the preparation so they were defrosted and then these wet hops were put in the dehydrator which made the whole building smell intensively of IPA for the next week. This batch was left overnight on 60°and turned from an intense green colour to a yellow. Once they were dryed I crushed them with my hands into a loose fine powder. After the tutorial on 3d Printing Bio Materials from the amazing Petra Garajova I thought I would try this with hops first using the alginate 3D printing recipes given out in the lecture as a starting point.
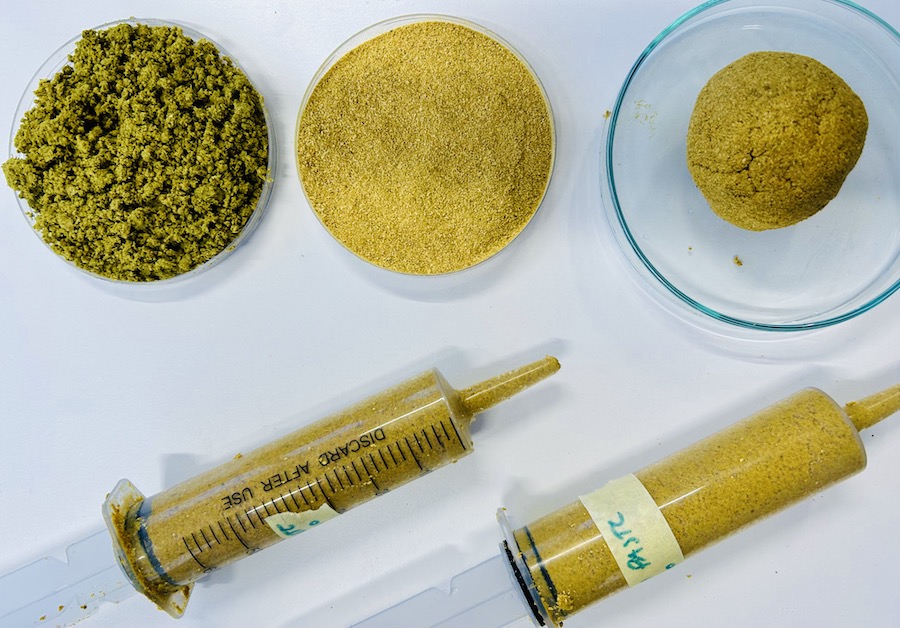 The Process of Preparing the Hop Alginate Paste.
In the picture above you can see the wet hops and then the dried powdered hops that came from the dying process. After the hops was combined with the alginate and the water I discovered just how absorbant the hop powder was. It just ate up all the water so I added more in small incremental bits till I had the bread dough like consistency I was looking for as shown above in the ball. I then pushed this into the syringe avoiding air bubbles and left it to sit for 25 minutes. I then repeated the process with adding 20ml glycerol.
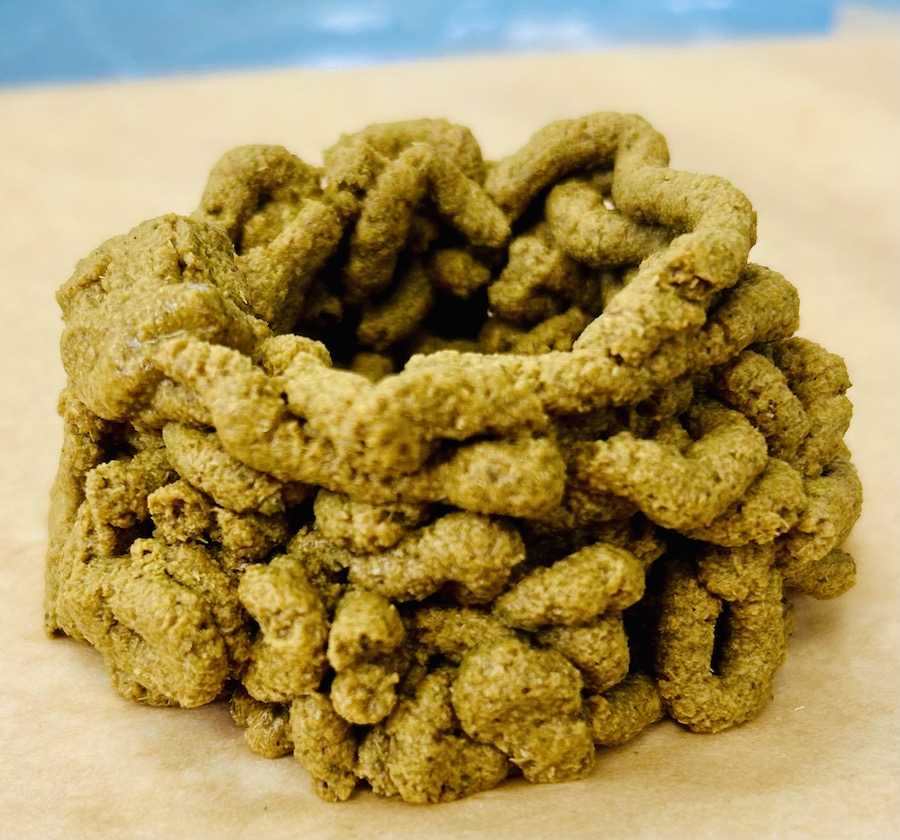 3D Printed Hop and Alginate Paste.
This paste did not work very well for these recipes and this process unfortunately. The paste did not flow well enough to allow the mixture to properly bind together. It could be that there was too much hop filler put into the mixture or that the hop material itself is too absorbant to work. Regardless we tried a couple more attempts but with incresing amounts of Glycerol added as a plasticer. The flow did get better but I do not feel any of the attempts were something to develop further. I used the leftovers to create some bricks in a mold. These actually did work a little better.
 Hop and Alginate Paste Molded
I also did some small tests with agar that also didnt turn out the way I had hoped but I did cast a small cup with two plastic cups which I think could potentially work better with gelatin. We were running low on gelatin powder towards the end of the week so that is also something to test later
Recipes
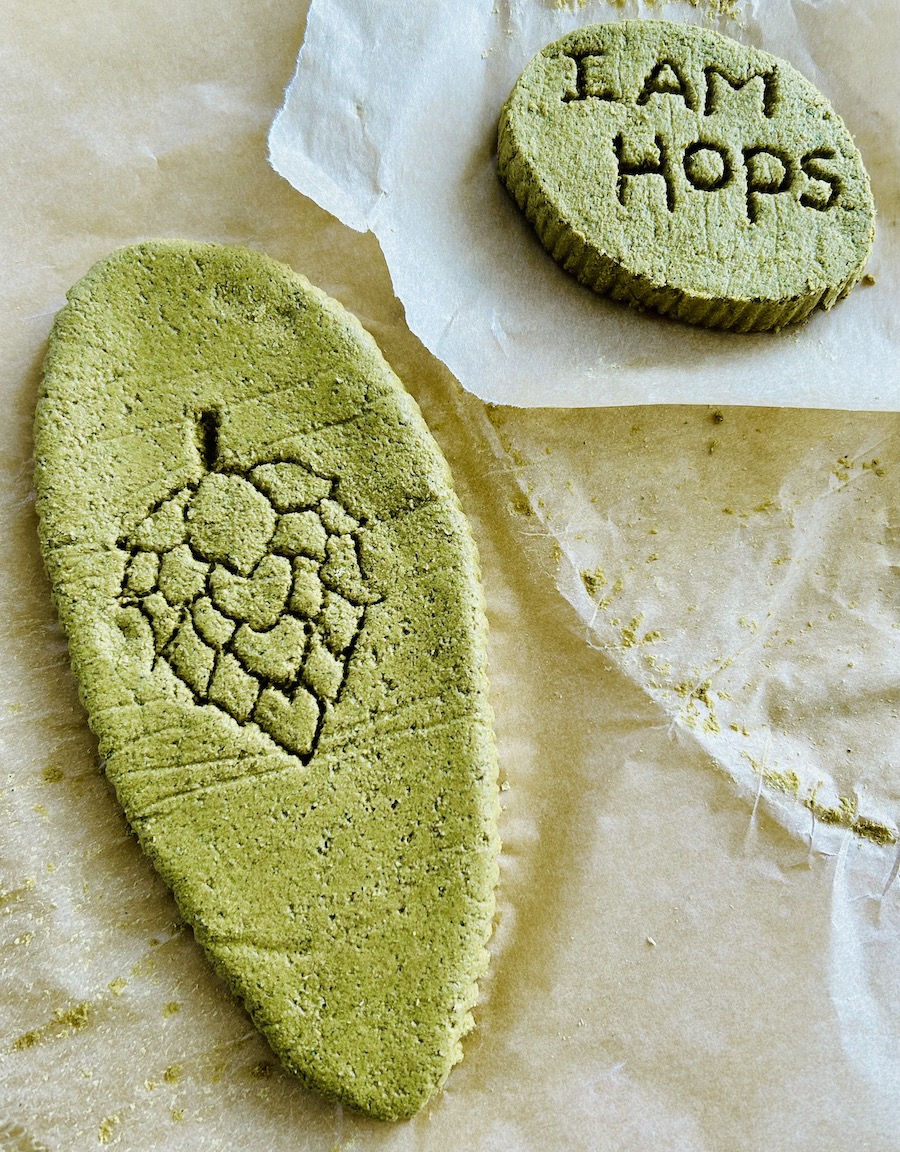
- Below you can find all the recipes and processes our team used when working with the hops.
Work From The Icelandic Node, Fabricademy, 2022.
Future Exploration
Even though my first forays into using hops as a component in Bio Materials didn´t really work out as I had hoped I still think there is great potential in this material for future experimentation. As well as the gelatin test, I hope to make some resin casts with it to make some coasters for the brewery. I also think it would be good to see if it is sound absorbant as in the agar mini test I did it gave a papery texture that could work. They are currently trowing away 20 kilos a week of this material just in that one brewery so the potential is there.
Fish Scales
Research
I had a really interesting talk with Catherine Euale during Bio Chromes week about structural colour. She mentioned the work of the Structural Colour Studio This is was really inspired my exploration looking into fish scales.
Structural Colour Studio Using Wood Cellulose to Create Bio Materials
Fish Scales are another natural resource by product that is just thrown away in Iceland. Salmon skin is known to be very reflective so knowing we have a fish leather factory in our neighbouring town of Sauðarkrokur called Nordic Fish Leather, I spoke to Hlynur there and arranged to pick up a bucket of fish scales to experiment with.
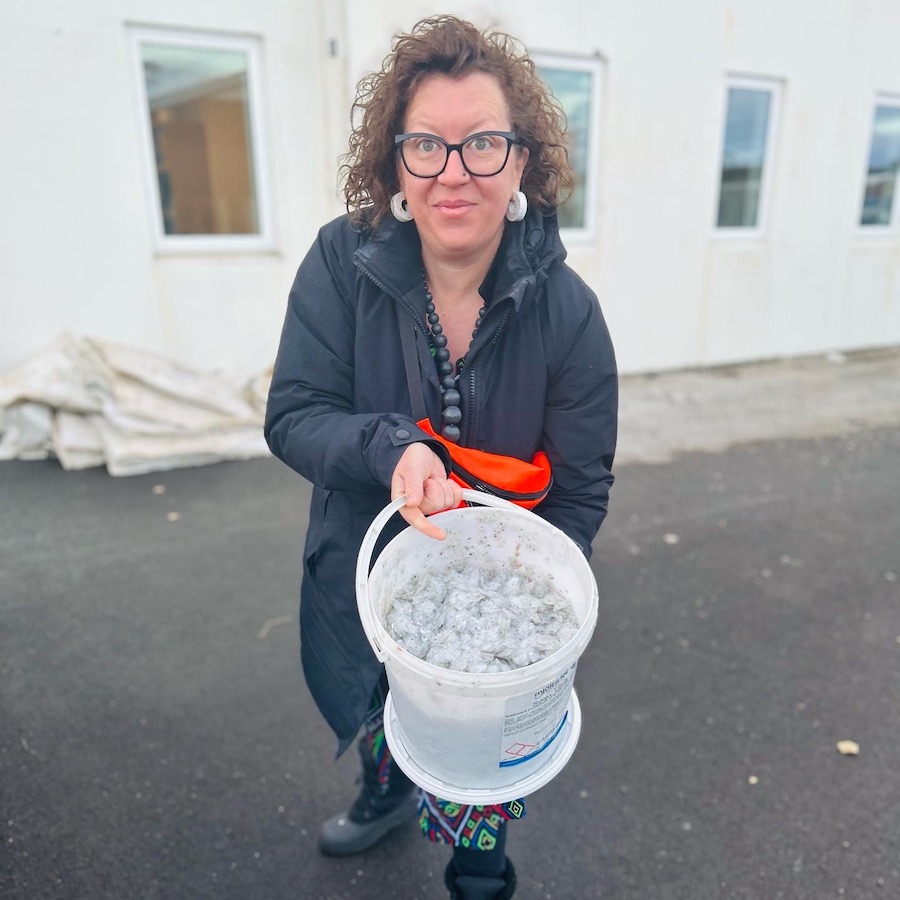
Washed Fish Scales Being Picked up at Nordic Fish Leather
Luckily the scales were collected after the first washing process of the fish laeather. They were washed with a bit of degreaser and soap but this was before the harsher chemicals used in the tanning process were added. So they were not as smelly as I had anticipated.
Process
The first thing we did was to wash them further by hand with water. We got an amazing pearlescent liquid after we soaked them. I now believe that this was partically the residue from the skins containing Biogenic Guanine Crystals that would actually provide the reflective structural colour that I was hoping to achieve with the scales themselves. This is definately worthy of further investigations.
We laid out the scales to dry and took some of them in order to dehydrate so they dried sooner. The texture was lovely and you can see the structure of the scale very clearly in the dried scales. Scales are small, hard plates, like fingernails, that cover the body of the fish for their protection. They form an overlaping flexible armour plating. Fish have the same number of scales all their lives. As the fish grows, the scales grow forming lines so you can apparently tell the age of a fish and how many years it spent in fresh and saltwater from the groups of lines on its scales. If a scale is lost, another scale will grow to replace it, but it will not have the growth lines in the center. This means you get almost a fingerprint pattern or a pattern like the rings of a tree.
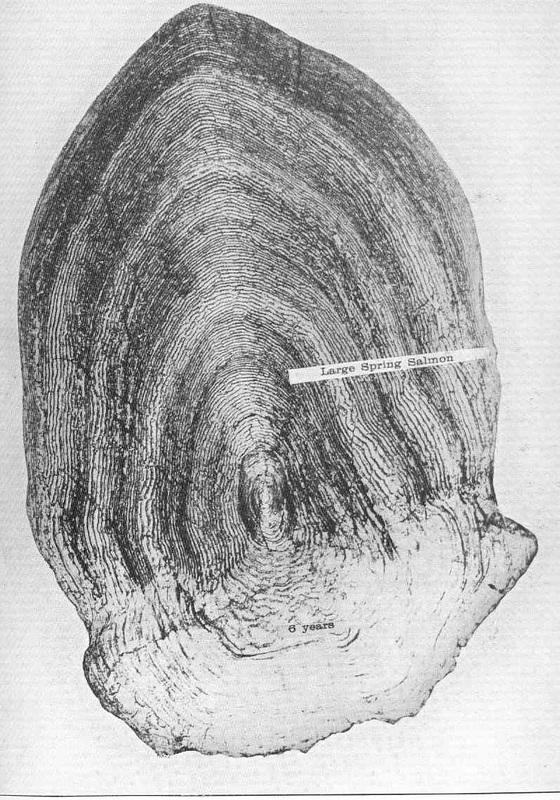
The Anatomy of the Salmon Scale Showing the Age of the Individual.
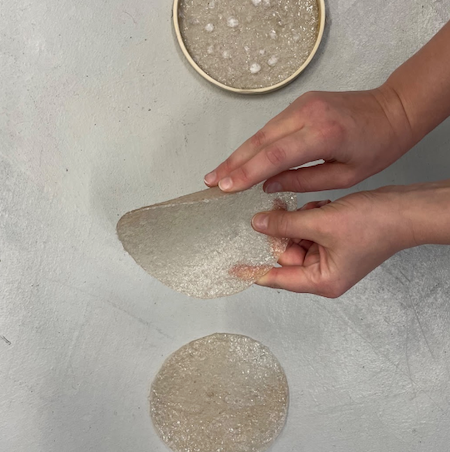
This is when we tried to grind the scales into a powder. i was amazed at the strength of them. We literally had them in the big blender for 30 mins with hardly any change in the consistancy. We eventually put them in the coffee blender and blitzed them some more. We eventually got a very course grain powder from it. some of it was accidently mixed with leftover Cochineal powder in the grinder that gave a slight pinkish hue to the powder which was actually very pleasant. It was at this point I decided to do the recipe that had worked well for us from the basic recipes, the Gelatin Silicon.
I followed the instructions and added the ground fish scales right at the end of the process. In doing so though I over stirred the mixture and ended up introducing some air bubbles into the mixture that rose to the top of the surface as I poured it. I guess this is a rookie mistake so on the final one I sprinkled some full dried fish scales on top just to see how it world turn out. As it dried over the week I had left the material in the molds and It became extremely solid as it dried. The bubbles became less noticable and actually the material turned out super nice. I would definately use this recipe again. (with less stirring)
After this first test I found an amazing scientific article, Development and Application of Fish Scale Wastes as Versatile Natural Biomaterials from the College of Marine Life Science, Ocean University of China and the Qingdao National Laboratory for Marine Science and Technology, Qingdao, China. This arcticle is a complete guide to the possibilities of using this resource and as I started working with it I started to understand the properties of the fish scales. I am not a biochemist of course but knowing the principle ingredients type I collagen and hydroxyapatite made me realise why the scales were so hard to grind up as they can be used in the biomedical world for bone and dental repair.
What interested me was the production of Gelatin which is derived from Collagen. I have no idea how to extract Gelatin directly from fish scales but I decided to do some simple experiments to see how they reacted to being boiled to see if I could extract anything interesting to use instead of using the gelatin powder.
I took 25g of fish scales and boiled them in 350ml of water over an hour. It was interesting to see how the scales developed. They curled in on themselves after around 5 minutes of boiling so I took a spoonful out to see how they behaved. They were extremely sticky when I rubbed them between my fingers which showed to me that there was some agent being released that I imagined was gelatin. I expected the water to become quite syrupy but it didn´t. Instead after 30 mins there started to be a film that formed on the outside of the pot. I scrapped some of this off and it was again extremely sticky.
The scales themselves became less sticky as the substance built up on the side so I decided to do another batch with the same amount of scales and water but only just to bring it to the boil them to use this as part of the gelatin plastic recipe but not adding the gelatin just to see what happens.
I took the fish scale water and added 12g of glycerol and prepared the mixture as per the recipe but as it reduced it became clear that there was not enough natural binder to make a usuable material so I decided to add just 5g of gelatin (the original recipe called for 48g) I poured the plate and because I had reduced the material so much it just made one round. I was actually very happy with the look of the material in the end. The fish scales actually look like rice. It is still drying currently as it still feels somewhat sticky but I think there is definately something interesting in this material. Again this is a waste product that at least 10kilos of it is thrown away everyweek just be Nordic Fish Leather.
Recipes
- Below you can find all the recipes and processes for the materials our tear made with fish scales.
Work From The Icelandic Node, Fabricademy, 2022.
- Here you can see the final result in the material where I attempted to use the fish gelatin.
Future Exploration
There is boundless potential for the exploration of the uses of this resource. I am going to try to extract gelatin from them to make bio materials without the use of bovine material. Also, I am suoer excited about the potential for using them for flexible electronics. If its compatable with creating a screen then that would be incredible. It is also amazing that scales can actually be used to fix arteries in just one of their potential Biomedical applications.
Conductive Material
As I am very interested in the potential of E-Textiles after last week I also decided to try to make some conductive bio materials. I would of liked to try to use activated charcoal but alas its not available anywhere in Blönduós so thats something I would like to make at a later date. My favourite example of work with the activated carbon is the project by Clara Davis and others on The Restology Project I found on the FabTextiles website.
 Bio Materials with Activated Carbon by Restology project, 2017.
Salt
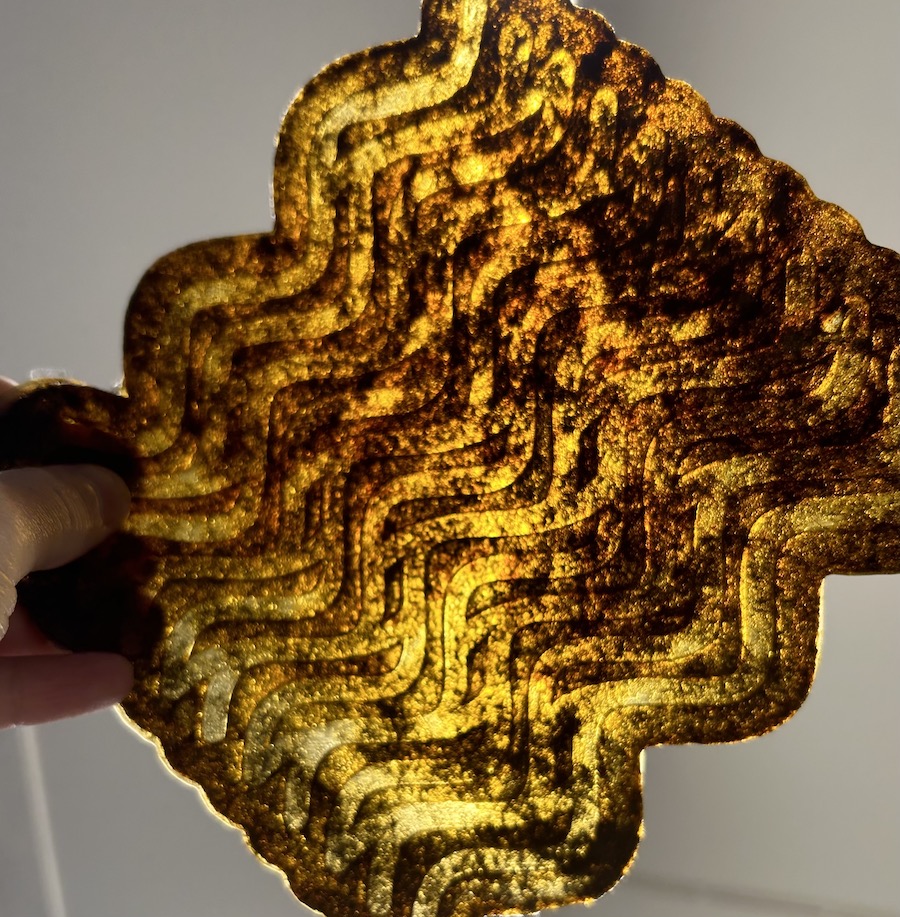
Firstly I made the conductive agar recipe from the brilliant resource Materiom. The recipe uses salt to create conductivity. Its very hard to tell if this is working yet as it takes some time to dry. I did just one plain pour and also one in a mold. The one in the mold I sprinkled in some fish scale and cochineal powder just for decoration. it was quite thin curently so I moved it out of the mold today. Hopefully it will be conductive in the end but I am still waiting for it to dry to see.
 Conductive Agar with Fish Scales and Cochineal powder Laid on Mould.
Steel Wool
There was some steel wool in the studio so I decided to add this into a biomaterial to see how it behaved and if it would be conductive. I prepared 2 plates, one with different conductive thicknesses of steel wool that were arranged in strands and one where I rubbed steel wool together over the mold to get a fuzzy layer of material to pour over. Here I used the Gelatin Bio Plastic Recipe. As i was making it i sprinkled half a table spoon of Spiralina powder into the pot but being very careful not to stir it ecessively (lessons learned)
Work From The Icelandic Node, Fabricademy, 2022.
Again I am very happy with how the material has turned out so far. The steel wool has rusted as it dried making a lovely colour combo. I wasnt overly fond of the original grey colour tbh.
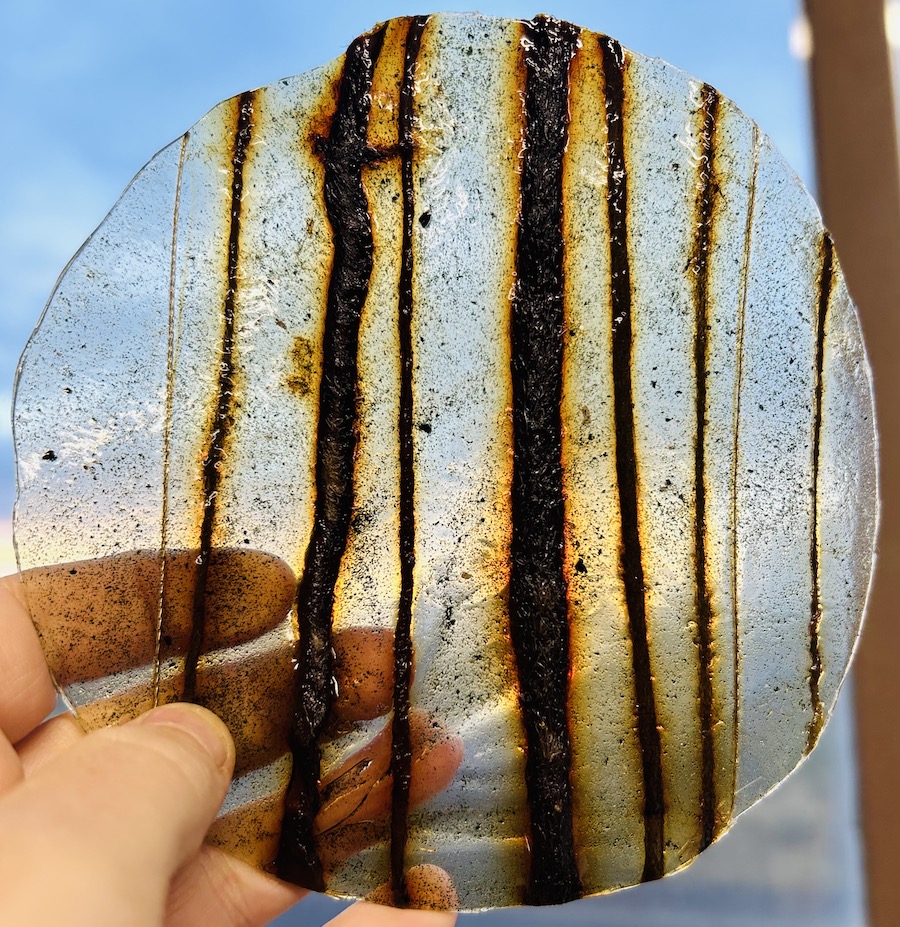 Lines of Conductive Steel Wool Laid in a Gelatin Bio Plastic.
 Shreaded Steel Wool Laid in a Gelatin Bio Plastic.
Future Exploration
The concept of conductive Bio Materials is very interesting and I will continue with this exploration in the next few months. I was thinking of the jelly in my EKG sensors so that is something I can make with the Agar.
Karen Kombucha
It was sad that I missed out on the Mycelium workshop with Catherine as I was away but interestingly my partner has extreme mycrophobia so I don´t think this is a material I could actually work with mushrooms going forward but thats OK because we grew Karen, our kombucha scobie. I have been following the work of Suzanne Lee for many years and it seems that these ideas in future grown textiles are finally coming to the fore. I enjoyed this Ted Talk with her from 2020.
We started the growth process in week one so its been nice to have Karen on our Fabricademy journey with us this whole time so it seems fitting that I am ending this week by harvesting her skin.
The Stages of Karen, From Birth to Harvesting.
Below you can find the steps we took to create her and to harvest her.
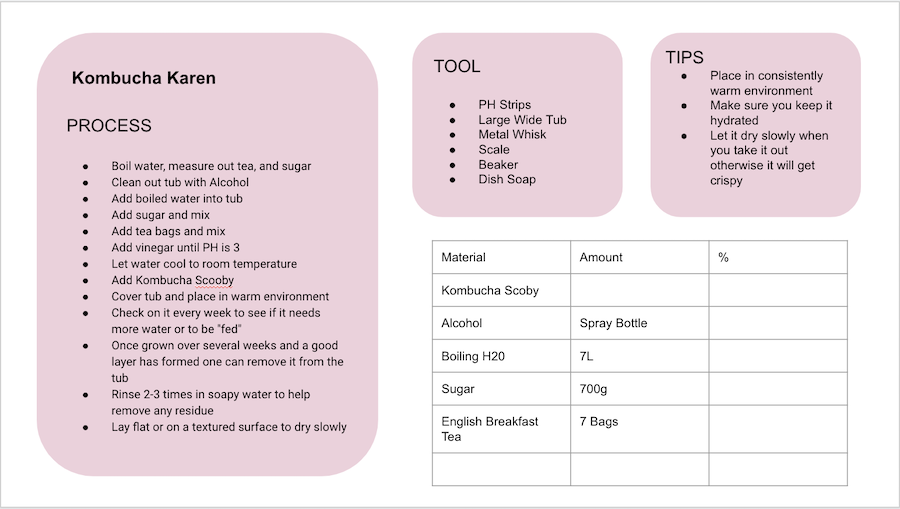 The Process of Making Karen.
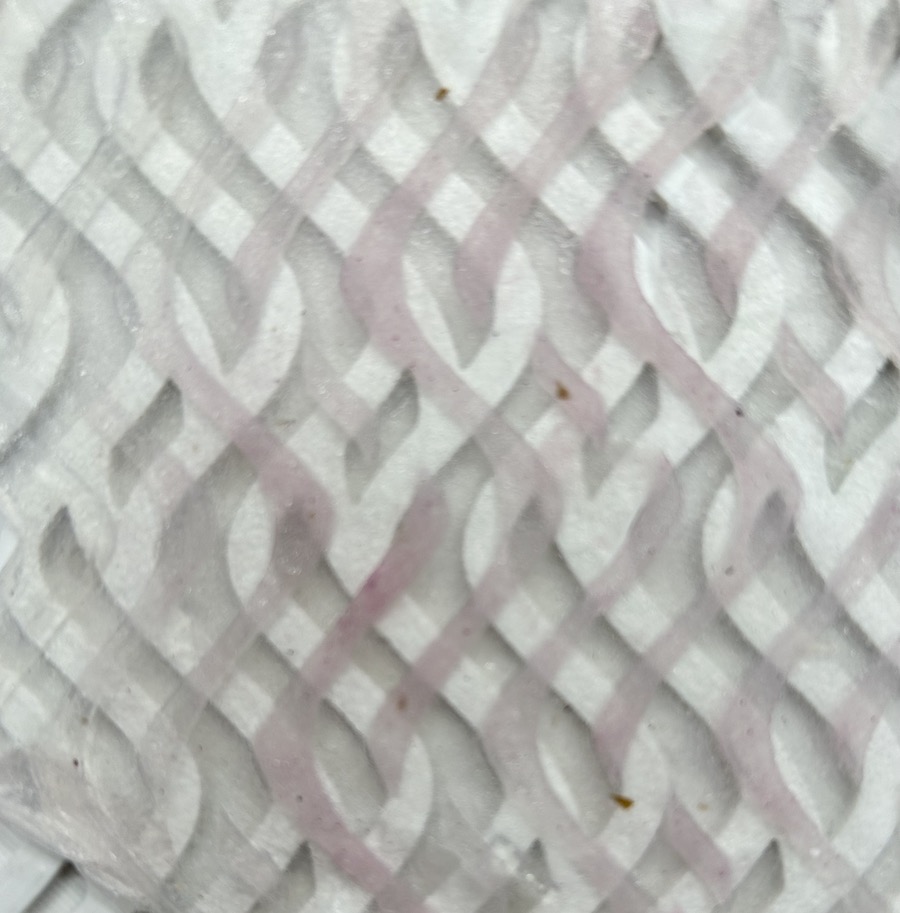
After taking her out you can see she has some dark spots on the surface. These came from mold patches on the scoby. I actually like this feature ans it looks like freckles. We decided to double her over as she was quite thin so we carefully folded the "skin" in half and massaged any bubbles out of the piece till we had a nice smooth surface. We then cut this in half and placed one on a mould that Alice had made with a glue gun. We also placed one half on a folded origami paper piece that Alberte had made. and left it to dry. The final piece is paper thin even though we doubled her over. It is transluscent and pilable. We are putting wax on her to increase her strength and durability.
Tools
Alumni Resources
- Lucrecia Strano Great Documentation
- Carolina Delgado amazing work with bioyarns
- Petra Garaiová Of course, so inspiring for biomaterials