2. Digital bodies
ADAPTATION OF THE BODY IN THE FACE OF AN ALTERATION OR DISEASE
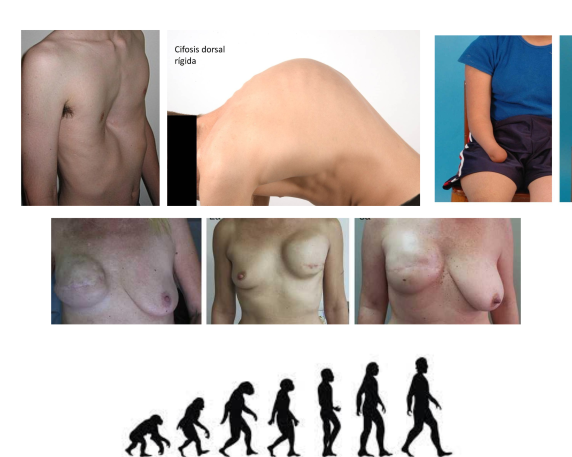
My quest for this week focused on adaptability and modification of the body in the face of disease or abnormality. There is no body the same as another, each one with its own dimensions and proportions adapts to the environment and needs to survive.
In the face of an illness or anormaly, the body is resized and acquires a new image; amputations, organ removal, bone and hormonal alterations... It is worth mentioning that the bpdy is not only modified by abnormalities, pregnancy, for example, offers us another perspective to our versatility.
On the other hand, referring to the capacity of the body, it is fascinating to observe the evolution of the human body over the years and centuries, adapting to the environment and needs.
Make a digital body
There are different ways to get the first prototype that we will work with
3D SCAN
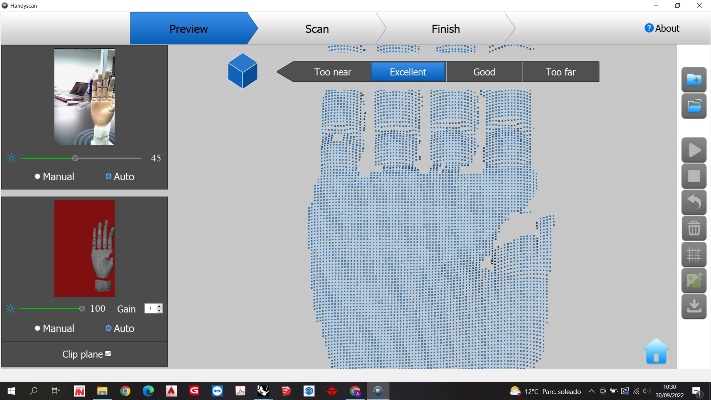
As a first test,I make the first prototype with the scanning technique. I took the hand of a mannequin and put it in an upright position.
The scanning process requires a lot of precision to get a complete and clear figure.
Steps to consider with scanning technique
- Choose the figure you want to scan. Keep in mind that the size of the figure has to have a size that covers the scanner.
- Make sure that you press the "AUTO FUNCTION".
- Press "Start" on the screen.
- Press "Play" in the scanner and scan your object carefully.
- Move around your object until you get the complete shape. It is important to keep a proper distance from the object. The program itself tells you if you are too near or far from the object.
- Wait untill the program fills the hole and you see the "Meshing completed" message.
- Then you need to export the model into an ".obj" file.
In the first test I did not get the fingers to be sharp and finished as shown in the image.

However, I continue with the deformed hand referring to the reflection and inspiration of the assignments.
MAKE HUMAN
On the other hand, as a first step I also did tests with Makehuman. In this case I generated the prototype of a pregnant woman.
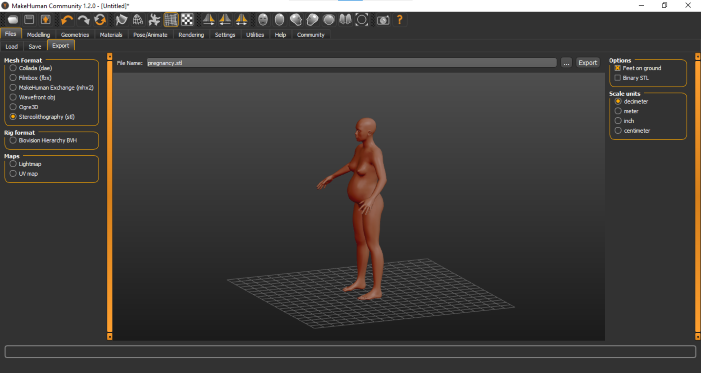
For this, I have adapted the dimensions of the body, mainly modifying the proportions of the belly, the breasts and the weight. I have not made any changes to the appearance of the face or the materials since there are no clothes.
Finally, I chose a stay position that I uploaded from main menu.
RHINO
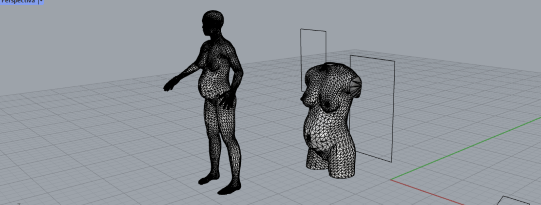
In the next step, I open the obj. made in make human. I remove the extremities and keep the bust. To do this, I center the mesh and select the box command and boolean difference. In the image we can see the initial figure and the final pre-slicer.
SLICER and LASER CUT
Before importing the design to the laser cutter, I cut the geometry in the way I want. In this case, interlocked slicess.
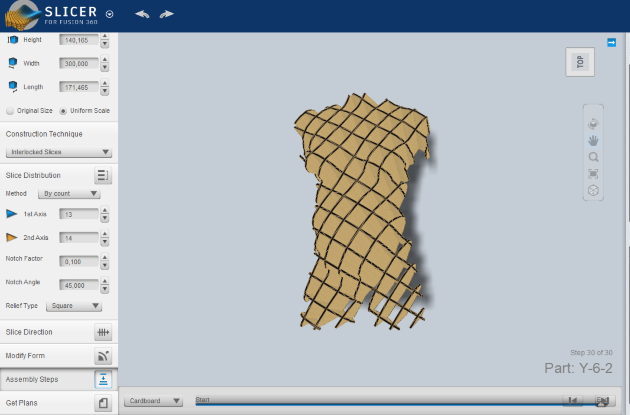
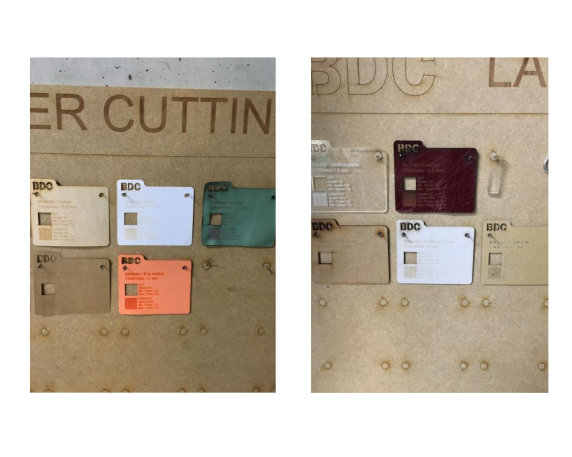
The material size and for the laser cutter:
- Type: Cardboard
- Thickness: 3 mm
- Length: 650 mm
- Width: 720 mm
- Horizontal margin: 5,08mm
- Vertical margin: 5,08mm
- Slice offset: 0.254 mm
Machine settings:
- CUT. SPEED: 19. POWER; Min: 70 / Max: 72
- ENGRAVE. SPEED: 400. POWER; Min: 50 / Max: 54
Object size:
- Height: 94,9mm
- Width: 203,2mm
- Length: 116,12mm
For Laser Cutter you need to follow the following steps as it appears in the image.
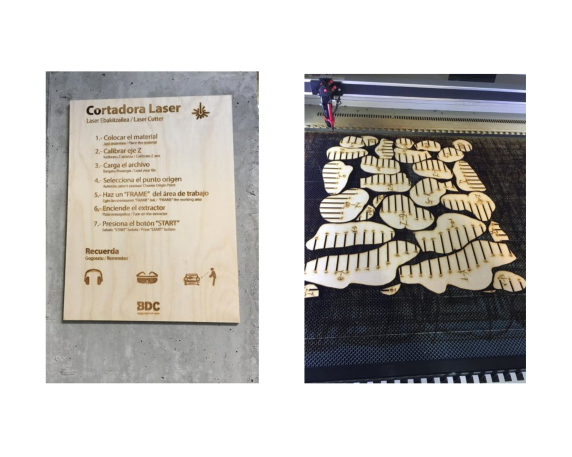
- Import your ".dxf" into the software and select an order of cutting.
- Select the parametters.
- Send the file to the laser cutter.
- Select your file from the list of files on the laser.
- Calibrate the Z axis.
- Choose the Origin Point.
- "Frame" the working area.
- Turn on the extractor.
- Press the "START" button and here we go!
3D MODEL