9. Textile Scaffold
This week we have experimented with different techniques and we have discovered how textile techniques have different applications.
Inspiration
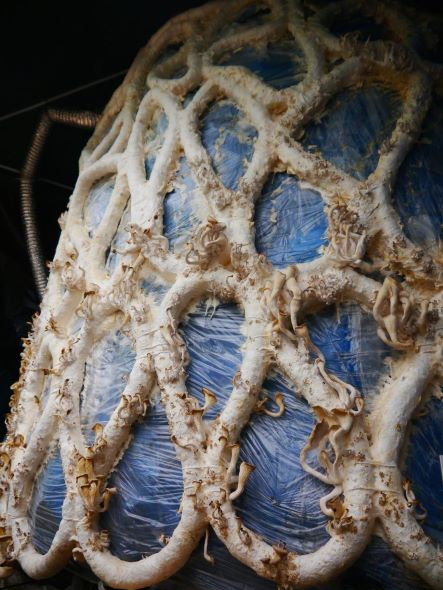
Aleksi Vesaluoma has developed a technique for using mushroom mycelium as an environmentally friendly construction material.
Vesaluoma, developed a technique where the mycelium material is mixed with cardboard before being moulded into what he calls "mushroom sausages" using a tube-shaped cotton bandage.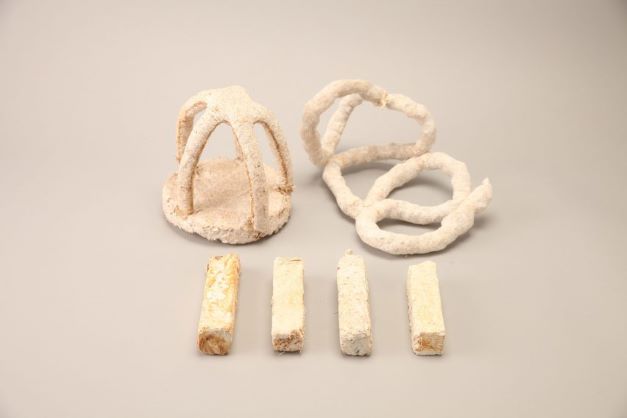
London-based Blast Studio collects coffee waste that they then mix with the roots of fungi – mycelium – to turn objects created by humans into unique pieces that are eventually transformed by urban waste. The designs of their Objects from Nature come from nature’s geometric shapes, and create micro-climate pockets that capture humidity and protect the organisms as they grown.
Crystalization
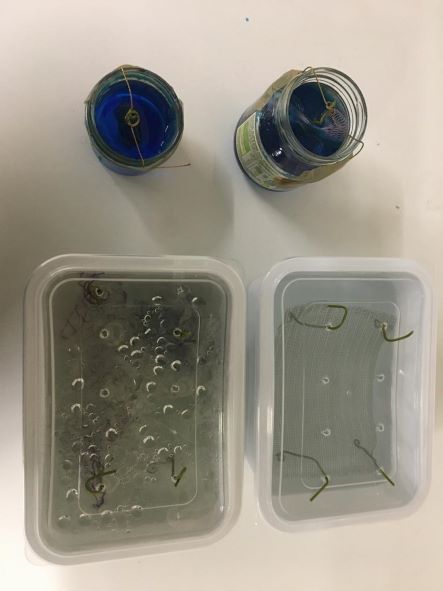
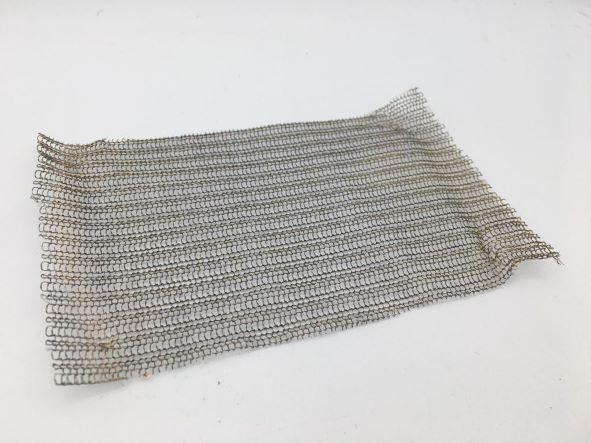
I found it very interesting to explore with this technique. I have experimented mixing alum, borax and cooper sulphate with different materials such as fishing nets, tulle and metallic structures.
This is the material and the process that I have carried out.
Material
- Cooper Suphate
- Borax
- Alum
- H2O
- Containers of different sizes
- Cotton fishing net
- Nylon net
- Tulle
- Metallic Tacot
- Balance
In order for the crystallization to take place properly, I put this system in the containers to prevent the material from touching the bottom and sides of the container.
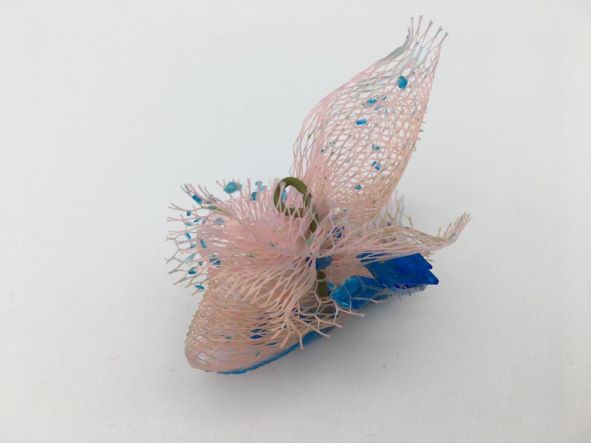
BORAX
| Crystal name | Material | Quantity of Crystal | Quantity of H2O | Time | Measure container |
|---|---|---|---|---|---|
| Borax | Cotton fishing net and Tulle | 300gr | 800ml | 48h | 20x13x15 |
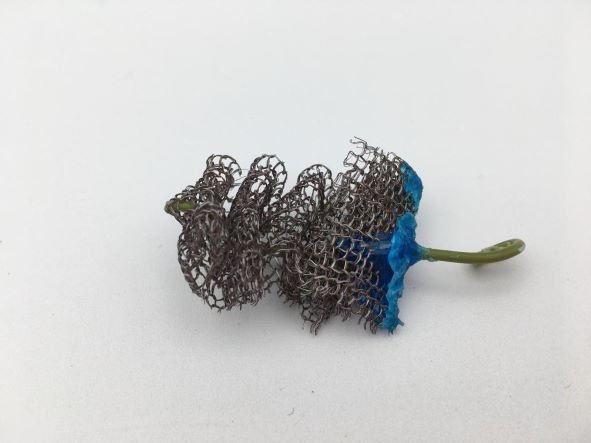
COOPER SULPHATE
| Crystal name | Material | Quantity of Crystal | Quantity of H2O | Time | Measure container |
|---|---|---|---|---|---|
| Cooper Sulphate | Nylon Net and Metallic Tacot | 50gr | 75ml | 48h | 75ml |
ALUM
| Crystal name | Material | Quantity of Crystal | Quantity of H2O | Time | Measure container |
|---|---|---|---|---|---|
| Alum | Metallic Tacot | 60gr | 500ml | 48h | 20x13x15 |
CNC mold
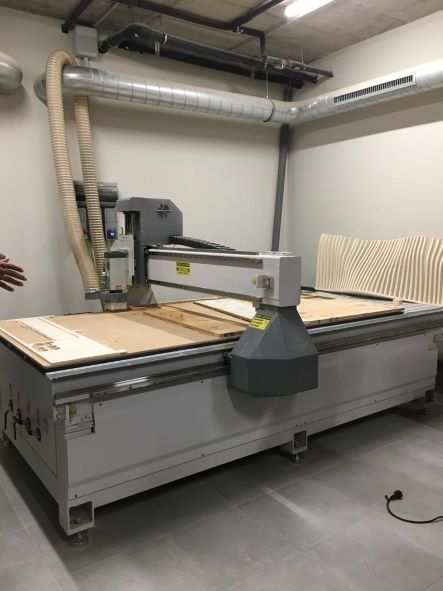
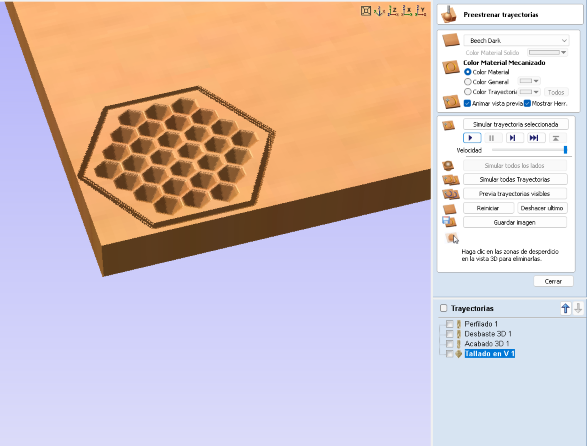
To make the wood composite, we have used the following tools. On the one hand, the machine in which we have drilled the wood with the pattern designed in Rhino and on the other hand, the various bits with which we can work according to the desired result.
These are the technical details about CNC Machine:
-
CNC Milling Machine by HDS
-
HDS spindle, air cooled 6kw
-
Model: AT/MT 1090-140, 18000RPM, ER32
-
Bed size: 1300mm by 2500mm
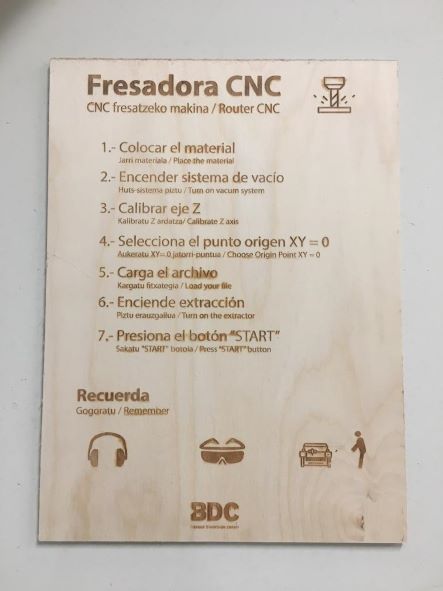
To use this type of machine it is important to take into account the following security measures:
- Place the material.
- Turn on vacum system.
- Calibrate Z axis.
- Choose Origin Point XY= 0
- Load your file.
- Turn on the extractor.
- Press START buttom.
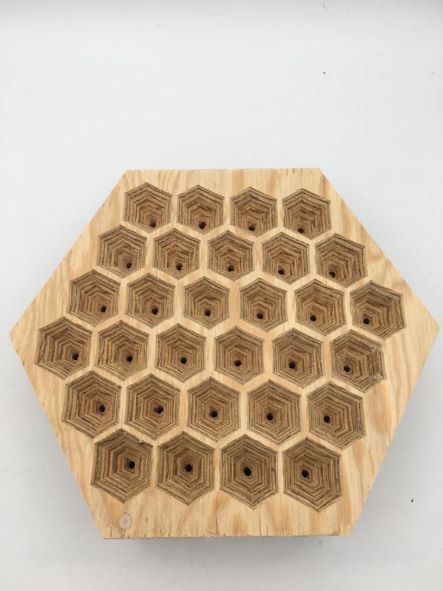
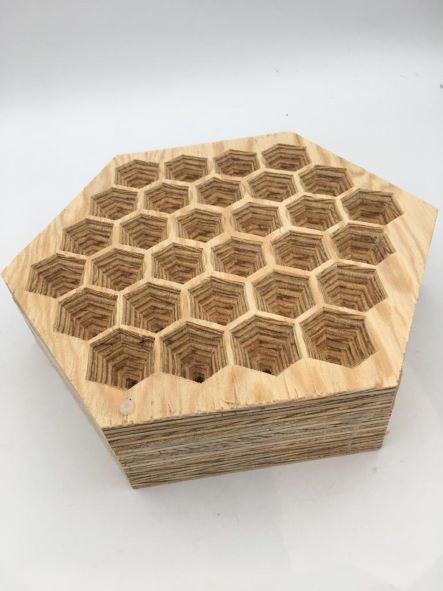
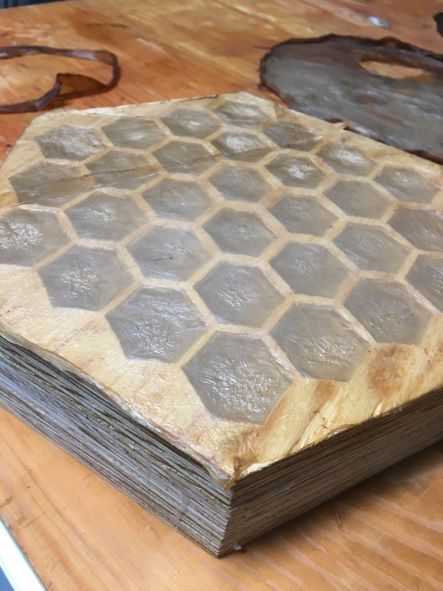
Before starting to design the mold, we start by taking into account the dimensions of our mold. They are the following:
- 60mm deep
- 130mm each side
- 40mm high
Step by Step
- Design of the mold in Rhino. For this we have to take into account that it has to be a design that allows the fabric to adapt well to the shapes of the mold.
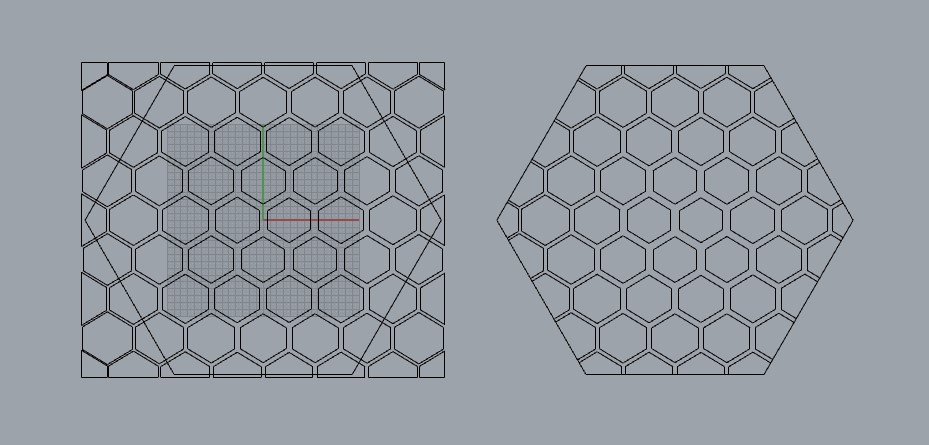
- Once we have the design decided, we adjust it to the appropriate measurements using the Aspire software.
This is a short tutorial that explains the basics of using the Aspire.
This is the last step before proceeding to cut. Calibrate the measurements with the Aspire program.
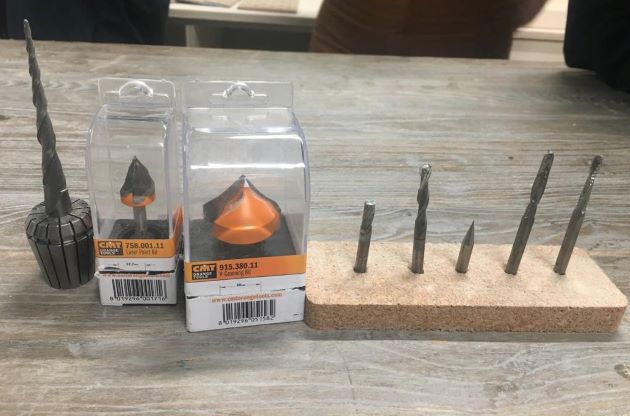
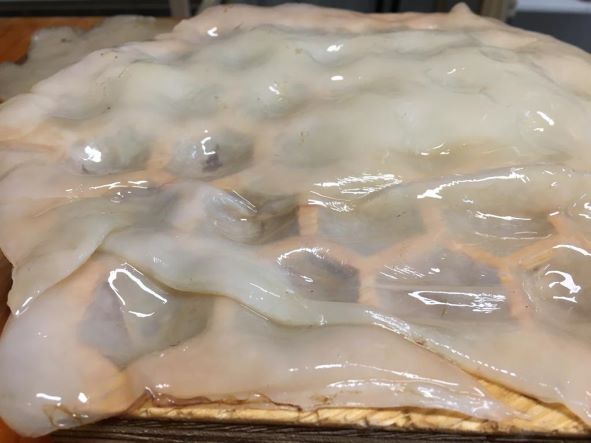
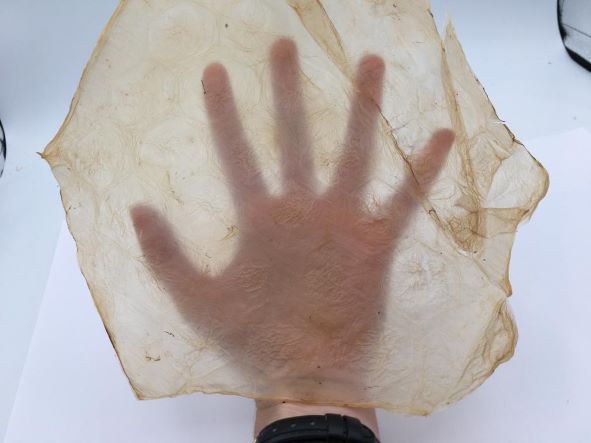
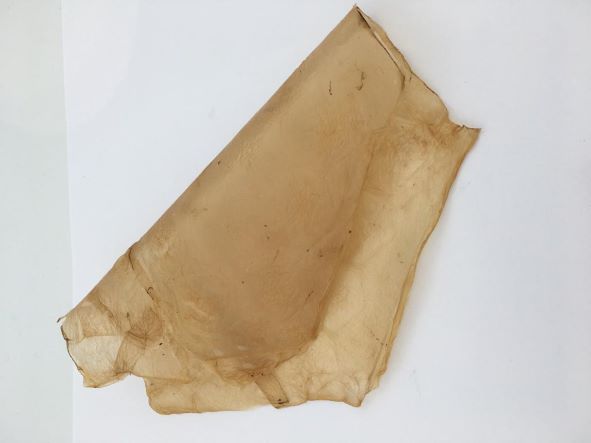
To make the mold we have used two types of drill bits. On the one hand, 6mm ball nose for the 3d carving and other hand, a 6mm endmill bit for the profilling of the gexagon.
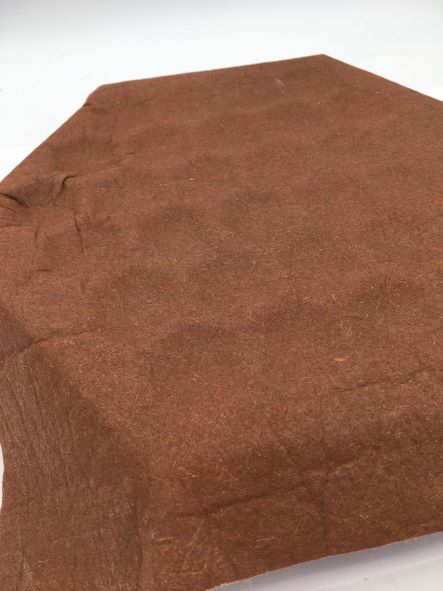
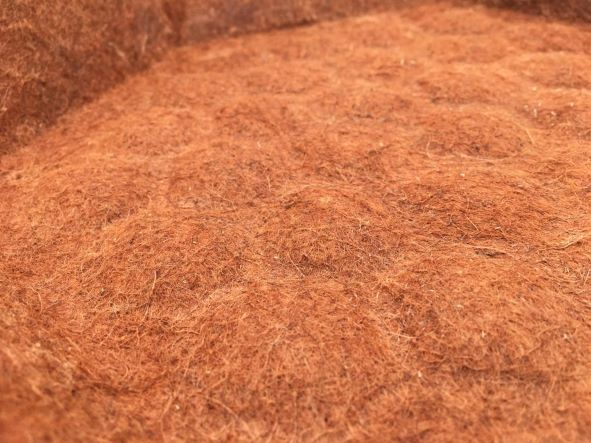
- In my case, I have worked with a vegetable fiber that comes from pineapple and scoby to experiment with the shapes of the mold.
- To do this, before placing the vegetable fiber in the mold, I have left it to soak to make it easier for the fabric to adapt better.
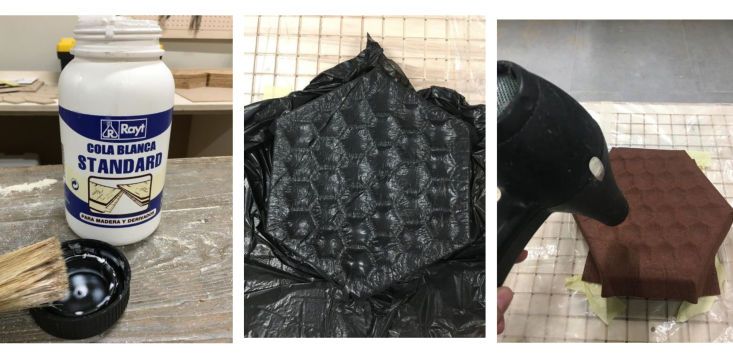
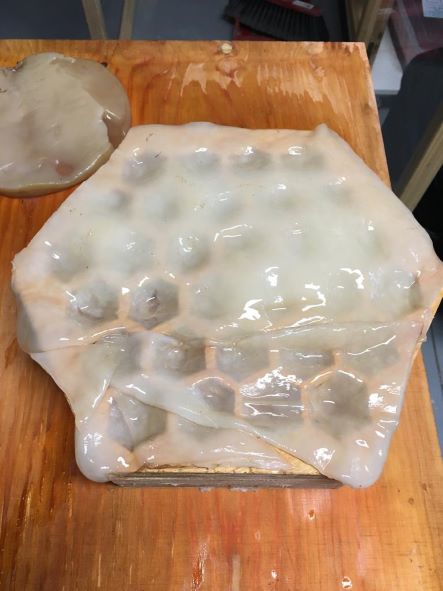
- I put white glue with a brush inside the fiber and place the textile on the mold.
- As seen in the video, I place a bag that covers the entire space to favor the vacuum effect.
- I apply heat to maintain the shape in the textile more safely.
Piñatex fiber
SCOBY

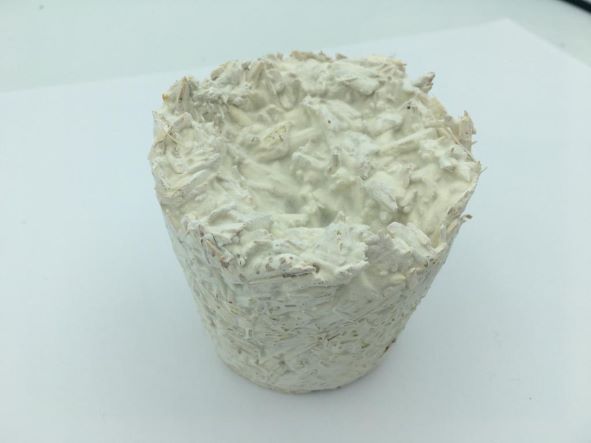
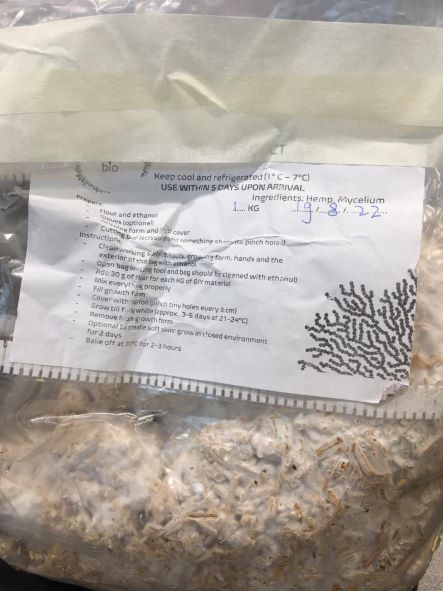
Molding with Mycellium
 |
 |
 |
 |
 |
 |
Step by step:
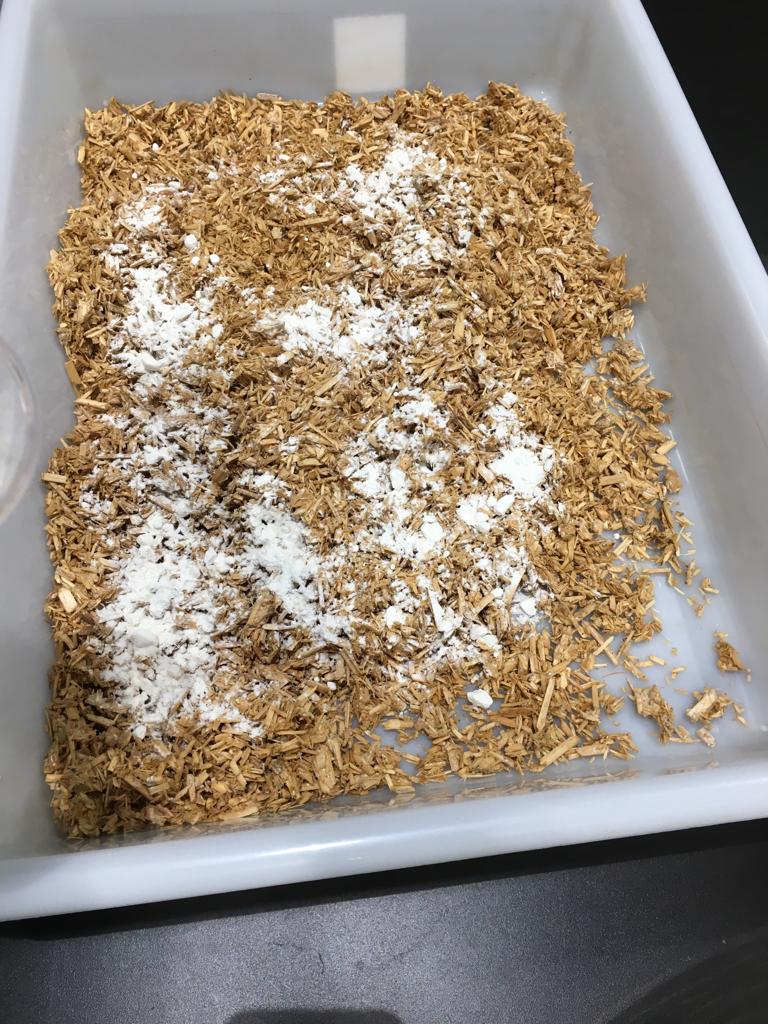
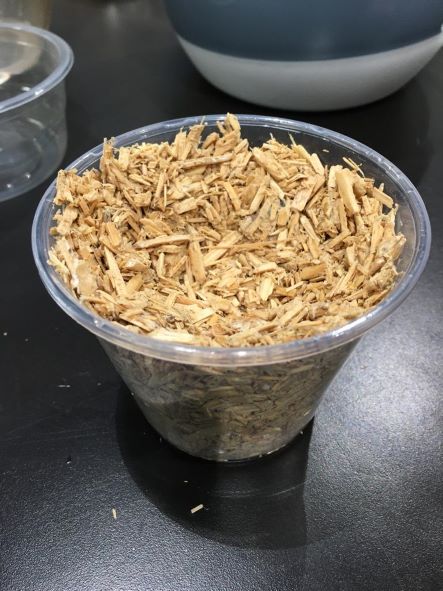
-
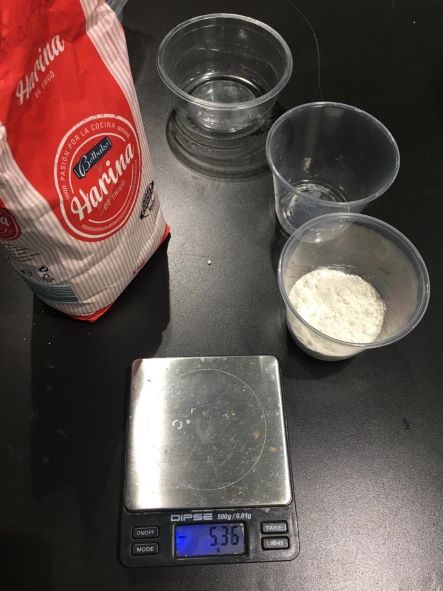
3gr of flour for 1kg of mycellium. 10% flour on the mycellium.
-
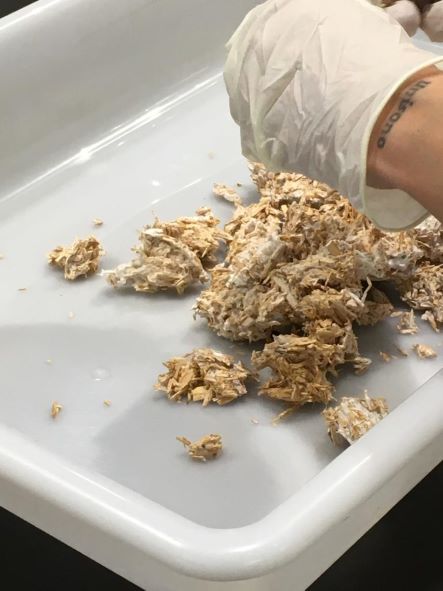
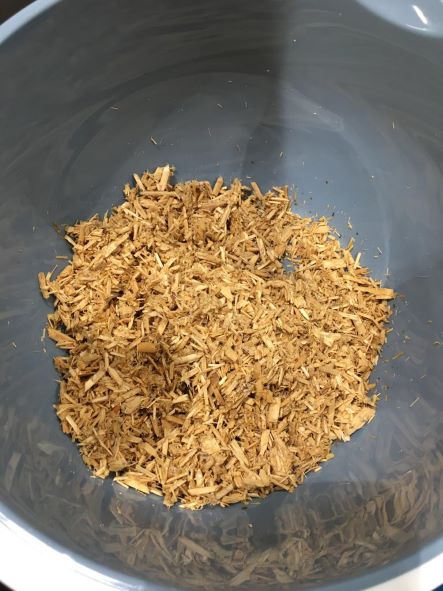
We tear apart the mycelium.
-
Mix with the flour.
-
We take a boat and disinfect it with alcohol ¨sterilization¨. We put the mycelium in the pot, crush it and leave a hole in the center.
-
We cover the jar with plastic wrap and close it with masking tape.
-
We put it in a disinfected black bag and store it in the dark, at a suitable temperature.
This is the result of the mycelium after leaving it for two weeks in optimal conditions of temperature, humidity and light.