7. Computational Couture
Our week started with an Aldo Solazzo and Ana Correa´s tutorial. We were shown several inspirational examples to show what can be achieved with Grasshopper. Throughout the week we have had different tutorials on how to work with GrassHopper. It has been a discovery learning this new language.
Inspiration
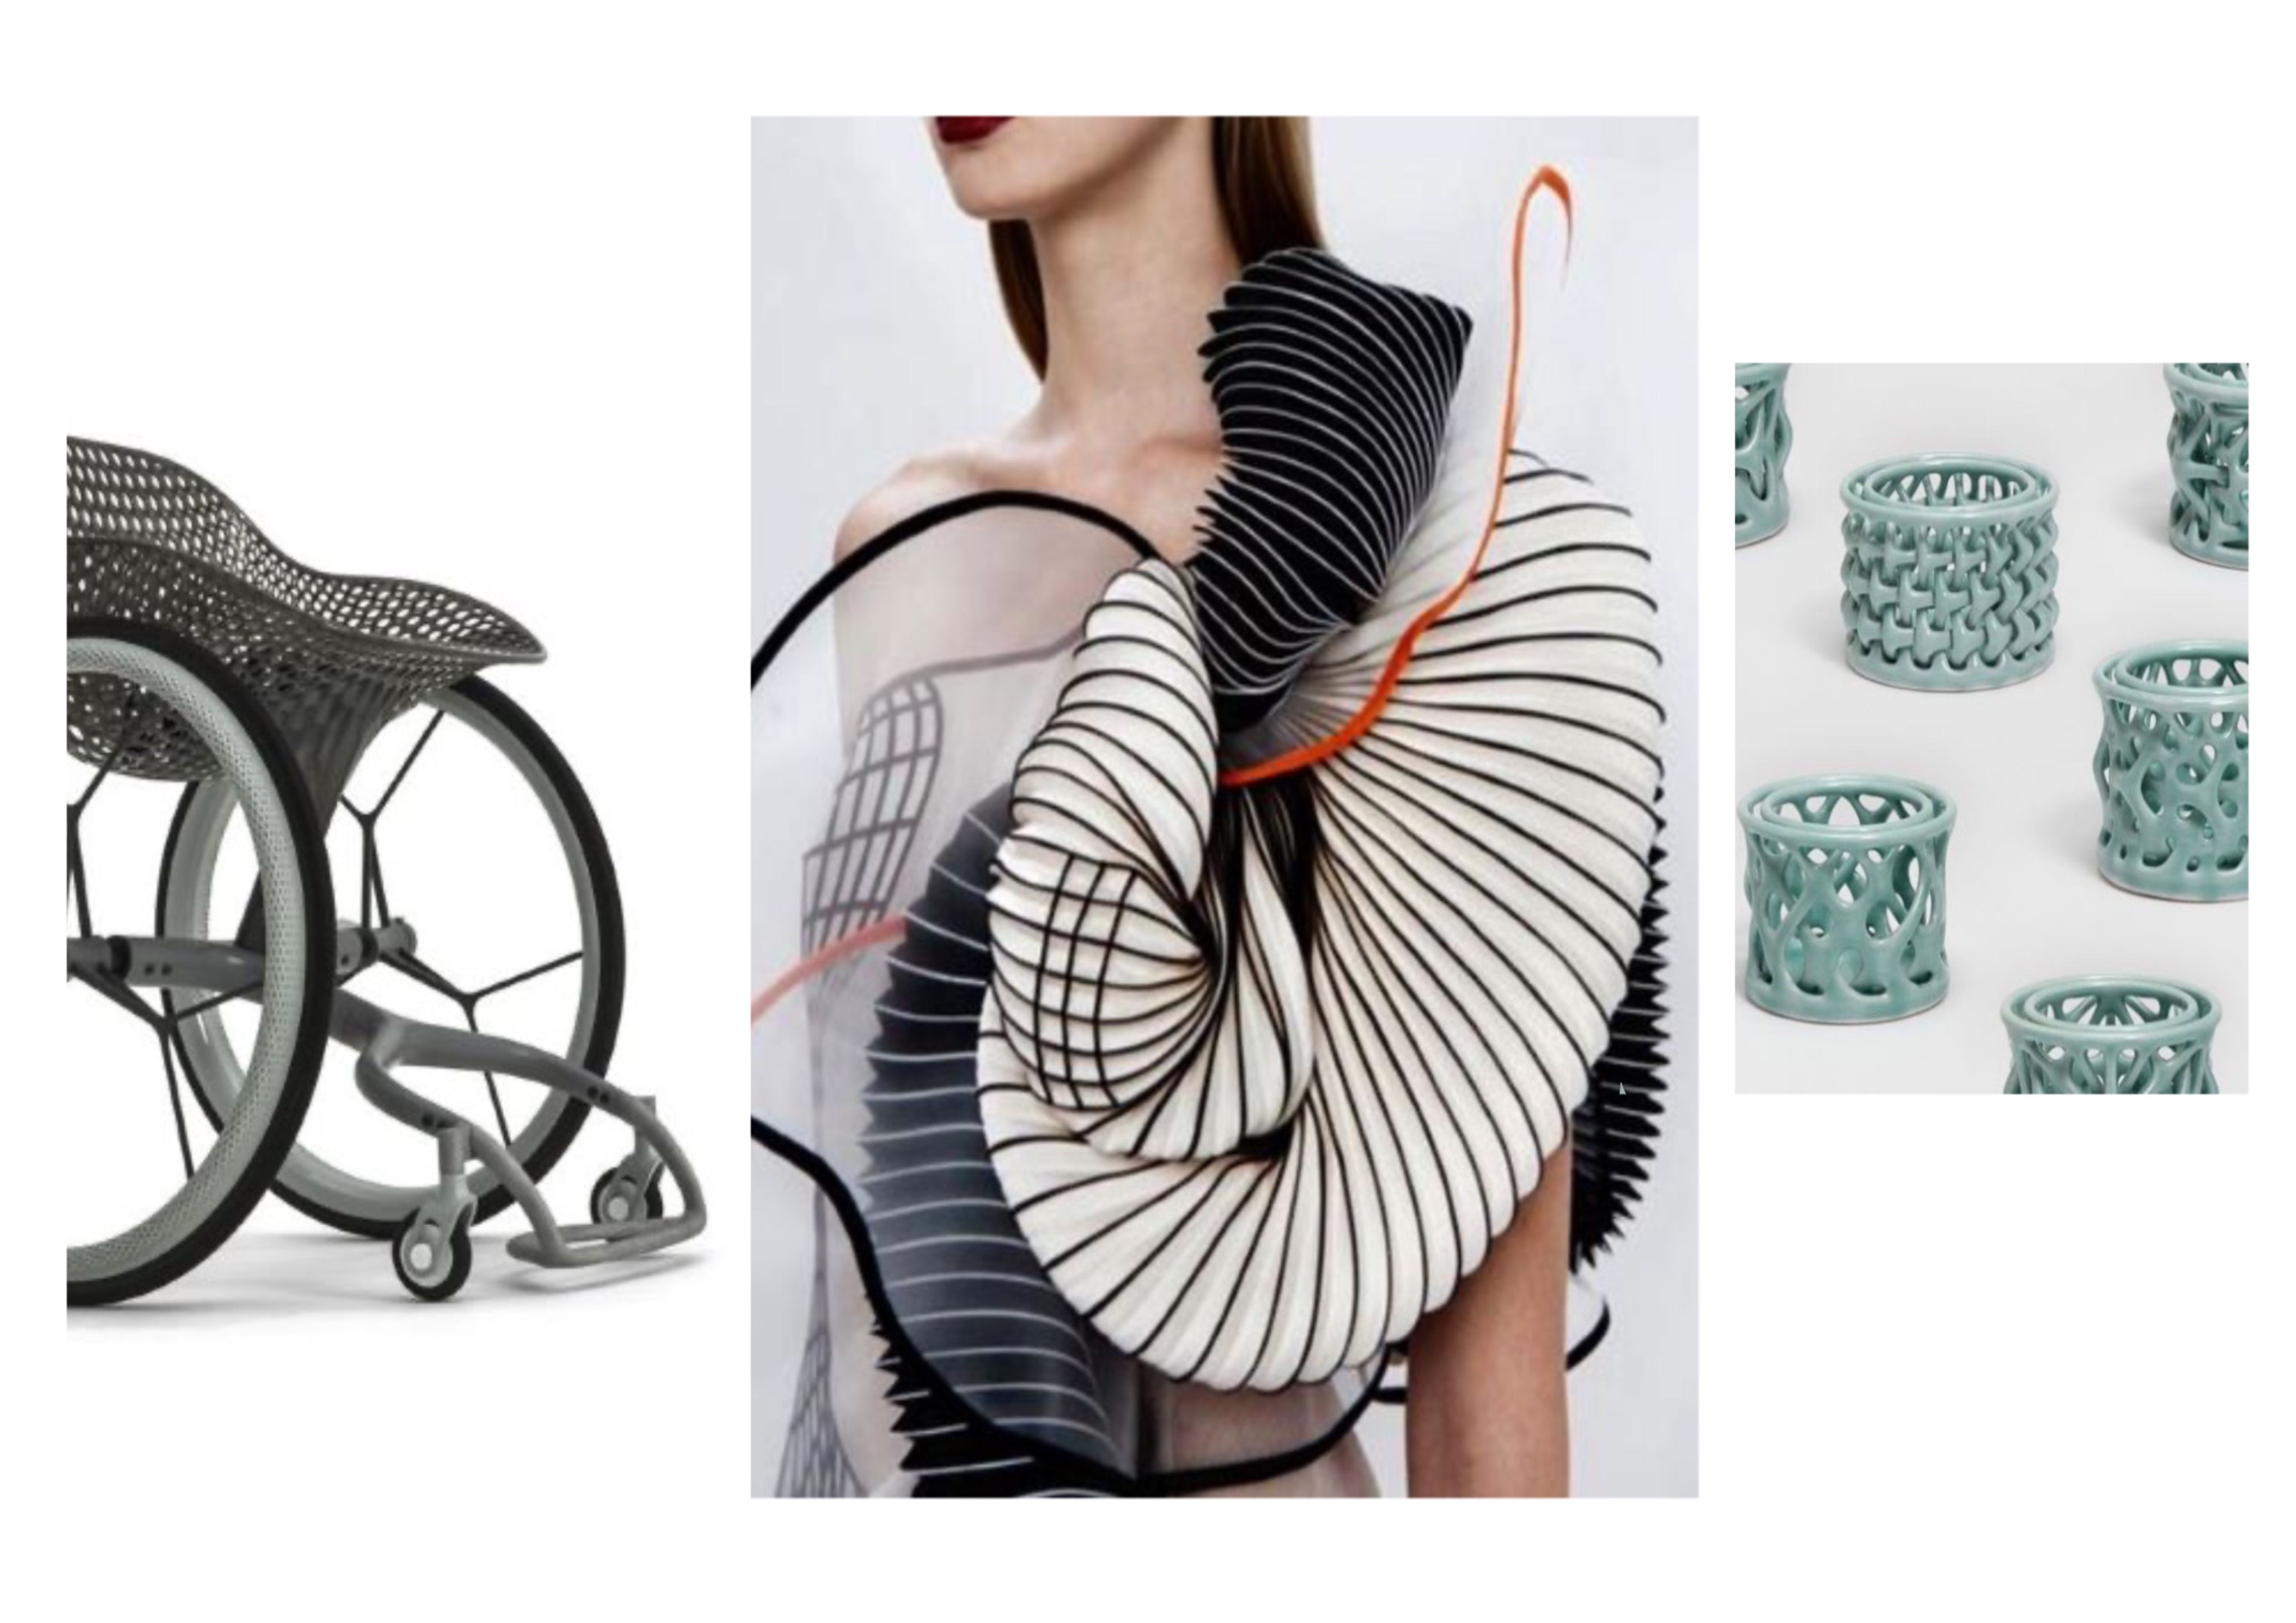
Benjamin Hubert | Noa Raviv | Yanko Design
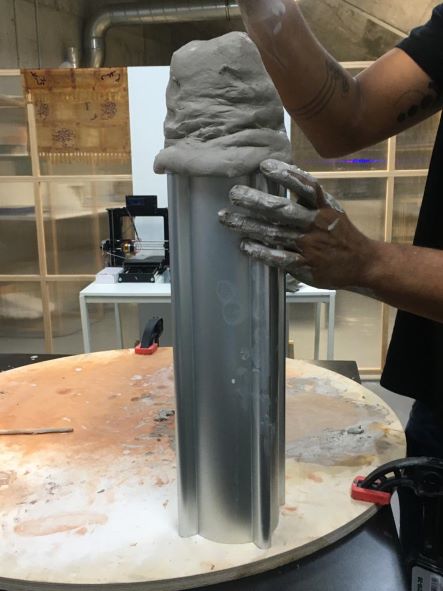
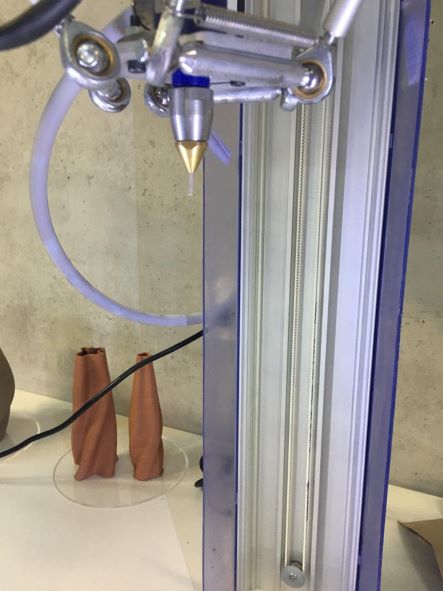
DELTA WASP 2040
Features:
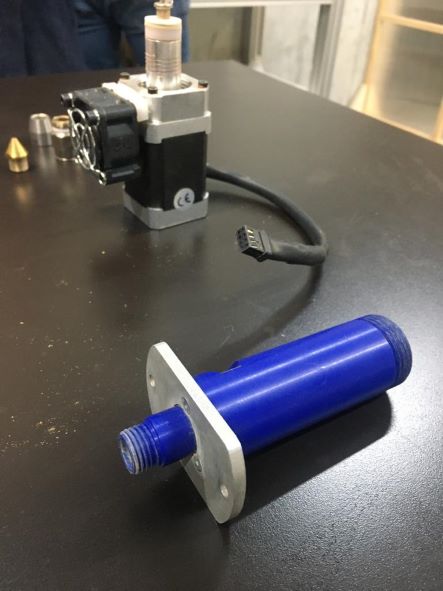
Basque BioDesign Center 3D Ceramic Printer.
Delta machine.
Dimensions: 200mm (diameter) x 400mm
 |
 |
 |
 |
 |
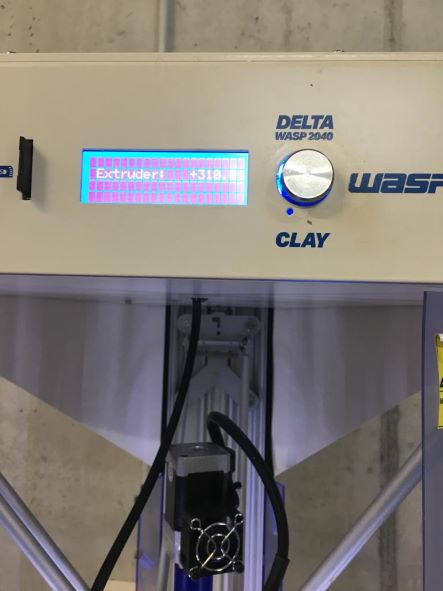 |
This is a ceramic printer which we have to use at the Basque BioDesing Centre. We had our first contact on Wednesday and we learned the basic functioning of the printer and how to work the material we used.
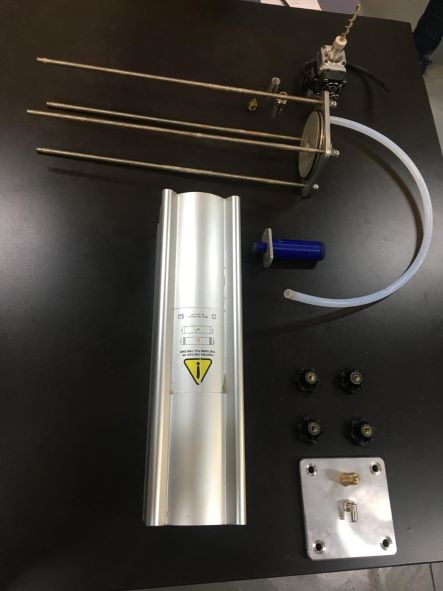
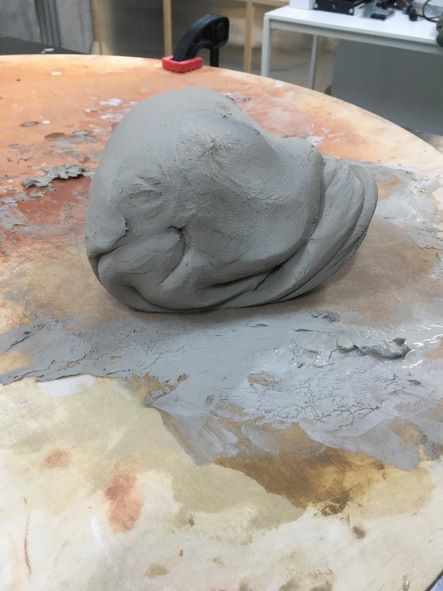
we learned to assemble all the parts that make up the printer with its subsequent calibration and purging. At the same time, we prepared the clay that would fill the tank. The clay is mixed with 5-10 percent water corresponding to the weight of the material. Once the mix was done, we started to knead the clay.
Finally, we introduced the clay in the tank, we closed the top part of the tank and we placed it into the machine.
My impressions of GRASSHOPPER:
-
Unlimited possibilities: in order to use correctly Grasshopper it is necessary to experiment and investigate several hours. During this time, I realised that with Grasshopper it is posible to create complex projects as well as straightforward (simple) ones.
-
Food4Rhino: with this webpage you can download many plugins that are highly useful to design your projects.
- 3d scan with Skanect
- Bifocals
- Bowerbird
- Weaverbird
- Chromodoris
- Lunchbox
- Mesh Edit
- Mesh Tools
- Noise4d
- Human
- Dendro
- Shotest walk
-
Once you have downloaded all these plugins, it is very important to activate and connect them to the Grasshopper app and to Rhinoceros.
-
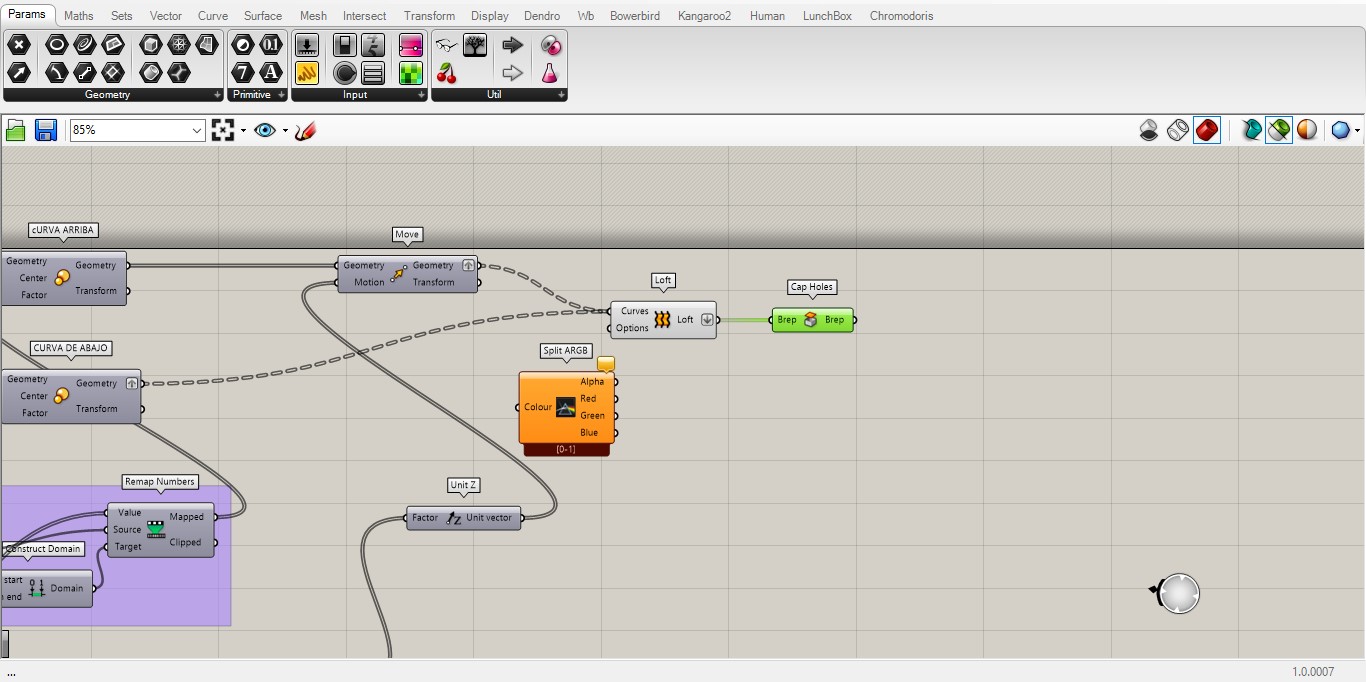
Parameters and components: one of the basic moves to use Grasshopper is to understand how they work. Parameters store data, whereas components perform actions that result in data. The most basic way to understand Grasshopper is to remember that we will use data to define the inputs of actions. These parameters and components usually have an input and an output. It is with these inputs and outputs that you can connect several functions and create the final result of the project.
In order to understand the state of these functions you have to attend to three colours. On the one hand, there is the green colour, which means that your function is selected and you are working on it at the moment.
On the other hand, there is grey. This colour means that the function is healthy (i.e. it is working well).
Finally, there is orange: it means that the function is inactive (it is not connected and has no data whatsoever).
-
There are two important things to consider to achieve and easier way of work: first, thanks to Bifocals, you can easily identify the work that each function is executing. Secondly, on the Grasshopper’s Display tab, you must have the Draw Icons, Draw Fancy Wires, Draw Full Names tools activated. This will considerably facilitate the display of your work.
-
Data is passed from one component to another through wires. The direction to connect these wires should be from left to right.
-
"Bake" it, and then "Cap" it. Bake, materialize Grasshopper's geometry in Rhino.
PARAMETRIC DESIGN
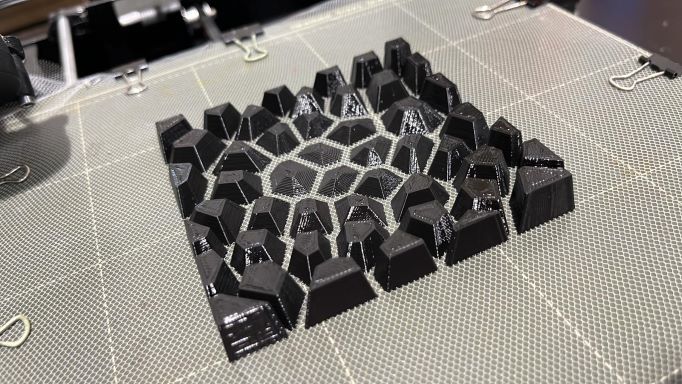
VORONOI + ATRACTOR POINT
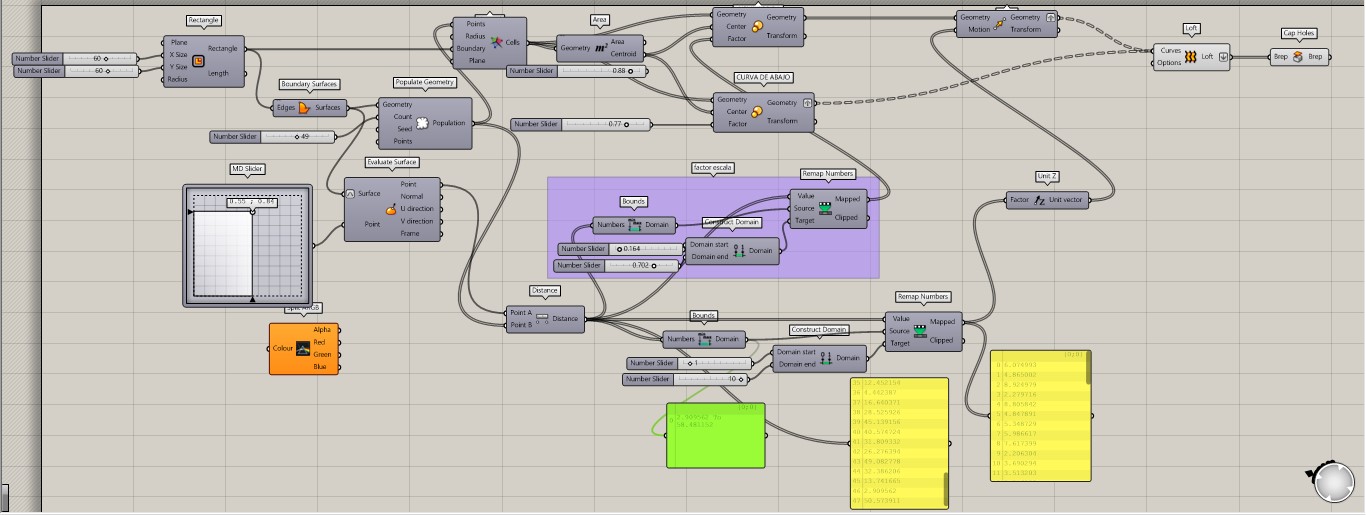
- RECTANGLE: We mark a rectangle in the angle X, Y.
- BOUNDARY SURFACES: we limit a surface.
- POPULATE GEOMETRY: In this surface we generate a population of points.
- VORONOI: each point is delimited in cells. Each cell is limited by the walls of each of them (no radius, it is not necessary in this case). All lines are linked.
- SCALE: we scale to enlarge or reduce the size of the cells. We differentiate them in the curve above and in the curve below.
- MD SLIDER – EVALUATE SURFACE – DISTANCE: I generate 2 scales to separate the voronoi. We choose a point so that they share a center, I scale it to give different heights.
- LOFT: is a transition between curves that generates a surface.
- BAKE: Materialize Grasshopper geometry in Rhino.
RHINOCEROS + GRASSHOPPER
I use the Bake command in Rhino to materialize the Grasshopper geometry in Rhino.
ULTIMAKER CURA
Last step before proceeding to 3D printing. Through Cura we modify the printing parameters and scale the size of the final sample.
| Material name | Layer height | Extruder temperature | Temperature of bed | Speed | Retraction speed | Retraction distance |
|---|---|---|---|---|---|---|
| PLA | 0,2mm | 210ºC | 60ºC | 40mm/seg | 35mm/seg | 0,8mm/seg |
We calibrate the printer, check that the parameters are adequate and finally, we transform them to GCode.
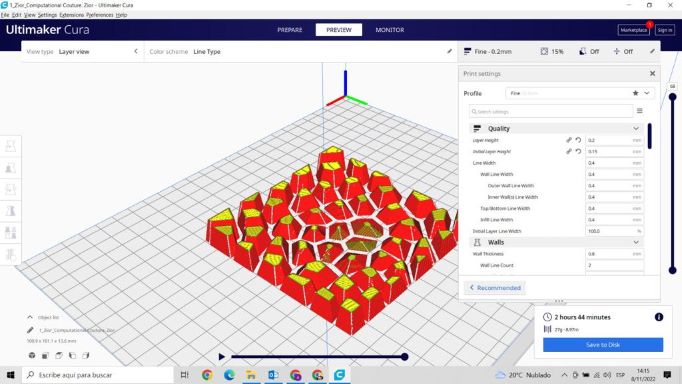
We choose the appropriate measures to reduce printing time. We check that the material temperature, print speed and filament material are the correct one.
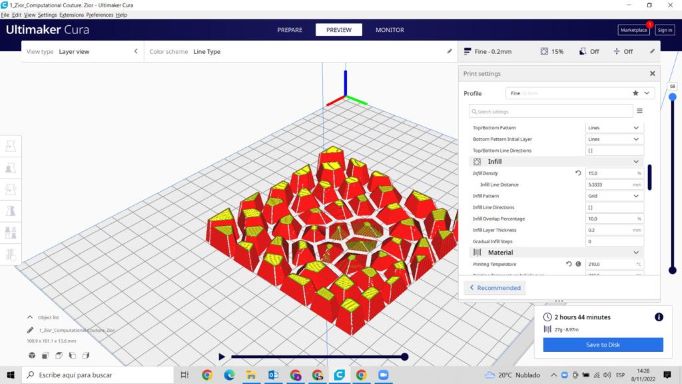
Before proceeding with the printing, we apply a film of lacquer on the base where the printing will be done.
Once we have the first layer, we will put a fine mesh so that the geometry is well fixed in the subsequent layers. Colloquially, the Sandwich method.
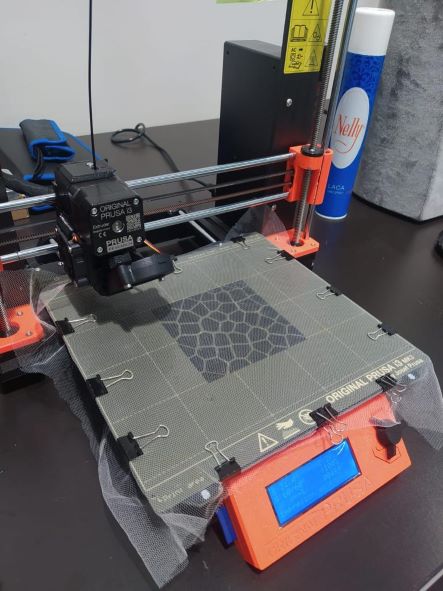
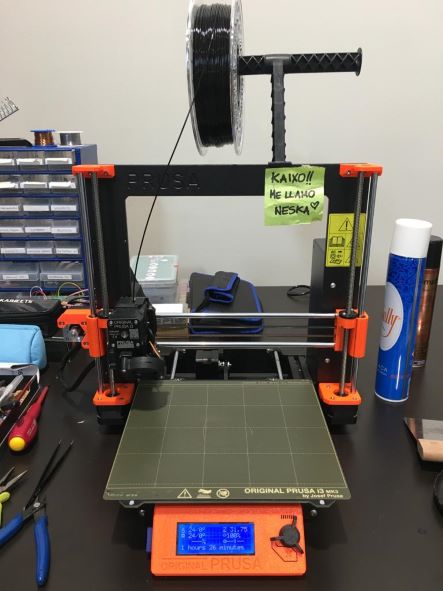
PRUSA PRINTER
This is the PRUSA printer we have printed on.
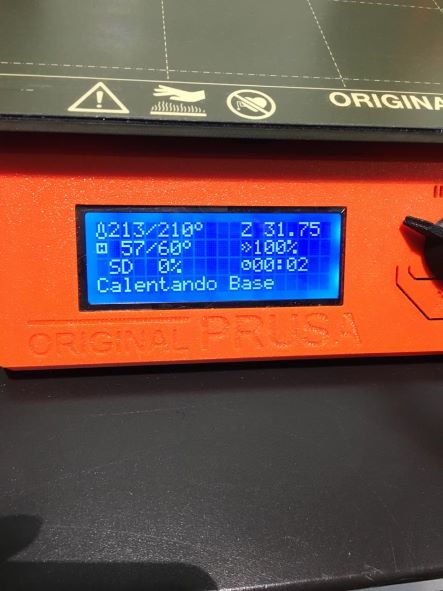
As can be seen in the image, when the printer temperature reaches 210ºC is when printing begins.
3D MODEL
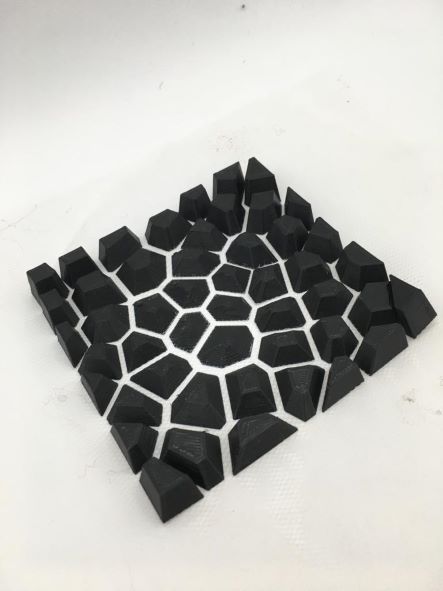
FINAL RESULT
USEFUL LINKS