3. Circular fashion
This week I had an idea for what I wanted to explore from the beggining. The recitation lecture with Elisabeth Jayot was truly inspiring, especially the connection to Simondons writings. Something that came up on both of the lectures, both the recitation and the Open Source Circular Fashion lecture is the quote-
"The next big thing is going to be a lot of small things".
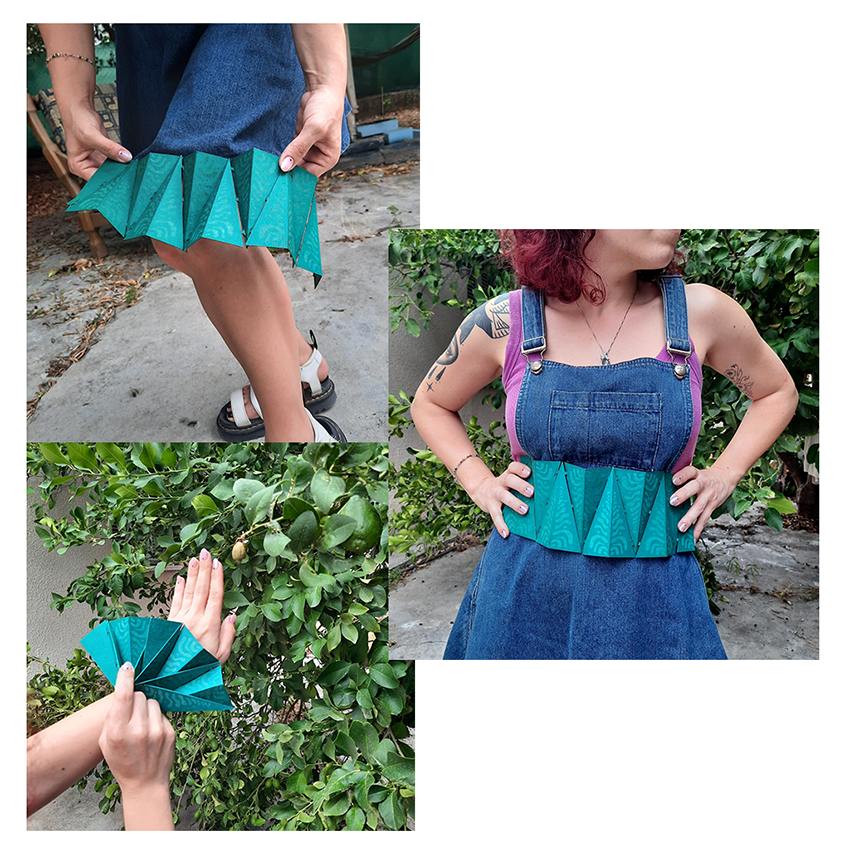
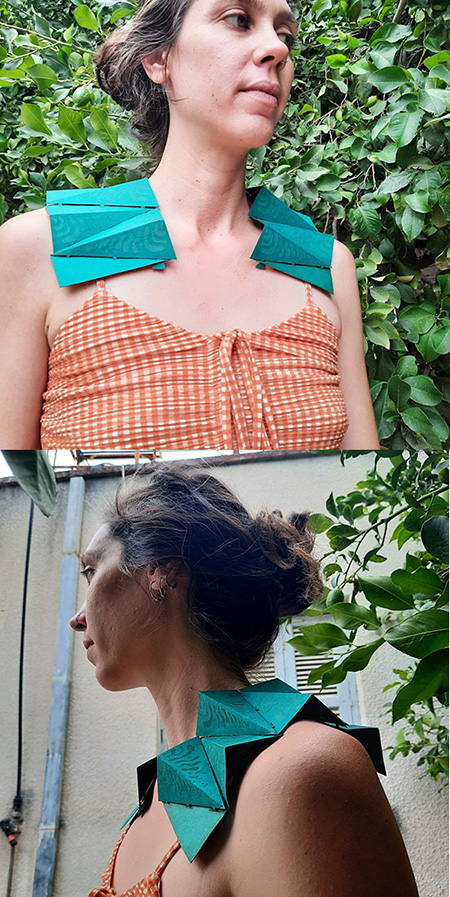
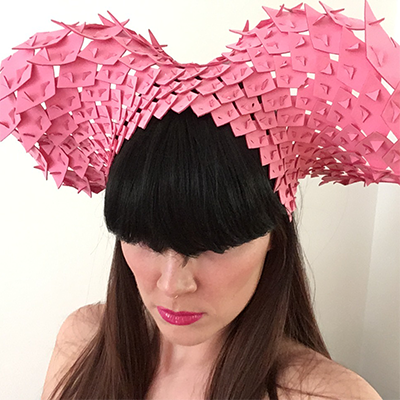
I really started thinking in terms of modular and seamless garments and accesories and I decided I wanted to recreate a modern frill collar that can be folded and worn in different ways.
Research and Inspiration
I was really inspired by this neckpiece that is in the oscircular fasion website. It is not quite Elisabethan but it has something that intrigues me!
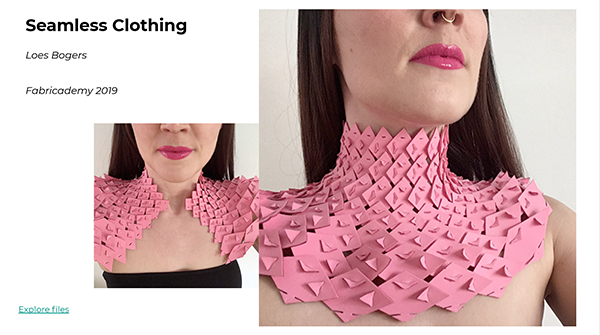
Inspiration from the Open Source Circular Fashion lecture and showing different ways to wear a modular design
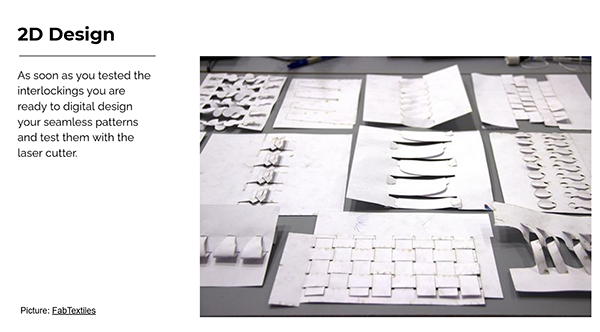
I also really liked these images below from the lecture in terms of presenting a 2D modular design idea and testing the interlockings!
Paper sculptures by Rogan brown and collaboration with Iris Van Herpen
I have known this artist for a while now and I really enjoy his microscopical style paper sculptures, they are absolutely mesmerising. He recently also collaborated with fashion designer Iris Van Herpen to create some stunning garments!
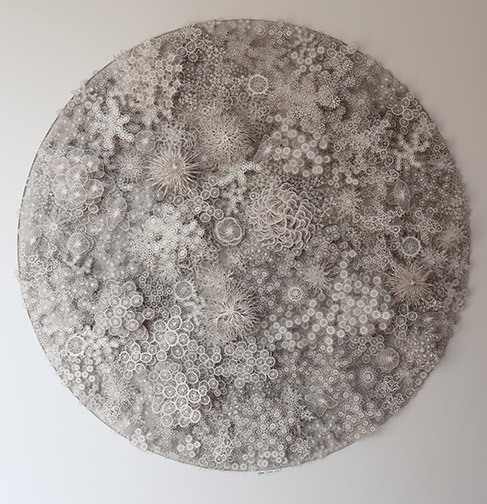
Cut Stem, Lasercut paper, 75x75x7cms/30x30x2.7inches, 2014, by Rogan Brown
Hand drawn, laser cut, hand mounted, 8 levels. Cut Stem reveals the hidden beauty of the natural world. We are all familiar with beautiful flowers sitting in a vase but look a little closer at a cross section of a flower stem under a microscope and a vast new world of detail, complexity, variety and beauty will open up before you.
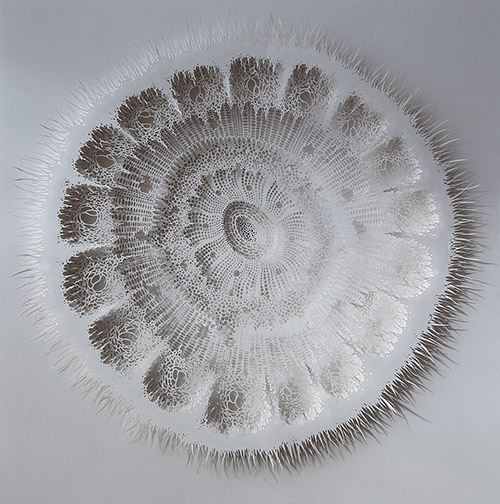
Paper sculpture, Magic Circle Variation, Hand and Laser cut Paper, Diameter 80cms/31.4 inches 2017, by Rogan Brown
The Magic Circle series is inspired by the human microbiome, that is the vast colony of bacteria that live in and on our bodies and help us survive. Scientists are only beginning to understand this hidden universe and how it contributes to our health and well being. As yet they have not fully identified all the different varieties of bacteria that make up the biome. What is clear is that it is a vast and hugely complex ecosystem that works in symbiosis with our bodies. My aim here is to imagine what this microscopic habitat looks like. I have researched images of bacteria and created stylized sculptural motifs that I have then placed in reef-like compositions celebrating the diversity and potential beauty of this hidden world.
Below you can see one of the garments he co-designed with Iris Van Herpen.
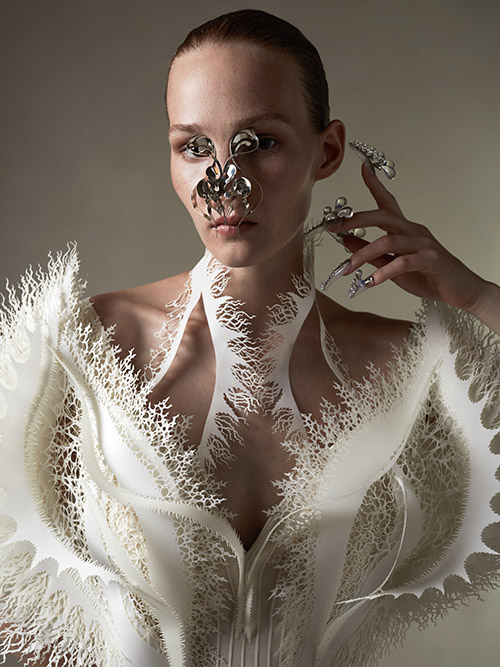
The laser cut paper reminds me of the lace texture and that is where the examples above are connected to Elisabethan frill collars.
Elisabethan frill collars
I was on Instagram the day before the Open Source Circular Fashion lecture and I saw the following gif from Europeana Pro as a part of GIF IT UP annual competition.
GIF IT UP challenges people to use openly licensed digitised cultural heritage material to produce unique GIFs and share them online. It encourages audiences to engage with digital cultural heritage in new and creative ways, and extends the reach of the openly licensed material in Europeana.eu and our partners collections.
Later on I found these other images with some ladies wearing some extravagant accesories and garments!
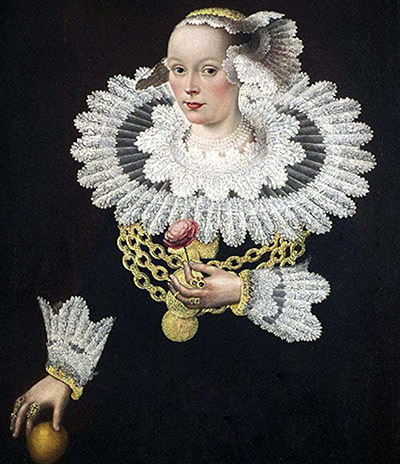
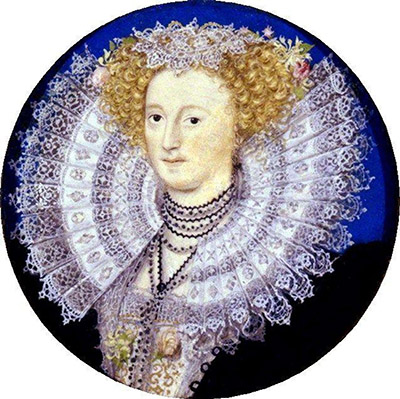
I found these images here.
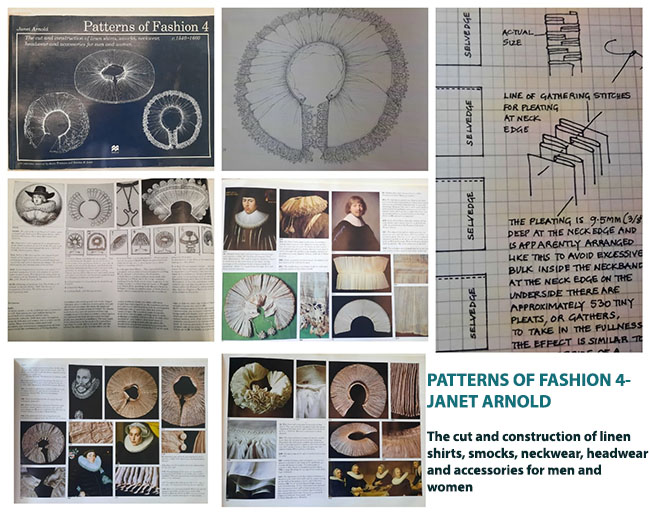
Patterns in Fashion book
Approach, Material and Texture
Reading into the way the collars and the garments were made back then, it was clear to me that clothing and excess fabric was a status symbol and a lot of the times more than 5 yards of fabric were used to make these outfits and accessories. I looked into using corrugated paper or making my own protopaper instead of cutting the final design on fabric.
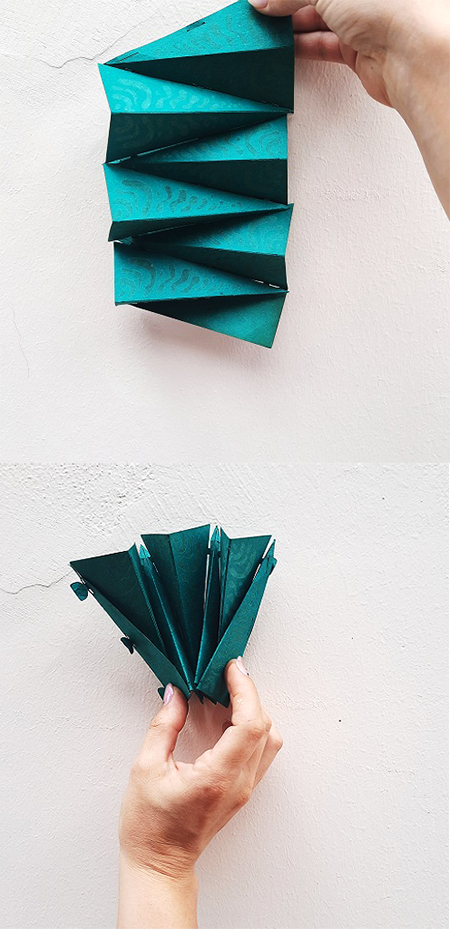
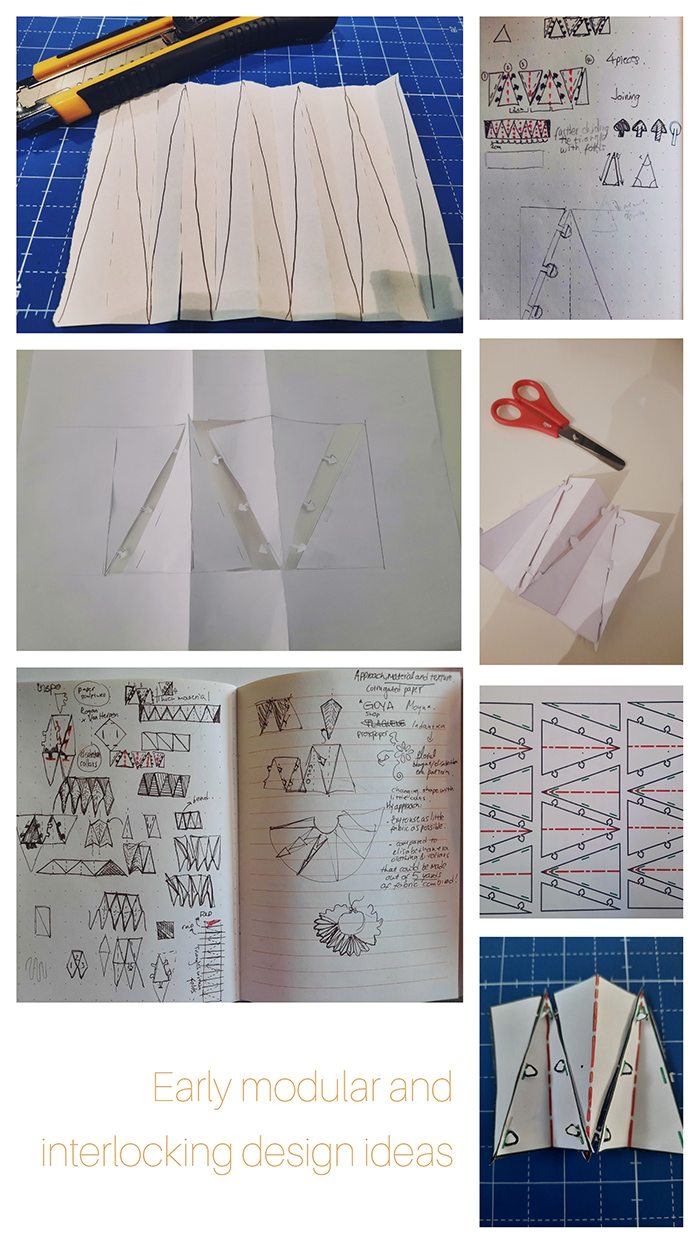
I started thinking about shapes that will allow me to create a frill like appearance and I decided to go with an isosceles triangle. Then I started folding paper and I realised that I can create an illusion with folding the triangles in the middle in order to give more depth and shape to the pattern.
My approach was to minimise the fabric or paper used into making my design and try and create little cuts within my triangles to make them fold. Another idea was to make a floral pattern and place it onto one of the two triangles to give a bit more of that elisabethan feeling and a hidden pattern within the folds.
Sketchbook doodles and experiments on paper
Digital design process
I made my first drawing on Rhinoceros the night after the lecture after playing with some cut triangles and trying to create triangles within folds. Later on I printed those drawings and cut the pieces with scissors and the cuts in the middle of the triangles and on the sides with a cutter.
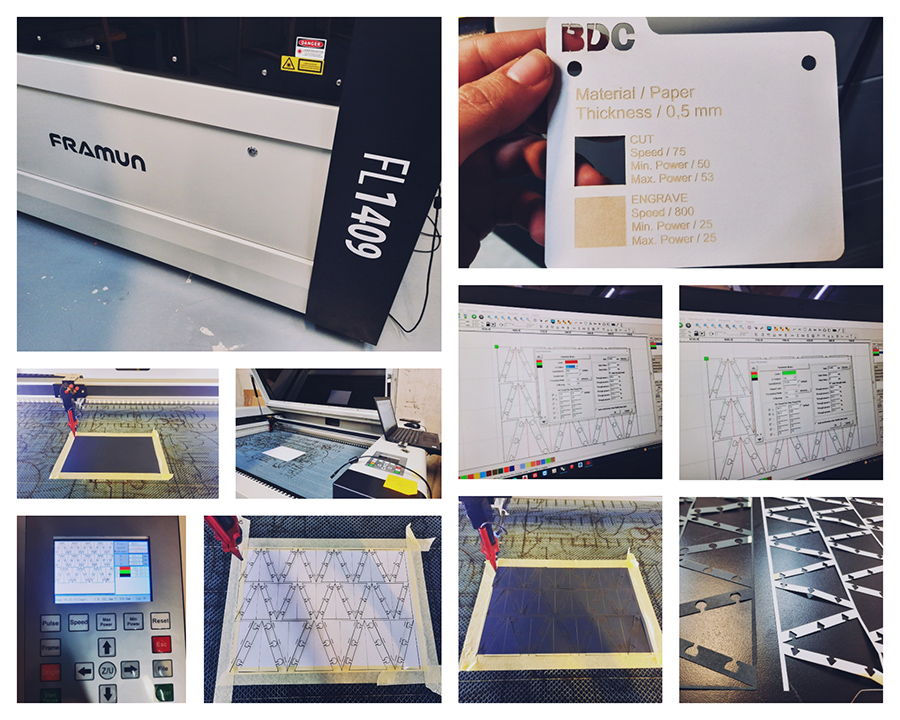
I realised the cuts were in the wrong place and my triangles are not on the same level so the interlockings and attachments were a bit unstable. I went back to Rhinoceros and tweaked my drawing however when I tried to lasercut a test later that week, I had some double lines on my drawing and the lasercutter did not read that well. On the next day I came back with a better design and wanted to make sure improved the interlockings so I did another test on black and then white thick paper.
Later on I changed the design slightly again and did another test with using engraving settings to create a more intricate texture on my modules!
Rhinoceros for the final design!
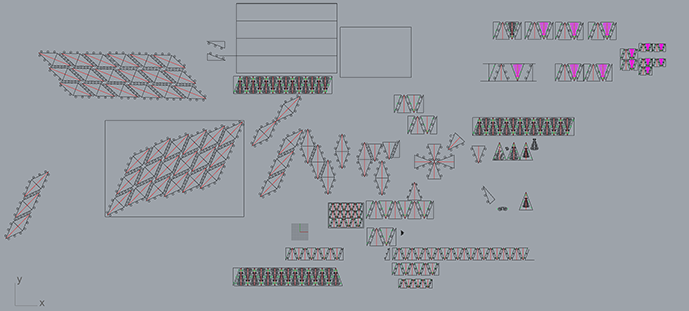
After all this trial and error I think I am ready to cut the final design! My rhino document looks like a mess at the moment from all the tweaking and changing the original design. Here is a photo below on the state of it at the moment!
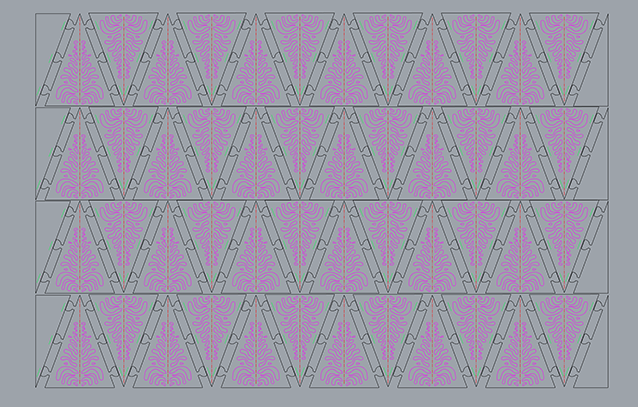
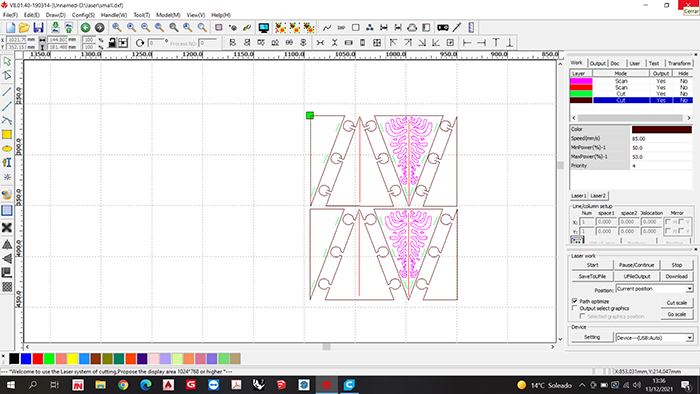
Final design file ready to for the lasercutter
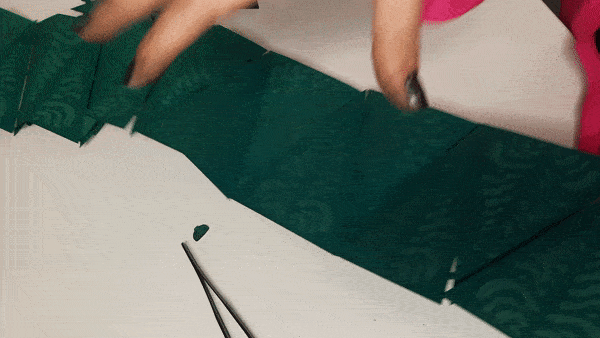
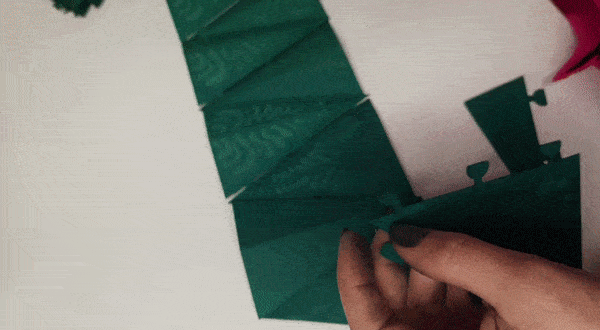
Laser cutting, material, settings and assembling the modules
Sooo I chose thick carton style (250gsm) because I wanted to do the engraving or non continuous cut in the middle of the triangle and have it bend and I could not find a sturdy and eco friendly textile material to do that. I would advise you to go a bit thinner since I found it hard to fold the material in the end.
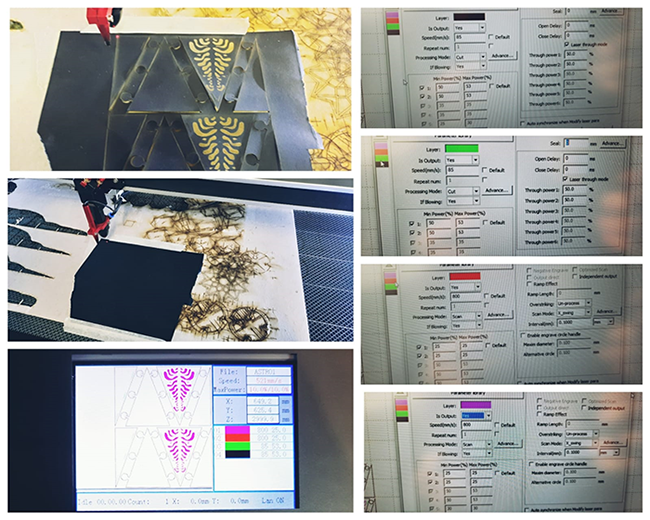
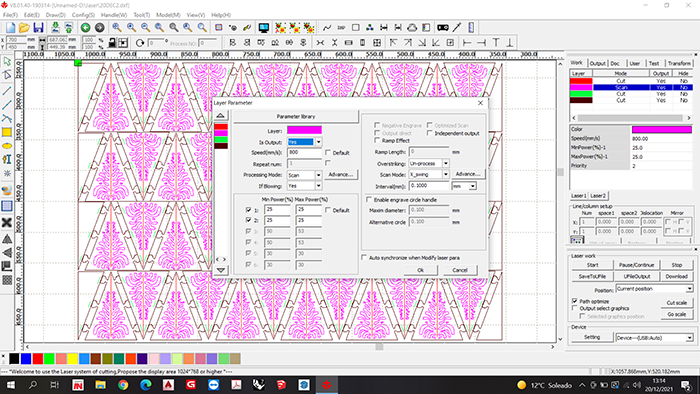
As you can see from the file above there are 4 layers to this rhino design! For the first layer, aka the engraving in the middle of the triangle in RED colour you can find the settings below! Go here to see our lasercutter, Martha.
Speed: 800 Processing mode: Cut Min power1: 25 % Max power1: 25% Min power2: 25 % Max power2: 25%

The second layer is the engraving layer, the PINK coloured layer.
Speed: 800 Processing mode: Scan Min power1: 25 % Max power1: 25% Min power2: 25 % Max power2: 25%
The third layer is the GREEN layer and it is the layer of the cuts on the side of the triangles for the interlockings!
Speed: 85 Processing mode: Cut Min power1: 50% Max power1: 53% Min power2: 50% Max power2: 53%
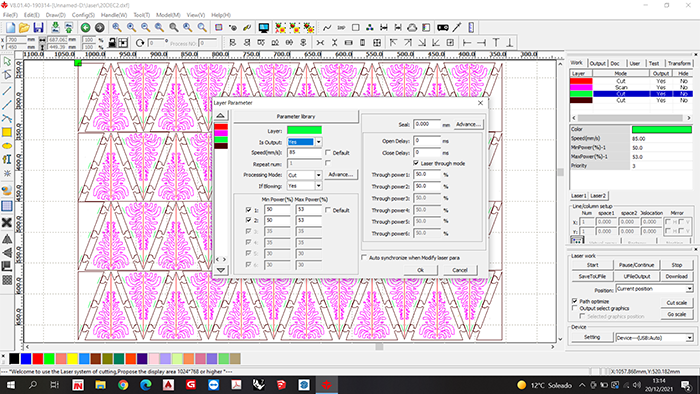
The final layer, the BLACK layer is the general outline of the design,
Speed: 85 Processing mode: Cut Min power1: 50% Max power2: 53% Min power2: 50% Max power2: 53%

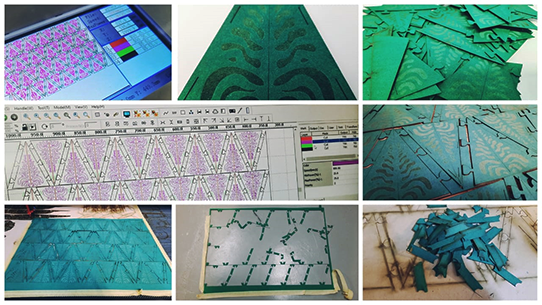
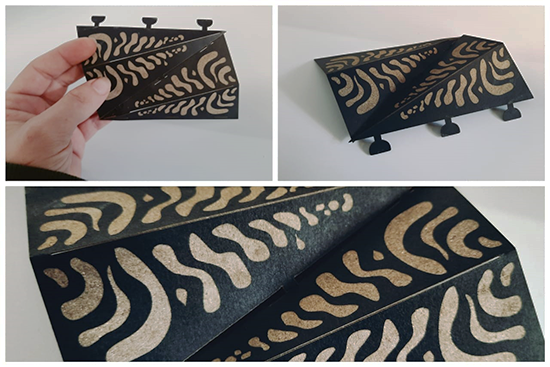
Assemblying the modular design video and hyperlapse
The finished design uploaded on OSCIRCULARFASHION
I chose to focus on particular details for this week such as the folding aspect of the modules and using the right settings to create that crease in the middle of the lasercutter! I might have missed out the bigger picture of the project and what to make of it but I had fun and learned a lot of things about how the lasercutter works.
You can remove the engravings on all of the triangles and choose to leave half of them or mix and match them. You can use textile as a material too but be sure that it is something quite stiff that can hold the structure of the overall design. You can turn the pieces into frill cuffs that go all over by attaching a ribbon on the end so you can tie if or you can wear it as a neck piece!
I uploaded the file and some more photos here.