7. Computational Couture
This weeks assignment:
-Document the concept, sketches, references also to artistic and scientific publications.
-Design a parametric model using Grasshopper3D and upload the rhino file + grasshopper files.
-Learn how to use 3D printing techniques to print the 3D model in/on the chosen materials.
-Document the workflow for exporting your file and preparing the machine and gcode to be 3D printed.
-Upload your stl file with pictures at : https://oscircularfashion.com
-Submit some of your swatches to the analog material library of your lab. (20cm *20cm aprox).
Research and Inspiration
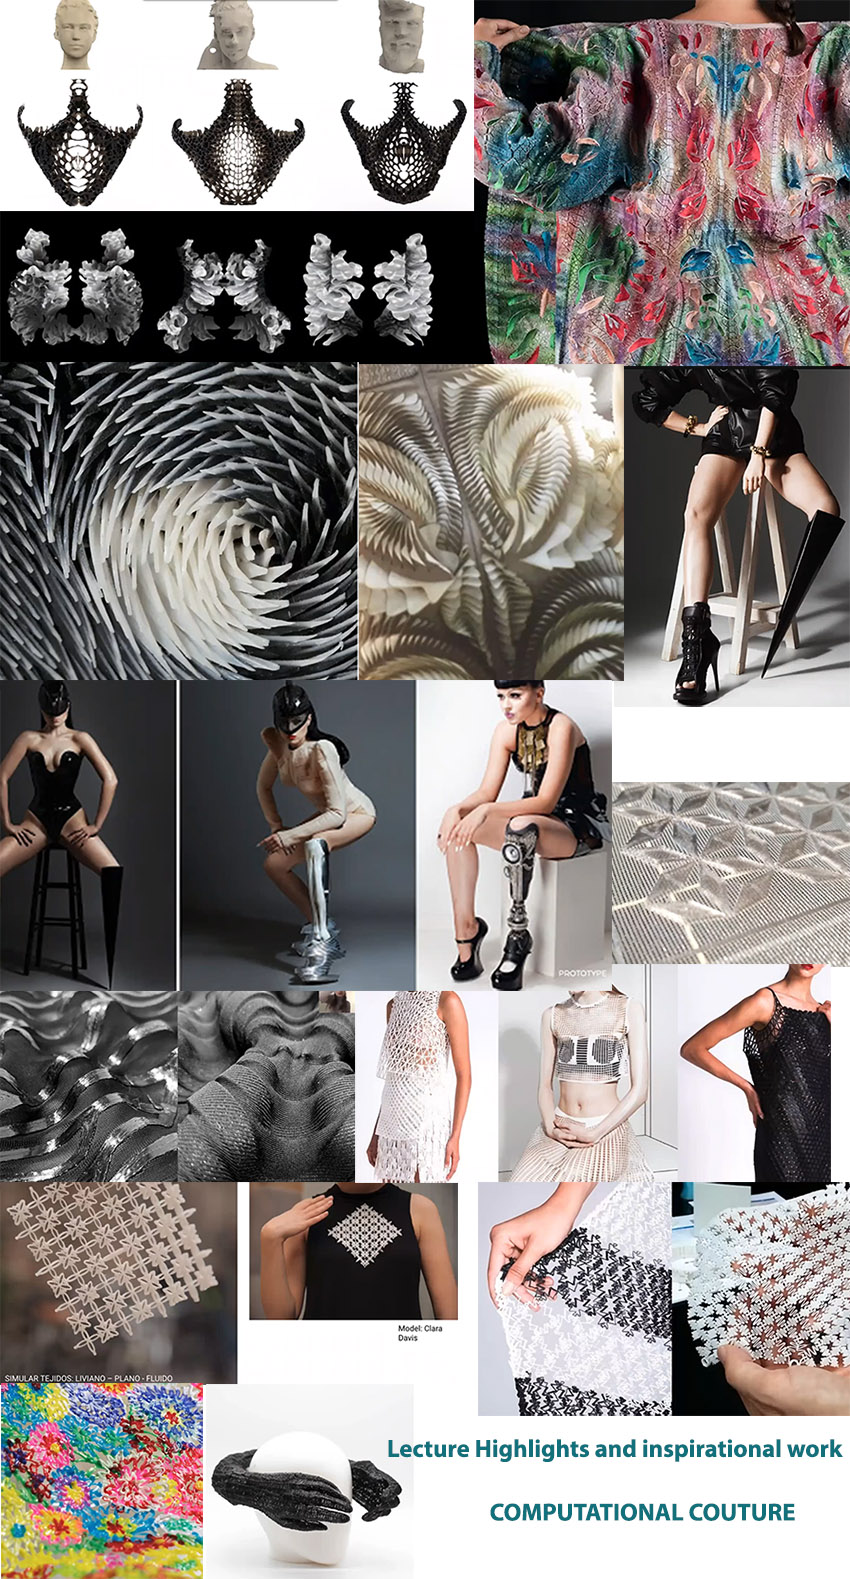
Inspirational work presented in Aldo's lecture

Slides summarizing the different 3D printer technologies available
Algorithmic botany- Phyllotaxis
I have done some creative computation before using p5.js, machine learning and Python. It was only a first introduction and during that time I got introduced to the concept of Algorithmic botany and the amazing book of The Algorithmic Beauty of Plants by Przemyslaw Prusinkiewicz and Aristid Lindenmayer! You can download the pdf for free from here and explore natures algorithms and patterns.
In the book it is being stated:
-Chapter 4: Phyllotaxis
The regular arrangement of lateral organs (leaves on a stem, scales on a cone axis, florets in a composite flower head) is an important aspect of plant form, known as phyllotaxis. The extensive literature generated by biologists’ and mathematicians’ interest in phyllotaxis is reviewed by Erickson [36] and Jean [78]. The proposed models range widely from purely geometric descriptions (for example, Coxeter [17]) to complex physiological hypotheses tested by computer simulations (Hellendoorn and Lindenmayer [59], Veen and Lindenmayer [151], Young [163]).
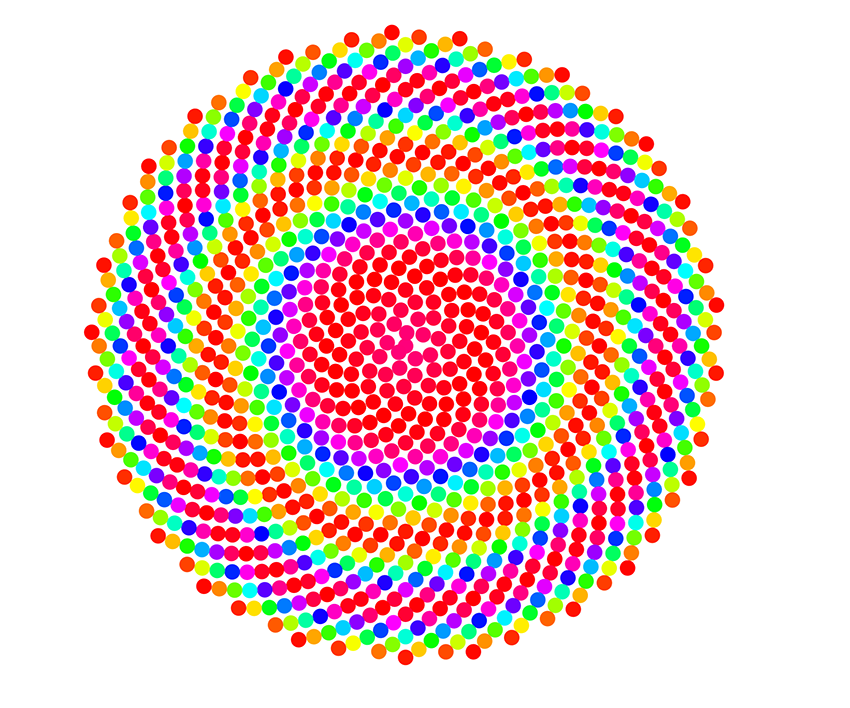
Phyllotaxis previous explorations on p5.js
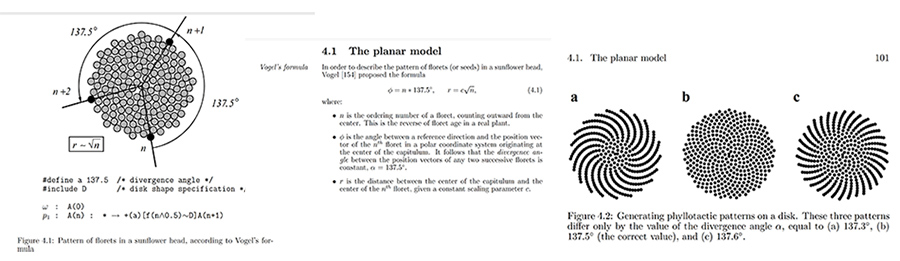
Phyllotaxis mathematics and algorithms from the book Algorithimic beauty of plants, chapter 4
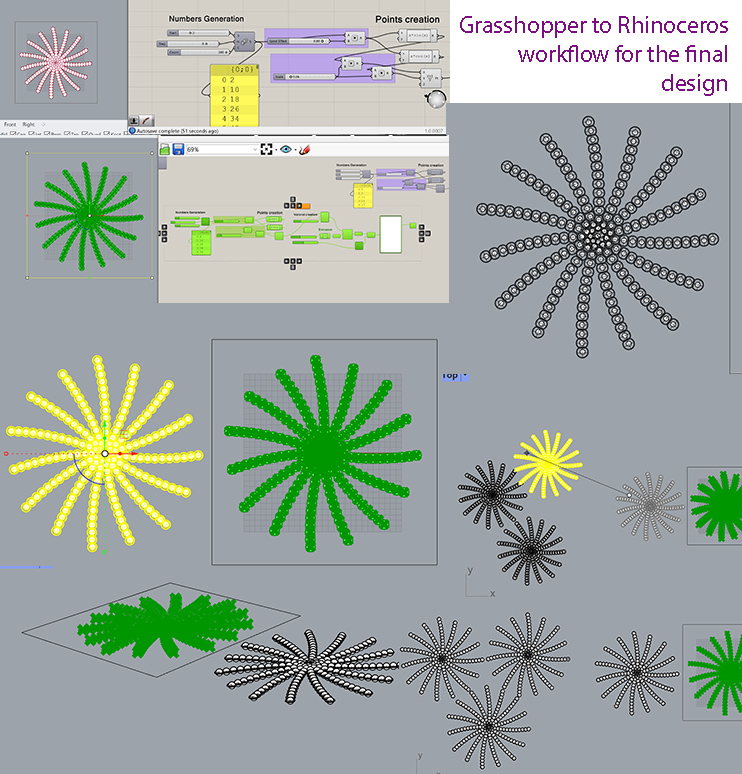
Grasshopper- Desinging and generating different parametric models based on Phyllotaxis and Voronoi
I wanted to do something particular this week and work with the Phyllotactic and Voronoi patterns so I followed 2 youtube tutorials from here and here. They are using the same formula but I urge you to check both of them out because they both have some special and different features.
Phyllotaxis and expressions tutorial
Spiralling Voronoi tutorial
You can create a huge variety of the Phyllotactic patterns only by changing some parameters in the components such as extrusion (the height of the design), point creation and numbers generation!
3D printing techniques on fabric, materials and special 3D printer settings
3D printer specifications and materials used
- 3D printer: Prusa I3 Mk3/MK3S 3D printer

- Material 1: Silver coloured PLA filament

- Materials 2: Black stretch micro tuille fabric

- Extruder specifications escpecially for printing on fabric: The nozzle needs to be closer to the bed than usual because the material won't stick to the fabric otherwise so we change the z axis settings to the minus and particularly in -0.5 in my case.
- Remember-> the design/shape on the fabric changes according to how much you stretch it on the bed and the material of the filament and of course the kind of fabric too.
- Another important factor is the type of filament used and whether it is flexible (TPU, filaflex etc)
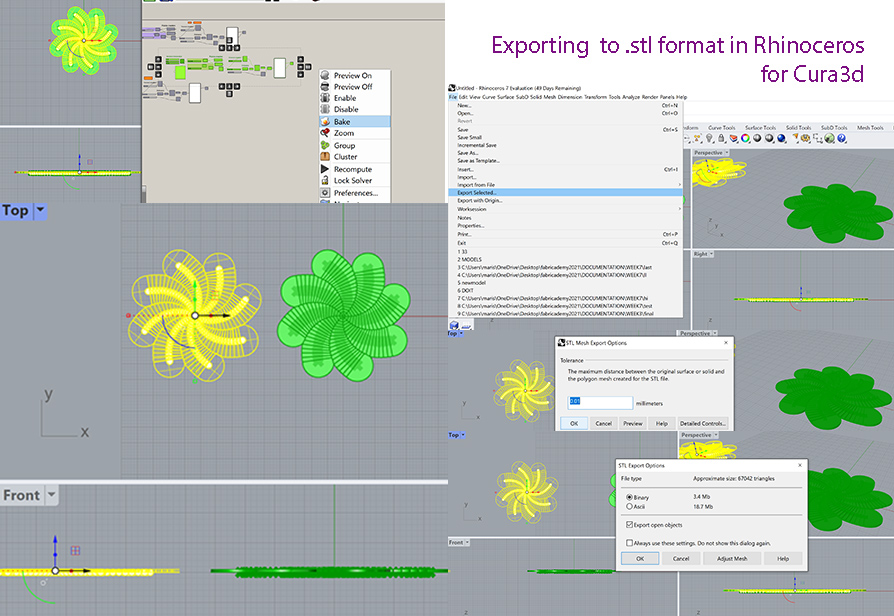
Exporting stl files from Rhinoceros to Cura3D, downloading gcode and 3D printing process documentation
I decided to 3D print 2 designs on my stretch mesh micro tuille fabric so here is the final Rhino/Grasshopper steps before I exported them into .stl for Cura3D and 3D printing. After I baked my design on Grasshopper I went to Rhinoceros and selected and dragged the points and the geometry generated. I needed to scale my design and then I decided to copy and rearrange the points and create a new pattern. ..
Selecting and dragging points generated in Grasshopper and then copying the pattern and rearranging it to create another design before exporting the selected design into an .stl format
If you are happy with the scale and your design in general you can go on and you save your file in an .stl format for the next step of the process, Cura3D software and then 3D printing! Here is my process of exporting in an .stl format for design numero 2!
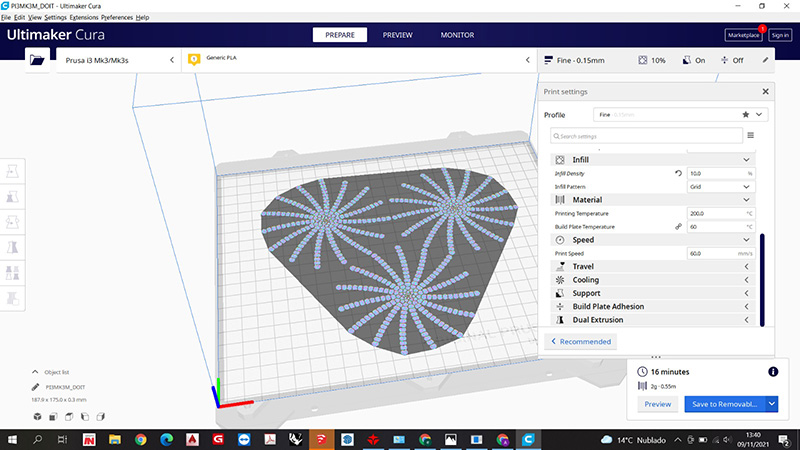
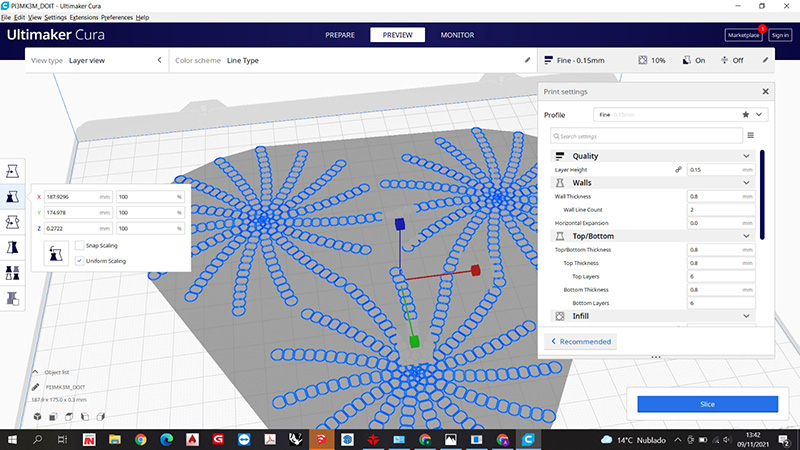
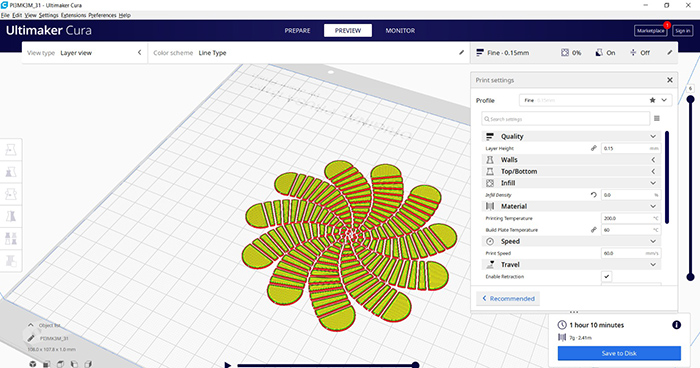
The next step is to open your .stl file on Cura3D, the software that "examines" our design and gives us the chance to adjust the settings on materials, temperature, wall thickness etc and download the gcode that our 3D printer needs in order to "translate" our design for printing!

Process photo, importing the model on Cura, checking out the material and other settings and downloading the gcode
Here I am adding some clearer photos of the general settings of our Prusa imK3 3D printer!

There are some slicer settings are super important for 3D printing generally which I will explain down below. For now I will explain what is a slicer?
A slicer is a piece of 3D printing software that takes a digitized 3D model and converts it into printing instructions that your printer can then use to turn the model into a physical object. In essence, the slicer takes the CAD model and “cuts” it into layers. Think of a series of 2D pictures stacked on top of each other to create a 3D model. It then calculates how much material needs to be used for that layer, where the material should go and how long it will take. It then converts all of the information for each layer into one GCode file which is sent to your printer.
There is a number os slicers out there like:
1- PrusaSlicer
2- Cura
3- Simplify3D
4- 3D Builder
5- Meshmixer
For 3dprinting my designs on the stretch microtuille fabric I did not use any support obviously. We are printing directly on top of the fabric and we need to make sure that the print adheres to the fabric too. With these settings I achieved it.
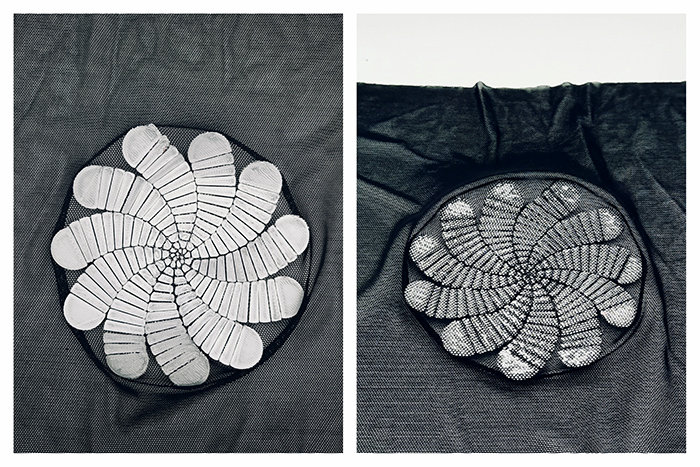
Design one
Layer height- 0.15 mm
Wall thickness- 0.8 mm
Retraction [I don't remember this unfortunately]
Infill density- 10%
Infill Pattern - Grid
Print speed- 60 mm/s
Here I am showing some of the slicing settings for the 1st design!
Downloading the Gcode on Cura and 3D printing on stretch micro tuille fabric
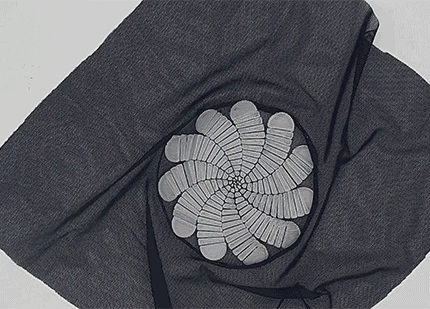
In the first attempt we wanted to use the sandwich technique so we let the 3D printer start printing half of the design directly on the bed of the printer but the design did not have enough height. After 2 minutes we realised that the smallest pieces of the design were not sticking into the bed so we stopped the process and CALIBRATED the machine and the nozzle and then we tried again but with no success.
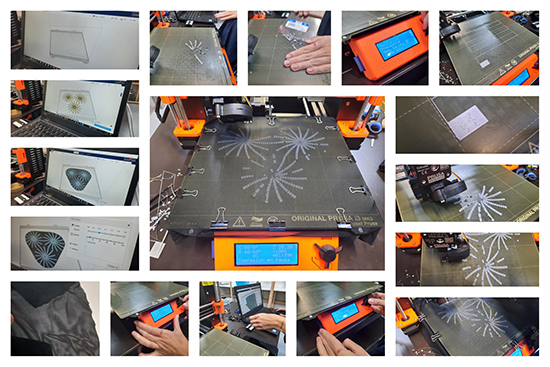
3D printing the first layers of the design on the bed for the sandwich technique and failing, then recalibrating and starting again with a better chance but with a very thin layer
We needed to recalibrate the nozzle to make sure that it is closer to the bed for 3D printing on fabric otherwise the material coming off the nozzle will just slide against the bed and our first half of the sandwich layer of our design will not stick on the bed
However this was not the issue here but we did not find until later that the design needed to be further optimised by scaling it up a bit and giving it a bit more height on Rhinoceros first and then reexporting the model on .stl format to start the process again.
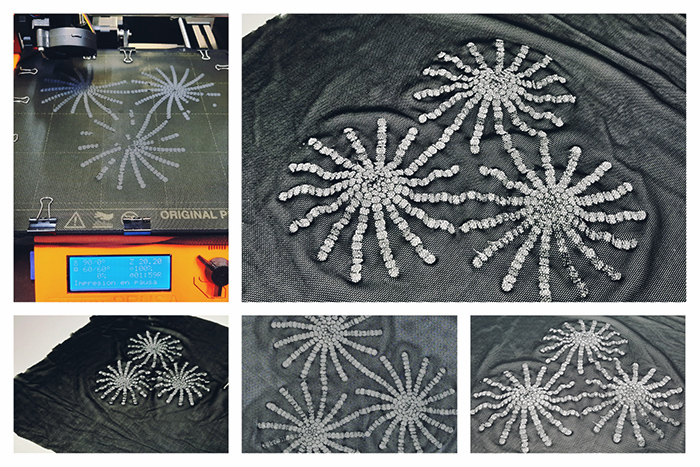
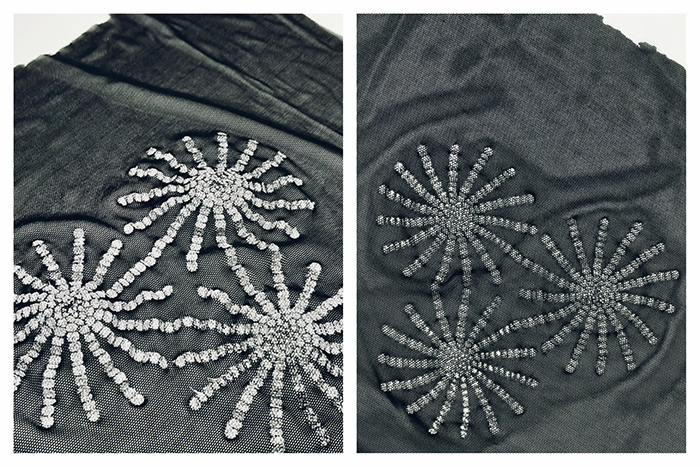
So I then decided to stop the machine and give the design some more height and added a few more mm on my Rhinoceros design file and started the process again this time with the same process for exporting my stl and putting it on Cura3D and with the same Cura3D settings and process as the pictures and video above. This time I decided to print directly on the black stretch micro tuille fabric. This time this technique worked better for my design and here are the results!
Some of the 3D printer settings for Design 2
-Layer height- 0.15 mm
-Wall thickness- 0.8 mm
-Retraction enabled
-Infill density- 0%
-Print speed- 60 mm/s
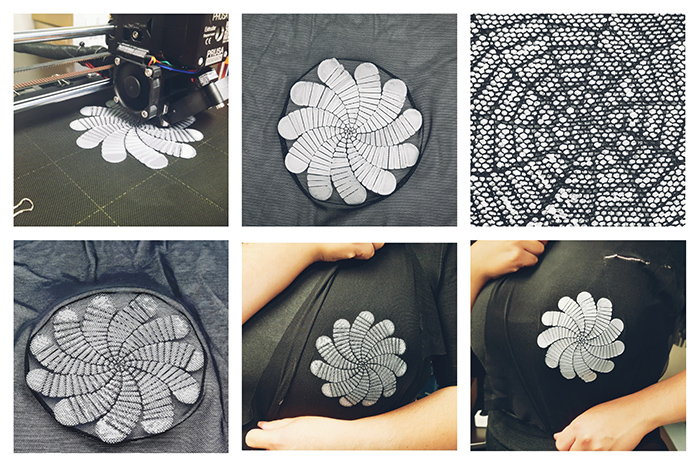
Then I decided to use 3D print another design on the same fabric with the same settings, same technique, same PLA filament and fabric and this is the process and results for design numero 2!
Here is a googledrive file with my Rhinoceros and Grasshopper files for you to download and experiment :)
Finished fabric samples
You can find the designs here and here.
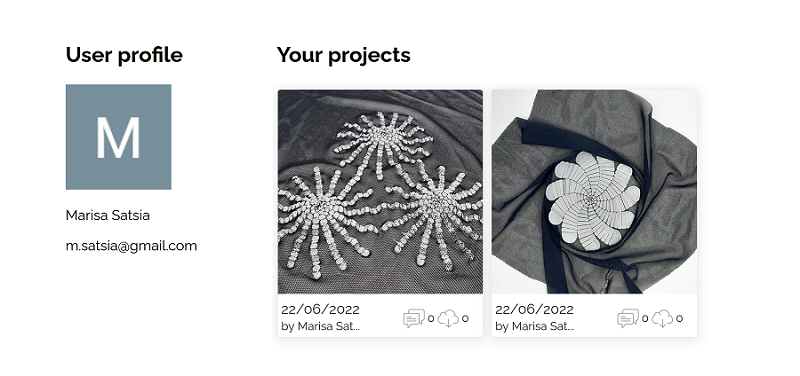
Here is a screenshot of my profile at the oscircularfashion website!