IV. Setting up my own little biolab, equipment and open source hardware
The first thing I did is I made sure I had a little space to work in our biolab here in the Basque Biodesign centre where I would make and find my equipment, make my tools, grow, craft, cultivate and research and develop my materials. Apart from my little DIY experiments for bodily exploration I am planning to make some tools or put some open source hardware together that can help me operate in my DIY biolab and carry out my explorations!
Starting my experimentations
I did not finalise my ideas or my calendar until the official first week of my experimentations which was the week from 18-23 of January! After I made some realistic decisions I began setting up more concrete goals for the project and then my head was clearer and the concept was also realised clearer in my head.
So here is how I started!
Setting up my own little biolab and my equipment
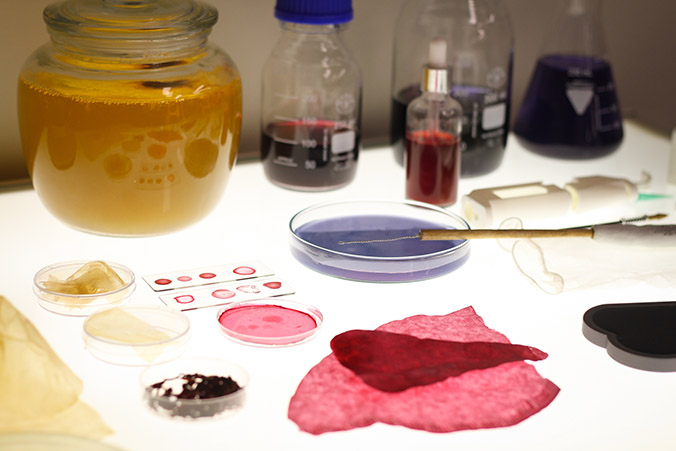
I knew I wanted to work with biochromes, crafting and cultivating materials such as bioplastics and bacterial cellulose. Having that in mind the first thing I did when I was back in the centre was to start up my own Kombucha family from our own bacterial girl, Fermina.
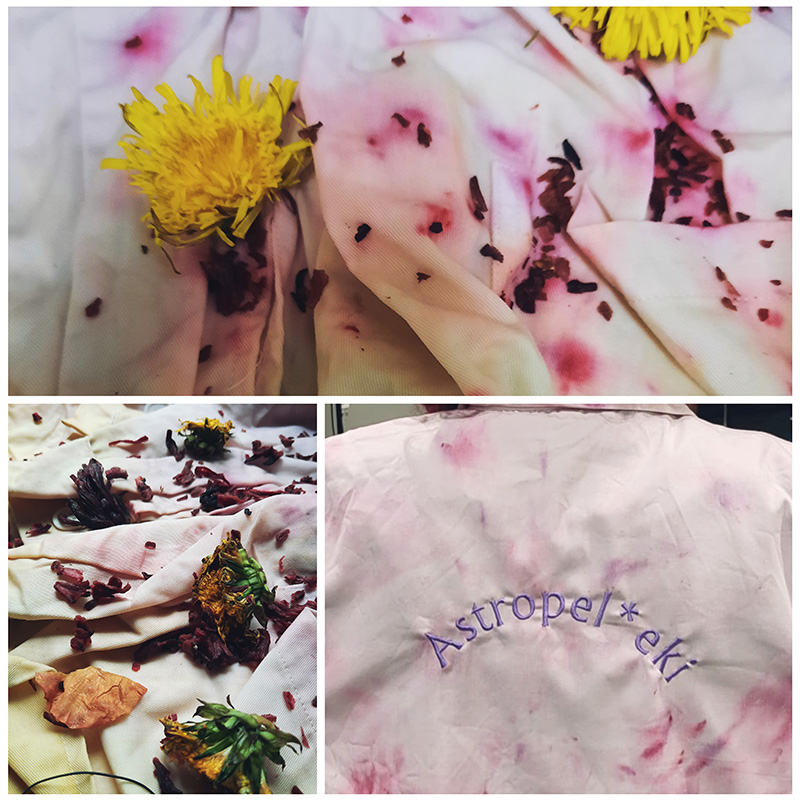
I made some mothers from Fermina from her soul and then I started planning my bacterial family! In addition I started modifying and making biochromes again mainly spirulina, hibiscus and later on red cabbage which can be used as pH indicators.
My biolab from Marisa Satsia on Vimeo.
On the second hackteria forum meeting one of the participants asked Marc Dusseiller-
How much money do you need to set up a biolab?
Mark said: 0 euros!!! you literally need 3 bottles of wine and some kitchen equipment and some friends and you can either make the rest of the stuff and search for parts from old factories, shops and other places like that
Since I am doing a DIY Bio project, I follow his advice! He advised me on how to make a simple microscope with a laser lens, we talked about chromatography, soil analysis and many more.
Then I started thinking that I should really sum up the results experiments and materials i will make for the project AGAIN so i can start making my tools and equipment.
Tools, equipment and experiments
Looking at the things I want to do for my project I realise I need to make all my TOOLS and EQUIPMENT for my DIY BIOLOGY experiments myself before I proceed with the final parts of the MATERIAL EXPLORATION. Everything is OPEN SOURCE nowadays, LAB TOOLS, MATERIALS but ESPECIALLY our BODIES and even biological matter and data. Look at my research above for more context and research!
In order to realise exactly of what equipment I need to carry out my explorations I had to sit down again and summarize the experiments that I will do. In doing so I answered to the questions of:
WHAT experiments and materials will be carried and explored
making biochromes, lactobacillus cultivation, agar microbiome cultivation, bacterial dyeing, chromatography, sample taking, cell staining and microscopy, making pH strips, biofabricating - growing, cultivating bacterial cellulose and hacking the properties, crafting materials as interface for bodily fluids, dna extraction, crystallisation.
HOW
biolab equipment needed: autoclave/pressure cooker, incubator, orbital shaker, microscope, cooking pots, filter papers, pH strips, petri dishes, inoculation loops.
other tools needed: digitally fabricated molds [cnc, printed, lasercut], sterilisable/sanitizable surfaces and molds, glass jars and containers, plastic containers.
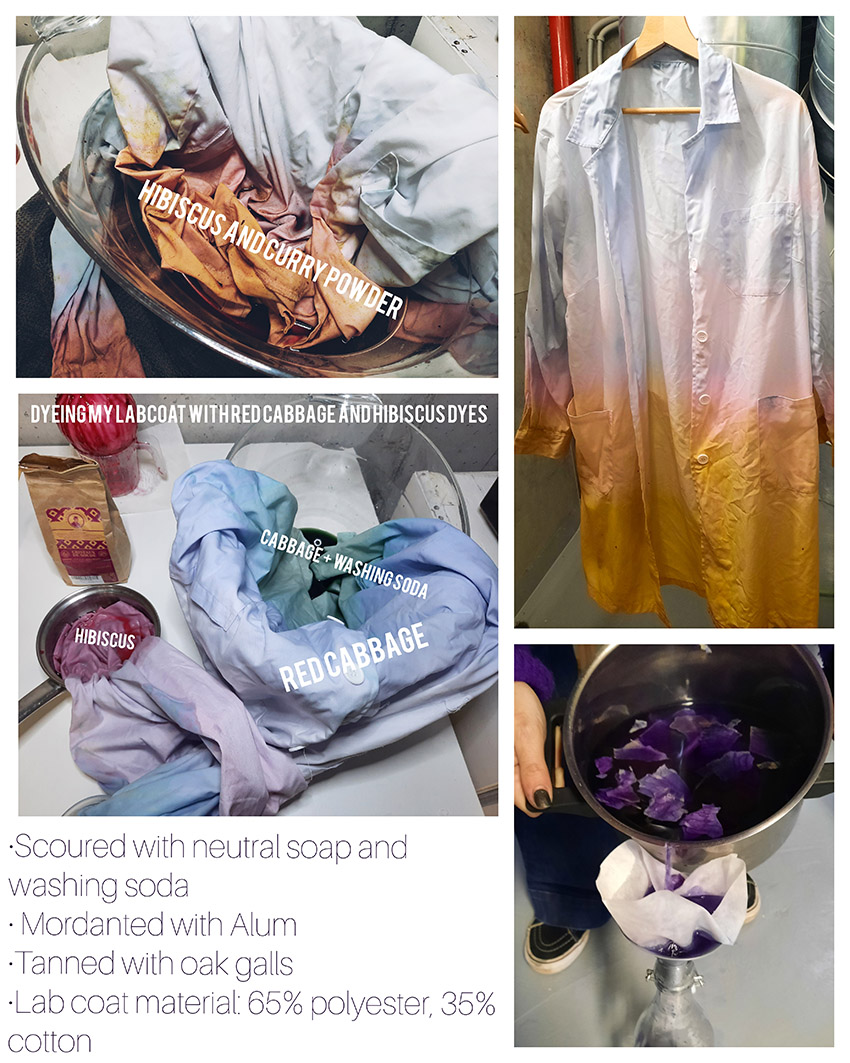
Customising my NEW LABCOAT- TRUST ME I AM AN ARTIST
What is the first thing a bioartist needs? A LABCOAT

Soo I got a new labcoat just for myself :) I am gifting it to myself because this period in my life is quite precious and I want to remember it. Lab coats do not have to be all white and we are not doctors! I started thinking about the labcoat as a symbol of (bio)power and scientific knowledge and that when we see someone wearing it we instantly LISTEN TO THEM AND TRUST THEM. To me a LABCOAT is a very performative object and piece of clothing and since my project is build around the open body source concept and it is an experience, my labcoat will accompany me in all my explorations and then it can have the significance that I attach to it, as a performer, performing my self care and open source body rituals.
With this idea I want to outperform and alter the authority attached to a piece of clothing like the labcoat and the outdated knowledge and ways of dealing with different health conditions too in the medical field. Medical objects, institutions, pieces of clothing, tools for visualising and exploring the body have a greater cultural and social meaning behind them however when we alter their meaning through artistic and collective action they begin to loose their power and authority. They can become tools of oppression and control taking away or misinterpreting our bodily experience and the full control and access to our bodies.
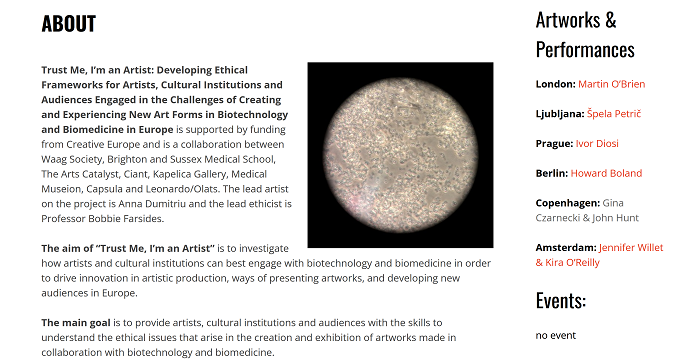
That brings me back to a European funded project called "Trust Me, I’m an Artist: Developing Ethical Frameworks for Artists, Cultural Institutions and Audiences Engaged in the Challenges of Creating and Experiencing New Art Forms in Biotechnology and Biomedicine in Europe".
The project involved a series of practical and discussion-based participatory workshop activities; a major series of performative events (before a live audiences) where a specially selected artist will propose an ethically complex artwork to a specially formed ethics committee (following the rules and procedures typical for the host country), the ethics committee will then debate the proposal and come to a decision, the artist will then be informed of the ethics committee’s decision and, alongside the audience, they can enter into a discussion about the result.
On the practical side of customising my new labcoat:
My labcoat is 65% Polyester and 35% cotton and I am planning to tie dye it with some hibiscus dye that I will modify. Next I want to use our BROTHER digital embroidery machine to further customise it.

I decided to add extra things to my coat like embroideries and perhaps some 3D printed nipples! I used the brother embroidery machine and I made the letters just by using the machine and with no prior drawing on inkstich (a program for embroidery). I did not have more time to experiment unfortunately.
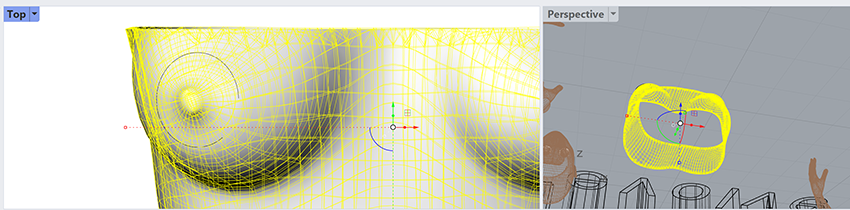
3D modeling and printing the nipples
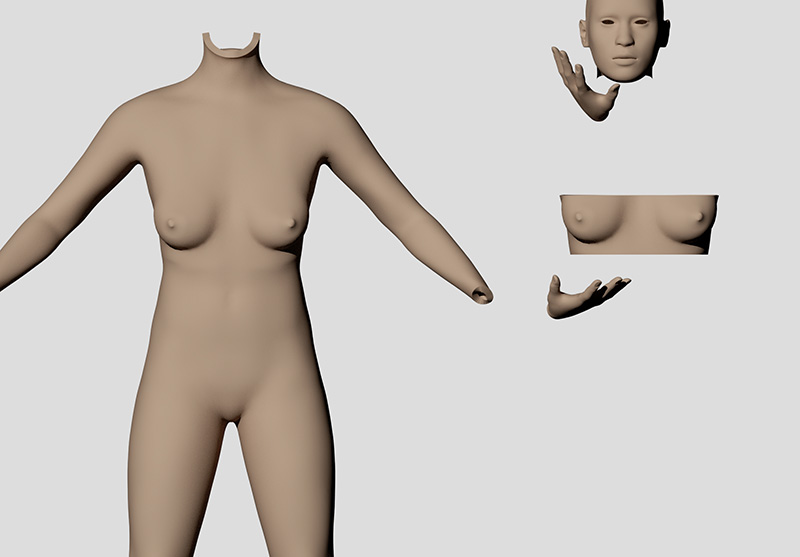
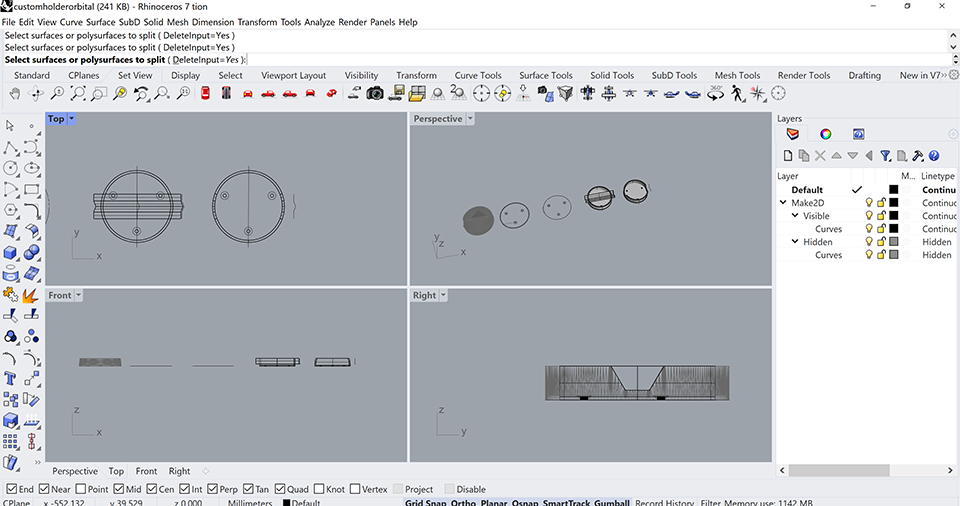
I first created a human in makehuman, an open source tool for creating 3d characters, and exported it into an stl. file. I then opened it on Rhinoceros and joined the surfaces. I then started using the Meshtrim command and I put a lot of squares where I wanted my cutting area to be in order to get a separate piece of the torso.
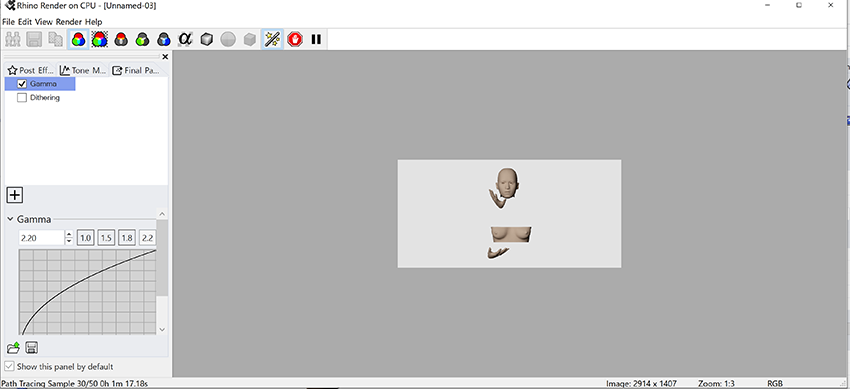
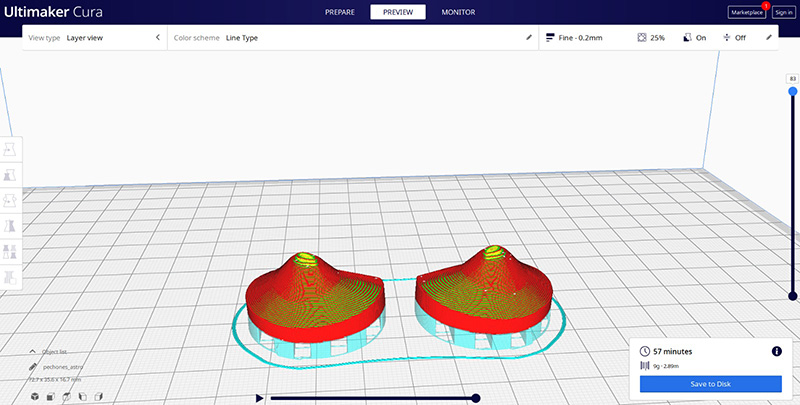
Then I played with the rendering a bit on Rhinoceros. I then started by creating a shape where I wanted to cut my model for the nipples and did a boolean split to obtain the piece I needed. I then saved the nipples in stl. formal and opened it up in the Cura Ultimaker program to make the gcode for the 3D printer. I first did a prototype with the gray/silver PLA filament and then I made the second pair with some wood filament we had in the textile lab. Then I glued the nipples on the coat.
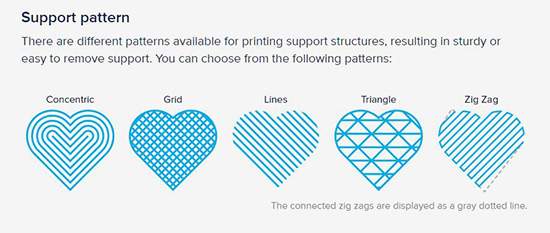
After you I opened the stl. model in Cura, I made sure I played a bit with the settings. I only put 20% infill, some support and a brim. I did not put a skirt (buildplate adhesion settings) as I thought it is not necessary! There are three types of build plate adhesion: skirt, brim and raft. The type of support was the concentric pattern. Below you can see a photo of the model in cura and underneath that I just added a small photo with the types of supports we have in 3d printing.
I was thinking of making 4 holes on them on each side so I can sew them on the coat instead of glewing them but I could not risk anything bad happening because I finished them a few days before we took the final footage for the video! You can find the downloadable file here.

Open source hardware
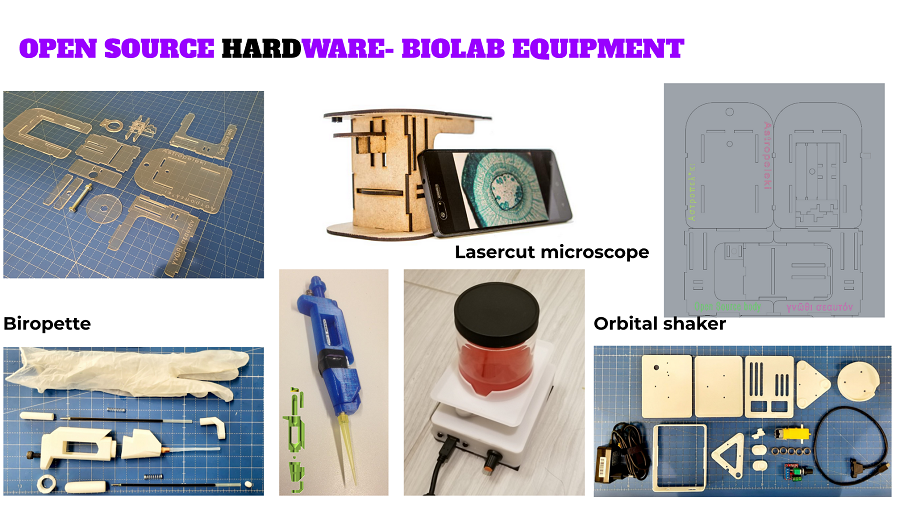
According to my needs there were a few different pieces of hardware that deemed to be useful for my explorations. Here is a photo below summarising the hardware that I put together for this project.
Orbital lab shaker
First thing I realise is that to make my Spirulina dye or any other liquid cultures for DIY Biology I NEED an orbital lab shaker. An orbital shaker is NECESSARY if you are:
Laboratory mixers and shakers are instruments that help to form a homogenous mixture from more than one ingredient. Used in many types of industry, such as food and beverage, cosmetic, pharmaceutical, and electronics, as well as labs that deal with life sciences, wastewater treatment, and biotech, laboratory mixers and shakers are an important part of many labs.
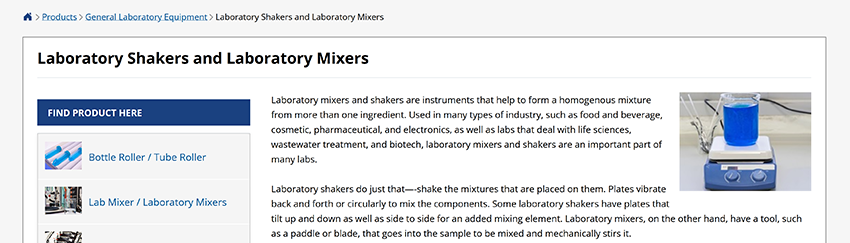
Laboratory shakers do just that—-shake the mixtures that are placed on them. Plates vibrate back and forth or circularly to mix the components. Some laboratory shakers have plates that tilt up and down as well as side to side for an added mixing element. Laboratory mixers, on the other hand, have a tool, such as a paddle or blade, that goes into the sample to be mixed and mechanically stirs it.
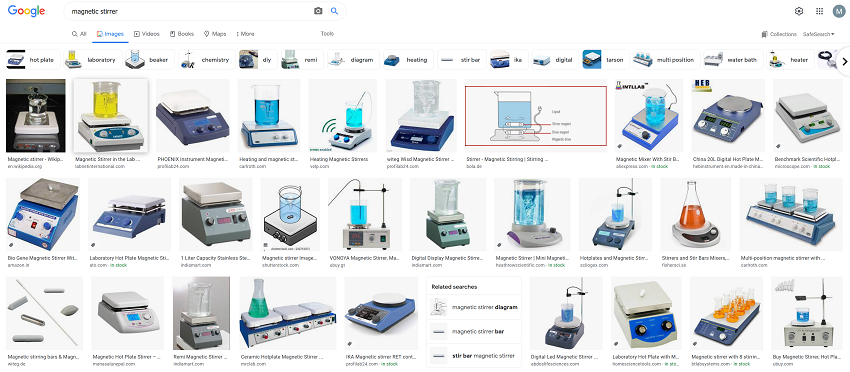
The point is that lab shakers are costumisable according to the process you are going to follow. Alternative to an orbital shaker is a magnetic stirrer that uses a rotating magnetic field to cause a stirrer bar (of flea), immersed within a liquid, to spin and therefore stir.
I found a few different versions. Initially I found this one by DIYBIO at thingiverse.com.
All you need is:
-Pololu DRV8825 stepper driver
-Arduino Micro Pro
-Potentiometer
-Rocker Switch
-DC Adapter (Female)
-608ZZ bearings (x5)
-3mm bolts (x3)
-3mm nuts (x3)
-3mm screws (x3)
We used a combination of friction welding and hot glue to assemble the motion system. Hot glue is used after the bearings are inserted with a thin bead placed around the edge. This makes it possible to take off later to remove the bearings if desired. Nuts are friction welded in place.
Arduino sketch used:
// Simple Stepper Motor Control // // by Achim pieters, www.studiopieters.nl // //
// Defines pins numbers const int stepPin = 7; const int dirPin = 8;
int customDelay,customDelayMapped; // Defines variables
void setup() { // Sets the two pins as Outputs pinMode(stepPin,OUTPUT); pinMode(dirPin,OUTPUT);
digitalWrite(dirPin,HIGH); //Enables the motor to move in a particular direction } void loop() {
customDelayMapped = speedUp(); // Gets custom delay values from the custom speedUp function // Makes pules with custom delay, depending on the Potentiometer, from which the speed of the motor depends digitalWrite(stepPin, HIGH); delayMicroseconds(customDelayMapped); digitalWrite(stepPin, LOW); delayMicroseconds(customDelayMapped); } // Function for reading the Potentiometer int speedUp() { int customDelay = analogRead(A0); // Reads the potentiometer int newCustom = map(customDelay, 0, 1023, 300,4000); // Convrests the read values of the potentiometer from 0 to 1023 into desireded delay values (300 to 4000) return newCustom; }
There is also a 2.0 Version with a bigger tray but unfortunately this does not fit in our PRUSA imk3 3dprinter so I have to go with the smaller older version. Apart from the DIY BIO orbital shaker there is also an Adafruit version on their leanr.adafruit site.
After looking for a simple and inexpensive way to make this orbital shaker without having to spend 150 euros to make it, I came across this remix on thingiverse again! This version does not use any boards such as the playground express by adafruit etc and you can get the electronics running with just 3 things and no programming. A micro usb mount cable, the motor driver and the motor, that is it!
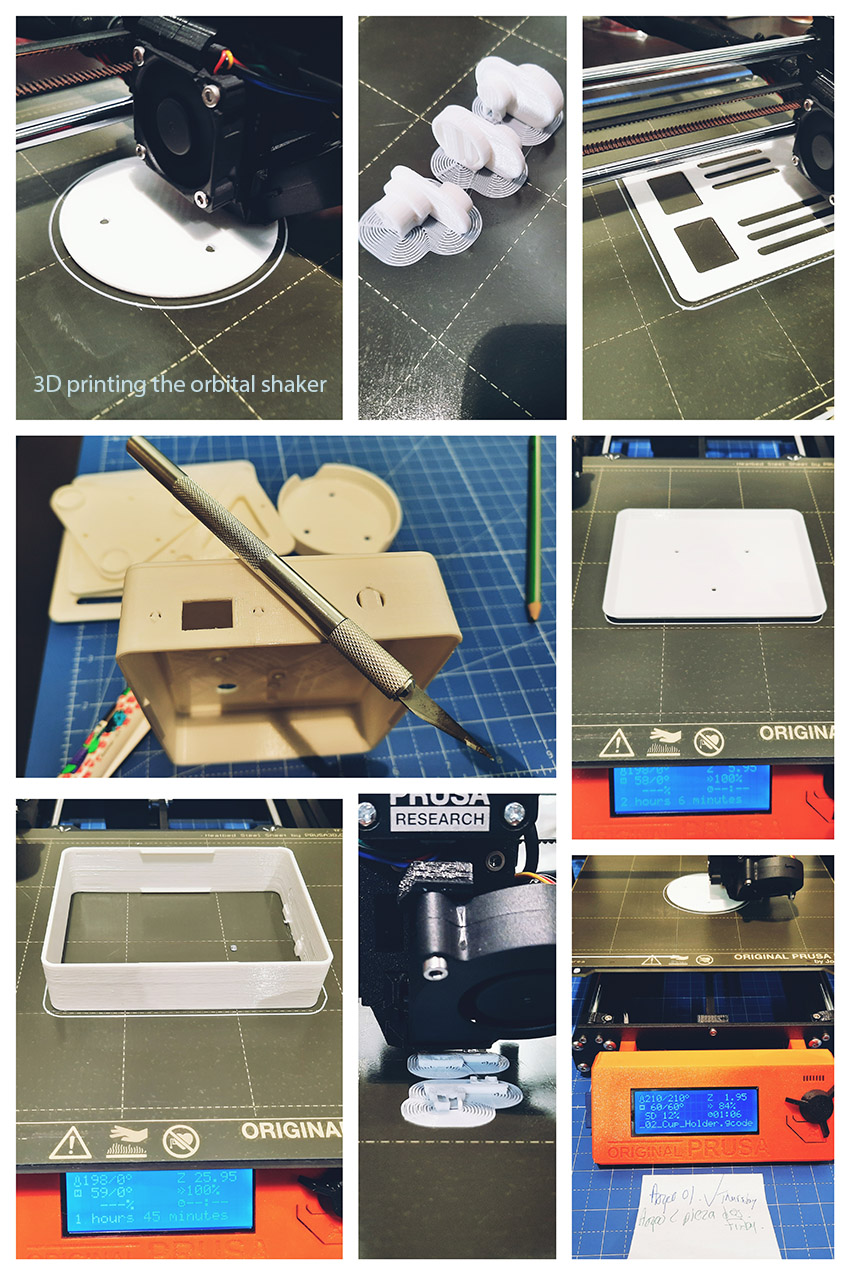
I decided to modify one of the holders to fit my 200ml flask since I use it very often either for biochromes or to make nutrient agar. You can download it here.
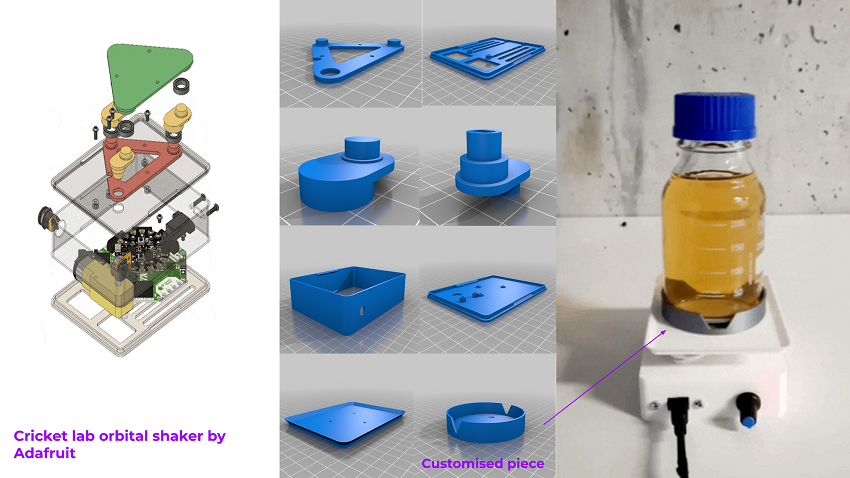
This is how I modified the existing piece keeping in mind that the 3 holes have to remain unchanged because this is where the piece will be screwed on the moving platform!
Bill of materials, fabrication and electronics process
Bill of materials
-The 3d printed pieces found here
-Screws
-Motor driver (has a potentiometer on it)
-Mini usb power source
-Motor
Electronics
Aaaaand here is the finished orbital shaker functioning perfectly in the lab!
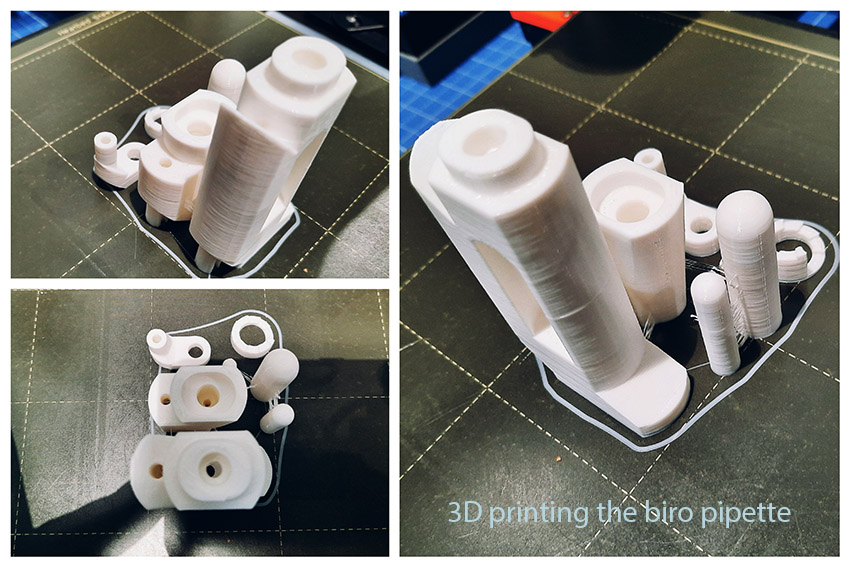
Biro Pipette
I found this biro pipette here. I really like biro pens and it turns out that if you take them apart you can also use the springs to make this pipette! At the end, I did not use it much but I want to explore it more in the future.
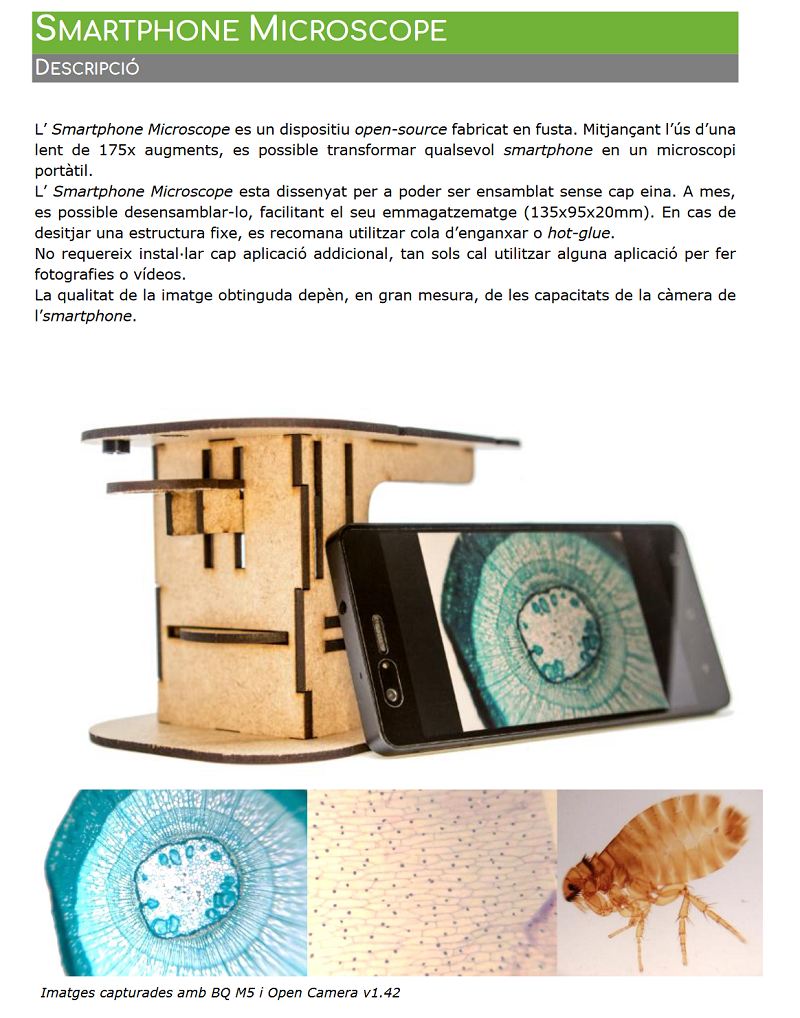
Smartphone Microscope-Curedbio
I wanna turn my smartphone into a super MICROSCOPE with a SUPER magnification so I can carry it everywhere with me along with every thing in my biolab. After I looked into the hackteria.org resources, I found this and it explans how to convert your smartphone into a digital microscope!
There is also this link here that you can check up for inspiration as it contains a loooot of info on microscopes. I decided to modify the Curedbio Microscope Version 2. You can find the files and the manual here, however I will provide my changed files here. I would rather not make a manual from the beggining as the step by step instructions and illustrations are pretty good in their own booklet here.
I will just explain what I did different and provide the new files as I designed and lasercut them. In the meantime check the open source microscope files here.
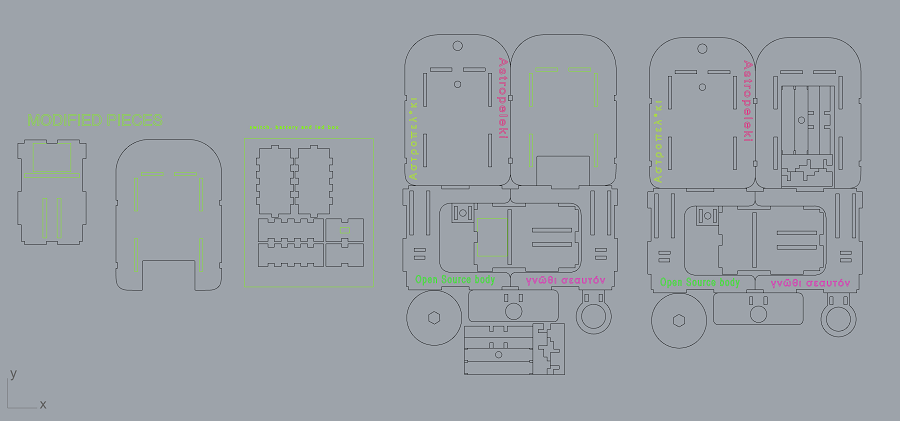
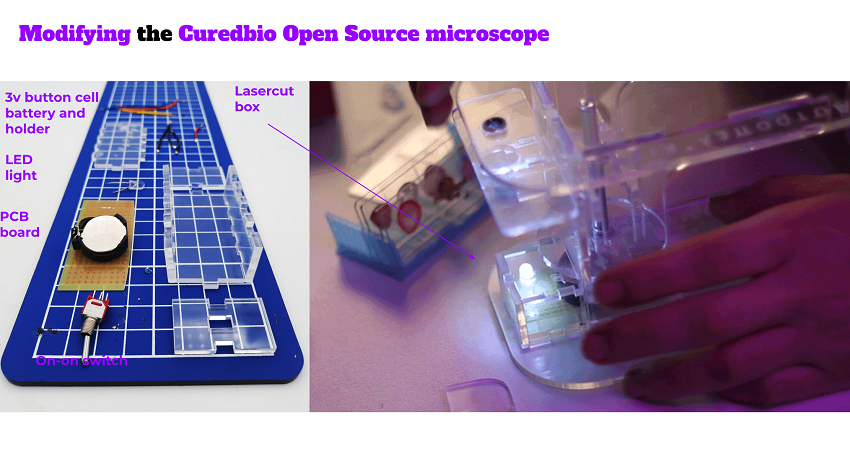
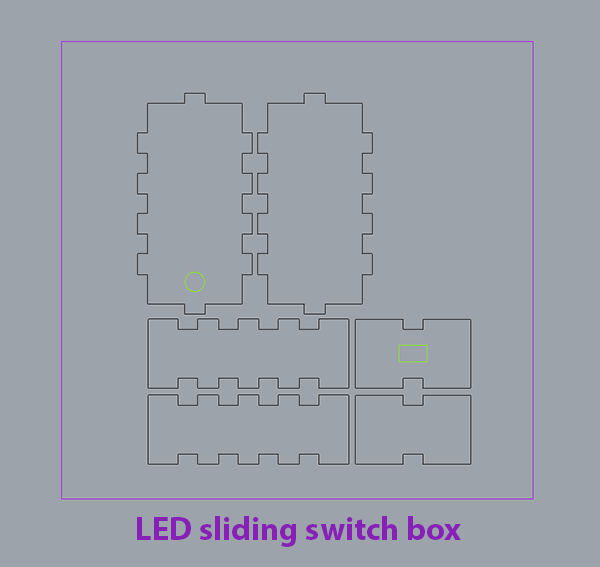
These modified pieces of the microscope to fit a sliding LED switch box in the centre of the structure, underneath the piece where the slide is placed on. I modified 2 pieces in order to accomodate the box and designed a new box that will fit a PCB board with a 3V battery and holder, an LED light, and a 250VAC ON-OFF-ON switch


Fabrication instructions and materials
-You can use any material in 3mm, I used metacrilato or perspex.

-Lasercutter parameters: Speed 25, Power 70-74

-Other things you need to fabricate the microscope: A 60mm M5 screw with the hex bolt for piece that is essentially your zoom dial and possibly some glue if you think that some of the parts might be a bit loose, especially the part where the slide sits on below the viewfinder.
In the next stage I decided to further modify the design and to create a small box with a pcb board inside that will hold a 3v battery, a battery holder, an LED light and an on-on switch. The other option as suggested by the creators of the microscope was to place the attached LED light onto the battery holder with the battery underneath the point of the viewfinder (underneath the microscope slide). I did not like this solution so I modified 2 of the pieces of the microscope according to the LED switch box dimensions. It was hard but I think I made it work. There was barely enough space between the part that holds the circular piece for focusing the lense but I managed to fit the box inside that space.

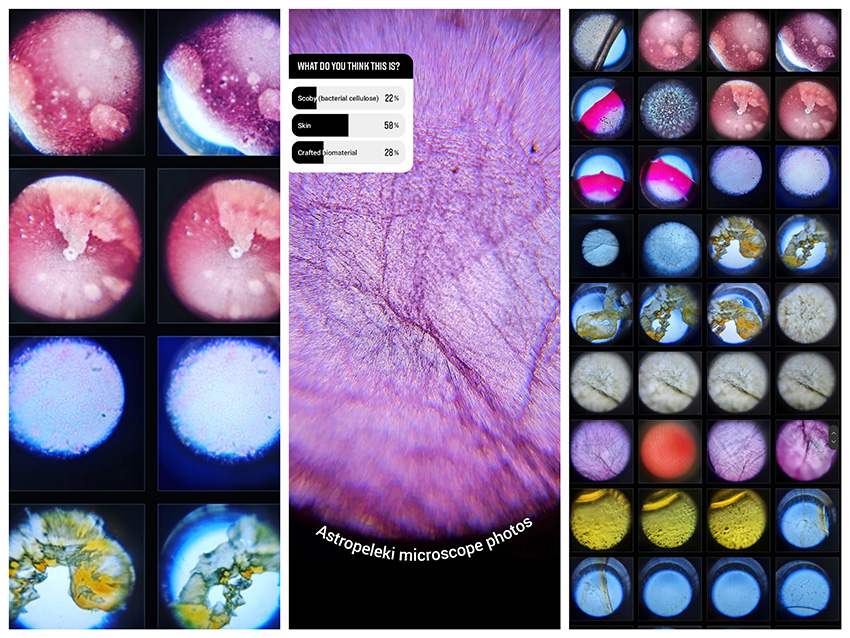
PHOTOS FROM THE MICROSCOPE
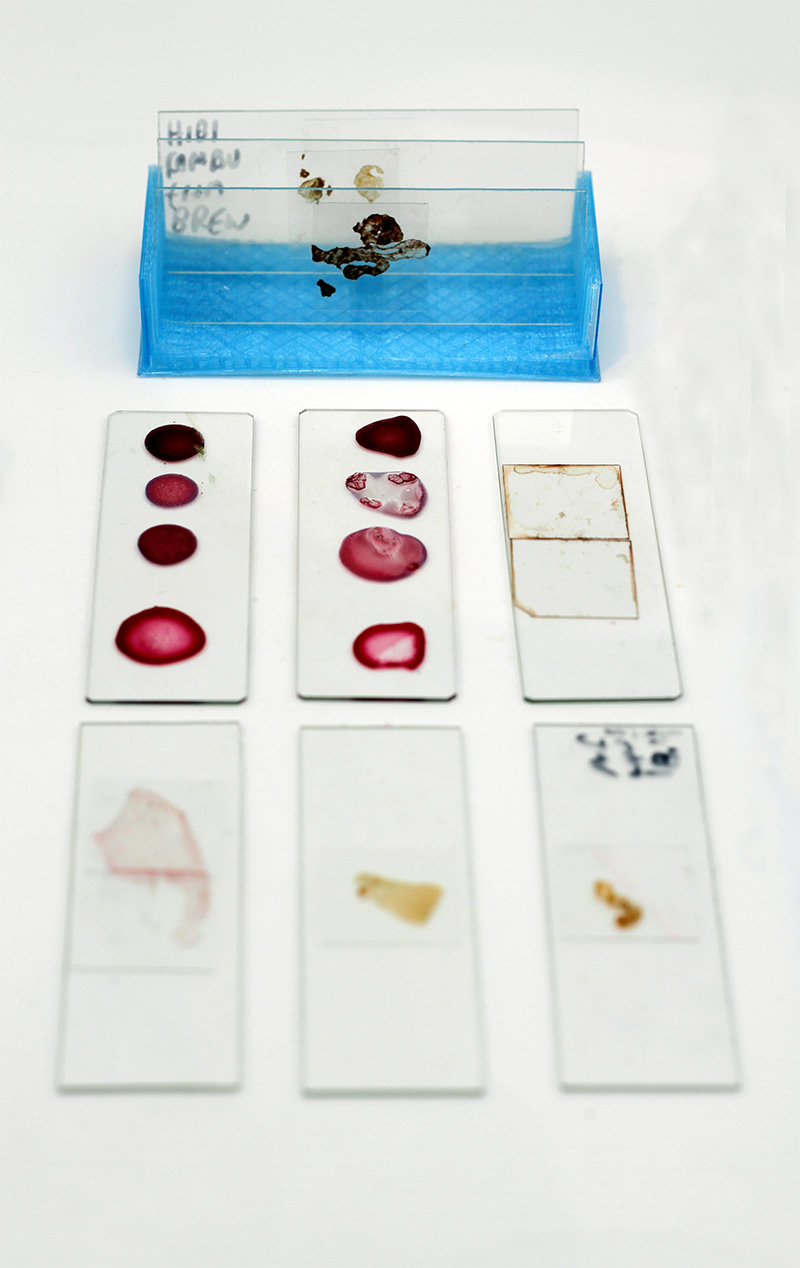
And here are some of the microscope slides I made with my material exploration. I took samples of some tears from my friend, some hibiscus bacterical cellulose, some material from the mother, some blood droplets, and some hibiscus dye samples!
You can download and 3D print the microscope slide holder from here.
Useful links
-
makehuman, an open source tool for creating 3d characters