4. Biochromes
Gif credit: Textile Lab Amsterdam. Also found on https://class.textile-academy.org/2020/lucrecia.strano/assignments/week04/
This week I got the chance to enrich my Bio side and explore natural dye sources and inks.
This week's assignment is: -Produce at least one natural dye or bacterial dye:
-Natural dye - modifying it’s colour and mordanting it in different ways to dye at least 2 different categories of fibers
-Bacterial dye - Explored dyeing with bacteria of different fibers and/or bacteria
-Produce at least one botanical or bacterial ink:
-Botanical Ink - explore different materials, recipes and understand how to adjust them based on the ingredients
-Bacterial Ink - explore bacteria solvents and understand how to adjust or use the inks
-Document your recipes, the ingredients and process and if there have been changes, document your unexpected discoveries
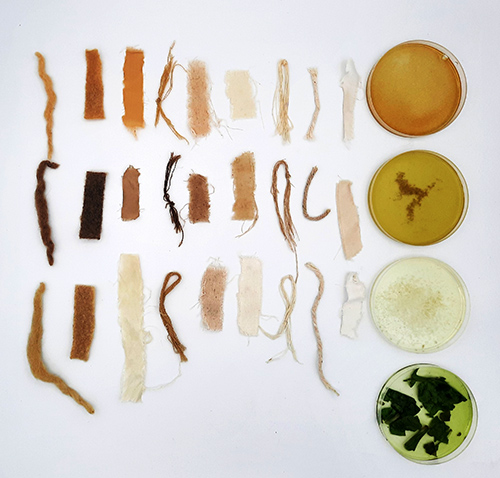
-Name your materials, classify them by typology and display them in a systematic order of samples.
-EXTRA POINT Submit some of your swatches to the analog material library of your lab. (20cm *20cm aprox)
Research and previous work with Bioart
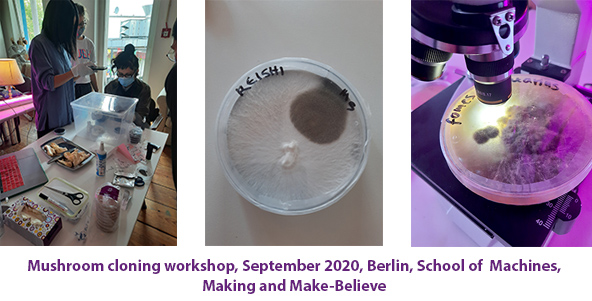
For the past couple of years, I have been obsessed with Bioart and DIY Biology or biohacking. So anything that has to do with bacteria, fungi, biomaterials and living tissues excites me! Since 2019 I have began to collaborate with non-human agents, such as fungi, bacteria, microorganisms and last year, at the School of Machines, Making and Make-Believe, I was introduced to mushroom cloning.
I am fascinated by the natural microscopical world and I have been experimenting with scientific imaging techniques since 2014.
This year I got the opportunity to teach a Creative Biology workshop as part of my residency at the CYENS Thinker-Maker Space in my homecountry! I instructed the participants into how to explore their own microbiomes on nutrient agar petri dishes and I also demonstrated how they can clone mushrooms from the supermarket!
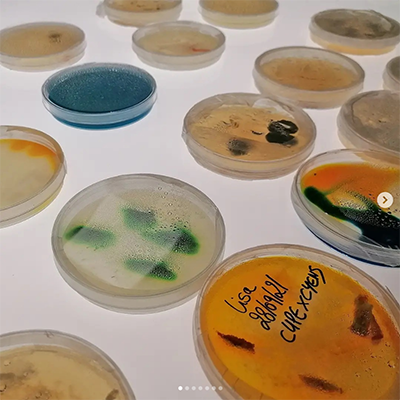
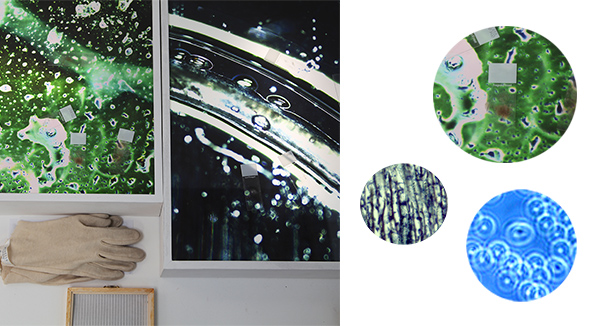
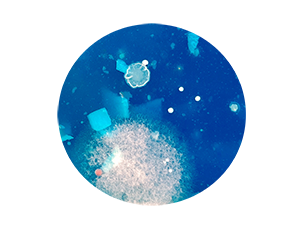
Microbial Delights- Agar agar plate for exploring my microbiome
In an attempt to explore parts of my microbiome, I created a huge agar agar plate. The idea was to try and create a gastronomical delight that also attracts microorganisms from my own human body. Assuming that colour attracts certain kinds of bacteria, I tried to experiment with the colour and the texture of the plate.
Materials and natural sources of chroma (colour)
For this week our materials and sources of inspiration and colour is the natural world. We began the assignment by collecting our food waste and leftover vegetables, nut shells, etc. Cecilia gave us some insight into utilising leftover dye baths for making pigments and pointed out how we can use different parts of our vegetables, fruit and nut shells and how a lot of these materials can be used 2-3 times to extract colours in dye baths.
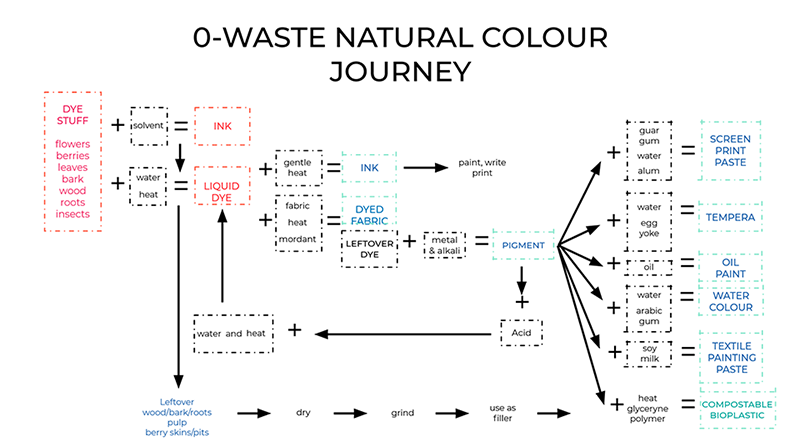
From Cecilias 1st lecture on Biochromes, 0 waste natural colour journey slide
Natural colour sources
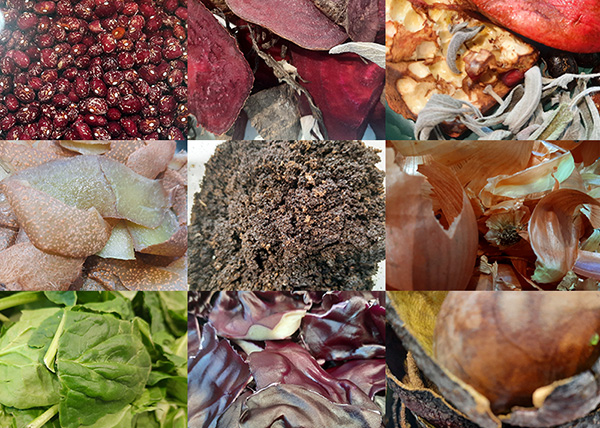
Photo of the natural colour sources we gathered at the lab here in Bilbao
- Mordants/Scouring agents:
alum & cream of tartar
copper liquor - copper pipes + vinegar or in crystals form
iron liquor - rusty irons + vinegar or in crystals form
Na2Co3 (sodium carbonate)

From Celilias 1st lecture on Biochromes
- Tannins
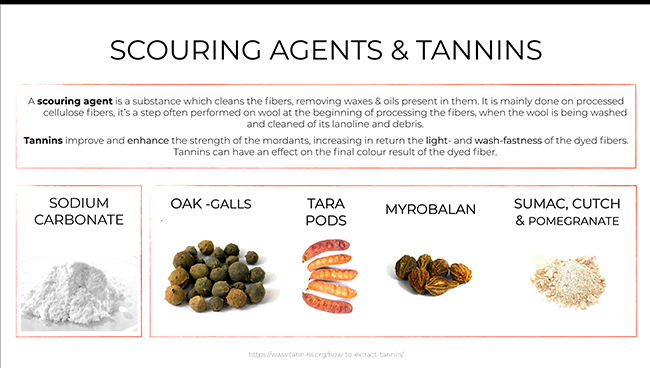
From Celilias 1st lecture on Biochromes
- pH modifiers
acids: vinegar, lemon
base: sodium carbonate
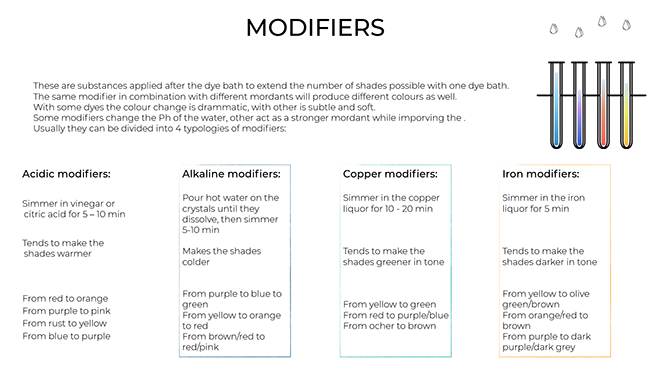
From Celilias 1st lecture on Biochromes
Preparing our fibres
We divided our fibres into two groups and we used Alum as our mordant for both kinds since it was the only kind of mordant we had available. We mordanted both kinds of fibres for 3-4 hours.
-
Animal Fibres: Wash the fibres gently with lukewarm water and a little bit of soap. Keep in mind that too much friction and heat will felt the wool, while it will damage the silk fibres making them dull and brittle. Also, sudden temperature changes are not recommended with animal fibres.
-
Vegetable Fibres: Boil the fibres for an hour in water and sodium carbonate (soda ash) ±2 spoons for 4-litre water. This process will remove the oil and waxes that are naturally present in the fibres. It’s good to repeat this process twice or to start by washing the fibres at a high temperature in the washing machine.
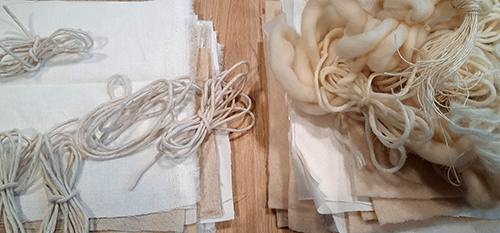
We divided our fibres to animal and vegetable fibres and then gathered them all, weighed them, calculated the amount of Alum and then we scoured and mordanted them.
Gif of preparing our fabrics
The process of dying, step by step
- Start by weighting your dry fibres (Weight Of Fibres or WOF).
- Calculate tannin, scouring agent, mordant and dye stuff based on the weight of your fibres!
- Weight tanning, scouring agent and dye stuff.
- Wash and scour your fibres- combine water with scouring agent. Heat up, boil, stir and add the fibres. Then remove, strain, and rinse your fibres.
- Tan your fibres by combining water with selected tannin agent. Heat up, boil, stir and add the fibres. Then remove, strain, and rinse your fibres.
- Mordant your fibres with one of the mordants. Combine water and mordant. Heat up, boil, stir and add the fibres. Then you remove and strain your fibres.
- Prepare the dye bath based on the WOF: combine dye stuff and vehicle (water) in order to make enough dye to submerge completely the fibres.
- Boil, stir and strain and measure the pH of your dye.
- Then add your fibres in the dye bath.
- Boil them, stir and strain them.
- Remove, strain and rinse your fibres with lukewarm water.
- Choose between mordanting again, colour change by mordanting or by modifying the pH of your rinse water.

Image summarising the process from Cecilias Biochromes lecture
Personal recipes development
The idea was to divide our available natural material sources in a way that each of us can develop and experiment with at least 2 recipes each and at the end, we can exchange recipes and add everything to the materials library. I decided to go with the Spinach and the Hibiscus and I created a dye with both of them. I also experimented with some marker and regular inks from Hibiscus, Beetroot and Campeche.
Spinach Dye recipe
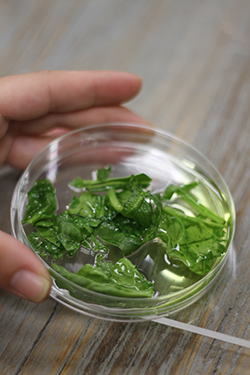
I started off by boiling my spinach leaves. I wanted to take a few leaves and suspend them in alcohol to see if I can extract any chlorophyll pigments from there for making a marker ink, however, I suspect that I had to finely chop the leaves first in the blender. Instead I chopped them with my hands and placed them in a petri dish along with some ethanol for a few hours. By the end, I had some pigment appearing!
- Dye stuff
Name - Spinach, Spinacia oleracea
Origin - Spain
Date - 15/10/2021, 15th of October
- Recipe
Scour time - 1 hour for vegetable fibres and the same for animal fibres.
Fibers gr - Both kinds of fibres were combined to test which ones work best with Spinach dye. In combination, my little swatches of each kind of fibres were almost 5 gr.
Mordant gr - We used Alum for both kinds of types of fibres- animal and plant fibres. We used gr for animals and gr for plant fibres but this is for the entirety of our swatches. I only used 15 gr of fibres in total (regular bath, Iron liquor bath and Alum bath) therefore we can say that I used 1.5-2 gr for only 15gr of fibres.
Dye stuff gr - I used 150 gr of spinach leaves.
Modifier time/gr - I used Iron liquor and Alum as my modifiers. For a dye bath of 5 gr of fibres I used approximately 3-4 ml of each and I left my fibres in the simmering modified liquid for hald an hour and then kept them in the bath for another 1.5 hours.
Gif of the process for making my Spinach dye
Final colour from dying my fibres with regular spinach dye and modifying with Iron liquor and Alum
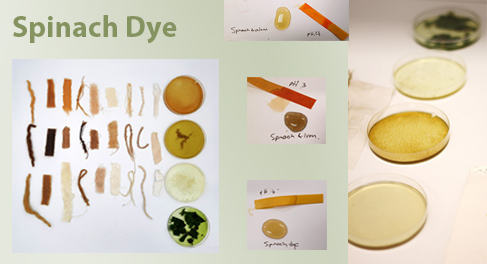
Dyed fibres and modifiers used to alter the natural spinach dye
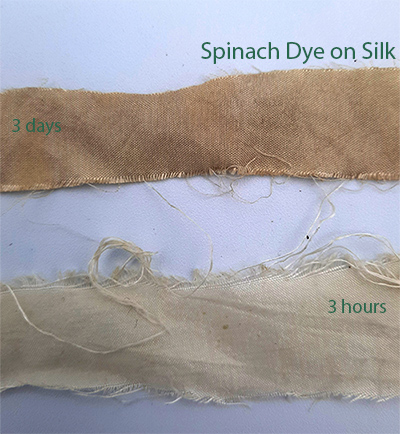
Dying silk with spinach dye, with no modifiers, 3 days vs 3 hours
Hibiscus Dye experiments
After I boiled my Hibiscus flower tea I decided to use the outcome of the dye bath into multiple batches so apart from the dye I can also make marker and regular ink from 1 dye bath.
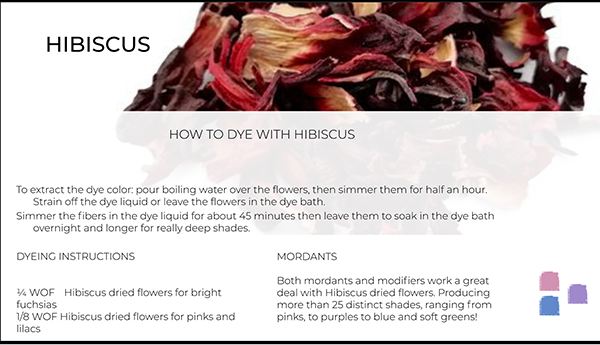
Image from the first Biochromes lecture by Cecilia Raspanti
- Dye stuff:
Name - Hibisco (Hibiscus), Hibiscus Sabdariffa
Origin - Spain
Date - 15/10/2021, 15th of October
- Recipe:
Scour time - 1 hour for both kinds of fibres
Fibers gr - 5gr of mixed fibres
Mordant gr - We used Alum for both kinds of types of fibres- animal and plant fibres. For 5gr of fibres I used about 1gr of Alum mordant.
Dye stuff gr - I used 10g of Hibiscus
Modifier time/gr - I used Iron liquor (3ml), curry powder (2ml), and vinegar (3ml) to modify the natural colour of the Hibiscus. I simmered the dye and the modifiers for 10 mins and then left the fibres inside for 2 hours.
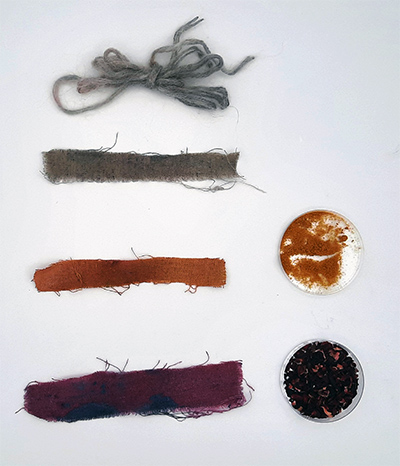
Photos from my dyed fibre results. In the first photo I only used linen and wool and on the second one I dipped all my kinds of fibres into the Hibiscus dye bath
Hibiscus ink recipe
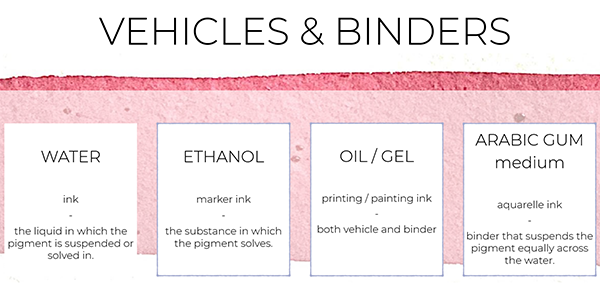
It is actually the vehicle and binder that distinguises one type of paint from the other. Depending on the vehicle (the liquid in which the pigment is suspended), or the binder (the substance that acts like a glue between the dye stufff and the liquid) we can make different kinds of paints.
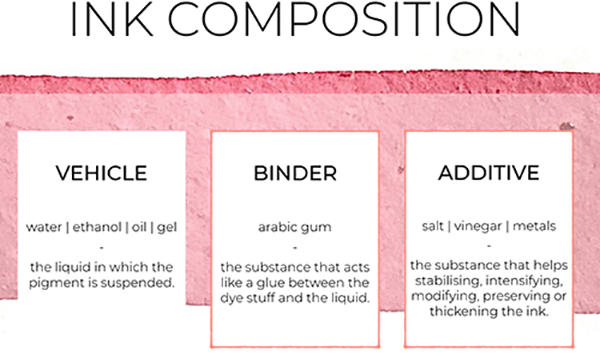
Images from Cecilias lecture on Biochromes-Inks
Process and the difference between marker and regular ink
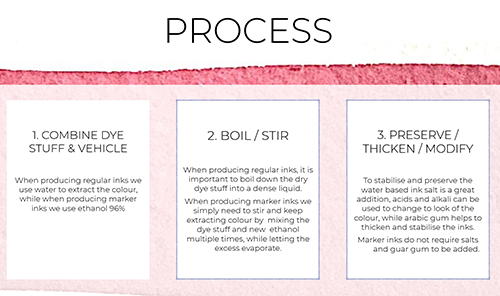
General process for making inks, from Cecilias Biochromes lecture
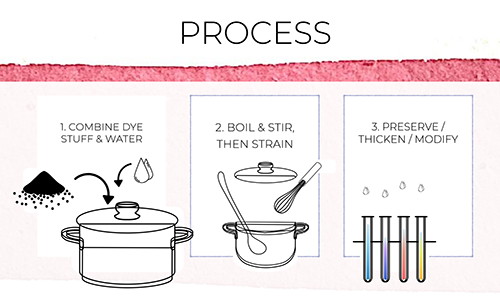
Process for regular ink that uses water as their vehicle, from Cecilias lecture
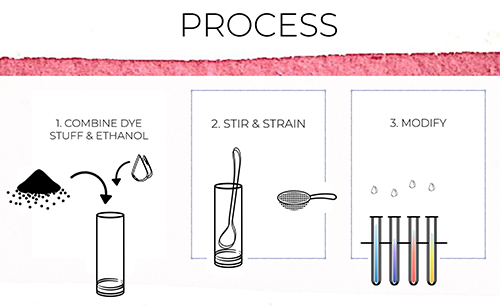
Process for marker ink that uses ethanol as thei suspension vehicle, from Cecilias lecture
Hibiscus marker and regular ink recipe
I used the boiled Hibiscus leftovers from the dye bath to make marker ink with ethanol as my vehicle. I also used the last third of the batch of the dye bath that had already been boiled, stirred and strained for my regular ink as it already contains water as the vehicle for my water soluble or regular ink. I condensed my leftover dye bath for 1 hour by lightly simmering the bath in order to get a more concentrated consistency of the ink. I ended up with 100ml of condensed ink. I then added some salt to thicken the solution and added some in some petri dishes to test the modifiers.
-
Dye stuff- same as dye recipe above
-
Recipe
Quantities- 10g of dried Hibiscus flower/tea, 2 cups of water
Time - Simmer for 1 hour until you get a dense liquid
Vehicle (the liquid in which the pigment is suspended)- Ethanol for marker ink, water for regular ink
Binder - None for marker ink, gum arabic for regular ink acts as a thickener and binder anyway
Stabiliser - None for marker ink, salt for regular ink (with a water base or vehicle)
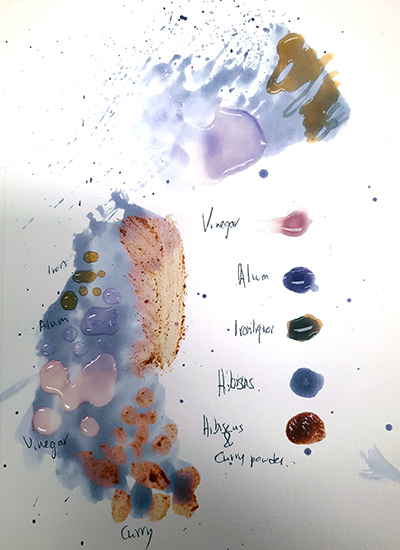
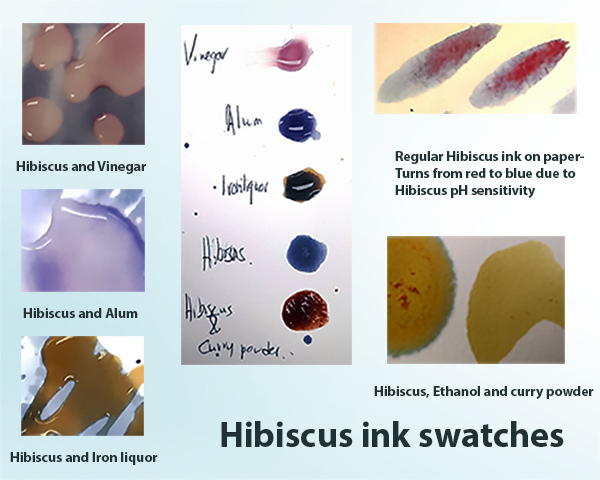
Modifier - I used Iron liquor, Alum, Vinegar and curry powder to modify the colour of my inks.
Thickener - None for marker ink, gum arabic for the regular ink
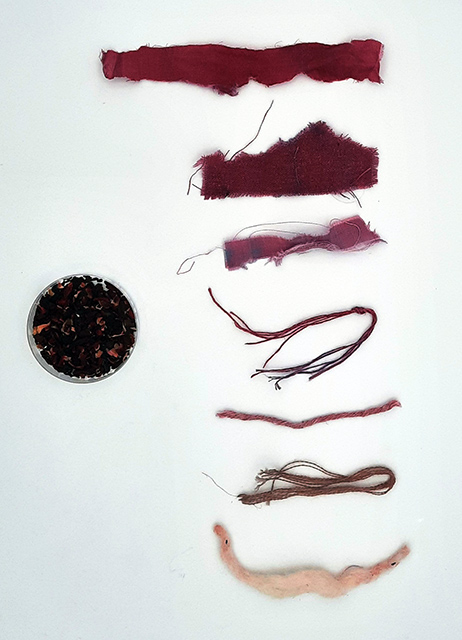
- Catalogue by material and colour-
Marker Ink
Regular Ink
Other ink experiments
Beetroot ink experimentation
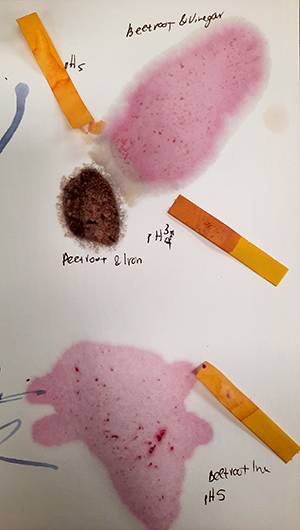
Finely chop a fresh beetroot without boiling it and suspend it in alcohol to make marker ink or alternatively gently boil 3-4 beetroots in water for a few hours for making the regular ink. Regular ink will require boiling down of the dry stuff into a dense liquid first, whereas marker ink only needs to be suspended in alcohol to extract the colour.
Modifiers- I used Iron liquor and vinegar to modify the beetroot pigment.

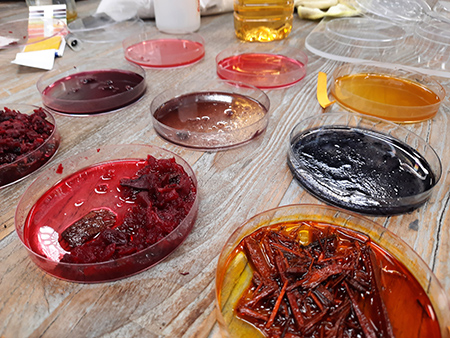
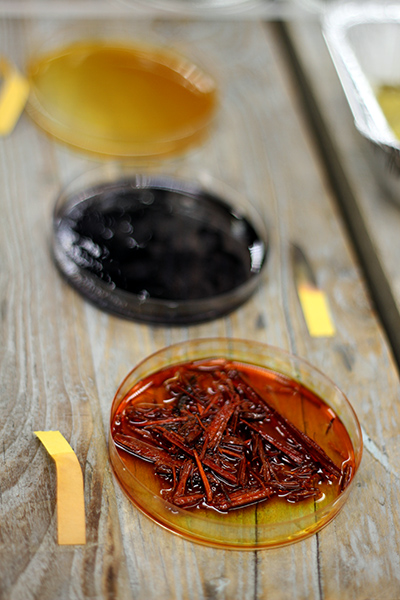
Making marker inks with Hibiscus, beetroot and Campeche, from left to right
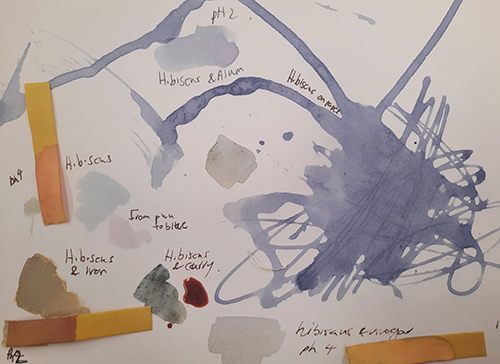
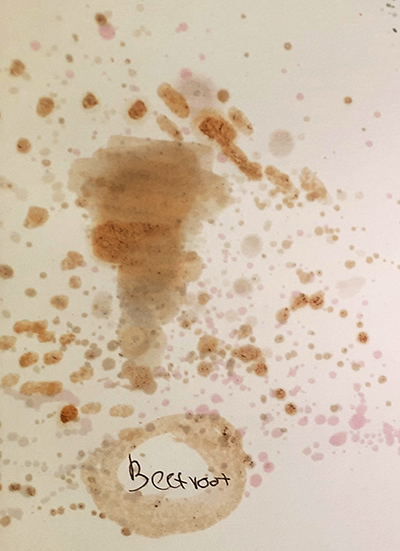
Documenting and mapping pH changes and modifiers onto my beetroot market ink
Painting with my marker inks and experimenting with the different hues
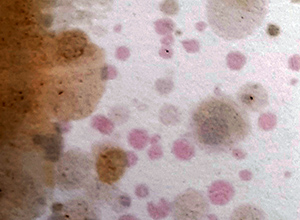
Detail from one of my beetroot ink paintings
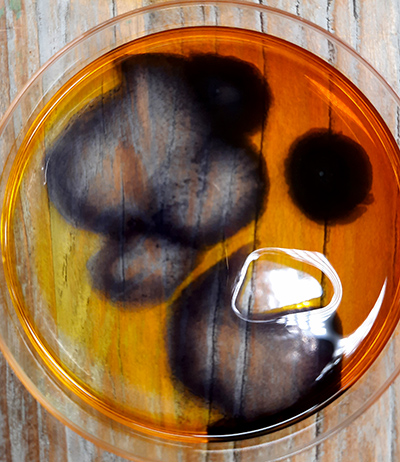
Campeche marker ink experimentation
Again the vehicle for my ink is alcohol so I just used ethanol to extract the beautiful colour of Campeche (logwood).
Modifiers- Iron liquor and vinegar
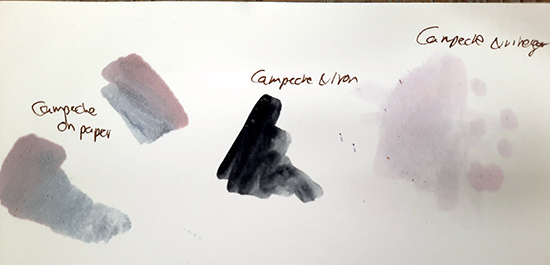
Modifying my Campeche with Iron liquor and vinegar to get some more colours to play with
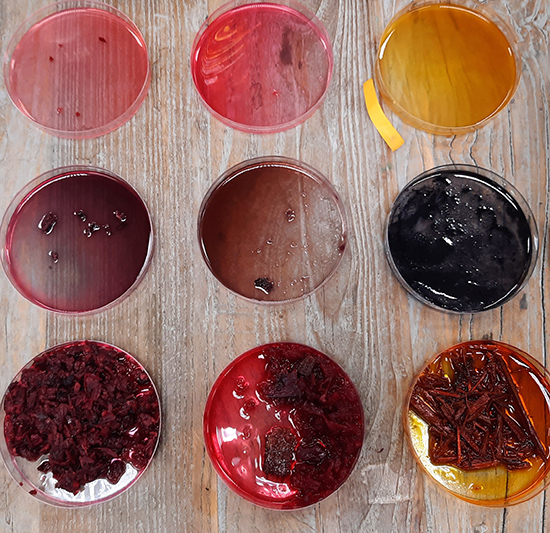
Photo of the marker inks I created. Hibiscus, beetroot and Campeche, from left to right
Documenting the change in colour as soon as I add Iron to Campeche
After I modified my colours, I noted down the new colours I created and then I started playing with them!
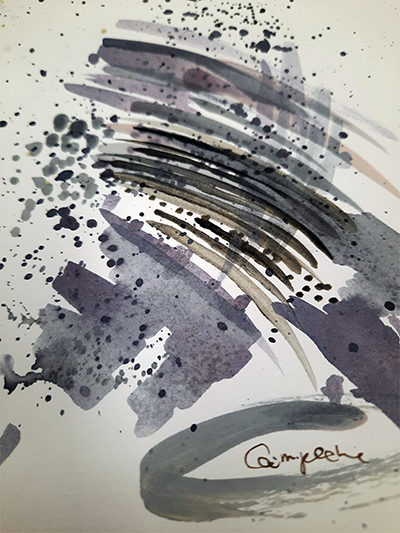
My final Campeche marker ink painting
Bacterial Dying- How to guide- TO BE CONTINUED
I was super excited to get into the world of bacterial dying since I have begun collaborating with non-human agents since 2019, however, we did not have all of the available materials such as the bacteria and the liquid agar to work with. Because of this, we listened closely to the tutorial that Cecilia gave us earlier this week so we are ready to do a hands on exploration when all of our materials are available.
Go here for more on bacterial dying. We managed to try it in March 2022. In this link you can find all the information, tutorials and everything else you need to try it.
Useful links
- Textile Lab Amsterdam
- Hibiscus dye by Carolina Delgado
- pH paper making
- Markdown
- Spinach dye
- Bacterial Dyeing