Dyeing with Food Waste
NATURAL DYEING
Onion Peels
I decided to use onion peels for my project because I was inspired by mushrooms and I wanted the collection to have earthy organic light shades. Onion peels can produce an earthy orange to brown to purple hues. Orange and brown from orange peels and purples from the pink onion peels. When I started I had shades ranging from earthy oranges to browns in mind. I had already learnt the process of dyeing using different kinds of food waste during the biochromes week, I specifically worked with avocado pits but the process for all is the same, just mordants can vary and a few other things like the period and temperature at which the dye bath is supposed to be heated to extract as much colour from them without buring it vary and should be kept in mind.
The idea behind using food waste for dyeing was to avoid the use of fabrics which have been dyed synthetically, to not support such processes and encourage organic and safer ways to produce garments on a bigger scale. Because I knew how to do this already the first batch of dyeing was an attempt to see how such dyes can work at an industrial level.
For that, I dyed at Eurecat which is a renowned centre of technology in Catalonia. It has a manufacturing unit with a lot of industrial machines for different techniques like Dyeing, Weaving, Knitting and many others. I had the opportunity to use one of the dyeing machines from the unit, it was still a small scale machine, not the traditional industrial machine but jsut a smaller scale of the kind you might find at dyeing houses. I used 100% silk for the project, silk crepe and silk organza which is an animal fibre.
Scaling up Natural Dyeing - Eurecat
Making the dye
I had been collecting onion peels for a long time, so after some time I had enough to to get a strong colour.
-
Fill a pot with about three times as much water as skins. The skins should float freely. Make sure that there is enough water for the fabric or fiber also to float freely once you add it later.
-
Bring the bath to a boil. Turn it down and simmer the skins in the water for an hour.
-
More prolonged boiling will release more dye, but only to a point.
-
You can leave the peels in overnight to get a little stronger colour.
-
Strain the peels out keep them in the dehydrator to dry, they can be used again. They might give the same intensity of colour but they can definitely be used again to make more dye.
Scouring
The next step is to clean your fibres. Newly bought fabric has a quoting to prevent them from getting too dirty which is supposed to be washed off, it prevents the fibres from absorbing the dye.
-
Boil enough water in a medium size pot. Just enough to cover your fibers.
-
Introduce 2% of WOF of Sodium Carbonate (Soda ash).
-
Mix thoroughly until dissolved.
-
Introduce your fibers to the hot pots and simmer for 1 hour.
-
Move your fibers around every once in a while. Do not let the fibers sit. This will avoid having uneven color and help you get nice even results
-
Remove and wash with cold water.
Dyeing
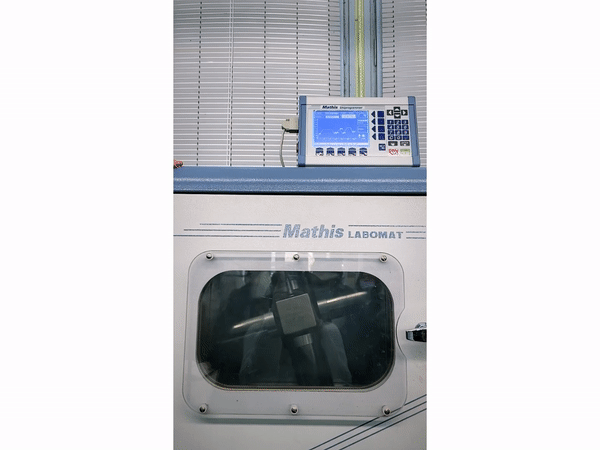
At Eurecat I learnt how to dye with this machine which is a small scale dyeing machine. It rotates continuously to mix the fabric and the dye well and has a sensor which keeps it at a constant tmeperature which doesn't make the dye boil but keeps it warm enough.
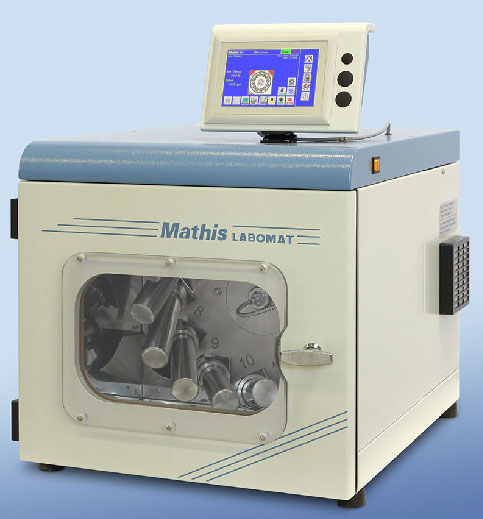
The machine has two ways of dyeing, one way is to use small containers to fill different dyes with - mostly used to make tests and the second is to dye bigger pieces of fabric altogether.
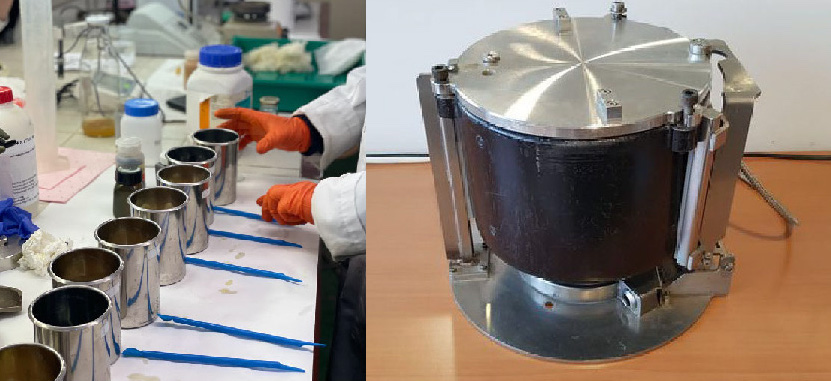
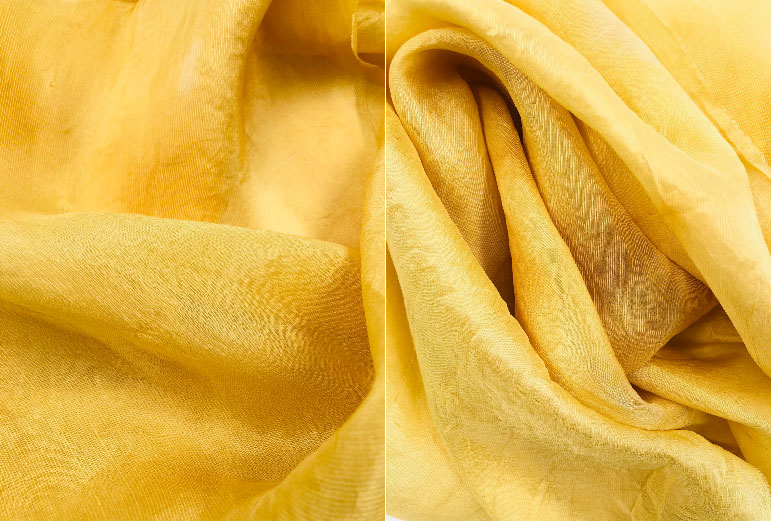
I used the big container which can accomodate upto 5kgs of fabric and dye. So I filled it up with dye upto 70% of its capacity leaving for some room for the dye and the fabric to move around. I weighed the fabric and put 15% of WOF of Alum in the dye.I wanted to mordant it with alum because that gives a very nice earthy orange. It immediately changed its colour to a more yellow shade which was a little surprising but I continued. Then I added aprroximately 2 metres of fabric into it and fixed it in the machine.
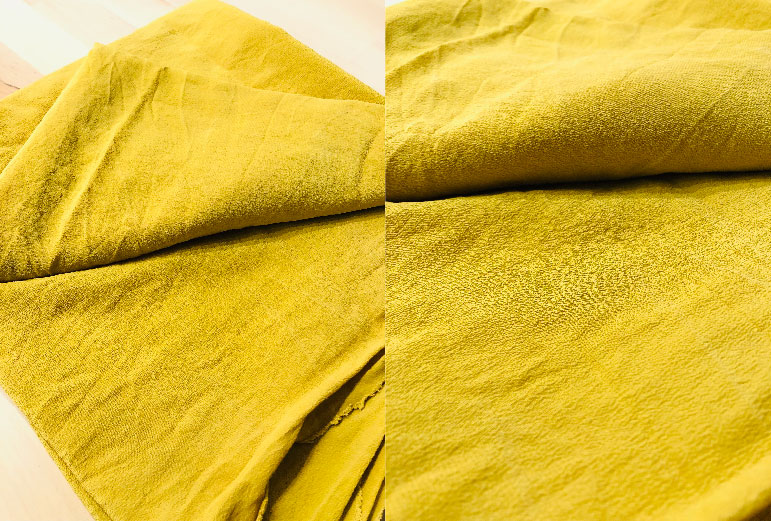
To start the machine we need to set a program on the monitor so I chose the one that runs for 4 hours at 21 degrees celsius. After 4 hours I took it out of the machine and rinsed it. Even after rinsing it 3 times it was still leaving a little bit of colour. Then finally I hung it to dry. I achieved a very equally distributed bright yellow colour. The machine definitely helped me achieve a very even colour but I was confused about the yellow because that's not very common from onion peels.
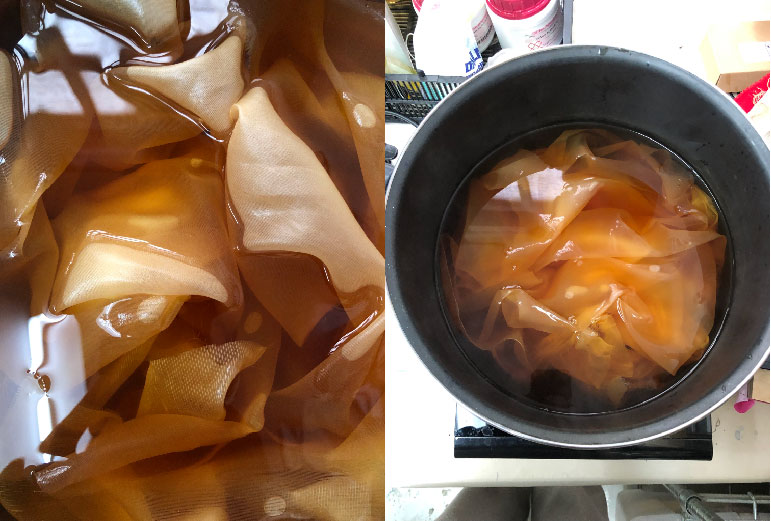
Recycling dye bath
I got the dye back from Eurecat because it still had colour in it and decided to reuse it dye smaller pieces of fabric. To dye manually
-
Set the dyebath to simmer. Once it's simmering, put the wet fabric in the pot. Simmer for 30 minutes.
-
Turn off the heat after 30 minutes. Using tongs, remove the fabric from the bath and place it into an empty pot or container to cool down.
-
Once it's cool enough to handle, rinse the fabric in fresh water.
I achieved lighter shades of yellow from the recycled dye bath but loved them. The dye bath was almost clear and could be thrown away now. These were the shades I got. I used these pieces of fabric to test bacteria dyeing over them.

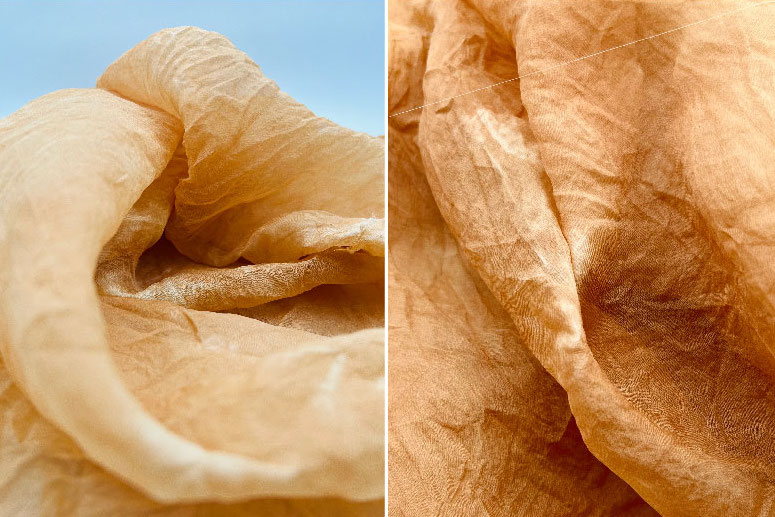
Batch 2 - Manually
I needed more fabric so I dyed another batch and made new dye from old and new onion peels using the same procedure as above. This time on adding 15% of WOF of alum it did not become yellow, which was surprising again. I started dyeing the textile.
This time the colour was how I had wanted it in the beginning - a brownish orange.
Conclusion
The reason why I think this drastic colour on change happened is because for the dyeing at Eurecat I add 15% of WOF of Alum in approximately 2 litres of dye but for the 2nd batch I added the same amount to approximately 5 litres of dye. Bigger quantites of alum makes an onion dye bath yellow.