2. Digital bodies
This week introduces us to new digital tools that complement hand tools in order to design, represent, make and modify the human figure that can then be used as a canvas for creation. We challenge the fashion designer to step away from the simple copy of the human figure as support of his work and start his creative process from its very beginning : the design of the canvas itself.
Inspiration
3D Scanning
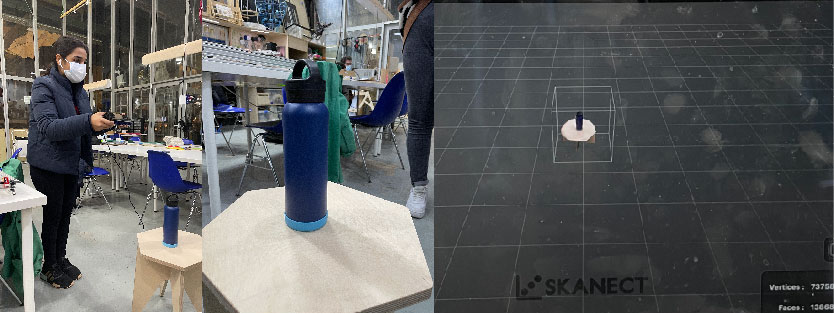
We were supposed to scan ourselves and then edit the model on rhino, but unfortunately I was not at the FabLab yet so I completed my assignment after, to understand how it works we used a handy 3D scanner and tried scanning a bottle. For this we used a software called Skanect. For smaller objects like a bottle, we just rotate the scanner around the object at a steady pace, but for scanning bigger objects or human body, we can use Kuka (A robotic arm at IAAC) as it would move at a more regular pace and would be more steady.
Steps to follow
Step 1: Setup What you will need:
-
computer
-
(Skanect software)[http://skanect.manctl.com/]
-
Microsoft Kinect This device reads color with its camera and reads depth with the infrared sensor.
-
Lights Lighting is very important in order to get an even colored scan.
-
Spinning platform (optional) This allows the subject to rotate making scanning much easier, Here at Fabricademy,Barcelona we used a robotic arm called kuka but as we were not there we did it later on by our hands keeping it steady as much as possible.
-
Step 2: Software Settings Open Skanect / Go to NEW / Make sure your settings match those in the picture (You can also make a - bounding box) Press START
-
Step 3: Workspace A screen will come up showing the bounding box in the middle. The infrared and video images are on the right.
-
Step 4: Place your object Have your object onto the platform. Make sure the lighting is consistent on your subject.
-
Step 5: Record Hold your Kinect up level with the subject's height and a few steps back from the platform. Press RECORD. The Kinect will begin recorded the depth (red) and the color (green).
-
Step 6: Spin Around Once you have done one full sweep of your subject head to toe, You can walk around your model or use any manual spinning base of your choice.
-
Step 7: Lining It Up As you are scanning be sure that you are getting a high frame rate around 18-24 frames. If you get below 18 you have to move your Kinect faster.
-
Step 8: Exporting Model To export it to your computer go to SHARE and the export menu will open with a LOCAL option. Under LOCAL go to EXPORT MODEL and use the setting seen in the picture to export for printing.
Visualisation of Human Form
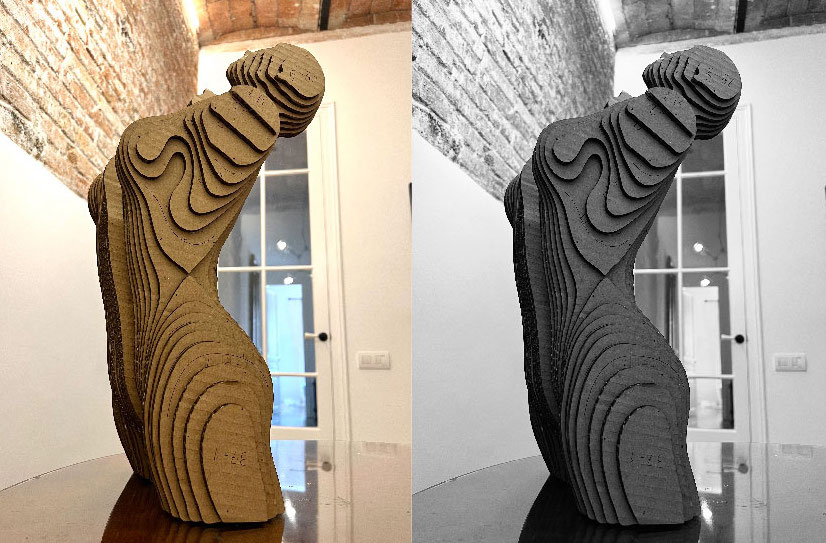
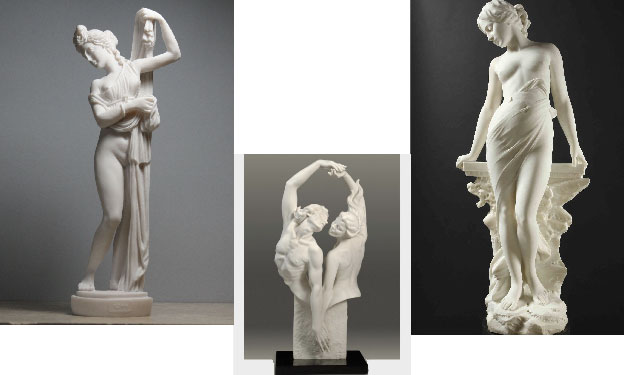
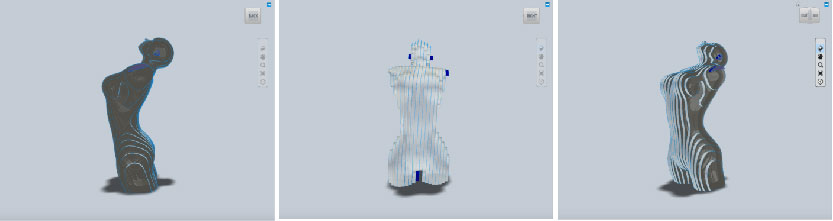
For this week to fabricate the human form I wanted to enhance and focus on the the curves of the human body. Taking inspiration from ancient greek sculptures while using fabrication techniques which help me exgaerrate it even more.
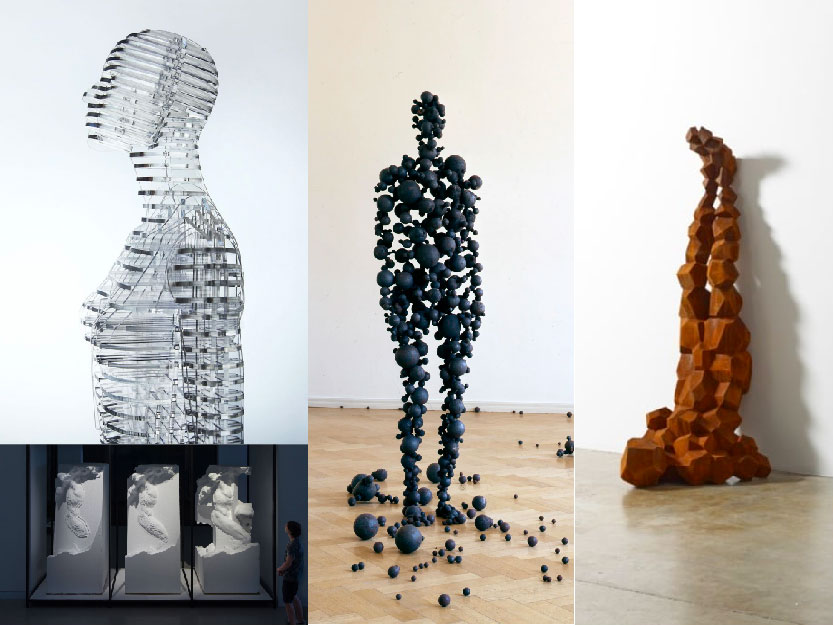
References
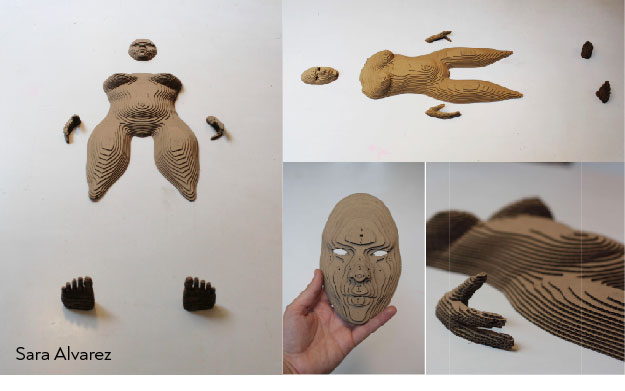
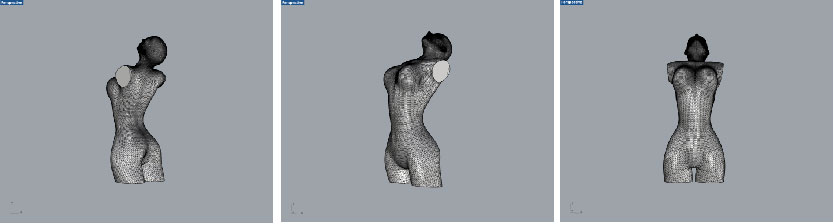
I took inspiration from some sculptures for the kind of form I wanted and then downloaded a similar form from MakeHuman and modified it in the way I wanted. For the kind of slicing structure I wanted I was very inspired from this project by Sara Alvarez, who is also a former alumni of Fabricademy and I wanted to use it too.
Rhino
I took the form that I downloaded from MakeHuman and then using BooleanSplit removed it's arms and legs and only focused on the torso because it was kind of what I wanted, it exaggerated the curves of a female human body.
Slicer for Fusion 360
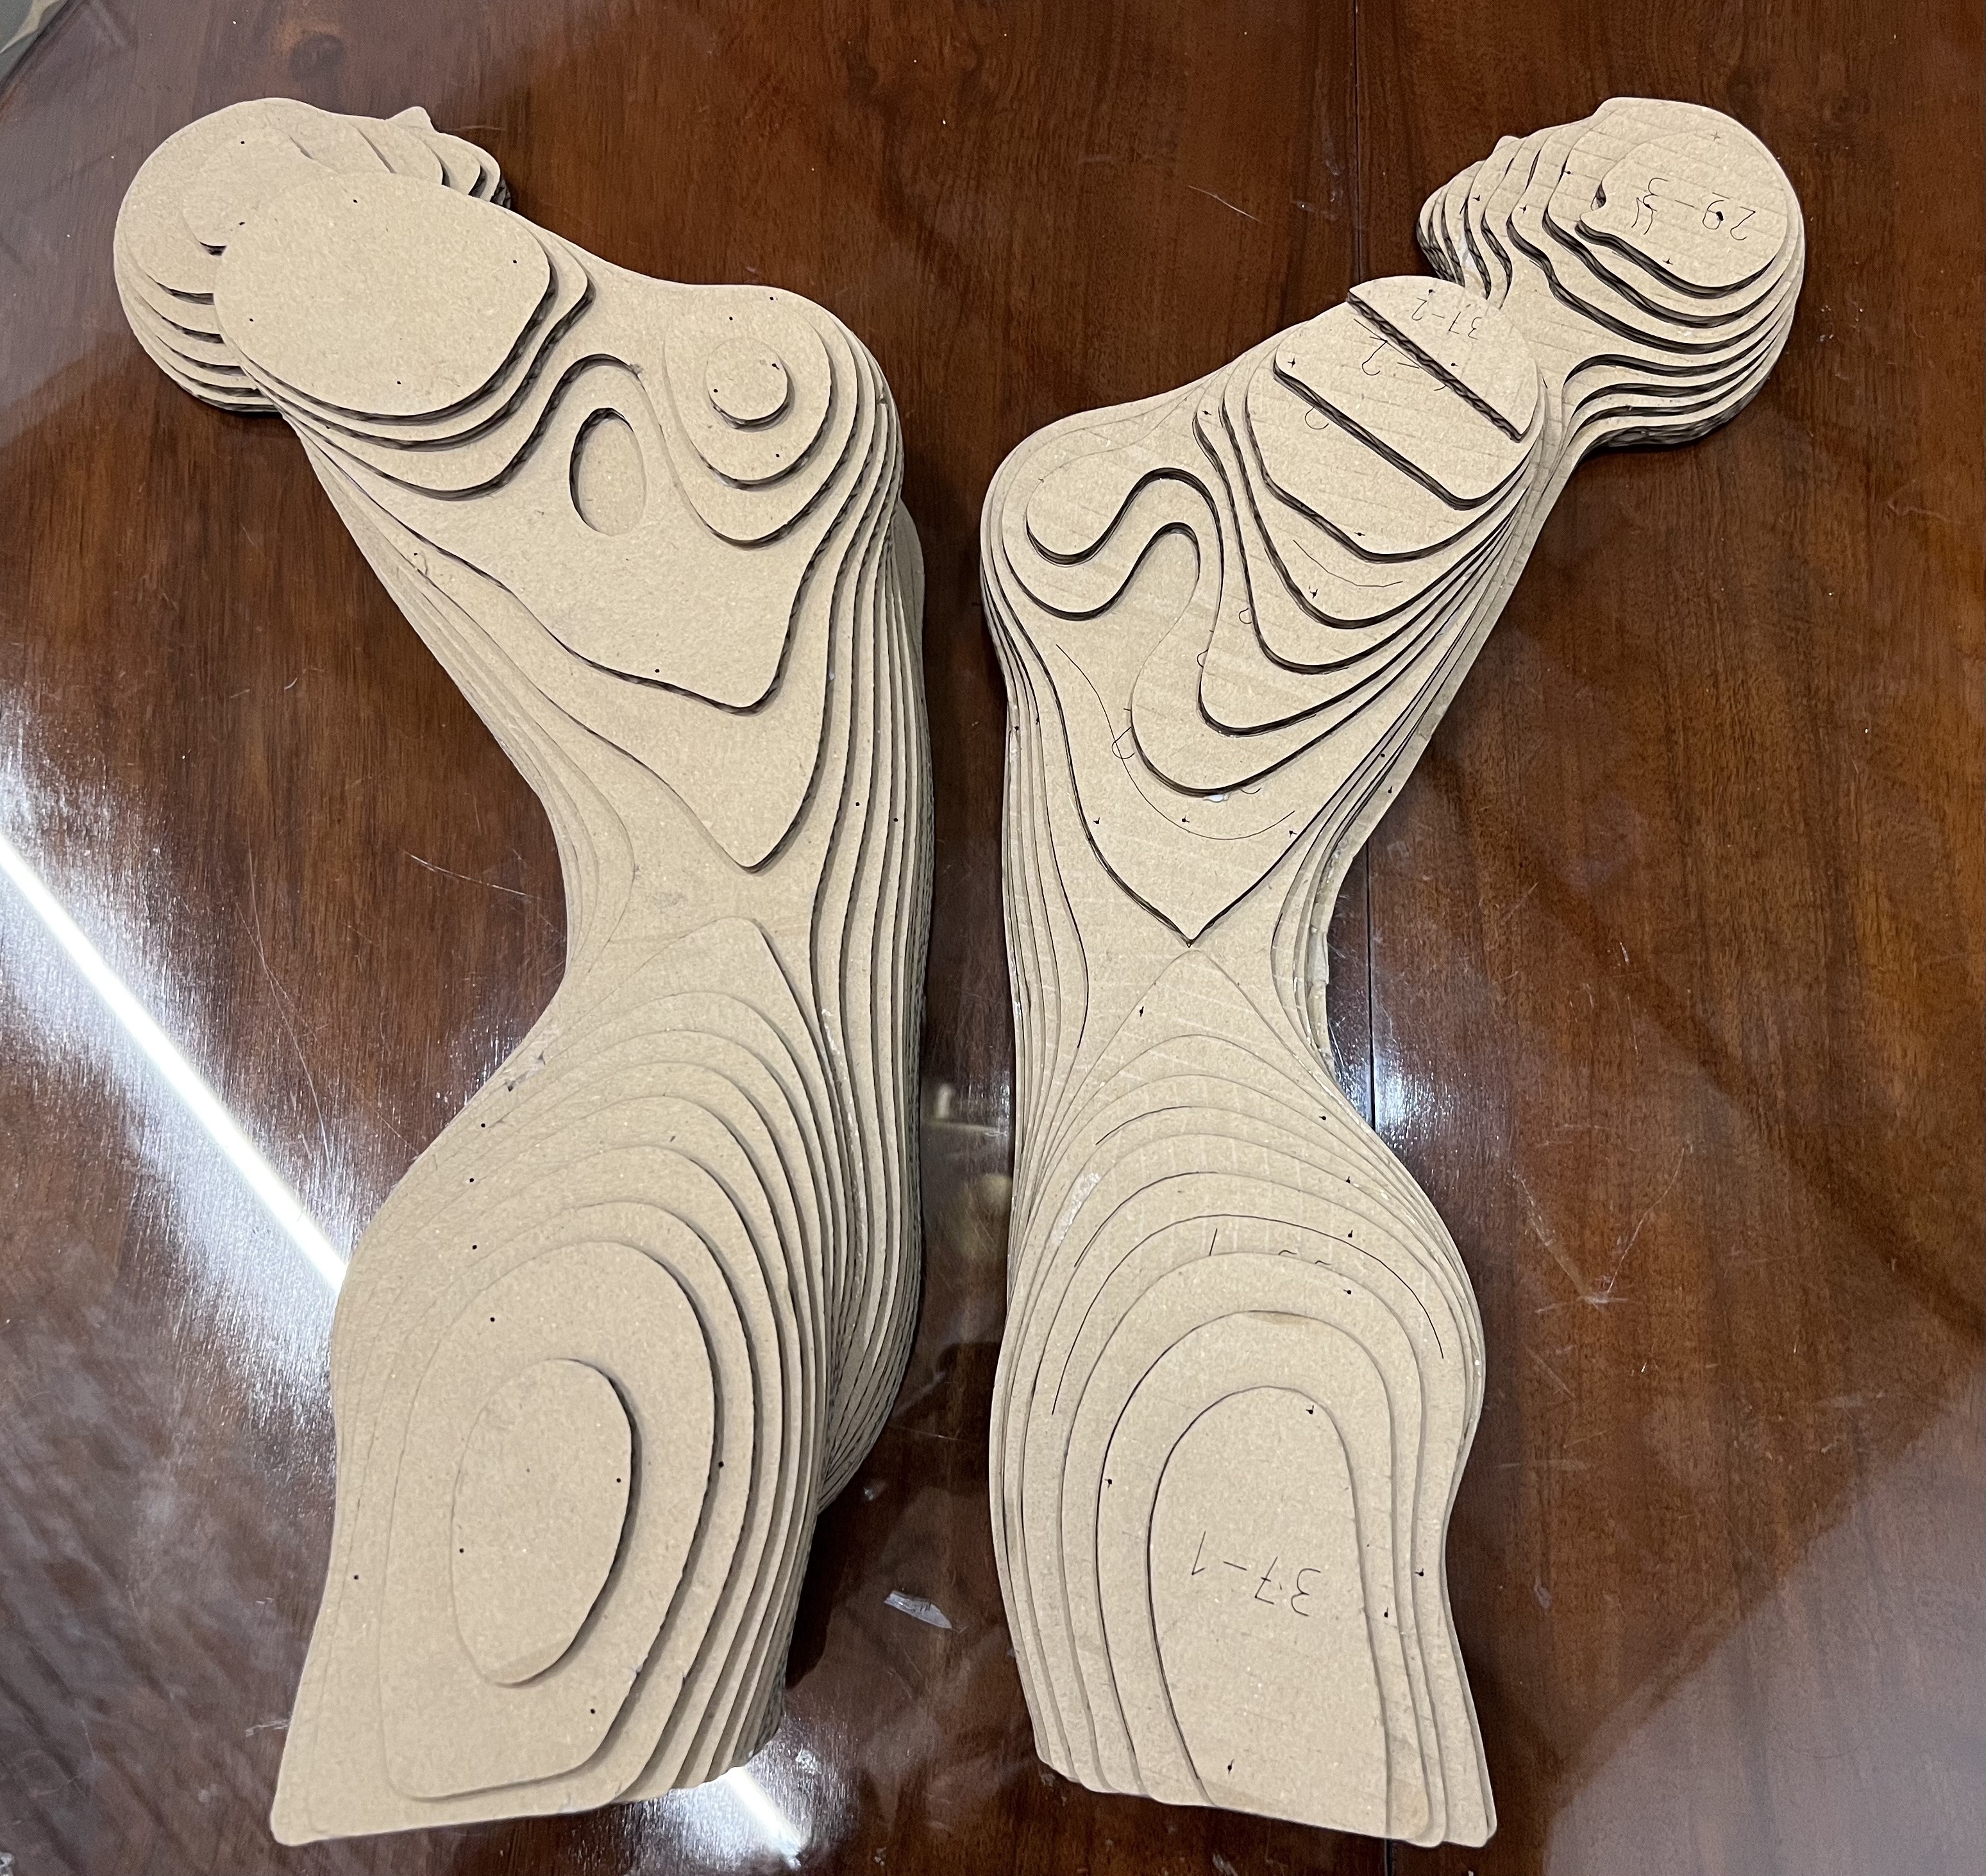
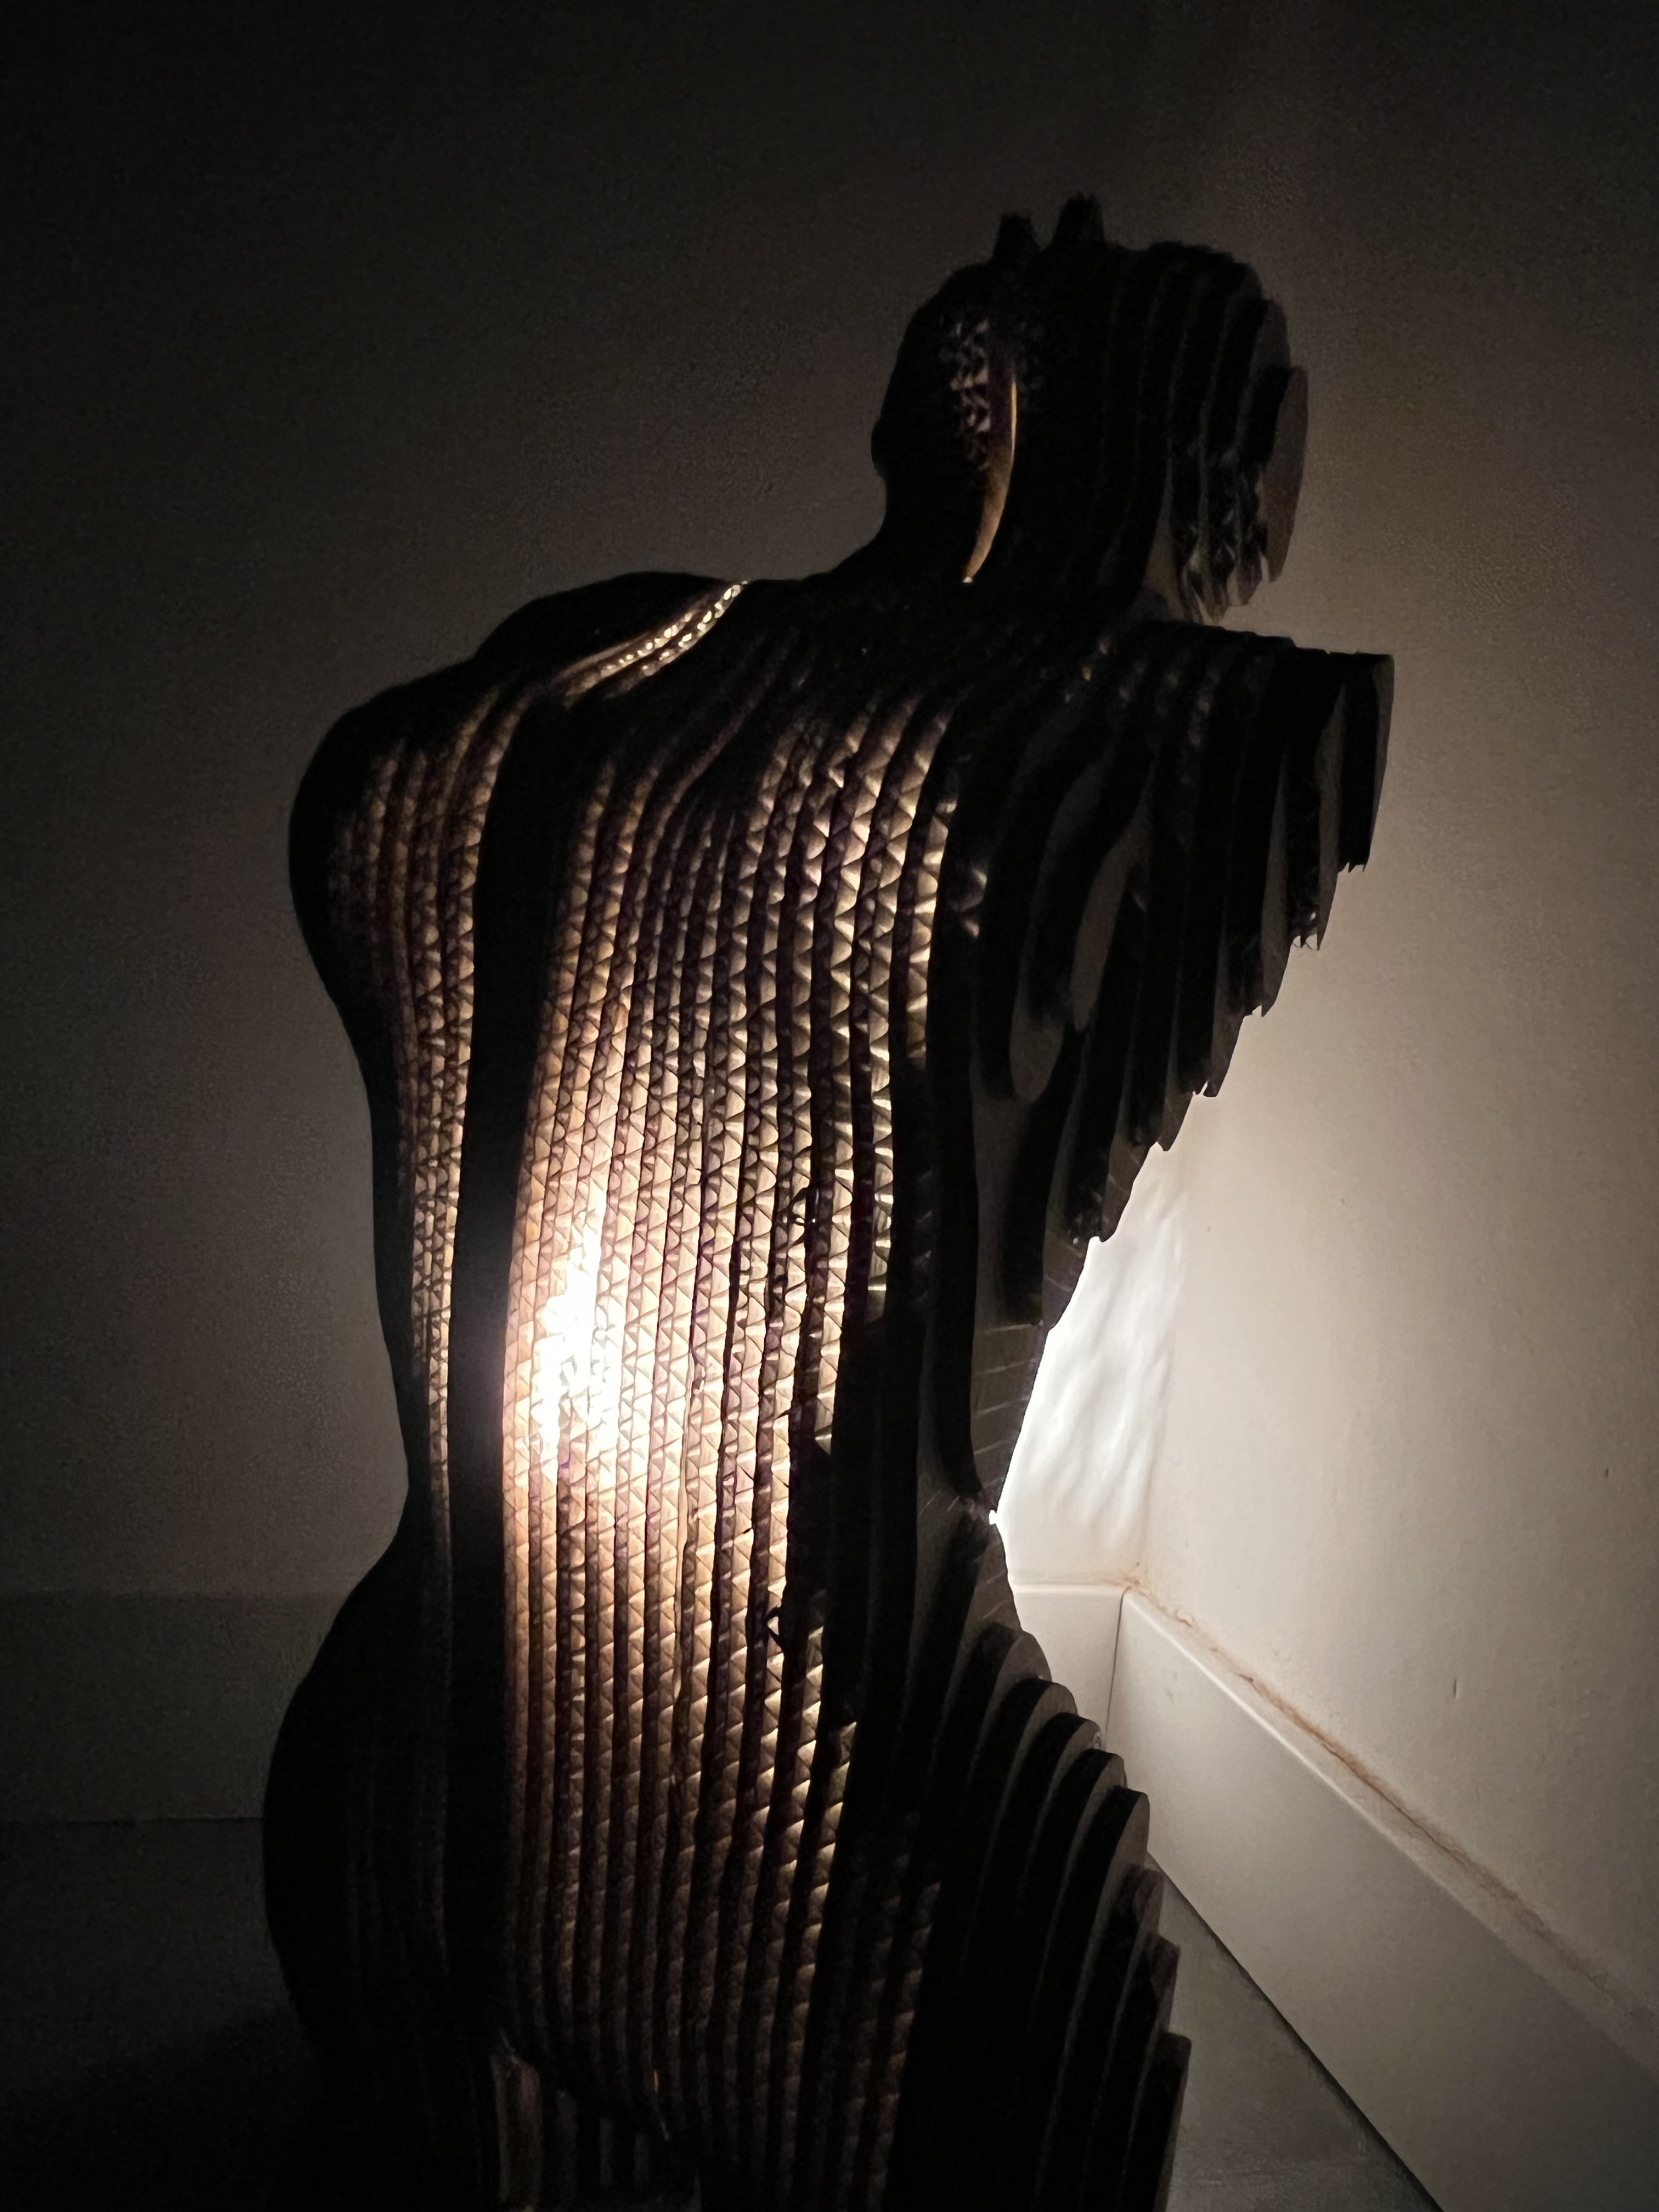
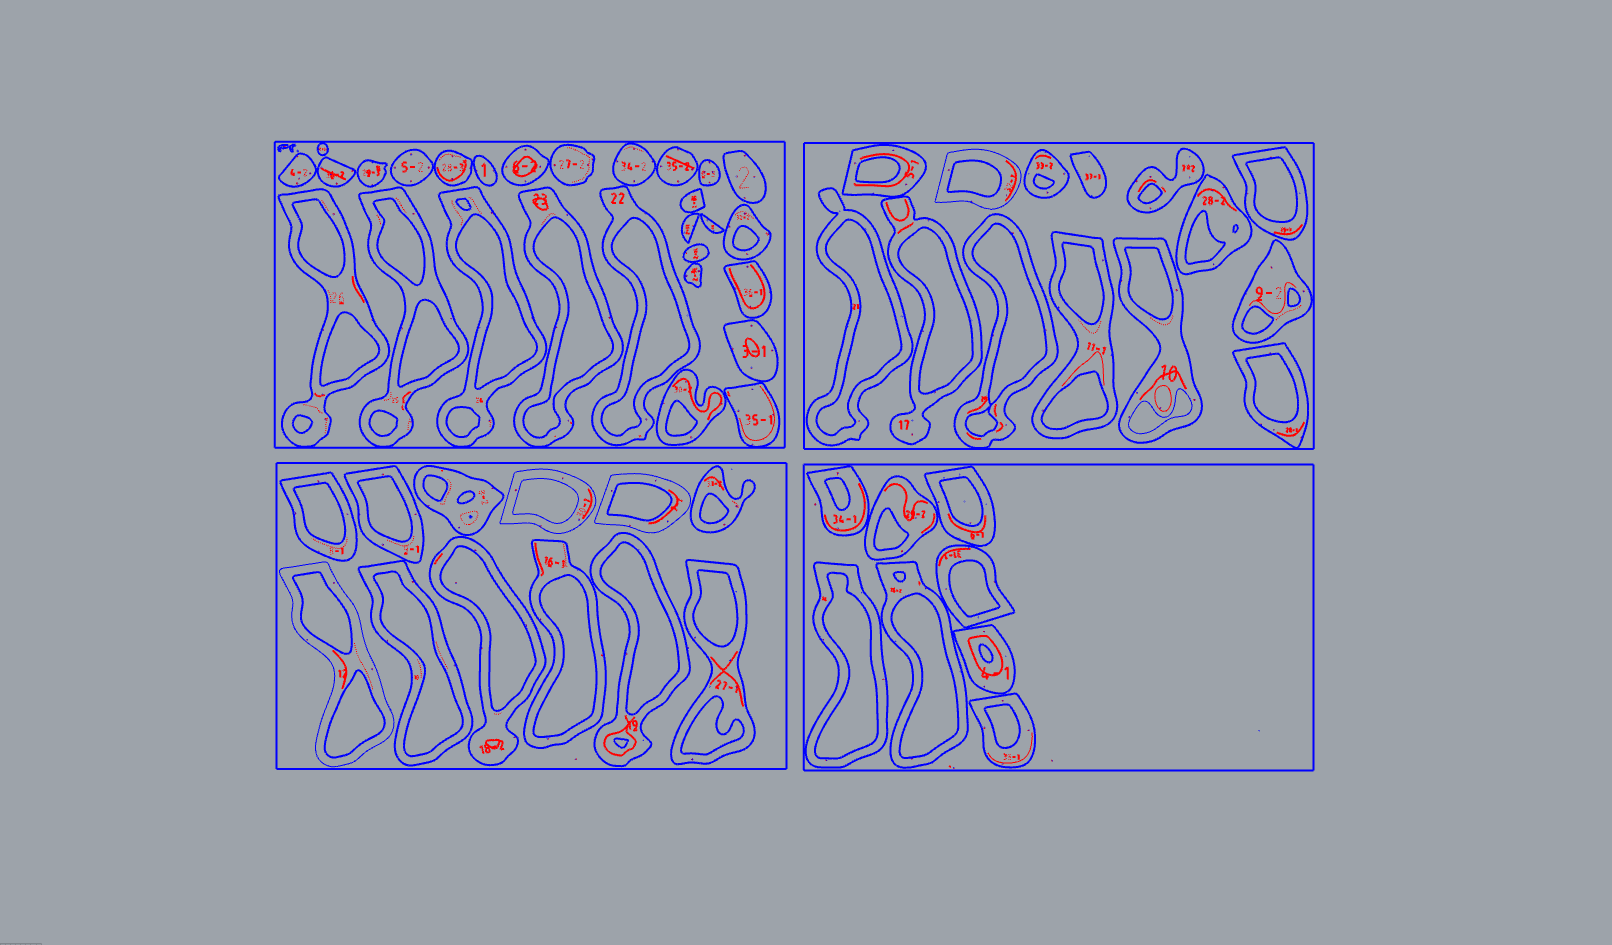
The slicing technique I used was Stacked Slices where you can choose the angle in which it gets sliced, can be vertically, horizontally, diaognal, etc. I wanted it to slice vertically so I did that. In the end I wanted to make a product out of it so I decided to use Cardboard and make the structure hollow so I can then install a bulb inside and make it a Lamp.
Laser cutting
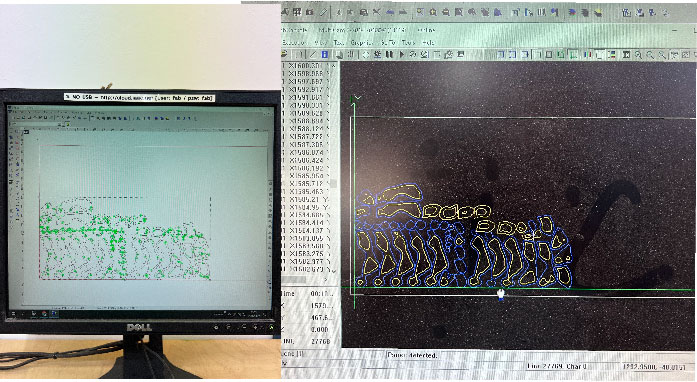
PARAMETERS
CUT FEEDRATE : 20
CUT POWER : 320
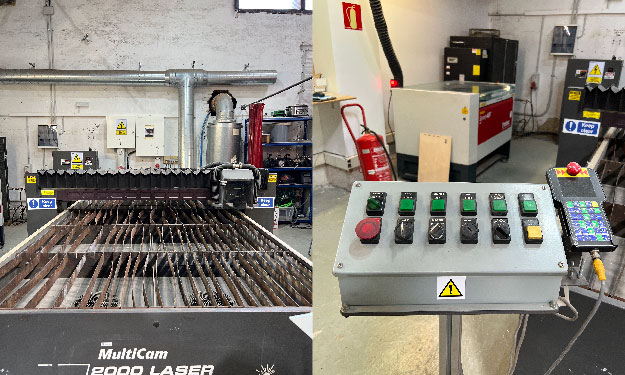
I used 5.5mm cardboard for my structure so it doesn't end up in a lot of smaller pieces and easier to assemble. I used the MultiCam 2000 LASER which is very big scale laser and cut big sheets of various materials including plastic, wood and light-gauge ferrous metals.


Assembling
It was easy and fun to assemble the pieces, they were very clearly marked and easy to undertsand. Here's a short clip of me assembling them.
I joined them in two parts so that I can fix the bulb in the middle and then join them. I expected it to emit much more light after installing the bulb like you can see in the first image in the beggining of the page, but the cardboard was more compact and did not let a lot of light pass. For the next time I will make sure to use a less compact cardboard.