7. Computational Couture
This week was heavy for sure but extremely interesting. We learnt about the Grasshopper software within Rhino to make 3D shapes and patterns and prepare files for the 3D printer. It was a lot in the beginning (it still is) but I started off with watching and practising a lot of tutorials from youtube to get used to the software a little and then start working on my own tile.
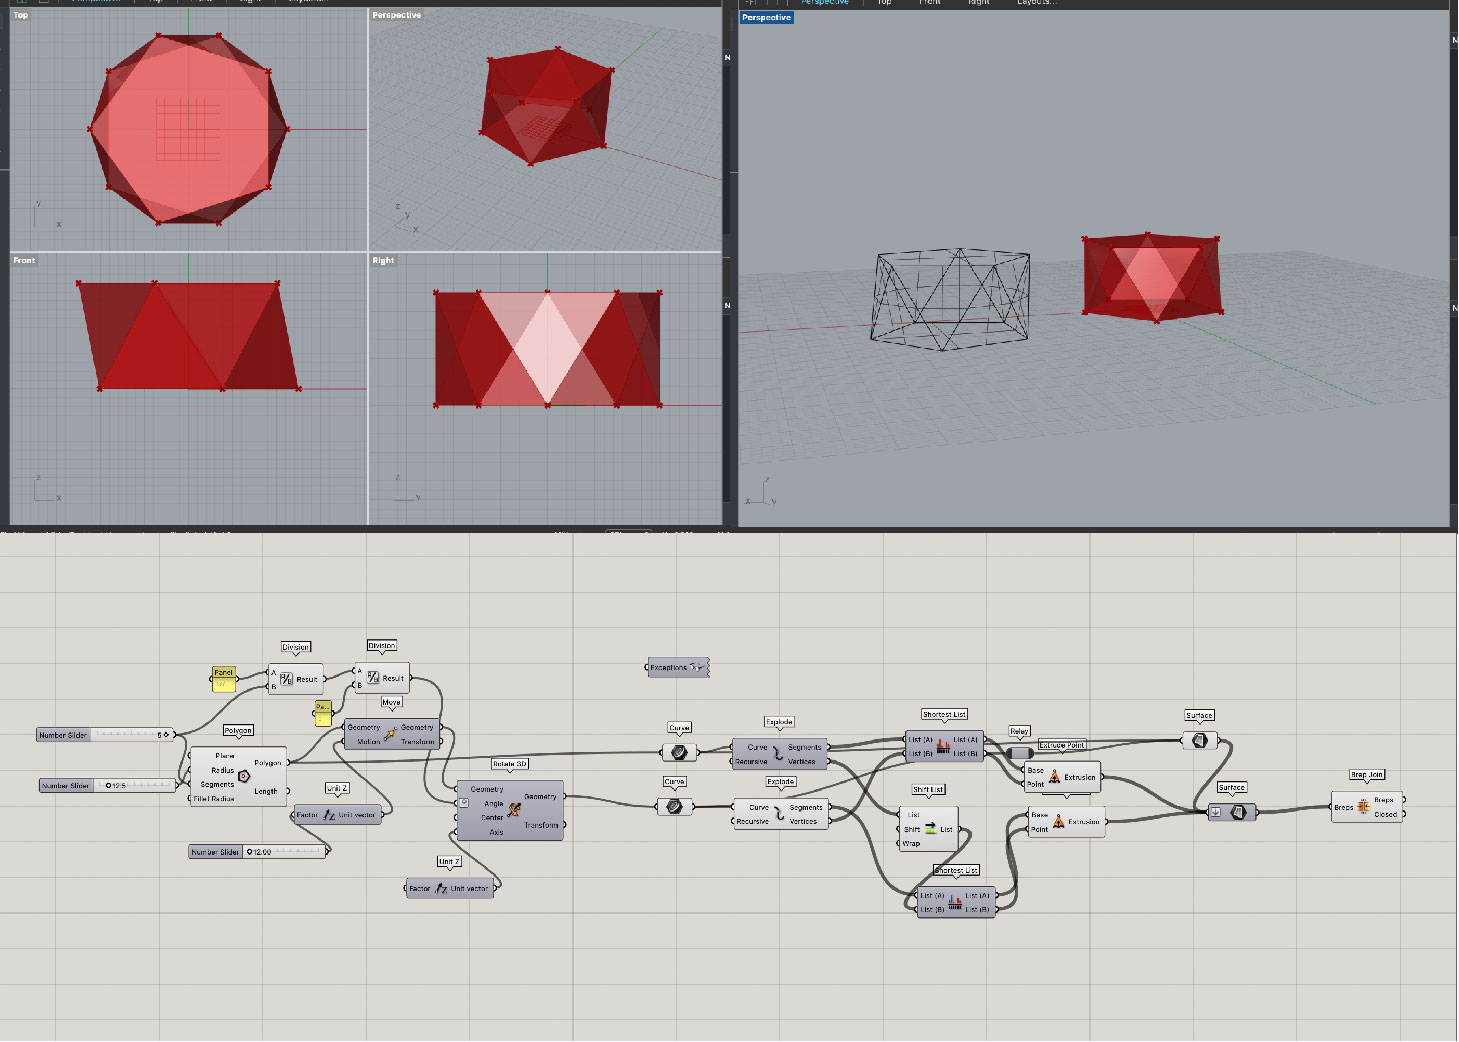
First off I practised this beginner tutorial, I understood the steps and created the same side by side, it did not turn out as it should have but taught me a few things and a few components and their functions.
Then again I went onto another tutorial which had vase designs with a lot of waves and curves. I did not get far in that tutorial because I could not understand the functions at all after one point but it was an interesting one. It taught me how I could divide my line into equidistant points and form circles around each. Most importantly how to use the graph mapper and easily change parameters.
Another one was to play with twisitng boxes but again I got stuck in the middle of it and couldn't get very far.
Experiment with the 3D printer
This was my inspiration for the tile, I wanted a similar pattern only with some kind of gradation.
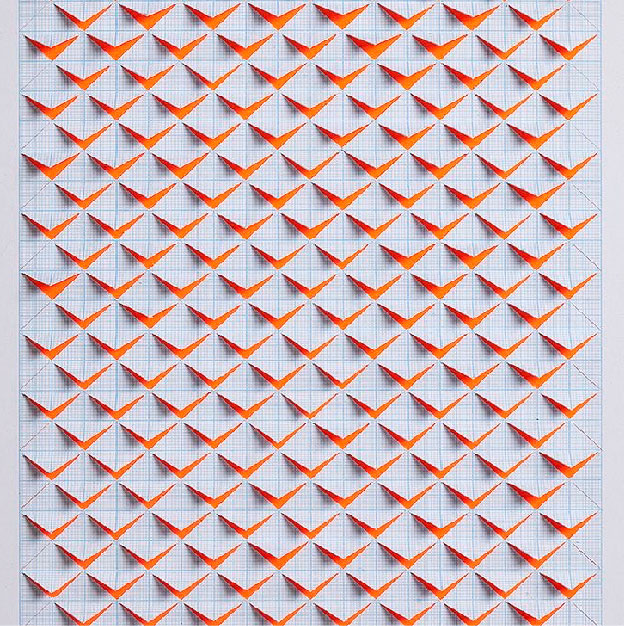
For example I wanted the pattern to reduce in thickness and size in a systematic manner. For that, I referred to one of Eugenio's example which looked like this
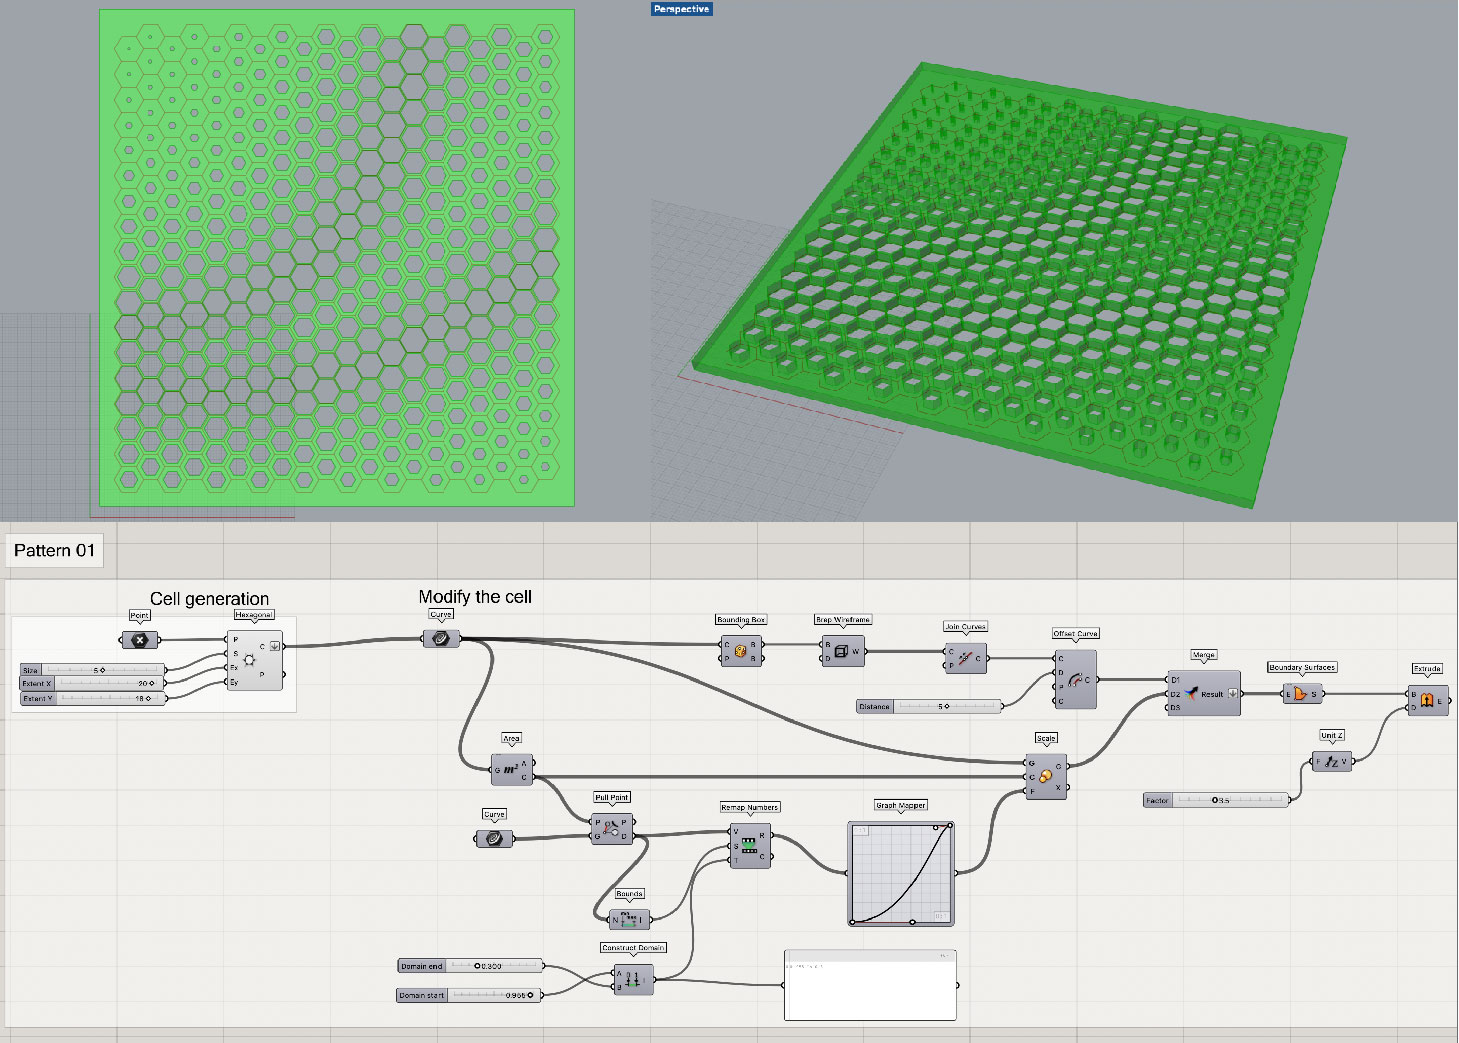
Using the same concept I created my own tile using a triangular grid.
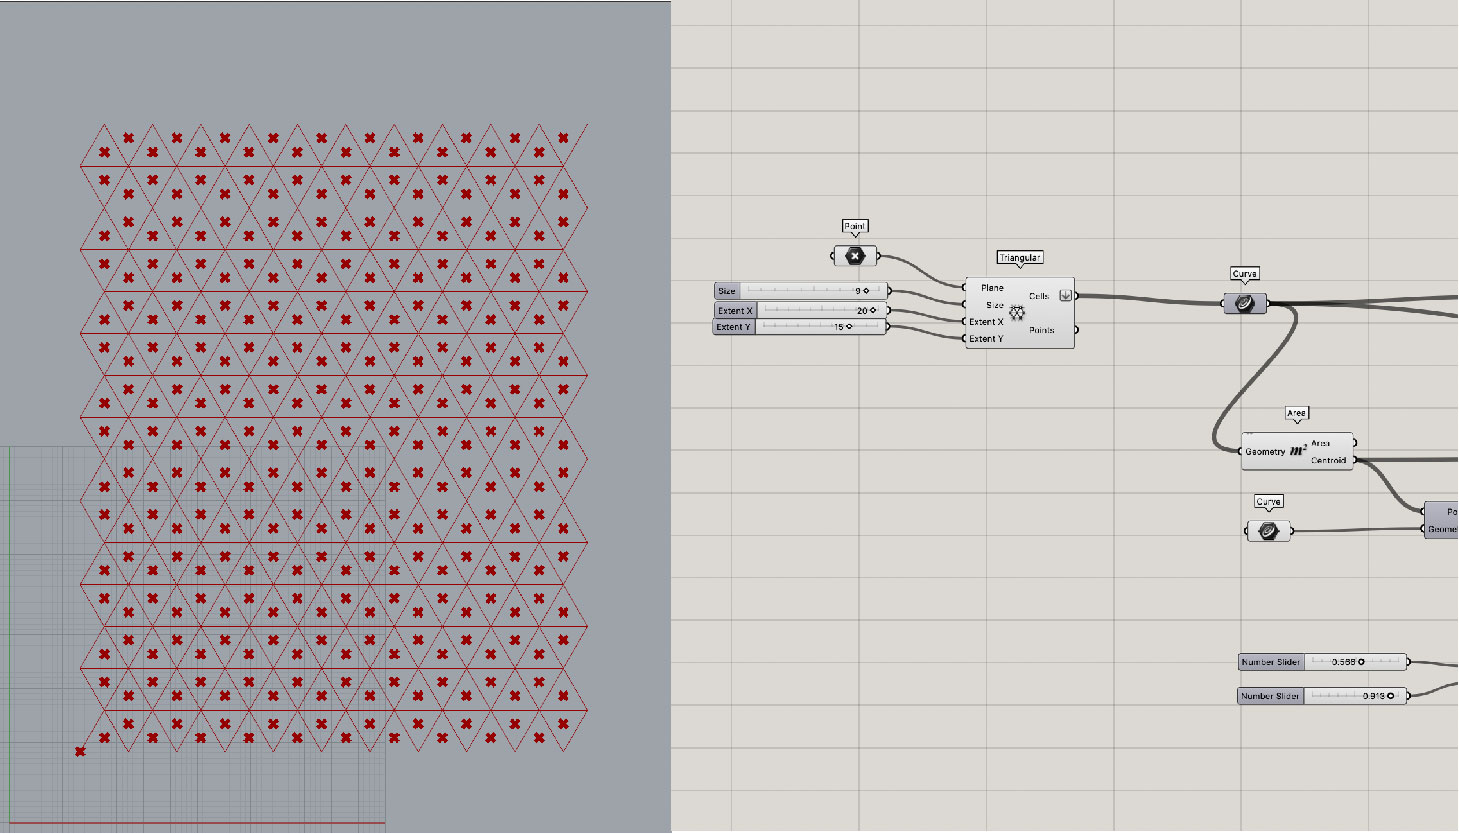
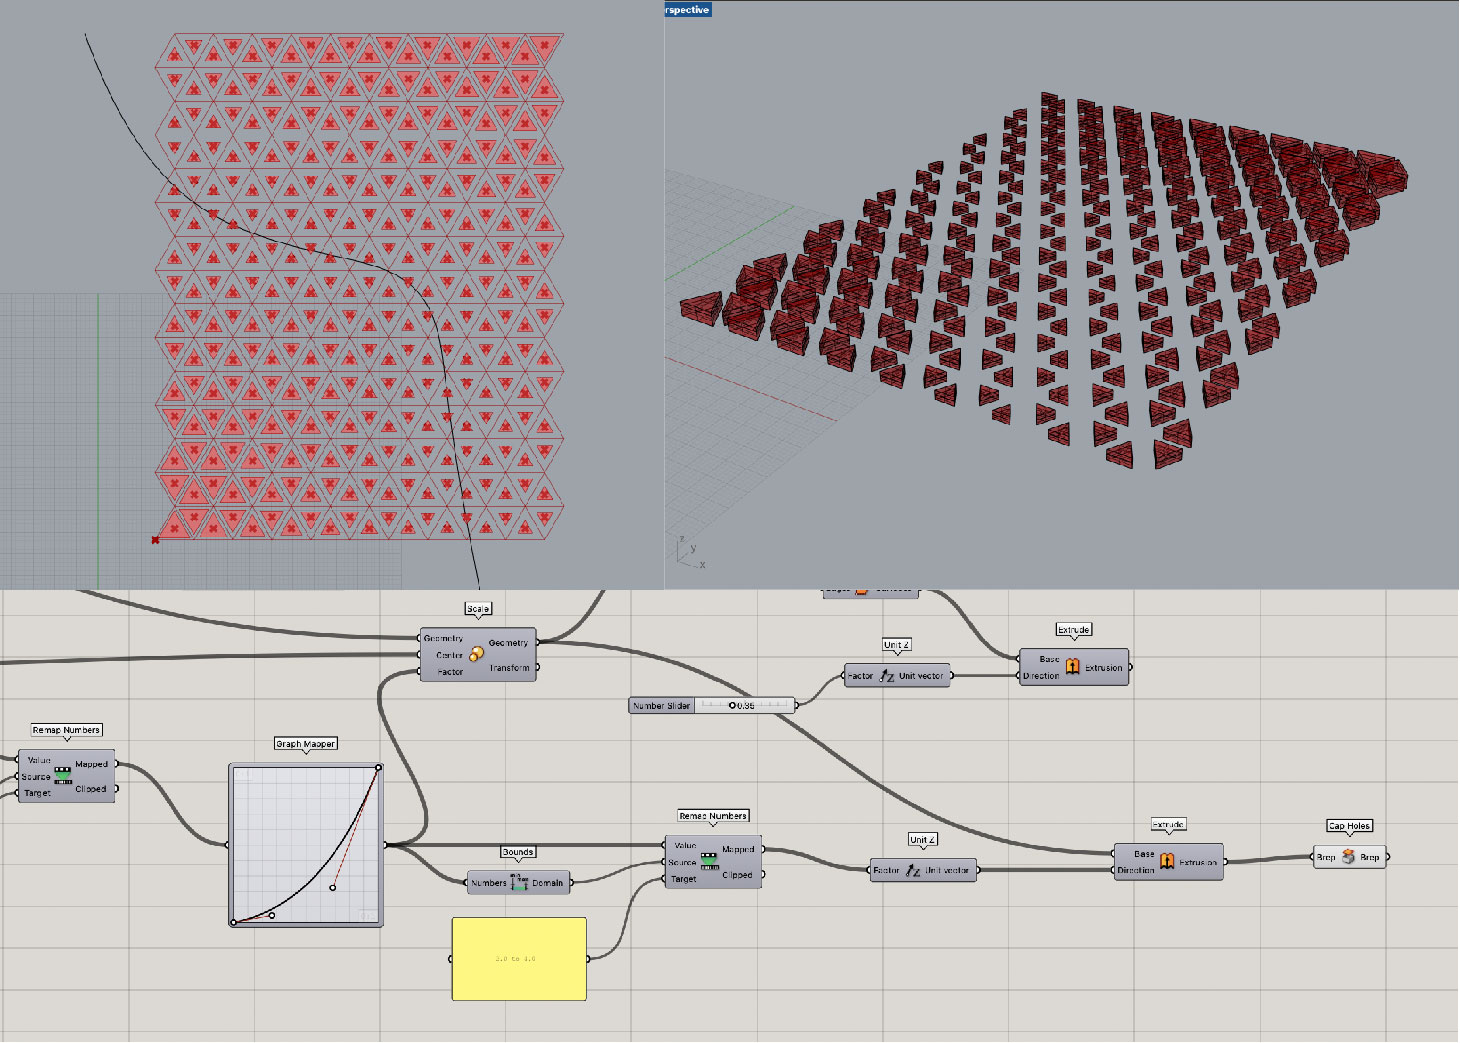
The concept was to insert a curve in the middle and using that as reference reduce the size of triangles in relation to the distance. Which means to find mid points of each triangle and calculate its distance from the curve and then make it directly proportional i.e. greater the distance from the curve greater the size and vice versa. But what I added was to increase and decrease the thickness of it in the same way. For that, I took the values from the graph mapper, the same ones which were going to the scale component, and remapped them and then fed them to the Z component which then links to the extrude component. Initially the values I kept for the thickness were 0.3 to 2.0mm but that turned out to be very thin so now I have changed them to 2.0 to 4.0mm which is yet to be printed.

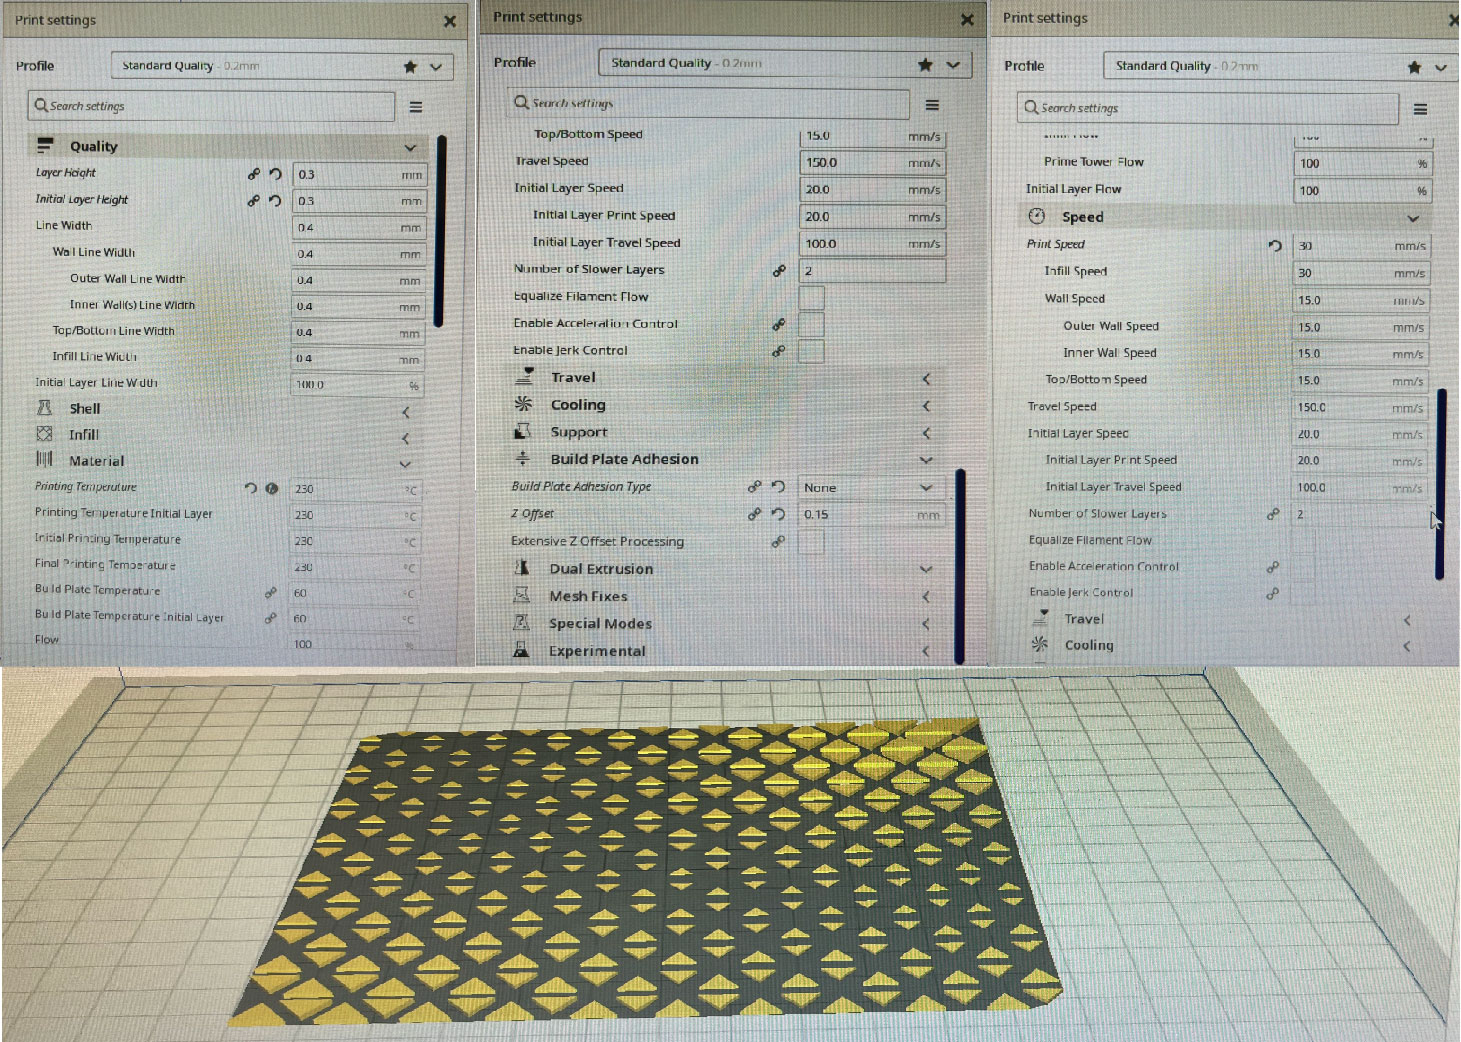
Then I put it on Cura to send it for 3D printing. The settings were as follows:
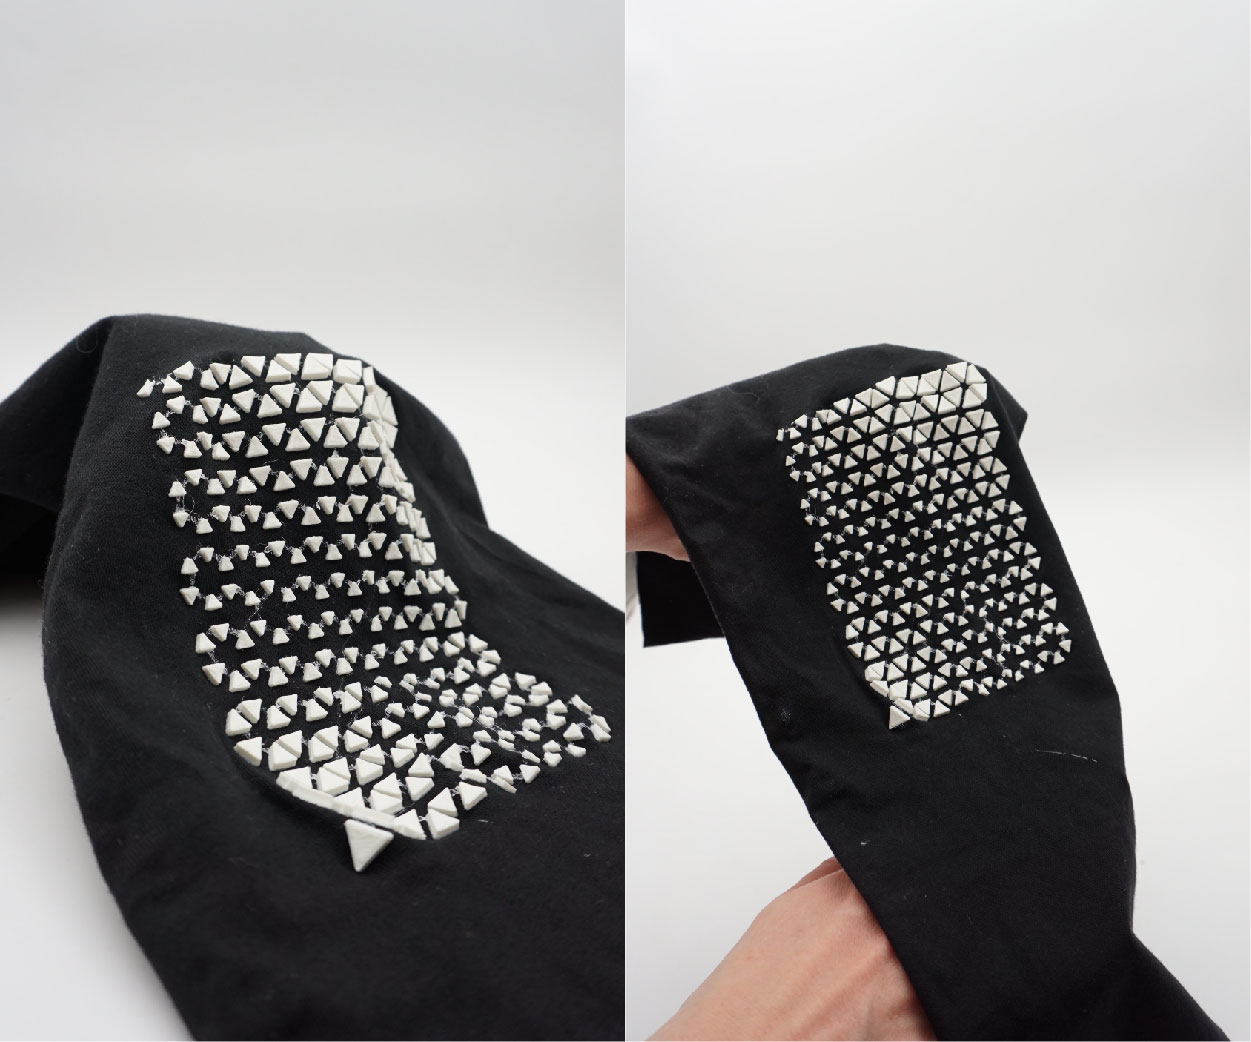
The final result, but I will print another with more thickness and a different stiffer filament to avoid leaking and get a more neater tile.
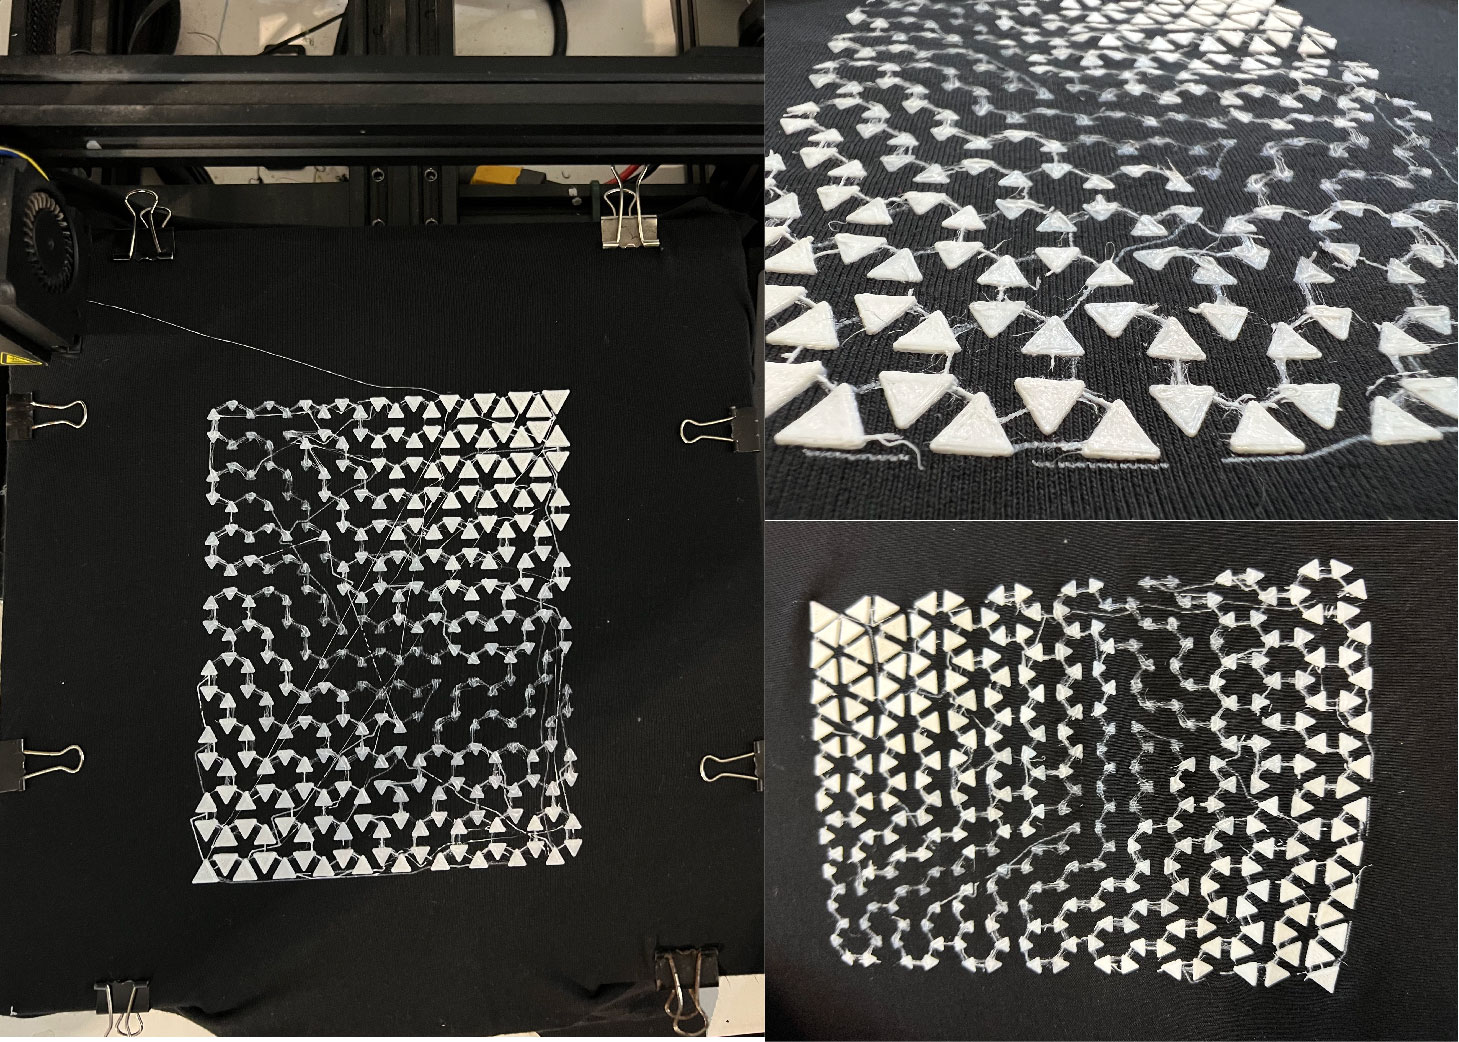
The second test with PLA and increased thickness.