10∙ Open Source Hardware - From Fibers to Fabric
22th to 29th november 2022
Update
- November, 2023
- July, 2023
Assignments
- Research and document existing fabrication methods, machines and industries , add references and sketches of the machine and the chosen process
- Design and document the files of the machine, machine hack or tool and fabrication - assembly process
- Document the schematic and the programming code (if any)
- List the materials: electronics, materials amount other (references of the components)
- Design, create and document a final outcome, a sample project of your process
- Make a small video of the machine
- Create an interface for controling your machine
Ressources of the week
This week is dedicated to the open source, making maching, hacking with Sara Diaz Rodrigez. She create Studio HILO, Studio HILO is a Berlin-based studio for textile innovation. They create a spinning machine.
My previous experience was to hack my knitting machine with AYAB. I still have fews trouble about it, but it's nice experience to arriving to hack it.
Research & Ideation
Before starting the week, we choose a group of the different project proposal by the Textile Lab. Following my interest for biomaterial and curious about 3D printer I choose this for this week.
References & Inspiration

- Studio Blast
I discover this video after the week, now I feel I really want to try it! Next goal.
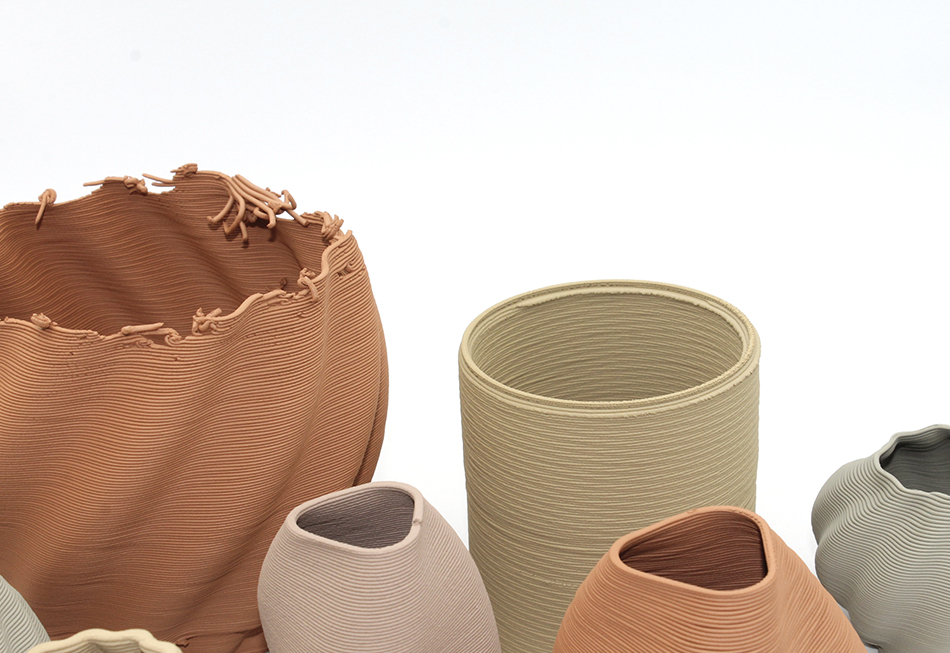
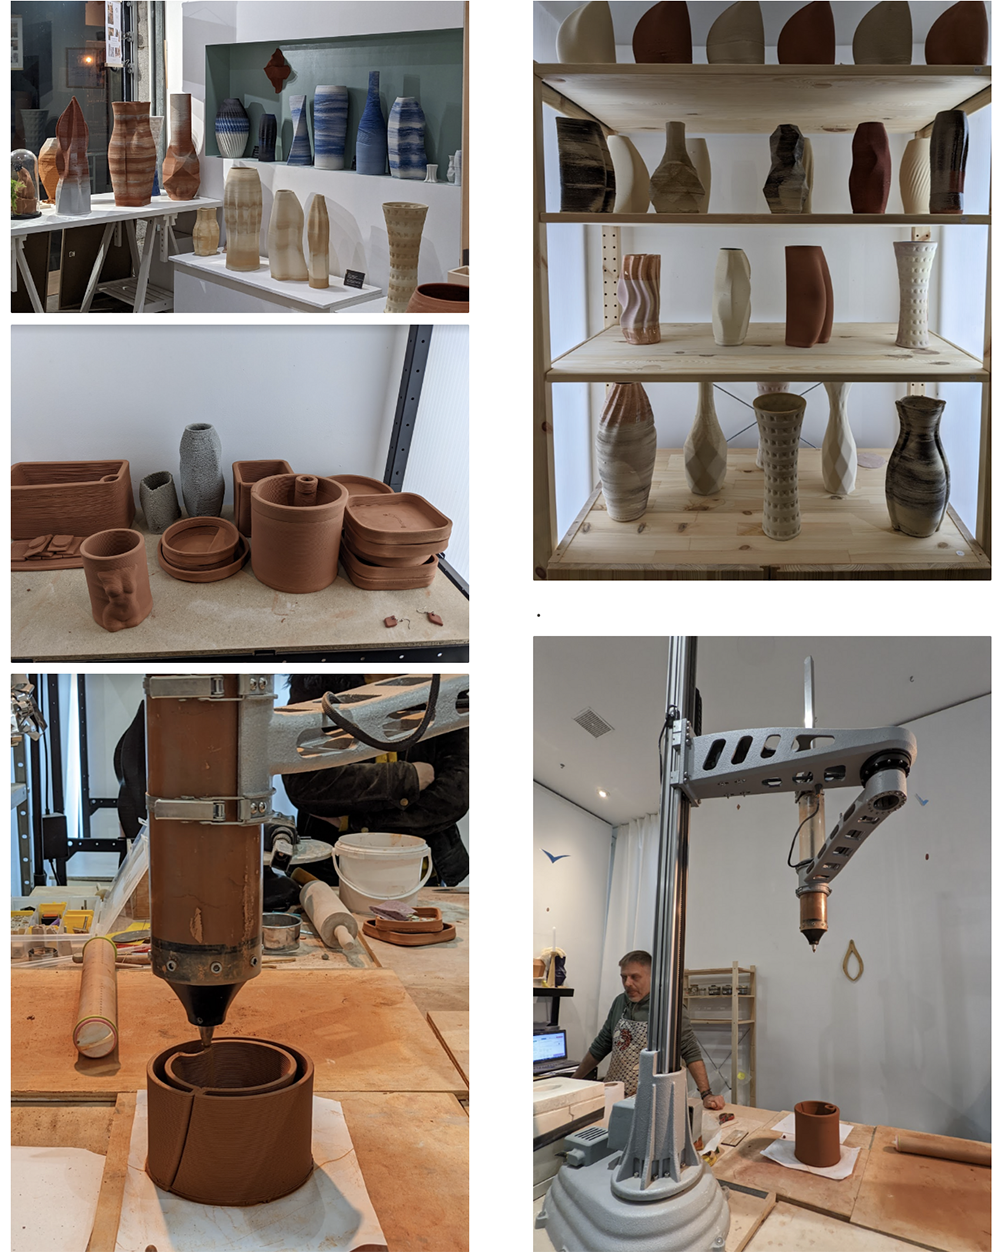
We visit Nicolas David : 19, rue René Leynaud, Lyon 1er. He use a big 3D printer for ceramics. If you come in Lyon not hesite to visit him.
Tools & Materials
| Material for 3D printer | Details |
|---|---|
| Machine | Zmorph Fab Printer, machine manual,Louise Massacrier, Fabricademy, Gcode |
| Software | Voxelizerl |
| Special tools for the 3D printer | Thick Paste Extruder, adapter USB/SD CARD |
Team for this week
Melanie Abel and Lauriane Beaumont we were joined by Capucine Robert from 2022 Fabricademy class.
We start to split the group, I start to work with Capucine Robert for start with the Thick Paste Extruder and understanding how it's work. This week was share in two axes: a part with the machine and the part looking for the recipe of biomaterial.
Process & workflow.
Methylcellulose recipe, Pancakes
Sodium alginate 4 g
CMC 5 g
Water 200 ml
Glycerol 1 tbsp
[Natural pigments](https://class.textile-academy.org/2023/amandine-fery/Assignments/___/04∙%20BioChromes/#pigments) made during the week4
Filler : 2 teaspoons of marble and 3 teaspoons of eggshell
Heat 1/3 of the water to 70°C
Add the methylcellulose
Add 2/3 of cold water
Add the alginate
We decide to separate the paste in two half
First half receive pigments
Keep both in the fridge for 20 min so that the mixture is well homogeneous
Food thickener, dissolves in cold water and gels in hot water. Dosage rate: from 0.5% to 5% depending on the application.


Result
Dry state after 2days
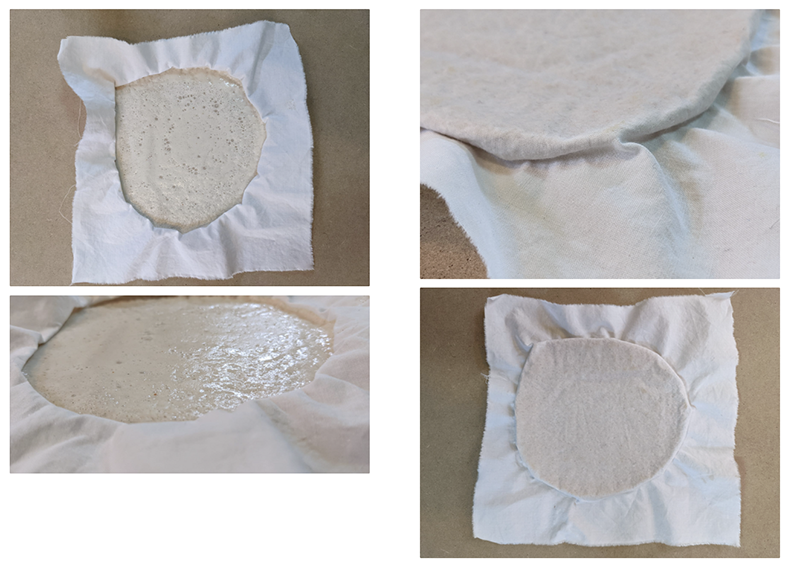
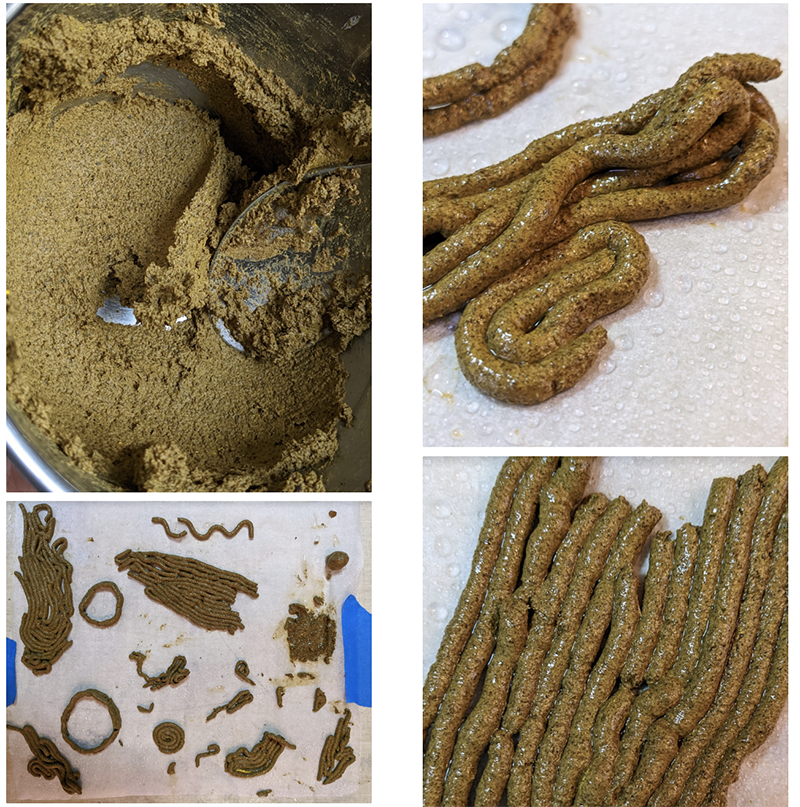
After a lot of try to arrange the correct speed for the machine, we arrive at the conclusion than the past was definitly not thick enought except if you want to do a pancake.
The first half was extruded on a cotton fabric. The result was not at all as expected, the dough was not firm enough to hold a shape we got a "Pancake". This result give to us an inspiration for the next recipe.
Alginate based paste
We visited the Materiom platform and find than in the recipes for 3D printing the filler was much more important (at least 60% of the total weight). For example: Mussel shell paste and Eggshell paste for 3d printing. We therefore defined two recipes by adding powdered shells to the basic alginate recipe until we obtained a paste that seemed thick enough for printing.
* 8g alginate
* 10g methylcellulose
* 12g de glycerine
* 400ml cold water
* Filler (will be added later)
* 10% calcium chloride solution in a spray bottle
* mix alginate, methylcellulose and water to get a nice gel with the arm mixer
* keep in the fridge for 20 min so that the mixture is well homogeneous
* add the filler (see recipe for eggs shells and mussels shells)
* spray with the 10% calcium chloride solution
Eggshells paste
Test 1
* 270g of eggshells
* 180g of the Alginate paste based
* Mix together
For the square, we sprayed calcium chlorure at each level to help the resistance of the thread so it can support the next layer whereas for the circle, no calcium, crash of the layers onto themselves.
We use a heatmat and deshydrator for helping to dry more quickly.
Test 2
* 307g basic preparation of the Test1
* 20g additional marble powder
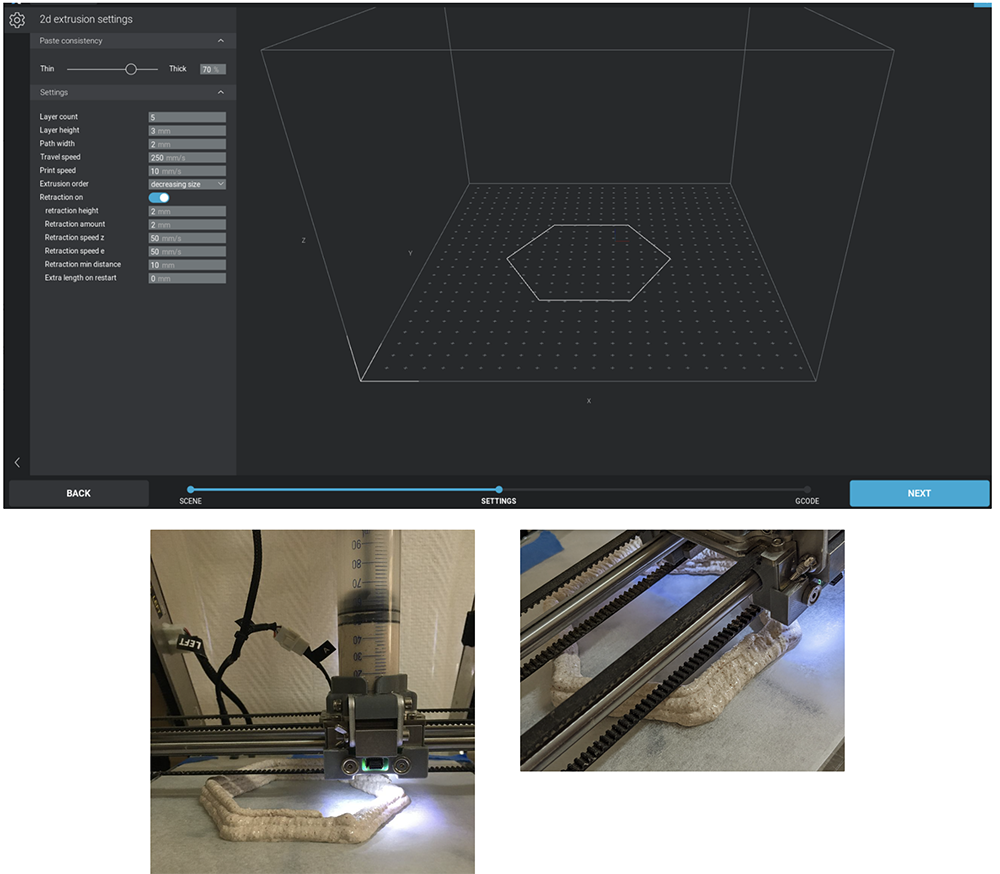
Settings Voxelizer
| material paste | paste consistency | layer count | layer height | path width | travel speed | print speed | extrusion order | retraction | retraction height | retraction amount | retraction speed Z | retraction speed E | retraction min distance | extra lenght restant | height of the head print (mm) |
|---|---|---|---|---|---|---|---|---|---|---|---|---|---|---|---|
| Eggshells hexagonal | 70% | 5 | 3mm | 2mm | 250mm/s | 10mm/s | decreasing size | on | 2mm | 2mm | 50mm/sec | 50mm/sec | 10mm | 0mm | 8 (before the nozzle was added) |
Result
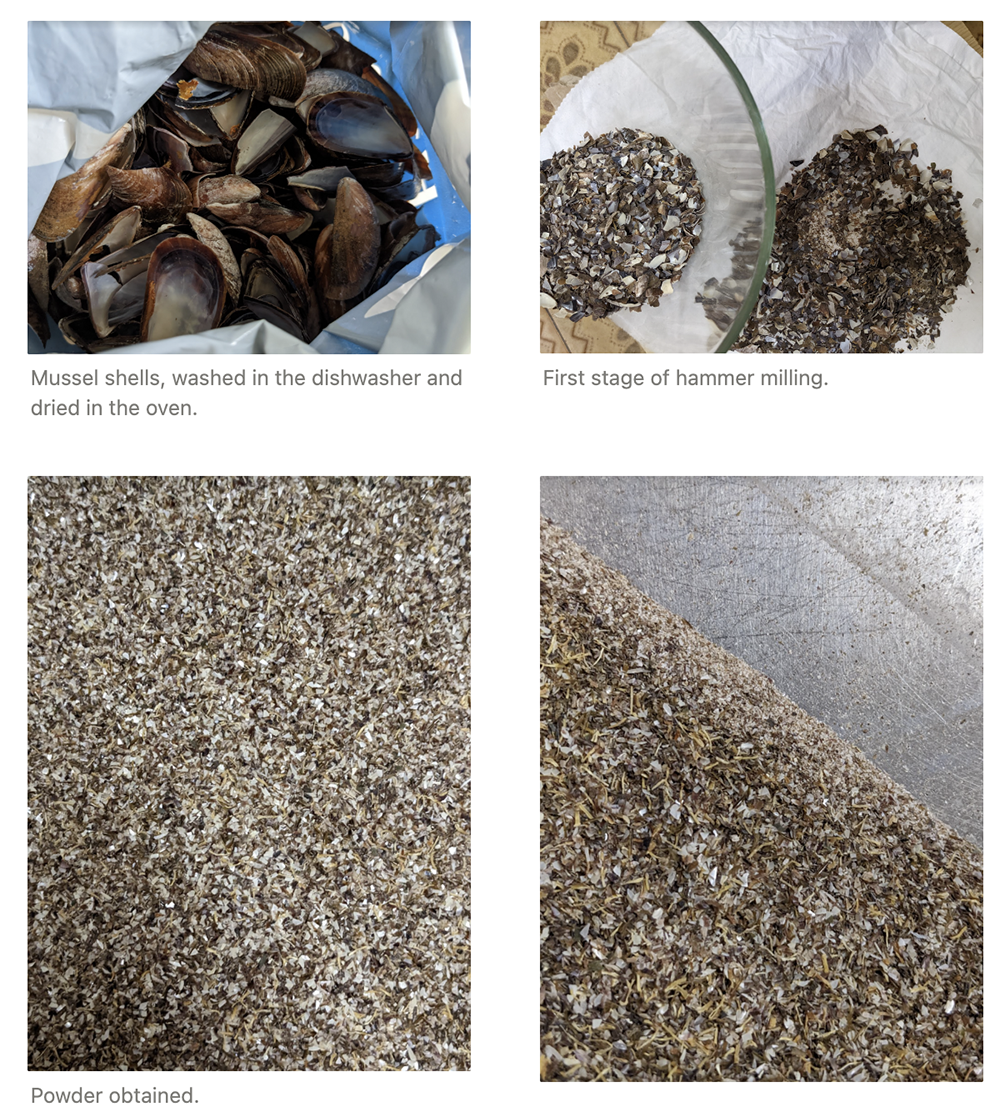
Mussels shells paste
* 70g mussels shells powder
* 30g Alginate based paste already make
* The mussels shells were cooked at 200ºC for 20 min, then smash with a hammer and ground with coffee grinder.
* Mix together
Settings Voxelizer
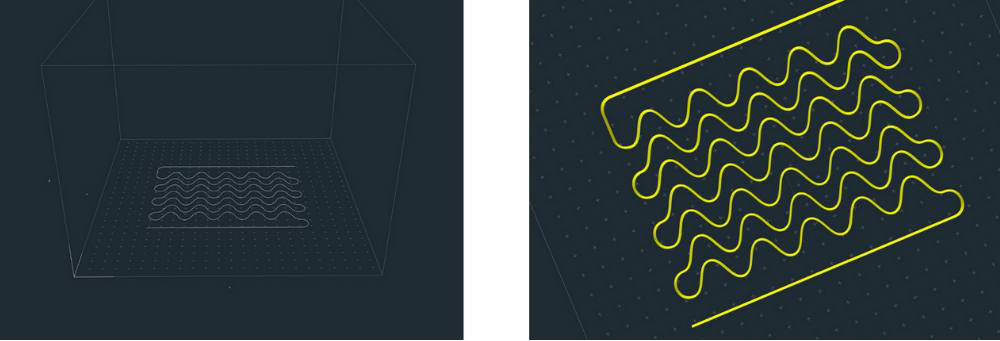
| Name of test | Fabric of test | paste consistency | layer count | layer height | path width | travel speed | print speed | extrusion order | retraction | retraction height | retraction amount | retraction speed Z | retraction speed E | retraction min distance | extra lenght restant | height of the head print (mm) |
|---|---|---|---|---|---|---|---|---|---|---|---|---|---|---|---|---|
| Mussels shells waves 1 | Elasthane | 120% | 1 | 2mm | 1mm | 40mm/s | 10mm/s | proximity | on | 2mm | 2mm | 50mm/sec | 50mm/sec | 10mm | 0mm | 6mm with the nozzle in the Zmorph |
| Mussels shells waves 2 | Elasthane | 70% | 1 | 2mm | 1mm | 40mm/s | 10mm/s | proximity | on | 2mm | 2mm | 50mm/sec | 50mm/sec | 10mm | 0mm | 4mm with the nozzle in the Zmorph |
| Mussels shells waves 3 | Silk | 70% | 1 | 2mm | 1mm | 40mm/s | 10mm/s | proximity | on | 2mm | 2mm | 50mm/sec | 50mm/sec | 10mm | 0mm | 4mm with the nozzle in the Zmorph |
Results
To print on textil, the fabric was stretch as much as possible. We tape it underneath so we can fix it to the worktable before putting the clamps back on. The paste deposited very evenly and thinly. We were pleasantly surprised after all our thick tests.
The paste's moisture quickly soaked into the fabric, bringing out the filler material, which didn't crush on the surface. We kept the shape of the basic document, while achieving the desired effect: the creation of volume thanks to the print when the fabric is relaxed.
Mussels shells 1
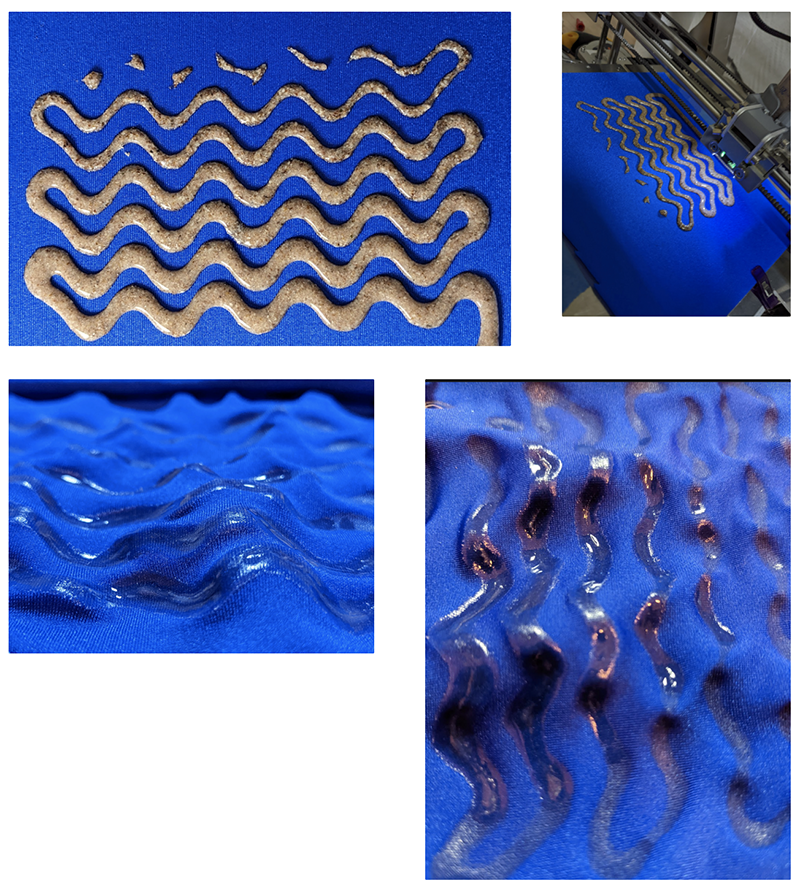
We don't understand why the print has a difference in thickness between the first and last lines, probably due to pressure on the Zmorph.
Mussels shells 2
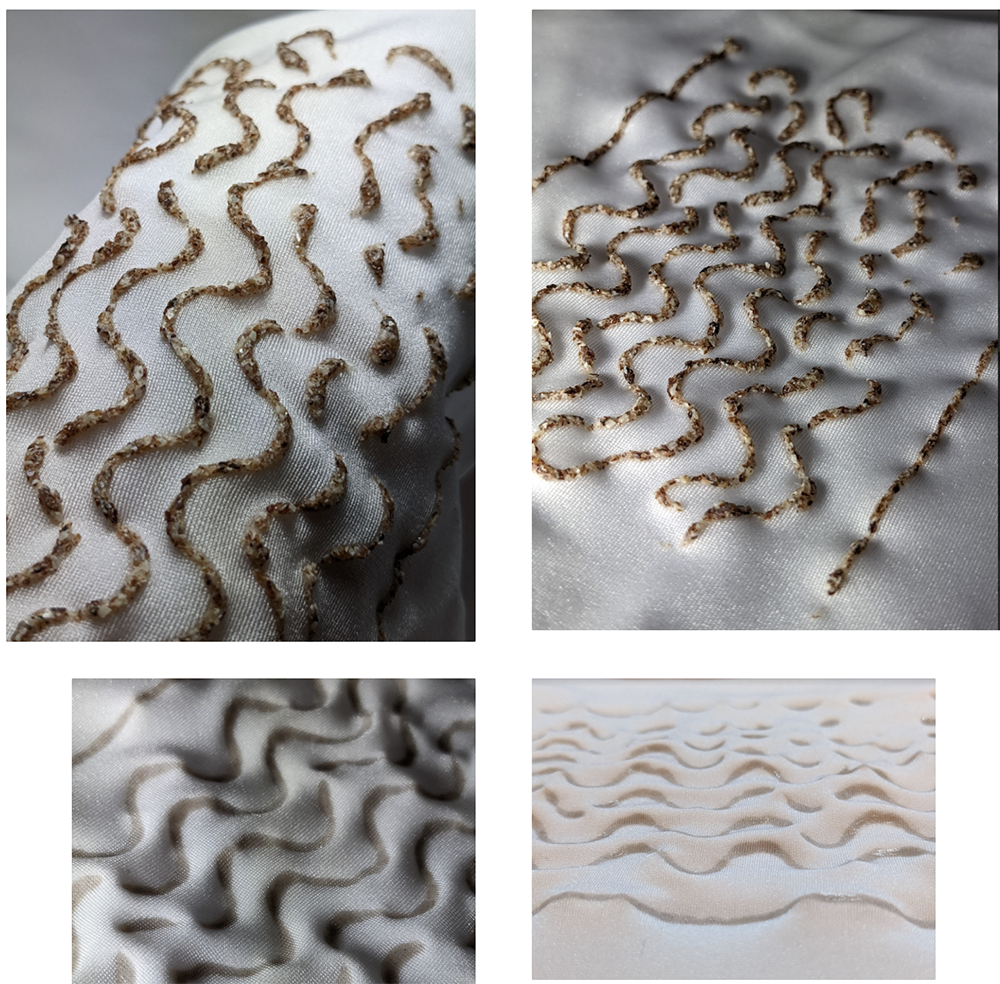
Mussels shells 3
Cofee ground and clay powder paste
* 40g wet coffee grounds
* 20g yellow clay powder
* 20g base mix (alginate / cellulose)
* Mix together
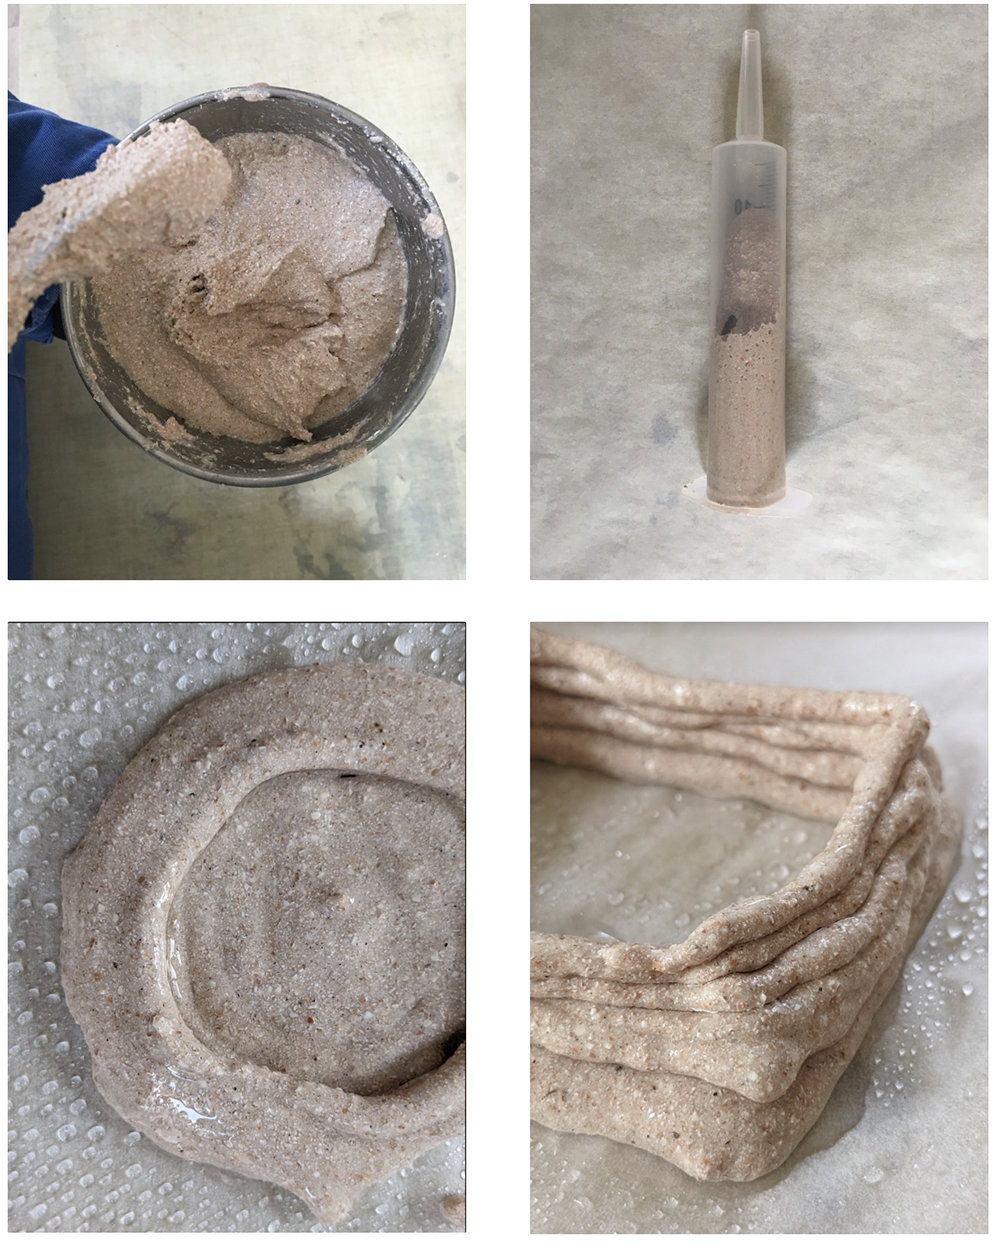
Results hand serynge
The hand extrusion was so hard than we didn't plan to put it in the printer. It's probably because of the clay powder and it's huge absorption power. When we visit Tygre, Nicolas explain us than he use 25% moistured clay. The fact is that his clay is already prepare, nothing to see with powder.
Difficulties encountered
We have several difficulties to make our tests go up in height. Otherwise we would like to create solidity effects on textile, following the inspiration of our "Pancake" experiment. Awell we took lot of time to understand the calibration of the machine. We broke the glass worktable, hopefully Diane has another one.
Lauriane resume the situation :
The fact of having a machine, which must be modified, with software off the machine, working on a file which must be transferred by SD card, to validate it in another software to create the version read by the machine, to transfer again , make the settings, then finally, start printing. Realizing that after 3 seconds nothing is going well and you dirty the machine, having to stop everything urgently, clean, recharge.
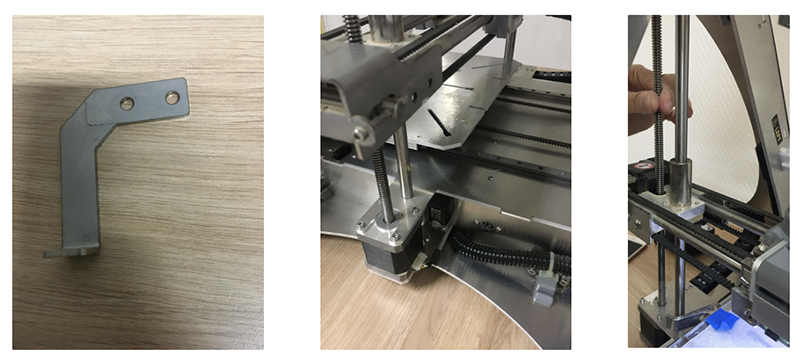
- The calibration of the plate.
We removed this part that was blocking the machine from lowering further.
- We also removed the windows from the openings to have an easier access to the whole machine
In the settings for the Z. It must be set to 0. Then validate at 8mm height because the diameter of the syringe is about 4mm.
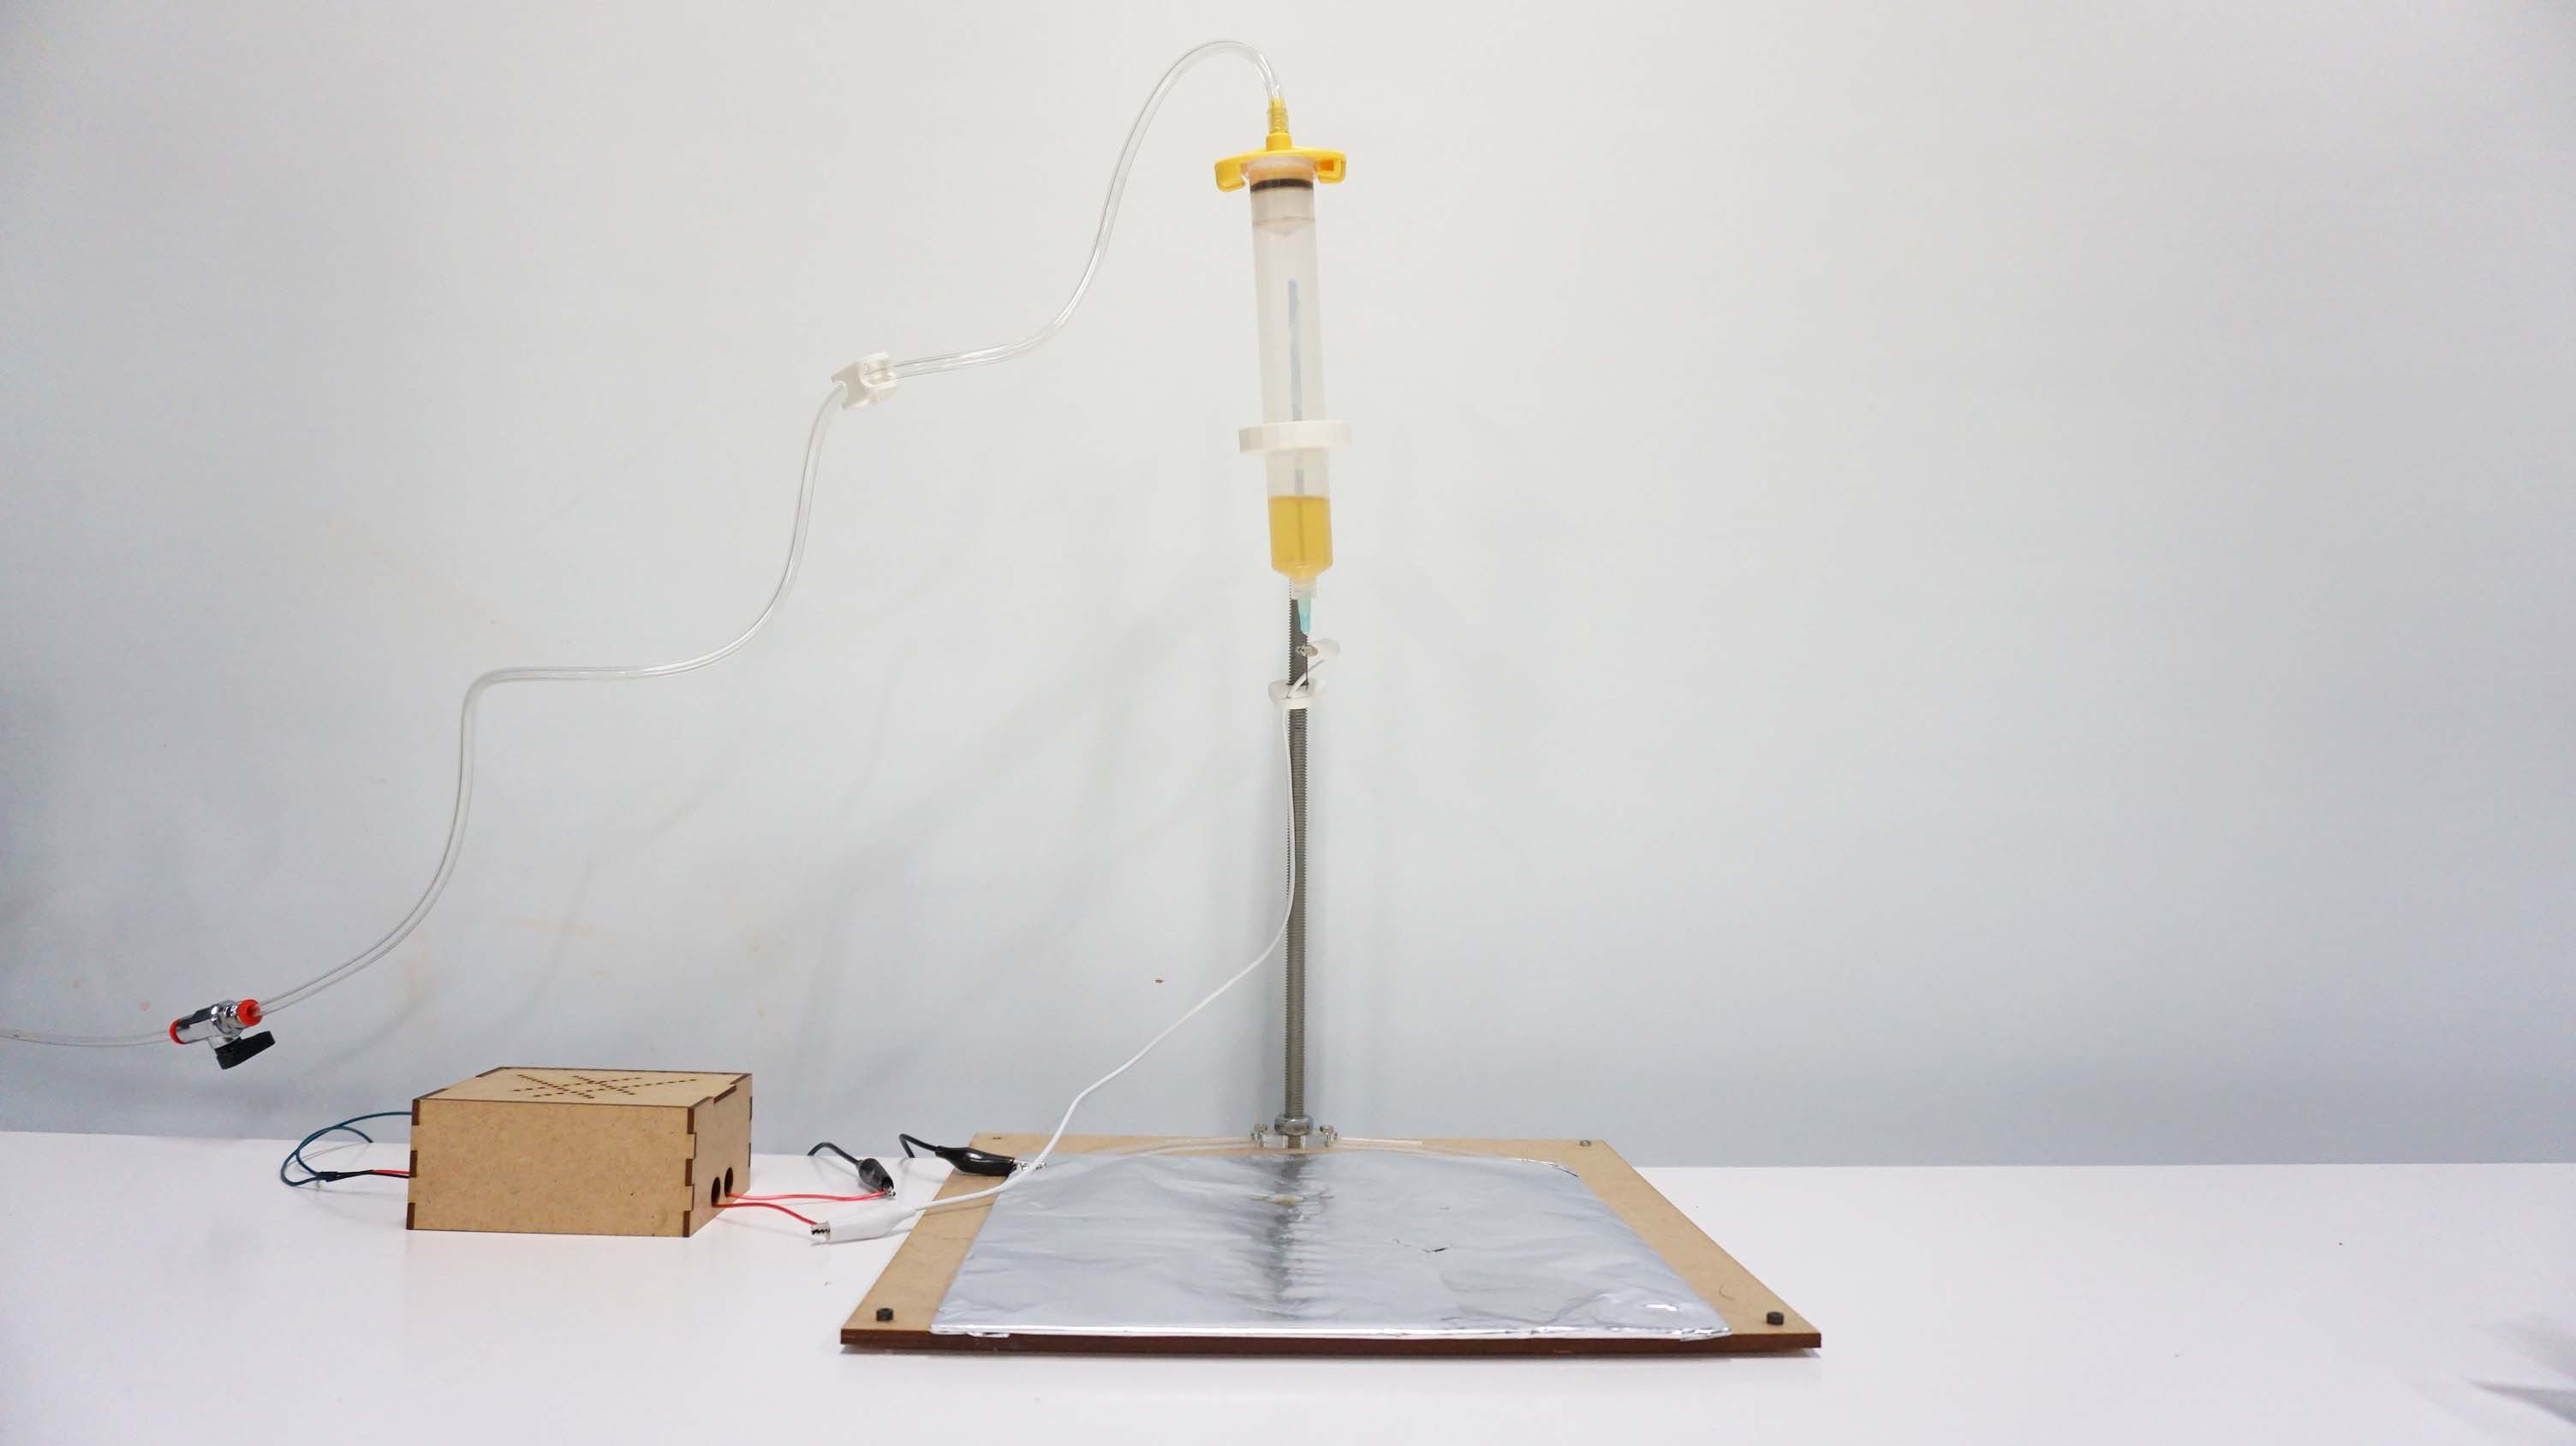
The missing nozzle
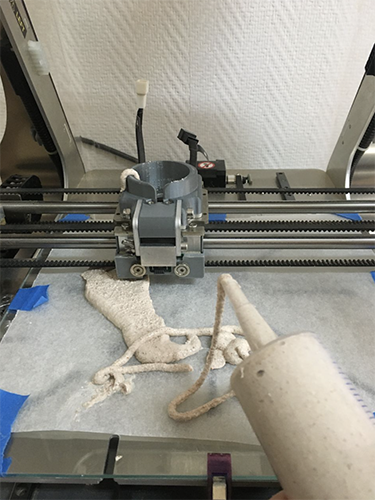
We got a double problem with the end of the syringe:
- it is not long enought to ensure the way of the print head without getting the printed material touched with the caterpilar;
- its bevelling leads to an irregular distribution of the material according to the path.
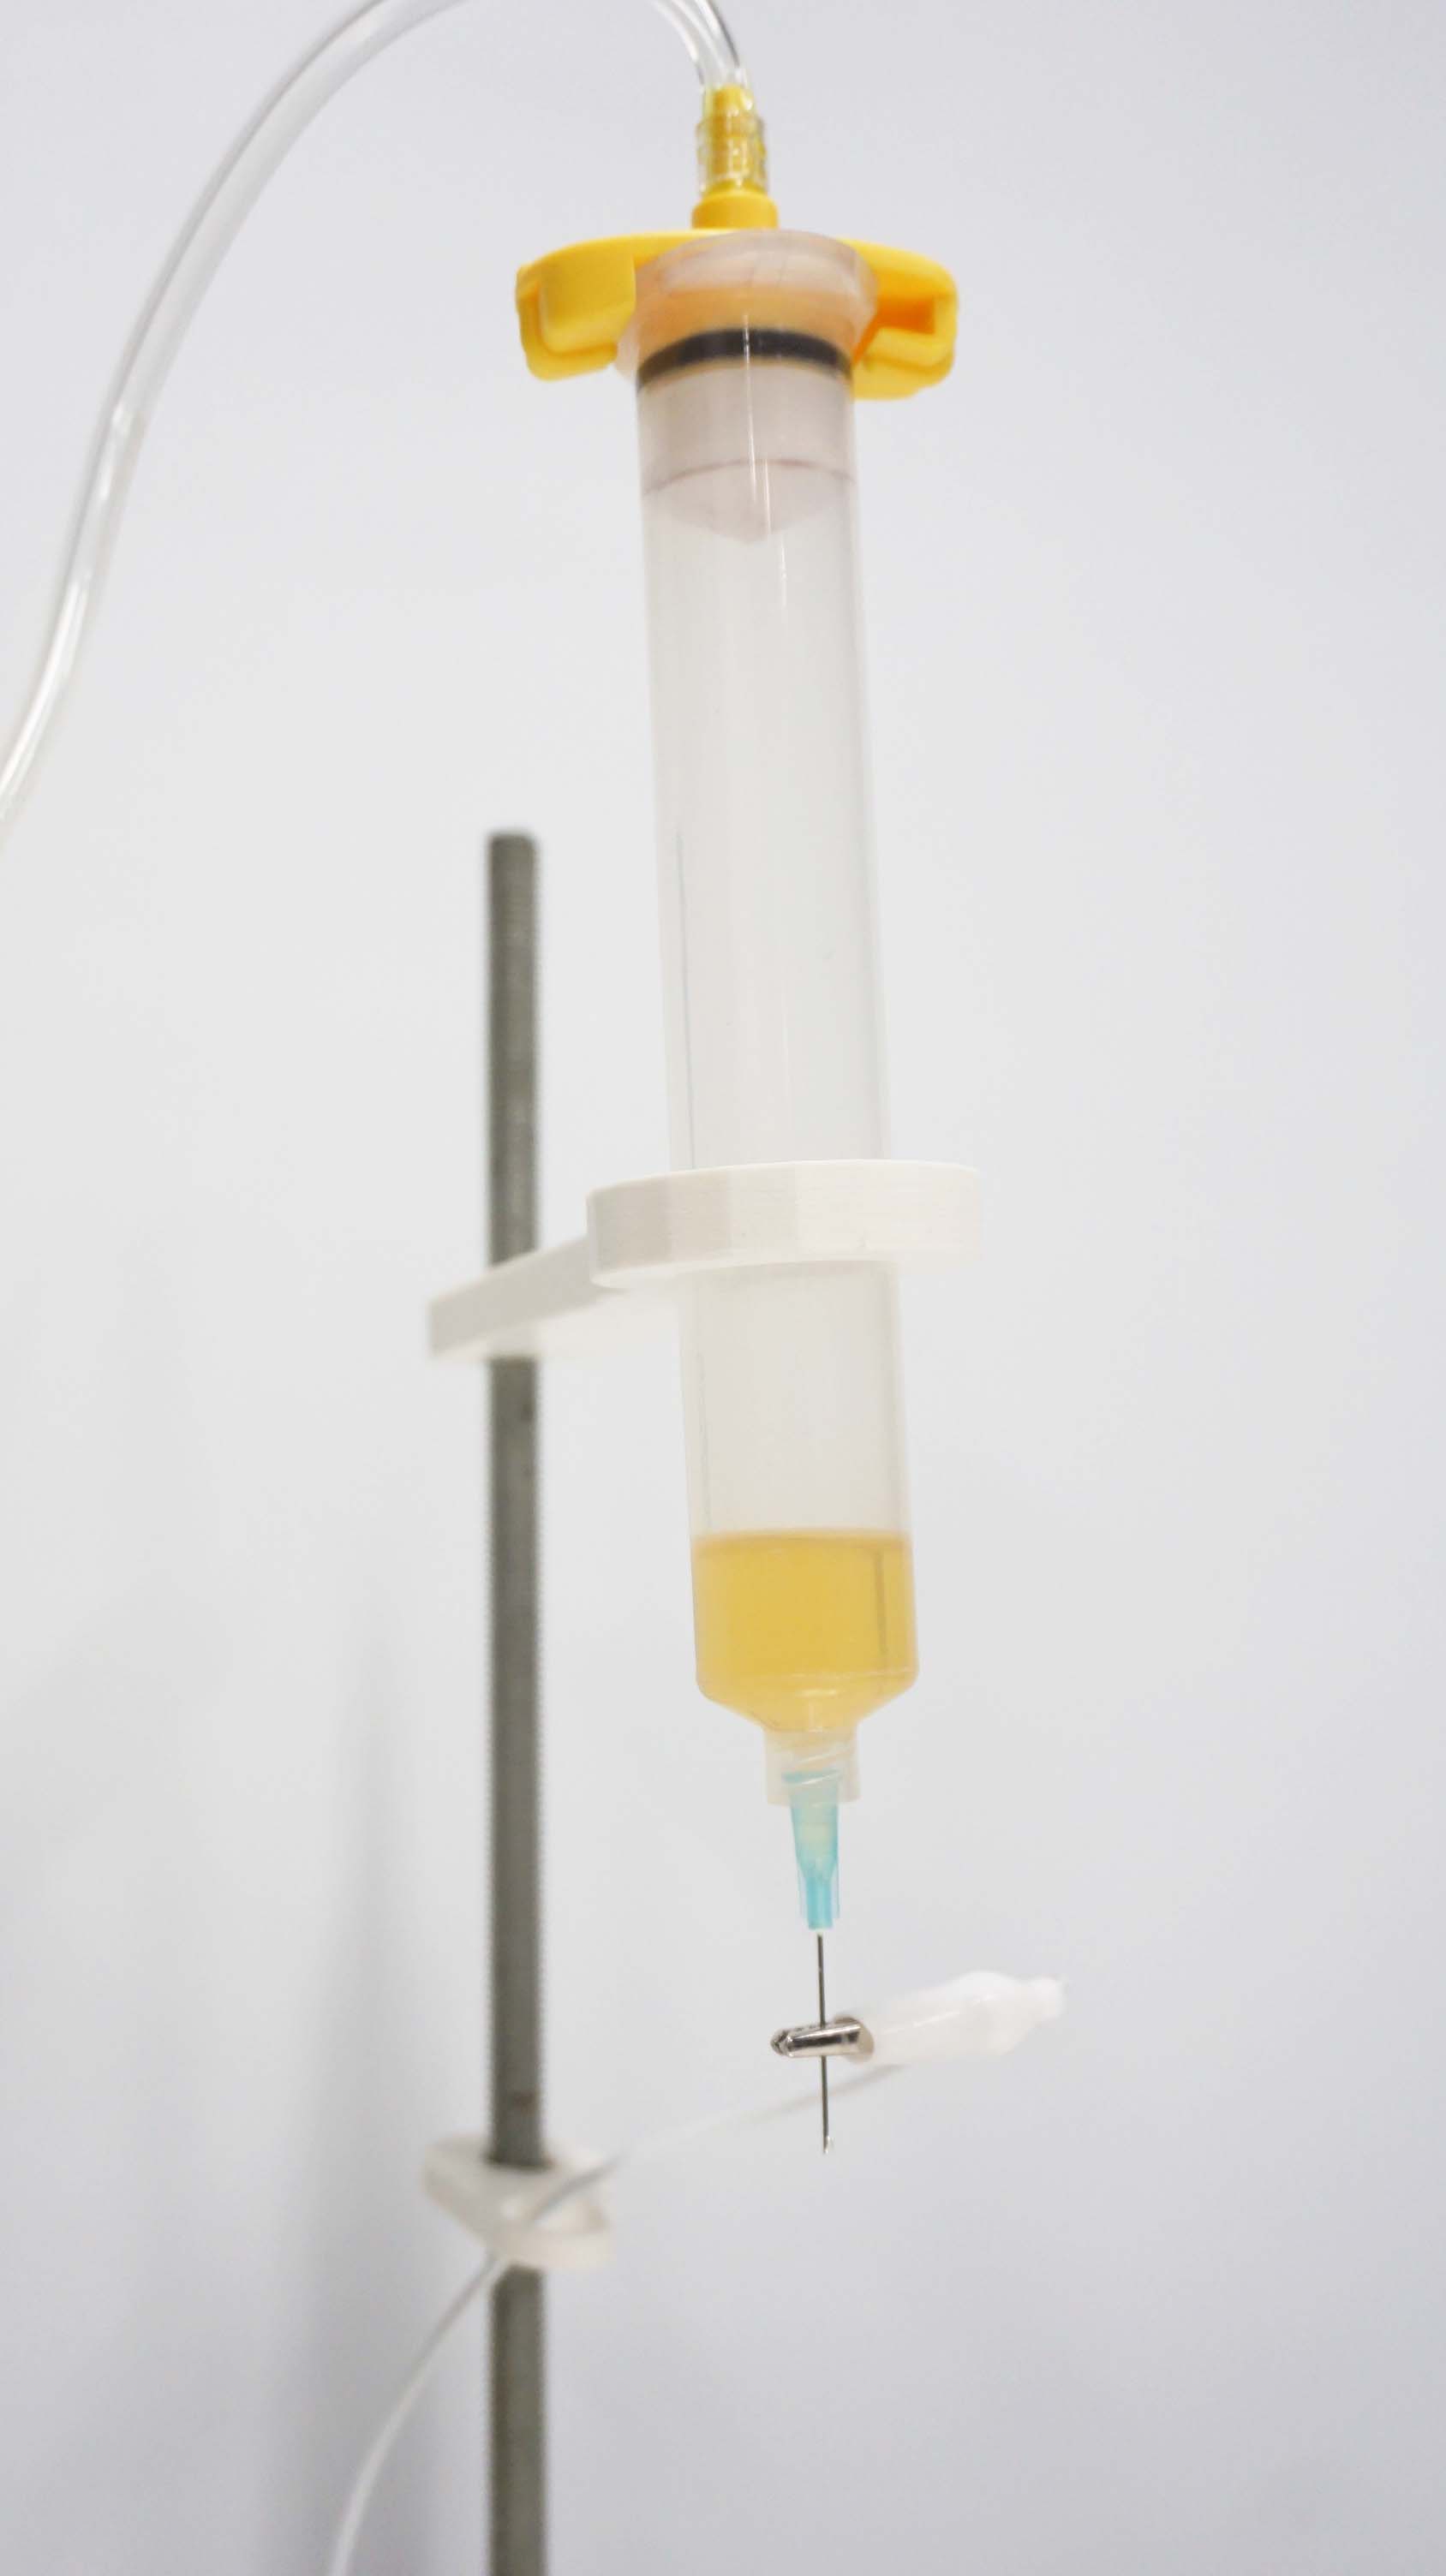
Looking for a solution, we thought to do an addition to the noze and by looking on internet we finally discover than a white nozzle was missing in the kit. It was probably add later by Zmorph because it also didn't comes in our printer documentation but it is present in this one (p148). Lauriane find a crafty hacking solution, by fixing the nozzle of a silicone gun. It allows also to plug the hole of the nozzle with the red stopper and don't get the paste outside when not wanted.
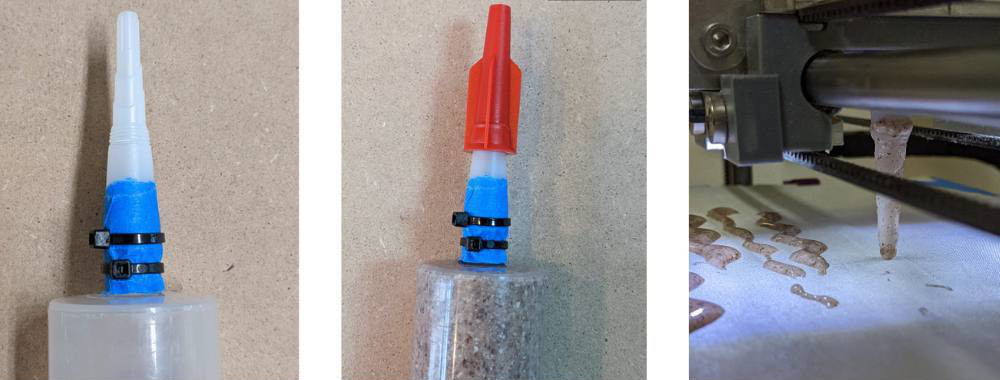 All the mussels shells paste were print with that method.
How ? Cutting a silicone cartridge tip to attach it to our syringe. It allows us to have both a thinner and more regular material distribution diameter (straight cut), and has an integrated cap that allows us to retain the material at the end of the printing process.
CLEANNING
- Difficult, lack of practicality on cleaning nozzle and when paste comes to stick.
- Tips: vinegar cleaner or for alginate based pastes, spray calcium chloride which plasticizes the surface instantly. You can then remove the solidified pieces of dough with fine tools.