COMMUNICATION
COMMUNICATION | Digital and physical communication of the project
How do I communicate about the emotions and poetics of mirage ?
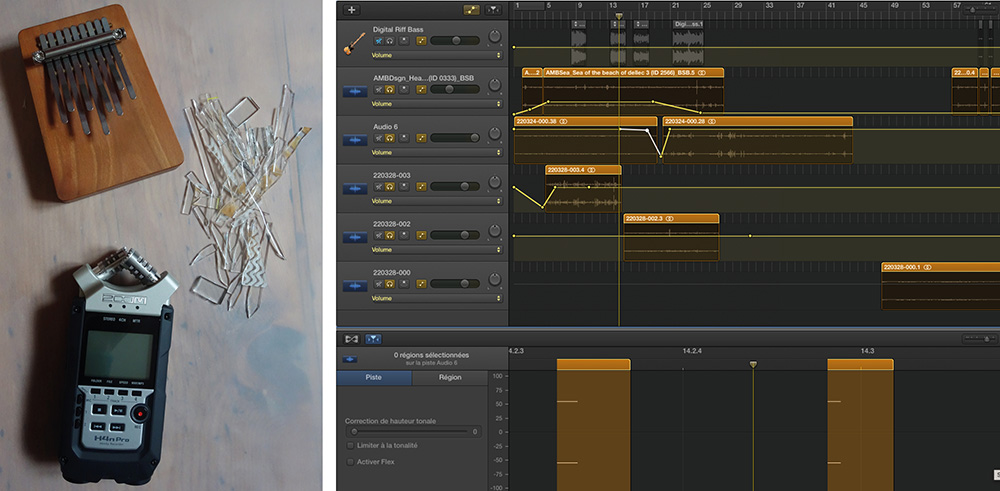
| TOOLS | Computer, Sound Recorder, Camera |
|---|---|
| SOFTWARES | GarageBand, iMovie, Keynote |
| FILES | - |
ASSETS
This project is :
- A New technologies and Handicrafts Symbiosis
- Committed with a sustainable cycle working with glass leftovers
- Exploring zero waste pattern when cutting glass
MUSIC
I wanted to make a video that take us to others worlds, I decided to create my own soundtrack which would evolve in 3 times : waves and waters, glass tessels and stars, and finally an emphasis on the sound of a carillon. It was also a way to use all my remaining tiny glass tessels from broken experiments to produce sounds.
VIDEO
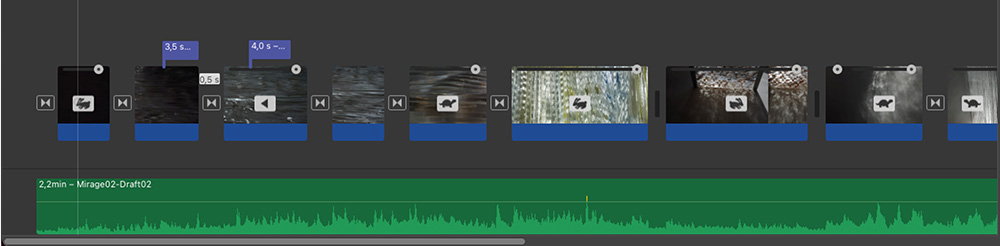
I would have loved to mix 3D Modelisation video with videos of the real samples. Did try some experiments with it as you can see below :
BUDGET
| Qty | Description | Price (€) | Link/Brand | Notes |
|---|---|---|---|---|
| 100 x 160 mm | Glass (float) | 16.00 | Leroy Merlin | Price is an indication as I worked with leftovers that I got for free |
| 1L | Denatured Ethyl Alcohol | 8.70 | Link or local shop | for the marker inks |
| L.1 m x l.1.2 cm x H.1.2 cm | U-shape aluminium profile | 4.90 | Link | - |
| 1H | Laser Engraving | 56.00 | - | Based on the price for laser engraving glass at Cerfav's Fablab |
| 1 | Professionnal glass cutter | 10.00 to 15.00 | local glass workshop | - |
| 1 | Plastic running pliers | 15.00 to 30.00 | local stained glass shop | - |
BLUEPRINTS
I am using the Material Pyramiden to have the average blueprint. I chose to see the Global Warming Potential of the production of all my samples. I simplified them by saying that they represent 3 A5 formats all together : 0.03108 m2 x 0.01 m.

PROVISIONAL SCHEDULE
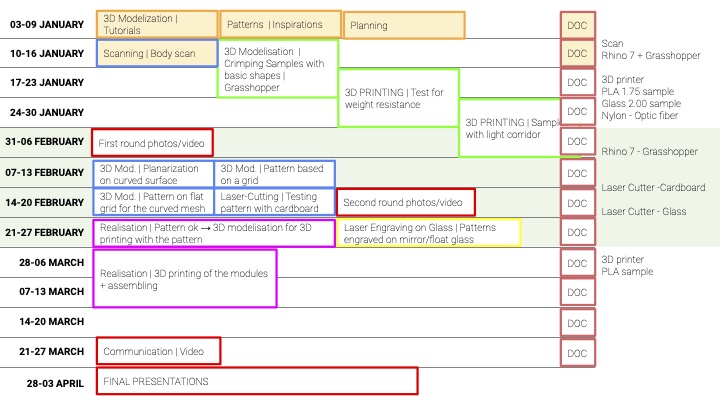
This was the previsional schedule for my research on making a 3D printed articulated structure with integrated glass. It changed when I decided to experiment more with the laser engraving on glass (basically from the 20th of February). And a week was added before the presentations.
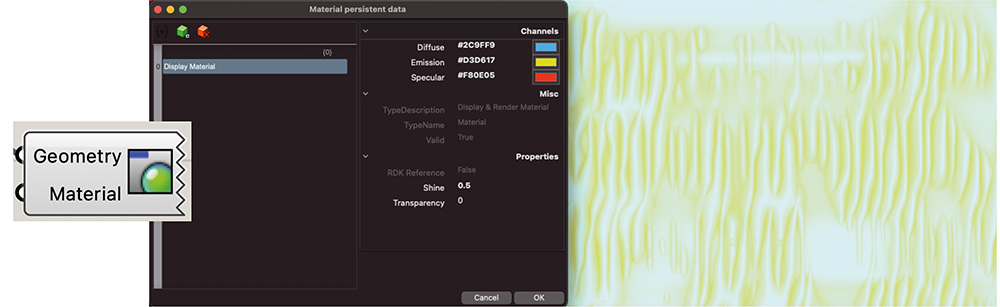
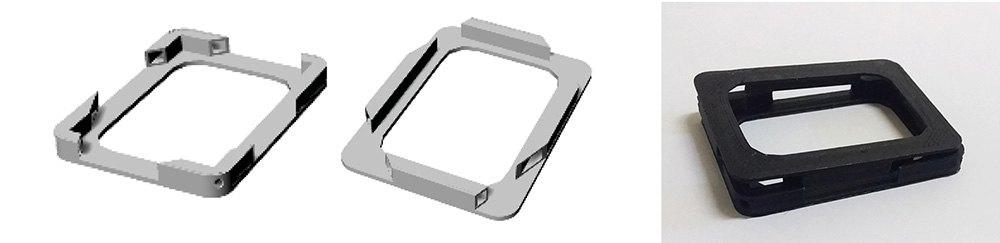
FINISHES : 3D PRINTED ELEMENTS
| TOOLS | 3D printer (Zmorph) |
|---|---|
| SOFTWARES | Rhinoceros 7, Grasshopper, OpenSCAD, Voxelizer, NCViewer |
| FILES | - |
Parametric Design
| TOOLS | Computer |
|---|---|
| SOFTWARES | Rhinoceros 7, Grasshopper, QuickTime Player (to record process) |
| FILES | Square Frame Crimping (gh) |
Notes - Grasshopper Definition must work on different shapes
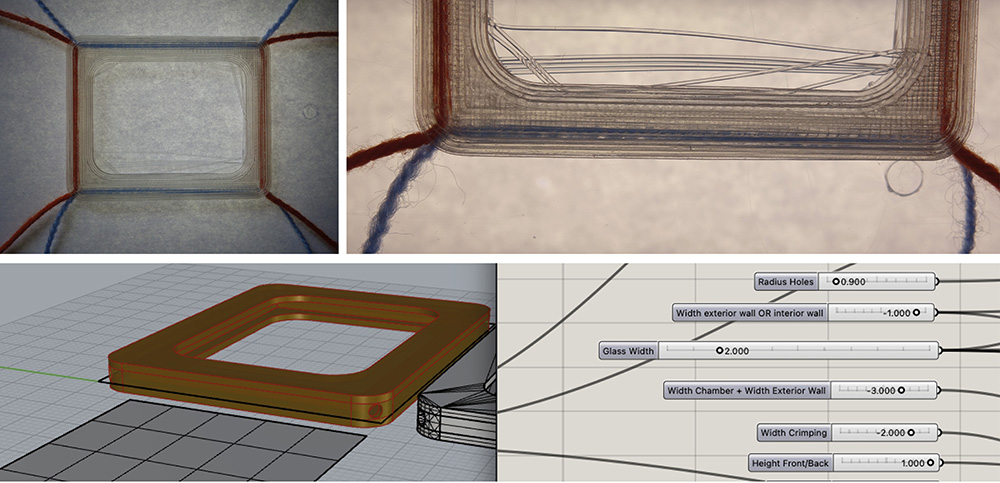
Addings Holes on the corners of the frame
- Scale depends on a factor, Offset Curve depends on a distance
- Discontinuity | To find the 4 extrem points on a curve (angles points for a square for example)
- Brep closest point | To project the corner point onto the Brep following the diagonals
- Put those points in the middle of the exterior frame by adding a Move linked to the Z vector extrusion of this wall (Z/2)
- Making the tunnel for hole following this tutorial
- Solid difference |! order of the Breps matters
Making a rounded frame
- Fillet Edges | Need to select specific edges, I don't know how to make it work for several different shapes
- Arc SED and Sweep 2 | To project a shape (with 2 arcs) between two curves | The projection works fine except at the corners of the shape... Maybe try to work on one edge=one curve and then Boolean Union ?
- Catenary to make an arc depending on a gravity
Experimentations
| TOOLS | 3D printer (Zmorph) |
|---|---|
| SOFTWARES | Rhinoceros 7, Grasshopper, OpenSCAD, Voxelizer, NCViewer, Ultimaker Cura |
| FILES | Square Frame Crimping (gh) same as above |
Materials
As the interesting part of 3D printing is to be able to produce locally I'm focusing on French suppliers. I contacted 2 of them ArianePlast and Francofil. The last one has many advantages : they take care of their PLA waste which mean that I can send them back my waste and they also sell PLA without synthetic colorants (colours are made by adding waste from local food industries) and they're are really nice :)
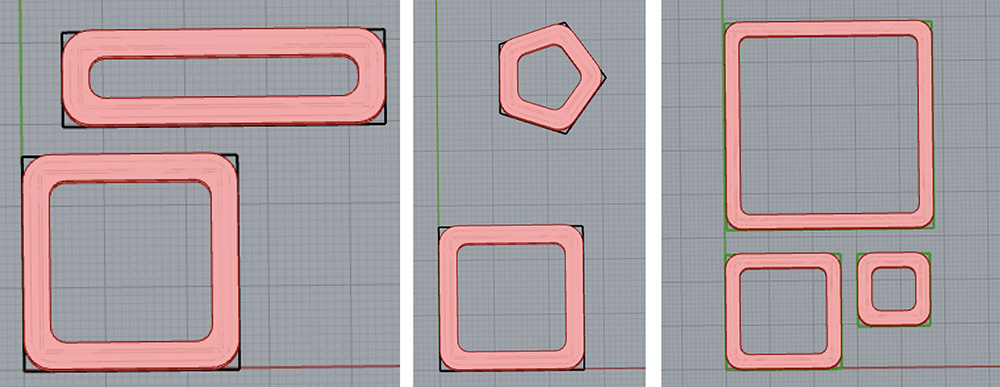
Tests
| Parameters | Test 00 | Test 01 | Test 02 | Test 03 |
|---|---|---|---|---|
| File | stl file | File | File | P1 stl file & P2 stl file |
| Material | Francofil PLA vierge 1.75mm | Idem | Idem | - |
| Temperature (°C) | 210 | 210 | 210 | 210 |
| Heating Bed (°C) | 60 (default) | 60 | 60 | 60 |
| Power Raft | OFF | ON, waste of time | OFF | OFF |
| Infill | 70% | 70% | 70% | 70% |
| Frame Dimensions | 50x40 | 50x40 | 50x40 | 35x47 |
| Glass Module Dimensions | 42x32 | 46x36 | 44x34 | 29x41 |
| Width Walls (each) | 1 | 0.5 seems good | 0.5 | 0.5 |
| Radius Hole | 0.9 | 0.9 | 0.9 | 0.9 |
| Height Glass (actually its width) | expected 2 but no glass | 2, too small | 2+0.5= 2.5 ok | 3+0.5= 3.5 |
| Width Thread Chamber | 2 | 1, too small | 2 | 2 |
| Height Front/Back Layers | 1 | 0.5, kind of flexible, may be good for eyewear technique | 1 | 1 |
| Crimping Width | 2 | 2 | 2 | 2 |
Test 00 - without integrated glass
Test 03 - 2 nestable pieces
Not satisfied with the finishes. Also should try to add a clicking part but the walls might be too thin for the moment (0.5mm).
Delaying 3D printing during process
On the Zmorph 3D printer
After several attempts using the "G4 P5000 (5 seconds)" command in G-code and this short G-code "G1 Z(desired height) F1000 G0 X0 F2400 M104 S0 M25", I read again this Z-morph Tutorial. , made some changes because the M25 command wasn't working with our 3D printer. And here is what I do now to add a delay command in the G-code before printing it :
- Export Total Shape File (.STL) from Rhino
- Import File in MeshMixer
- Edit > Separate shell > export all the files separated (let's say File 1 et File 2)
- In Voxelizer, Import File 1 and File 2 aligned
- In , Add desired Height (z1)
- Commands : G1 Z(z2) F1000 | G0 X0 F2400 | G4 P60000
- (z1) < (z2) and P60000 means the 3D printer will pause for 60s
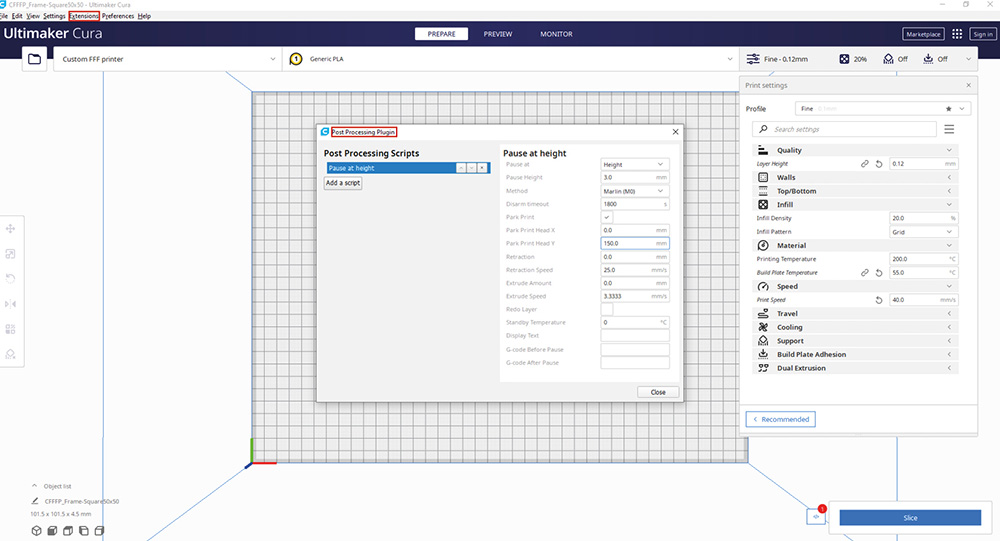
On the Custom FFF Printer with Ultimaker Cura Software
Informations
Evaluating Time
Evaluating Supply Quantity
Weight of your 3D printed pieces + 30% (sampling) More info
Making filament swatches
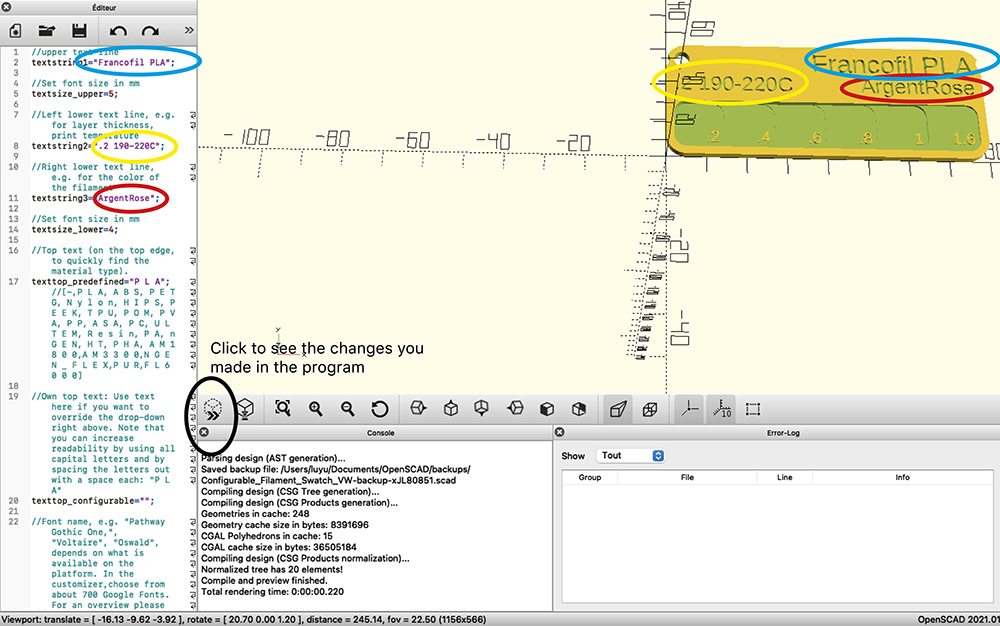
- Customizable Filament Swatches from Thingiverse
- Download OpenSCAD (opensource) to customize the swatches without using Thingiverse Customization service (which doesn't work btw)
- Open file in OpenSCAD and make some changes in the program until satisfied
- Conception > Calculer le rendu (F6) (might take a bit of time)
- File > Export as STL
Researches on PLA Finishes
- Adjusting the 3D printing settings | thin layer height | increased shell thickness (for sanding) | increased fill density |
- Wet sanding + Heating | "To finish your 3D print, simply point the heat gun at the object and maintain slow and constant motion. It is best to set the temperature of the heat gun only slightly above PLA’s glass transition temperature, at around 80 to 100 °C. Don’t allow the heat gun to stay pointed at any single area, as prolonged exposure will easily melt PLA." quote
- Wet sanding (200 to 3000) + Polishing with a liquid metal polish
- Primer coat + Undercoat + top coating + finish coating see explanations here
- Sanding 120 + Filler primer + Sanding + Spray Matte or Gloss Paint here
- Shot-peening (FR: microbillage) : like sanding but for more fragile materials and with ronded beads, need to have a sandblaster cabinet / make me think of the traditional way to sand bead in Ghana video
- Aceton : doesn't work on PLA (only for ABS)