WEEK 02 : Digital bodies
This week was about creating a 3D body by using 3D scanning and Rhinoceros 3D, associated with laser cutting process !
It allows you to imagine several shapes ! You can either create a whole body, or only parts of it, with cardboard or ay other sliced material !
First inspirations and ideas
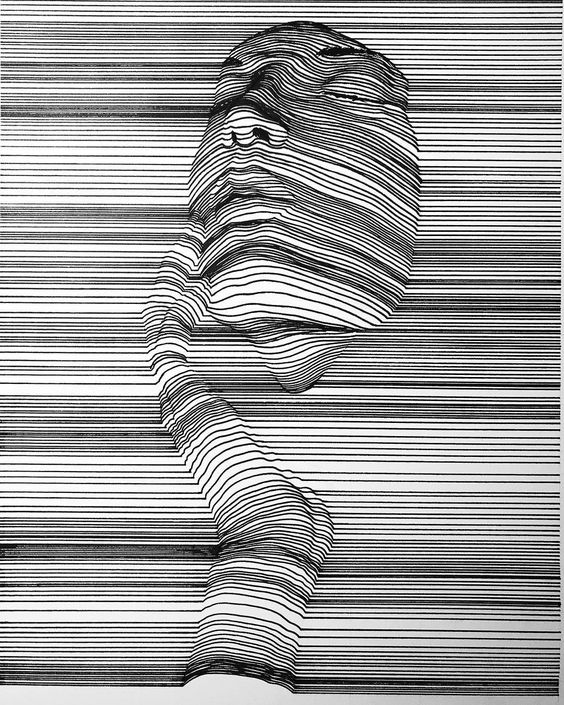
Nester Formentera
Aron Demetz
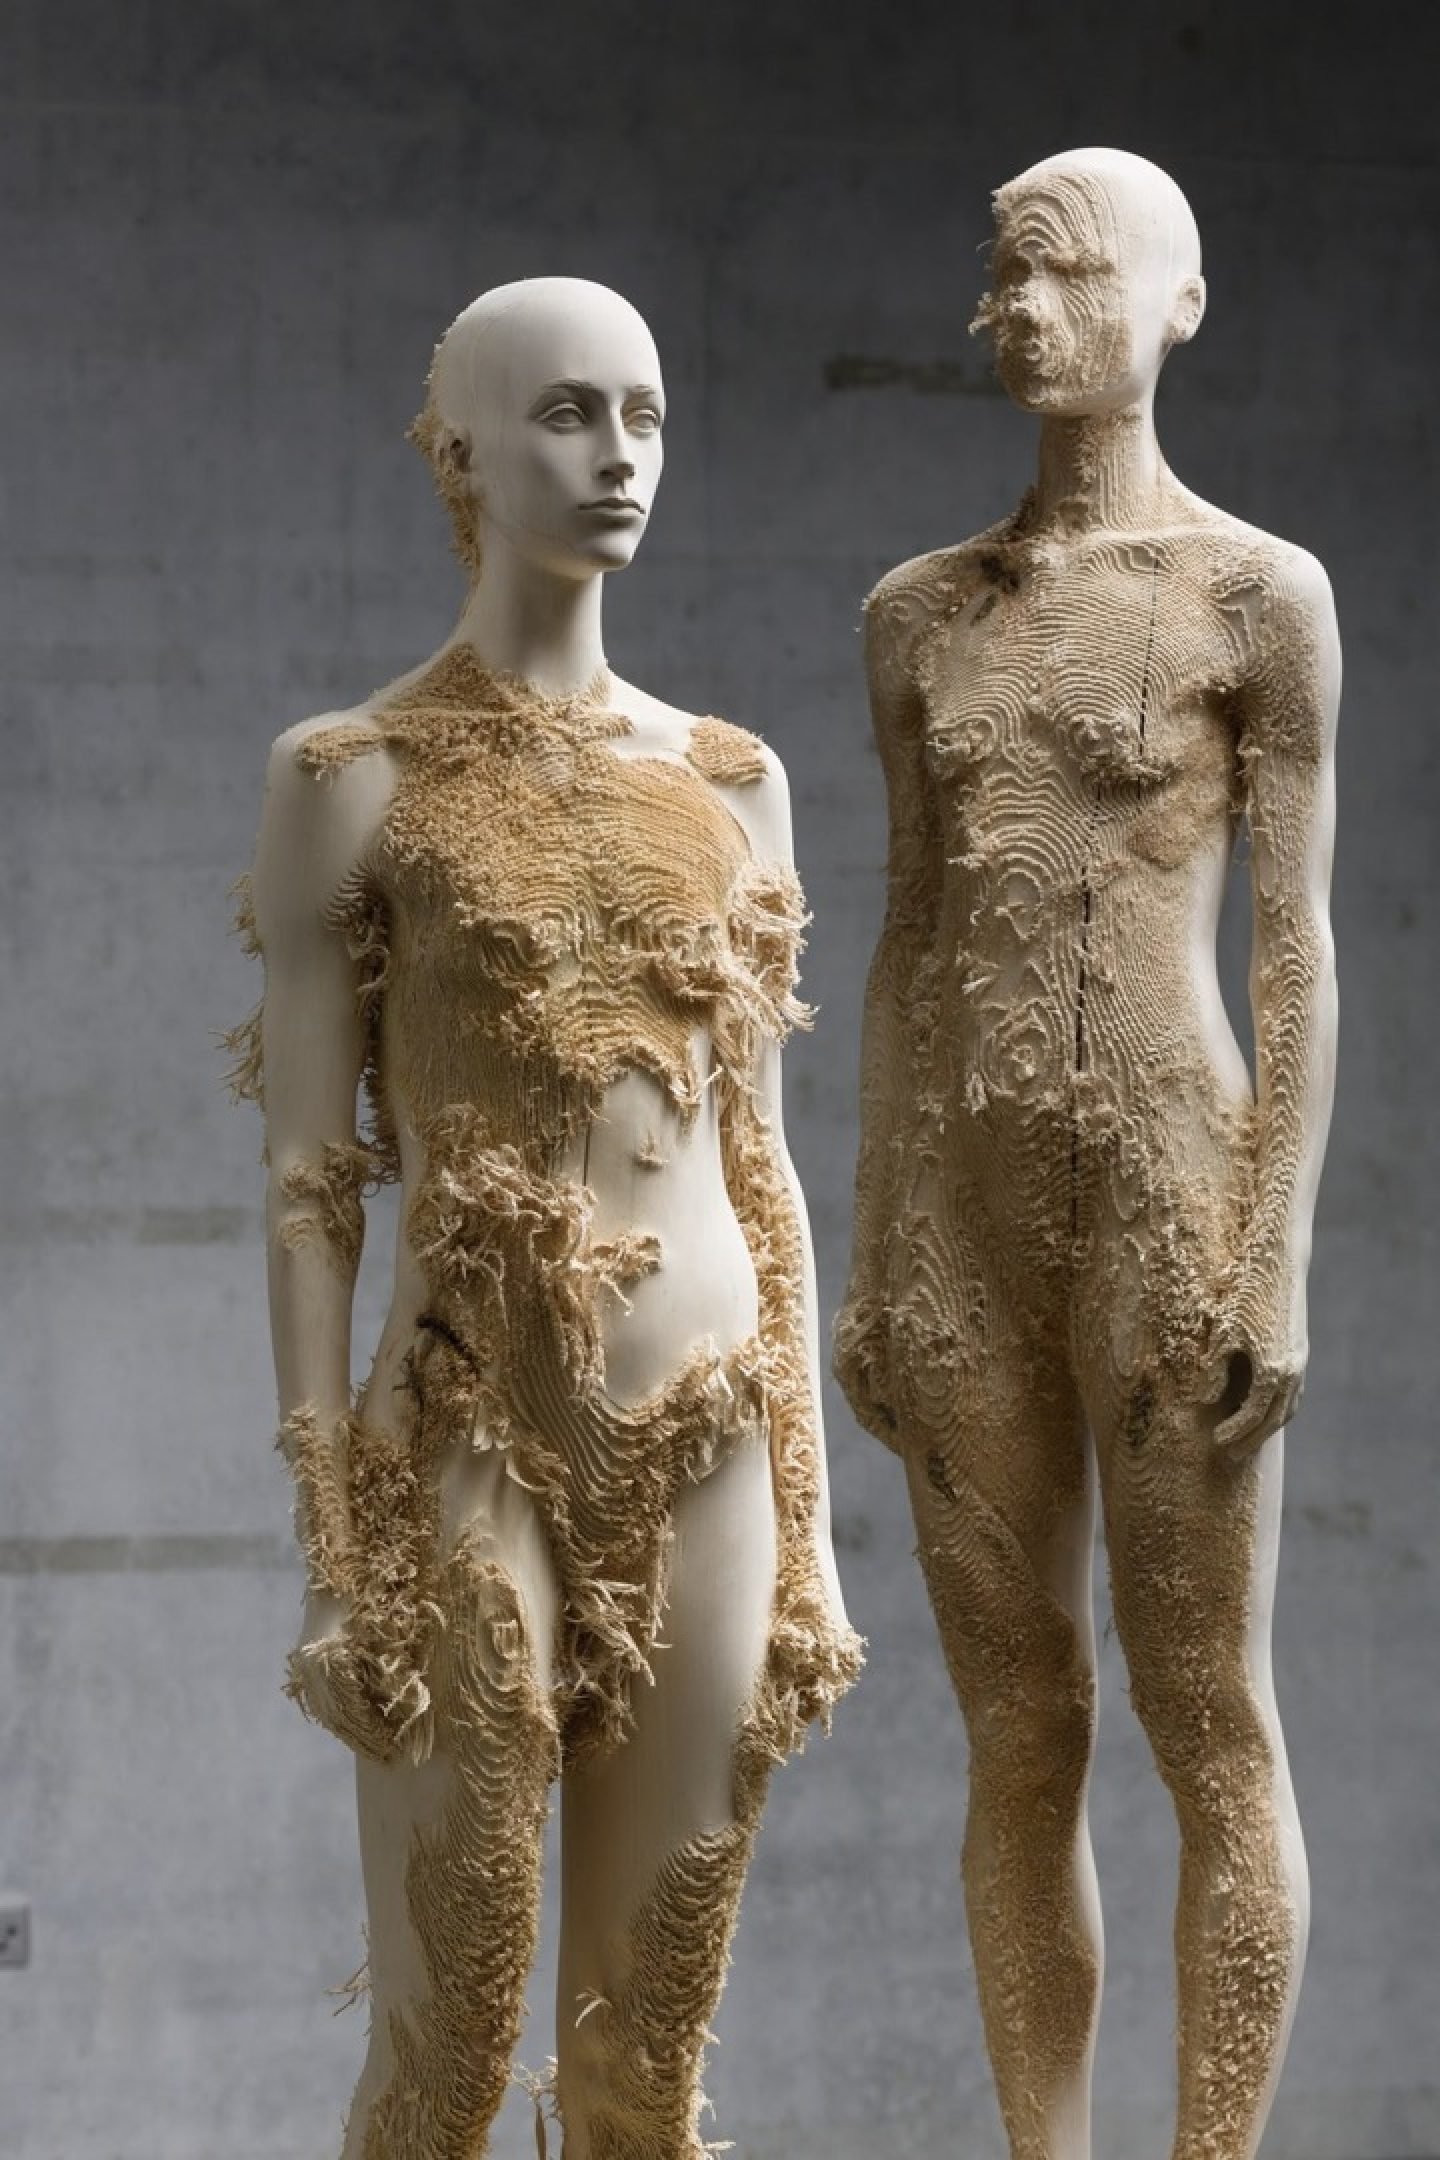
I read a little analysis of the work of Aron Demetz, written by Jean-Paul Gavard-Perret, that you can find here (translate it if you need, it's written in french), and it made me understand better the construction of these wood figures covered with fabric. This article is untitled "Le corps textile et matière", whcih means "The fabric and substance body.", that I find interesting. This Aron Demetz's work deals with the idea of the psychological
Bruno Catalano
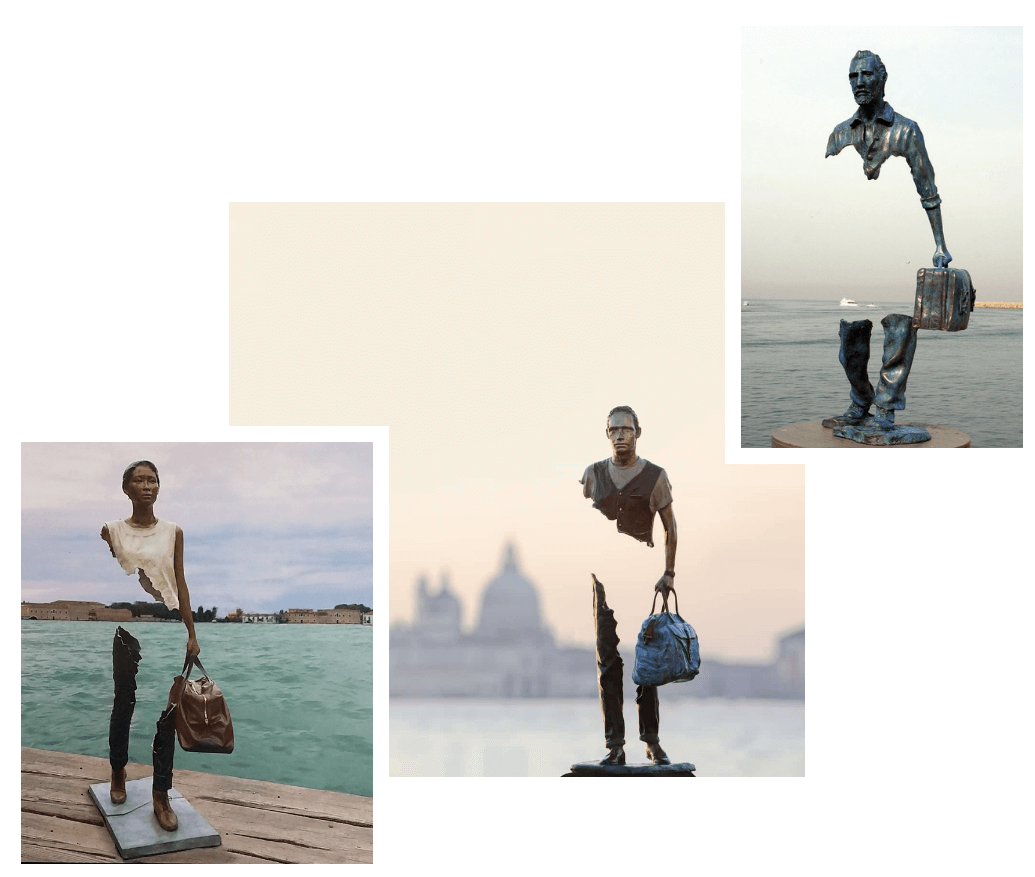
This series of bronze sculptures are very emotionnally charged, since they display the theme of travel in a very visual way: the characters are partial, and the only link that allows them to stay is their luggage.
At first, you can think that this is about exile and being shattered because of moving out from a place where you were socially built. But, the title of this series is "Travellers", and this is very important: actually, this work gives a message of hope, with the idea that travelling is always leaving some fragments from ourselves in the place we come from, but it is also a possibility to get to fill ourselves with new fragments from the place we are going to.
Yuichi Ikehata
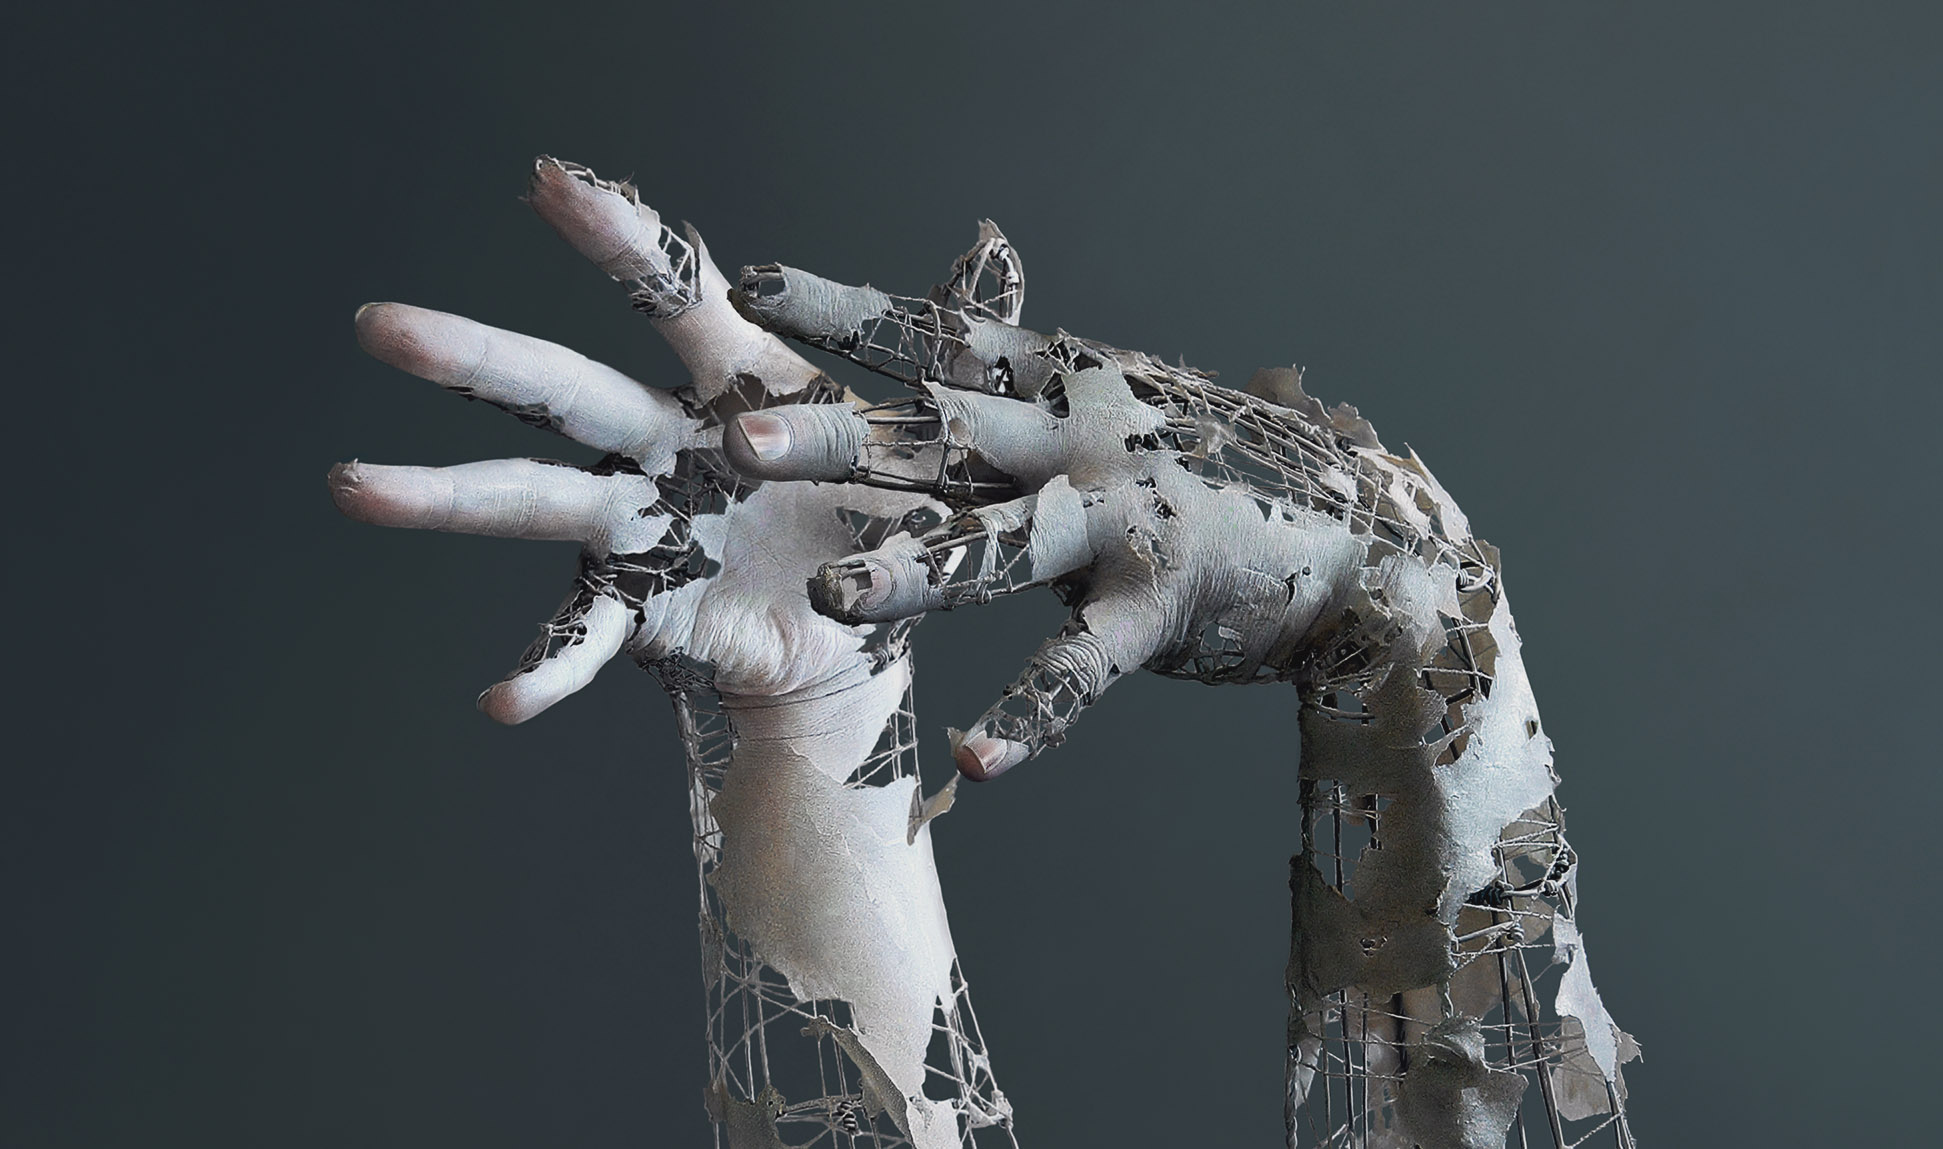
Deconstruction of the body, partial memories of his own body, Yuichi Ikehata tackles these themes in this work. He expresses through his art the fragility of our existences: it is both about reality and unreality of the material. He uses pictures, paper, ceramic and metal threads to create these reinforced-concrete looking and disturbing sculptures. I do like the very realistic details (that creates an effect of Uncanny Valley, between the human and the unhuman) combined with the more robotic parts.
Various ideas to test softwares
Scanning with a Kinect with Skanect

Here is our tool in Lyon! The Kinect needs some slow movement, and it can be tricky to get a complete scan of a whole body for instance. Actually, when you move too fastly, the screen freezes, and you have to come back to the last scanning pose to be able to pursue the scanning session.
It shows that we don't need very expensive tools to 3D scan something!
It opens a wide range of possibilities in term of creation, even at home! (Nonetheless, you will need a laser cutting machine, and this can be reeeeally expensive..)
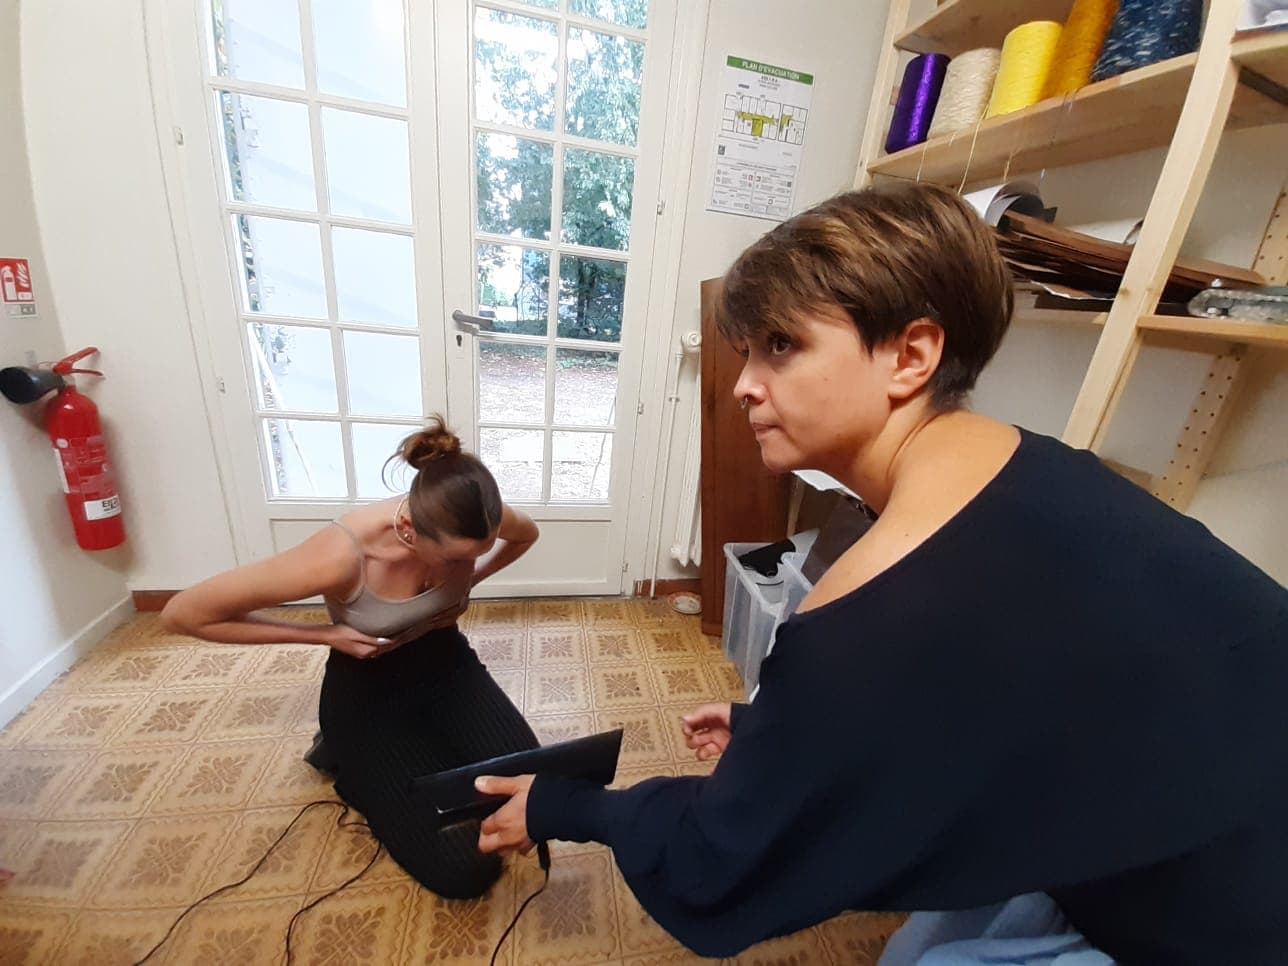
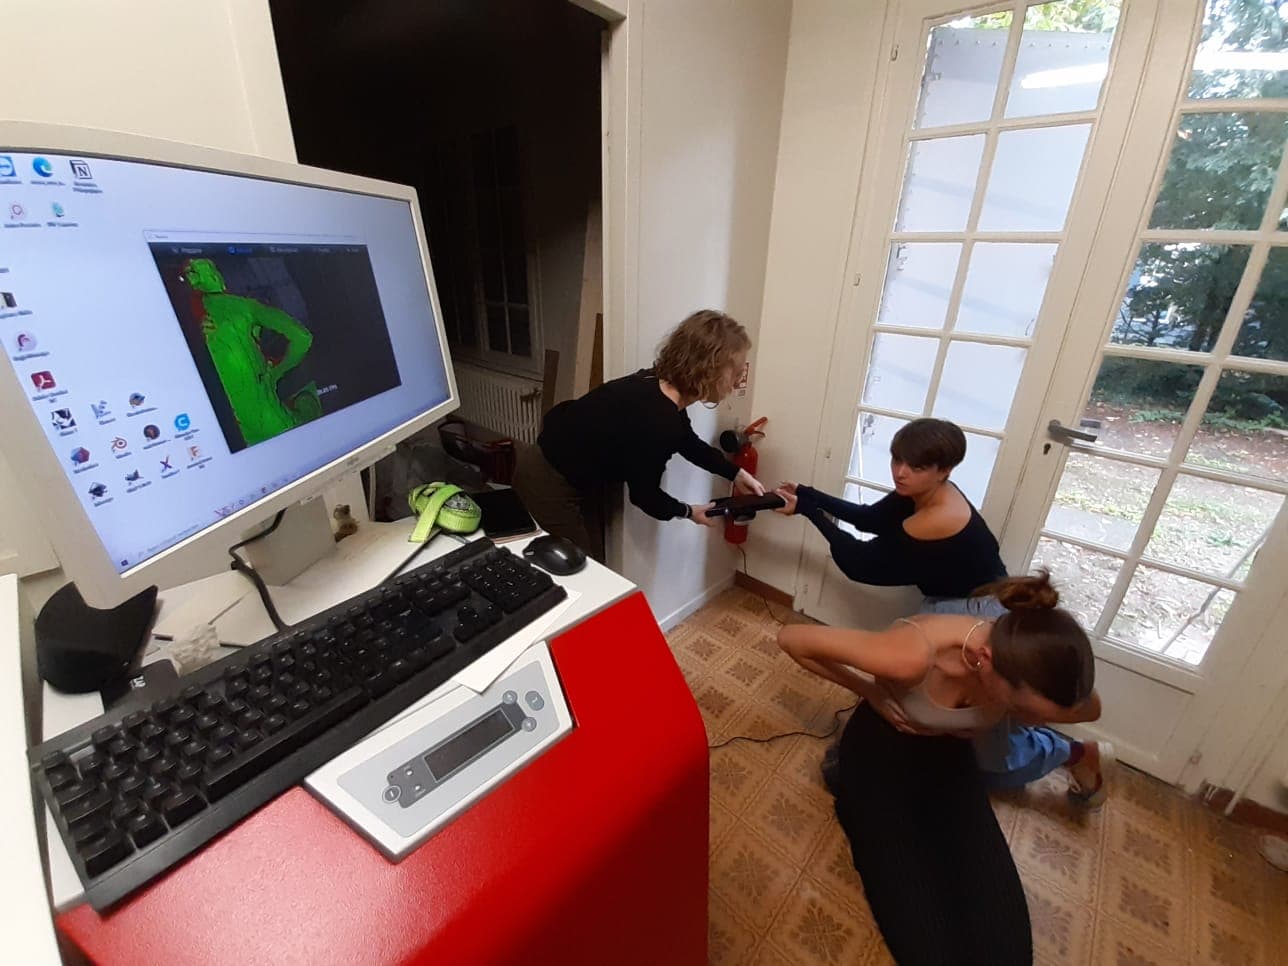
First, you open Skanect, which is automatically connected to the Kinect. Before starting to scan, we have to choose what size will be the scanned object/body. It creates a virtual box in which framing the object with the Kinect. In the second picture above, you can see the screen of the software. The green parts are being scanned. If the Kinect is too far from the scanned body, it becomes red. We had to be very cautious when scanning, because the screen can freeze, and then, it is very hard to come back to the last pose, and you have to stop the scan. For instance, on the picture below, you can see my scanned bust. You can see that some parts of the head are missing.
Actually, I wanted to create some object in which the body wasn't recognizable, where you could mistake is with something else. I had so many idea, and I wanted to experiment so many different techniques that I had some troubles to fix myself on something. I only knew I wanted to work with a disasembled body.
Scanning software
Skanect
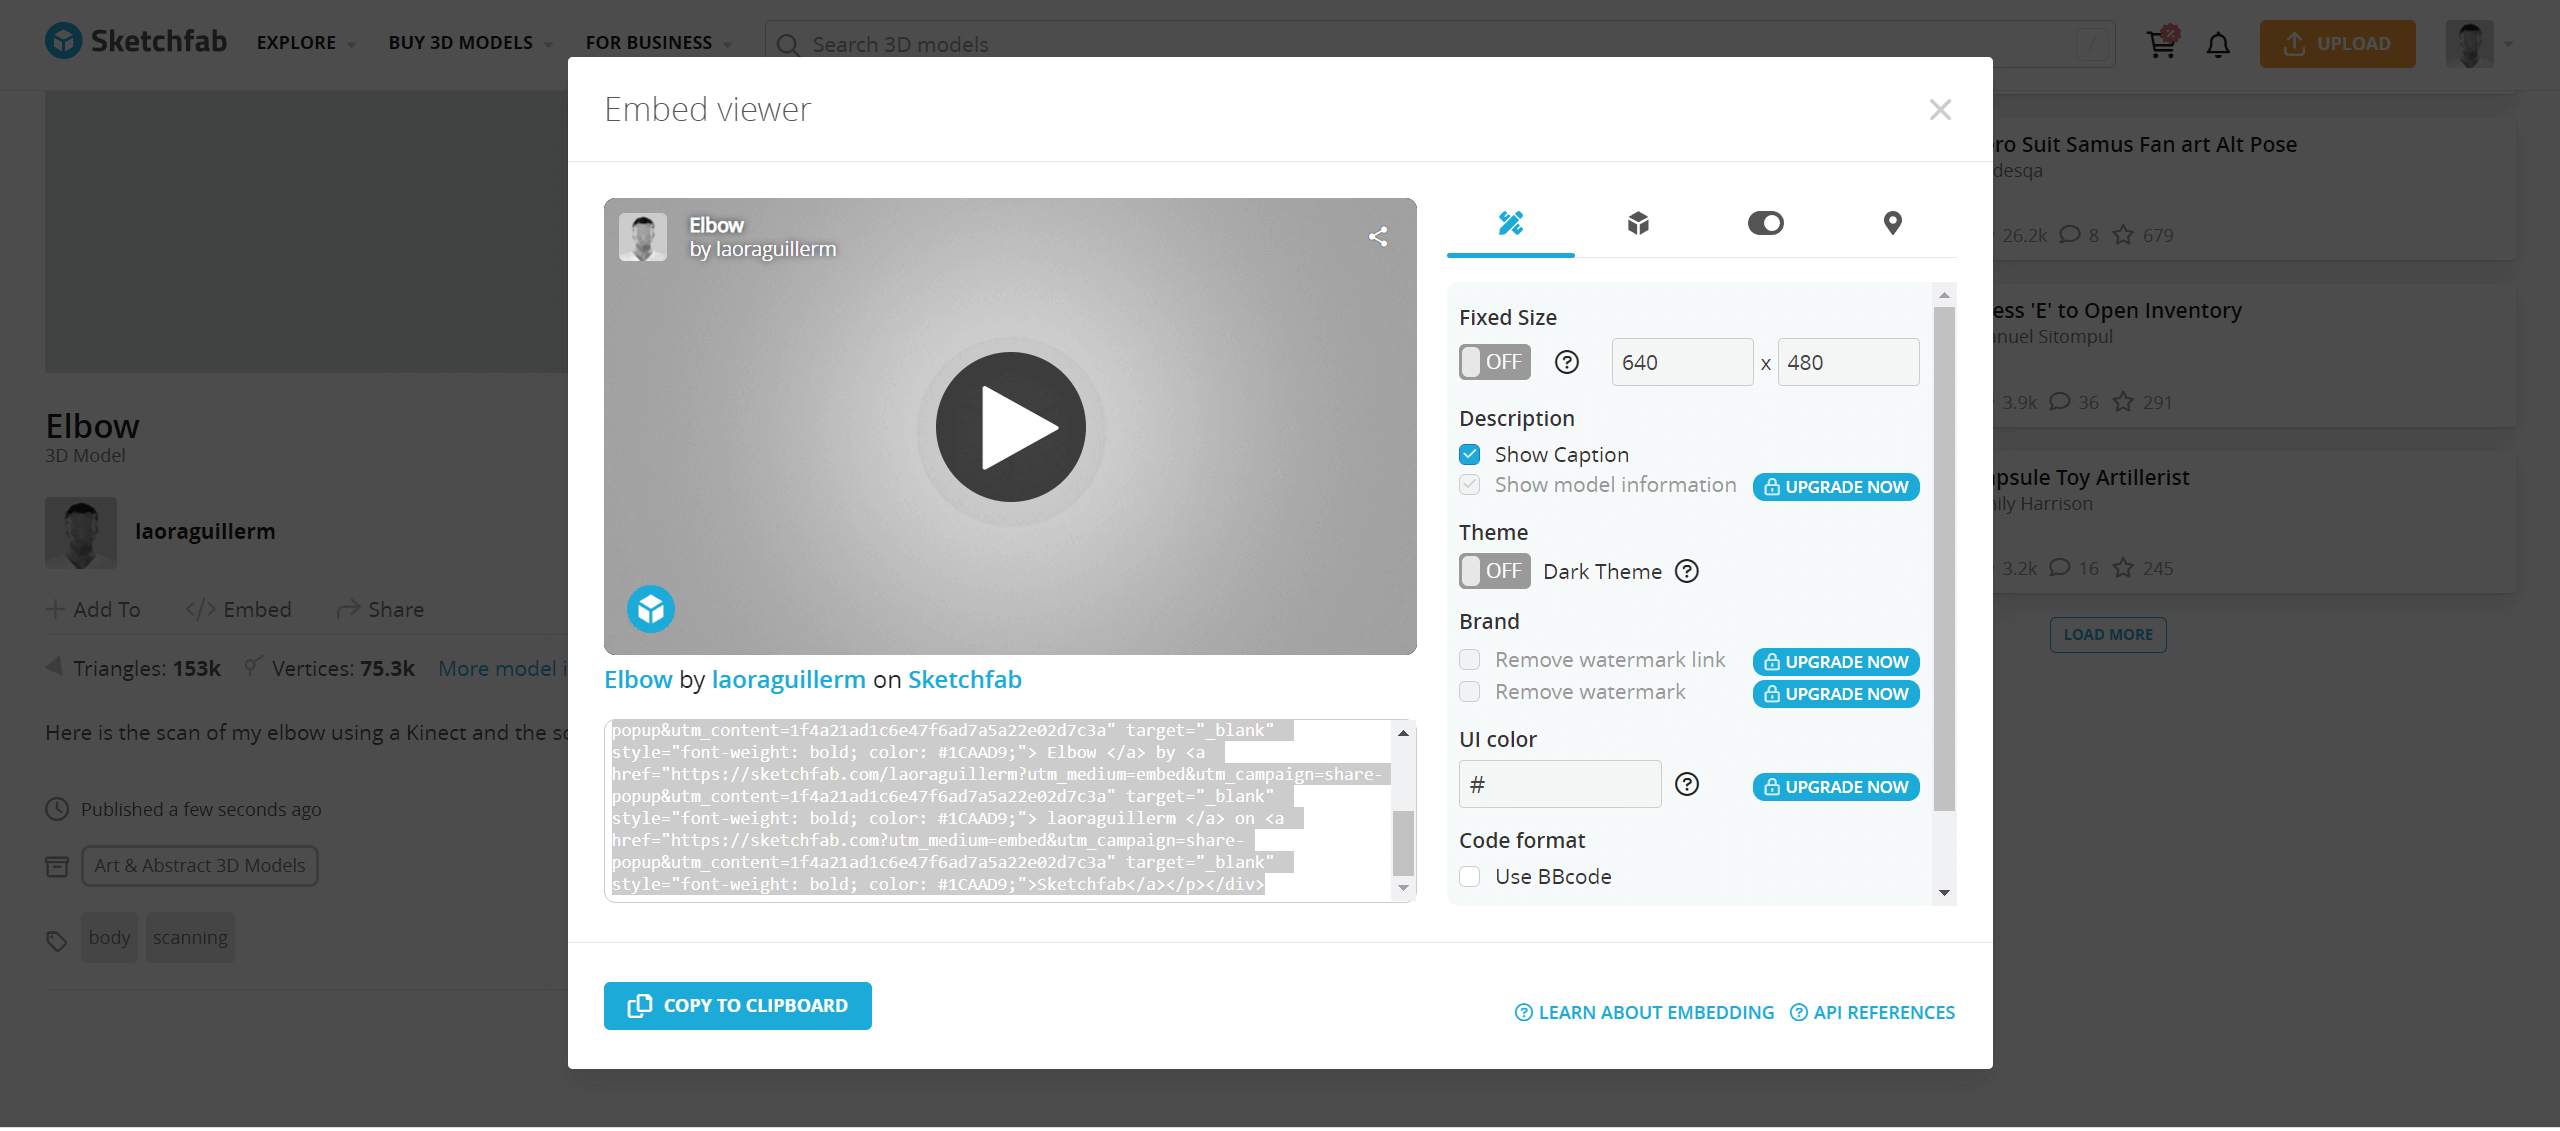
Here is the scan of my elbow made with the Kinect.
Sketchfab
For you to see this 3D view of the scan, I uploaded it in Sketchfab, and I published it in order to embed the previous view.
Creating a mini-me with MakeHuman
The work of art called "Les Voyageurs" by Bruno Catalano is really inspiring to me. I wanted to try to realize a maquette by hollowing some parts of the character. This is still at the stage of trying it. I tried to be as objective as possible, and to create a character with my approximative measurements.
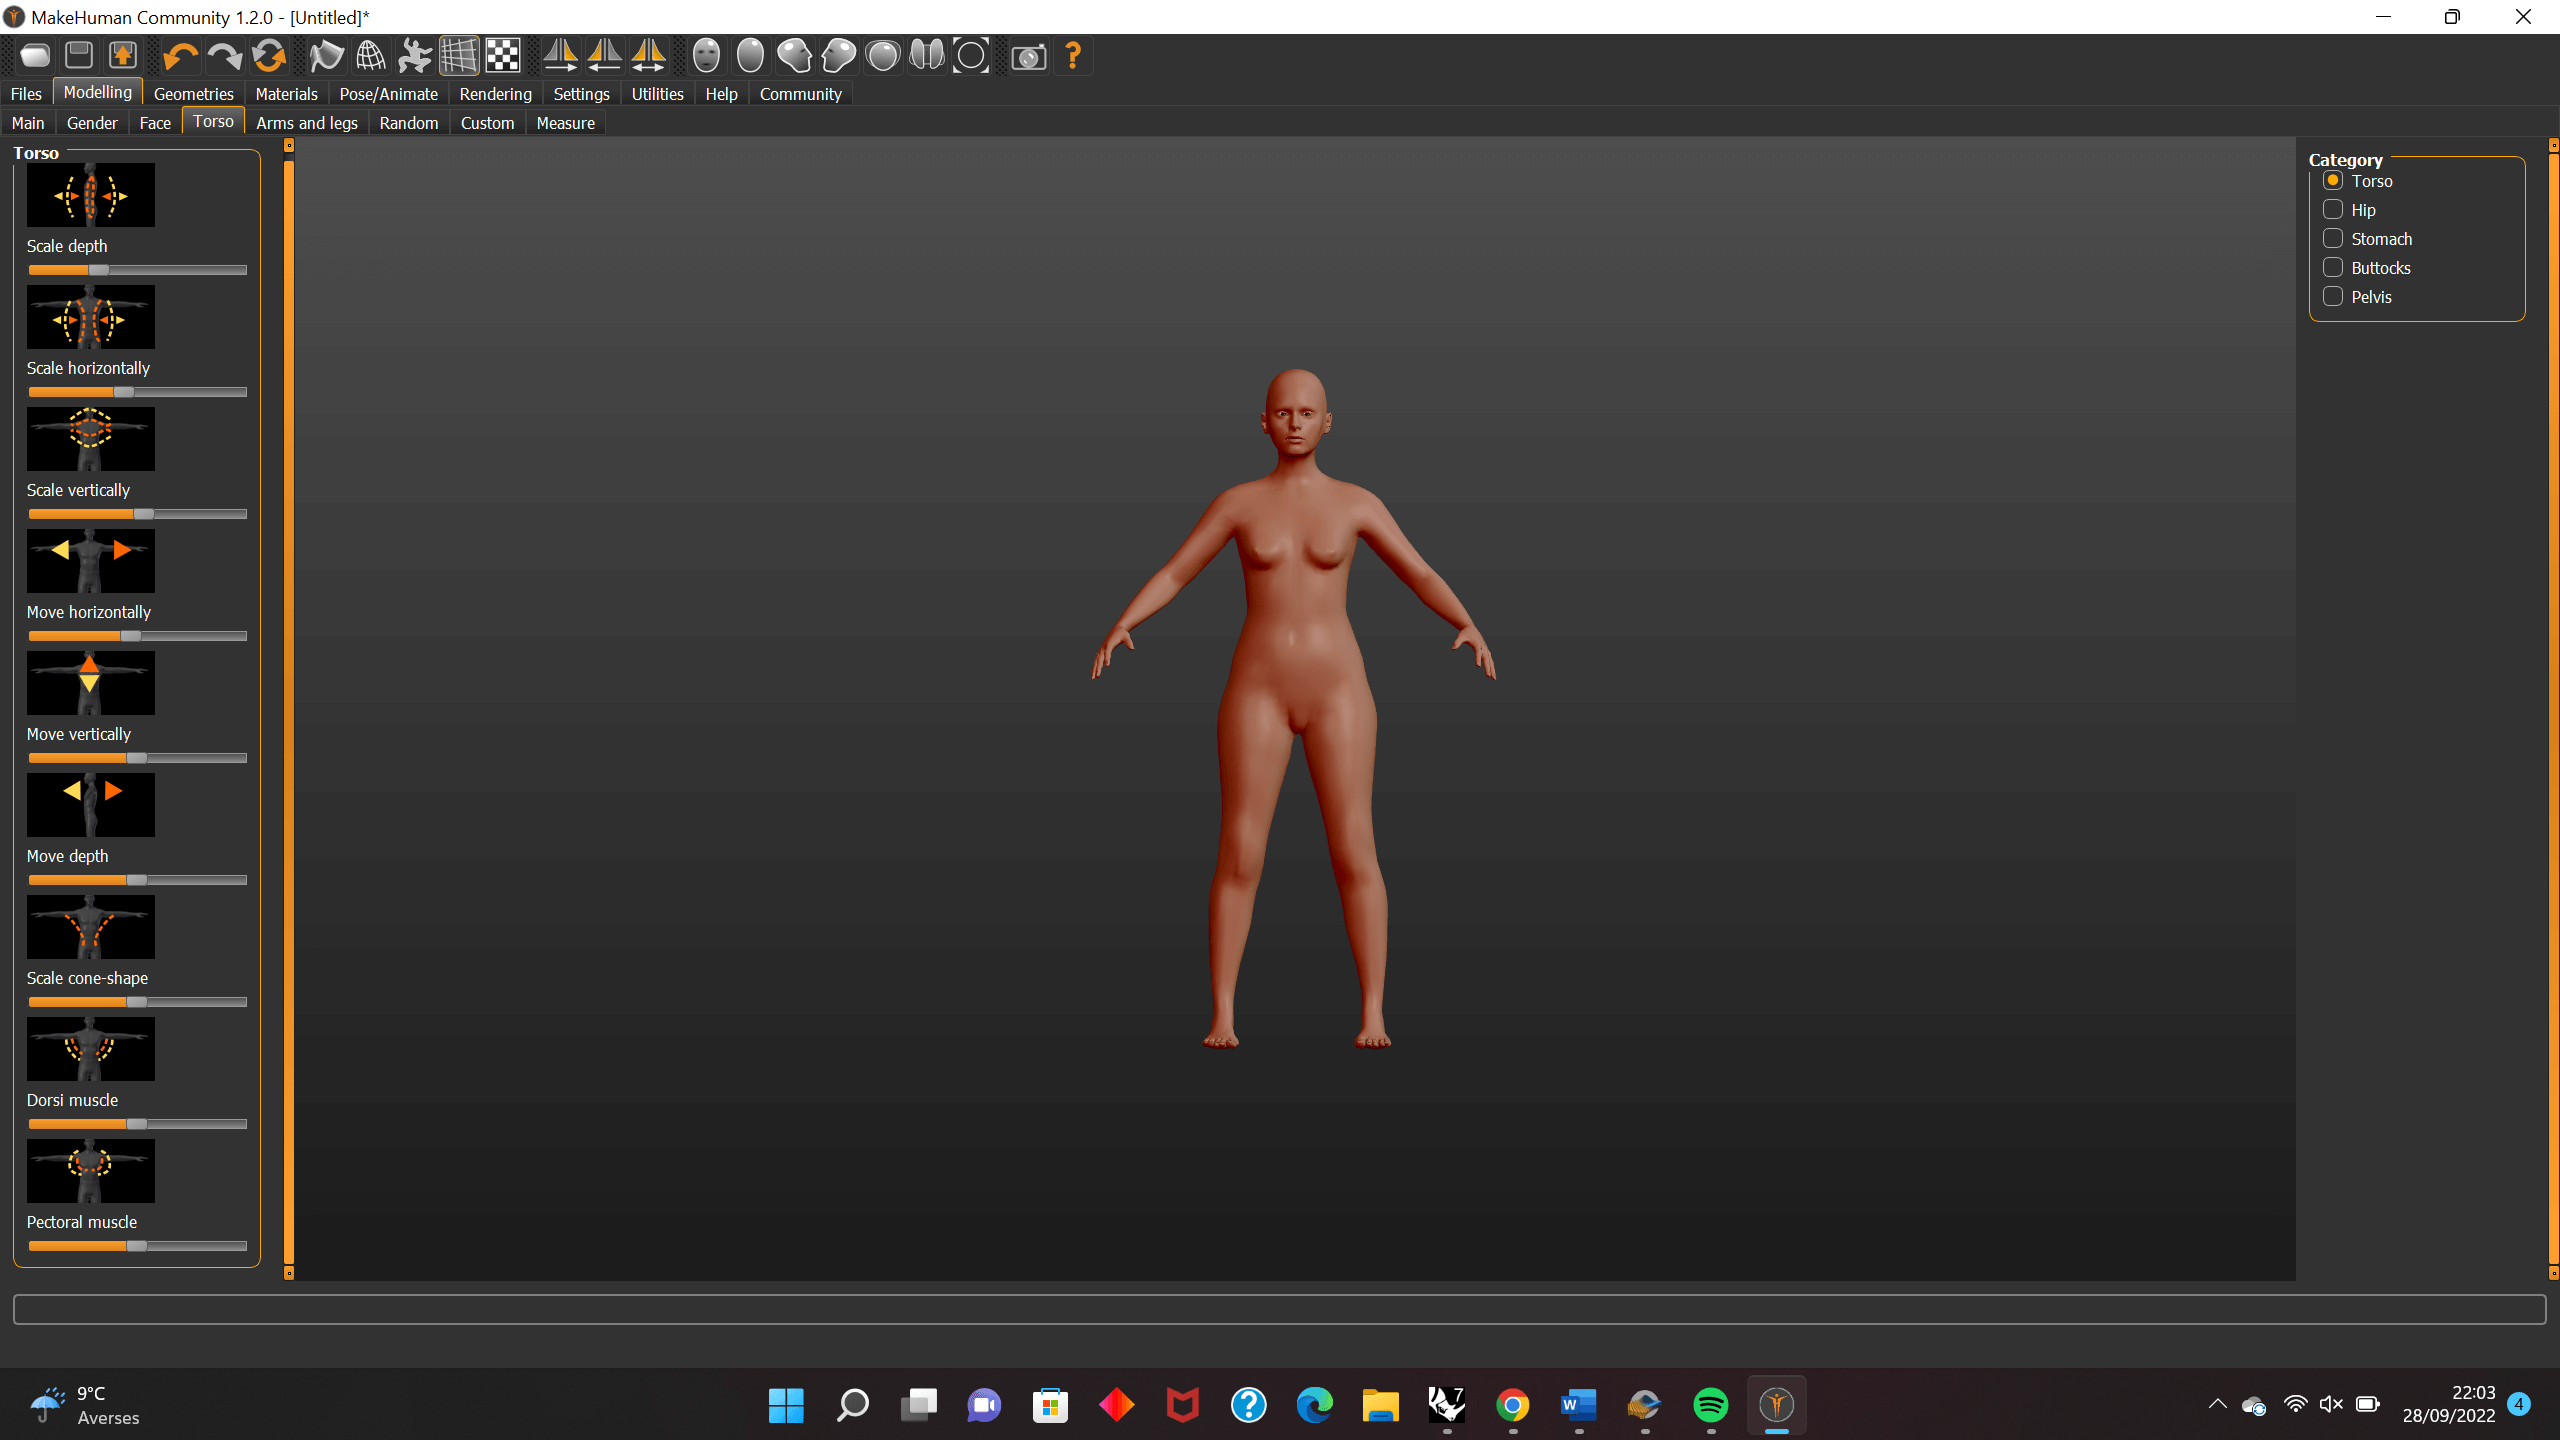
Modifying 3D scans with Rhinoceros 3D ^1
Here was the starting point pose.

In order to creates holes on this 3D mini-me, I loaded my MakeHuman document (saved under .slt) in Rhinoceros3D.
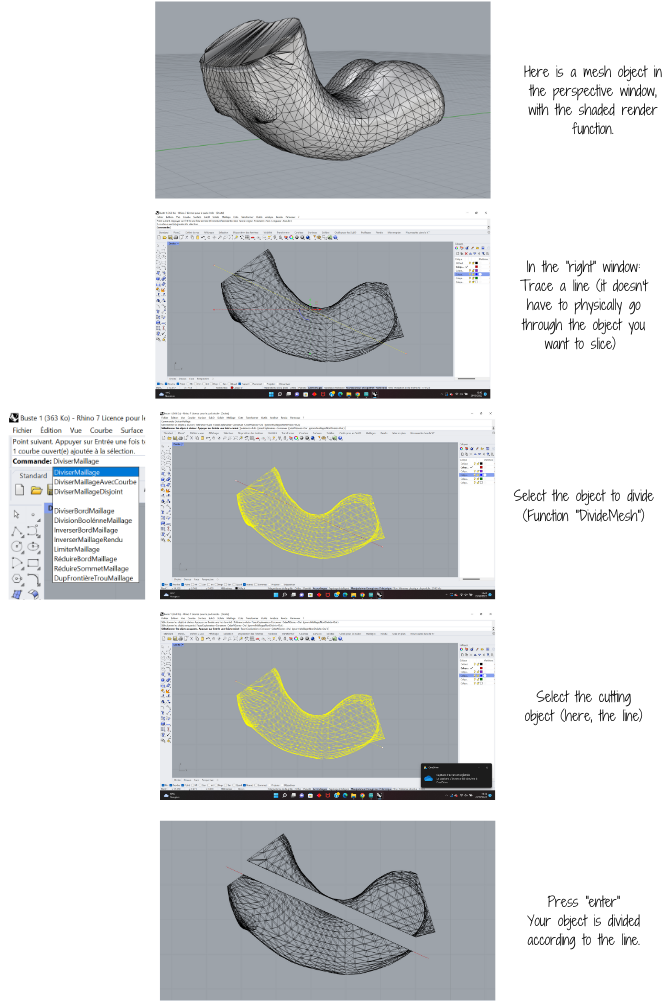
I used the "demeshing" tool
NURBS and meshes
When you import a 3D scan from Skanect or a character from MakeHuman, always remember that these objects are meshes and not NURBS. So, in this case, always select the Rhino3D tools in the 'Meshes'tab. Some useful tools -ExtractMeshFaces, to separate faces from a mesh. -Mesh Trim -Rebuilt Mesh -Divide Mesh
Towards the final design: useful tools and process
Slicer for Fusion 360
Discovering Nester Formentera and his subtle work gave me an idea about this week assignment: I wanted to create a piece of body coming out of a frame. All lines would have be parallels and horizontally put, and only connected and supported by two or three vertical bars. Being in front of the frame, the body parts wouldn't be perceptible, but as you go to the left of to the right of the structure, you would perceive the shapes.
I tried this idea by using a part of a MakeHuman character, working on it on Rhino3D 7, then uploading it in Slicer. Here is the problem I realized when adding it to Slicer:
Here is a short view of what the problem was: it seemed that the shoulder wasn't really attached to the frame, eventhough they were joined (thanks to Boolean Union) in Rhino3D. What happens then is that my different parts were disjoined, and the general design was less smooth.
From 2D to 3D : what not to forget
 1 : Make your document a RGB one, otherwise you won't be able to lasercut it (you need precise color for the cutting part)
 2 : The linework of your document must be a vectorized one. If needed, download your work in Adobe Illustrator or Inkscape to vectorize it before going into laser cutting process.
The laser cutting process
At Le Textile Lab, in Lyon, we have a Rayjet400 laser cut. Make sure to have cardboard (I used 6mm cardboard), or any other material, look below to see what you cannot cut, and to resize it to the laser cut board.
Materials you can't cut with the laser cut
-Reflecting materials (mirors, chromed objects, polished metals). Mirors can only be engraved with the reflecting side turned on the laser cutting board.(otherwise, the reflection could damage the machine)
-Most of the metal materials (but you can engrave them with the cutting mode)
-Fiberglass
-Carbonfiber
-All materials in which you find chlorine, PVC, vinyl (because of a risk of mortal gaz)
-All materials in which you can find fluor : Teflon / Polytétrafluoroéthylène / PTFE (because of a risk of mortal gaz)
-Glass
-Mass tinted valcromat medium (can catch fire)
-Polycarbonate / PC / Lexan / Makrolon (it melts and burns)
-Expanded/extruded polystyrene (foam) (it melts and burns)
-Printed circuit board (Fiberglass + epoxy)
- Turn on the chiller
- Turn on the machine itself
- If you are using a new material that isn't already indexed in the Trotec software, or if you have slots in your design, make a test with two small parts that you isolate from your design before cutting the whole piece.
On Rhinoceros3D :
- Select the pieces
- Trim them
- Join all the lines in order to have independant parts of your design
- Cut it following the next instructions
- When you have cut these parts, and if they are nicely cut:
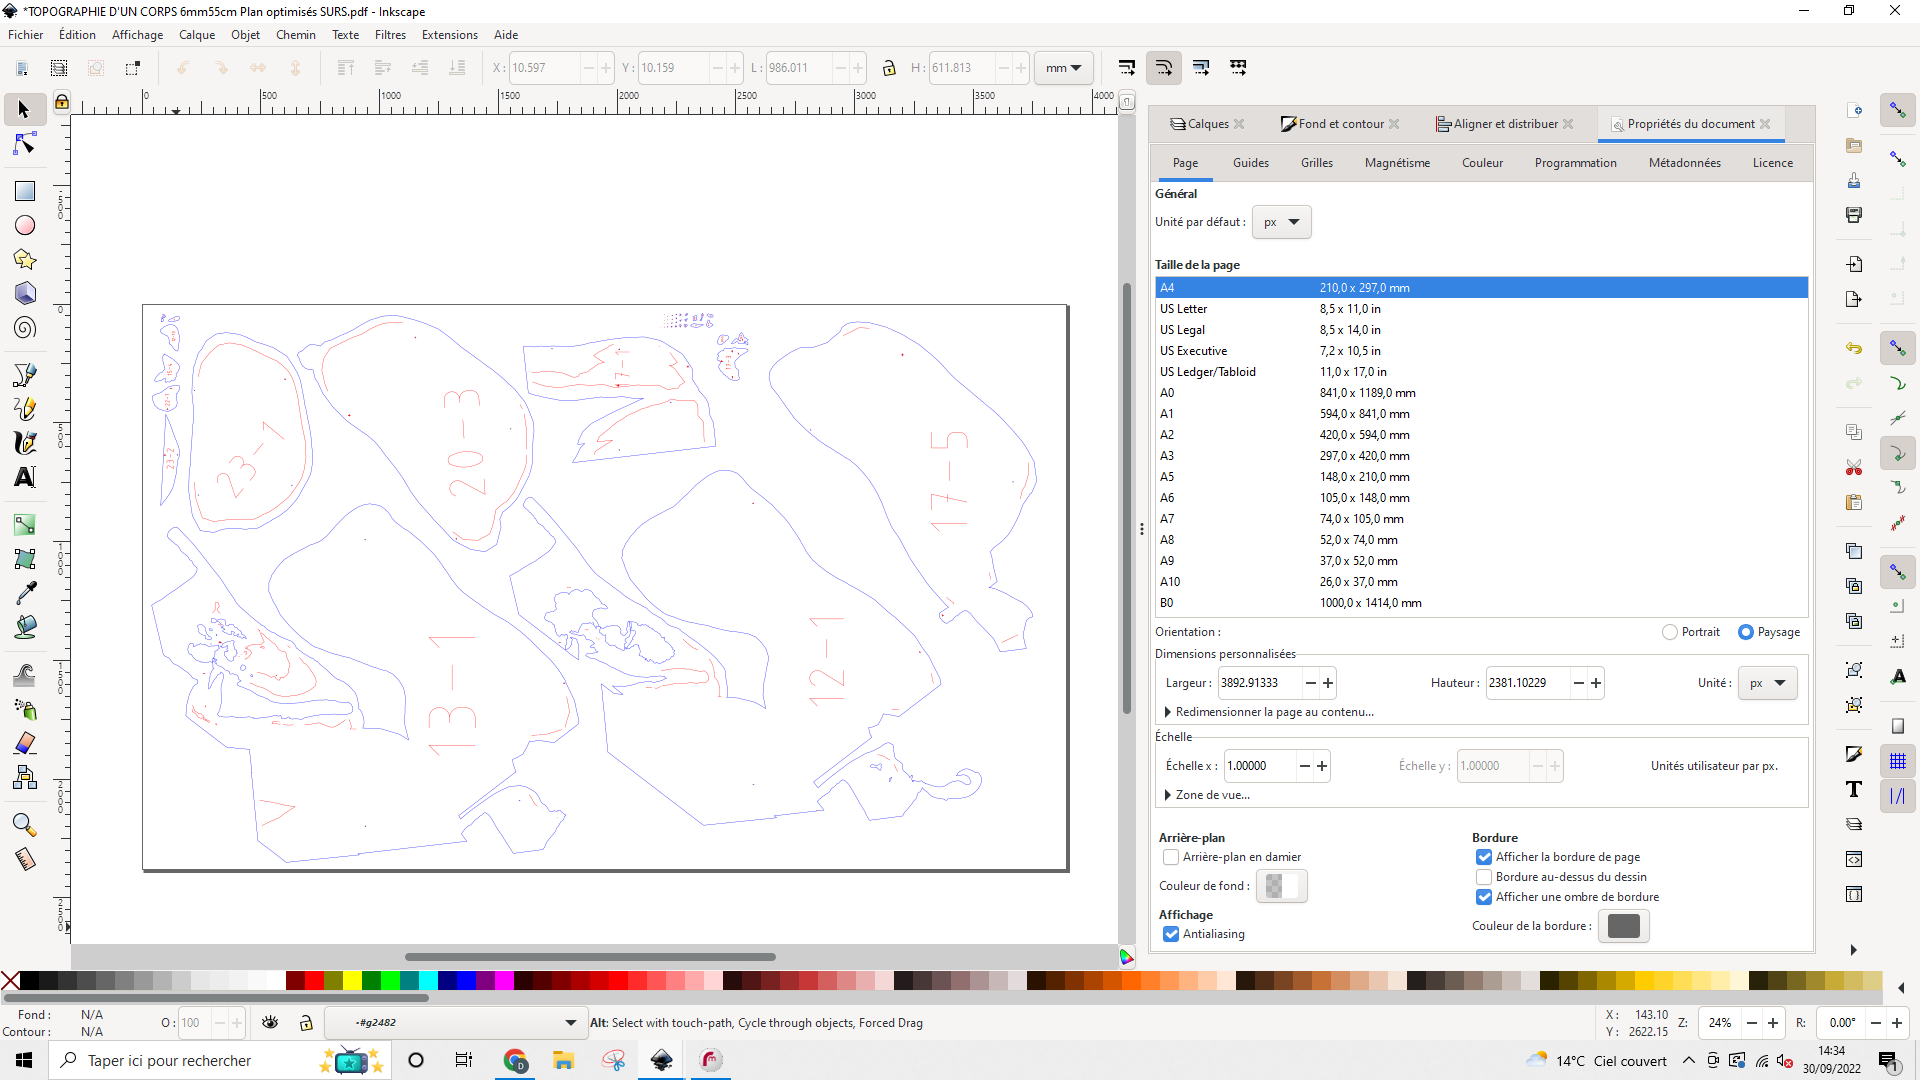
On Inkscape:- Optimize the placement of the pieces on the plans; it will avoid the waste of materials. 2
- Check your scale is at 100%
- Verify that the contour lines are on the right color for the cutting mode and the engraved lines. Depending on the color, the laser cutting machine won't apply the same power and speed to the material. This you can change in the material parameters.
- Change the thickness of the lines
Thickness of the lines
Make this step right before printing with the laser cutting machine, because the thiness of the lines will make your design "disappears" on the screen. See below.

- Then, ready to print!!
The printing setup: Trotec

Parameters for the 6mm cardboard that I used :
P (Powerness) : 65,00 (the higher the number, the more powerful the laser)
V (Velocity) : 15,00 (the higher the number, the faster the laser (so less intense in each point))
Final idea: topography of a body
I think that nowadays, we tend to dissociate from our bodies, and to see them only as a vitrine to show to the world. We forget that our body is made as a gift from nature; since you know it is .
I wanted us to forget this painting is made out of body parts.
Creation of an oniric landscape, made out of both virtual and real bodies. The characters are various, they don't correspond to any This is a "safe place" to be, a place where you don't compare yourself to somebody else. This is a
This is also the embodiment of the allegory of nature
First attempt
I tried to create a piece with several body parts. I modified it on Rhino, but uploading it in Slicer, I realized I forgot a very important step: unite the different body parts. Because of this mistake, the following sheets appeared in Slicer:
The sheets are chaotic, it is not possible for them to hold together. That is why the issues are colored in blue. I decided to fix this, and reajusted the different body parts.
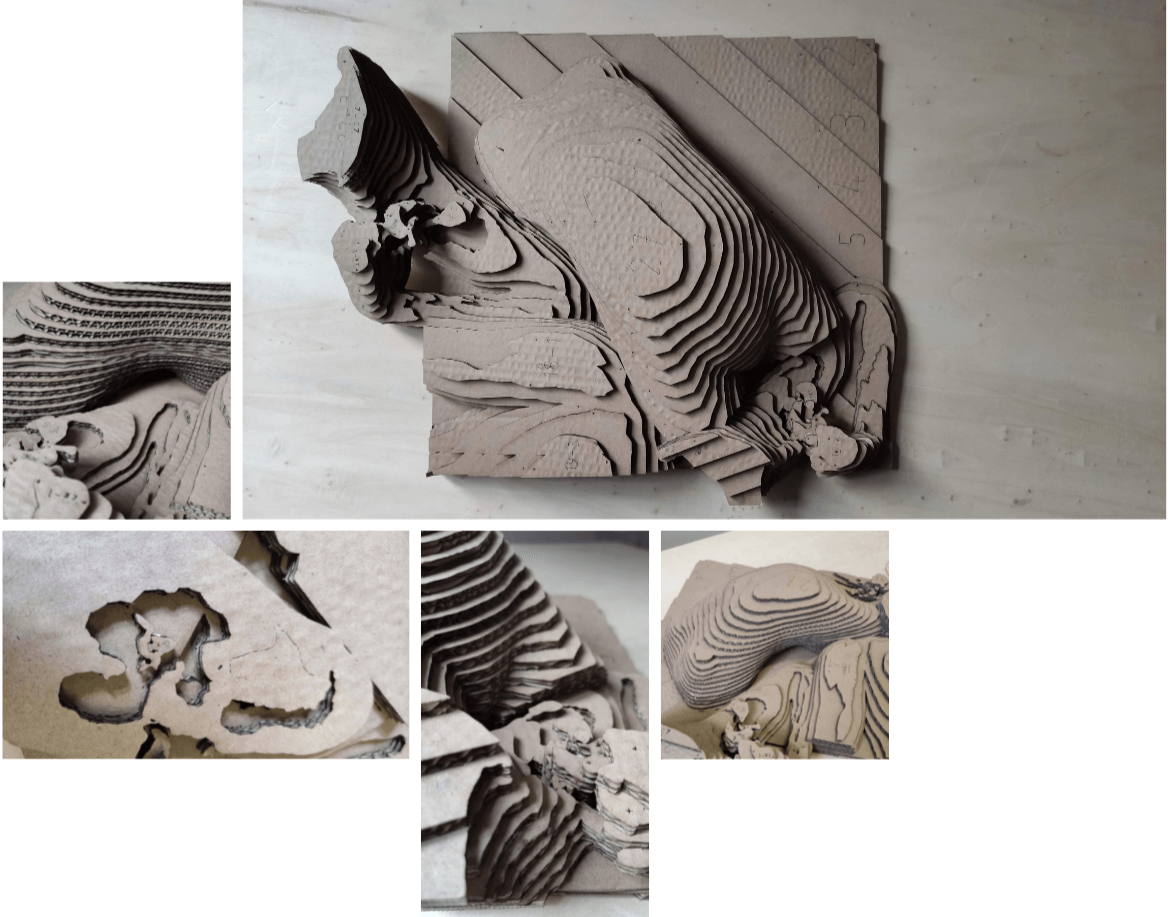
The real final
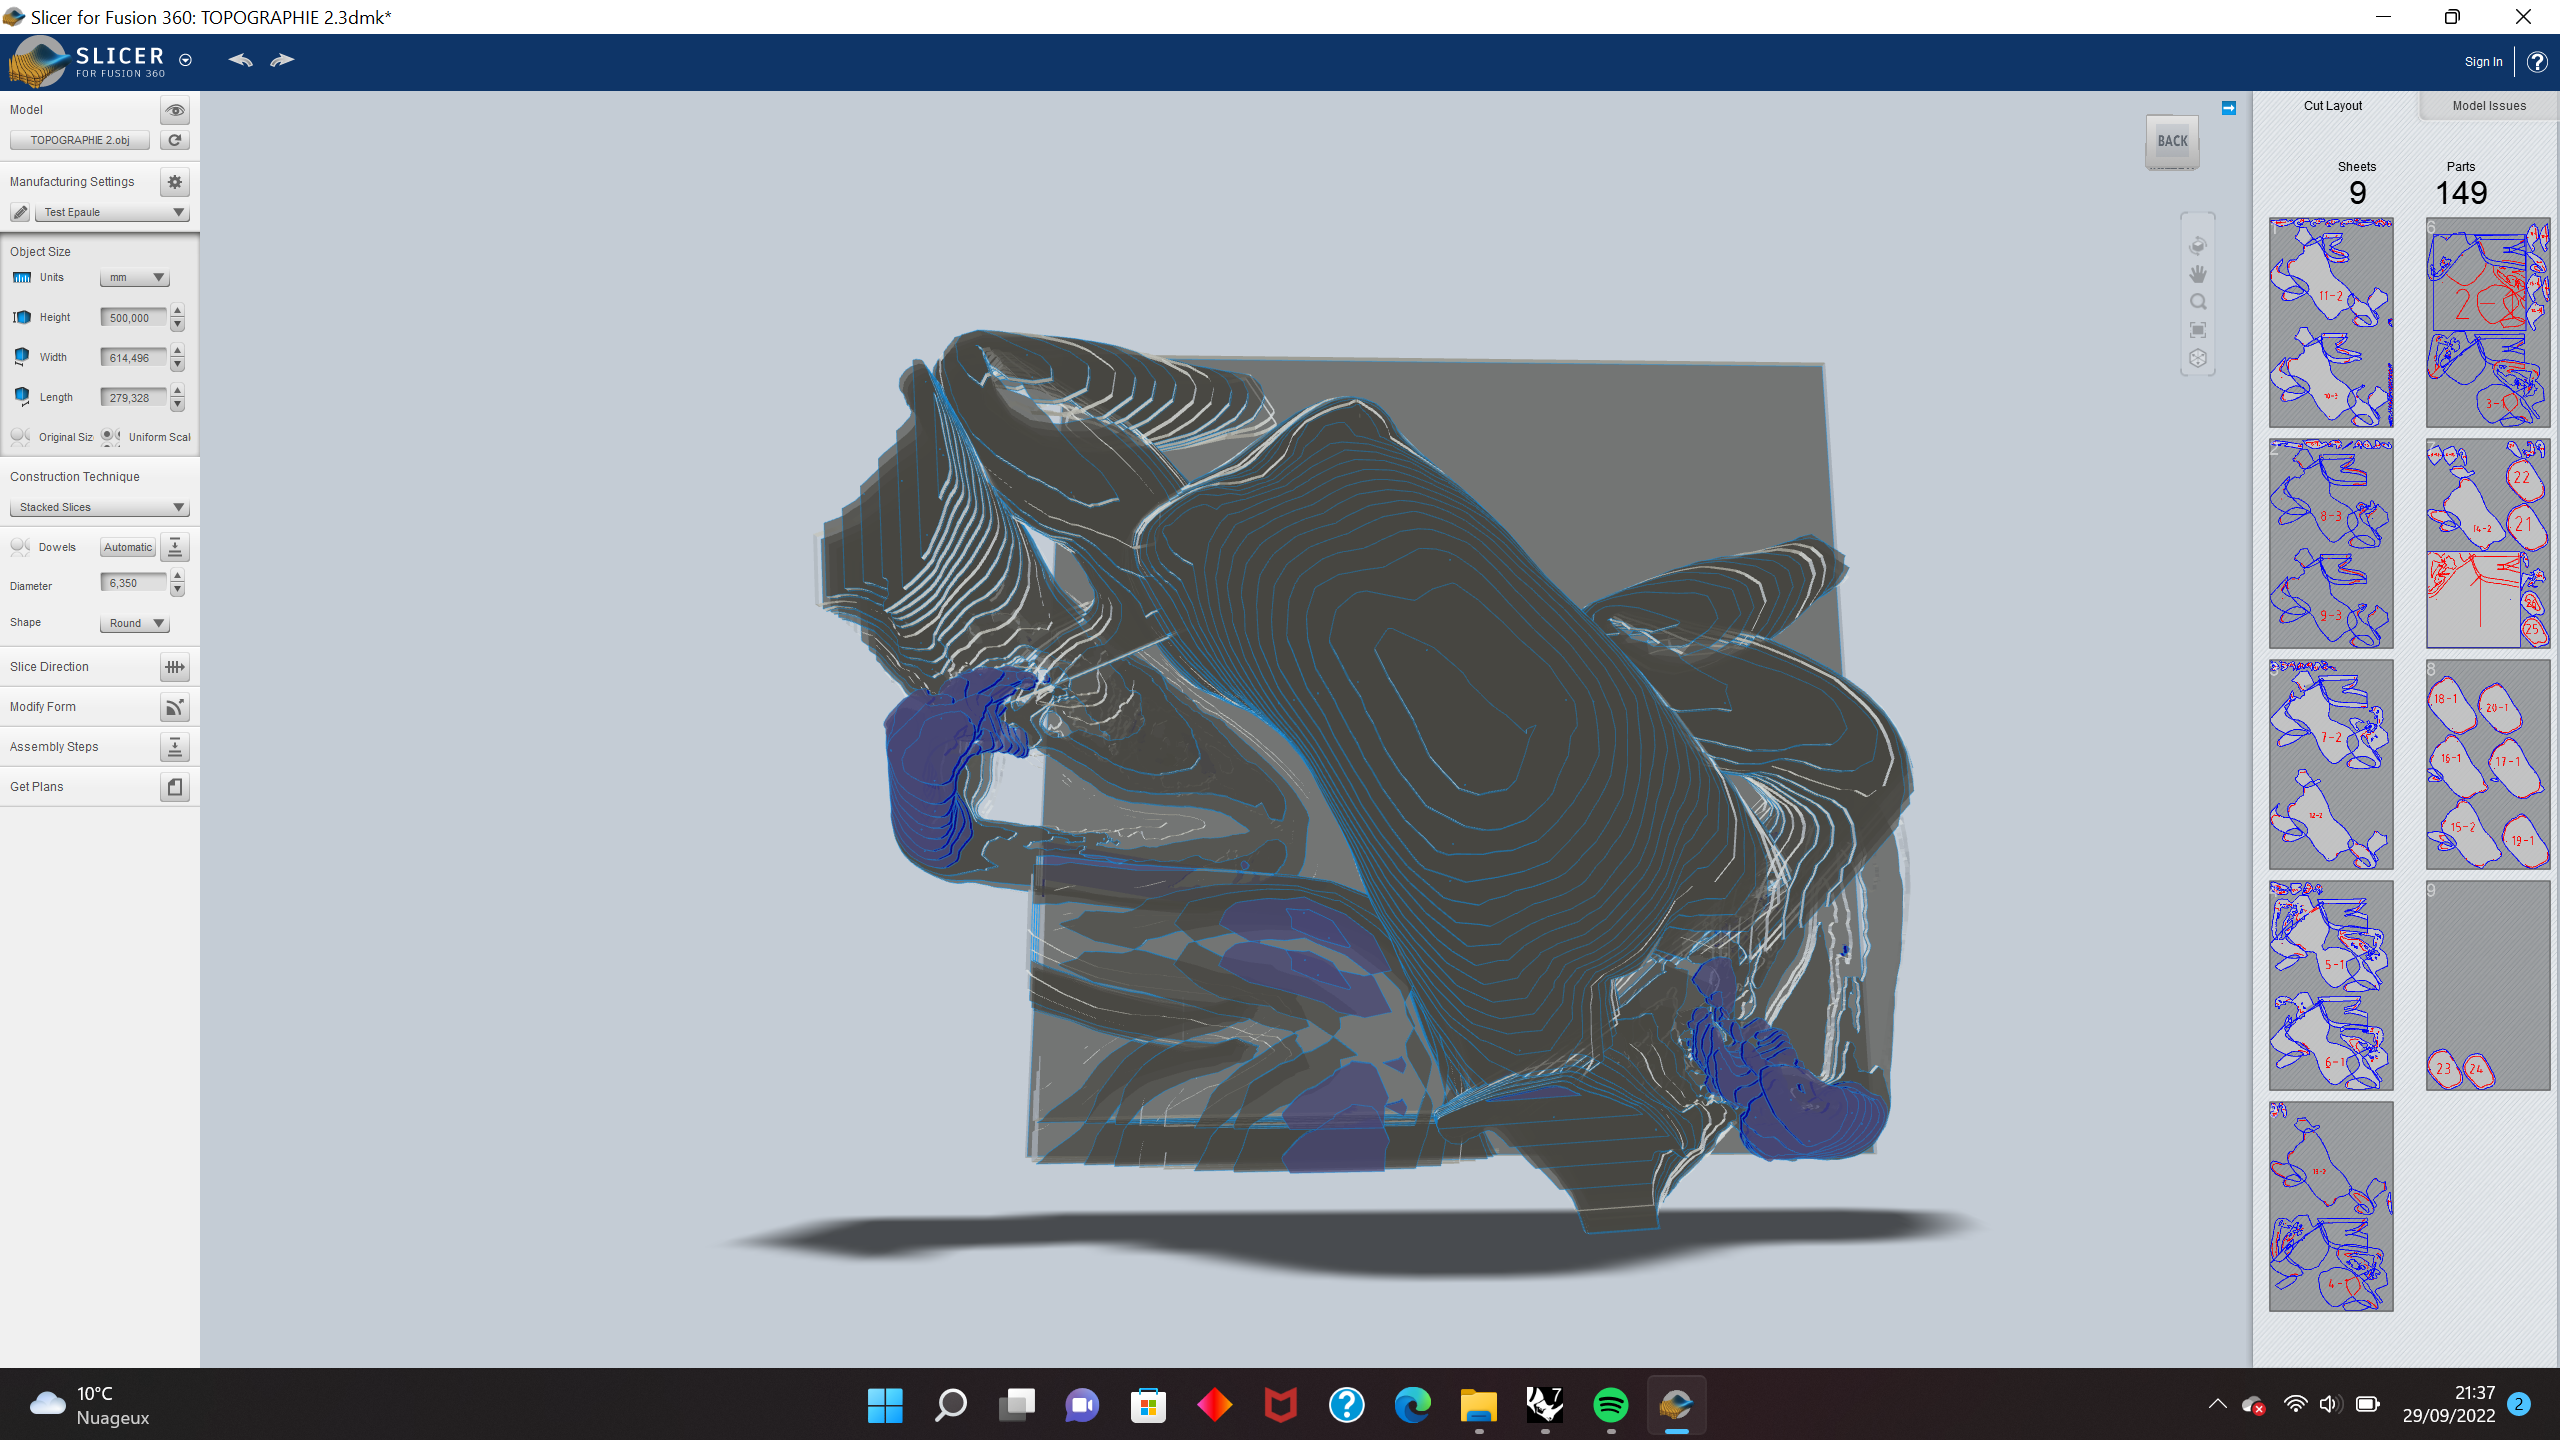
Here is a suggestion of work aroung the idea of body and landscape. Actually, what you can see are part of virtual and real body. The virtual ones were found on MakeHuman and modified using Rhino3D. The real ones were scanned thanks to Scanect, and modified using Rhino3D. The purpose was to create a topography out of body parts that become unrecognizable. The next step was to slice this design in 'stacked slices' in Slicer, and then to cut it using a laser cutting machine.
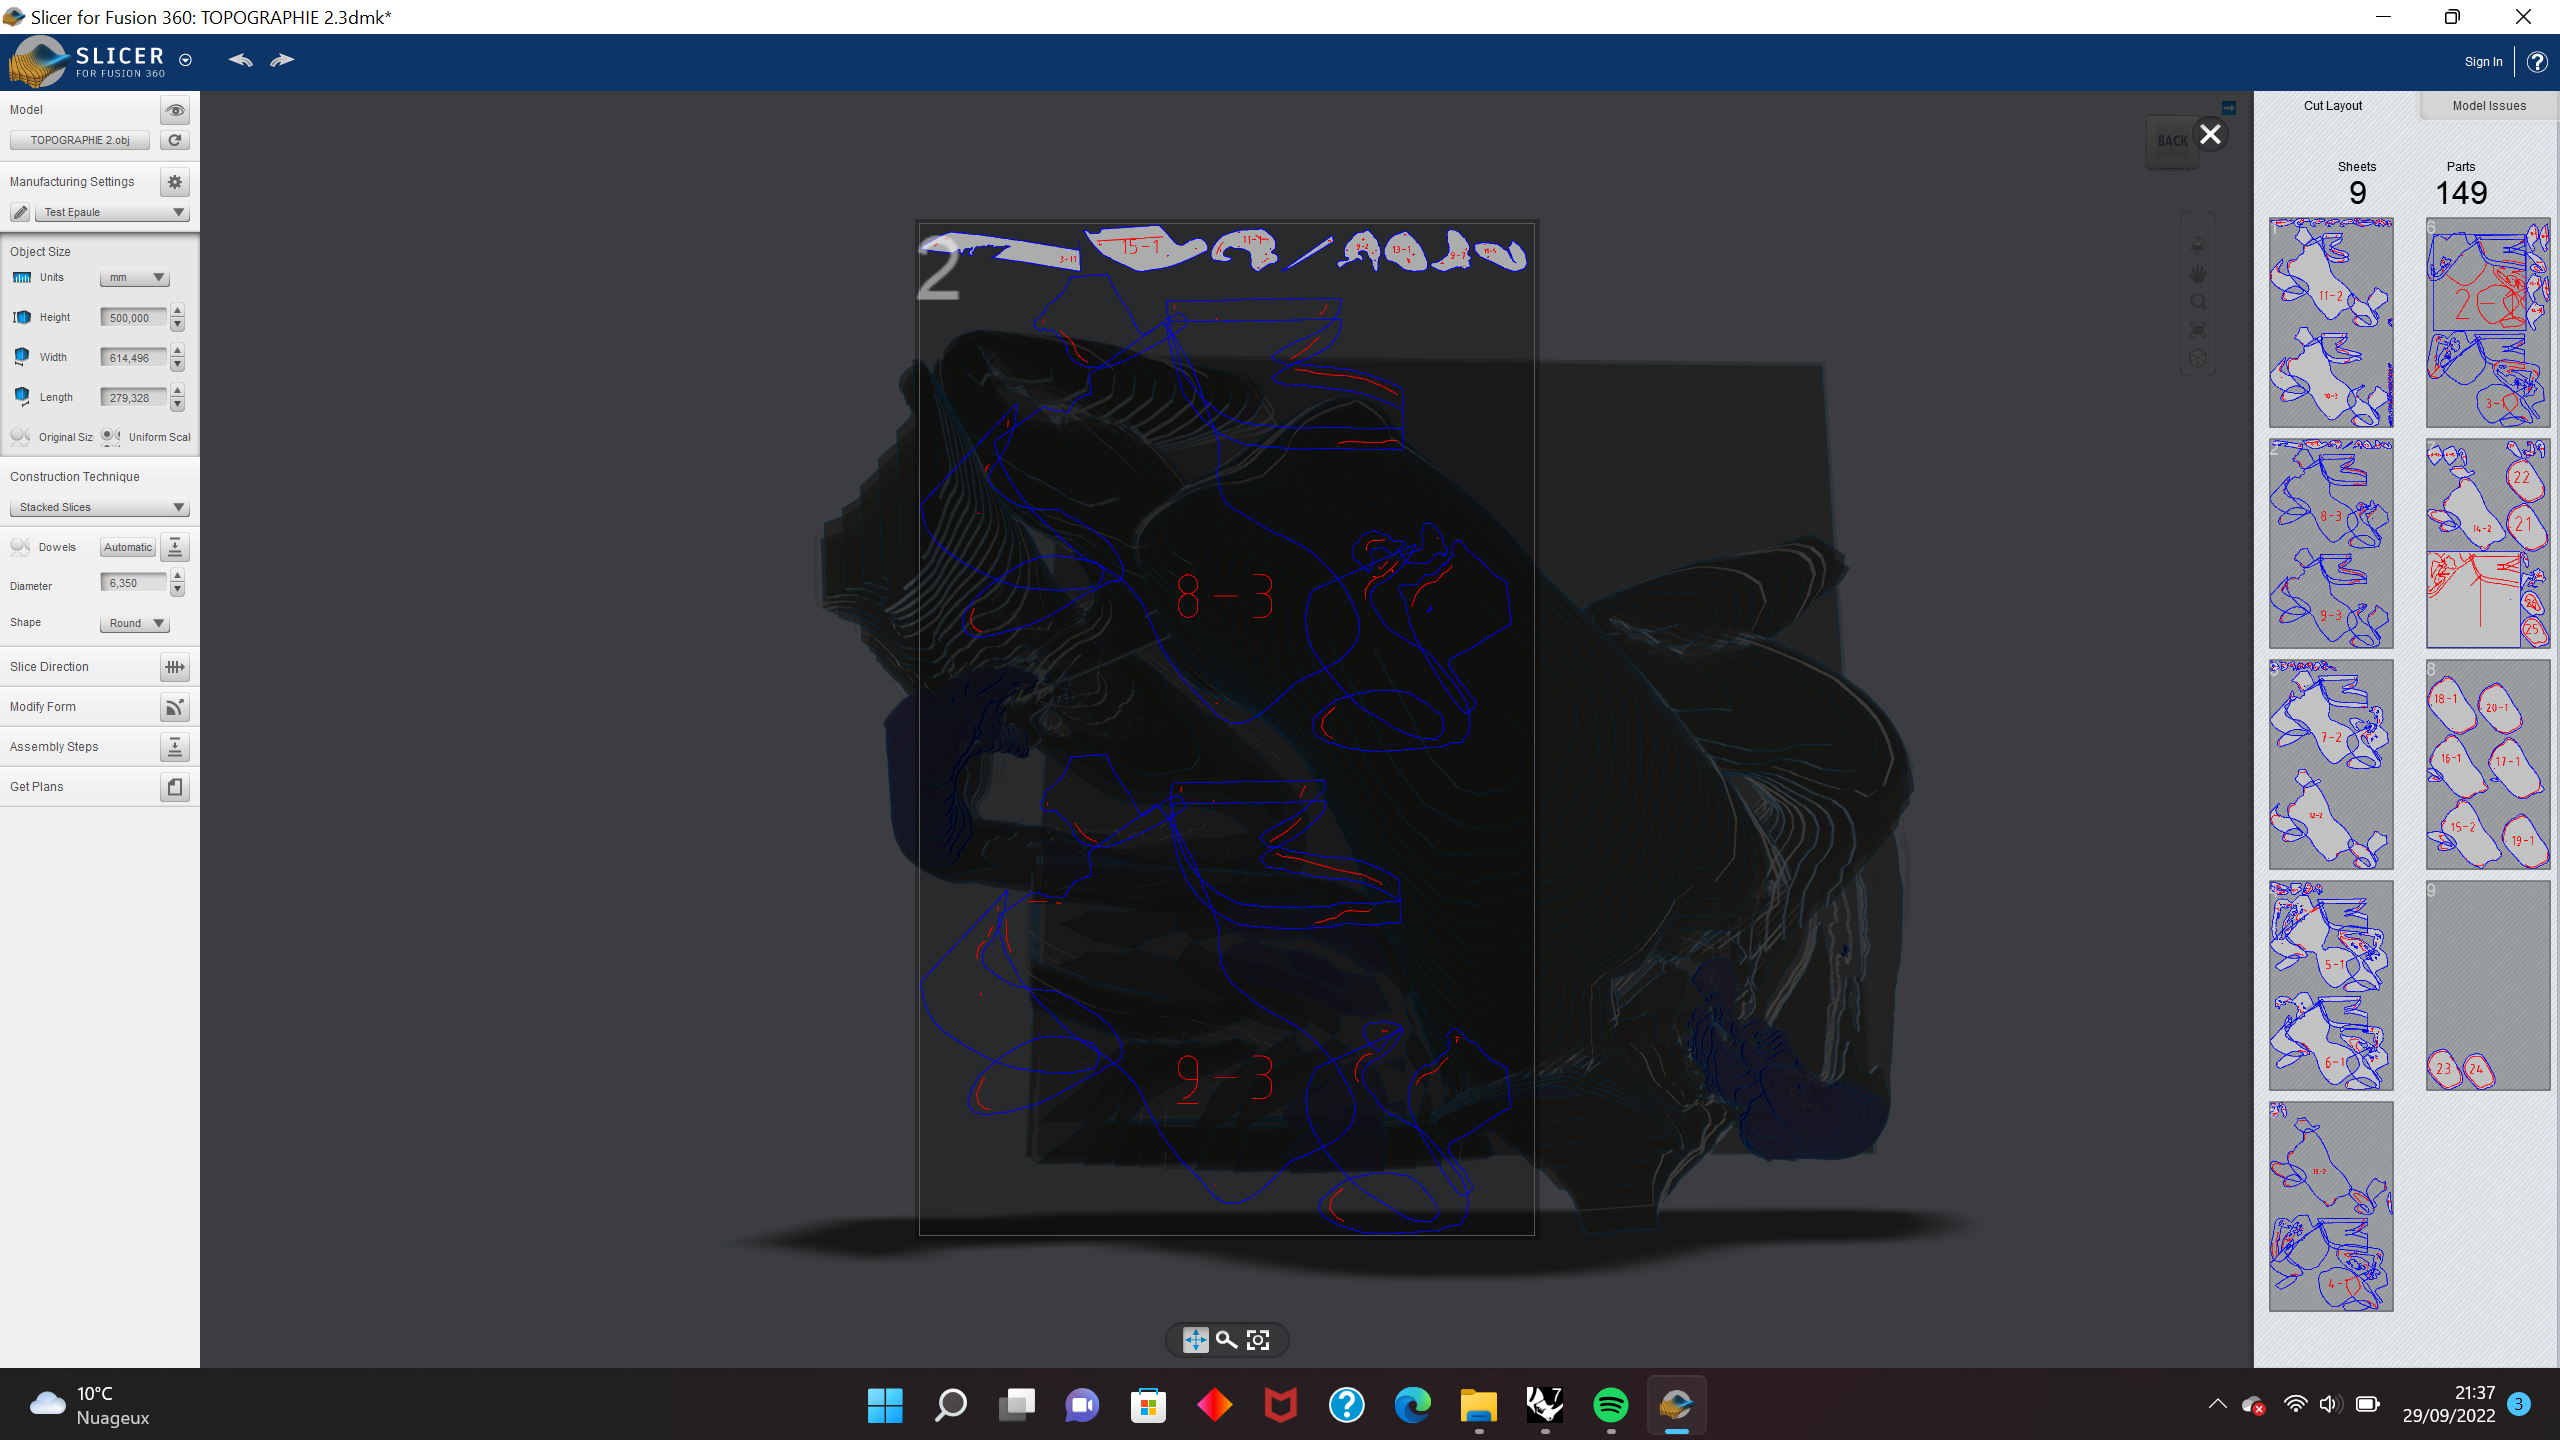
Then I put this design into Slicer. I got plans and chose the "stacked slices" option. Then I optimized them, and I got this:
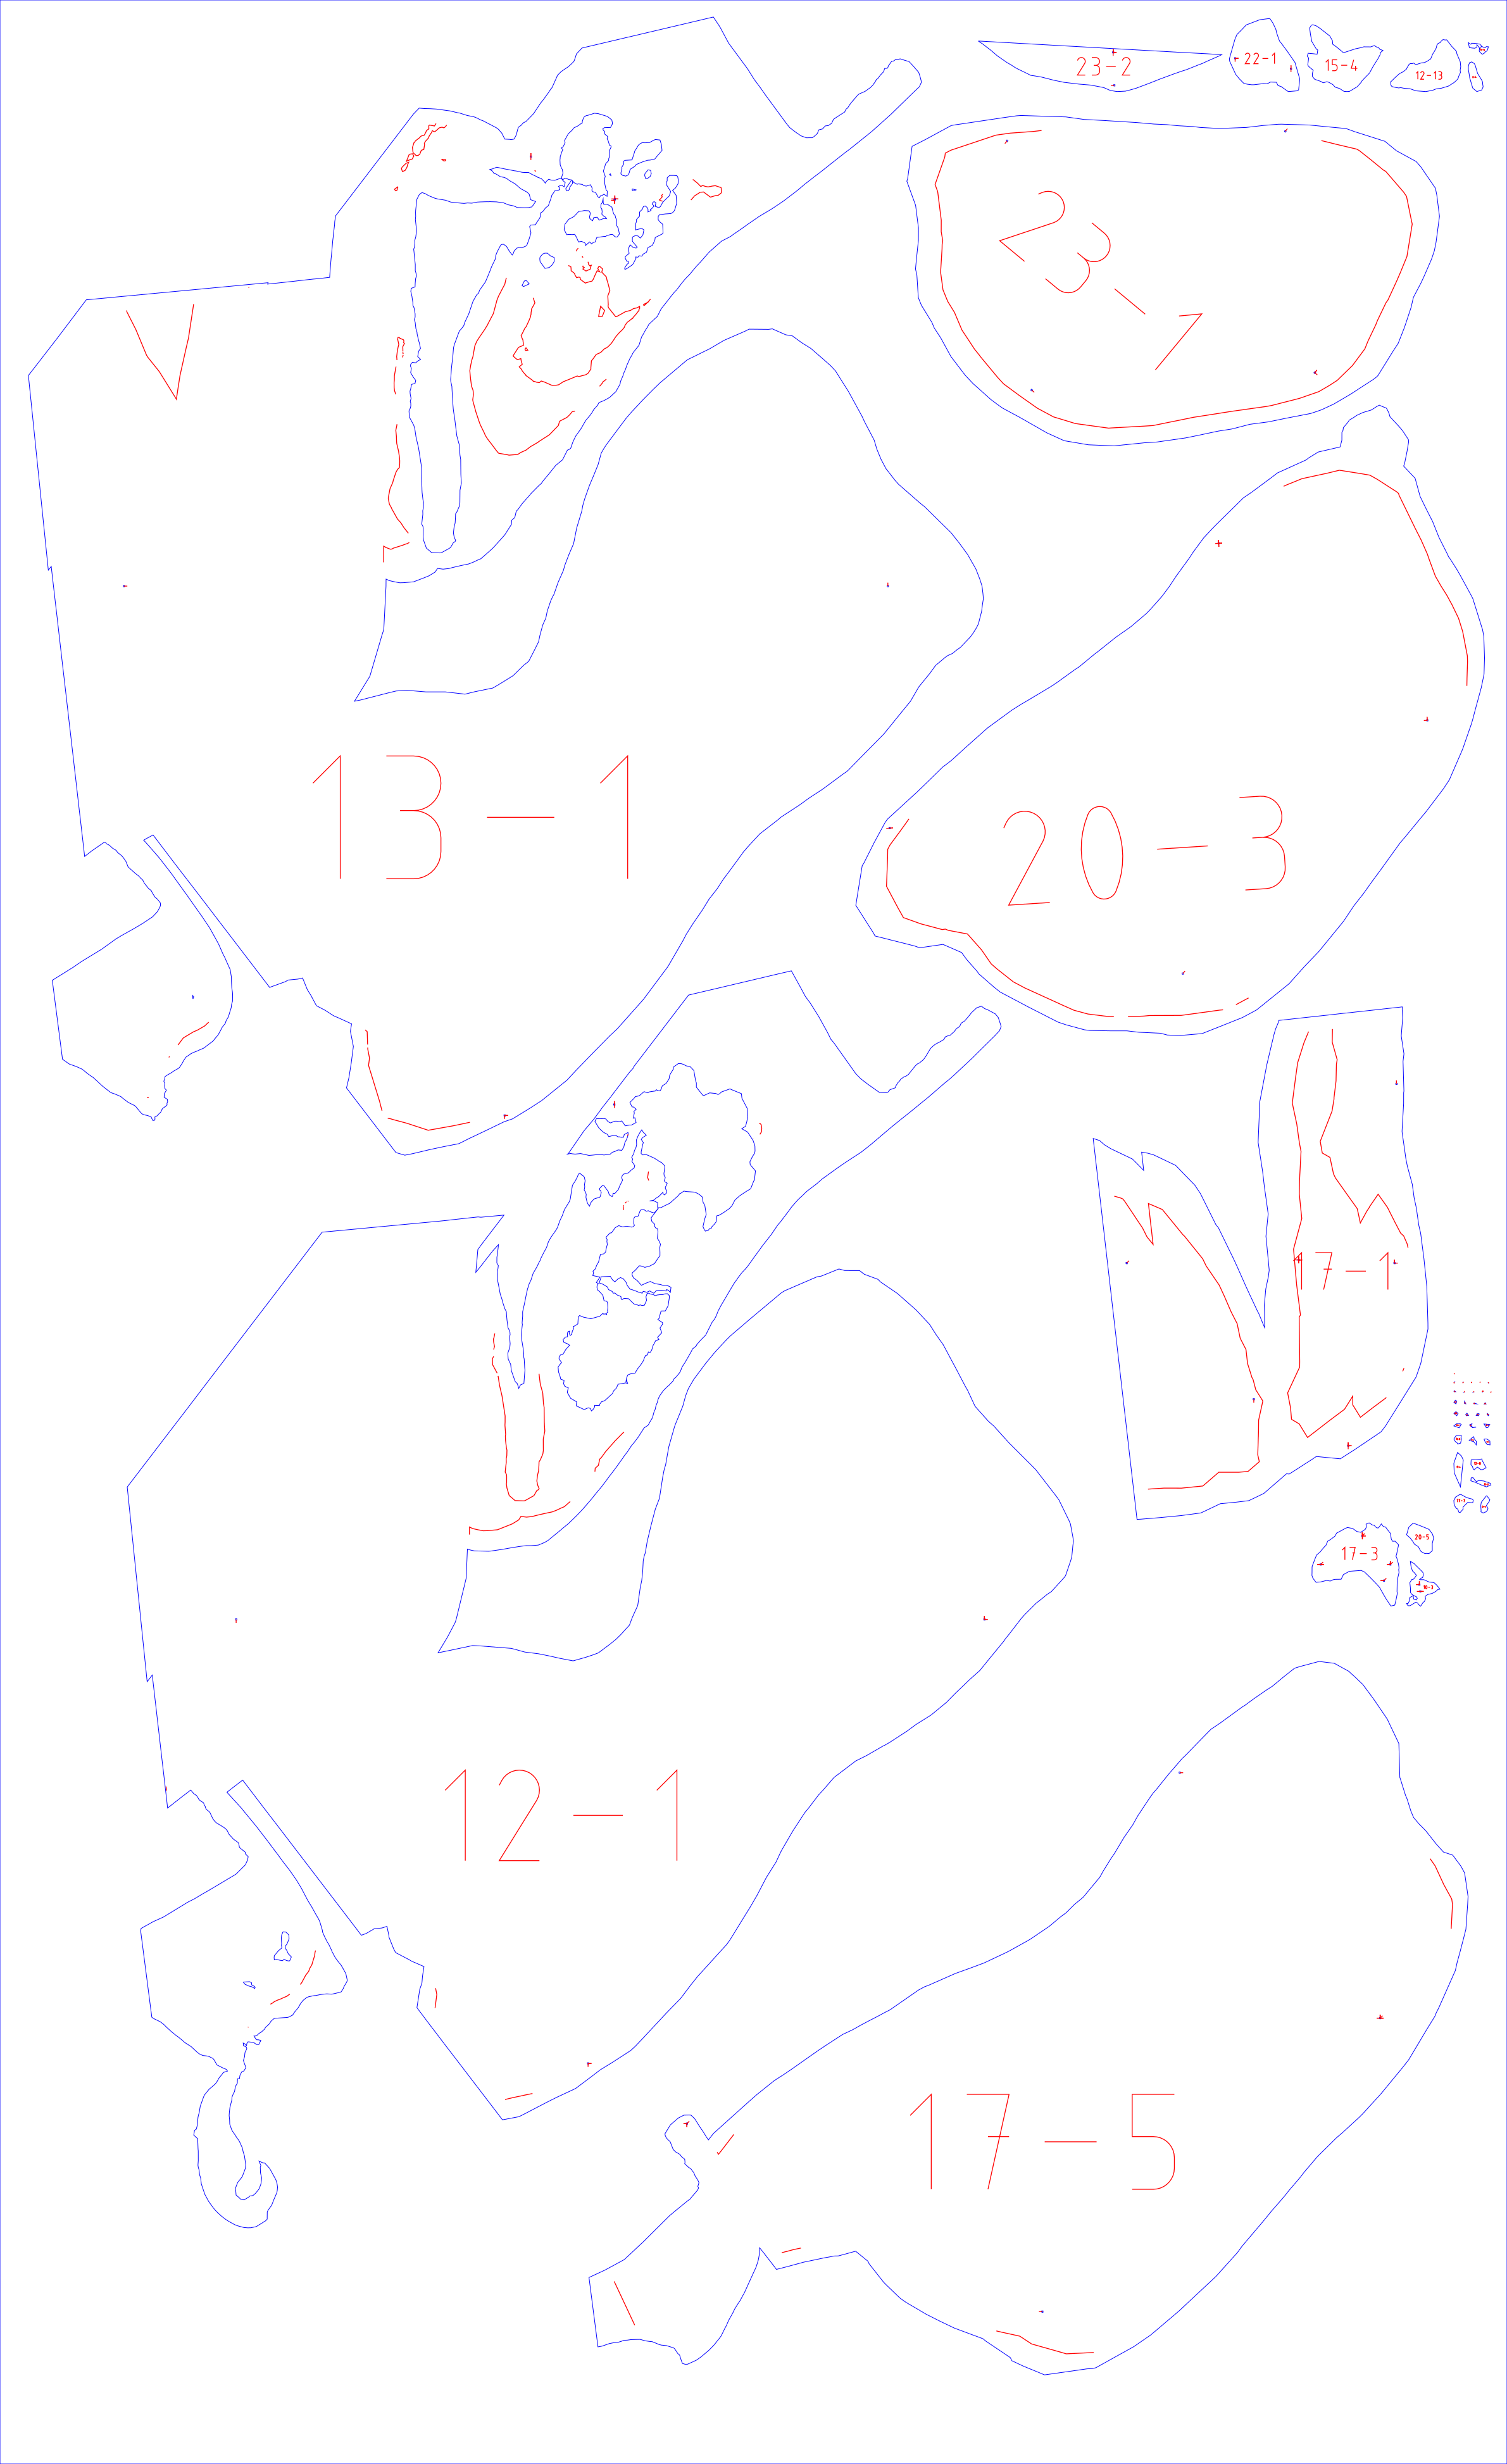
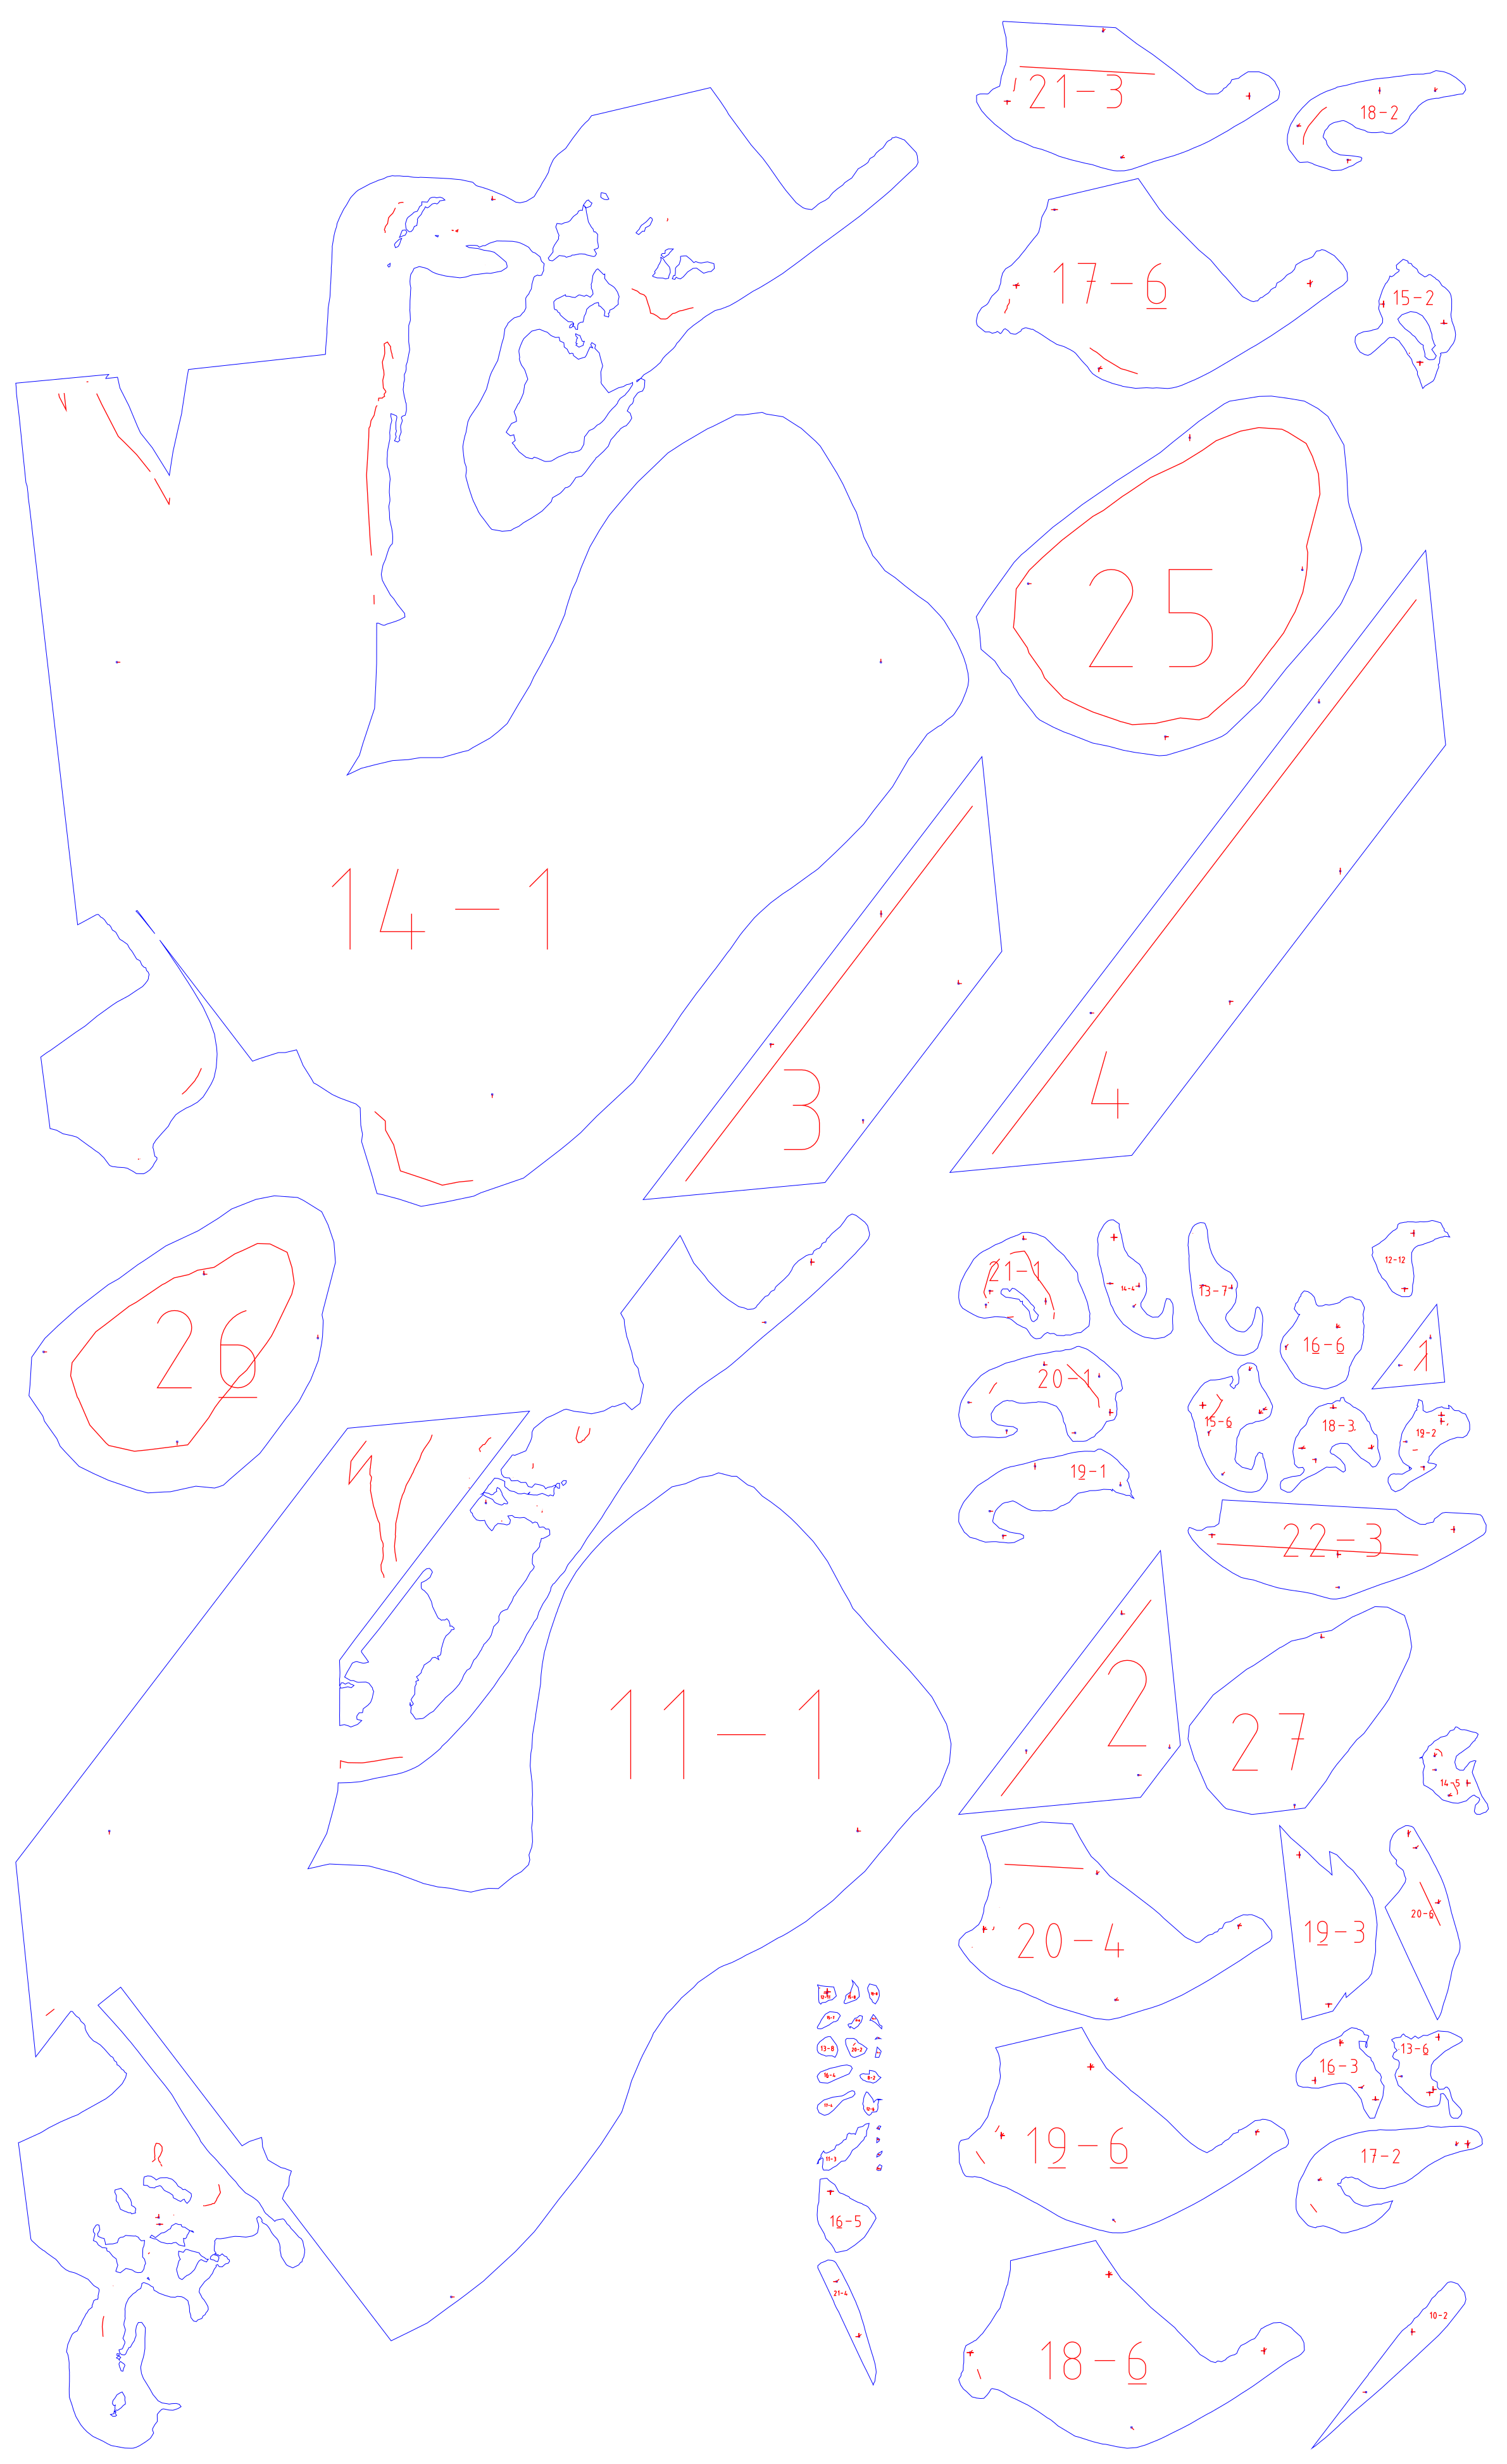
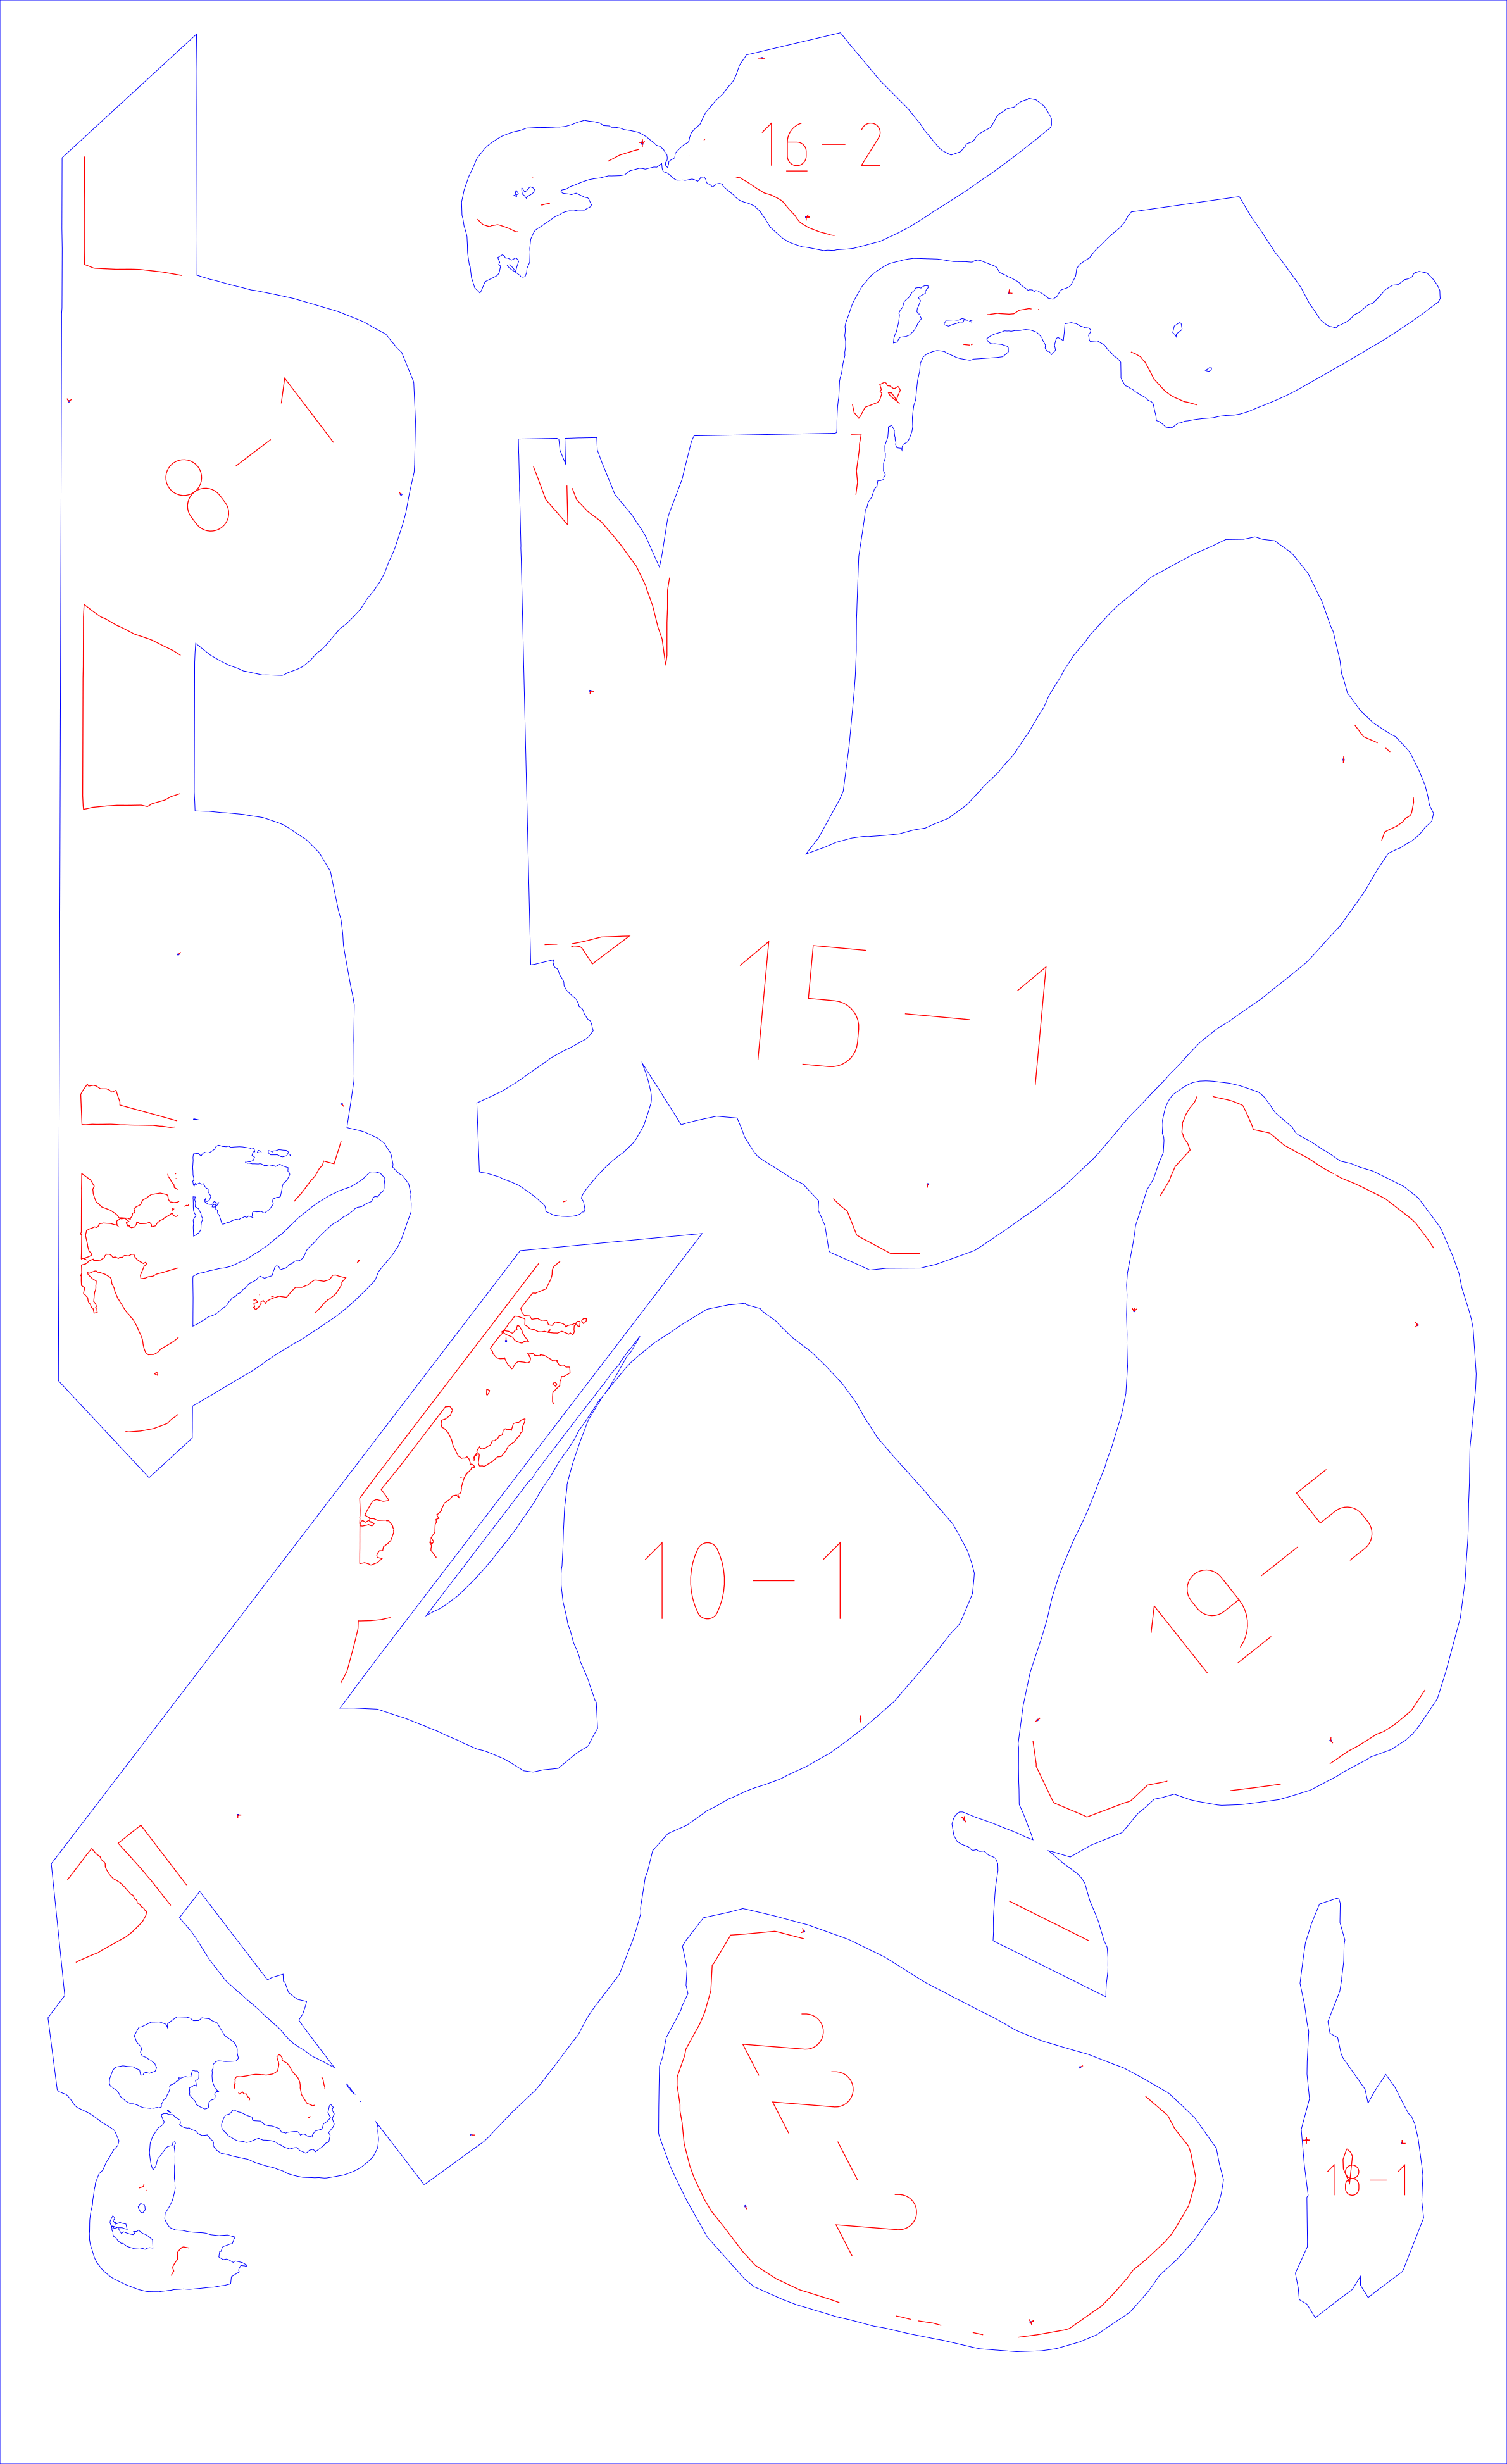
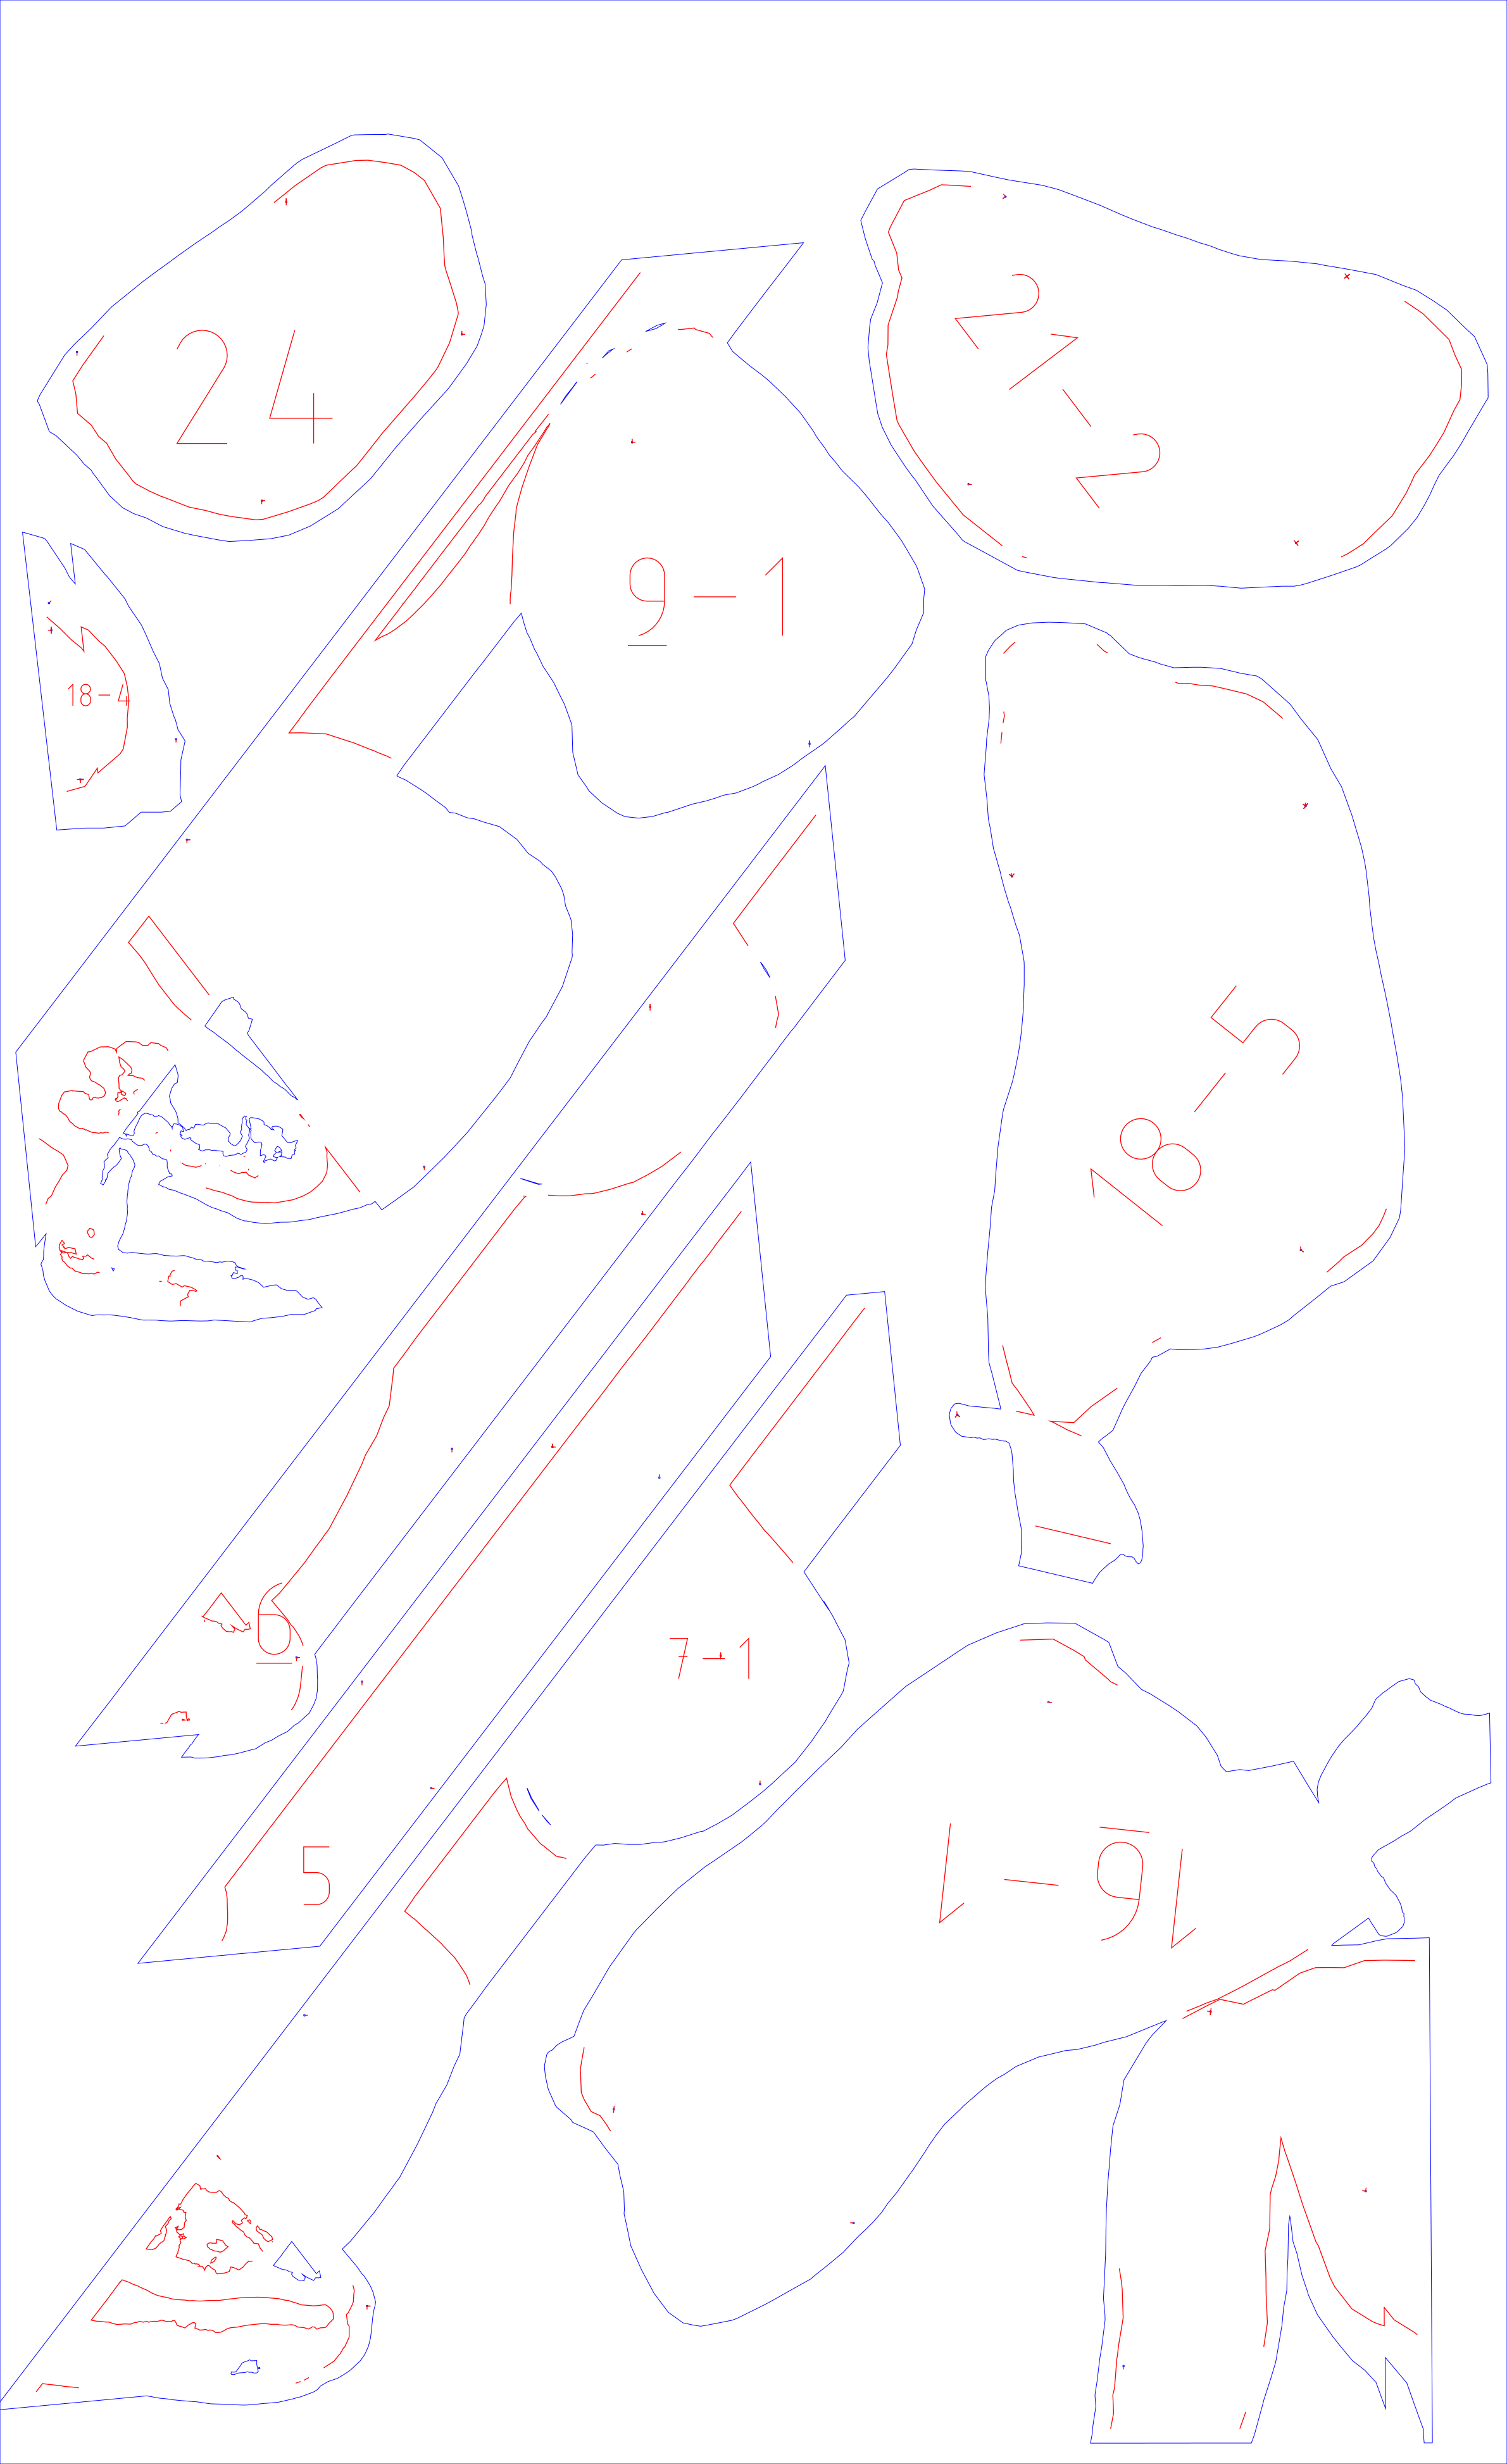
I cut it, assembled it, and finally...