WEEK 04: BioChromes
Previous discoveries
Tamara Louis
Last summer, I had the pleasure to do an internship with the serigraphist Tamara Louis, in Belgium. She is serigraphing, of course, but she is also experimenting and using natural dyeing in some of her researches, especially in collaborations with others designers.

I was really intrigued in discovering new recipes and processes, and others ways to dye fabric (for instance with bacterias!). The very first course of the week, on tuesday afternoon, was very interesting, yet very dense, and I was happy I did some natural dying before, for I was able to follow and understand most of it.
Craftwomen doing vegetal dyeing
I met Dominique Vaes and Françoise Lesage during my recent internship in Belgium.
They shared their passion and knowledge with me. I really felt the importance of transmission from a person to another in this specific technique of natural dyeing. I want to share their work, for it stuns me.
Manjishta - Dominique Vaes
Dominique Vaes dyes silk. She creates clothes and accesories with her embellished fabrics.


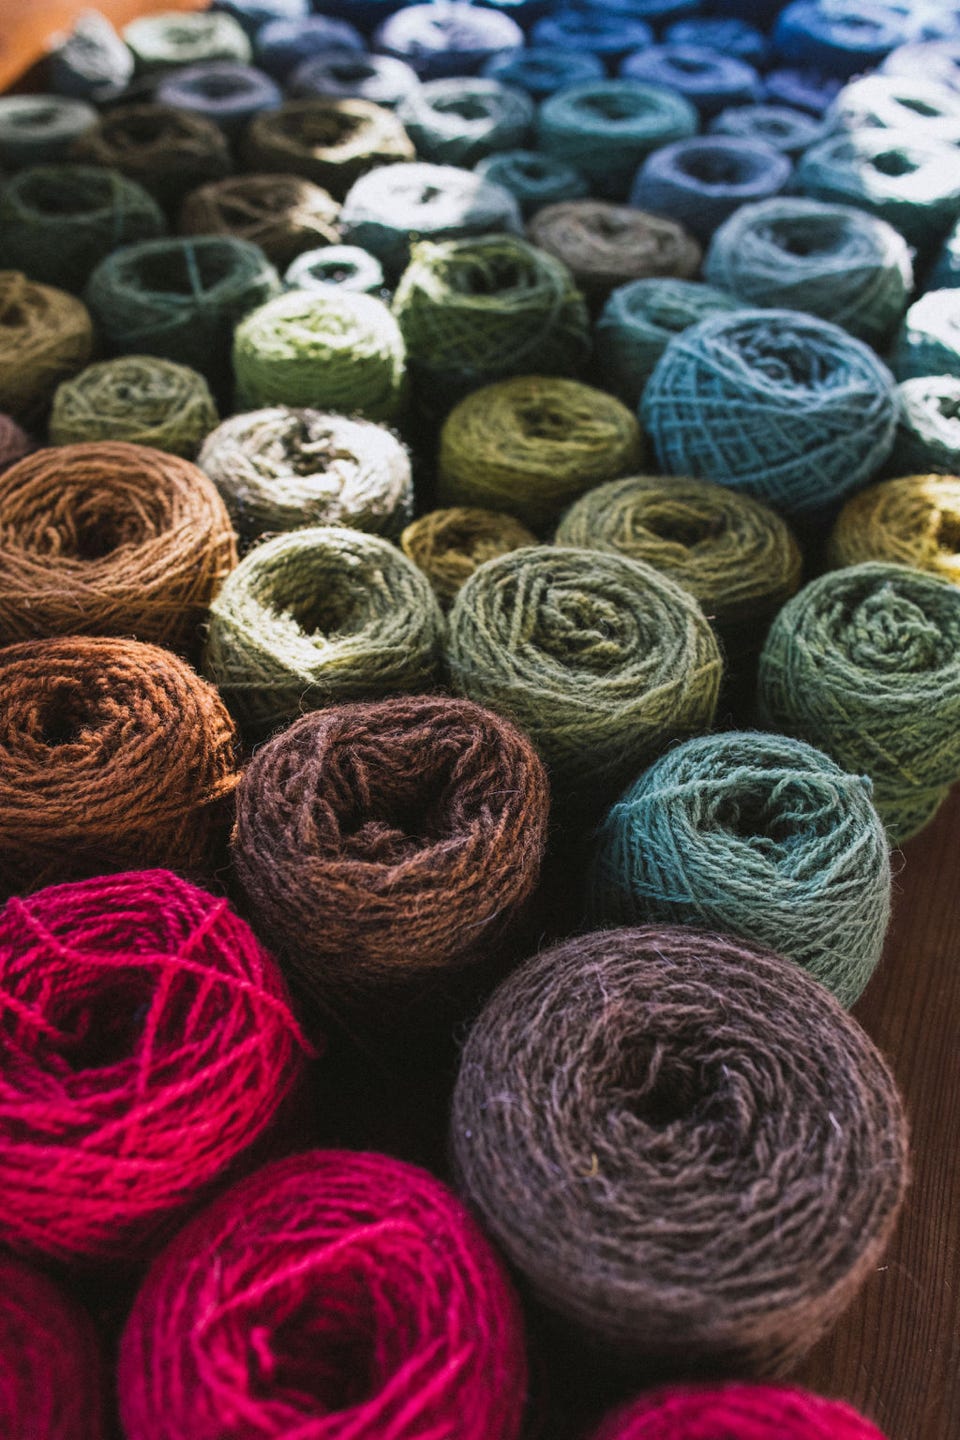
Françoise Lesage
Françoise Lesage dyes wool. Then she knits or weave it to create beautiful fabrics which are meant to be worn or put as ornament into the house.
Her goal is to keep as much control on the production chain, from the sheep to the dyeing process, and to produce it as locally as possible.

Meeting Charlotte Julien
The next day, we had the pleasure to meet Charlotte Julien, who created the brand Margà specialized in natural dying. She was going to be our instructor for the three following days.
She is passionate (just as Cecilia Raspanti is) and she shares her knowledge with us. Her goal is to prove that natural dyes are just as good as (or better than) synthetic ones. Very inspiring to meet people with such goals!


Learning and practicing natural dyeing
About fibers
Before all: preparing and pre-preparing your fabric is very important step in dying fibers, since it enables them to fix the colours. First step when you get your fibers:
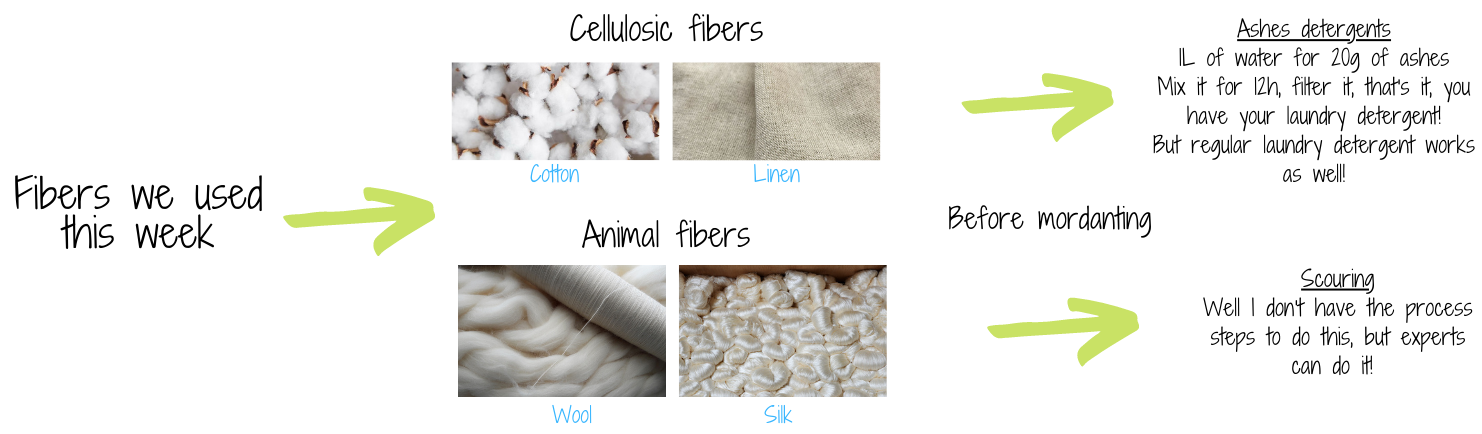
All tests in Le Textile Lab this year were done on silk, cotton and linen, sometimes on wool.
| Material name | Fabric composition | Breathability | Moisture-wicking abilities | Heat retention abilities | Stretchability | Washing temperatures |
|---|---|---|---|---|---|---|
| Silk | Animal fibers - silkworm insect | Highly breathable | High | Low | Low | Cool or warm |
| Material name | Fabric composition | Breathability | Moisture-wicking abilities | Heat retention abilities | Stretchability | Washing temperatures |
|---|---|---|---|---|---|---|
| Cotton | Cellulosic fibers | Highly breathable | High | Low | Low | Warm |
| Material name | Fabric composition | Breathability | Moisture-wicking abilities | Heat retention abilities | Stretchability | Washing temperatures |
|---|---|---|---|---|---|---|
| Linen | Cellulosic fibers | Highly breathable | High | Low | Low | Warm |
| Material name | Fabric composition | Breathability | Moisture-wicking abilities | Heat retention abilities | Stretchability | Washing temperatures |
|---|---|---|---|---|---|---|
| Wool | Animal fibers - sheep fleece | Highly breathable (contains 80% of its weight of air) | High | Low | Low | Cold or cool (wool can felt with high changes of temperature) |
Mordanting
Crucial step too. Without it, your dye won't be fixed onto the fibers. It won't resist washing, friction, or sun. There are two ways of mordanting your fibers, depending on the fibers' nature.
ALWAYS WEIGHT YOUR FIBERS BEFORE STARTING!!
Every step requires a weight to calculate the amount of product to add into the cooking pot.
For the engallage, you need 10% of the fibers'weight of tannins (here the Gall nut). For the alunage, you need 30% of the fibers'weight of alum.
For instance, for our mordanting process, we had 734g (rounded down to 730g) of cellulosic fibers, so:
- 730 : 10 = 73g of tannins
- 730 : 10 x 3= 219g of alum
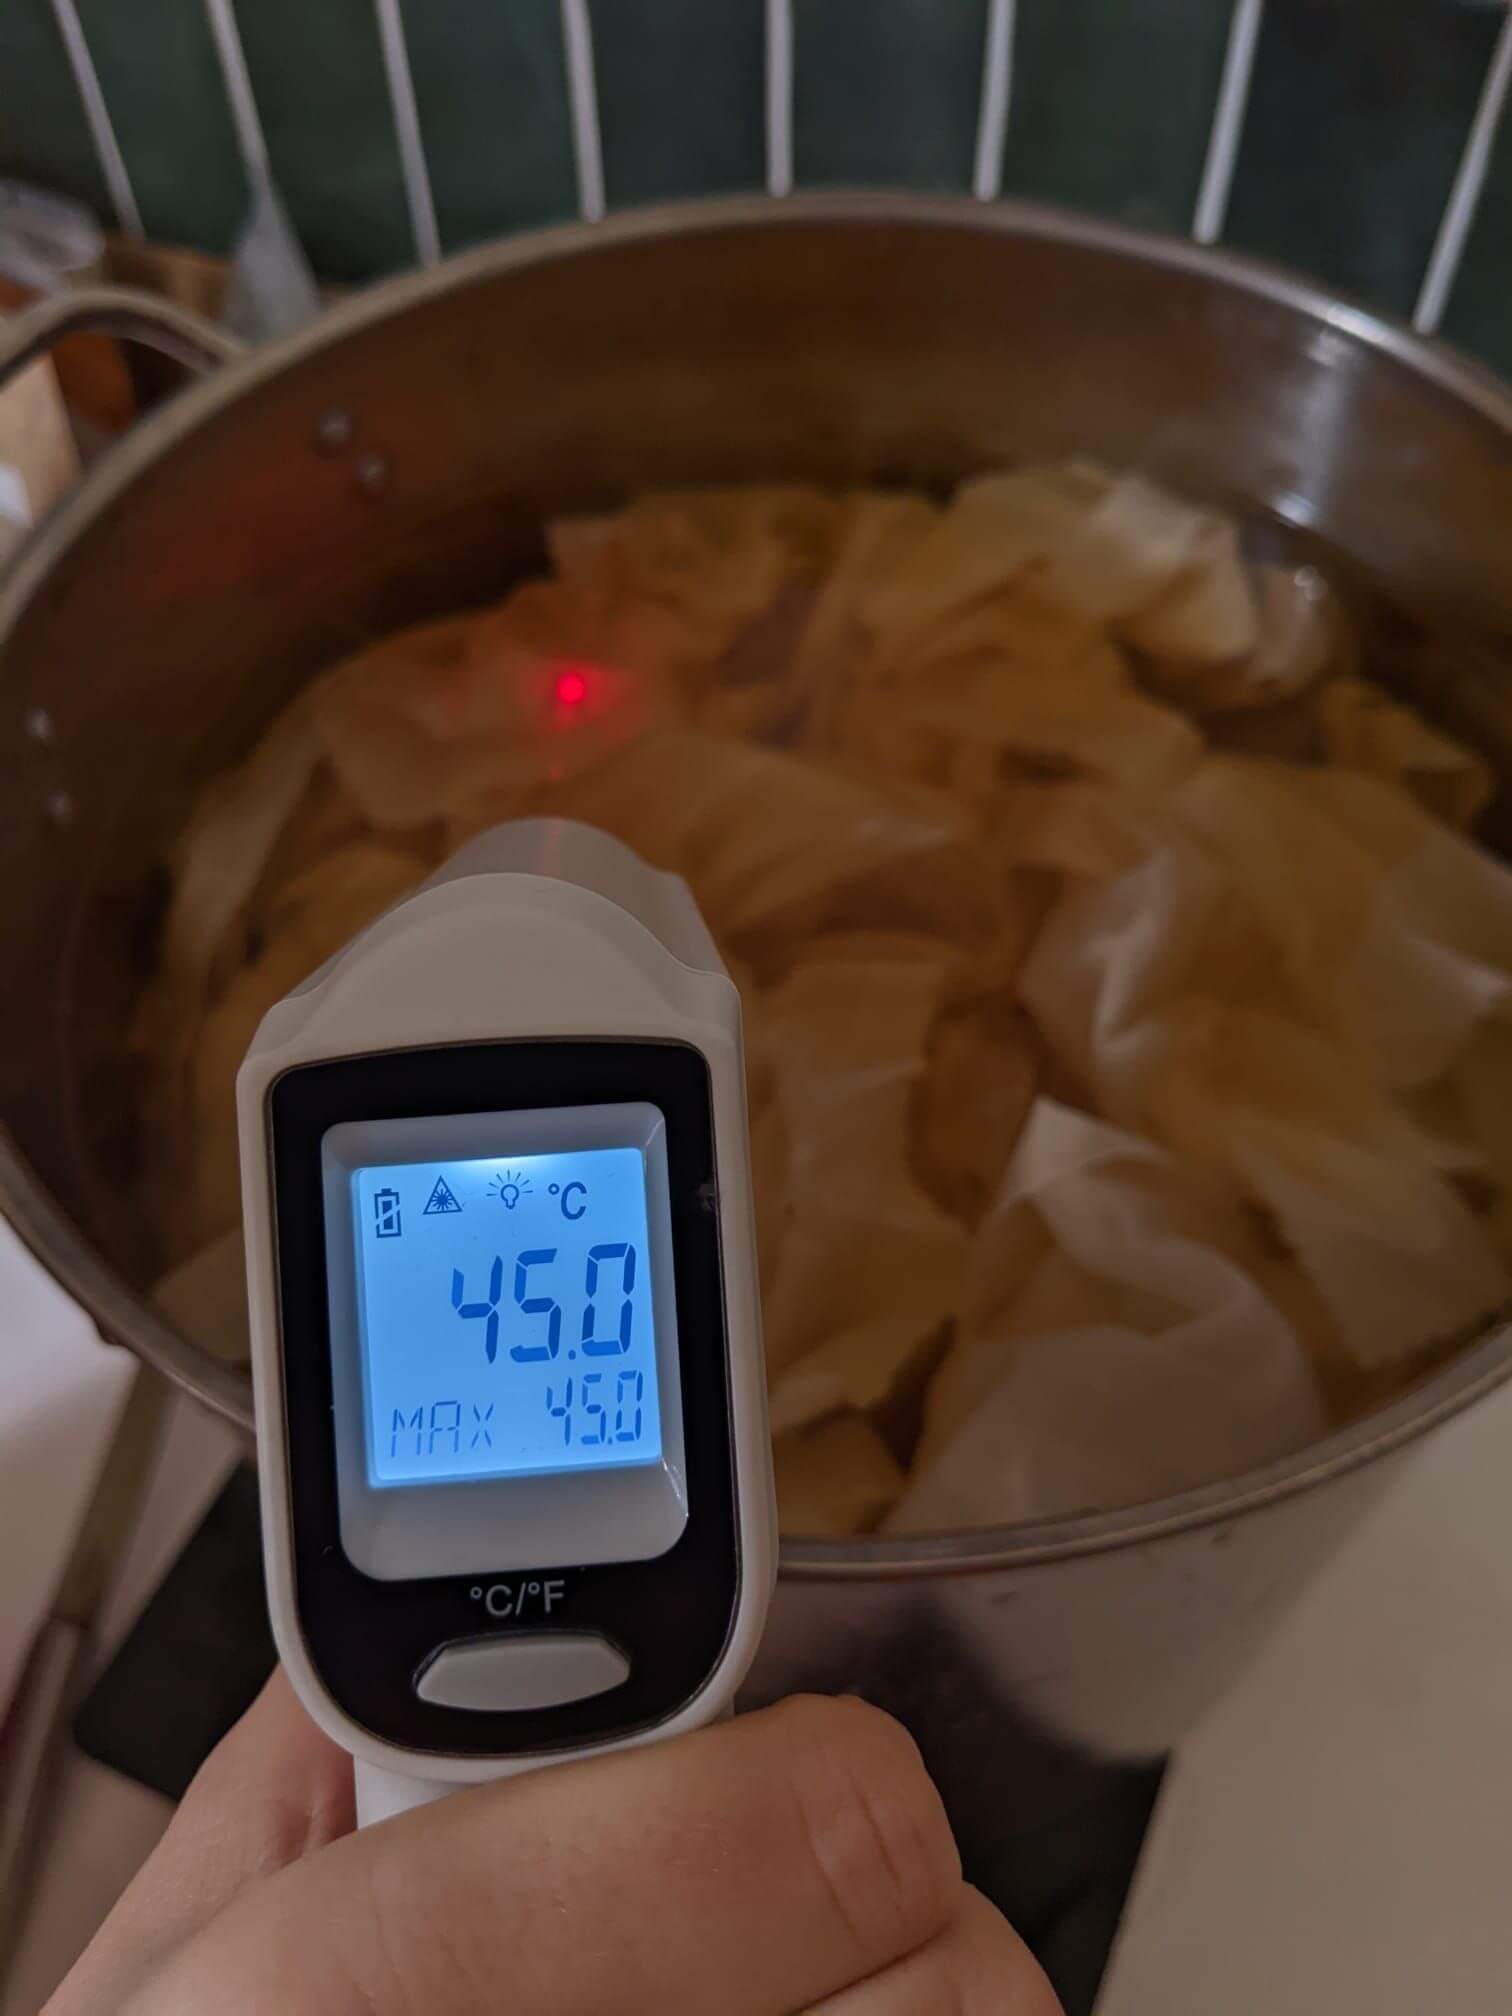
Mordanting cellulosic fibers
Step 1- Put in Bath 1 - Engallage (70°C), during at least 1h.
Etape 2 - Let it cool slowly, let the fibers into the pan during the cooling time
Etape 3 - Take the fibers out of the water wringing them softly
Etape 4 - Rinse with clear water
Etape 5 - Put in Bath 2 - Alunage (70°C), during at least 1h.
Step 6 - Take the fibers out of the water wringing them softly
Etape 7 - Rinse with clear water
These two steps can be done one, two or more times, the more is the best in term of solidifying the colours further.
Also, engallage isn't necessary, but it also enables the fibers to fix more colour.
Mordanting animal fibers
With the animal fibers, there is no need to do the engallage (with tannins), because there are already protein molecules into the animal fibers.
Step 1 - Put in Bath 2 - Alunage (70°C), during at least 1h.
Step 2 - Take the fibers out of the water wringing them softly
Step 3 - Rinse with clear water
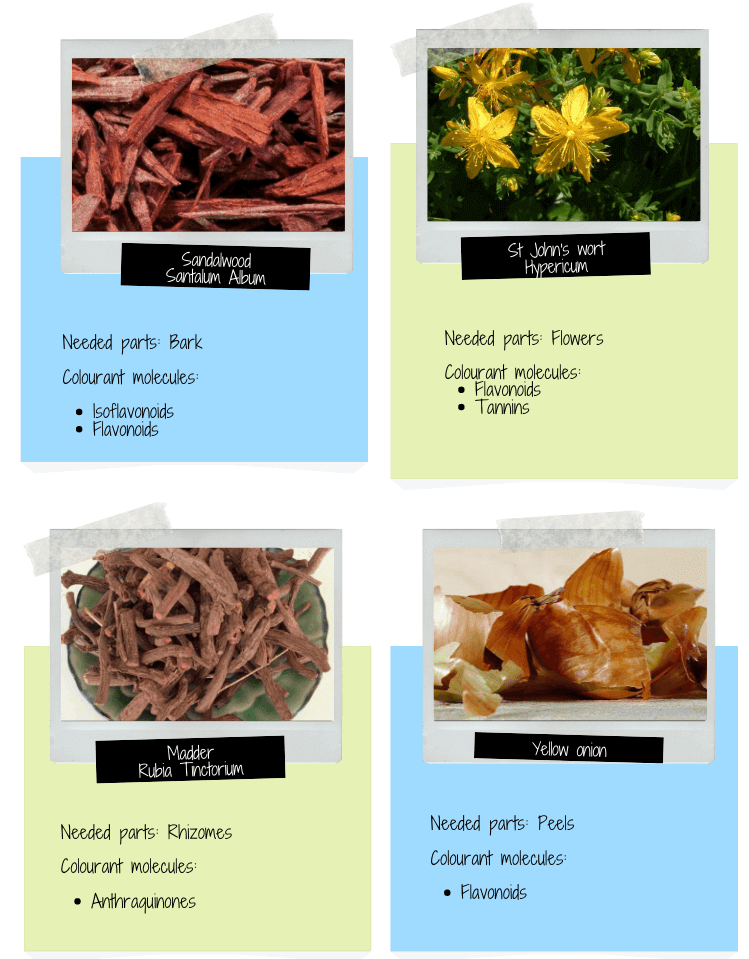
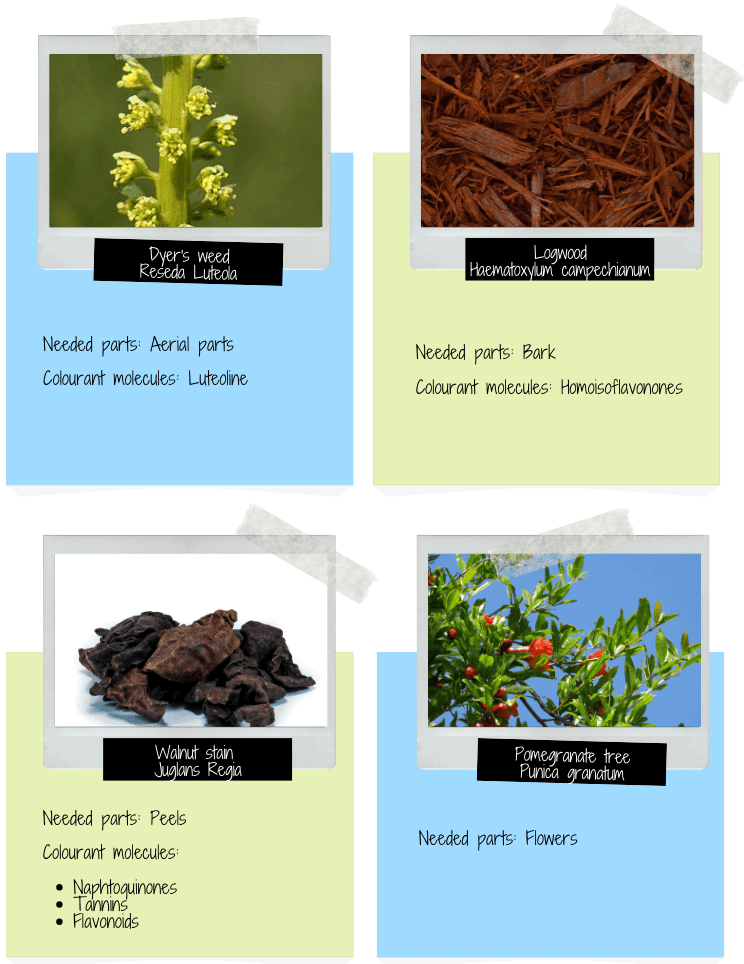
About plants
Serigraphy
Printing pastes
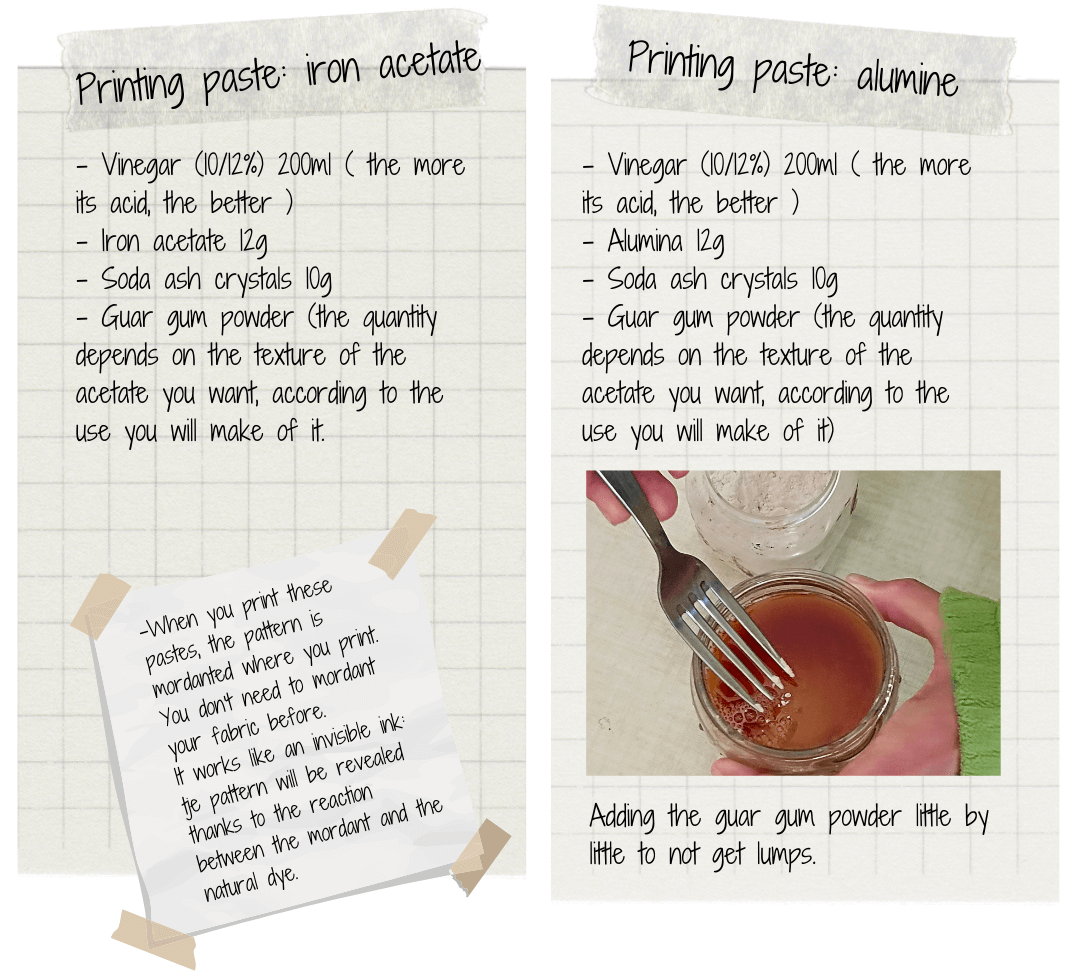
Printing pastes
1 - In a beaker, pour the vinegar, then the alumine sulfate (or iron sulfate), then the soda ash crystals.
Make sure to respect the ingredients' order.
Add the soda ash crystals little by little.
Beware of the acido-basic reaction, it foams.
2 - Stir it well, no lumps are allowed!
3 - Add the guar gum powder little by little (as said in the recipe above)
The texture should be honey-like.
You can preserve it for a week approximatly.
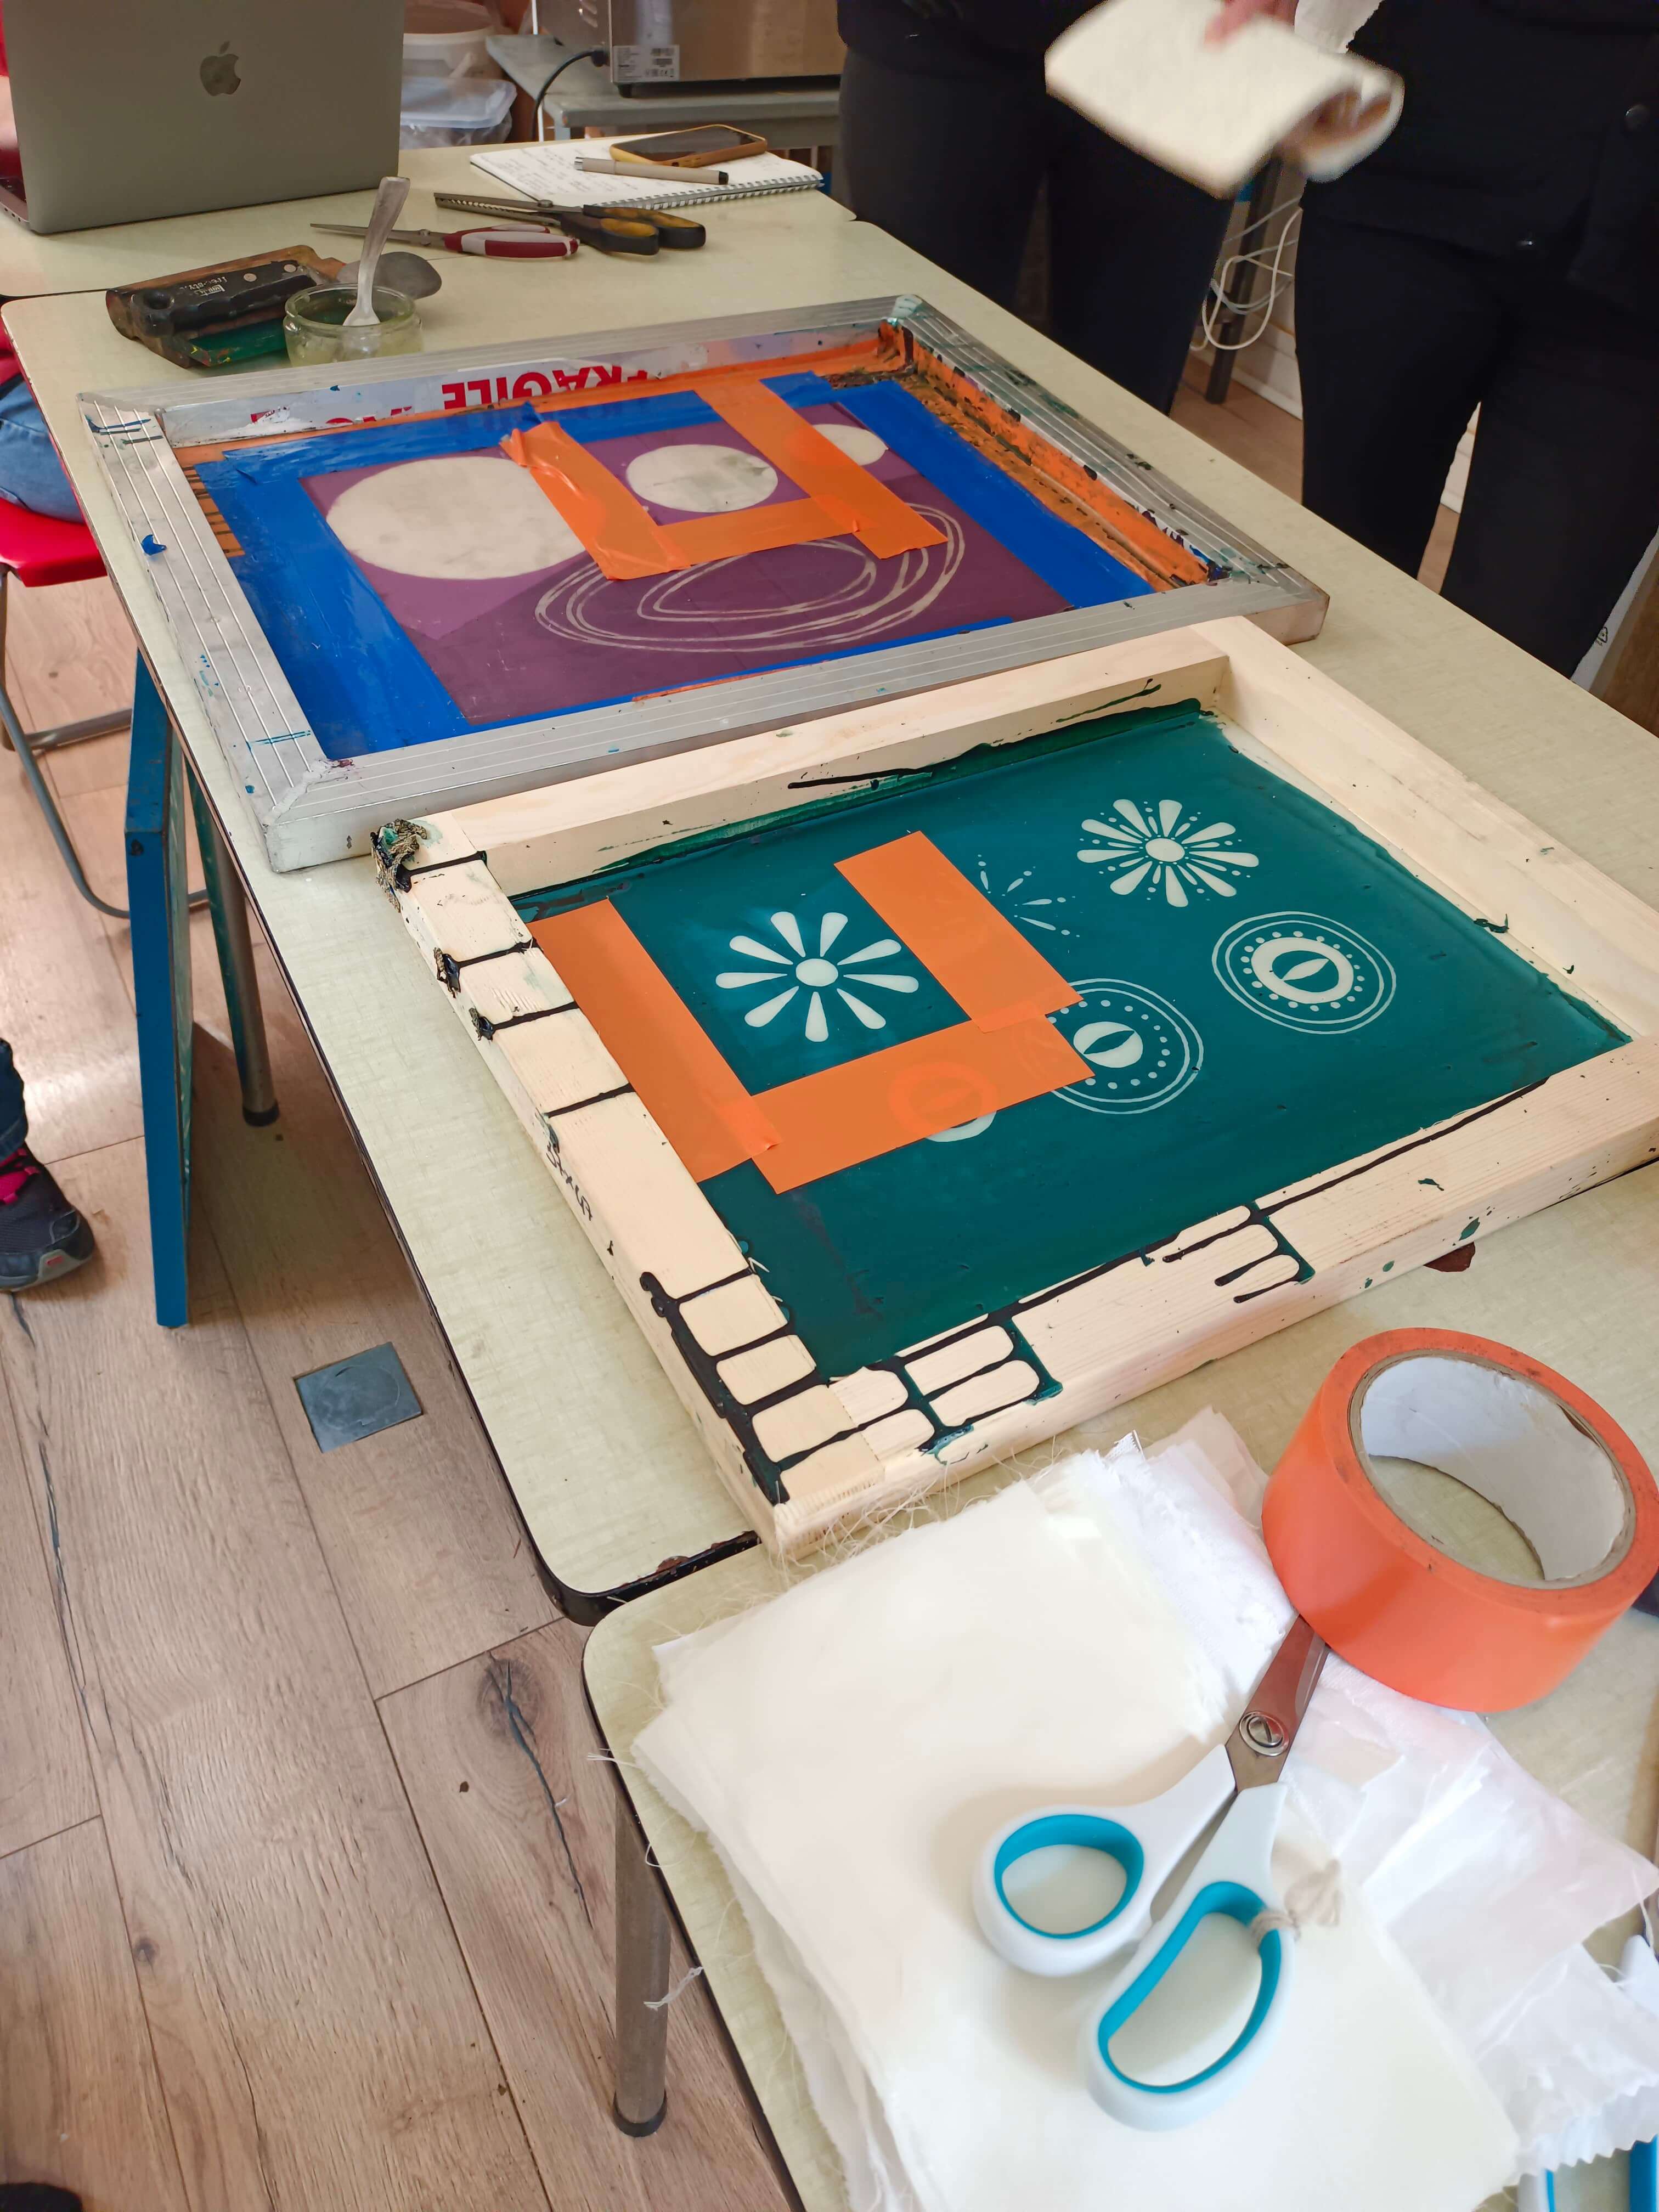
For serigraphy
-Beaker
-2 bowls (one for the iron acetate, one for alumine acetate)
-Spoons
Tool for printing :
-Screen printing frame previously insolated
-Squeegee
-Spatula
-Printing paste with iron and alum
Then you can print. The iron acetate appears in a dark brown tint, while the alumine is transparent. When dried, both mixtures confer a cardboardish touch to your fabric. Wait until it is fully dried.
You can put it into a dye baths. The one we used are:
- Madder (50%)
- Dyers'weed (150%)
- Gall nut
Results
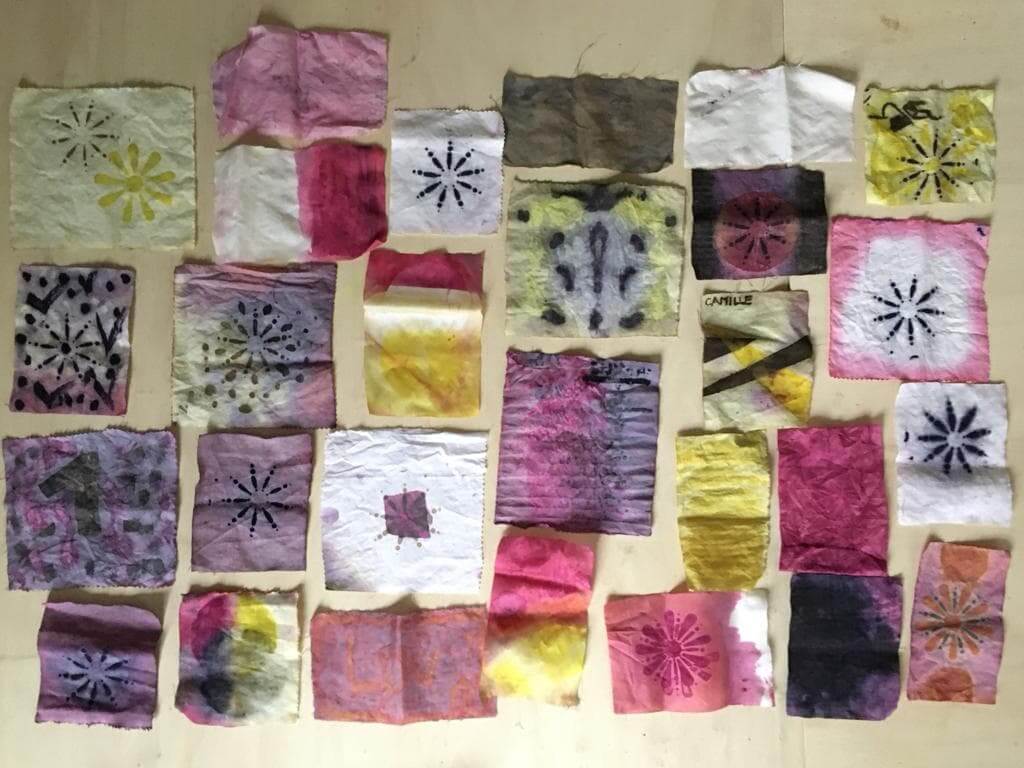
Only the parts that are printed with mordant will keep color. Nonetheless, as you can see here, some parts of the samples are coloured while they shoudn't. There will have to be several rinsing processes to get rid of that unwanted color.
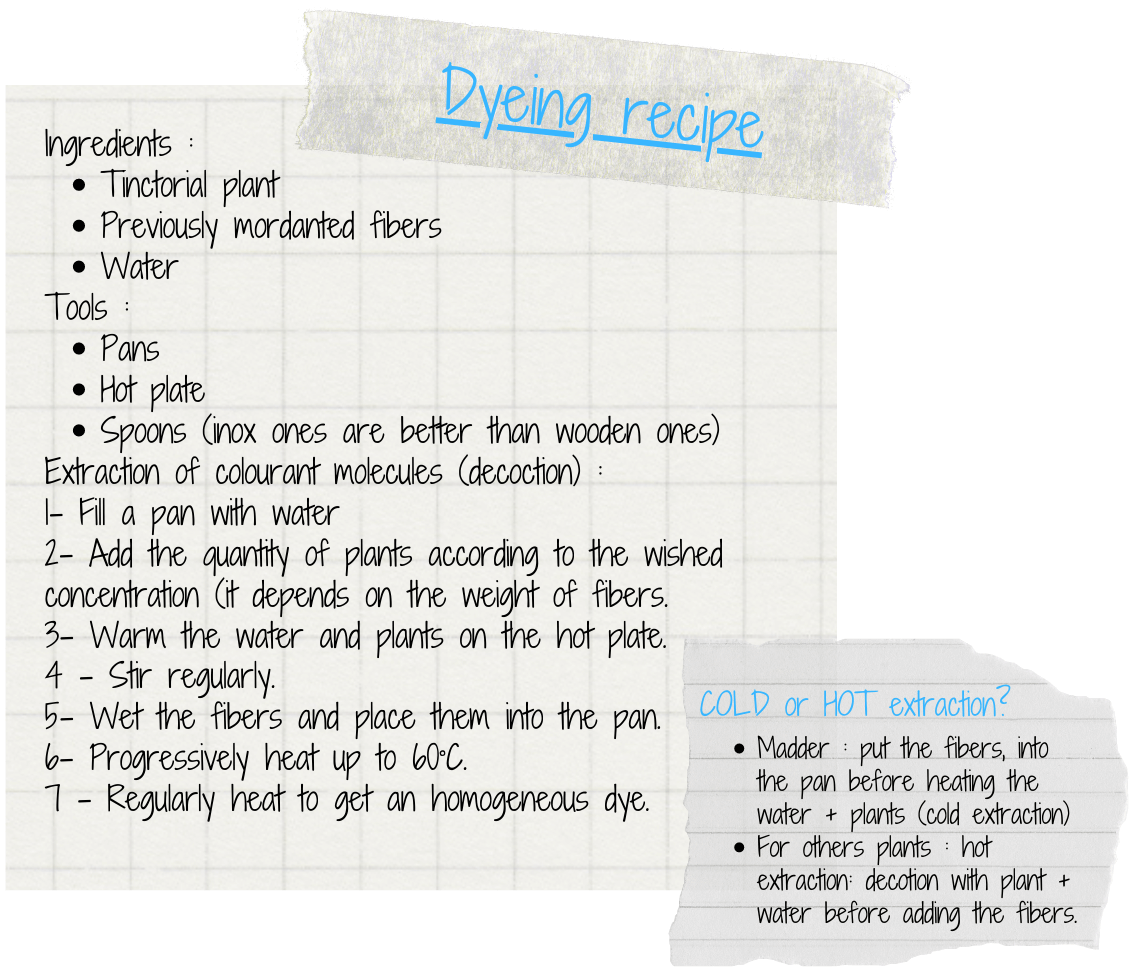
Dyeing
Saturation
The saturation of plants is more a matter of quantity of plants in the beginning of the process, than of time you let them dying in the mixture. But the more you let the fibers into the dying mixture, the stronger the dye will be!
General process
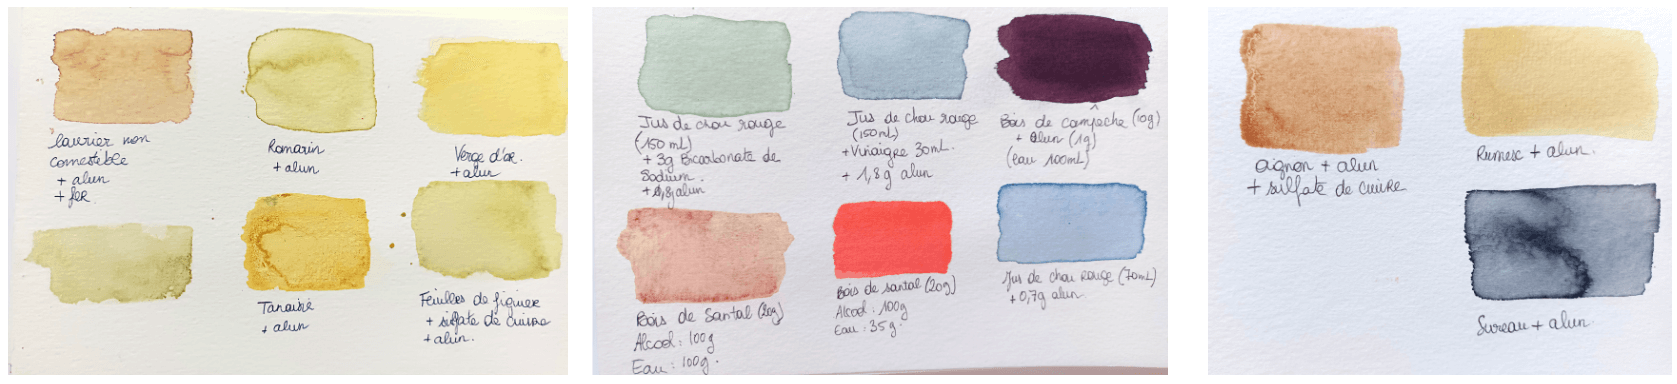
Results of the tests
For you to understand better the percentage (and because it took us some time to understand it), let's explain how it works:
For instance, for 130g of fibers:
Bath of a concentration of 100% : 130g of plants
Bath of a concentration of 30% : 130 / 10 x 3 = 39g of plants
Bath of a concentration of 300% : 130 x 3 = 390g of plants
These calculations are made everytime you want to create a dye bath. The following results are precised with the percentages of concentration.
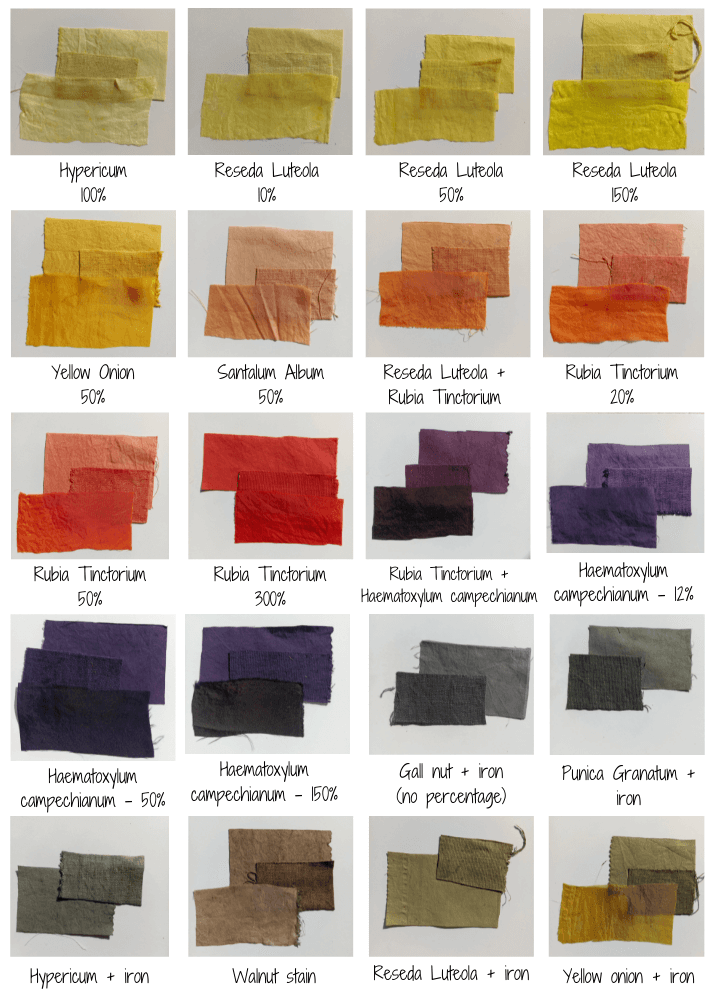
As you can see, some colors are a "mix" of two plants, but in fact you the best is not to mix plants in your dye bath, but to immmerge your fibers in a first bath, then in another, for it grab both colors. The magic mixing appears at that moment.
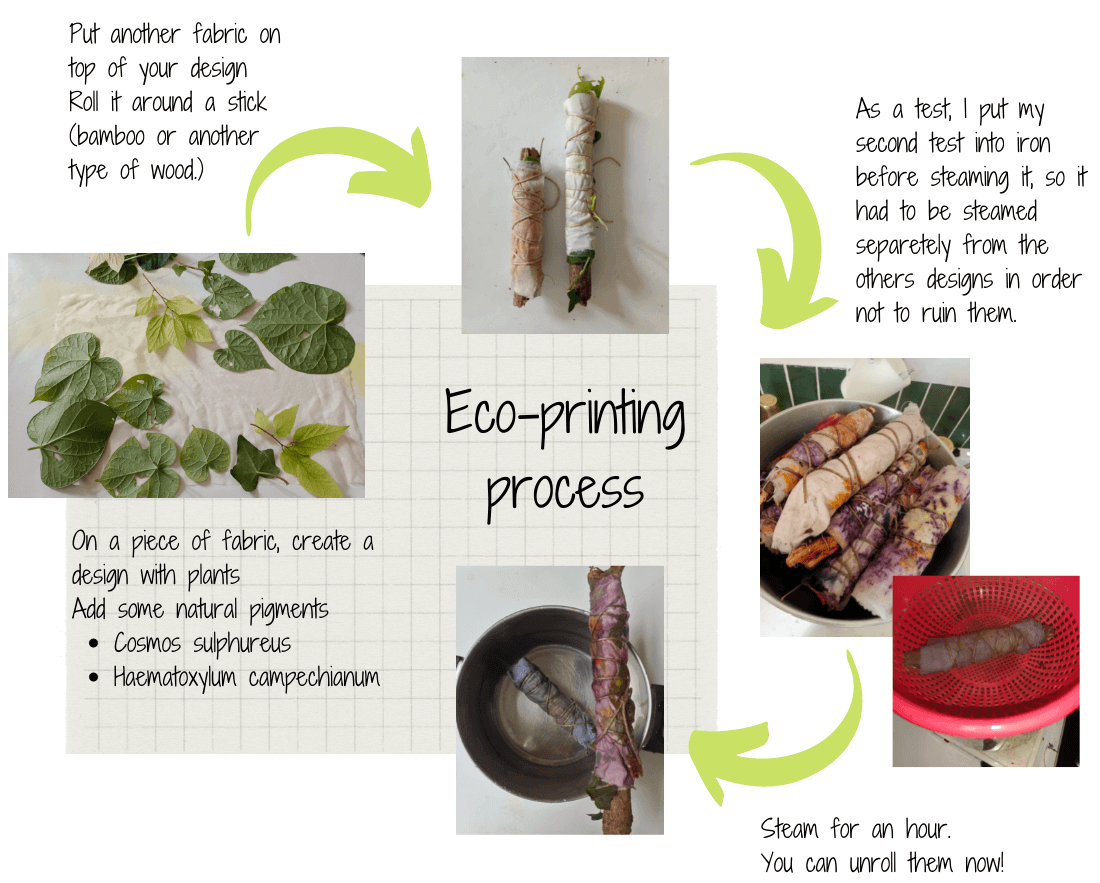
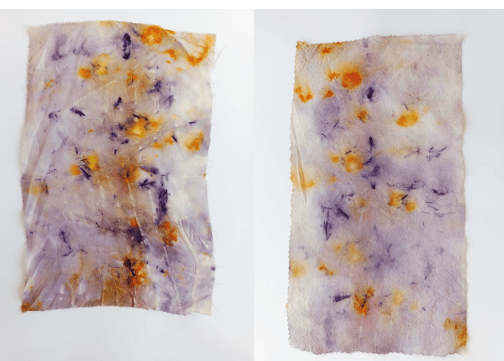
Eco-printing
We had the opportunity to try on some ecoprinting.
The result
Inks
Recipe for making inks out of dye baths
- Measure a quantity of alumine
- Add the same quantity (weight) of left-over dye bath (of your choice)
- Mix together
- Thicken the mixture with guar gum powder (or rice flour, gelatin, amidon, arabic gum, depending on the use targeted; inks doesn't have the same consistency when it is for serigraphy, painting, linocuts..)
Results

To fix the ink onto the fabric, steam it for 1 hour.
Inks are less solid than printing pastes.
It can be preserved for 1 week maximum.
Recycling the dye into pigments
Ingredients & Recipes
Prepare this recipe by collecting the ingredients necessary, to be found in the list below:
ingredients
- 200 ml madder root dye bath (it has already been used for dyeing fabric before, so the color was less intense eventhough it was really concentrated in the first place)
- 20g alum
- 5g soda ash crystals
Here is a video that shows the process of mixing the ingredients for making the dye bath into pigments. The order described in the video is important to respect, otherwise the reaction won't happen.
Conclusion of the week: still amazed, still curious!!
Well well well... what can I say except that this week gave me more will to explore this field?
I personally love colours, and discovering the power of plants is still a mind-blowing experience to me.
I will pursue this path with tests and production (as gifts, from nature, by nature, with a little bit of help from me.)
I really want to thank Charlotte Julien, who did great this week, sharing her passion with us!