WEEK 03 : Circular Open Source Fashion
This week was about creating modular patterns and modules in order to design garments in an alternative way that would follow the circular way of producting fashion. The idea was for it to be open source, allowing anyone who would like to produce with this philoshophy in mind to dive into it without starting everything over.
Here you can find the file of the project on OS Circular Fashion, a library of modules (but not only) that is useful when you want to discover utilizations of modules.
Inspirations from others years
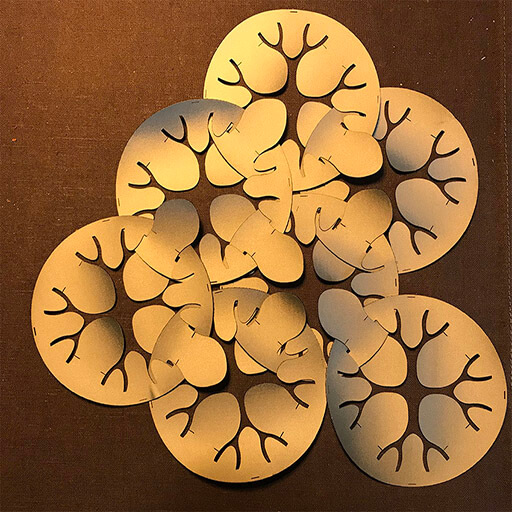
Janvi Gohel
The pattern here is interesting, since it uses a circle and very organic shapes that create volume and refinement on the final proposition.
Pauline Bianchi
Haeckel is also an inspiration to me: his drawings are very delicate and imaginative.
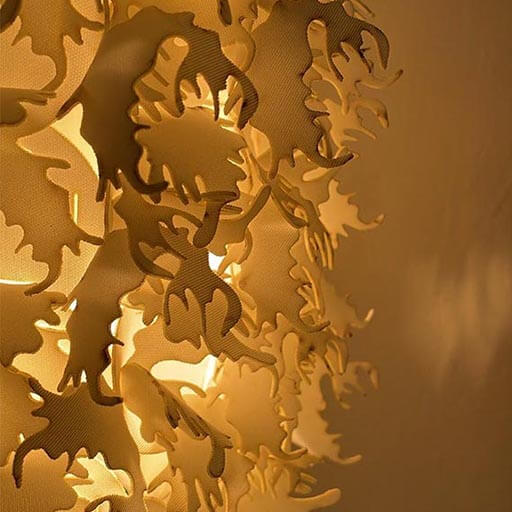
Brunna Ramos
 The use of different colors and materials, and the variation in the sizes of the modules give depth and poetry to this design, which I particularly like.
Theme
My first idea was to work with transparency.
With the superposition of slightly transparent materials, such as rice paper, I wanted to create patterns. I got inspired by the book "Praise of Shadows", by Jun'ichiro.
For instance, the work of Olatz Pereda inspired me in this way
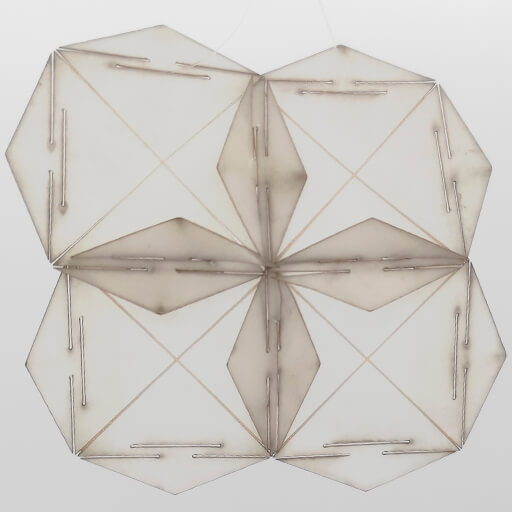 I really like the fact that superposition creates a geometrical game with the light going through the pieces.
However, I also wanted to work with textile, in order to test the opportunities that this material can give when laser cut. So, if I couldn't work efficently with transparency at this point (because none of the textile I could find and cut were the right transparency I had in mind), I decided that I was going to create my own openwork, in order to still play with light and see-through materials.
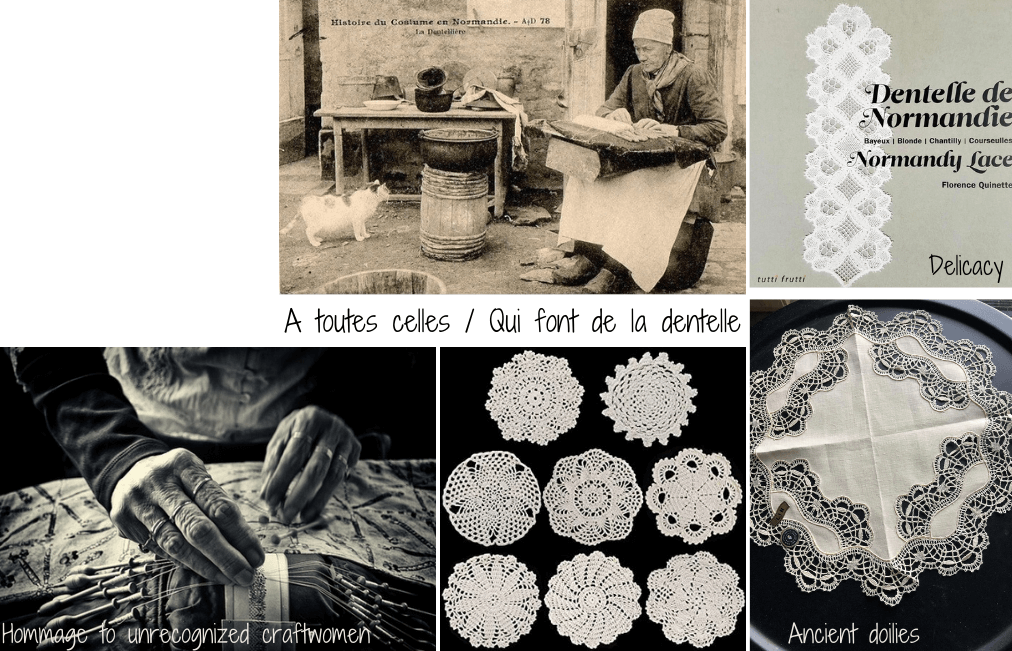
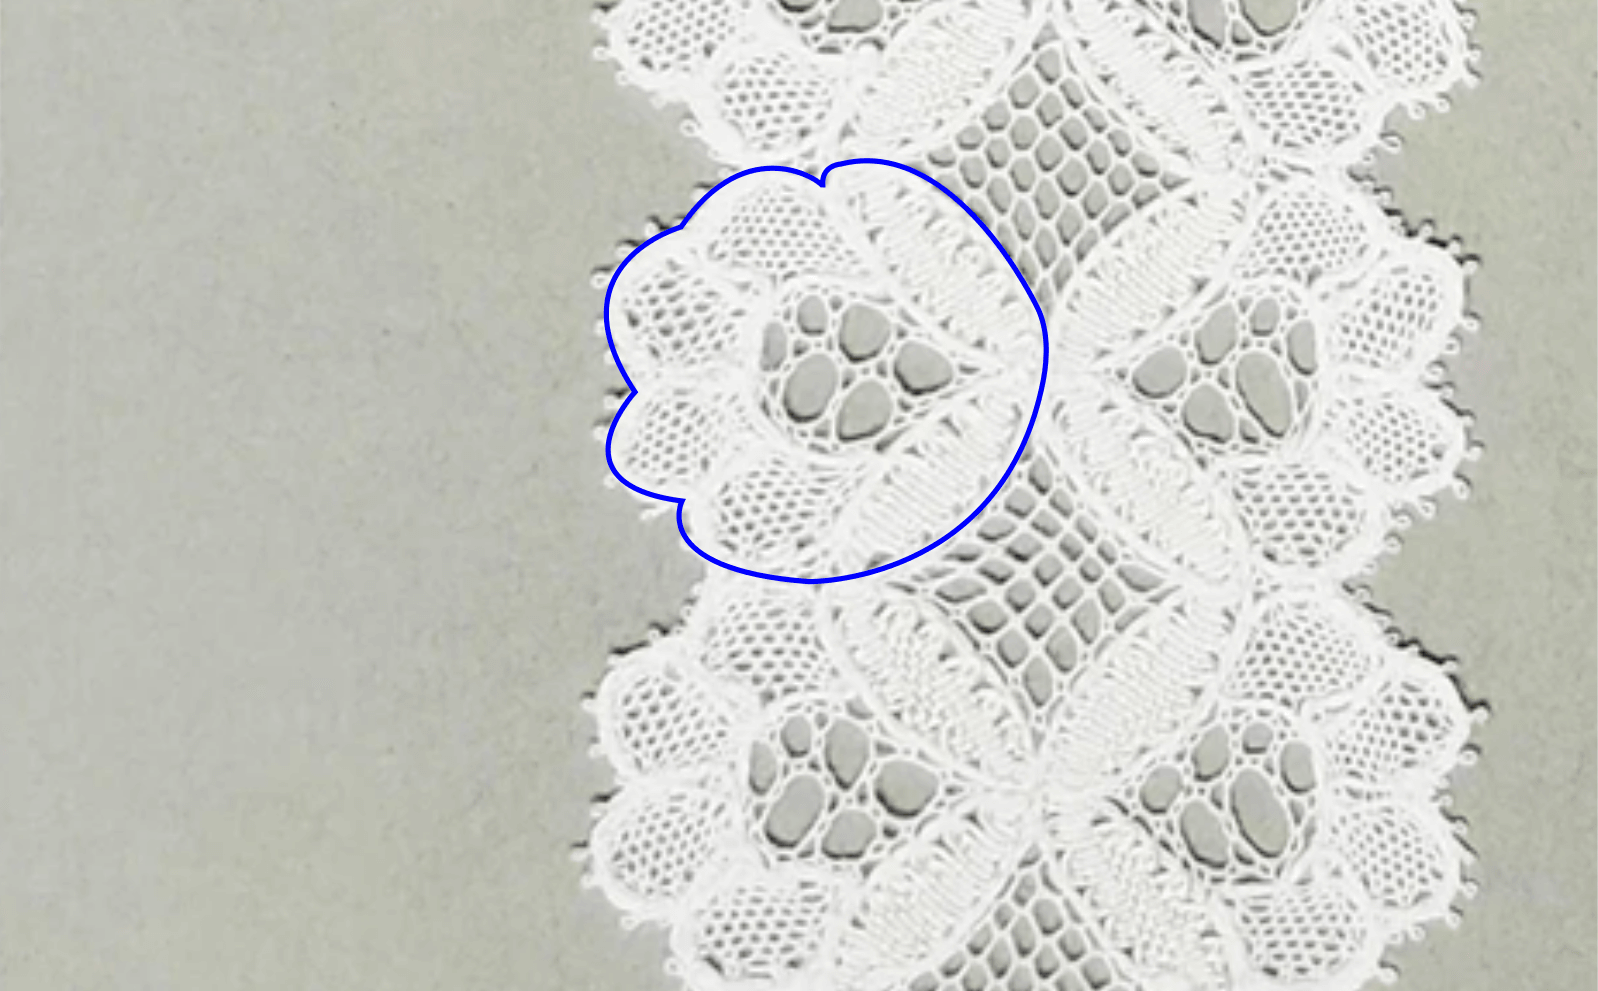
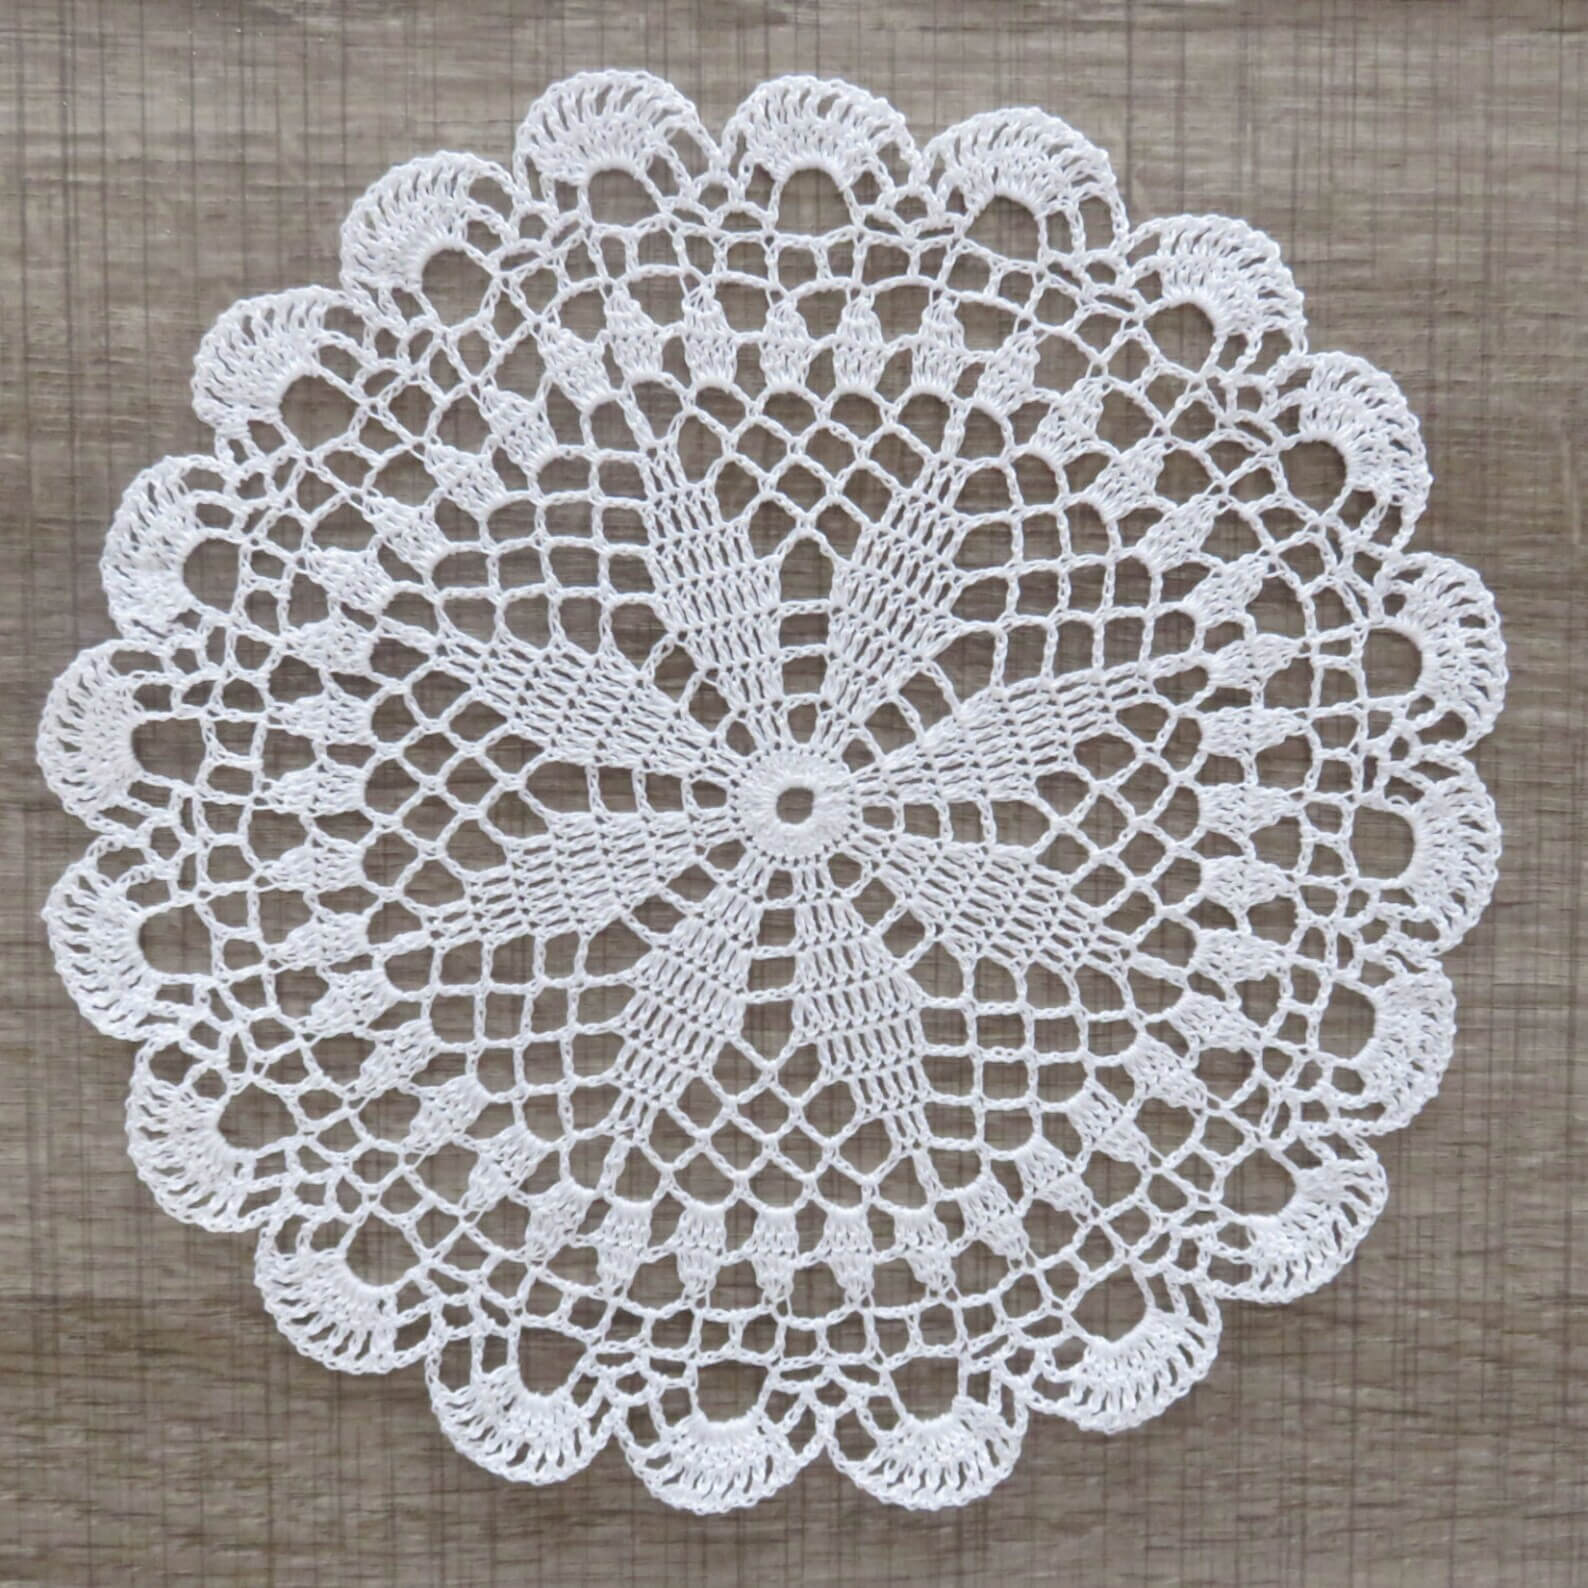
What kind of patterns did I want to work with? If, at first, I was attracted by the sashiko embroidery designs, because they create intricate designs, I changed my mind thinking about my territorial heritage: in Normandy, where I come from; laces and others thready techniques that recquire a lot of patience and perseverance.
For instance, below is a video of the ancient knowledge of embroidery in La Perrière, a village located in Perche, France. I find these skills very impressive, and the easiness that it seems to imply is mindblowing to me.
Experimenting with paper: trying to find a great shape
About waste
The idea of avoiding the material waste was part of my reflection. Working in a square is a solution, and make everything fit in this is important too. I tried to follow this direction, but it was blocking me, since I wanted to work with doilies' shapes.
As you will see further, I optimized the laser cut sheets on Inkscape and Rhino. 2
Process and workflow
Collecting visuals ; angle of reflection evolving with experimentations
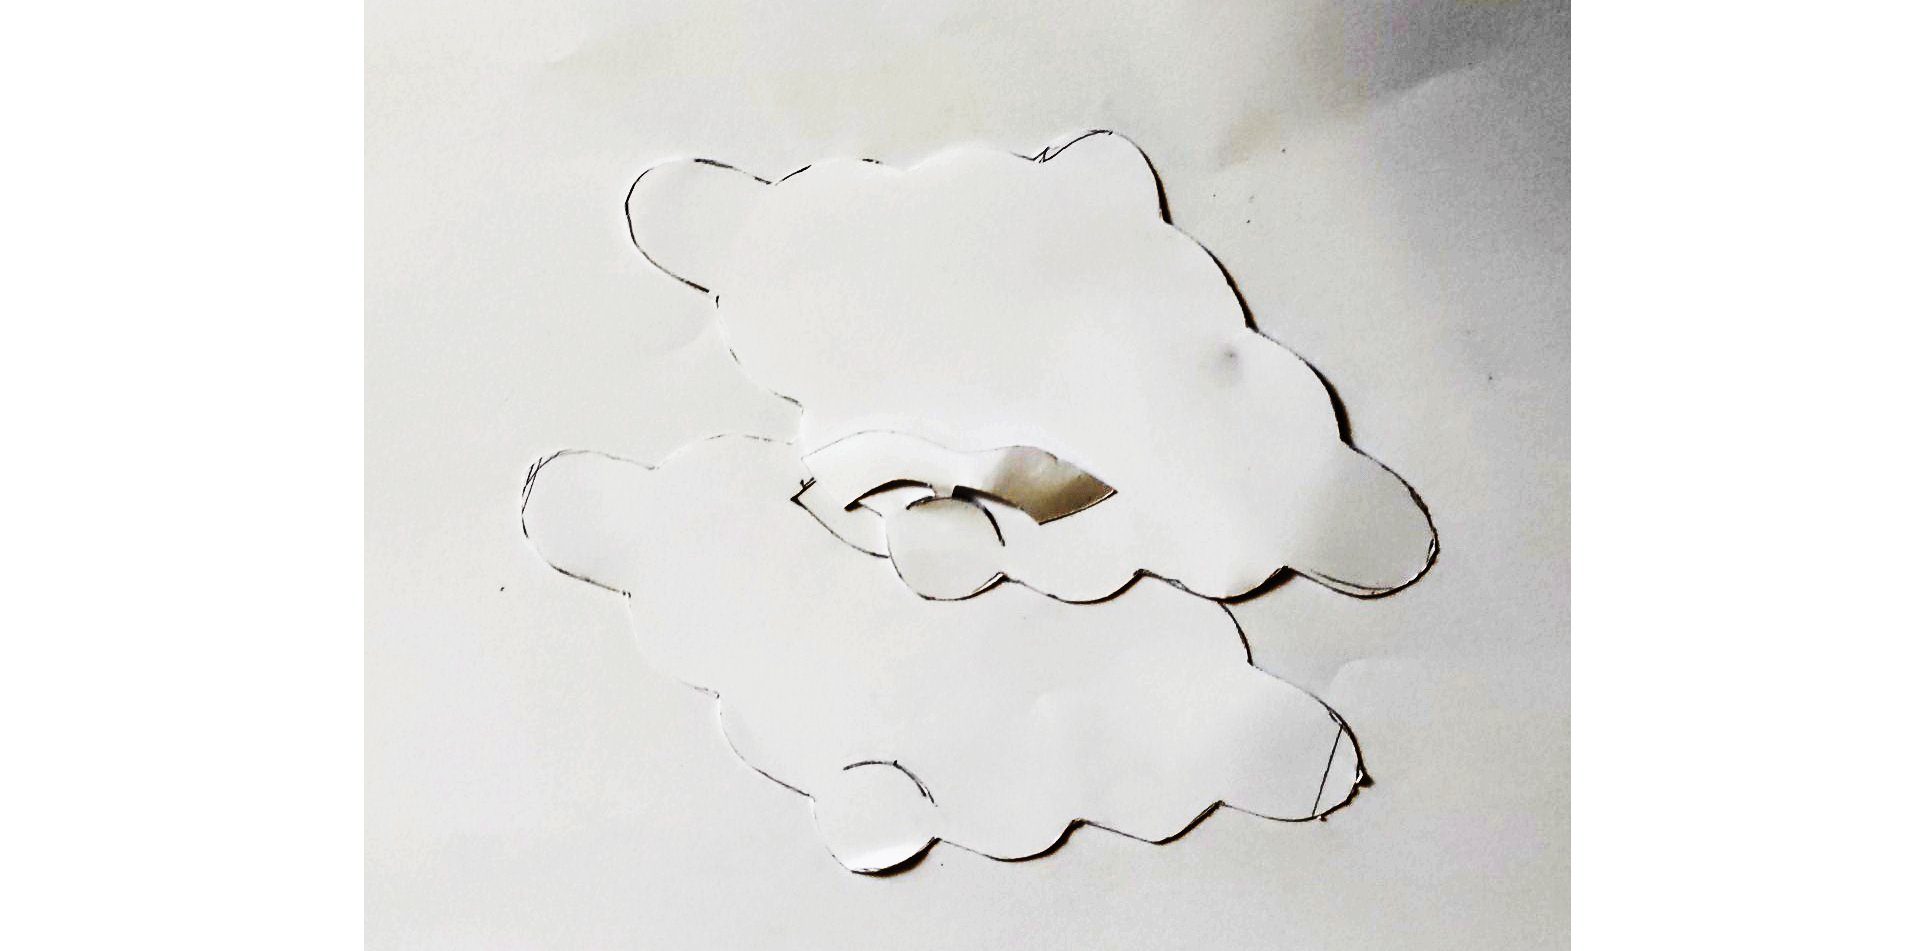
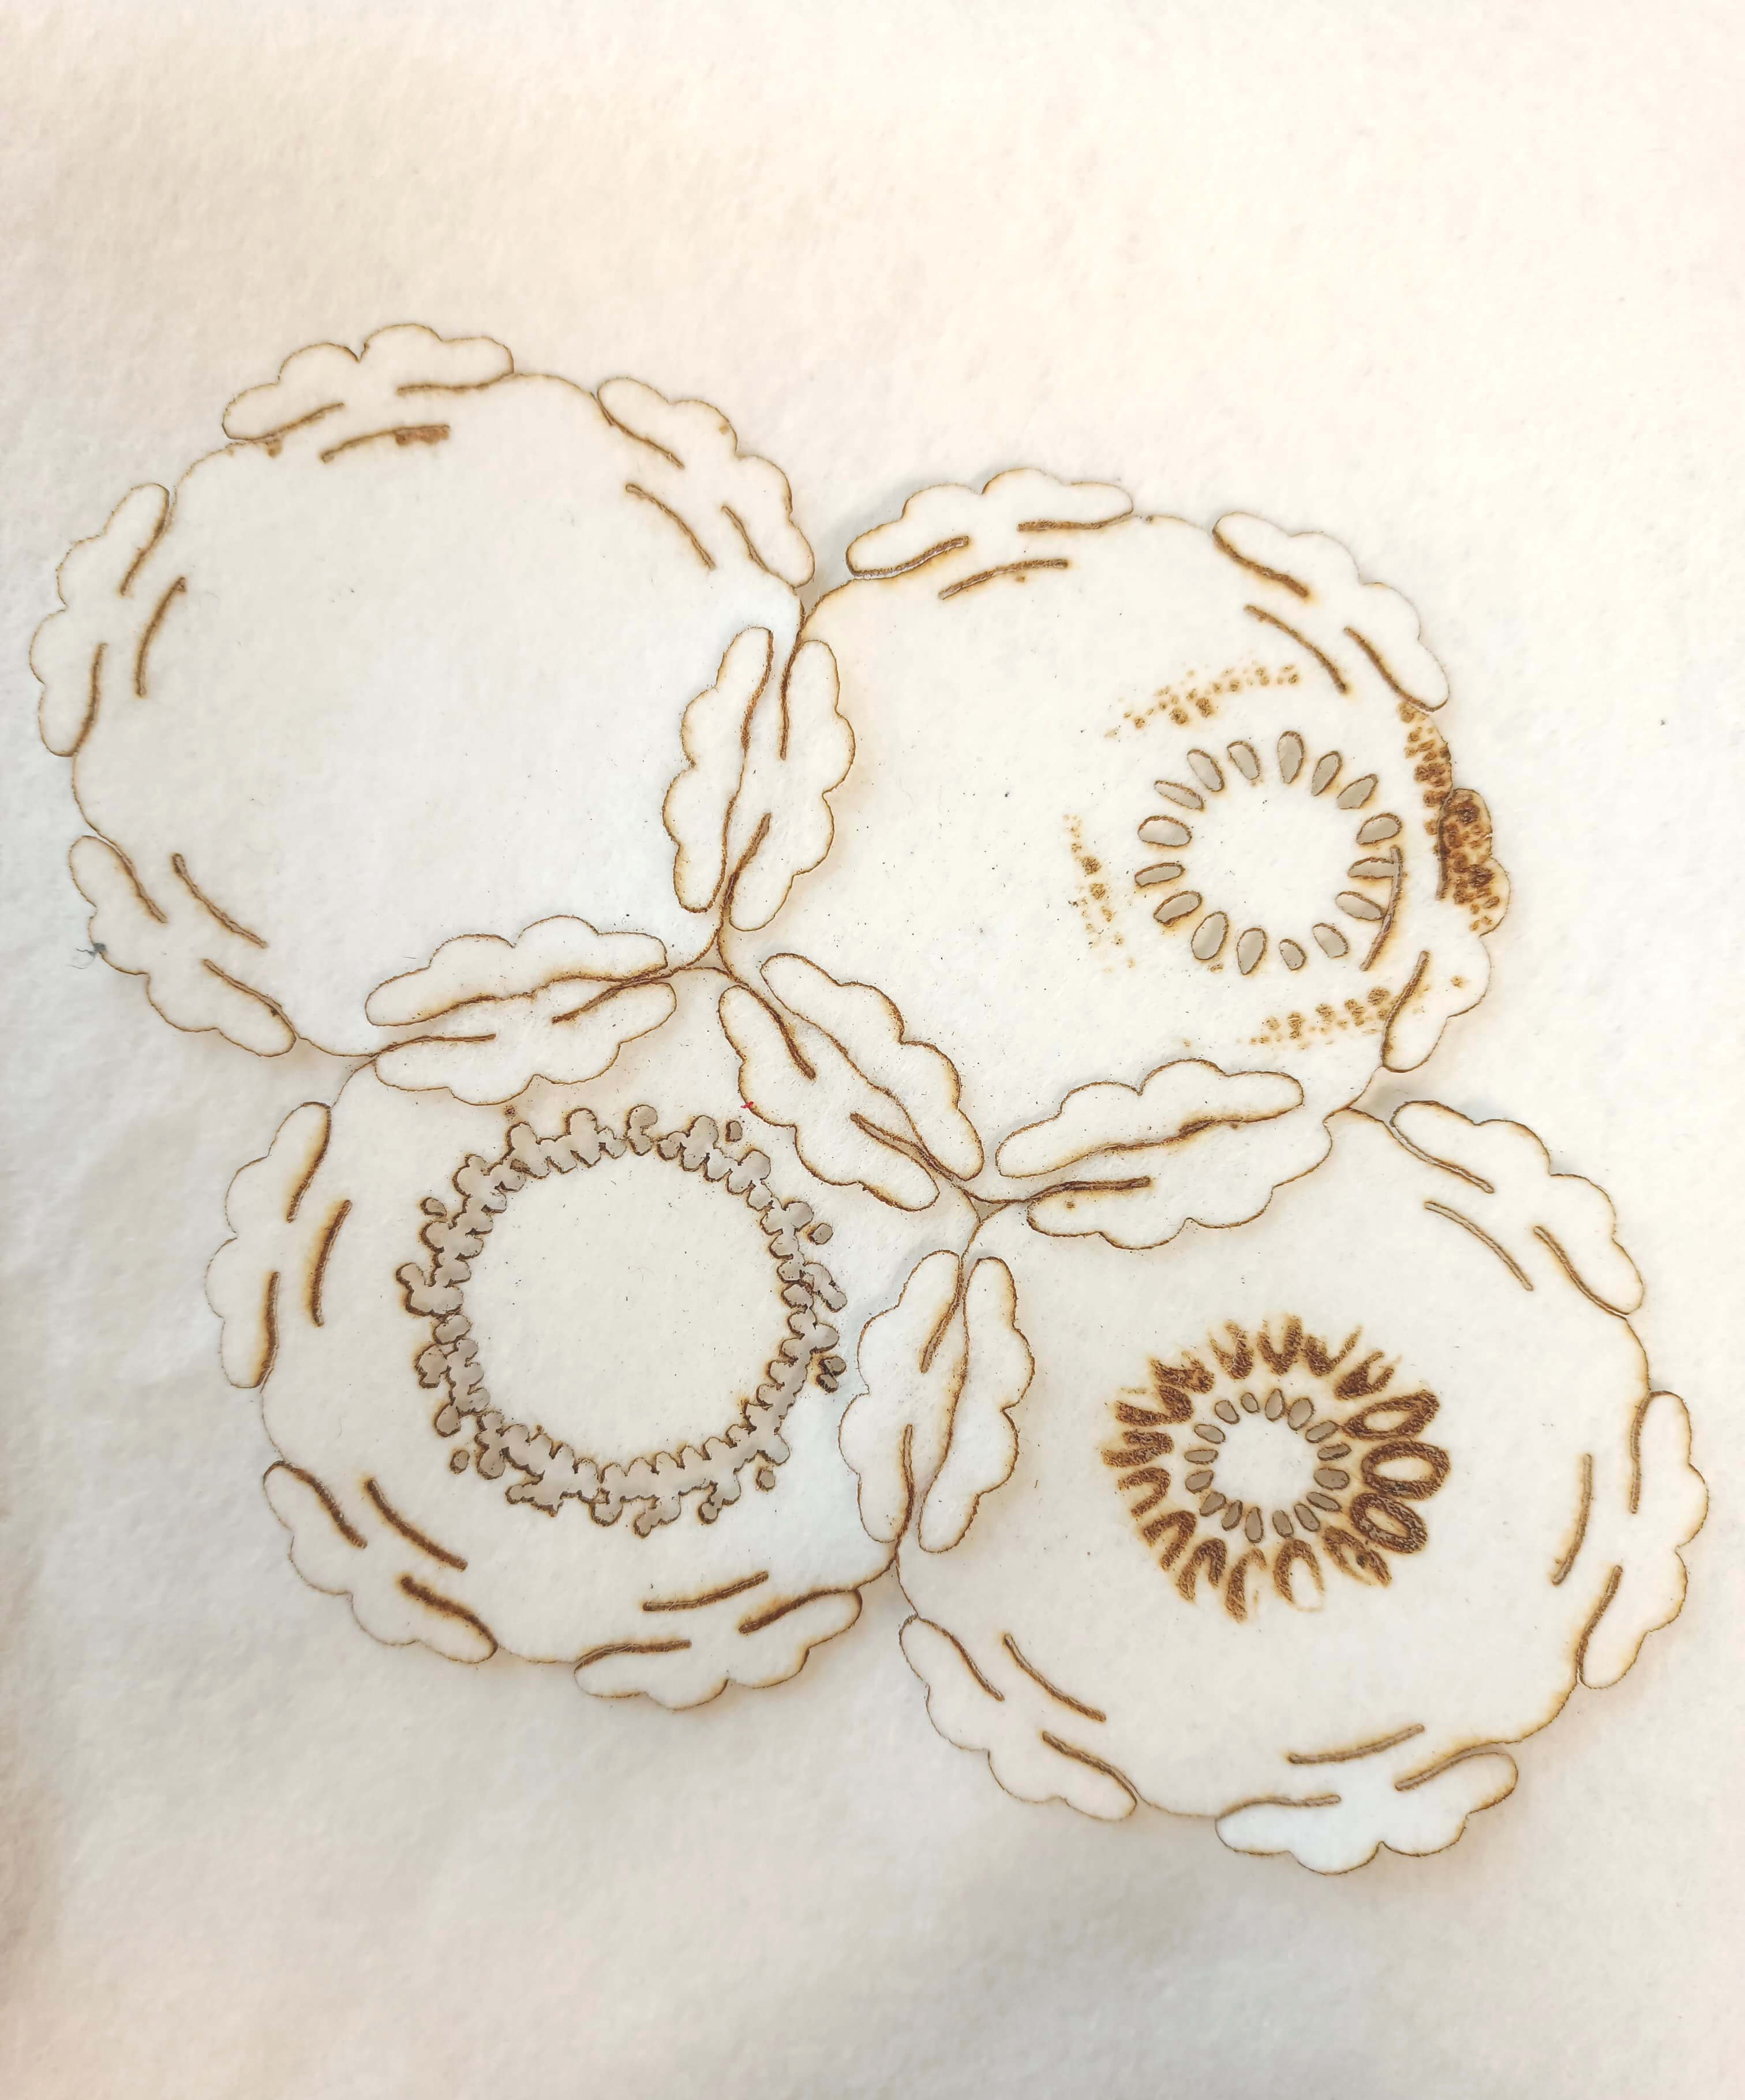
I tested several modules imagined after some doilies. The shapes were round, with little half-circles. I started with this pattern of normand lace:
Useful serendipity
As I was working on this pattern, I tried to find a way to attach them together.
I was working on tracing-paper, and the result was reminiscing me of "L'origine du monde" by Gustave Courbet. Actually, it was displaying a female sex.
Here is the result!
I found this interesting: my project was becoming an hommage to the women who used to create little masterpieces for their interior. their skills weren't recognized because it was the norm for them to be sewing, embroidering, knitting and lacing during the day.
For the attachment, I got inspired by the work of Olatz Pereda inspired me in this way
About laces
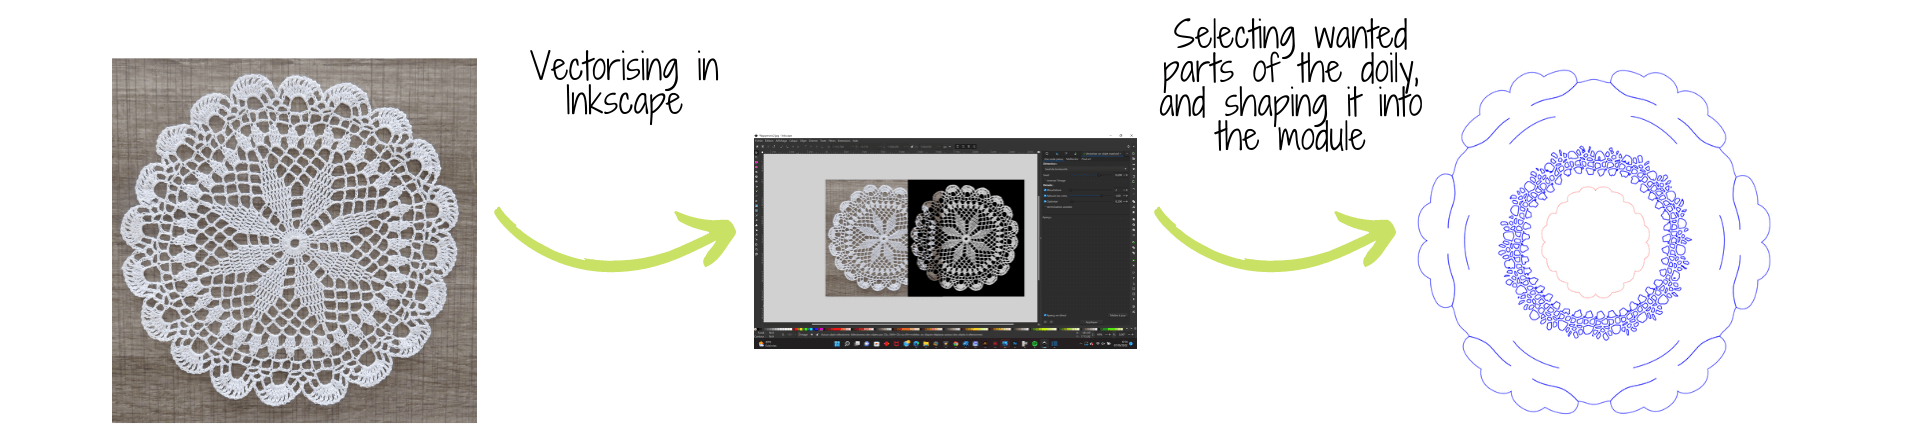
Laces are part of my concept, and I wanted it to appear in my work. I vectorised two different doilies.

Going digital
Then, moving on Inkscape to create the shape.
First of all, creating a grid. Below you can see the parameters I used.
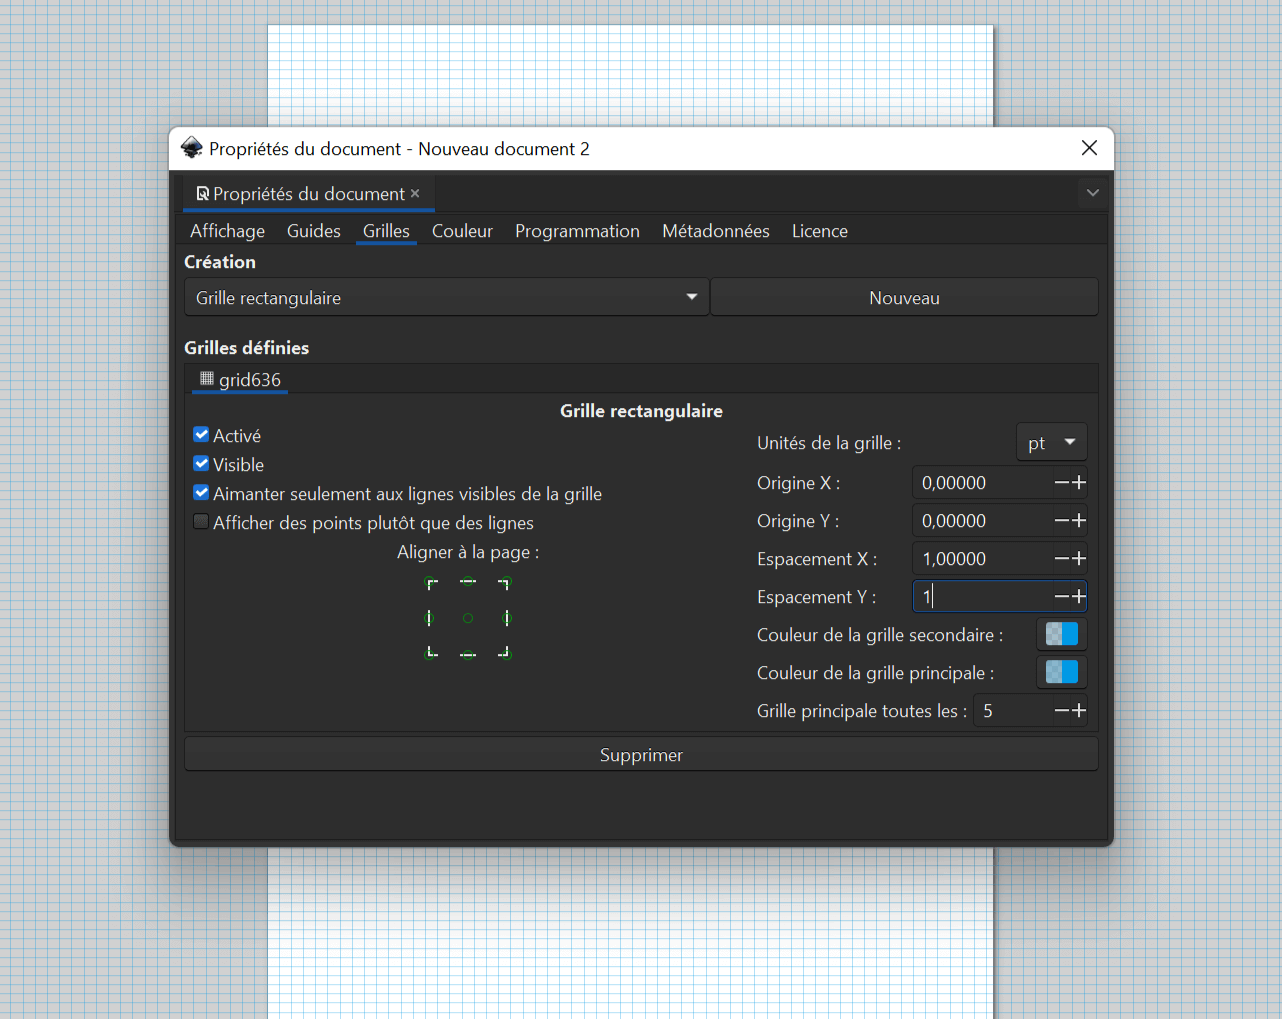
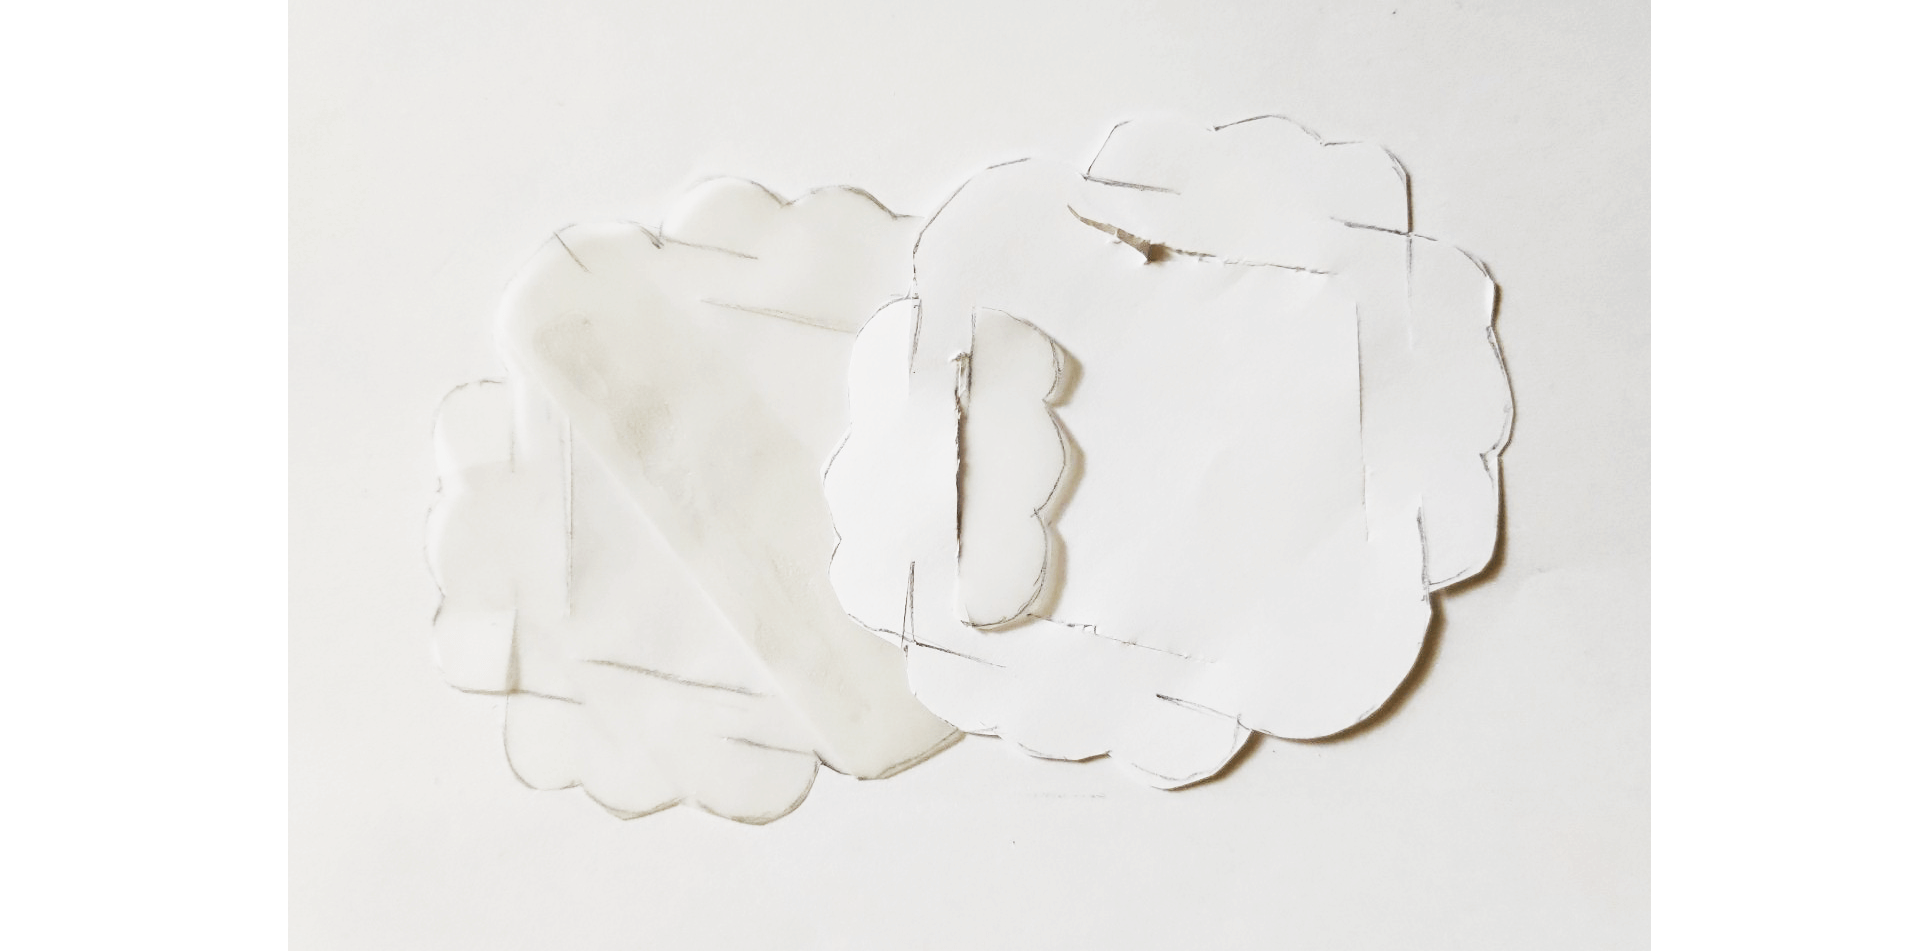
This grid really helps drawing symetrical and geometrical forms. Then I tested this attempt with paper.
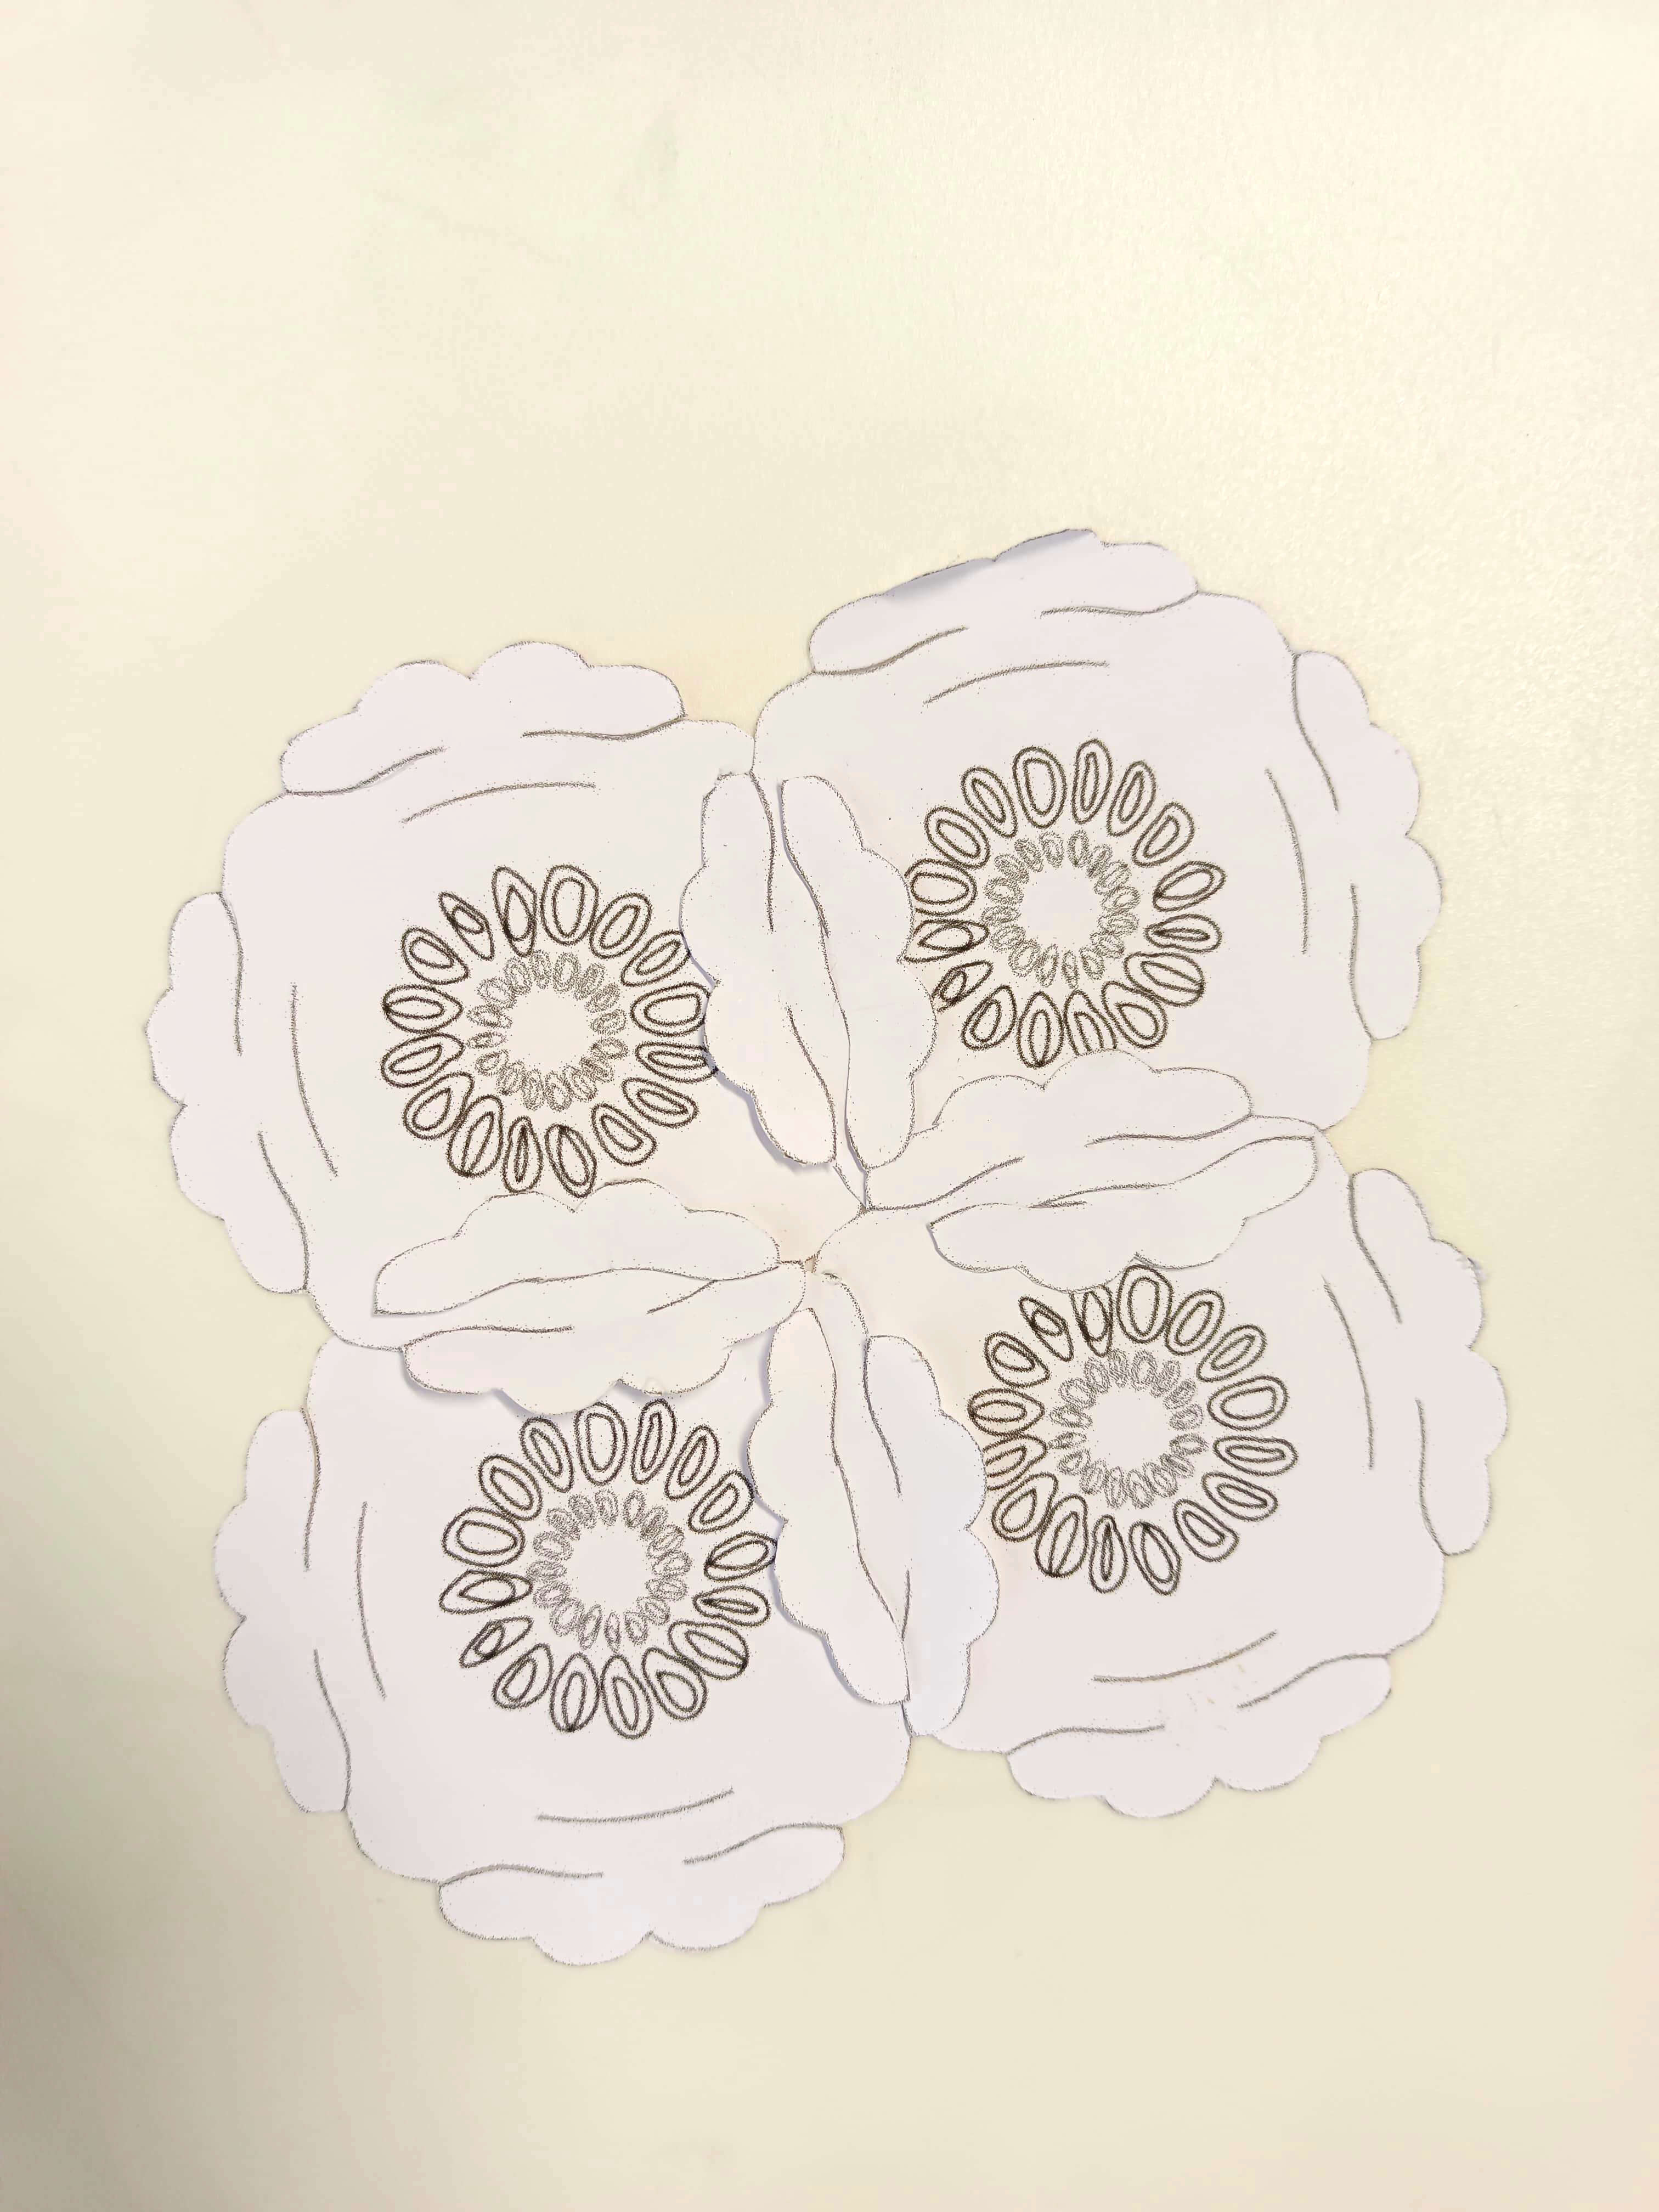
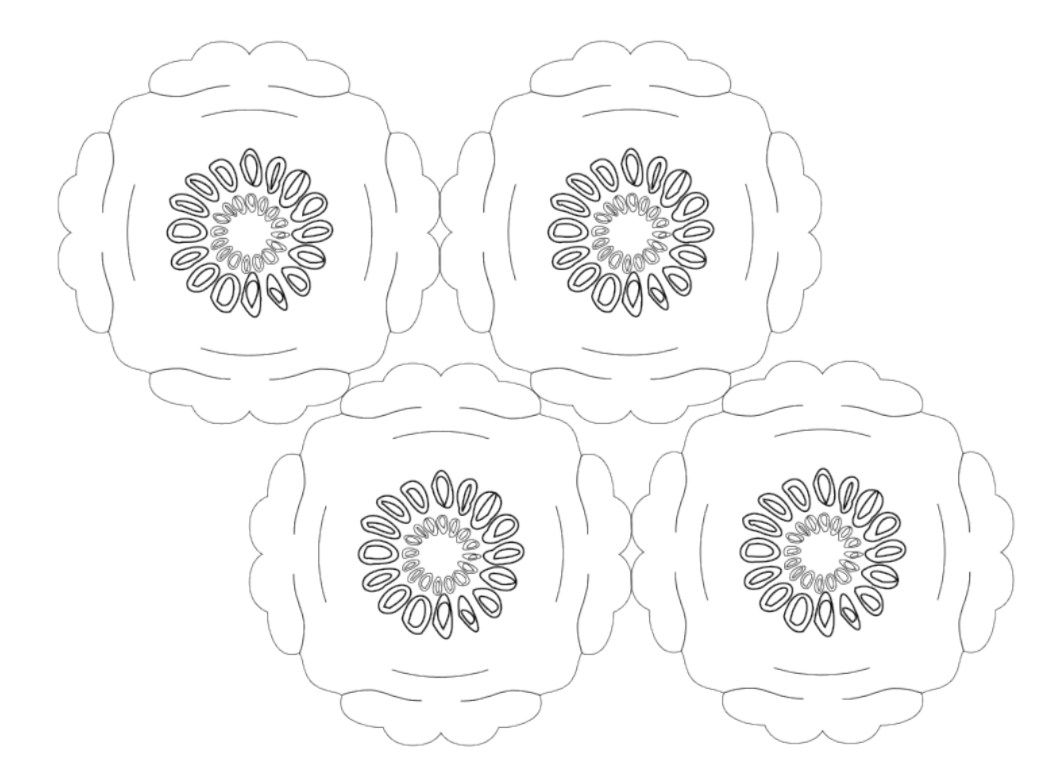
The result was too square-shaped, and the goal was to be able to create round shapes (like doilies)
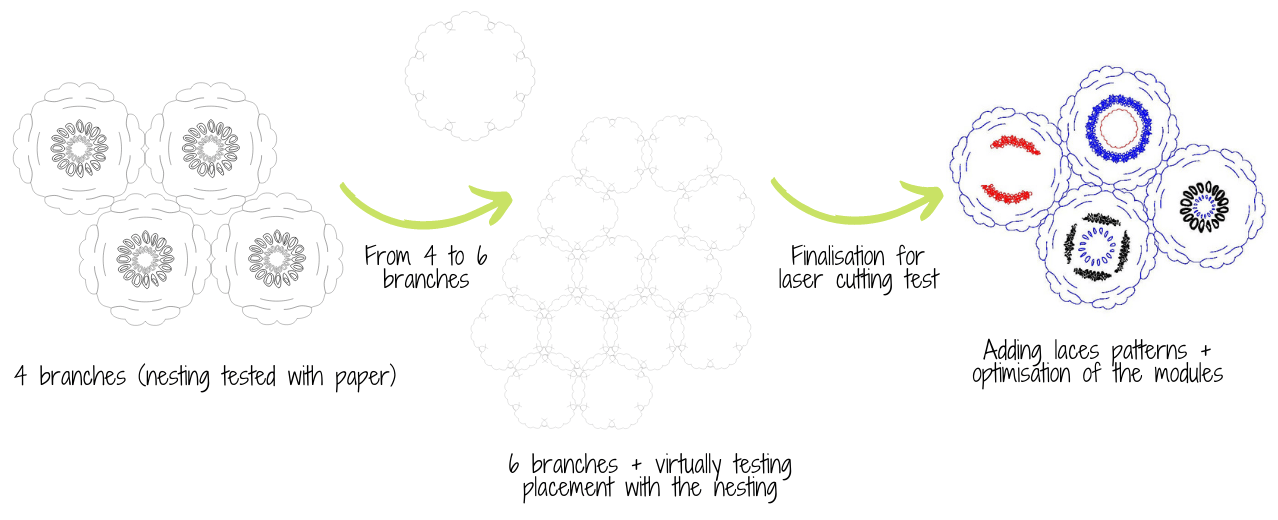
I modified the 4 branches pattern to go with a 6 branches pattern, and visually tested the placement in Inkscape.
I also optimized my sheets that were to be cut.
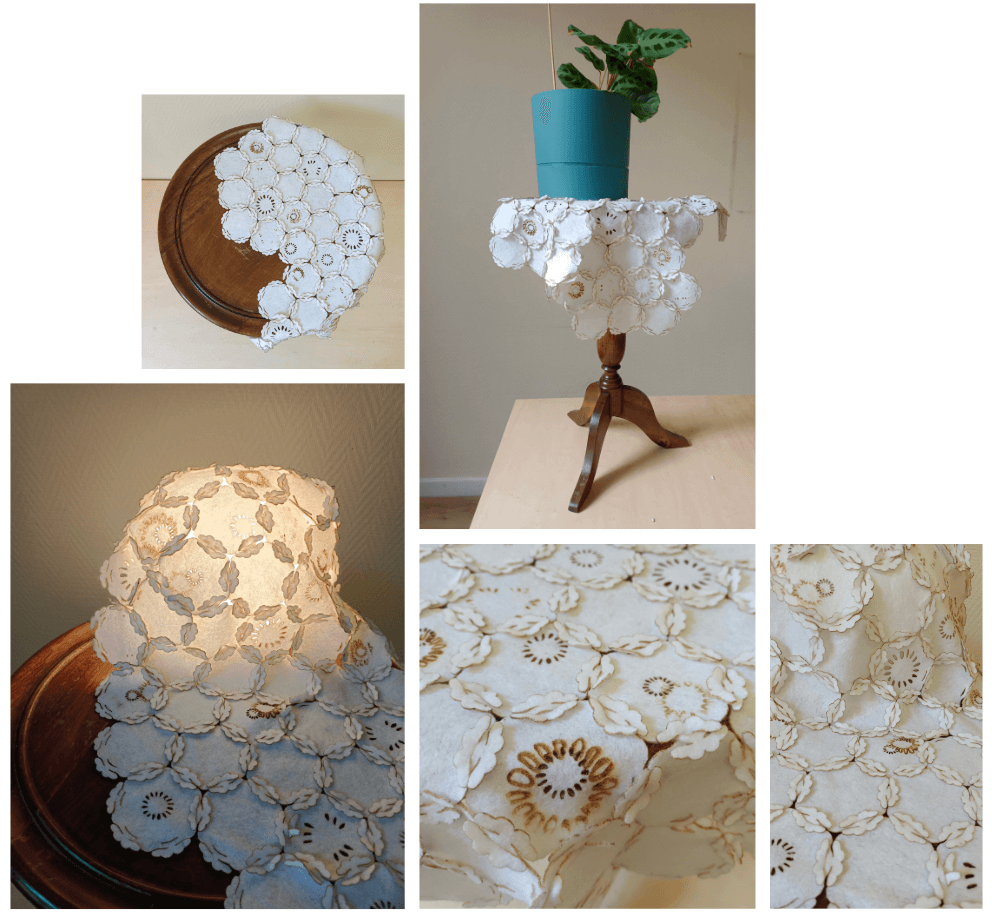
Laser cutting process
Chosen material: white woollen felt
Thickness: About 3mm
Laser cutting machine settings:
| ................ | Engraving (black) | Semi-cutting (red) | Cutting (blue) |
|---|---|---|---|
| Power | 20.00 | 90.00 | 95.00 |
| ------------- | ------------- | ------------- | ------------- |
| Speed | 30.00 | 40.00 | 35.00 |
| ------------- | ------------- | ------------- | ------------- |
| PPI/Hz | 500 | ...... | ...... |
- Engraving :
The helpful lighter
If you want to know the global composition of your fabric, the burning test can help.
You can know if your fabric is natural and artificial, and this is useful because natural fabrics, when they are laser cut, can still fray, contrarily to the synthetic materials.
Also, some fabrics can't be laser cut, it can help you distinguish them.
Nonetheless, if you got any doubt, DO NOT CUT IT!
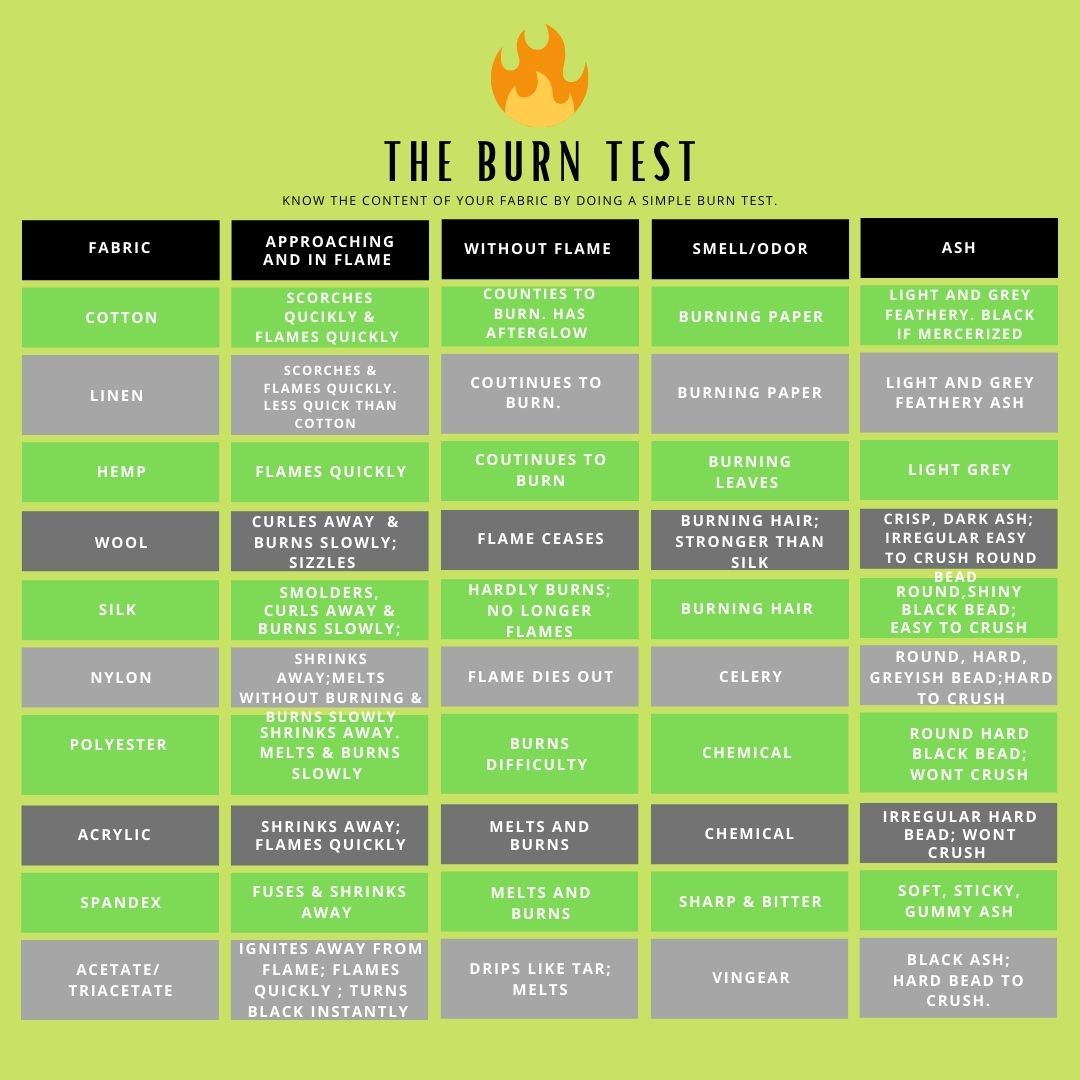 For my fabric for instance, the smell was the one of burnt hair: it's a sign that it certainly is wool.
Problem of timing
When I first tried to print my project, the time estimation was 2h30 for engraving, and 1h05 for cutting.
I came back during the week-end in order not to block my colleagues in the laser cutting process.
NOT TO FORGET : Engraving is so time-consuming! I really need to keep this in mind for later projects; it requires organisation.
First felt test
GOOD POINTS :
- the shape of the arrows and the size of the slots were functionning.
TO MODIFY:
- some laces parts were too fragile because the cut parts were to close from each other.
- the semi-cutting parameter (in red) wasn't efficient enough on my material.
Then... cutting time !!
Gap in the cutting process
When I was cutting, the machine stopped working because the connection between the computer and the laser cutting machine got lost.
I had the same problem during the test phase, so for the final cutting phase I had drawn a little dot in the left up corner of the fabric: it was my reference point for the beginning of the job, and it would help me restart the cutting process without gapping everything. But, it didn't work as expected.
When it happened, I modified my document on Inkscape in order to remove the already engraved parts. I only keft half a engraved pattern to be able to see if it was engraving without any problem. It allowed me to know that my document was mismatching.
Cut job
I had quite a rough time when adding my document from Inkscape to Trotec, because my document kept being cut on the side. I had no idea of how to fix this, I tried several techniques but none of them was working. As I was running out of time, I decided to cut anyway.
Assembly videos
Final
Tools
Fabrication files
-
File: Laser cut sheets ↩