Animation: Growth of Oyster mushroom mycelium after optimization of cultivation conditions. Pictures on D1, D5, D14 and D36.
Optimization of growth conditions
After having satisfying results for the growth on textile and food waste, I had to figure out how to make the mycelium grow stronger on that substrate.
Incubator optimization
As stated in Vandelook et al., 2021, aerial hyphae pure mycelium material requires very specific growth conditions including high temperature (± 30 °C), 50–70 k ppm gaseous CO2 and CO2 gradient, 40–99% relative humidity, osmotic diving force and air flow. I wanted to reach those conditions in order to have a layer of aerial mycelium growing on the top of the colonized petri dish that would make the composite leather have two distinct faces: one displaying only mycelium and the other one showing the fibers. In order to achieve the right conditions, I had to optimize the incubation technique we were using at the lab.
Temperature regulation
At first, I was using a tent and an incubator for the incubation of the mycelium but these were both located in the biolab. The biolab has a big exposure to sun and this resulted in both the incubator and tent having very variable temperatures throughout the day. With the help of Anastasia, we worked on the control of these conditions.
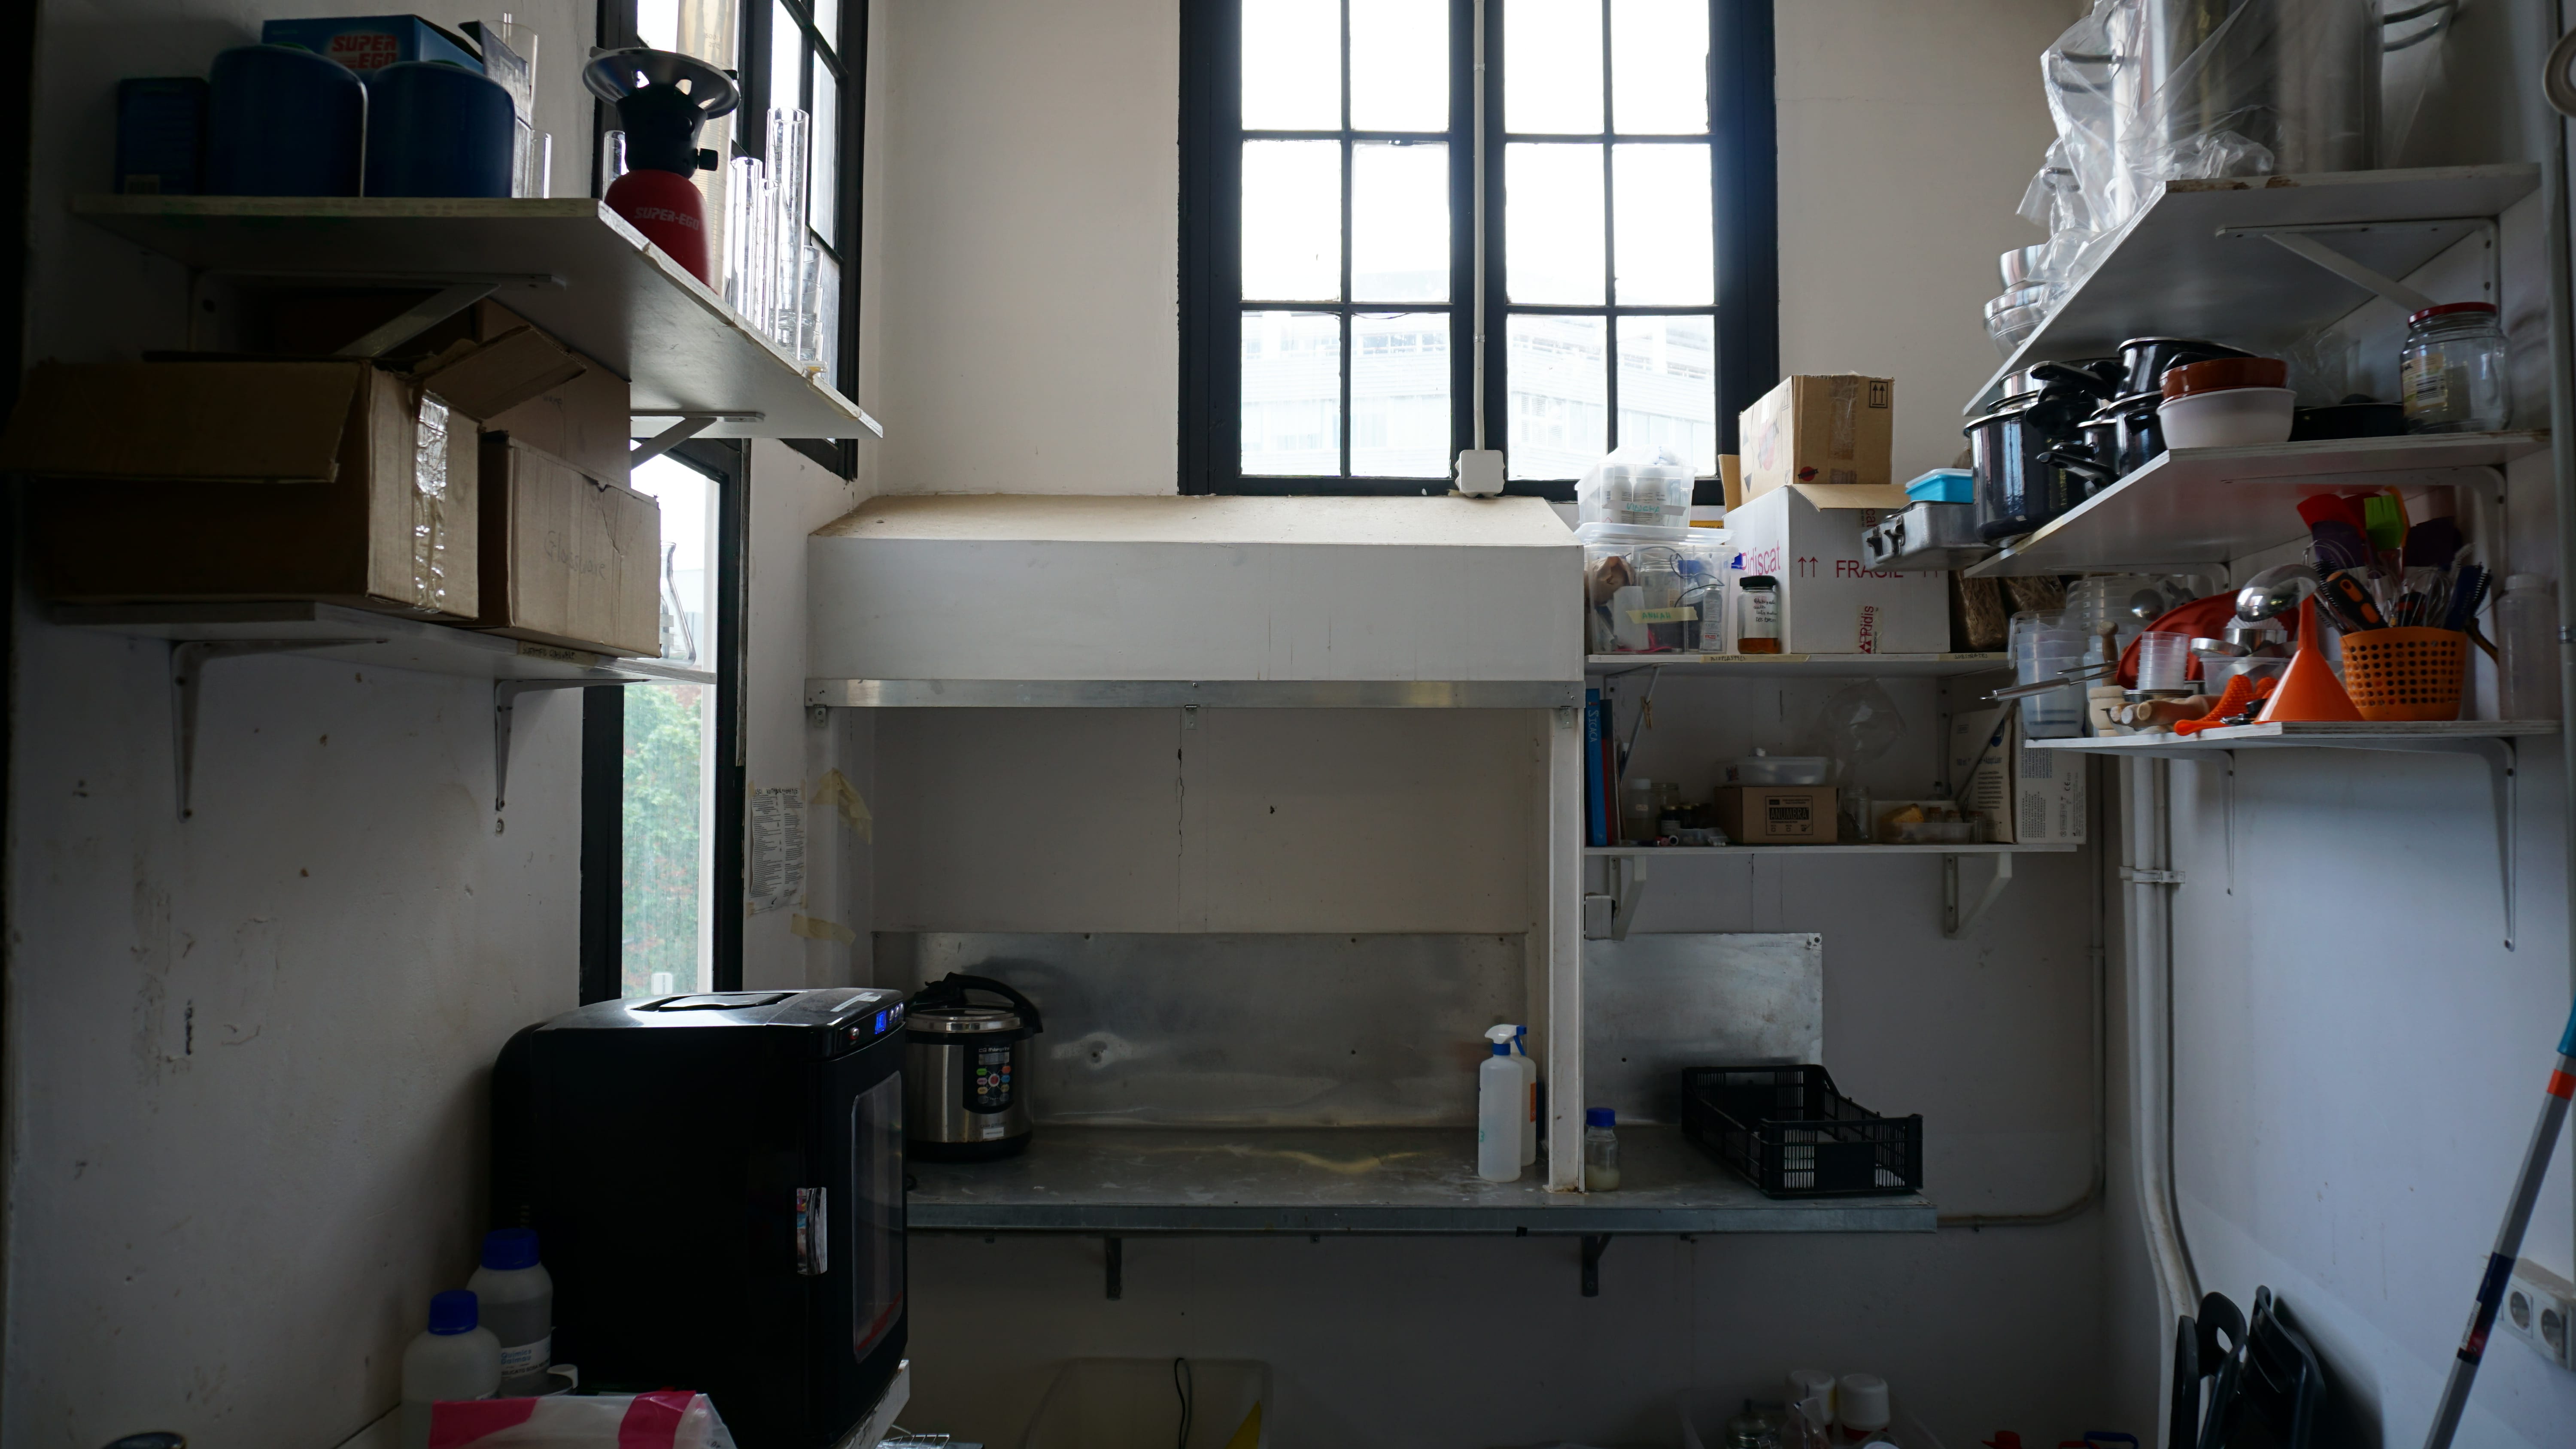
Image: FabLab BCN biolab.
A project named Smart Citizen was initiated in Fab Lab Barcelona some years ago. This project is a multi-sensor mesuring different parameters to assess the quality of the air in different places. This sensor has multiple functions among which a temperature sensor, a humidity sensor and also a CO2 sensor for an affordable price, which is exactly what we needed!
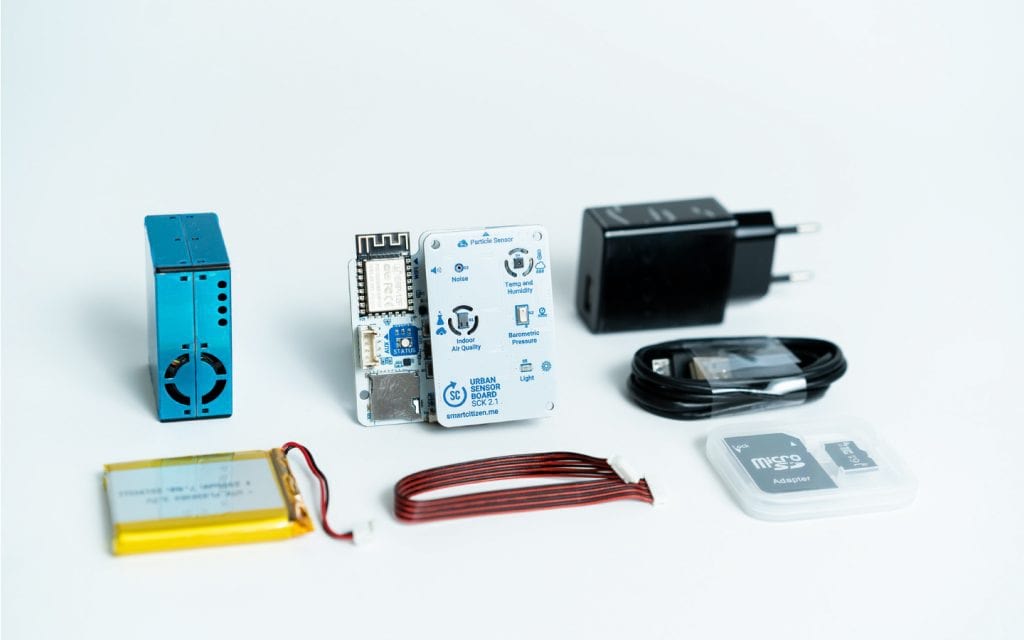
Image: Smart citizen sensor.
We thus decided to put a Smart Citizen sensor in the incubation tent and watch the live data in the Smart citizen webpage.
I could thus figure out the temperature variations we had in a day in the lab. The results showed that the exposure to the sun led to daily variations of temperature between 18°C and 32°C.
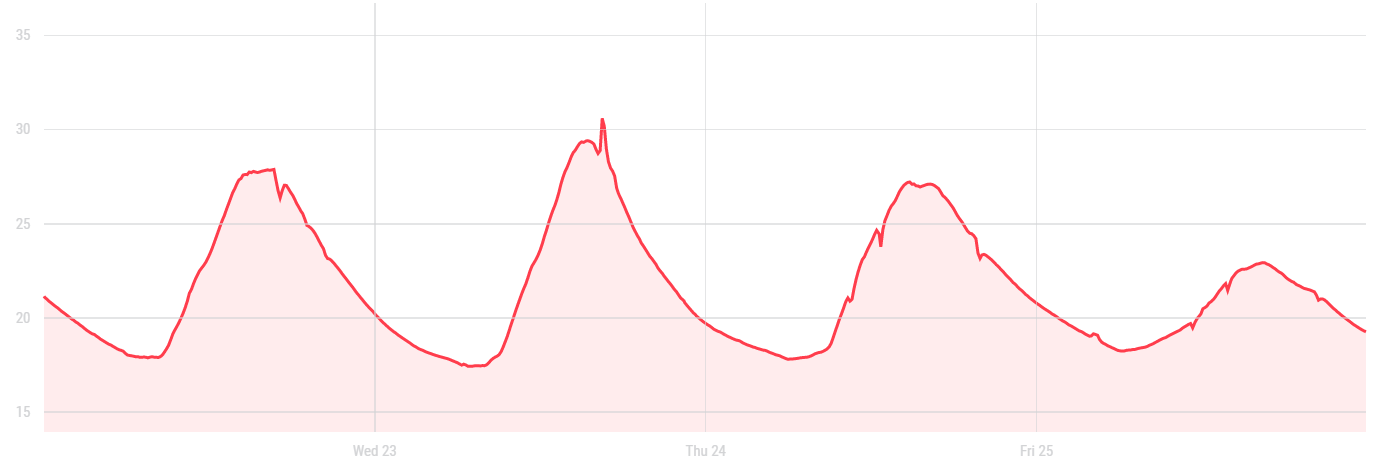
Graph: daily temperature variations of the incubation tent when located in the biolab.
Those variations of temperature that I could not control were not optimal for the growth of mycelium, so we decided to relocate the incubation tent less exposed to temperature variations (a room with no windows to the outside). The temperature in that room was however too low so I had to get something to heat the tent up. The heater I found is a heater blowing hot air equipped with a thermostat: it automatically switches on when the temperature is too low and switches off when the temperature gets too high.
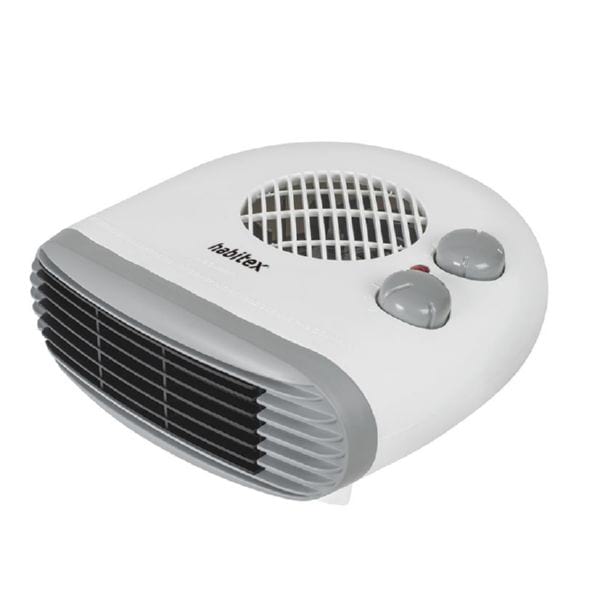
Image: heater used for the heating of the incubation tent (HABITEX E306 2000 W).
After putting the heater in the tent, the temperature variations switched from daily variations of 18°C to 32°C to hourly variations between 25°C and 32°C, which is was preferable to the previous provision.
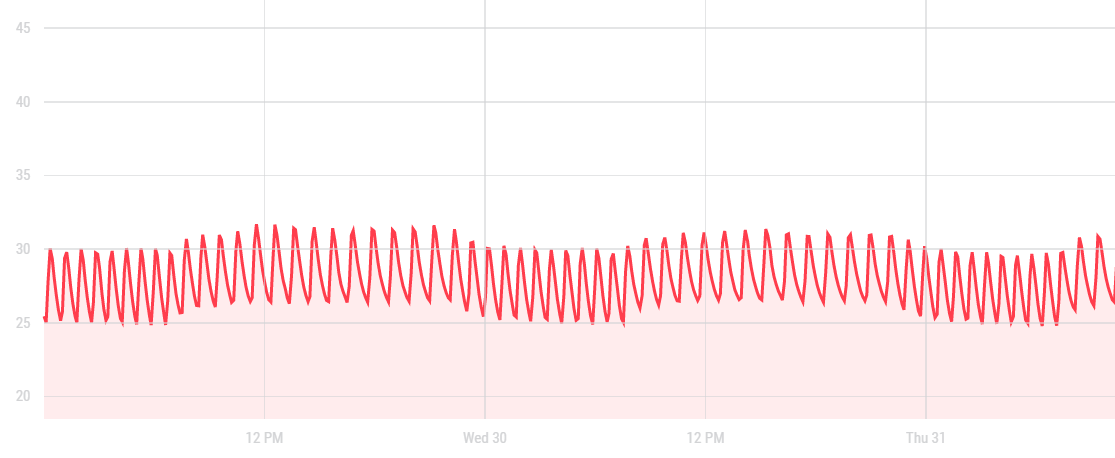
Graph: hourly temperature variations of the incubation tent when located in the shaded room.
After moving the incubation tent and adding the new tools, this is how the incubation tent looks like.
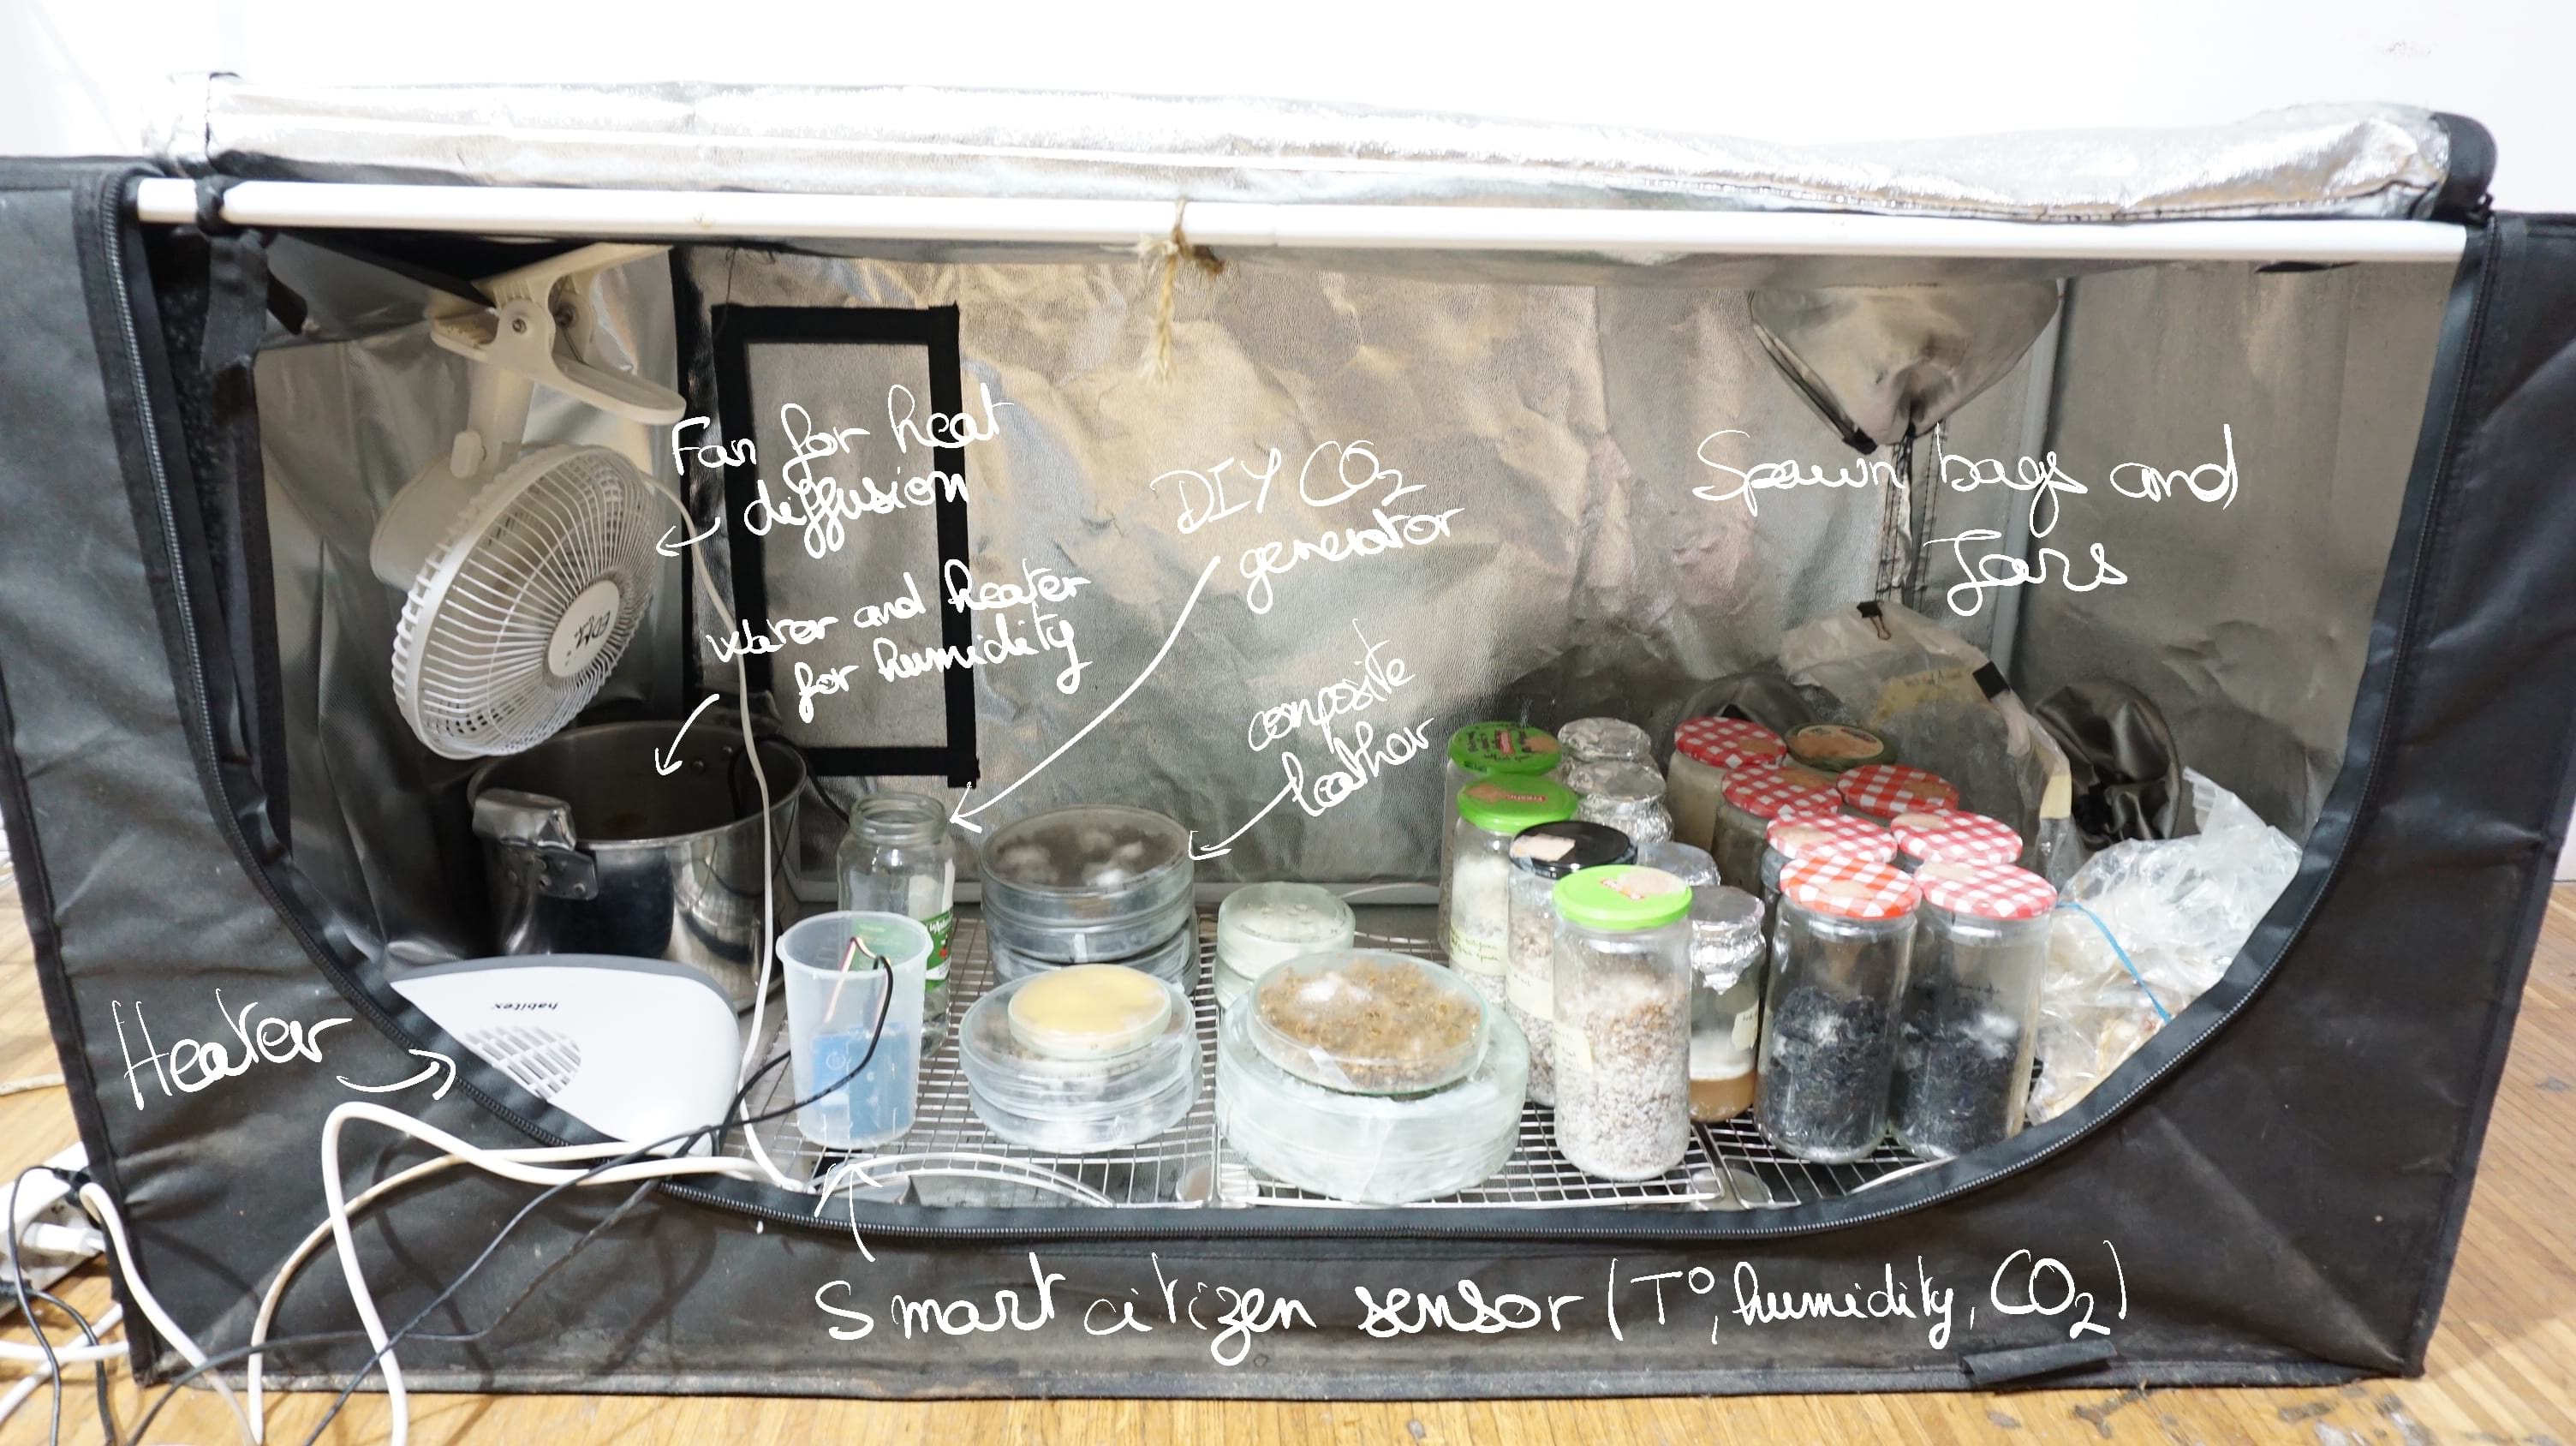
Image: new organization of the incubation tent.
High CO2 chamber
In order to achieve aerial growth of mycelium foam, I need to reach high concentrations of C02. But how can I do that in a cheap way? CO2 is currently concentrated at 412 ppm in the atmosphere (0,04%) and I needed to reach 50 000 ppm (5%). In order to do so, I needed to find a CO2 source and a gas-proof box. According to A&C plastics inc, High Density PolyEthylene (HDPE) is used for the storage of gasses which makes it a suitable option for a gas tight chamber. I found a closable 30L HDPE barreel at a local bazar and used it as a chamber.
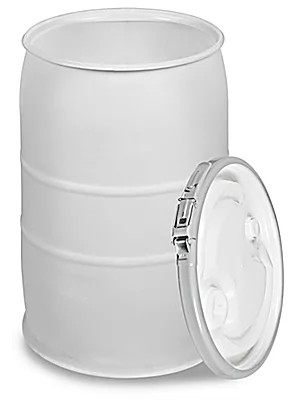
Image: HDPE barrel used to create a high CO2 chamber.
For the concentration of the CO2 in the barrel, I read a lot of things, including this amazing documentation on how to make a DIY CO2 incubator by PellingLab who used CO2 bottles from sodastream as a CO2 source. I however neither had the time nor finances to make all the system he developped for the CO2 regulation. In order to see if my experiments would even work, I first wanted to make a cheap, quick and dirty prototype. I figured out from watching videos on how to make CO2 in aquariums that I could easily produce CO2 for cheap by mixing sodium bicarbonate and citric acid following this reaction.
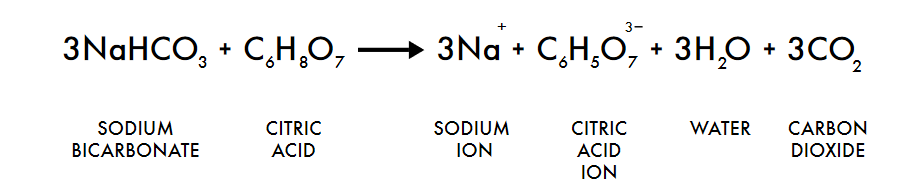
Following the logic presented in this video, I calculated that for my 30 L barrel, I needed 5g of citric acid and 5g of baking soda to get the barrel to approximately 5% CO2. Since the reagents are a powder, adding water is also needed but the amount of it does not matter since it is just a solvant and does not take part in the equation.
This is the detail of my calculations to know how many grams of each reagent I need to put to react.
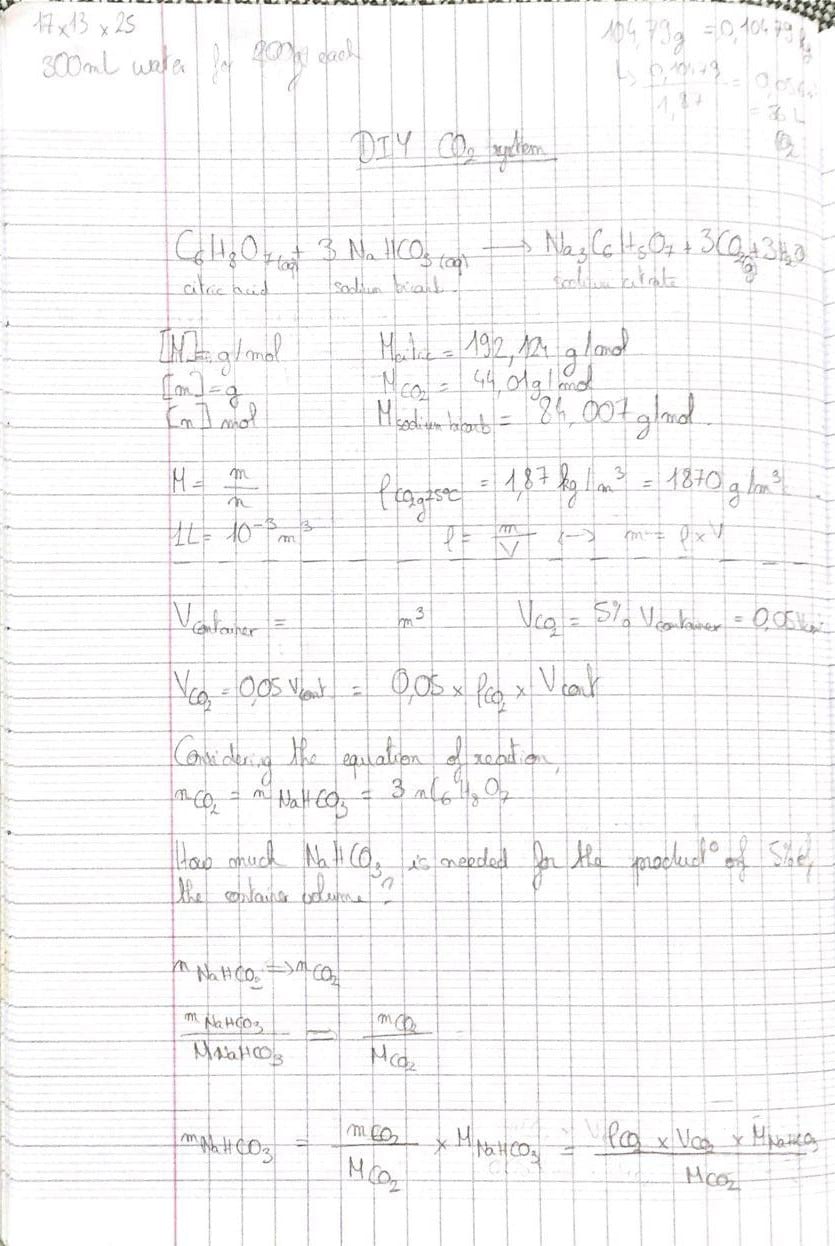
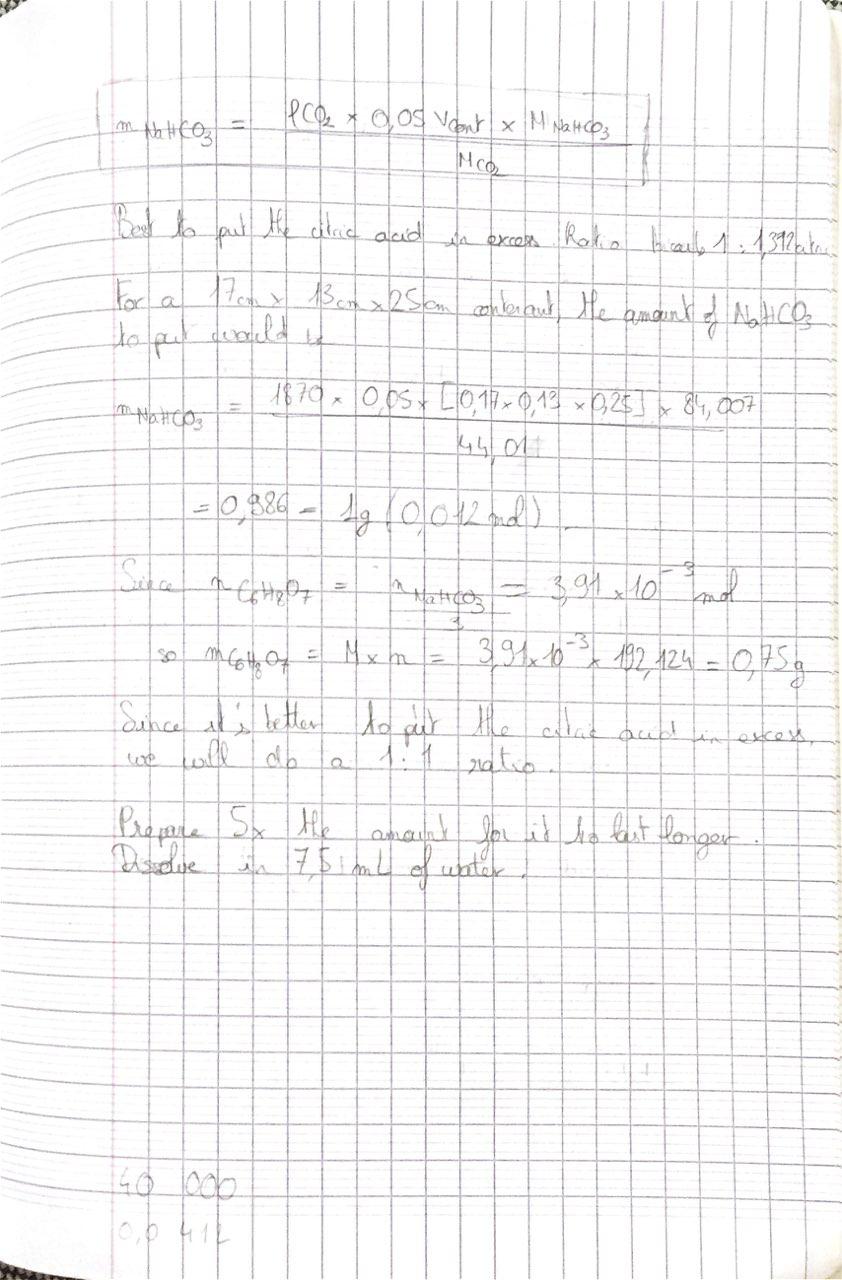
Those calculations are made for a 17cm x 13cm x 25cm box. The same logic can be followed to reach 5% CO2 concentration in a 30L barrel. For this size, the mass of sodium bicarbonate to put in the reaction is 5,35g and the amount of citric acid is of 4,01g. Since the carbons of the CO2 come from the sodium bicarbonate, it is better to put the citric acid in excess so that the reaction of the sodium bicarbonate will be total. Since the scales we have in the lab are not that precise, I decided to put 5g of each in the reaction.
Video: How to make a concentrated CO2 barrel for mycelium culture.
After doing the DIY CO2 concentration protocol as described above, I measured the increase of the quantity of CO2 in the barrel. The following graph shows what the smart citizen sensor measured inside the barrel after putting the reaction inside. Though a clear increase in the CO2 concentration from 500 to 2000 ppm is noticable, it is not the result I had hoped for. The concentration was supposed to reach 50 000 ppm, which we are very far from. The concentration of CO2 in the barrel is also decreasing after around 3 days, probably meaning there is some leakage in the barrel.
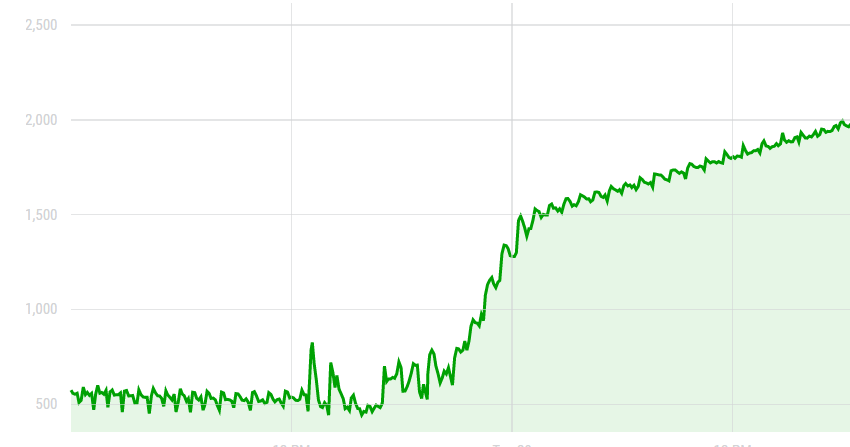
Graph: evolution of the CO2 concentration in the barrel after putting the CO2 emitting reaction inside of it.
In order to check if there is leakage or not, a leakage test was performed, consisting in doing the CO2 increasing experiment, putting it in the barrel and closing it, spraying soapy water on the barrel and finally waiting to see if bubbles appear, indicating a zone of leakage.
Video: leakage test of the barrel.
As we can see on the video, there is leakage of gas in the zone of the joint. In order to remedy this, I tried buying different joints made out of different plastics. That was unsuccessful since I never achieved more than 2500 ppm in the barrel despite all my efforts. Even multyplying the amount of reagents by 20 did not lead me to more than 3000 ppm but rather led be to the blowing off of the lid of the barrel due to overpressure. For my next step, a friend of mine producing biogas in HDPE barrels told me to use gebatout jointing paste to cover the leaking parts of the barrel.
Use of spawn for inoculation
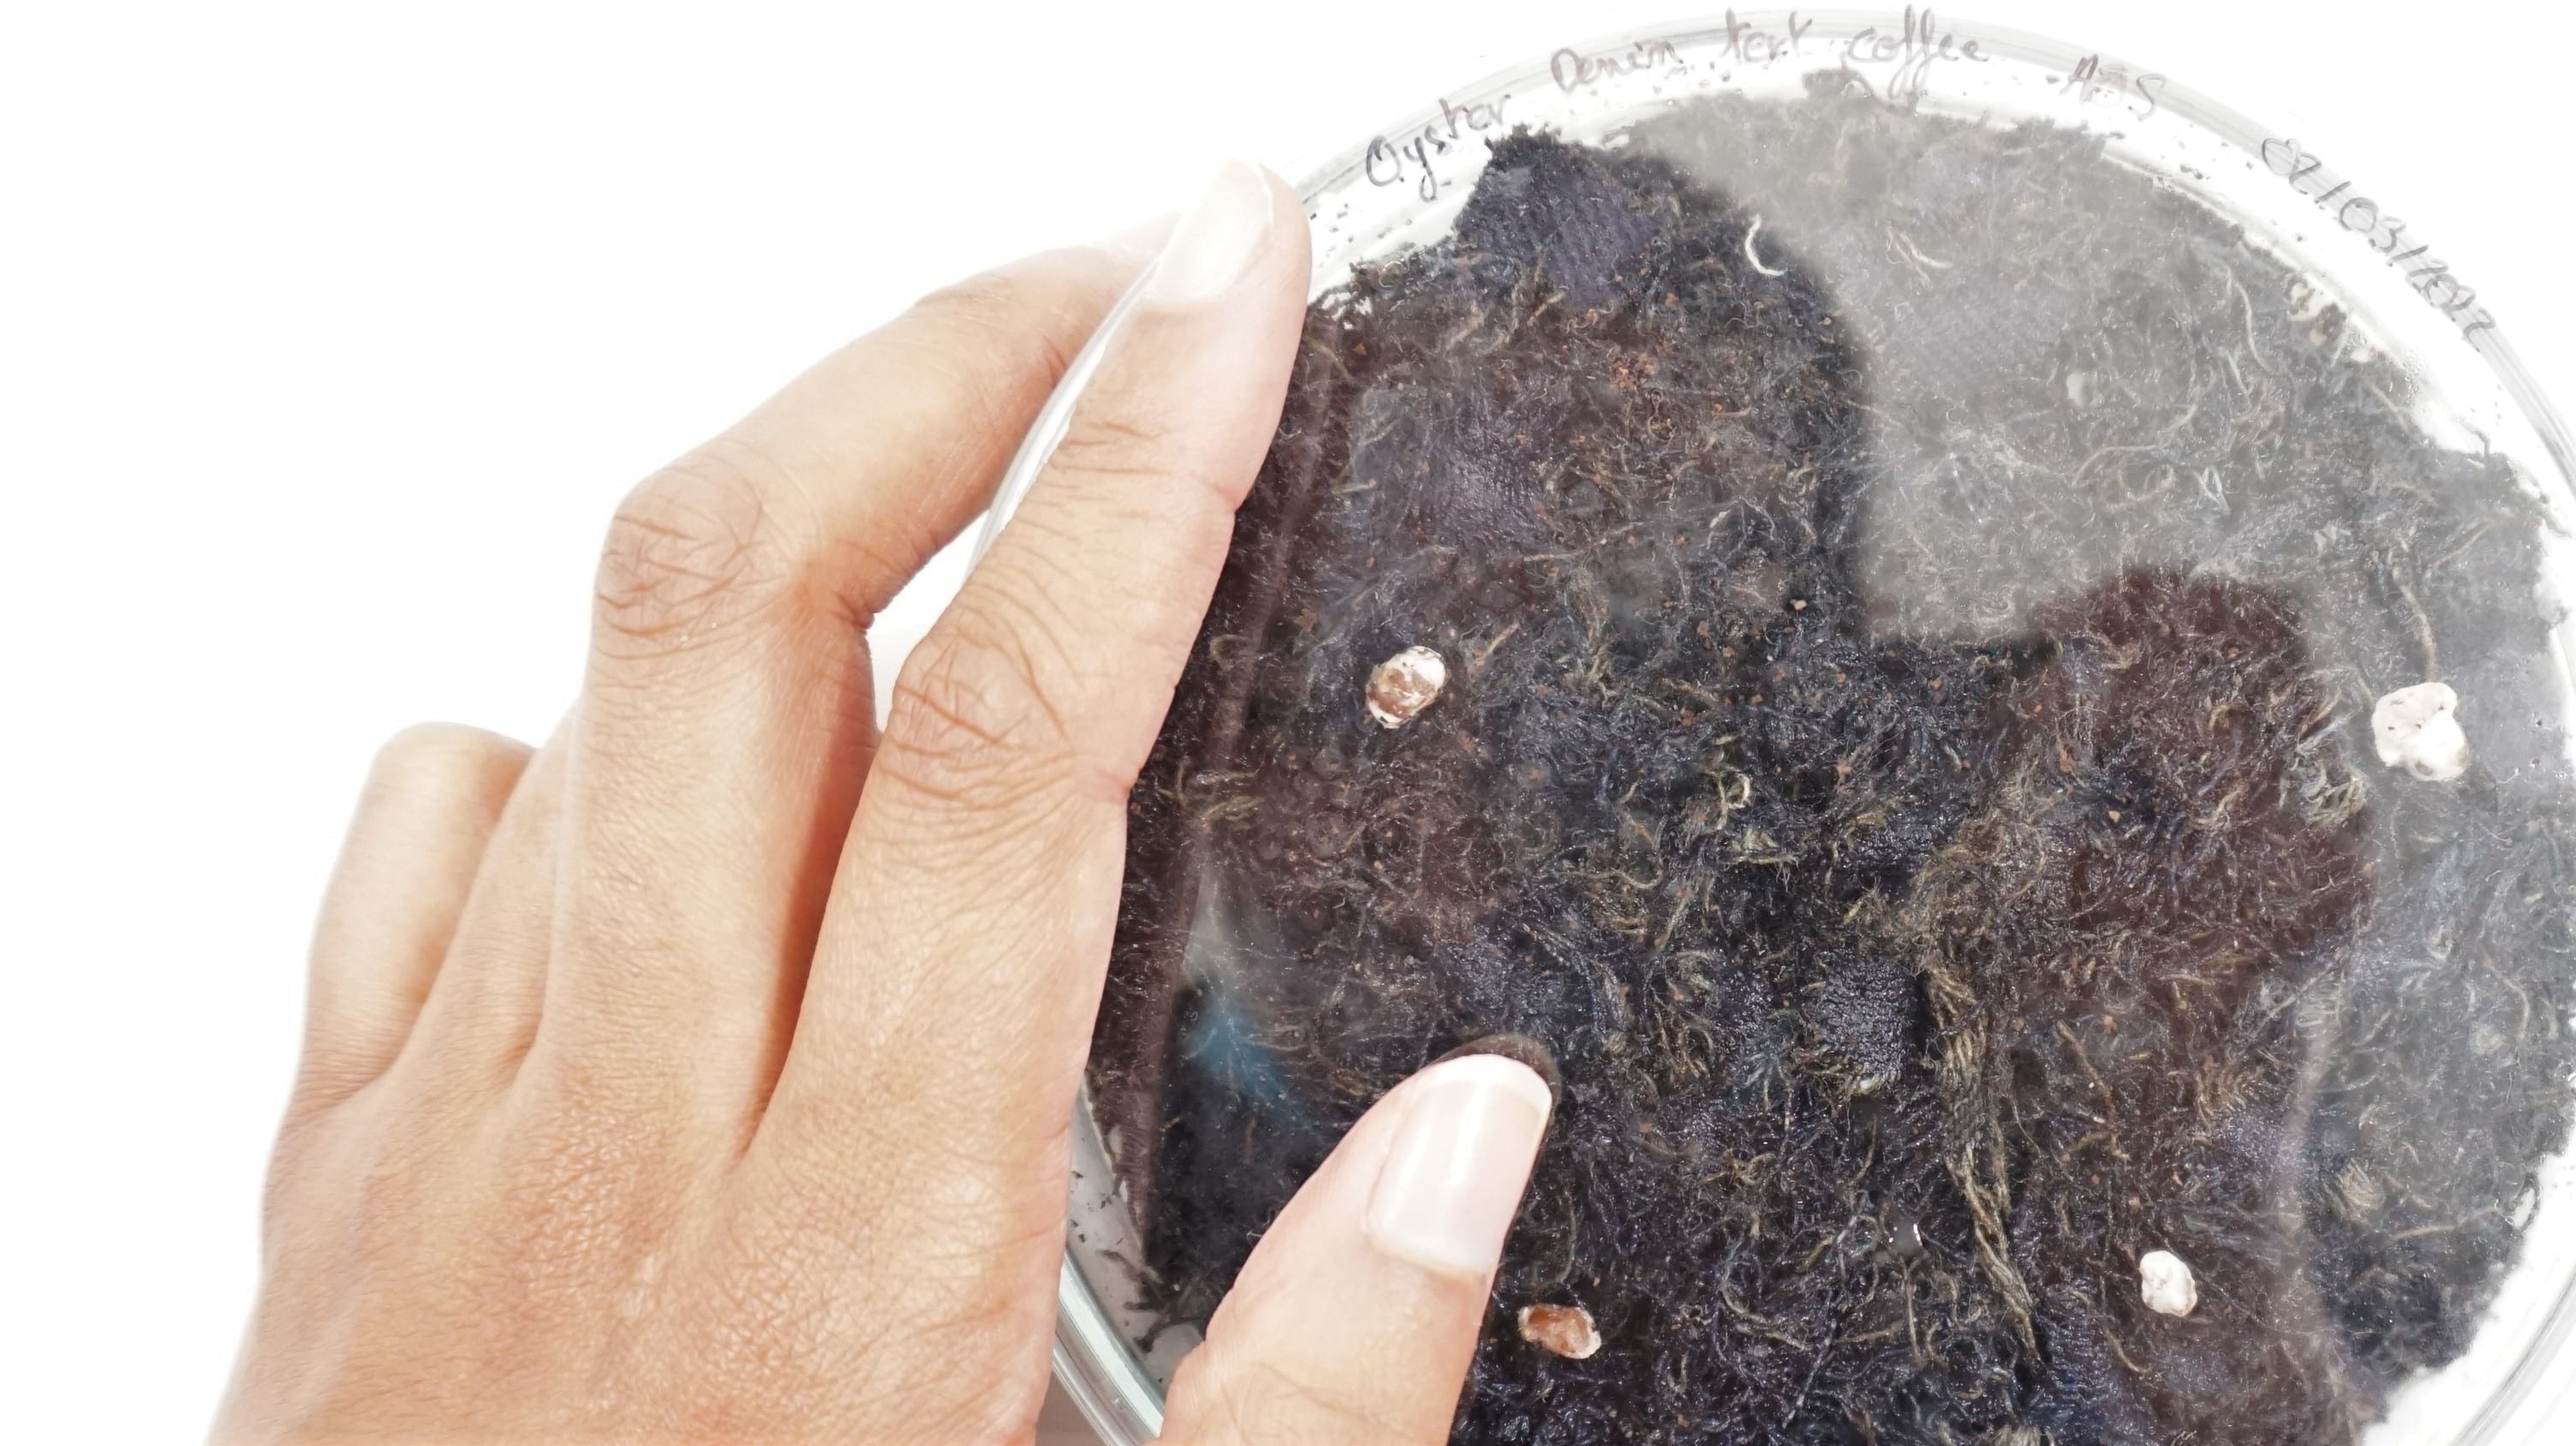
Image: Oyster mycelium grain inoculation of a denim and coffee waste substrate.
During our mentoring sessions, the first thing Jessica told me is that replating mycelium over and over would exhaust it and make it weaker. For the substrate testing experiments, I used mycelium grown on agar for the inoculation.
I noticed that using spawn grain for inoculation led to much faster and stronger colonization of petri dishes. I also used various grains to inoculate the petri dishes for faster colonization.
New growth experiments
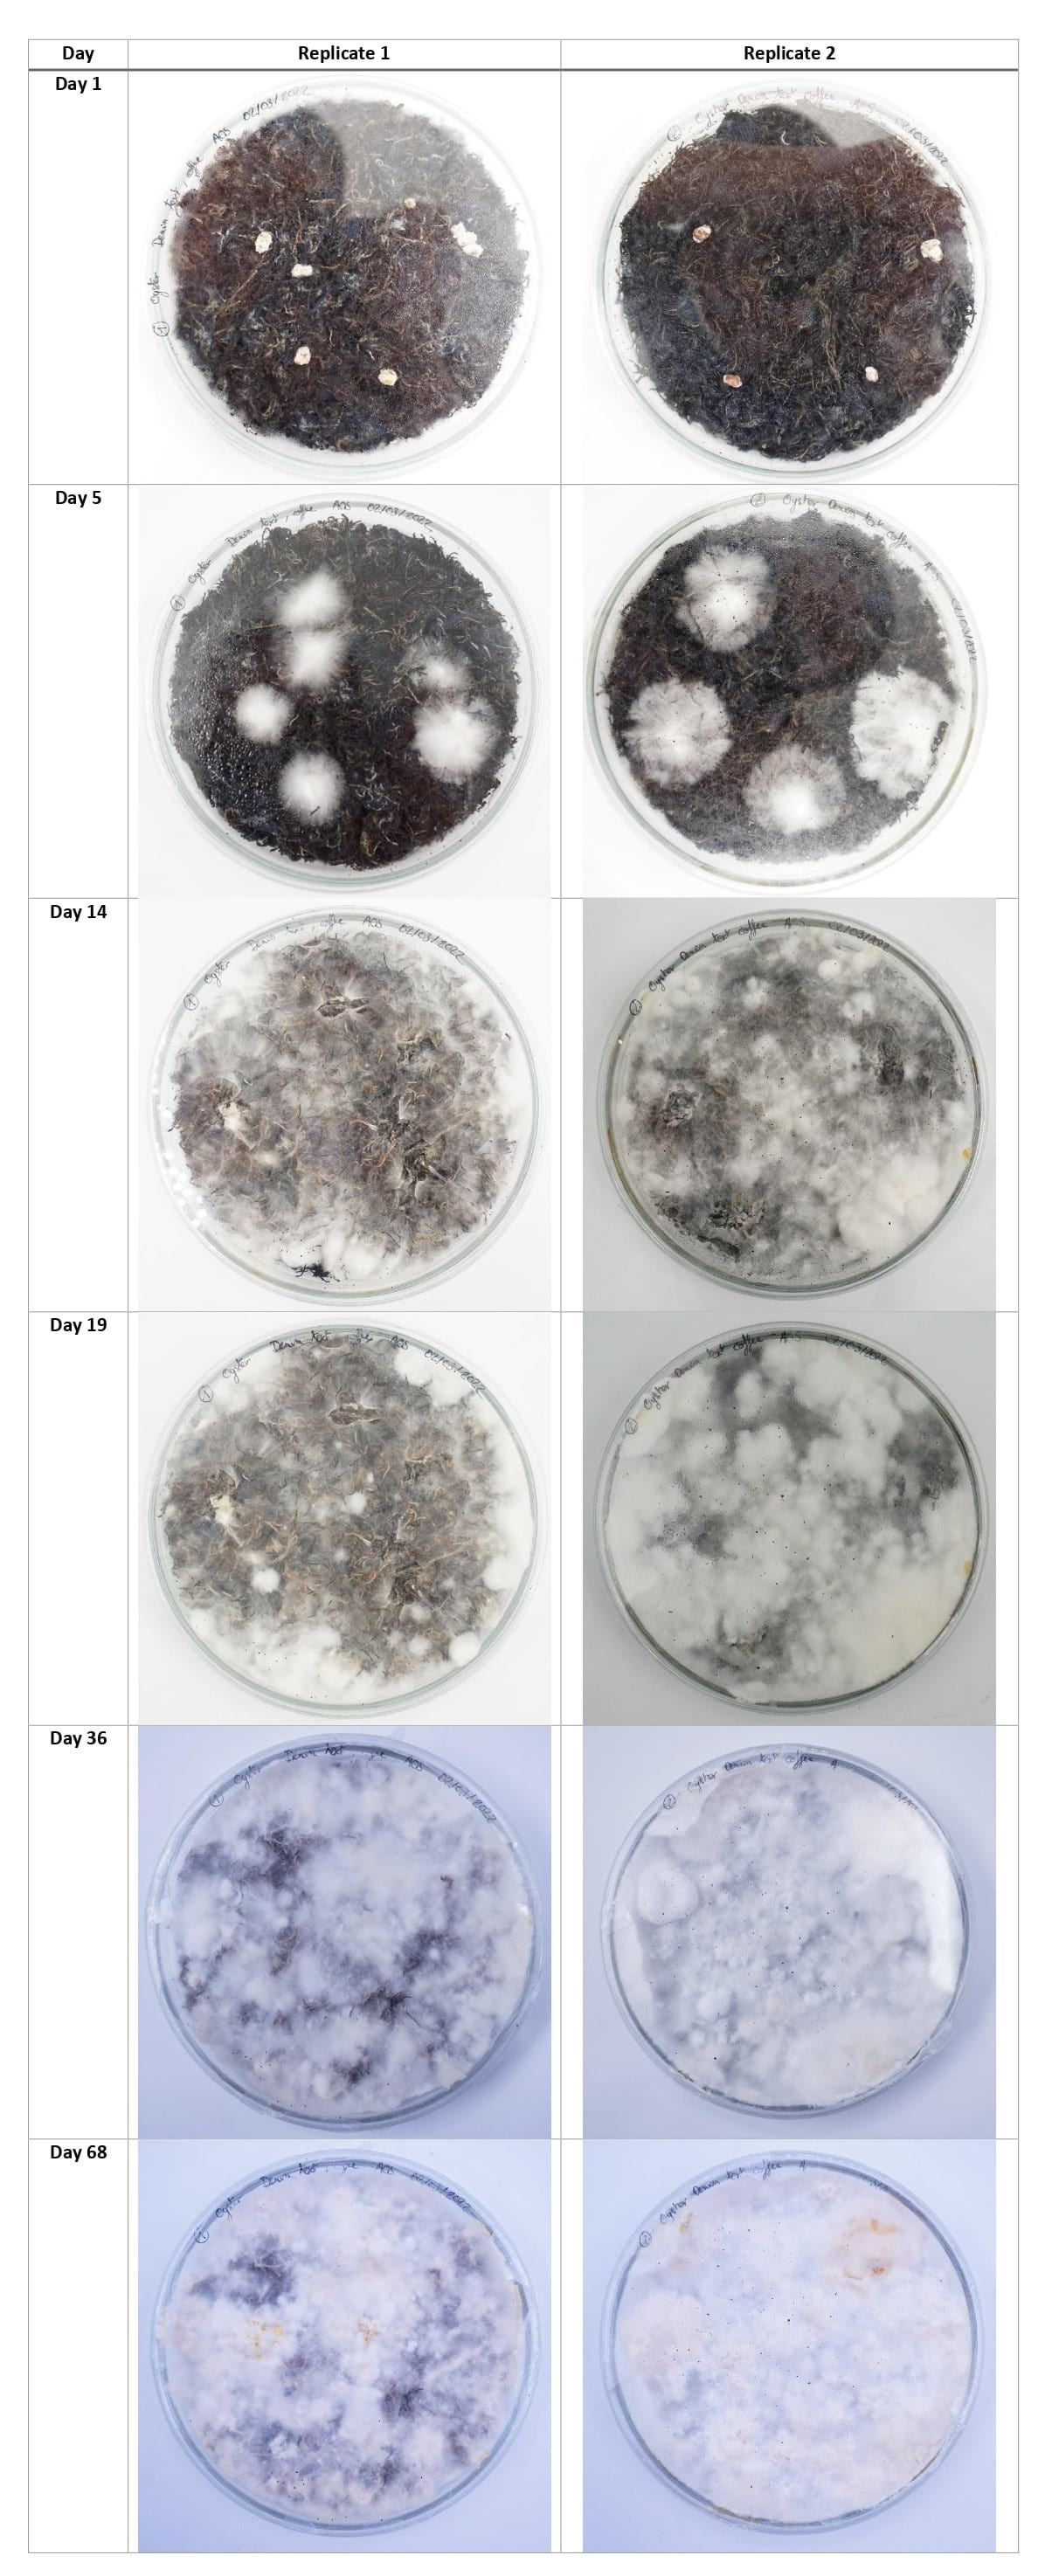
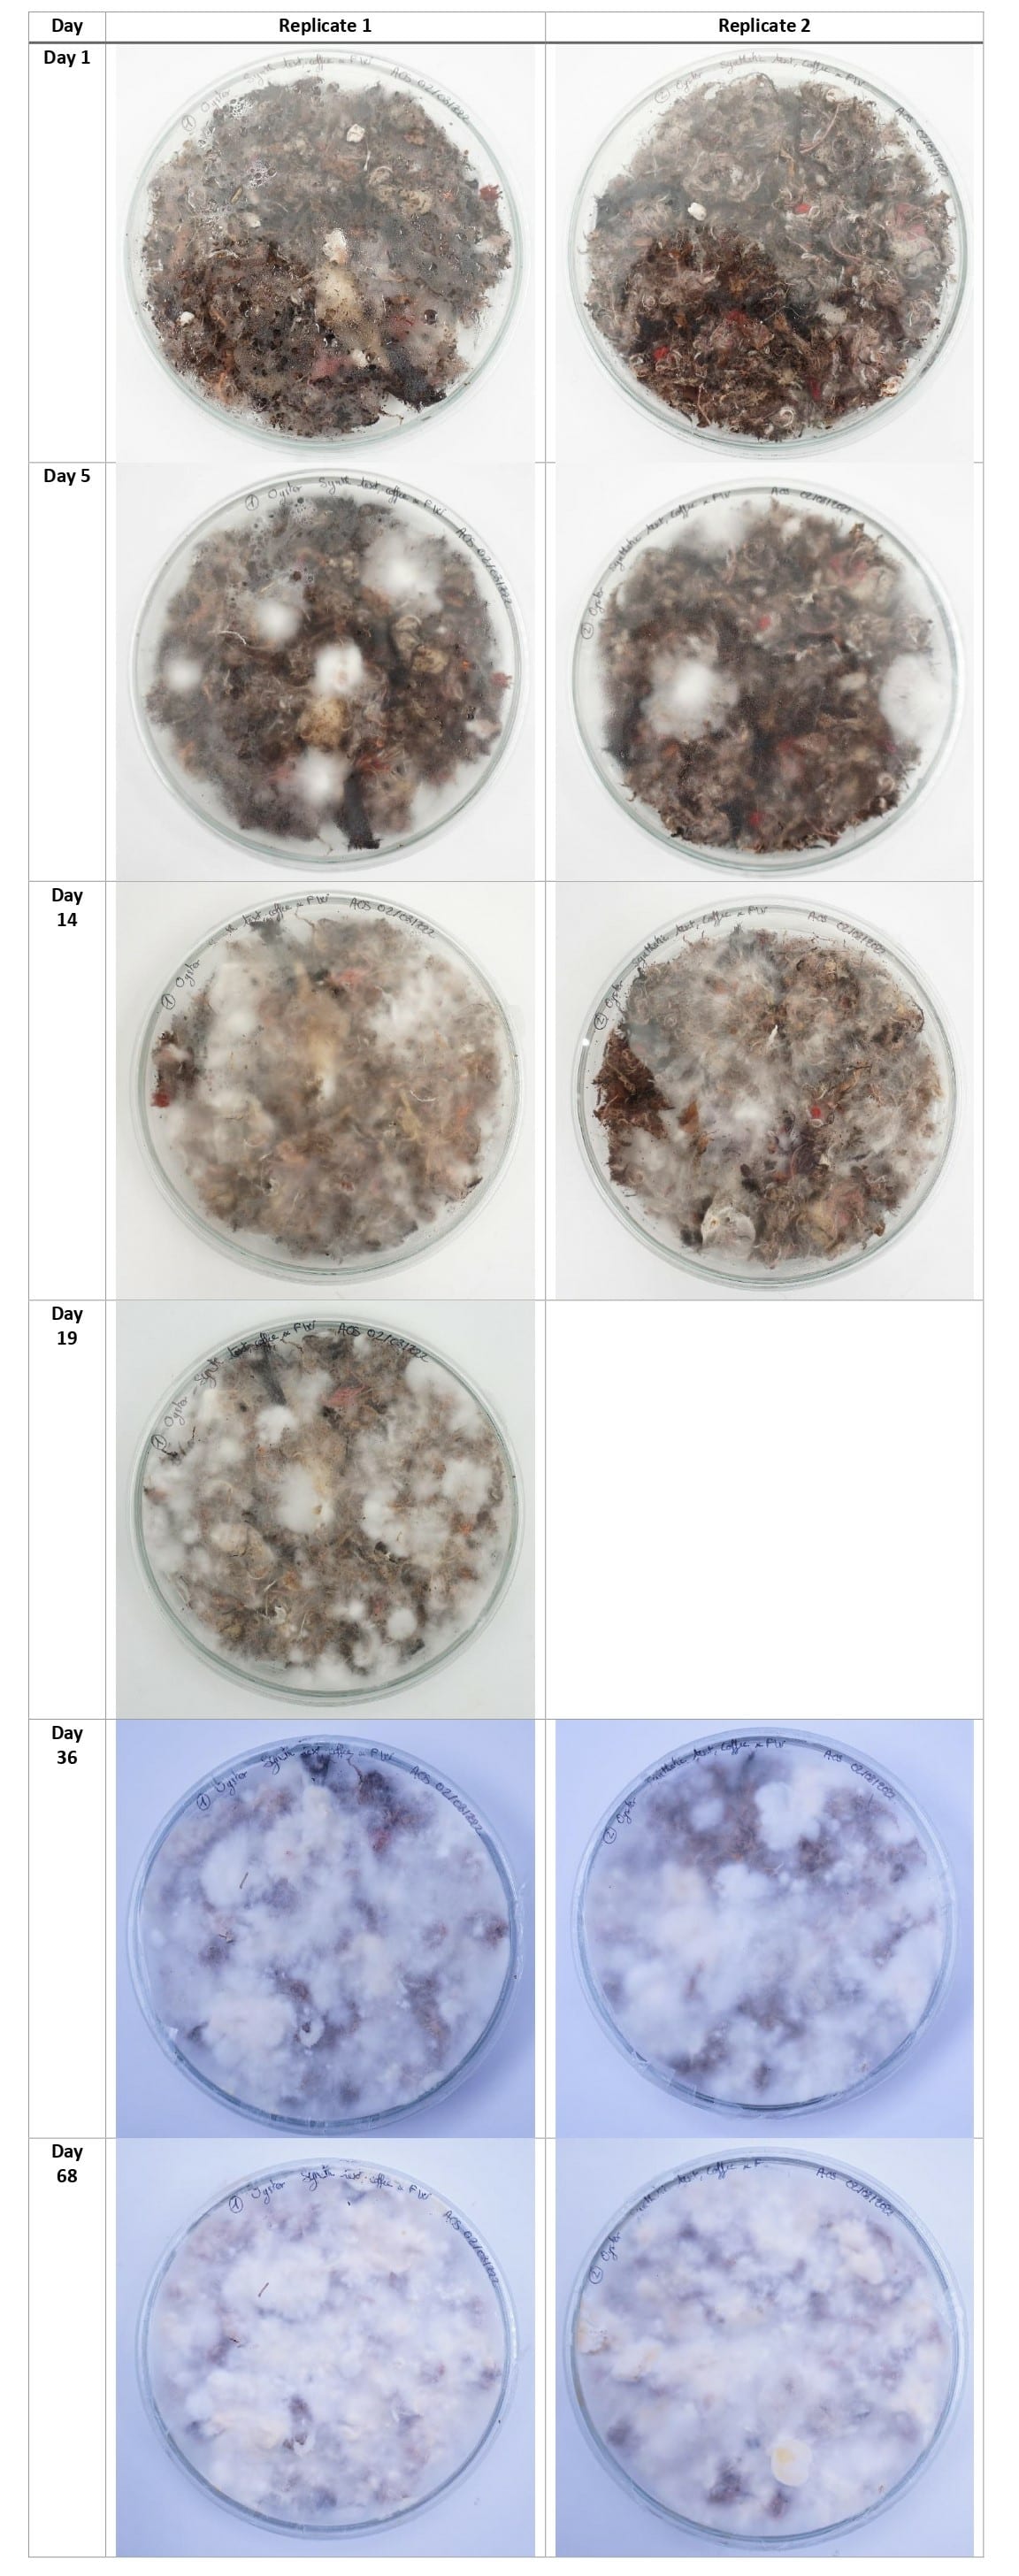
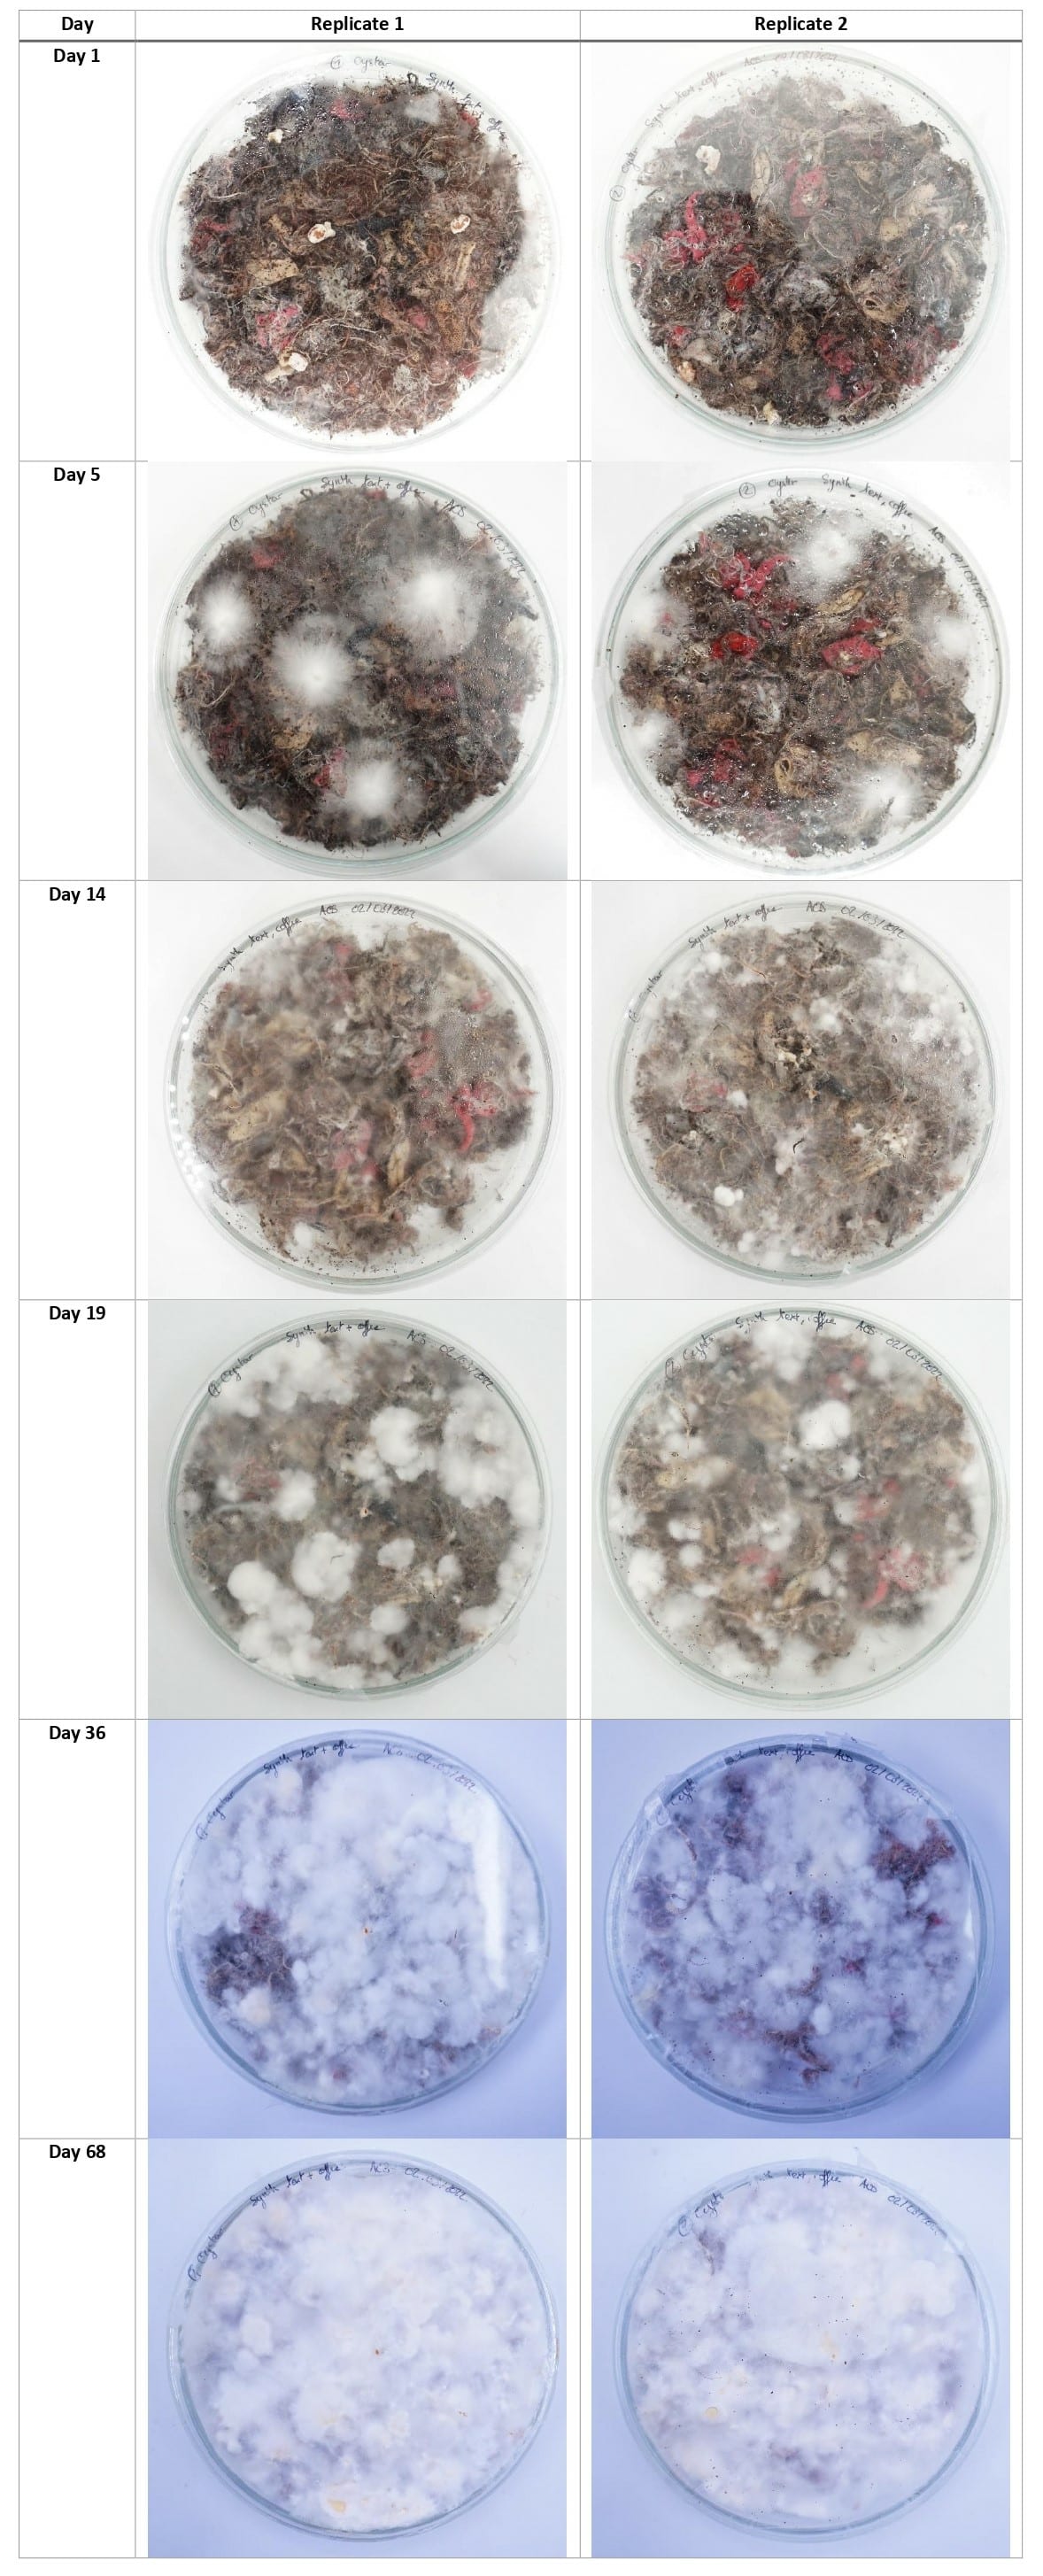
After optimizing the growth conditions, new growth experiments were carried out with the most promising samples. I repeated the experiments described in substrate experiments for the denim textile waste and coffee grounds, synthetic textile and coffe grounds and finally synthetic textile, coffee grounds and food waste. The same ratio of textile wastes and food wastes as in the previous experiments was applied.
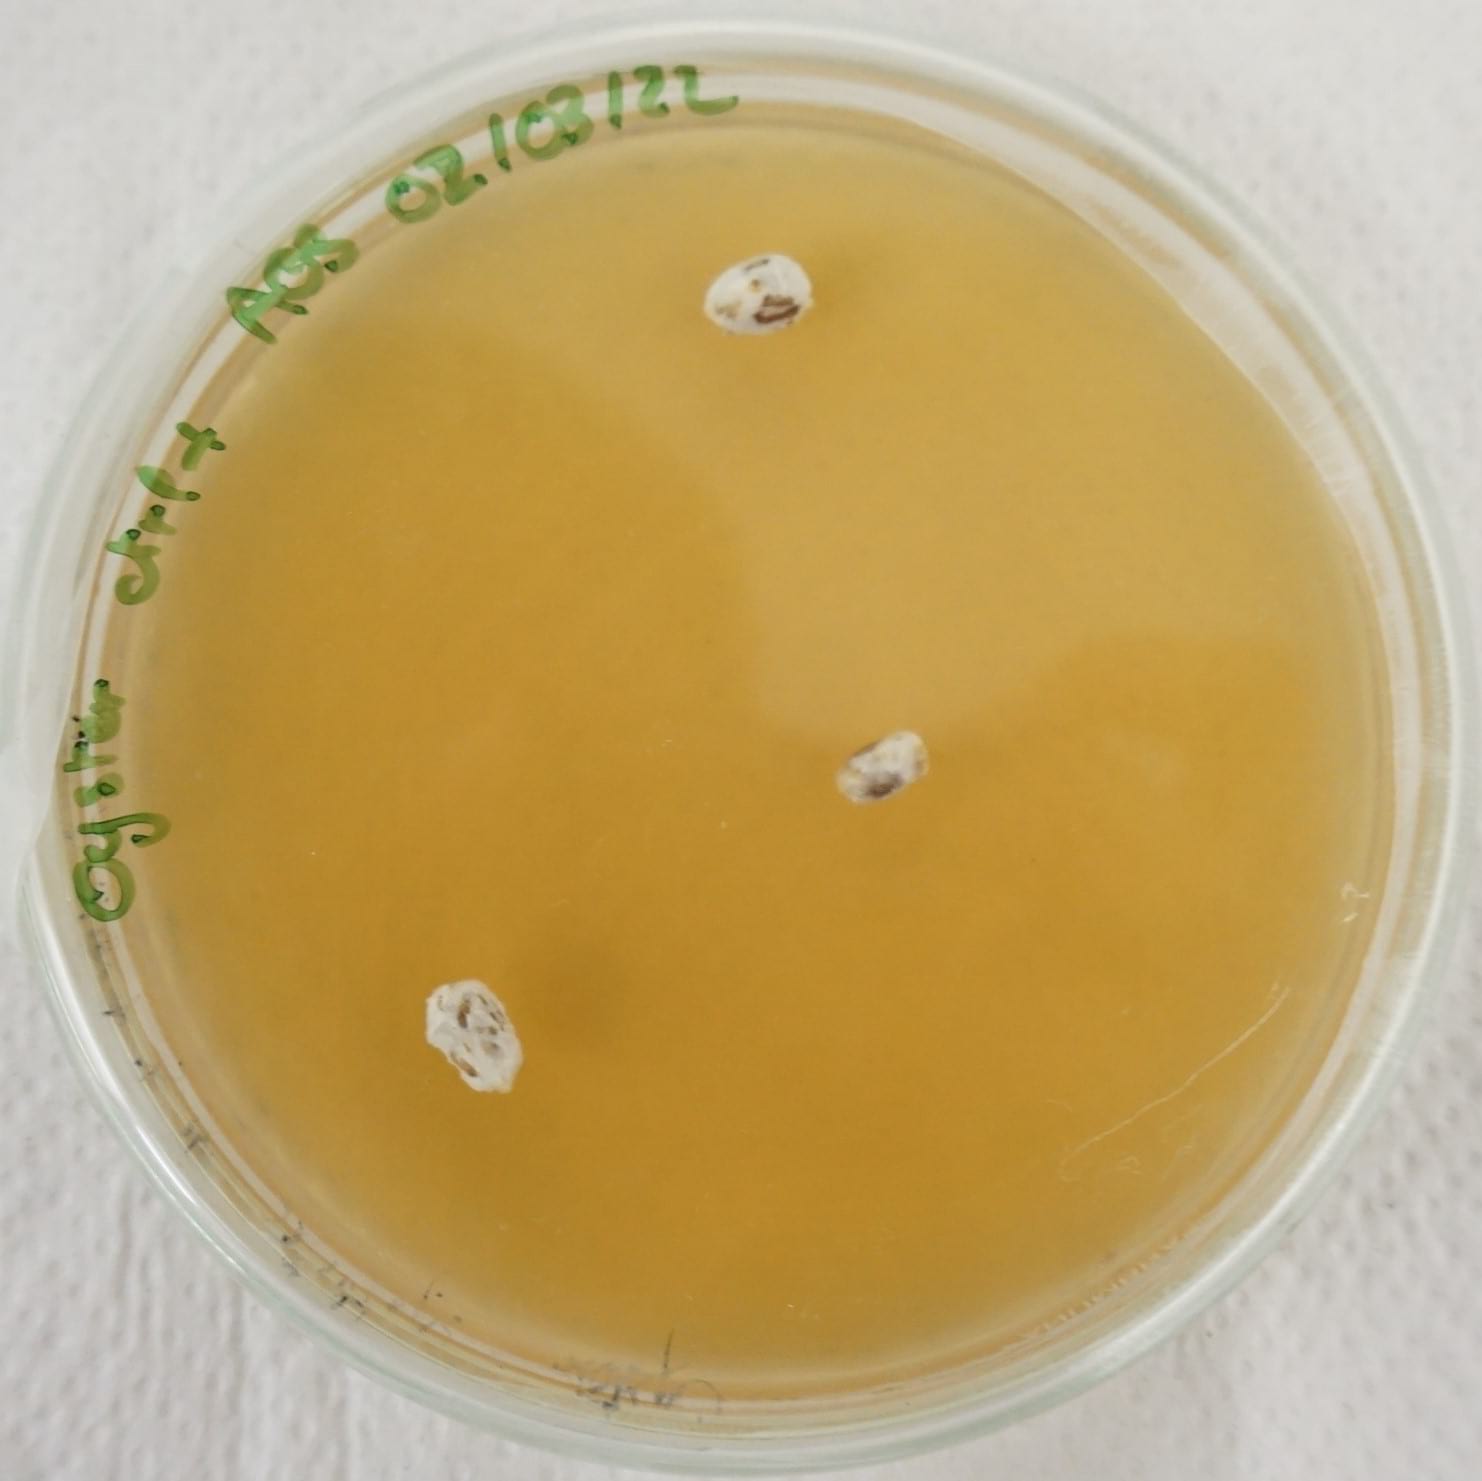
15 cm ⌀ and 2 cm thick petri dishes were inoculated with 4 to 6 colonized mycelium grains from the oyster spawn and put to grow in the CO2 chamber of the incubation tent. Positive control was performed using the same amount of grains for inoculation using a malt agar substrate.
Denim textile waste + coffee grounds
Synthetic textile waste + coffee grounds + food waste
Synthetic textile waste + coffee grounds
Positive control
| Day 1 | Day 5 | Day 19 | Day 36 | Day 68 |
|---|---|---|---|---|
 |
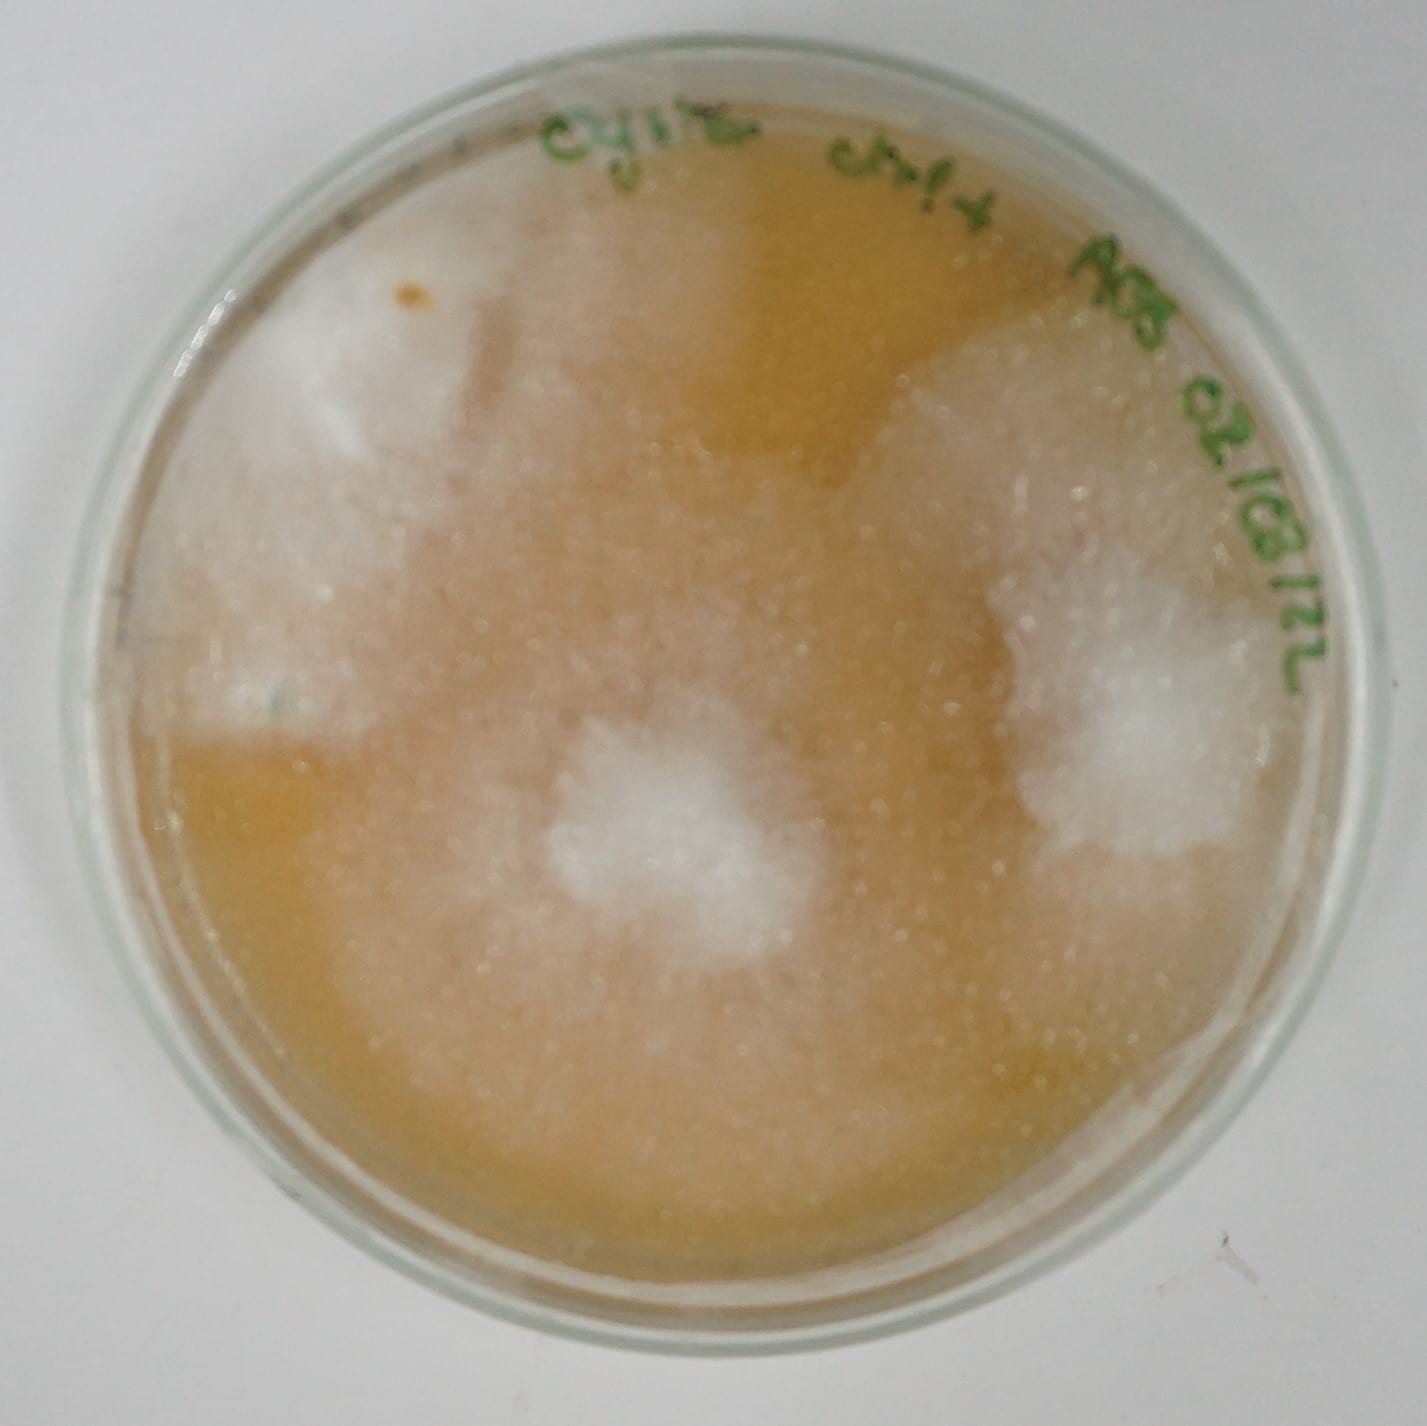 |
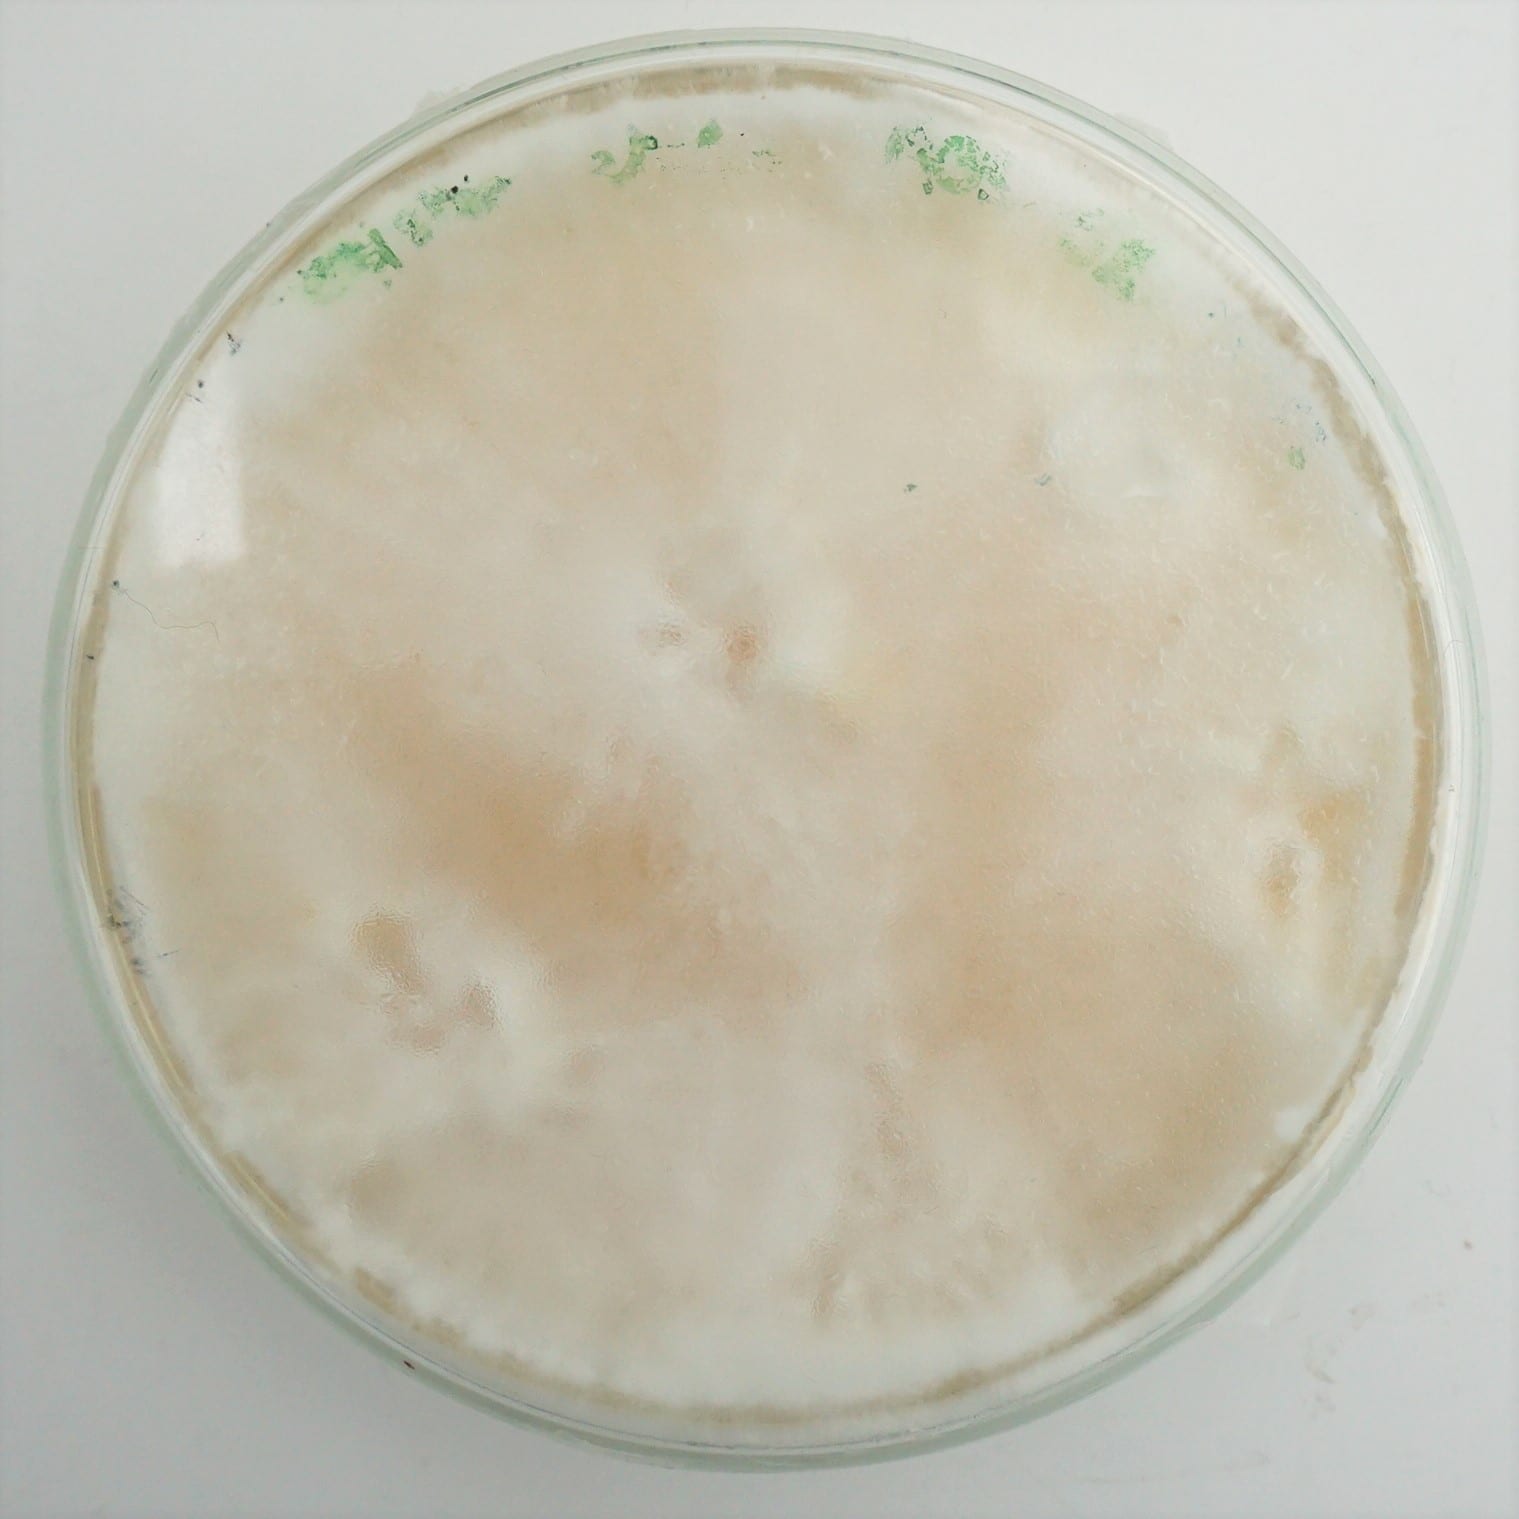 |
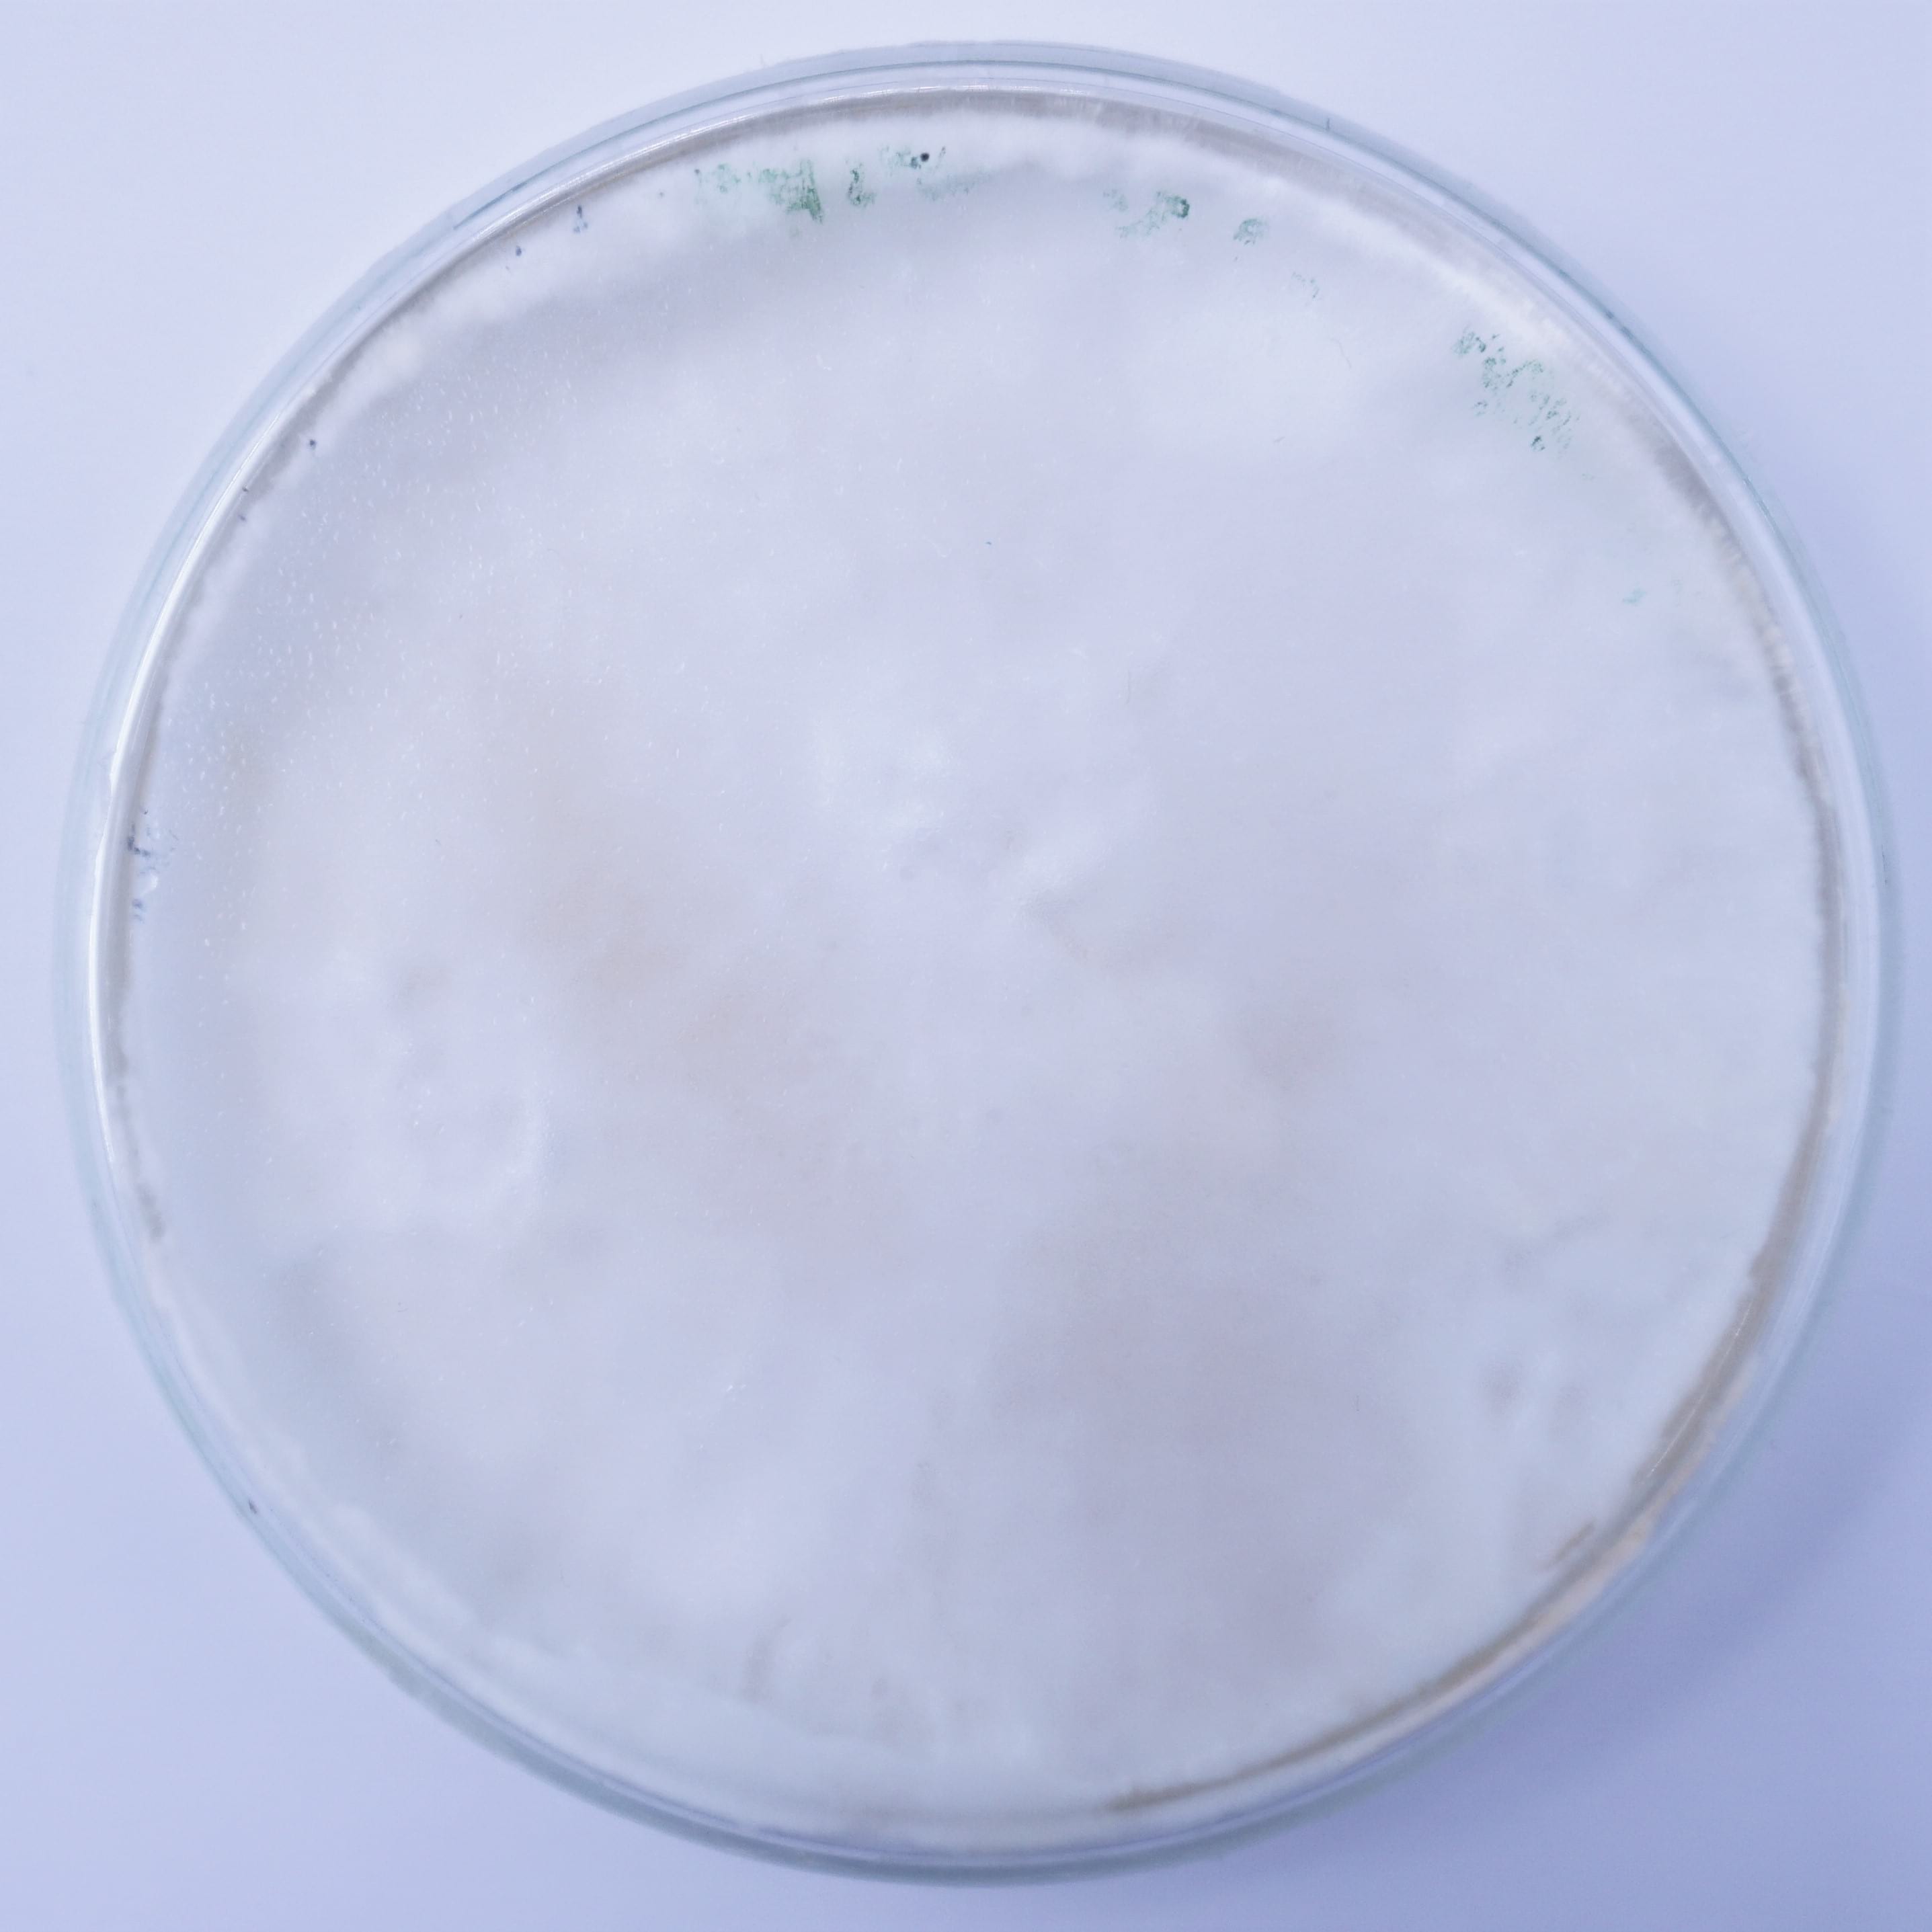 |
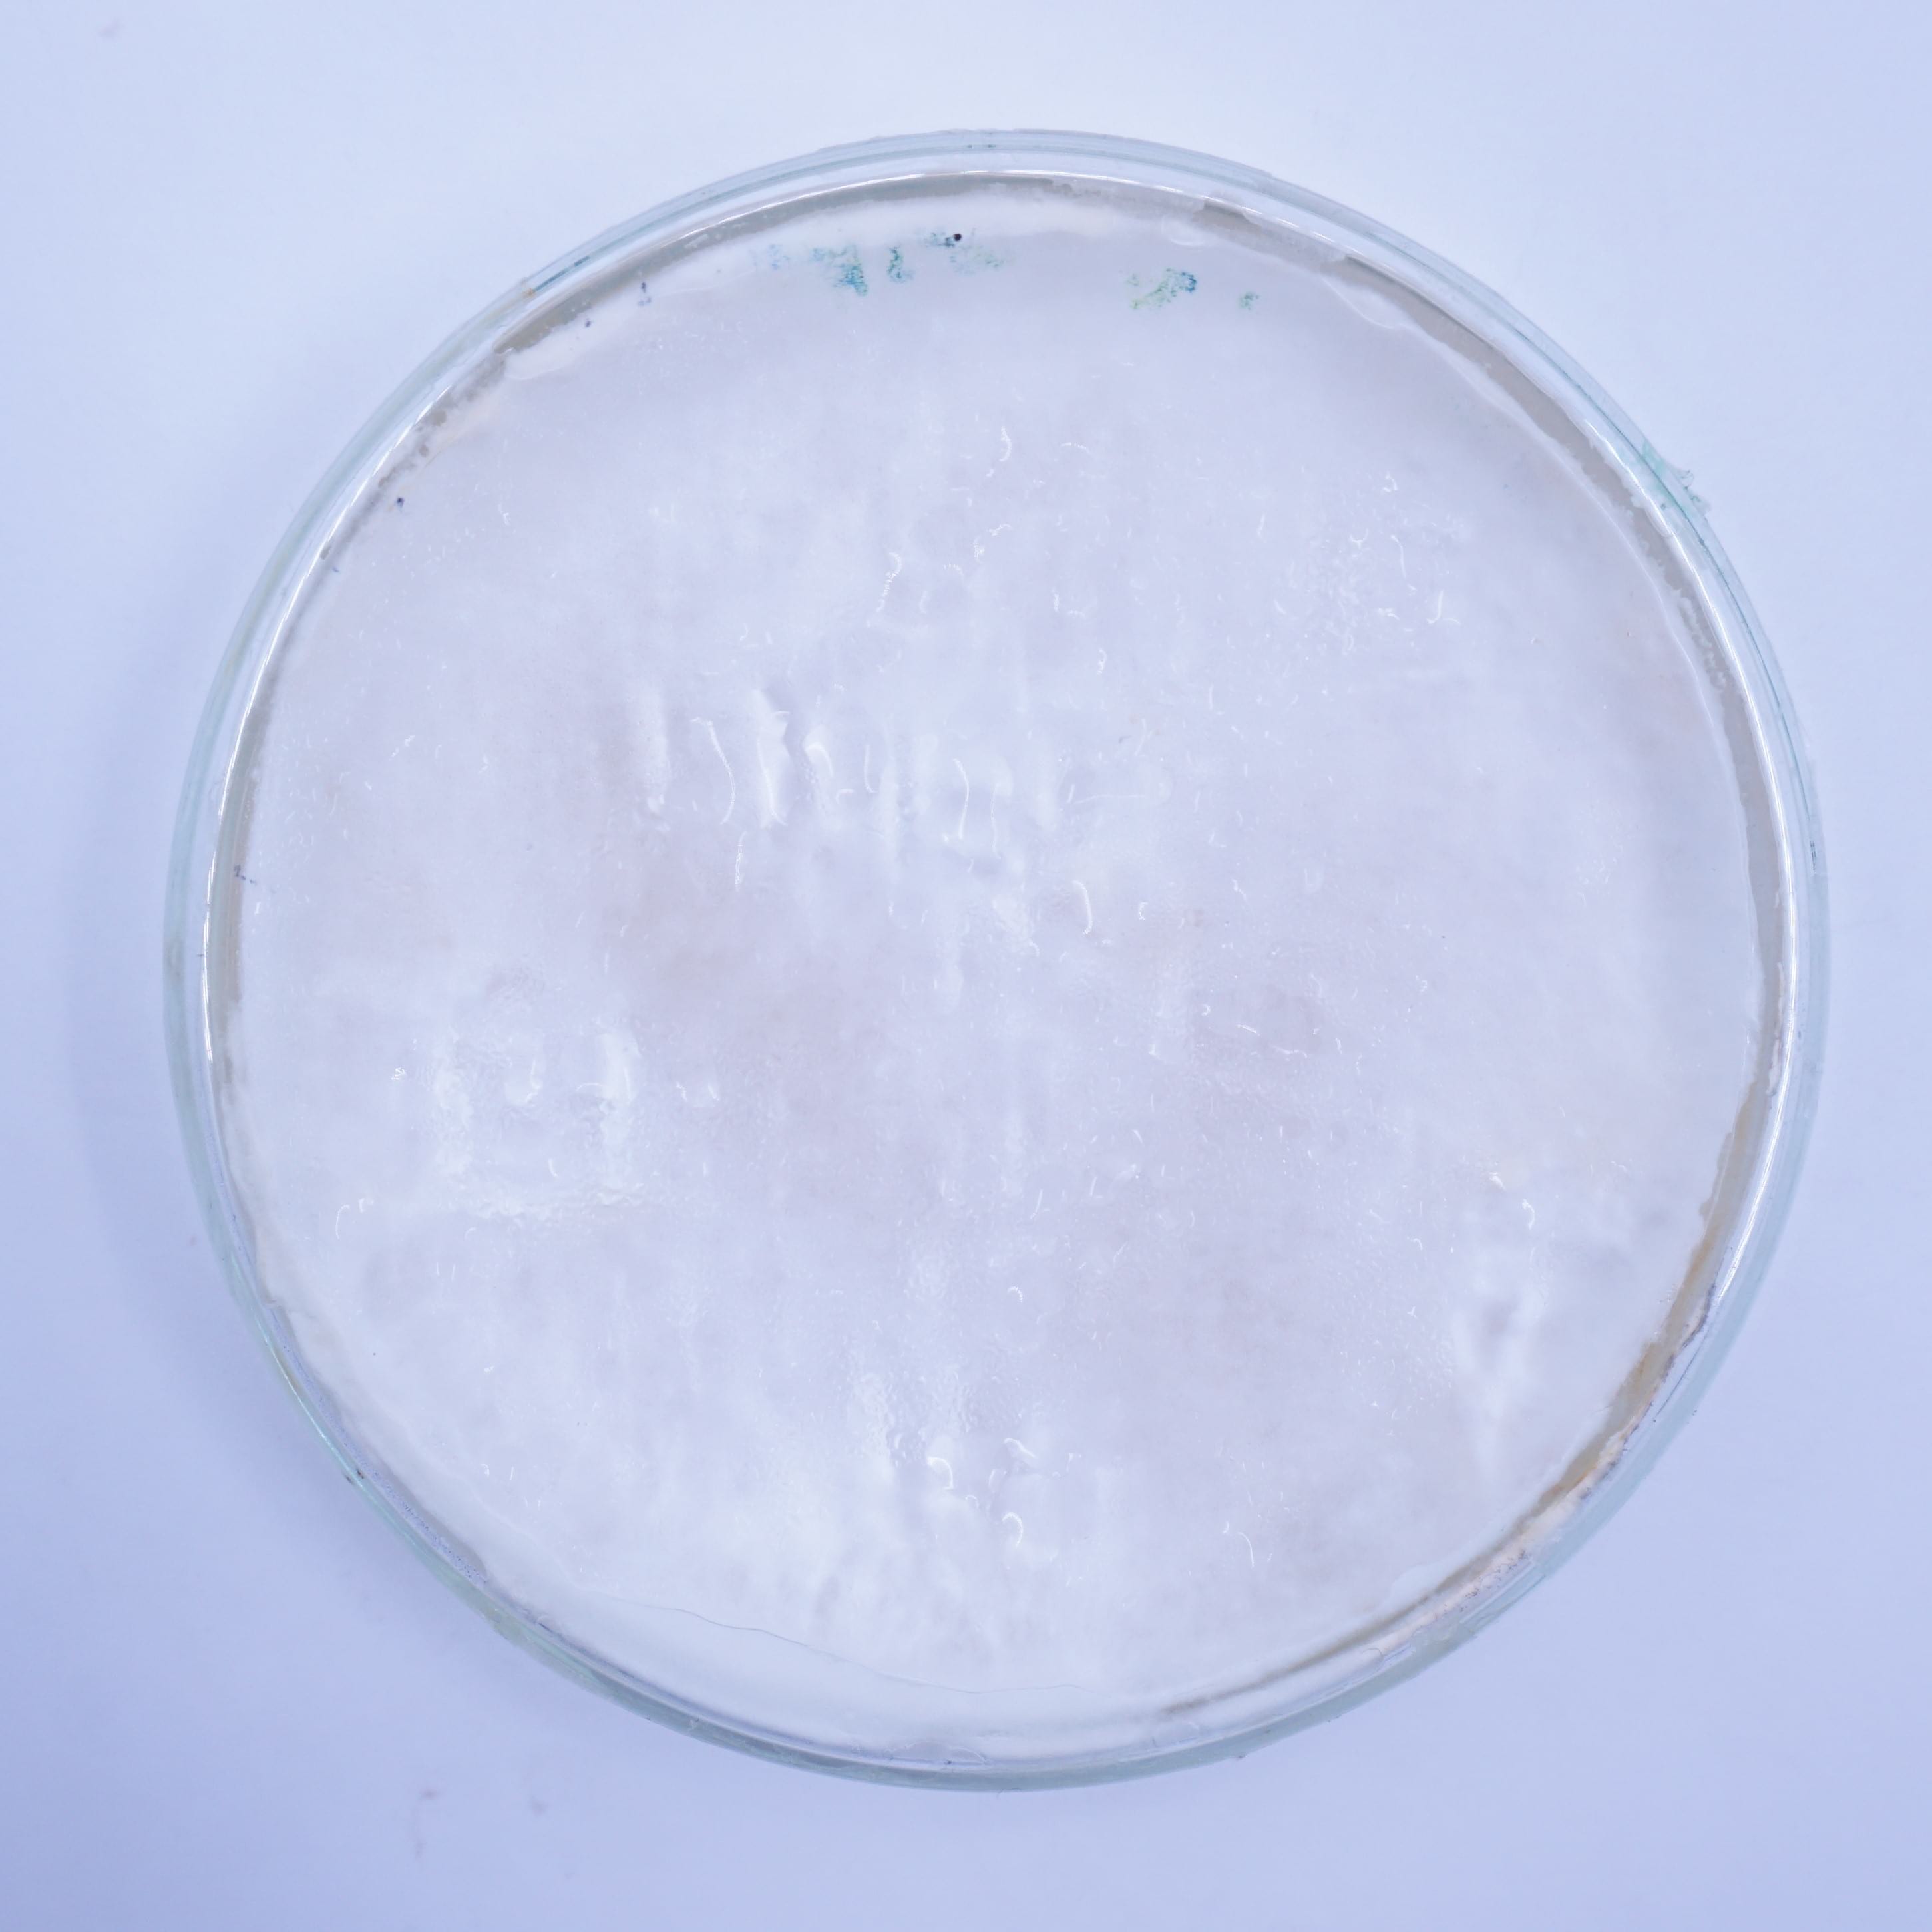 |
Conclusions
Using the new cultivation method, the mycelium grew equally on the 3 types of substrates, with a slight advantage for the denim textile waste samples.
This experiment's aim was to make bigger and stronger samples of composite leather to see if I could scale it up and eventually sew something from it. The petri dishes were colonized well on the top but the mycelium did not grow strong on the bottom.
For the next growing experiments, I should first make the mycelium colonize the entiere top of the petri dish, then flip the dish upside down until the mycelium colonizes the bottom part too, then finally flip it again and put the dish in the CO2 concentrated chamber until the mycelium grow fluffy on top.
Mycelium training
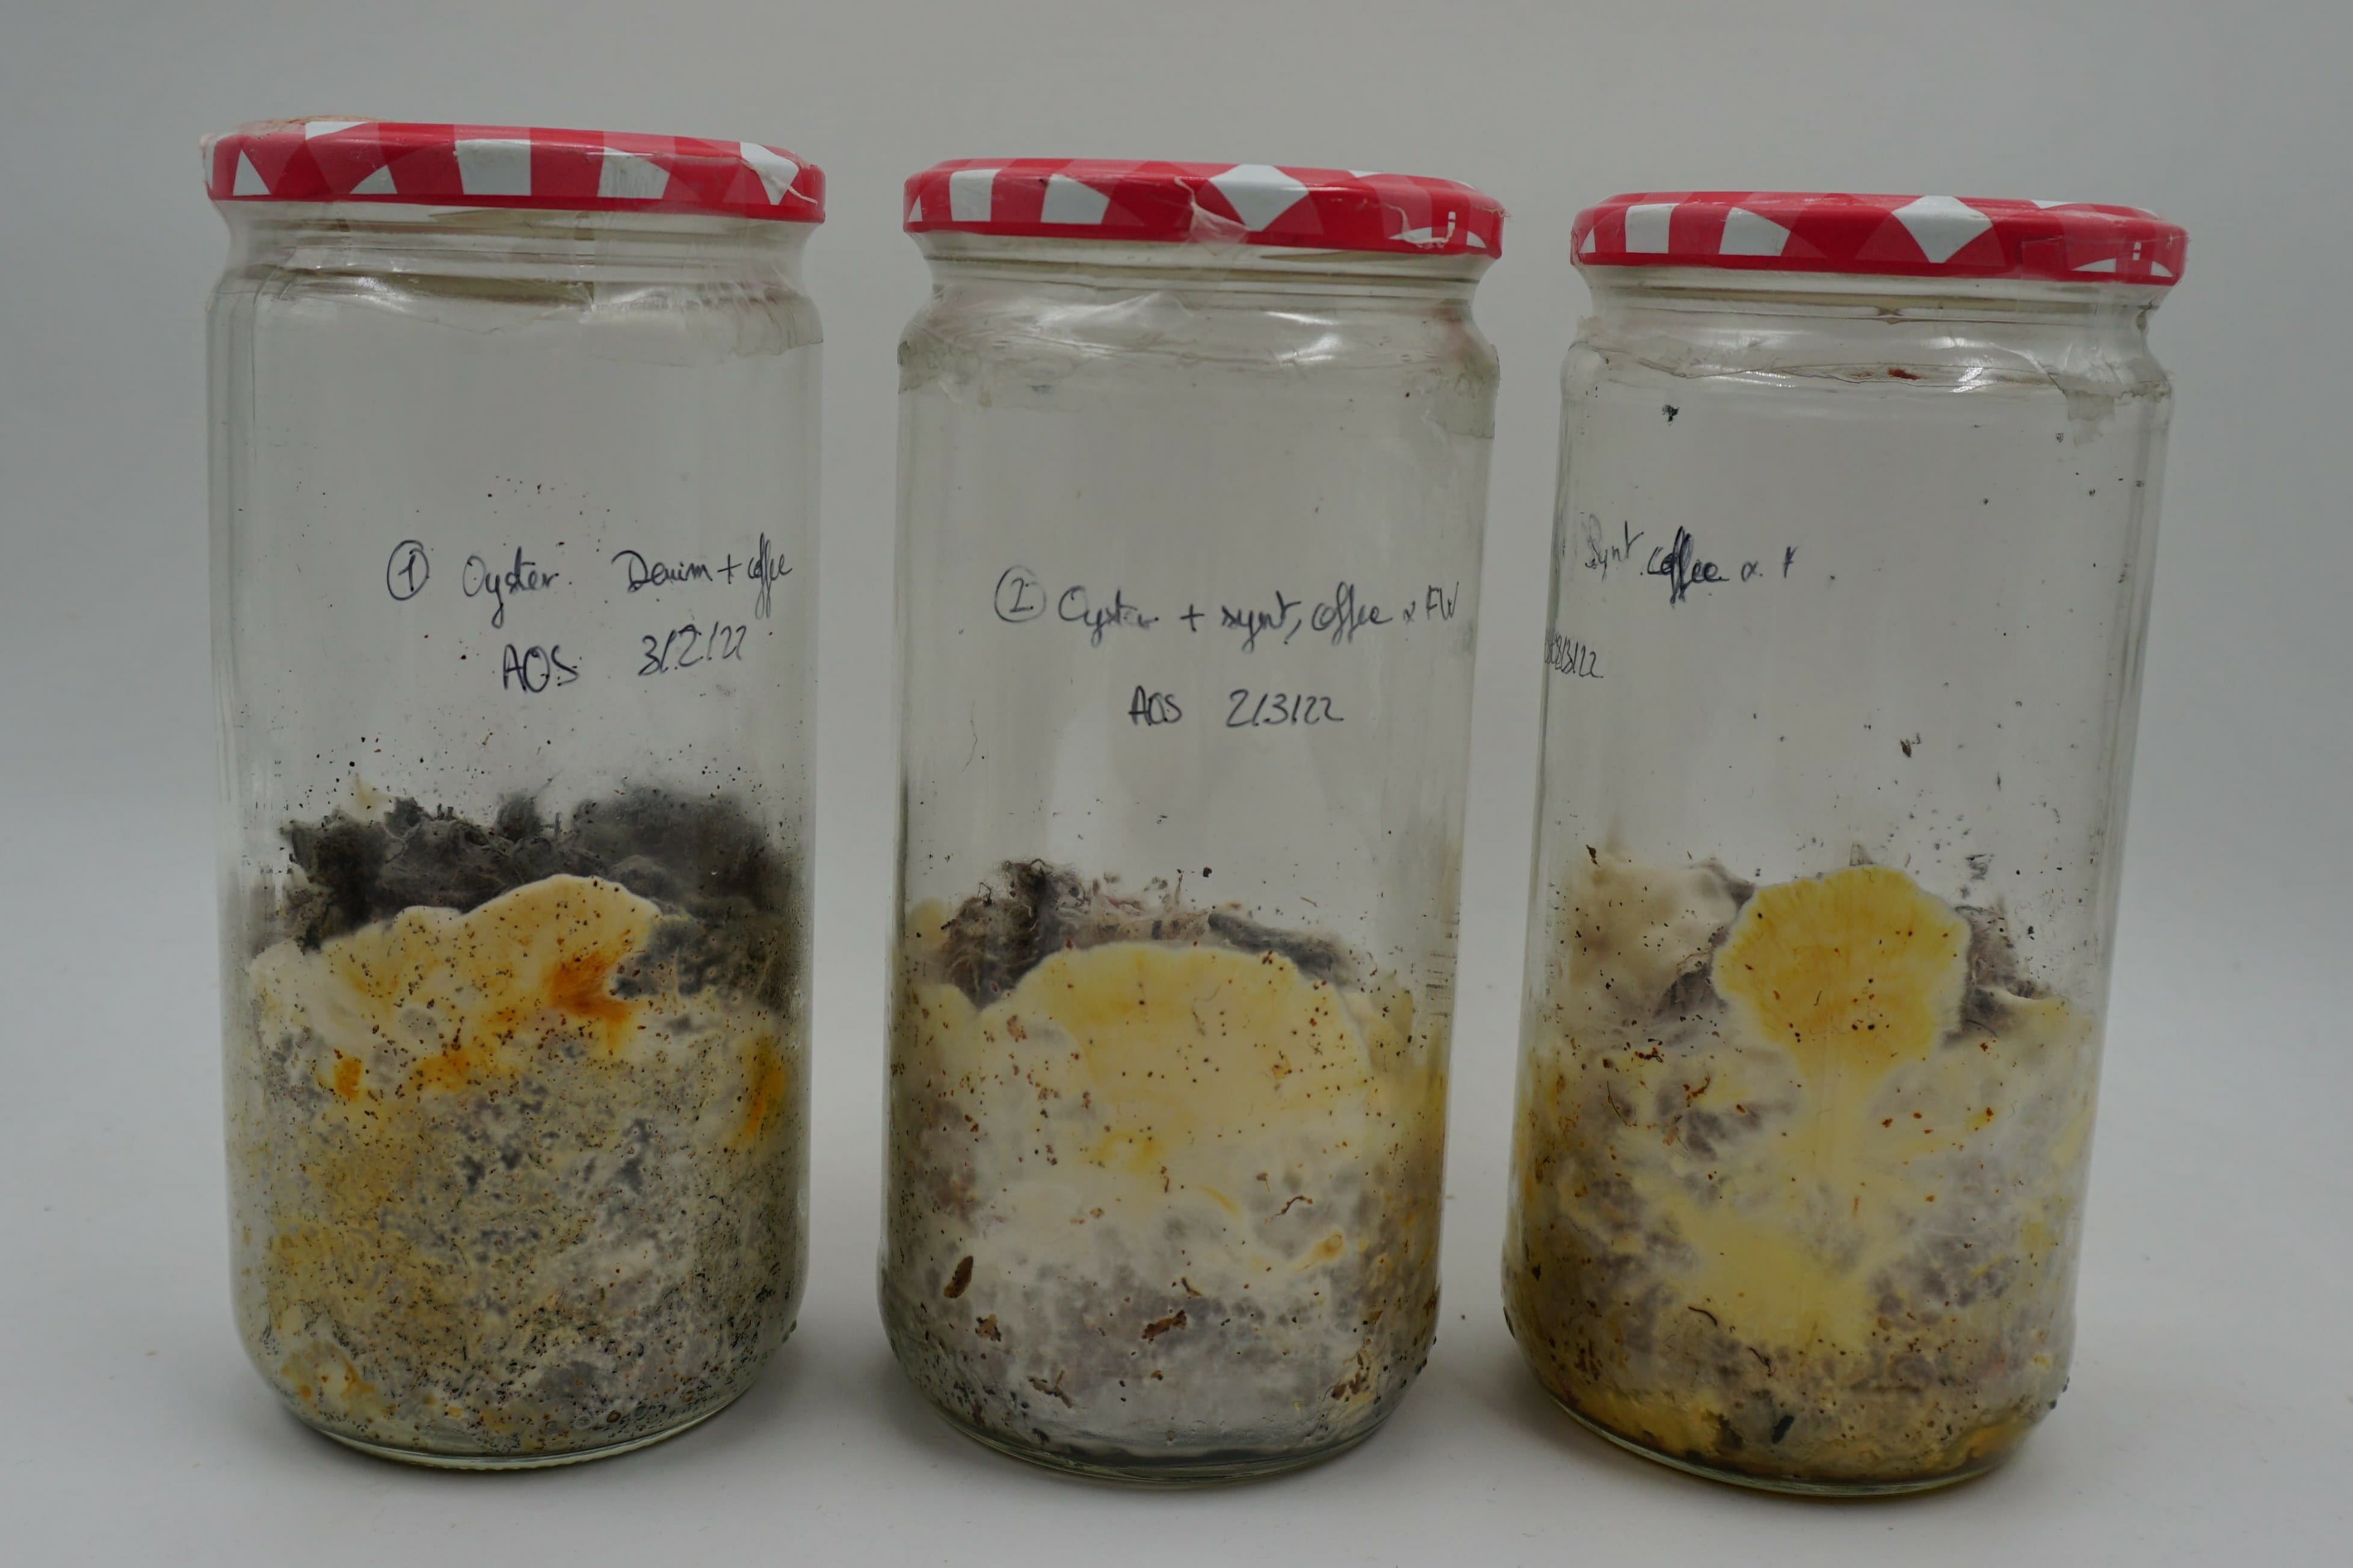
Image: Detail of the mycelium growing on the textile and food waste mixes.
One other step to optimize the cultivation conditions is to train the mycelium to grow on textile substrates by making it achieve full life cycles on that same substrate as described in the spawn preparation tab.
In order to do so, breathable jars as prepared in the spawn preparation tab were used. Those jars were filled to the third with either denim textile waste and coffee grounds, synthetic textile and coffe grounds or synthetic textile, coffee grounds and food waste. The same ratio of textile wastes and food wastes as in the substrate experiments was applied.
Jars were inoculated with 4 to 5 colonized mycelium grains from the oyster spawn and put to grow in the incubation tent. 2 jars of each mix were prepared.
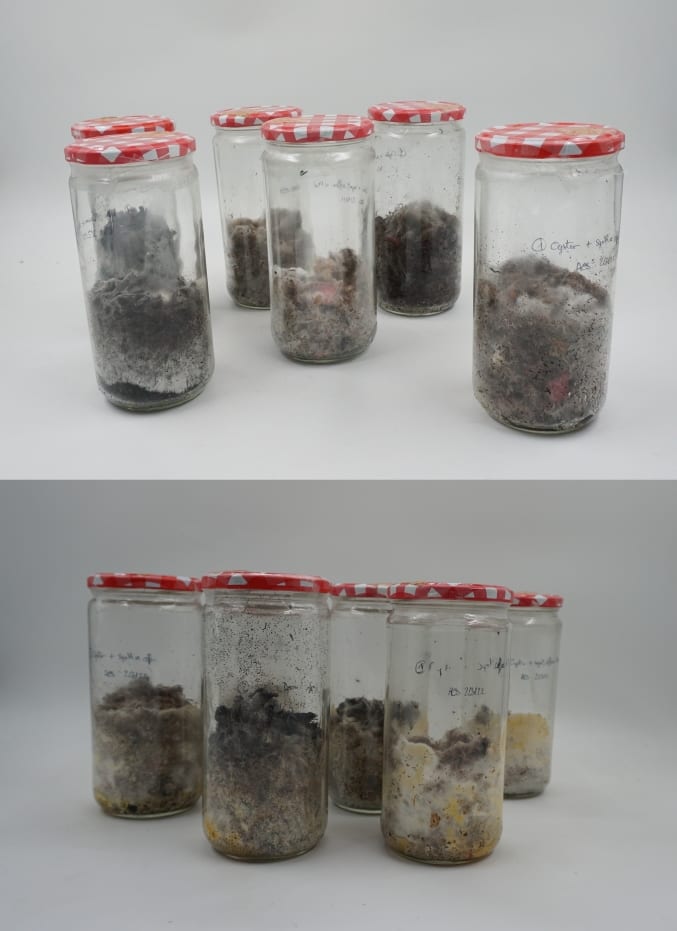
Image: Bioremediation jars on D14 and D67.
After around 60 days, the mycelium had fully colonized the textile and food waste mix and grown strong on it. It is ready for the fruiting experiments that will be carried on in the next trimester.