1. State of the art, project management and documentation
This first week of Fabricademy was dedicated to discoveries : we discovered the different fablab nodes, we discovered what the program of the year would be and we discovered each other. I was impressed by the size of the Labs in Barcelona and all the facilities at our disposition. Before coming to Barcelona, I had some few ideas of what I wanted to achieve during my journey at Fabricademy but seeing the machines and knowing I am going to learn how to use them and turn ideas into real projects confirmed me I was in the right place and had made the right choice.
I-GitLab documentation
First and foremost, our instructors thought us the way we should document our work at fabricademy. All the work we make, all the projects we develop must be documented on our dedicated webpage. We thus leart how to edit our webpage using GitLab, a platform using Markdown language for users to create and modify websites without necessarily know html.
Following the Fabricademy tutorials and using the Markdown guide , we leart how to edit and personnalize the basic webpage we had and document our previous work. With basic Markdown commands, it is possible to insert text, titles, subtitles, images and videos.
# Puts the text as a Title.
## Puts the text as a subtitle.
##### Puts the text as a sub-sub-sub-subtitle.
*text* Puts text in italic.
**text** Puts text in bold.
***text*** Puts text in bold and italic.
 Adds an image.
[text](link) Adds an hyperlink to the text.
However, GitLab also understands html coding which, in my opinion, allows more freedom and opens up more possibilities. Depending on what I wanted to do, I learnt some html codes in order to have a more personnalized webpage.
<img src="ImagePath" alt="ImageName" align="right" width="350"/>
This code line allows to decide where to align the image and to choose its size.

<img src="ImagePath" width="175" style="display:inline-block;"/>
<img src="ImagePath" width="175" style="display:inline-block;"/>
These code lines allow to decide the size of the image and to display them side by side.
Coding can sometimes be challenging and though I found out how to solve most problems by trial and error, I nedded help to figure out some issues. For instance, thanks to the help of Julian, I figured out what CSS was and leart that as CSS rule blocked me from changing the height of images. However, even after adding a new CSS to the stylesheet folder, the initial CSS rule could still not be taken down. As the width of the images is not automatic, I found a more "crafty" way to display the images the way I wanted : by a simple rule of three, I could get the width I should apply to the image in order to have the desired height.
When having issues with coding, inspecting the code of other students' GitLab webpage was of great help.
II-Tools I used
To present my previous work, I used some tools and softwares.
-
TinyPNG is an online tool to compress images and turn them into a lighter .jpg image for it to be better supported by GitLab.
-
Canva is an amazing online tool allowing the making of collages, but also presentations, posters, portfolios, resumes, logos, flyers, social media content, buisness cards, menus, etc with a large range of designs available.

-
EzGif is an online tool to make Gifs out of pictures or videos. The advantage of this website is that it automatically compresses the images of the Gif, making it directly importable into GitLab.
-
An easy way to make collages was to use Powerpoint and exporting slides into a .jpg format.
-
Gimp is a free image editing software. I had never used it before coming to fabricademy, where I leart how to reduce the size of an image using it. As I am not from a design related carreer background, I decided to follow Youtube tutorials on how to use Gimp, especially for Photo Collages. This turotial helped me a lot and made me learn how to do photocollages, cut a piece of an image and insert it into another one, apply filters, use calques...
III-Final project ideas
I did not come to Fabricademy with a defined final project in mind but just some ideas and concepts. I am waiting to see the different assignements we make to define what I like and I want to make.
IV-Inspiration
In order to define a project, I first had to define what my inspirations were. These inspirations come from different fields : fashion, science and graphic design. In terms of aesthetic, I particularly like Alexander McQueen for the tailored shapes, Schiaparelli for the incorporation of metallic and hard materials in their collections, and Iris Van Herpen for enigmatic and mycellium-like shapes.
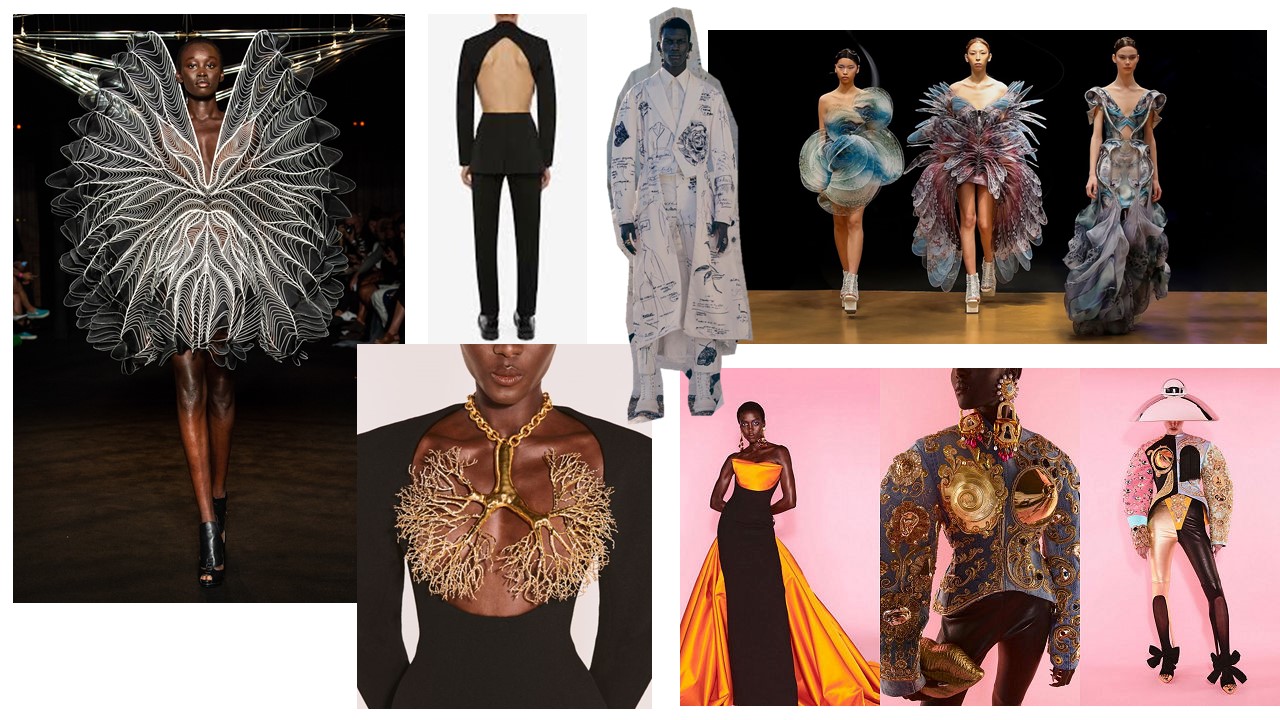
Making couture out of self grown materials has already been done by Suzanne Lee, who developped Kombucha leather from the Kombucha SCOBY (bacteria and yeasts), or by Aniela Hoitink, who made clothes out of mycelium... And more and more brands are interested in developping that field even more. However, nature's diversity is huge and only a handful possibilities have been explored.
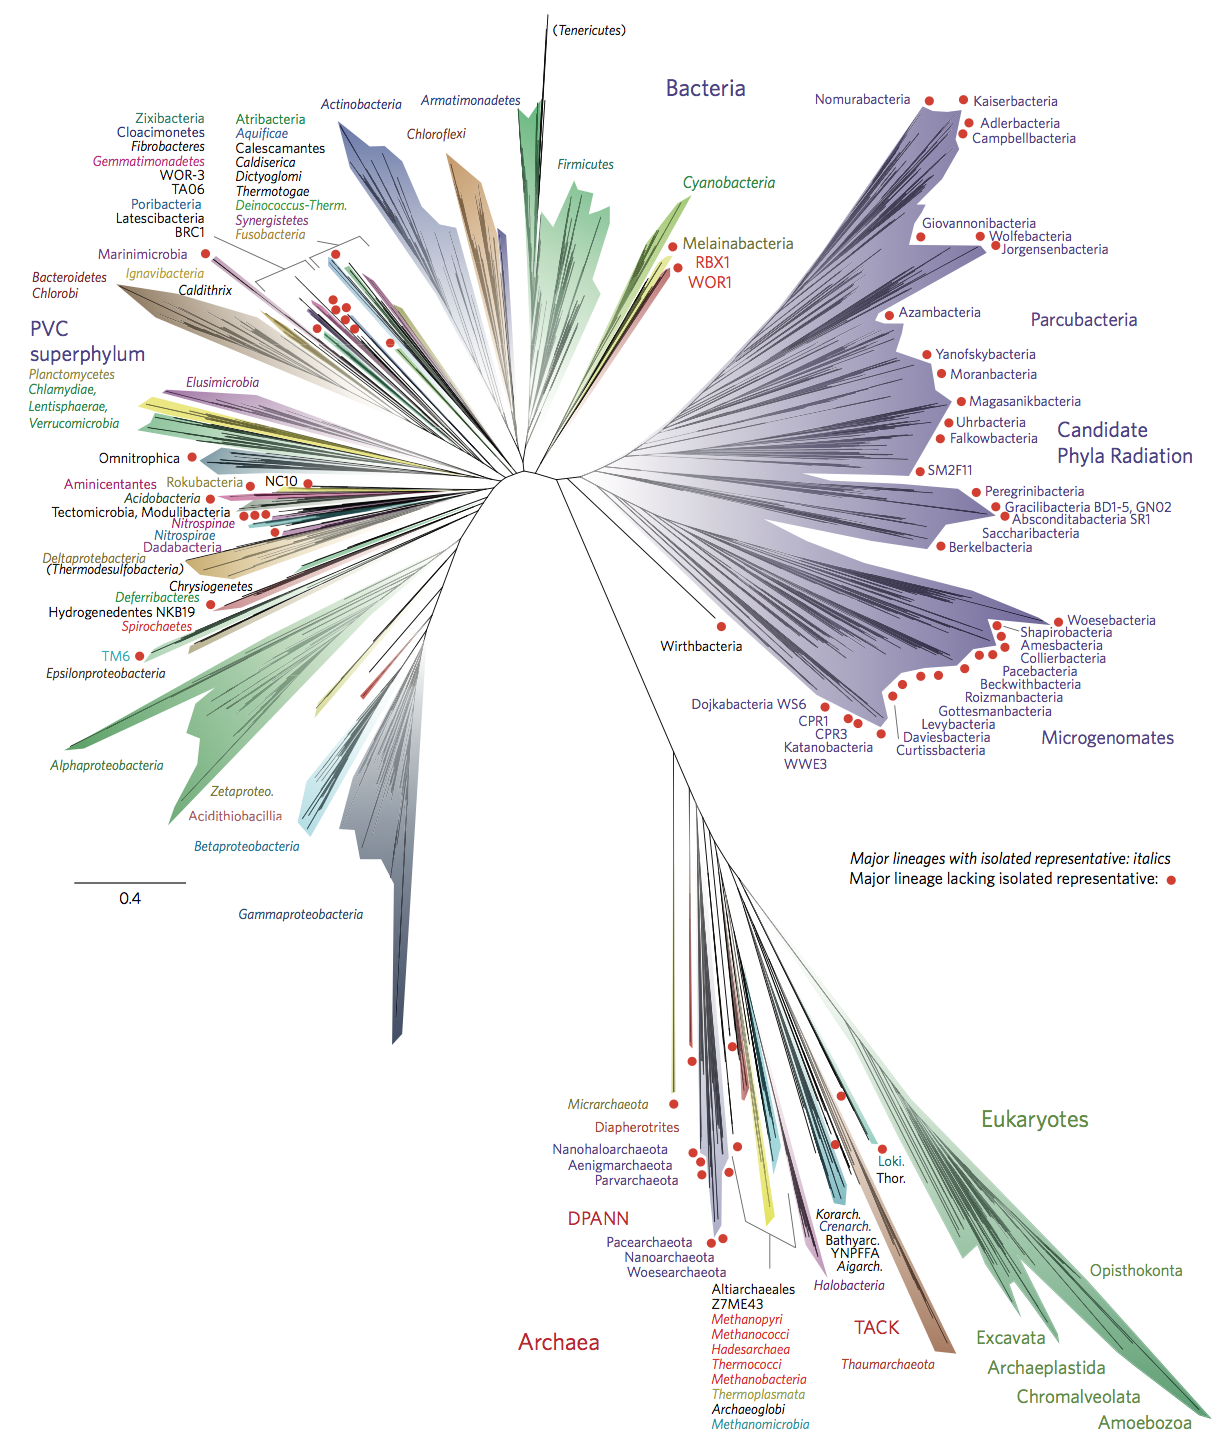
This is a phylogenetic three of life, giving an insight of the diversity of living beings on earth. Most used ressources for textiles such as cotton, wool, linen, leather but also mycelium belong to the category of the Eukaryotes, Opisthokonta. It is constatable that there are infinite other categories of organisms and species among which some present similar traits as materials used in the textile industry. Some of them form networks, fibers, cell tissues...
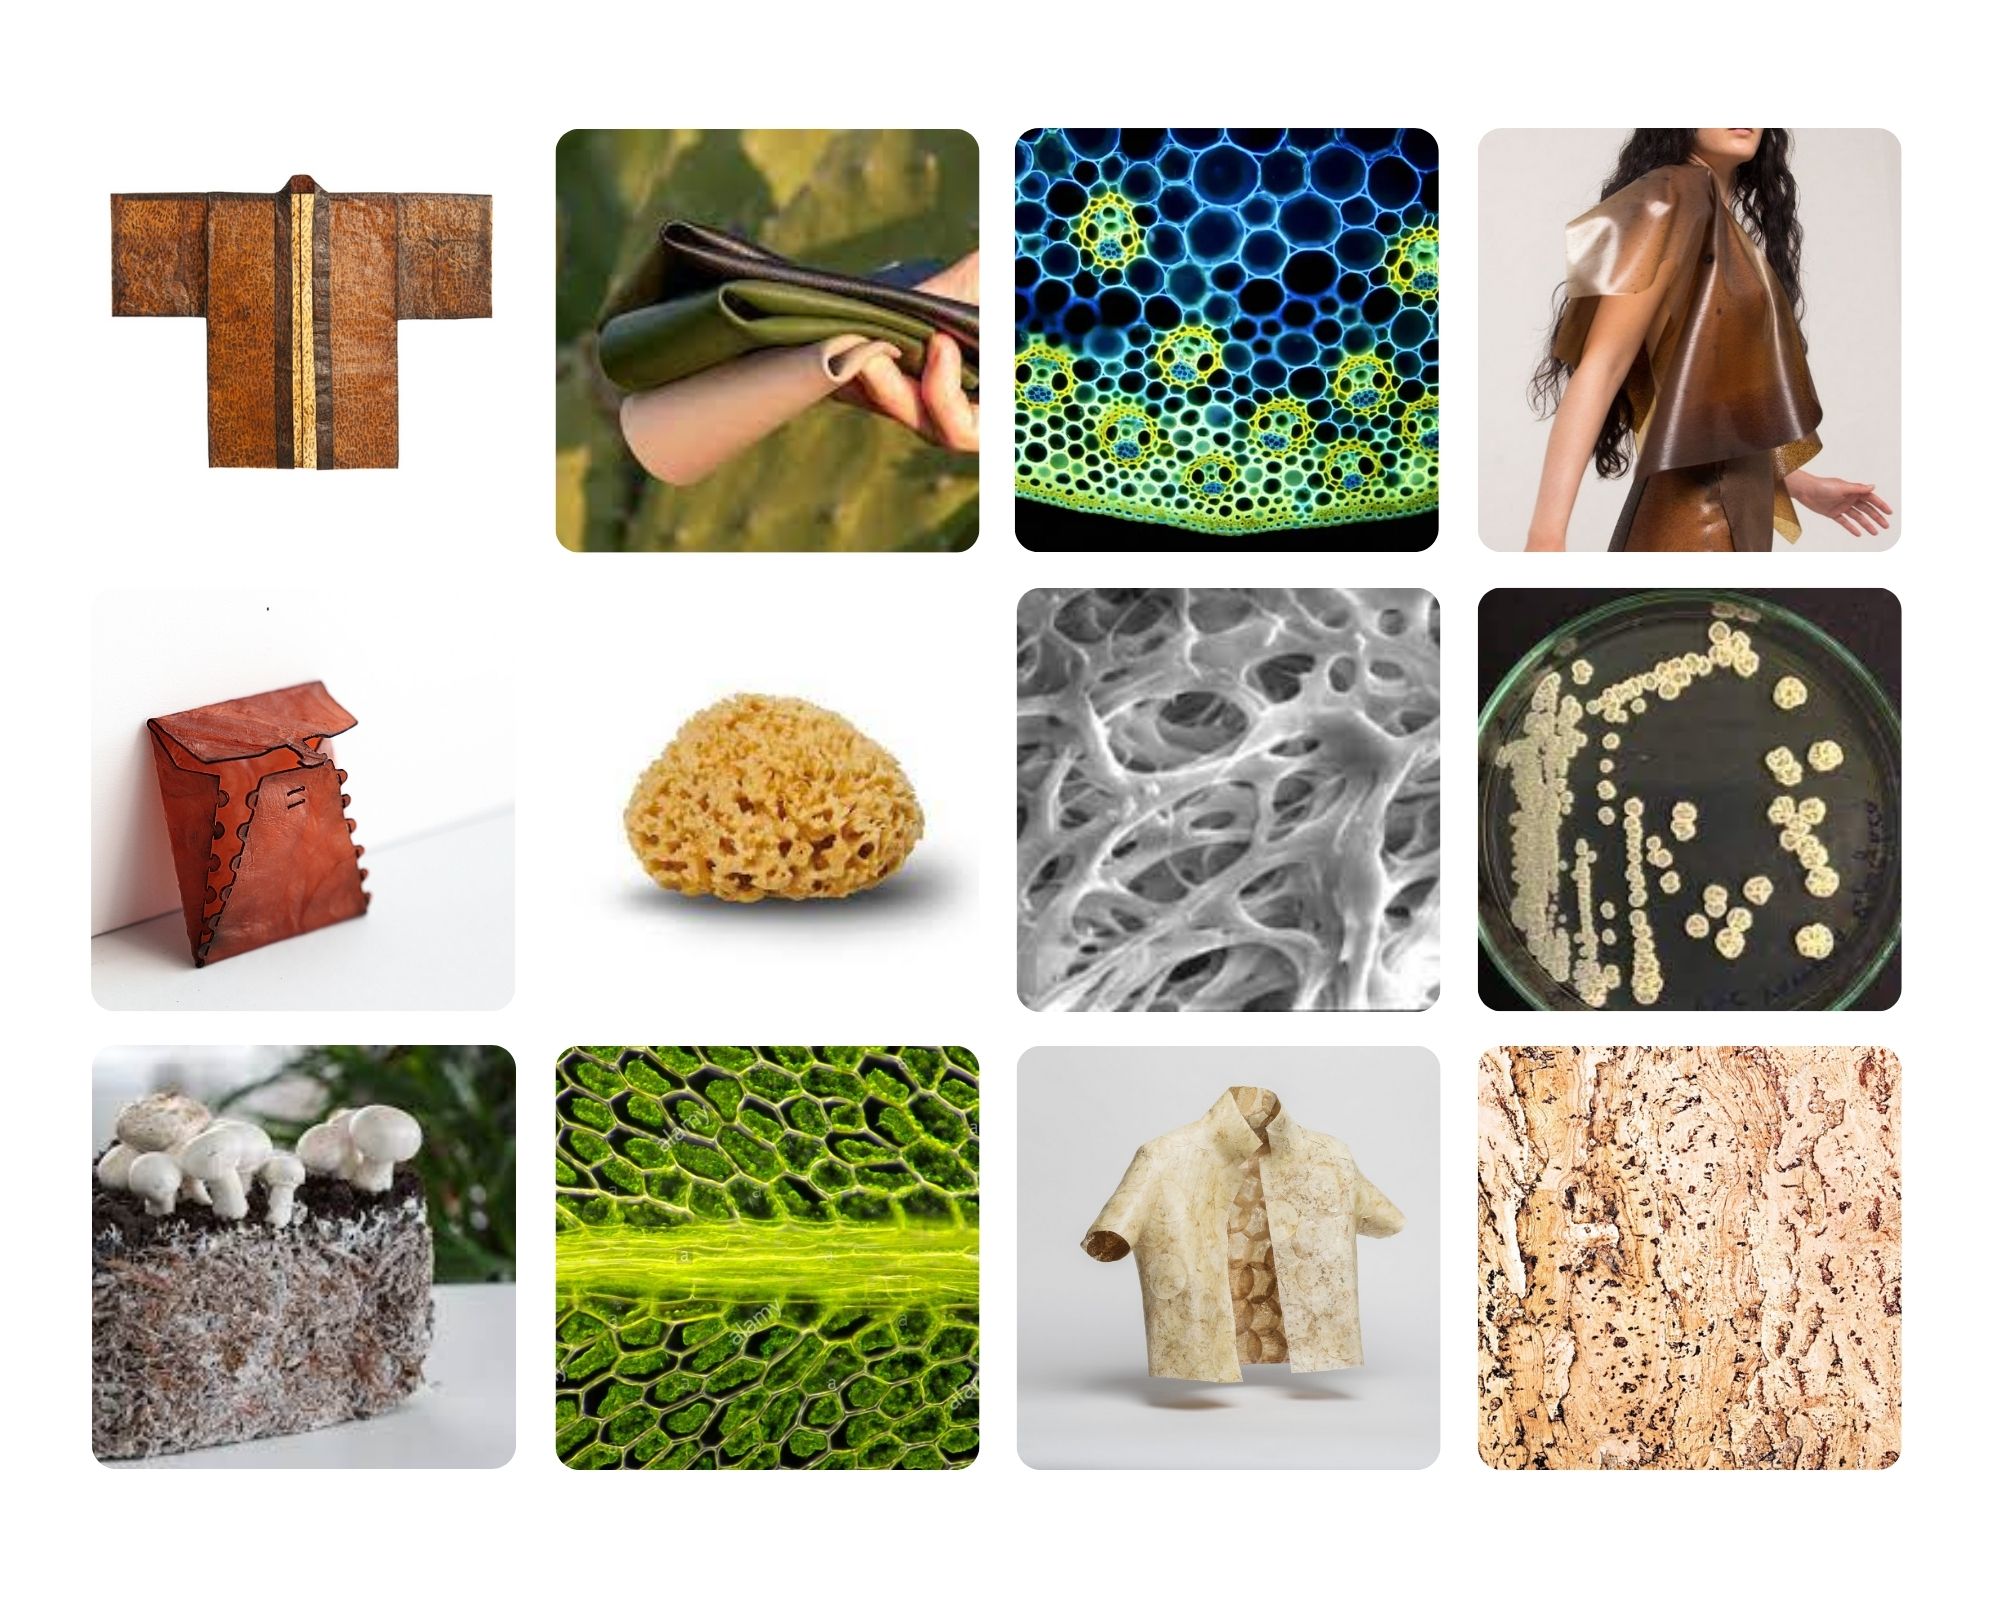
With this goal, could it be possible to grow sponges in an aquarium shaped in a coat? Could we grow porous cell tissue into the shape of the desired pattern? I am thus particularly excited to experiment with the 3D printers in order to make molds and try and grow organisms into shape. I am also really excited to experiment with the bacterial and natural dyes and to experiment ways to upcycle existing waste material.