10. Open Source Hardware - From Fibers To Fabric
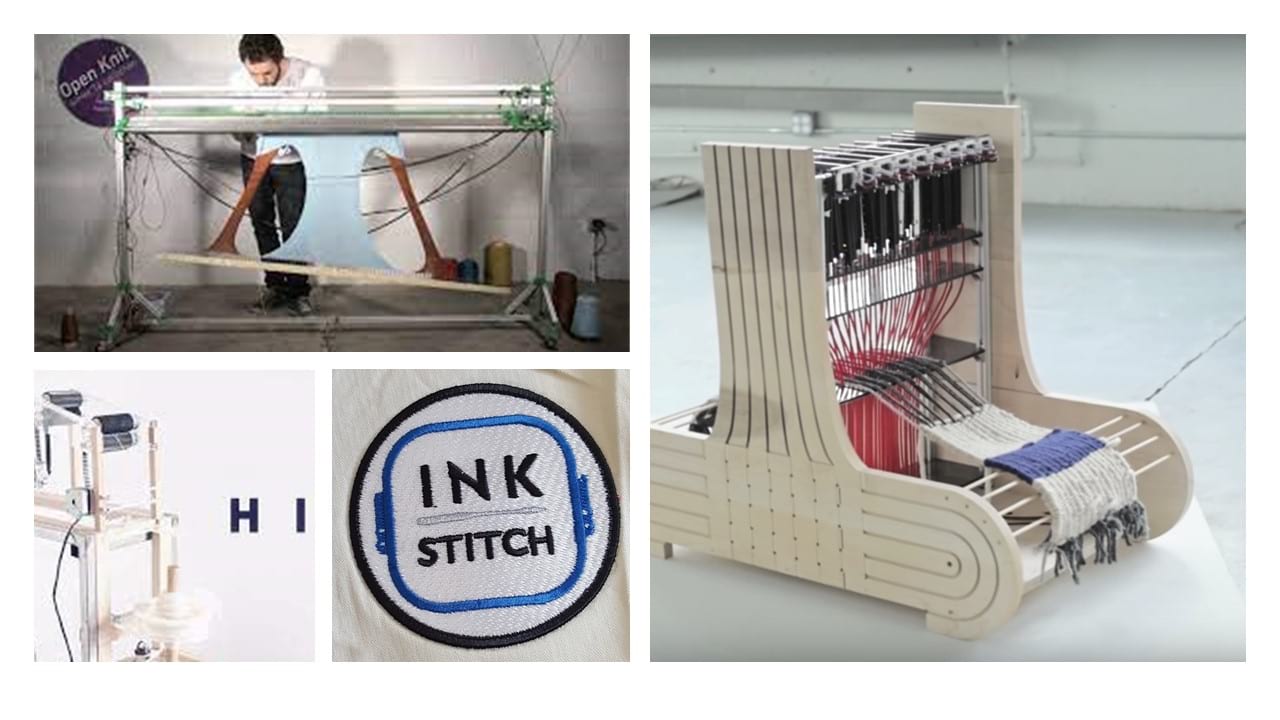
We have been using the same knitting, weaving, crochet and braiding techniques for ages, these technologies never changed. Since the techniques have not changed much, the machines have not changed much either. But some technology can be incorporated to them by introducing microcontrollers and macrocontrollers ! Knitting machines can be hacked to knit the desired patterns using arduino (Glitchknit, Ayab, etc). We can also build new knitting machines based on the previous knitting machines and embed new features in it, like for instance being able to knit more than one thread at once or to knit a pattern ! It is however difficult to make a machine that works as great as the old ones. I was particularly inspired by this project called the Open Knit Machine but unfortunately discovered it too late to make it on my own this week... Filt is also an open source machine set to make recycled fabric into felted fabric !
 Legos are also really good tools for making hacked machines since they are modular and you can make almost any shape you want with it. For instance, this video shows how to hack a sewing machine into an emboidery machine using legos !
An important range of machines can be done manually, such as knitting machines, looms, wrapers but also eel wheels. There are also softwares that can be hacked or improved by the creation of plugins to give them new functions, such as InkStitch that is a tool in InkScape for embroidery.
Assignement
- Research and document existing fabrication methods, machines and industries , add references and sketches of the machine and the chosen process
- Design and document the files of the machine, machine hack or tool and fabrication - assembly process
- Document the schematic and the programming code (if any)
- List the materials: electronics, materials amount other (references of the components)
- Design, create and document a final outcome, a sample project of your process
- Make a small video of the machine
- Create an interface for controling your machine
I-Making a spinning machine
This week, we were meant to all make a spinning machine. Of course, it was not meant to be done from scratch and we were very guided since we followed the tutorials of the open source HILO spinning machine 3.0.
Assembling the Hardware was pretty easy, we only had to follow the instructions like an IKEA booklet. The list of the needed parts was in the second tab of the link. The job was made very easy to us since all the pieces were already ordered, 3D printed or laser cut for us.Unfortunately, we did not recieve all the required pieces on time and had to change plans so we strarted off by doing other machines. We actually did this one on the next week with Florencia and Janvi. We are not going to document all the steps since they are described on the website but here is a time lapse of us assembling the hardware :
After assembling the Hardware, we had to assemble the Software. For the Software assembly, we needed to solder the different wires to the pins of an Arduino Mega capped with a control board ramps 1.4.
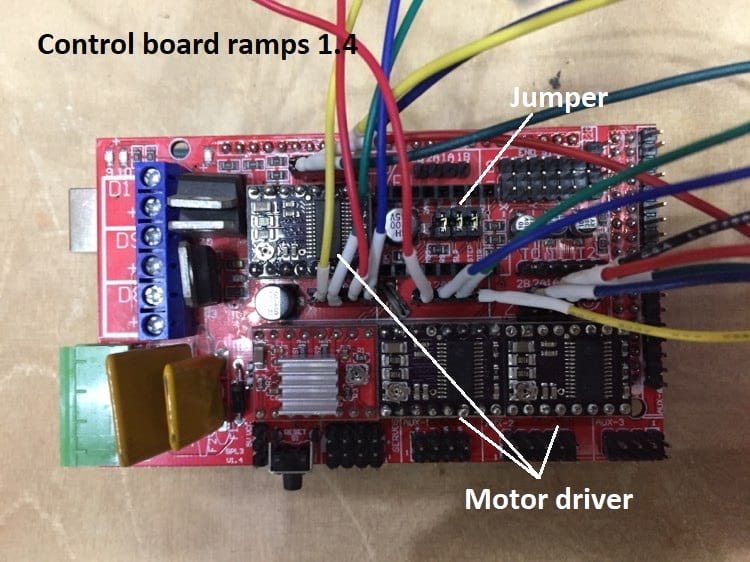
Programming the Arduino was easy as we only had to upload the code from the link. Then, we downloaded the Hilo app and opened it using a software called Processing. The app worked but once we started it, the motors were not rotating in the same sides and one of the motor drivers did not work. We also had to take the jumpers off so that the motors would rotate properly. After some troubleshooting and adjustments, we managed to make all the motors work properly and here is a video of the machine working:
II-Making a Laminar Flow Hood
Since we could not make the eeling machine to make our own threads from fibers, Florencia and I formed a group and decided to make a laminar flow hood for the biolab in order to work in a cleaner and sterile environment when cultivating bacteria, mycelium or doing projects involving cell cuture. We took our inspiration from EZMushroom.com who made this very simple yet functional laminar flow hood and described the process very well.
Materials needed
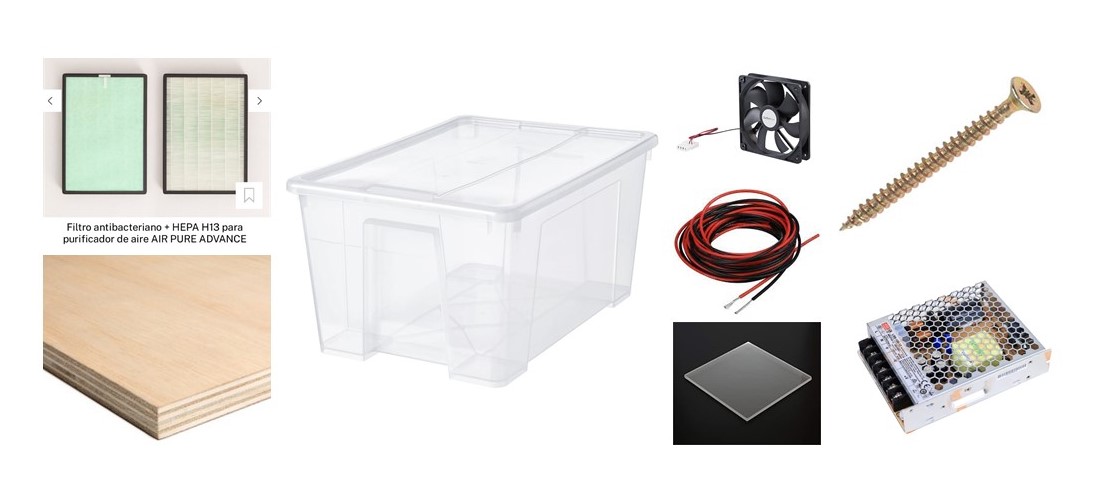
- Plastic box, without lid, large and transparent to be able to work comfortably
- HEPA filter, we use a HIGH FILTRATION AIR EXIT FILTER.
- Hot glue to make the joints air tight
- Fans
- Wires
- A LRS 100 12 current transformator
- 12 screws
- Acrylic (5mm thickness)
- Wood (9mm thickness)
Let's do it !
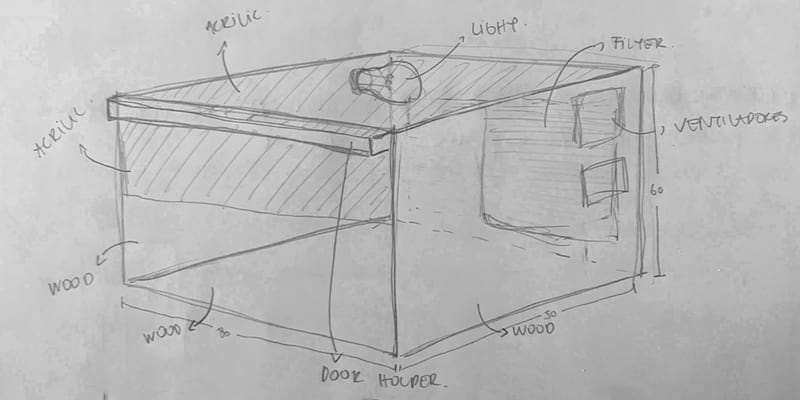
Before doing anything, we wanted to lay the fundations and sketch the product to have an idea of the final result and know what direction to take.
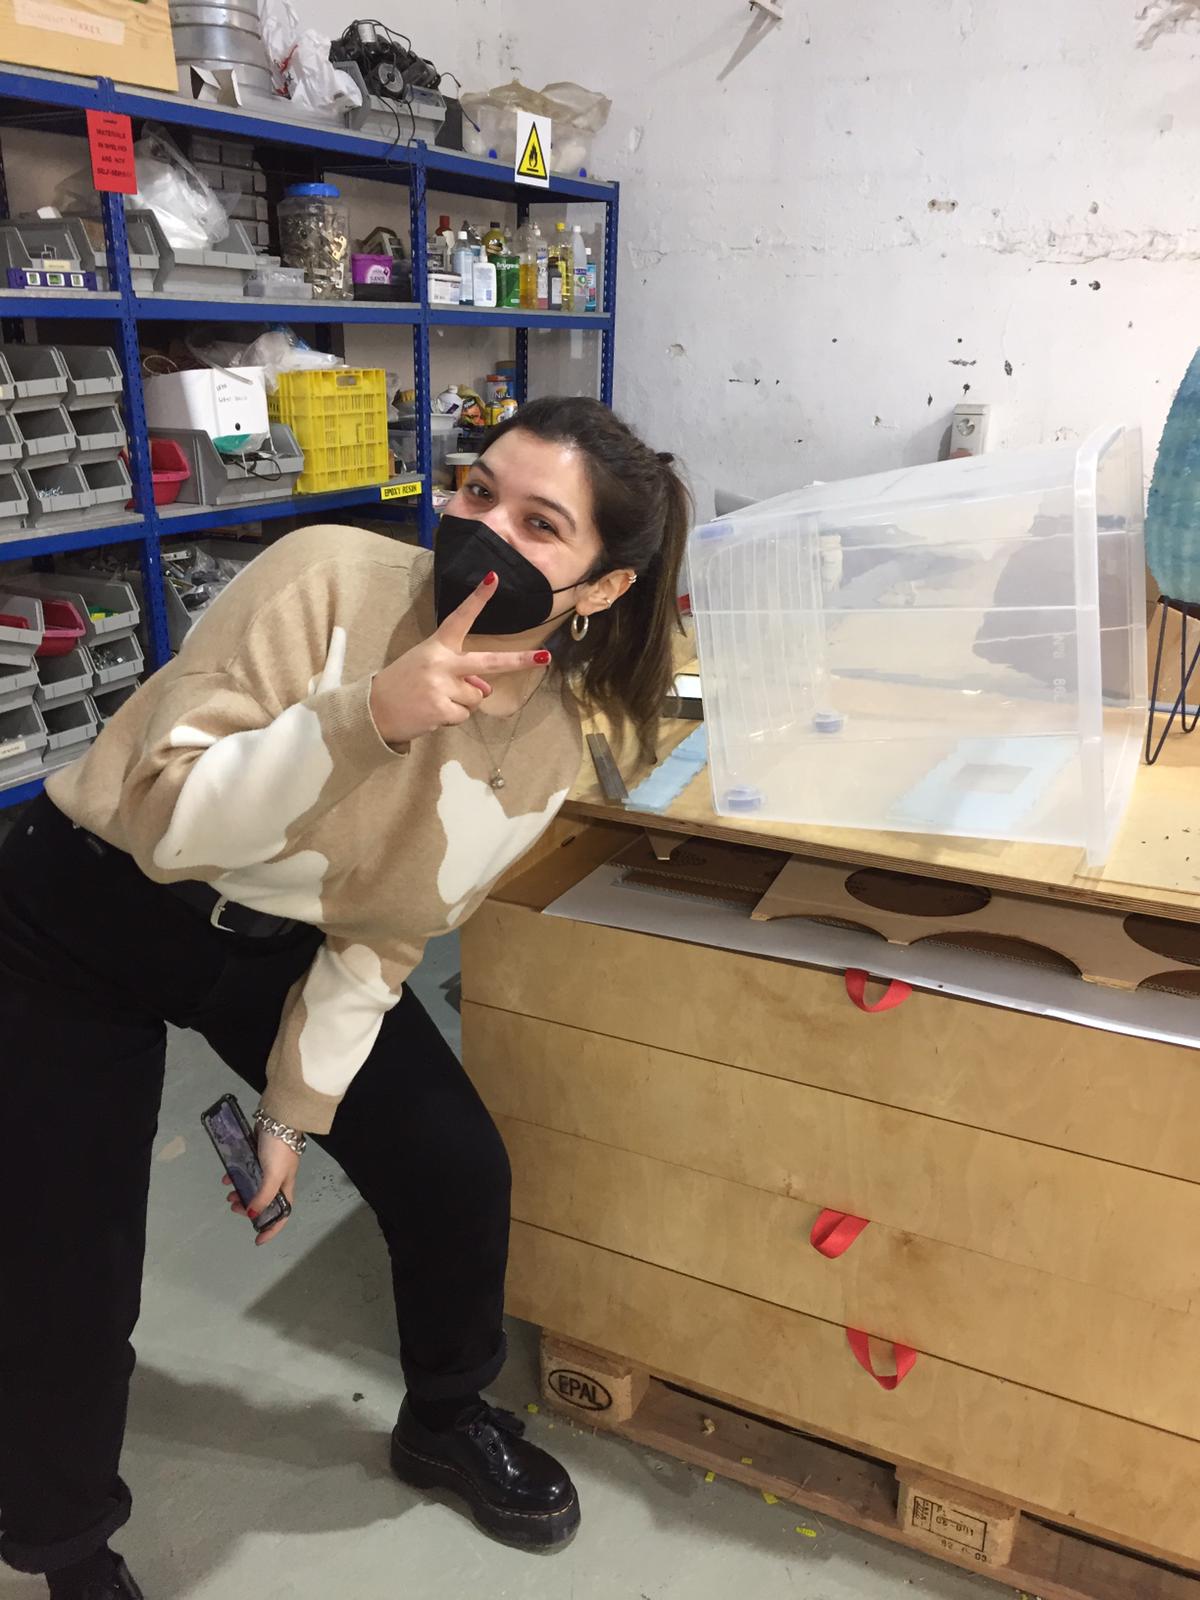
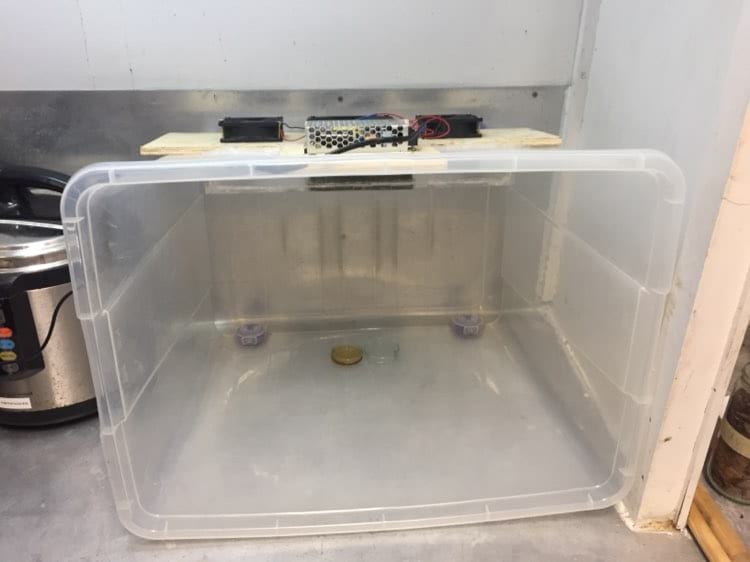
STEP 01: The box we had was a kind gift from Anastasia who had it in the textile lab and that she was using for storing fabrics. First, we had to clean the box and fix the hole in it to make it airtight. Once it was well cleaned we were able to start working.
STEP 02: Designing a wood board to support the fans and the transformator.
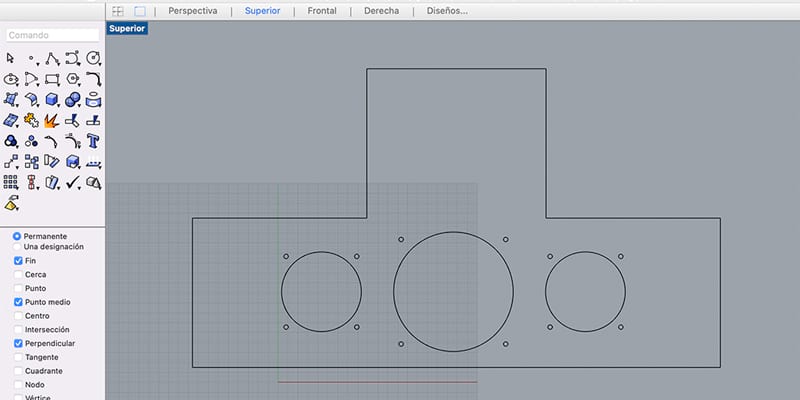
The board supporting the different objects is 40x15 cm with a 12x12 cm extension. It has 3 holes for the fans creating the air flow in the sterile chamber. The extension is for the current transformator taking as an input the wall current (230 V, 16 Amp and AC current) and changig it to a 12V DC current with a maximum capacity of 8.6 Amperes.
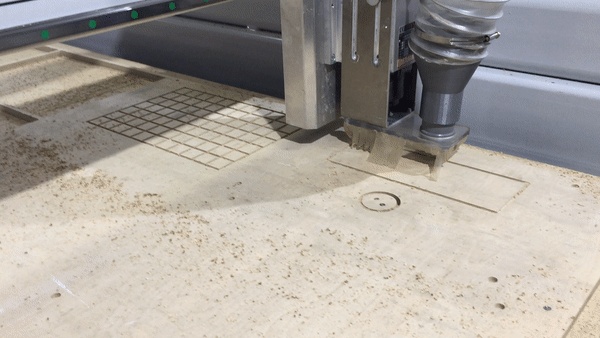
STEP 03: We cut our board in 9mm thick plywood so that it is strong enough and does not bend due under the weight of our equipment. For the CNC milling, we had to generate a NC file in G code using the RhinoCAM plugin. The wood piece can be considered 2D so we selected the 2 axis milling mode. There are different techniques of 2D milling. The engraving follows the line in its middle and the thickness of the mill acts as an offset, which we do not want. That is why we chose the profiling mode which cuts inside or outside a closed line, taking the thickness of the mill into consideration in order to have the final shape with no offset. We made sure to cut inside the lines for the circles for the fans and outside the line for the shape of the structure. We first created a NC file defining the holes for the screws in order to fix the plywood board and then made a second one for the cutting of the piece. We used a 6mm 2 flutes ball endmill for the milling.
STEP 04: In order to make the air flow sterile, we have to make it go through a specific filter called HEPA filter. The cut diameter of these types of equipements are of 0.3µm, filtering yeasts, modls, spores and most of the existing bacteria. Since we only had one small yet thick filter, we decided to concentrate the power of the fans mediating an airtight box. The box dimentions are of 40 x 15 x 5 cm with a 14 x 9 cm hole in 5mm thick Acrylic. The box pattern was generated using the Make A Box online tool. We chose acrylic because it is easy to clean and does not leave residue and therefore is adapted to working in sterile environment.
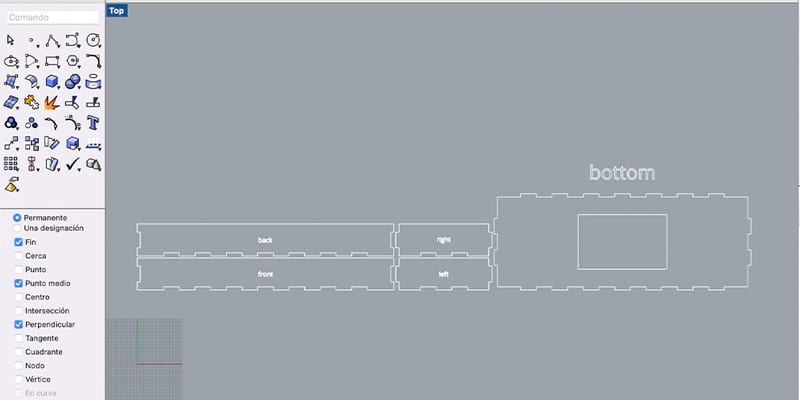
The acrylic was cut in the laser cutter using the following parameters: 95 for power, 0.5 for speed, 20.000 Hz and 2 passages.
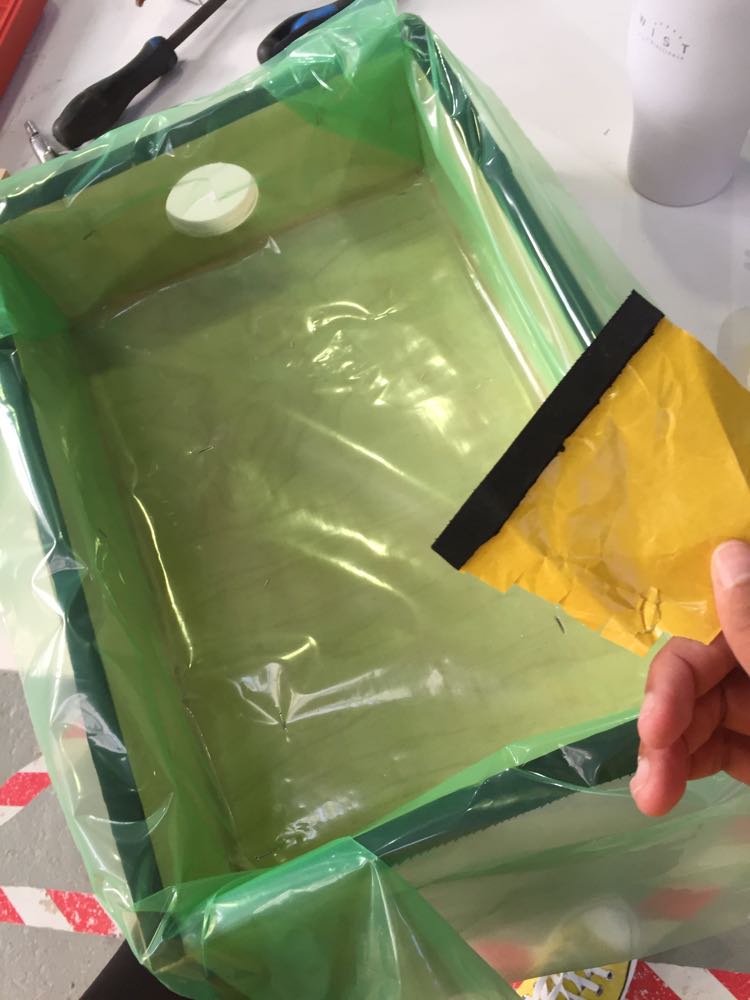
Once the pieces were cut, we assembled and glued the box and glued the filter in the hole. With a silicone glue gun, we made the box/filter system airtight.
STEP 05: With a DREMEL, we cut a 40 x 15 cm hole in the plastic box in order to have space to fit the acrylic box/filter system in the bigger plastic box. We centered it on the lower part of the top face of the box, which is where we will put our filter and fans. Once cut, we sand the plastic to have smooth edges.
STEP 06: While our acrylic box with the filter was drying, we screw the fans to the wooden plate. We made sure the propellers of the fans rotated in the anticlockwise direction so that the air would blow inside the plastic box.
STEP 07: We glued the box with the filter and the wooden plate, first with super glue and then with hot silicone to ensure airtighness.
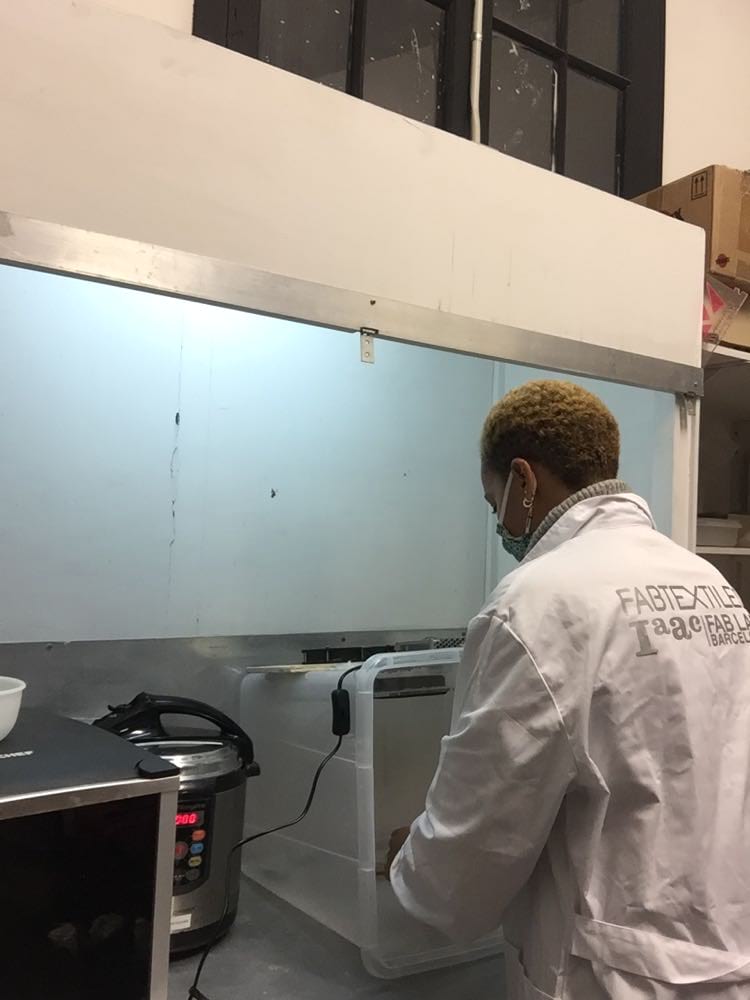
STEP 08: Power Supply Installation. After everything was installed, we connected the wires of the fans to the current transformator. We had to make some wires longer so we did a bit of soldering and with a little bit of screwing, we connected the current transformator to a plug that could be plugged on the wall. And the fans worked!
STEP 09: Problems. What we did not think through was that the fact that we had a box 5cm away from the fans and that not all the fans were directly in front of the filter acted as a wall against the air. Once the fans were turnt on, very few air passed through the filter (which is quite resistive to the air flow) and the air was actually repelled trough the fan and the air flow was very low.
STEP 10: Finding solutions. We decided to try to construct the laminar flow hood anyways and tested if it was working by turning it on for 5 minutes, putting a petri dish open inside the hood for 10 minutes and then incubating that dish for some days to check if it was contaminated or not.
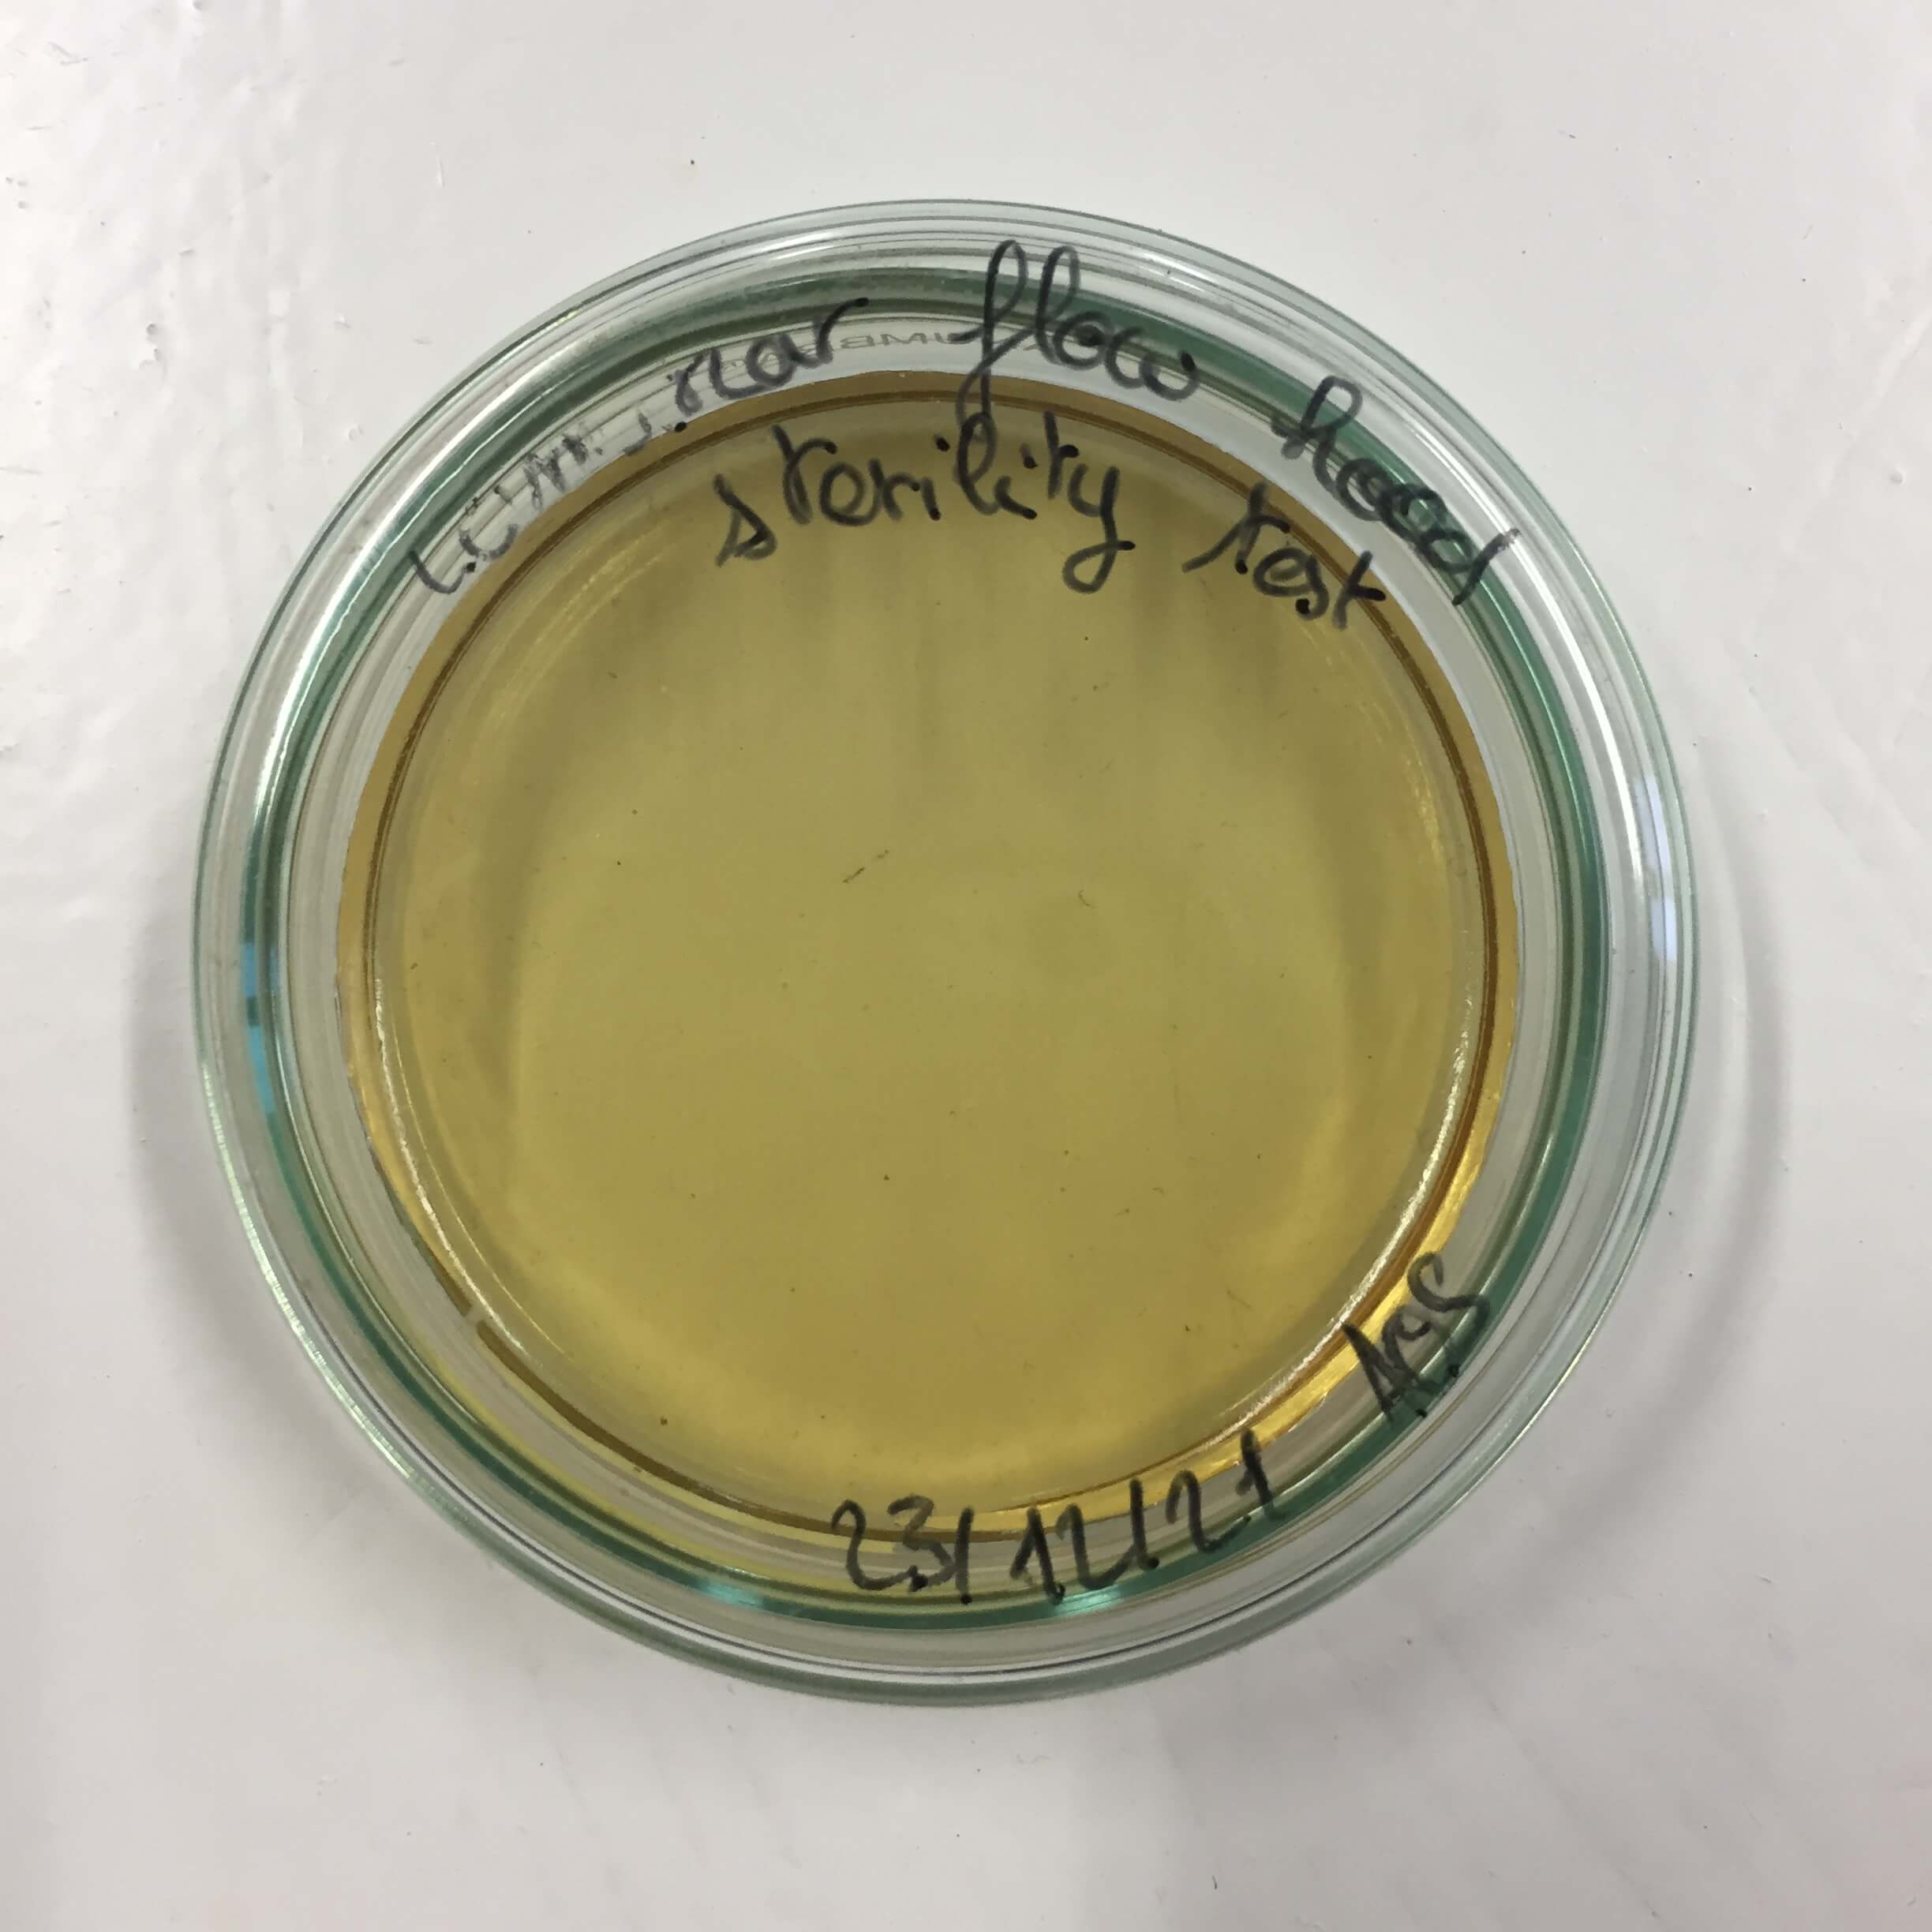
After doing this experiment, I checked the petri dish and nothing had grown on it ! The laminar flow hood works !
Final Results
III-Making a vaccum machine
I really loved the concept of making machines and thus also decided to make a vaccum machine this week! It was a really easy one since I just took the files and documents Hannah had already made. She got her inspiration from Gabriela Lotef and Juan Felipe Enriquez's work at Fabricademy in 2019.
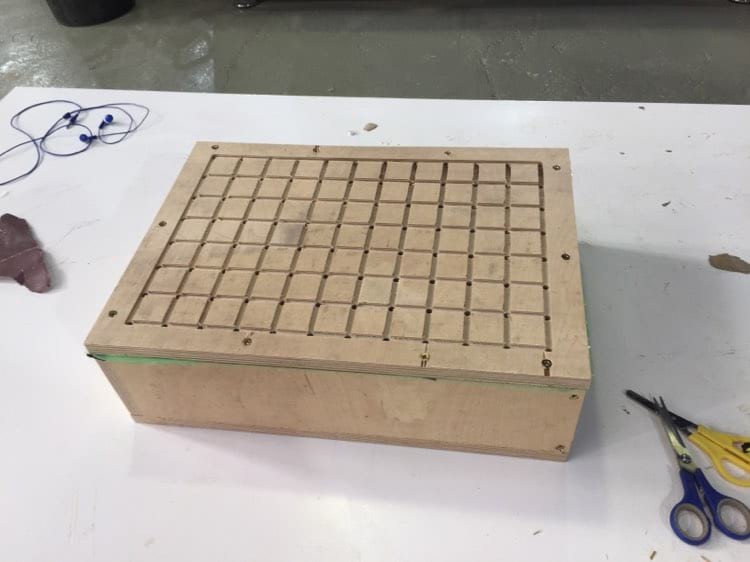
The process was pretty easy once Hannah had made the most difficult part of the work for me: I first cut the wood pieces in 15mm plywood using the CNC milling machine, and two different flutes: a 4mm and a 6mm flat end mill.
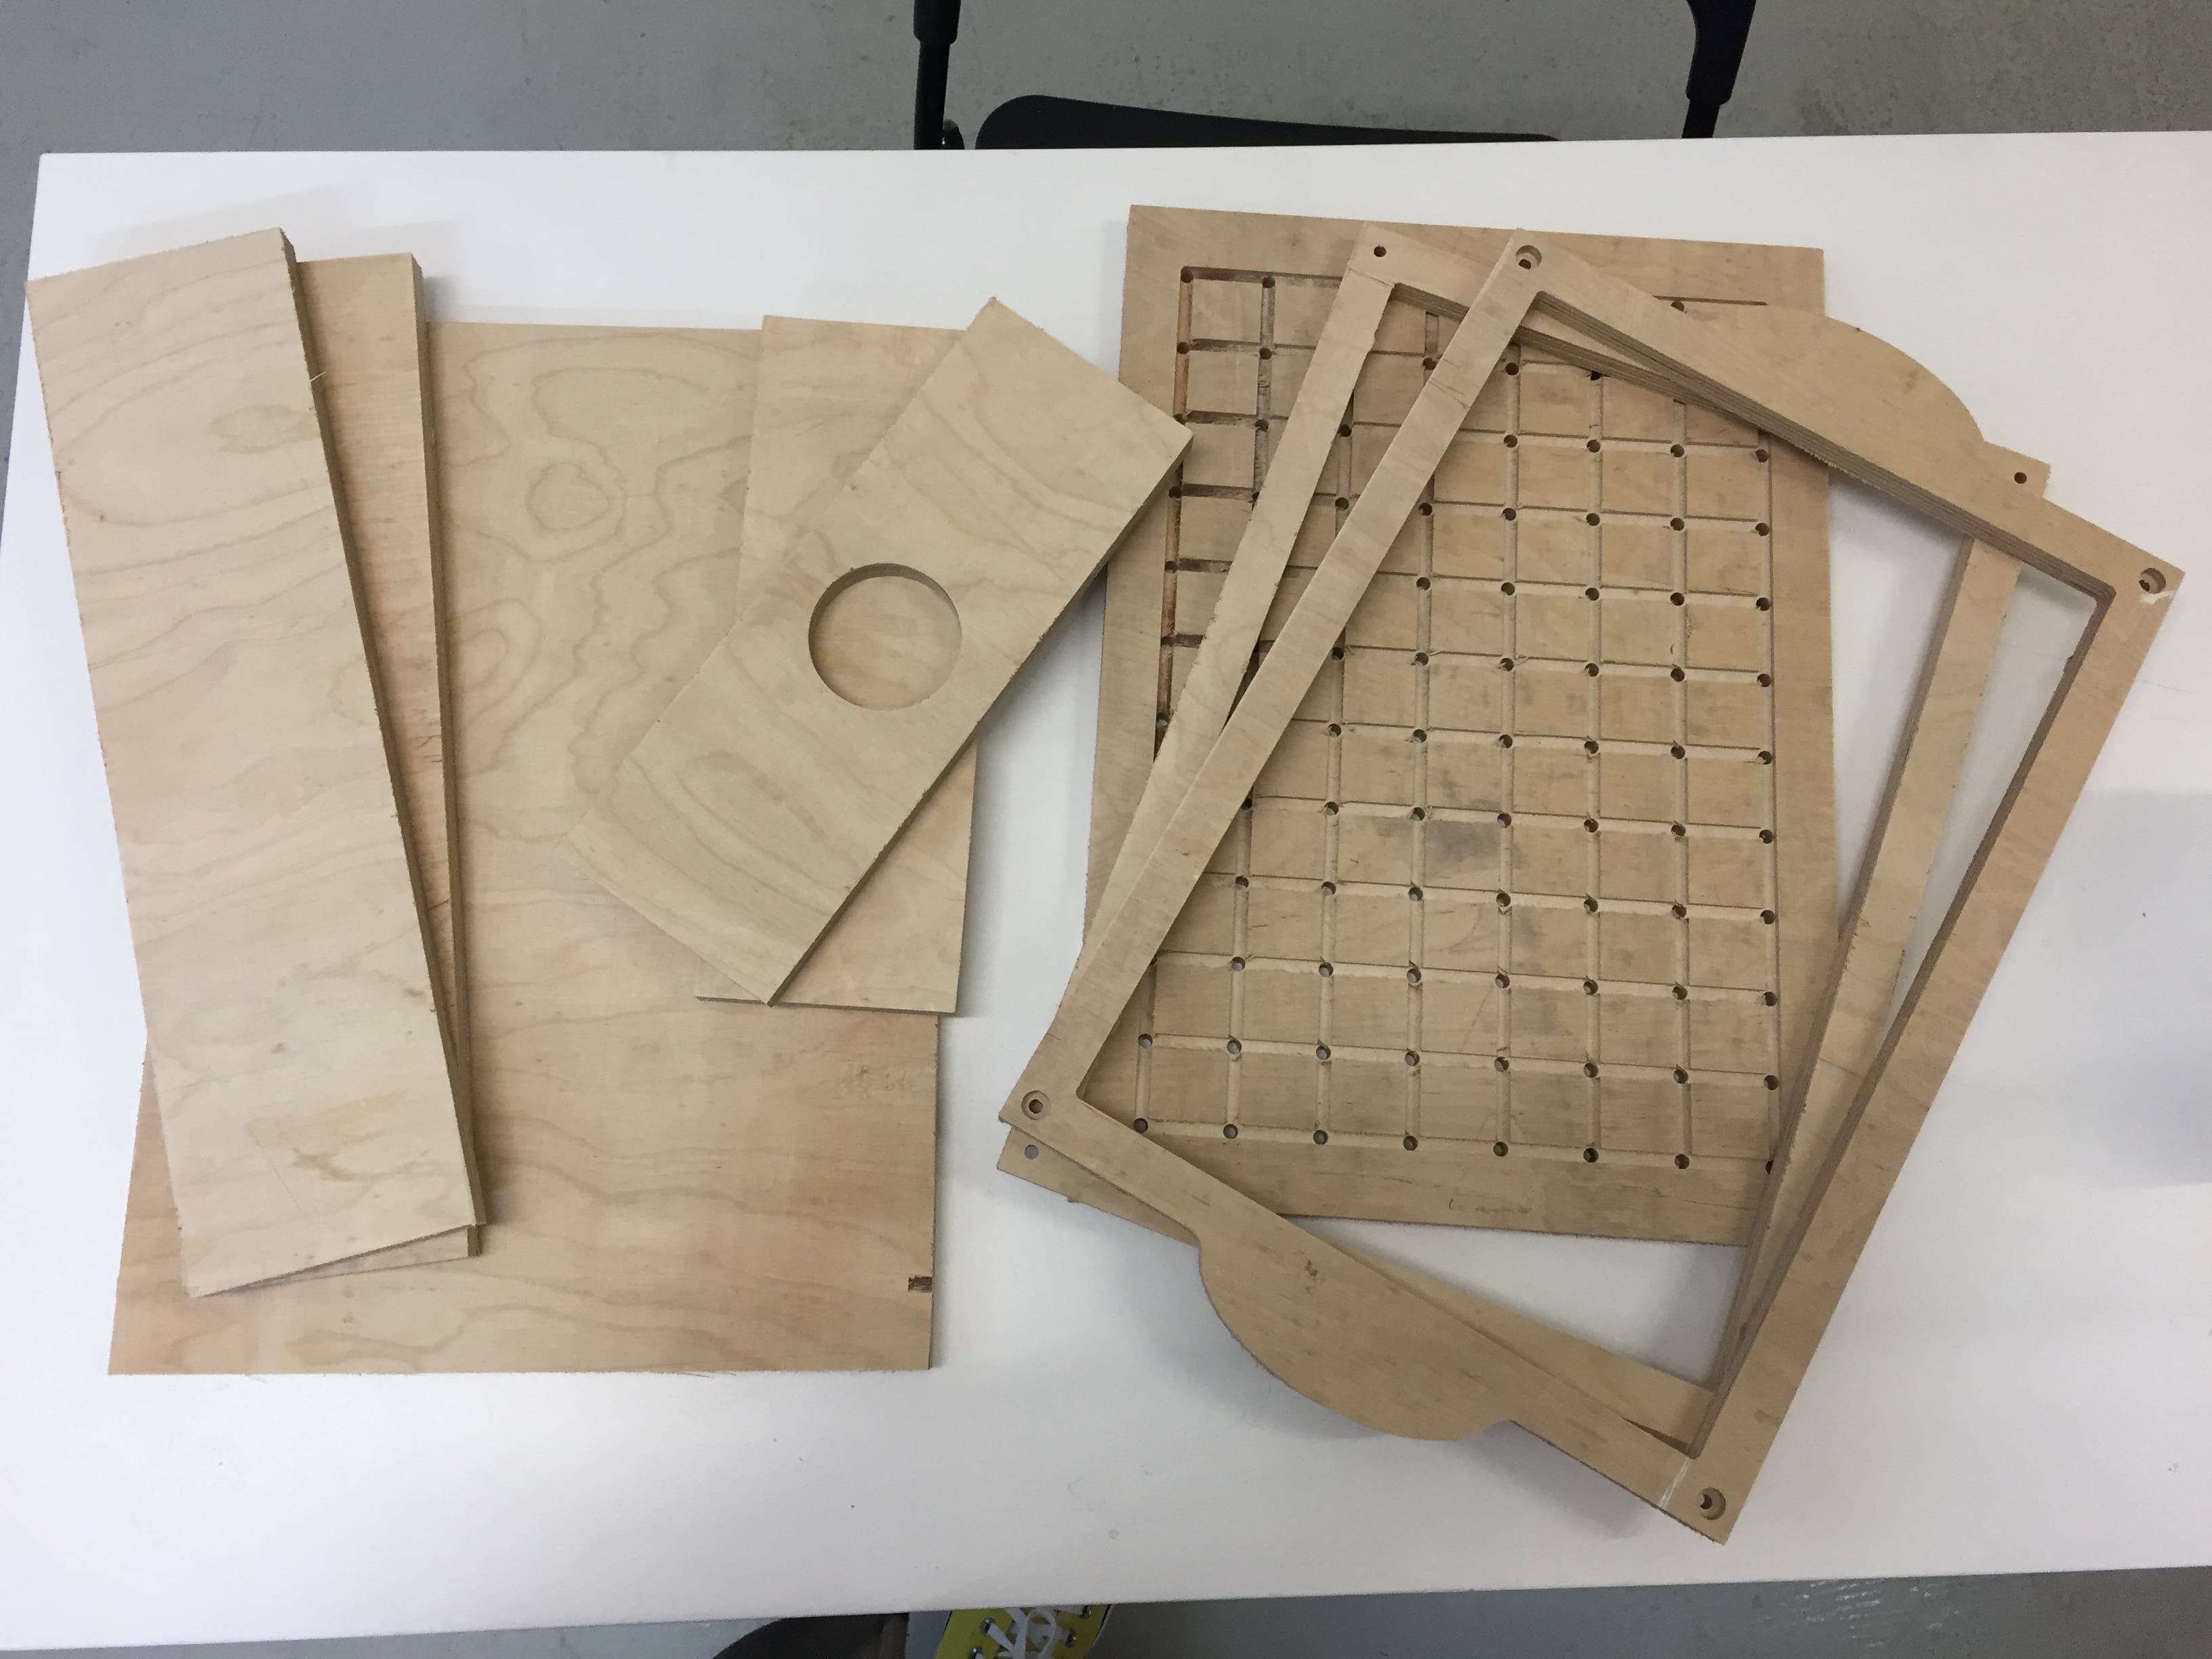
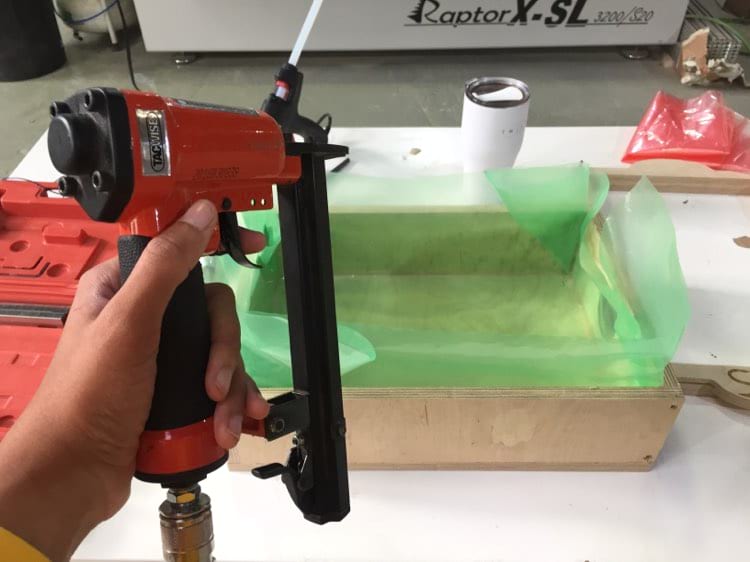
After having the different pieces cut, I sanded them and screw them together. With hot silicone, I made airtight joints and then covered the box with a plastic film that I starpled.
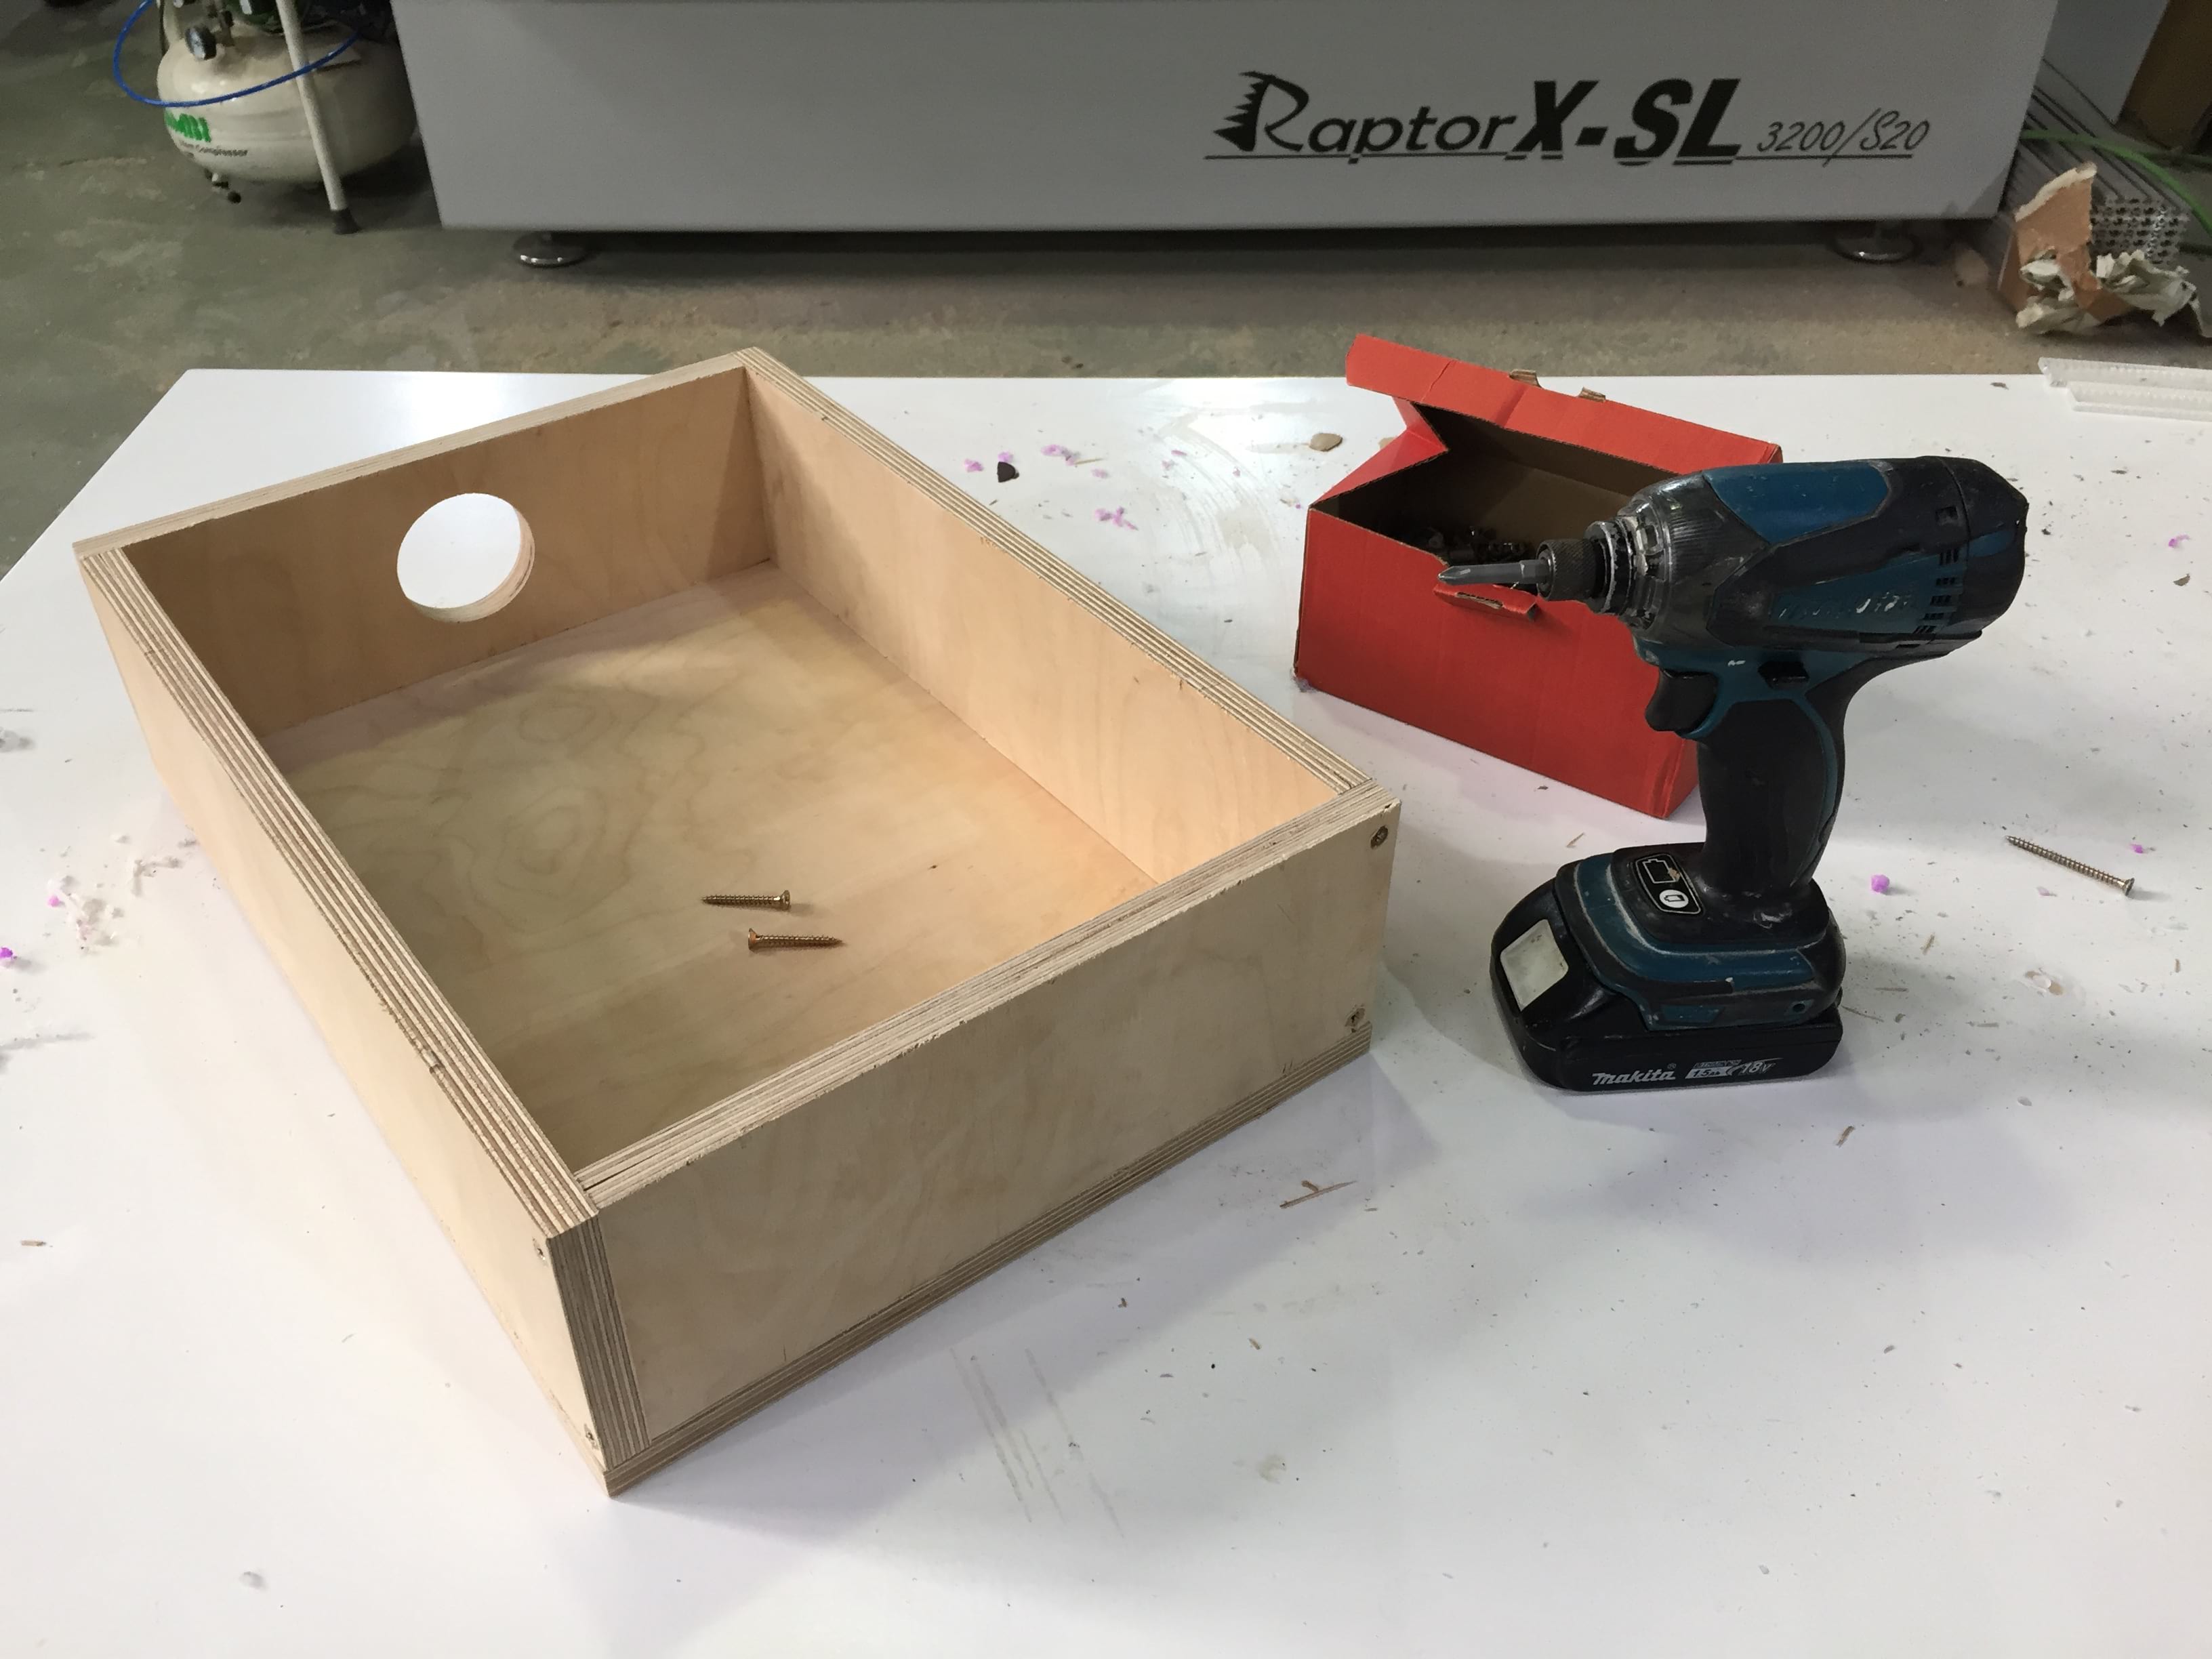

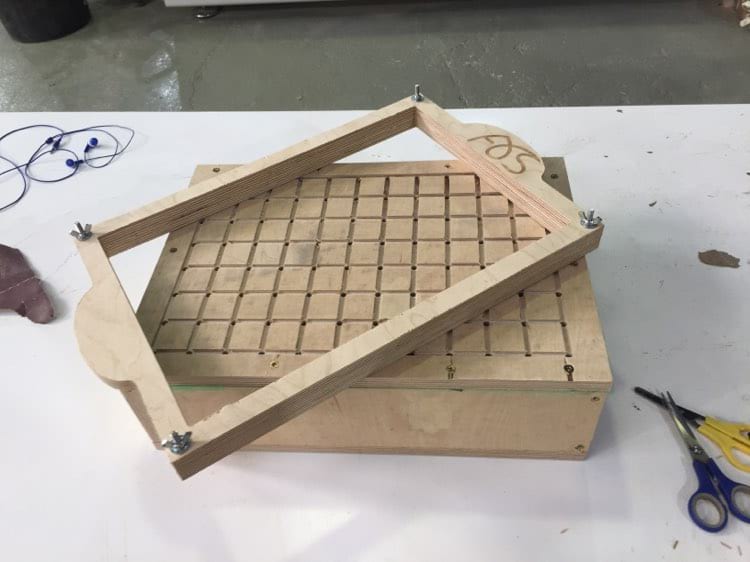
 I made the joints airtight by putting some foam between the plastic and the wood and made a hole for the vaccum.
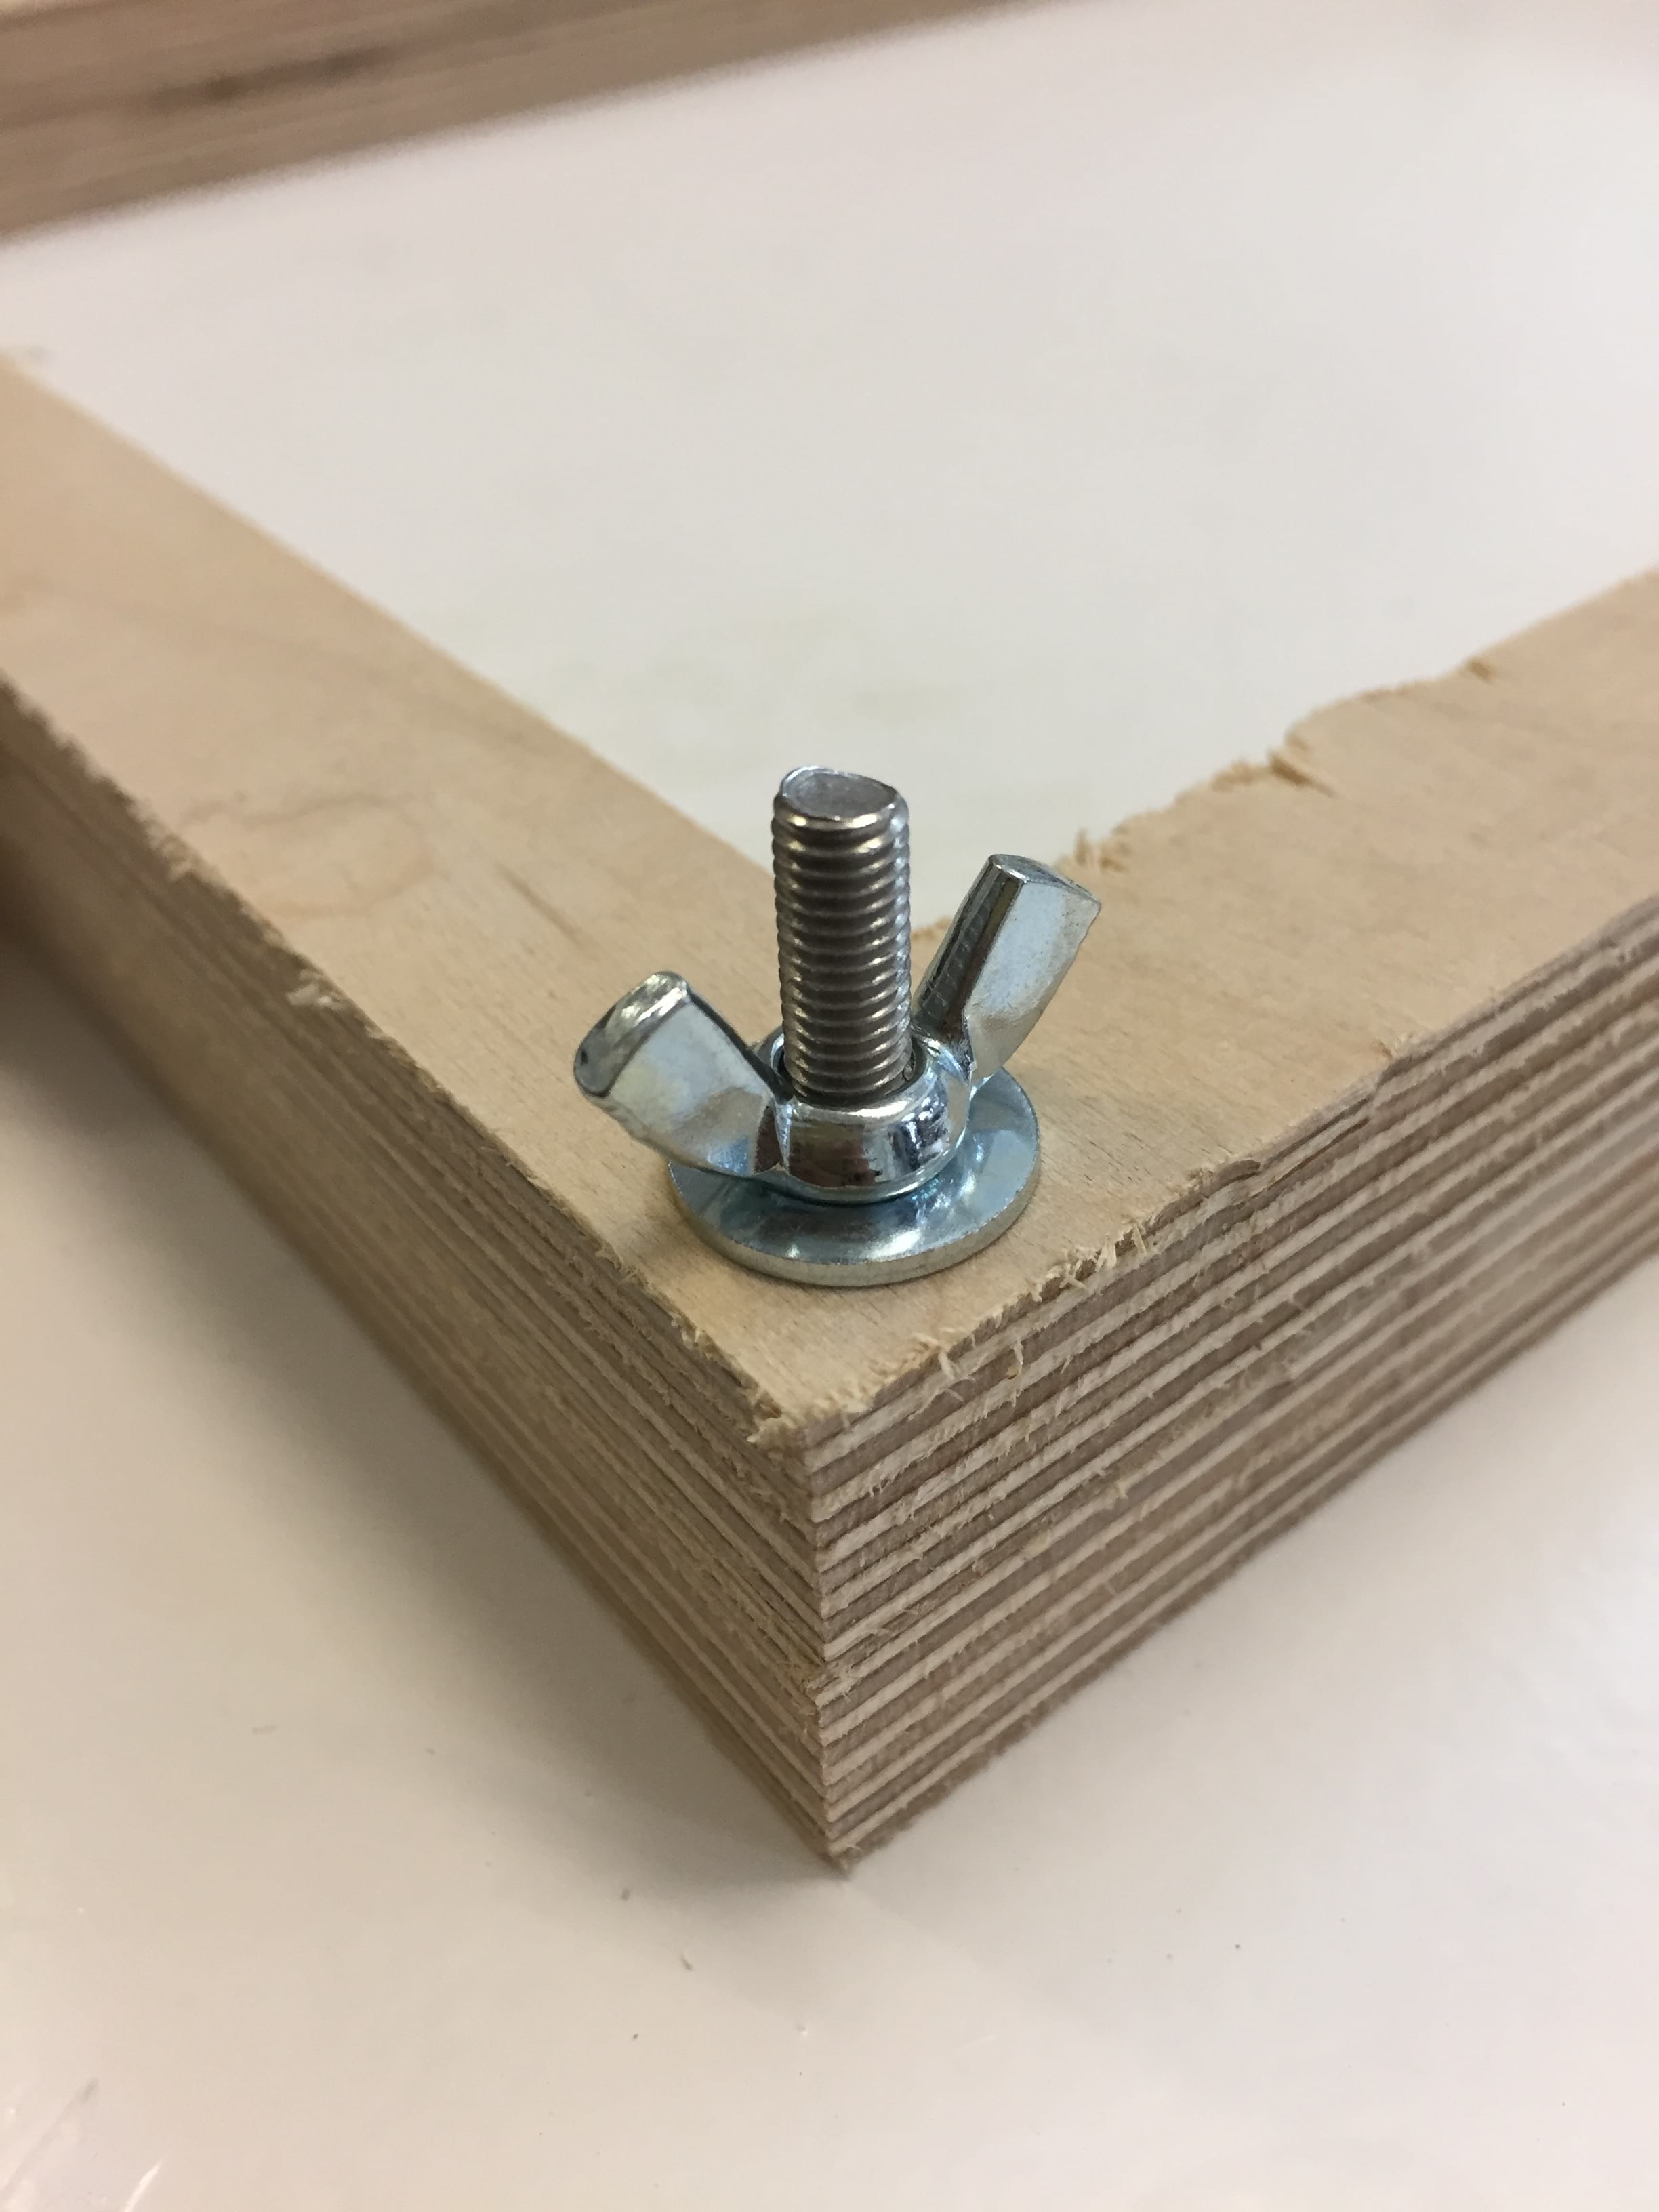
 Once I screw the cover in place and made screwed the top part together, the machine was finally assembled !
Here is a Gif of it working, and it is also the machine that was used in the Textile as Scaffold week for the making of the shoe !
