7. Computational Couture
I-Inspiration
During the lecture and by making some research, I was very inspired by different designs:
-
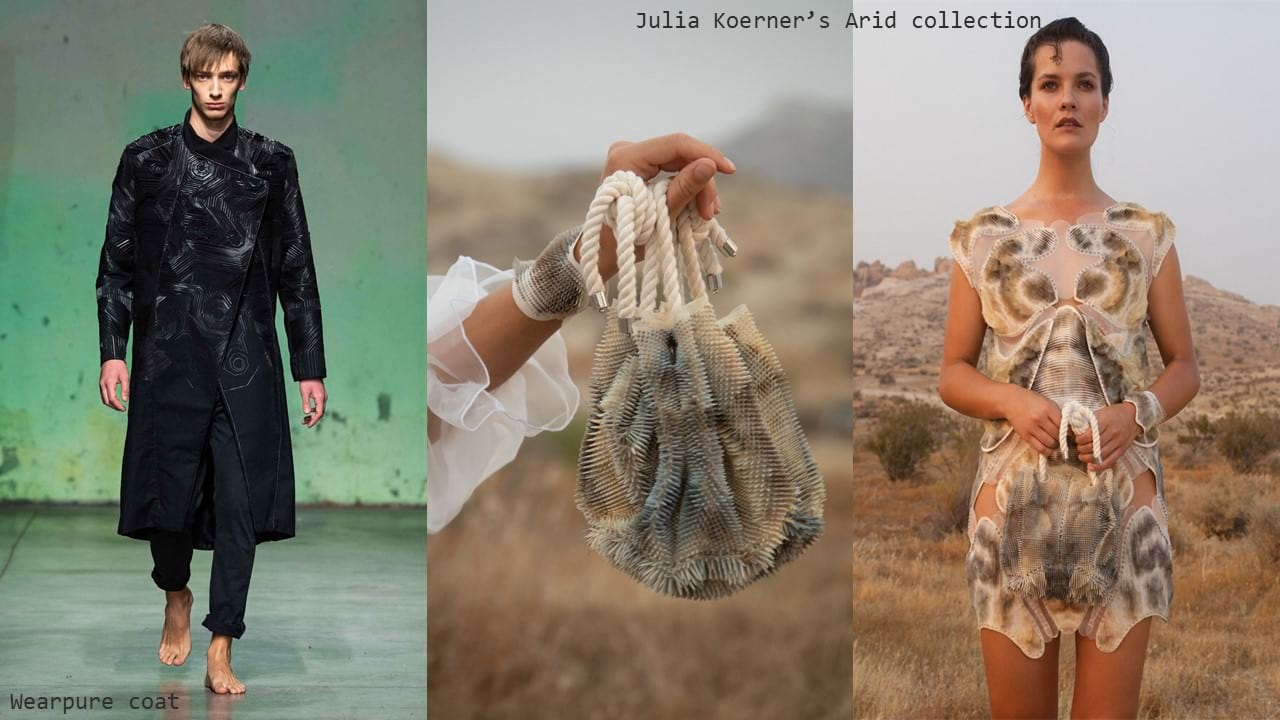
Wearpure coat from Noumena, Cecilia Raspanti and the WAAG technology and society, combining 3D printing and regenerative design by incorporating the air-filtering pure-tech material in their amazing parametric design, 3D printed on the textile.
-
Julia Koerner's Arid collection featuring 3D printed-on textiles with different colours. The overall result is absolutely gorgeous !
-
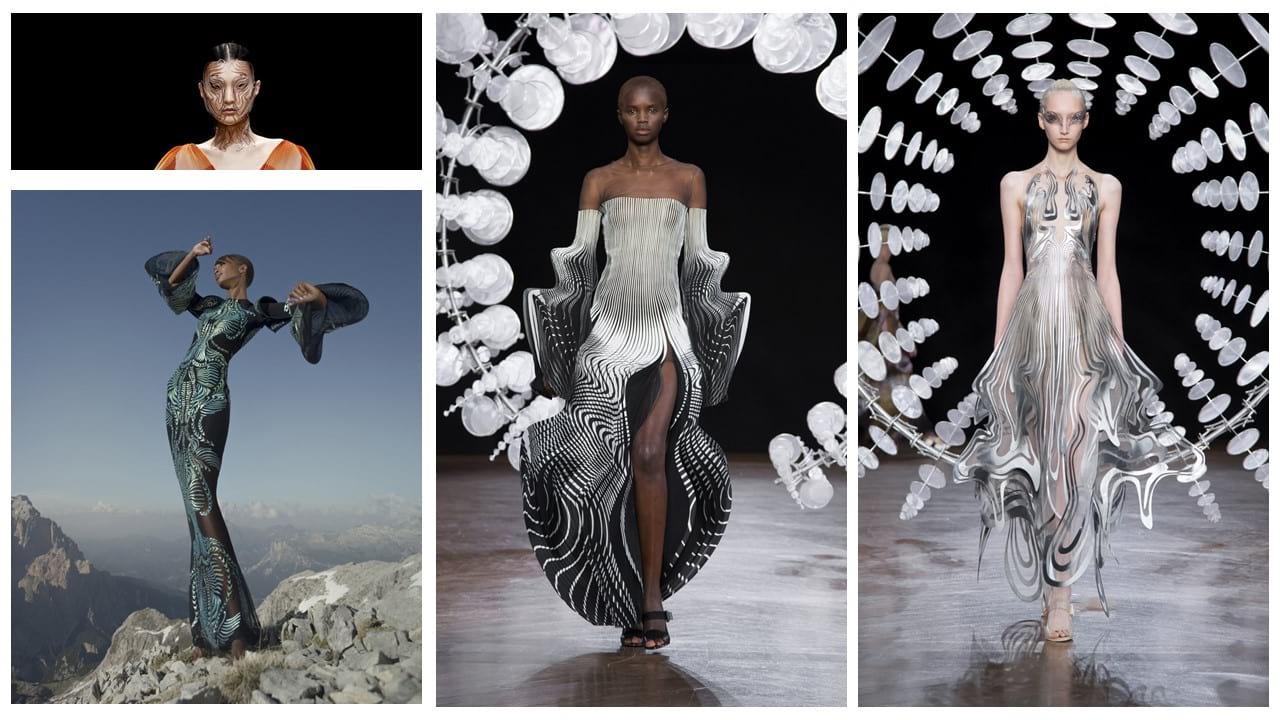
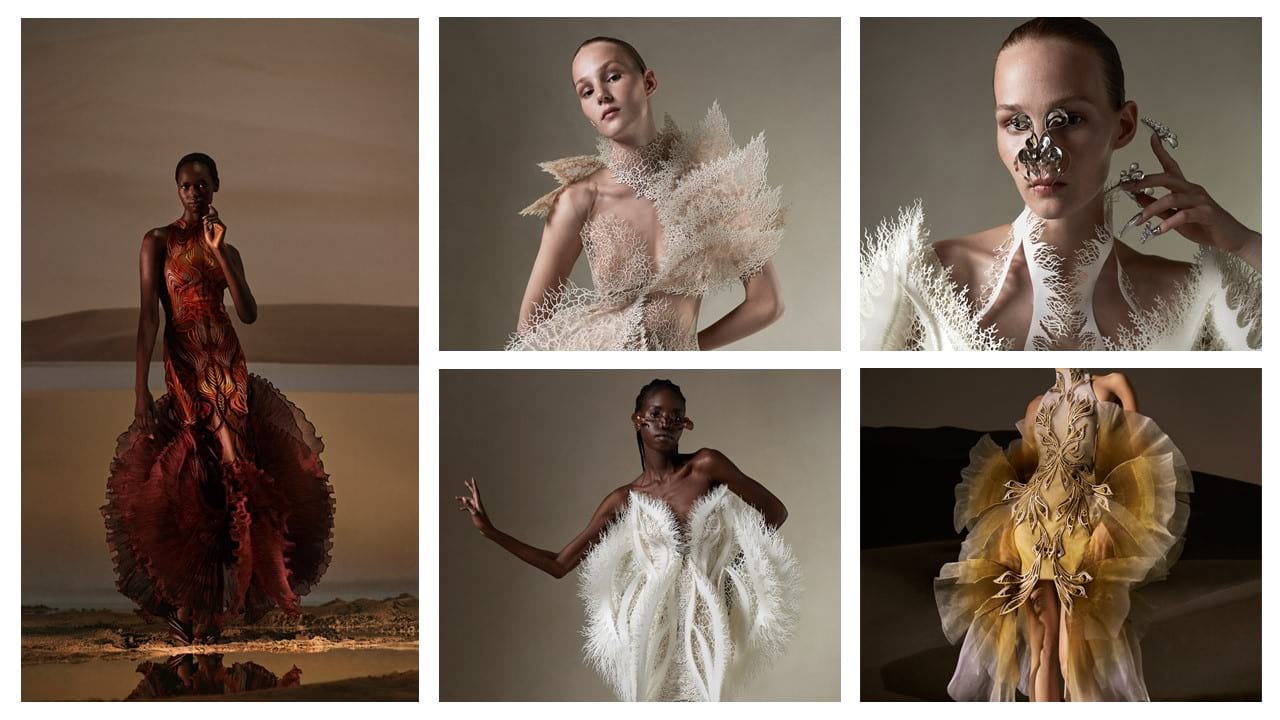
citing only one of Iris Van Herpen's collection would be a lie because I loved them all. I genuinely struggled doing the inspiration board because I wanted to show all her creations. With her collaborators, she 3D prints delicate shapes on tulle-like textile and obtains a surrealist/futuristic/mycellium like effect.
-
We also had the chance to visit the Noumena institute specialized in 3D printing and parametric design. They have different poles: a data analysis pole called "reshape" which focuses on material and textile technology, and "la machina" which is the place where 3D objects are produced at an industrial scale. We were able to see a lot of samples of parametrically designed and 3D printed textiles, but also 3D printed shoes, ceramics, walls and art works. I saw the different possibilities to play with colors and shapes, and also learnt that in other sustractive manufacturin industries, making an object uses about 25% of the material and generates around 75% of waste, while in this factory, the waste was contained in a single cardboard box. This part also inspired me a lot and I would really love to try and 3D print with biomaterials. Visiting Noumena was the most interesting part for me but I can unfortunately not post any pictures due to confidentiality.
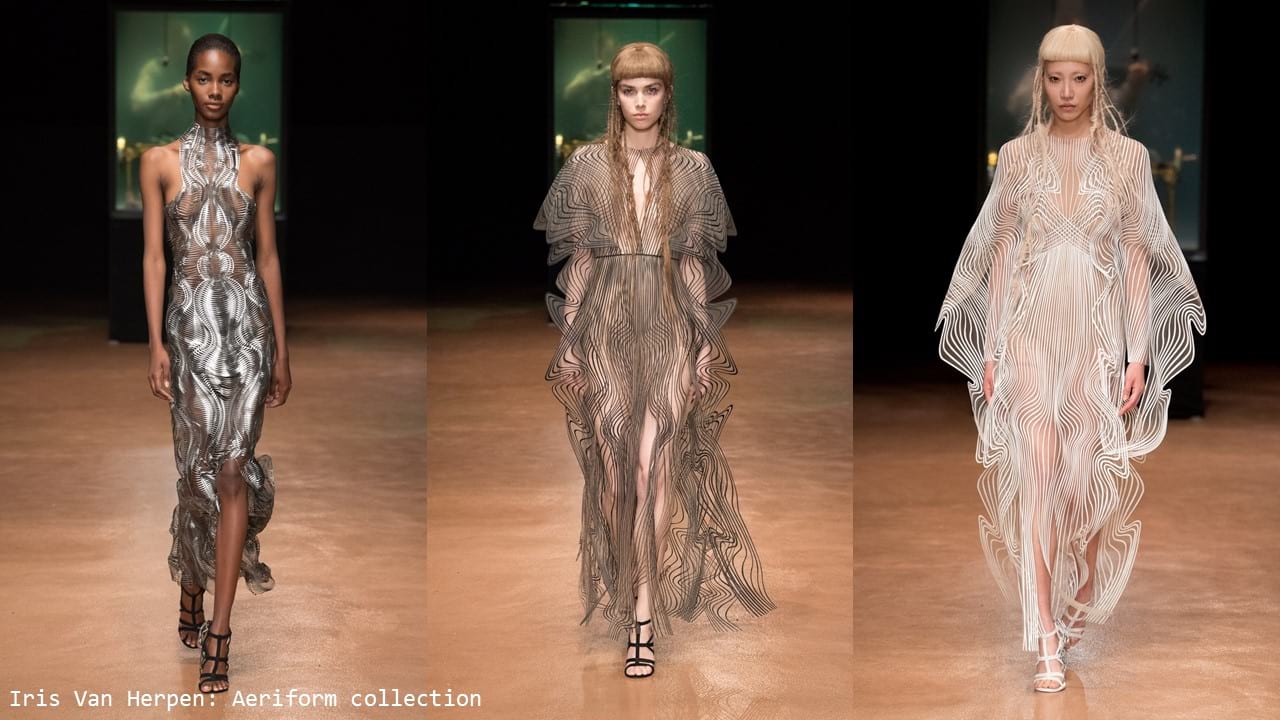
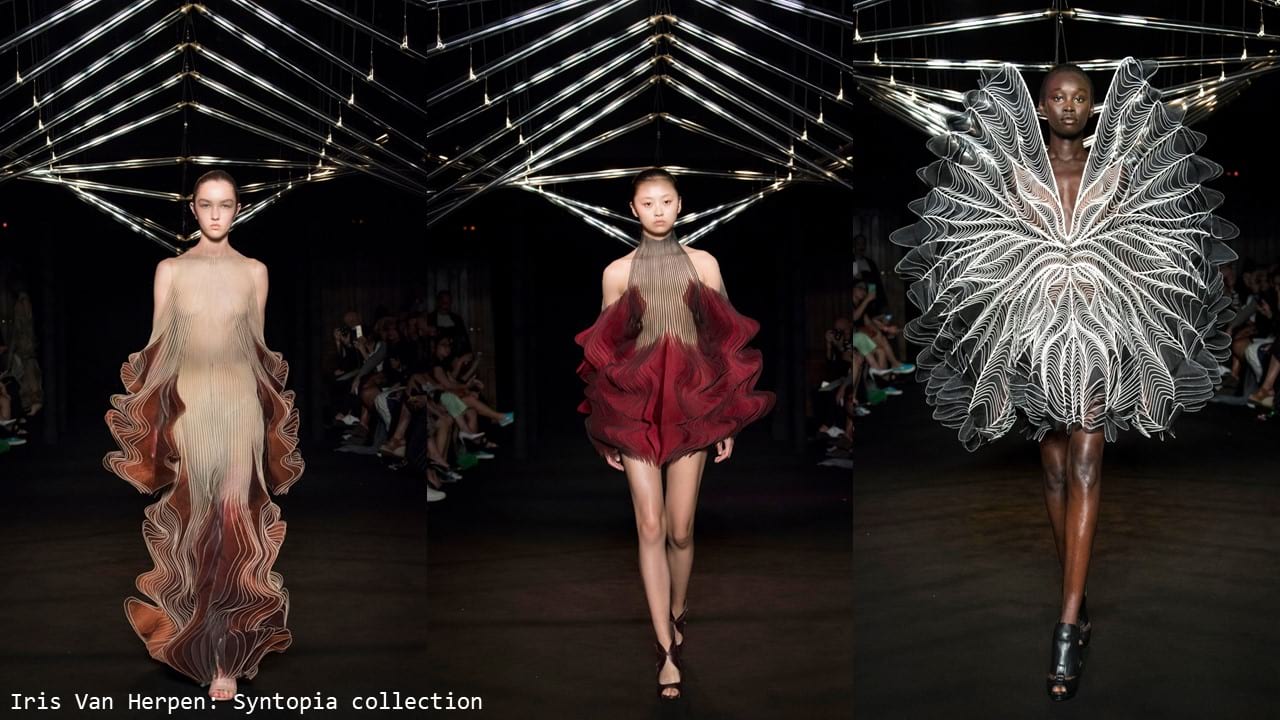 Other collections from Iris Van Herpen :
I also really loved the approach of Nervous System with their project called "kinematics" combining parametric design with modularity and making 3D printed modular dresses, jewellery and puzzles.
II-Assignements
- Document the concept, sketches, references also to artistic and scientific publications
- Design a parametric model using Grasshopper 3D and uploadthe rhino file + grasshopper files.
- Learn how to use 3D printing techniques to print the 3D model in/on the chosen materials.
- Document the workflow for exporting your file and preparing the machine and gcode to be 3D printed
- Upload your stl file with pictures at : https://oscircularfashion.com
- Submit some of your swatches to the analog material library of your lab. (20cm *20cm aprox)
III-3D printing
a-3D printers
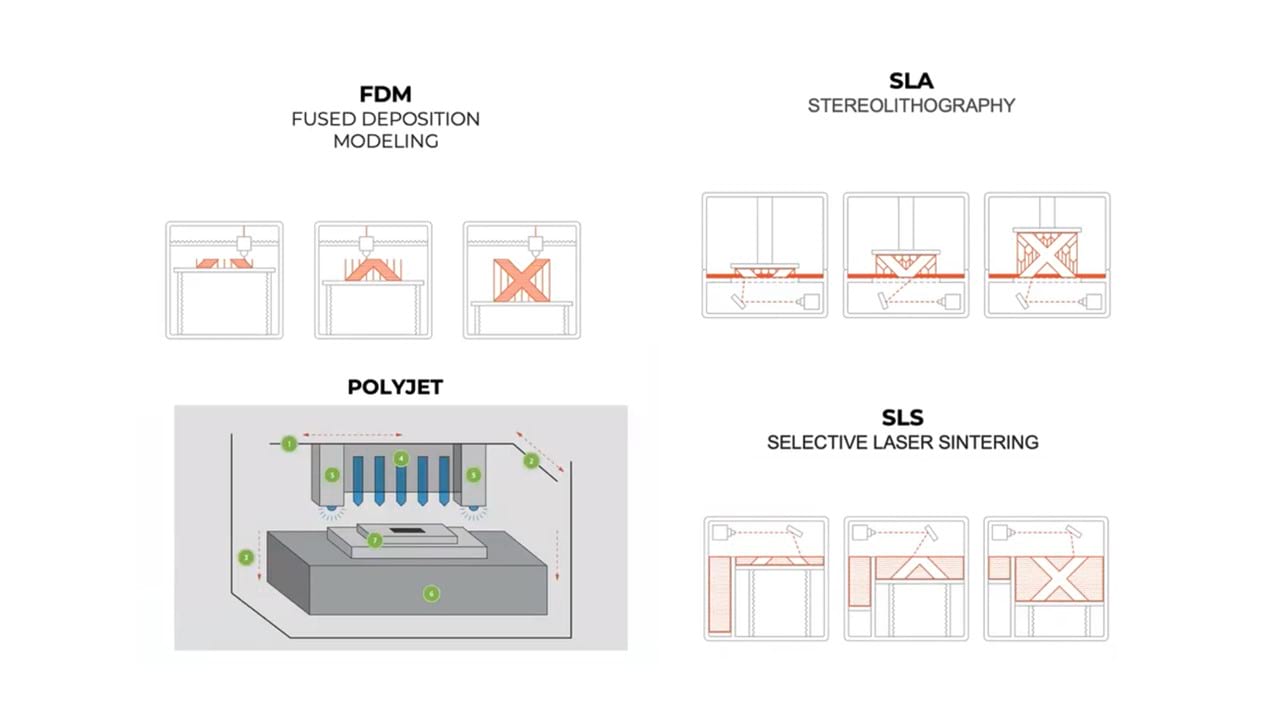
During the lecture, we learnt that there are different types of 3D printers based on different techniques: - Fused Depositing Modeling (FDM), where the material is fused and distributed on the x, y and z directions to make the desired object. - Stereolithography, offering a very high resolution since it is solidifying a polymer resin with a laser.The object is created from the top (highest z) to bottom (z=0). - Polyjet offering a nanoresolution. This technique is more used for chips and objects requiring this kind of resolution. - Selective Laser Sintering, which is more or less like stereolithography but upside down and generating a solid object covered in the unsolidified (powder) material.
At Fabricademy Barcelona, we have the traditional FDM 3D printers. They use plastic, mostly PLA or AVS if we want something more resistant (but worse for the environment). The filaments come in two standard thickness sizes: 1,75mm (used in Barcelona) or 3mm diameter. Various types of filaments can be used: some of them feature mixes of plastic and wood or even clay particles. To use them, one has to be careful of not damaging thee nozzle used because these particles do not melt and might damage or block the extrusion. But what is the nozzle?
 Image from MegaDepot Website.
The nozzle is the heated part of the 3D printer, where the material is extruded. In Fabricademy Barcelona, we have nozzles of 0.4 mm, 0.6mm and 1mm. The definition of the object and the time of printing will depend on the size of the nozzle and the speed of printing chosen. The motor can be placed in two different places: on top of the extruder (direct drive) or next to the plastic filament (bowden driven). Make sure to use a direct driven 3D printer when using a flexibe filament. Bowden driven 3D printers offers the possibility of having better movement.
b-Cura software
Meshes in .stl files (handmade on Rhino3D or directly obtained in Thingiverse) can be 3D printed using the Cura software for the slicing (slicing is necessary since the printer is printing in layers). Cura is going to generate profiles (slices) of a desired height, which will define the quality and resolution of the final printed object. Octoprint software can also be used instead of Cura.
An object can not be printed empty, it needs infill to avoid breaking or bending once printed. We usually use between 10 to 50% infill. It is also important to enable the retraction (retracts the plastic filament when the printer is not printing) and put a Z hop of about 0,5 mm to avoid having plastic leaking when the nozzle is traveling from one printing spot to another. One of the options is to make a plate of adhesion, which is a full planar surface before making the object. This option is useful when printing a structure that can be disbalanced so that the object will be fixed. This should not be done when printing on a textile. When printing on textile, it is recommanded to use a z offset of about the thickness of the material before printing to avoid dragging the fabric.
When printing an object, it is important to study the different angles it features. If the object has inclinasons with angles superior to 45-50°, it will require support. The support is automatically drawn on Cura but is not always optimal, so it is better to optimise the .stl file and draw your own support.
c-My design
To experiment with 3D printing, I decided to draw a pattern on Rhinoceros 3D by making triangles of different sizes (hello again triangle obsession), making an offset varying between 1 and 7mm and extruding them, then trimming them in random angles and capping them. I made sure the size of my composition was not too large and could fit in the 3D printer.
Then, I exported the .stl structure and imported it on Cura. I used a 3D printer with a 0,4mm nozzle and used PLA plastic. I chose leather (on the wrong side) since it offers adherence and could easily be incorporated on a patchwork leather jacket. When printing, I used the following settings : 0,3mm thickness, infill of 10%, a Z offset of 8mm, double wall on the sides, 35mm thick top and bottom layer.
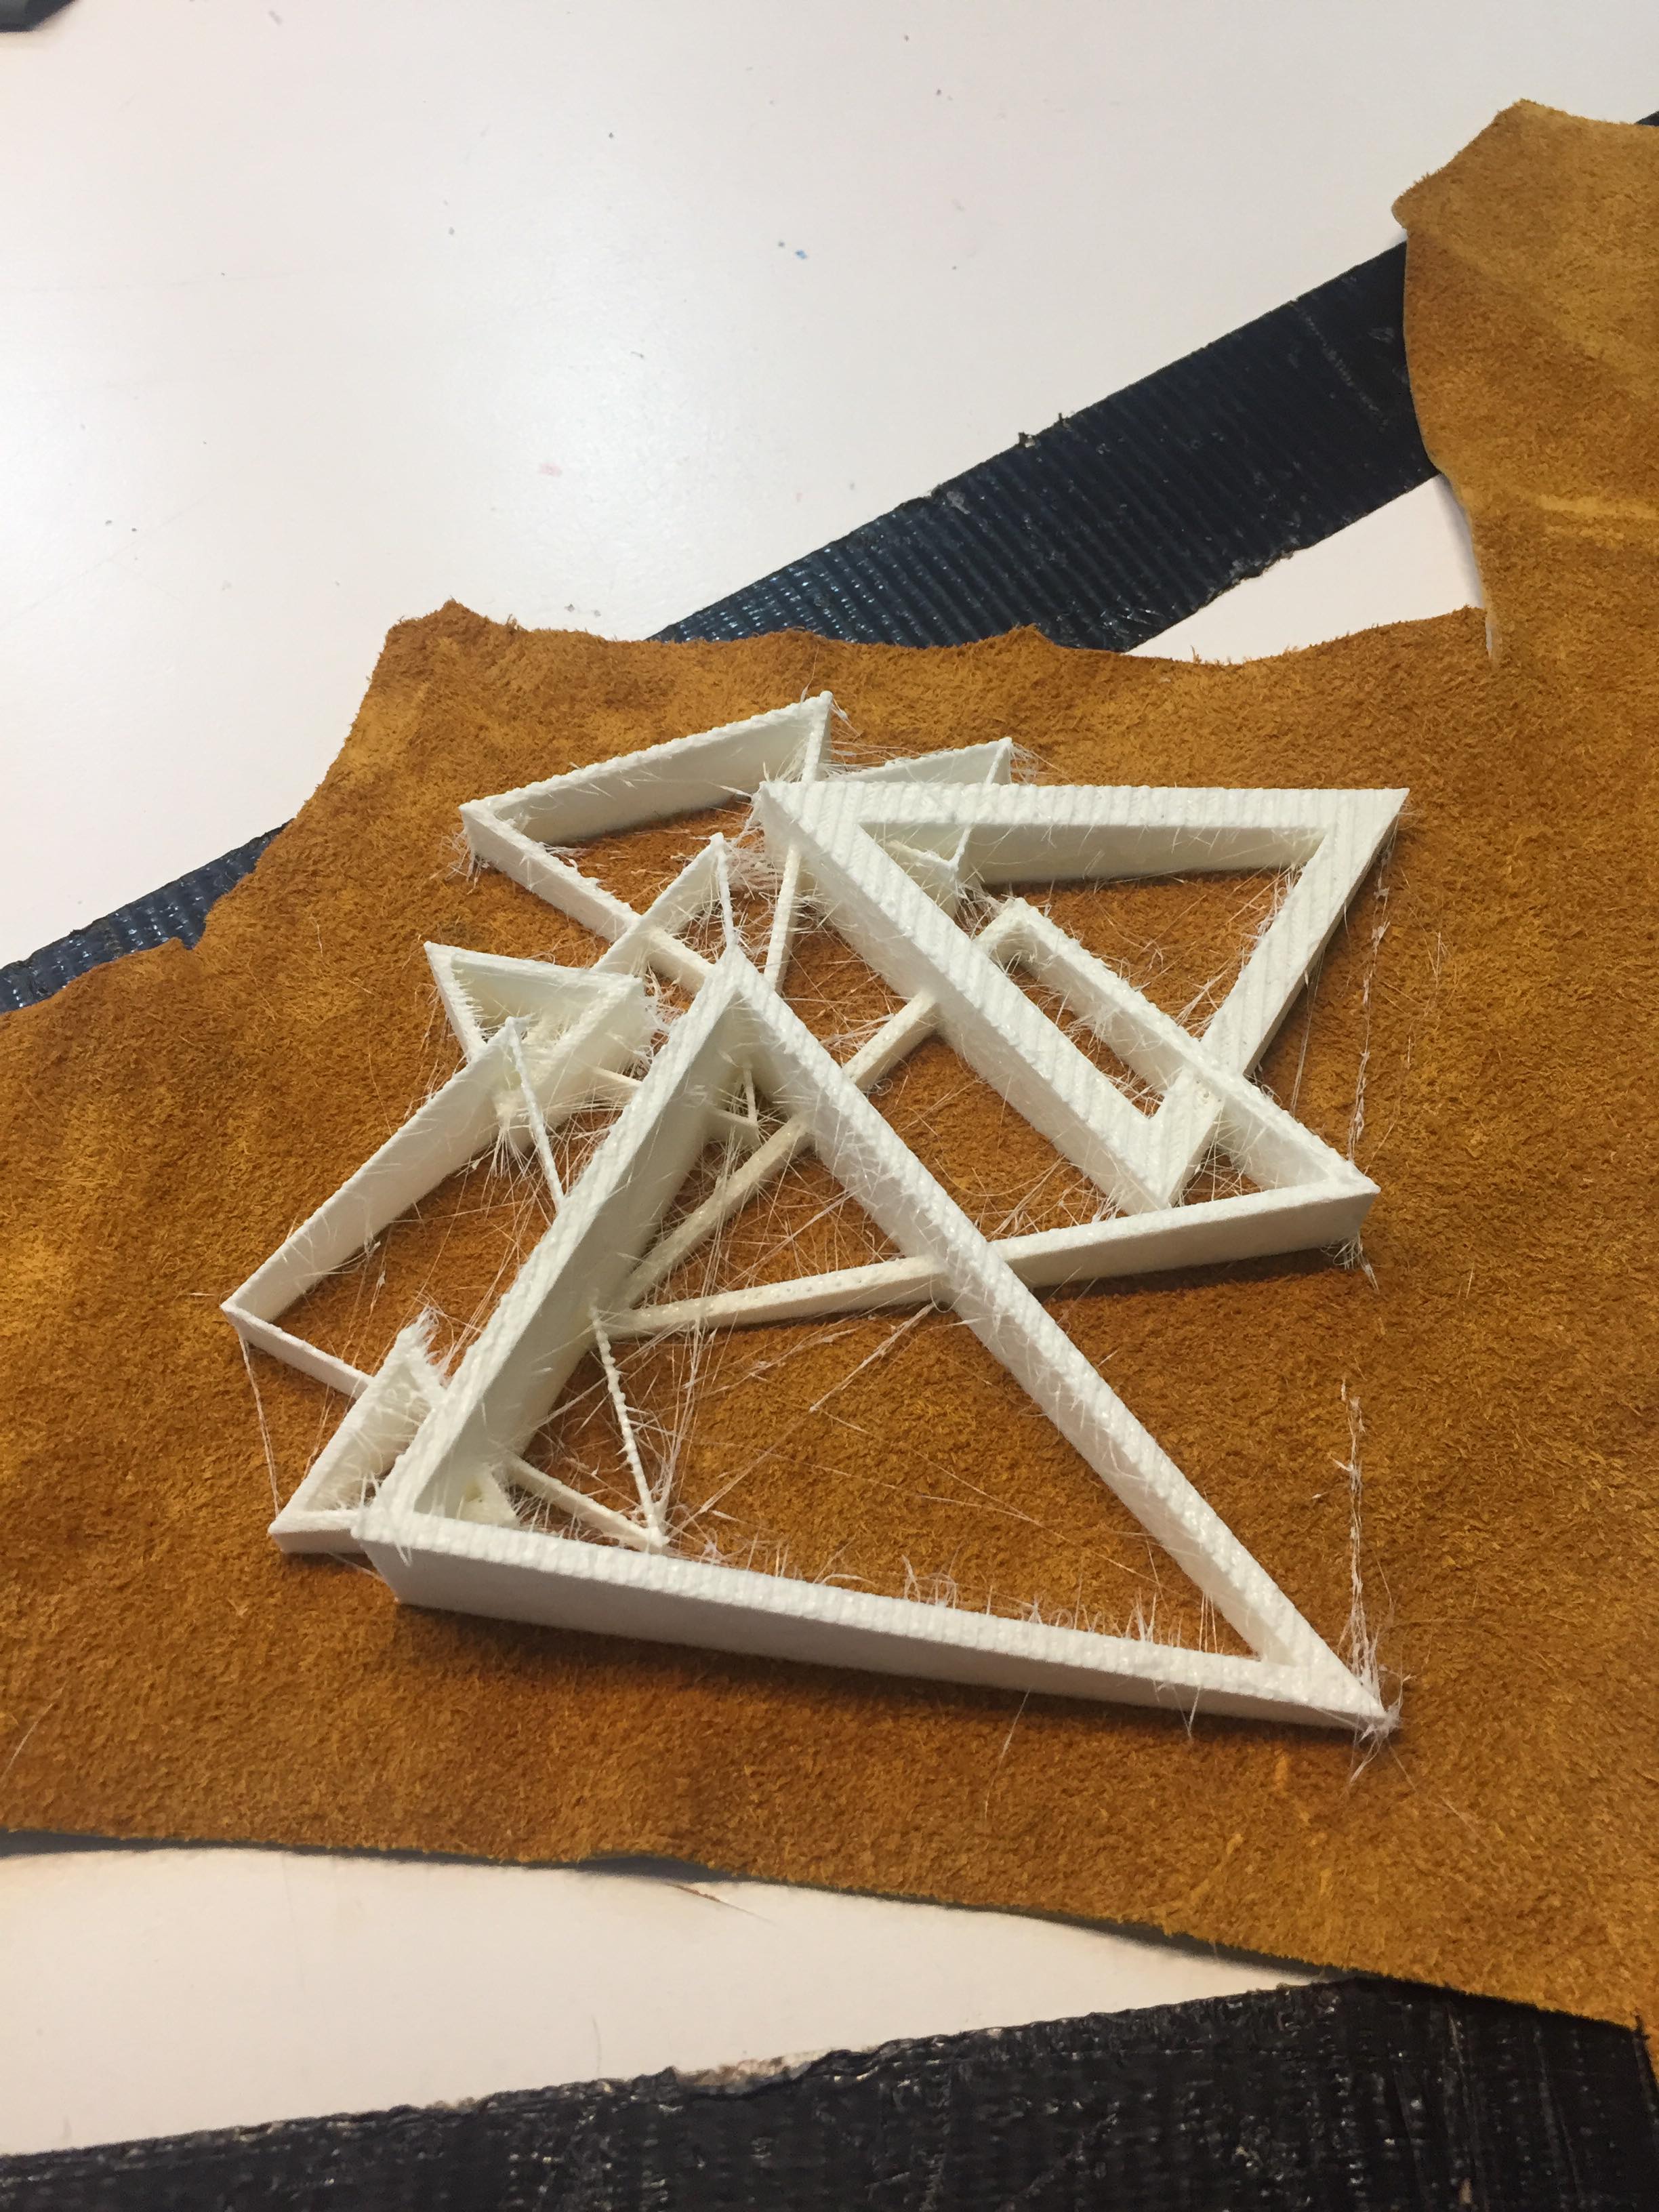
I really liked the final outcome but it is not really flexible for something that should be worn. Anastasia advised me to cut the triangles at their intersection if I was to print it again. Here is a link to the Rhino file of the triangles!
IV-Grasshopper for Rhino7
Grasshopper... This one was though. But super powerful! So I am determined to get to the bottom of it! This plugin from Rhinoceros3D allows to make parametric design, that is to say modify a design after making it without having to make it all over again. It uses a special way of coding using cables and connectors, and powerful tools including solvers for dynamic modelisations when the right plugins are used.
To be honest, I will not document how to use Grasshopper on this page. Other fabricademers such as Marie-Charlotte Desforges did it very well soooo I would advice to go visit her fabricadem page. This plugin from Rhino is too complicatedd so I will directly redirect you to the tutorials I followed, whether they are from Fabricademy or from Youtube Channels. To begin with, I watched the tutorials from Fabricademy led by Eugenio and I tried following but I was incapable of doing anything he did after that. To get a hand of the interface, I followed a beginner's tutorial to make a vase with changing types of faces. This allowed me to understant how the connections work a bit better, some shortcuts and the overall logic of the interface. Then, I dived into the files Eugenio made for the first lecture and step by step, tried to understand and modify what he did. Finally, I watched more tutorials to understand the kangaroo plugin (this one gave me some flashbacks of when I studied engineering and especially resolution of differential equations for fluids mechanistics, using solvers) and learnt how to use more and more powerful tools. I went back through Eugenio's files from the 2nd and 3rd tutorial to understand how it worked.
Only after doing so was I able to make my own designs.
a-Making patterns
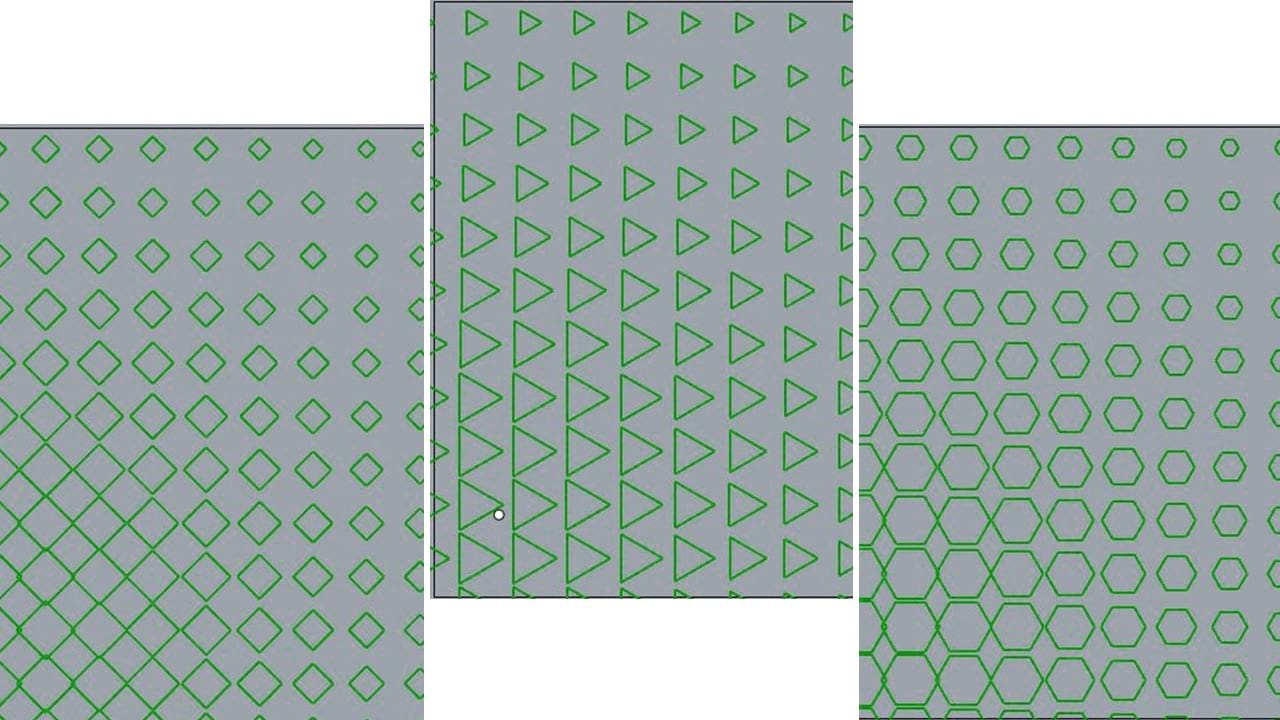
During the lecture, Eugenio adviced us to download a list of libraries for Grasshopper (lunchbox, weaverbird, meshedit, meshtools, noise 4d, human, bowerbird, chromodoris, shortestwalk, pufferfish, plankton, meshtools, Kangaroo2, DendroGH) in order to access new functionnalities. Grasshopper libraries can almost always be found on the website Food4Rhino. In order to explore more patterns, I also installed the Parakeet library made for generating complex patterns by combining them together. After watching the different tutorials previously mentionned, I generated a grasshopper file with 4 different patterns.
-
Pattern 1
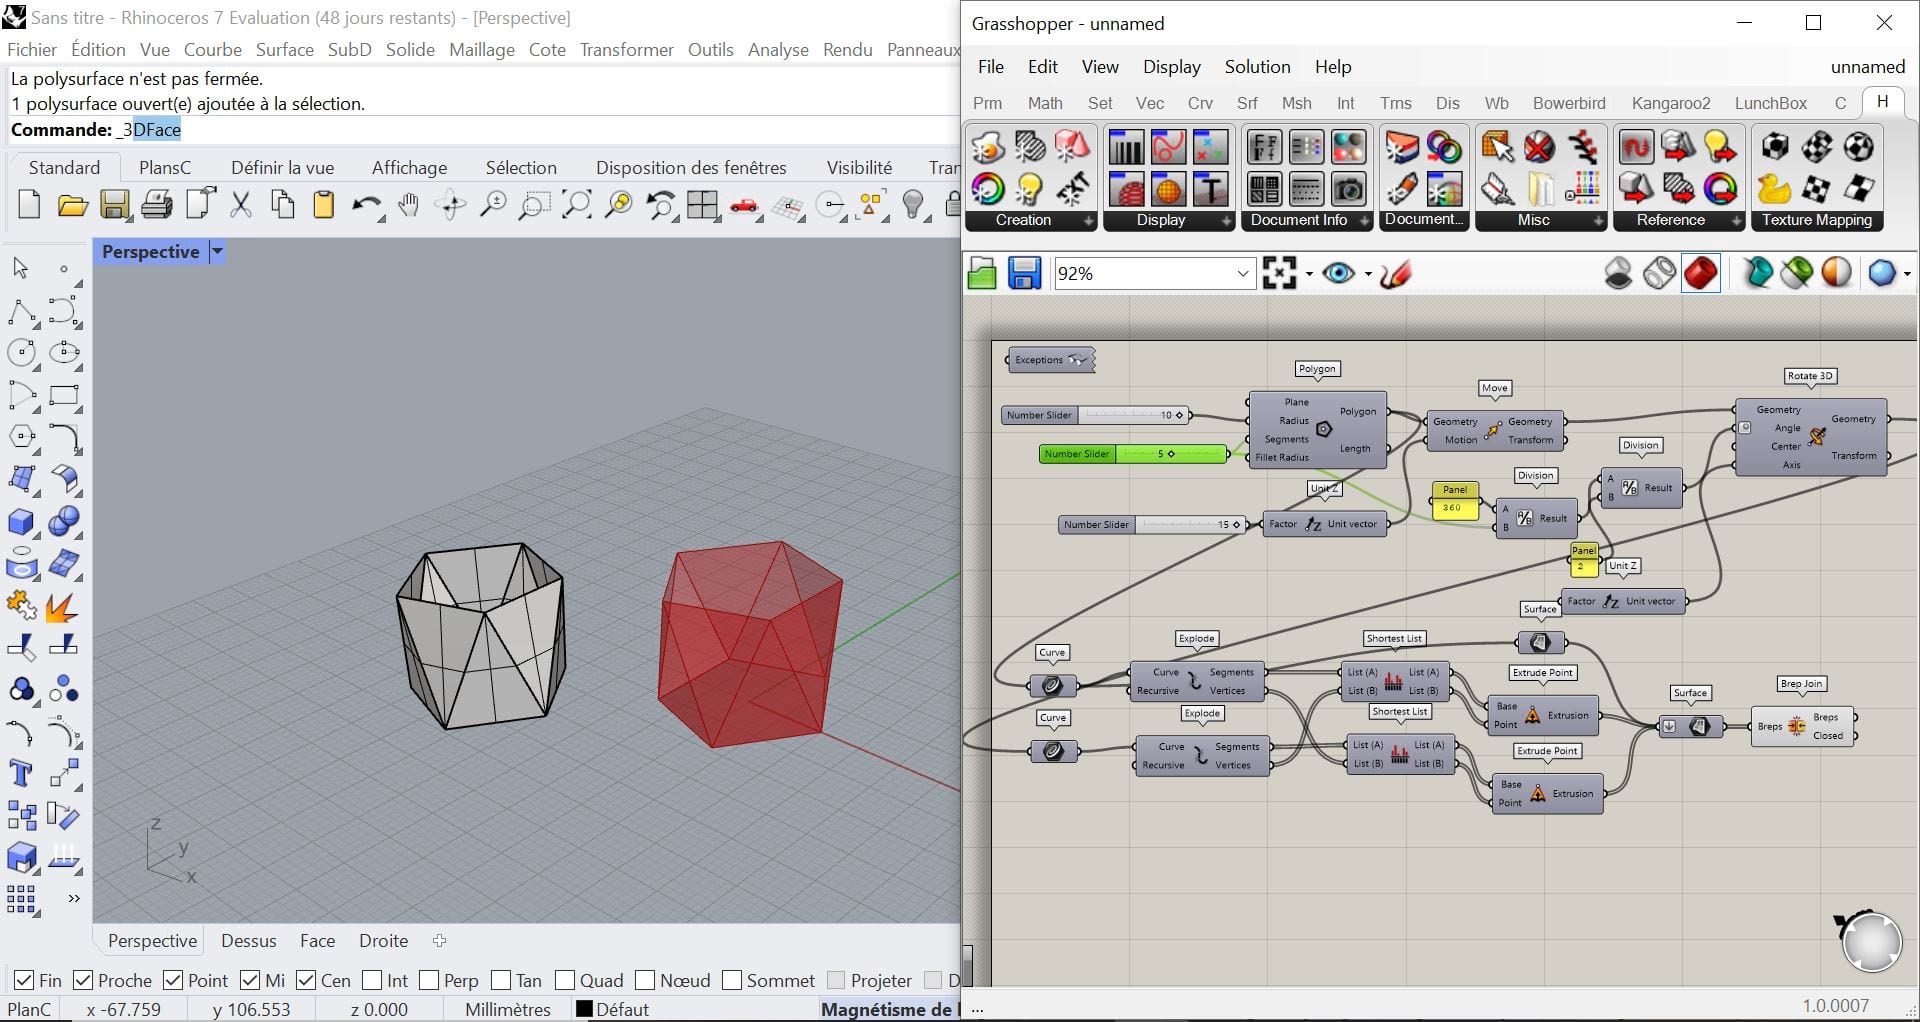
 The first pattern I generated was pretty basic. It consists in a mesh of polygons that I scaled according to their distance to an attracting point. I really like the number slider functionnality so I used it to change the shape of the number of sides of the polygon easily, resulting in different patterns in the end.
-
Pattern 2
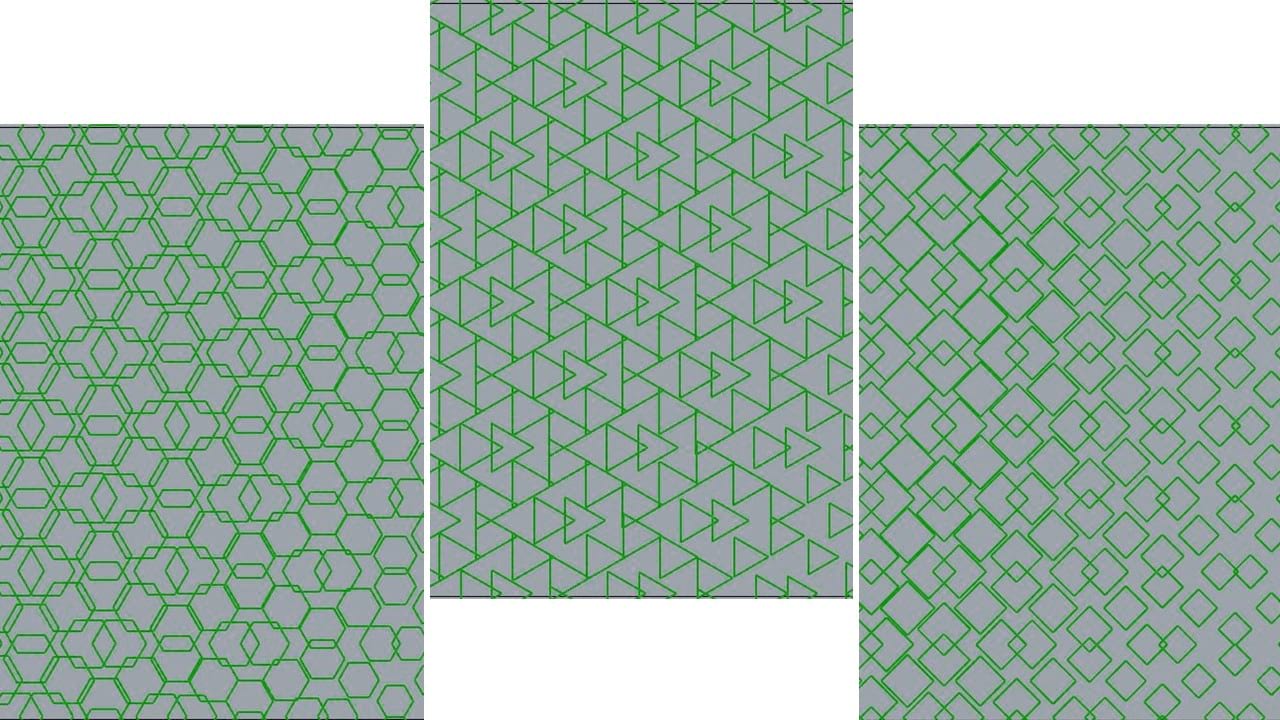
 For the second pattern, I used the Parakeet library in order to access more complex meshes. The logic of using polygons is the same as for the first pattern. However, I did not exploit the full potential of Parakeet in this example combining patterns and pattern generators as it generated meshes I found too complex for this project.
-
Pattern 3
 In the third pattern, I used something a bit more complex as I combined two different types of meshes for the generation of the motives and for the scaling. The same logic using polygons with different number of vertices was used.

-
Pattern 4
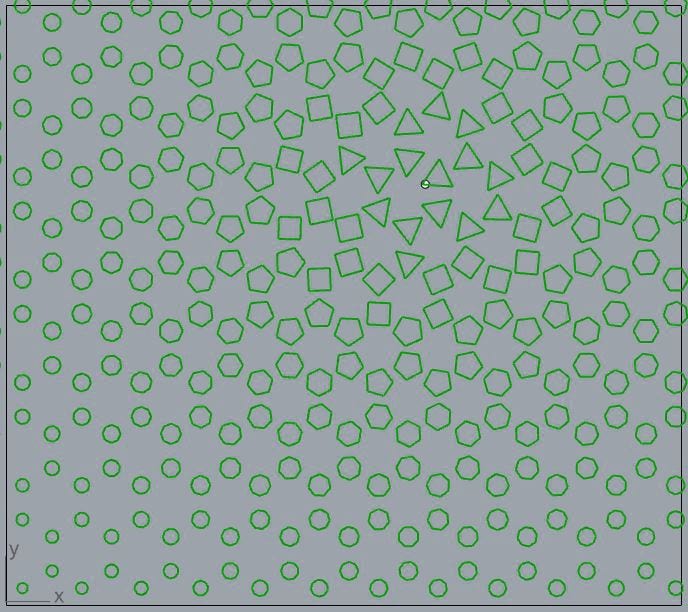
 For the last pattern, I really wanted to use all the possible polgons and make a pattern populated with polygons of a different number of faces depending on the distance to an attractor point, making a fade effect from triangle to circles. In order to do that, I had to generate a circle with offset curves generating different zones: if a certain point belongs to a certain zone, it will generate a polygon of a certain amount of vertices. Although I find this pattern less aesthetic than the previous ones, it was more technical and helped me practice.
Here is a link to the grasshopper files for all these motives !
b-3D printing fabric
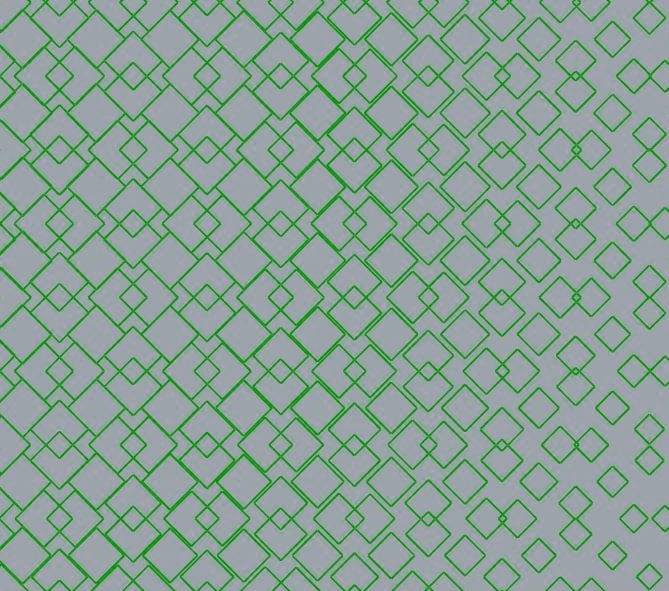
In the end, my favorite pattern was the pattern n°2 with squares. As Christmas is approaching, I am looking for Christmas presents to make to my family and since I had already done a first 3D printing on fabric, I though I could level up and 3D print on fabric in the shape of a pattern to generate a unique design.
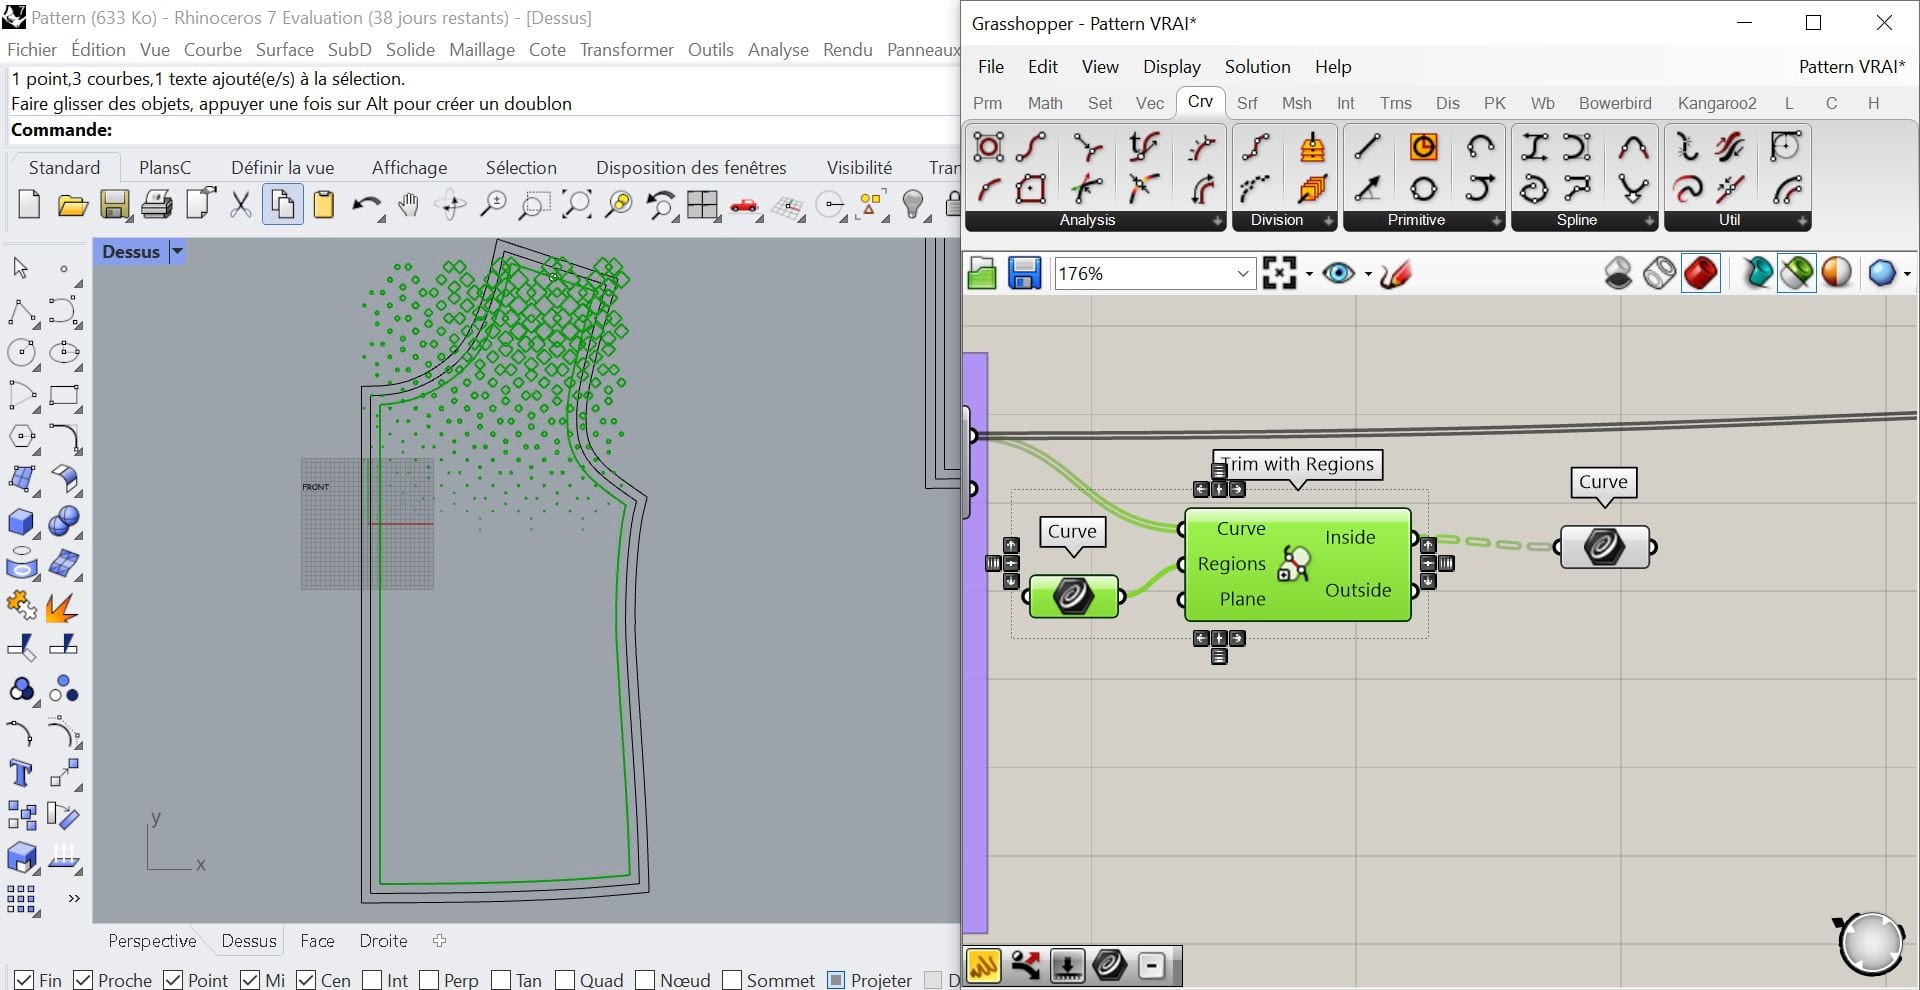
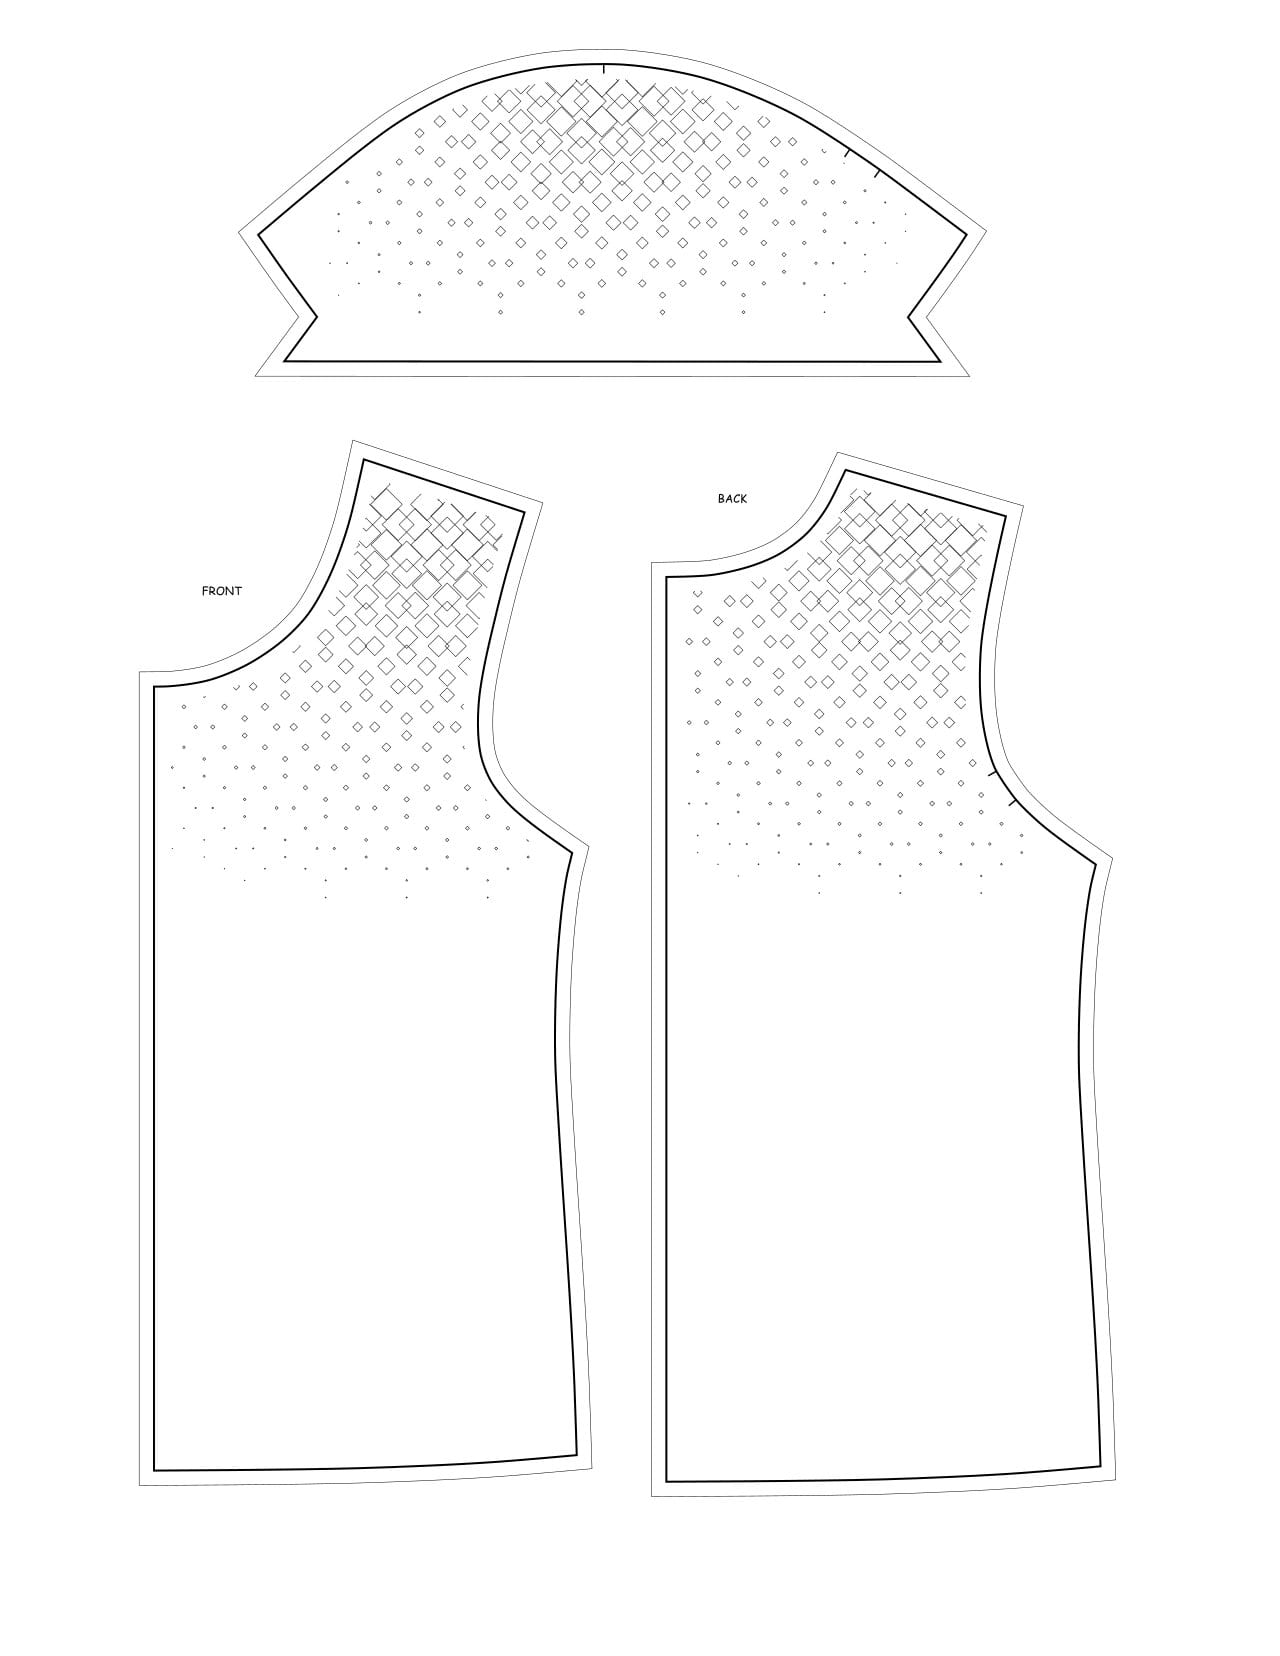
 I downloaded the pattern of a basic large Tshirt called Sparrow tee on Common Stitch and using the "Trim with region" tool, I applied the motive to the pattern. The Rhinoceros3D and the Grasshopper files can be found on OS circular fashion webpage.
 In the end, I reached this pattern.
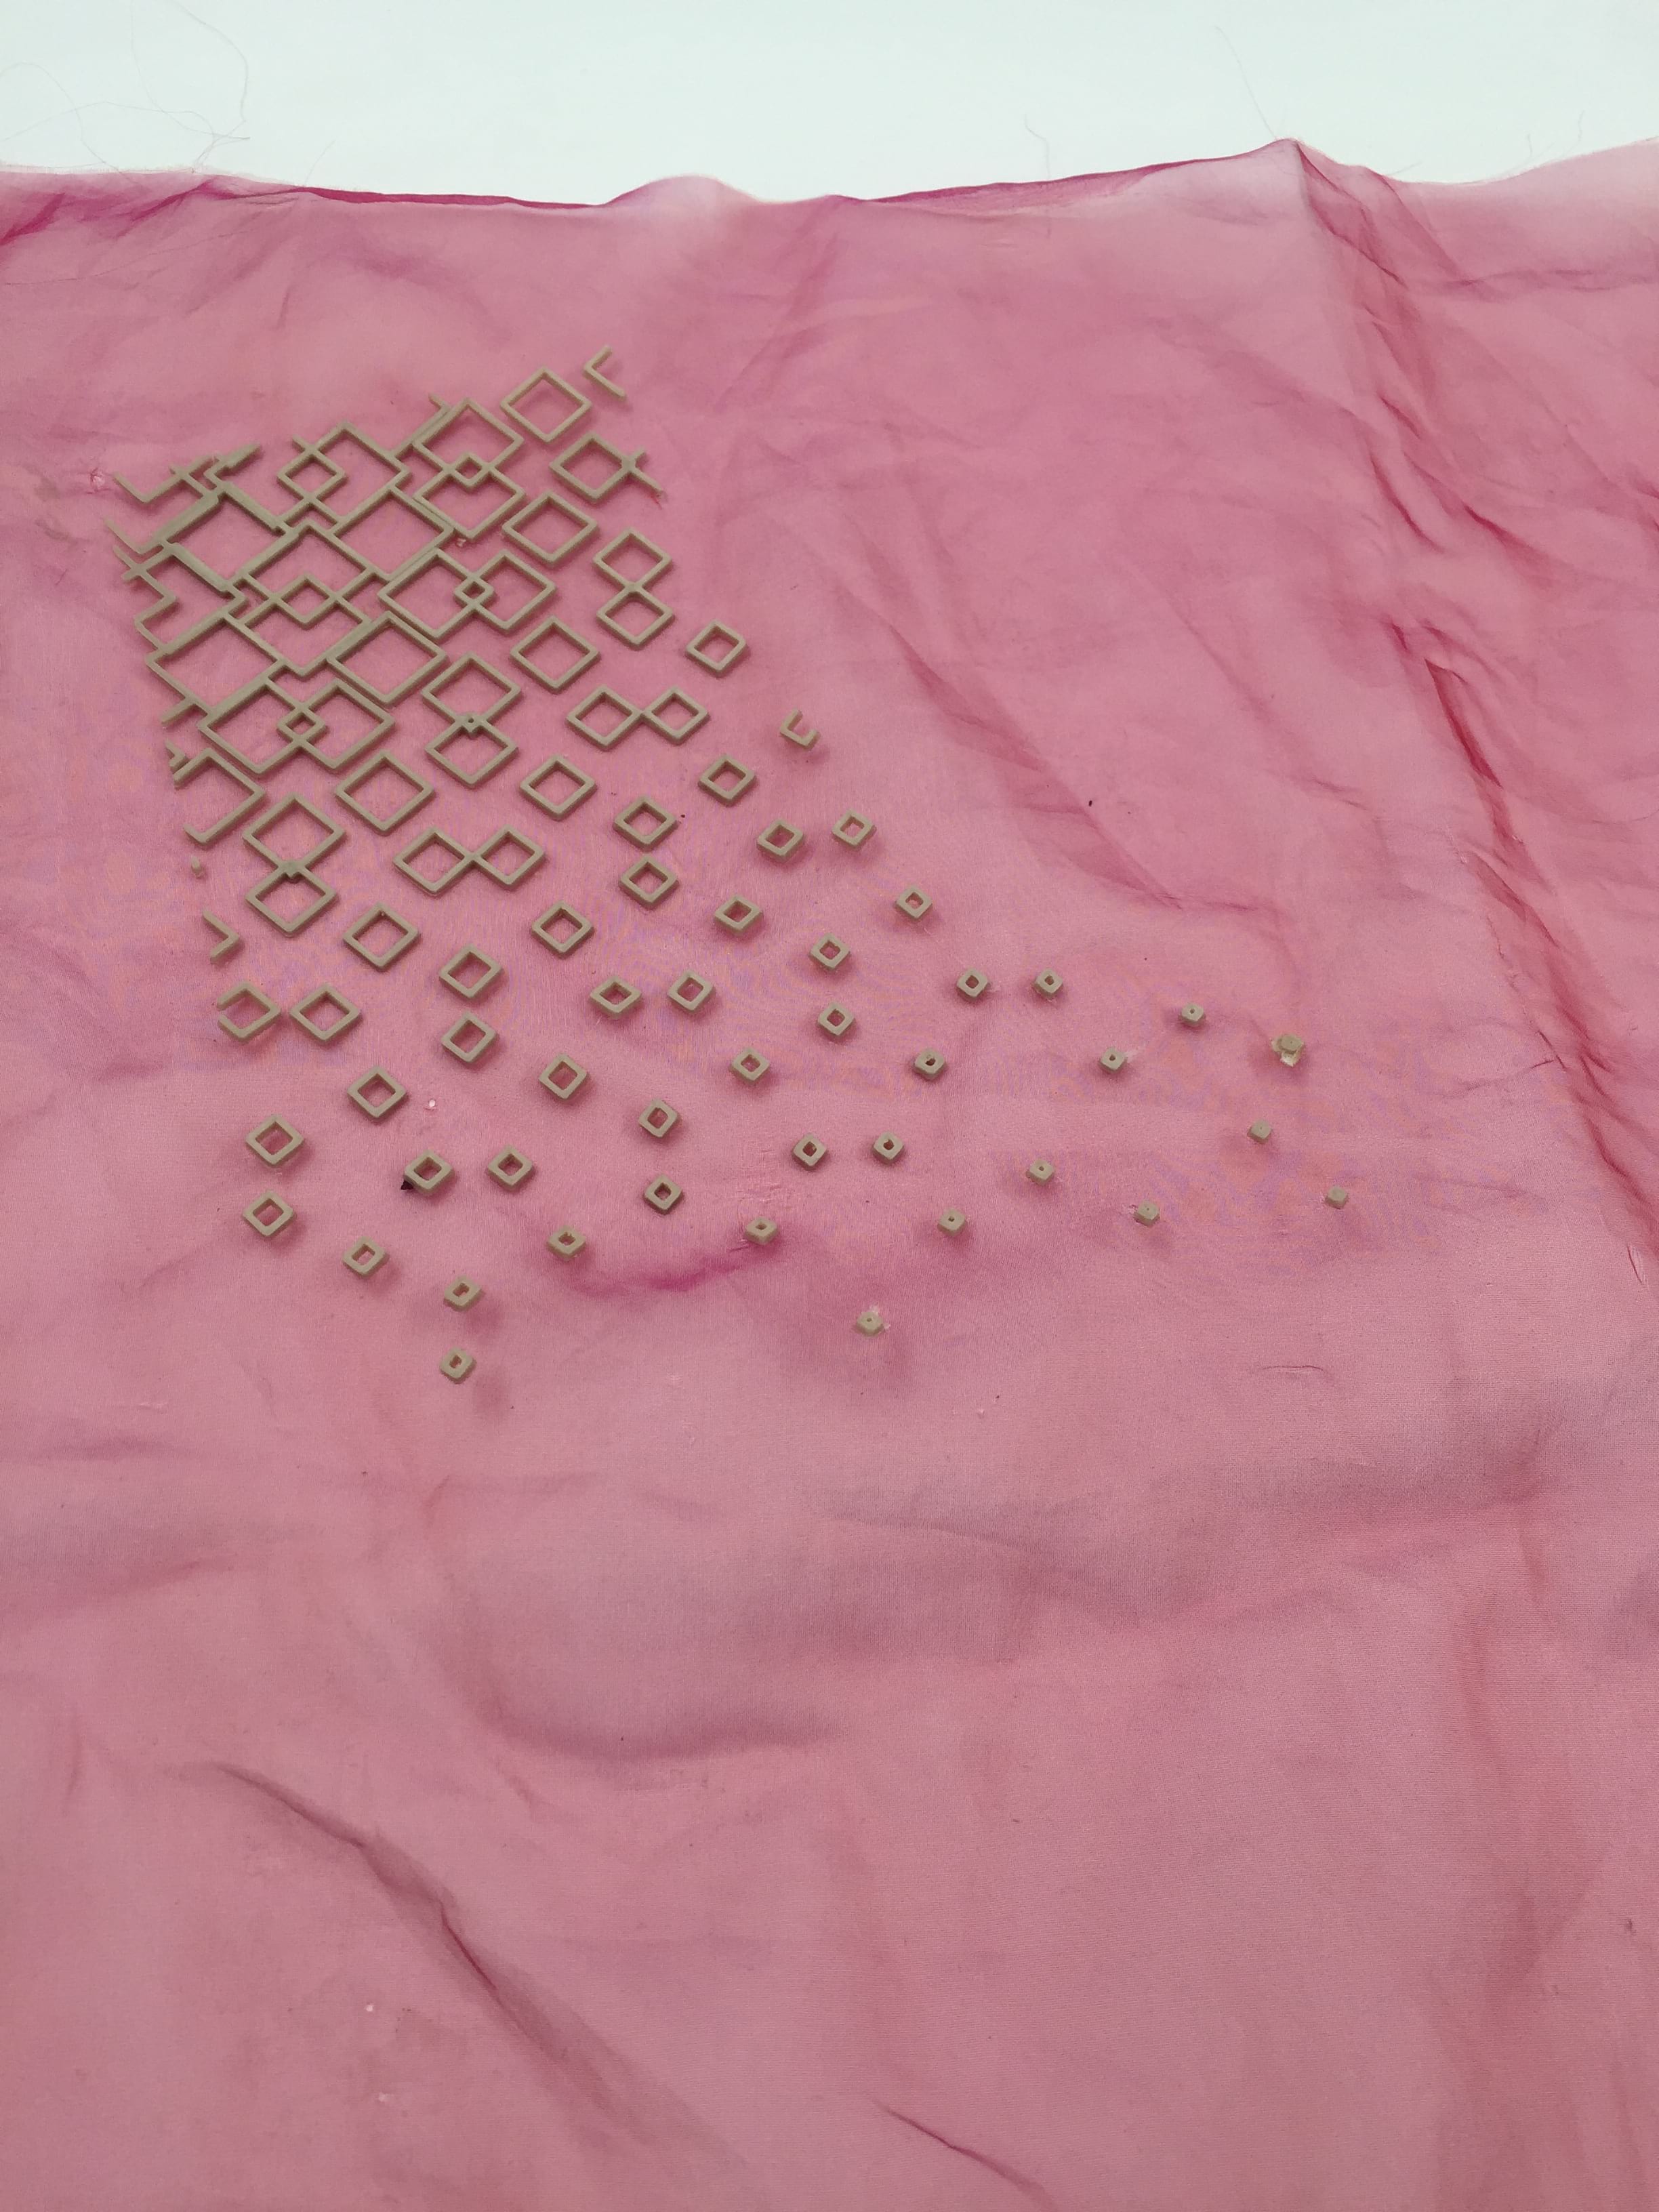
However, things started going bananas when I started to 3D print it on fabric. I chose chiffon fabric so that the meshy structure would allow the melted plastic to adhere to the surface better. Daphne helped me a lot on that one and I think we litteraly made 10 attempts before having a result.
-
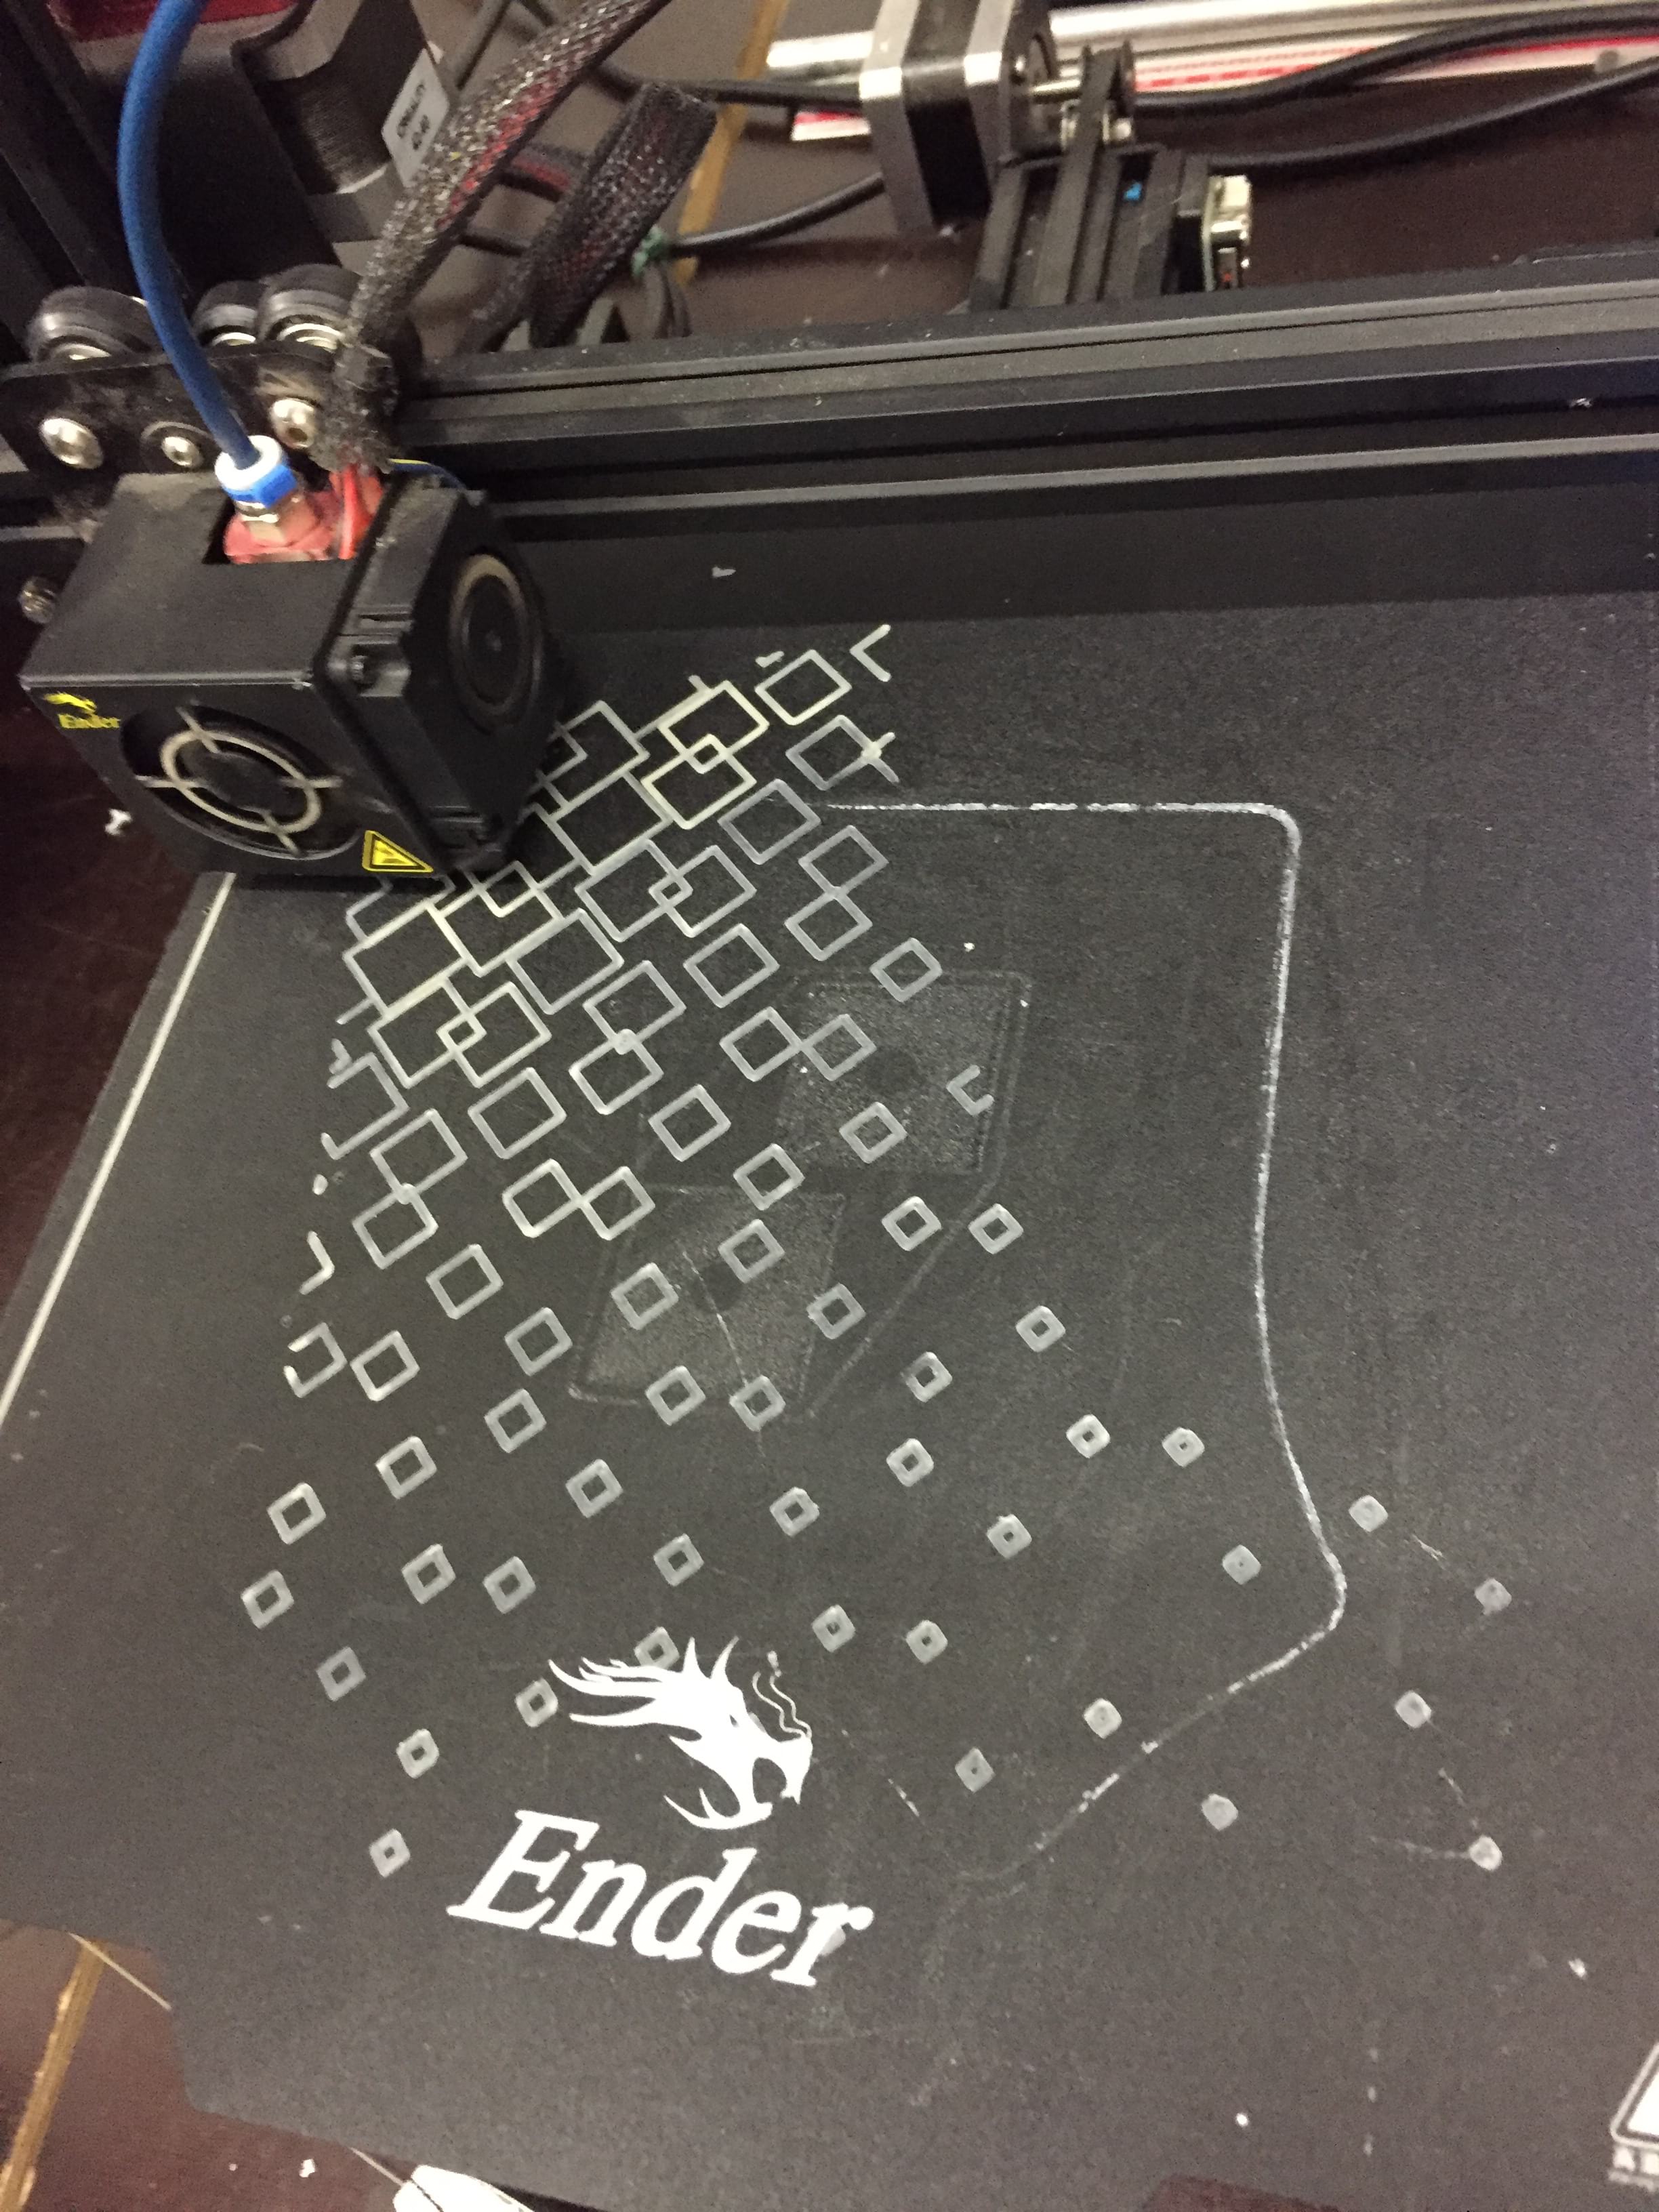
My first attempt was to was to make a first 1mm layer (z axis) without fabric, put the fabric on it and then make a second 2mm thick layer on top of it after sandwiching the fabric inside. I first wanted to use the 3D printer that has a large mat (but a 1mm nozzle) so that the square pattern would cover a bigger part of the tshirt. However, only by looking at the first layer without fabric, I could see that the result did not look delicate as I wanted it to as the definition was not good enough.
-
I then modified my pattern so that the squares could fit in a 20cm x 20cm bounding box. This way, the pattern could be printed in the smaller 3D printers using a 0.4mm nozzle. The definition was much better and cleaner but I had troubles making the extruded material stick to the mat. I had to attempt is trice to get it right. However, when inserting the fabric, the nozzle would alwas drag it and I would end up with a very messy result.
-
For the 3rd attempt, I tried to directly 3D print on the fabric without making any bottom layer. The nozzle would drag the fabric (making holes by melting it at the same time) and the plastic would not stick to the chiffon once taken out of the printer.
- For the last attempt, I was following a lecture and Daphne came up with the idea of spraying hairspray on the chiffon fabric for the plastic to stick to it and... It worked! However, the squares would come out of the fabric easily and I eventually gave up on the idea of making a 3D printed Tshirt for my mom. But I am happy we finally found a way to make it work, even if the binding of the plastic to the Tshirt is not very strong.