06 | BIOFABRICATING MATERIALS
WEEK 06 | BIOFABRICATING MATERIALS This week was about the fabrication of biodegradable bioplastics and others materials with Agar, Alginate, Gelatin or Kombucha
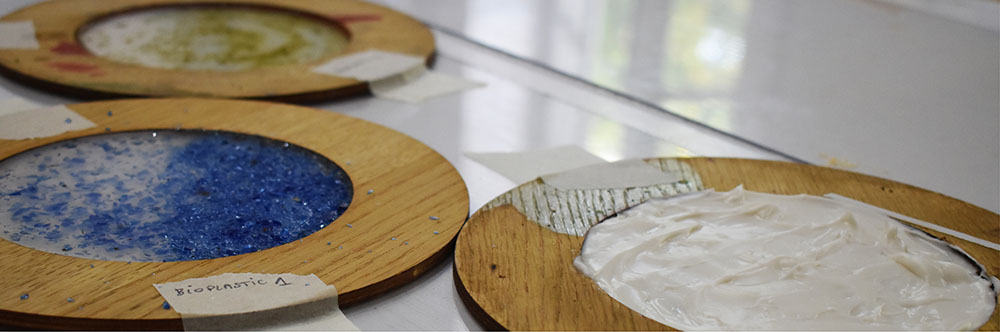
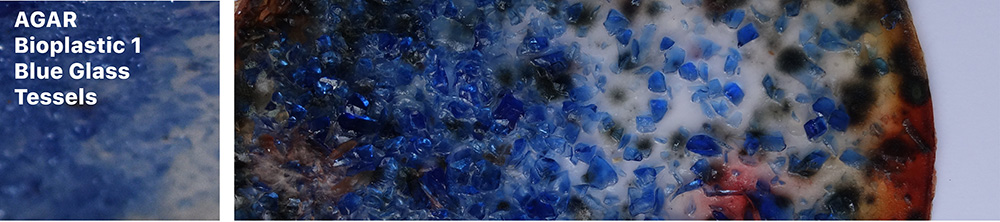
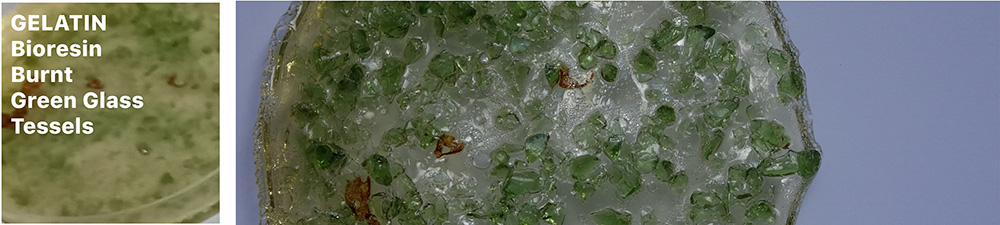
Quickly, I decided to work with a transparent and colourless material and to try to add glass tessels coming from broken glass windows or broken bottles in it. The main problem that can cause the use of glass is that it is not a porous material. Because of that, the adhesion of the bioplastic to the glass won't probably work. I'm curious to see if the differents bioplastics are enough flexible to keep the glass tessels inside when being manipulated.
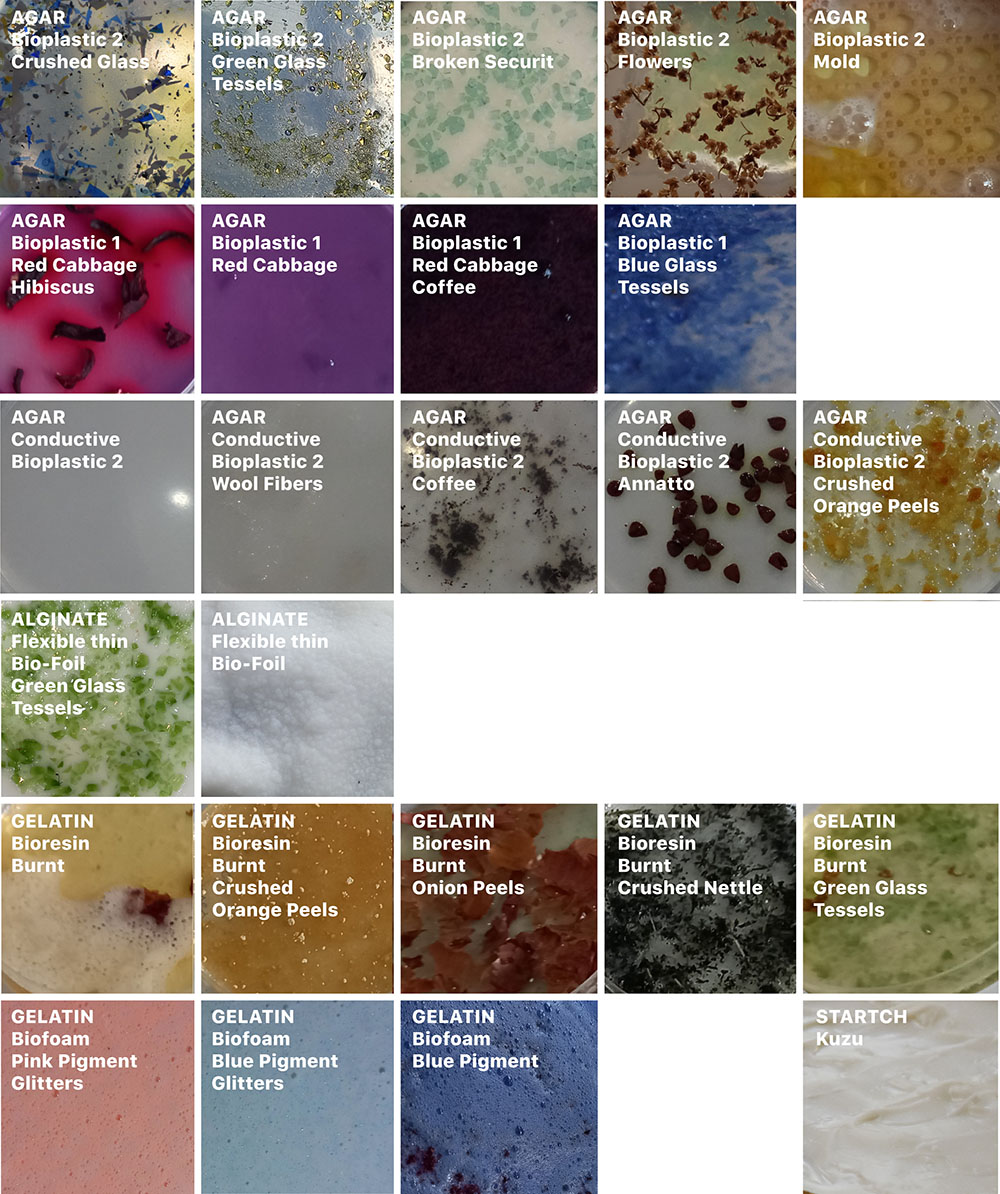
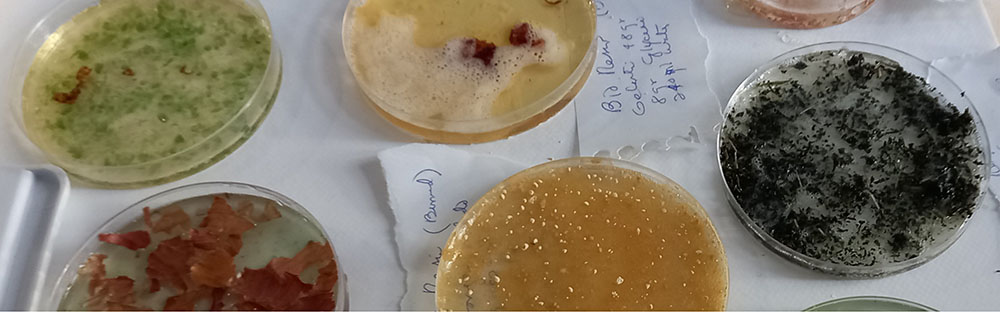
You can find below a table of the different textures we got before drying.
ALGAE
 © 2020 Lugae. | Algae Lab with Eric Klarenbeek & Maartje Dros, © Antoine Raab - Atelier Luma
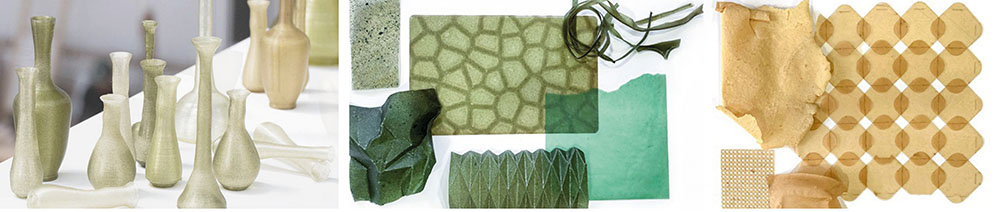
The first thing I noticed about bioplastic was the different ranges of textures and transparency. The work of Maartje Dros and Eric Klarenbeek is very impressive to me. The translucidity of the algae material echoes sanded glass and the way the vases reflect light is really delicate.
© 2020 Lugae. | Algae Lab with Eric Klarenbeek & Maartje Dros, © Antoine Raab - Atelier Luma
The first thing I noticed about bioplastic was the different ranges of textures and transparency. The work of Maartje Dros and Eric Klarenbeek is very impressive to me. The translucidity of the algae material echoes sanded glass and the way the vases reflect light is really delicate.
Recipes with Agar

Recipes are from our course on BioFabricating materials
Bioplastic 1
- 4g Agar
- 2,5g Glycerin
- 400mL Water
Stir until reaching a honey like texture.
Bioplastic 2
- 4g Agar
- 12g Glycerin
- 200mL Water
±15min at 80°C are required
Conductive Bioplastic with Agar
 As we just finished the week on e-textiles my interest for conductive materials was still here. When I found the following recipe from Elisabeth Lorenzi on Materiom, I thought I would give it a try.
Conductive Bioplastic Recipe from Conductive Agar Ag03 by Elisabeth Lorenzi, Materiom
- 2g Agar
- 1mL Glycerol
- 5g Salt
- 240mL Water
For the moment, this recipe seems to give a very flexible sheet. I'm afraid it'll be too fragile. Update : such a big fail that I forgot to take a picture of it dry.
Conductive Bioplastic 2
- 4g Agar
- 12g Glycerin
- 10g Salt
- 800mL Water
Unfortunatly, I misread the cardboard with the recipe and put 800mL instead of 200mL but it is drying well so far. After adding all the ingredients, I mixed for 20min and let cool down a bit before pouring into the molds. I was afraid it wouldn't solidify because of my mistake on the water quantity but it did solidify quickly than expected. Hope it will be conductive when dry ! Update : the salt crystalized very quickly and kinf of completly disrupted the bioplastic structure. Big fail.
Recipes with Alginate
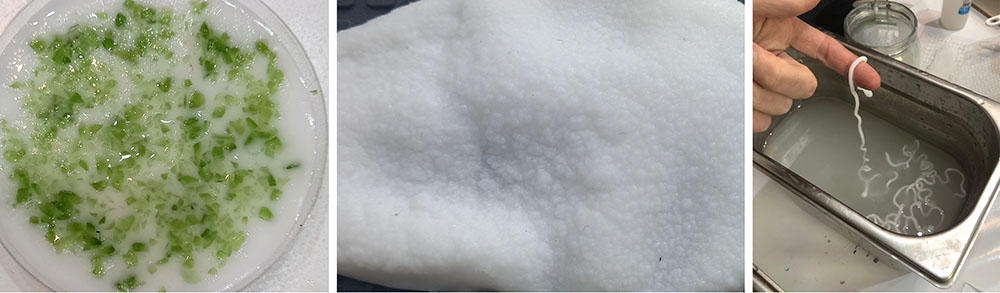
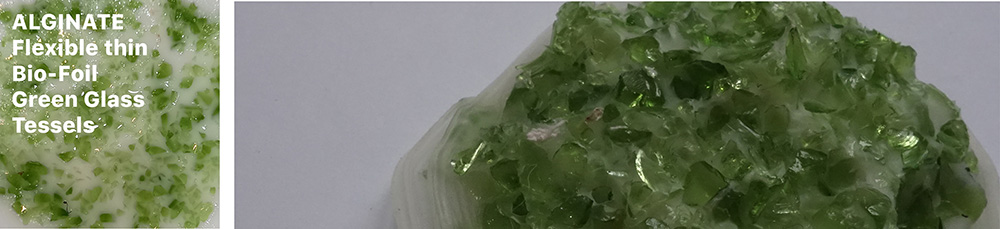
Flexible thin BIO-FOIL
- 12g Alginate
- 20g Glycerol
- 10g Sunflower oil
- 200mL Water
Spread solution for curing
- 10mL Sodium Chloride Hydrate / Calcium Chlorure
- 100mL Water
To make a surface you'll have to pour the bio-foil on a surface and then spray the spread solution on the surface. Do it several time. You'll see the mixture shrink.
To make a thread, make the spread solution in a contenant and then add the bio-foil mixture with a syringe (third picture). Be careful not to touch the solution with your syringe ! The thread solidifies as soon as it touches the solution. I tried to make it with glass tessels but it didn't go well with the syringe :-/
STARTCH
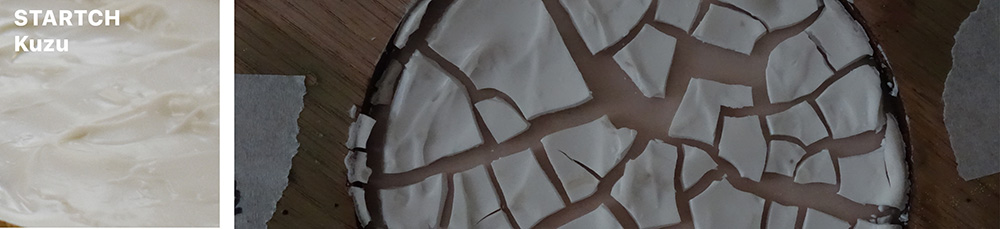
Tapioca Startch Bioplastic Recipe from Tapioca Startch Bioplastic by Malavika Byju, Materiom
- 60mg tapioca startch
- 120mL Water
- 10mL glycerin
- 10mL Vinegar
Tapioca Startch was replaced with Kuzu startch, it gave a white opaque yummy texture. Unfortunately the drying process isn't going well because it is cracking.
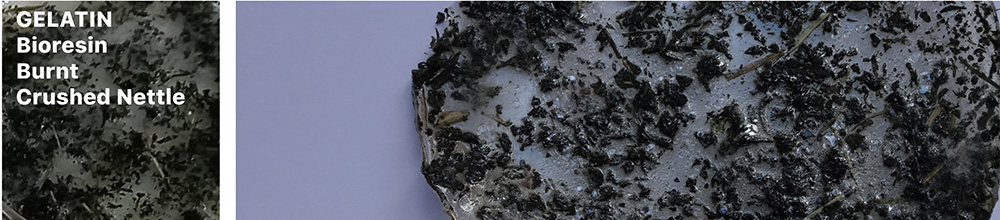
GELATIN
Bioresin
 Recipe is from our course on BioFabricating materials
Bioresin
- 48g Gelatin
- 8g Glycerin
- 240mL Water
Mix at 60°C until smooth, then boil for 5-10min (be carful not to burn it !)
Biofoam
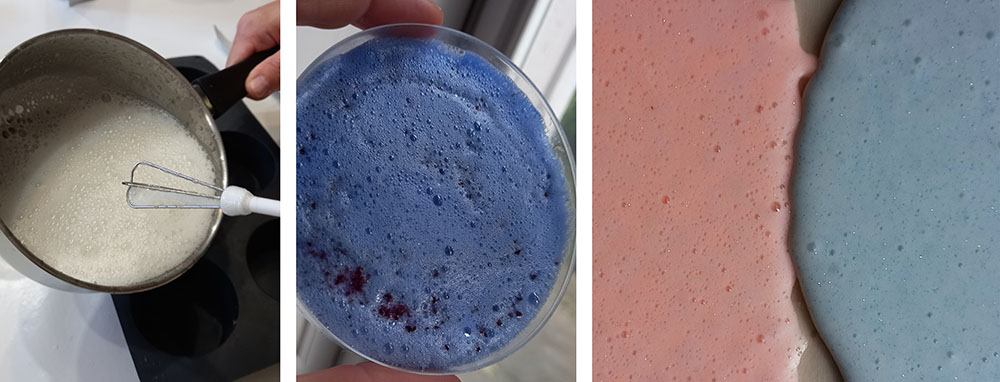
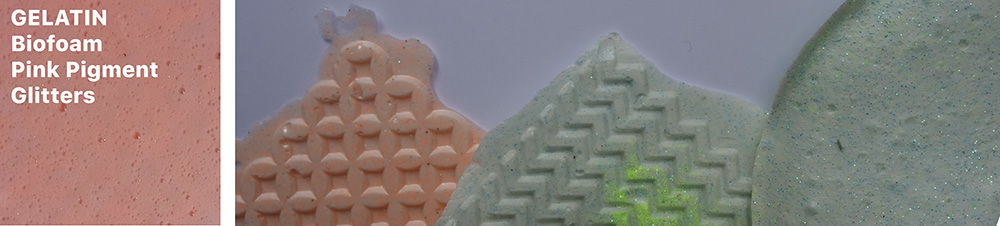
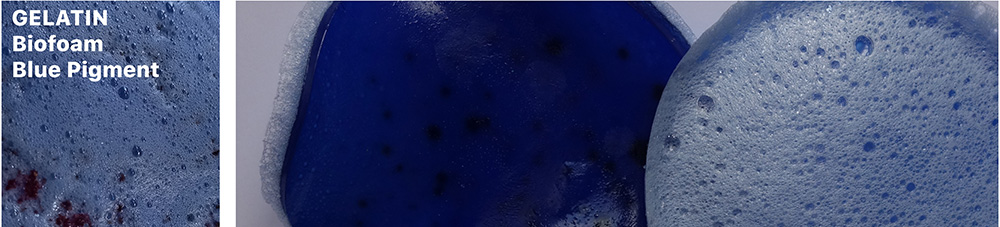
Two first pictures are biofoam made with liquid soap. Last is with soap flakes (Marseille soap). Recipe is from our course on BioFabricating materials
Biofoam
- 48g Gelatin
- 12g Glycerin
- 240mL Water
- 10mL Soap
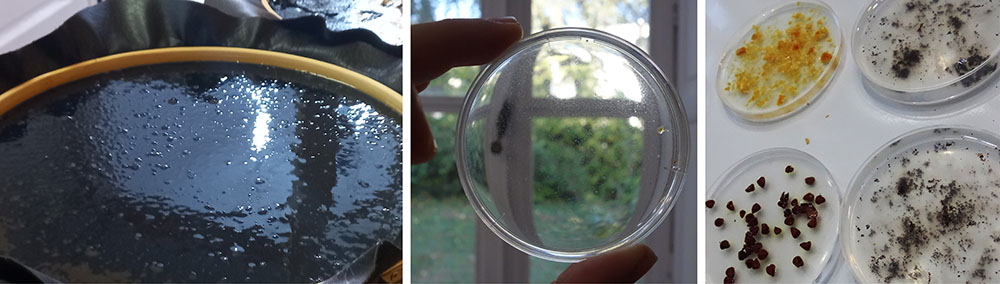
MYCELLIUM
For the mycellium, we used the Grown It Yourself kit from Grown bio which comes with a easy to follow tutorial. There are a few steps to follow.
Steps
- Wear gloves, mask and a lab coat for best sterile environment
- Sterilize your tools (steam/alcohol) and the space you are going to use
- Prepare your moulds by sterilising it with alcohol
- Open the kit, weight the amount of mycelium you want to use and break it down into smaller pieces
- Add 10% of the weight of mycelium of FLOUR to boost its growth and mix well with the mycelium
- Put it into the mould and PRESS so that it is really dense inside the mould.
- Cover with a thin plastic and make some holes on it so that the mycelium can breath
- You can put it in a dark storage preferably at room temperature (around 22 - 23°C was working well for us)
- Depending on the size of your mould, give it a week and more to grow (without fruiting !)
- Dry it using the oven or a dehydrator
For my experimentations I was interested in shapes made with moules à lamelles - moulds made of slices that are used for glass blowing. You can see below the experimentations.

KOMBUCHA
For the first part go here After 5 weeks, we harvested the kombucha. Unfortunatly its environment is too humid and cold so it didn't grow that much. The layer is really fragile and we won't be able to make something out of it :(
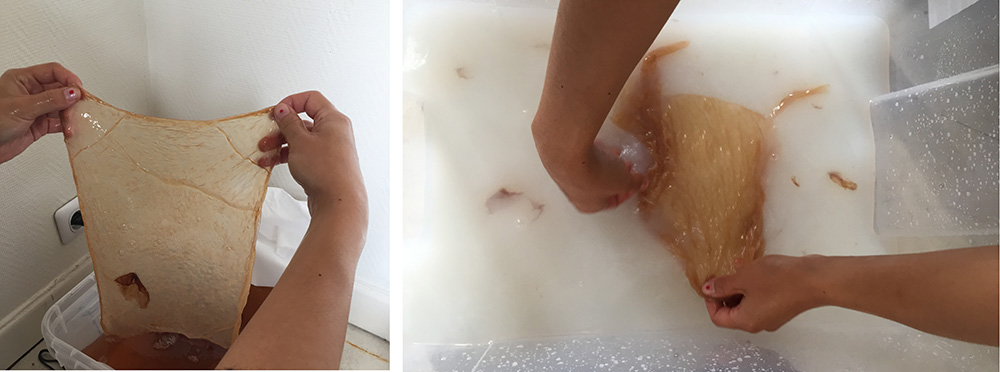
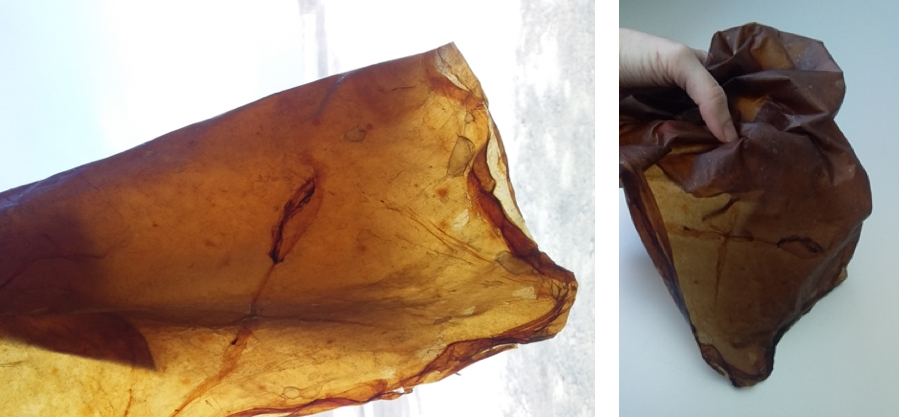
We grew one in Iceland then but in a much warmer environment fortunatly ! It turns out to be around 0.5cm thick when harvested but it gave a nice layer. A bit of beewax on top of it after the slow drying process and the leather-like kombucha has a nice finish !
References
- The ChemArts cookbook, Aalto University, 2020 : Recipes for different biofabricating materials
- *Materiale Pyramiden: to know the impact of your materials**
- Atelier Luma
- Mycoworks
- Conductive Agar Ag03 by Elisabeth Lorenzi, Materiom
- © 2020 Lugae.
- Algae Lab with Eric Klarenbeek & Maartje Dros
- Algae Platform by Atelier Luma
- Dyeing Kombucha with red cabbage
- Fish Leather Process
- Fish Leather Process Video
- Fish Leather Process Video 2
- The Art of turning fish into leather by Hakai Magazine (really good article)
- Yomiuri Shimbum Fishskin
- Making leather from fish skin
| Videos | Class, Review 06, Tutorial Introduction 3D printing with clay, Tutorial Biomaterials Part 1, Tutorial Biomaterials Part 2, Tutorial Microbial Cellulose |
|---|---|