O9 | TEXTILE AS SCAFFOLD
WEEK 09 | TEXTILE SCAFFOLD This week was about textiles becoming a support for creation. How they could inspire new shapes, new textures, new structures...
INSPIRATION
Wood and Plants
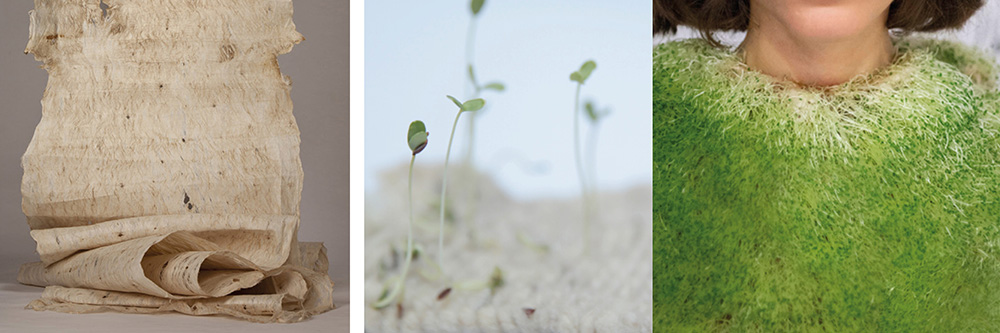 Wooden textiles by Belén | Be grounded by Lara Campos
The wooden textiles from Belén are an interesting example of the use of traditionnal techniques for contemporary products. I really like how it turned out. And of course, the project Be grounded from Lara Campos is impressive ! Love the poetry and the human-nature work here.
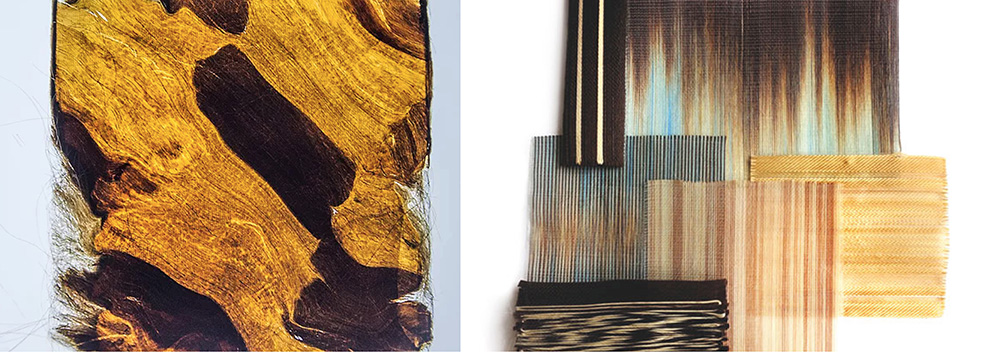
Glass x Textile
PICTURE
For my work on Glass and Textile, I worked on some samples where glass already has a textile identity in its core. I used sanding to print patterns of lace on it. I also used the glass fusing technique to make a few samples of remaining traces of textile in the glass. The glass sheet is placed on a lace sample in the glass fusing oven. After the fusing, the lace disappears completly because it is entirely consumed. Only the imprint of its consuming remains.
Taboo Material : Human Hair
 Kera-PLAST,plasticization of keratin trhough compression molded human hair by Romy Kaiser | Antonin Mongin French PhD student and Artisan Designer Textile (Prix de la jeune Création Métiers d'Art 2017)
CRYSTALS
Inspiration
Potassion Ferrioaxlate Crystal, Shih Wei Chieh To make conductive cristals : https://class.textile-academy.org/2021/kate.reed/Interspecies%20Collaboration/02CrystalInterfaces/ Carolina Delgado's documentation for cristallisation
How to make alum crystals
Recipe
- Dissolve 250g of alum for 1L water (distilled water will give you clear crystals)
- Filter the solution and pour it in a jar (to avoid impurities and crystals forming on the bottom of the jar)
- Add the textile sample : they MUST NOT touch the jar walls.
- Put the jar in a space with minimum vibrations so that the crystals can grow in a homogenous shape
Results
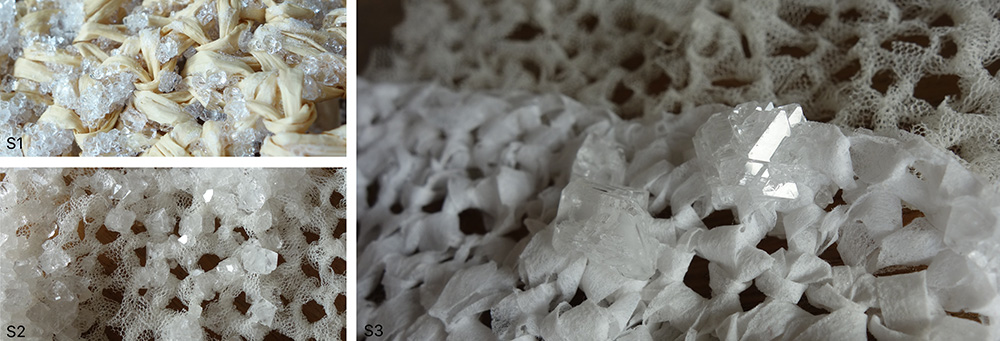
I tried with 3 different textile samples. The three of them are handmade crochet surface (single stitches) with a crochet of 4mm. One is made with raphia which isn't porous. Another is made from tulle leftovers, cut in a 0,5cm ribbon. And the last one is made of leftovers from the embroidery machine fabric. It's a non woven fabric, porous and a bit fragile. Crocheting it wasn't easy. For the crystals growth, I used water from the tap and the jars were stored in a space with a lot of passage (a lot of vibrations then).
Crystals appeared on the three samples but there are really different.
- Raphia sample : there are small and fall apart when touched. Raphia isn't porous so this is not a surprise.
- Tulle sample : small crystals (0.5 cm diameter) are very well attached to the structure on both sides. There are not totally clear but they shine really well.
- Non woven fabric : big crystals appeared (1.5 cm diameter) but there aren't very clear and have several heterogenous facets.
Notes
- The cooling duration affects the physical shape of the crystal, the longer the cooling time is, the larger the crystal becomes.
- Less vibrations means homogenous shapes
- Distilled water will prevent from white crystals
- Pigments can be added to the solution to obtain colored crystals
FABRIC CURVES
Apart from the crystallisation I didn't have that many ideas and felt pretty tired (in a creative way if it makes sense to anyone :) ). I thought I could try to work with balloons and try different ways to shape it. This would be a time to research shapes made by breath (a bit like glass blowing). Round shapes and curves always attract me but are quite a struggling as I'm more at ease with clean-square-shapes. With ballons, I was really struggling to obtain interesting shapes. So I quit this idea (but I'm keeping it in mind, just need to find the technique for it).
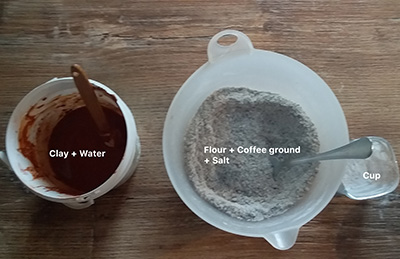
I finally decided to go back to basic, which is to make pâte à sel, an activity we do as children. I remembered that when dry, it is quite strong and then it can be cooked in the oven to make it stronger. It is made from kitchen ingredients which is safer to make it at home. I must say that I didn't know what I wanted to do with it, what results I was aiming for and what was the link between this opaque paste and my love for transparency.
Making the paste
- 2 cup of flour (I used coffee ground and flour)
- 1 cup water (I used water tinted with red clay)
- 1 cup salt (actually put 3/4 cup of table salt)
Results
|
|
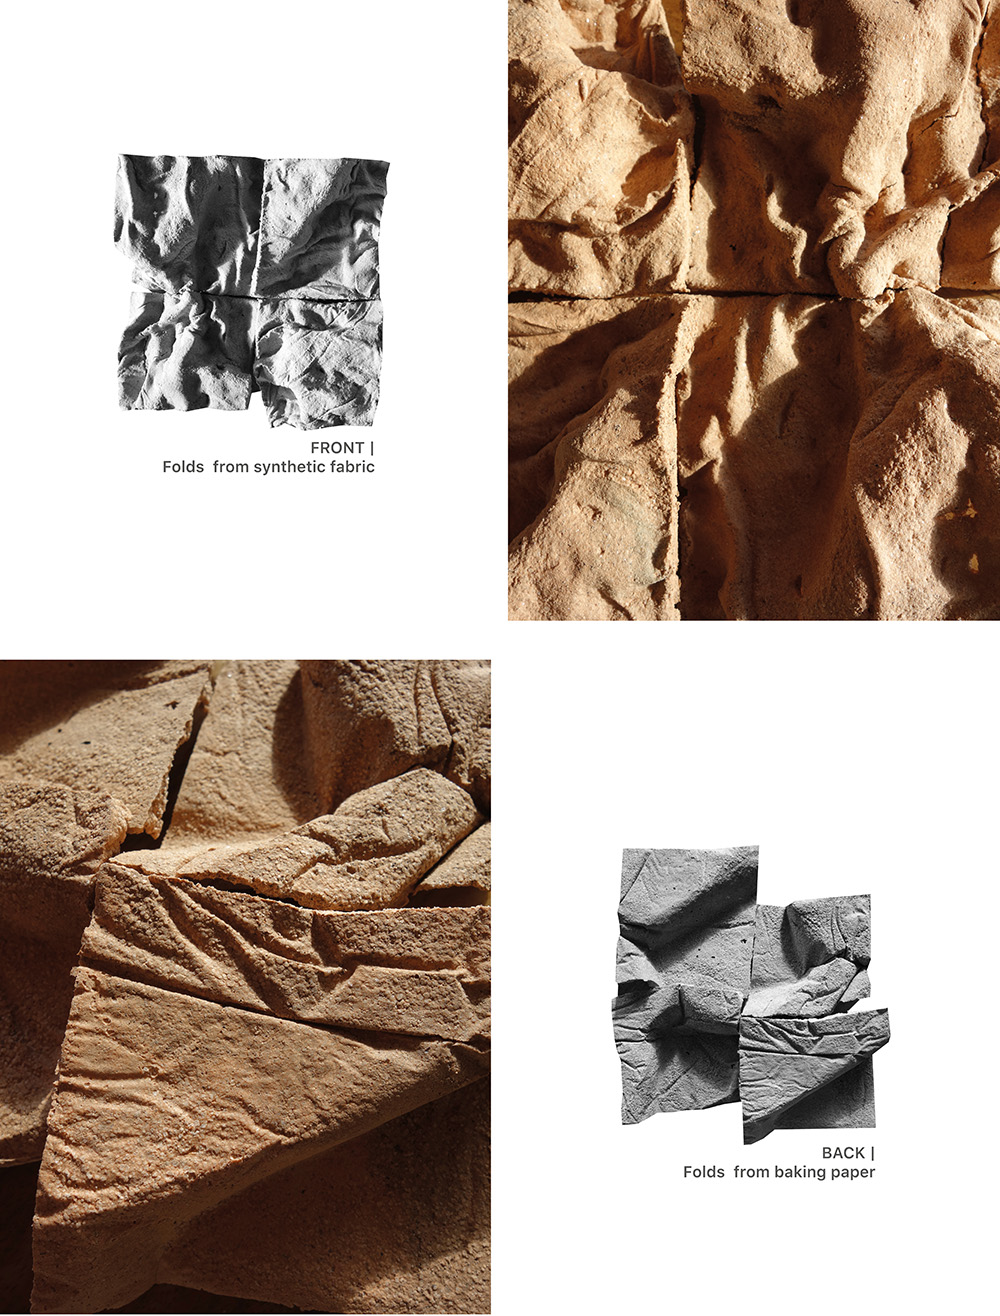
After making the paste, I spread it on a baking sheet. I put fabric on it and made plits on the surface. I removed the fabric and put the baking sheet in a warm room so that it can dry. I put it on an irregular surface (with bricks randomly away from each others). I let it dry for 2 days (it turned dark brown to red ochre/terracota).
REFERENCES
- Norlha, felted and weaved homewear and scarves
- Wooden textiles* by Belén
- Be grounded by Lara Campos
- Kera-PLAST,Romy Kaiser
- Antonin Mongin, French PhD student and Artisan Designer Textile (Prix de la jeune Création Métiers d'Art 2017)
- Potassion Ferrioaxlate Crystal, Shih Wei Chieh
- Iane Cabral Alumnae website
- Haneen Jaafreh Alumnae website
| Videos | Class, Review 09, Tutorial Crystallization, Tutorial Rhino CAM/CNC |
|---|---|
| Softwares | Rhinoceros 7 |
| Tools | CNC machine, laser-cutter, 3D printer |