12 | SOFT ROBOTICS
WEEK 12 | SOFT ROBOTICS This week is about inflatable robots, molding and casting silicon, using air for movement. So interesting !
INSPIRATION
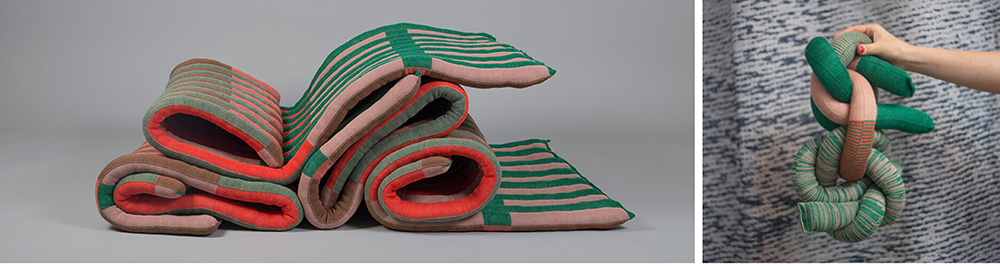 Knitting Knotting (not inflatables) by Ana Maria Gomez, ©Alexandra Colmenares Cossio
Inflated and padded surfaces or objects are really interesting to me. They are strongly linked to touch, manipulation and playfullness. It's the feeling of coming back to young age.
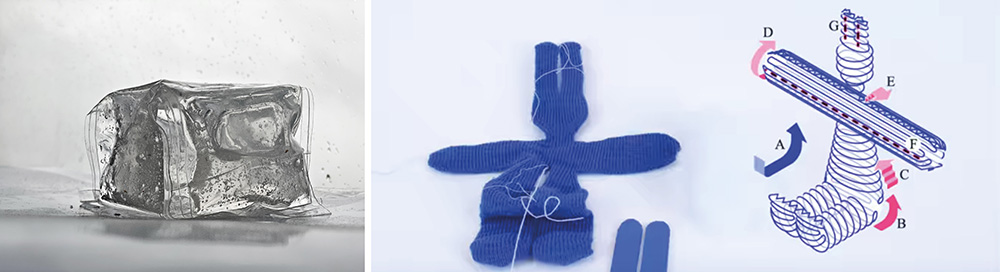 Inflatables with slime as filling by Jen Ji (KYON) | Digital Fabrication of Soft Actuated Objects by Machine Knitting by L. Albaugh, S. Hudson and L. Yao
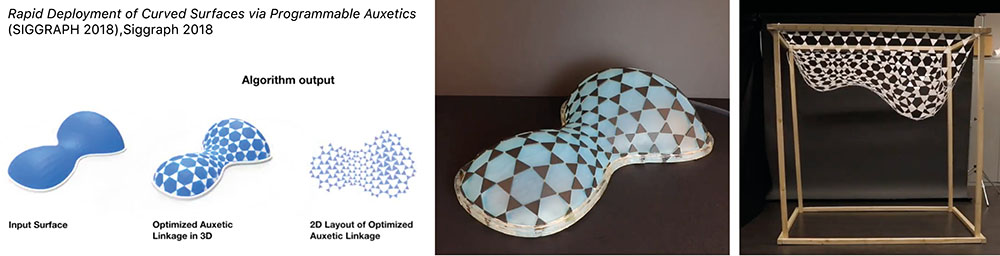
In the last project, the shape of the inflatable is given by the external auxetic structure. It makes me think of the art work Welcome to Caveland! by Philippe Quesne that I was lucky to discover during the 14th Biennale de Lyon Mondes flottants (Floating Worlds).
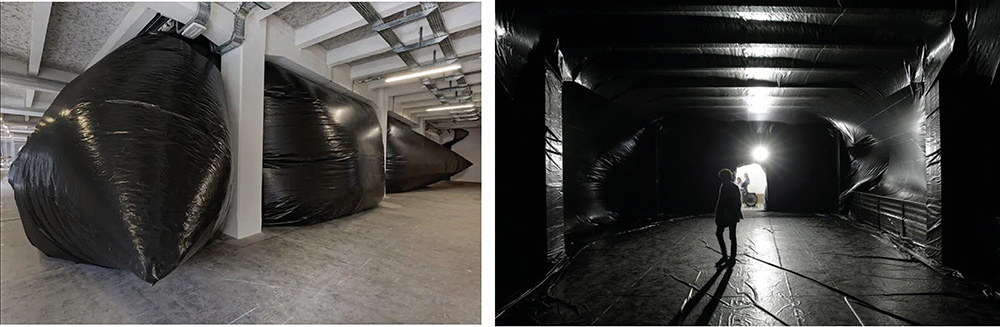 Welcome to Caveland! de Philippe Quesne | Exterior ©Blaise Adilon and Interior ©Maxime JEGAT
It was a very impressive experience to enter this space made from a huge inflated plastic bag limited by the surrounding architecture. The air pump sometimes stopped to let the bag deflate a bit, mimicking someone breathing.
VINYL SOFT ROBOTICS Snapology principle
Pictures from Snapology inspired soft foldable structures video and article
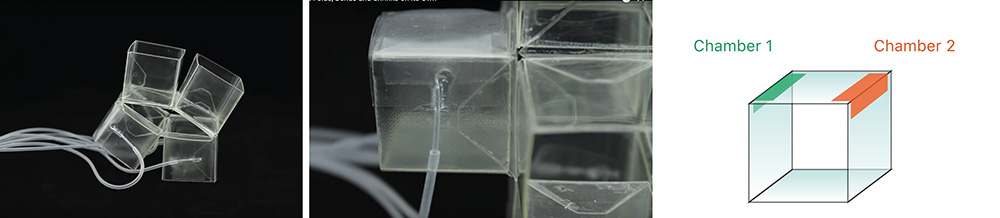
I was really interested by this foldable structure activated by inflatables. As everything is transparent it wasn't easy to understand how it works at first sight. Actually, the structure is made of 6 folded squares, attached together with the origami technique called Snapology (really cool technique btw). This structure isn't inflatable. To make it move, inflatable chambers were added on the structure. On the second picture we can see that the inflatable chamber is located on one of the edge of a the structure : when inflated, the chamber goes bigger and flattens the edge causing the square to flatten.
I tried to make an example to illustrate this technique and be sure it works.
GIF
VINYL SOFT ROBOTICS Pattern
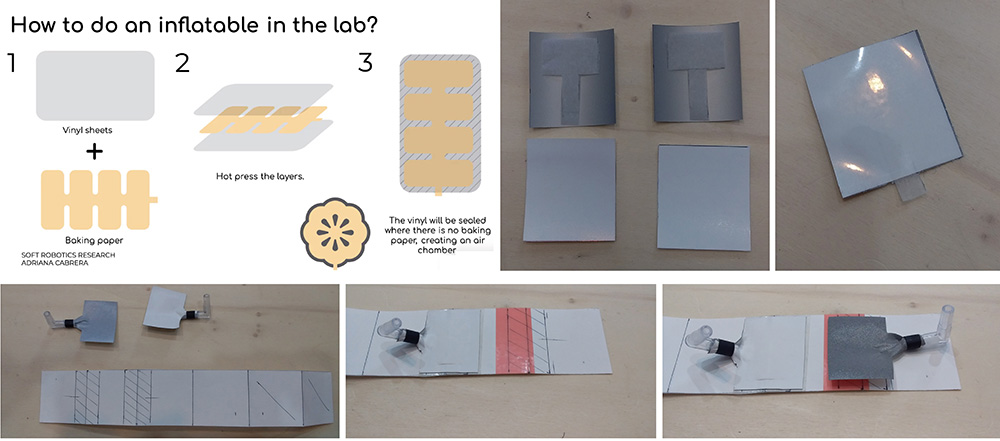
The two patterns are made following the instructions above.
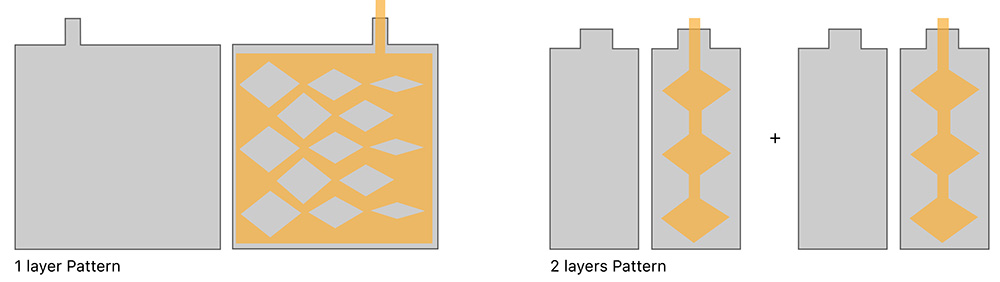
1 layer pattern
2 layers pattern
SILICON SOFT ROBOTICS Grip
Molding and casting a grip
We used the 3D printed mold from last year Fabricademy to try out the silicon robotics.
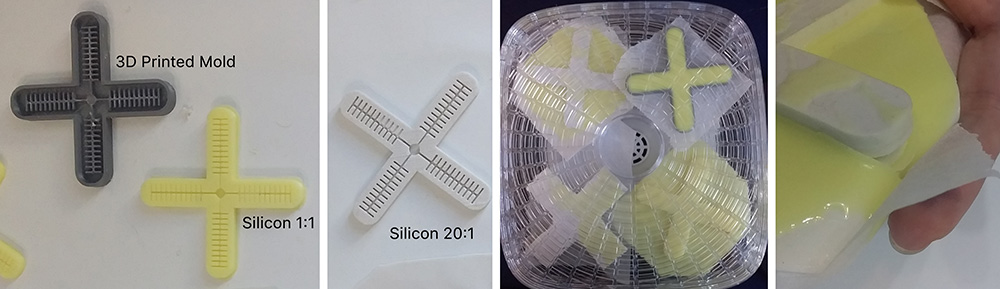
We used Silicon Rubber R PRO30 from RESCHIMICA (for mold making) with base + platinum catalyst 1:1. We used our dehydrator (temp around 40°C) to dry the samples faster but it took some time still.
Note : don't mix silicons they won't stick together (far right picture fail).
Testing the grip with an air pump (DC motor) and Arduino
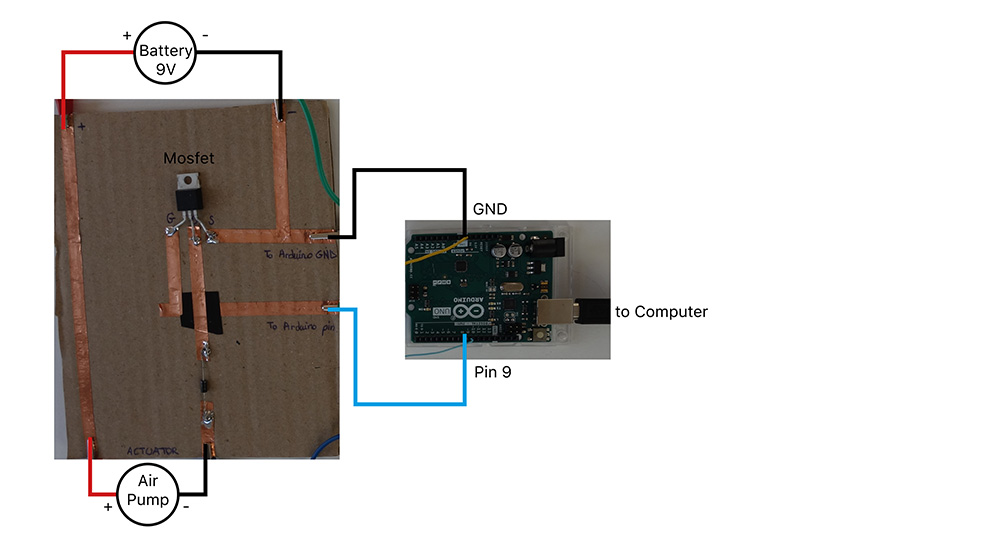
BLINK function
int air=9;
// the setup function runs once when you press reset or power the board
void setup() {
  // initialize analog pin "air" as an output.
  pinMode(air, OUTPUT);
}

// the loop function runs over and over again forever
void loop() {
  digitalWrite(air, HIGH);   // turn the air pump on (HIGH is the voltage level)
  delay(1000);                       // wait for a second
  digitalWrite(air, LOW);    // turn the air pump off by making the voltage LOW
  delay(1000);                       // wait for a second
}
Results : the chambers didn't work on this one except for the only bubble at the end of one arm. What happened is probably that the chambers weren't properly closed. Moreover, I'm not sure the air pump was strong enough.
SILICON SOFT ROBOTICS Moving mirror
Molding and casting
Goal : to make a chamber around a hard material (glass module).
Tools : laser cutter and 3D printer weren't available so I decided to use linocutting instead. As I wasn't sure silicon would not stick to the lino I decided to cut the lino to make the mold with it.
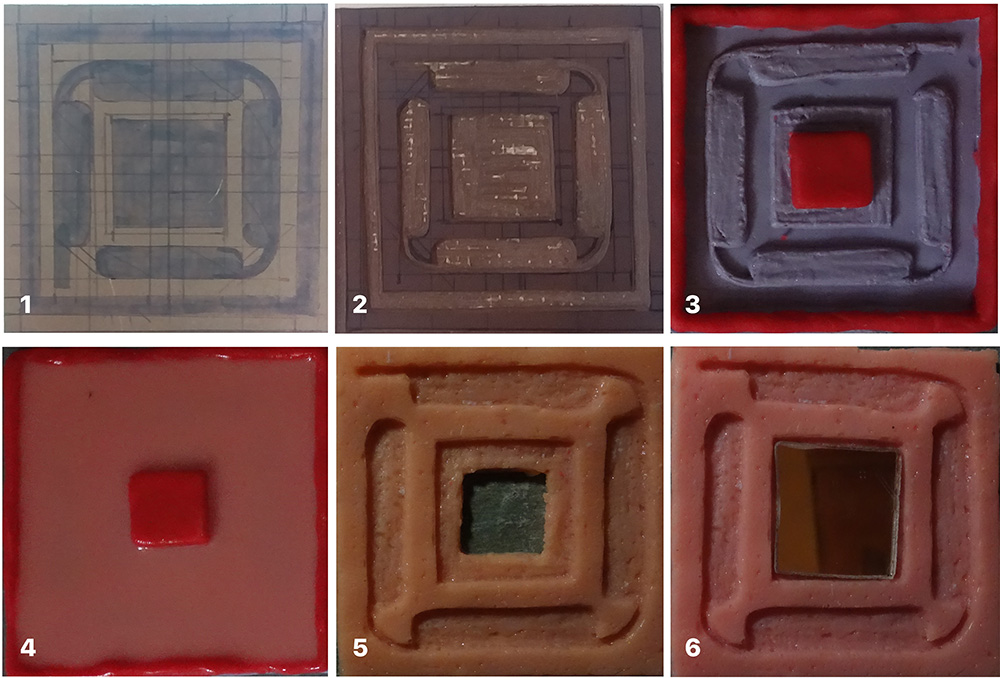
- 1 | Drawing the wanted shape on lino
- 2 | Lino is cut according to pattern
- 3 | Mold is made by using Silgum PASTE (hard silicon) on the lino. An additional layer of play dough (red) is added to have more depth
- 4 | Casting of the silicon (1:1 silicon:activator), one day until dry
- 5, 6 | Results of the casting without and with an integrated glass module
- The chambers are closed by adding the last layer on the front, glass module is locked inside
Results : the connections between the four chambers didn't work (they might have been filled when adding the last layer). Each chamber works separatly. Also I though the bubbles were gonna be bigger but maybe the air pump isn't stronger or the silicon is too thick. Would be fun to see what happens when the 4 chambers work all together but I only had one air pump.
Notes
- Both functions pumping and suction : same motors + H Bridge or L298N (dual H-Bridge motor driver) more info here
- To know more about electronics for soft Robotics, and using liquids instead of air (peristaltic pump) you can read documentation by Adriana Cabrera here
- Biodegradable Gelatin Actuator : Glycerin, Gelatin, Warm Water 1:2:4
3V AIR PUMP CONTROL WITH ARDUINO
Materials
- 2N2222 Transistor
- 4.7k ohms Resistor
- 1N4007 Diode
- DC 3V 12A Air pump
Montage
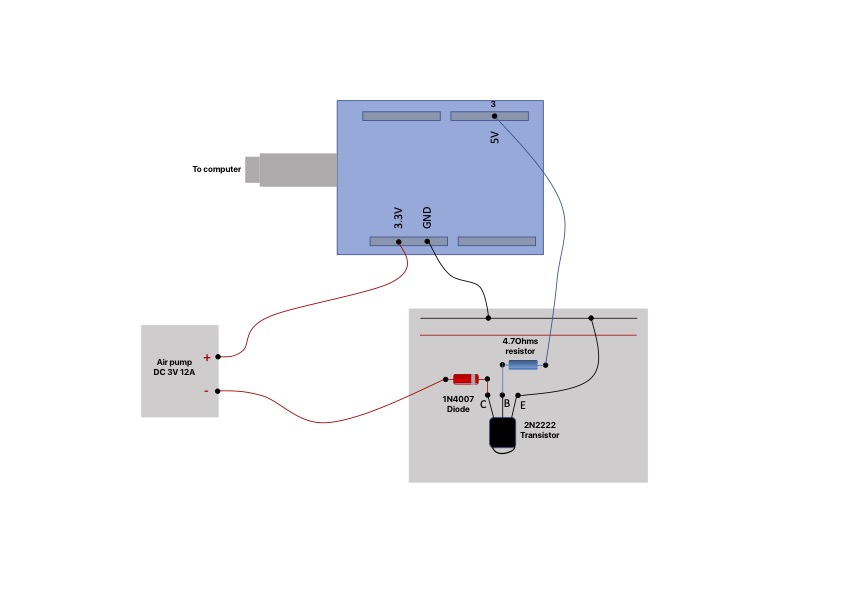
Principle : the air pump gets power from the 3.3V pin but the current is only going between C and E if there is some current from B (coming from the Arduino pin 5V which works like a ON/OFF switch). No current going through the 5V pin (6), no current is able to go through C and E. The diode helps to avoid the air pump to have current in the wrong direction. The resistor is to avoid too much current to go through B.
Arduino Code from Blink
int motor = 3;

// the setup function runs once when you press reset or power the board
void setup() {
  // initialize digital pin LED_BUILTIN as an output.
  pinMode(motor, OUTPUT);
}

// the loop function runs over and over again forever
void loop() {
  digitalWrite(motor, HIGH);   // turn the LED on (HIGH is the voltage level)
  delay(1000);                       // wait for a second
  digitalWrite(motor, LOW);    // turn the LED off by making the voltage LOW
  delay(1000);                       // wait for a second
}
REFERENCES
- Electronics for soft Robotics, Adriana Cabrera
- Air pressure sensor
- How to connect a L298N
- Snapology inspired soft foldable structures*
- *Transforming Materials
- 14th Biennale de Lyon Mondes flottants (Floating Worlds), 2017
- Robotic fibers can make breath-monitoring garments
| Videos | Class, Recitation Embroidered Inflatables, Tutorial Soft Robotic Part I, Tutorial Soft Robotics Part II |
|---|---|
| Softwares | Arduino, Rhino 7 (molds) |
| Tools | DC motor (air pump), Laser cutter, 3D printer, Arduino |
| Materials | Silicon |