MIRAGE
MIRAGE | Mirage is a research on the creation of surfaces exploring the movement between absence and presence and the multiple illusions which go with it. Combining parametric design, glass handwork and laser engraving, the project aims at taking us to other worlds and offers surprising parenthesis.
A mirage is an illusion. It is when you are expecting something and then you’re surprised not to encounter it. It goes with trembling air, shimmering water and the promise of a dream. In that way, glass is kind of my mirage material. It makes me dream, it breaks some times et gets me surprised. It allows me to work with absence and presence, and lets abstraction enters reality.
With Mirage I wanted to explore how I could share this feeling of surprise and of constant movement through the creation of surfaces combining parametric design, glass handicrafts and laser engraving. I also wanted it to be a tool for other creatives such as designers, glass design studio, interior designer and light designer to explore glass in all its light and reflections.
Starting with this concept of illusions, I ask myself on how a single surface or object could multiply its stories and takes us to other worlds.
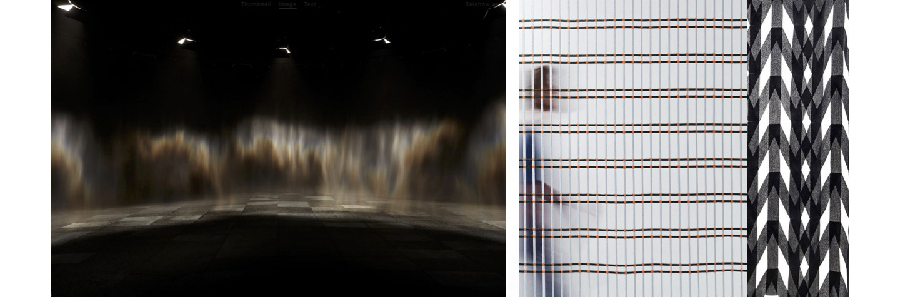 1. Rainbow Assembly by Olafur Eliasson, 2016, ©Hyunsoo Kim
2. Screen #6 and Screen #5 from 17 screens Exhibition by Erwan and Ronan Bouroullec, ©Studio Bouroullec
1. Rainbow Assembly by Olafur Eliasson, 2016, ©Hyunsoo Kim
2. Screen #6 and Screen #5 from 17 screens Exhibition by Erwan and Ronan Bouroullec, ©Studio Bouroullec
There is this wonderful artwork by Olafur Eliasson which is called rainbow assembly that inspired me in my process. It is a collective experience because everyone in the room can see rainbows. But each person sees a unique rainbow, different from what see the others and depending on where they are in the room. I am interested in how perceptions become dependent on our movement and our physical point of view, drawing a link between abstract feelings and physical space.
I started by working on the articulation of structures and adding movement to 2 dimensional or 3 dimensional structures. It was a way to explore more grasshopper and tessellation according to stained glass constraints. Then, I got interested in the surface itself an how I could add illusions in the surface.
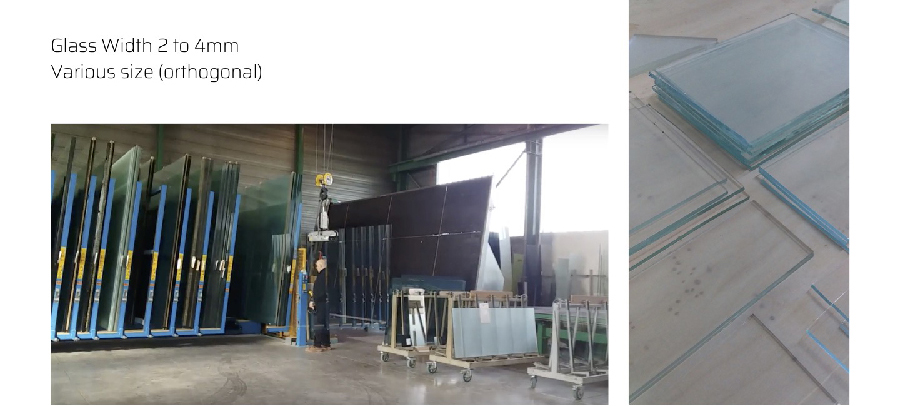
I worked with glass leftovers from two local shops near our lab and especially the Miroiterie Paulhac. They gave me several leftovers with various sizes and widths.
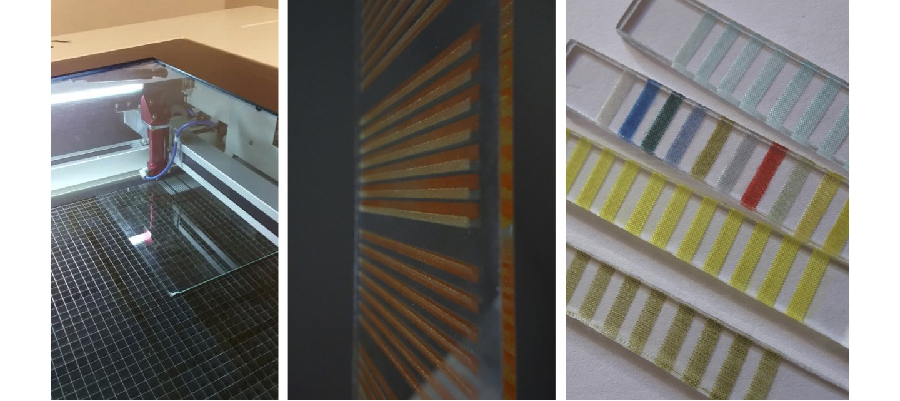
I started working with laser engraving and this idea of anamorphosis and moiré effects. I quickly added some colours to enhance those effects.
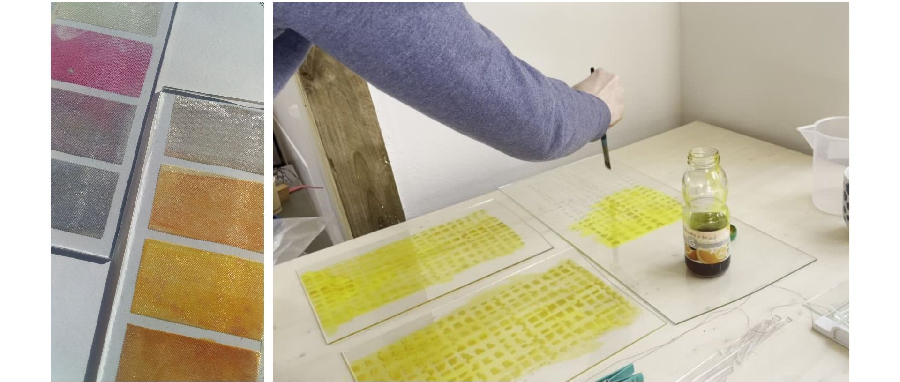
To do so, I worked on making my own marker inks from plants. After being applied on the glass, I let the ink dry and then I can remove the excess with a wet cloth. The colour remains on the engraved part.
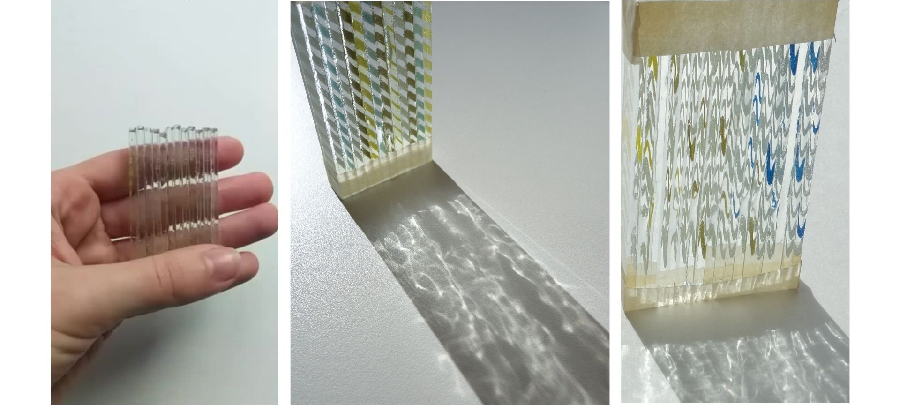
Working with all these patterns, I wanted to twist a little more the point of view. This is when I started to cut the glass in slats after engraving it using my glass cutter and pliers - two tools for stained glass work. Then all the slats are stacked together : it creates a transparent surface when you look at the piece from the front, and then from the sides there is a pattern appearing.
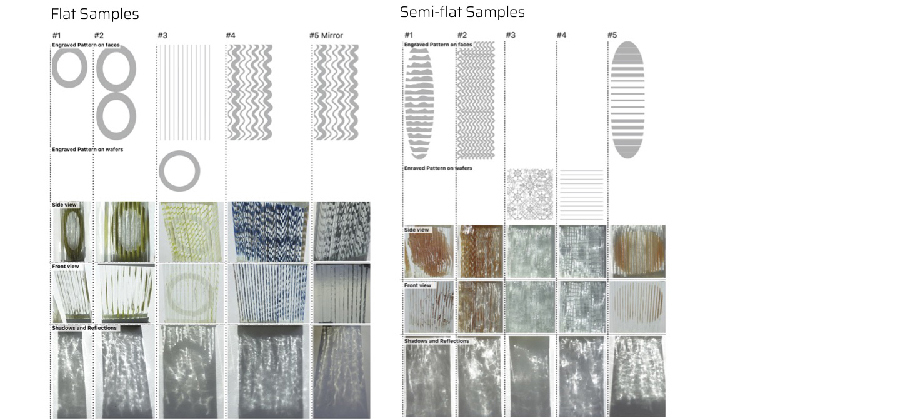
As I was experimenting, I documented all the visual effects considering where the piece was engraved and its impact on the shadows and reflections. It is a library that I can use myself for future creations but that can also be used to help others into their own design process.
Of course I got interested in how to engrave a placed pattern using 3D modelisation and then generating the pattern with grasshopper.
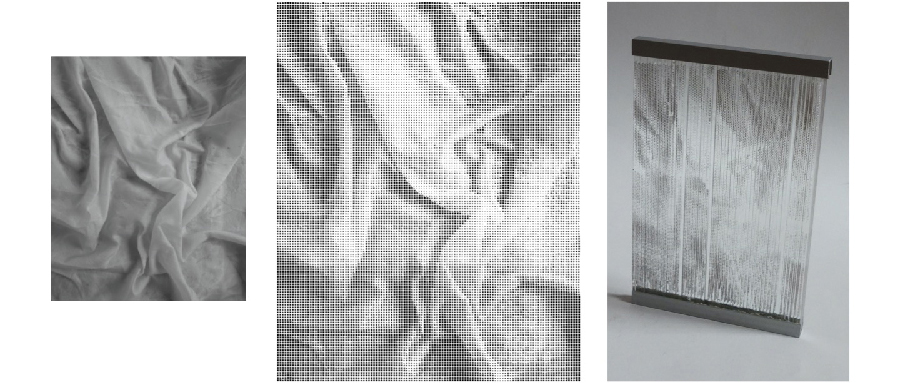
I had to try with engraving a picture using the Image sampler option from grasshopper.
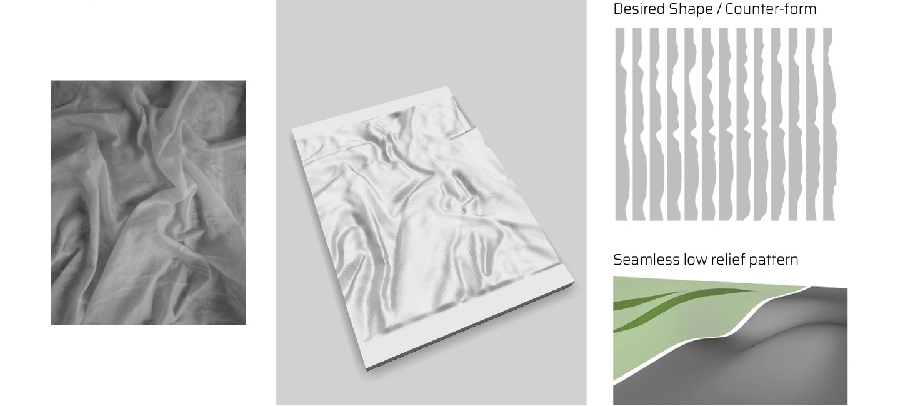
The picture can also give me a low relief. In addition to adding more complexity on the shadows and reflections work, this part was interesting to me through an optimisation angle. As you may know cutting glass has some specific shape requirements and especially because I wanted to keep my edges clear as you have them when hand cut (and not when milled* for example). Some very narrow curves can’t be cut without having leftovers and my goal was to avoid them. I needed to optimise also the shapes so that my curves are not to sharp. And also working on making seamless low relief pattern, a way to produce glass tiles.
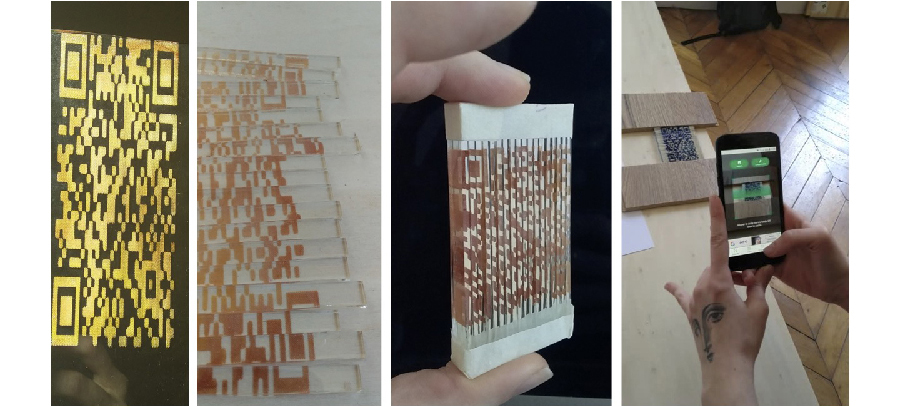
Of course I had to try inserting a QR code. That would be a great way for others to access my documentation. It was -and still is- a challenge as reading the QR code through the imperfections of the glass is not that obvious for my phone.
Here you can find my presentation for Fabricademy Final Presentations 2021-22 ! Starting at 23:55