02 | DIGITAL BODIES
WEEK 02 | DIGITAL BODIES This week was about 3D modelling from scanning a body to transpose it in a 3D model on Rhino, and then using Slicer to obtain a pattern for laser cutting.
INSPIRATION
3D modelling is something completly new for me. At first, the expression "digital bodies" is linked to the music world. It reminds me of two music videos : Corps by Yseult and THAT OTHER GIRL by Sevdaliza.
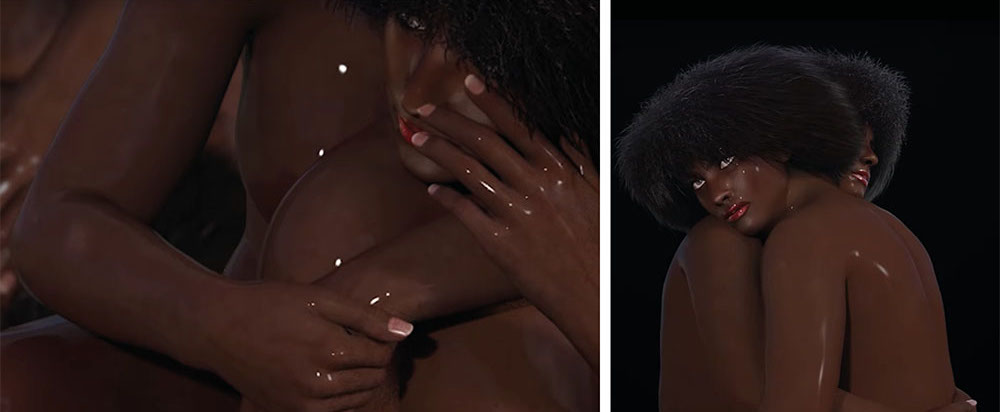 Corps Lyric Video, Yseult, 2019, 3D animation by Samylacrapule X NDA Paris
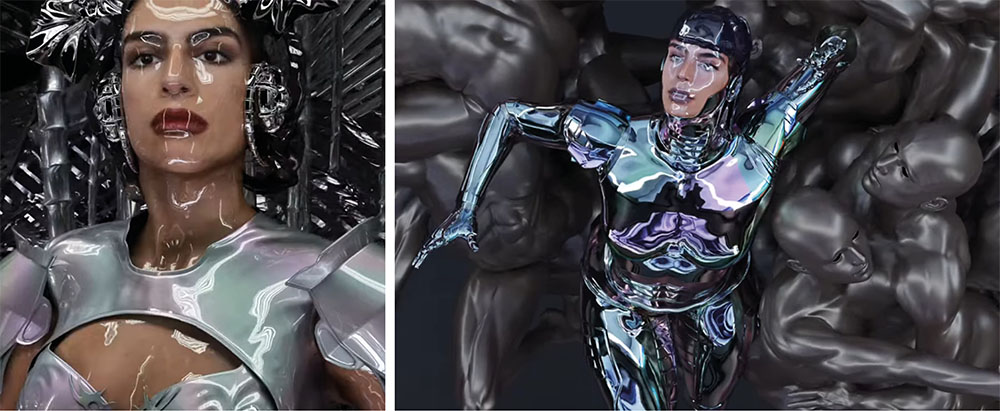 THAT OTHER GIRL, Sevdaliza, 2015, 3D animation by Pussykrew
In both videos, the 3D animated character are the avatar of the singers. For her song, Yseult had her avatar cloned several times. They are holding each others. In THE OTHER GIRL, Sevdaliza has a semi-robotic body and only her face is human.
Digital bodies are intimately questionning the notions of identity and identification. There is something really fascinating about 3D scan and 3D animation but the things you can do with them are also scaring. I wanted to explore a bit more around ID and what it means to me. The face is the body part that is pictured on our ID card. This is why I chose to work with this part specifically. In fashion industry, when it comes to modelling, identity is quite tricky. This field isn't known as being inclusive. But some alternatives exist. The brand The Fabricant have digital models without a specific face. Only a few traits to mark a human face. Some models are even transparent. We can see the presence of a body inside the clothes only by their volumes and movements. The goal is to make it easier for the consumers to project themselves into the clothes. Another designer used invisible models for her fashion show : Hanifa by Anifa Mvuemba.
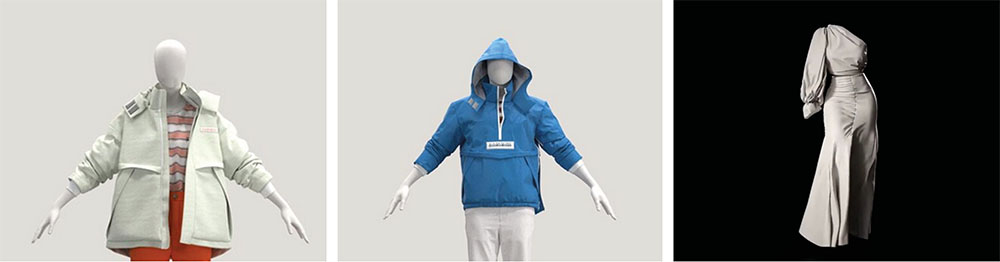 First two pictures from The Fabricant | Picture from the HANIFA VIRTUAL FASHION SHOW
FIRST PROJECT
The idea
First, I decided to work on a face without identity. It could come from the absence of specific features on the 3D model. And then when transposing it for the laser cutting, I could enhance that effect by using a transparent material. A way of making it more invisible. Here are two projects of Fabricademy that I like : Sara and Kate. I like how the body part are cut in the first one. I like the use of transparent acrylic for the project of Kate. To obtain a 3D model there are different options :
- 3D model it from scratch : Core3D ; Tuka3D ; Marvelousdesigner ; Clo3D ; Seamly2D (open source); Blender...
- Scan it : Kinect... There are different technologies that help you transpose a real body to a 3D model. You can do it with photogrammetry, laser scanning, contact-based or structured light
- Download it : http://humanshape.org/ ; Mixamo ; Thingiverse ; Turbosquid (free models) ; sketchfab (to upload your 3D model)
- Generate it with data
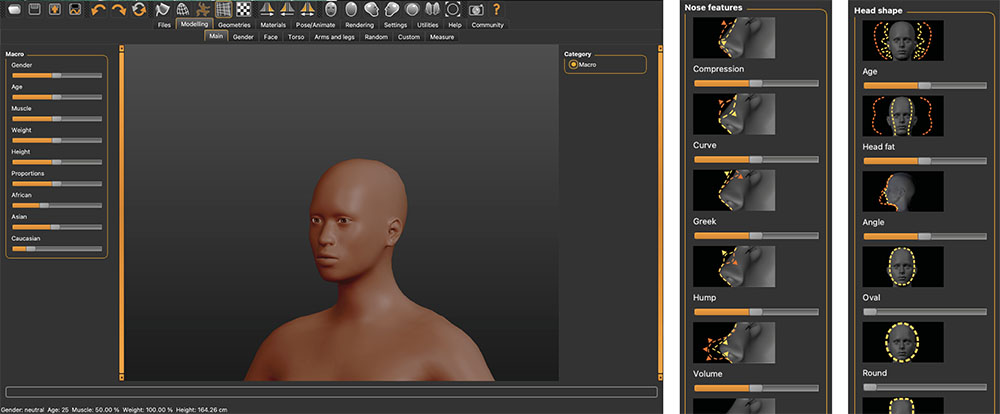
I began to work with Make Humans to make a random face, genderless (the notion of gender in this app is questionnable btw). I wanted to have all the same Macro features (by putting the cursor at the center) but it doesn't work with African/Asian/Caucasian.The skin's colour did not matter as I was planning on cutting it in a transparent material. No expression needed, no distinctive characteristics.
Then, I worked on Rhino to obtain the right shape. The 'mask shape' became obvious as it is an object that is worn to hide your identity/turn into someone else. So, I removed the body and the back of the skull.
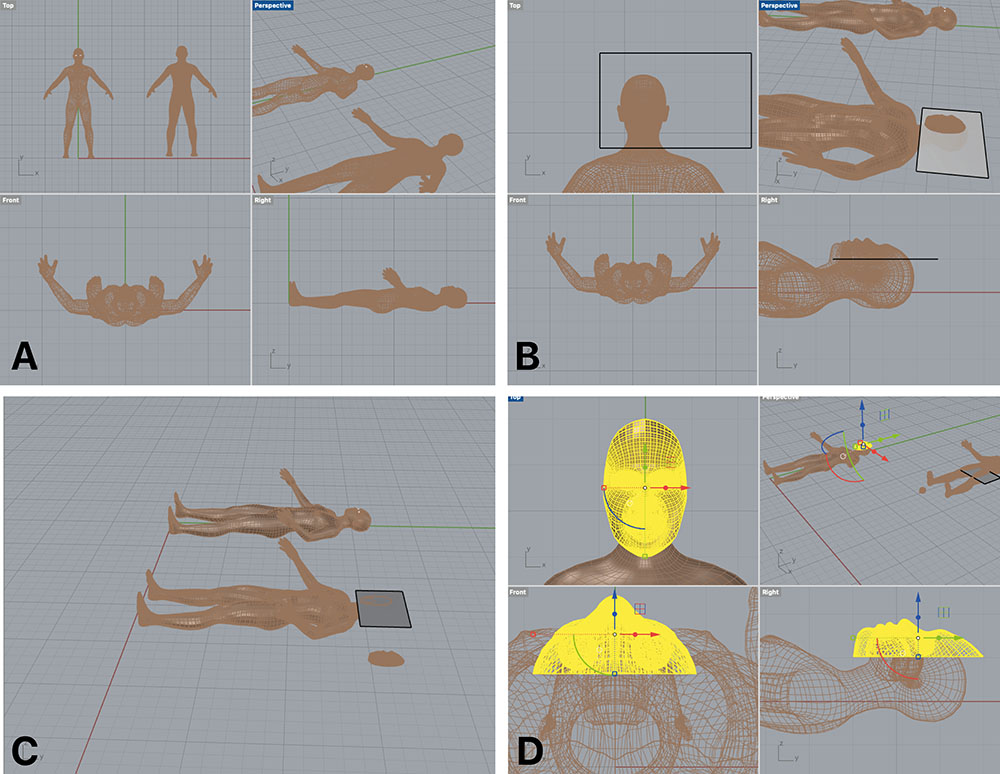
Different ways to cut parts of the body on Rhinoceros 7
Way 1 as explained in this Youtube tutorial :
- Open the file with body (obj)
- Group everything (eyes and body) : select all > cmd G
- (Command) MeshtoNURB (A)
- Move the body aside the other (pressing maJ makes the moving orthogonal). Make sure you work with the Open polysurface and not the closed mesh.
- (Command) Curve or Polyline : to draw a straight line where you want to cut. Enter
- (Command) ExtrudeCrV : select curve and extrude it in the right direction. You should have a flat surface. Adjust it so that it cuts the body as wanted. (B)
- (Command) Split : select object to split and then select the cutting object. Enter The different parts should be dissociated from each others following the flat surface. (C)
Way 2
- Import the file with body (stl)
- (Command) Mesh box : put the box where you want to delete the volume on the body
- (Command) Mesh booleen difference : select volumes body and box. Enter
Another command that could be useful : (command) Cap : to make a volume watertight.
Using Slicer for Fusion 360
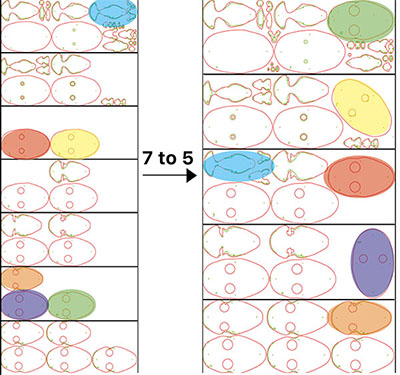
When I obtained the right shape, I used Slicer for Fusion 360 to cut the face mask. You can cut it in different ways (waffle structure, stack slices, vacuum formed, cnc milled, 3D printing, flat pack mannequin). I chose to cut it in stacked slices as you can see on the gif which shows the assembly steps. You have to clarify the manufacturing setting (mine was Height 280.00 / Length 730.00 and Thickness 2.00 millimeters) so that the mask pieces are arranged on a surface with the right size for laser cutting. As you can see I obtained 7 sheets but I used Illustrator to make it 5 and avoid too many leftovers. I also removed the hole of the mouth and sized down the numbers written on the pieces (didn't remove them because I neeeded them to assembly the whole object).
Here, red lines are for cutting and green lines are for engraving. I had to program the settings for cutting and engraving. Here is some settings I used : Honeycomb Cardboard Settings for Laser-cutting Cutting : Power 40 | Speed 1 Engraving : P20 | S2 Plexiglas Setting for Laser-cutting Cutting : P95 | S0.65 Engraving : P20 | S10 First, I had to try different settings to find the right one which wouldn't melt/burn the plexiglas. Unfortunately, the plexi didn't react as expected (it was second-hand sourced). For safety, I decided to use cardboard instead of plexi. I used the settings above for honeycomb cardboard.
Here is the result :)
I still don't know if I'm going to glue all the parts together because by moving the pieces I obtain different shapes/effects for the face. It would be fun to take pictures for all of them. One object, several faces, a moving identity.
You can download the Laser-cutting pattern here
SECOND PROJECT
The idea
When I was discovering Slicer, I though that the folded panels option would be useful to work with glass in 3D because it would give me directly the right glass patterns. There are shapes that are hard to cut in a material like glass. Hollows require specific equipment and notches would weaken the glass too much. Straight lines with no hollows are the easiest to cut. This is why the folded panels option is interesting : there are only triangles to cut. Also, I've wanted to work with mirror for a while now and I though that being able to work on a stained glass piece (which turned out as a mosaic piece) made of mirrors with a 3D model of myself would be interesting. Indeed, knowing that I can scan my body or be scanned by someone else arose questions about my appearance and reflection on others. To me, Appearance is linked to the object mirror (you should read what S. Bramly explains about mirror history in his book La transparence et le reflet [Transparency and Reflection]) Appearance as a mirror of reality but not as reality itself. It kind of looks like a project on selfishness. The mirror face is also a warning on how we judge people with our own standards which aren't the same for everyone.
From scanning to pattern
I started by scanning my upper body and head with the help of Lucia (thank you again !). We used a Kinect Xbox 360 and the Skanect software to scan my body. Unfortunatly, as you can see in the video my 3D model has a hole on the head...
I decided to keep the same shape as the previous project so the hole didn't bother me. It would have bother me if I wanted to work with all the model. I would have had to make sure it is watertight. With Rhino, I cut the wanted shape using the WAY 2 (see above) and also realised that my nose wasn't straight at all ! And then I used Slicer and the folded panels (diamond) option to get the pattern of my face.
Making the mirror face
I made a cardboard face as a support for the mirror pieces. I made sure to choose a cardboard strong enough to support the glass weight. I reinforced it using a glue gun on the back. You can cut it using laser cutting or do it the old way : print it on paper, glue it on the cardboard, cut it and put all the pieces together.
PICTURE
Time to cut the mirror ! First, I worked on my pattern on Illustrator. I made the lines thicker (3 pt) and printed 2 patterns. The first one was my reference for all the pieces I cut. And I cut the other pattern to obtain all the paper pieces (A to B). I made sure to remove the thick line. Then I transpose the paper pieces on the glass, starting with the biggest ones. The small pieces can be cut in the leftovers (kind of a tetris game !). I used my glass cutter and glass cutting plier. To cut glass :
- Make a scratch on the glass surface with the glass cutter following the line you want to cut
- Use your glass cutting plier to apply pressure on the glass : it will break along the scratch ! What you need to remember is that when you do the scratch, even if it doesn't go right to the edge of the glass, the material will break from edge to edge ! For example on the picture below there is a precise order to cut the glass (C order from 1 to 3)
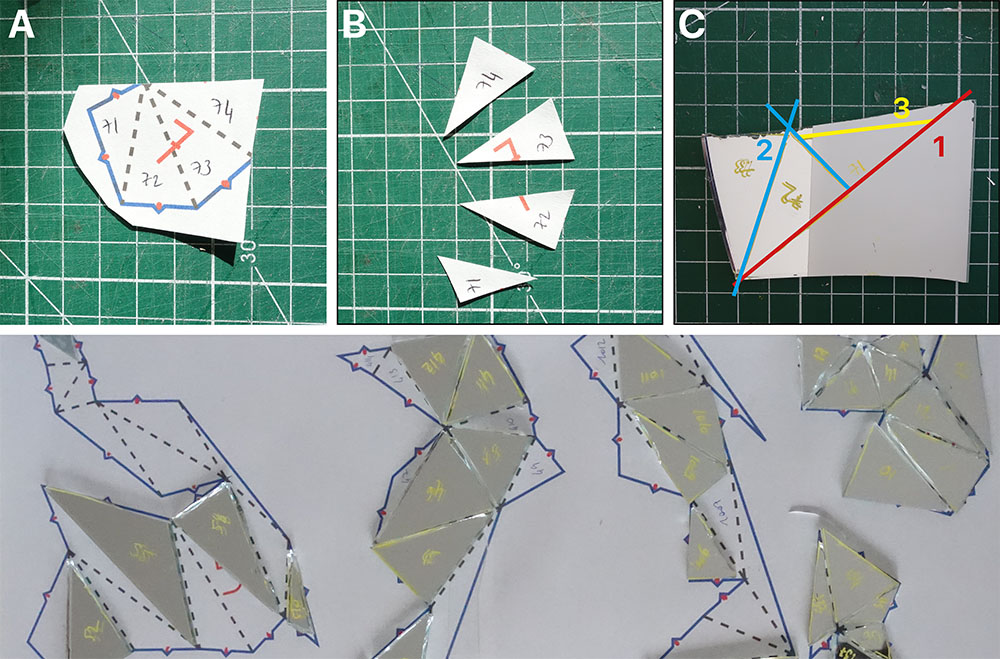
Don't forget to write the number of the piece on the mirror with a marker pen to know how to assembly. I thought that it would be better to sand the edges to avoid any accidents when manipulating the face. After that I used the glue gun to glue the mirror pieces on the cardboard.
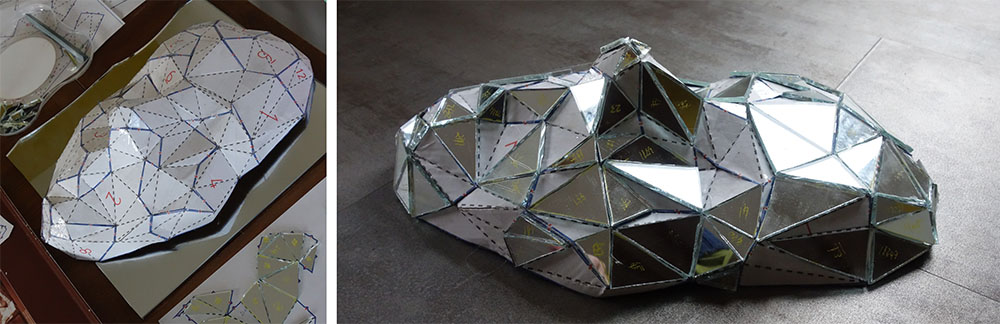
Next step will be to add a sealant for the joints.
You can download the laser-cutting pattern here
REFERENCES
- Don-Alvin Adegeest. (2020) New AI modelling agency champions unfiltered beauty. FashionUnited.
- Anifa Mvuemba by Beyong the Single Story
- Serge Bramly. (2017). La transparence et le reflet [Transparency and Reflection]
| Videos | Class, Review 02, Tutorial Make Human, Scan Jam Live, Slicer 3D and Fusion 360, Tutorial Rhinoceros Part 1 |
|---|---|
| Softwares | Slicer 3D for Fusion 360, Rhinoceros 7, Make Human, Skanect software, Job control (Laser-cutter software) |
| Tools | Speedy 300 Trotec CO2 Laser-cutter, Kinect Xbox 360 |