2. Digital bodies
Inspiration and tools
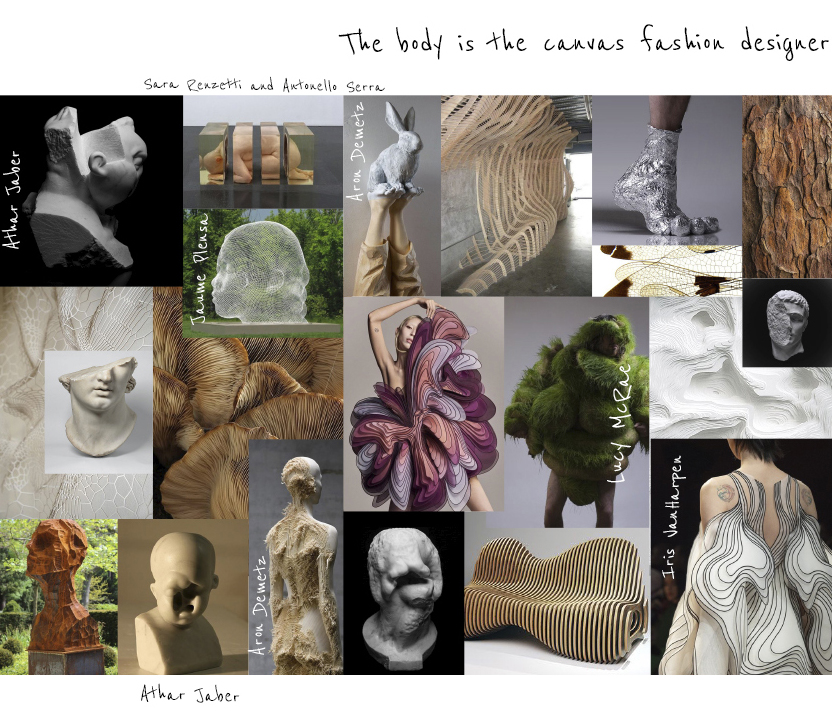
Brainstorming
Software
Rhino 7
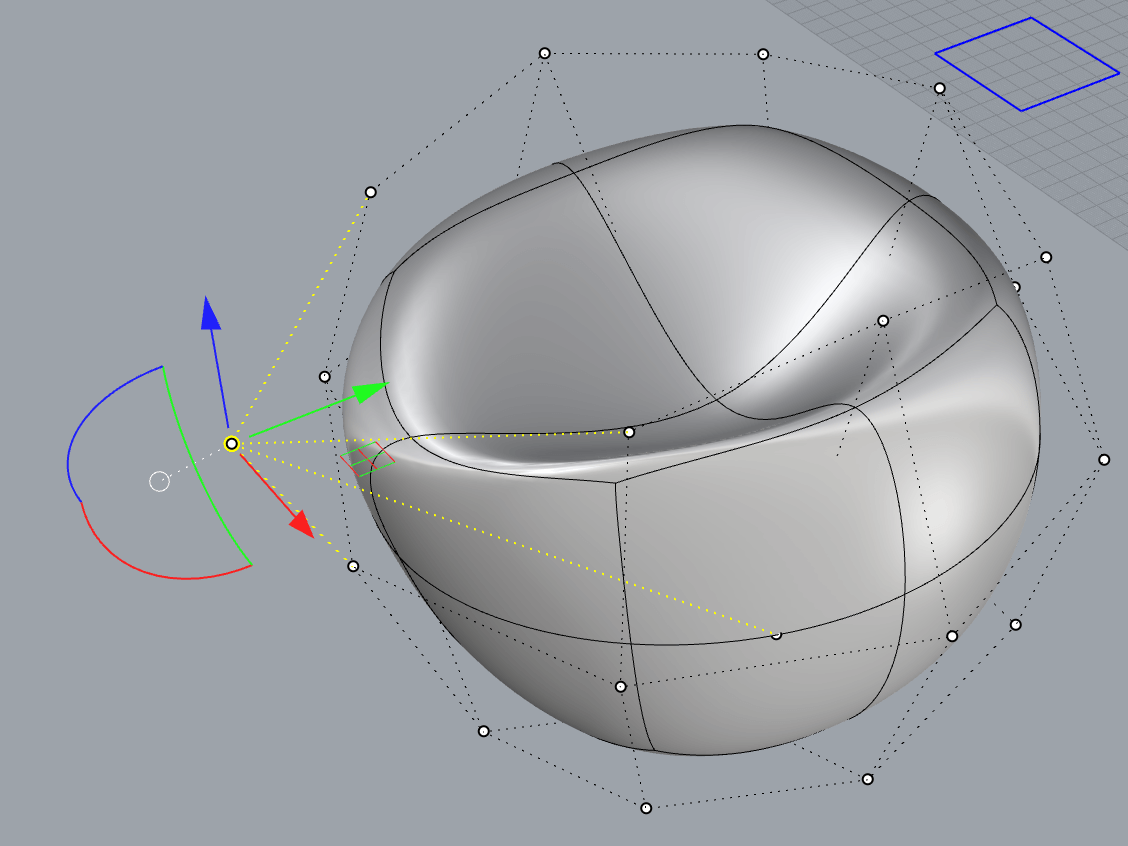
Rhinoceros is a CAD application for prototyping, 3D printing and reverse engineering in industries including architecture, industrial design, product design as well as for multimedia and graphic design.
Useful commands:
- Extrude a line, a plane, or a solid.
- Rebuild surface: Show control points on (Right button), then select the point and deform or move.
- Repair mesh
- Fill mesh holes: Use when the avatar is imported to Rhino and there are holes to tap.
- Quadremesh: The object turns into a SubD object.
- Mesh holes: To close a mesh. To know if it is an open or a closed object go to the properties, right button of the mouse.
- Explode: To delete the selected pieces of the object/mesh.
- Gumball Displays the gumball widget on a selected object facilitating move, scale, and rotate transformations around the gumball origin.
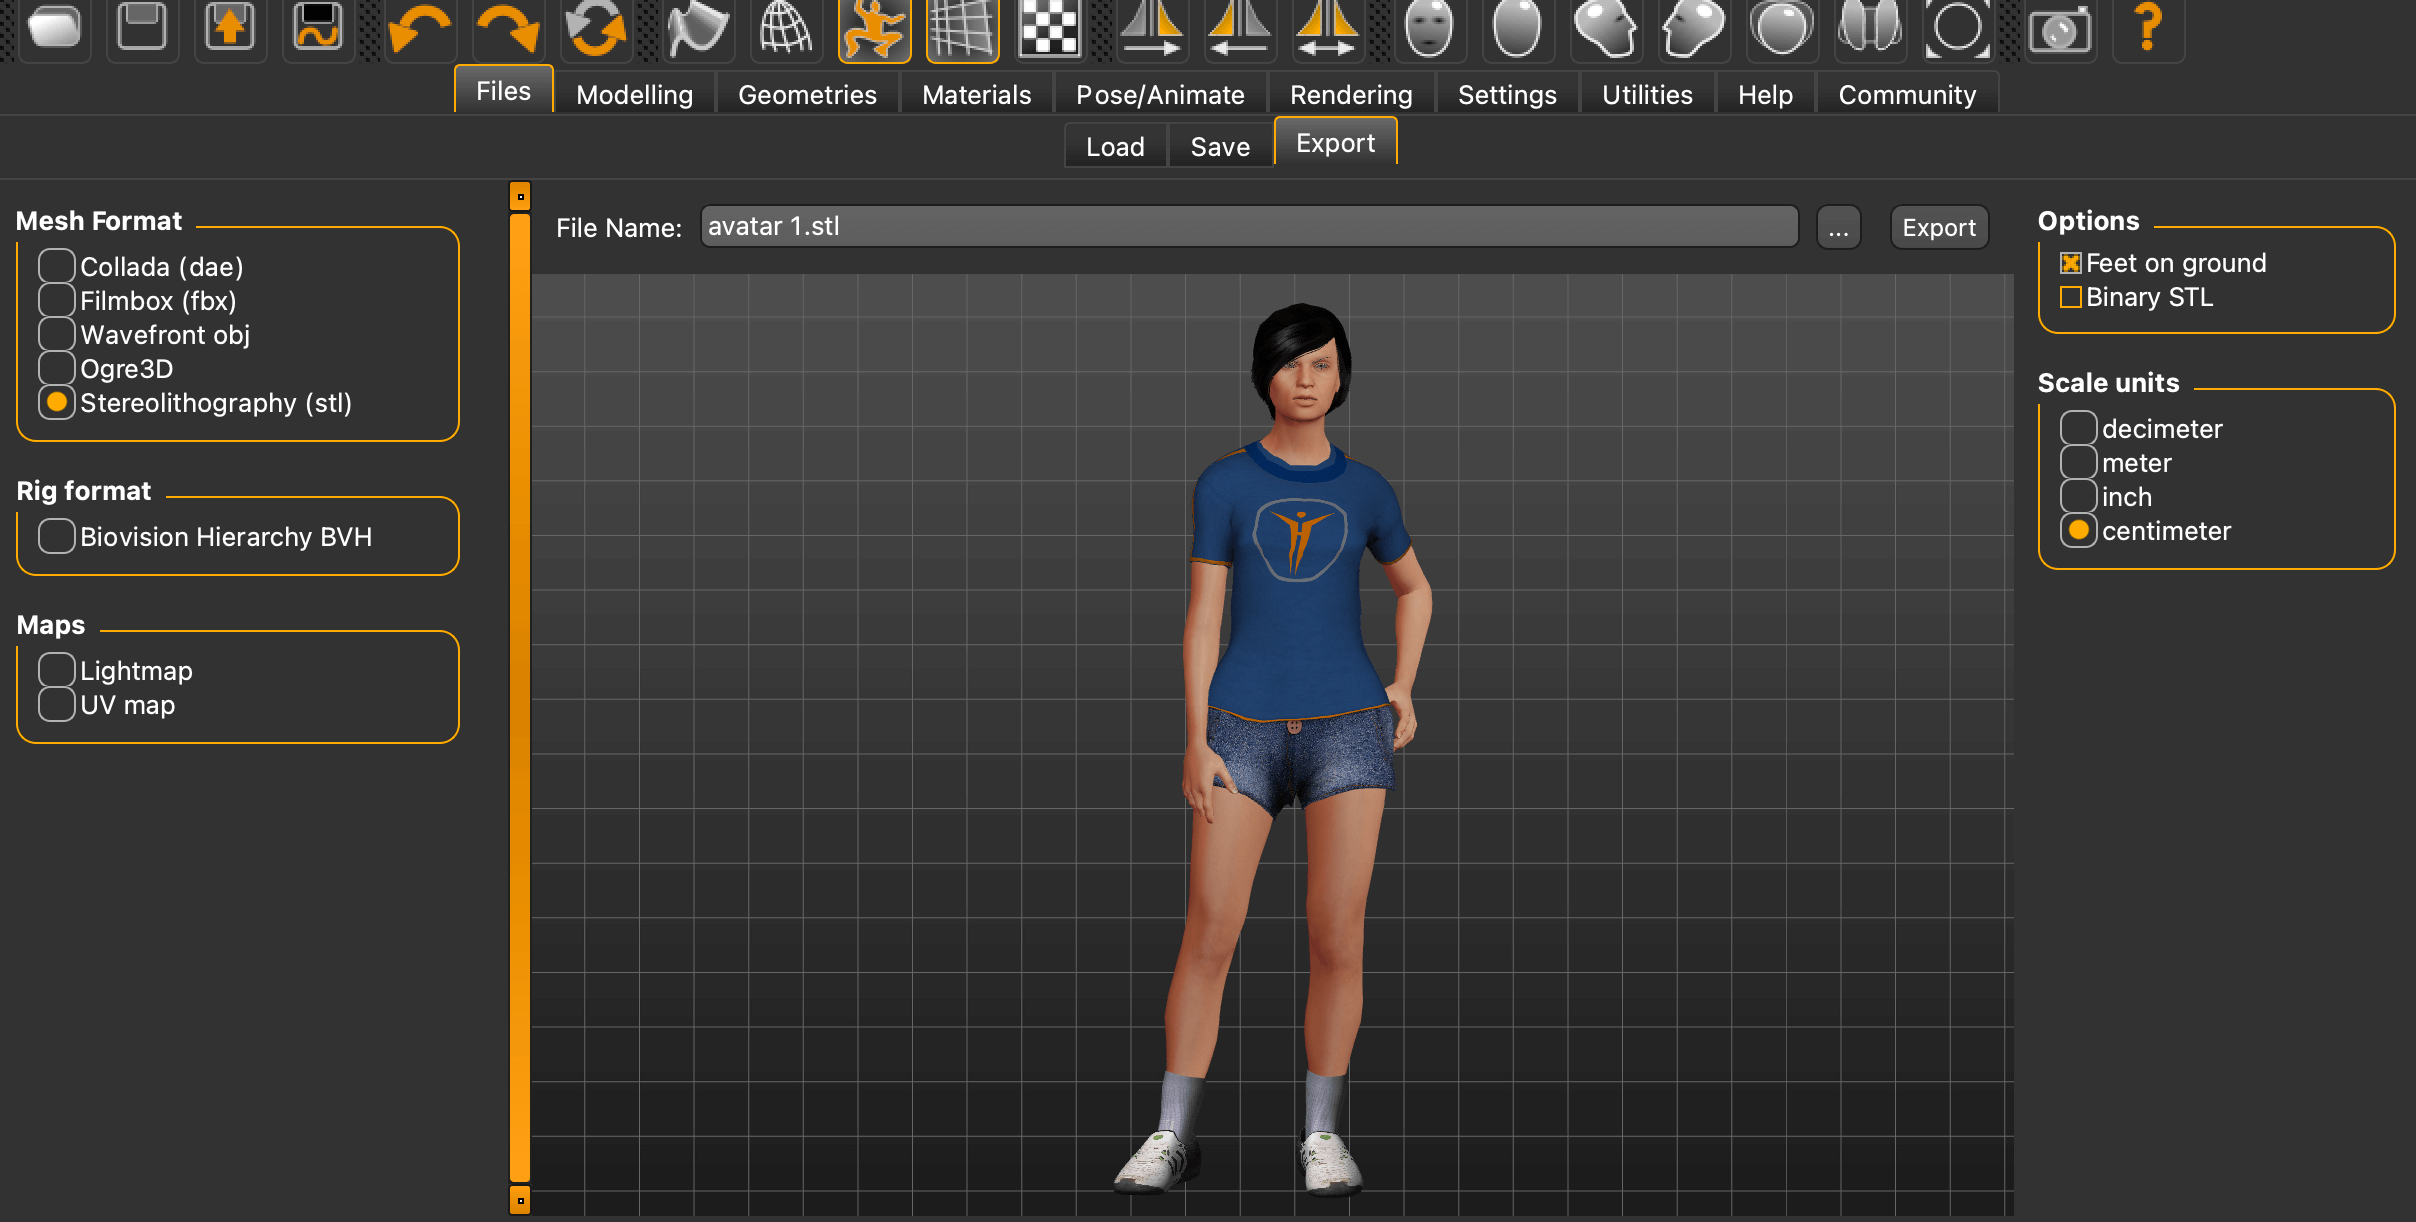
MakeHuman
This free software allow you to do an avatar with your own sizes and shapes or what you have in mind. Also, you could download files on the community page.
REMEMBER: Import object in STL to open in Rhino 7. It will convert into a mesh object.
- STL: files describe only the surface geometry of a three-dimensional object without any representation of color, texture, or other common CAD model attributes.
Slicer for Fusion 360
This free software allows you to create your design in pieces to cut the plan and assemble with the diverse options to the fitting.
Disseny de Emma
- To open your file you must save it as a .OBJ in Rhino 7.
- If the pieces to cut are red it's because something is wrong and the design it's not going to fit.
In the final mannequin prototype, there are 58 pieces to be joined.
More about Slicer for Fusion 360
Fabricate a mannequin
During this week I aimed to design a useful mannequin without forgetting the idea of an artistic sculpture. A harmony between both terms. For this reason, I decided to use my scan to recreate my shape to apply as a mold. On the other hand, deforming and deconstructing the head as an extraction thought.
Scanning with robot Kuka
Scanning with robot Kuka. de Emma
A morning scanning the classmates with the robot Kuka to obtain a precise scan. We used a regular Kinect attached to the robotic arm. Each one of us stood on a platform that rotates 360 degrees while the Kinect, moved by the Kuka.
The arm starts scanning in the middle of the object/person when it finishes SAVE before any operation. In the same program, use the water title command to delete the holes. For example the top of your head or between your legs.
I GET MY SCAN!
More:
-
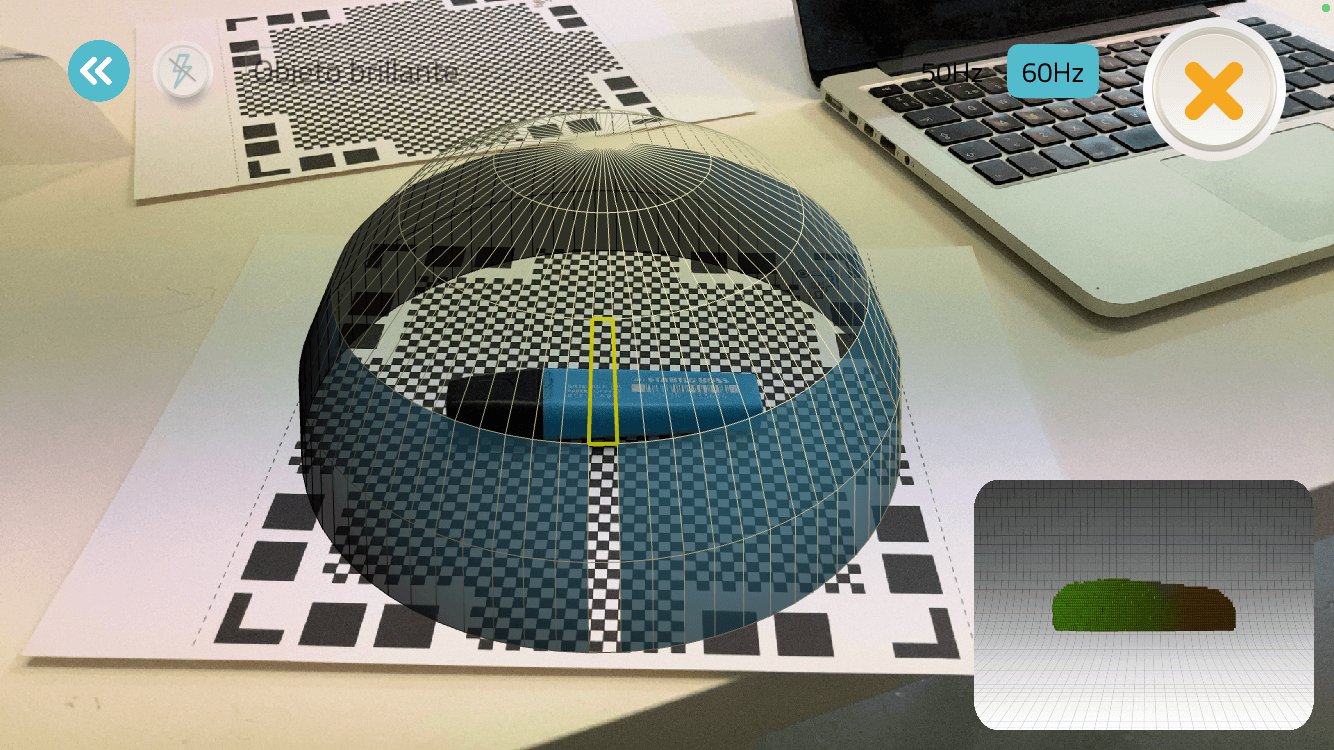
QLONE App Free application to scan with your mobile phone.
Virtual production
- Rhino 7:
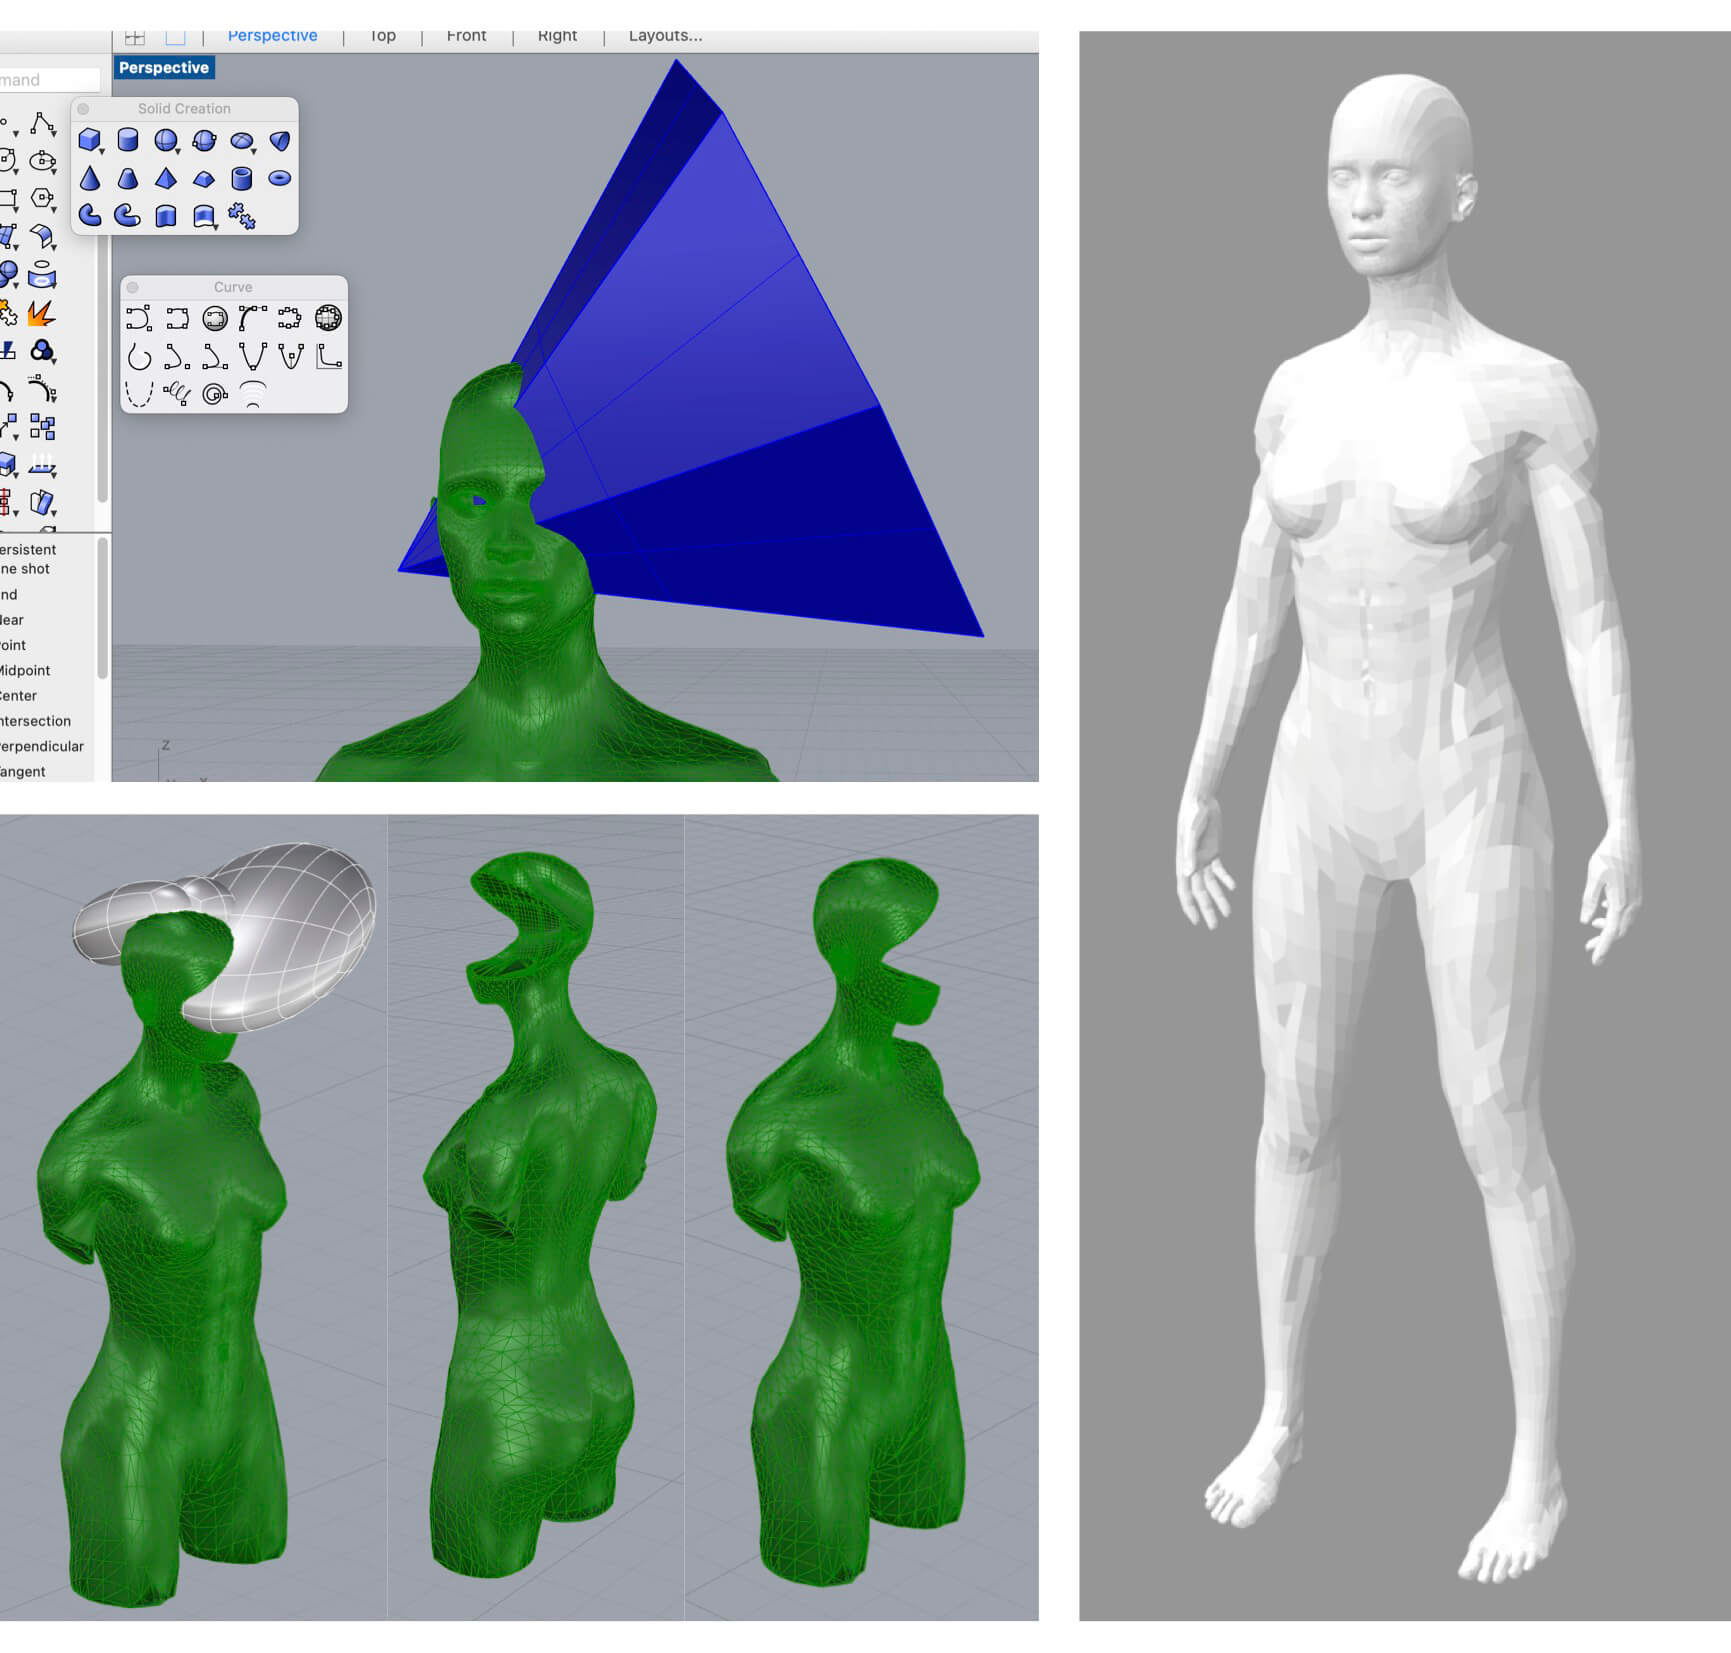
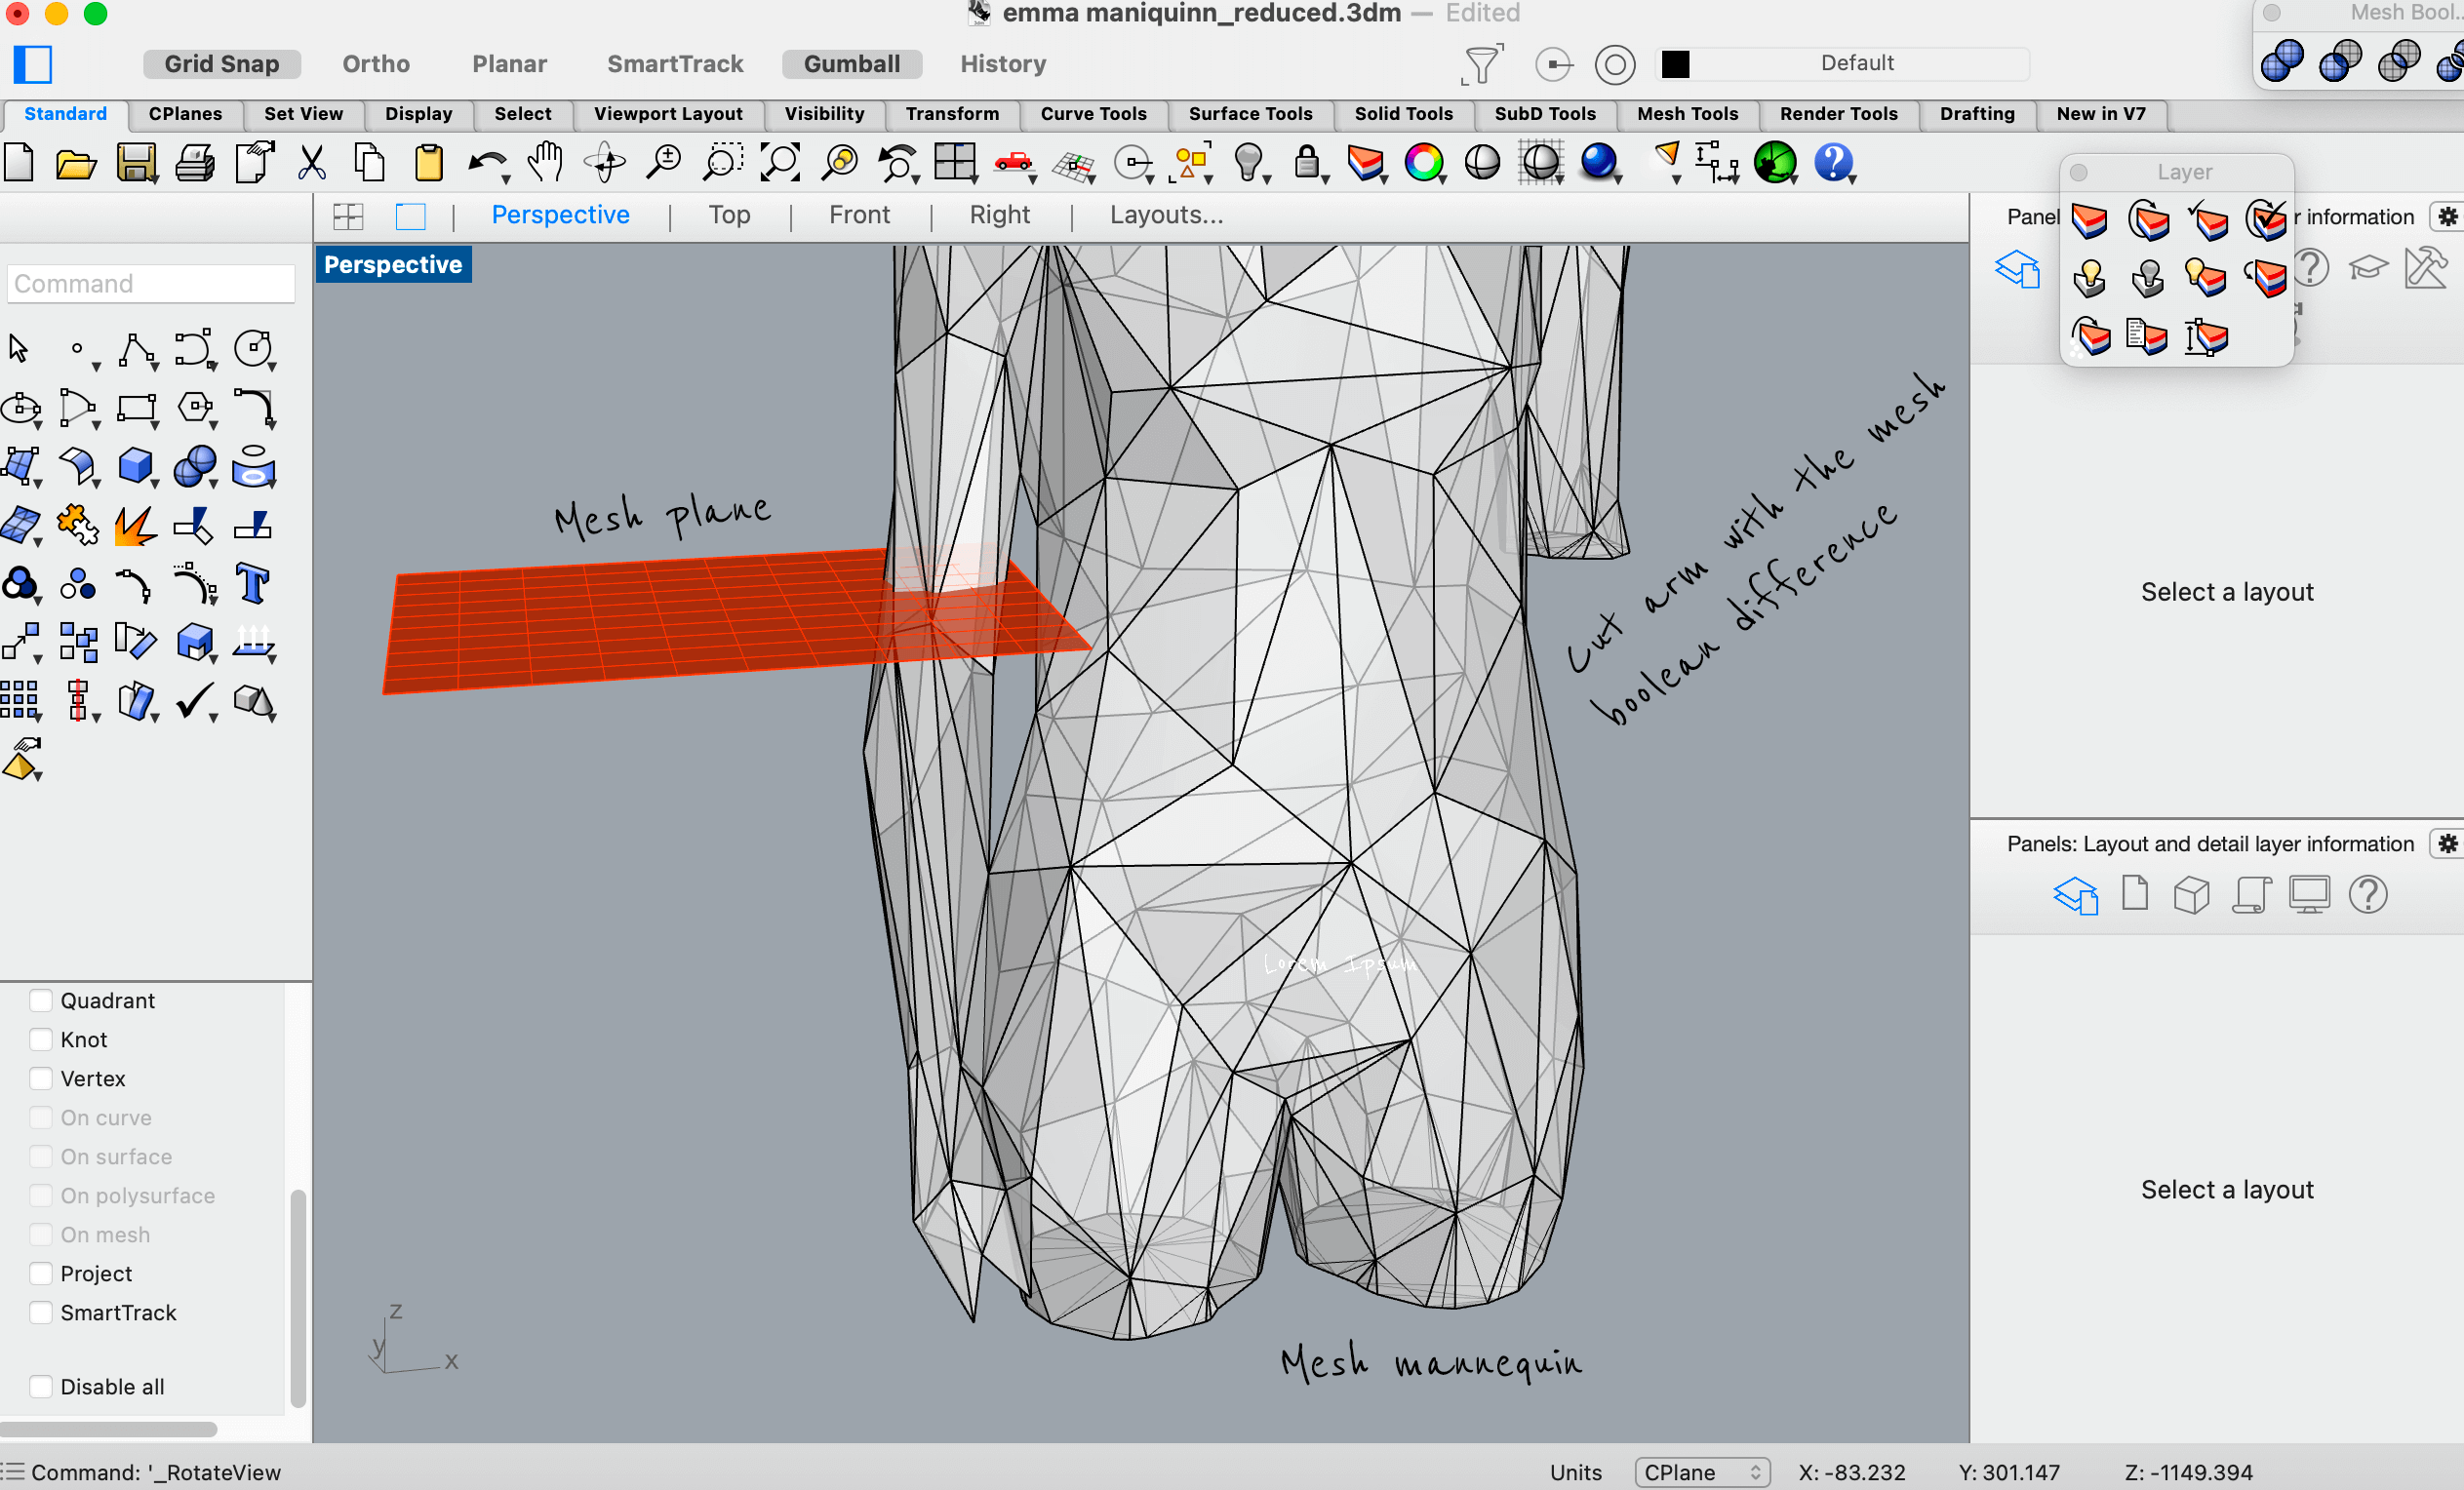
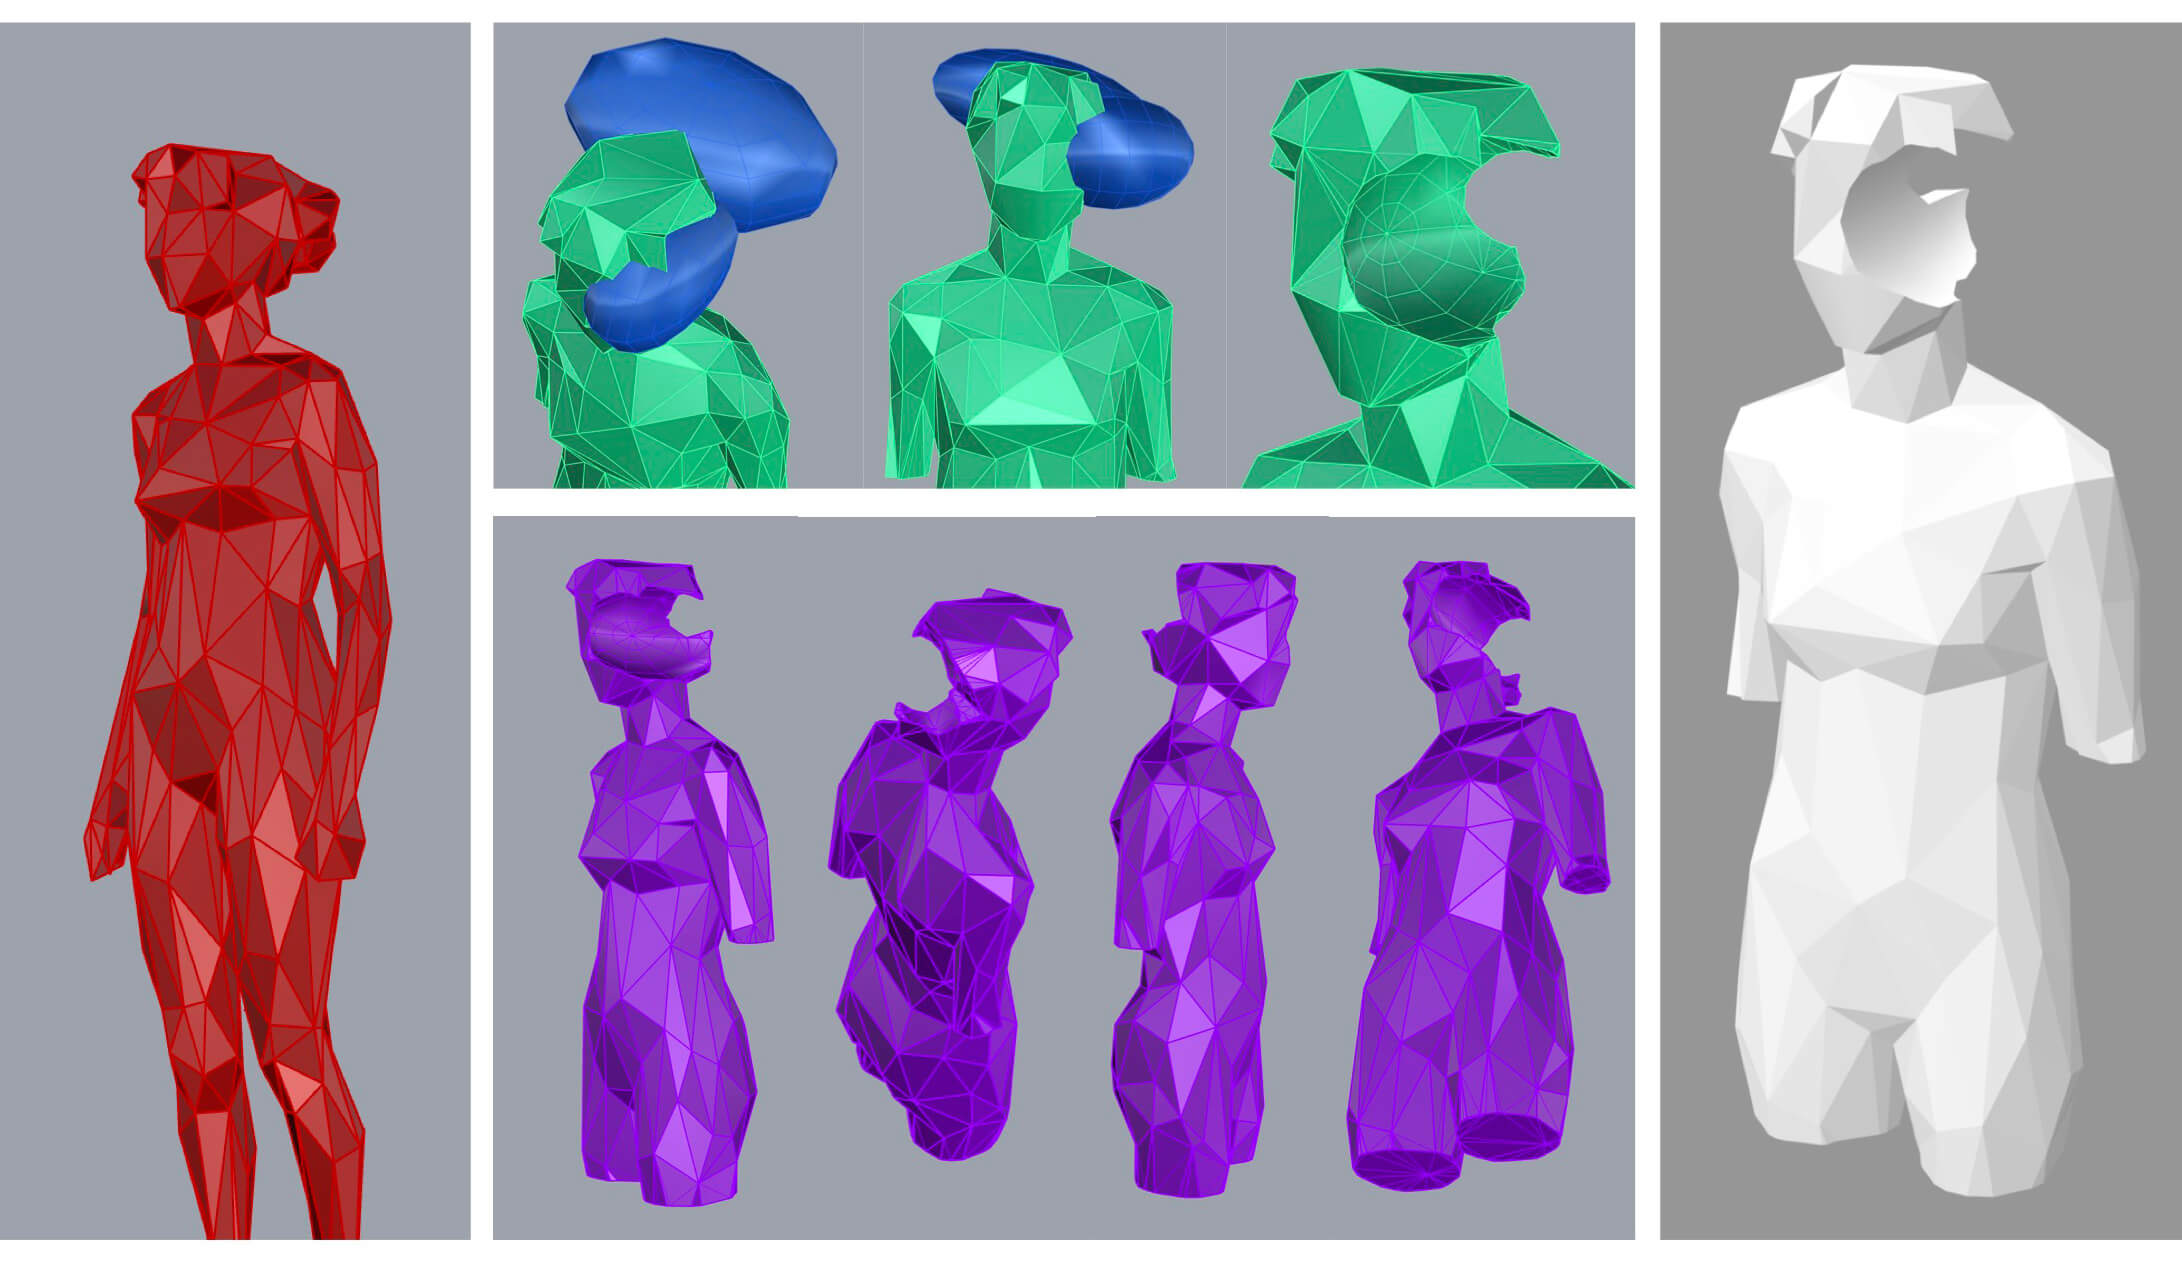
To recreate the concept I use the boolean tool to form diverse types of holes with the MakeHuman avatar to see the possibilities I will have in real size.
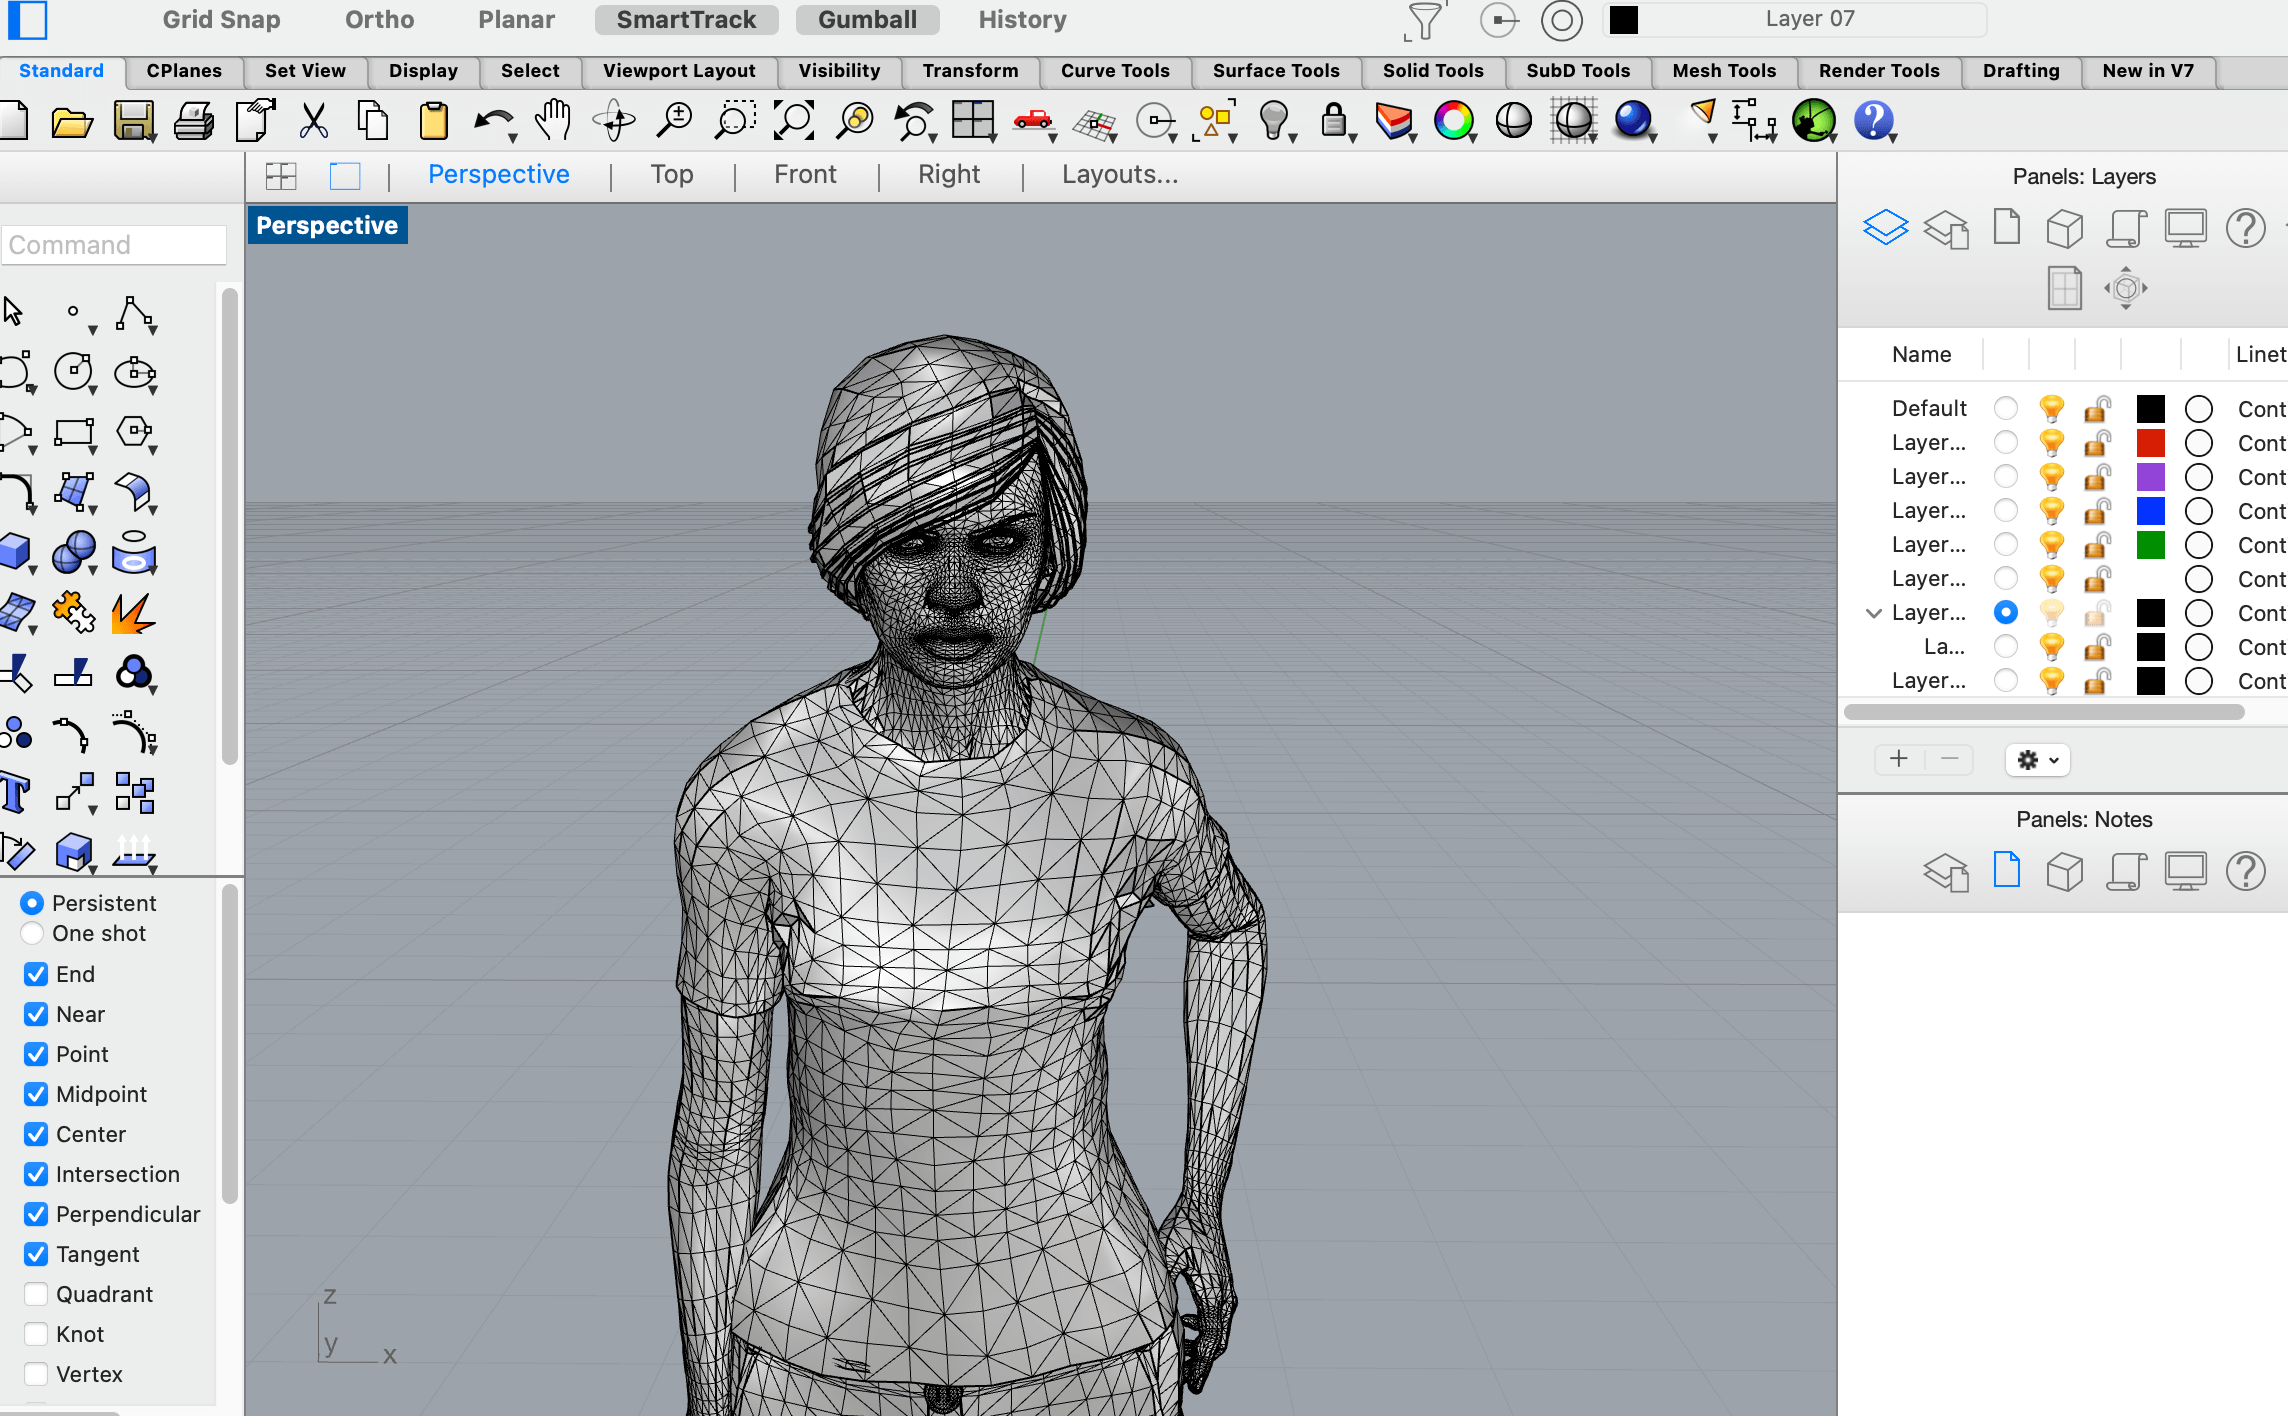
LET'S IMPORT THE SCAN INTO THE RHINO 7!
REMEMBER: An STL is a mesh and the object is saved in white instead of the .OBJ which is saved in color.
When I pass the scan file in the Rhino it was super heavy so I need to reduce the mesh option by 20%, if I increase it more my computer freeze. I have done this several times to simplify the silhouette. Then I have to close the mesh to cut the legs and the arms.
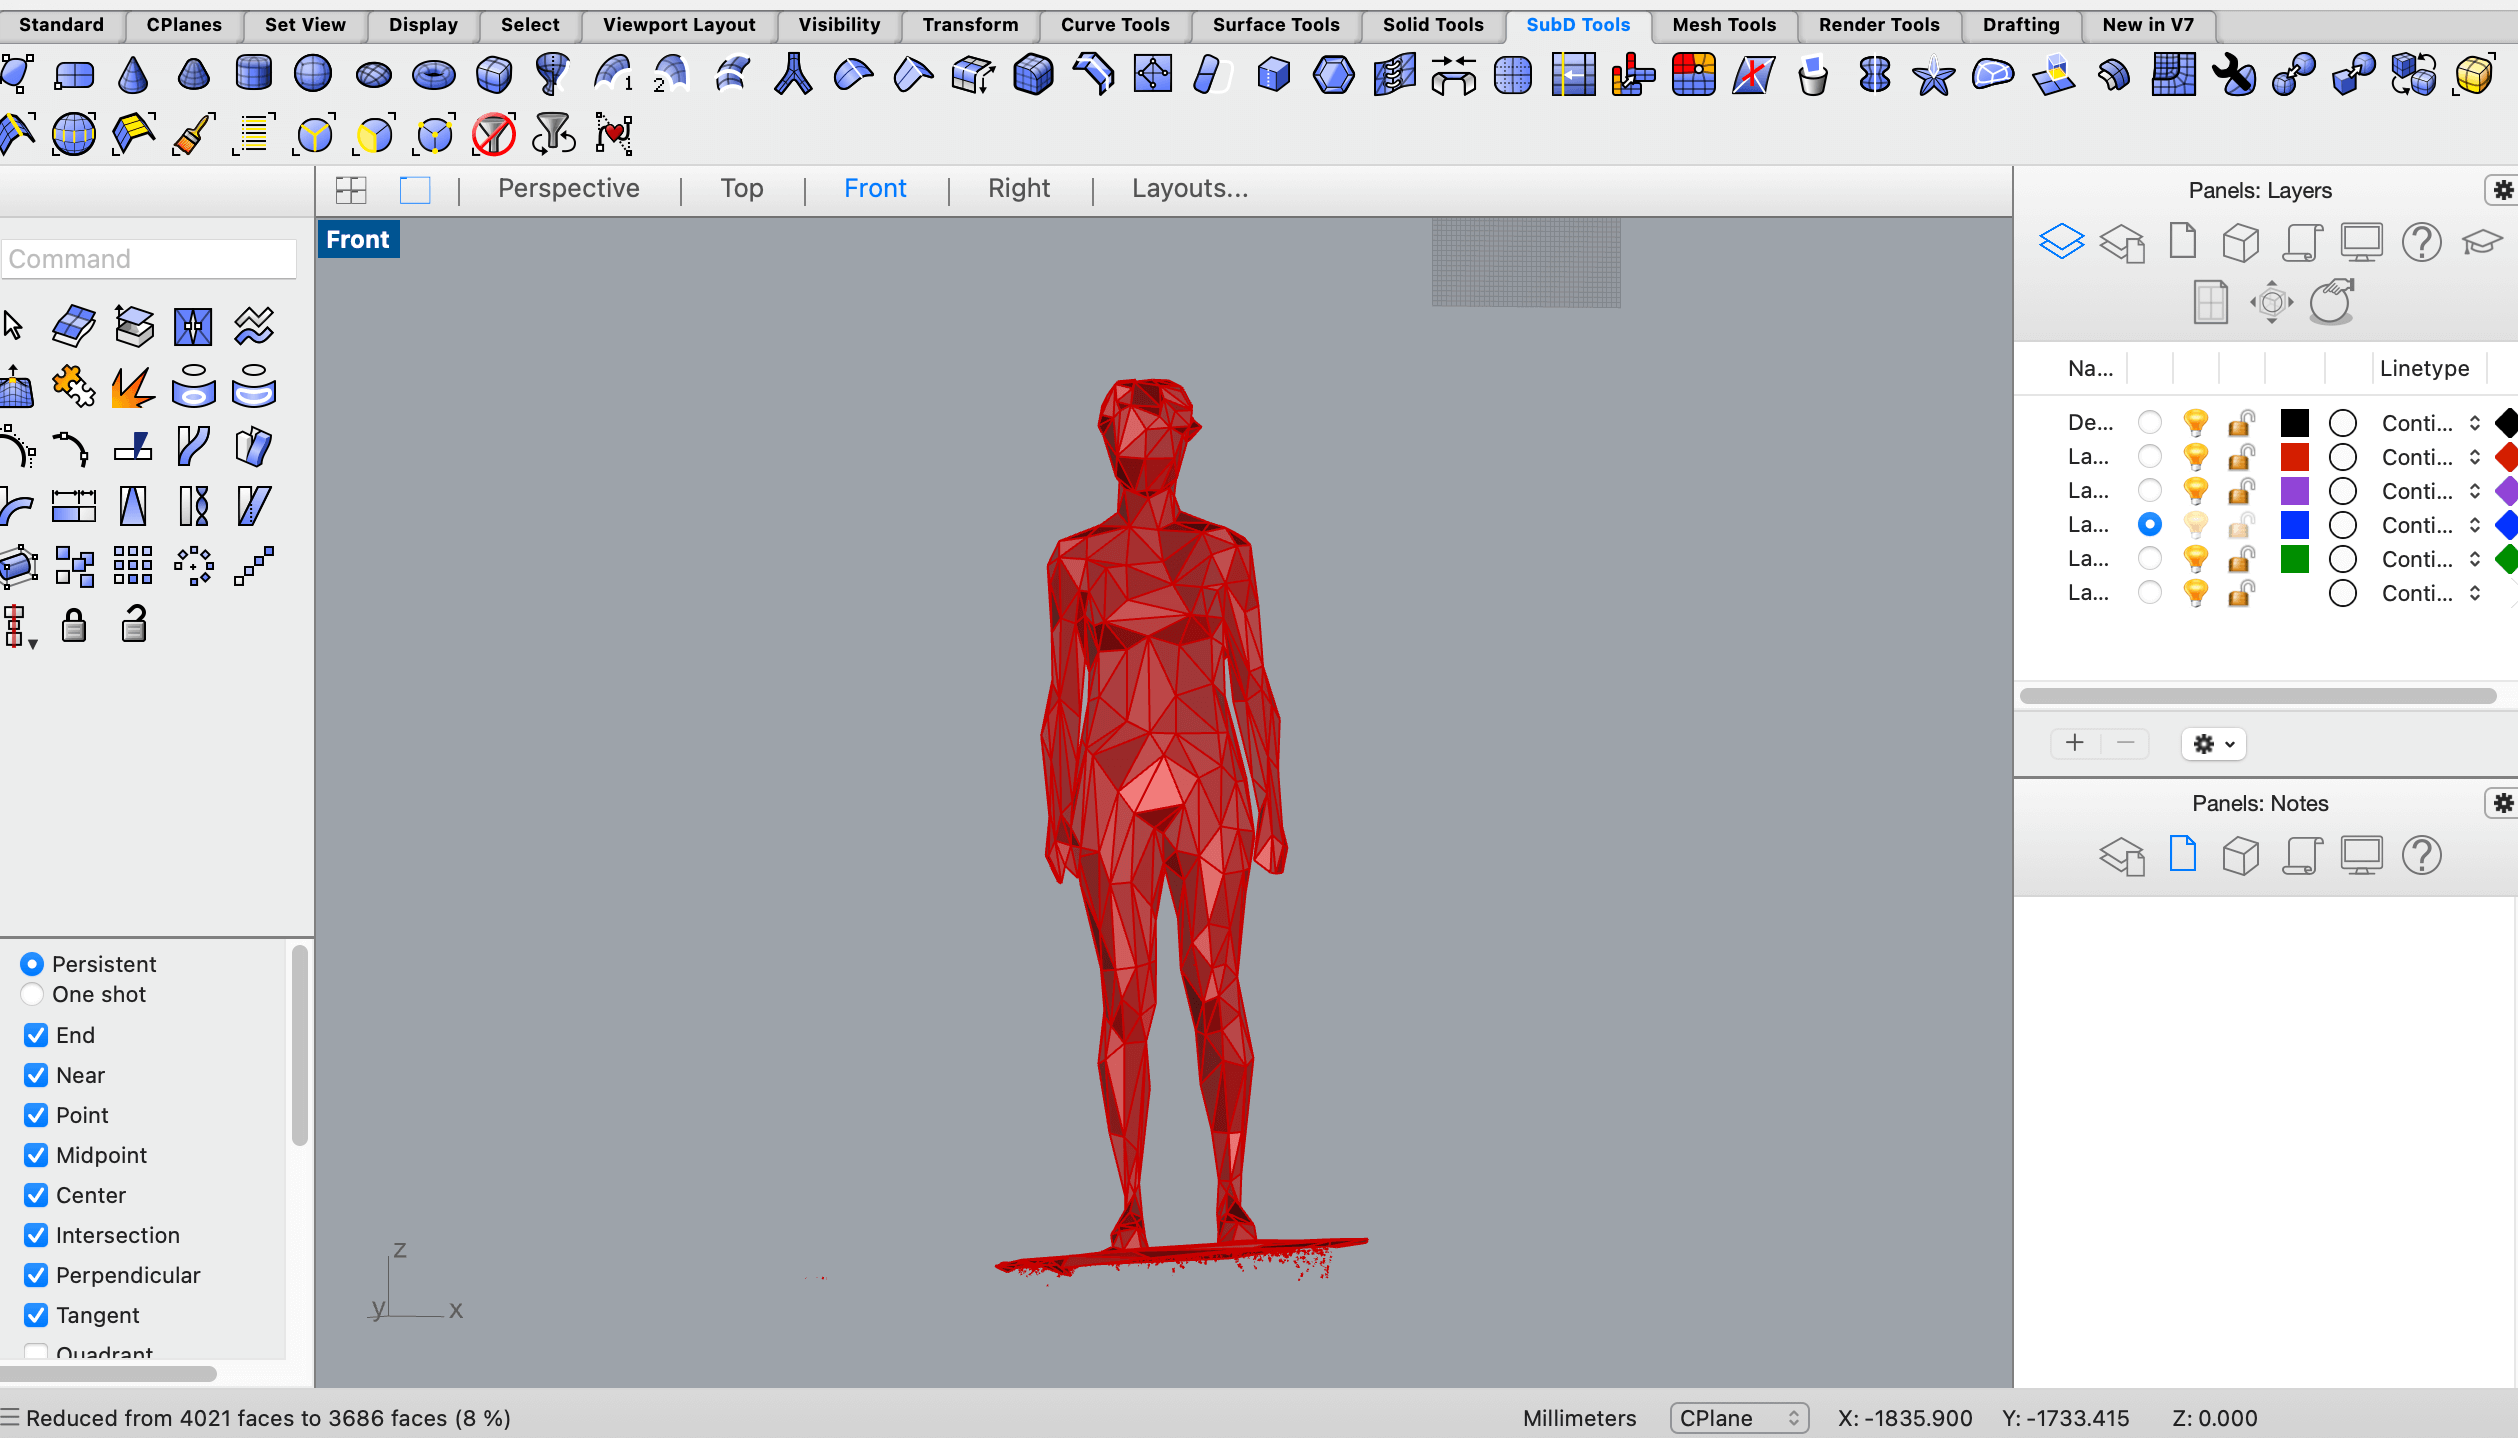
Steps:
- Check: To know if it is a bad mesh.
- Degenereited mesh faces, press enter.
- Show edges.
- Edge analyses: Zoom to see the error, it will show in a different color. Put done in the left window.
- Sel Naked Mesh Edges Pt.
- Shift to select and move the points to close the mesh.
If you still could not boolean the mannequin try the command: Pt Unifay directions.
- Slicer for Fusion 360:
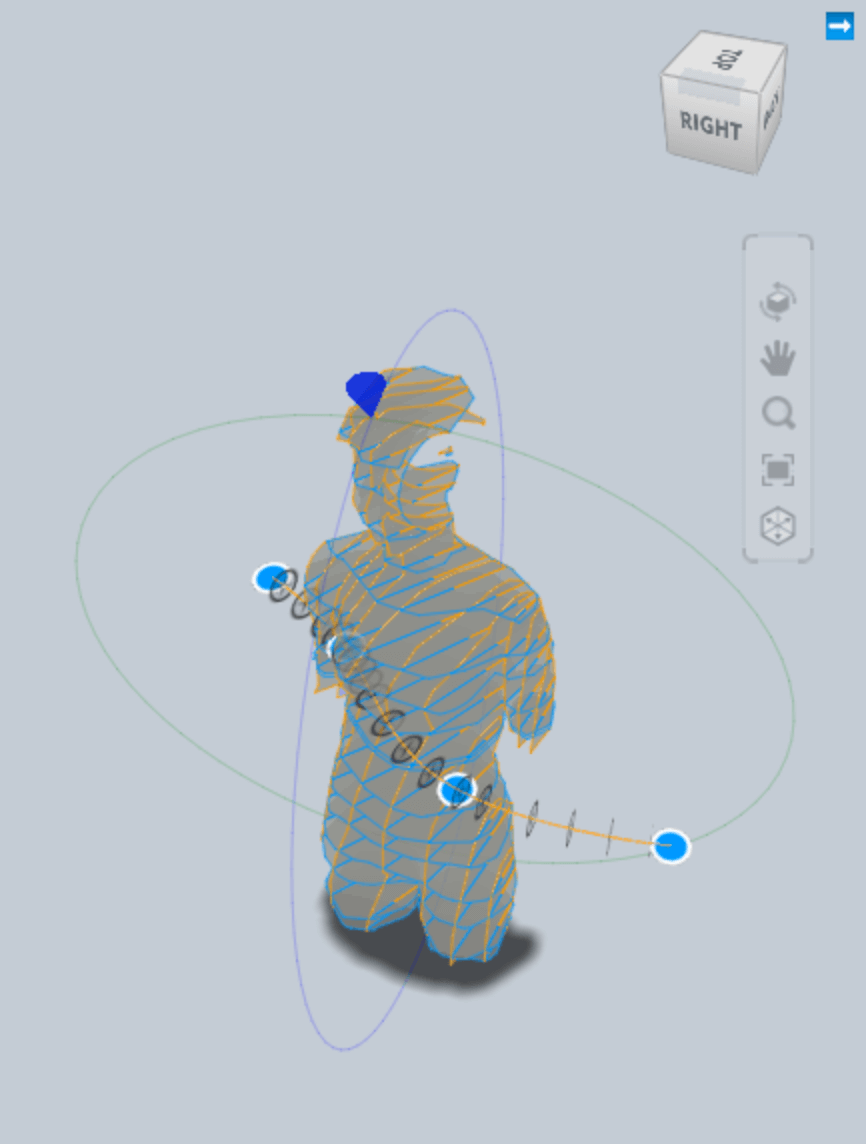
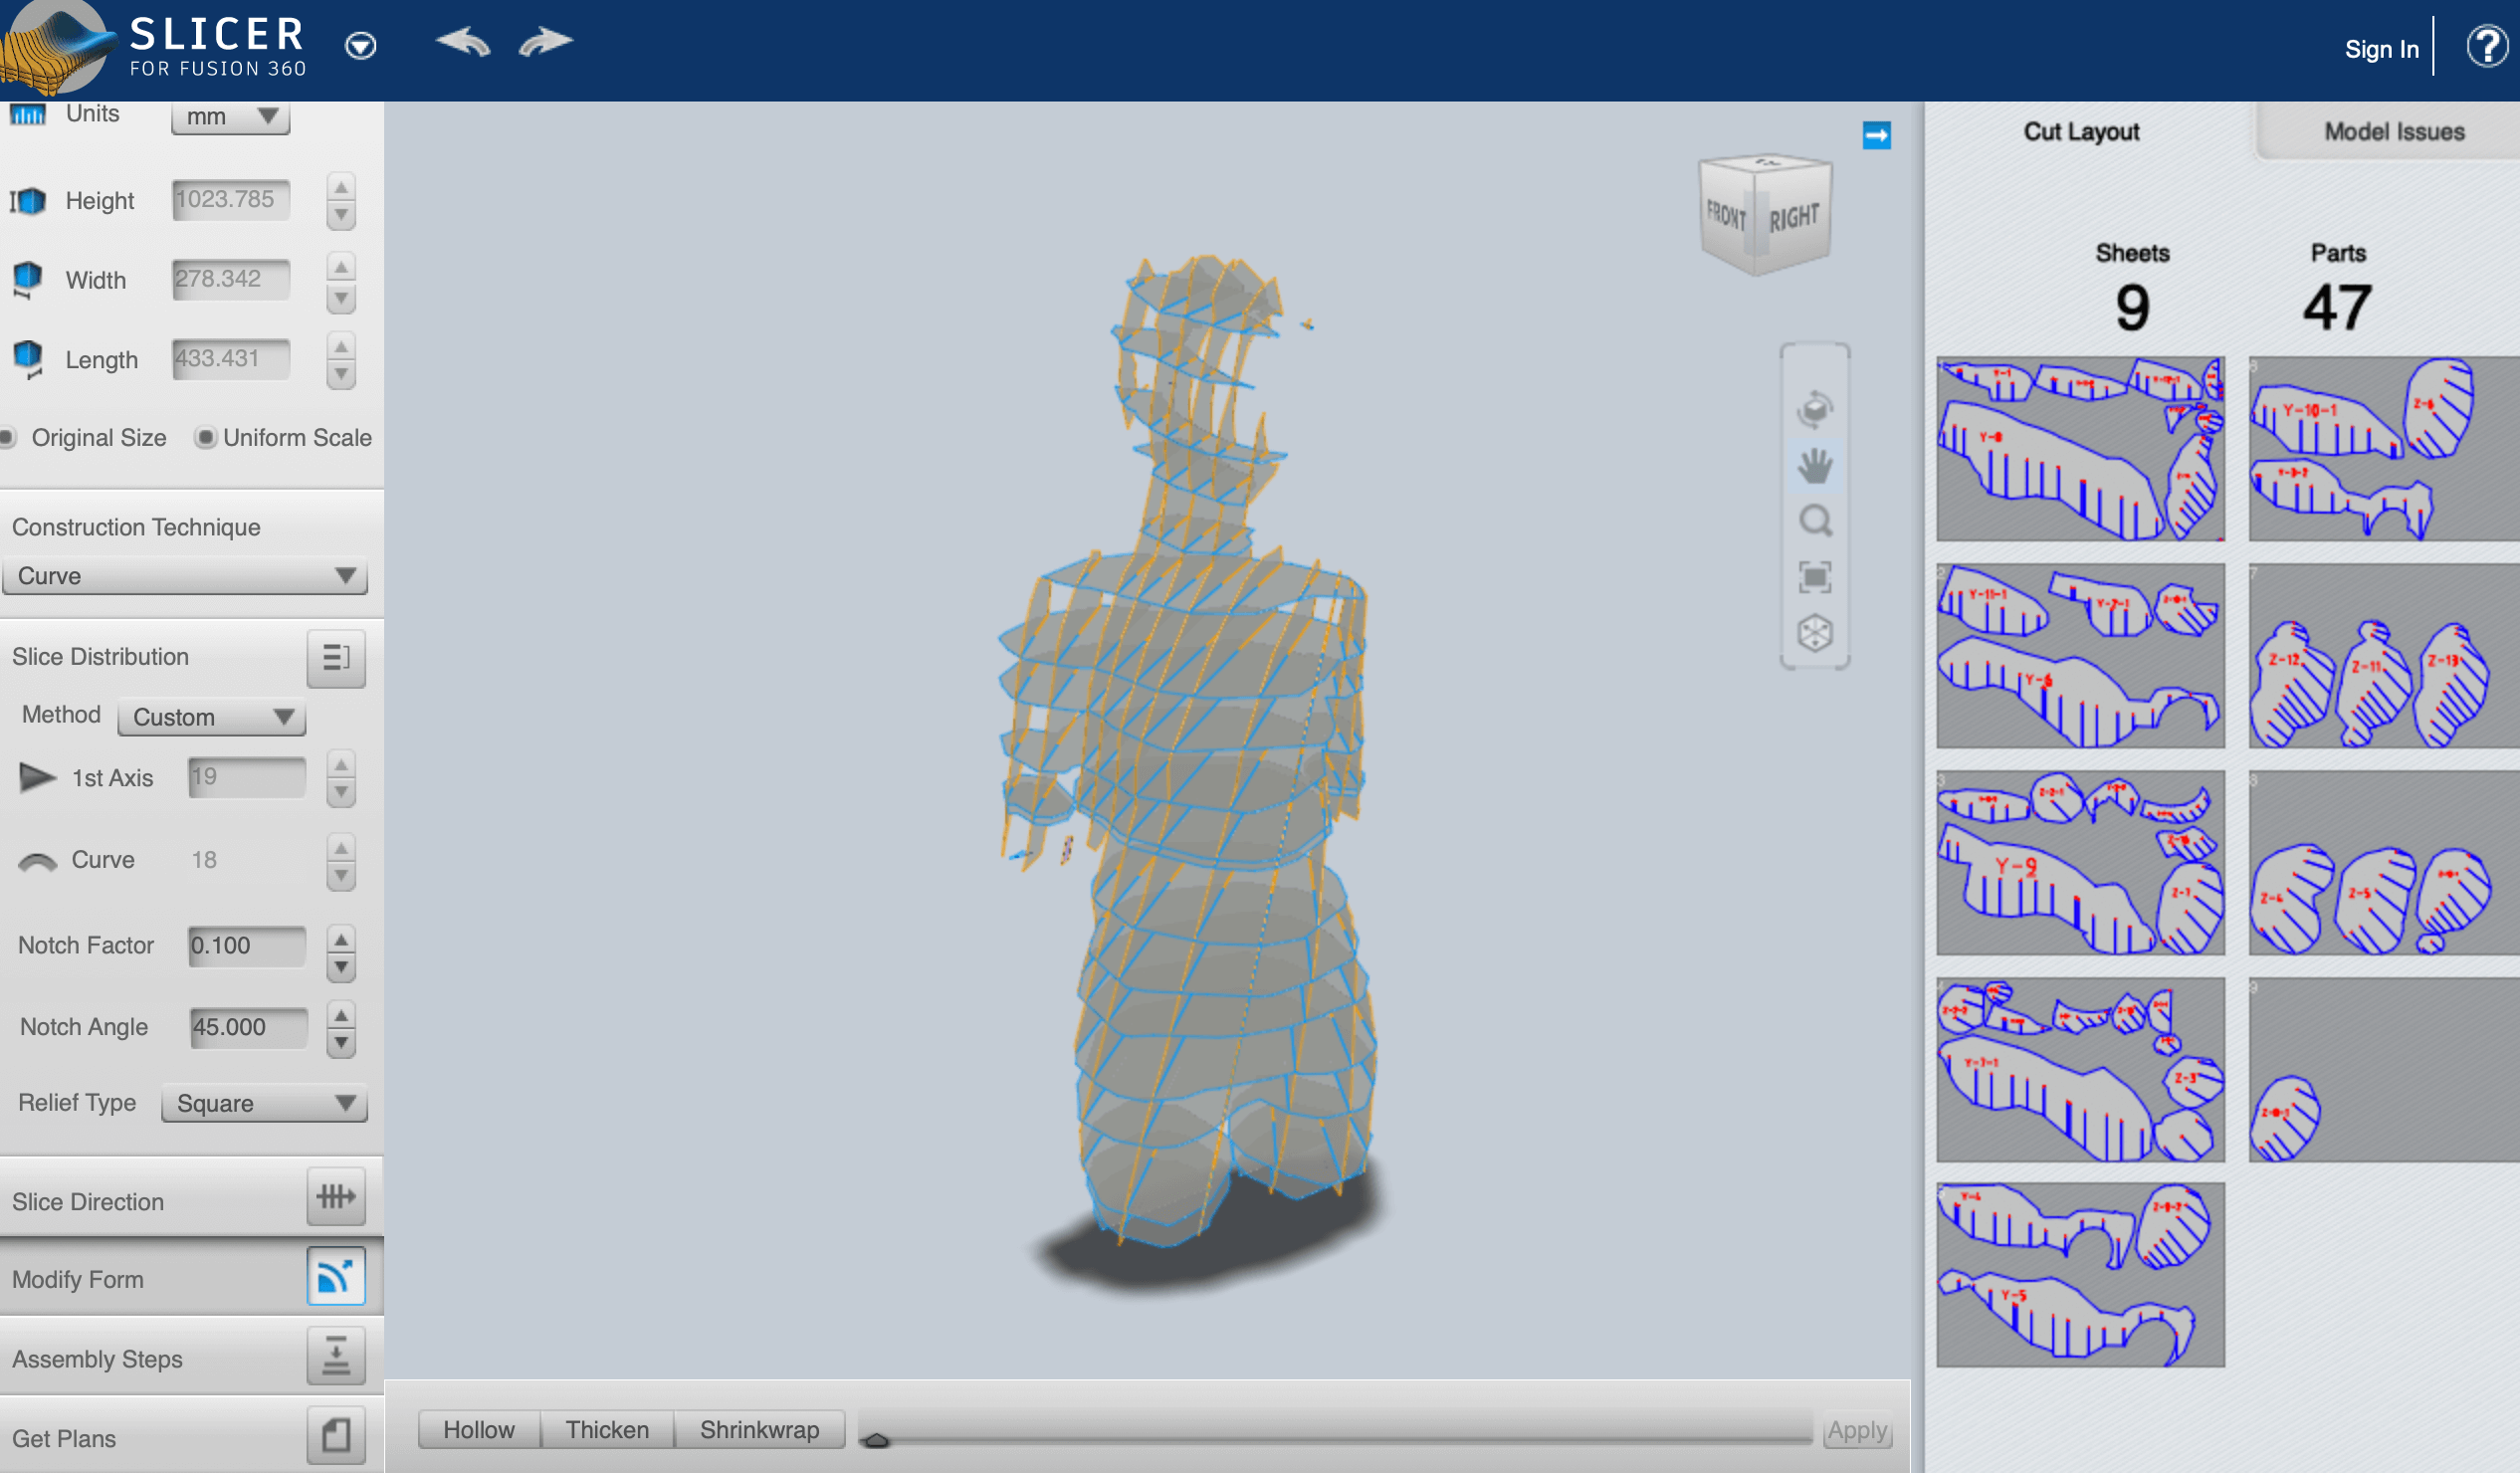
The Slicer program lets you move each piece and add more columns to readjust your mannequin. Also, use to improve the firmness of the object. So finally the prototype will have 47 pieces to be joined.
In that case, I didn't add an offset for the interlocking system because I am going to use cardboard of 2mm thickness, "a soft material" that I need tight joins to don't lose the components if it moves. However, as you will see, while I am building it, it was super hard...
Save as a DXF, open the zip, and import one by one to Rhino in the top viewport. Make 2D each piece. Join. Go to object properties to change the layer by color.
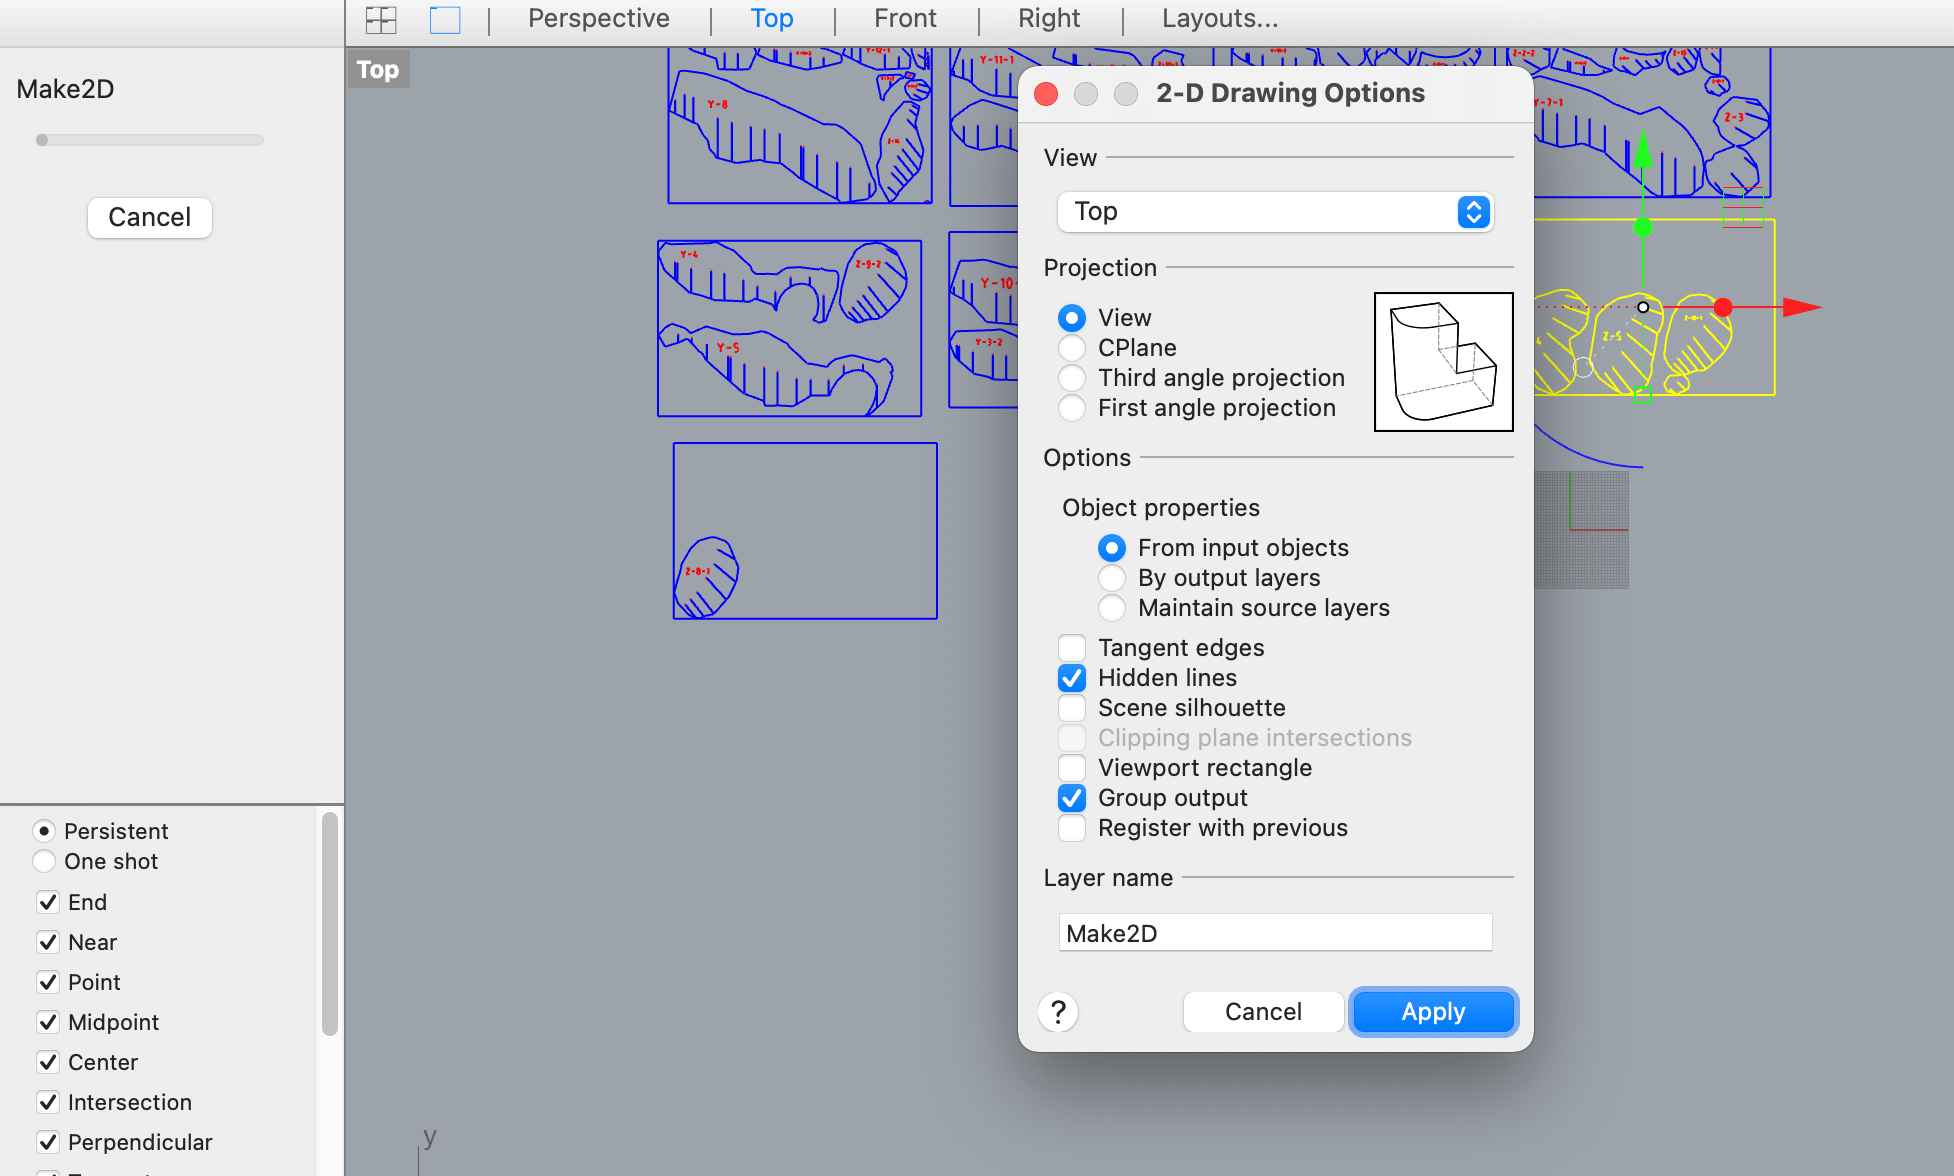
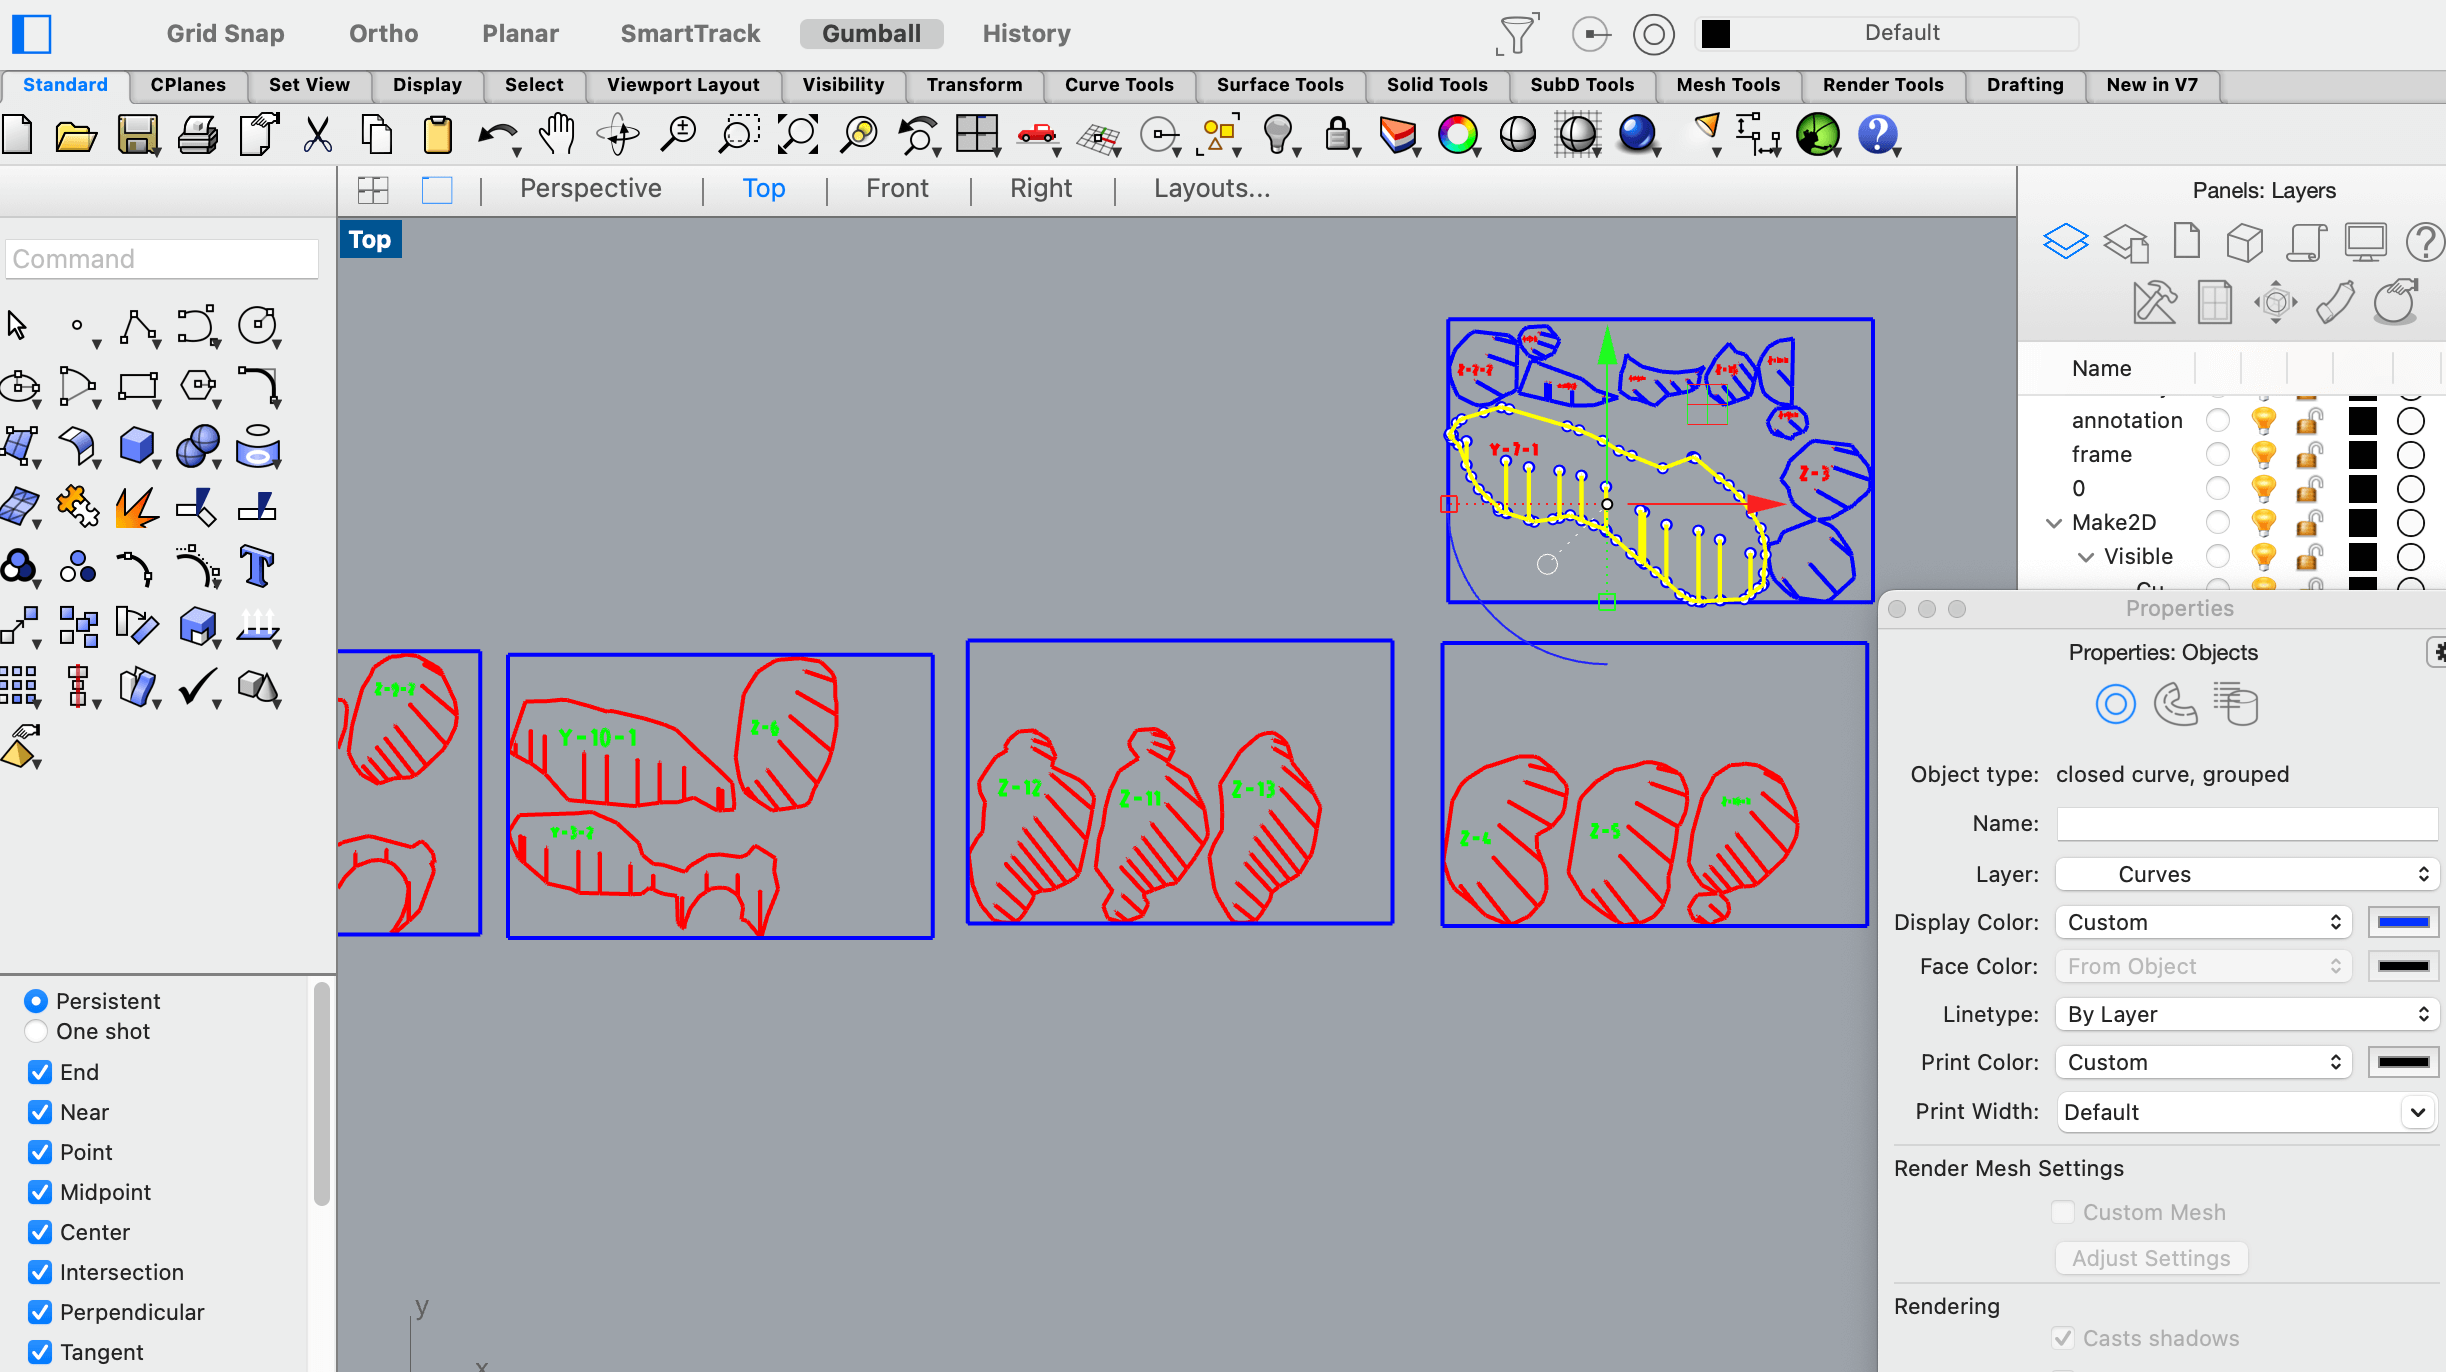
Category color
| Cut | Engrave | Board |
|---|---|---|
| Red | Green | Blue |
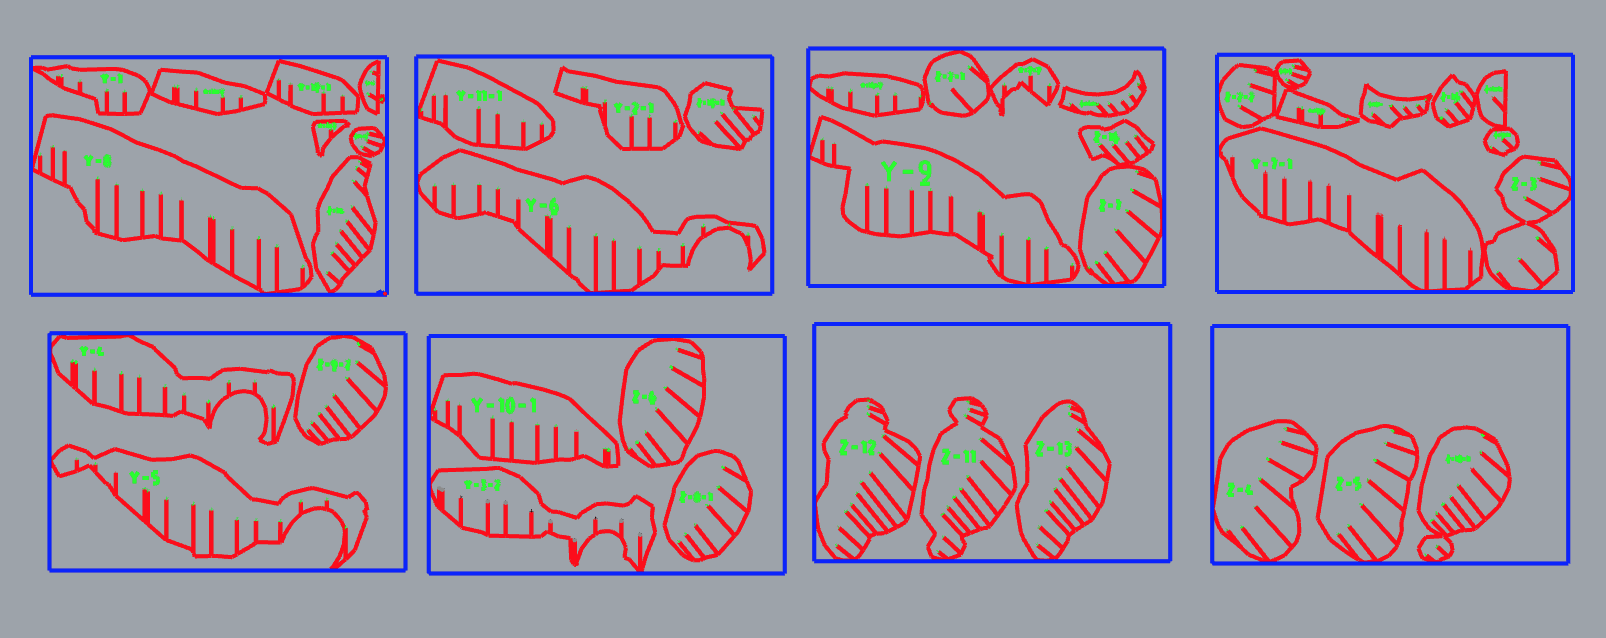
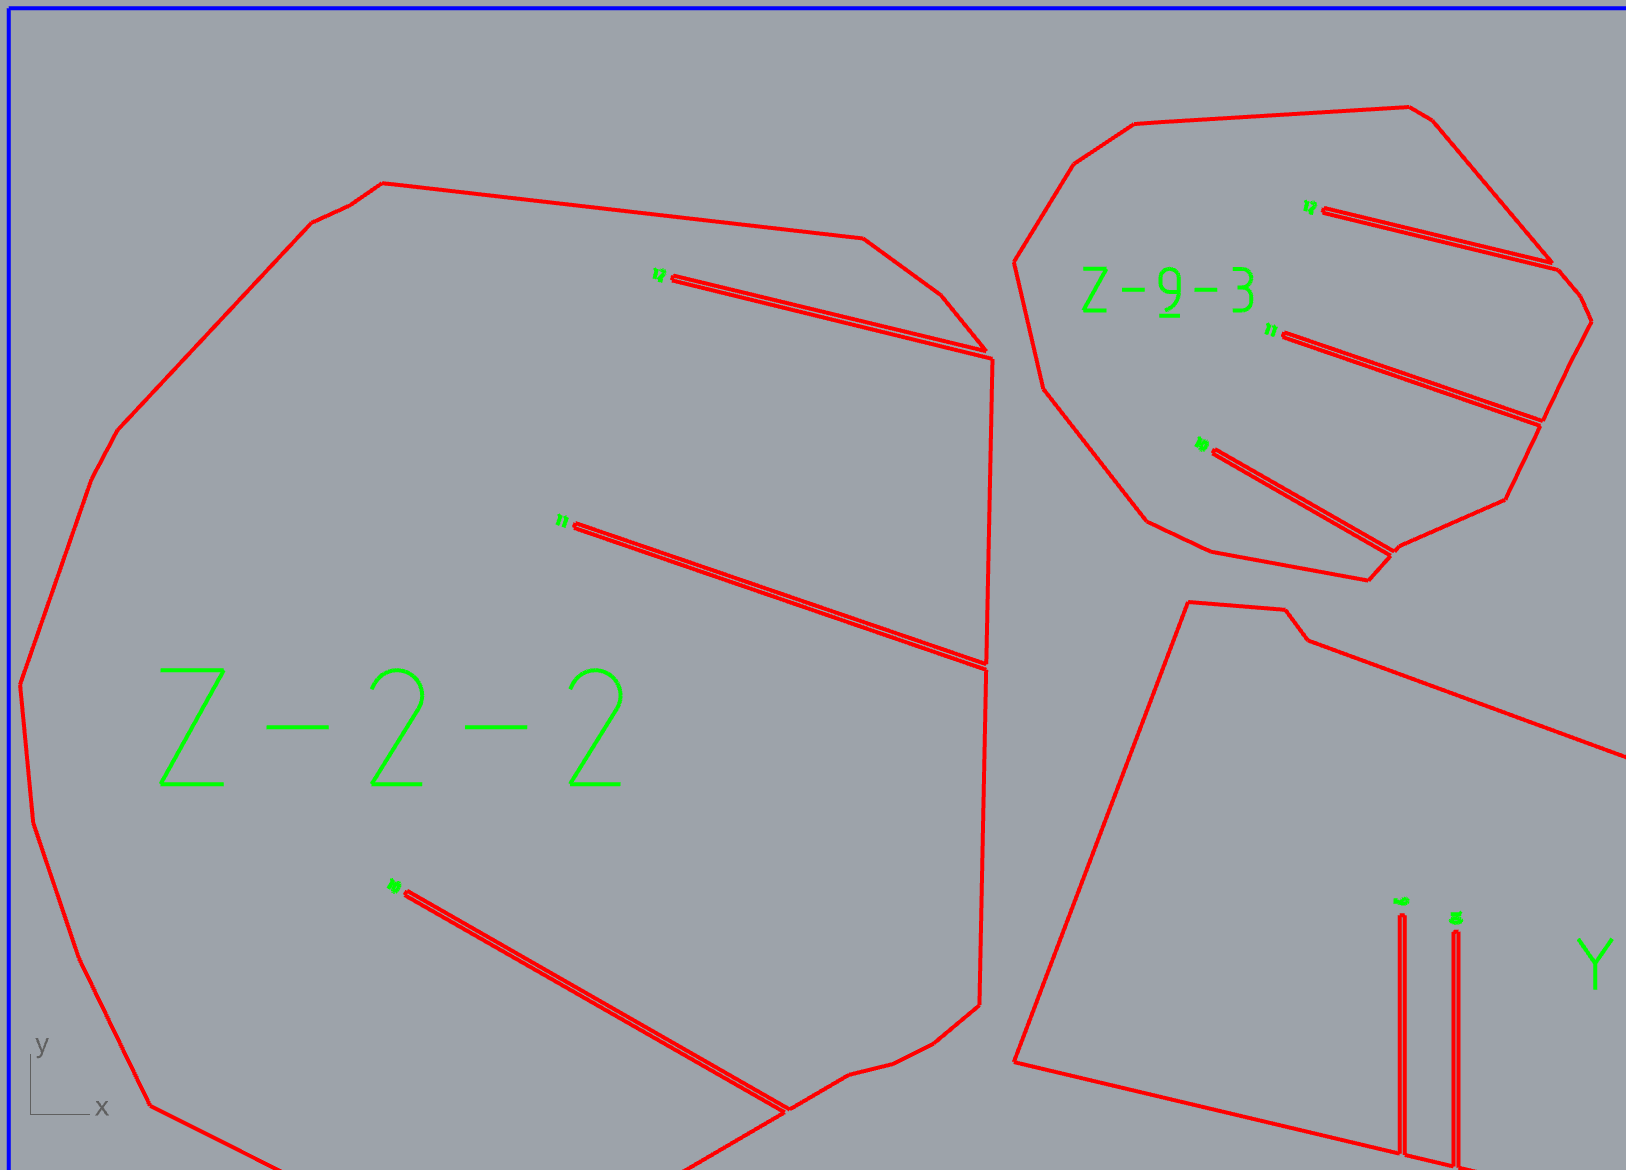
Examine all the parts in detail to readjust with the polyline command. For example, if the notch is near the ending piece. Additionally, you could rearrange the boards to use as less as you could. In my case, I pass to need 8 to 5 pieces of cardboard (2mm thikness). What a challenge...
Laser cutting
- Save the Rhino file in .3dm and uploaded it to the CloudIAAC
-
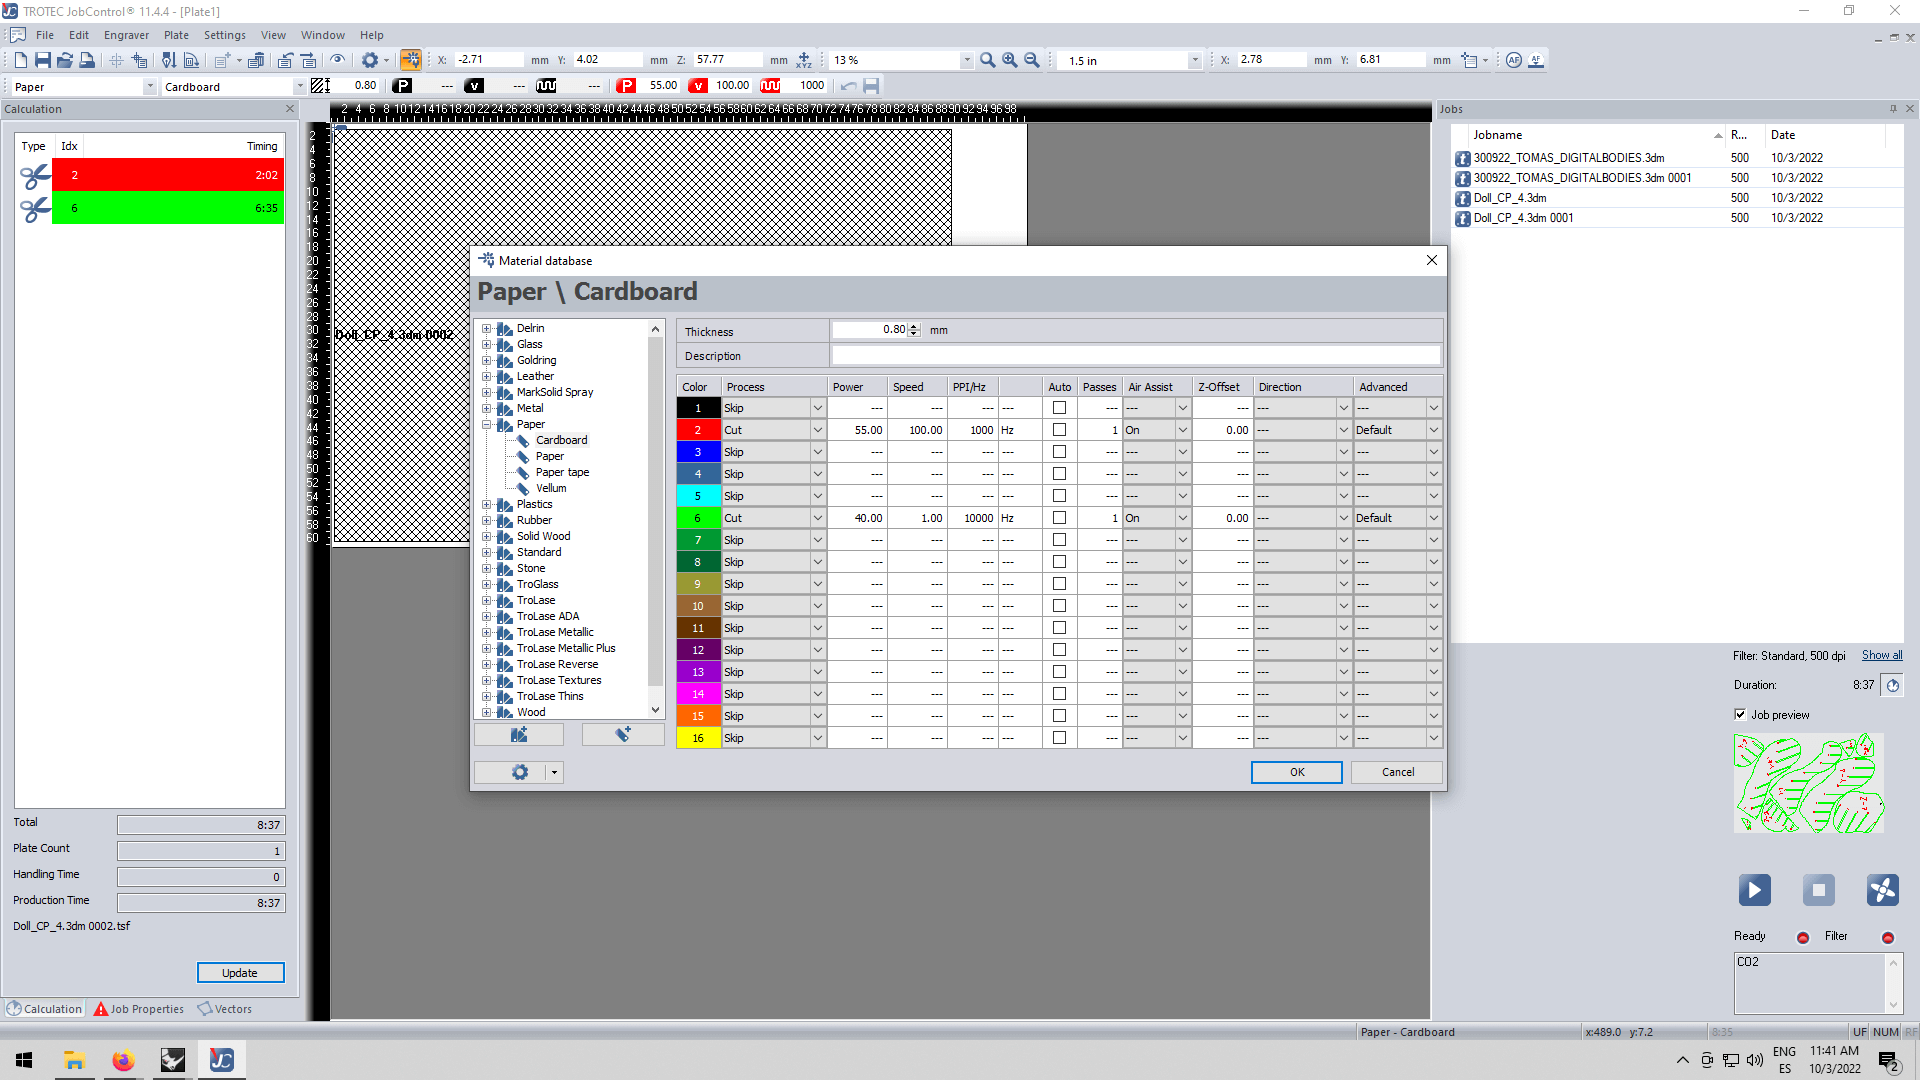
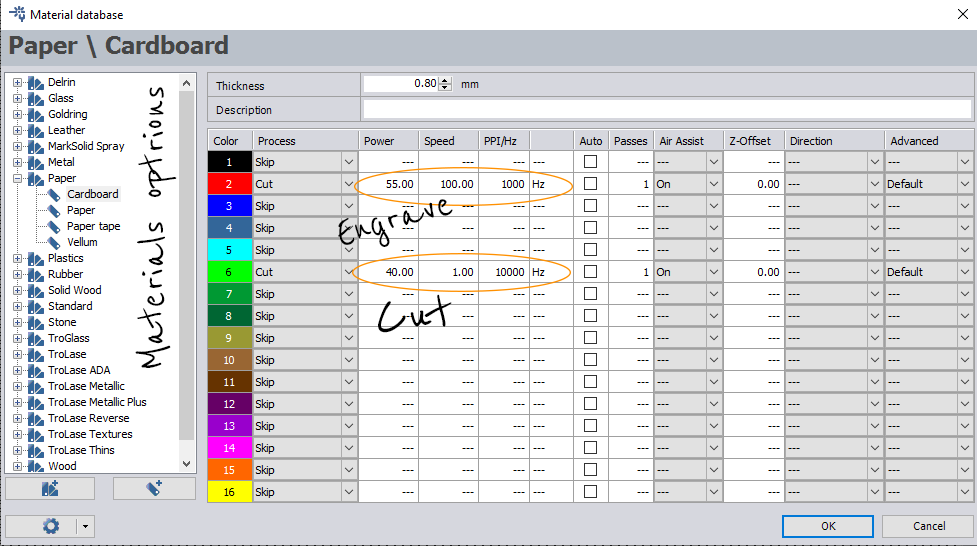
Calculate the thickness of your material and select it in the program. In that case, we are going to use a 2mm cardboard from the FabLab with one white side and the other in black color.
-
Put the correct order with the different colors.
REMEMBER: Always cutting is the last step.
-
Tape the corners if the material is bent with paper tape.
-
Move the bed to the correct height with the plastic tool. Make a frequent press to move slowly. When it falls, it's in the correct position.
ALERT: Before sending the file turn on the air extractor.
- Before cutting the whole board tries the notch if it's fit correctly with a part of a piece.
With laser cutting, you could also engrave a white and black image, it must have contrasts.
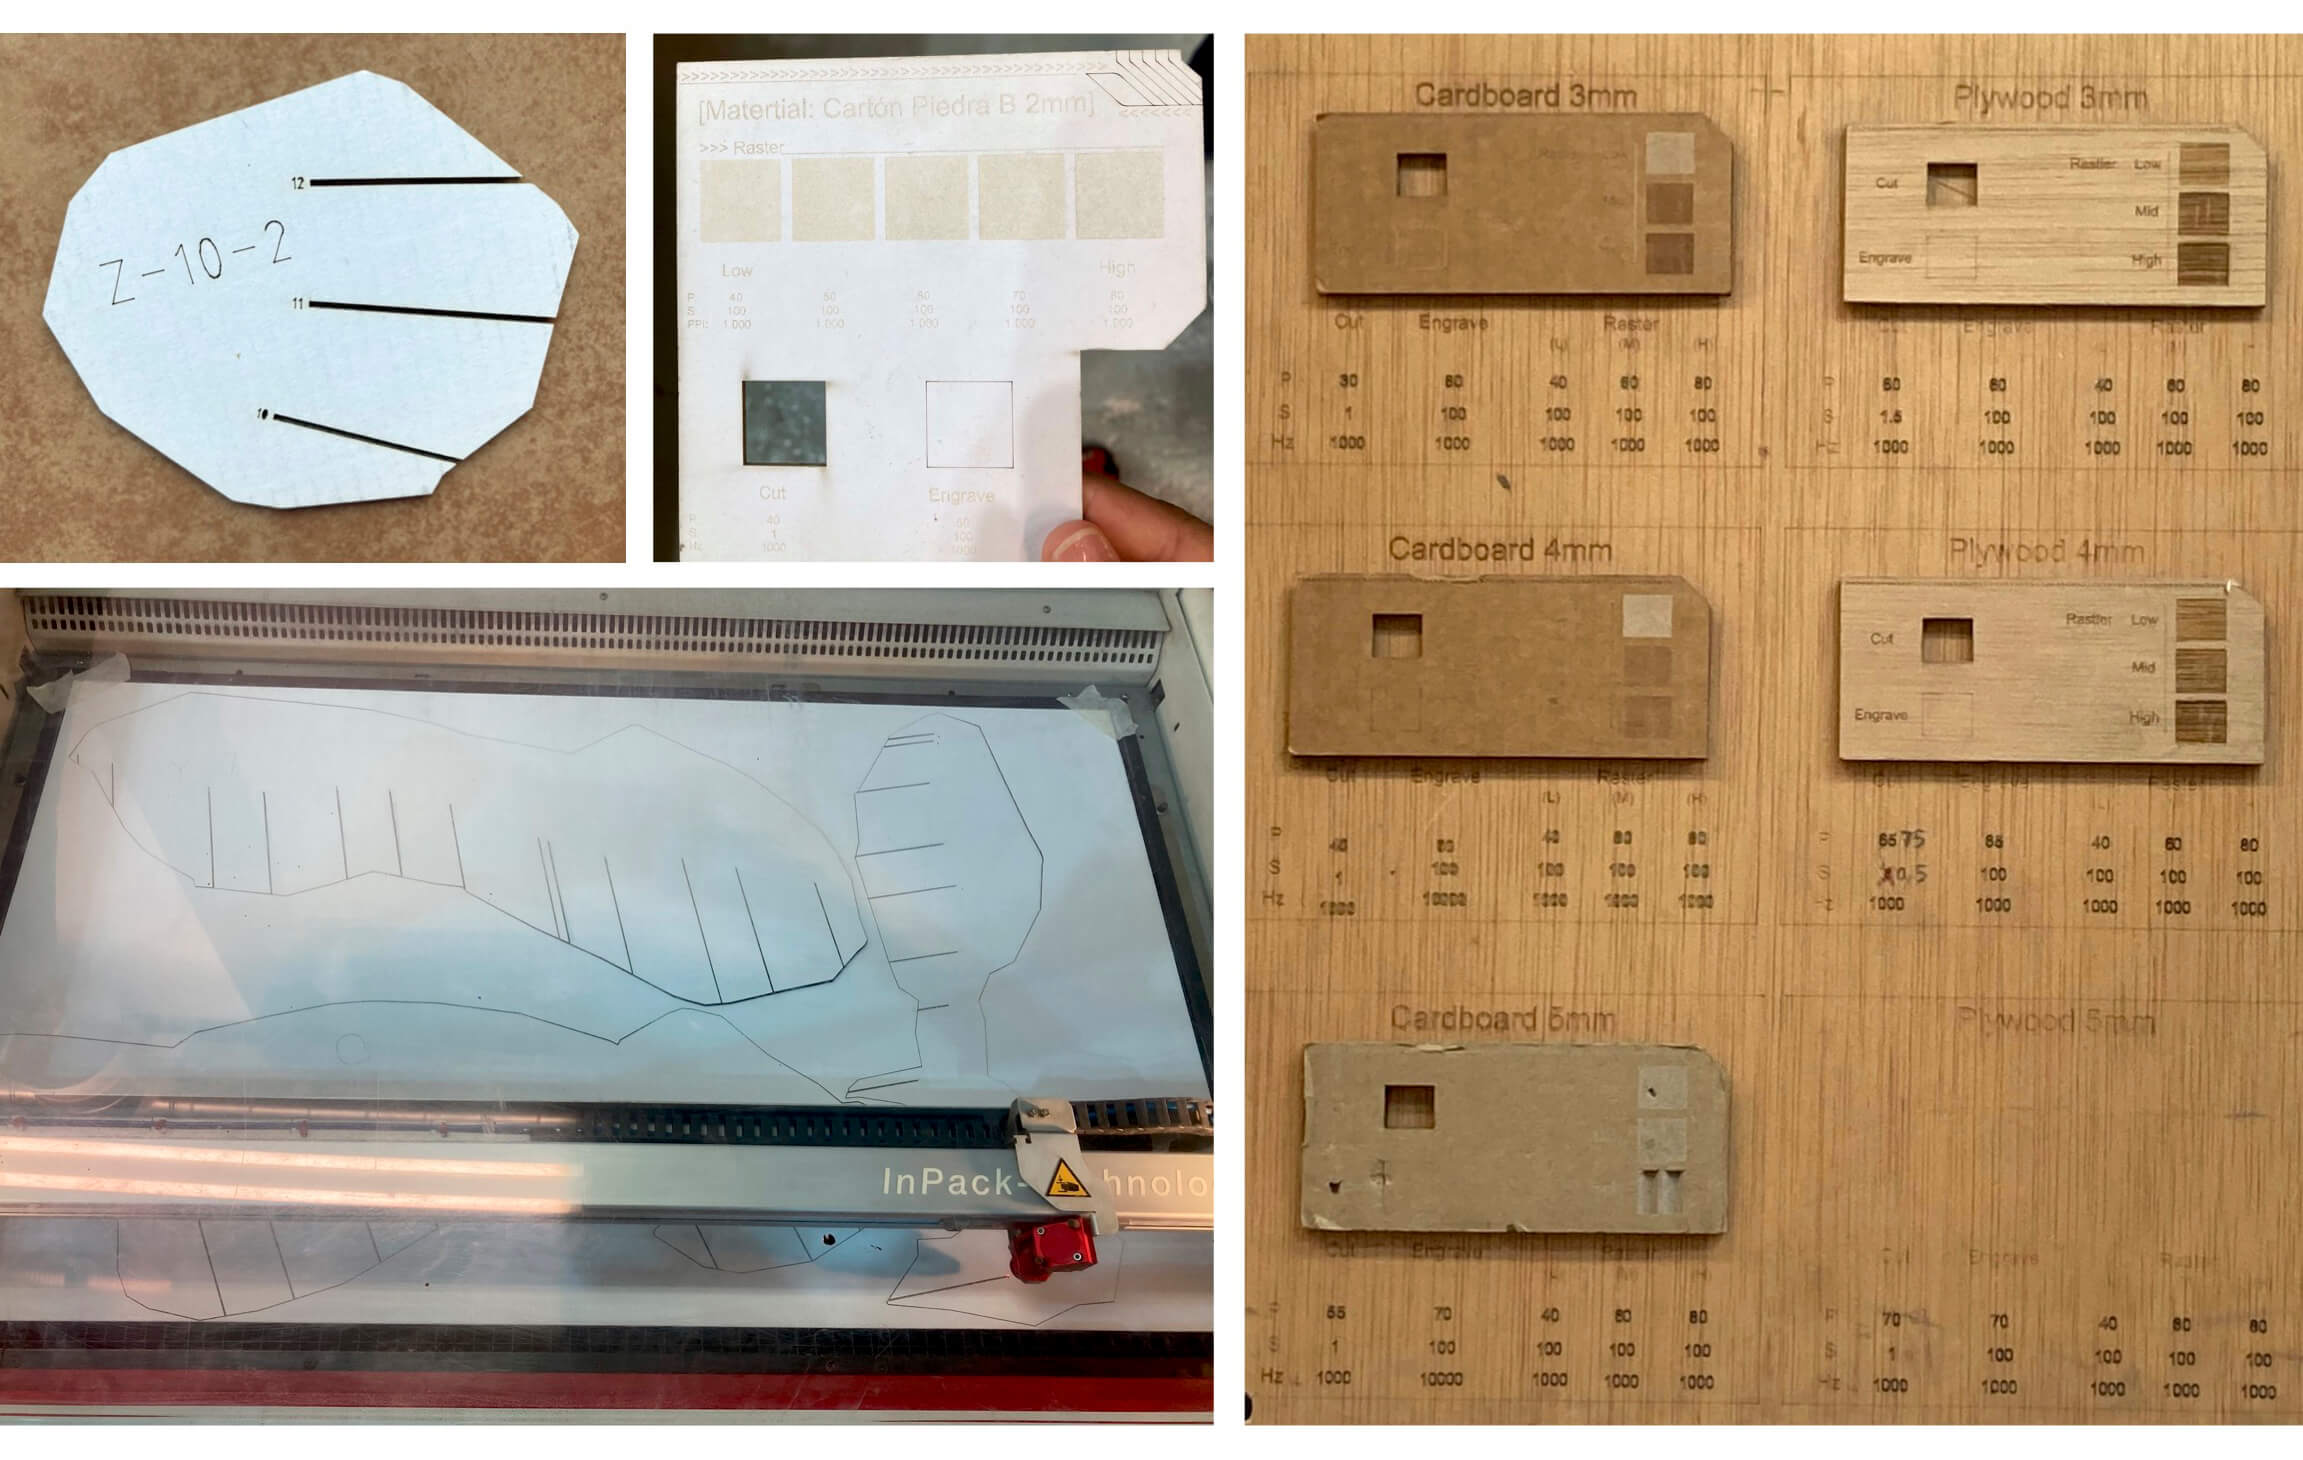
How the machine works:
Laser cutting cardboard de Emma
Construction and the result
REAL SIZE PUZZLE!
IT TOOK A WHILE...
Unfortunately, the thickness to fit each piece was too small, so before assembling I have to cut the pieces with a cutter to make them bigger. Because of the time, cutting another time wasn't an option. In the future, I will make sure which thickness the material has!

After I build the mannequin it was starting to be unstable because the cardboard wasn't enough thickness. So, I tried to figure out a base to stand the mannequin.
At last, the best solution to stabilize the figure was to put some horizontal cardboard pieces between the holes and made the structure more rigid. In addition, I add double cardboard in the lower pieces to don't let them bend.

DONE!
See you the following week!🙌