4. Molding
As I have exposed in the 3rd section, the best biomaterials characteristic that I am been working on are the Alginate and the Celulouse leather, so from now on I am going to cast with these 2 recipes to get the properties and the look that I am looking for the handbag.
On the other hand, for the trimming pieces I am going to use the Pine resin recipe.
Research
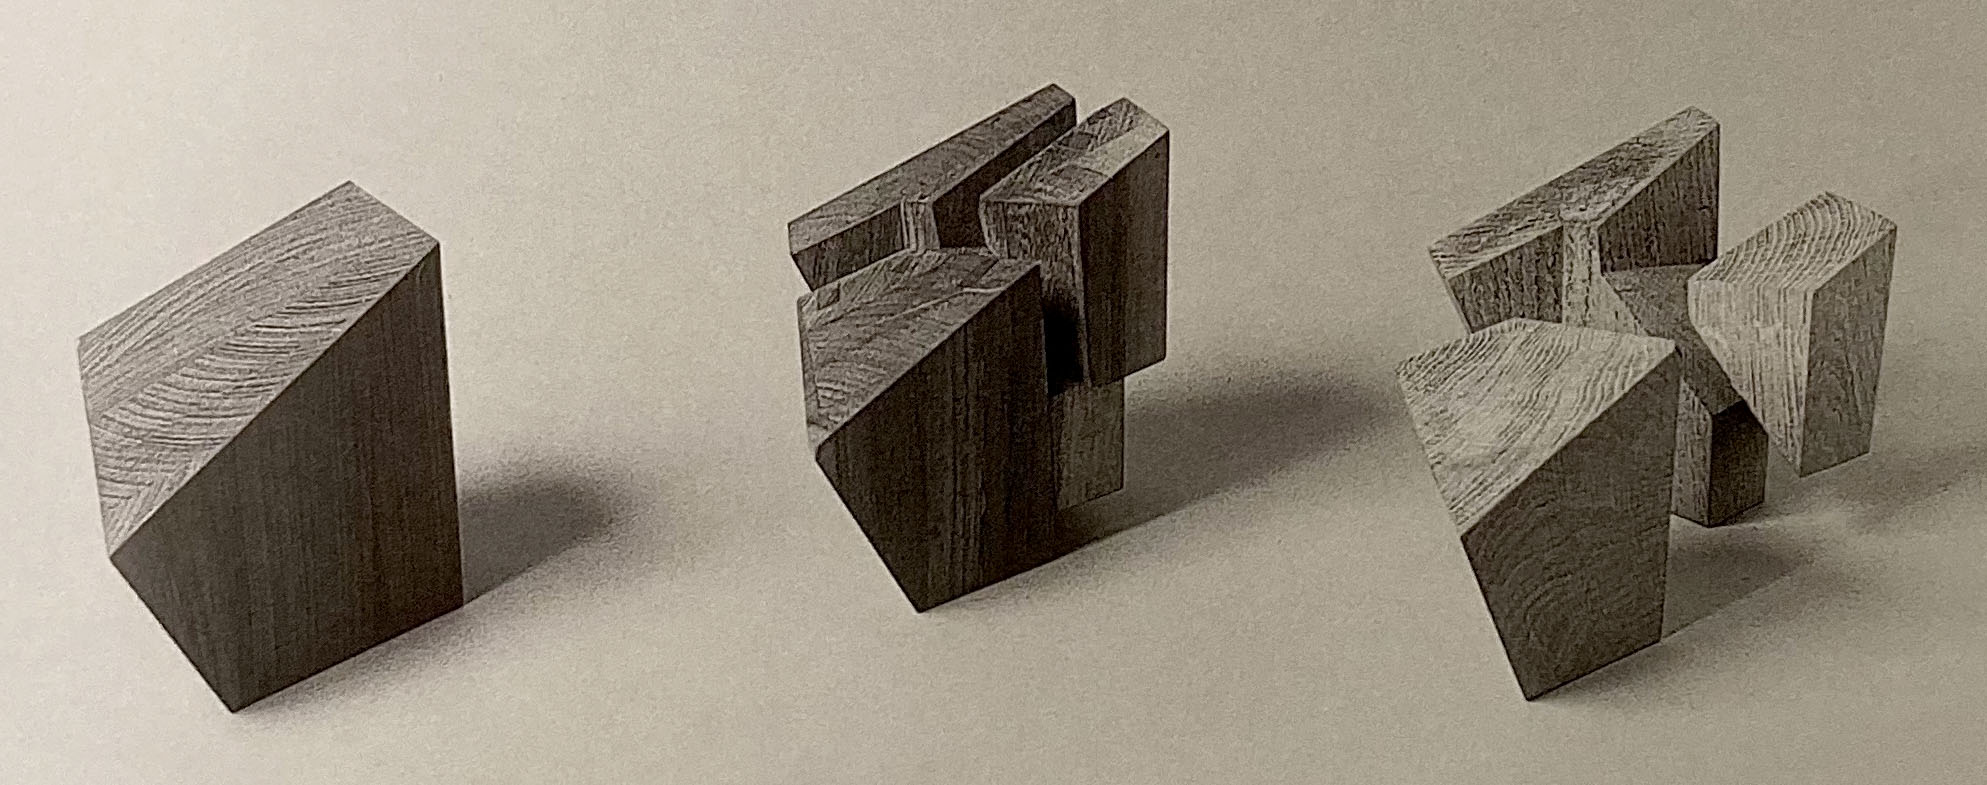
- Samuel Reis moldings and organic shapes. Take a look on his collection.
Machines
ROTATIONAL CASTING
Sketch of the machine to understand the functioning and the materials / pieces we could require to build it:
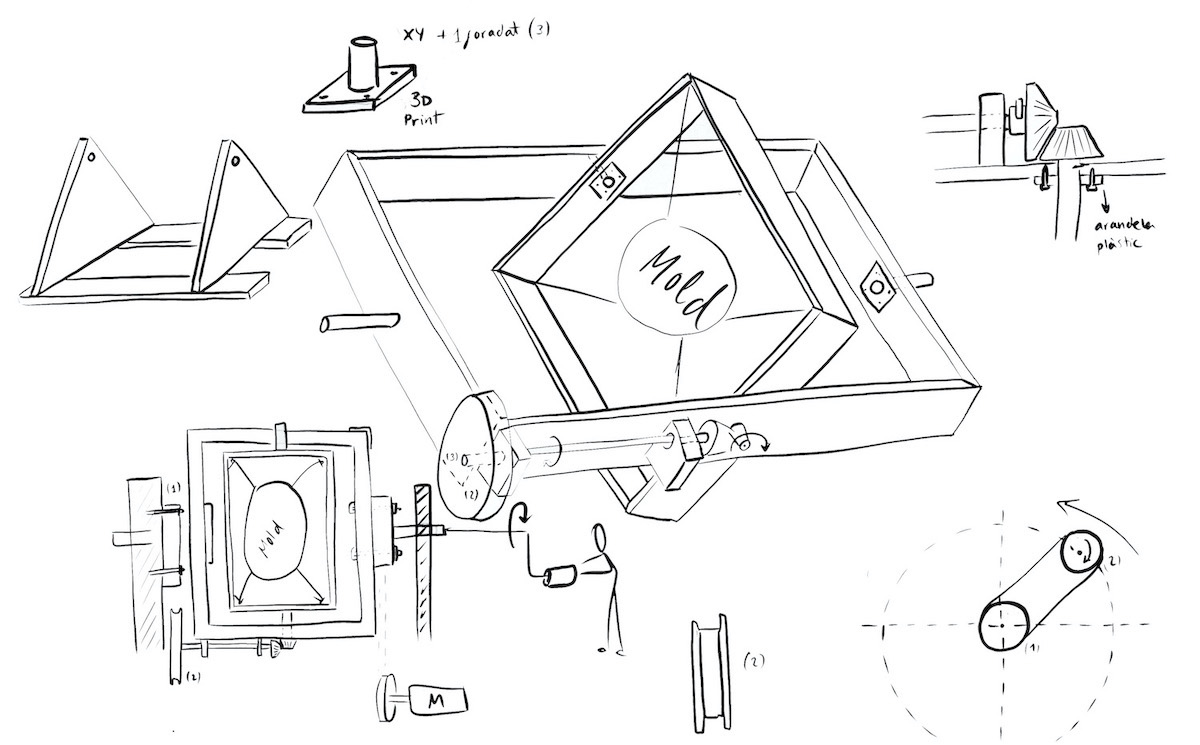
Finally I dismissed to build this machine cause my material wasn't that liquid, so with my cream texture I could place it on top of the mold without dripping.
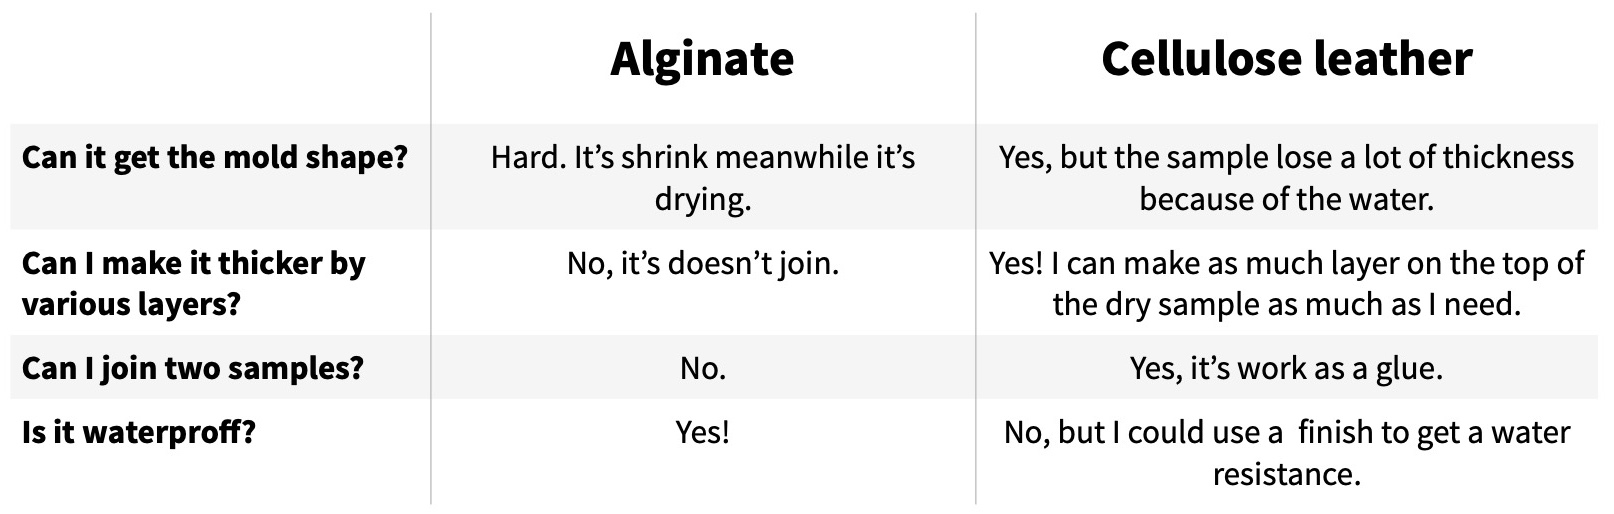
Comparation of the final samples
After I decided on the two final materials to work with:
- ALGINATE
- CELLULOUSE LEATHER
some questions about the caracteristiques come up:
- Could I join/sew two parts?
- How the cellulose leather / Alginate reacts with a wood mold? And a foam mold?
- Which mold is better to use? Positive or negative?
- Is the Biomaterial drip on the top of the mold? Can I paint different thin layers on the top of the mold?
- Is the Biomaterial resistant of high heat?
Time to make some fast tests!
I used the Cellulouse recipe with 5% of Talco and 5% of Clay.
Fortunately, the Cellulose leather allows the joining with another layer between the two pieces, additionally, you could paint different thin layers on top and get a solid result sample.
On the other hand, the Alginate doesn't let you make differenst layers and convert into one piece. The best surface to get the shape is the wrinkled foam.
Create a mold
First of all, I need to know which kind of mold works better so, we will mill a positive and a negative mold to test the Biomaterial.
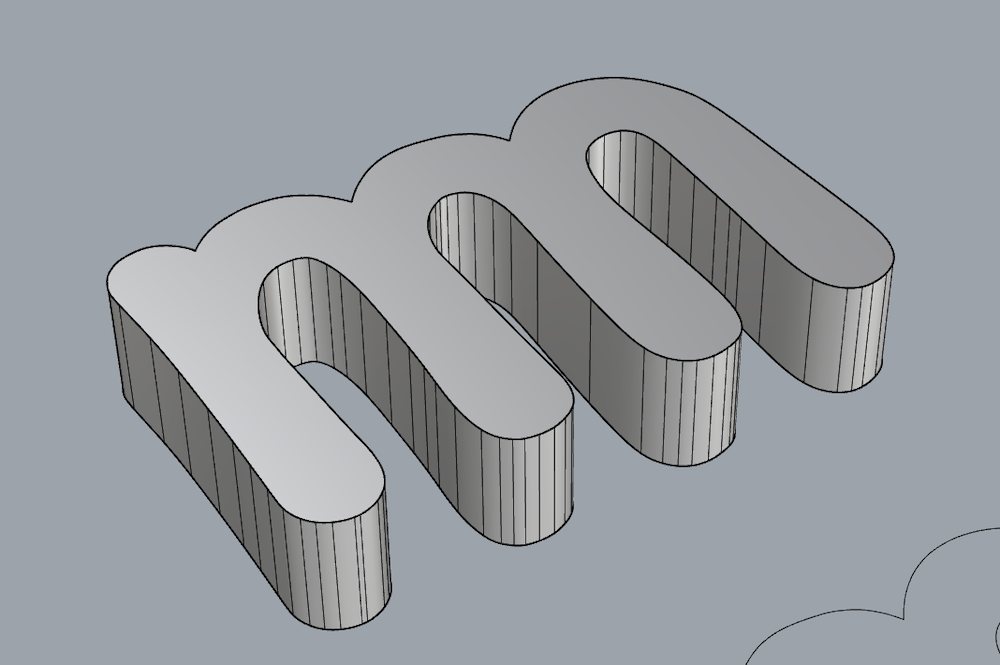
Rhinoceros
Let's design a easy mold with similar shapes that I will work for the final samples too, so create a U mold in Rhinoceros.
Useful commands:
- Revolt
- Extrude curve
- Smooth edge
- Boolean difference
- Cap
- Offset surface
- Bounding Box
Ready to send it to the CNC machine:
How to calculate the area of the "U" mold in Rhino to know how much material we will need?
Explode the mold, unroll the volume, and calculate the area. In this model we get 48301,5699mm2 of total surface to paint.
Material for the mold
The next step is to know which kind of material will be the mold so, check the options that we have in the FabLab and also work with both Biomaterial recipes.
In order to reduce the material for the mold I ideate an adaptable mold to get more applications and shapes in one base mold with removable parts, to change the handle, the dimensions of each bag, the shape of the bottom... So as a young handbag brand, you could get more models with fewer pieces to the mill.
- TESTING MOLD MATERIAL:
We test the Alginate and the Cellulose leather on the top of wood and foam material with various shapes to know which material gets the better results:
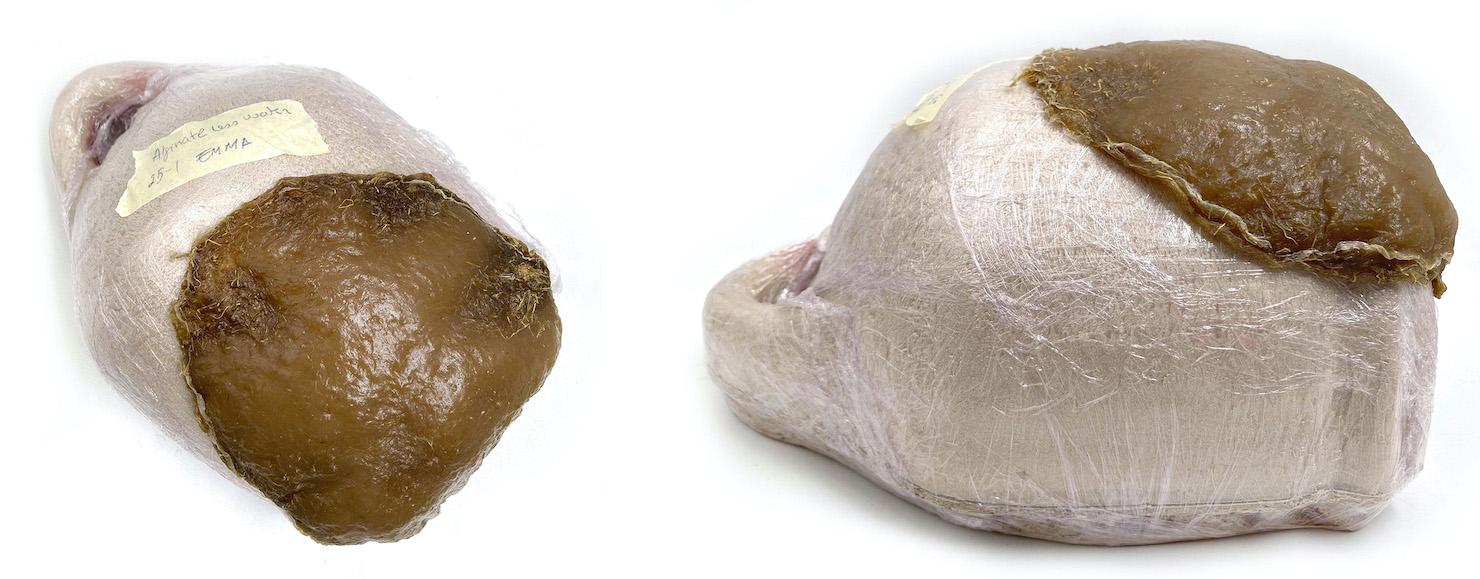
An example of Alginate in a wood-negative mold:
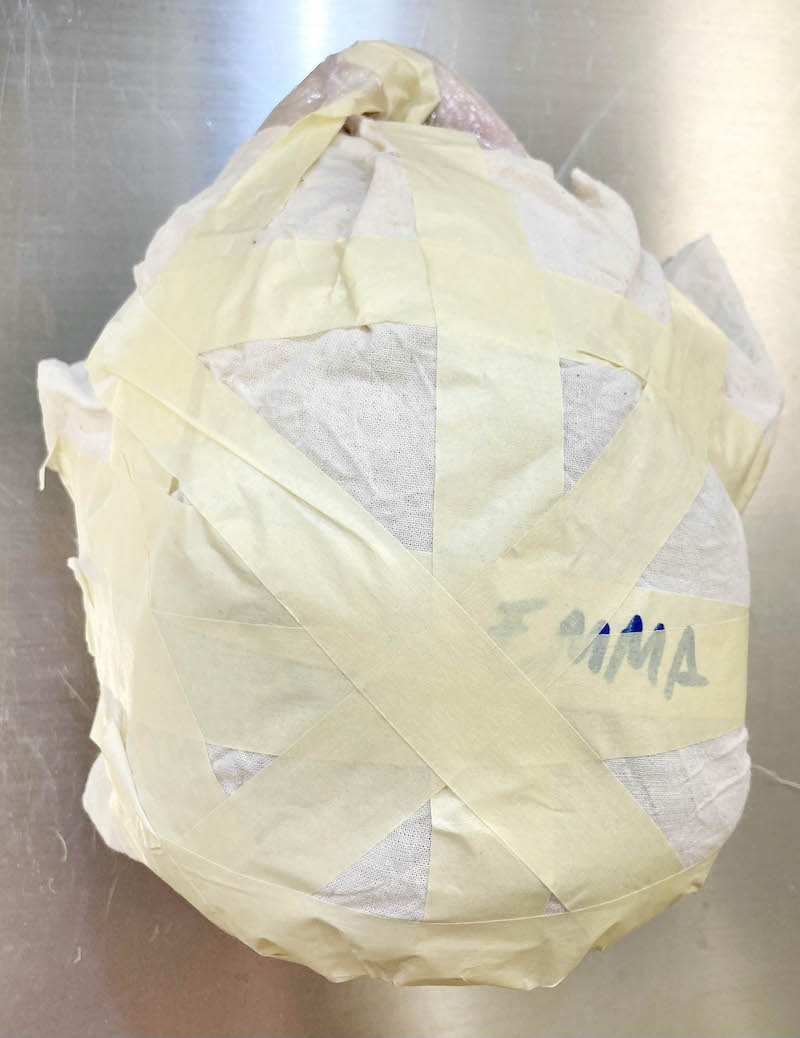
Test materials to mold de Emma
As a result,
The Celulouse leather with a positive foam mold is the best option.
Some properties and characteristics
FOAM:
-
SOPRA-XPS (a cellular foam, extruded polystyrene thermal in solution panel. 70% of it's recycled content)
-
Dimensions of each piece of foam: 60x120 cm 10cm of thikness.
-
The melt temperature of the foam material is around 73ºC however, I just need 50-60ºC to dry the cellulose leather in the oven.
ATTENTION: In case we create a mold bigger than 10cm we will need to cut the shape of the mold and after the CNC milling we will paste it with double tape or glue to get the final shape.
The CNC could work between 0cm to 15cm high.
BIOMATERIAL:
Moreover, I test some Pine resin recipes to find a sustainable alternative to the foam.

To calculate the volume of these samples I pour inside a water pot to know the difference.
-
Pine resin + Clay:
-
50g Pine resin
- 50g Clay
Final weight: 92.3g Volume: 70ml = 70.000mm3
This formula is not water resistant.
-
Pine resin + Eggs shells powder:
-
50g Pine Resin
- 108g Eggs shells powder
Final weight: 151g Volume: 100ml = 100.000mm3
-
Pine resin + Coffe:
-
50g Pine Resin
- 50g Coffe
Final weight: 95g Volume: 90ml = 90.000mm3
This sample will need more coffe powder.
TEST THE COMPOSITE IF CAN BE MILLED IN CNC:

It's hard to get good finishes because meanwhile, it's working the sample start melting, but this sample of 8mm thickness could be milled.
So as a conclusion, it could be a future option material to build a mold with the coffee powder or the eggs shells mixed with some pine resin and then cut the sheets in the CNC and joined melting between them to get the final 3D mold for the handbag. However this mold it's not going to be able to let it in the oven, so the drying process will be slow.
Another test I would like to try in the near future is with coffee powder compressed to create the mold. Cause, in that case, I could put it in the oven.
CNC
After the study of how the Biomaterial reacts on the surface, I could mill the first mold. As we see in the previous test, the best material to work with Cellulose leather is the foam.
Time to go to the milling machine!

We mill the positive and the negative mold to verify which one it's going to get better the organic shapes and is easy to remove from that bigger mold.
So, as we guess, the final mold that works with my Biomaterial is the POSITIVE shape!
Download the testing mold "U" here.
Testing cooking materials
After the molding test with the Cellulose leather recipe, I test with more samples to know how much fur I could go with the other samples and be able to mix between them or not. I need to start thinking about the possibilities that I have to design a real handbag collection from husks.
So,
How the material reacts when I try to mold it?
Paperhusks
Making and testing with a sheet of wet paperhusk on the top of a possitive wood mold.
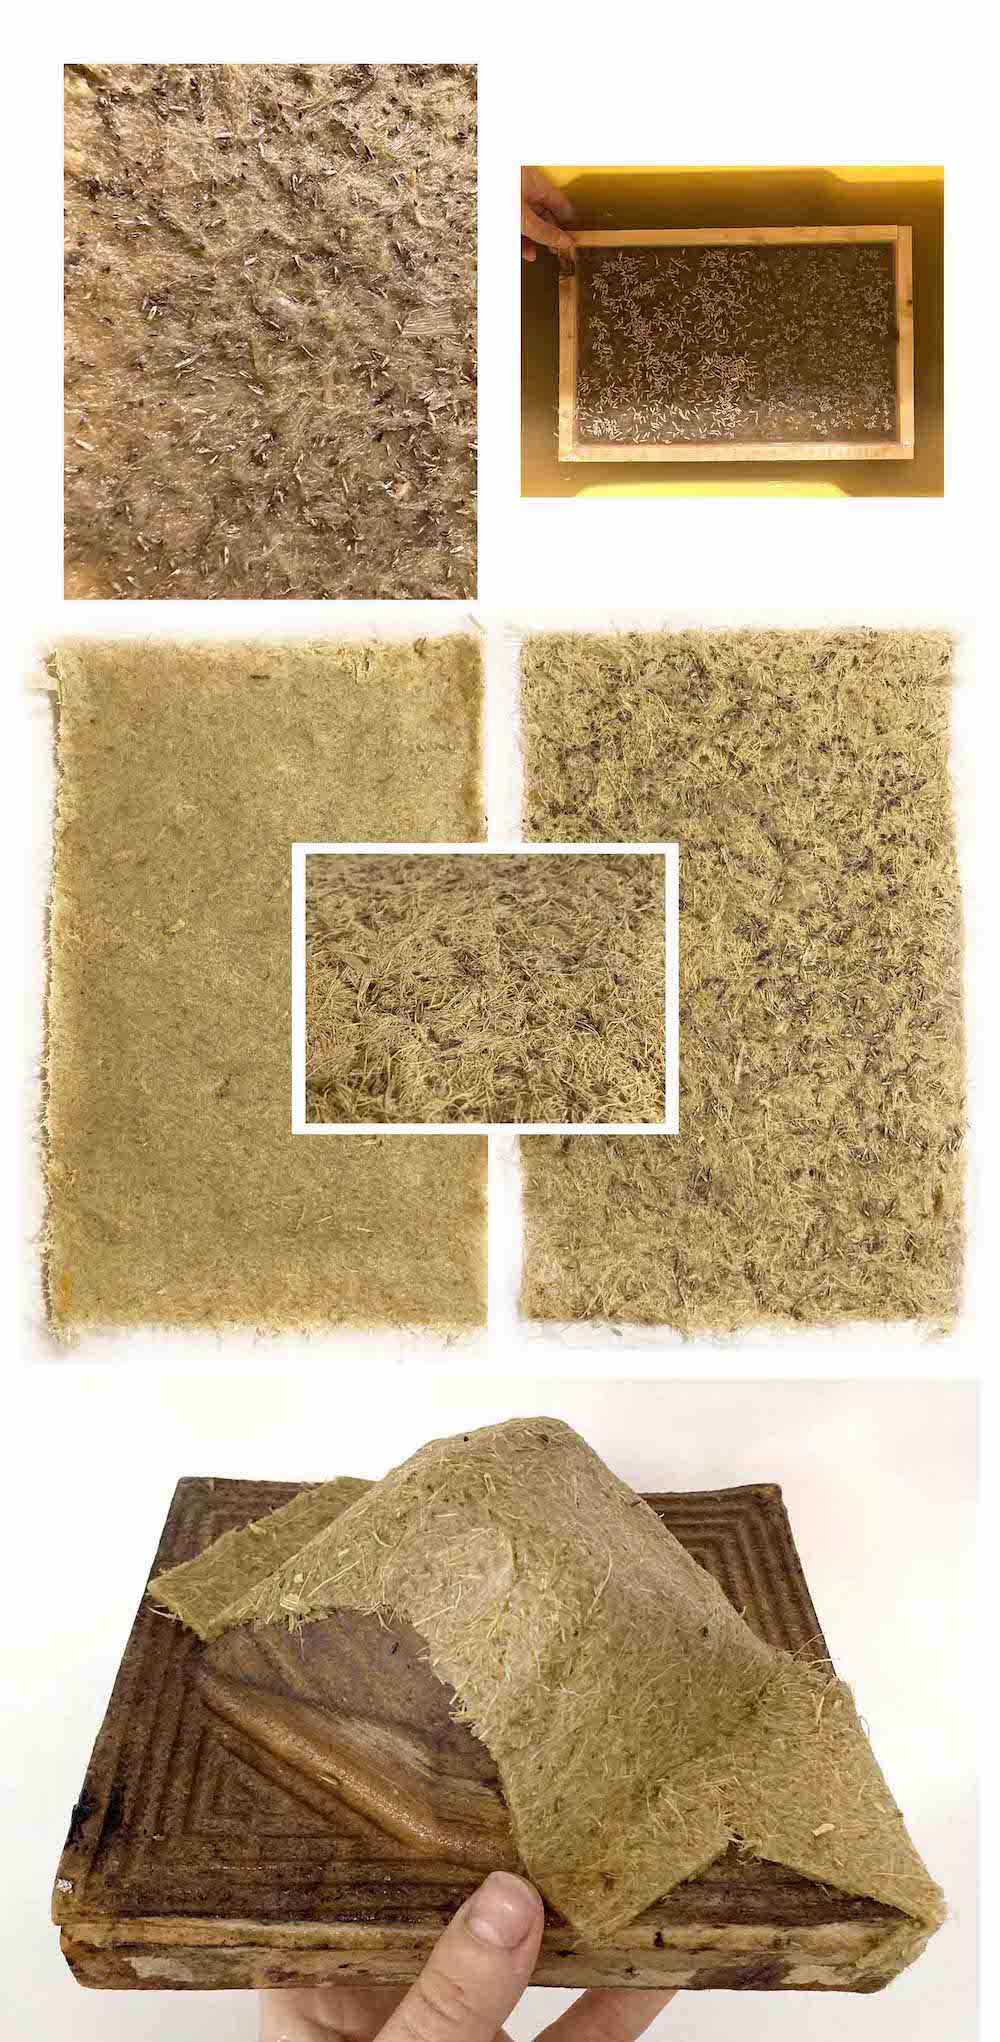
In this sample the paper sheet is thin so the molded shape is a little fragile for daily usage, however, the thickness of it we could increase it meanwhile making.
These sheets with seeds were planted in the grown to let them germinate, a new life! Check the final result in the Packaging section
Felt
Create a sheet of felt and then place it on the top of the mold and let it dry.
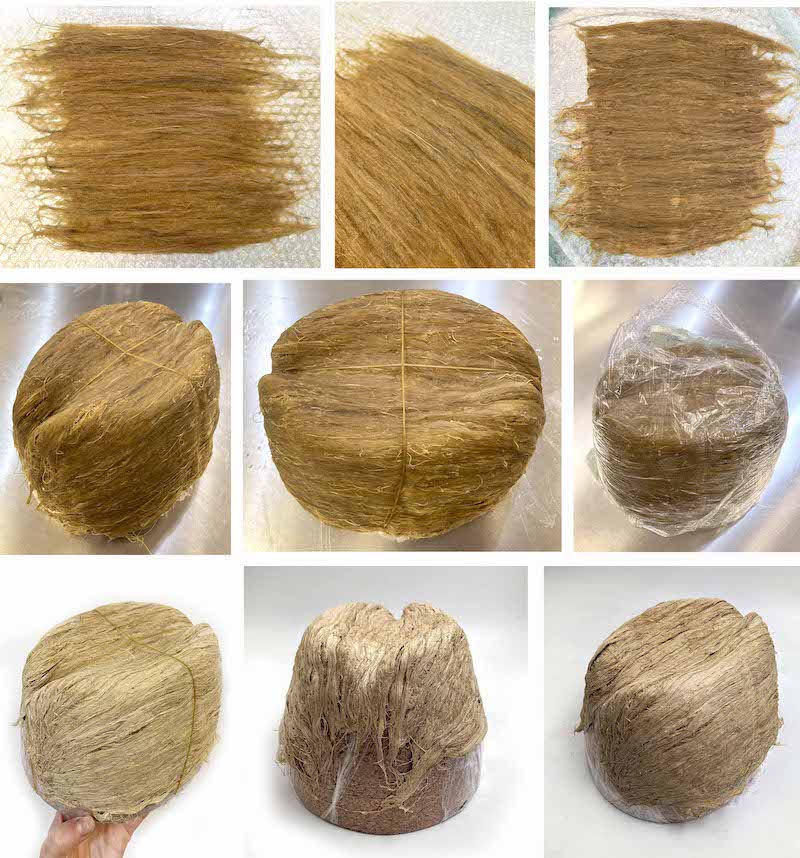
For this test, I used a hat cork mold.
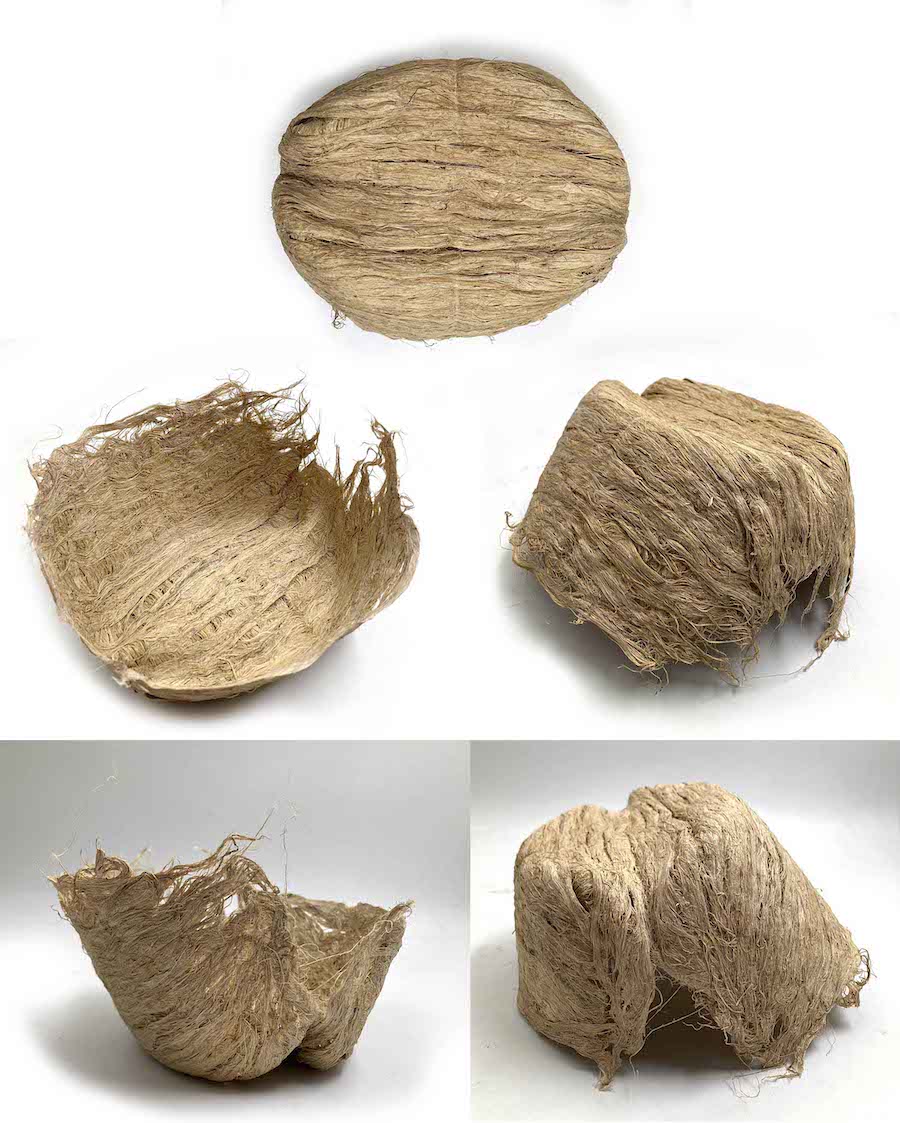
An interesting result to apply to any object and get a unique texture with the fibers of the corn husk.
Alginate
TRY 1:
Follow the Alginate base recipe and mix all the ingredients. Place some humidity long fibers as a way to get some resistance in a specific direction for the sample and get the shape. Consequently, pour on a flat mold with Calcium chloride spray.
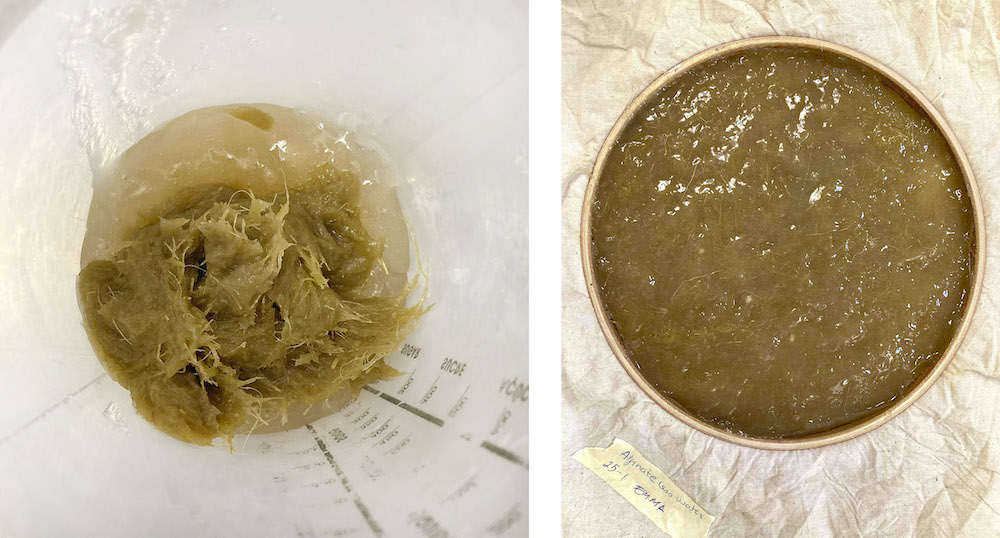
Move the sample carefully on the top of the mold. Press with some fabric to let it breathe and also get the shape.
Meanwhile the sample it's drying remove the fabric on the top to dry it easyly.
Mold Alginate samples it's so hard because it's shrunk a lot meanwhile it's drying, so we will need to consider a percentage of his reduction.
TRY 2:
Alginate with Casein to reduce the shrinking and deformation of the sample while it's drying.
Ingredients:
- 100g Alginate mix
- 5g Casein mix
- 10g Wet pulp
- Some long fibers to add on the top
Observations:
After I spray the thin layer sample with Calcium chloride I lay the sample on the top of the mold. I wrap the mold with a plastic film with holes to let it breathe meanwhile it's getting the shape. Remove as soon is possible to don't get fungi.
As a result, the sample didn't shrink as the first one, however, it's still unpredictable to know the final dimensions.
Cellulouse leather
TRY 1:
* 200ml WateR
* 76g Wet pulp
* 30ml CMC 3% Solved in water
* 35ml Glycerol (Glicerina)
* 20g Corn strach (Maizena)
* 5ml Vinegar
* Prepare 100ml water of 3% CMC:
* **ATTENTION: **The day before you want to cast the mix you will need to prepare the CMC solution.
* Add 3g CMC in 100 ml cold water.
* Mix with the bender. Let the mixture stand over the night. In the morning it has to be a viscose mix. For this recipe, we will use 30ml, so the rest we will store it.
- Measure the water in a bowl.
- Shred the dry pulp into small pieces and add to water. Let it a few minutes. Mix with the blender.
- Add the CMC solution, glycerol, cornstarch a vinegar one by one while you are mixing with the blender, add the water slowly while you are mixing all of them. Make sure there are not any lumps.
- Pour the mixture in to a pan.
- Heat slowly, stirring constantly until bubbles start to form. It’s a solid mass.
- Spread the solution as a 4-6mm layer in a mold or a tray, and cover with baking paper to remove when it’s dry.
- Dry in the oven at 50ºC during 7h.
- Remove the sample easily from the mold and place it on the positive mold. Place the wettest side of the material in the part we need more detail. Do not forget to lay the fabric between the sample.
- Let the sample between the positive and the negative mold overnight.
- The following day takes out the negative part of the mold to let it dry easily.
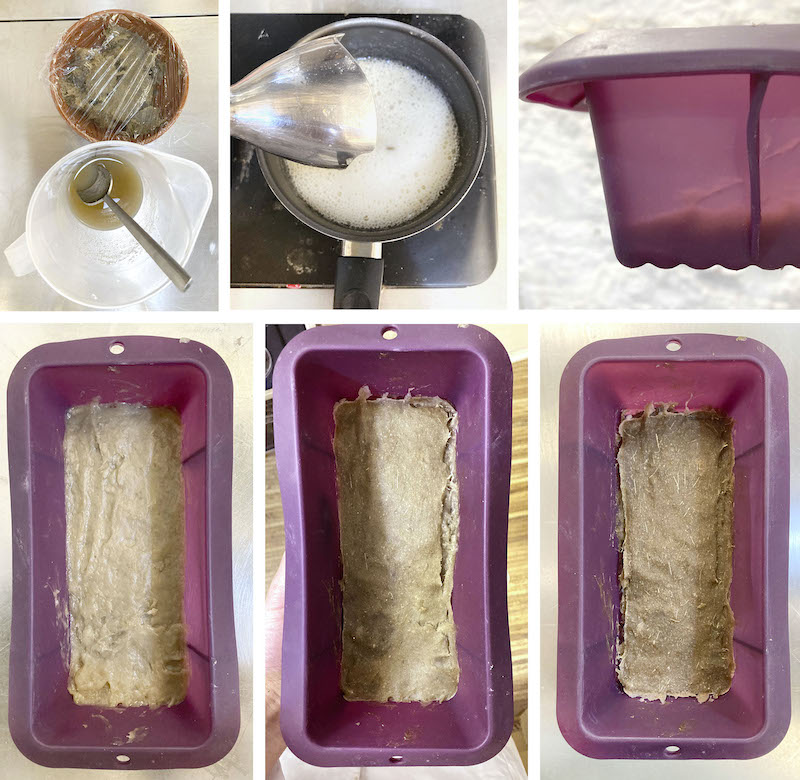
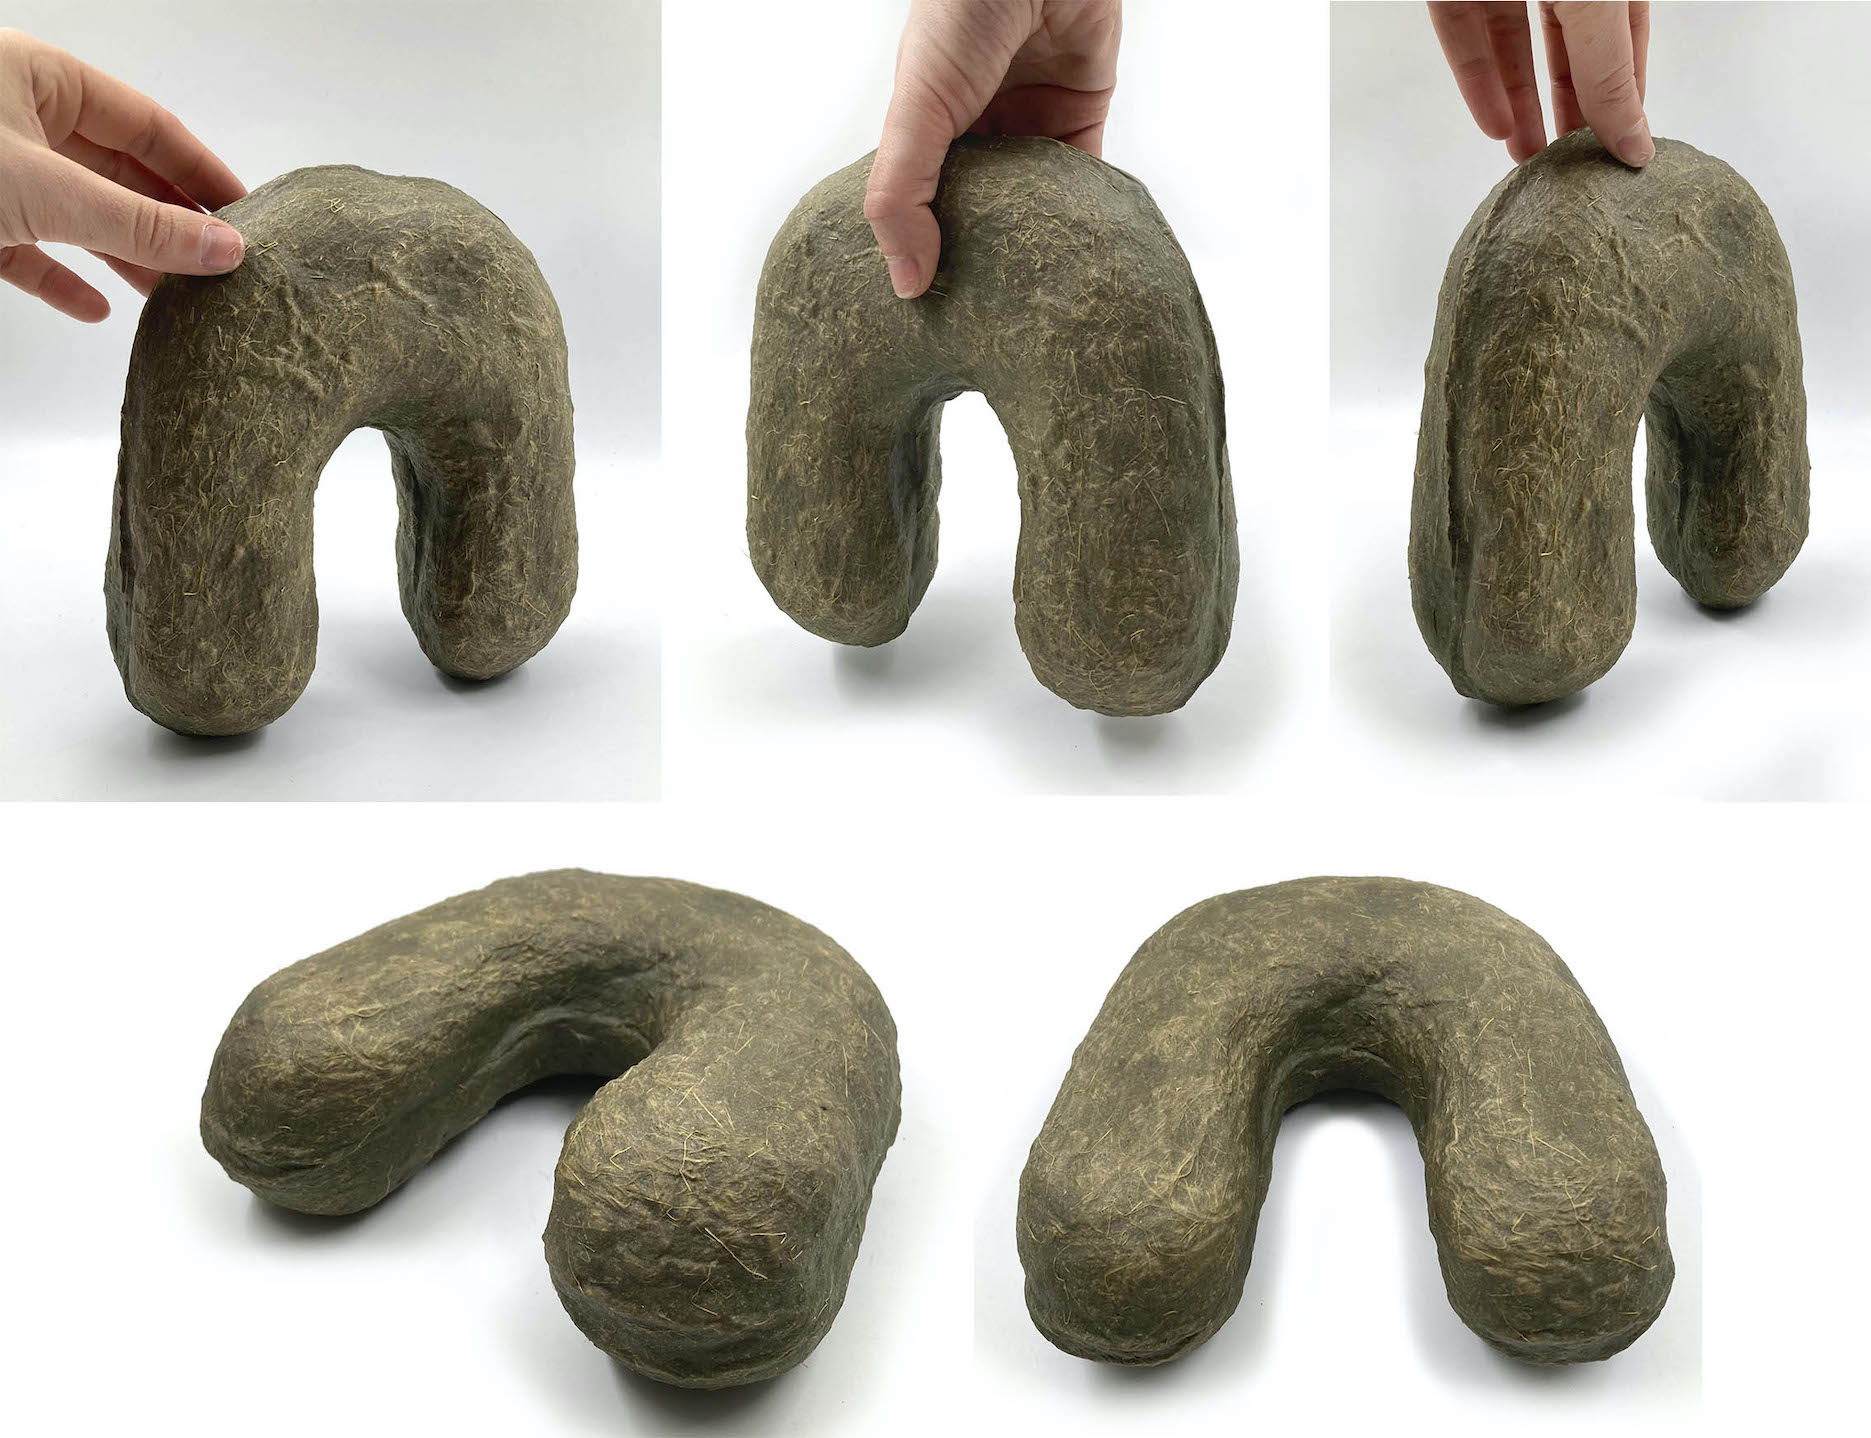
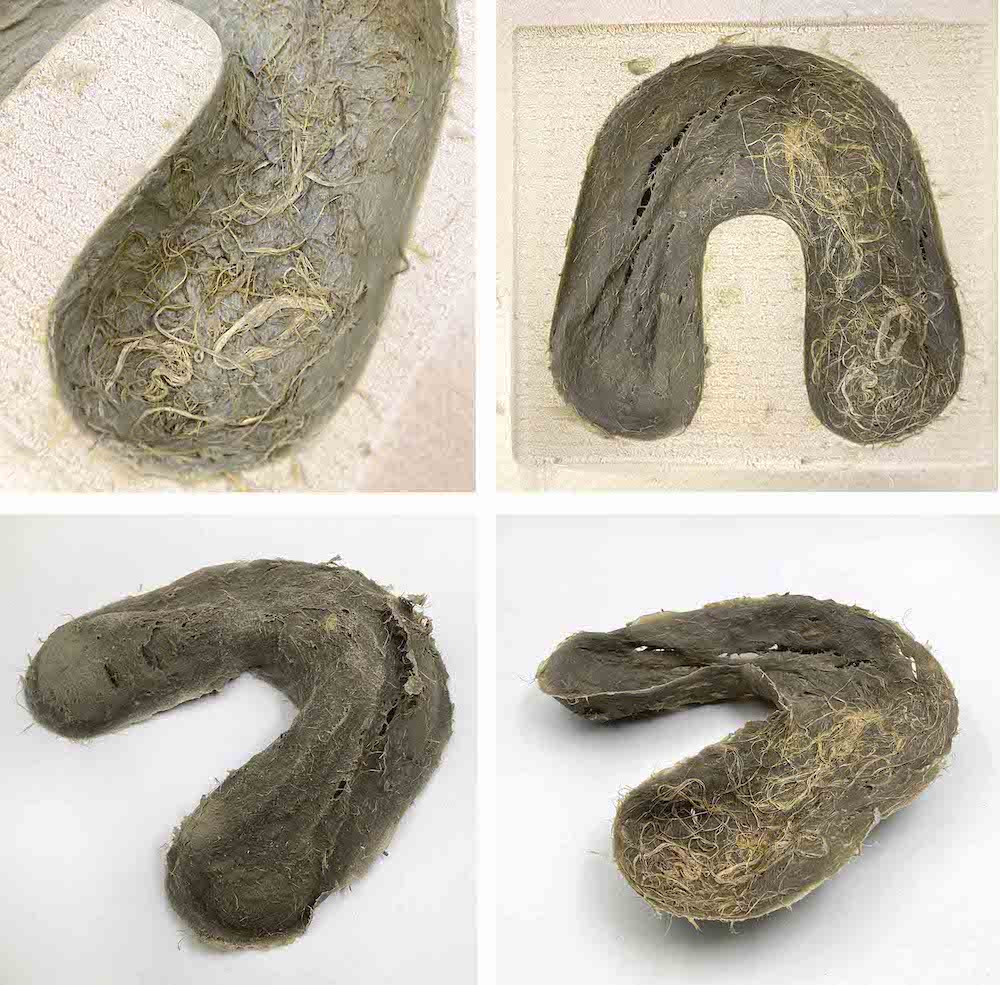
After letting the sample dry the surface in the oven, I remove from the silicone mold to the top of the wood mold and place the positive and the negative mold pieces.
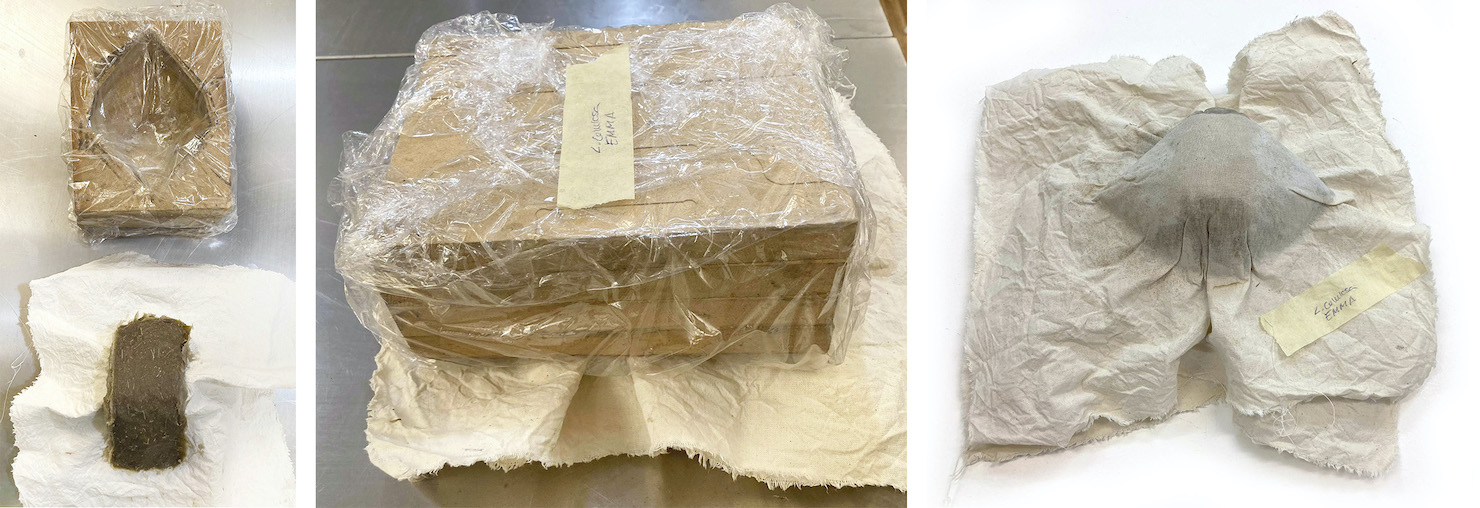
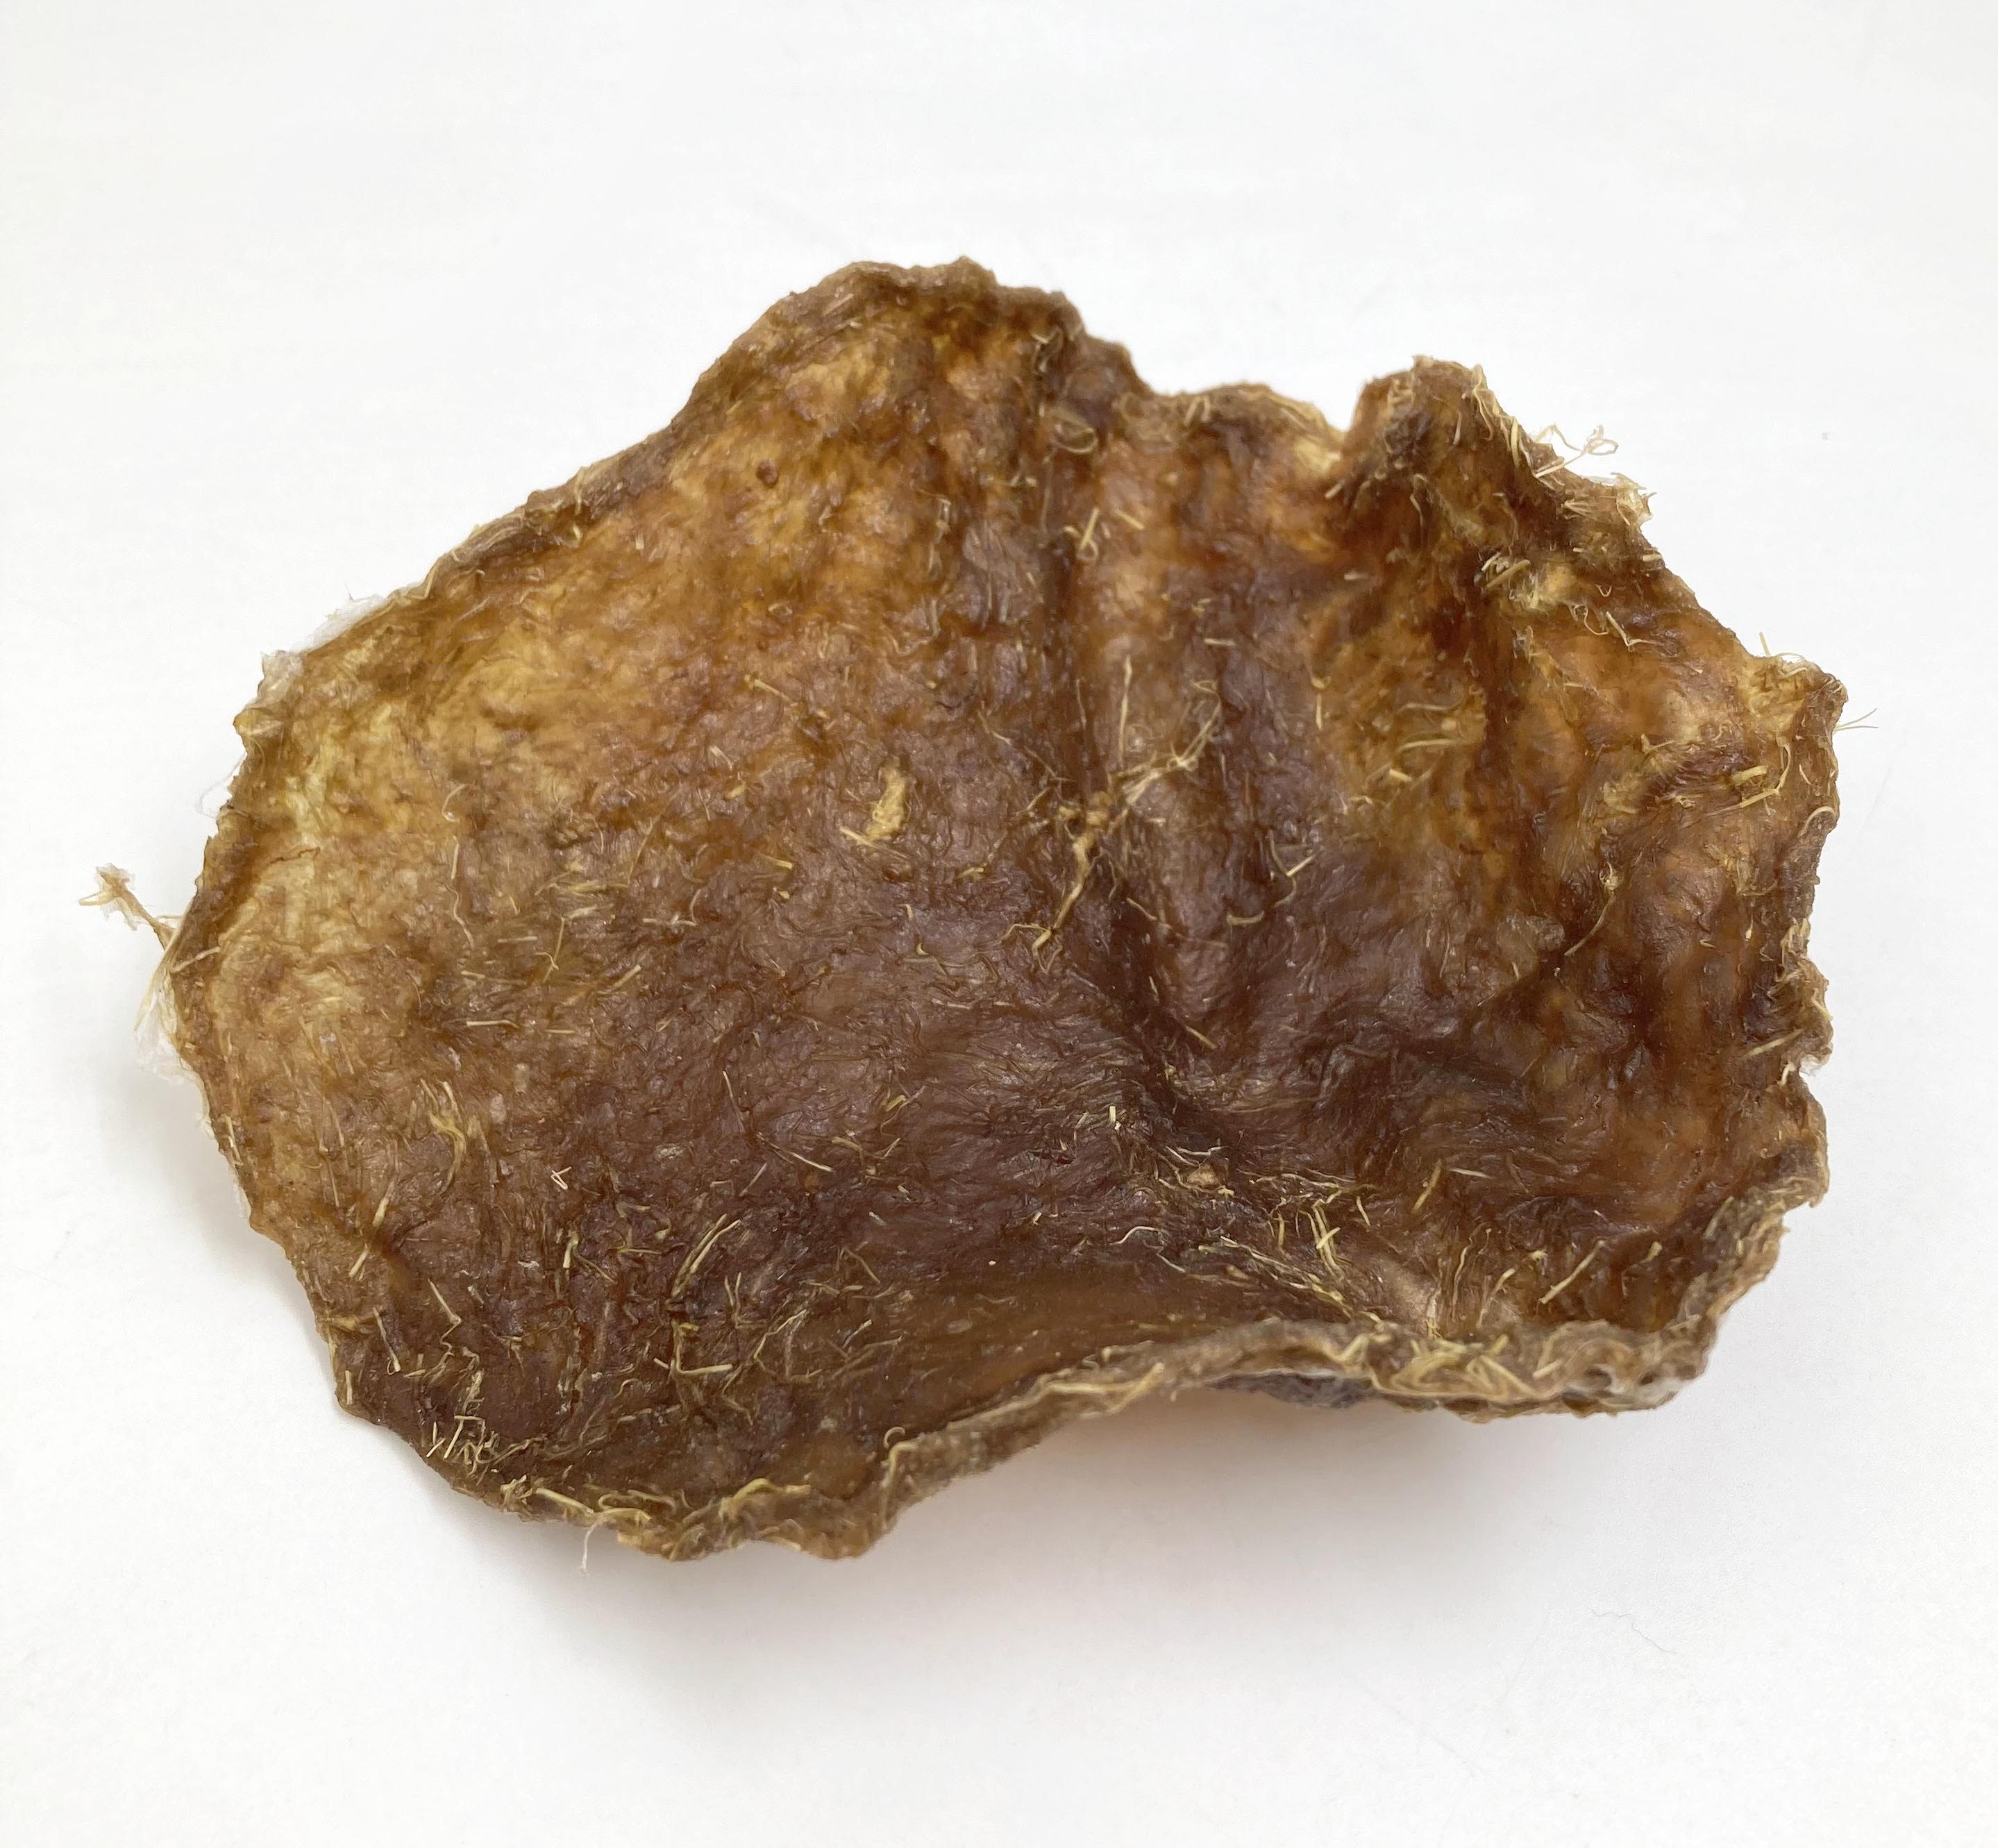
Final result:
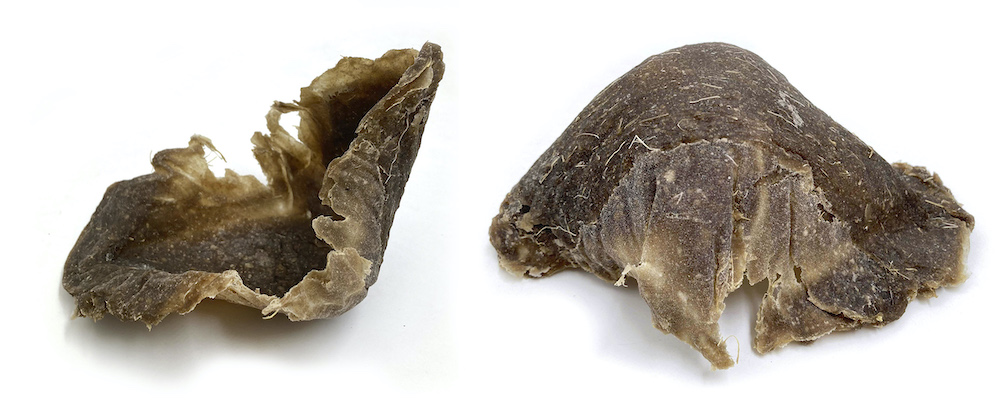
The cellulose leather gets the shape but it looks like a little monster! I need to try with another method to get the shape with a better texture and look.
TRY 2:
We are going to use the Test 4 recipe with 21.5% more drain wet pulp + long fibers.
So, using 130g of Cellulose leather + 5% Talco + 5% Clay plus 28g of drain pulp (21,5%) we get 25000.0000mm2 surface.
Let's calculate how much material I will need to get the "U" mold:
Remember that the total surface of our mold is: 48301,5699mm2.
So we will need:
- 251,168163g of Cellulose leather + 5% Talco + 5% Clay
- 54.09g of drain wet pulp
* 103,87ml Water
* 51,94g Wet pulp
* 31,16g CMC solution
- 18,18ml Glycerin
- 20,77g Corn Starch
- 5,2ml Vinegar
- 5% Talco
- 5% Green Clay
- Some humidity long brush fibers boiled in Sodium Carbonate
* Mix all the ingredients one by one with the blender. Make sure to not have any lump in the mixture.
* Pour in the pot and heat it in the electric stove until it creates bubbles and you get a dense mass.
* Add some Vaselina in the foam mold.
- Paint the mold with the spoon or you fingers the first layer.
- Place some long fibers around the shape.
- Add another thin layer on the top to fix the fibers. Make sure to cover all surfaces.
- Let the sample in the oven at 60ºC for 7h. Then let it dry in the room.
- The following day you could remove the sample from the mold. In case there are some gaps you could repaint the sample with more Cellulouse leather mix and let it dry.
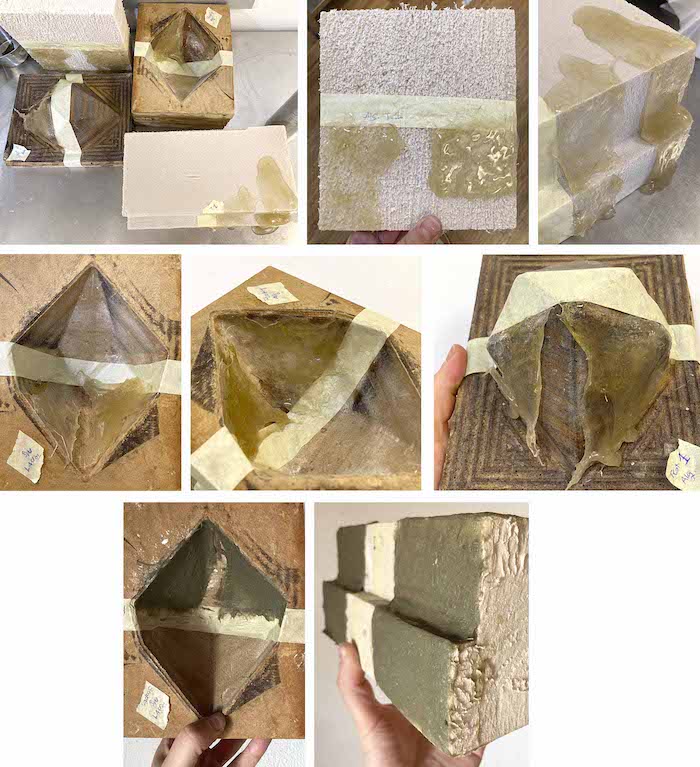
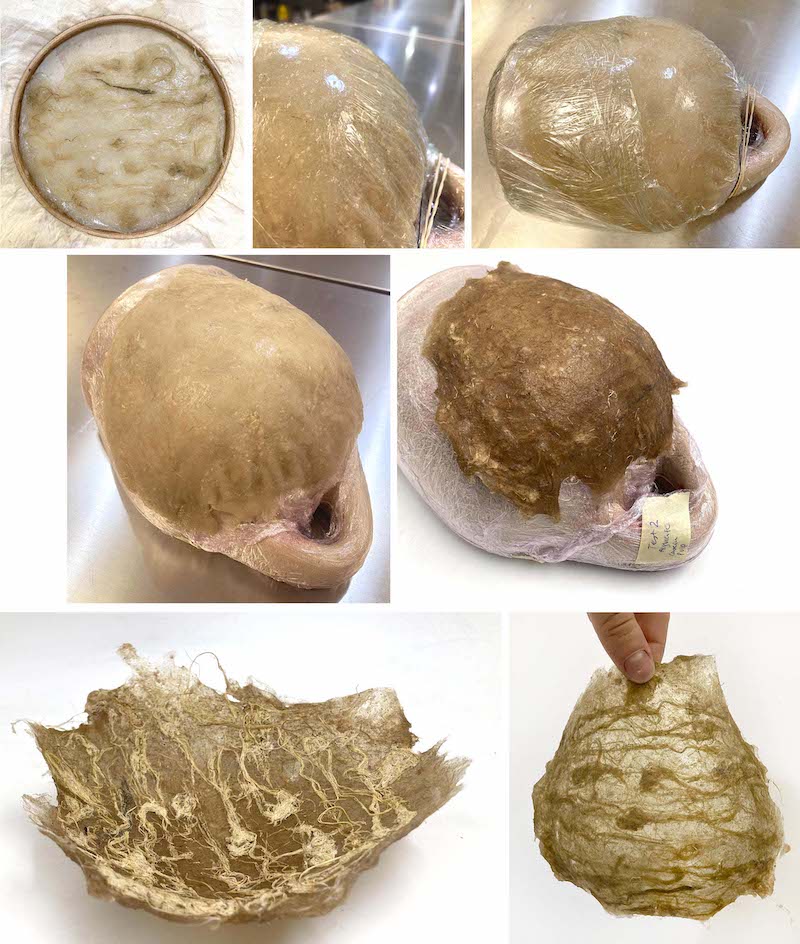
PROCESS:
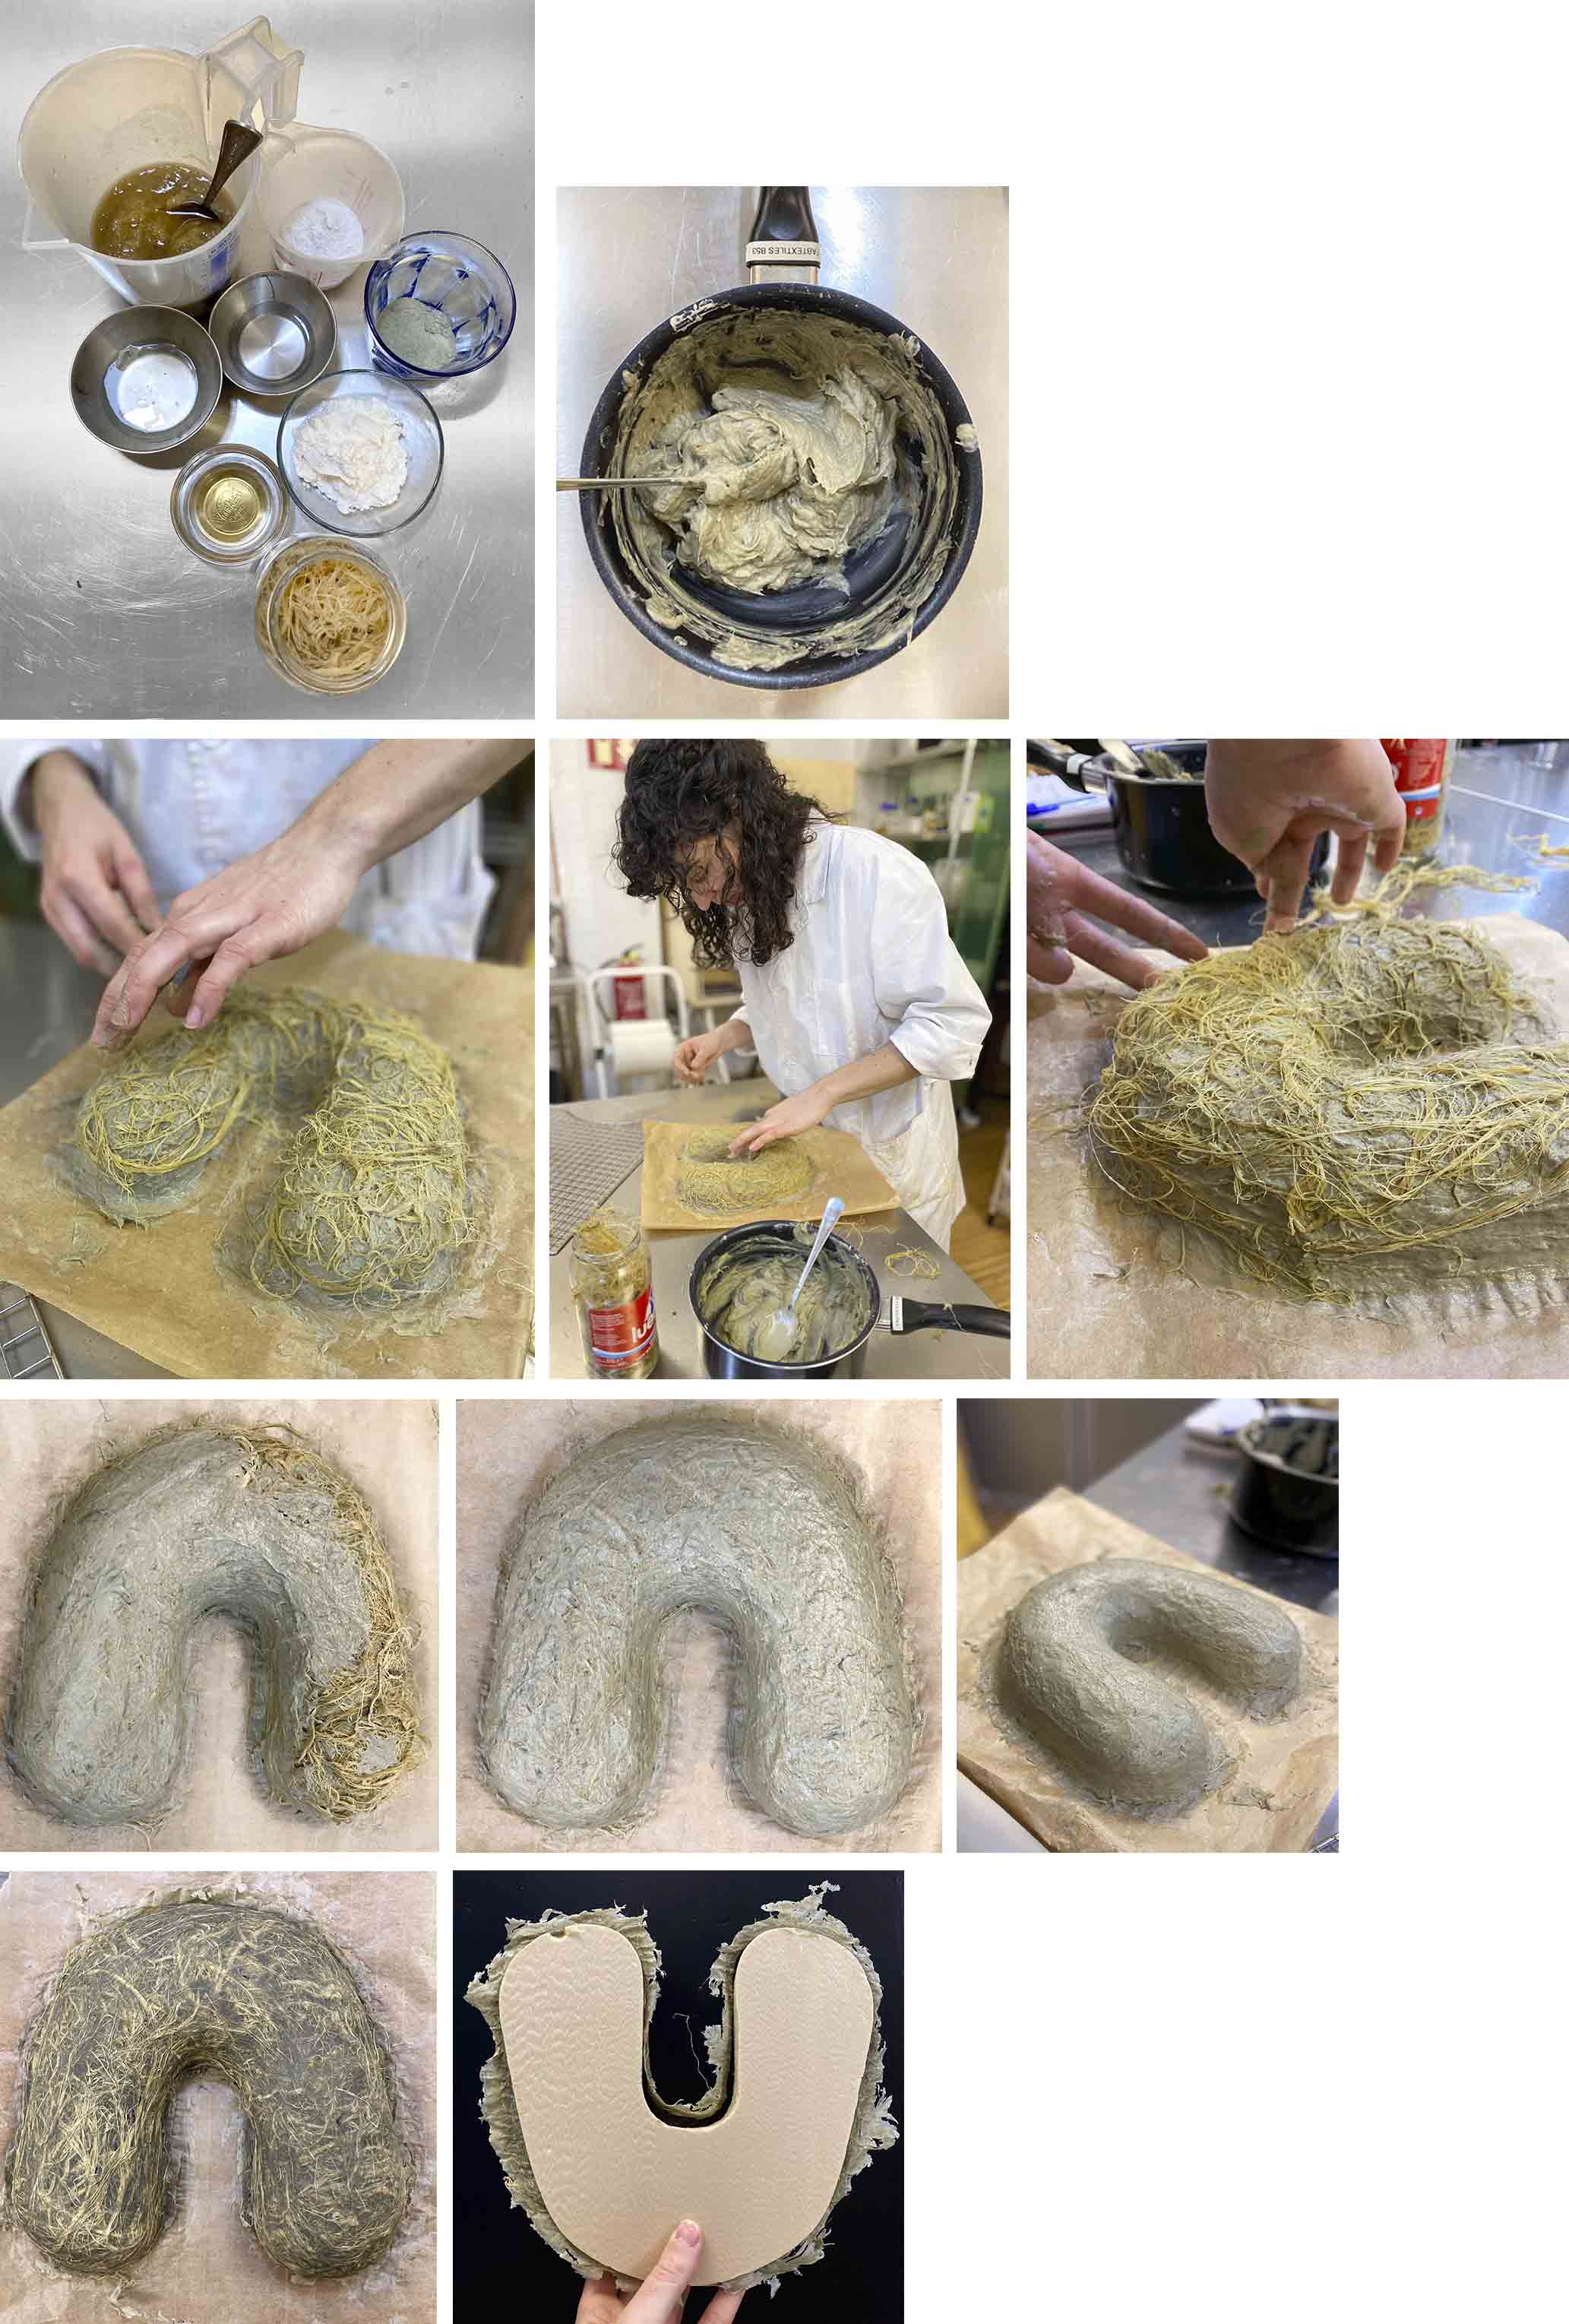
Texture:
Placing the last layer:
Observations:
I test the positive and negative mold. As we expected the positive one let the Biomaterial get the shape, however the negative while it's drying shrinks and doesn't get the whole shape of the mold.
POSITIVE MOLD:
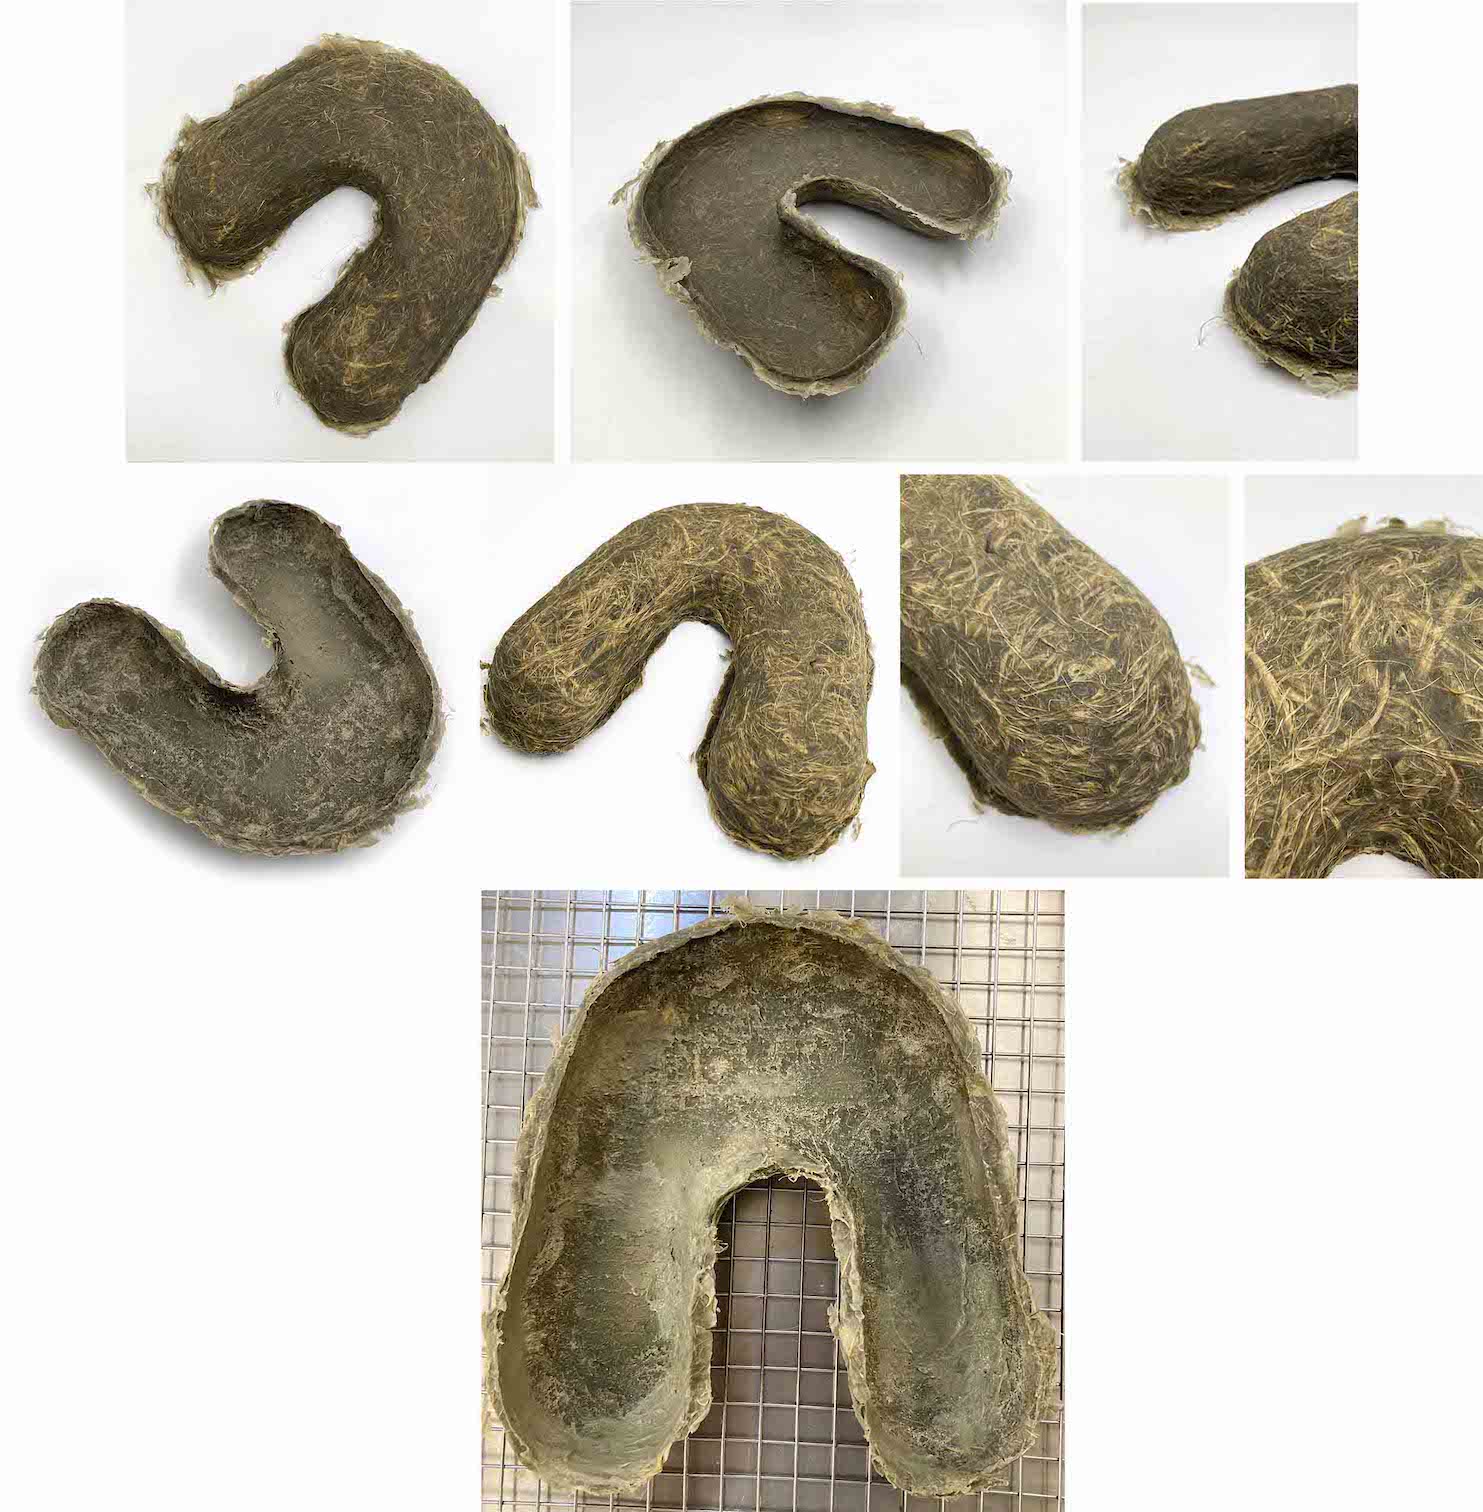
If the sample has some holes or the exterior/interior texture is not smooth, you could do another layer on top of the dry shape.
Then I join the both sides with the same recepie.
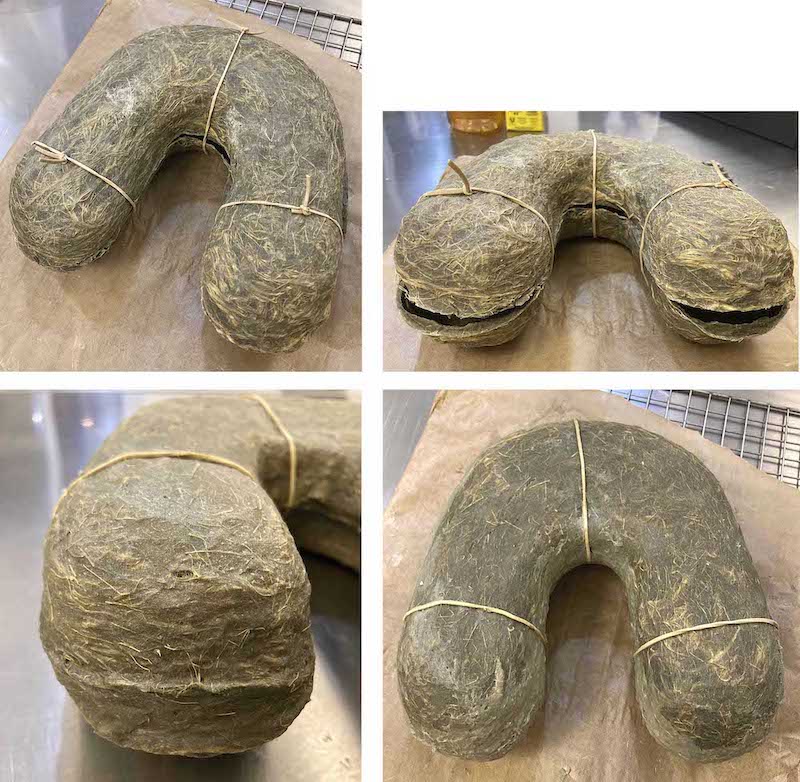
COMPONENTS:
- CL strong (150g x 3 layers)
COOKING TIME: 2h
DRYING TIME: 16h
And the final result!
So happy and a big relief to arrive here in just 3 months so now, I could continue to the next step, the handbag!
Well...
and the
NEGATIVE MOLD:
That's the result:
A failure...
Acetone
An other option to create a mold is to print the shape in the 3D printer with hips or PVA. Then cast the Biomaterial on the top and after the dry sample is poured into a pot full of acetone or a solution of water and lemon. The inside mold will be dissolved.
With this technique, you can create any shape without any joining required. In case, it's a compact shape let a little hole pour inside the acetone to dissolve the mold.
To know if this technique could be an option I tested if the Cellulose leather and the Alginate resist the Acetone:
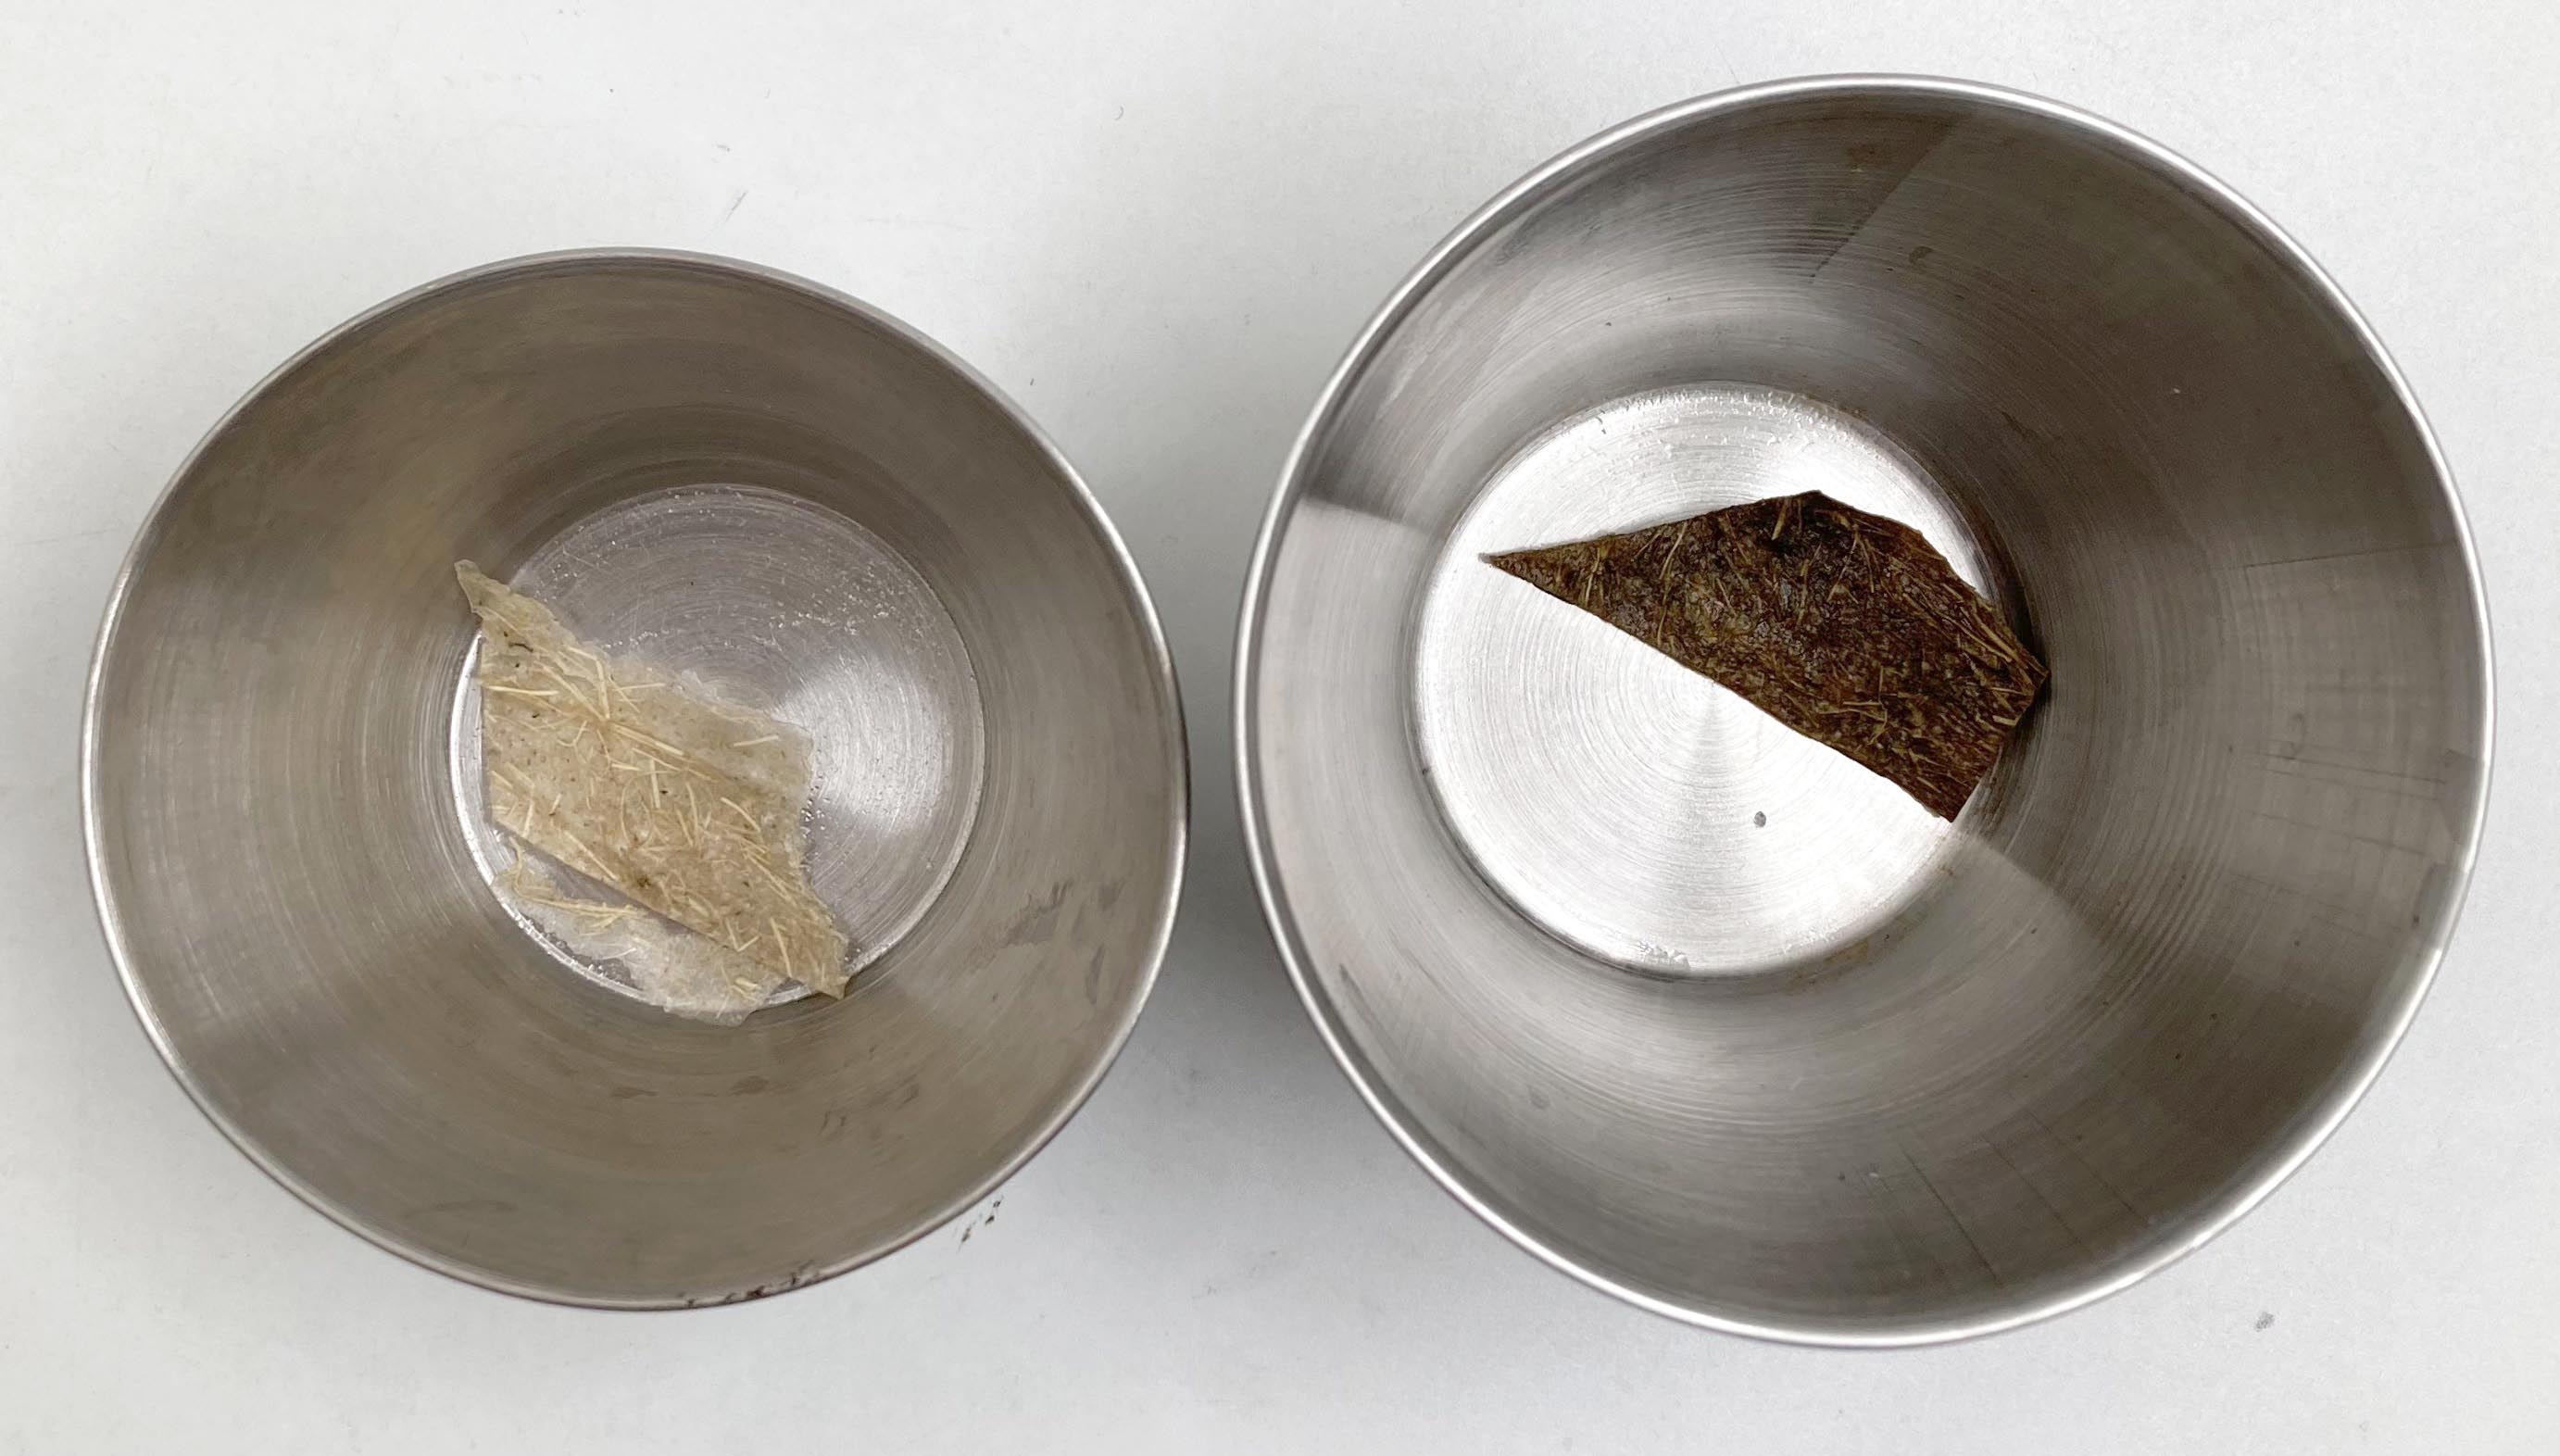
So both of them could be molded with this technique because non of them reacts to it.
Some inspiration to use this technique is the Julia Koerner 3D printed bag.
Molding hard shapes
3d logo in pine resin
Rhinoceros:
Extrude the line of the logo and round the edges to get the volume of the shape more organic.
Export in OBJ. or STL. format.
Printing:
For the printer settings I use the same as I use for the Plugs of the Vacuum machine.
Dimensions: 5x3 cm
Create a silicone mold:
Ecoflex Silicone recomended:
- 00-30
- 00-35
PREPARATION:
- First of all, we need to calculate the volume of silicone we will need to cover the logo in the pot (cmd Volume). Go to Unit Converter to change the mm3 to a ml.
- Divide the result into two parts. Remember to get the silicone you should mix parts A and B in equal proportions.
- Mix properly A and B. Be careful to do not to create bubbles.
- Pour the mix into the pot with the logo on the bottom.
- Let them dry for 1 day (The dry time could change depending on the brand/type of silicone, so read the instructions).
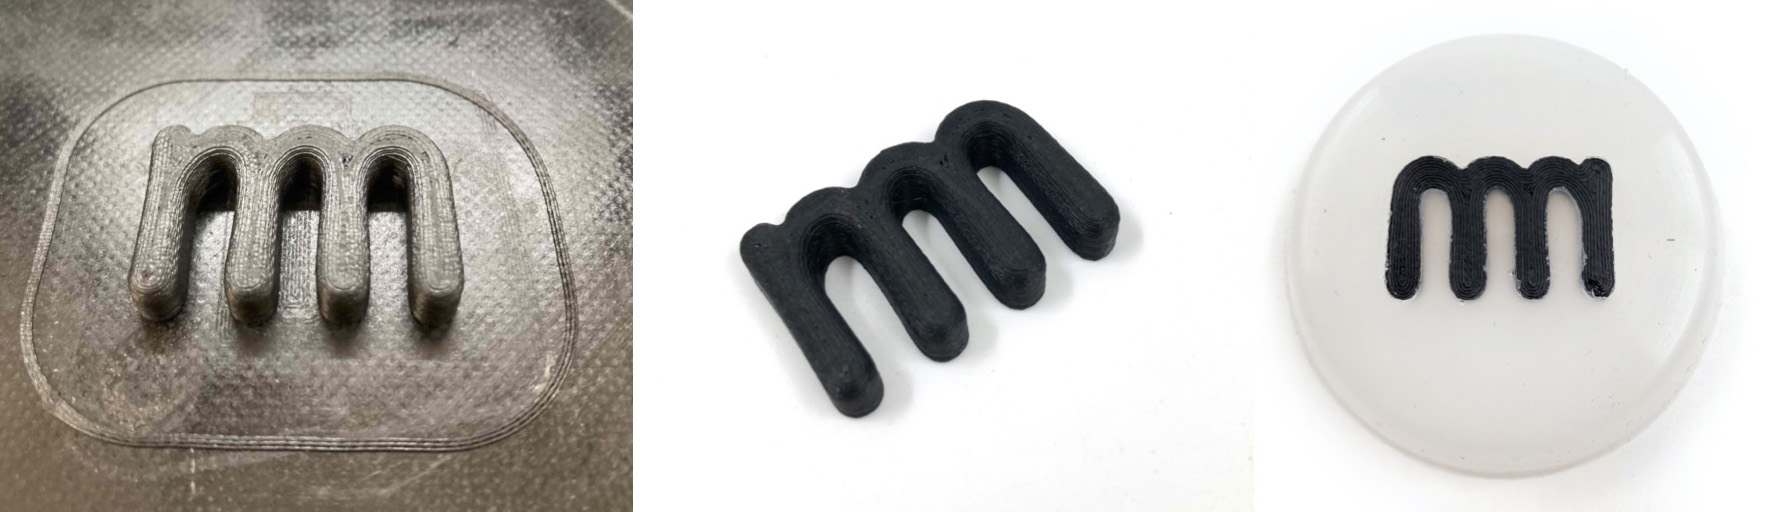
Final sample:
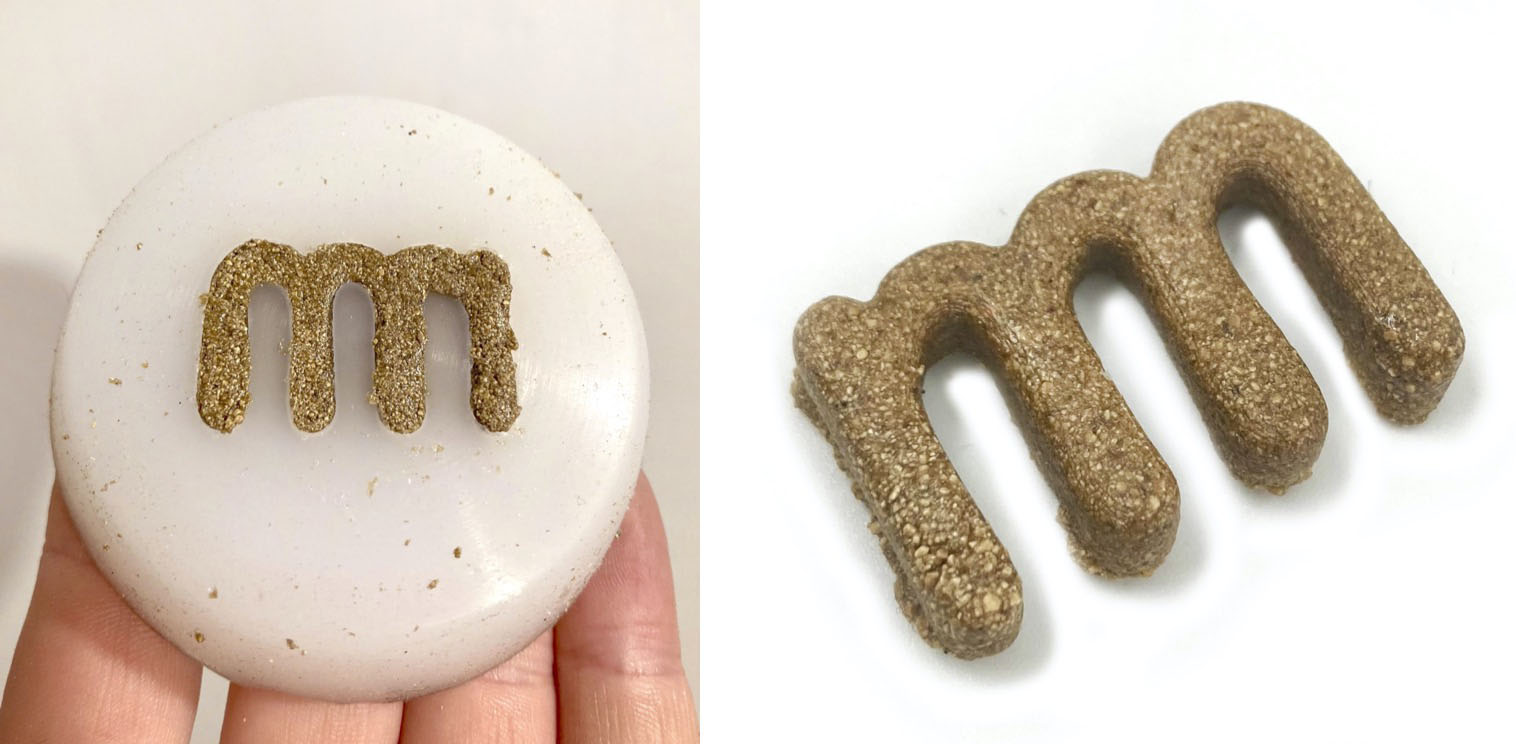
The piece it's too fragile to place in a daily bag so I will cook Cellulose leather to laser cut the logo and glue it in the bag. However, it could have another application.