6. BioFabricating Materials
During this week we are going to create our Biomaterials.
To introduce ourselves to Biomaterials, we go to visit the MaterFad, a center of Materials in Barcelona located inside the Disseny Hub Barcelona and directed by the scientific director Robert D. Thompson.
Research
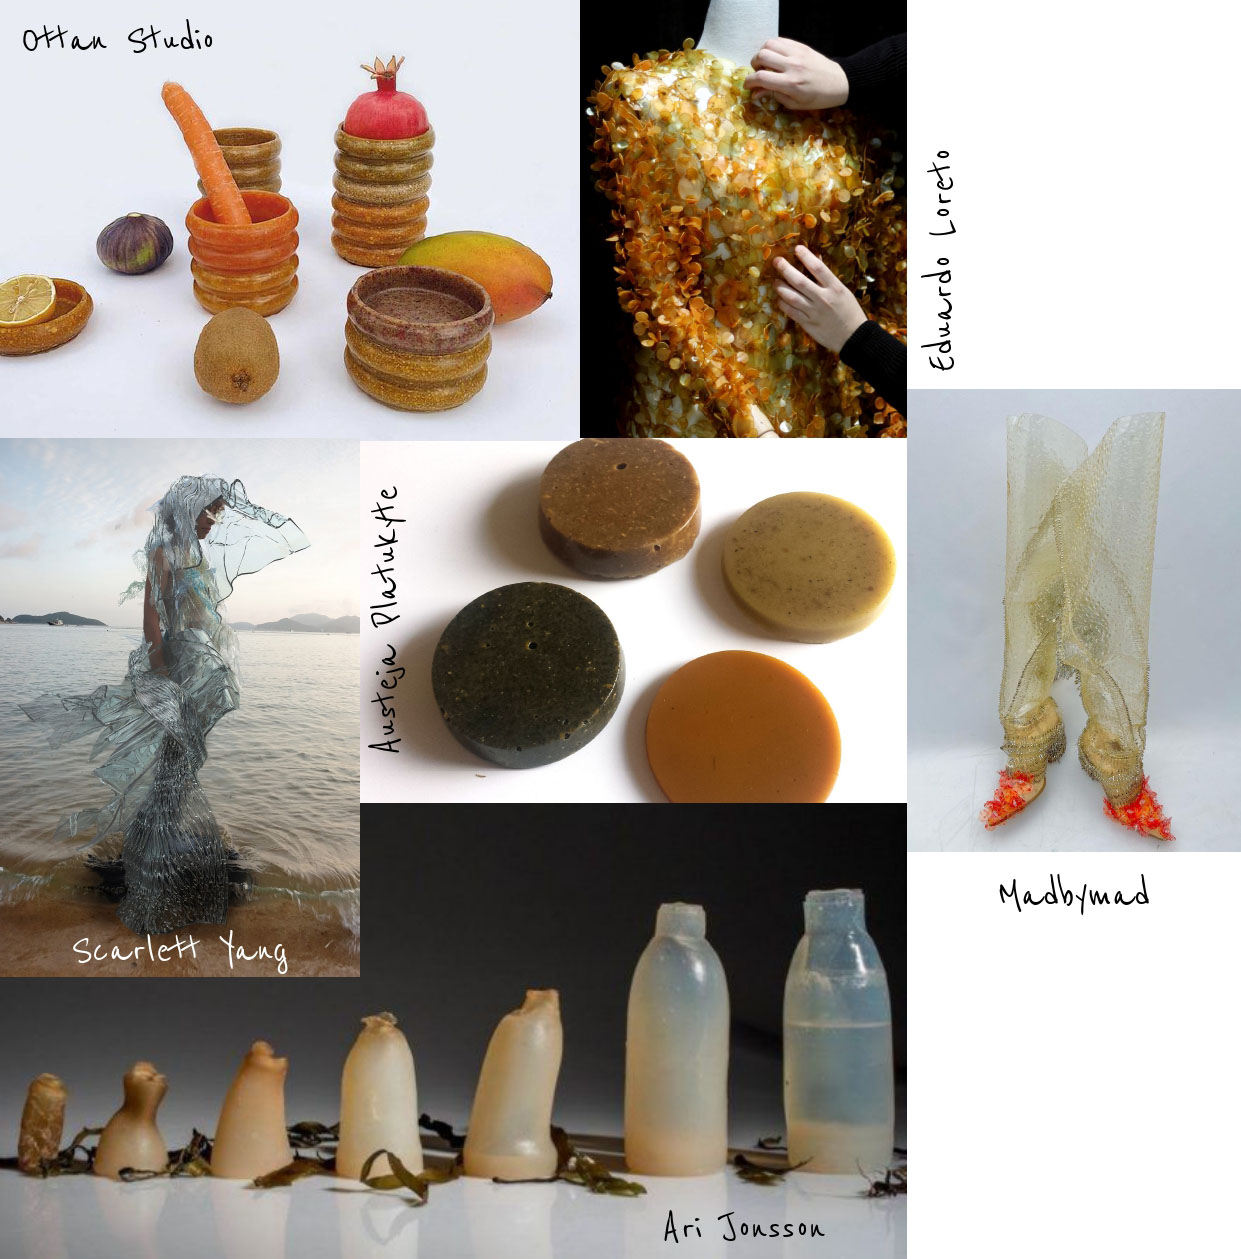
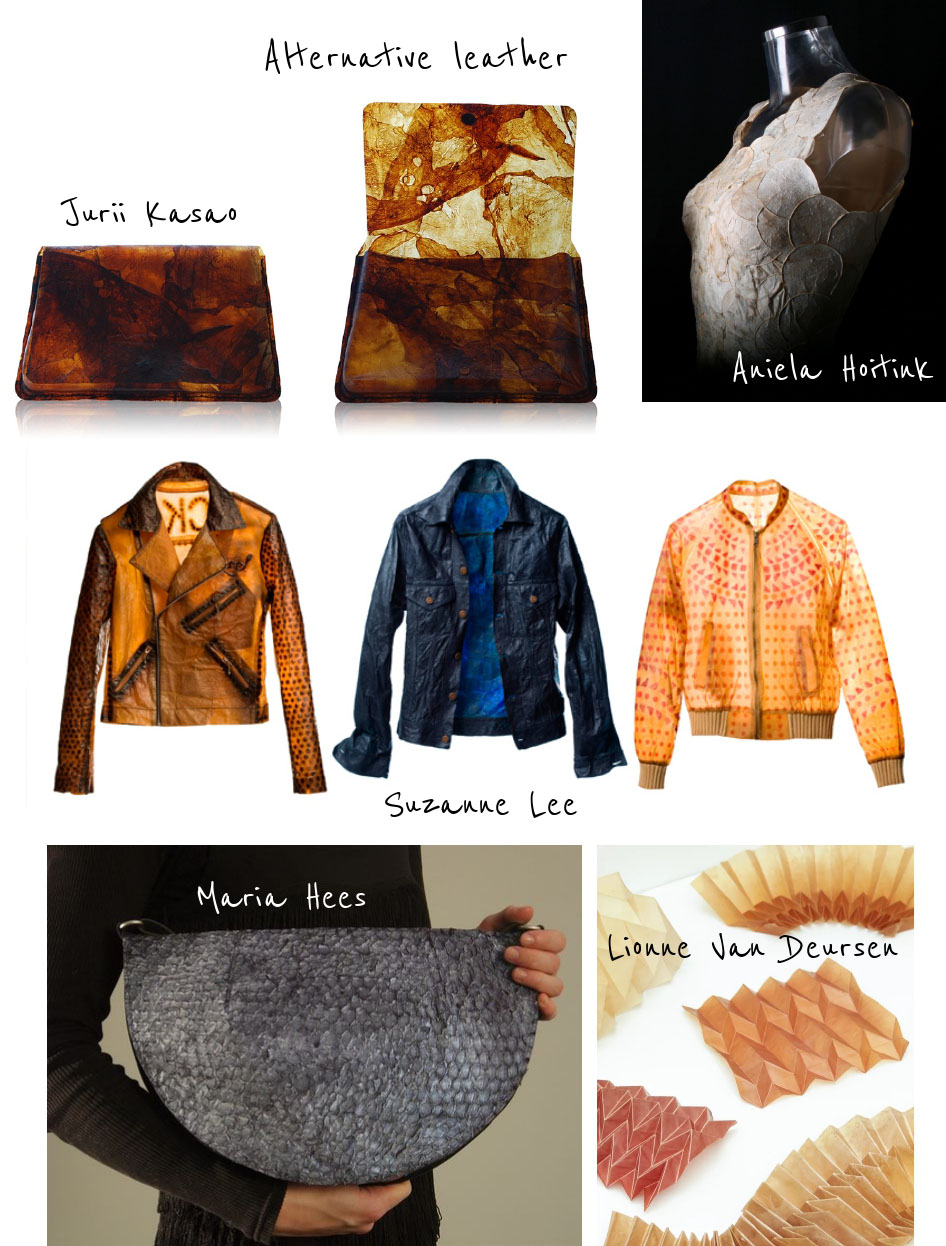
Reference artists
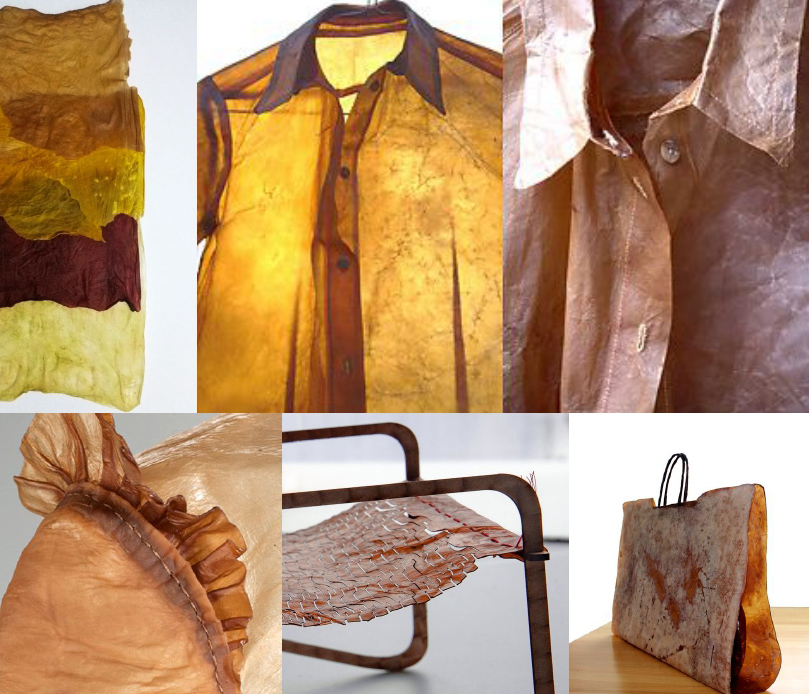
- Scarlett Yang Algae dress
- Lionne Van Deursen
- Moya Hoke
- Aurore Bourguignon Fabtextile Coffee Bag
- Beatriz Sandini Mango leather
- Julia Lohmann
- Eduardo Loreto printing and laser cutter
- Juliette Pepin
- Fruit Leather Rotterdam
- Amanda Jarvis sequin
Reference pages
- The secrets of Bioplastic
- Bioplastics Fabtextiles
- Textile Academy Tutorials
- Fabricademy: Inventory and consumables
- Bioplastic Cook Book
- Materiom Recipes
- Eggshell-Starch Biomaterial
- Carrageenan Film Ca03
- Gelatin Bioplatic bags
- Mussel shell reciepe
Biomaterials
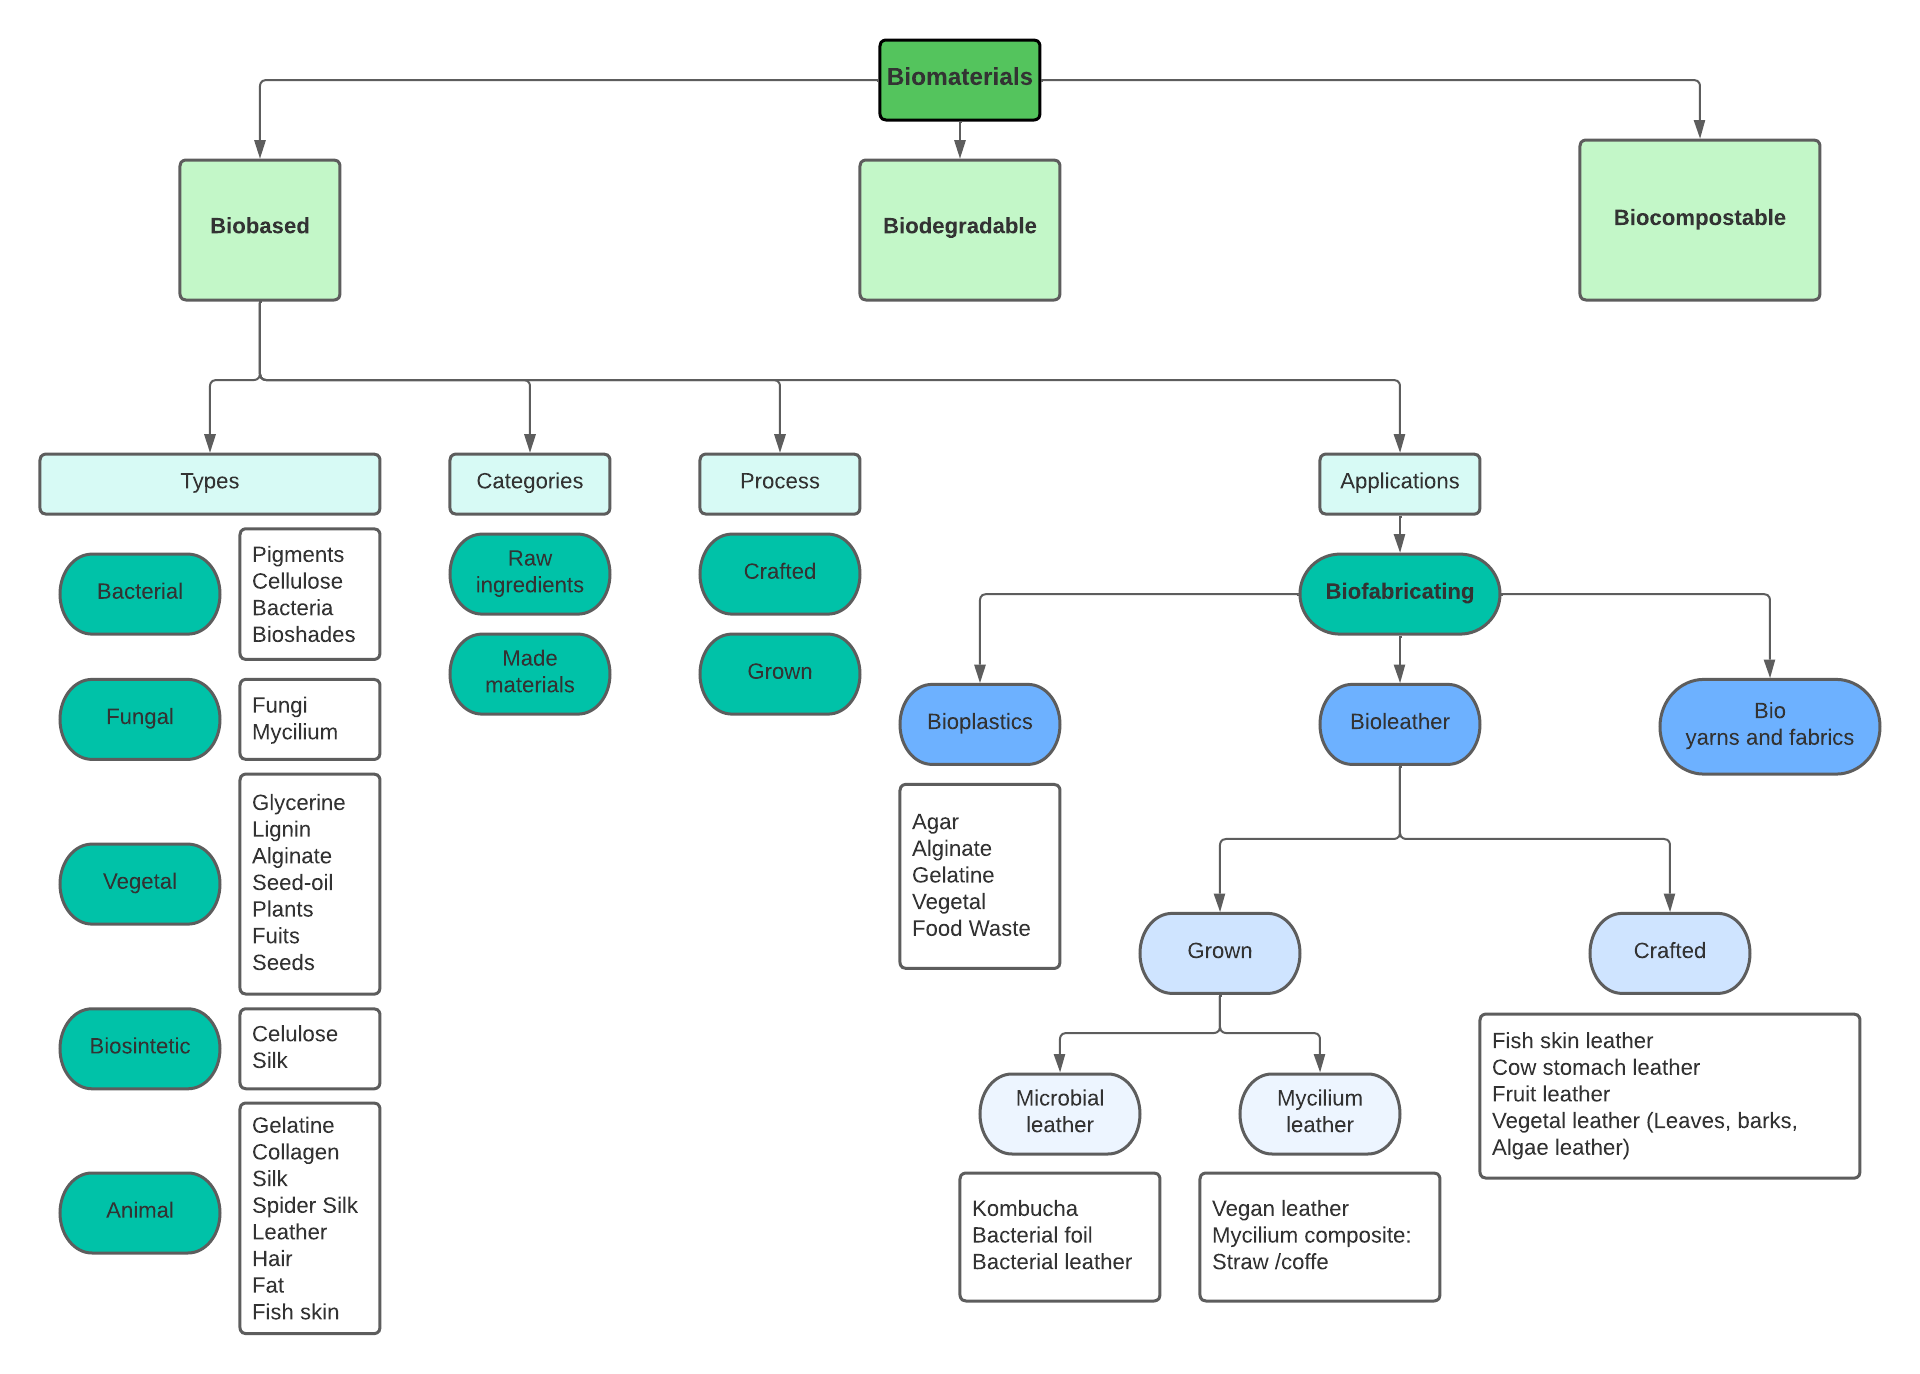
I used the Lucid to create the diagram and understand more about how Biomaterials organize and the different categories.
Bioplastics
Plastic is a name for a category of materials called polymers. Polymers are made of long chains of molecules that abound in nature, such as cellulose, a natural polymer.
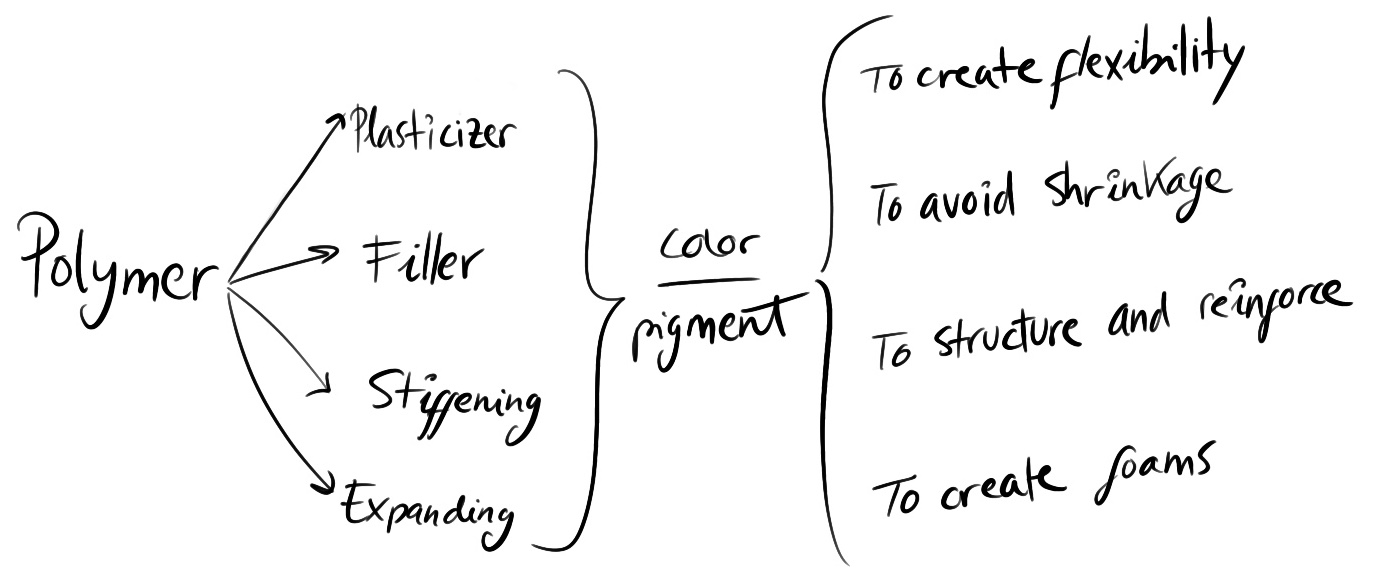
Plastic is a substance that the earth can't digest.
So we need to rethink:
RECYCLE/ DECOMPOSE/ REGENERATE/ RE-ASSEMBLING
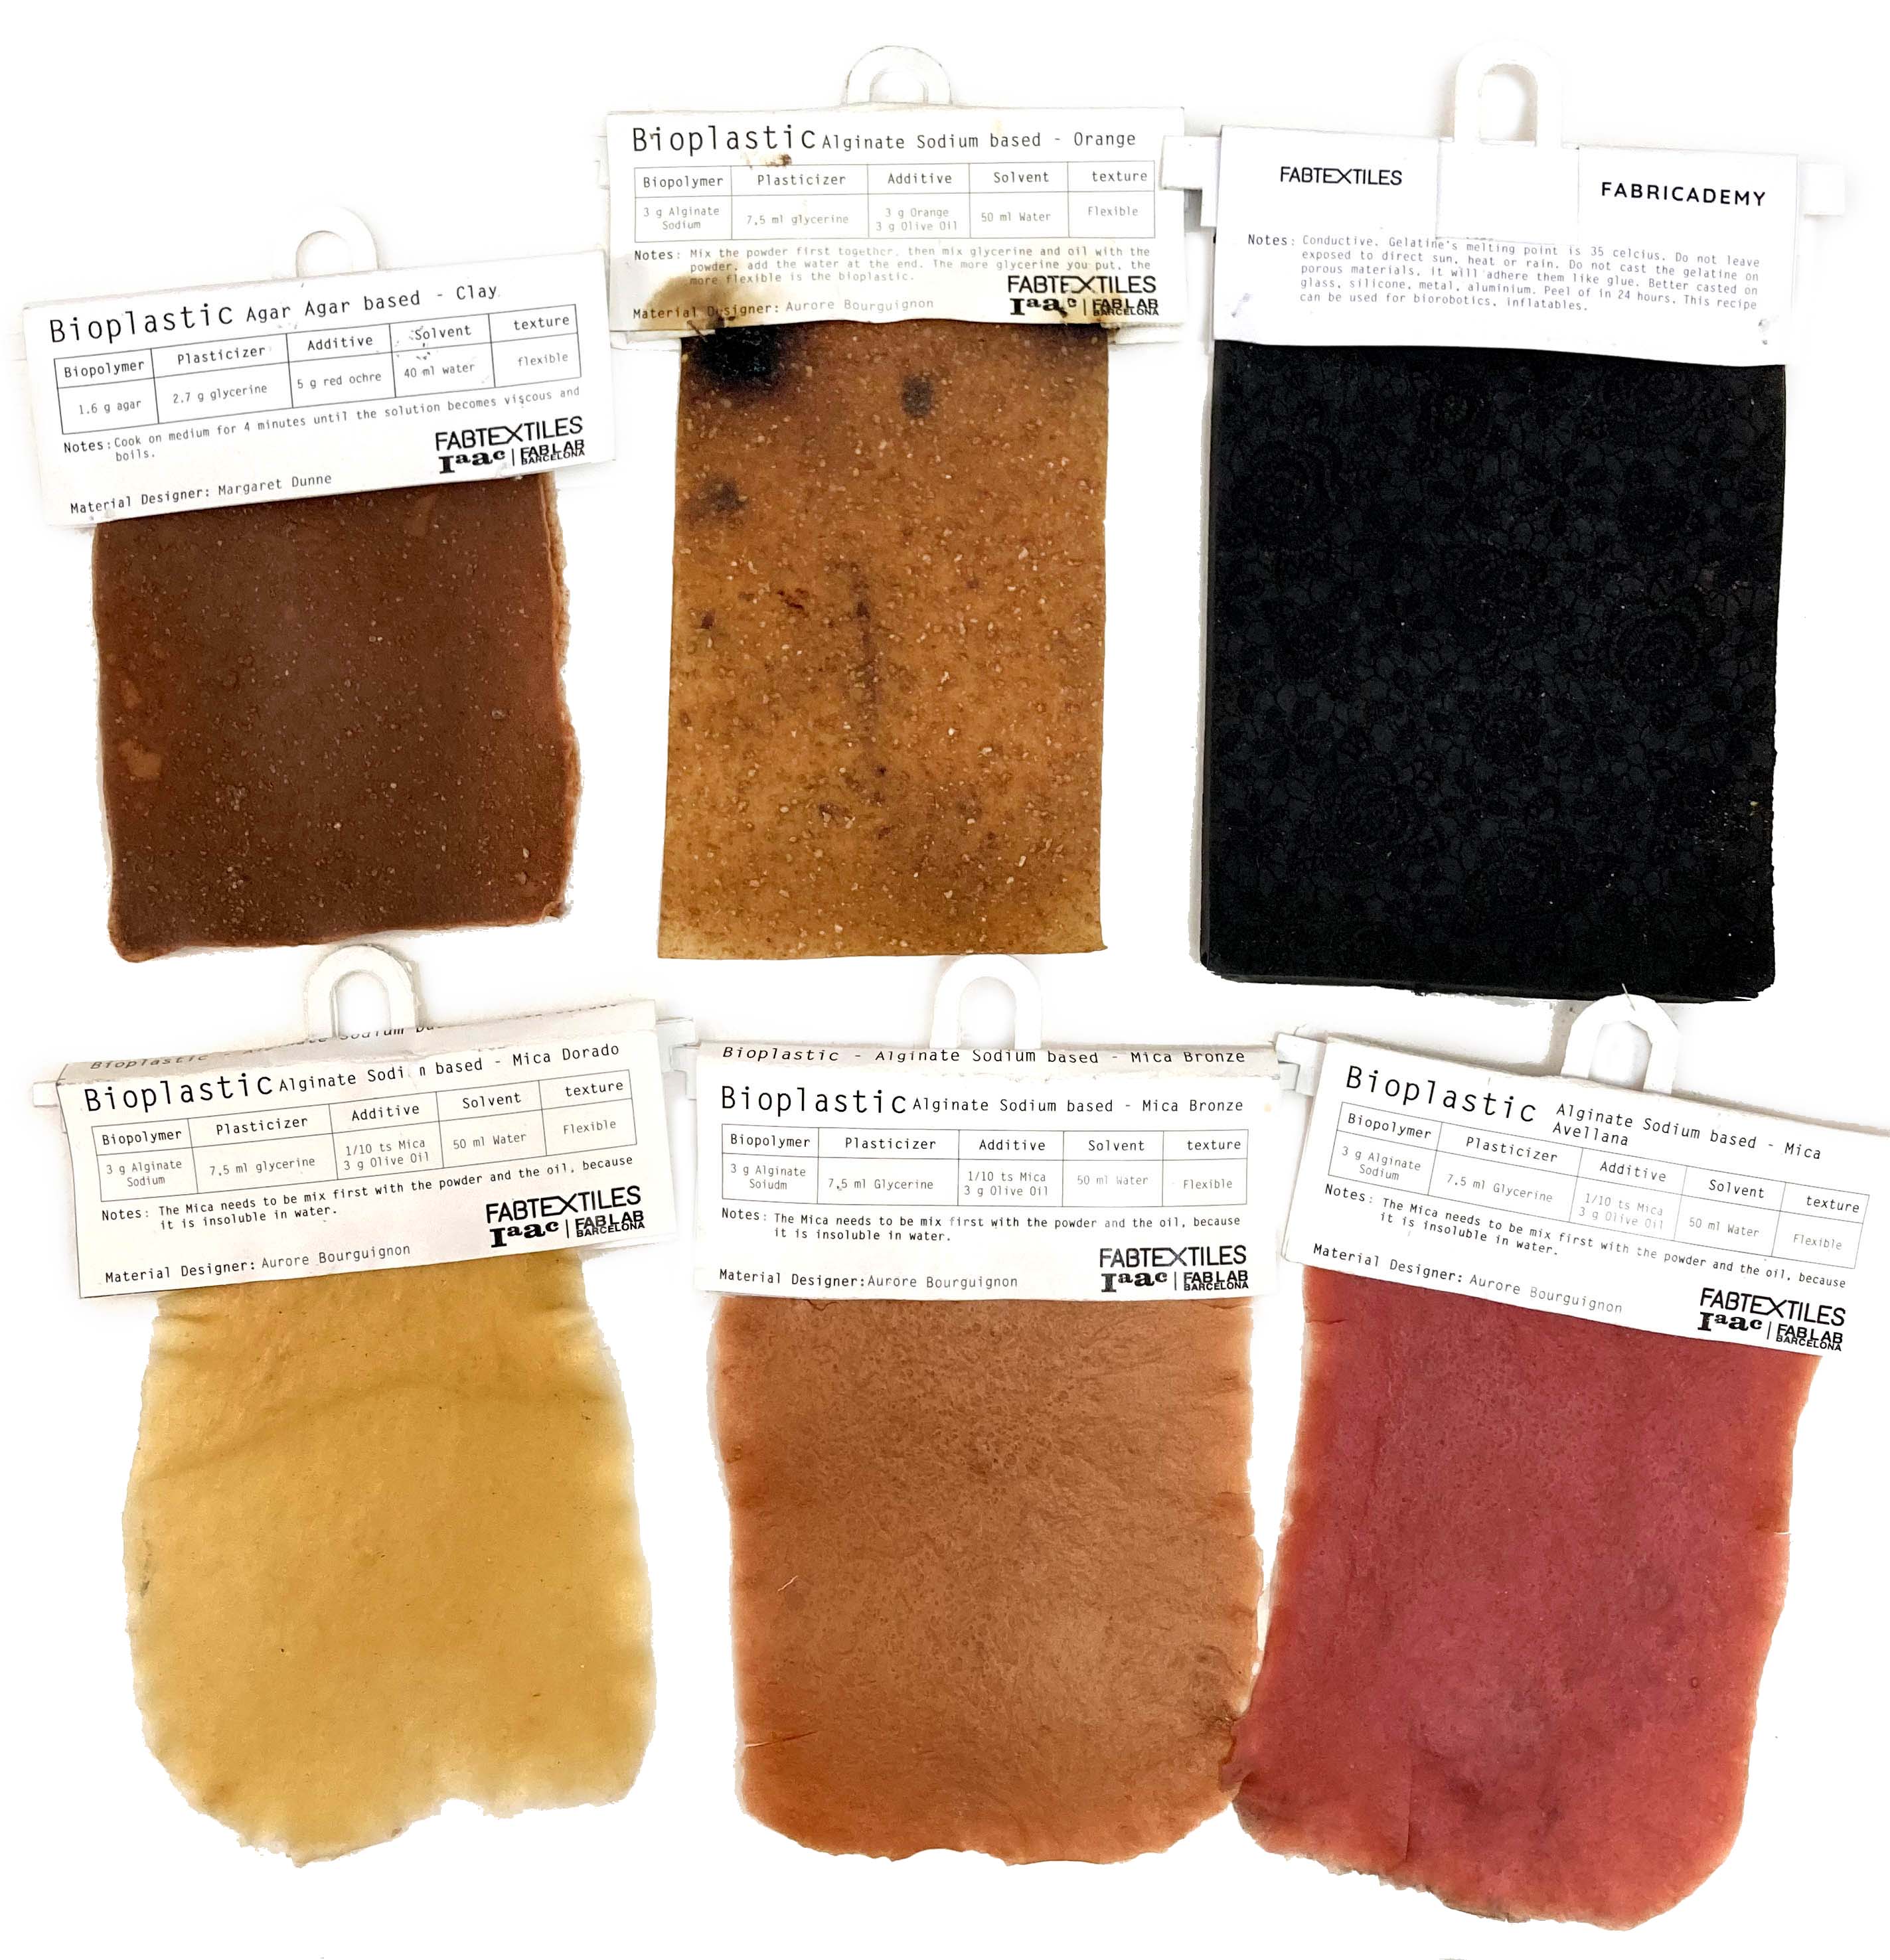
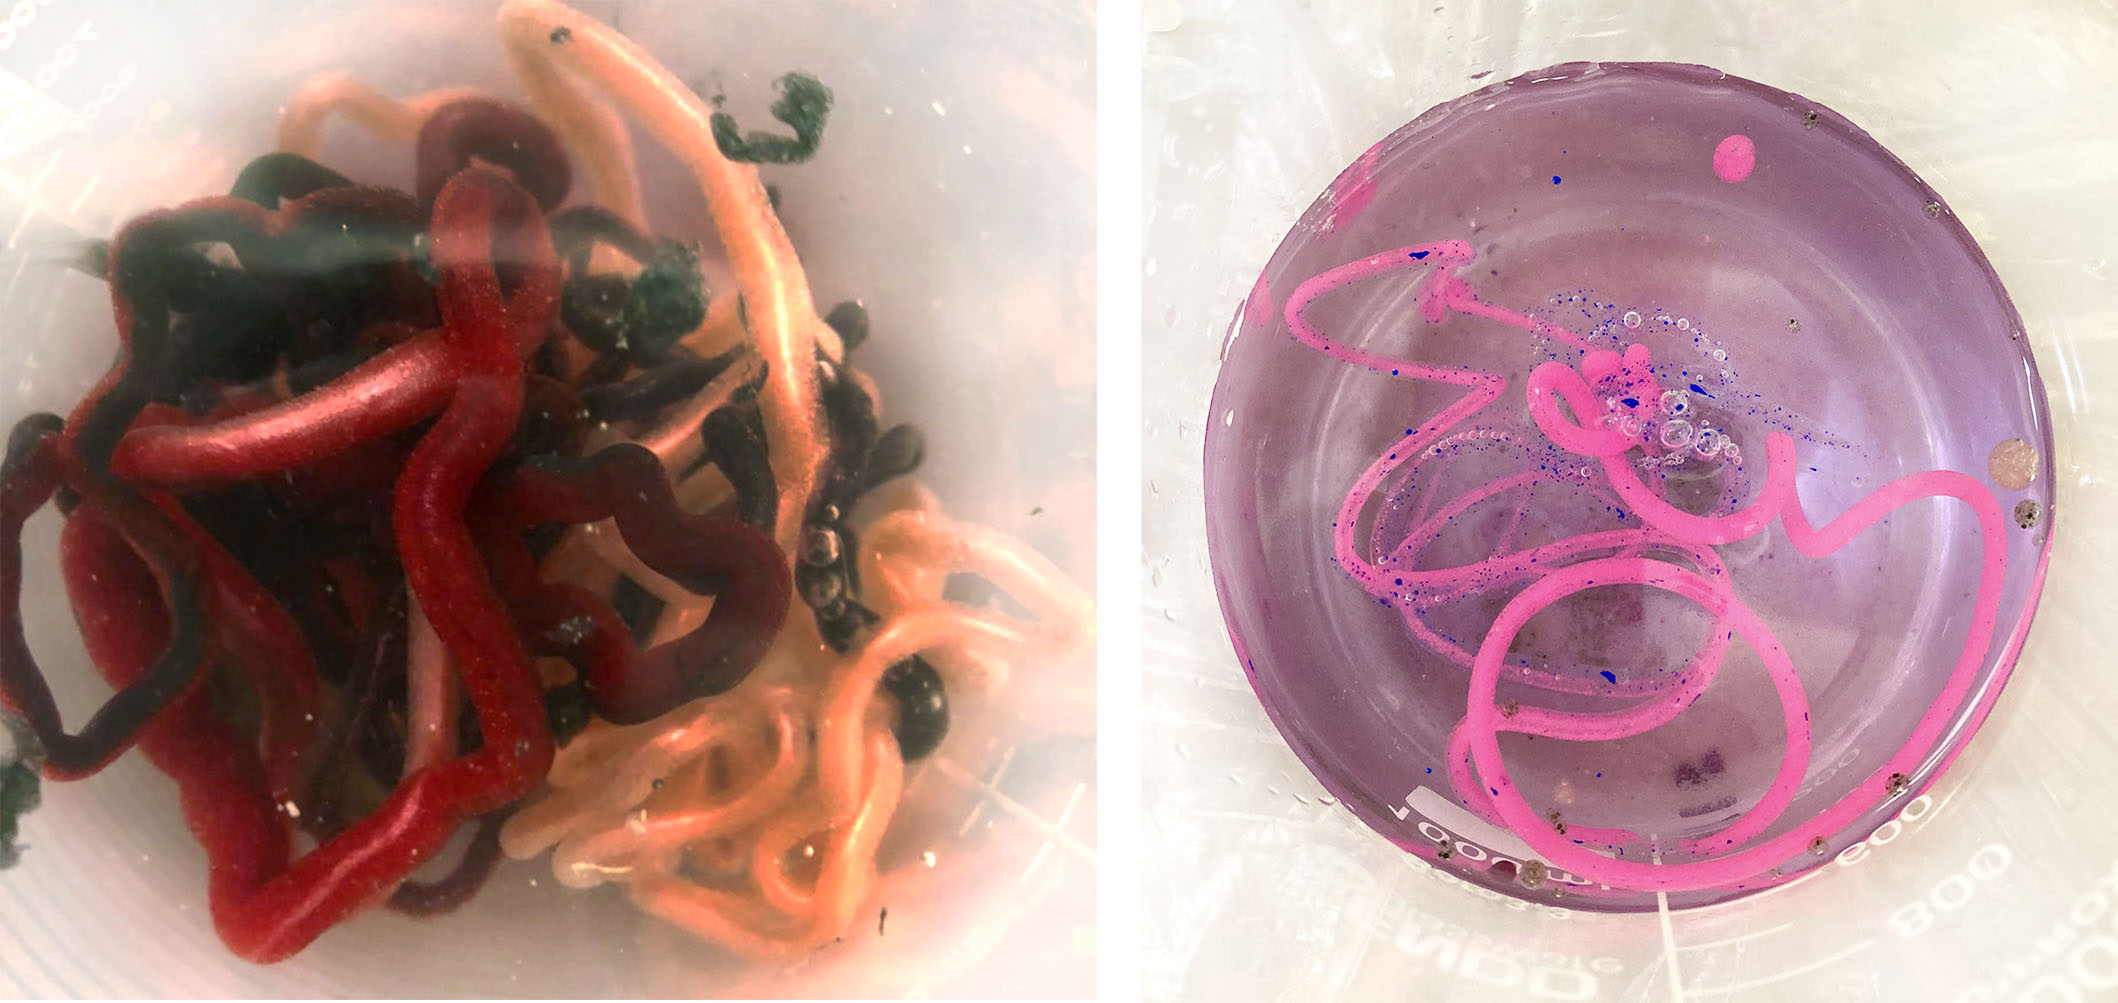
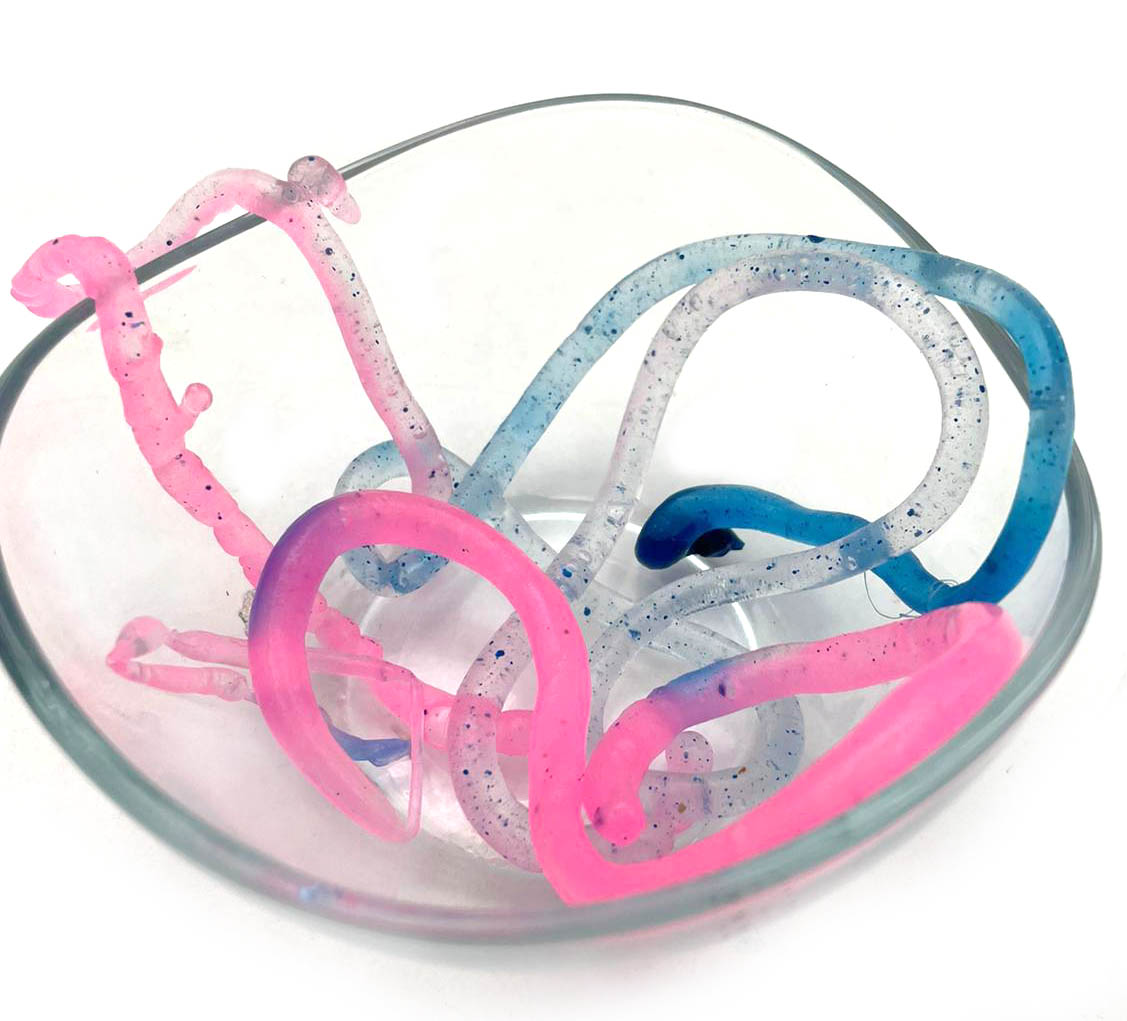
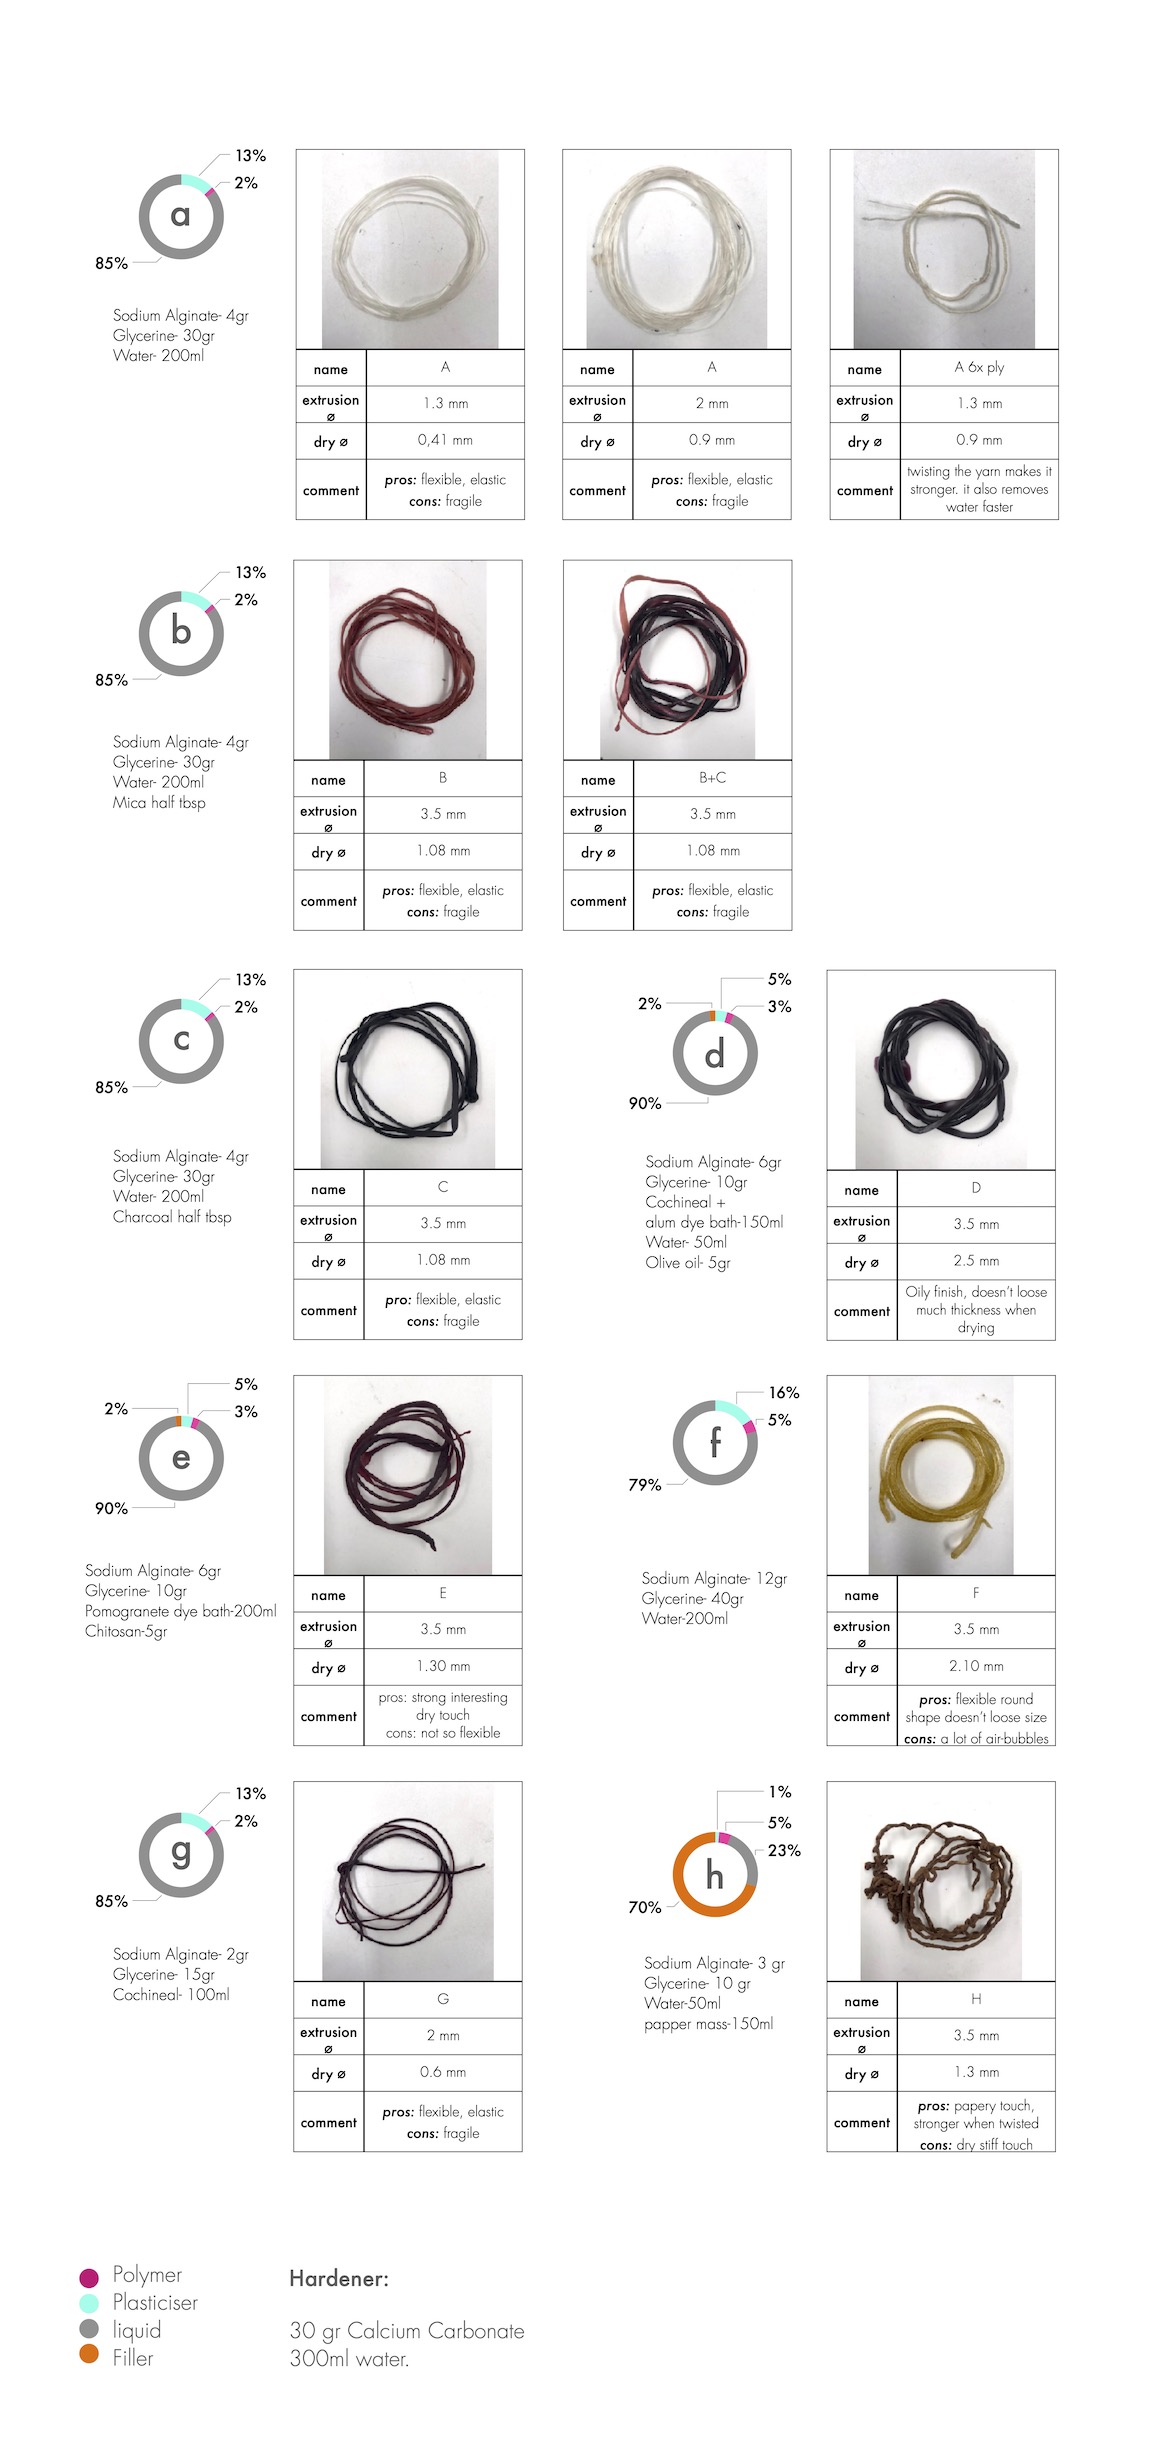
Sodium Alginate Extrusion
It's a cold recipe.
* 200 ml Mineral Water
* 4g Sodium Alginate
* < 30g Glycerine (Depends of the flexibility)
* 30g Calcium chloride
* 300ml Water
* Mix polymer, plasticizer, liquid and filler with a hand blender.
* Let the mixture stand for 3-4 hours to remove air bubbles from the mixture (or use a vacuum pump)
* In a pot, dissolve Calcium chloride in water.
* Put the Sodium Alginate mix into a syringe.
* Use a syringe to extrude the plastic mixture into the Calcium Chloride water.
* Rinse the strings in normal water.
* Hang to dry.
Extrusion de Emma
This recipe has Sodium Alginate + 60g Glycerine + Carbon conductive pigment added after the Sodium and the Glycerine are blended.
In addition, you could search for more information about extrusion work during this week following the Alve PDF and Dinesh Bio yarn.
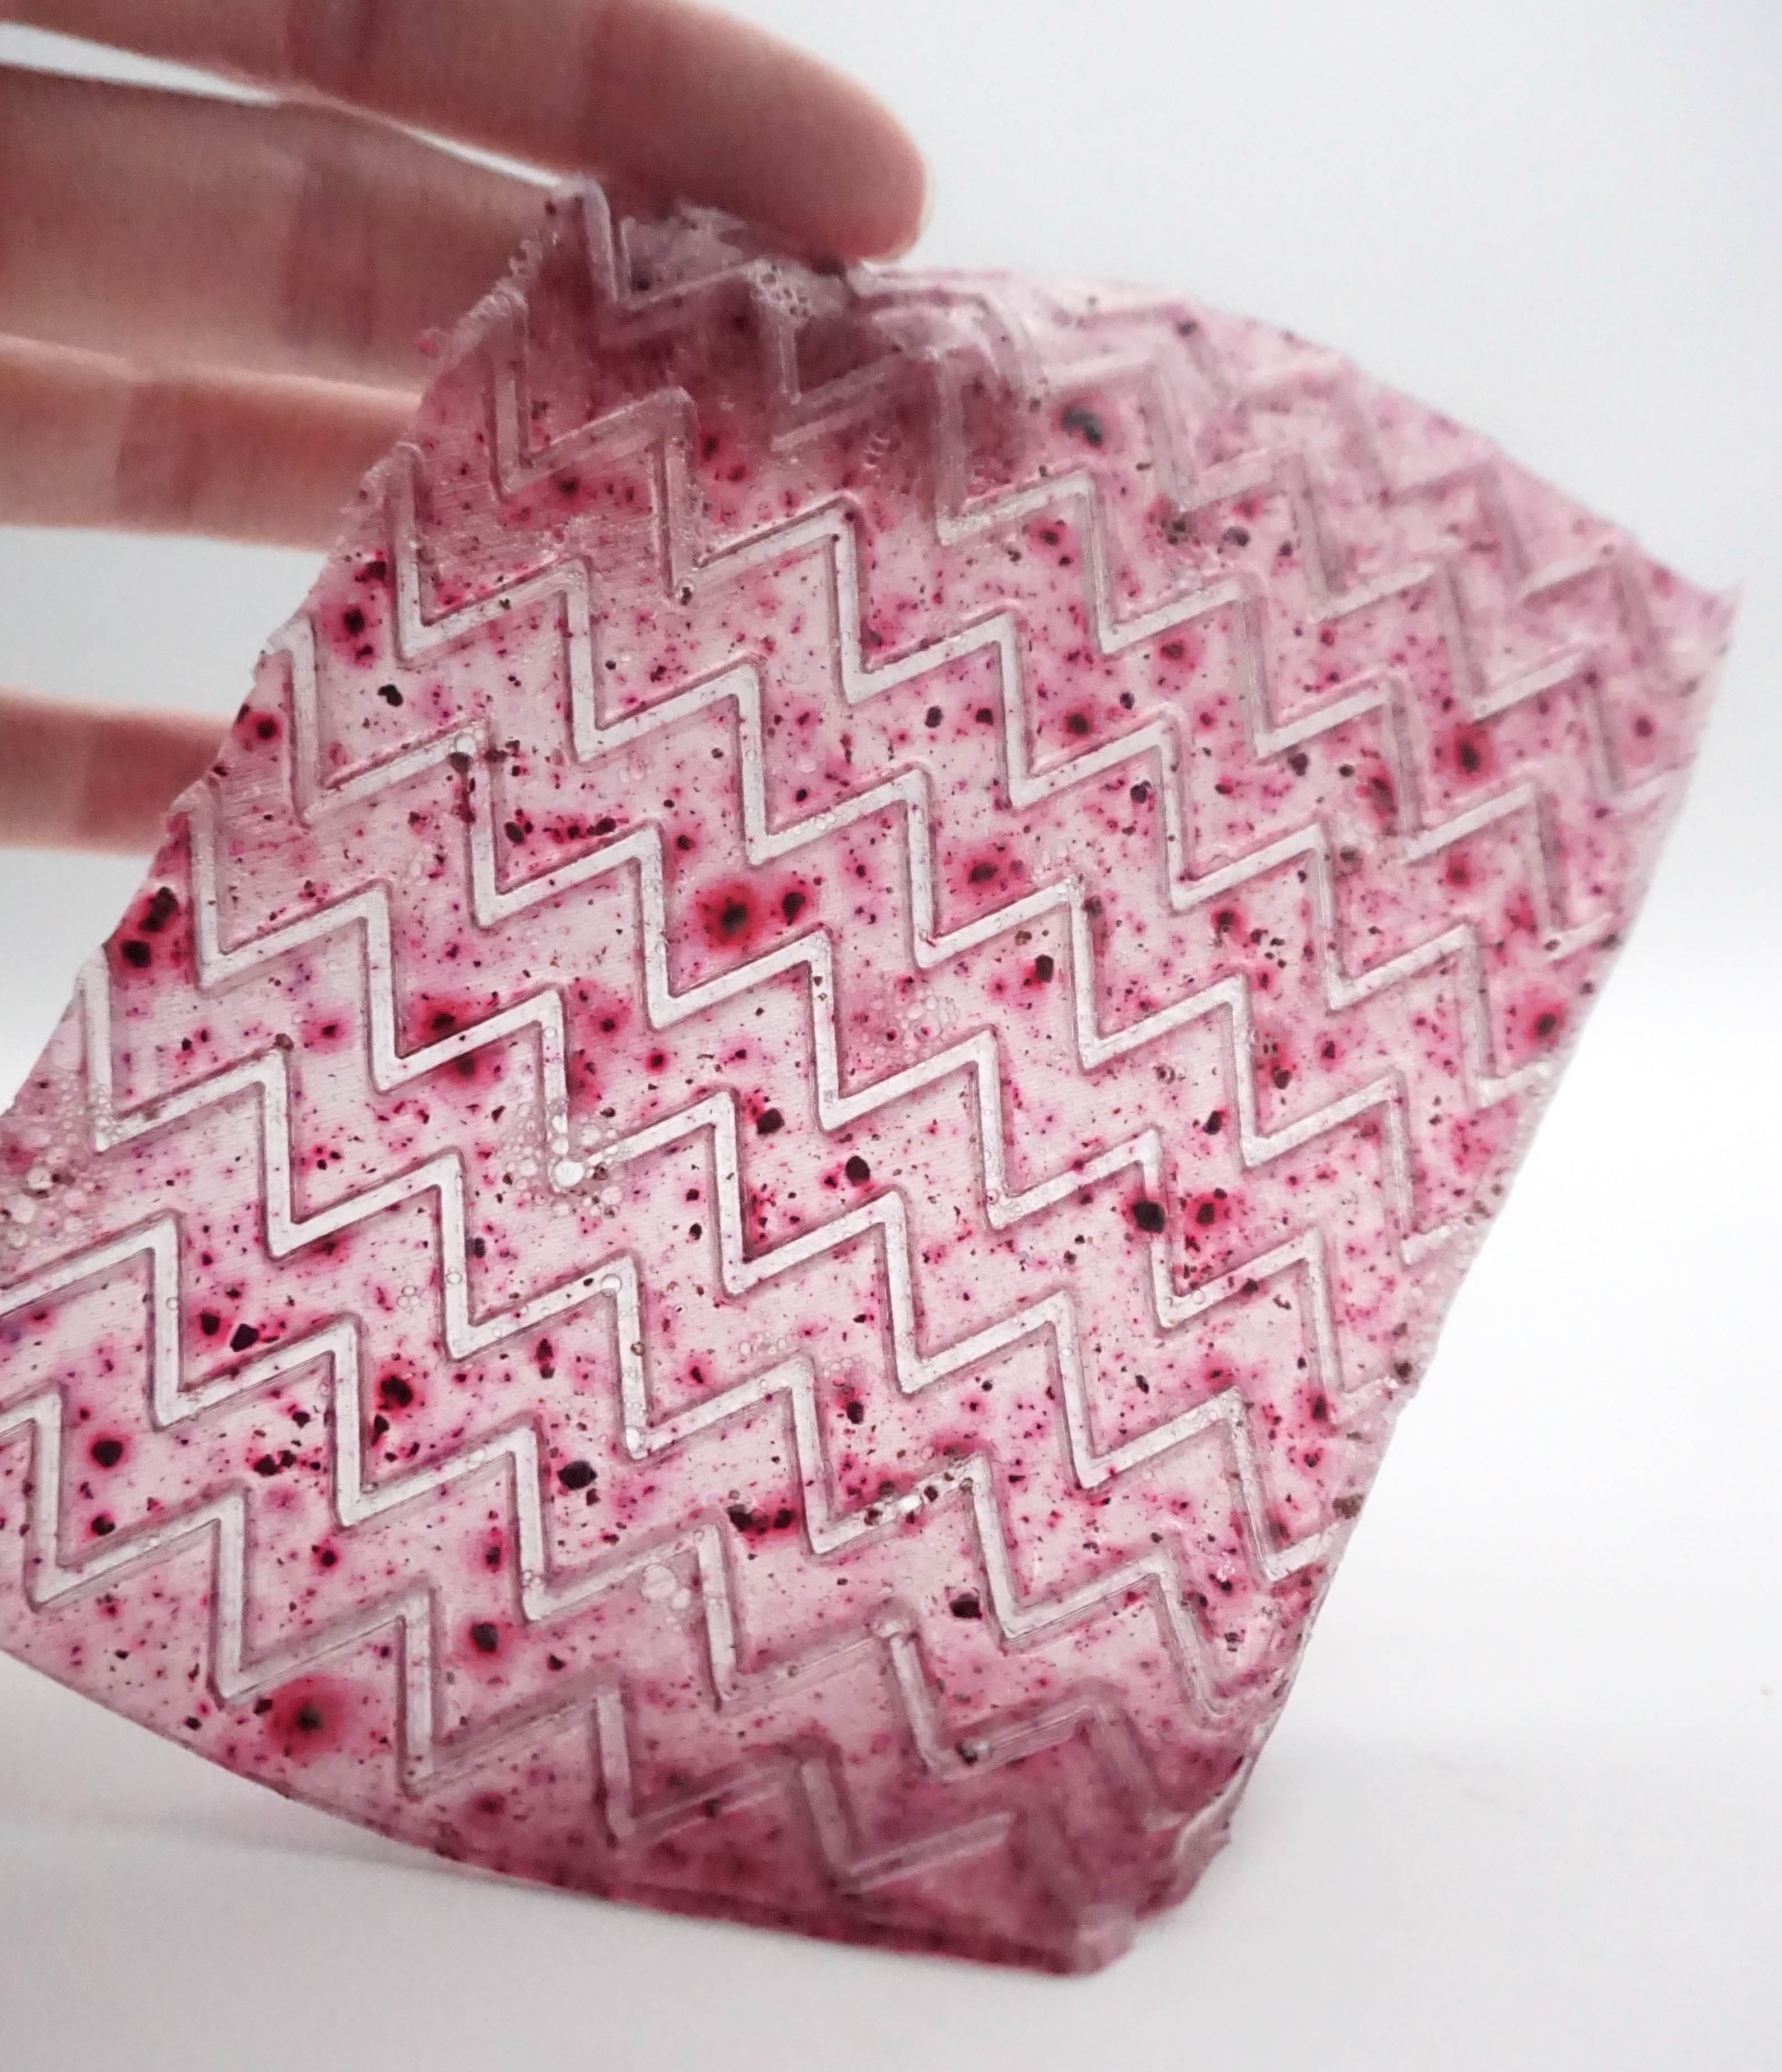
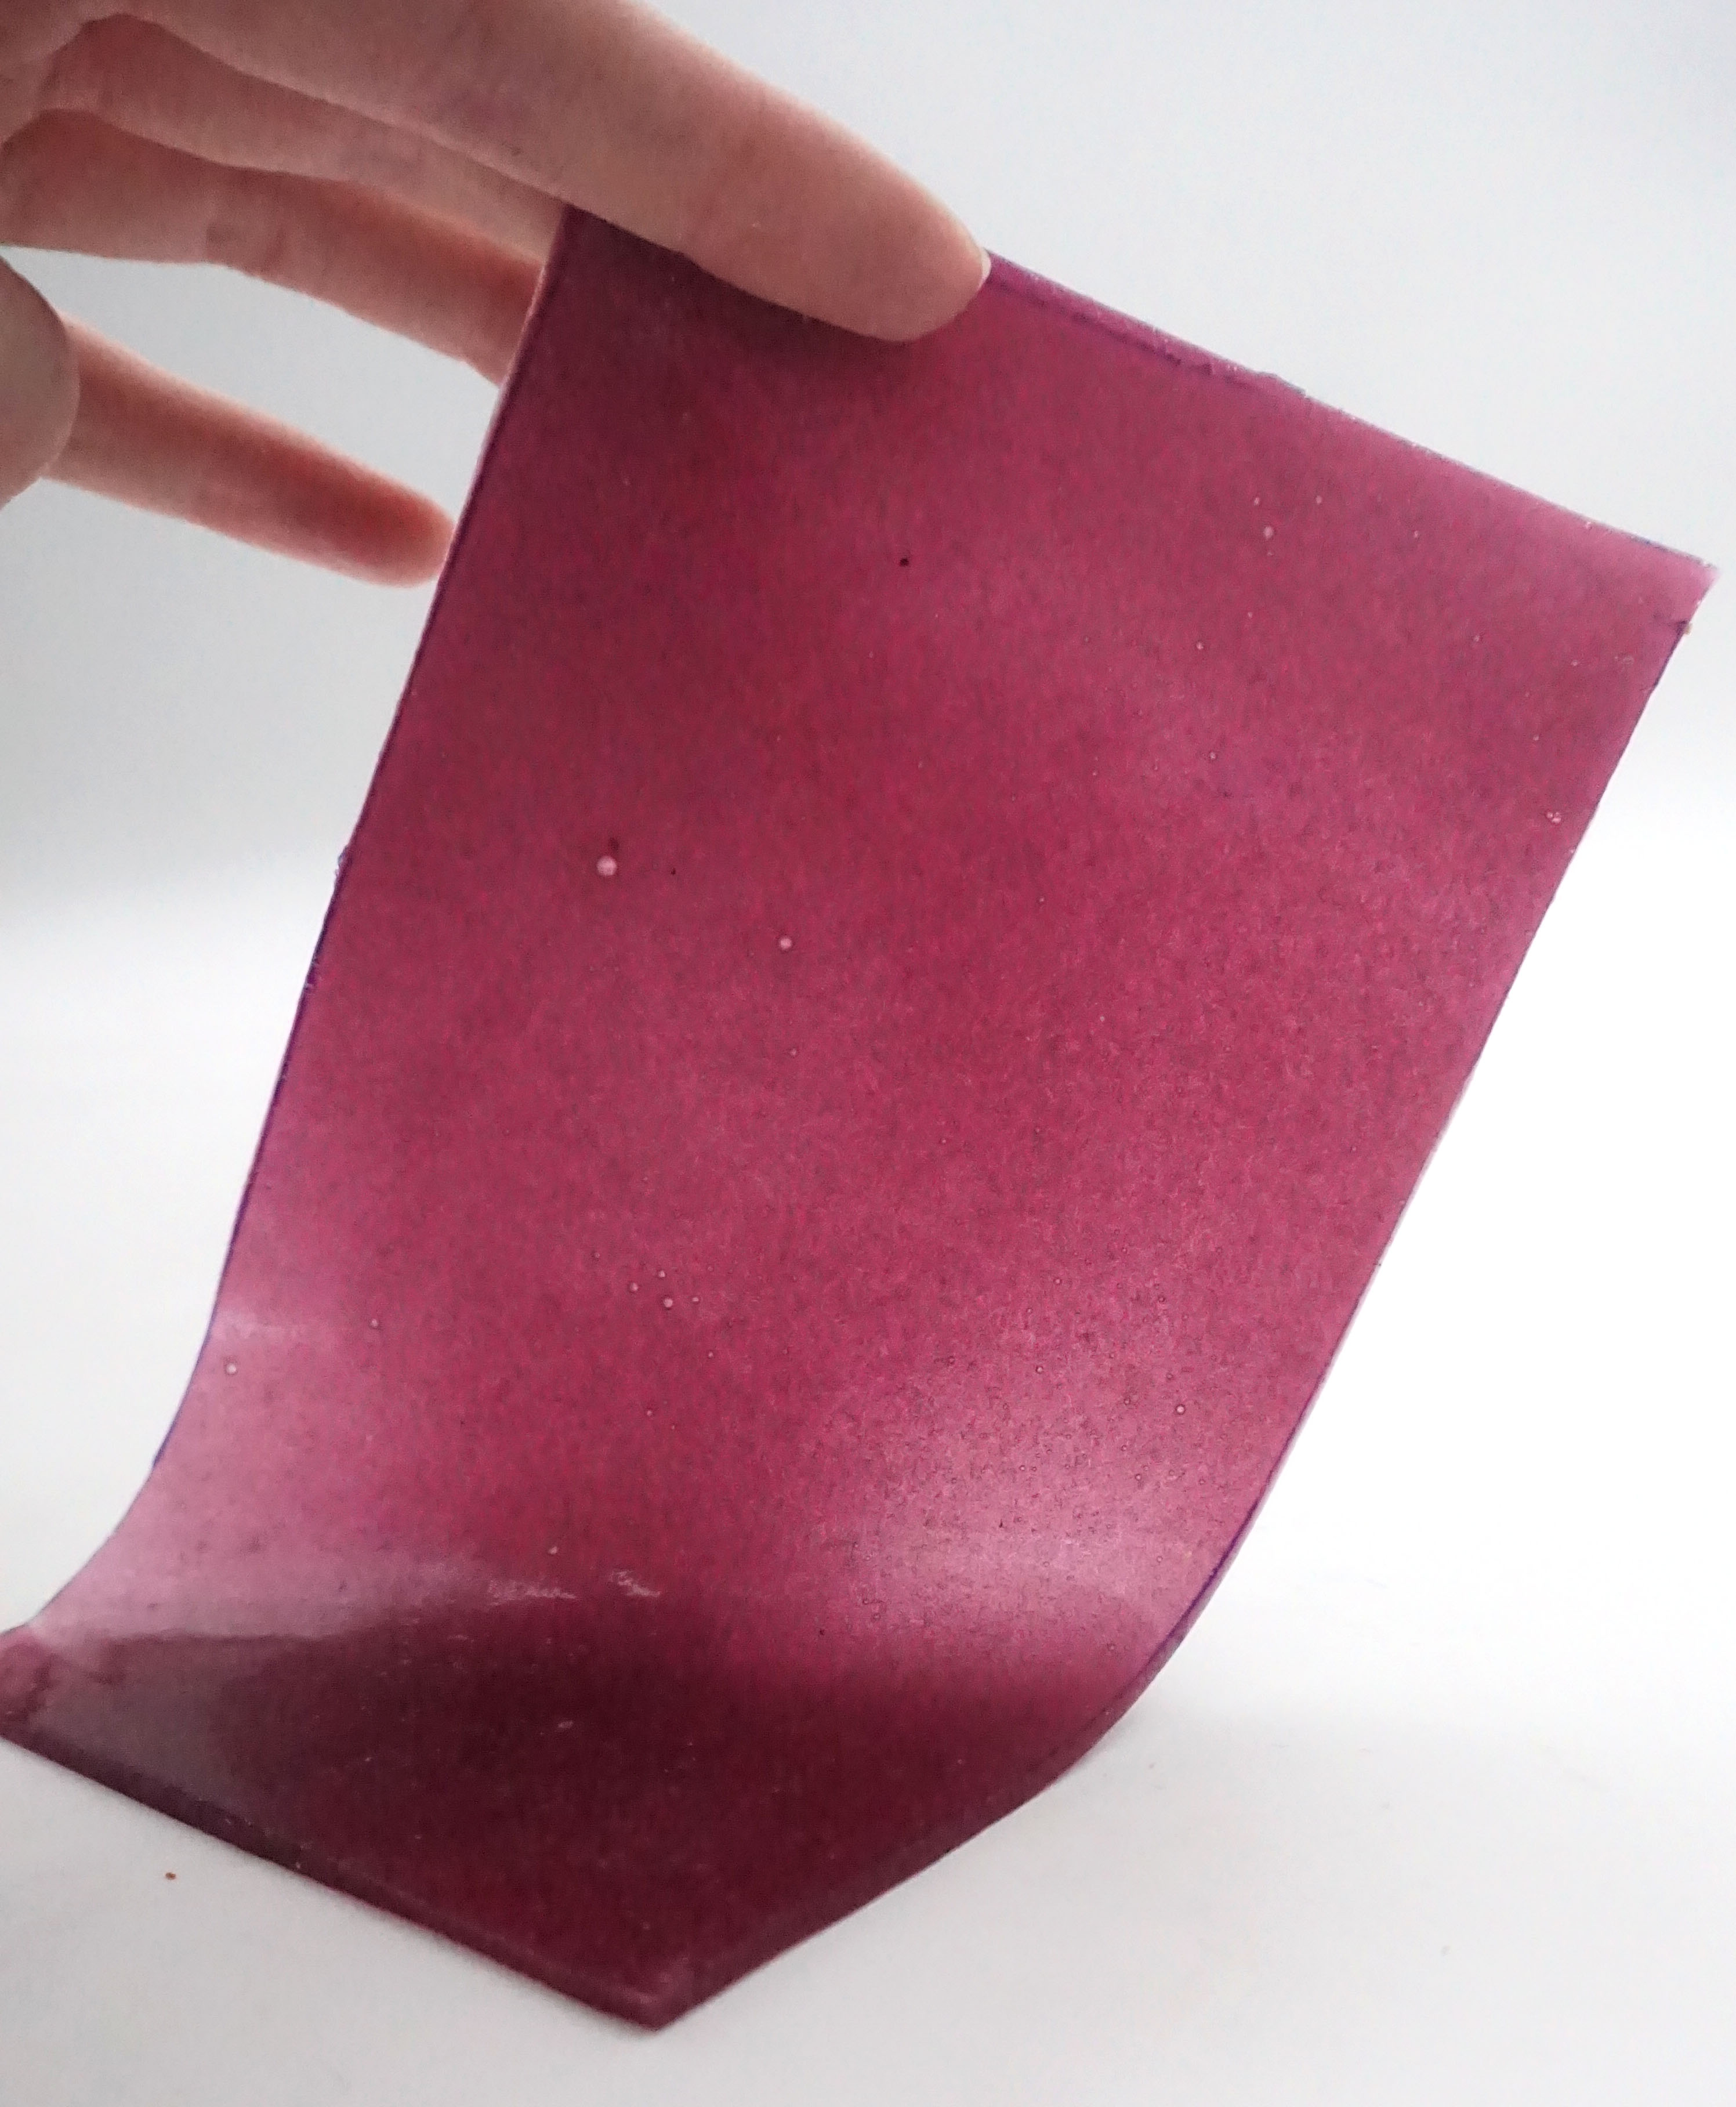
Sodium Alginate Casting
It's a cold recipe to mold.
* 200 ml Mineral Water
* 4g Sodium Alginate
* 10 - 30g Glycerine (Will depends the flexibility)
* 30g Calcium chloride
* 300ml Water
* Measure the Sodium alginate and water and mix it.
* Measure the Calcium chloride and water. Mix and put in a spray bottle.
* Prepare the mold. For the Alginate recipe you should use a mold that the mass could breathe, such as a wood or fabric mold.
* Spray the mold surface with the solution in the spray bottle (prepared before)and clean it with towel paper.
* Put the Sodium alginate into your mold. Make a thickness layer cause it will shrink considerably.
* Spray above your material with CaCl2 solution and wait for it to dry.
* After a day, flip and spray the other side, repeat this process until it hardens. It could take some time... You also could use the dehydrated machine at a low temperature to dry faster.
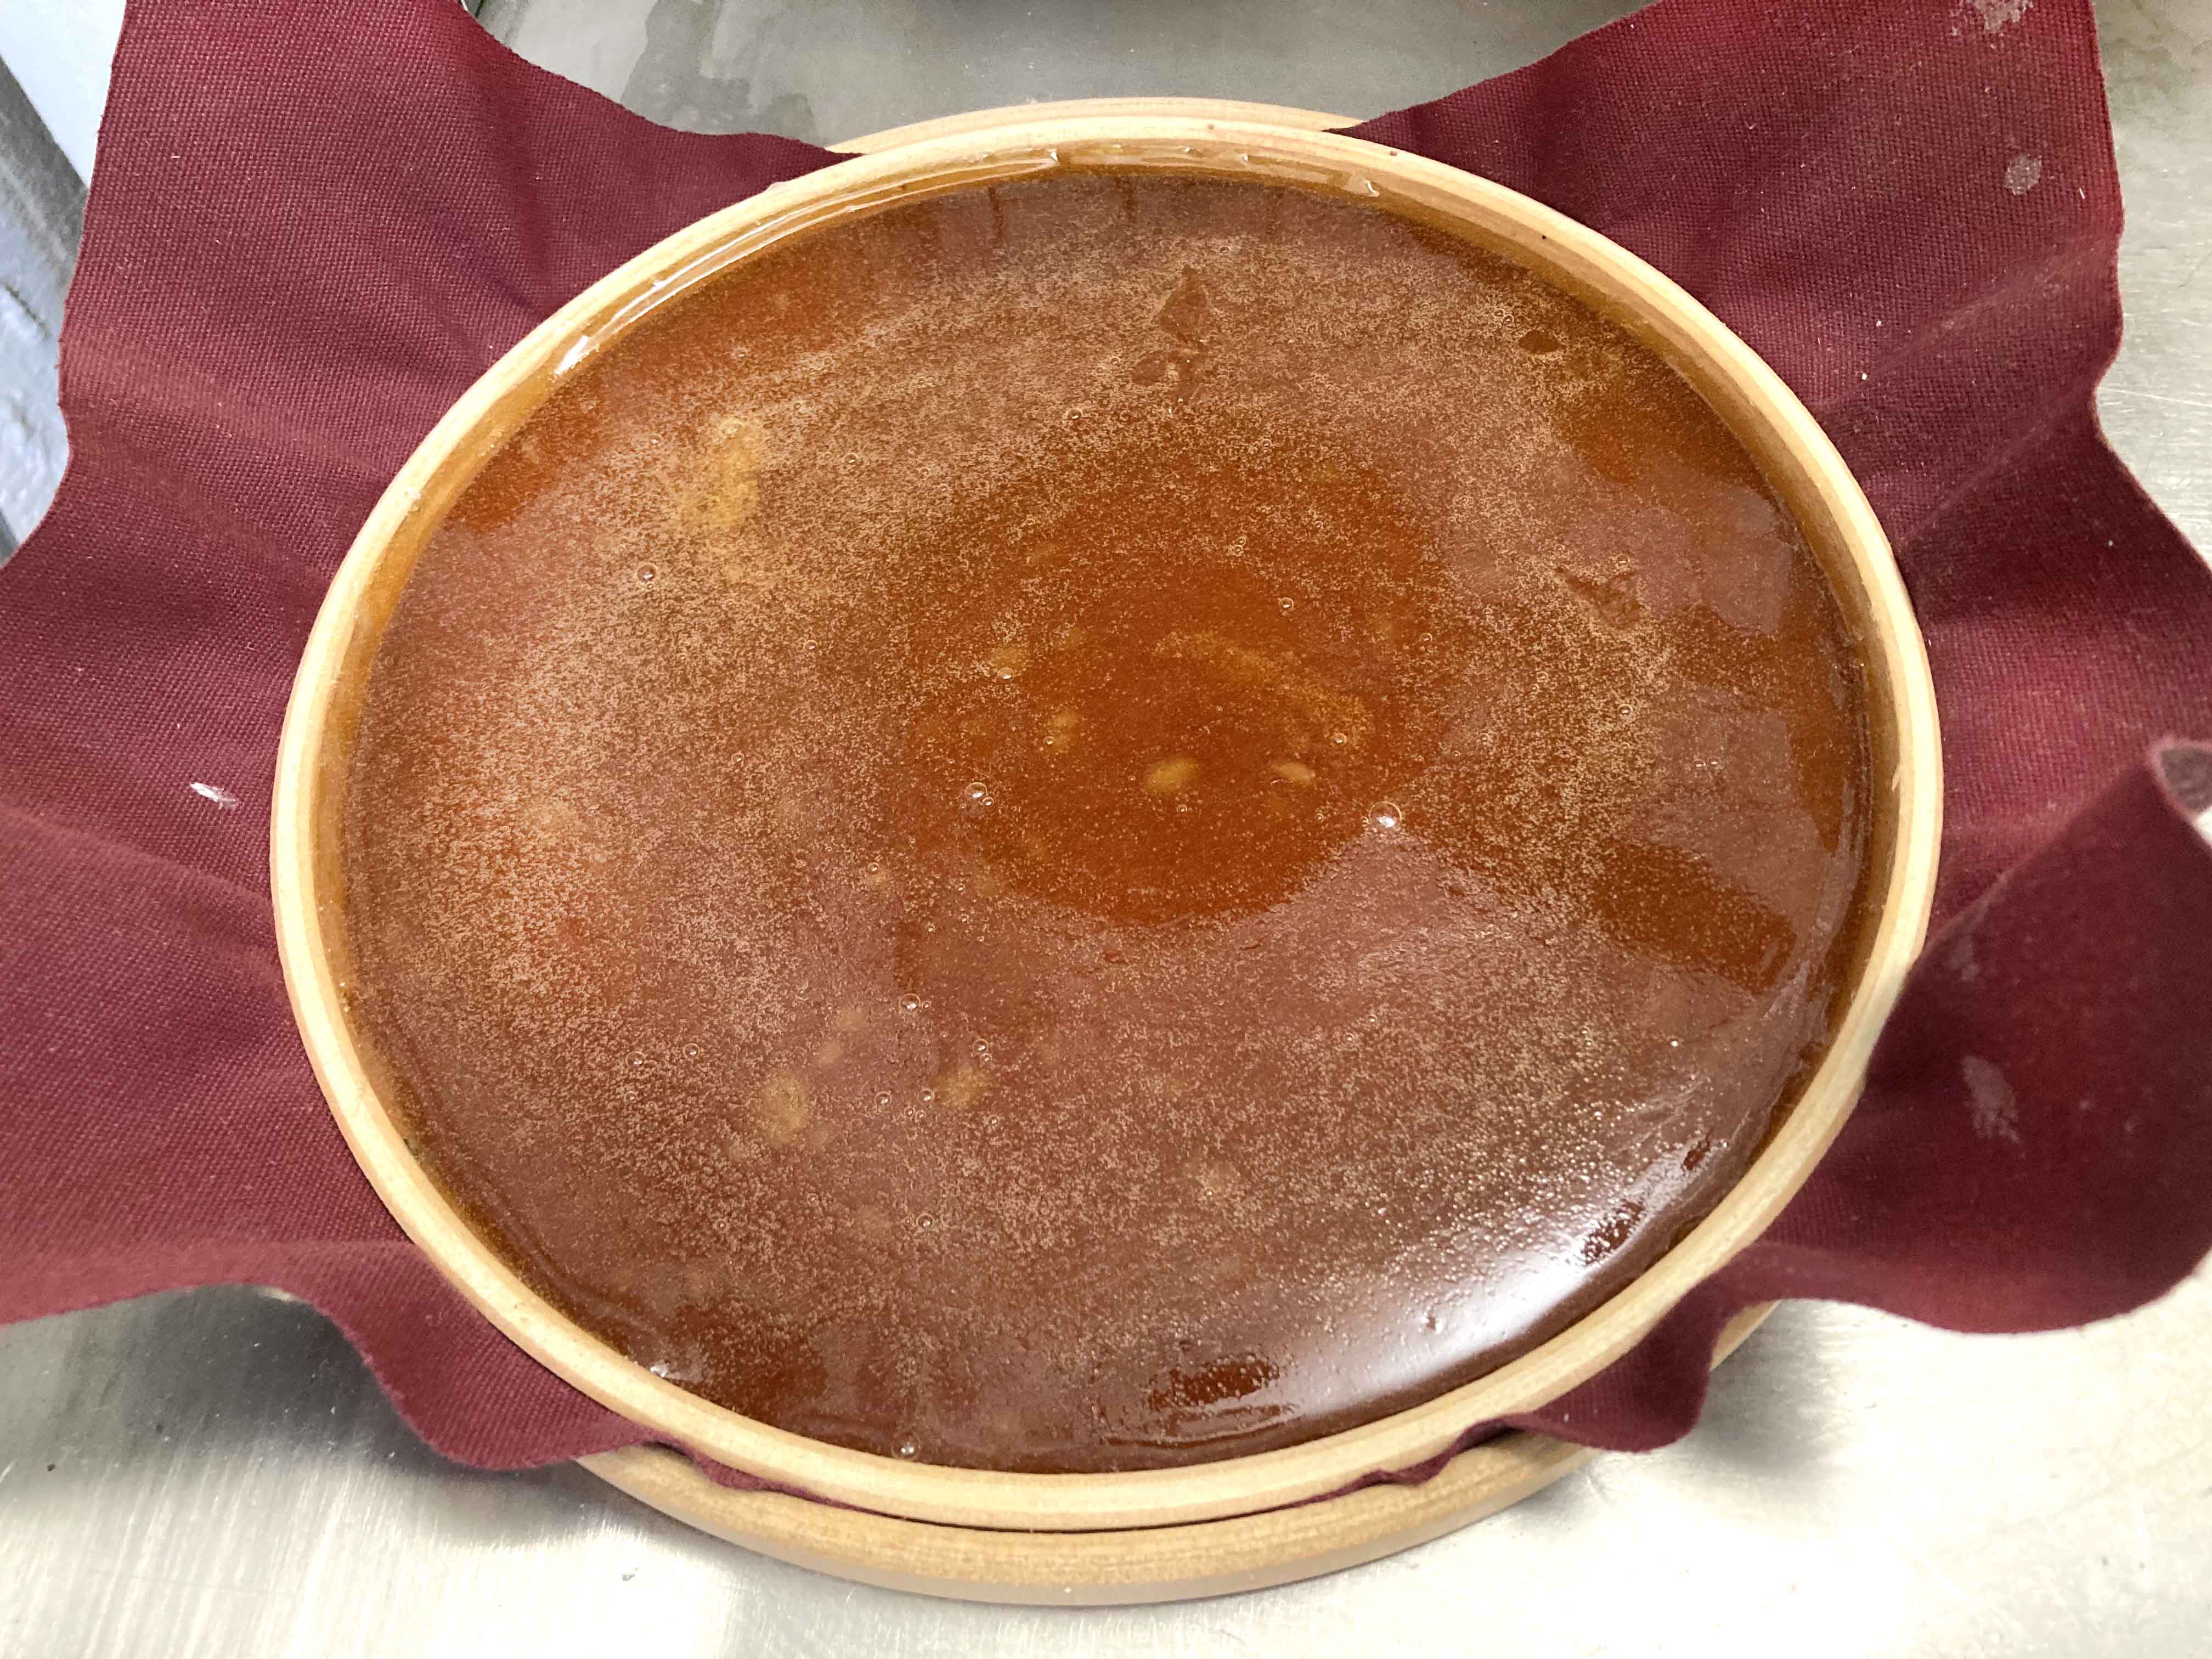
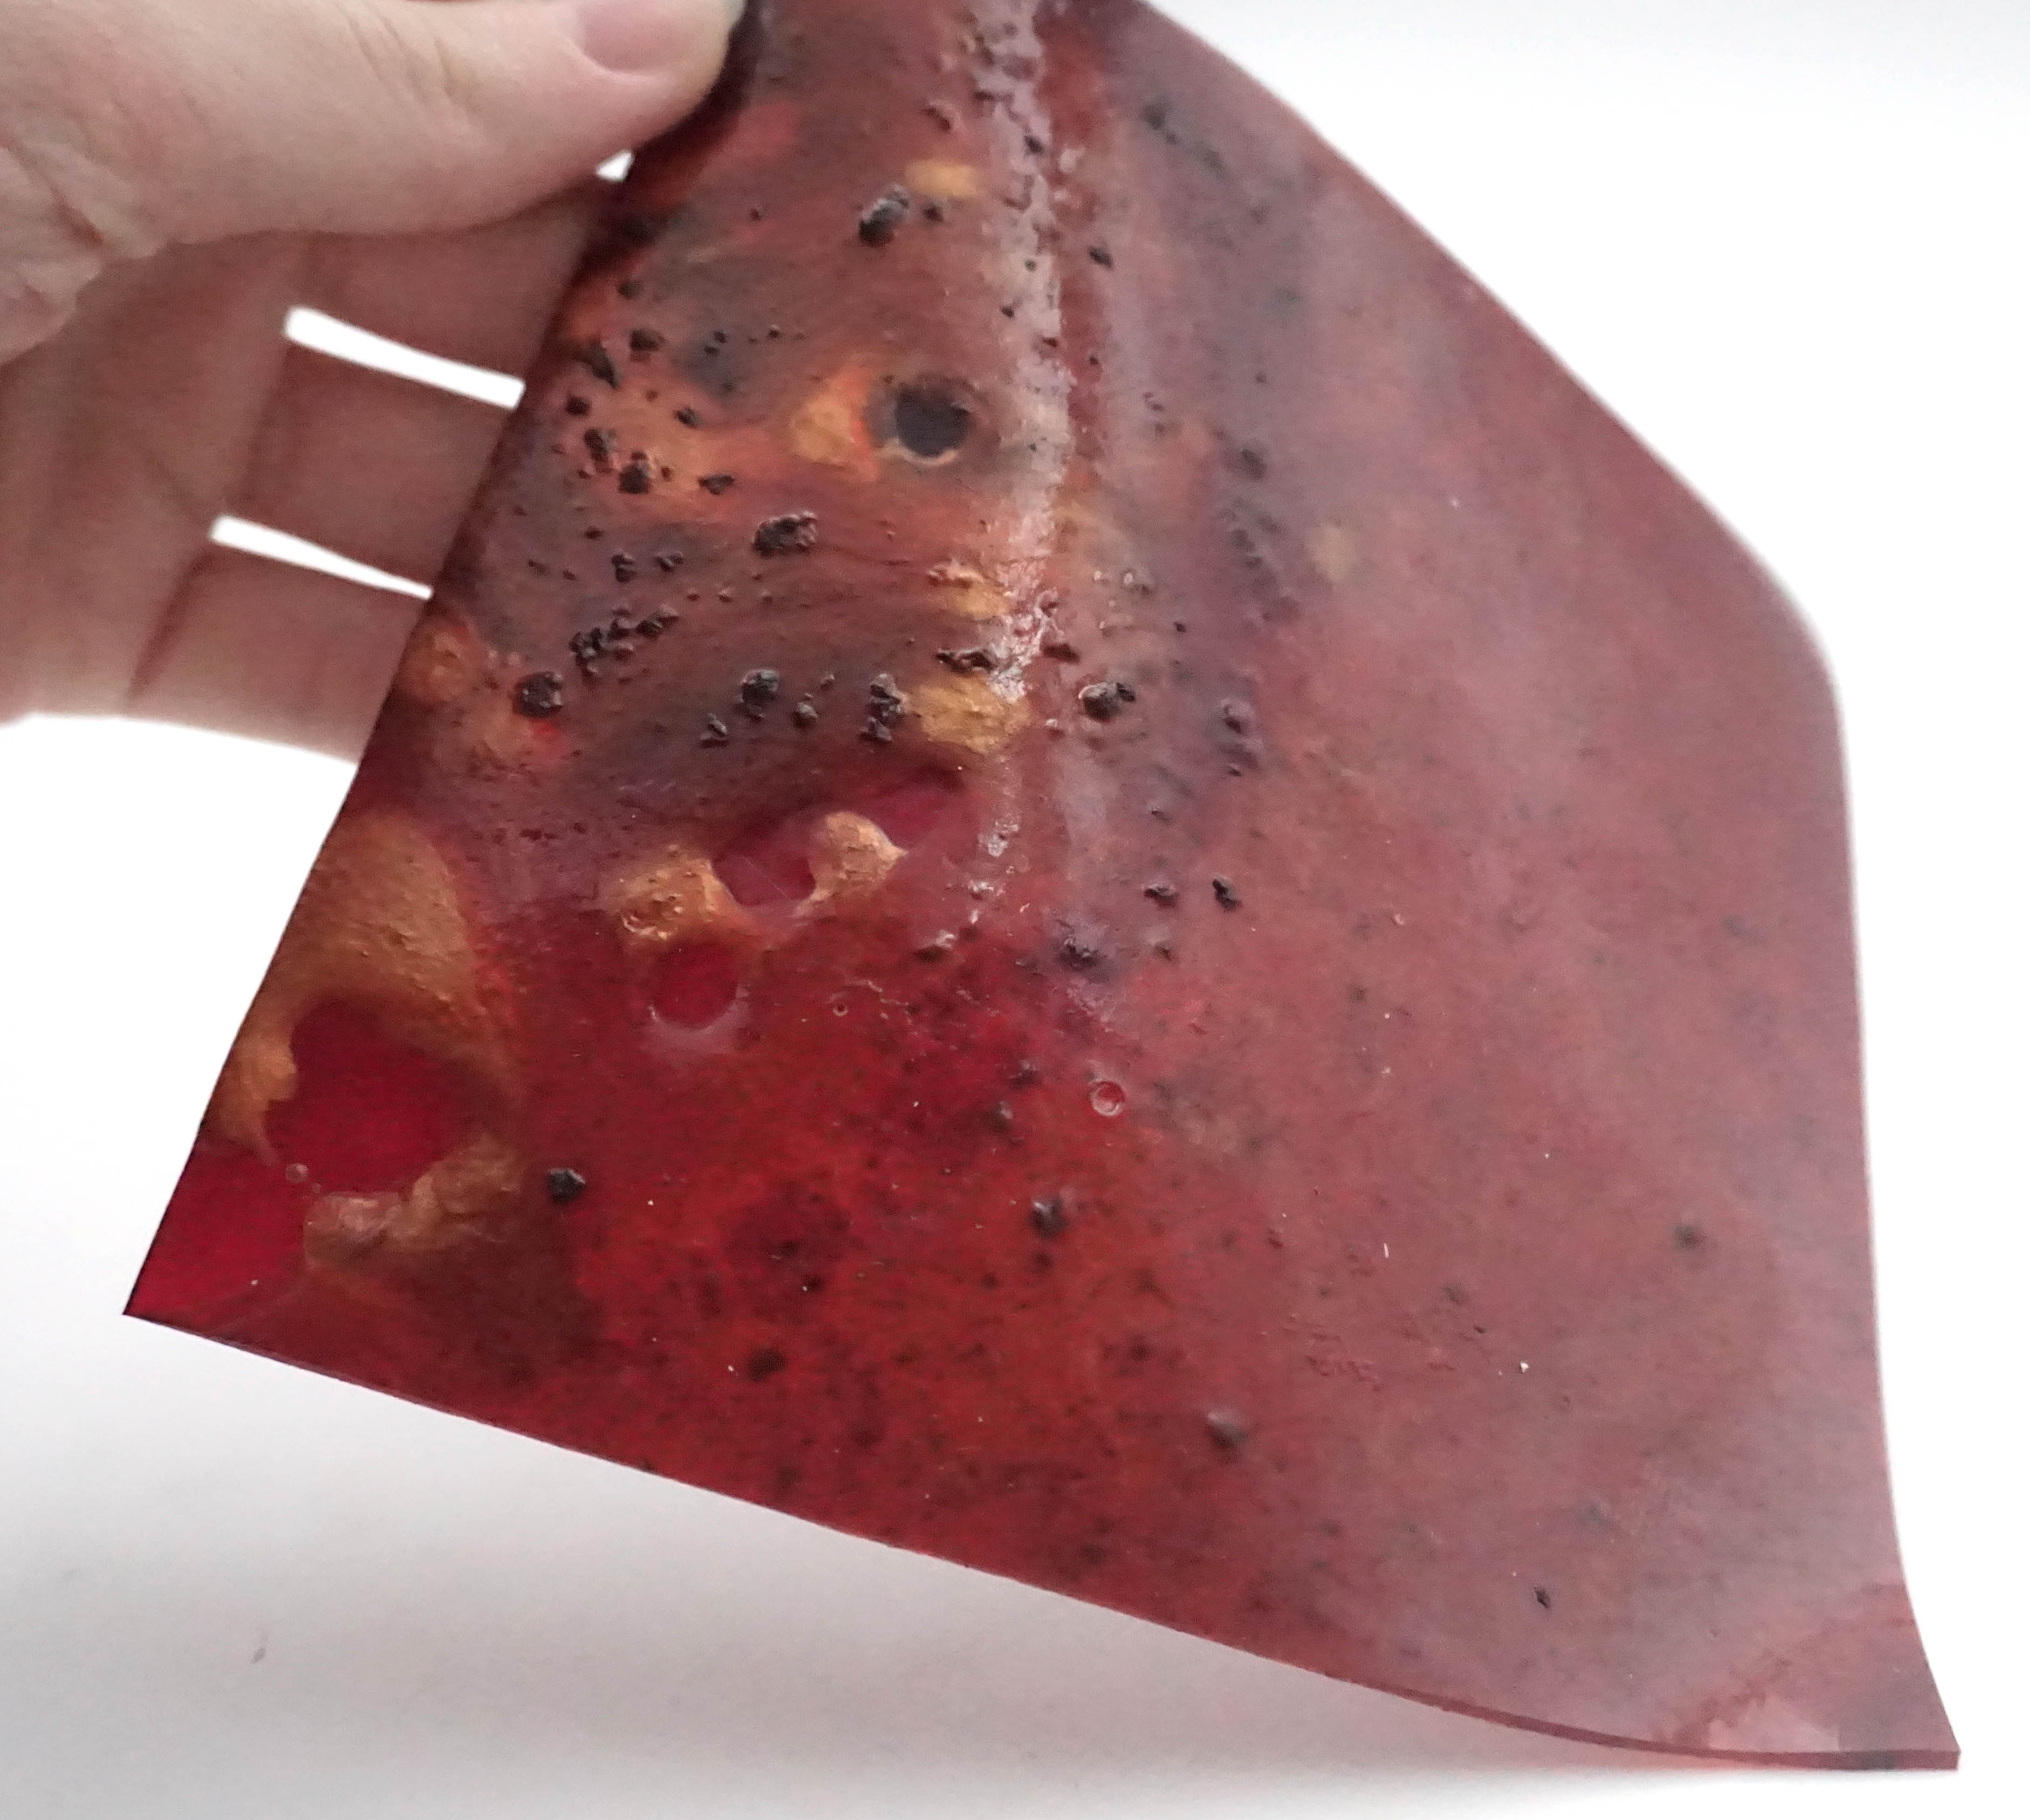
Gold recipe:
* 700 ml Mineral Water
* 42g Sodium Alginate
* 105ml Glycerine
* 42g Olive oil
* 2g Cinamon
* 26g Mica gold azteca
* 14g Curcuma

* 30g Calcium chloride
* 300ml Water
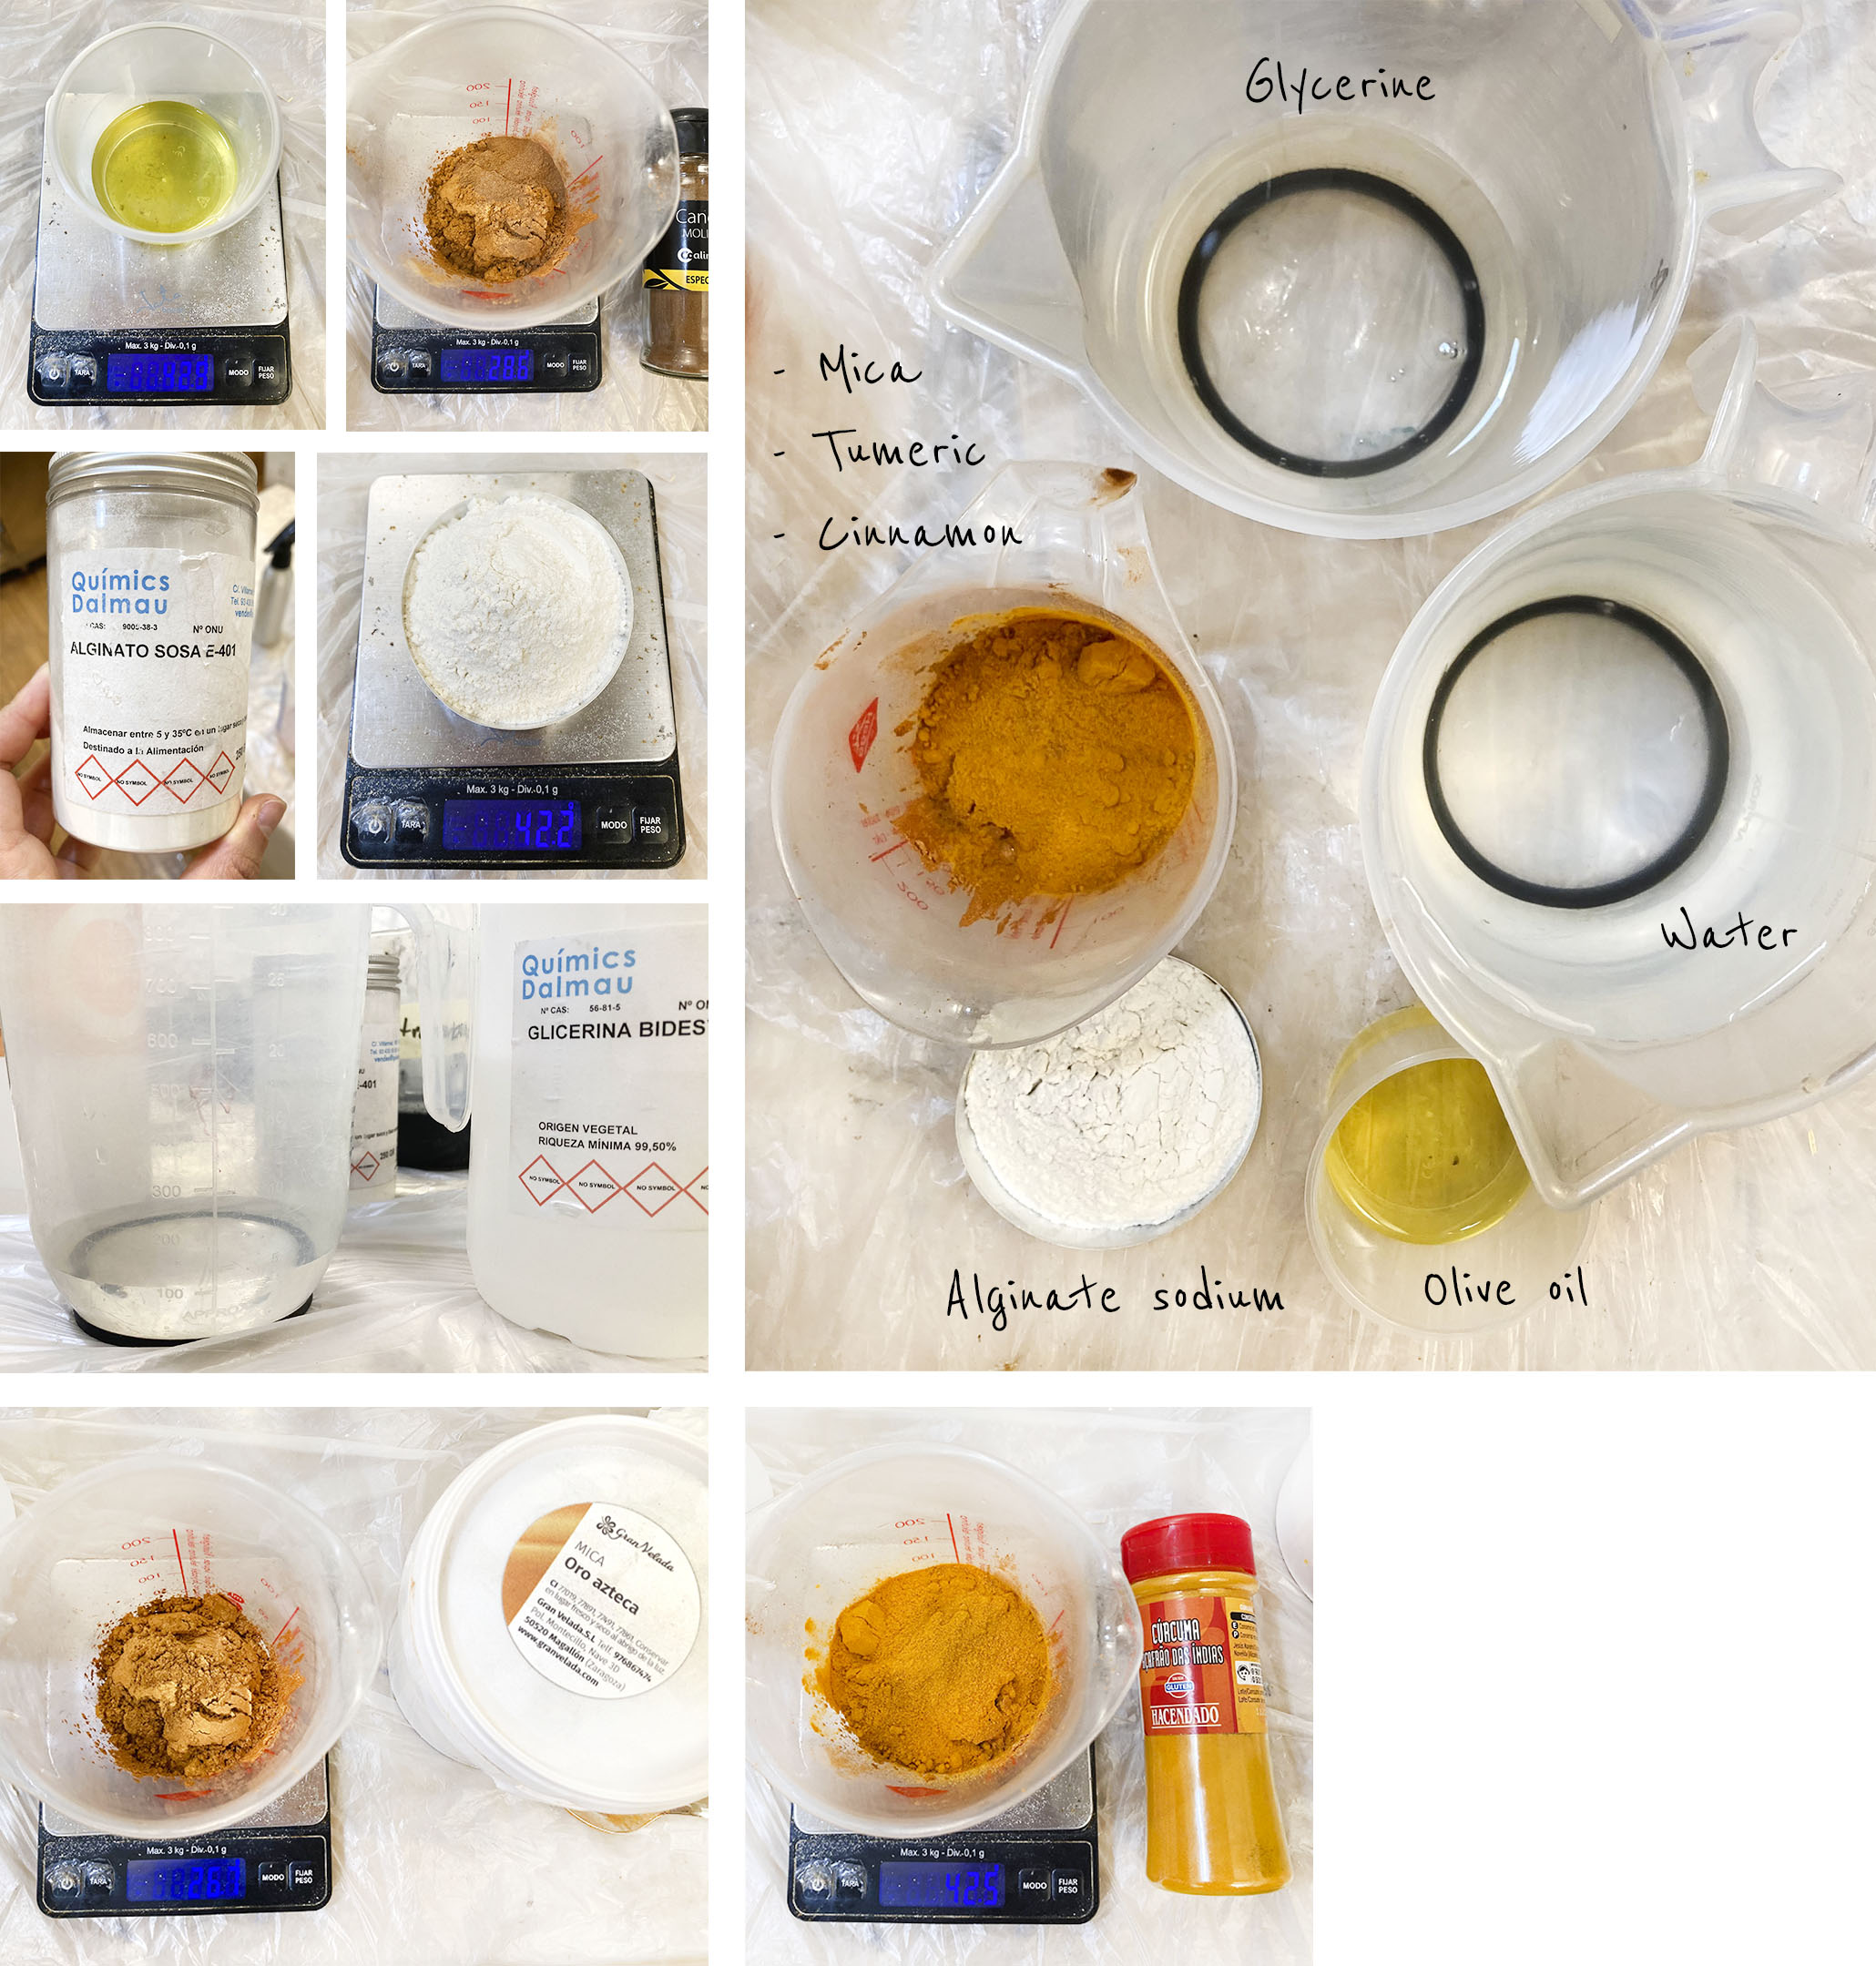
The process is the same as Sodium Alginate Casting reciepe. In this case, I used a mold with fabric on the surface to let it breathe.
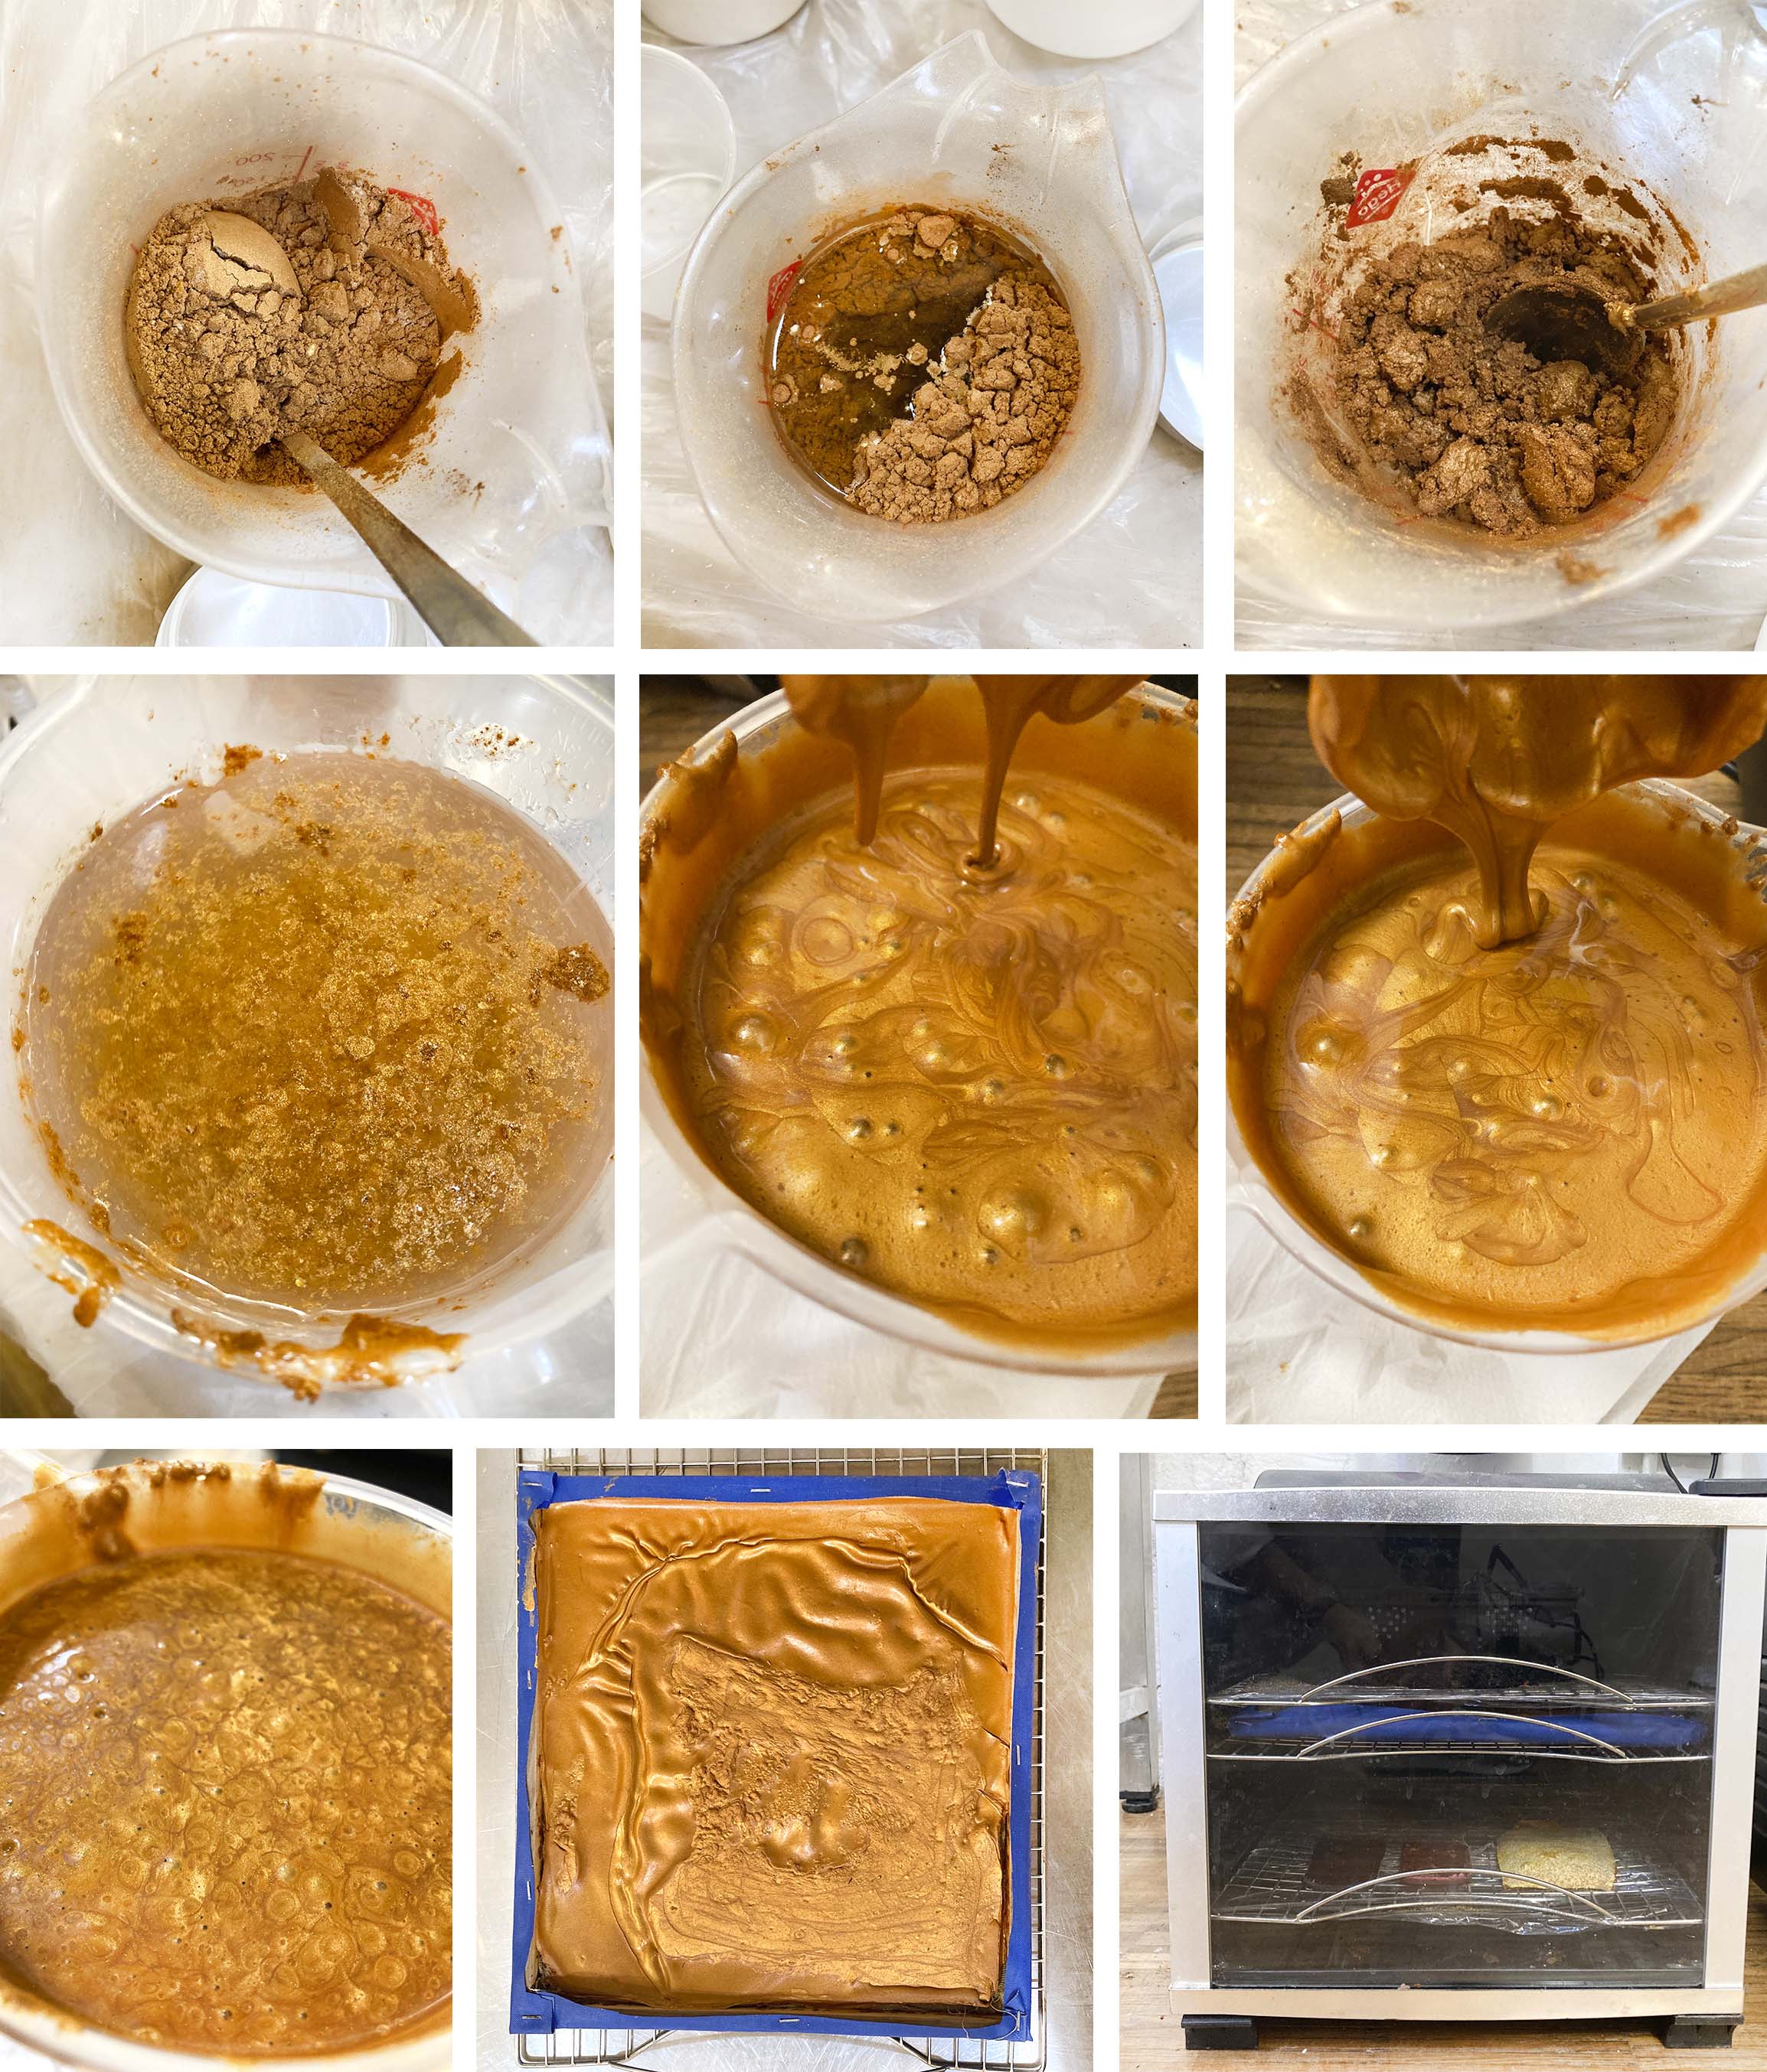
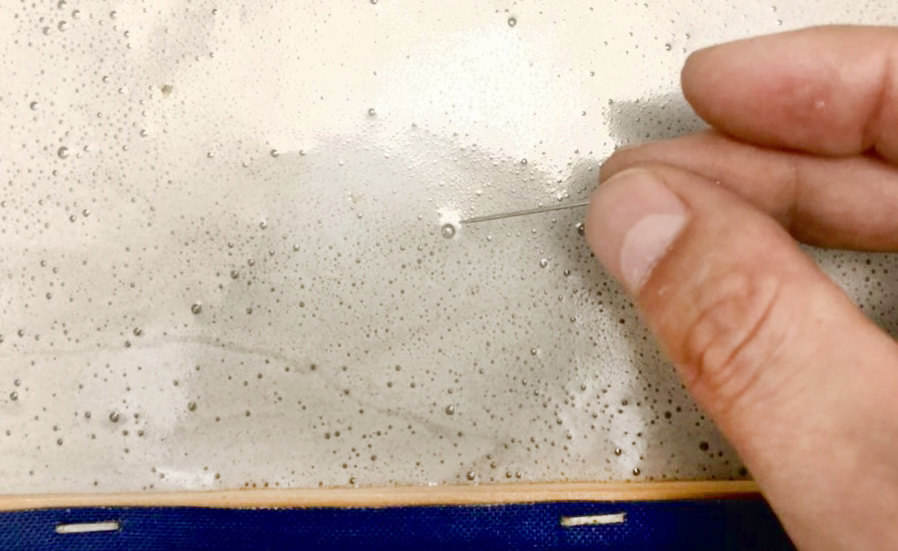
It was hard to blend because I made a huge quantity to fill the mold and also, the mix was too sold for the blender. Consequently, the mixture wasn't properly and had some bubbles so I need to remove it with a needle before I pour it into the mold.
After 10 days dying, the final result:
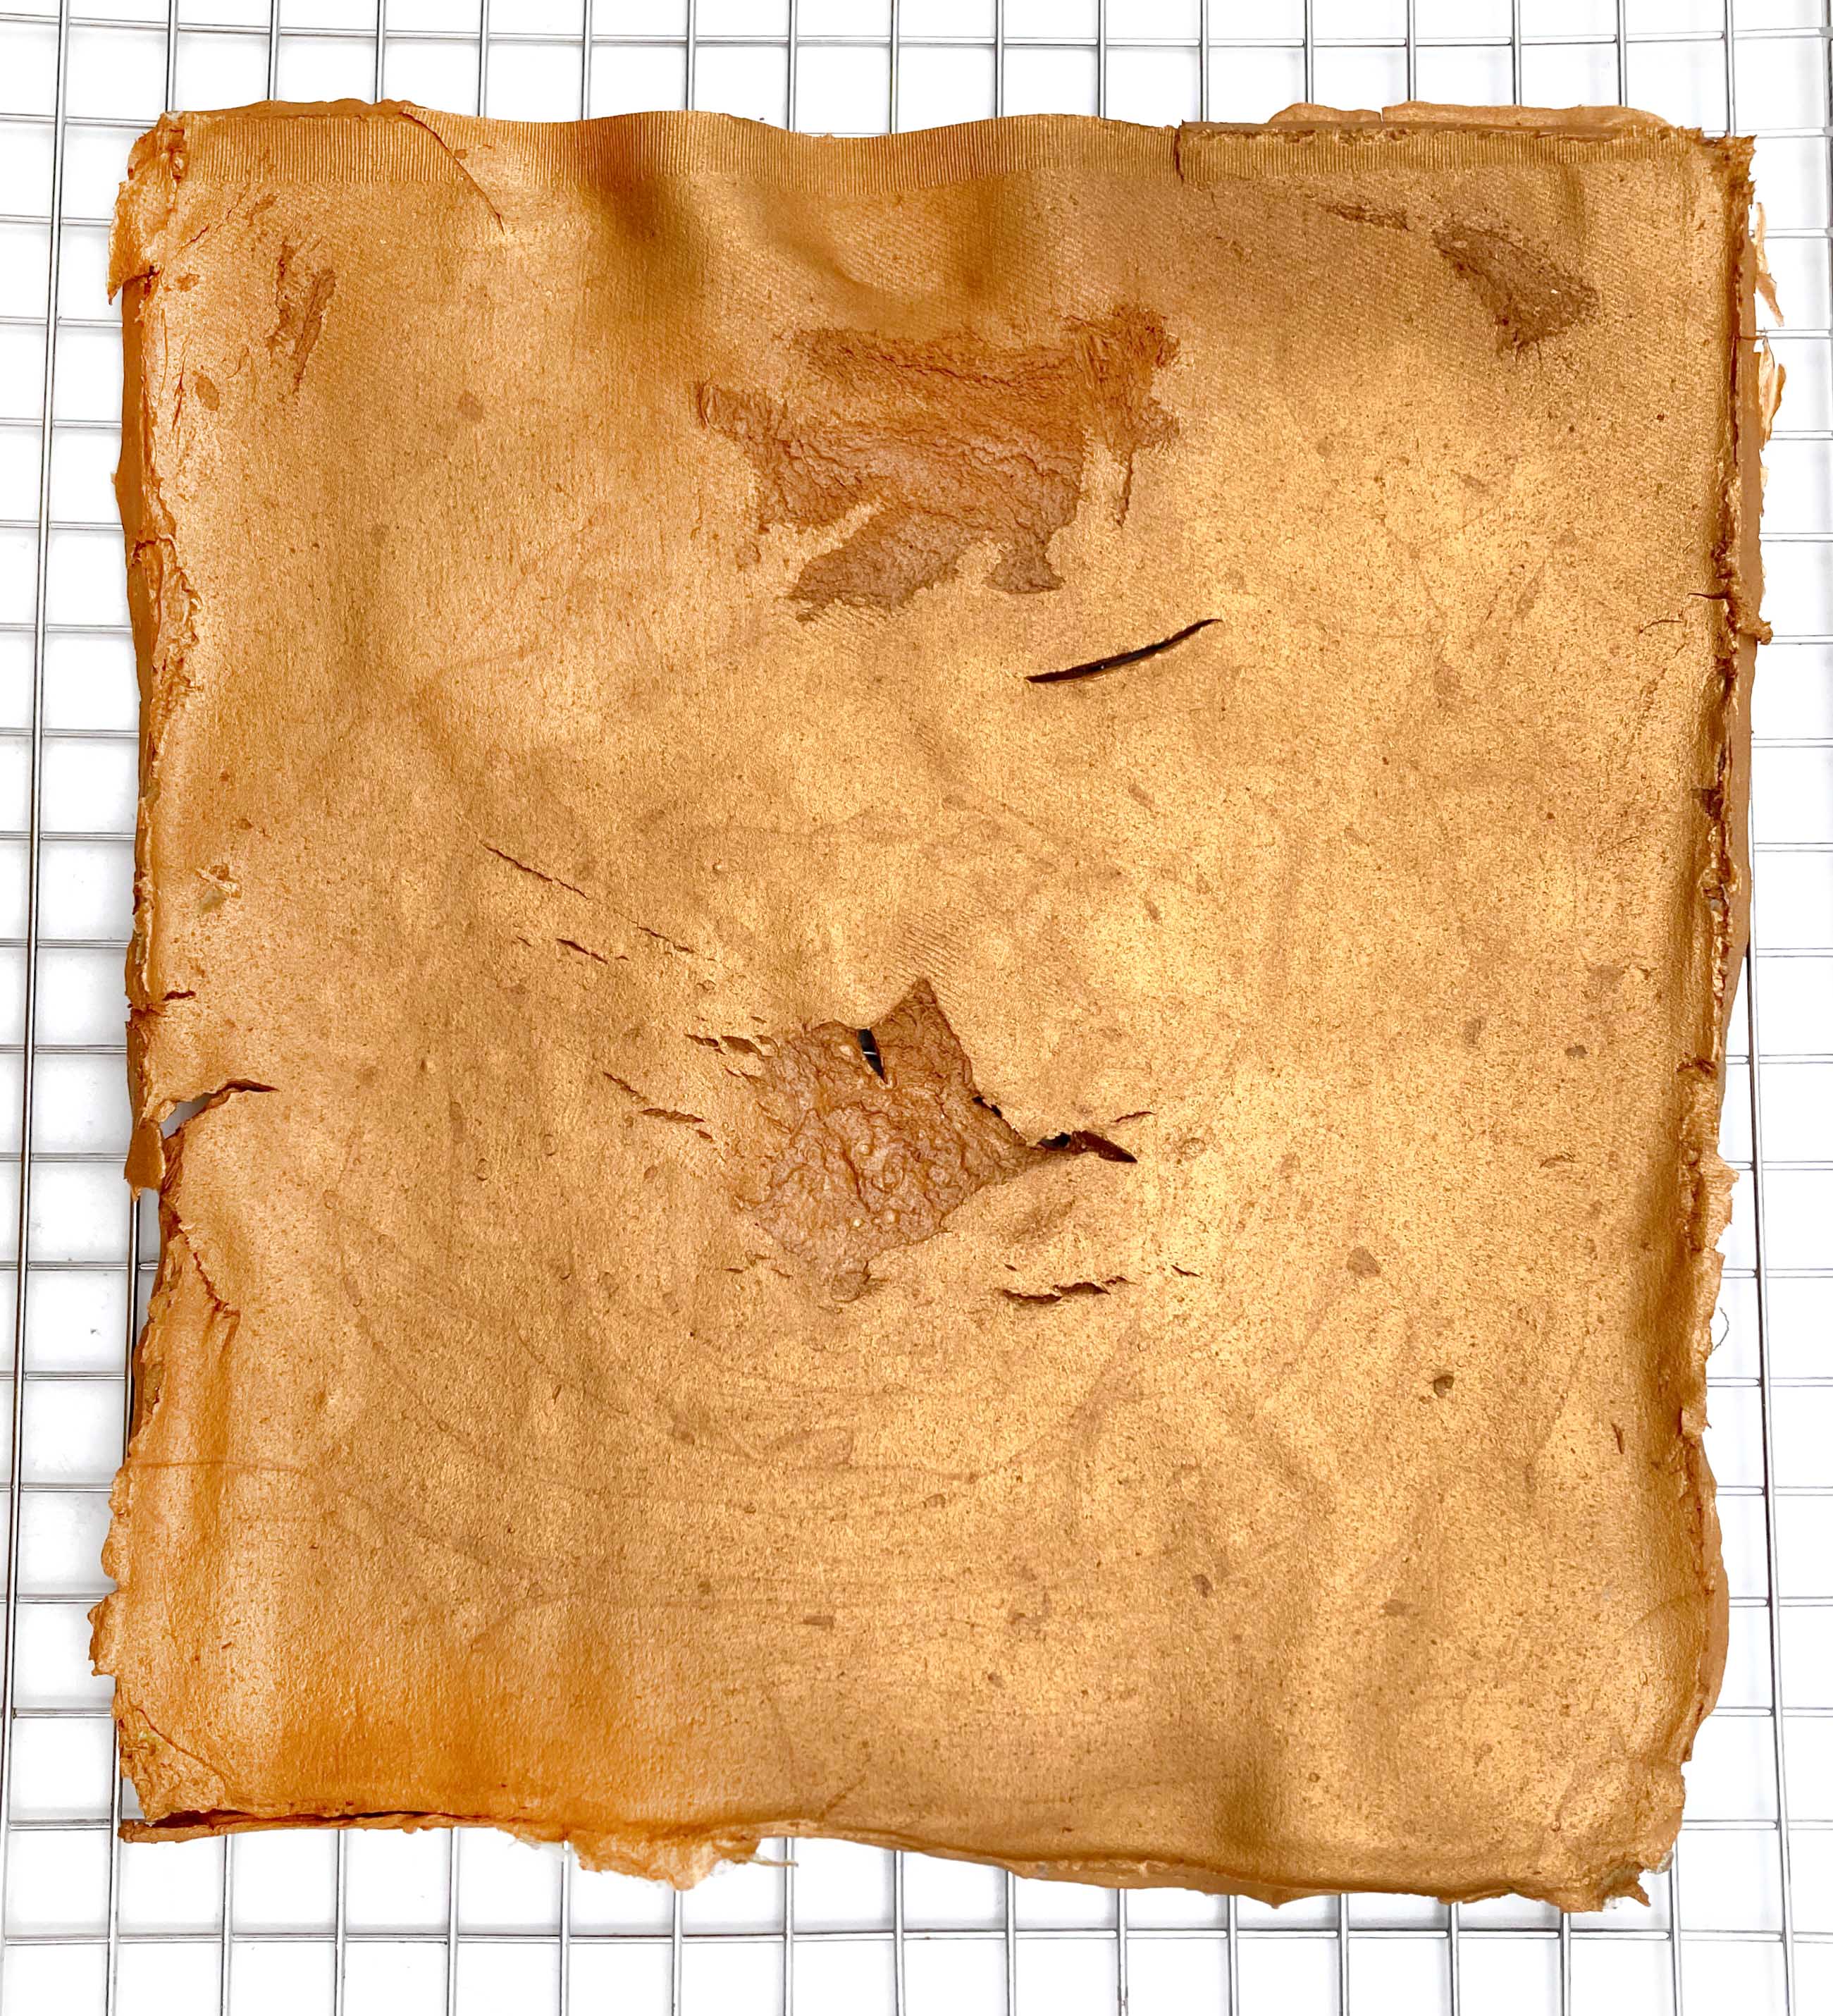
While I was removing the sample to get it dryer faster, it still stuck in the mold, so unfortunately it creates some texture and cuts in it.
Sodium Alginate Gold de Emma
For another try, I would mix much better and I will make the layer thinner to dry it faster.
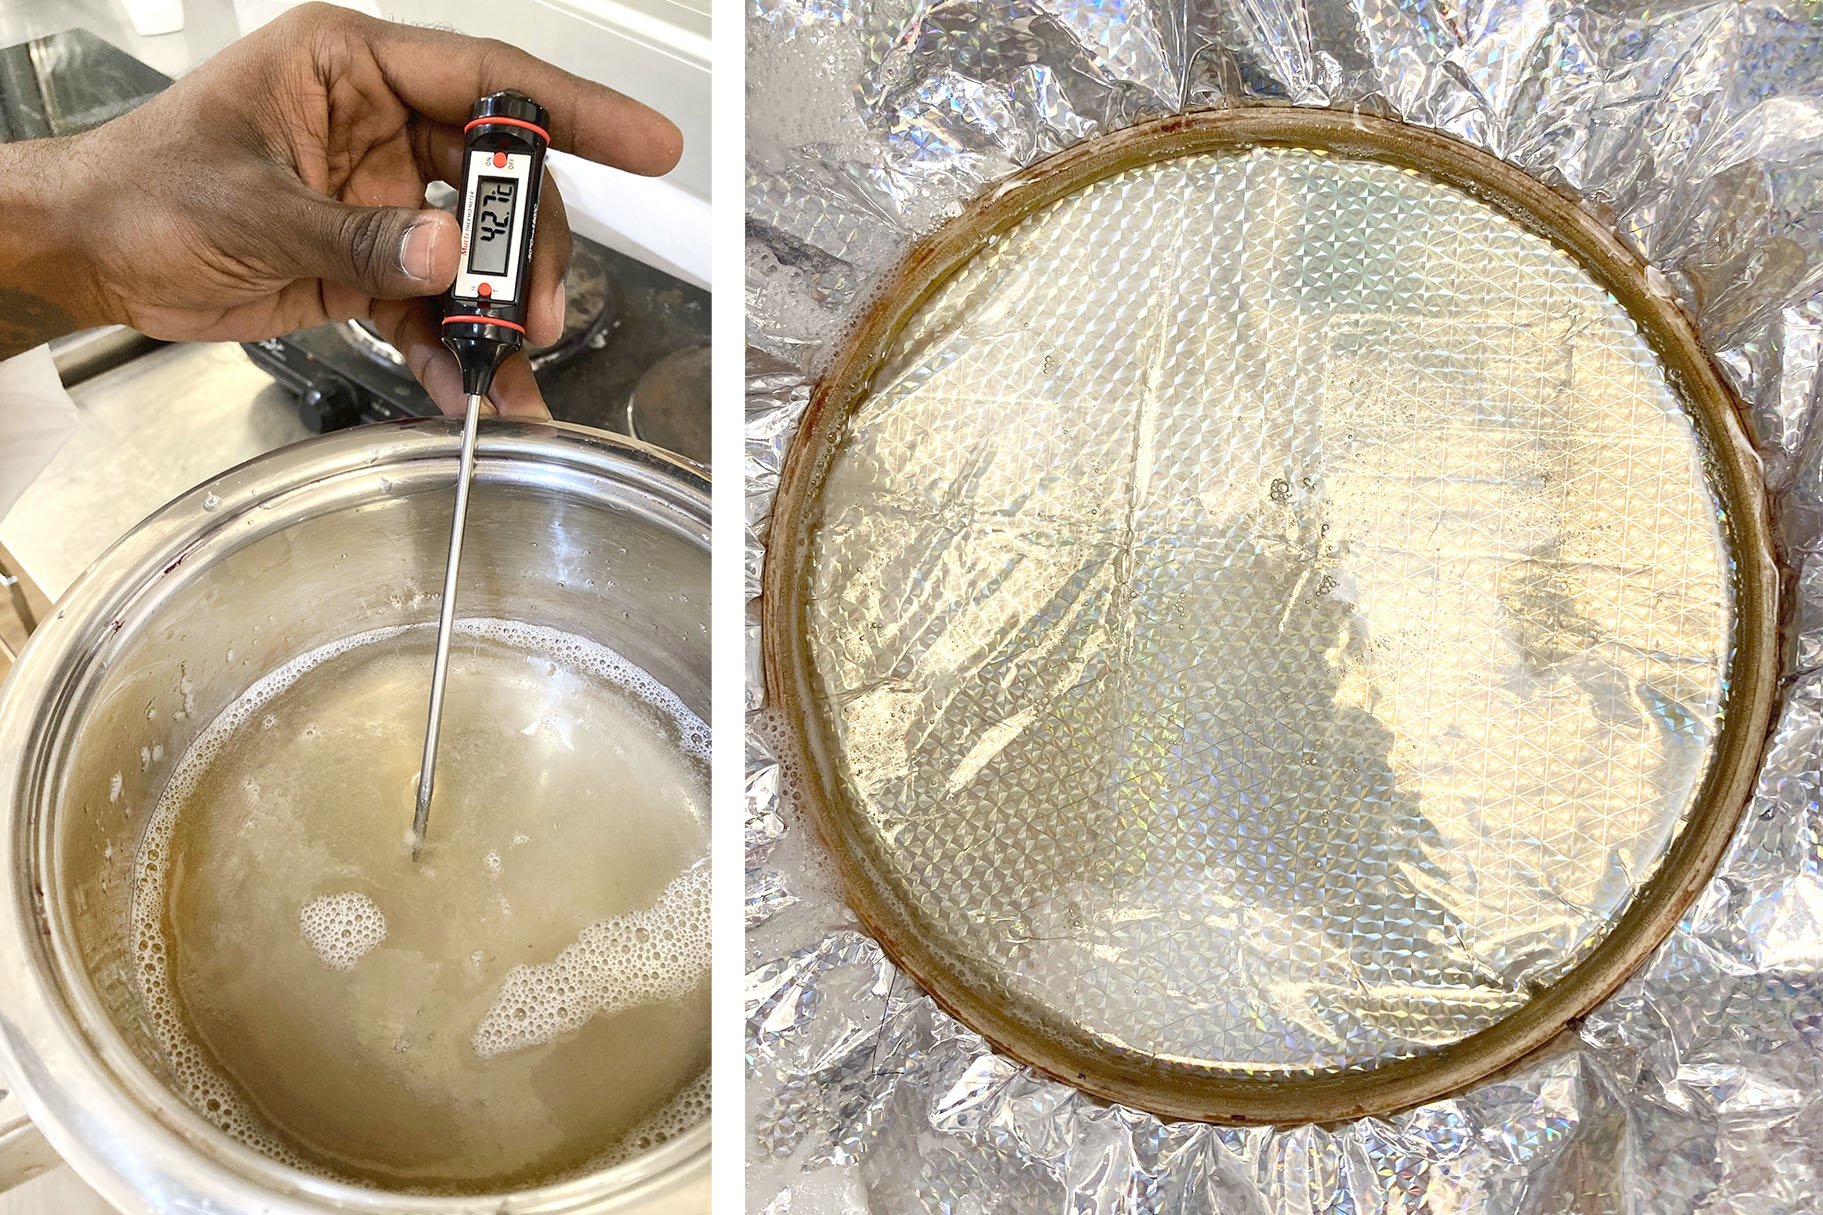
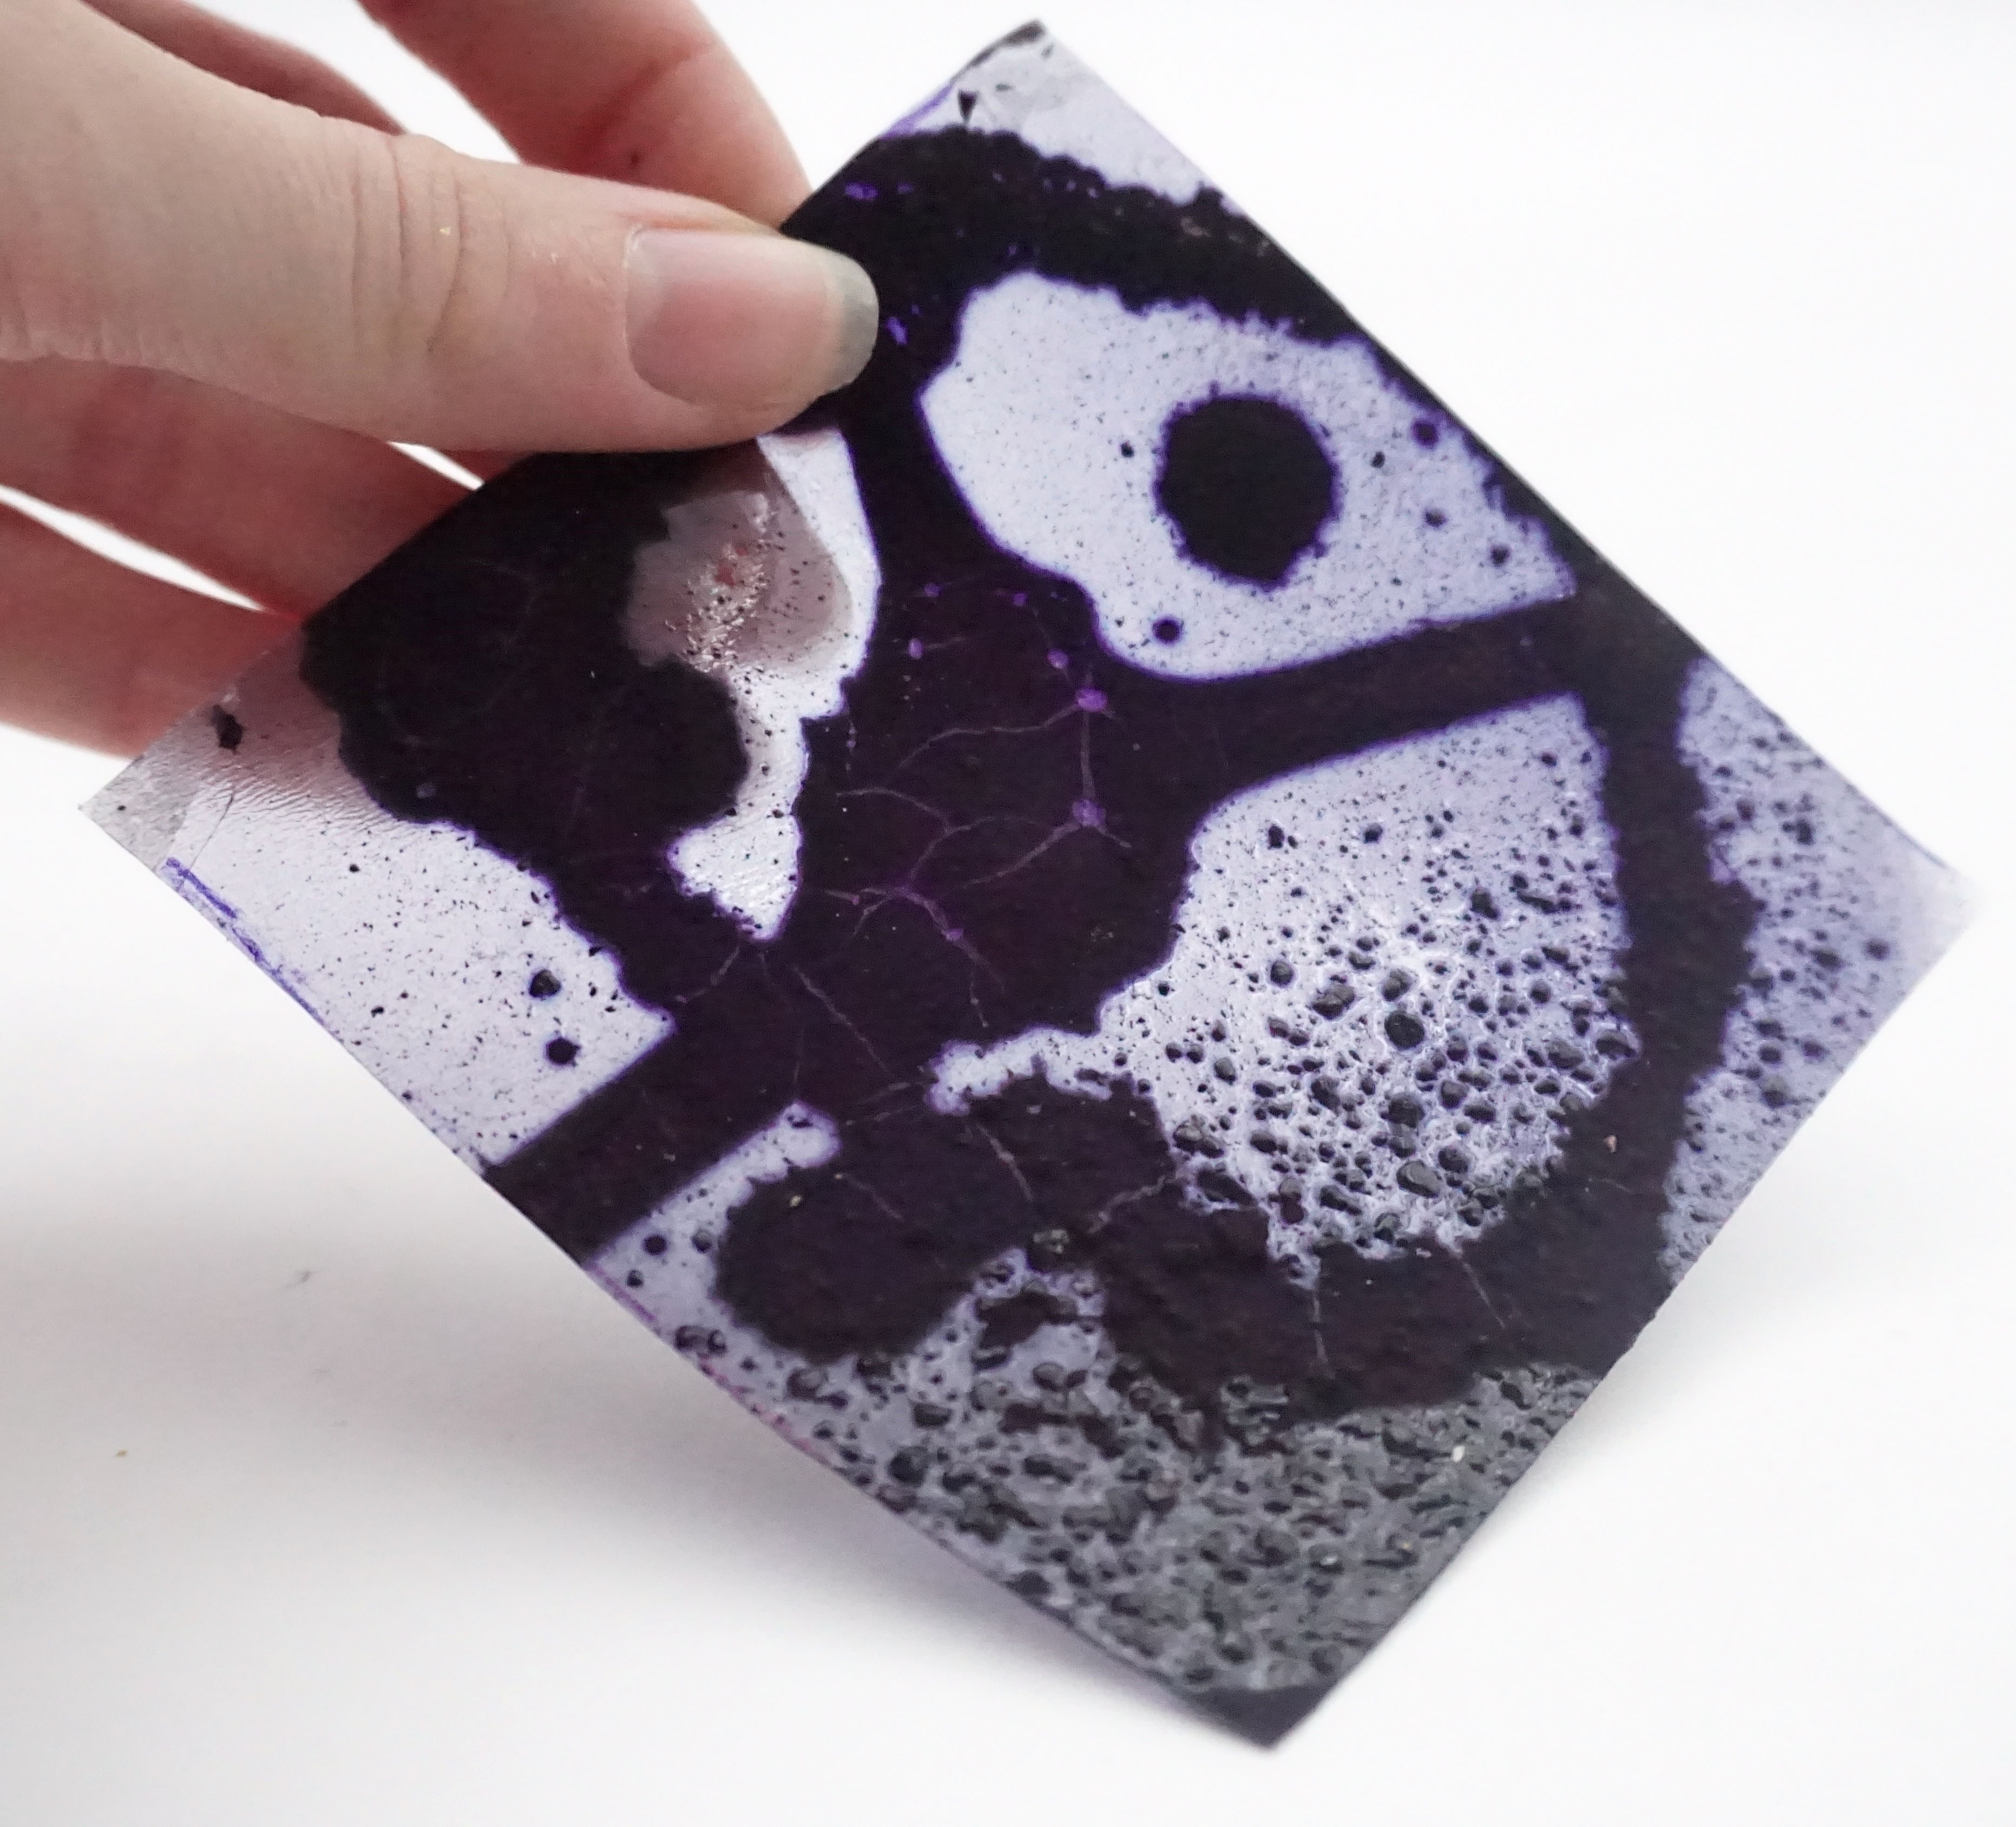
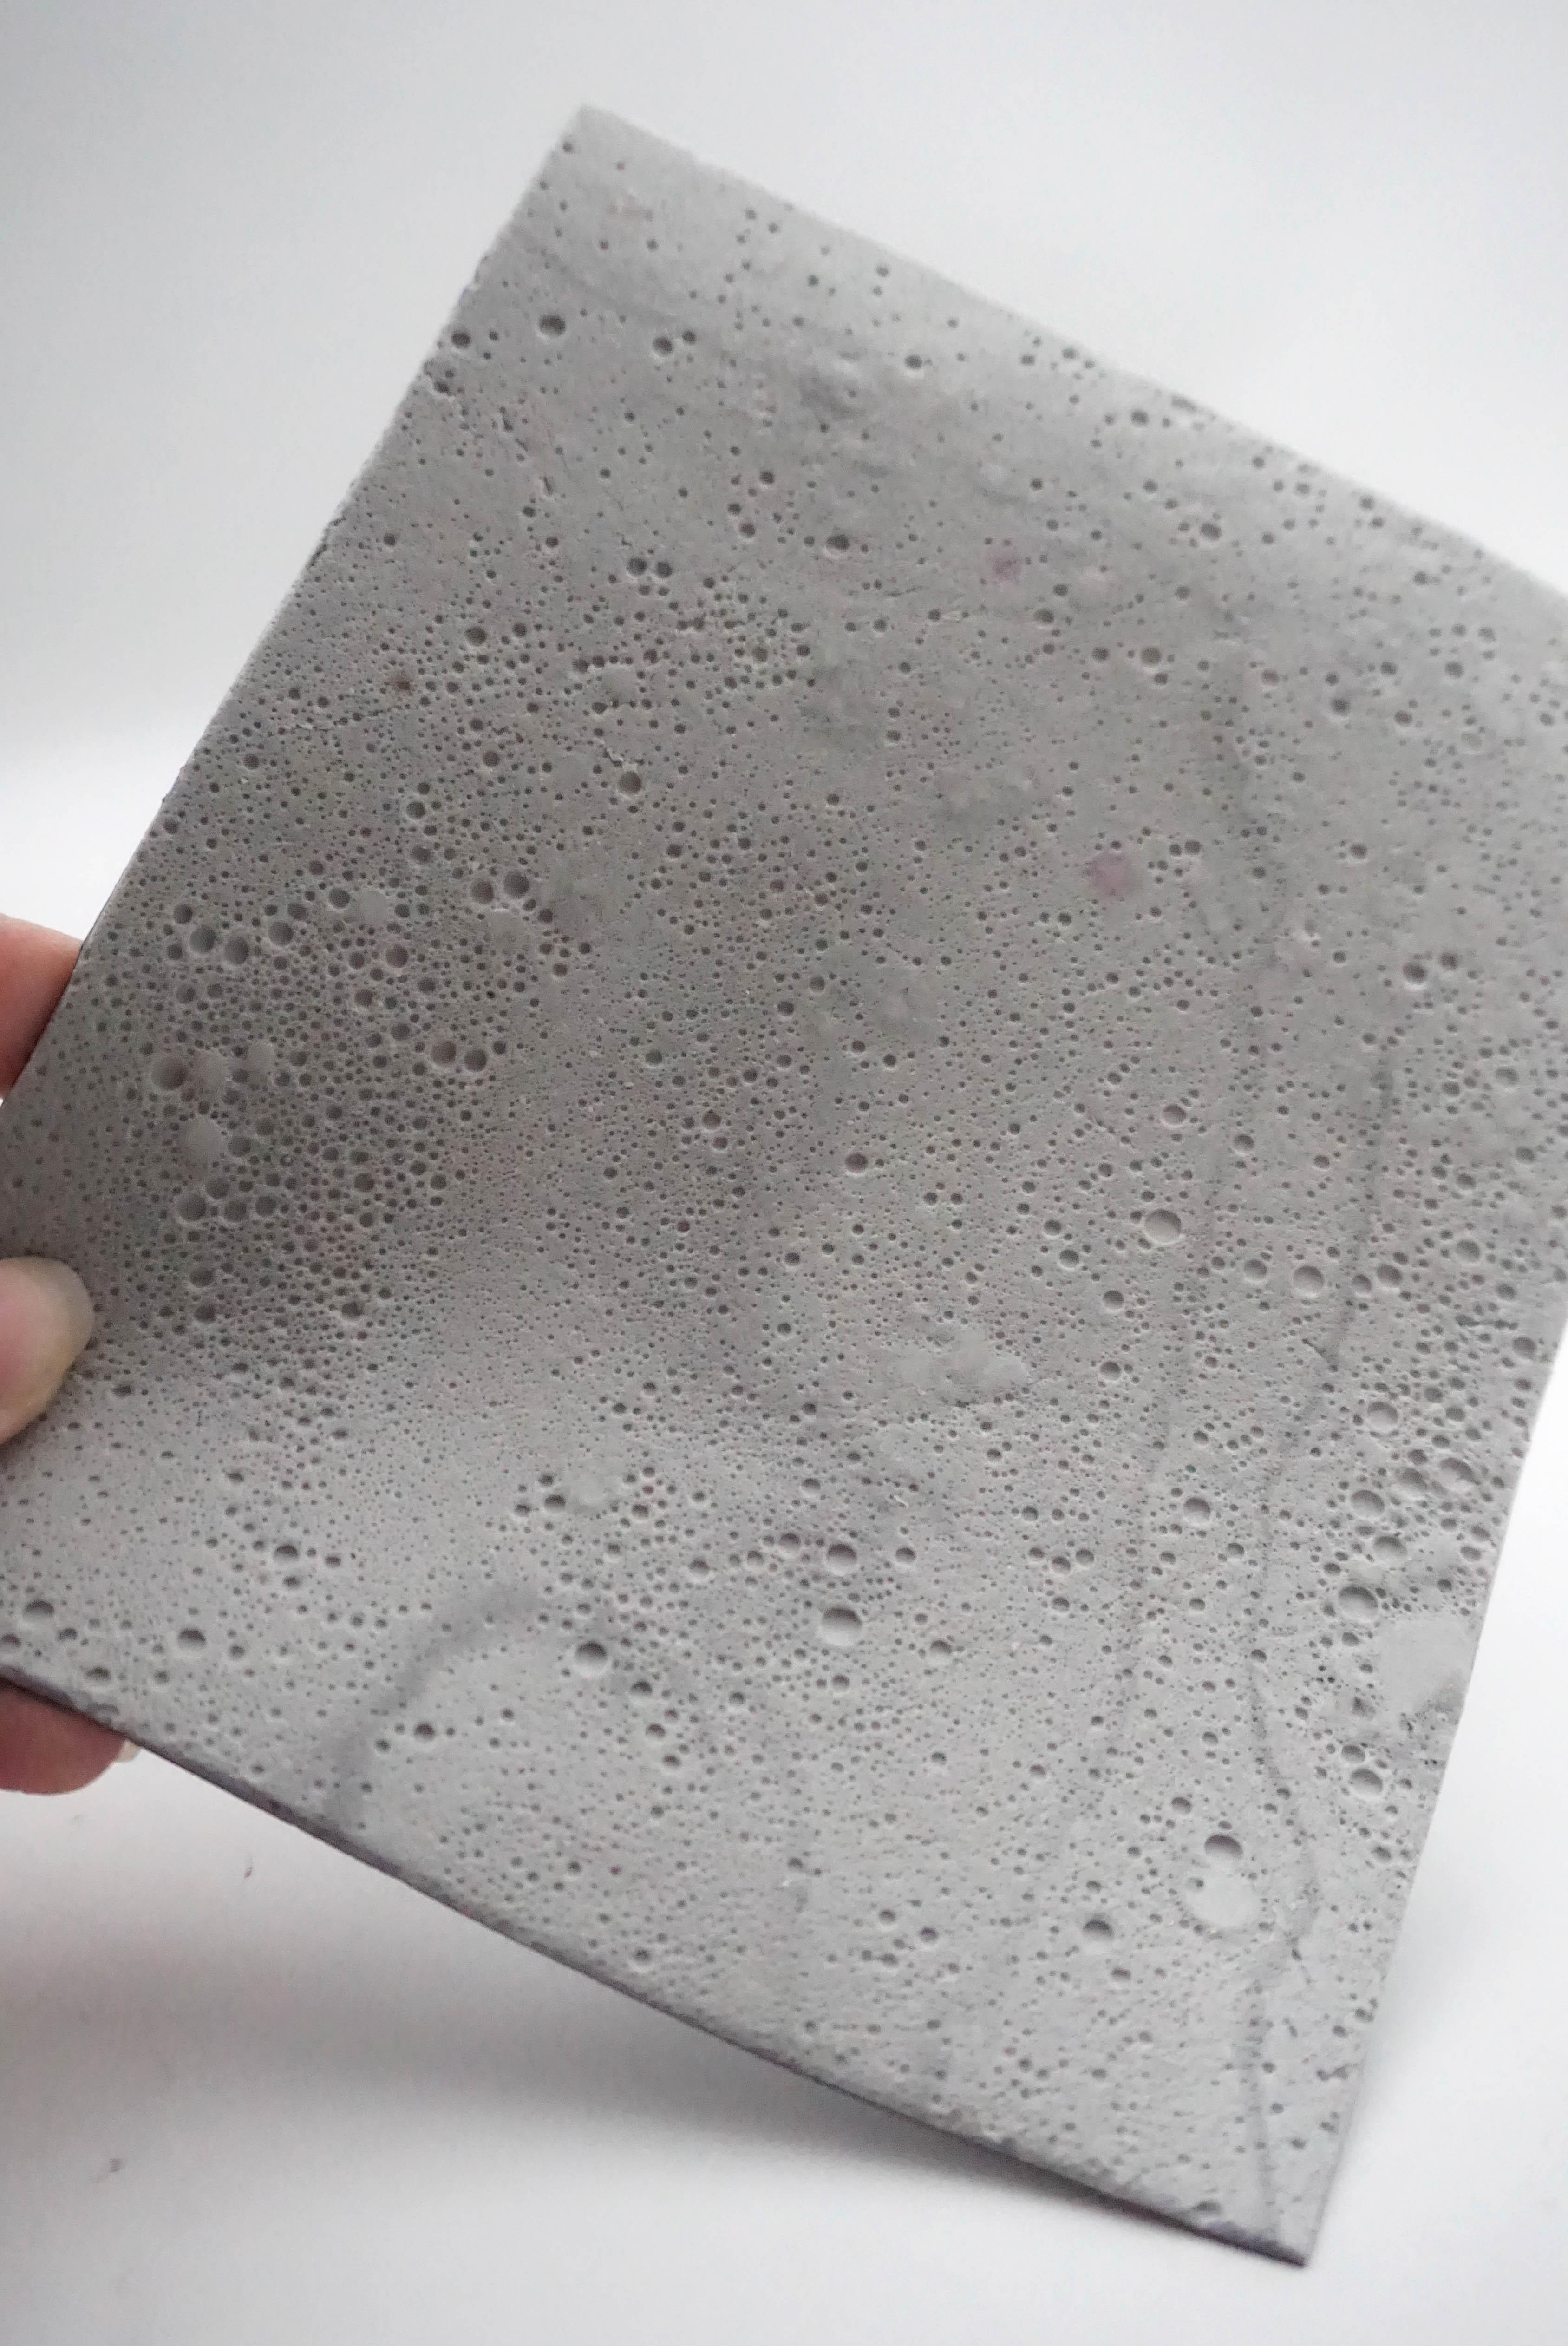
Gelatine recipe
It's a hot recipe.
To get a transparent material use Water + Gelatin.
To get the foam add all the ingredients and mix fast to get the bubles.
* 48g Gelatine
* 240ml Water/Dye bath
* Glycerol (Will depends the flexibility. 0g= Rigid, 24g normal, 48g Elastic)
* Warm up water in a cooking pot.
* Add the Glycerine. At first, it's super liquid.
* Add the Gelatine while gently whisking. In case, you want pigment to add it when it starts boiling and let it dissolve.
* Mix slowly until smooth.
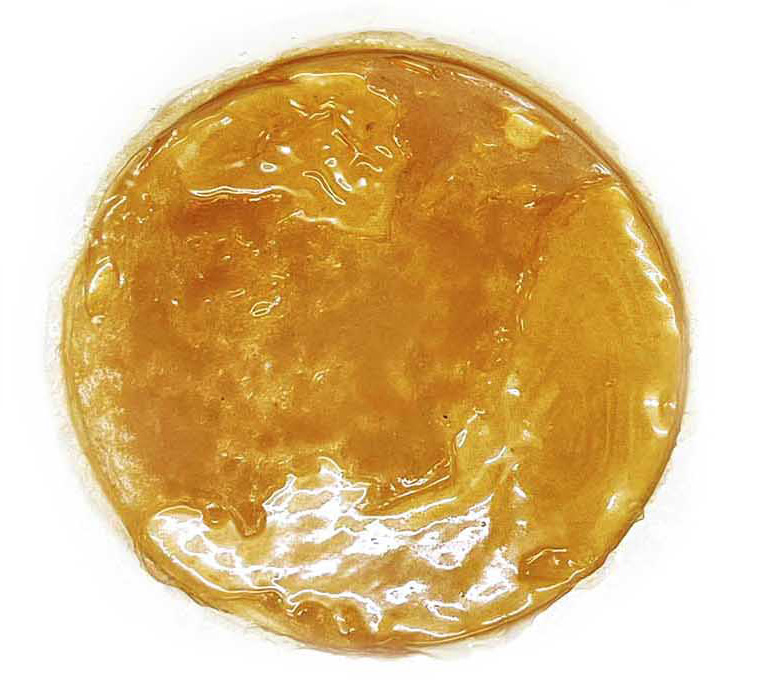
* Simmer for 15-30', max 85º. Aim for a liquid honey consistency.
* Pour while hot on you surface.
* Let it dry. When it's solid and cold start turning to help the water loss of your piece.
Gelatin Process de Emma
Blow the mold to get the air up to the surface to extract the bubbles. In case we have a lot of air holes it will easily rip the Biomaterial when it's dry.
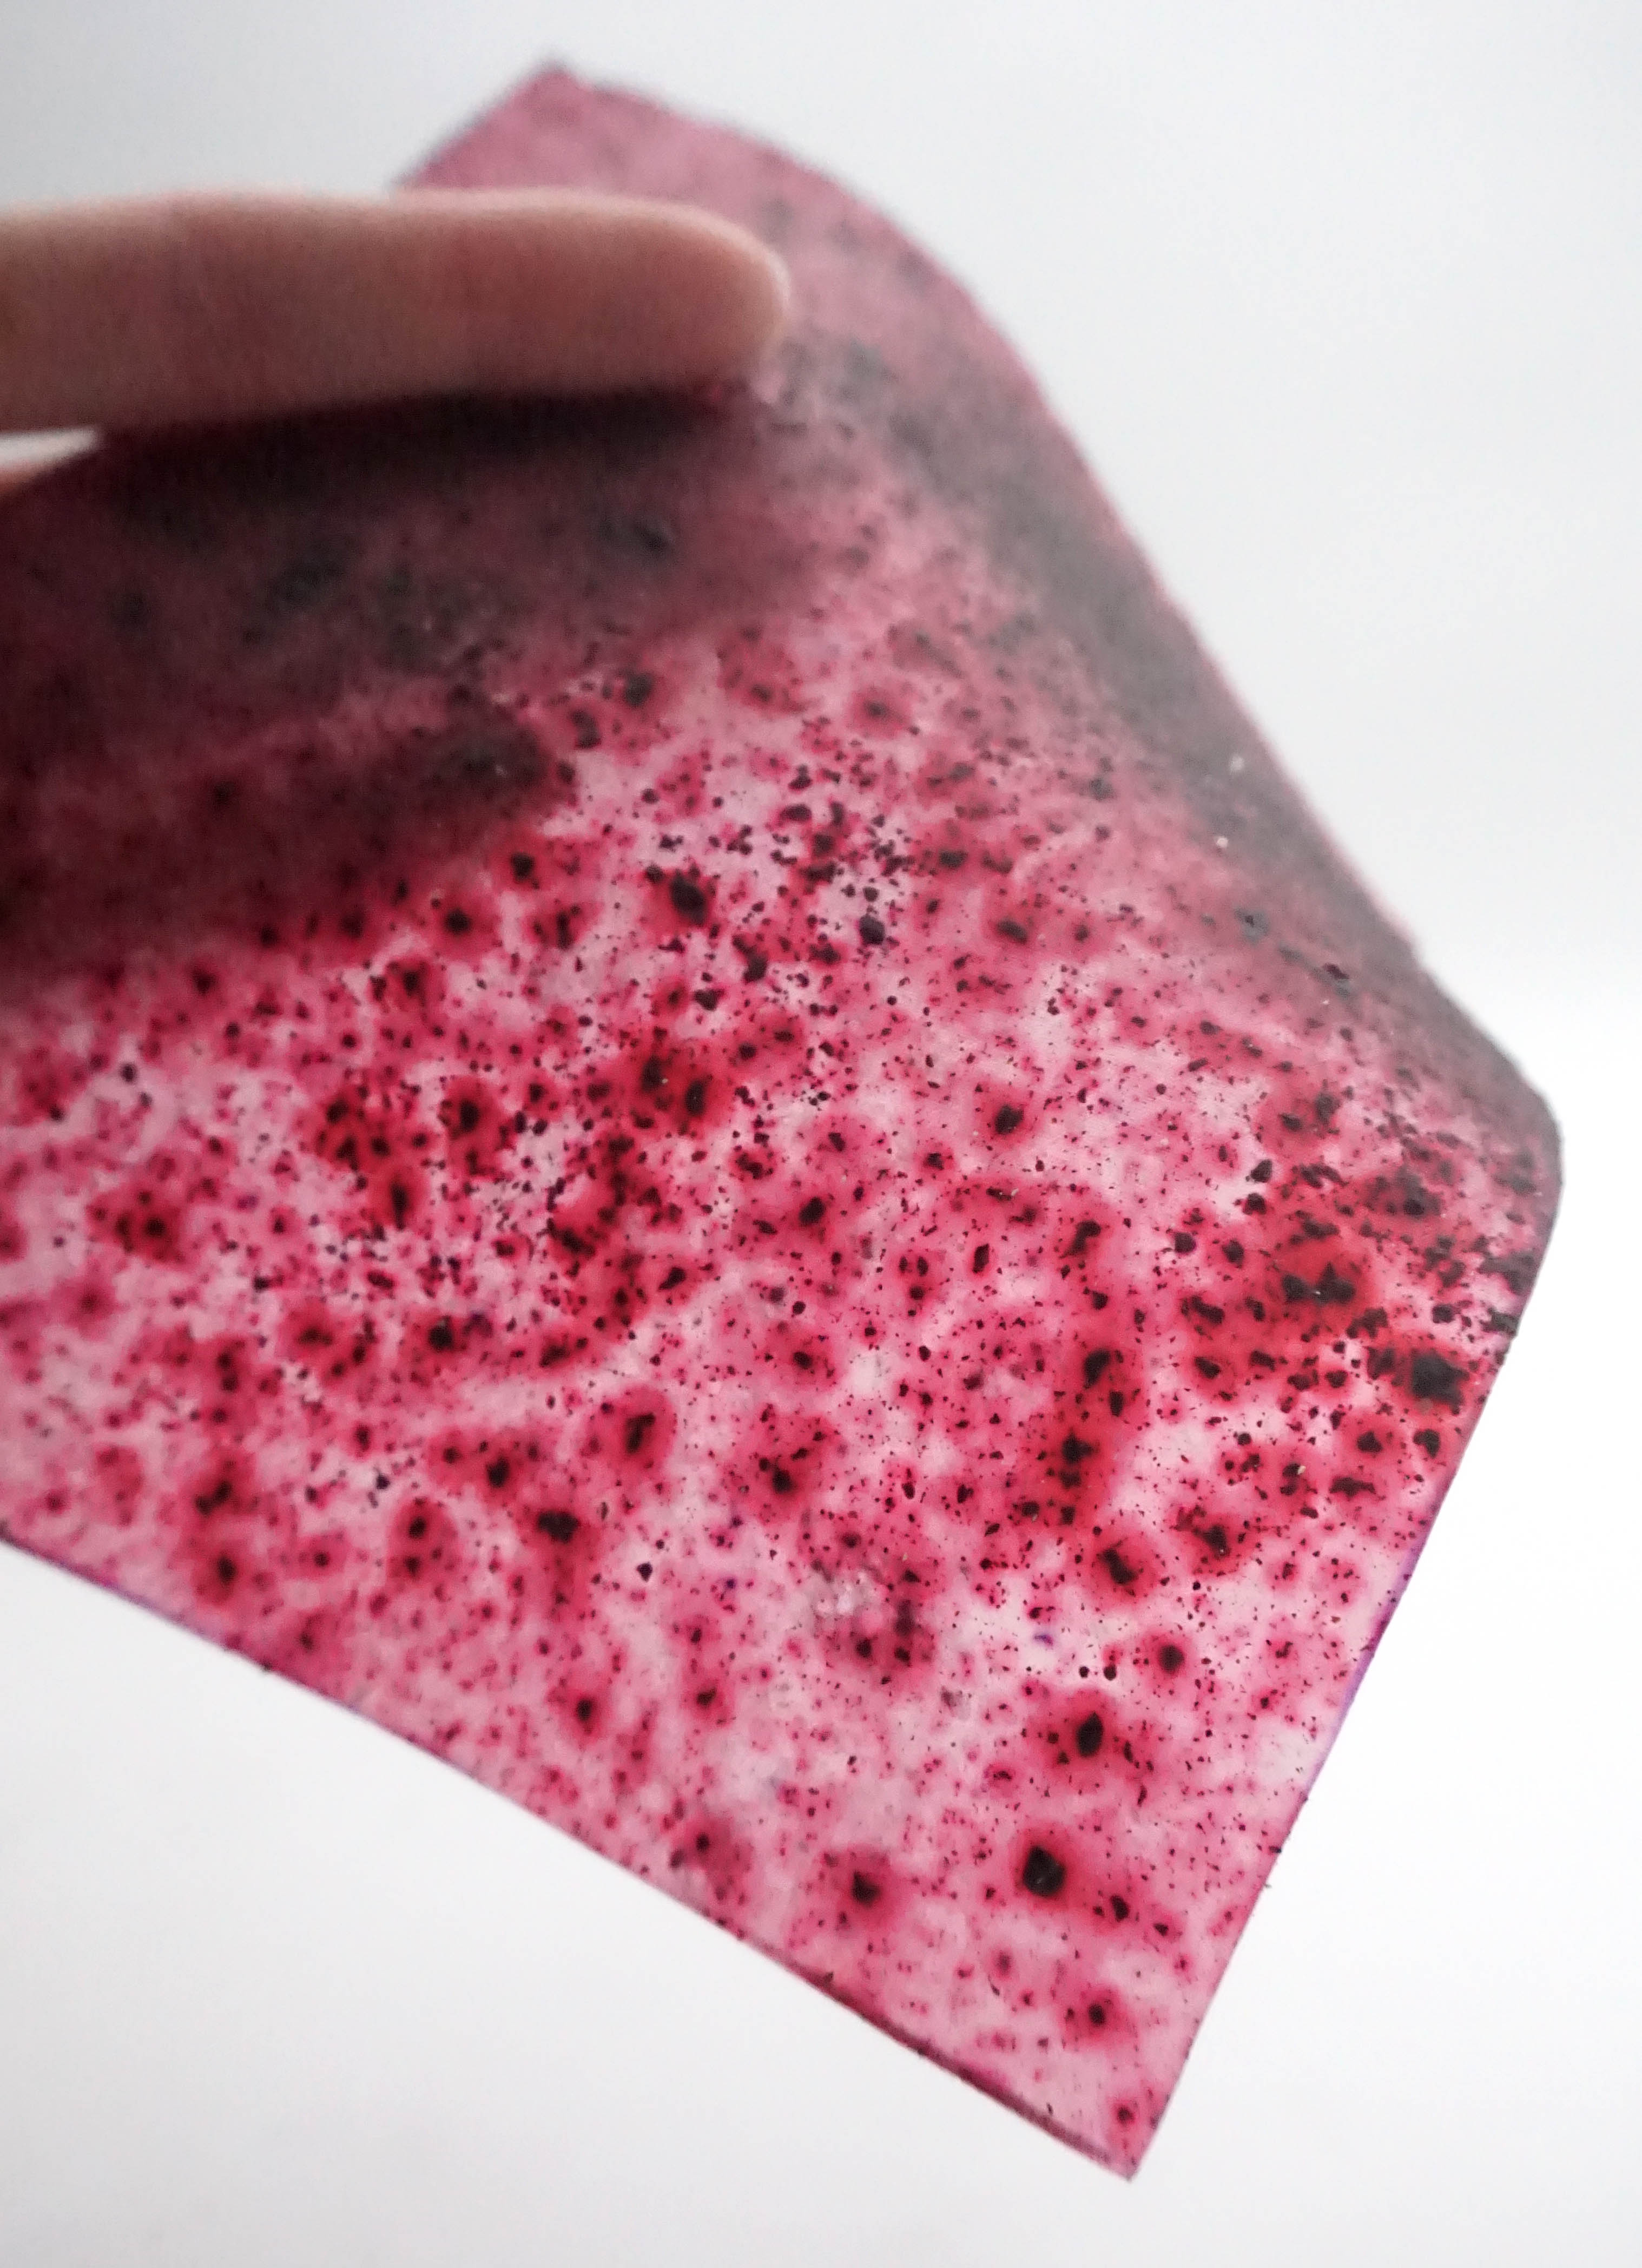
Recipe from Amanda Jarvis:
* 12 grams of glycerine
* 240 ml of water
* 48g Gelatine
The final result was not what we were expecting... The holographic pattern didn't print it, unfortunately, just a little little bit...
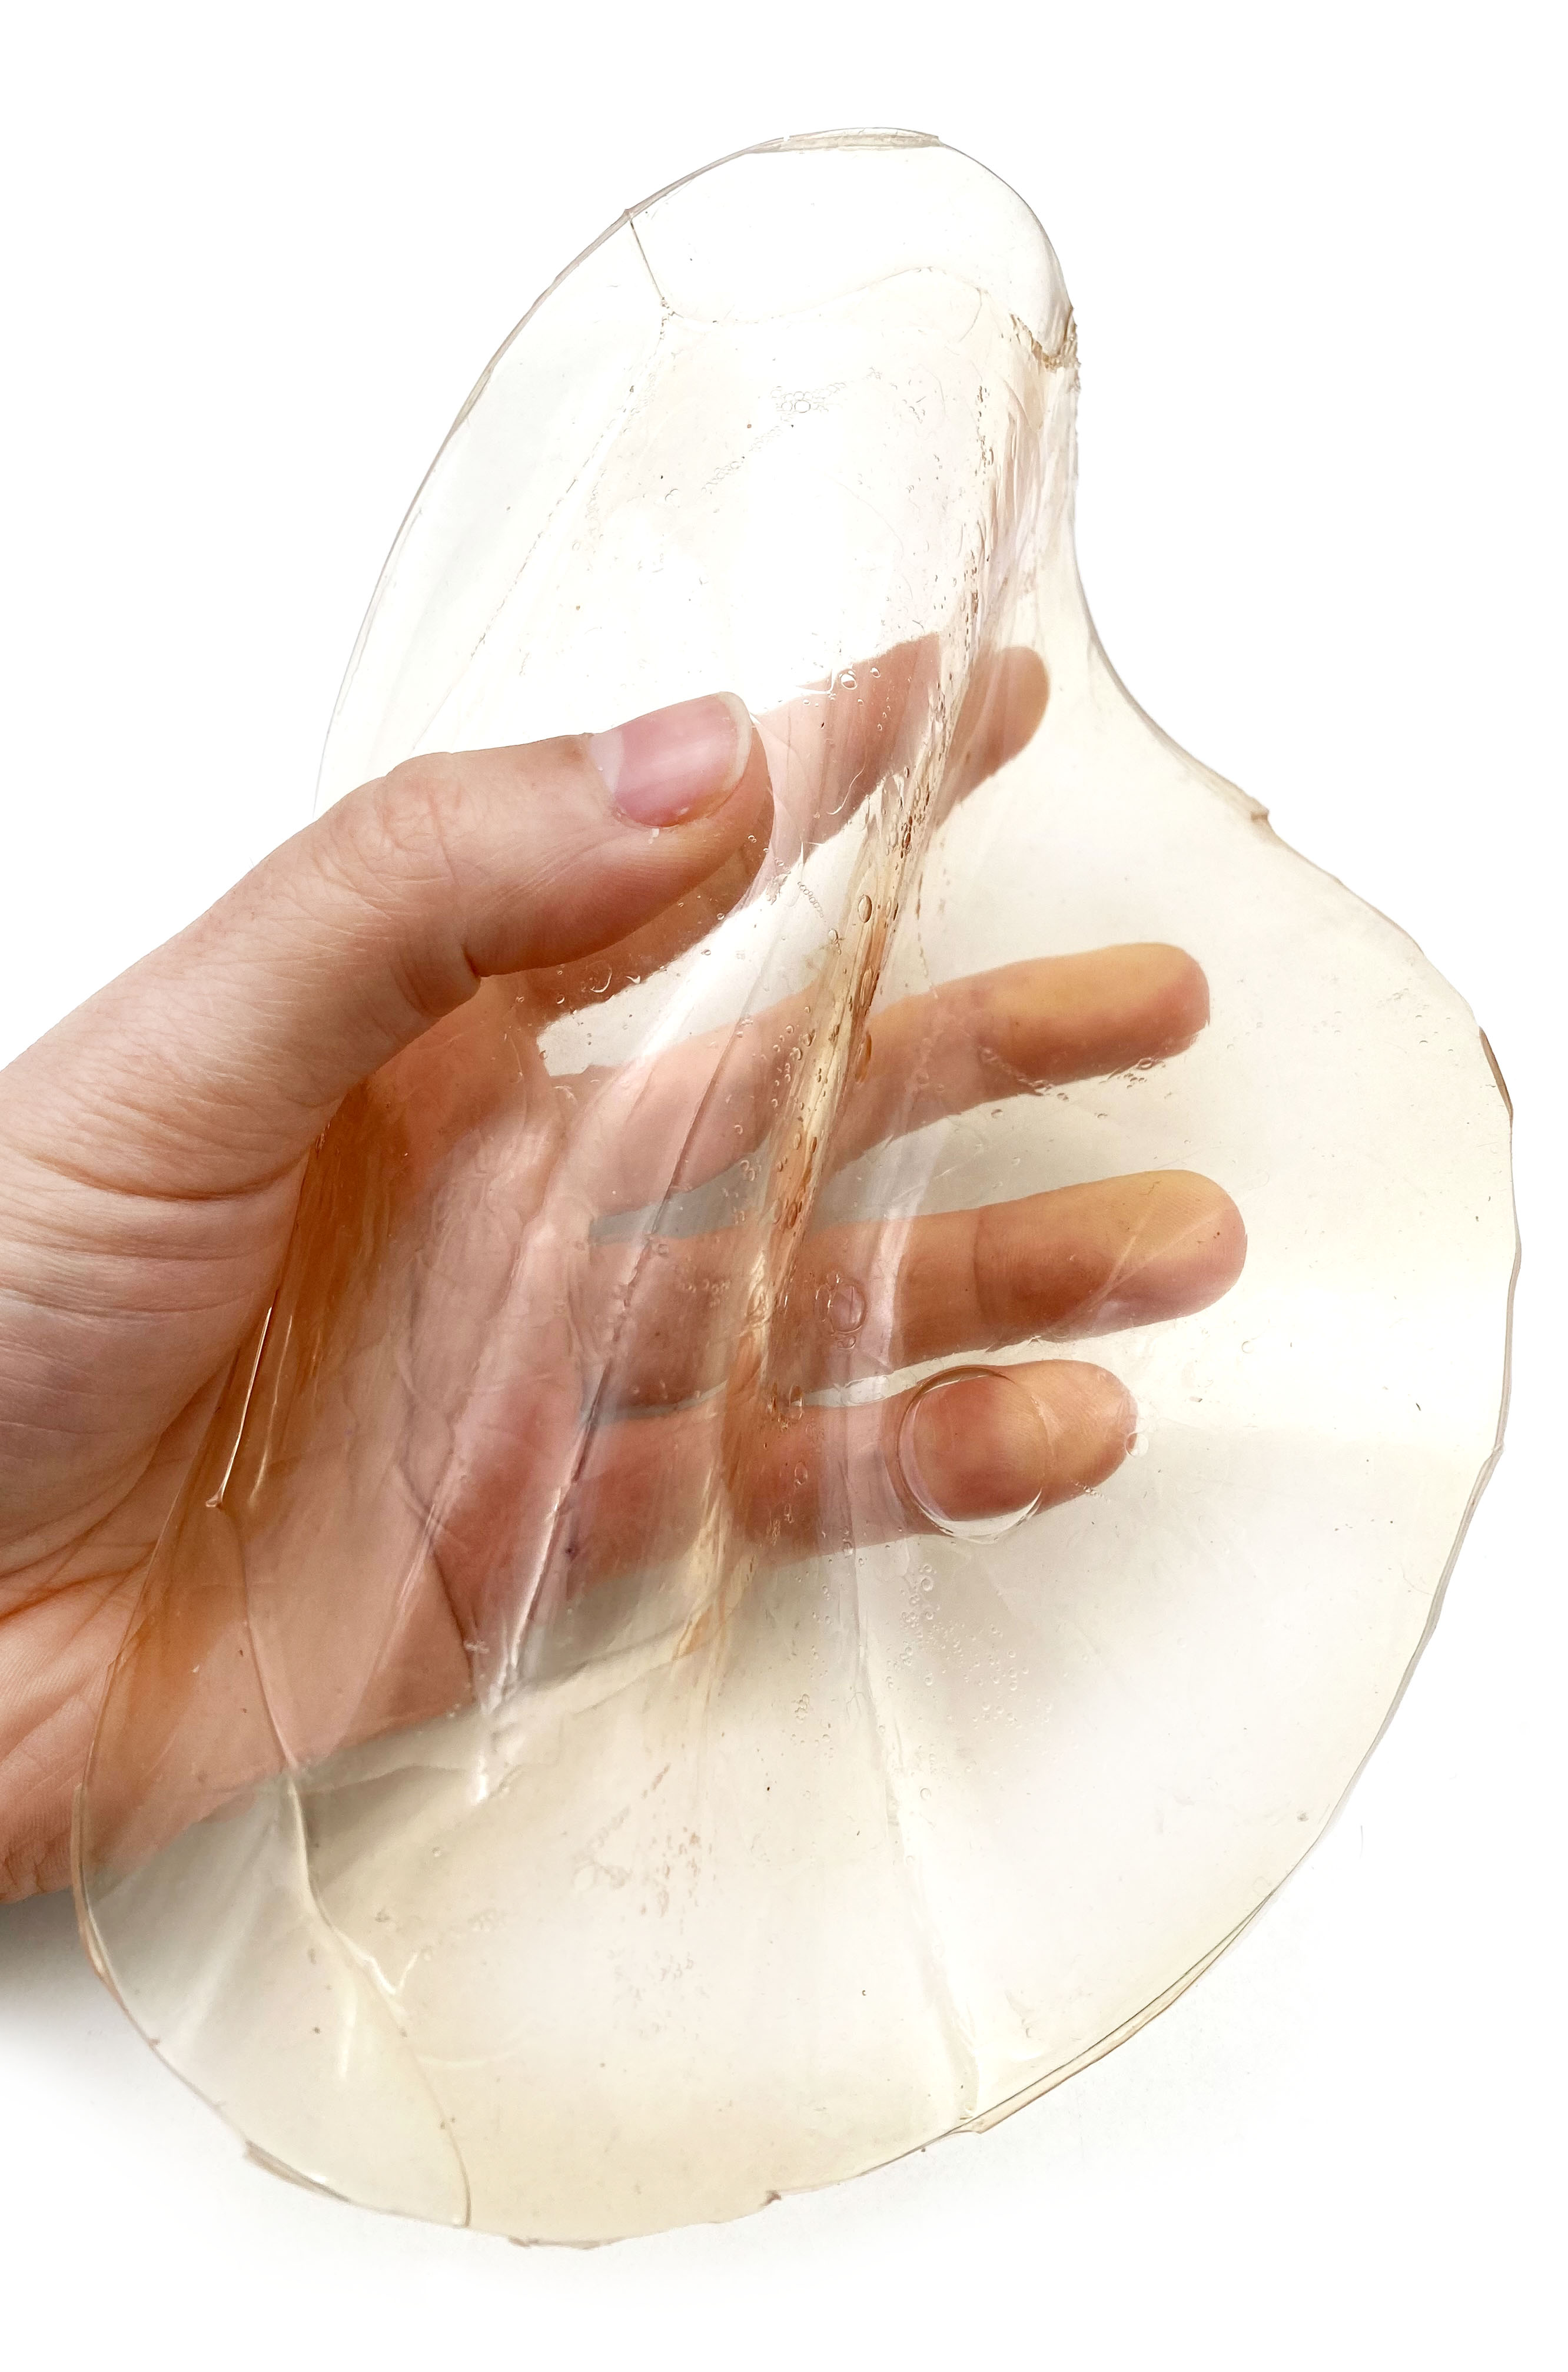
Holographic de Emma
To know more about the Gelatine texture follow Olivia Cueba's documentation.
Agar Agar recipe
It's a hot recipe.
* 10g Agar Agar
* 300ml Water
* Glycerol (Will depends the flexibility. 4g= Rigid, 16g normal, 32g Elastic)
* Warm up the water in the pot on the cooking stove. Max 80ºC.
* Add Agar Agar and Glycerin, stir until it dissolve.
* Simmer for another 30' in 60ºC to 85ºC.
* Pour in the mold.
* Let it dry.
* When it's completly dry, the Agar Bioplastic loose a lot of water. It can shrink up to 20% based water/Agar when we casted.
For further information and the Biomaterials collection follow Anna Cain's documentation.
Bio resin
It's a hot recipe.
-
Recommended working on the exterior place because of the vapors.
-
Caution: Do not stand inhaling over the pot if there is alcohol.
-
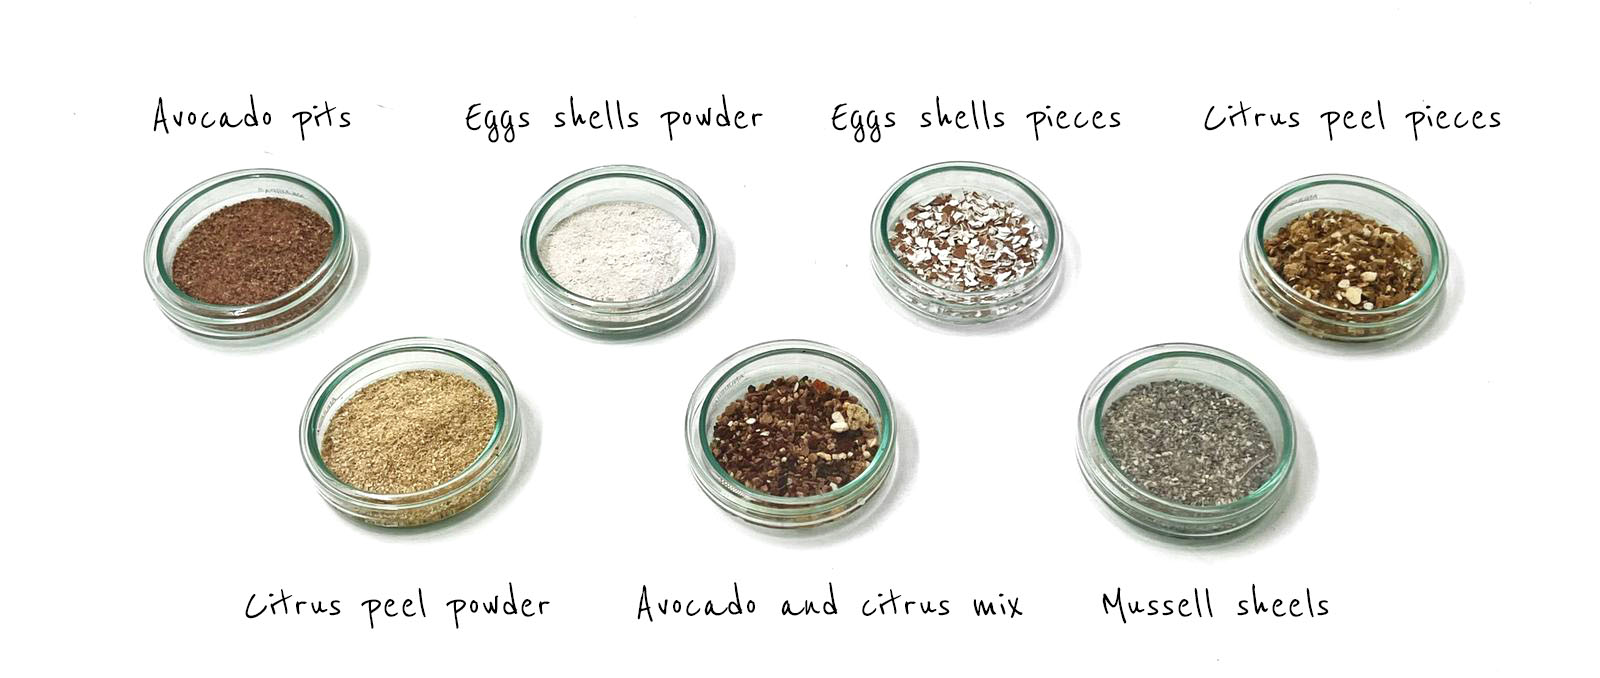
As a filler you colud use food waste as: coffee grains, orange peels, avocado pits, eggs sheels, tea leaves, carrot, yerba mate...
* 45g Pine resin
* 5g Carnauba wax
* 20 ml Alcochol
* 40g Filler (Eggs shells)
* Digital scale
* Electric stove
* Pot/Vessel
* Wood mold
* Spoon
* Silicon spatulas
* Scale
* Backing paper
* Towel to pick up hot pots
* Lab coat
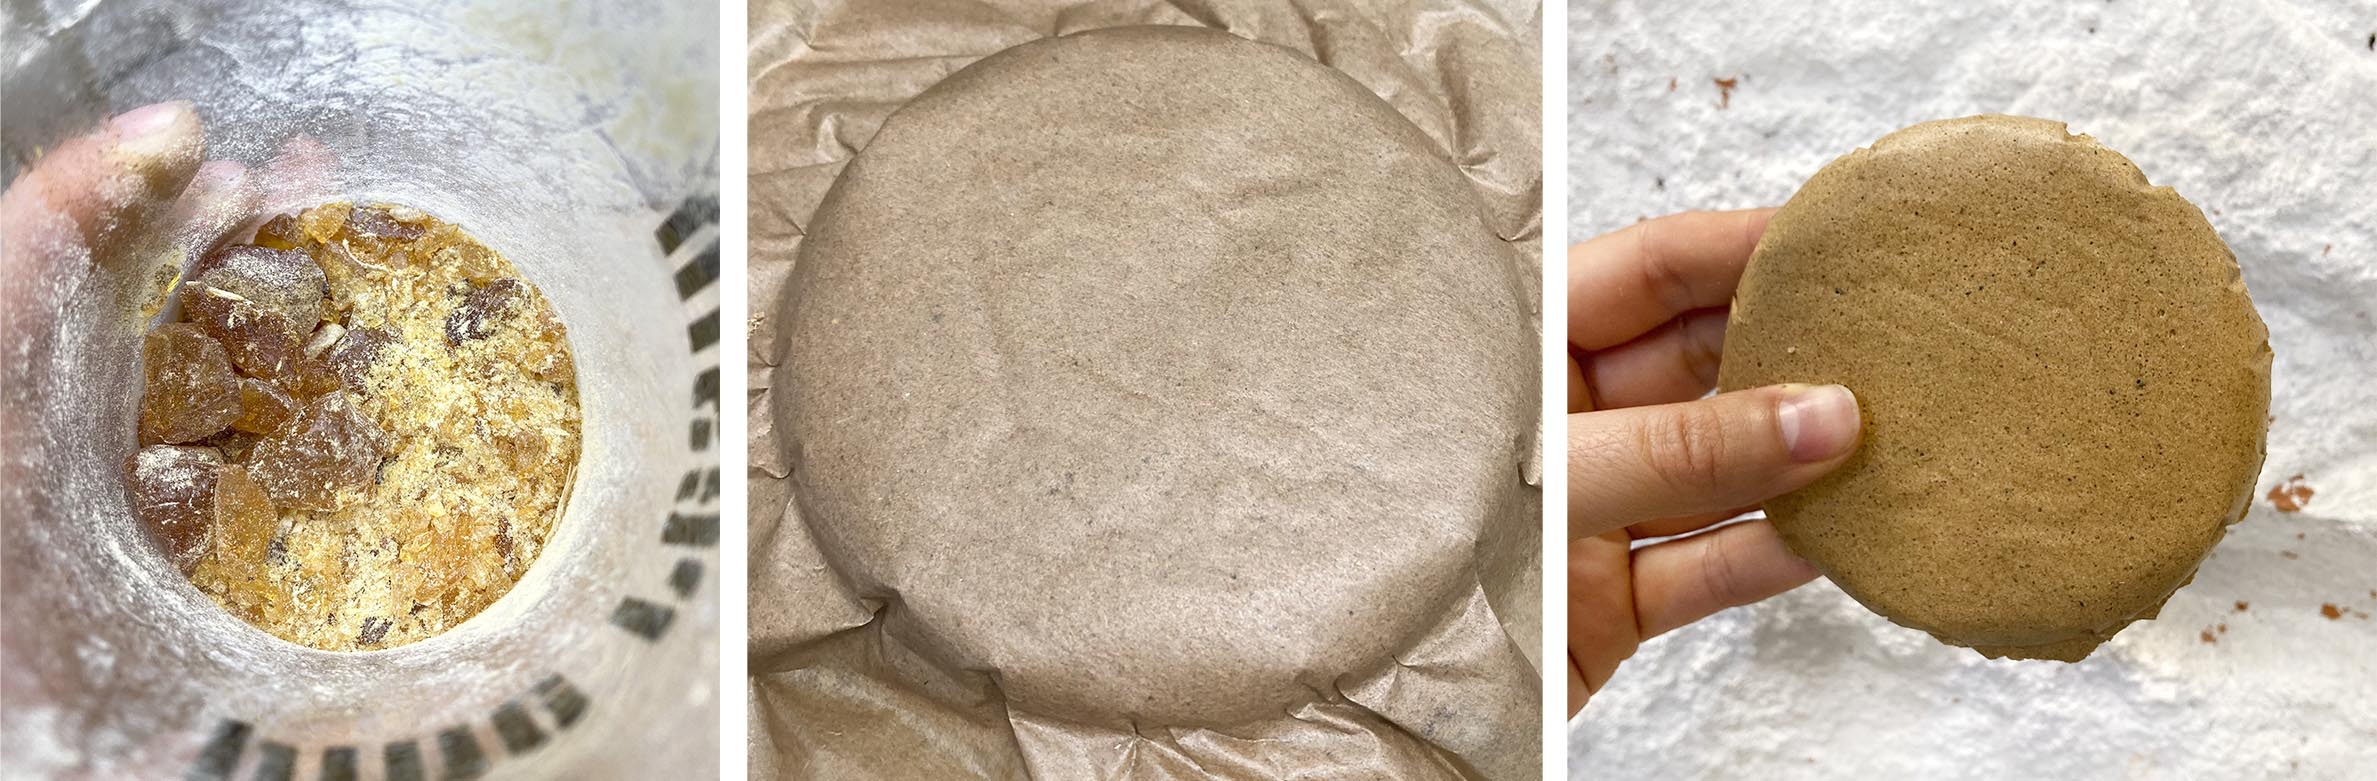
* Prepepare the materials and ingredients
* Place baking paper on the buttom part of the mold. Press with the top part to fit the shape. Reserve a piece of baking paper for the top.
* Melt the pine resin.
* When the pine resie are melted, mix with the Carnauba wax. Melt them.
* Add the alchocol and mix. Do not breathe the vapours.
* Add the filler (waste material) and mixed.
* Take the mix and pour **quickly** into the mold using the spatula.
* Cover the top with the baking paper.
* Press with your hands to distribute the mix. Then with the top mold. Compact down.
* Let the mix cold down. Aprox. 15'.
* Remove the baking paper and the mold.
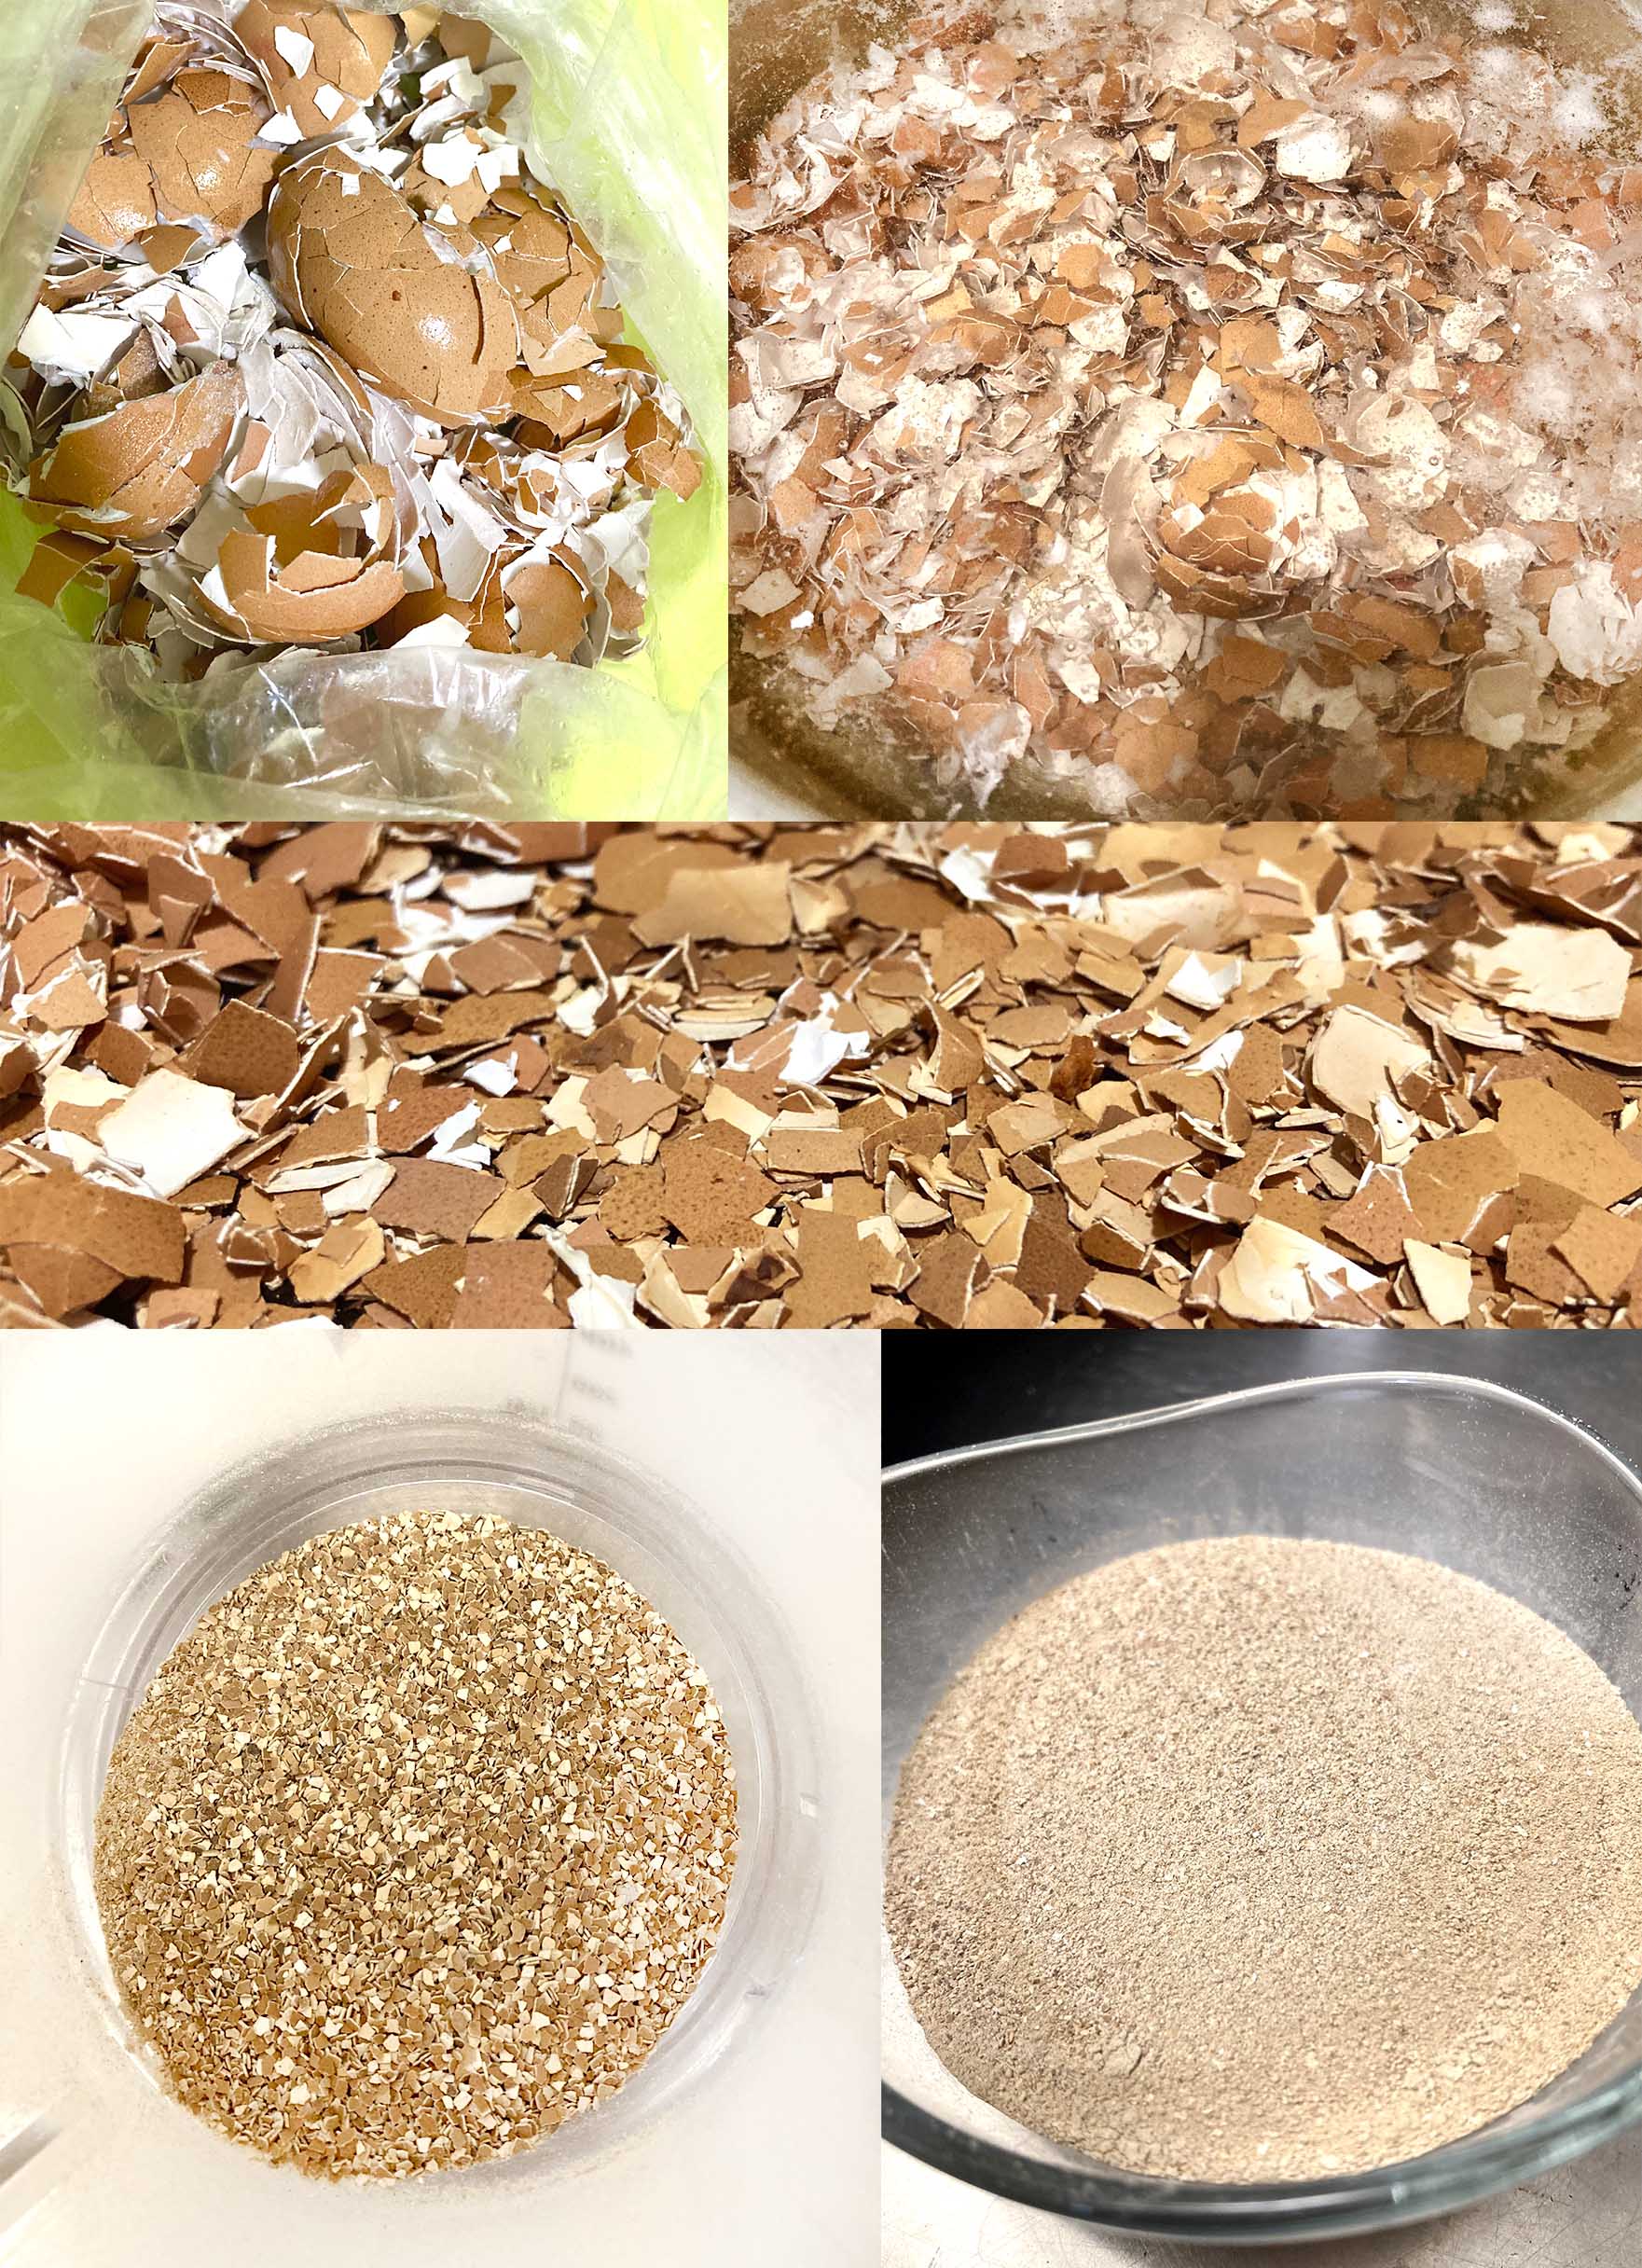
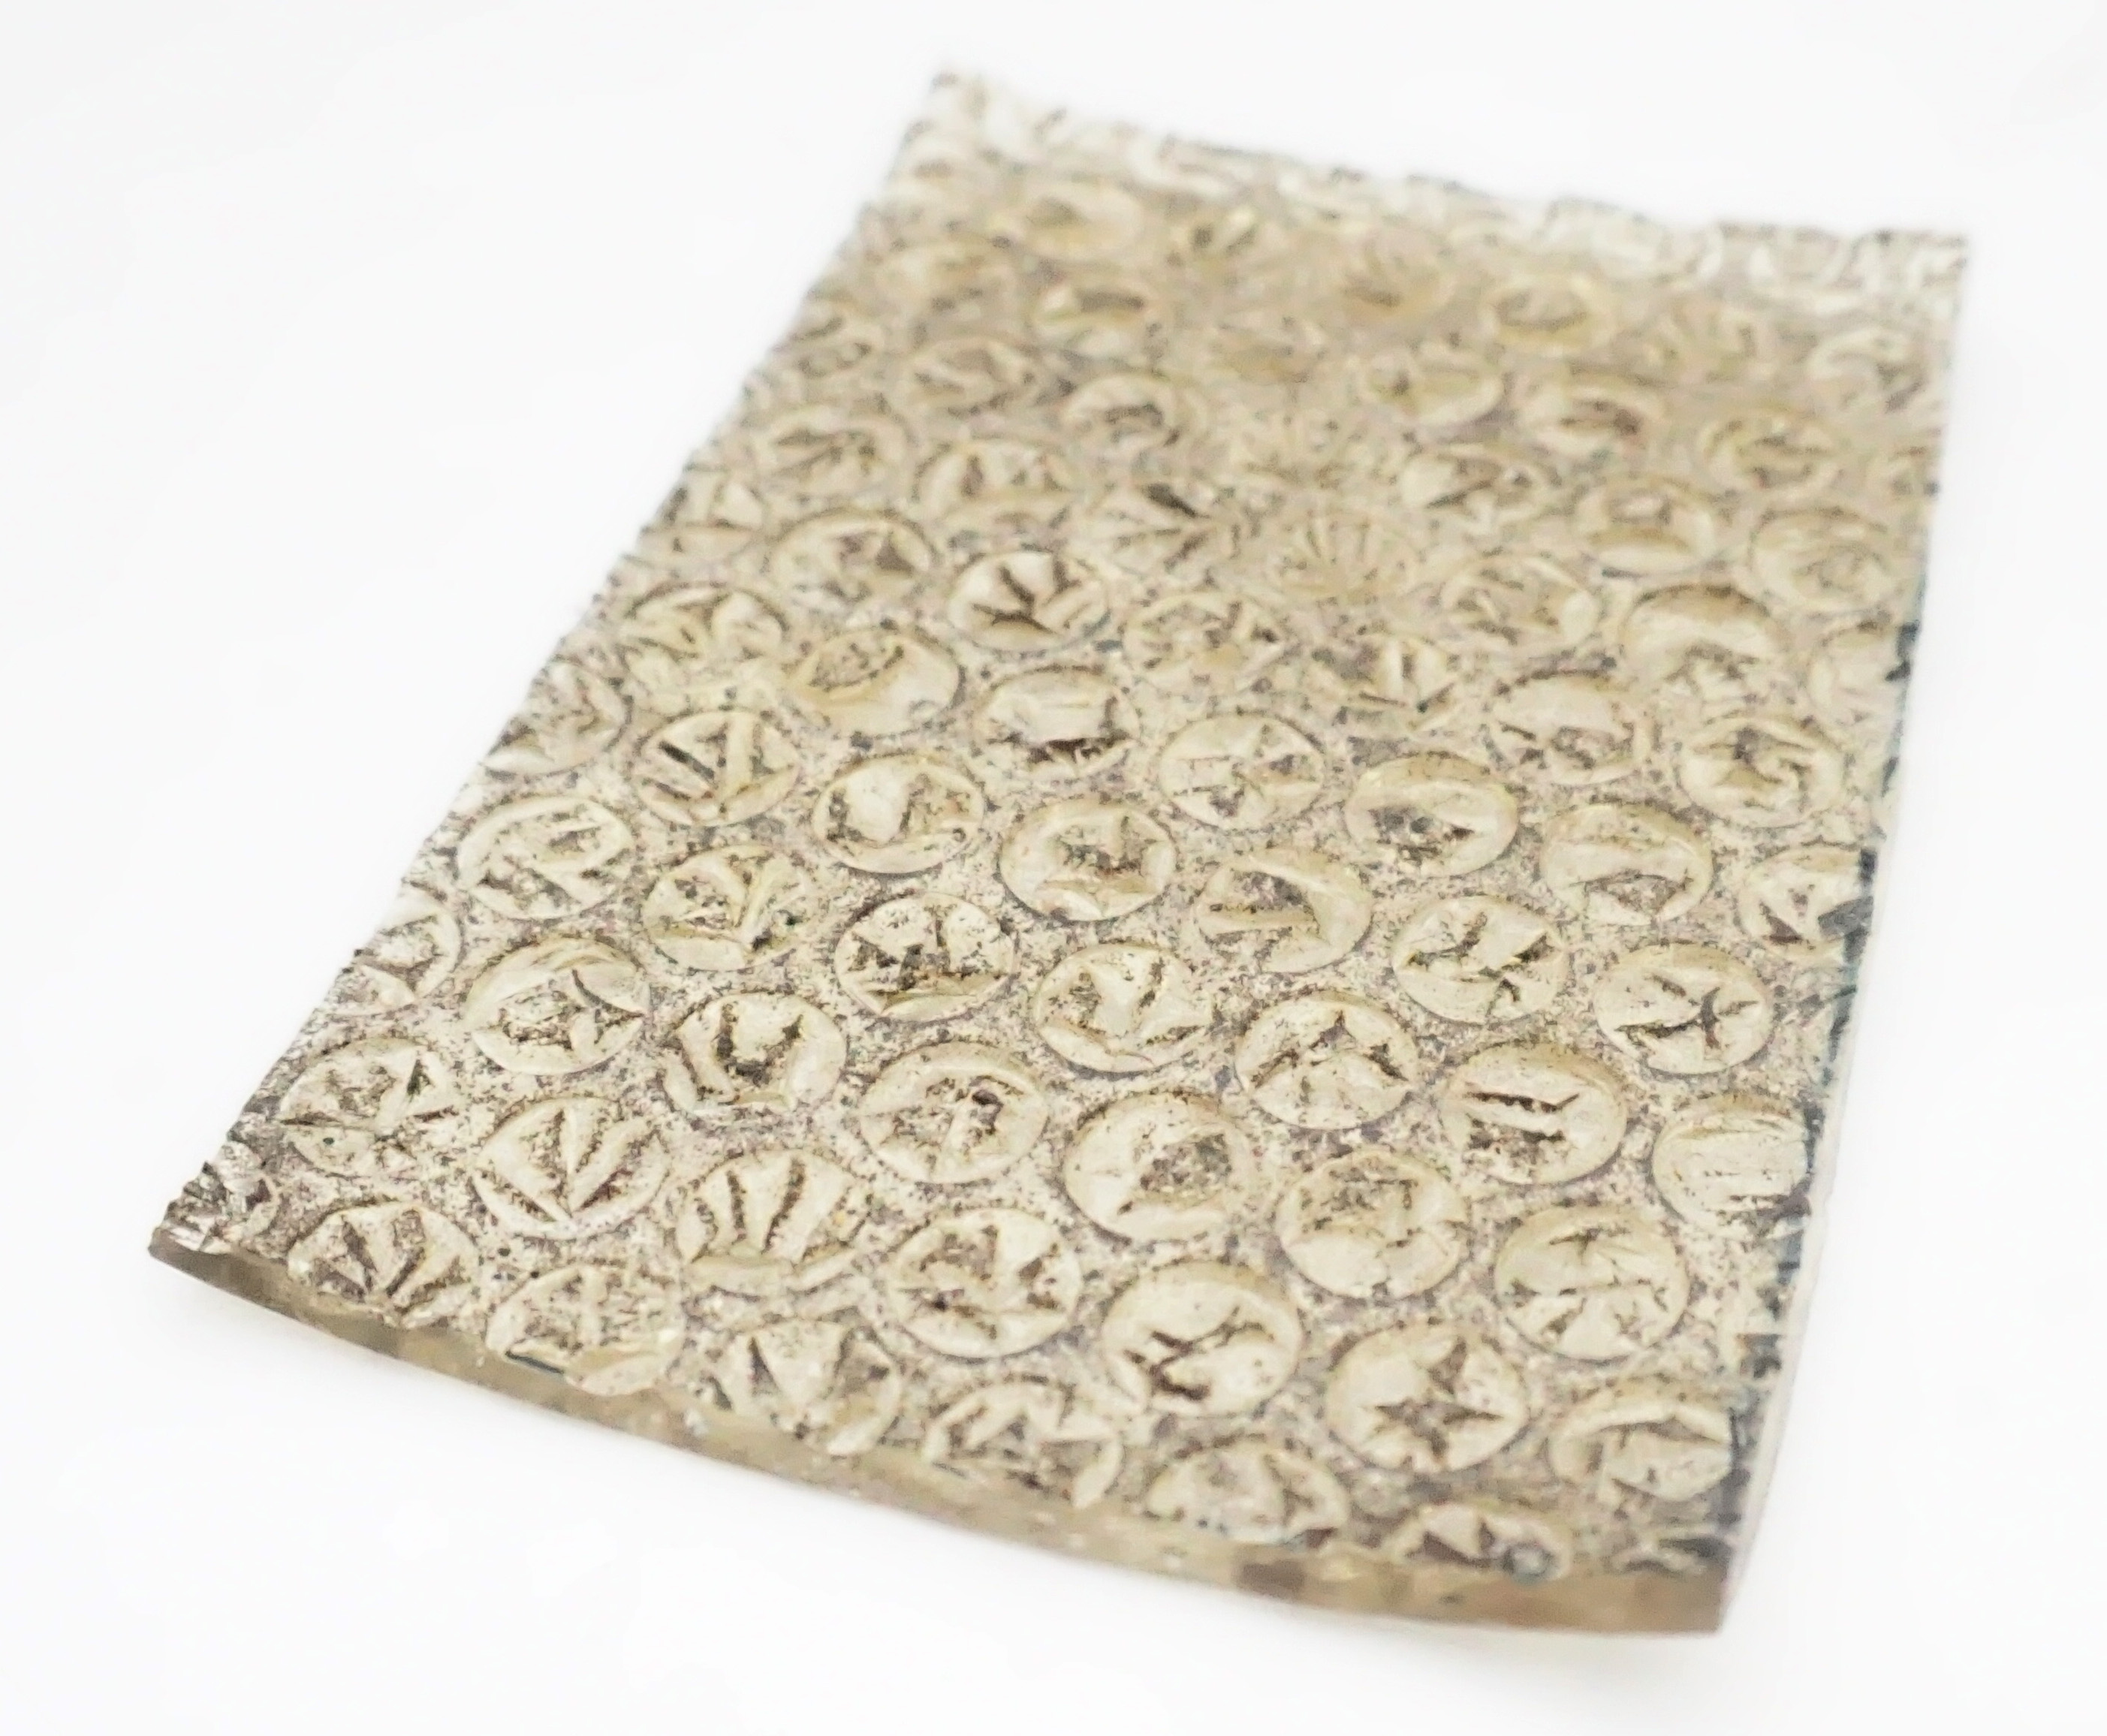
To obtain the eggs shells powder:
-
Colect the eggs shells, we need a huge quantity. Clean in water and save in the freezer.
-
Put in a pot and let them boil during 40'. Remove the foam.
-
Let them dry in the oven during 60' aprox.
-
Blend the eggs shells.
-
Add the pieces little by little to the mini primer to get the powder.
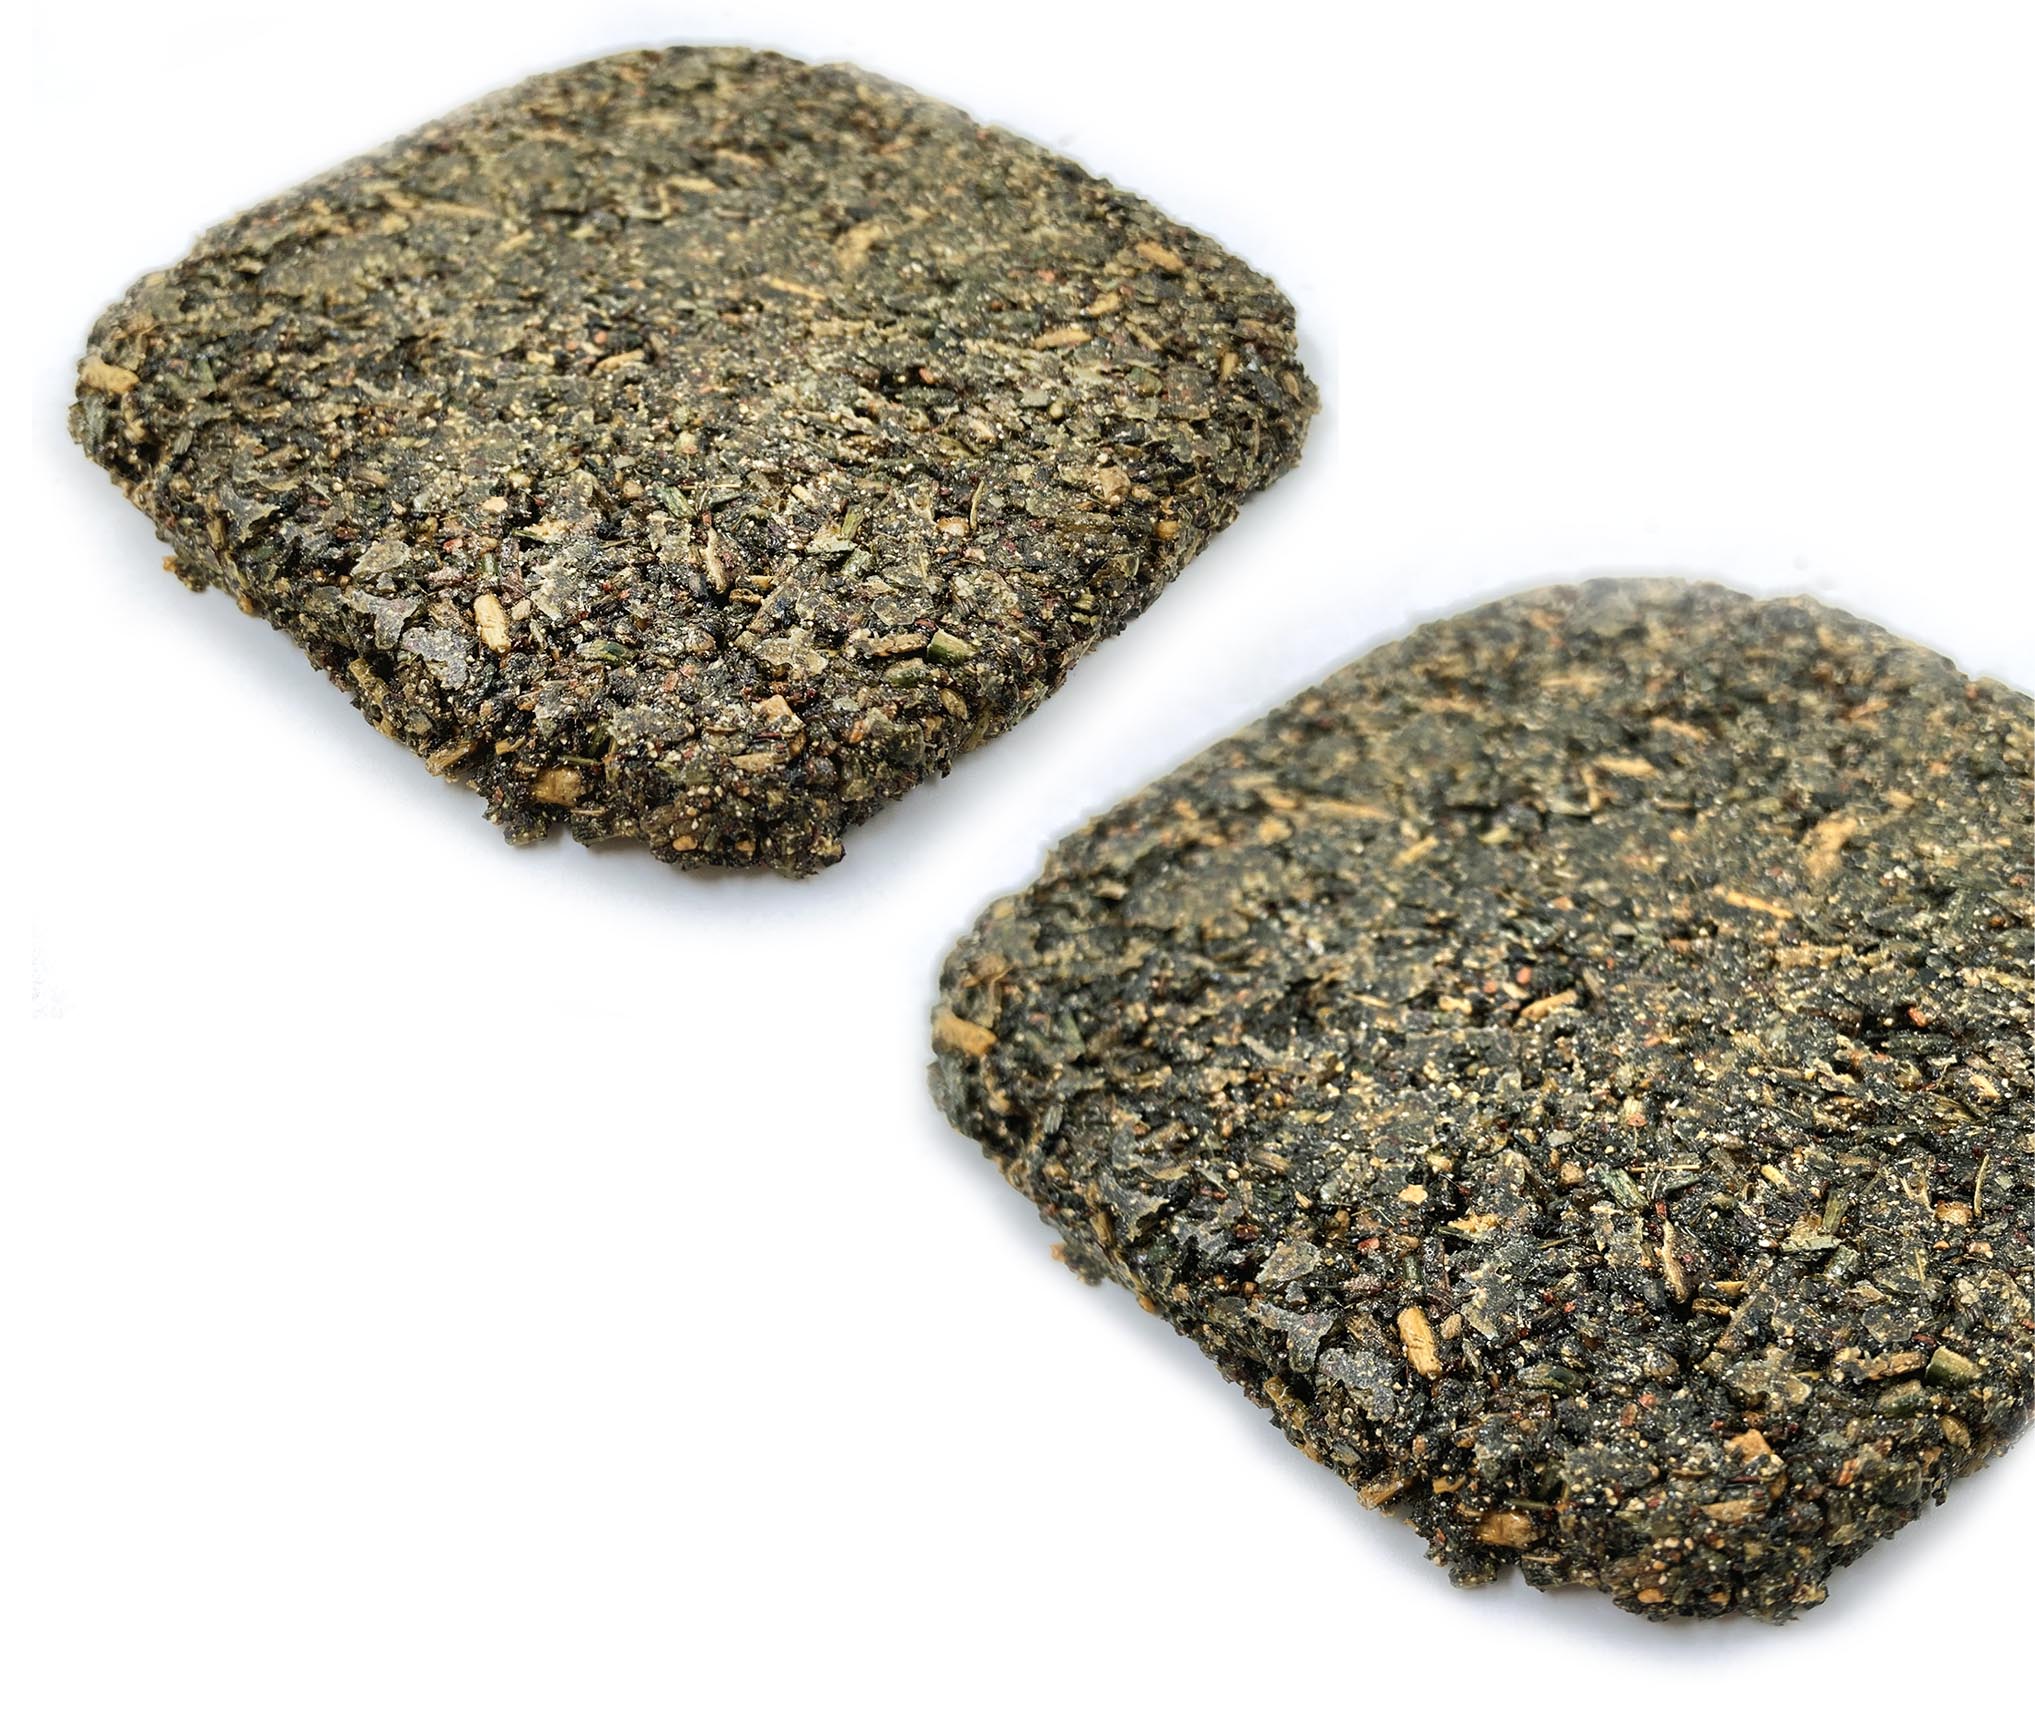
Making off
Resin process de Emma
Wait for 10-15' to dry the resin.
For one wood mold:
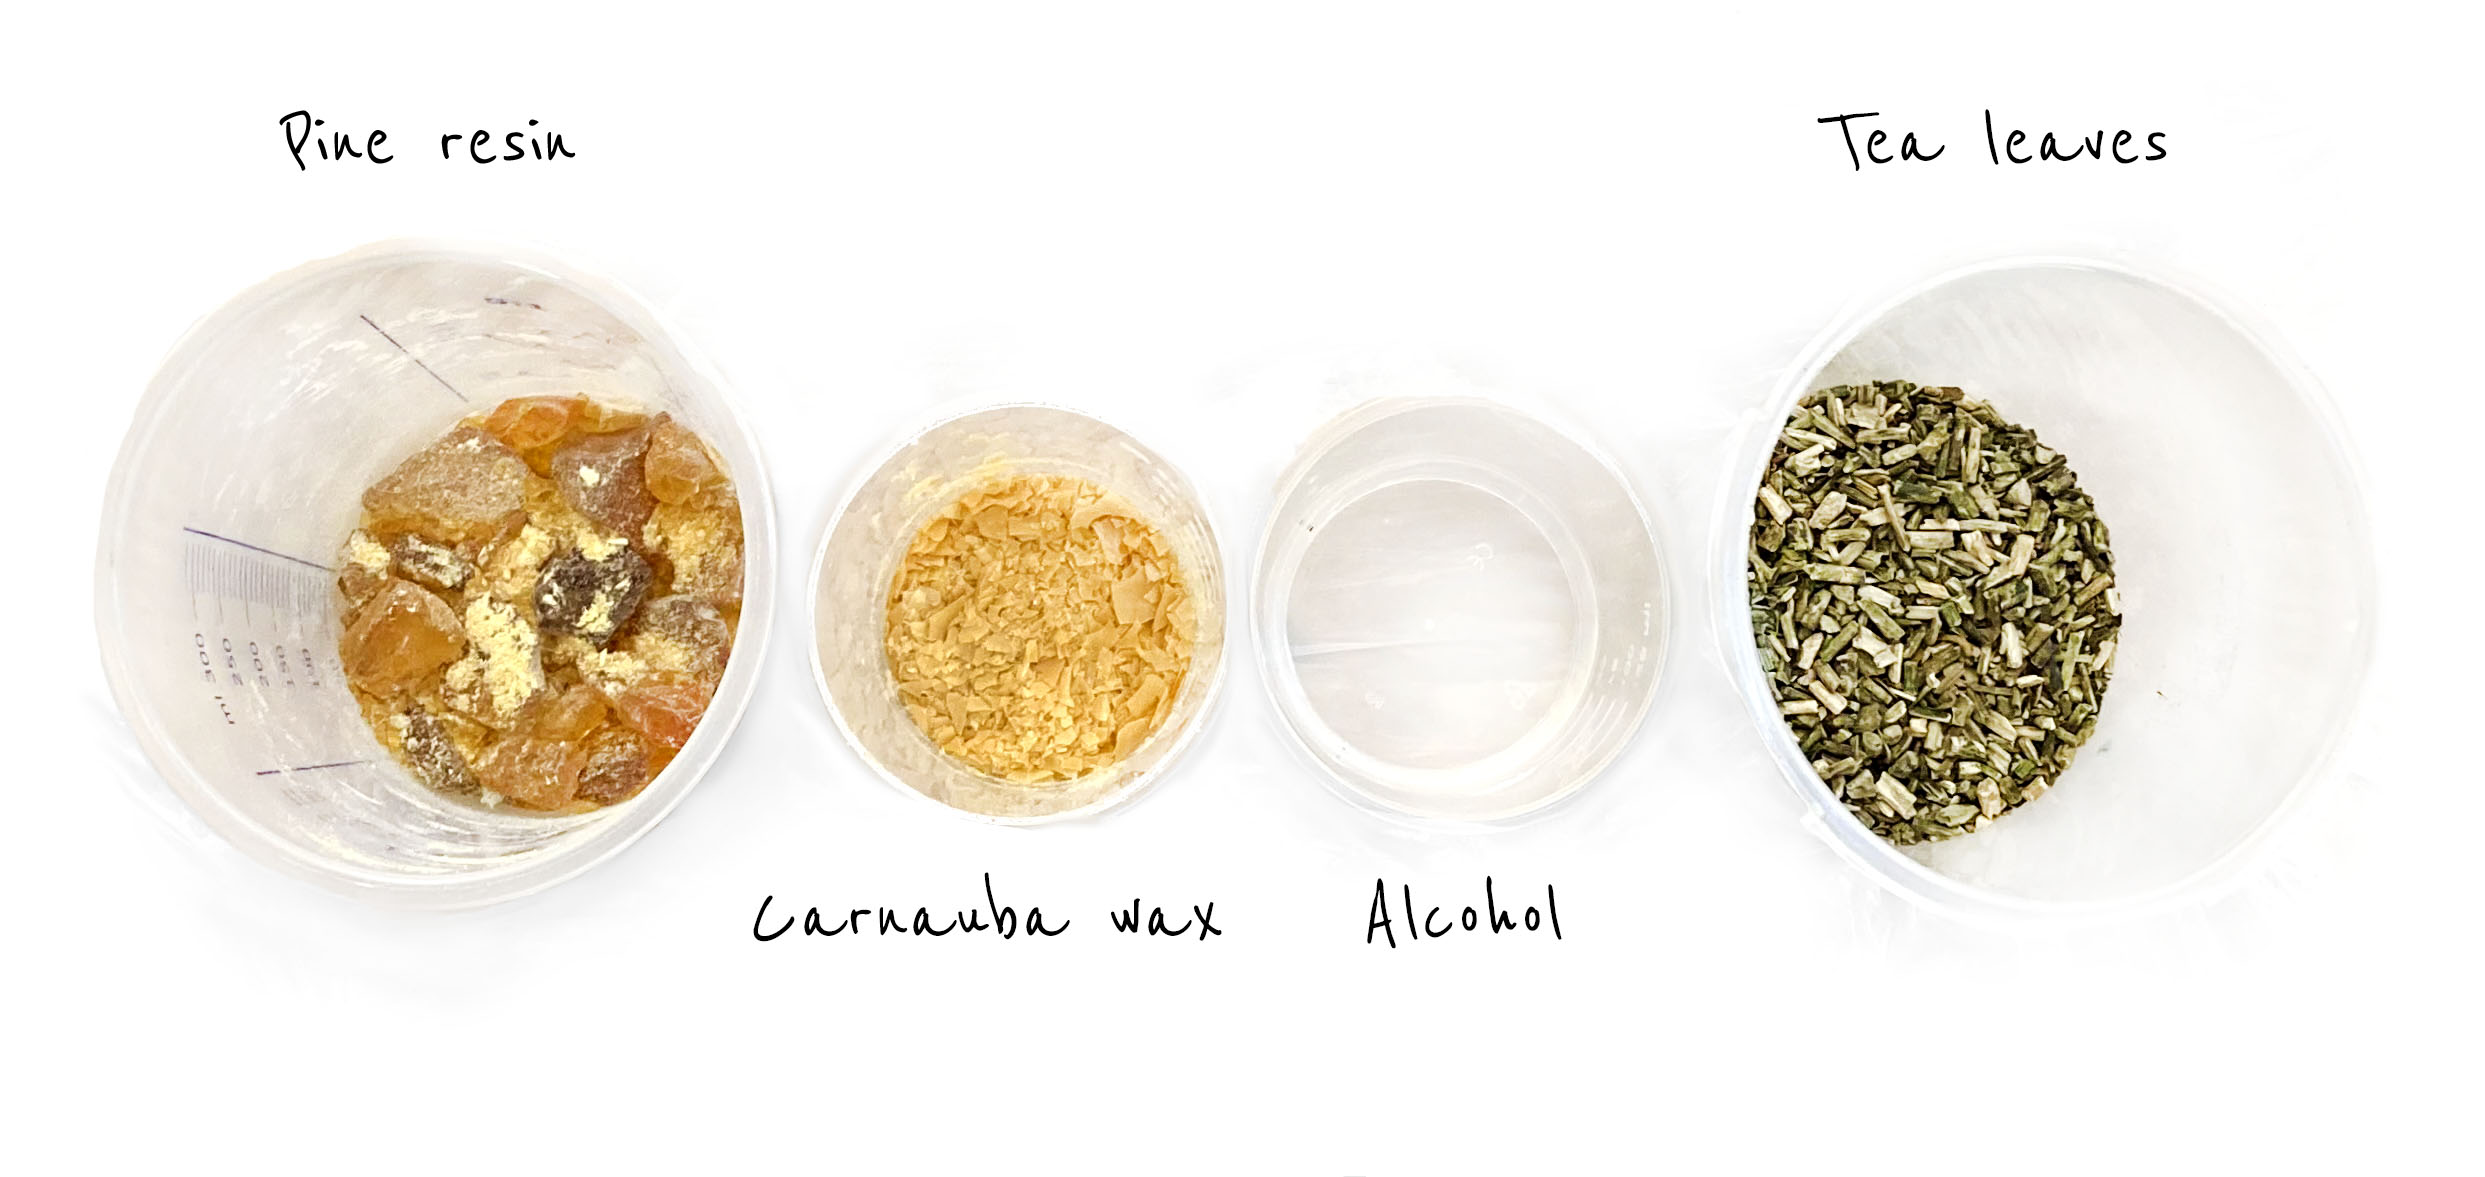
* 39g Pine resin
* 4.3g Carnauba wax
* 18 ml Alcohol
* 35g Filler (Tea leaves)

More about pine resin:
-
Biomaterials from Pine Resin and Food Waste - REMIX EL BARRIO
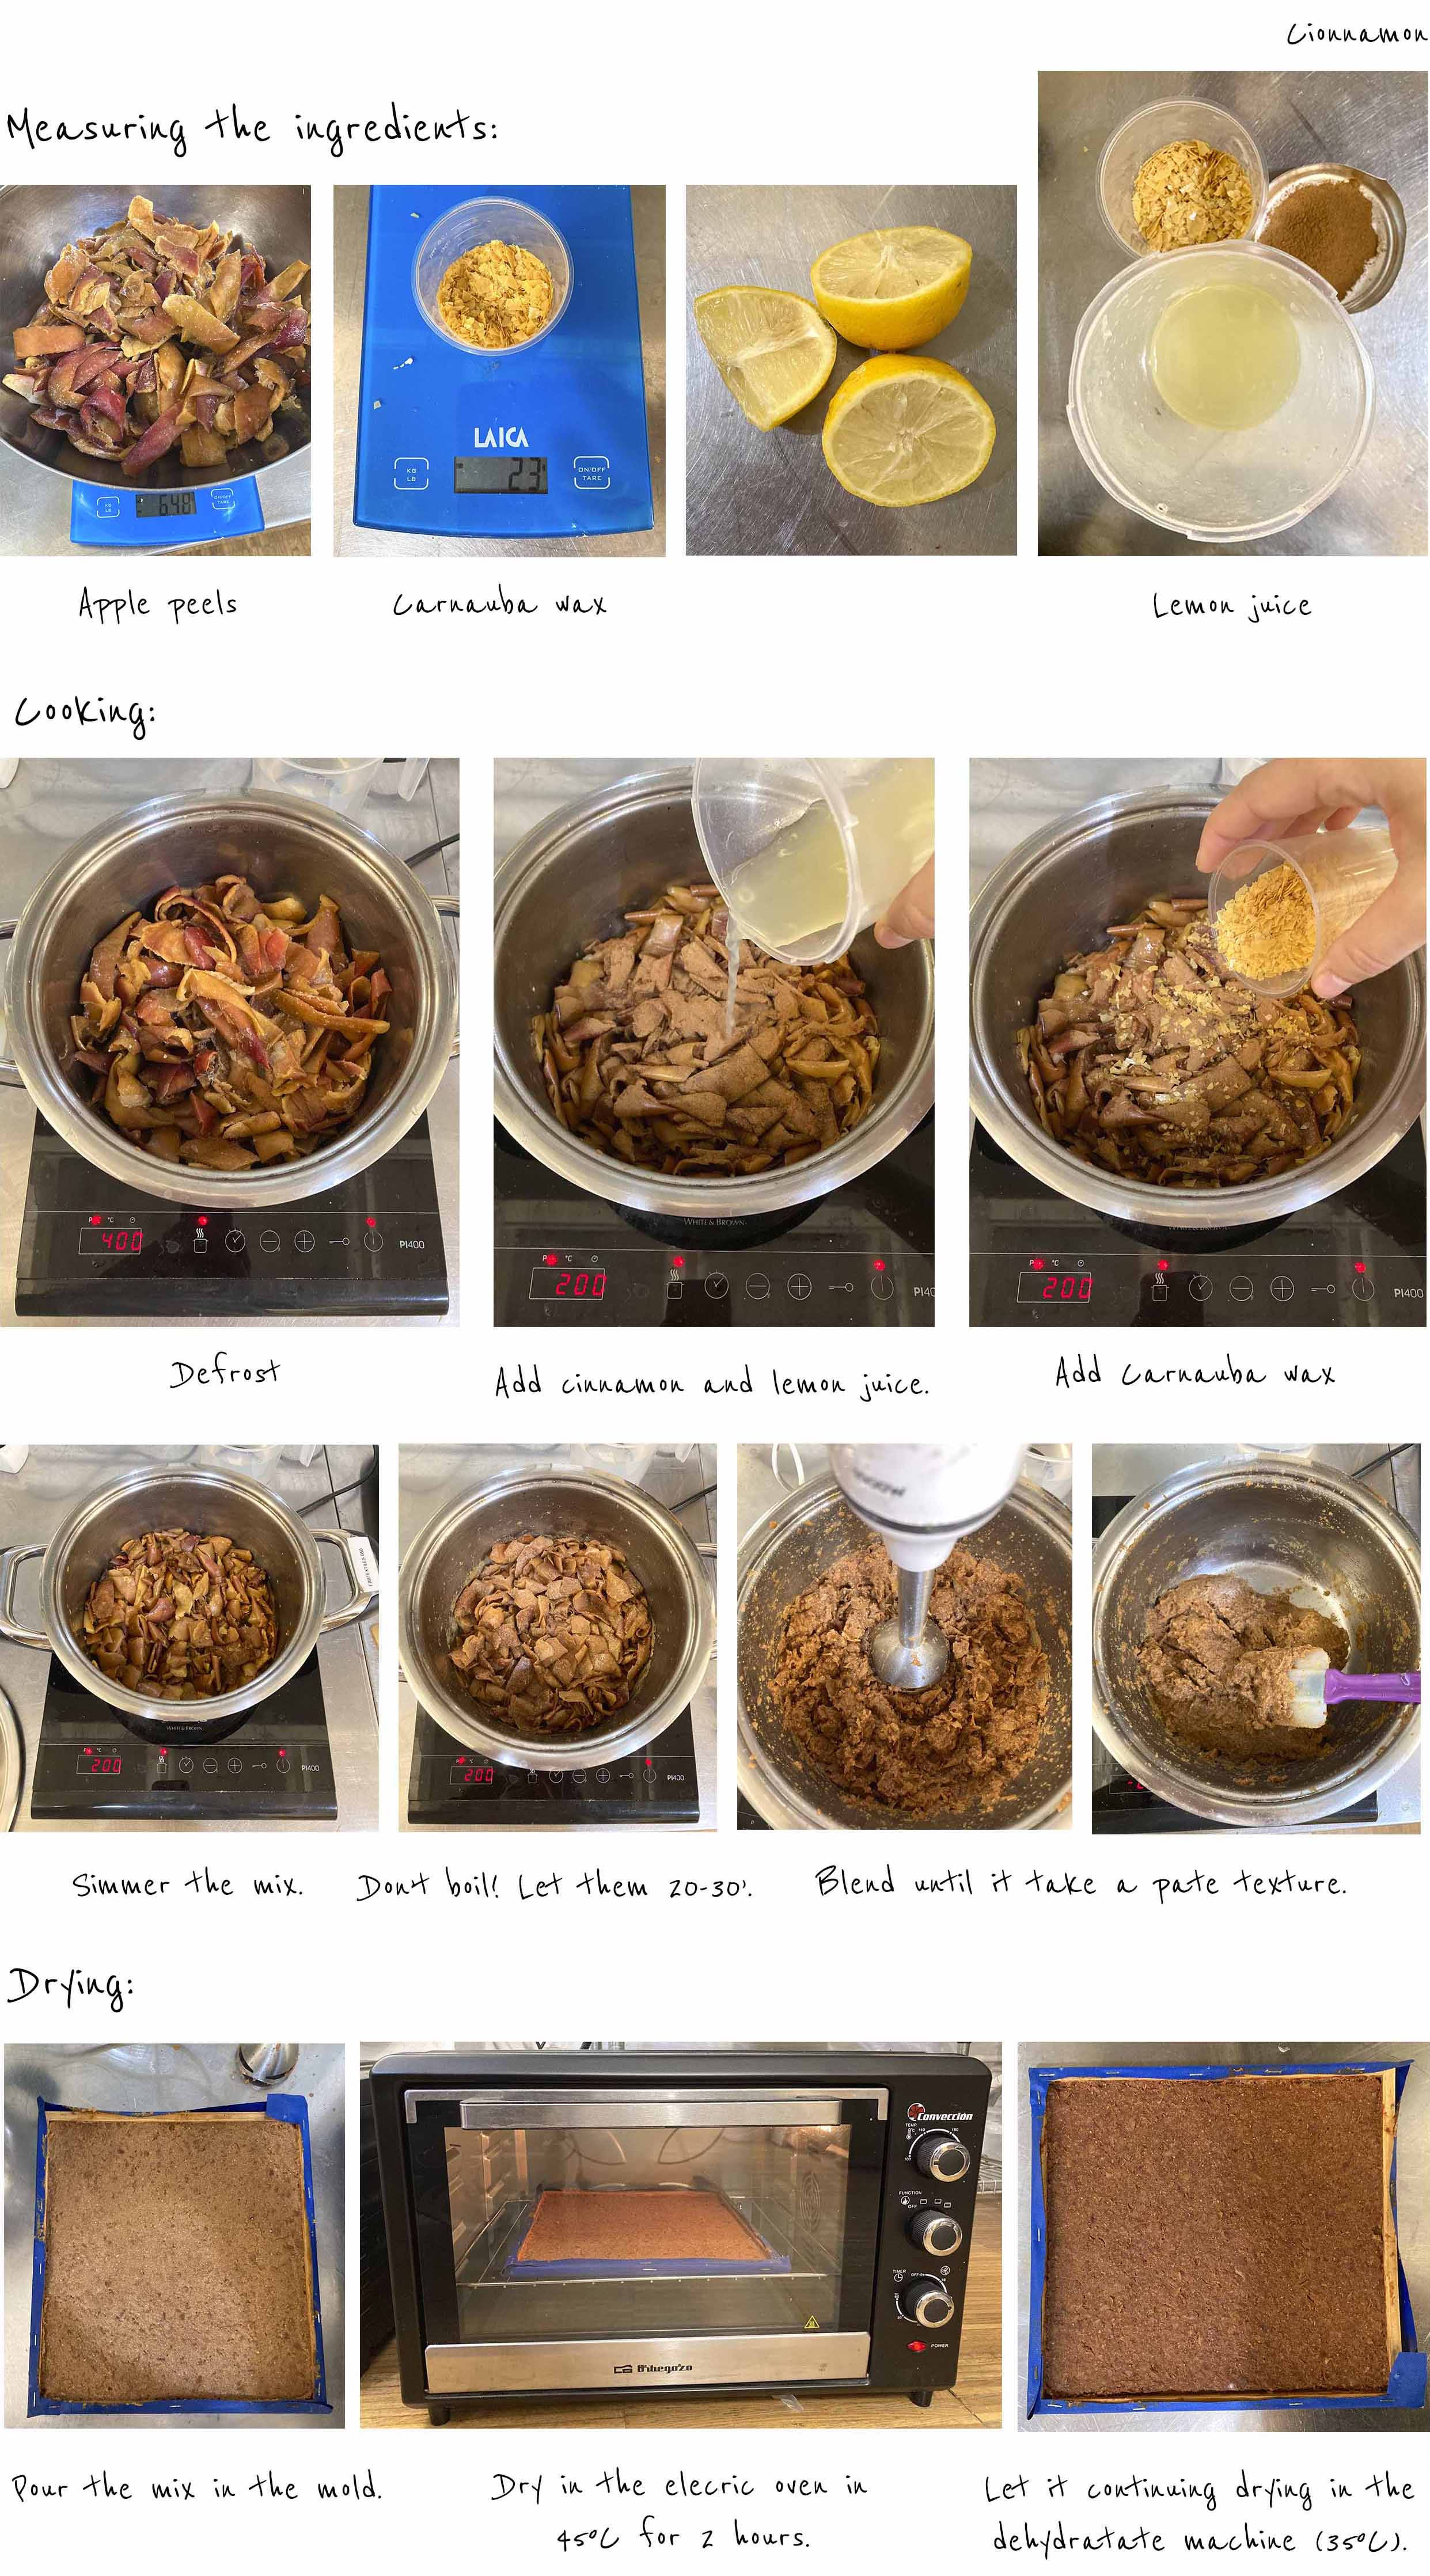
Apple Bioleather
The following recipe was developed by:
* 2 Mangos
* 20g Beeswax
* 1 Lemon
* 1 Pinch teaspoon of cinnamon
* Some water to get a pate mixture (optional)
Transformation recipe:
* 648g Apple skin
* 23g Carnauba wax
* 1 + 1/4 Lemons
* 1 + 1/4 Tea spoon of cinemon
* Some water to get a pate mixture (optional)
* Digital scale
* Cooking stove
* Pot
* Mold with fabric
* Spoon
* Blender
* Oven 45ºC
* Take out the apple peels from the freeze.
* Measure the peel apple and calculate the rest of the ingredients you will need.
* Defrost the apples in a pot slowly.
* Add the cinnamon, the lemon juice and the carnauba wax.
* Simmer the mix during 20-30'. Do not let them boil. If it need it, you could add some water.
* Blend until it take a pate texture.
* Pour the mix in the mold.
* Smooth the surface with a spatula.
* Dry in the electric oven (45ºC) during 2 hours.
* Let it dry in the dehydrate machine (35ºC) for 6h to accelerate the process. Wait until it's dry, could take some time.
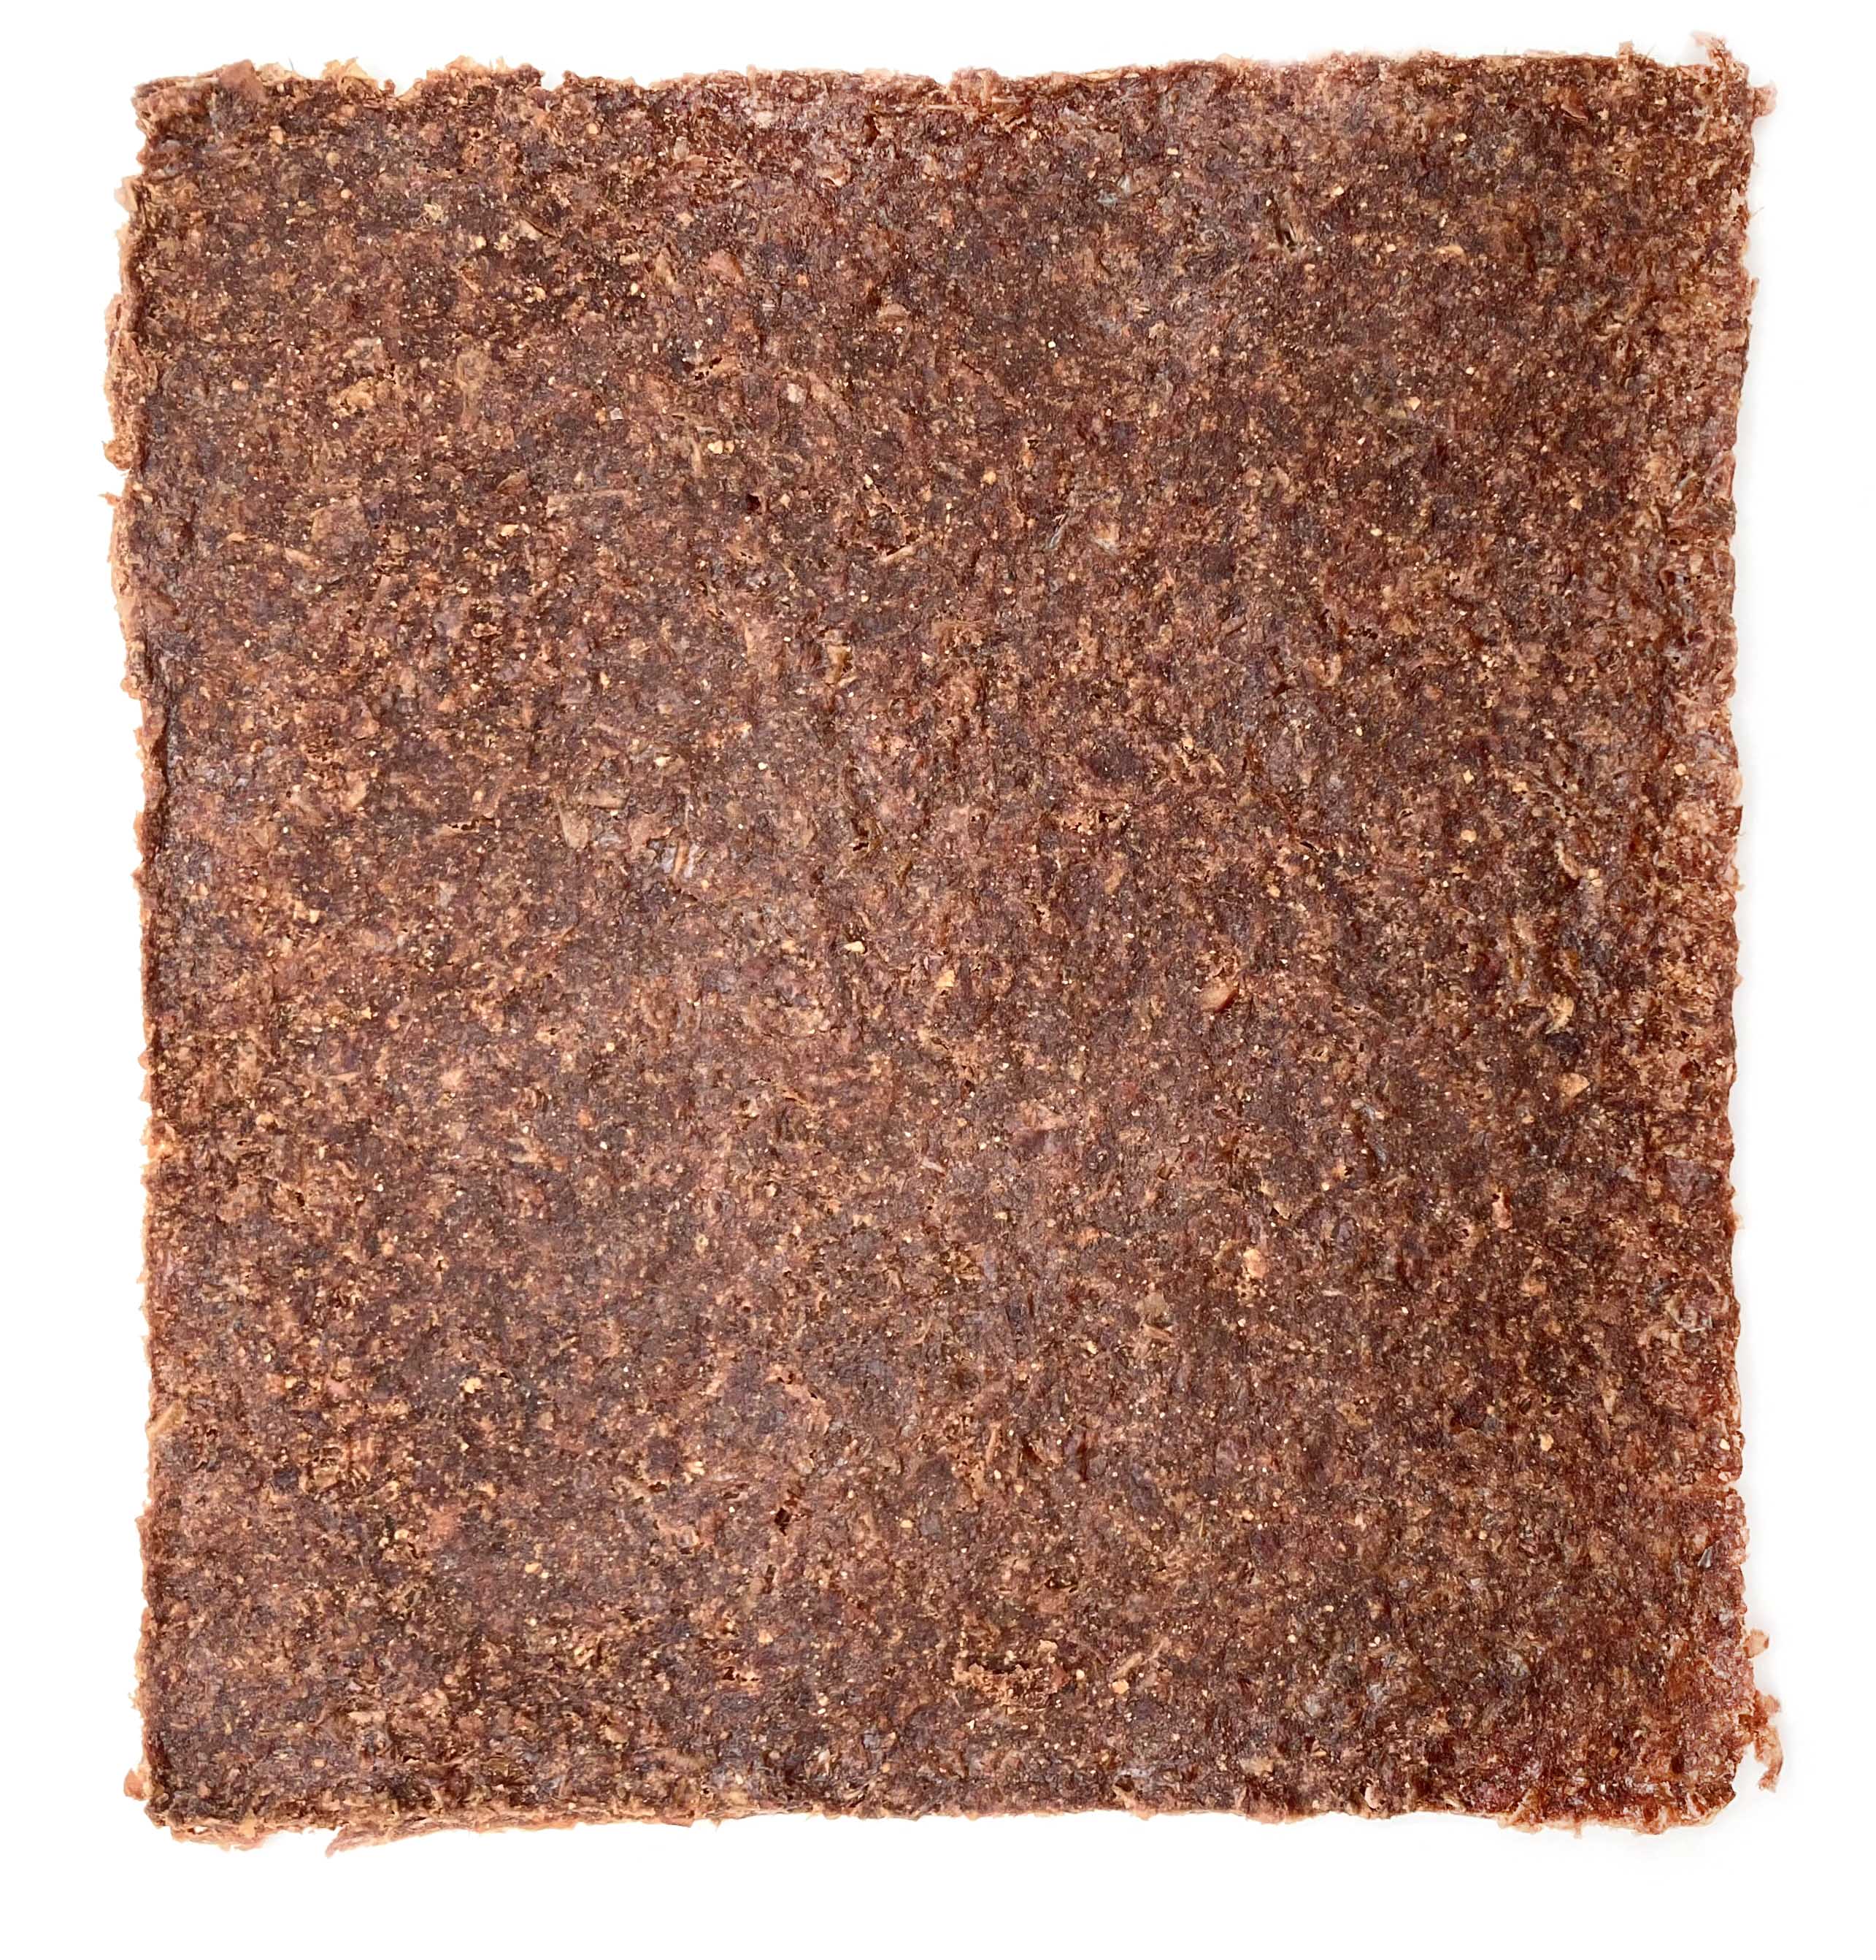
The final result after waiting 10 days of drying:
See the following video and discover the texture of the sample:
Apple leather de Emma
In conclusion, the Apple Bioleather was finally dry, however, it takes more than a week, so I would recommend making the layer thinner and blending the apple skins more to get the mix as homogenous as a porridge. On the other hand, the result wasn't so flexible and when you try to fold the little pieces easily detached and it cracks.
The properties of this leather allow you to create structure shapes so it could be an interesting idea to redo the handbag of Circular Open Source week with this material and also try if it resists laser cutting.
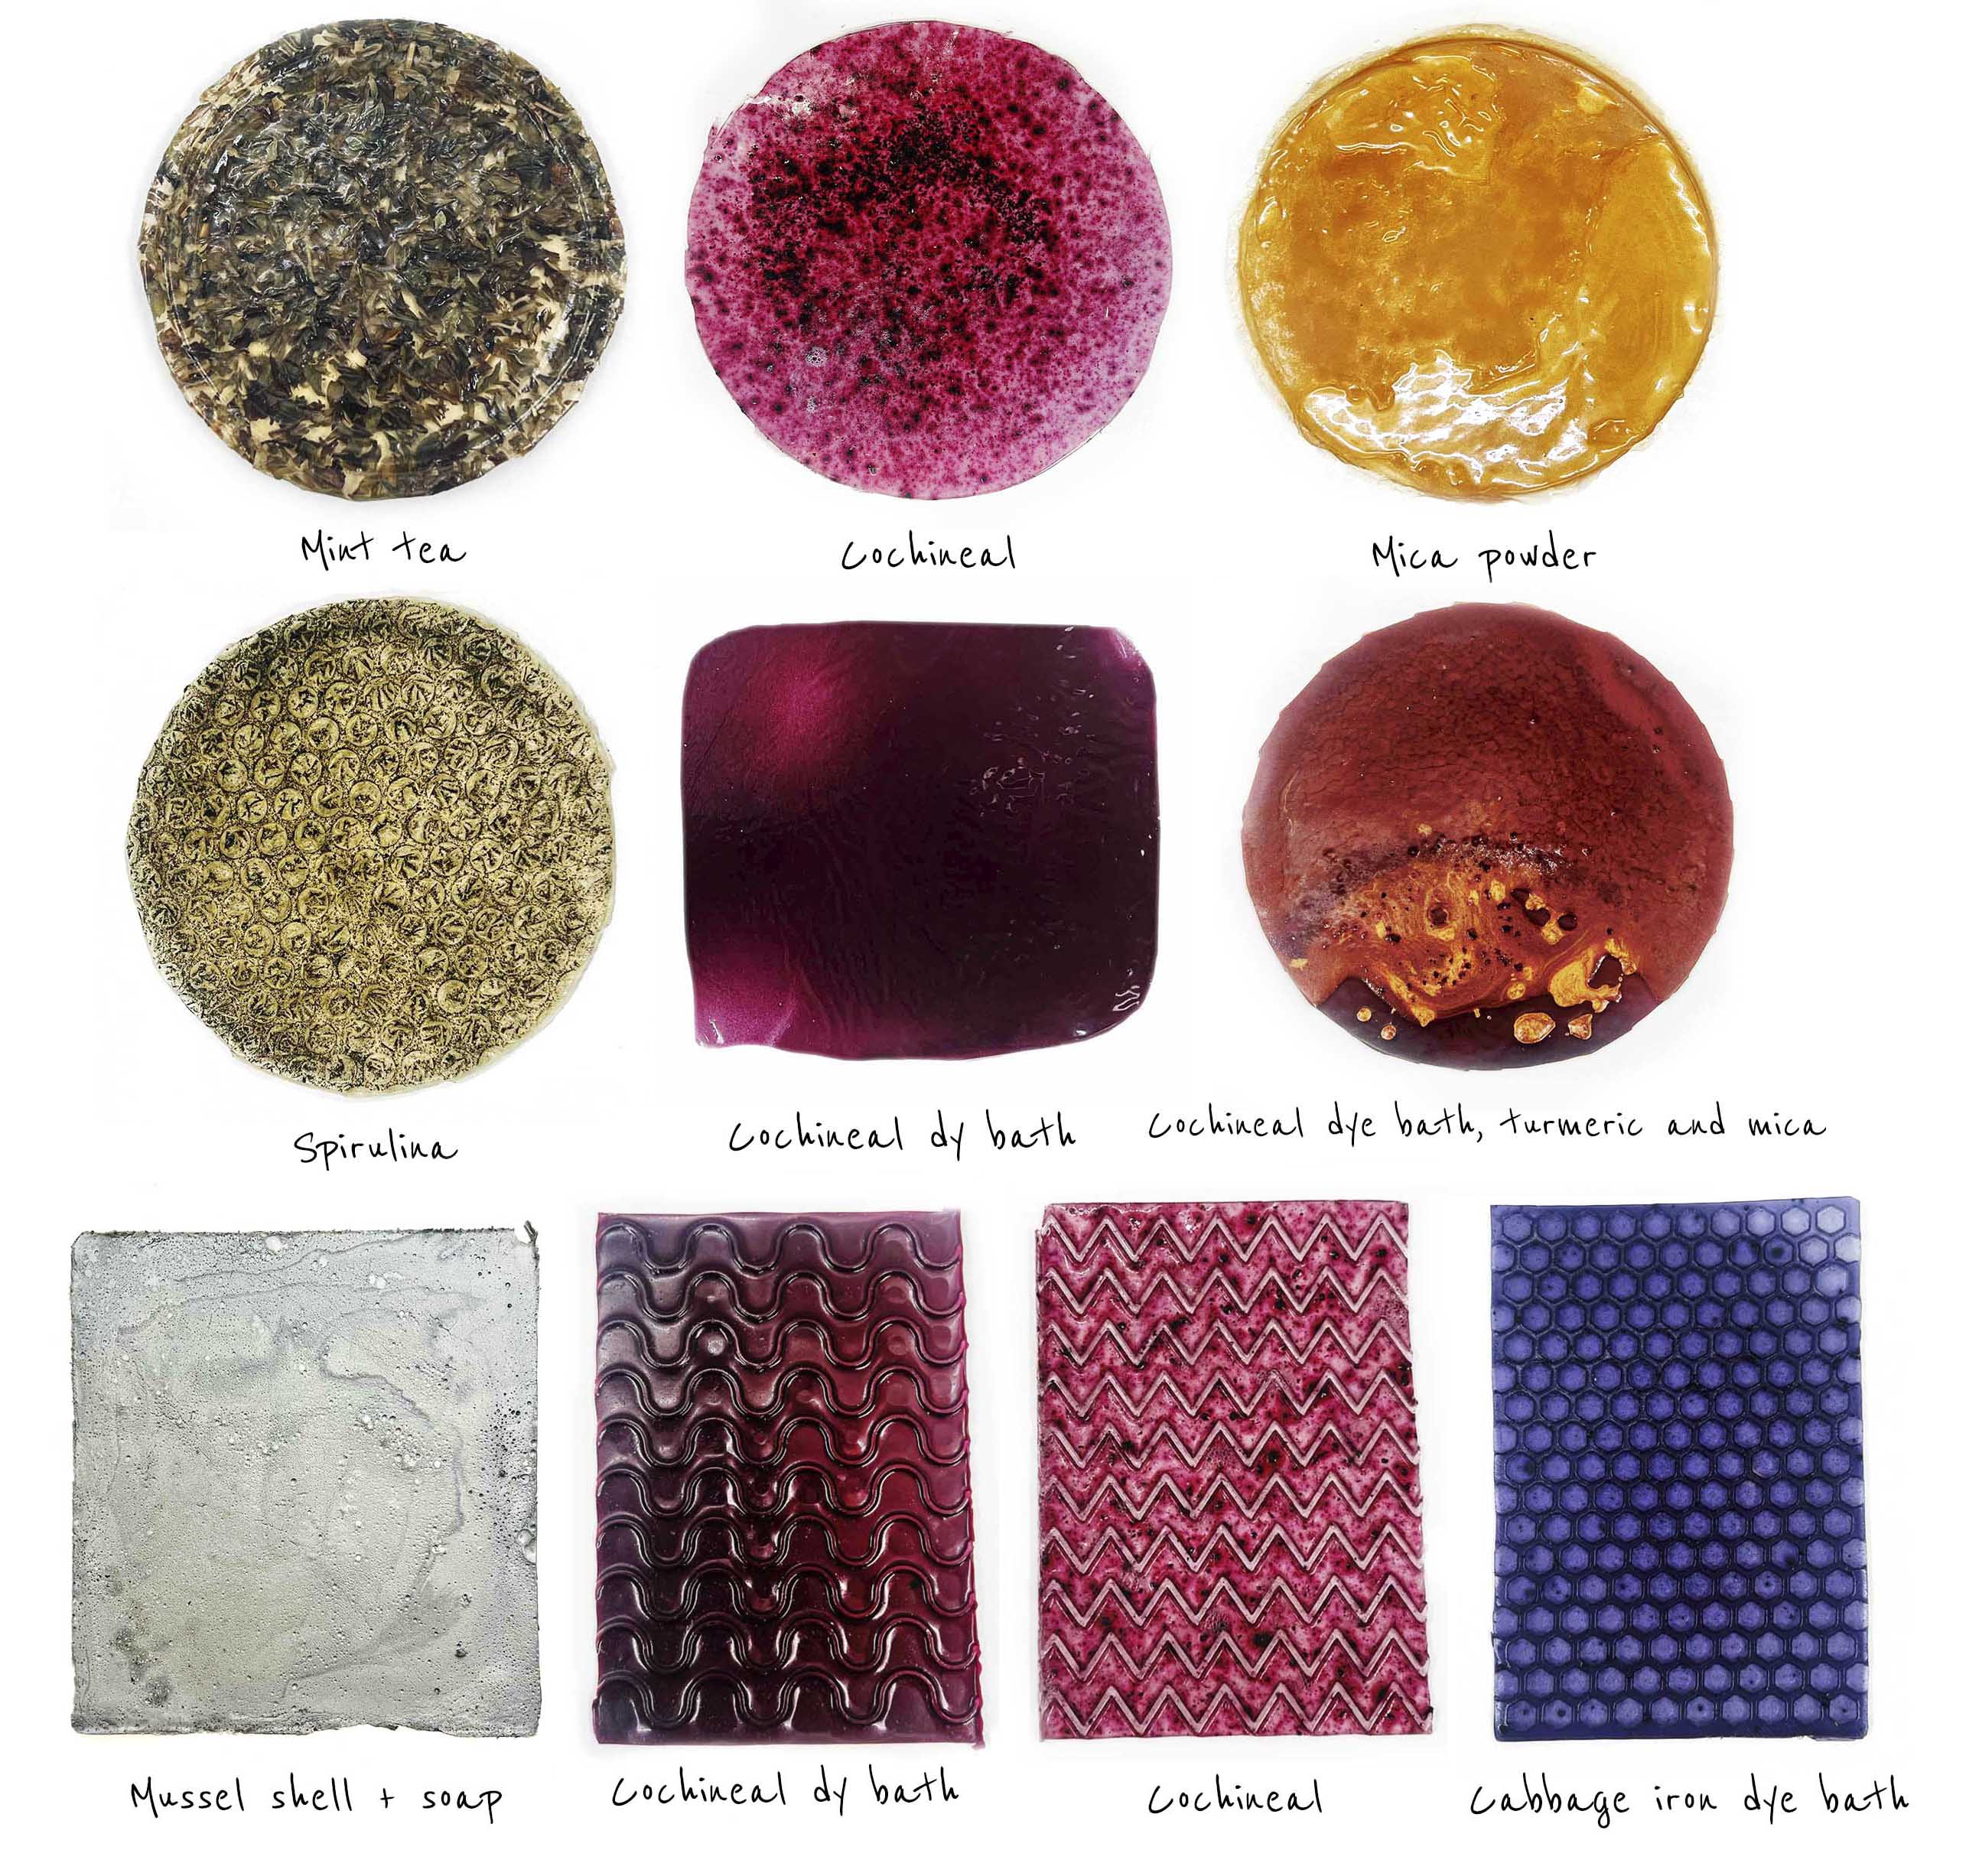
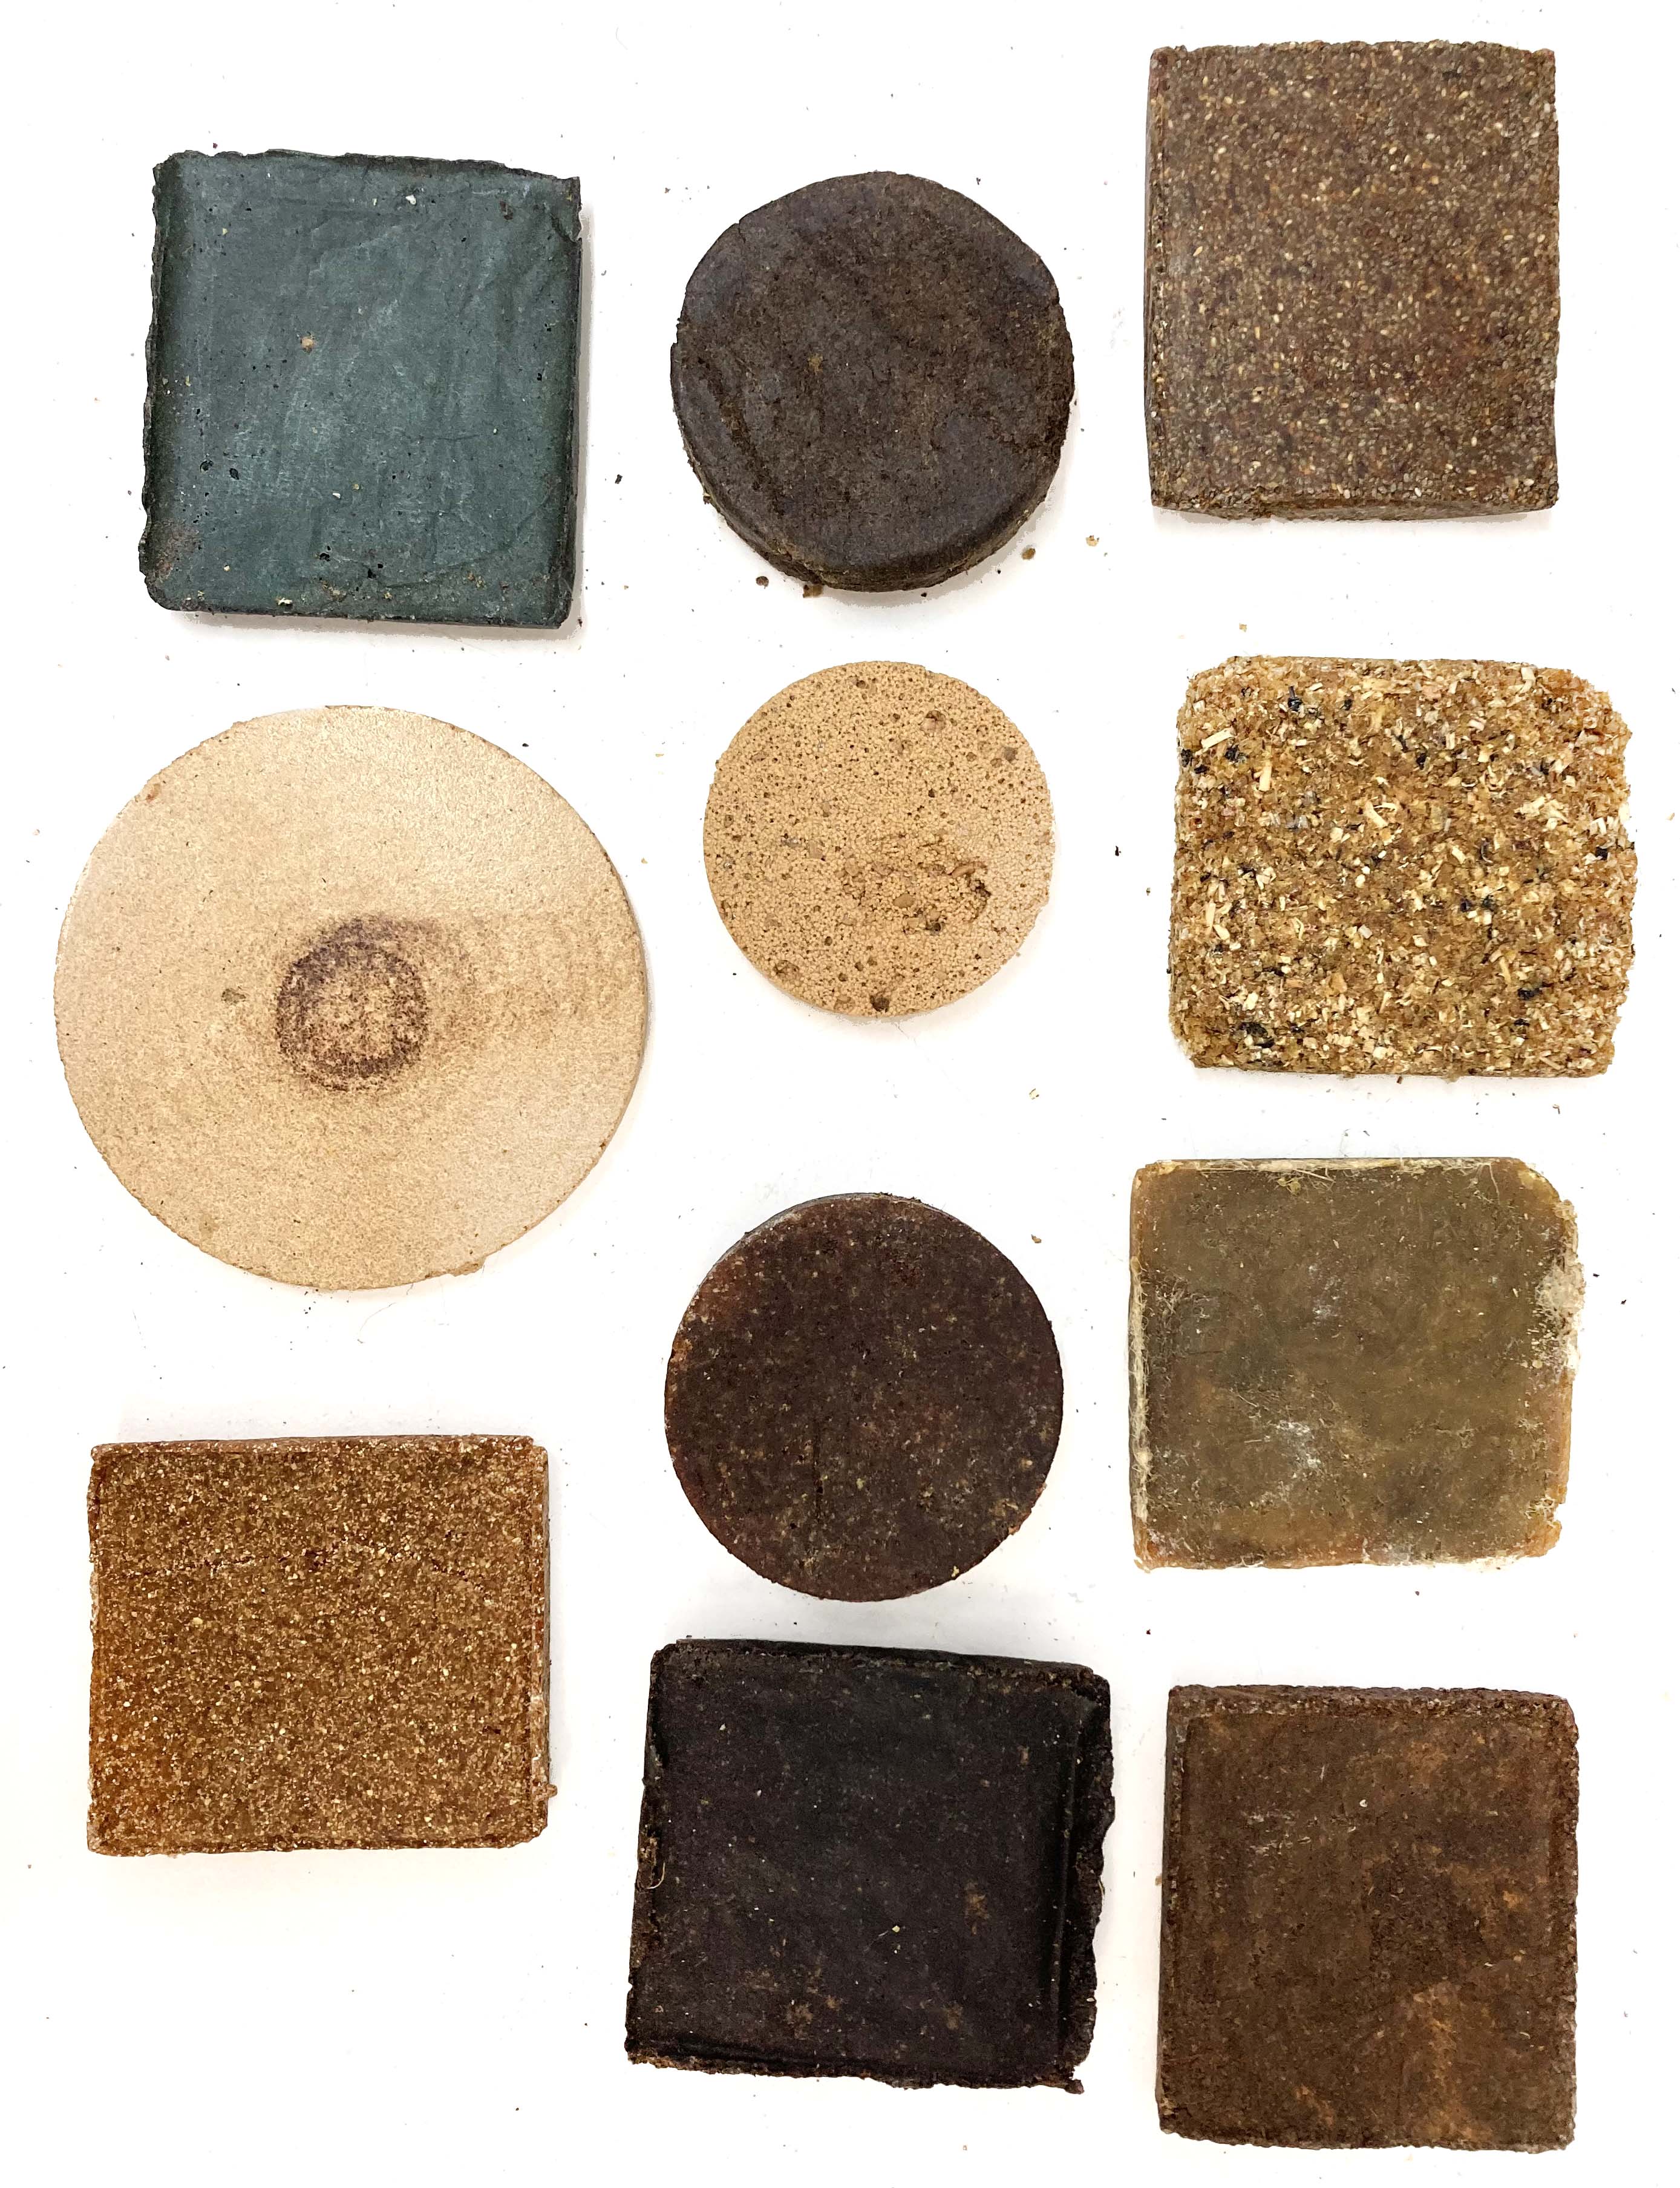
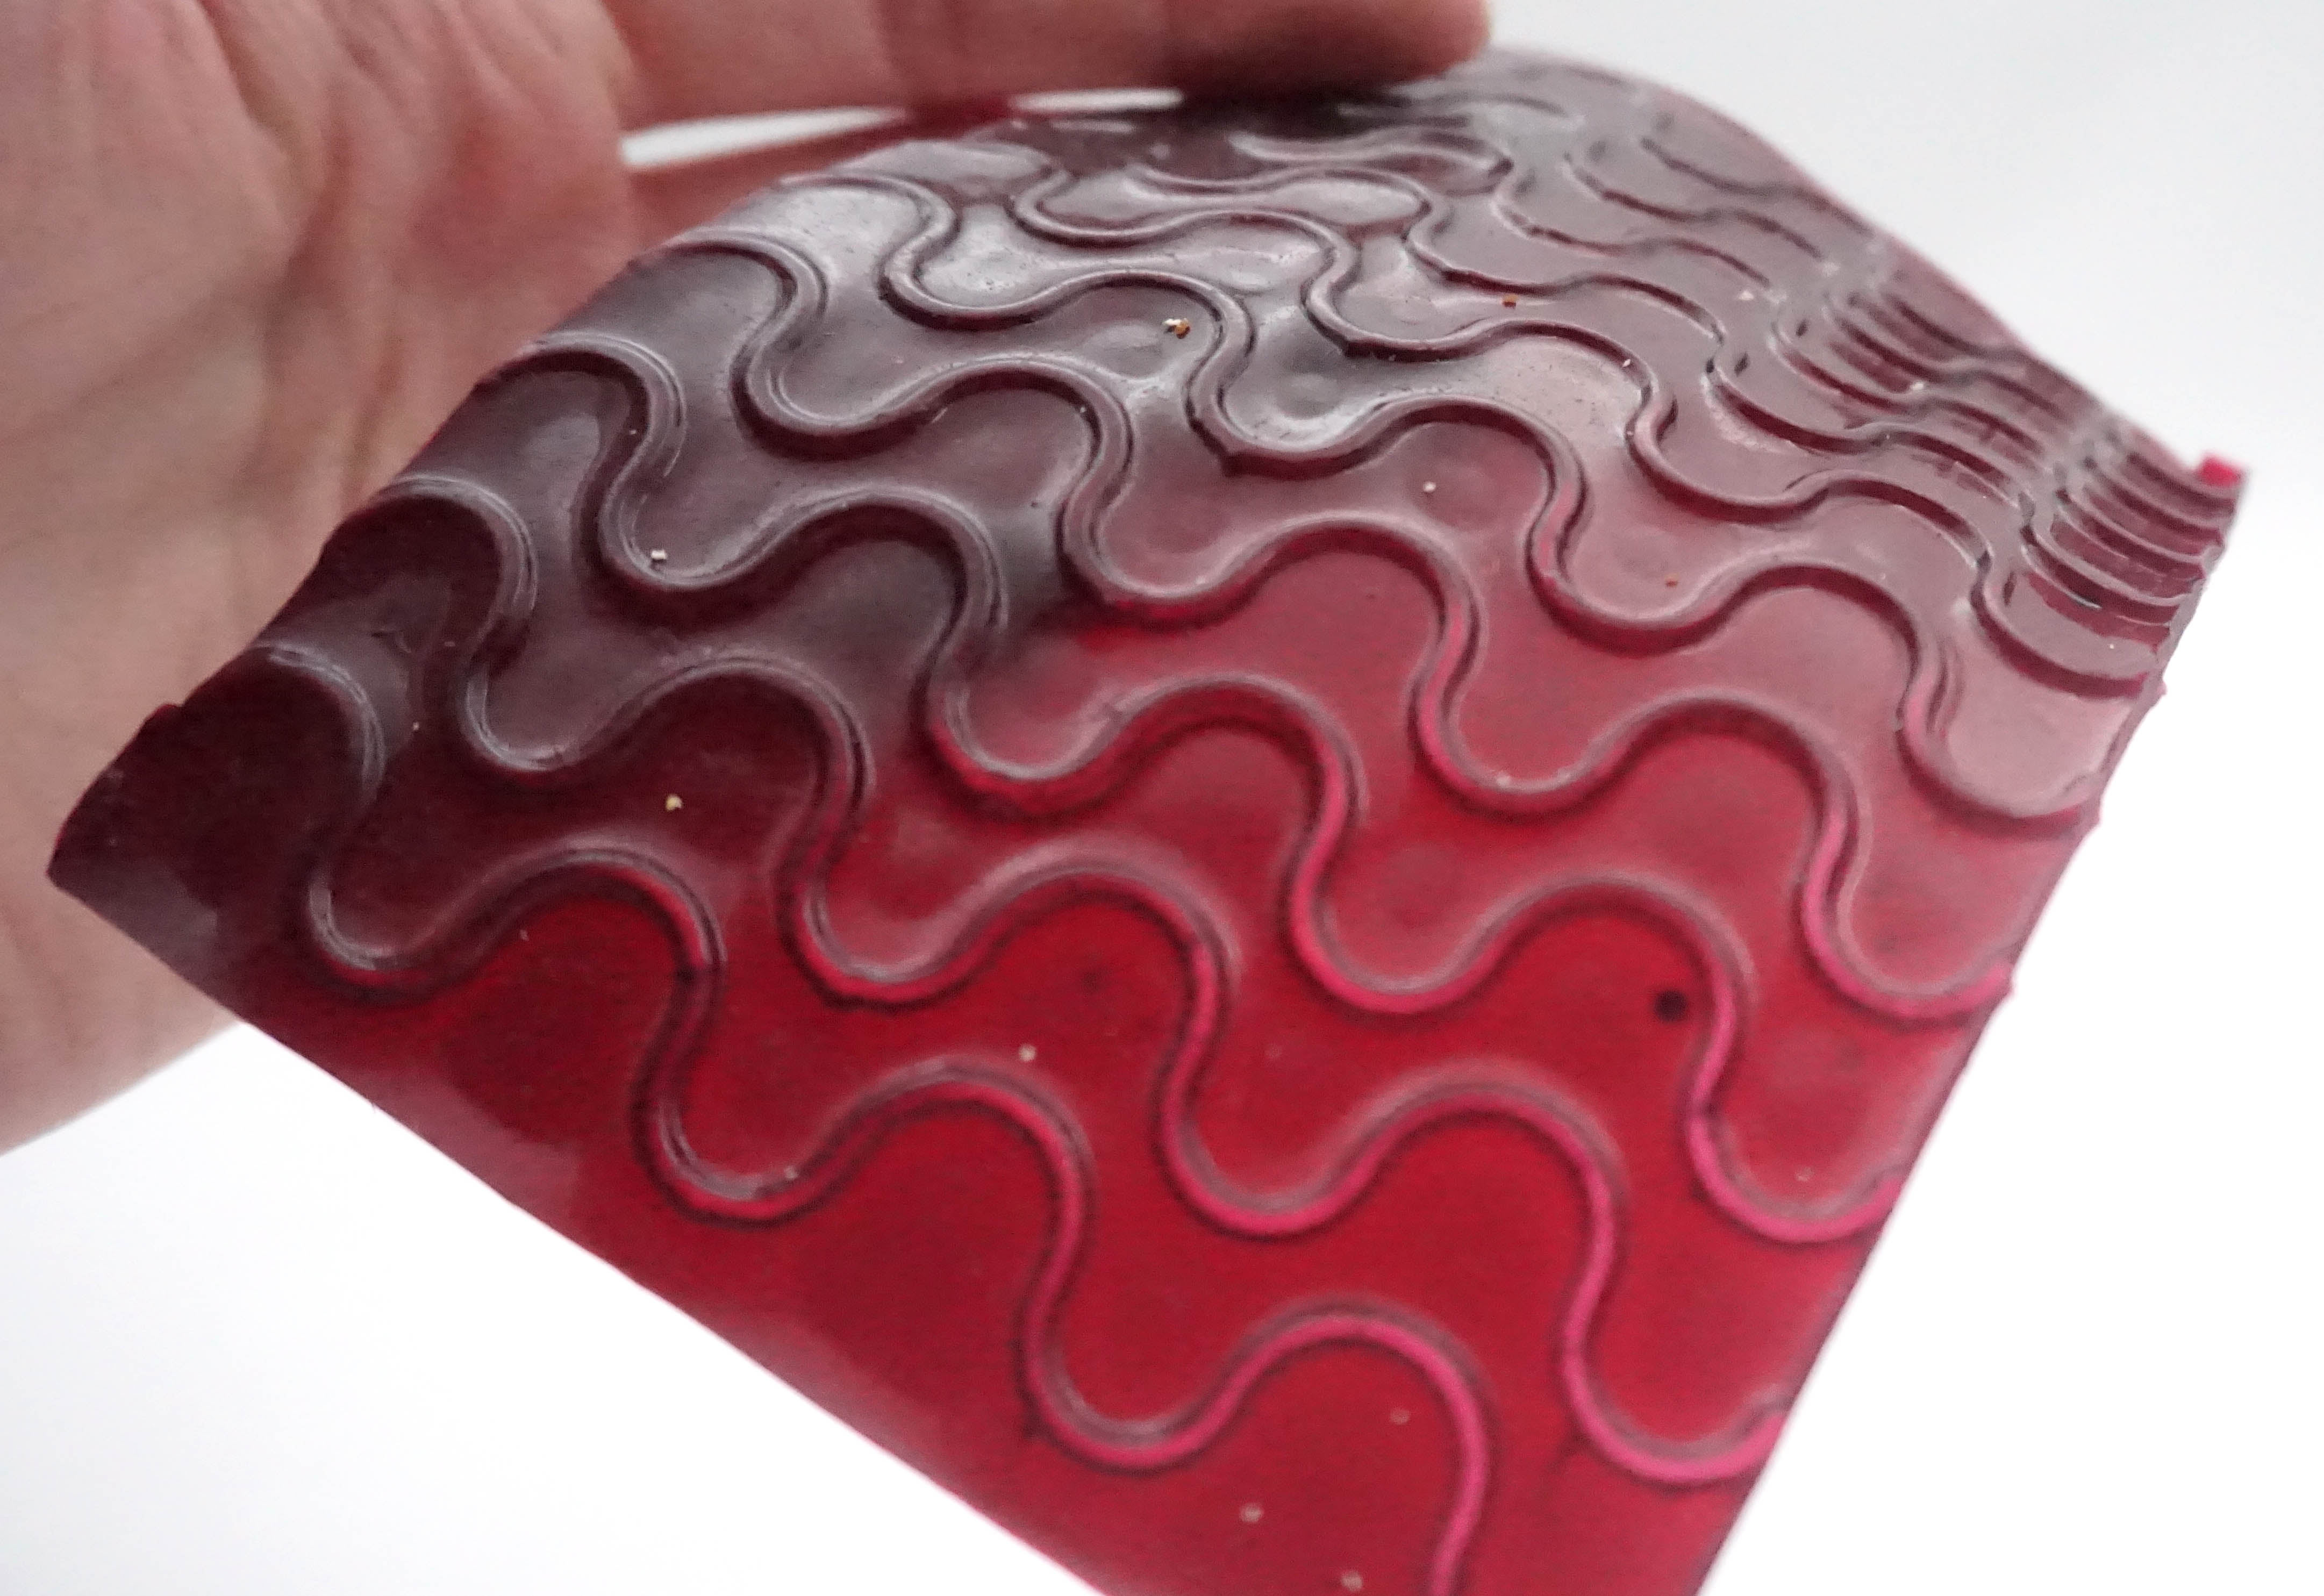
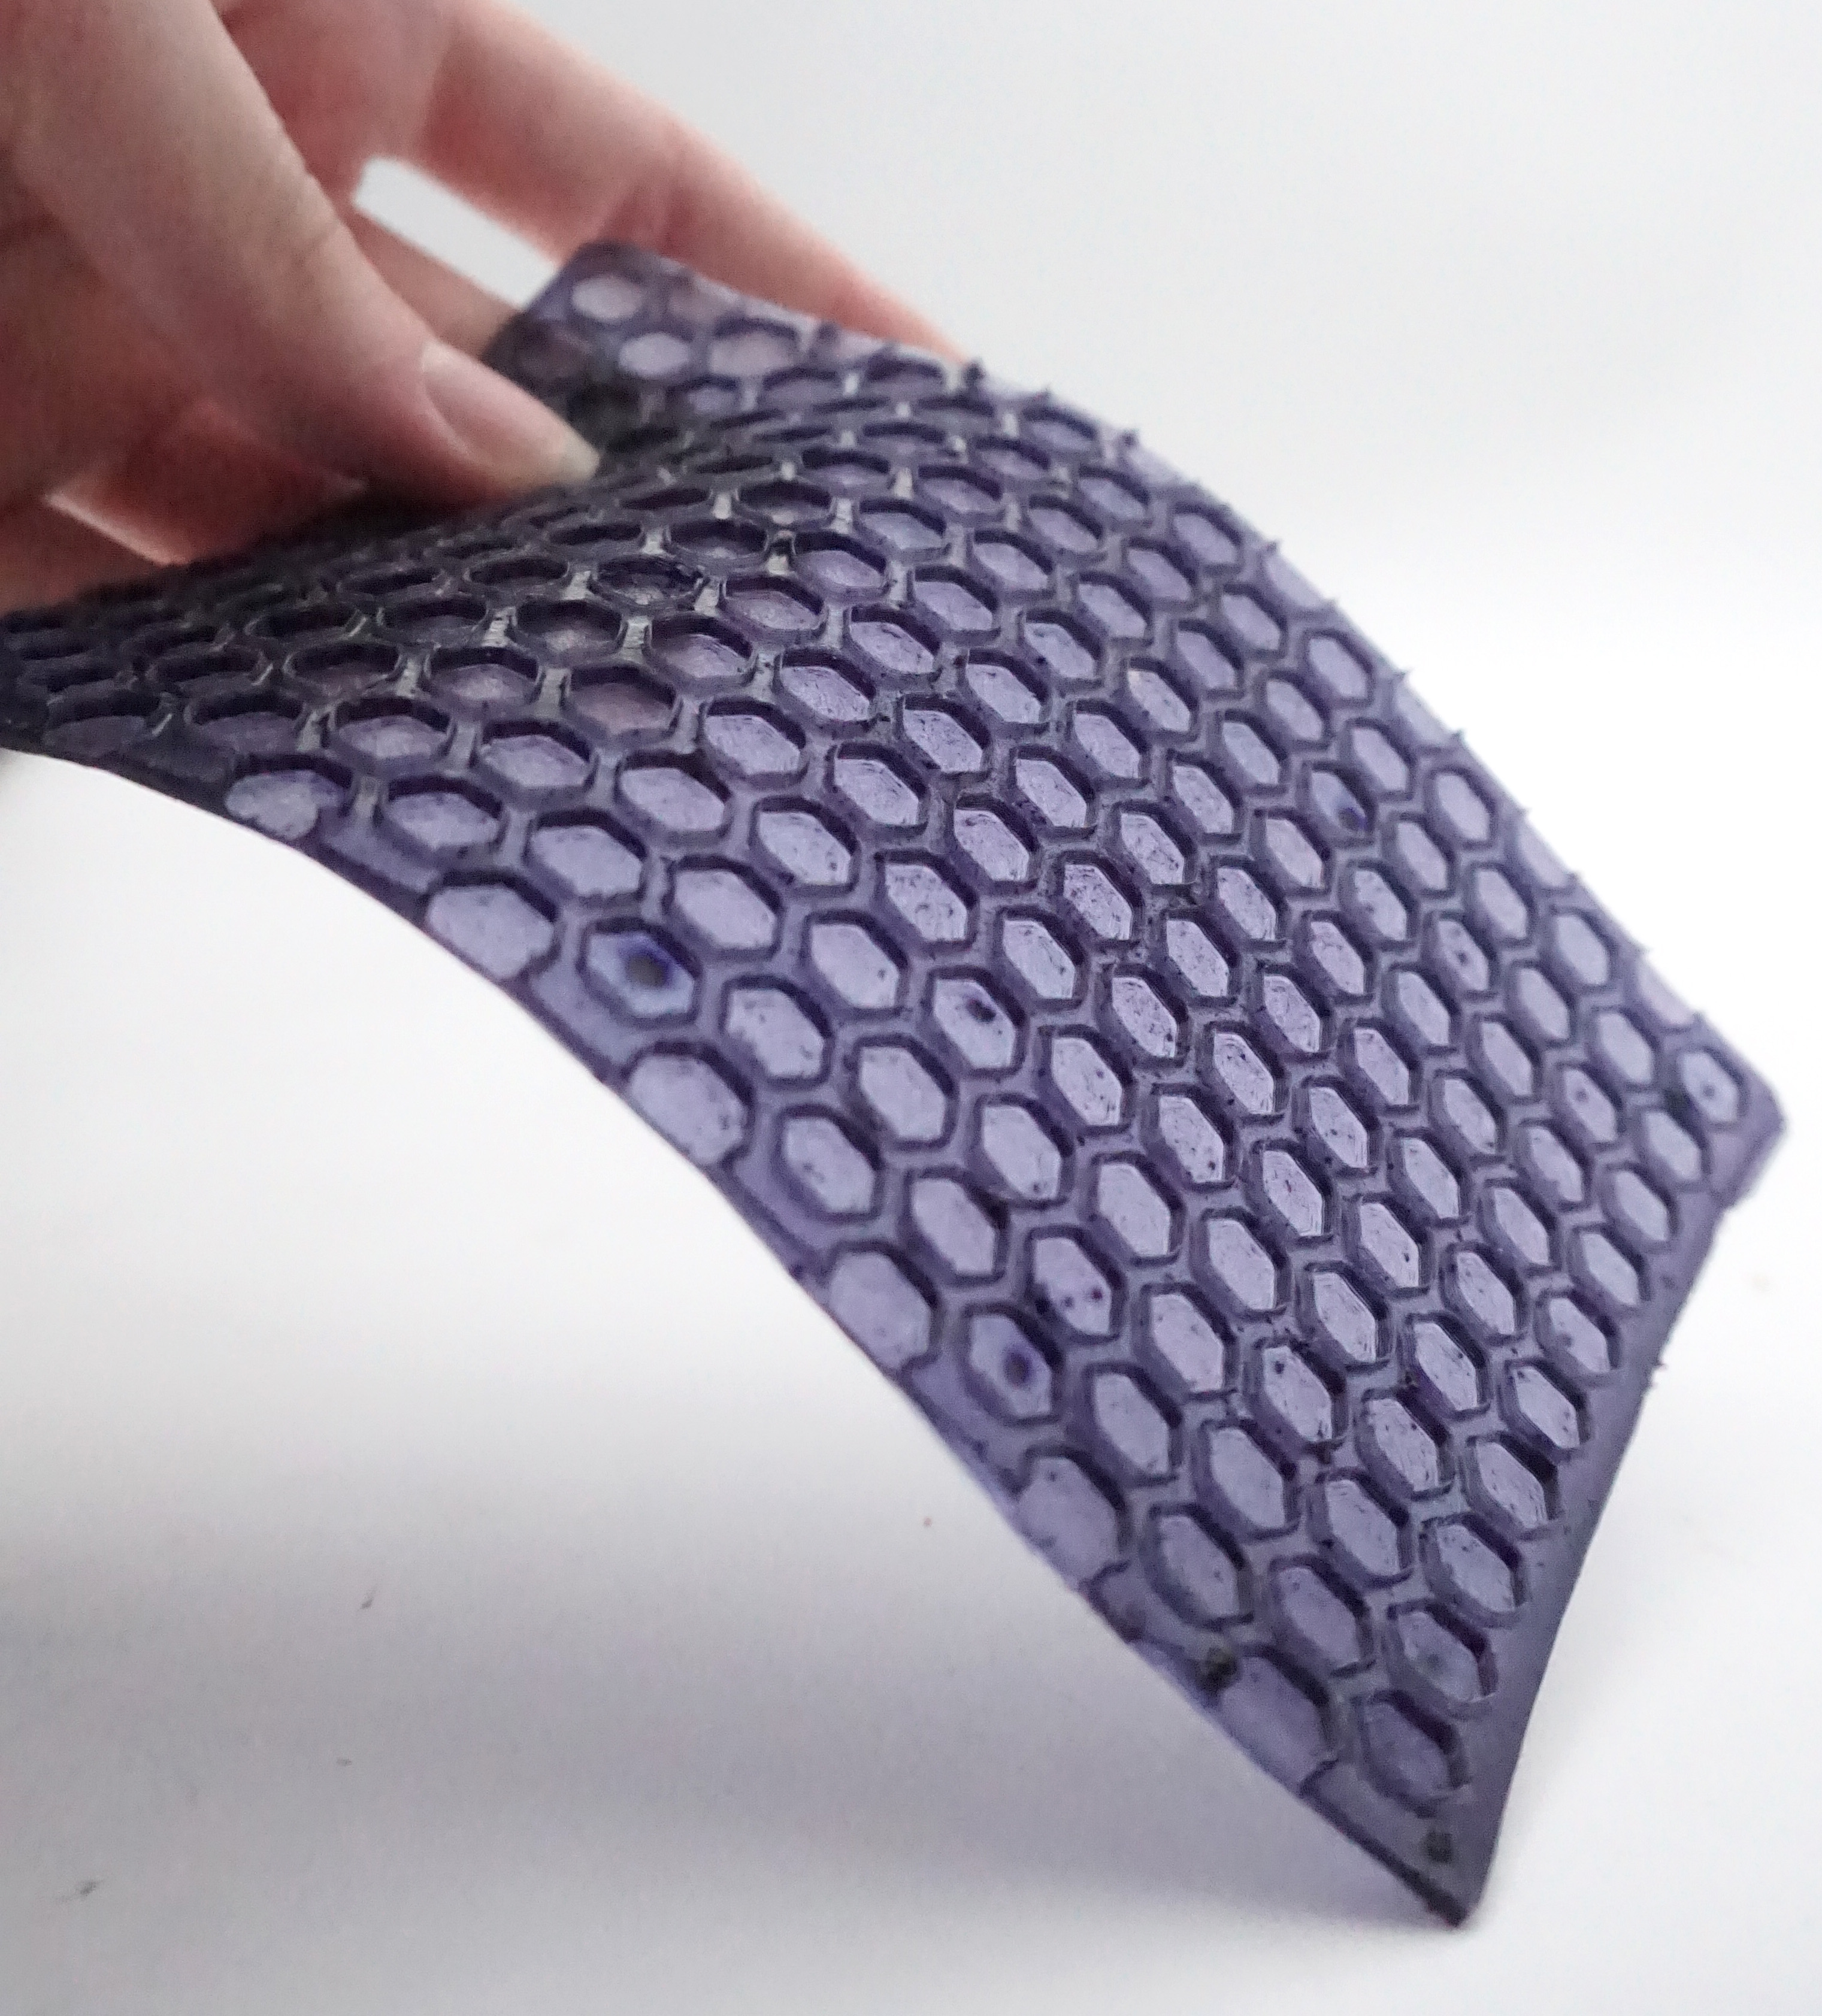
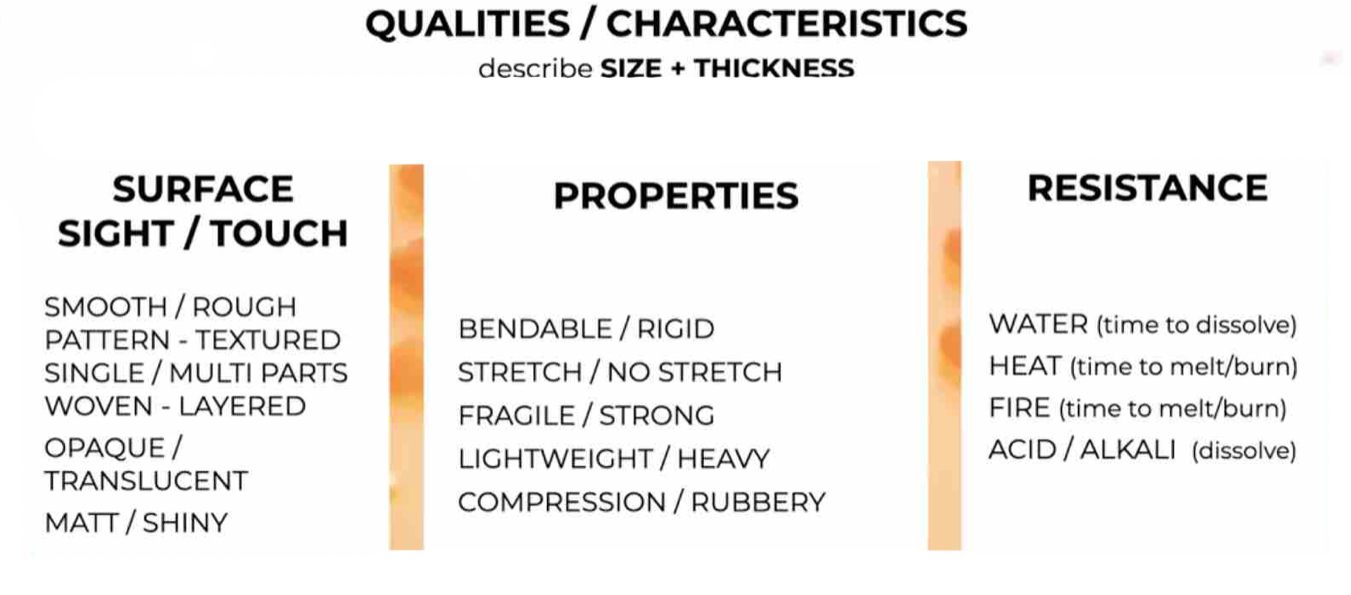
Comparing BioMaterial samples
Analyzation of the various examples during this week:
| Sample | Material name | Polymer | Plastifier | Filler | Properties |
|---|---|---|---|---|---|
 |
Bio Platic | Gelatin | Glycerine | Cochineal dye bath | Flexible |
 |
Bio Plastic | Gelatin | Glycerine | Cabbage iron dye bath | Flexible |
 |
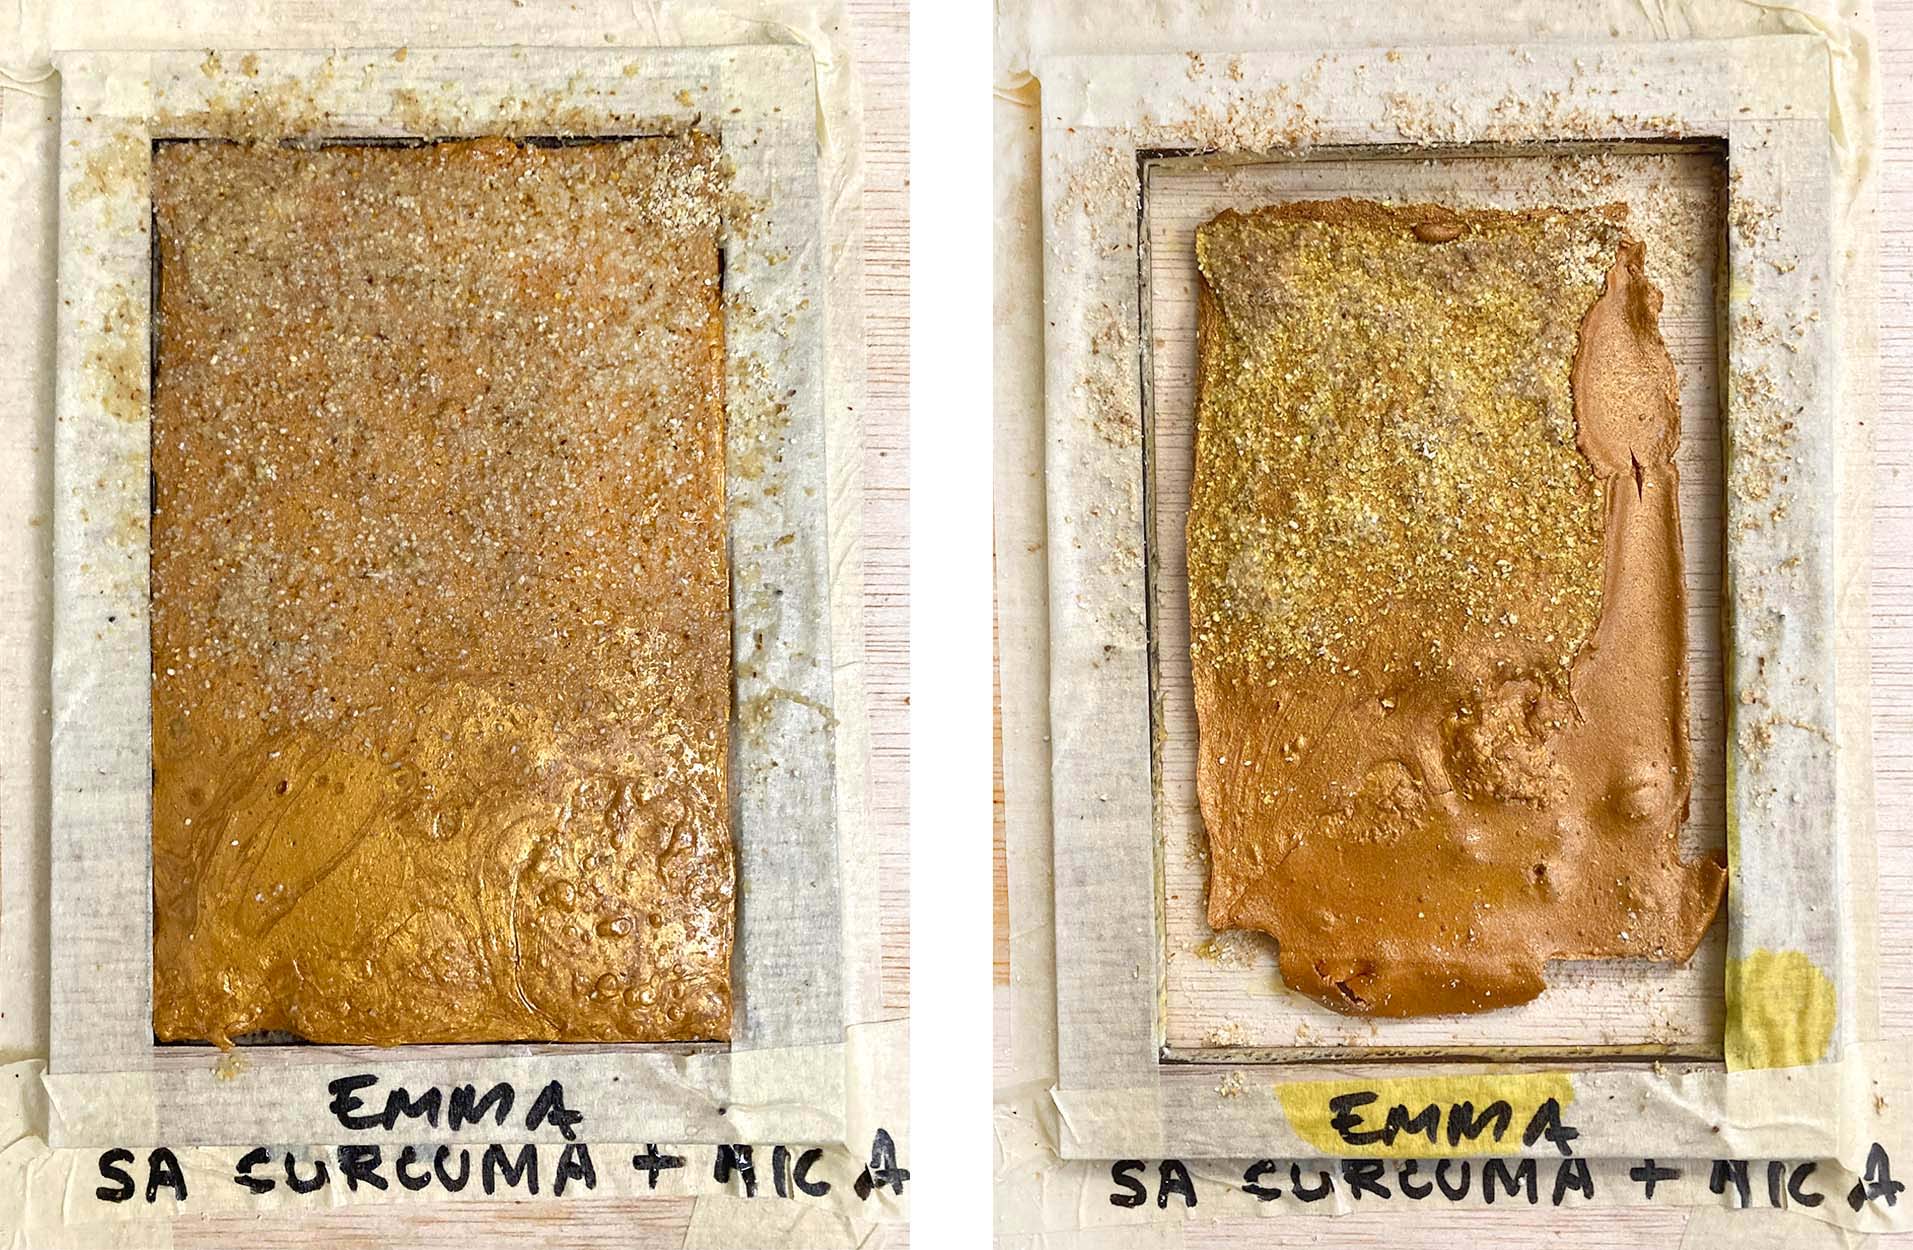
Bio Plastic | Gelatin | Glycerine | Cochineal dye bath & pigment, turmeric powder and gold mica | Flexible |
 |
Bio Silicone | Sodium alginate cast | Glycerine | Cochineal pieces | Flexible and jelly |
 |
Bio Silicone | Gelatin | Glycerine | Gold Mica | Flexible and jelly |
 |
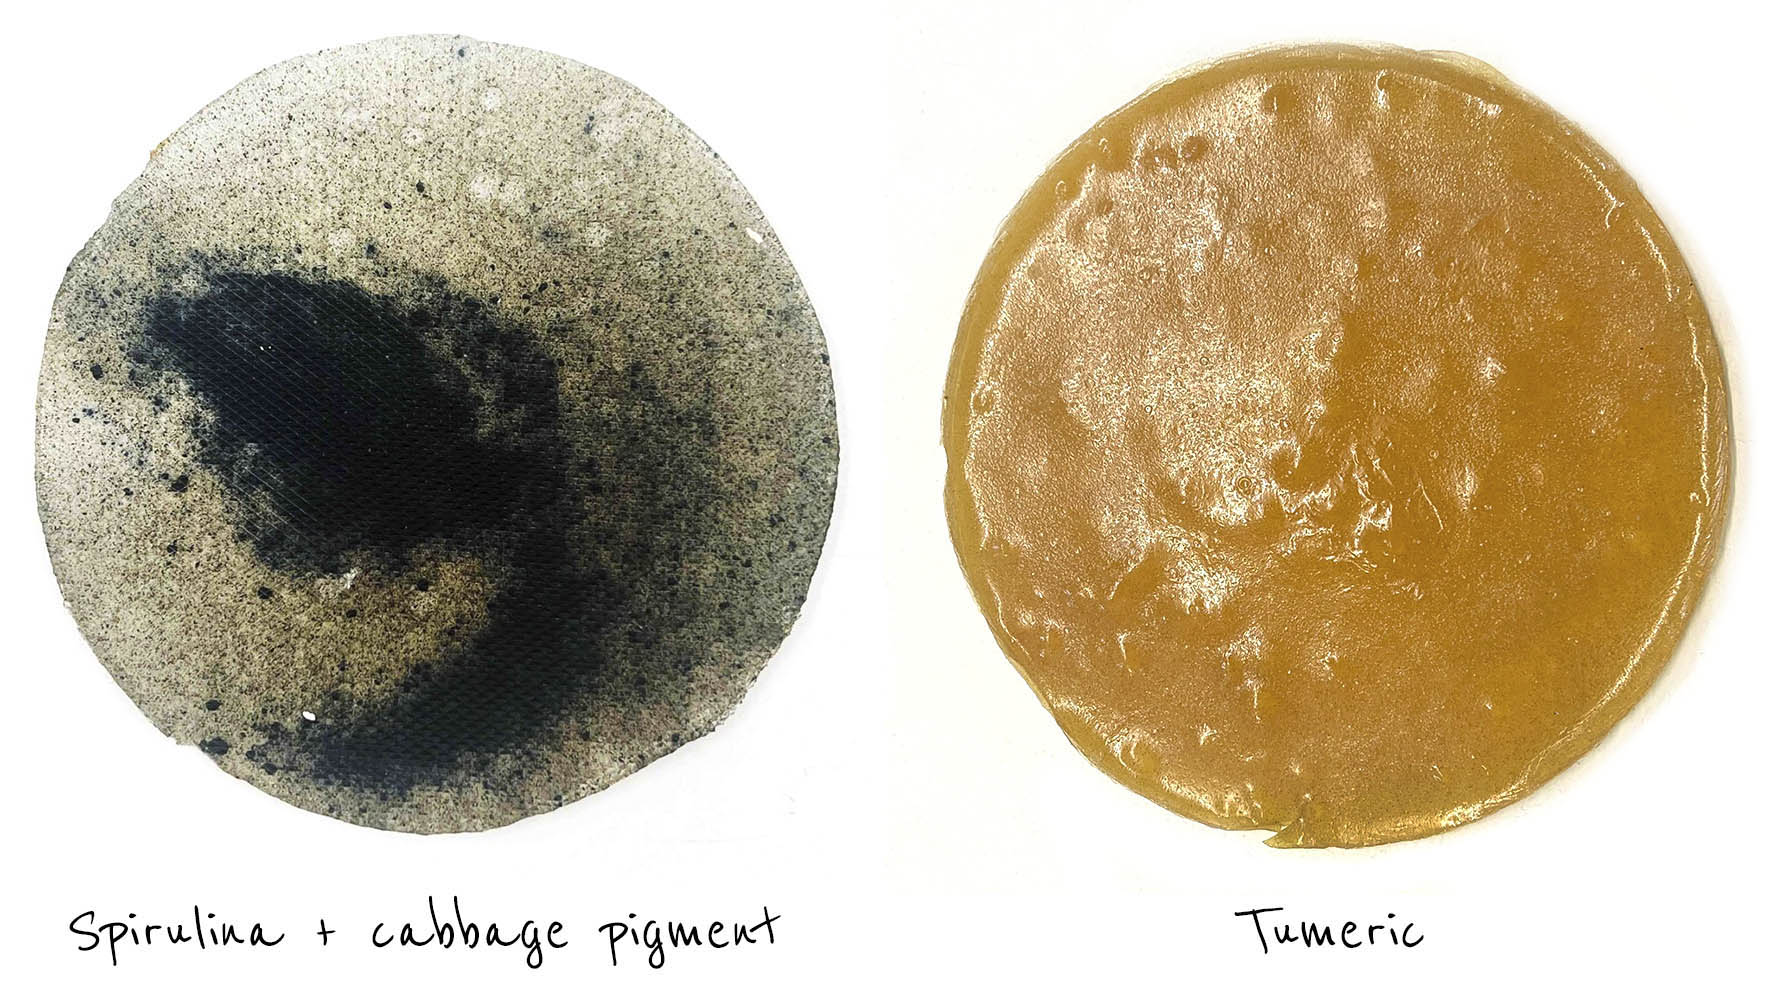
Bio Silicone | Gelatin | Glycerine | Spirulina | Flexible and jelly |
 |
Bio Silicone | Gelatin | Glycerine | Cochineal pigment & Eucalyptus pigment | Flexible and jelly |
 |
Bio Silicone | Gelatin | Glycerine | Cochineal dye bath | Thin, flexible and jelly |
 |
Bio Film | Gelatin | Glycerine | Cabbage pigment & logwood dyebath drops | Thin, flexible with a rigid top |
 |
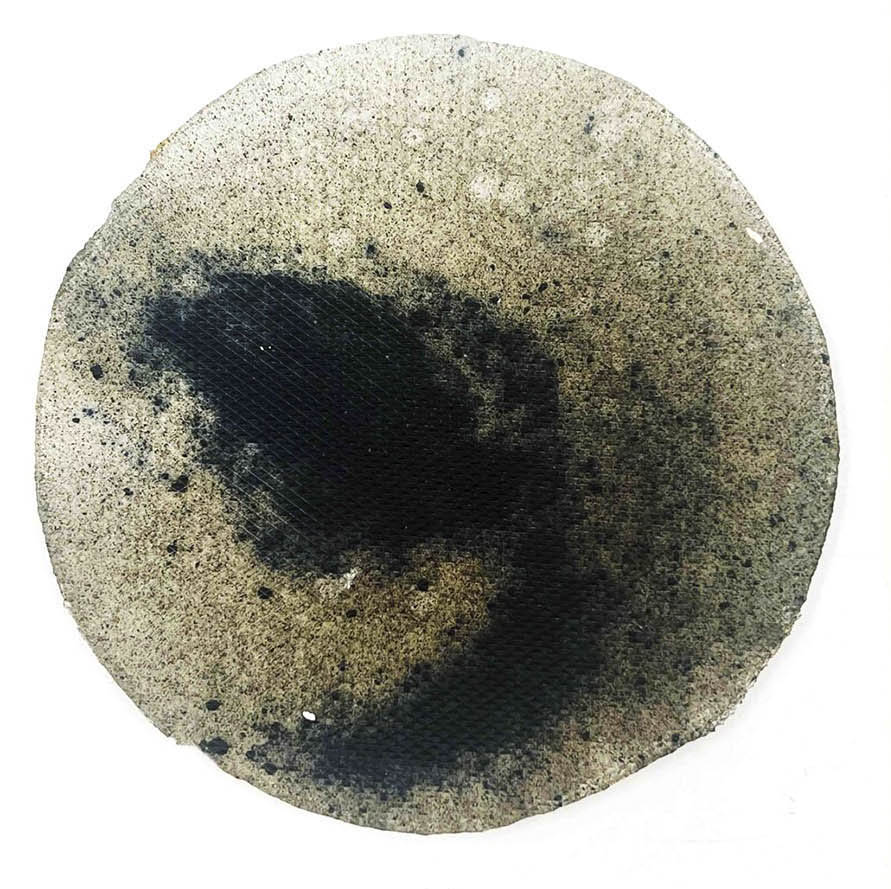
Bio Foam | Gelatin | Glycerine | Charcoal and Mussel shells | Firm and spongy |
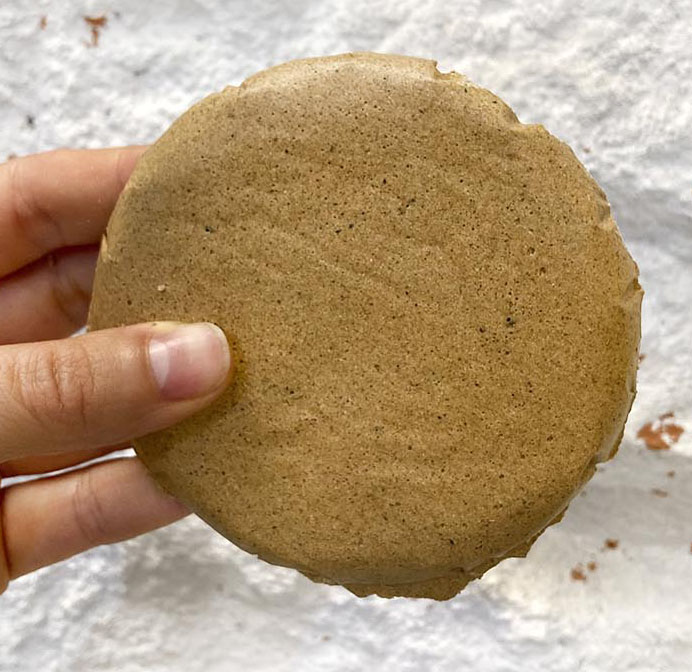
| Bio Plastic | Sodium Alginate Cast | Glycerine | Cochineal | Soft and flexible | |
| Bio Plastic | Sodium Alginate Cast | Glycerine | Rose copper Mica | Soft and flexible | |
 |
Bio Plastic | Agar | Glycerine | Turmeric powder | Flexible and jelly |
 |
Bio Plastic | Agar | Glycerine | Spirulina and cabbage pigment | Flexible and jelly |
 |
Bio Resin | Pine Resin | - | Egg shells powder | Hard, rigid block and fragile |
|
Bio Resin | Pine Resin | - | Deshidratated hibiscus and tea leaves | Hard, rigid block and fragile |
|
Apple Bio-leather | Apple skins | Carnauba wax | Apple peels, cinnamon and lemon | Not super flexible, trend to crack when it blends |
How we should describe a sample?
3D printing
Recipe
The ingredients we will need for the 3d printing recipes:
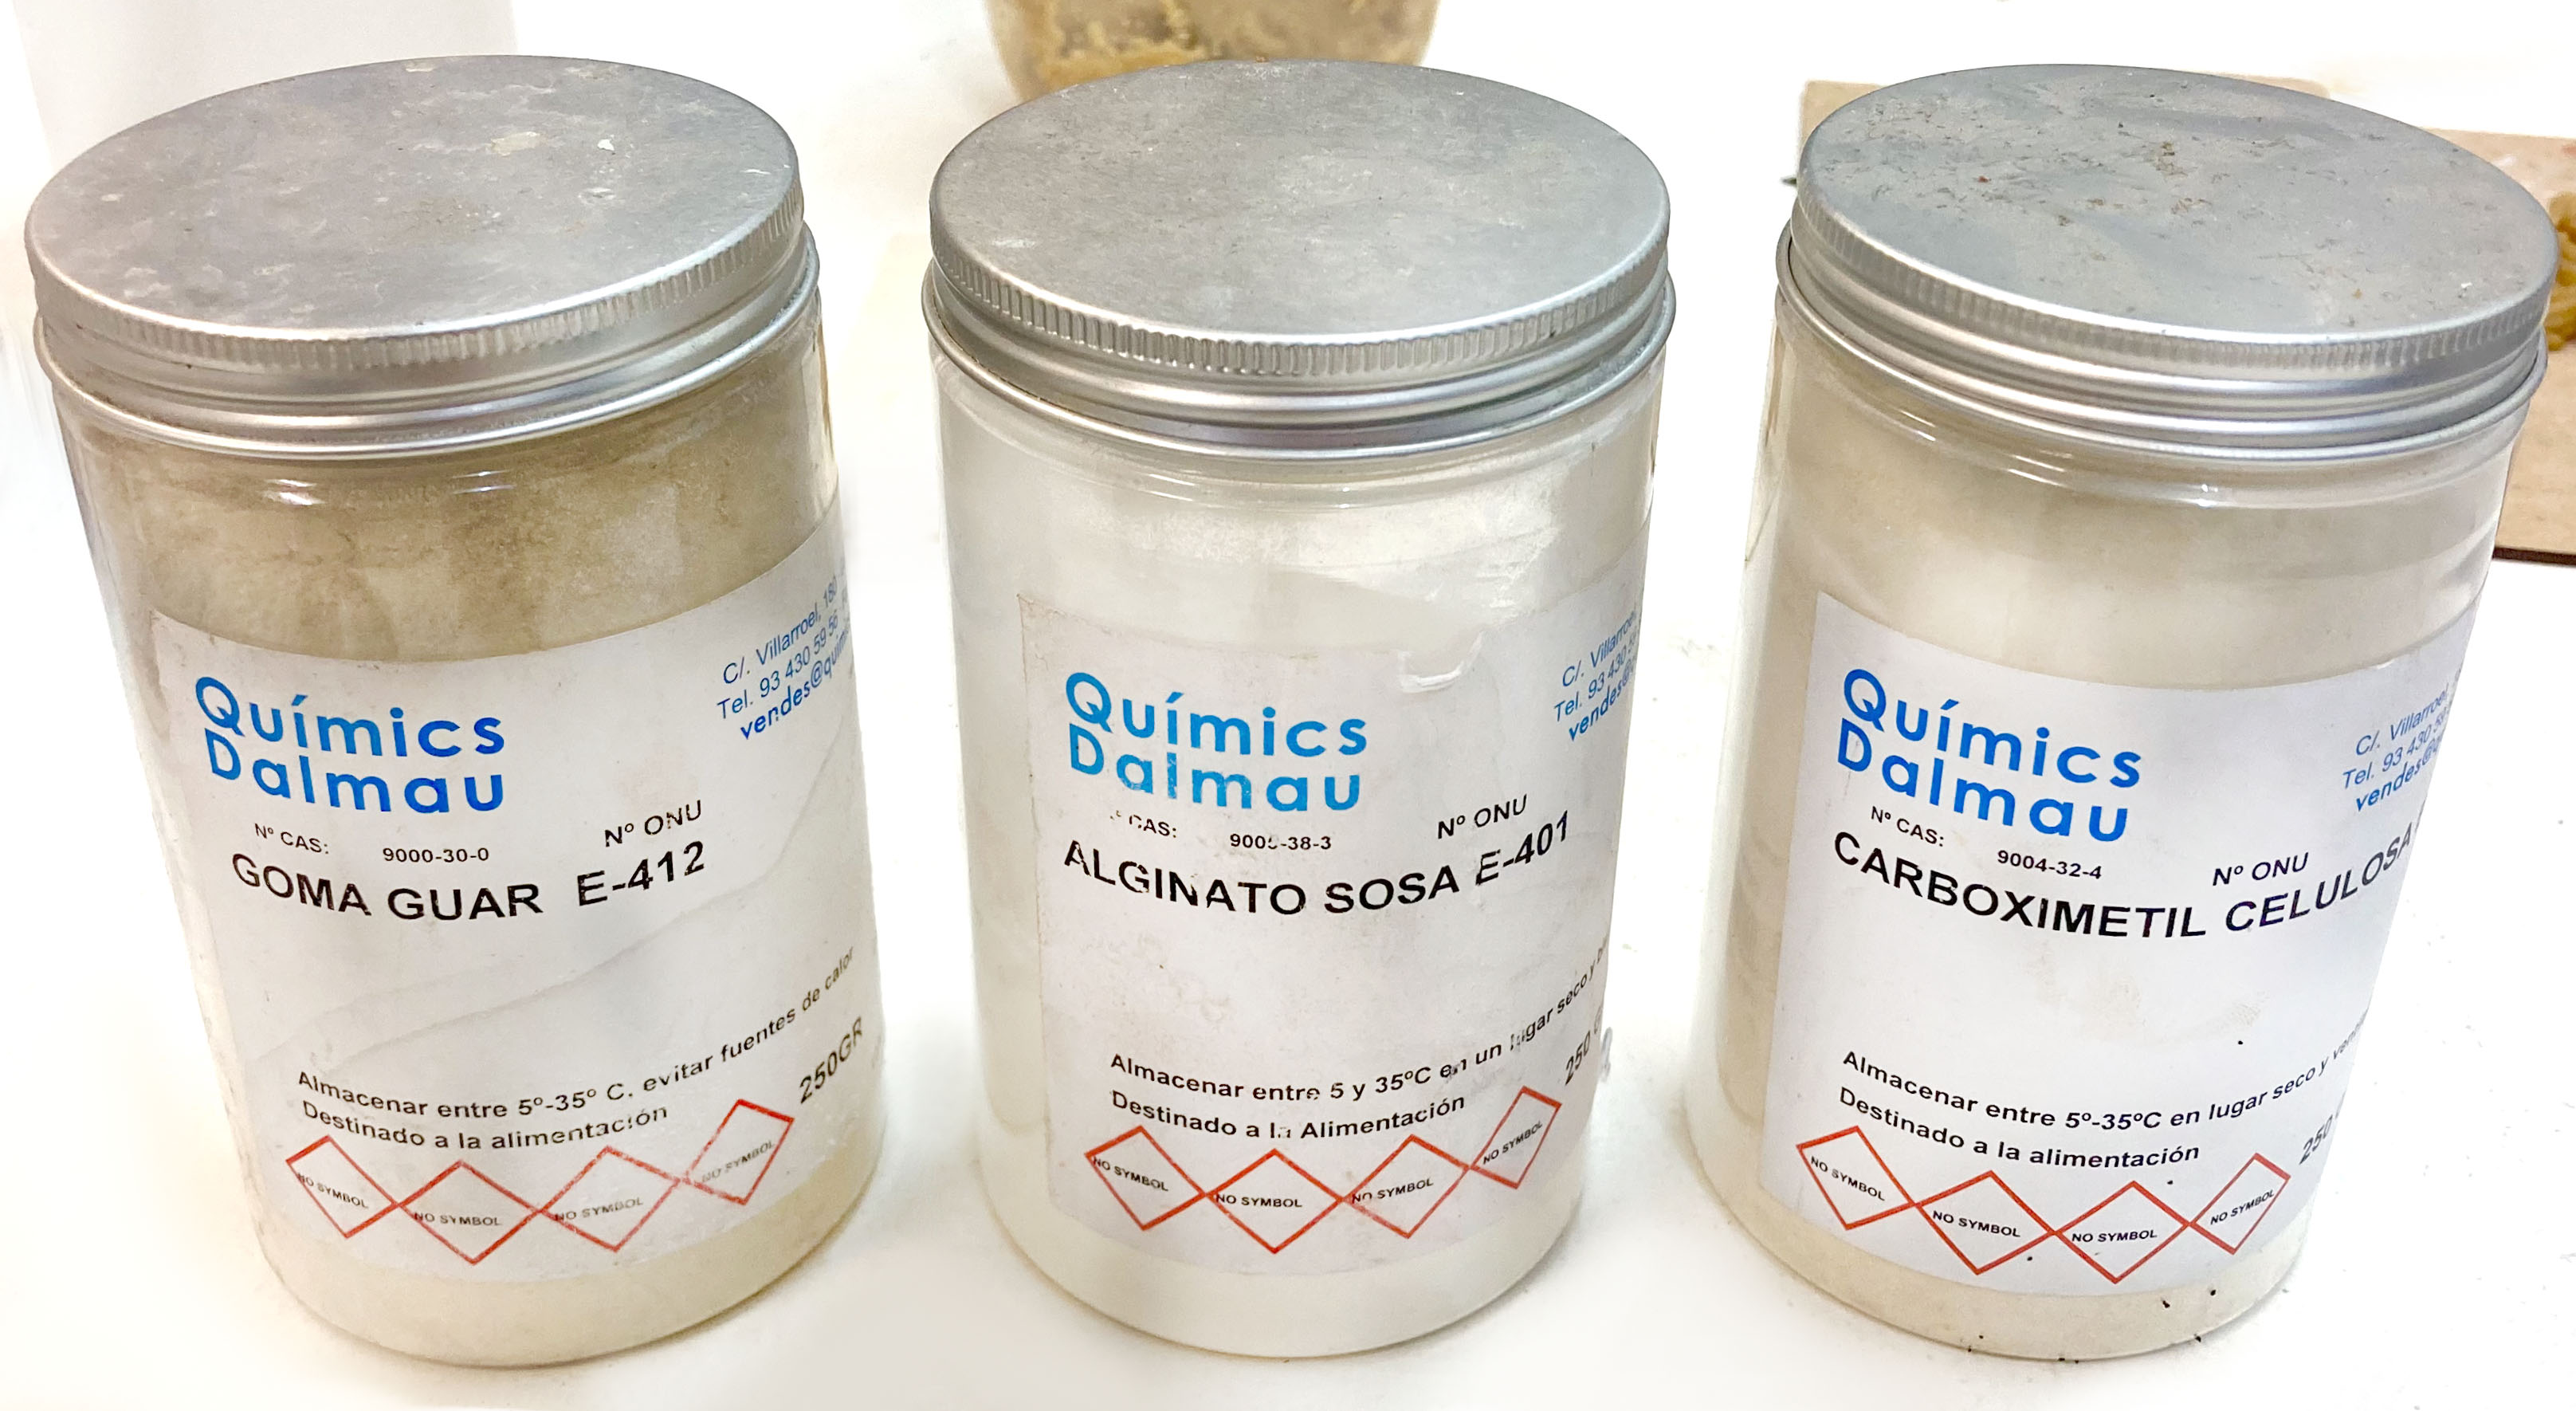
- Biopolymer: Sodium Alginate, Gelatin, Agar Agar, Xantham gum, Guar gum, Pectin, Sugar Cane
- Biolasticer: Glycerol, Sorbitol, Oil
- Solvent: Water, Dye bath left over, Vinegar
- Additives
There are 2 types:
- Fillers: Eggshells, Oystershell, Avocado peels, Coffee grounds...
- Colorants: Charcoal powder, Mica, Tumeric, Cinnamon, Spirulina...
Ingredients for 3D printing:
* 8g Guar gum
* 200 ml Water
* 7 spoons of filler (Avocado)
* 4g Sodium alginate
* 5g CMC
* 200ml Water
* 1tbsp Glycerol
* 5 spoons Filler (citrus peels)
Tools
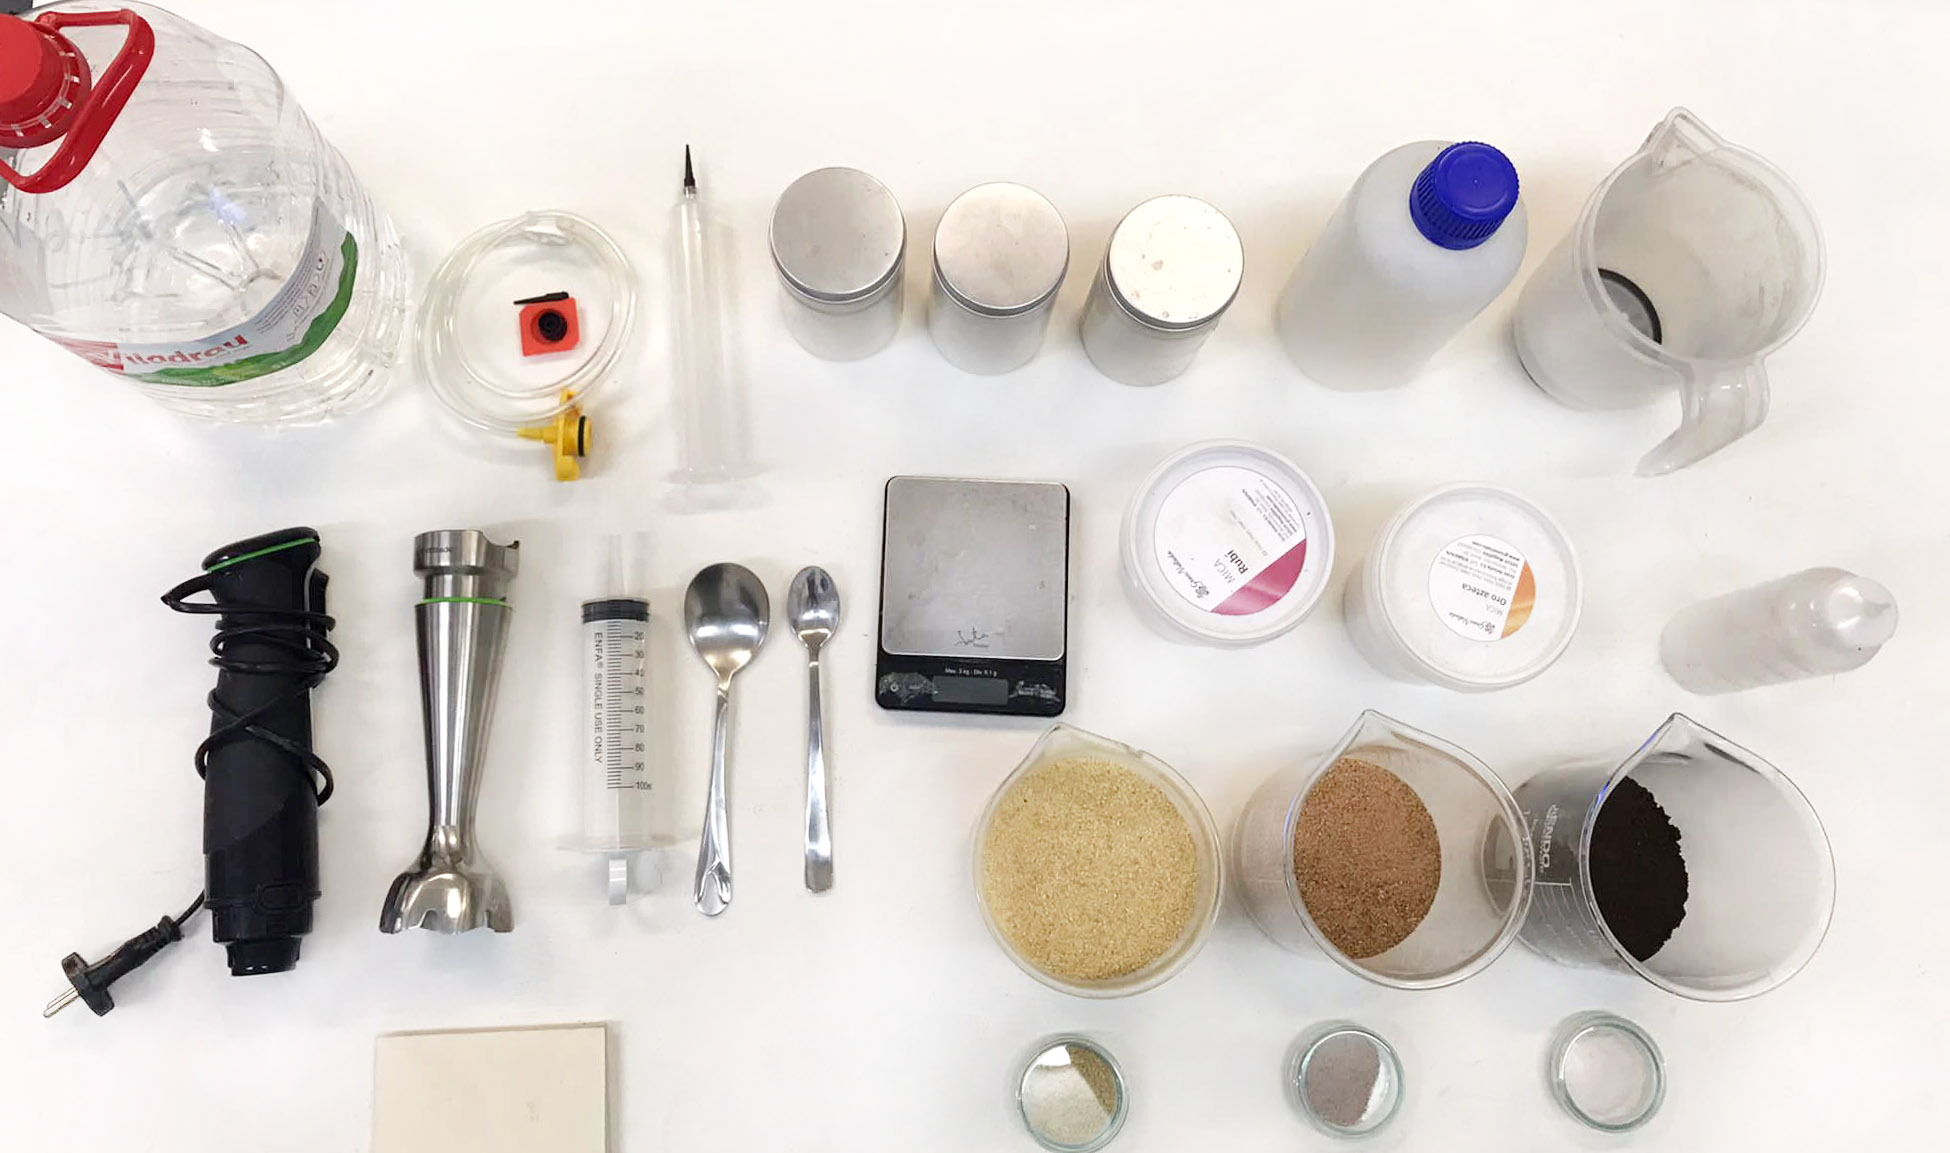
- Hand blender
- Digital scale
For hand printing: Sauce bottle, Syringe, Bakery tools, or BioGun of Marcos Georgiou.
Process
Always you must try the mixture with a manual tool before using the 3d printing machine.
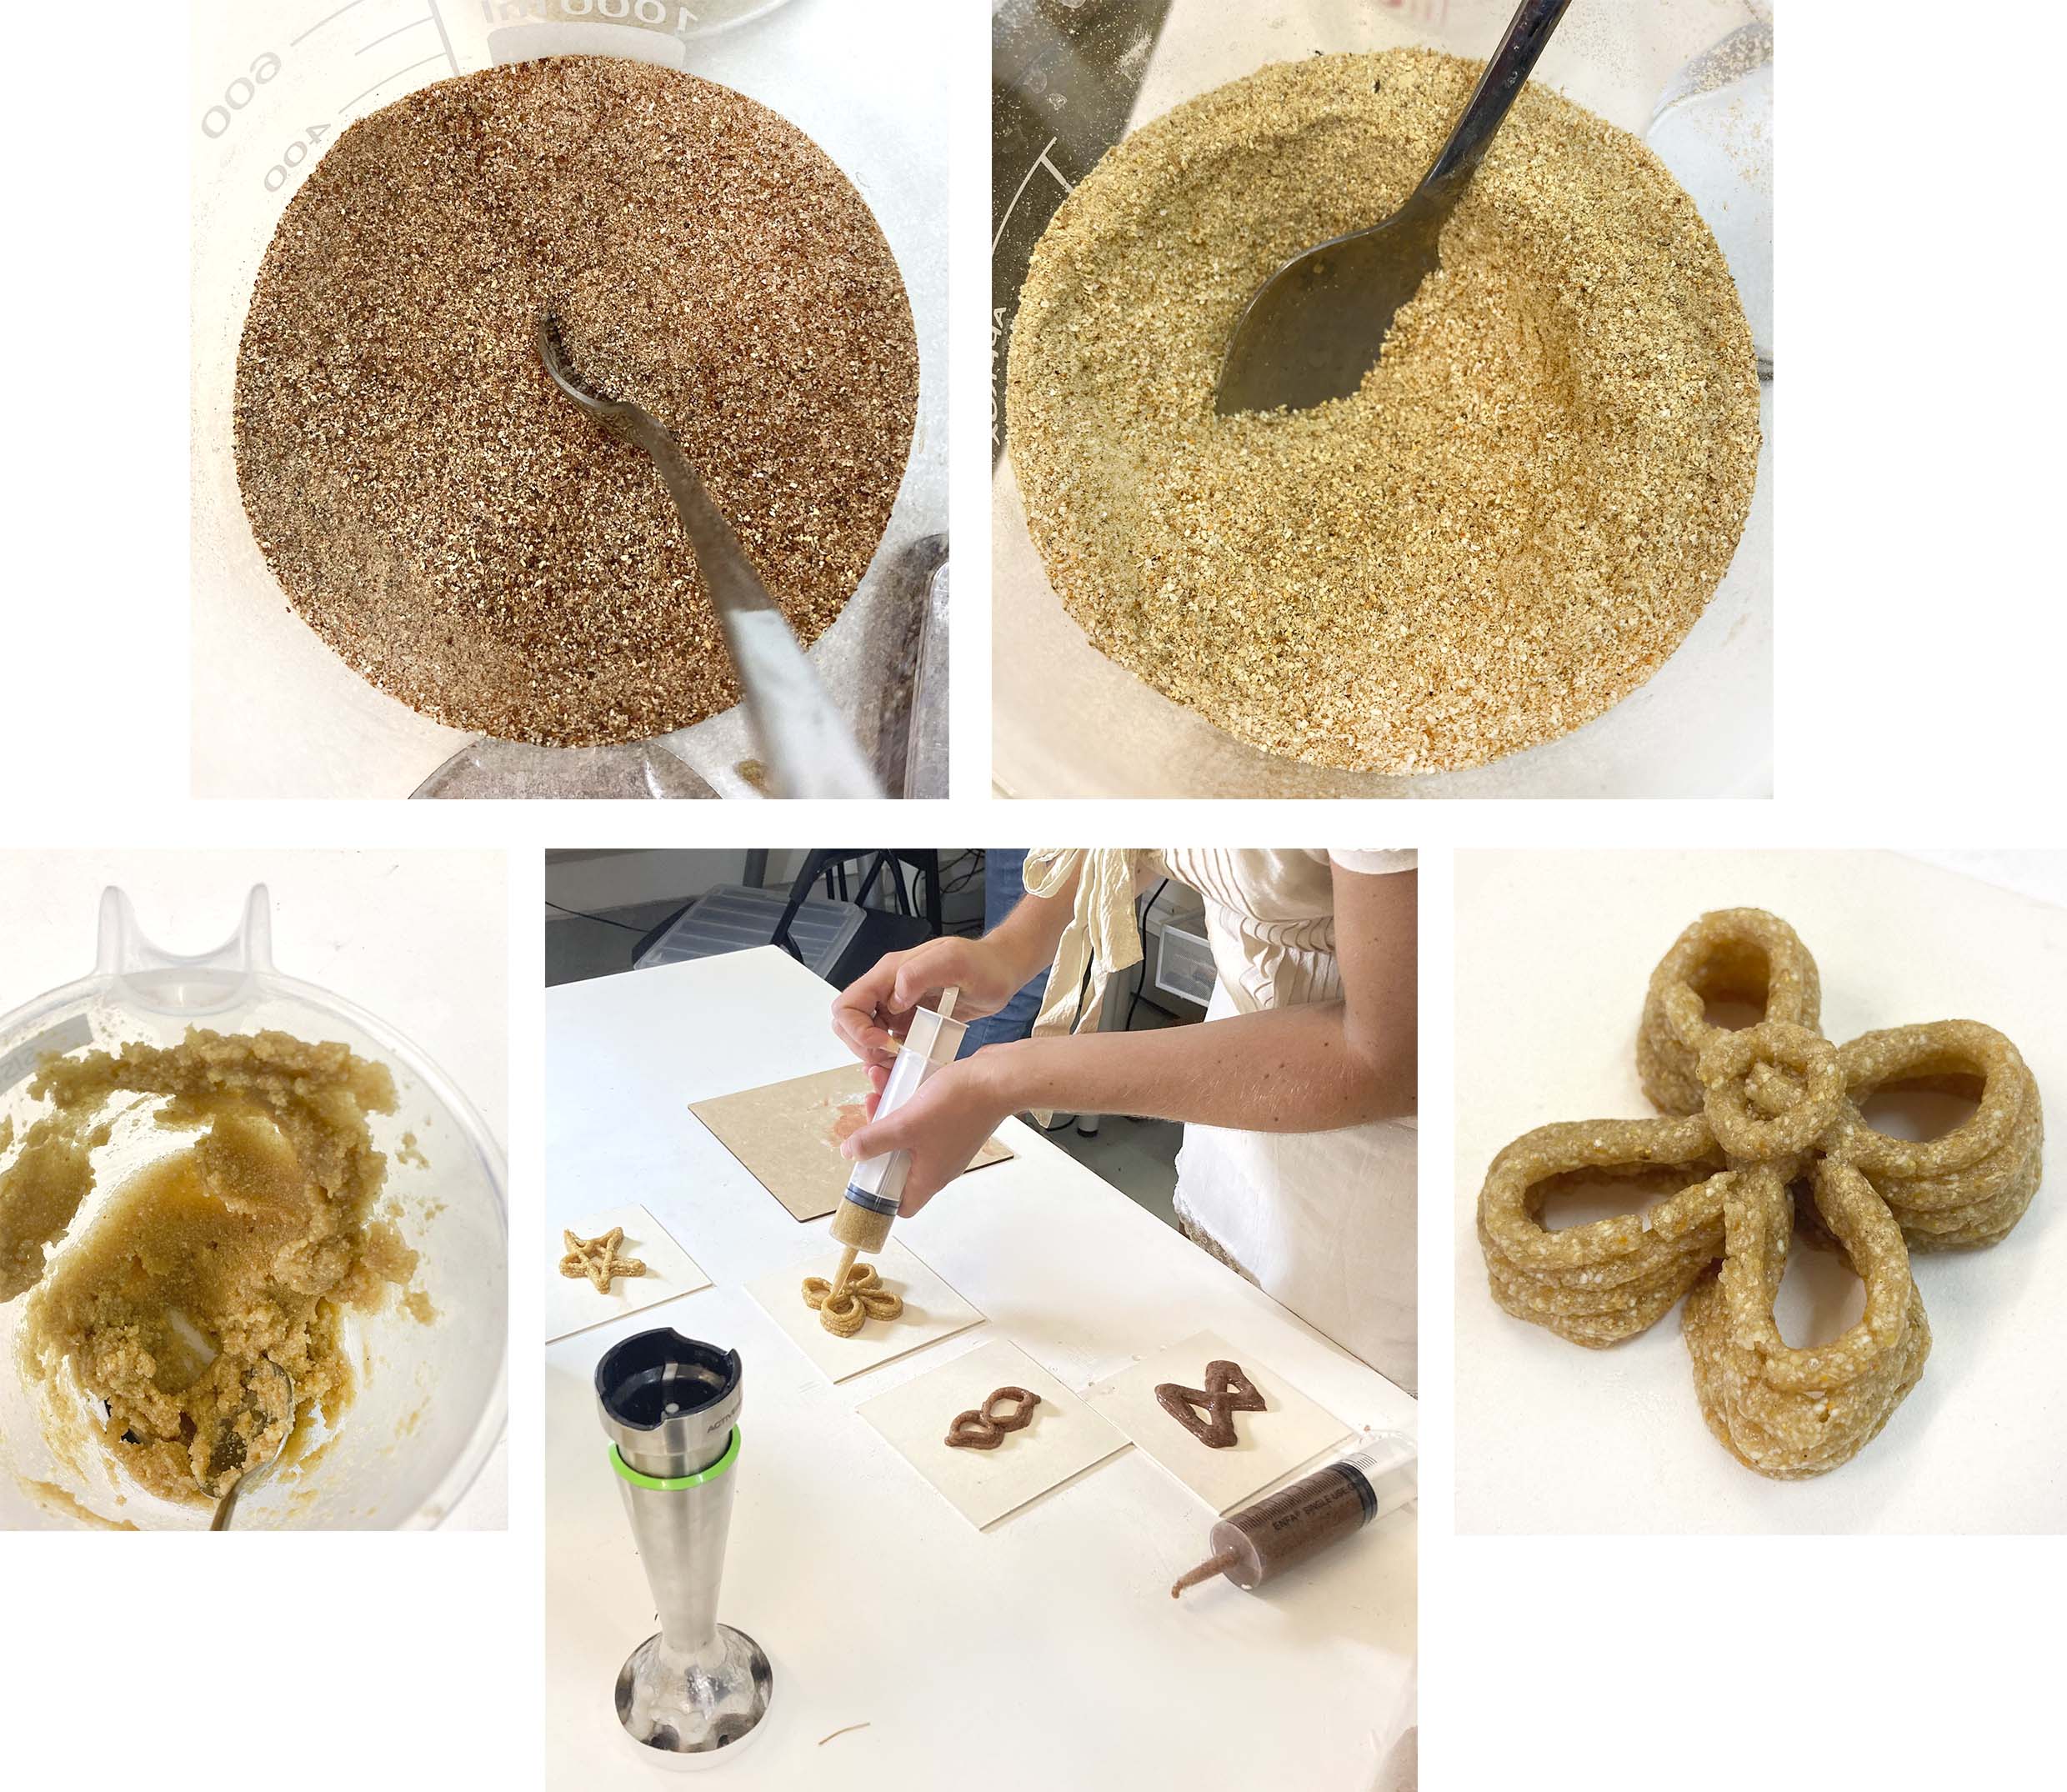
* Measure the ingredients.
* Mix the CMC and sodium alginate in a cup with the mixer.
* Add the filler and adjust the quantity to create a printable viscosity texture.
* Put the paste in a syringe or whatever device you are using to print.
* Tap on the table to avoid air bubbles inside.
* Press out the paste and draw a geometry you want.
* Leave to dry.
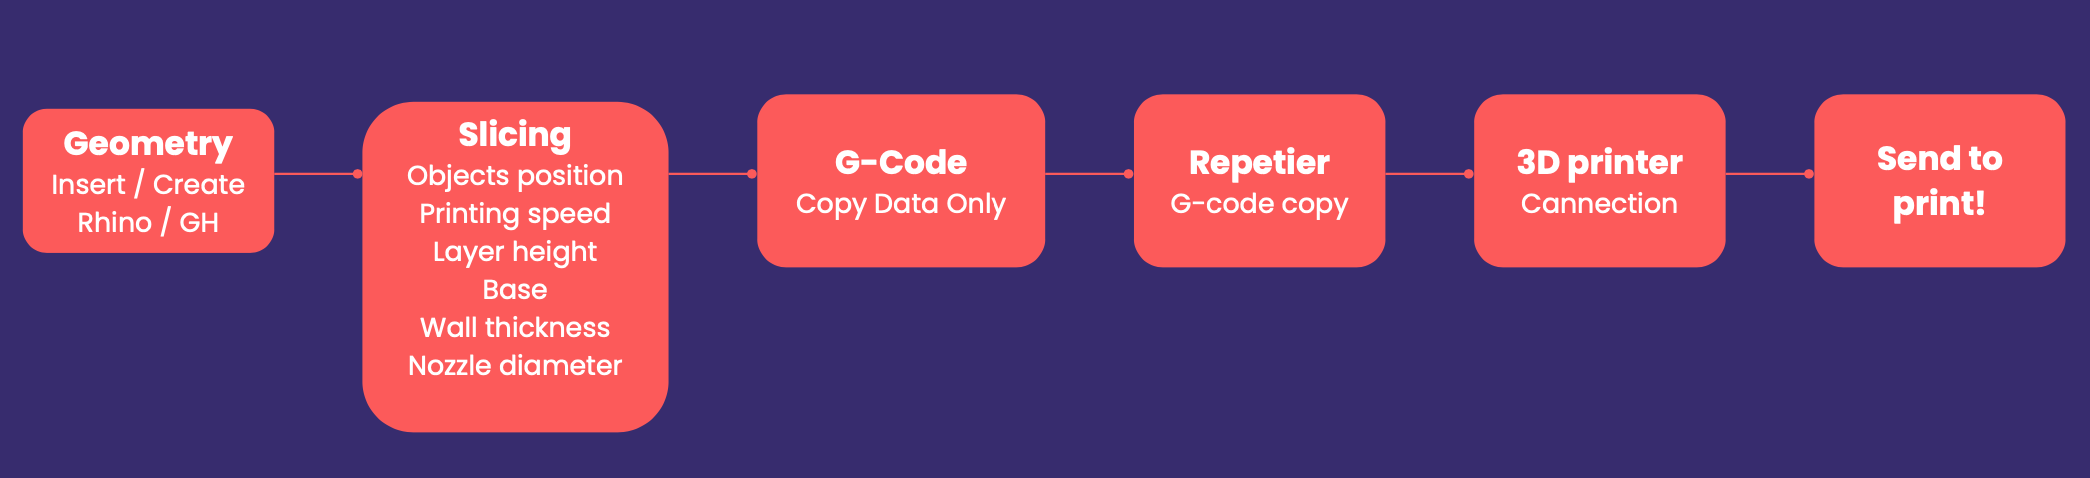
Useful software:
-
Grasshopper: Is a plug-in included in the Rhinoceros 3D modeling software. It is a tool for algorithmic modeling, specifically used for designing and editing complex shapes through certain parameters.
-
MAMBA Plugin: Is designed to be used on almost any kind of generic 3D printer both FDM & paste printers (ceramic-biomaterials with pressure or motor control), up to large-scale Robotic Fabricators using FFF technologies and running from Gcode or for simple path generator on them.
-
Repitier Host: Is a 3D printer host and slicing program that converts STL files into G-code using one of three prominent slicing engines: Cura, Slic3r or PrusaSlicer. It also has tons of features that are aimed at improving your 3D printing setup.

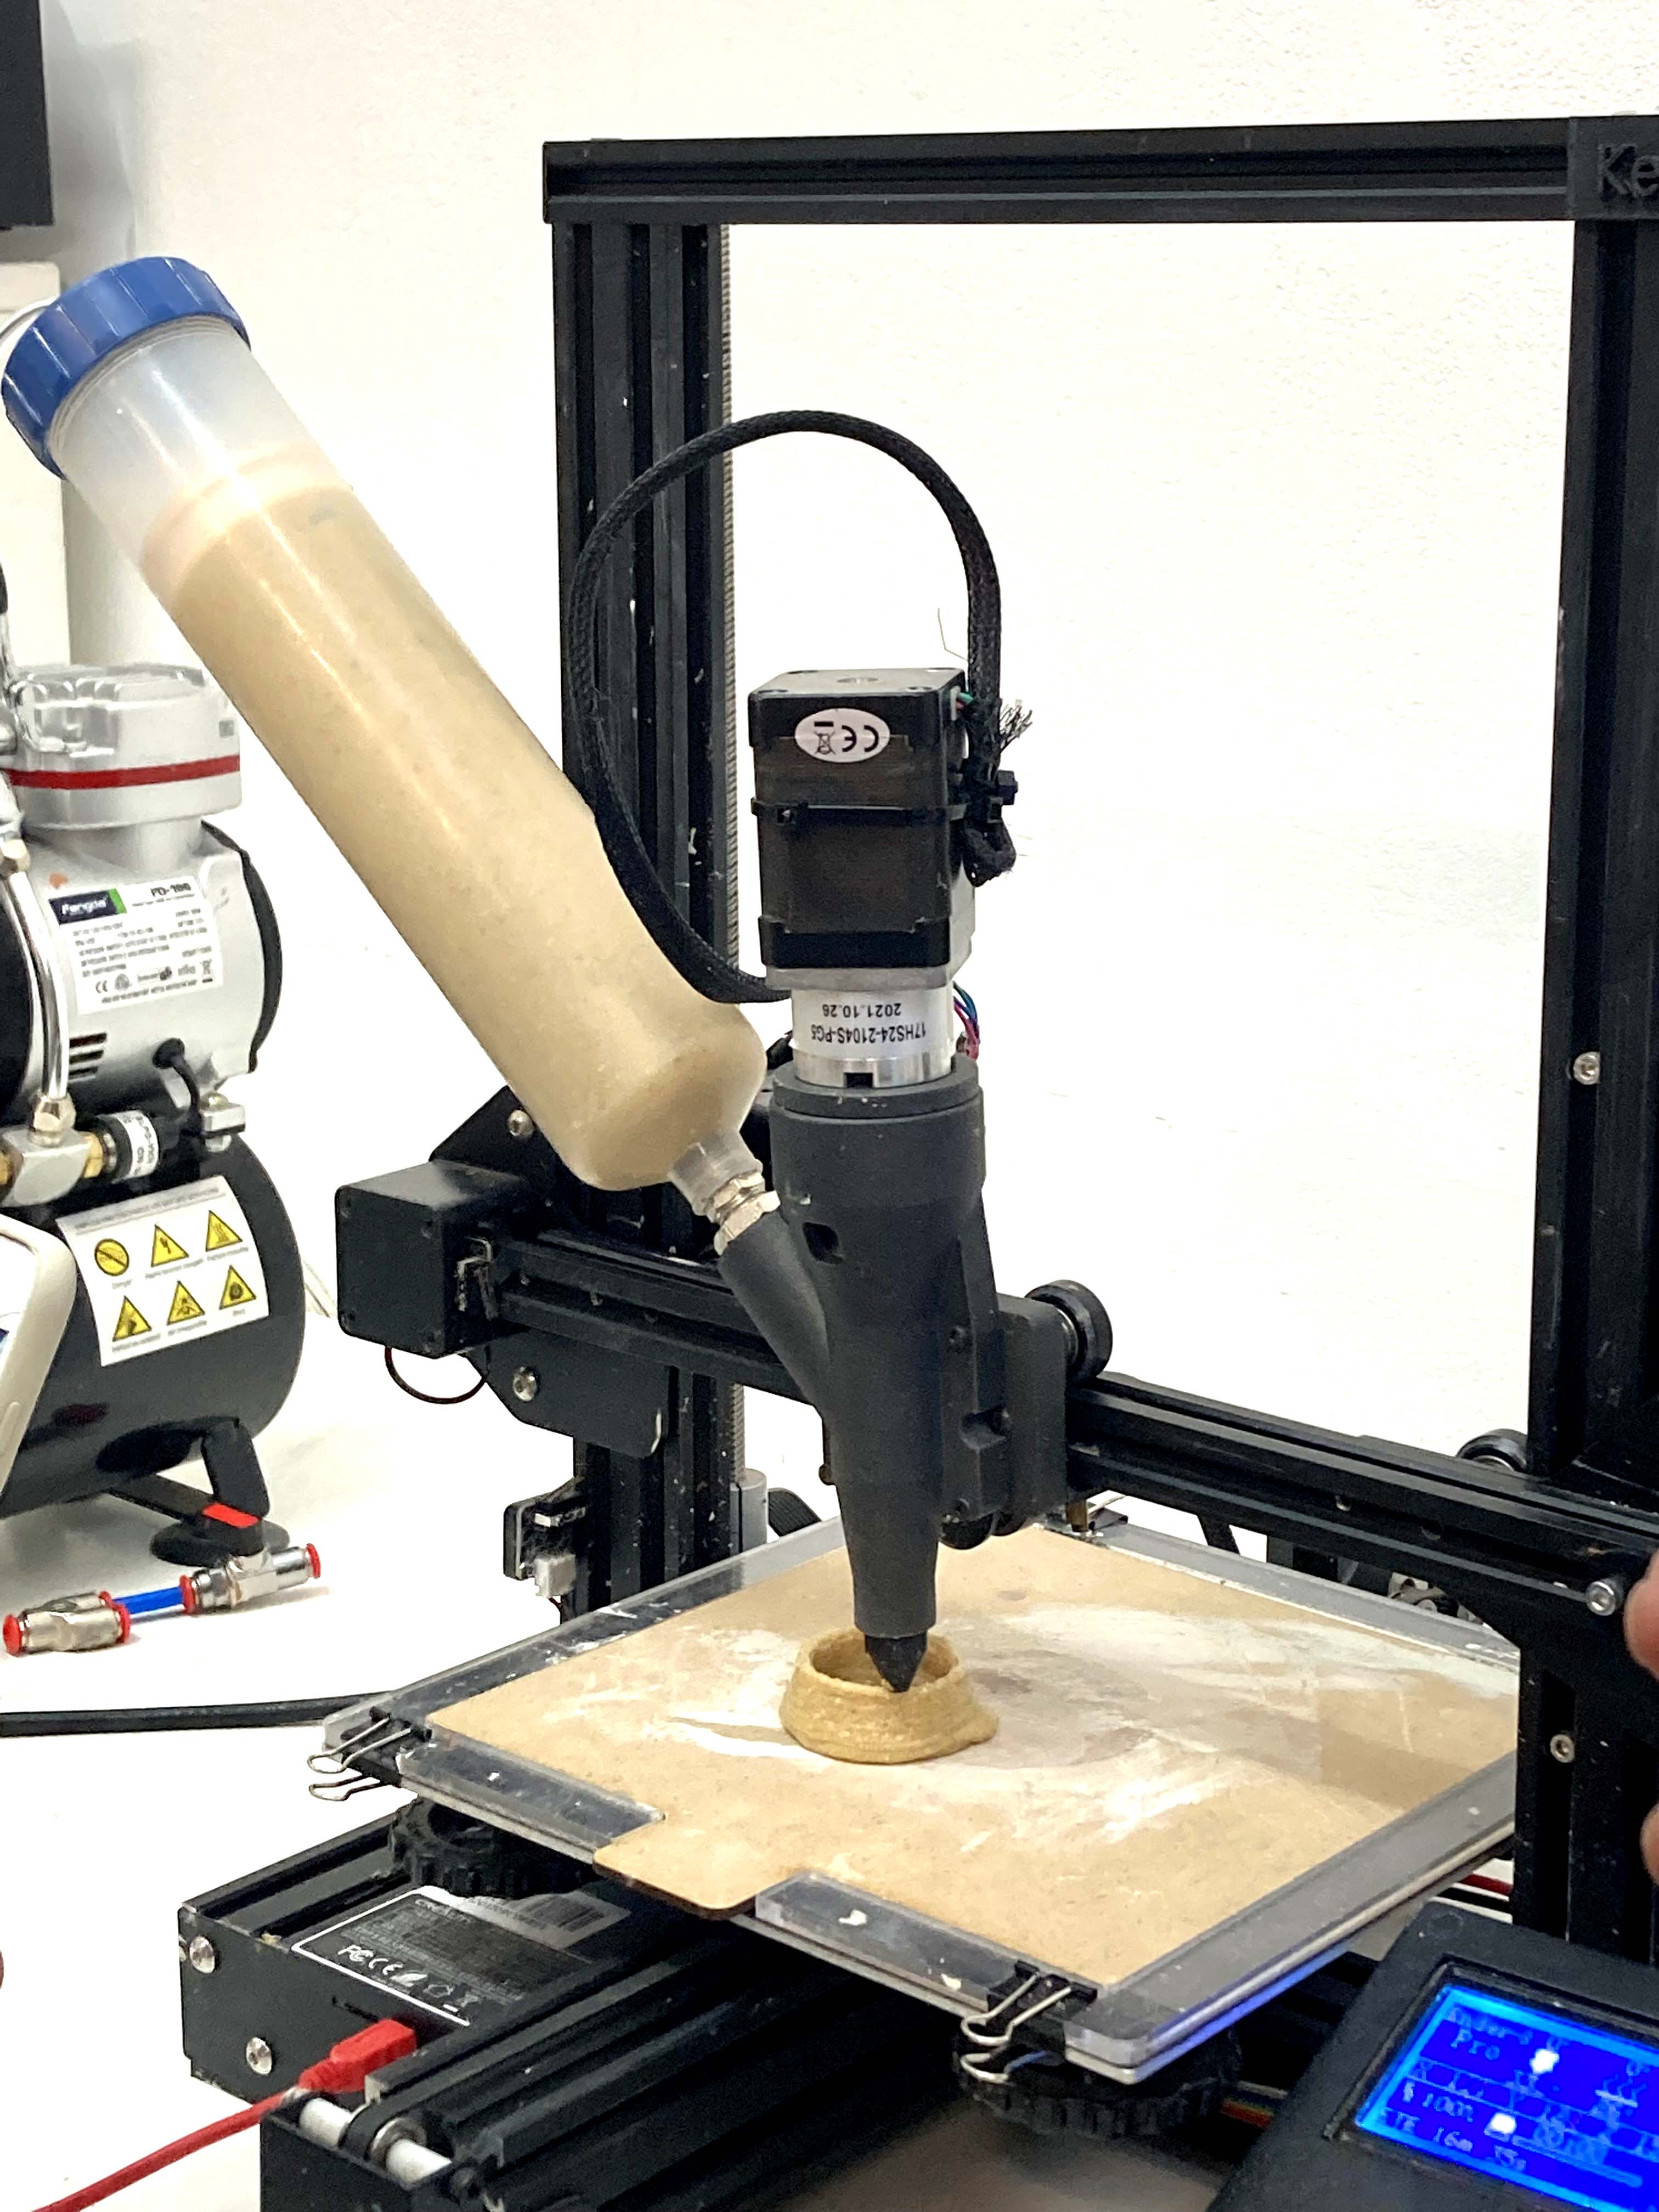
Before printing with the 3D print machine, make your Biomaterial solution as smooth as possible to void any bubbles. Do not let air inside! Check the air pressure and slowly bring up the level to avoid any mess. Adjust the speed of the software depending on your material and also the height of the printing bed.
More about 3D printing:
Eggshell paste for 3d printing
How to use the biomaterial and paste 3D Printing Machine
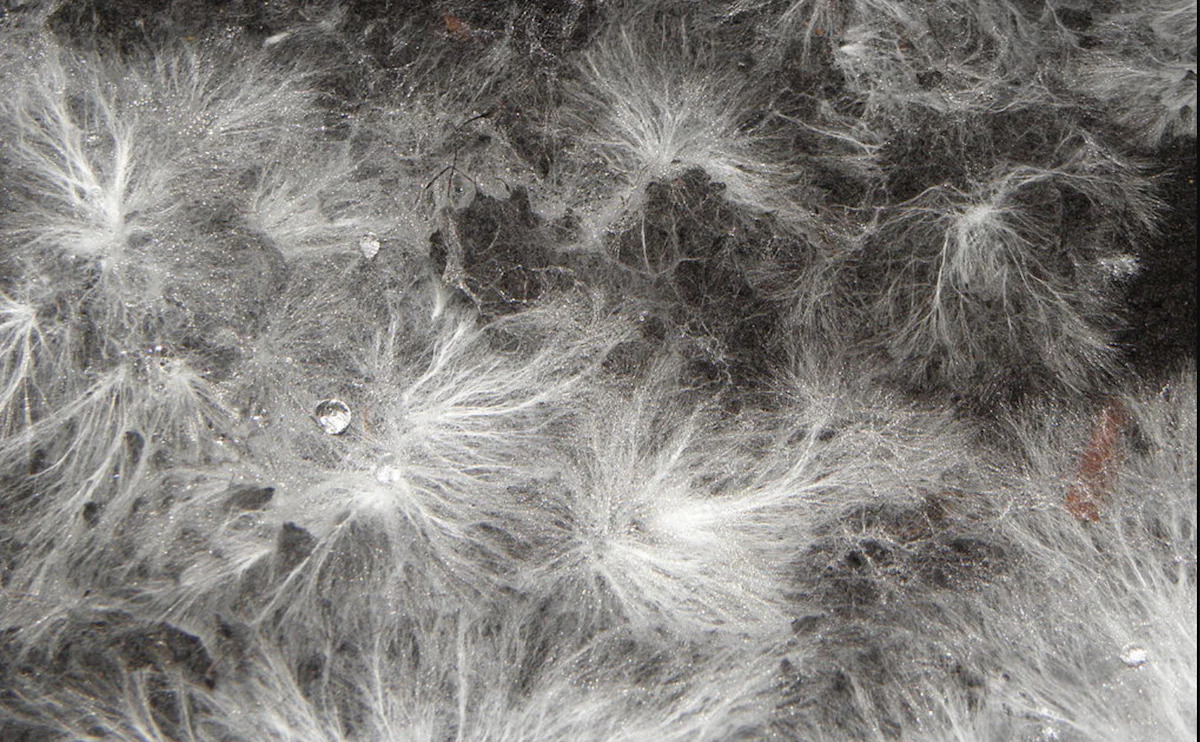
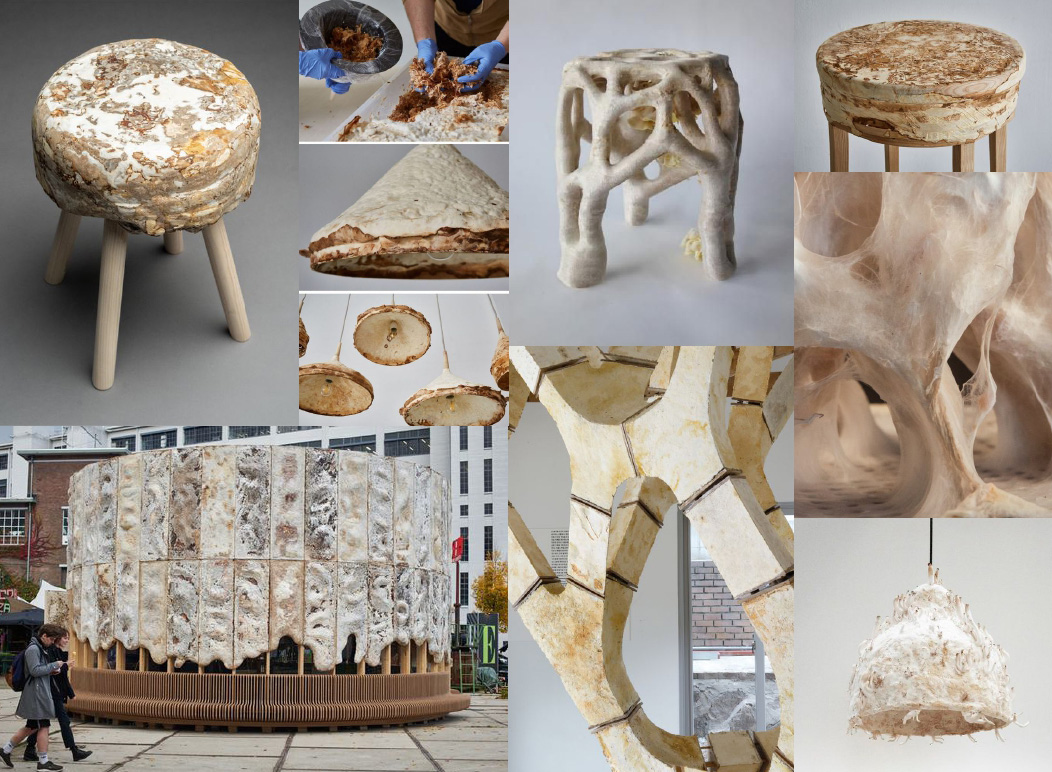
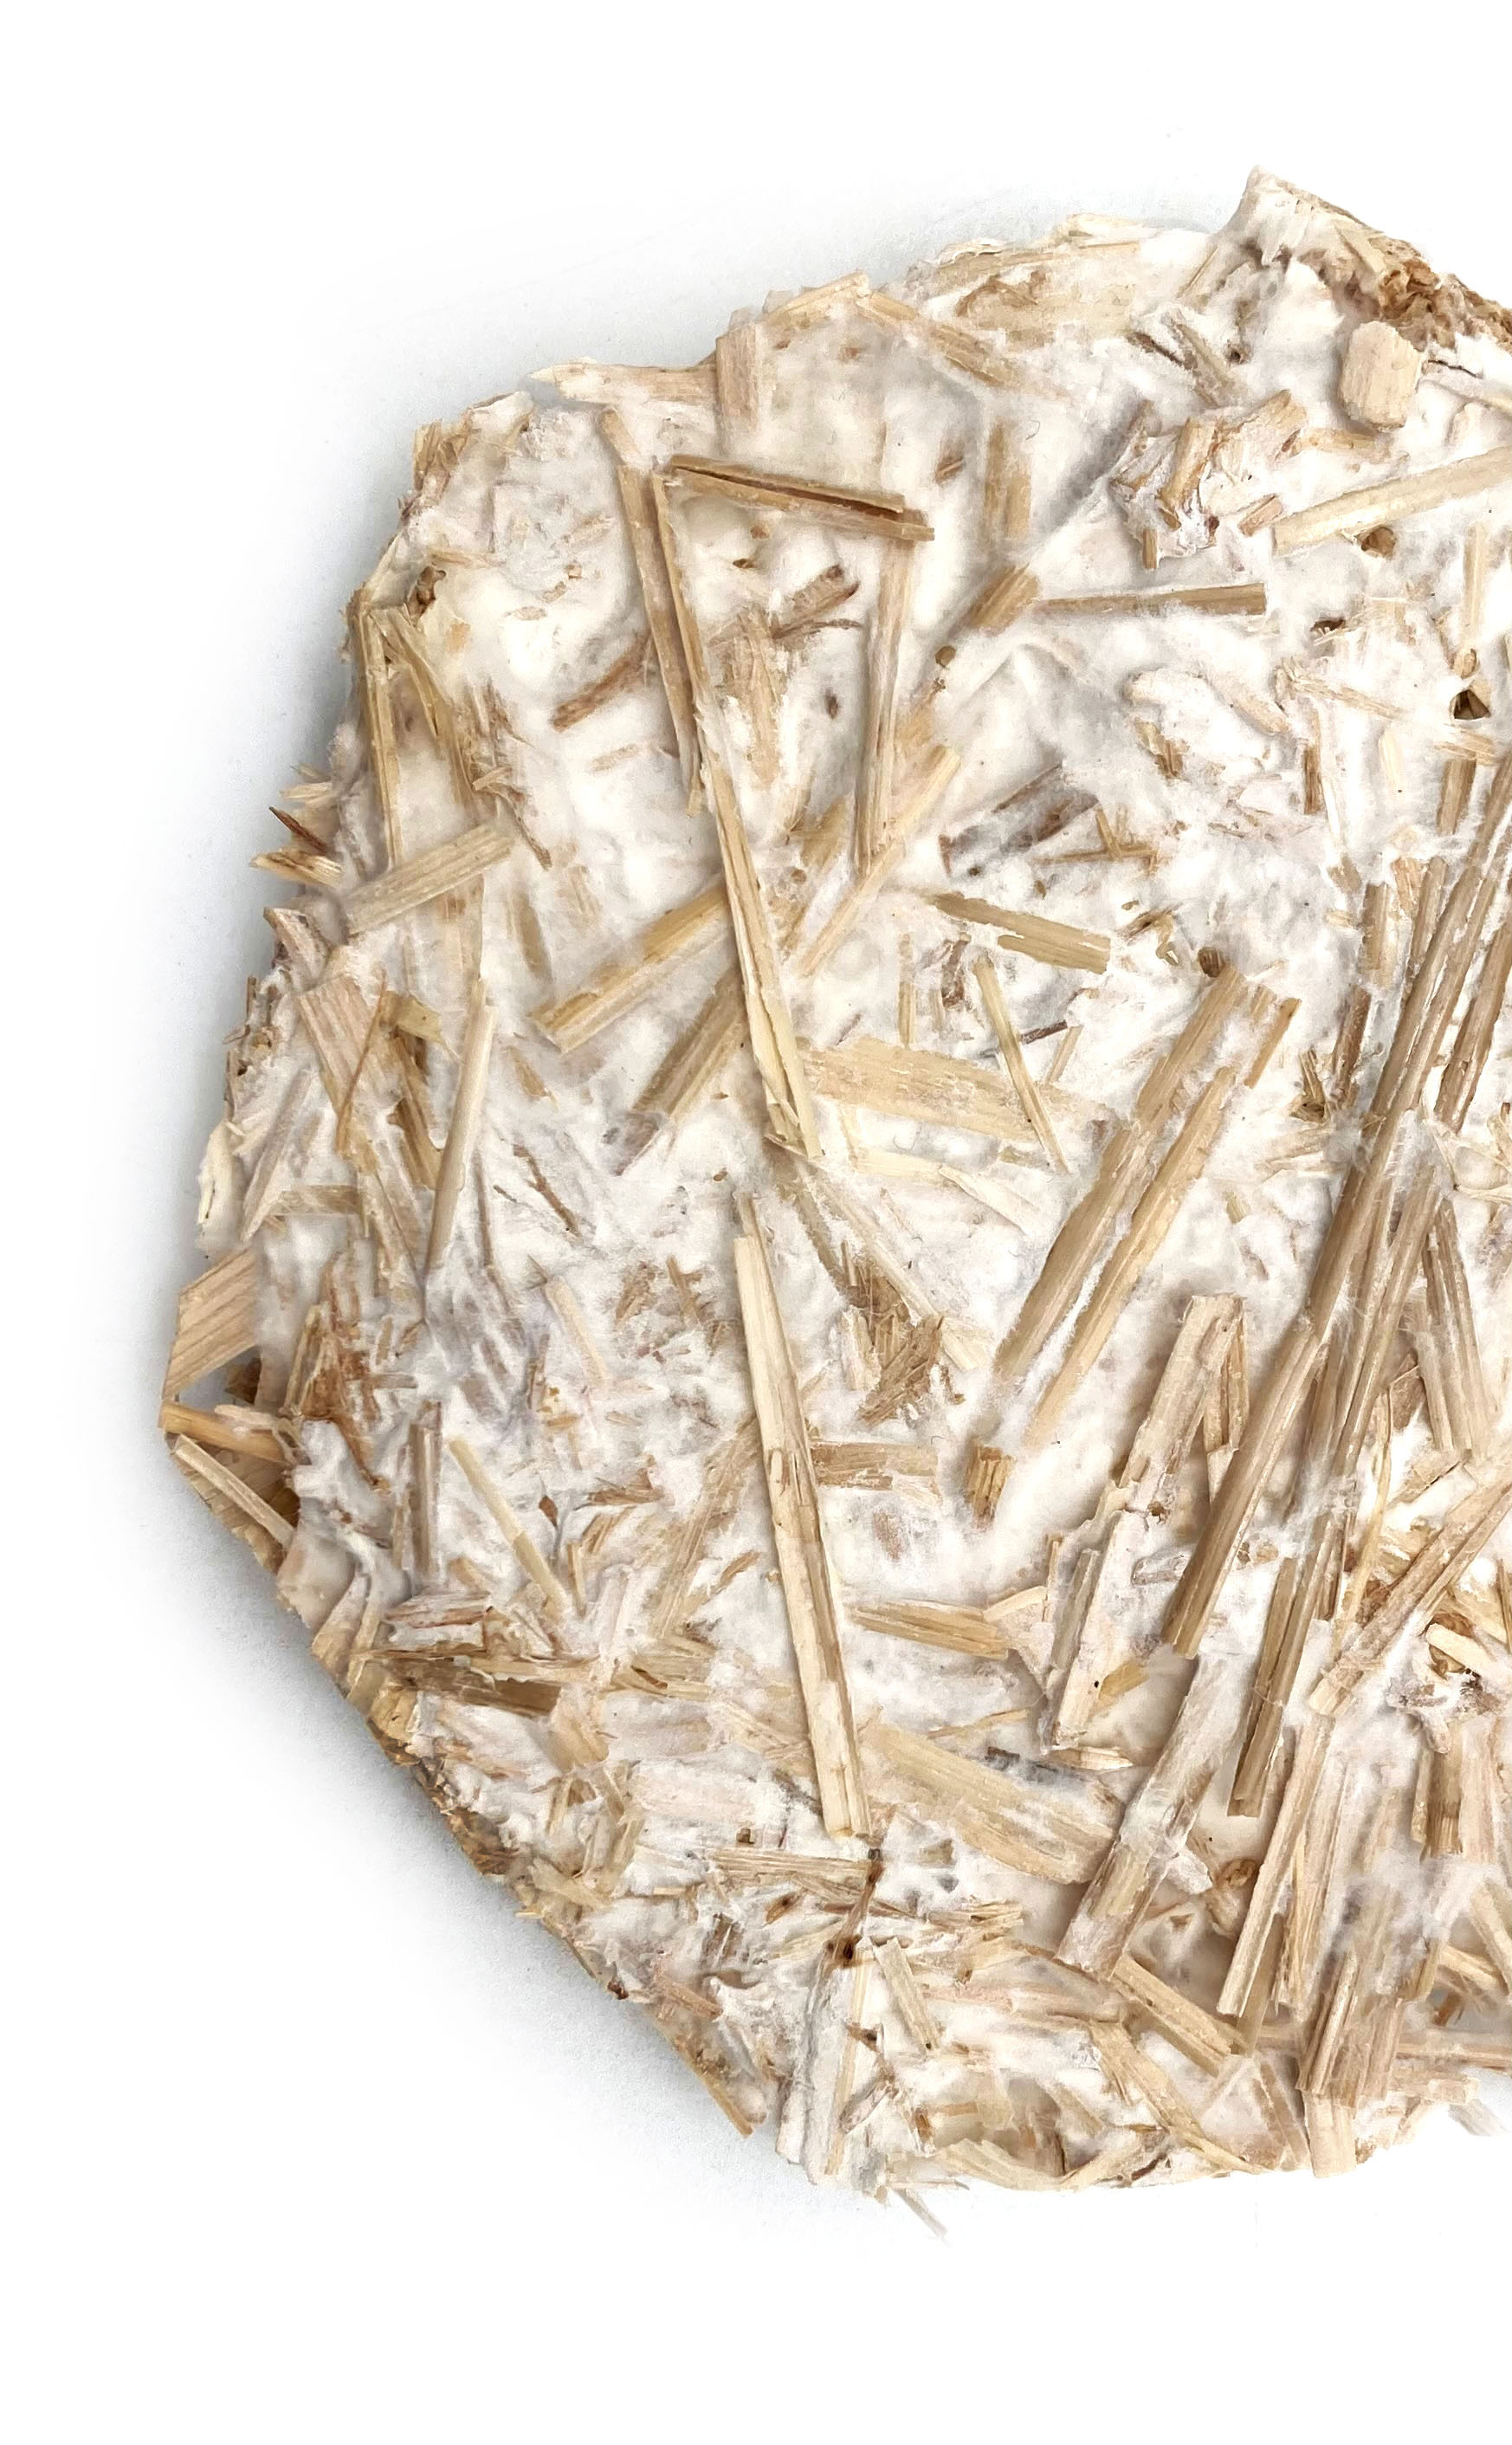
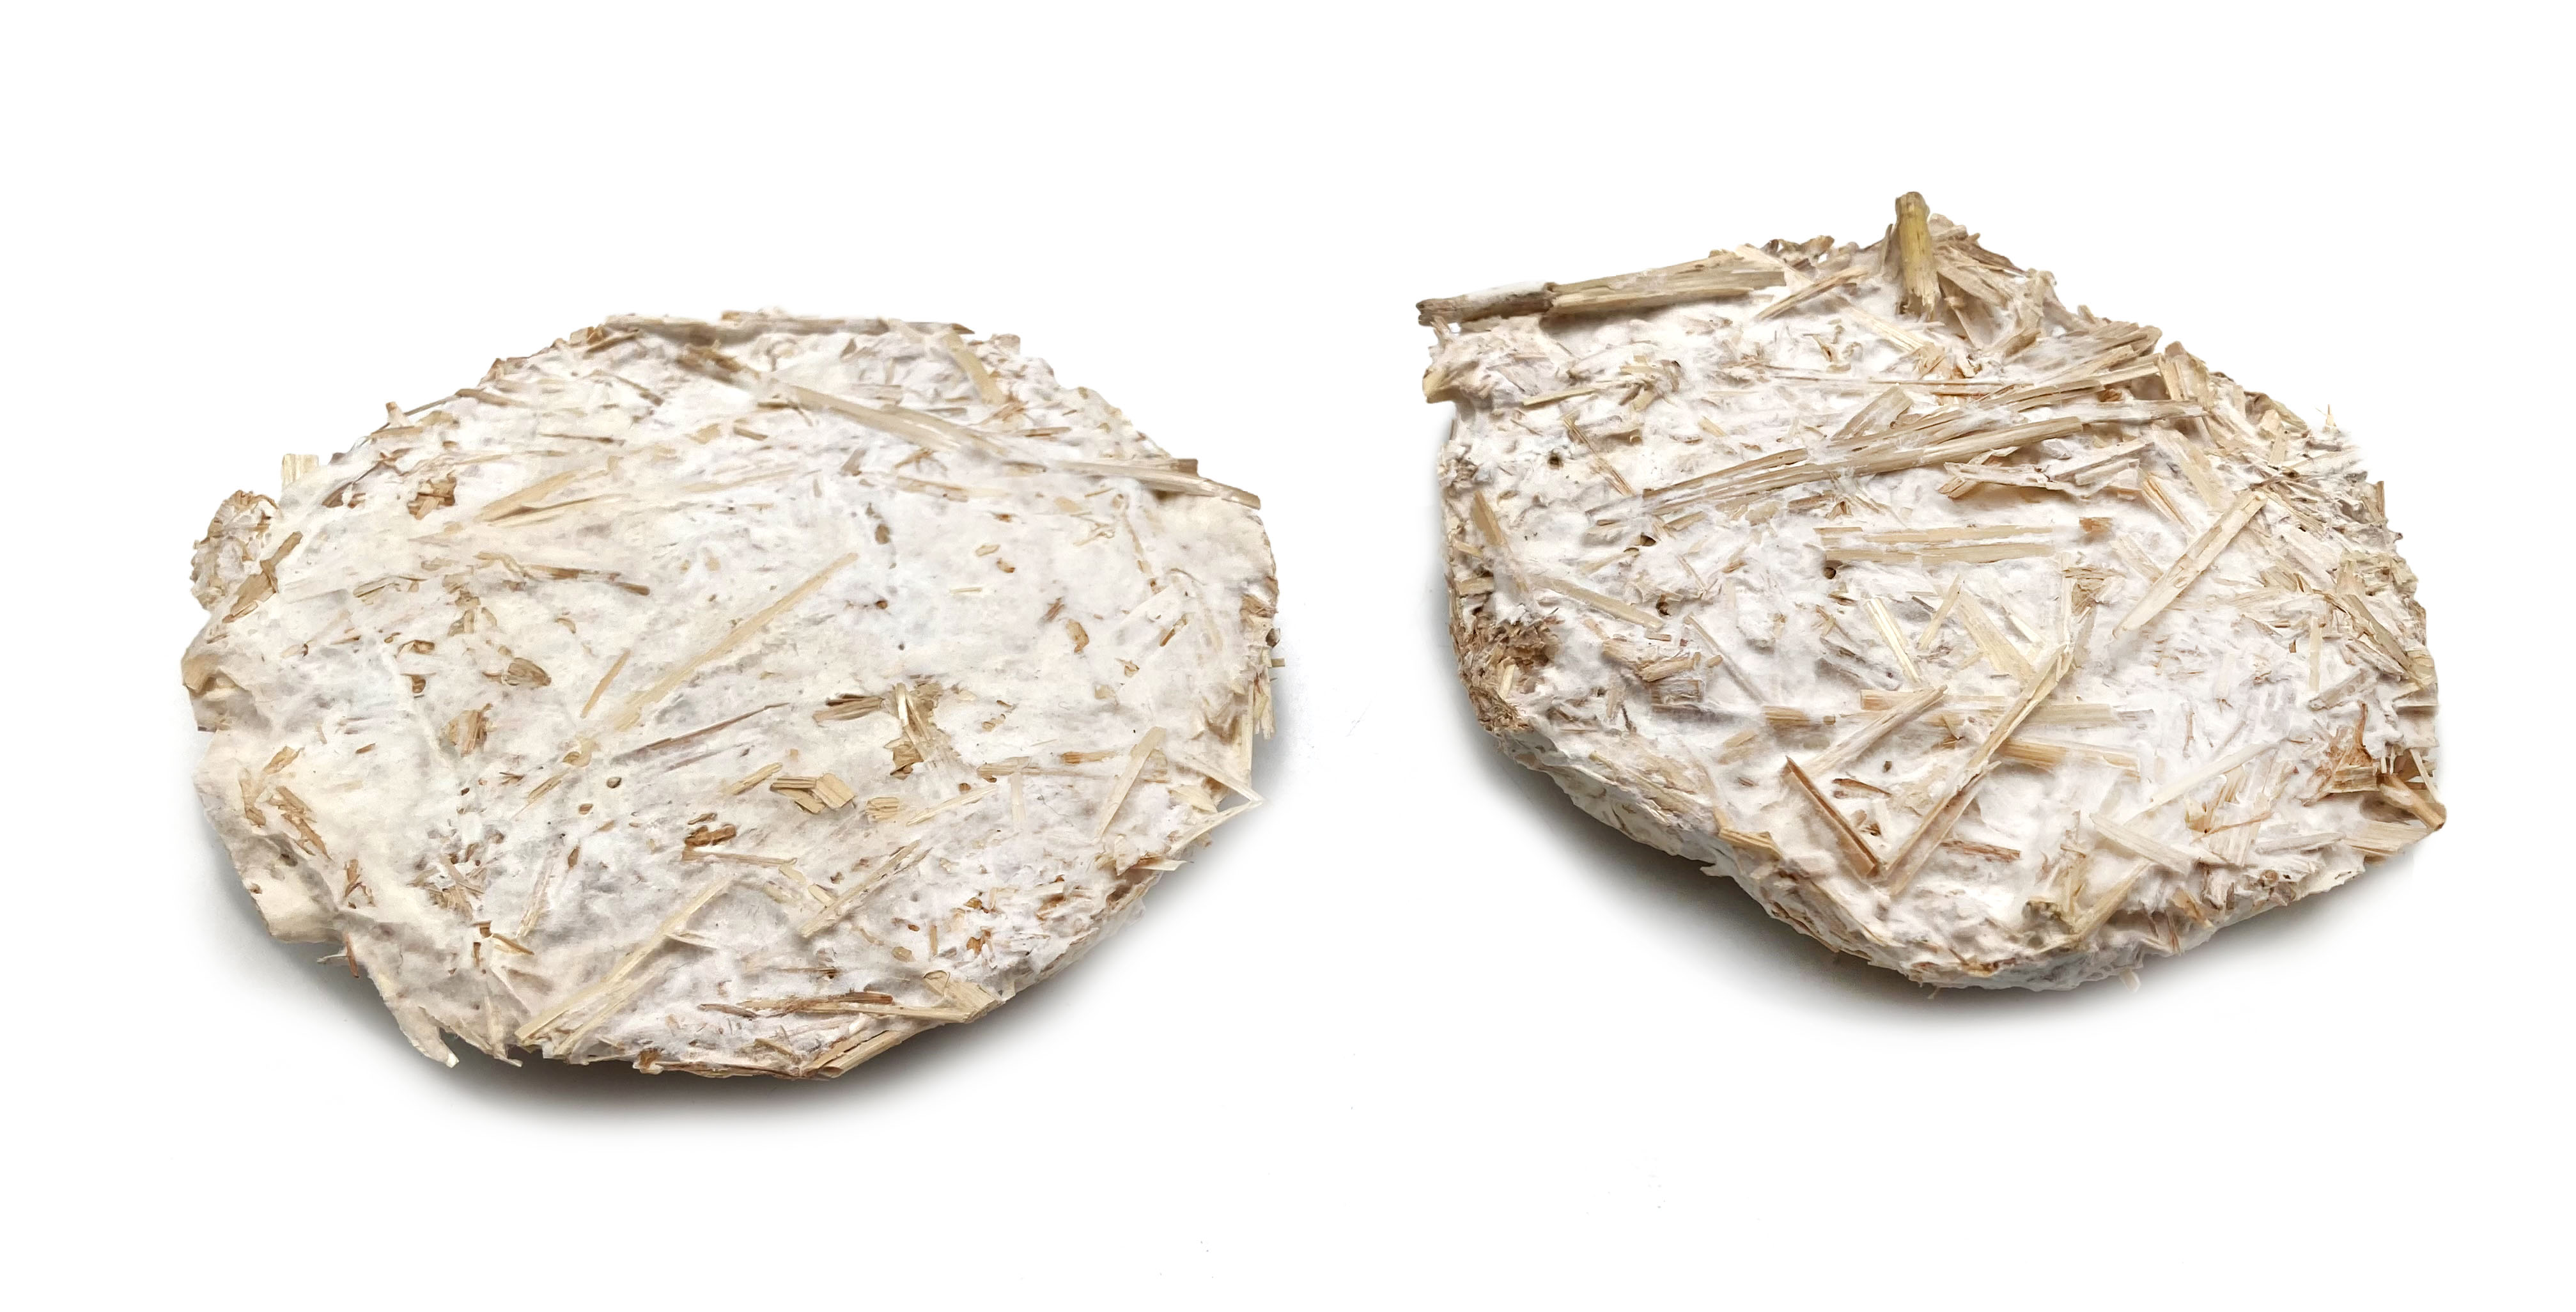
Mycelium
Mycelium is the root-like vegetative part of the fungi, it is formed of a filamentous hyphal network that branches out, forming connections with other hyphae in search for nutrients and moisture from its surroundings
Properties
- Acoustic and thermal insulation
- Highly resistant to moisture and steam
- Water and mold resistant
- Fireproof (can hold up to 800 ° C)
- Biodegradable
- Compostable
- Stronger than concrete pound for pound
- Not toxic
- Scalable
- Versatile (materials like foam, bricks and textiles)
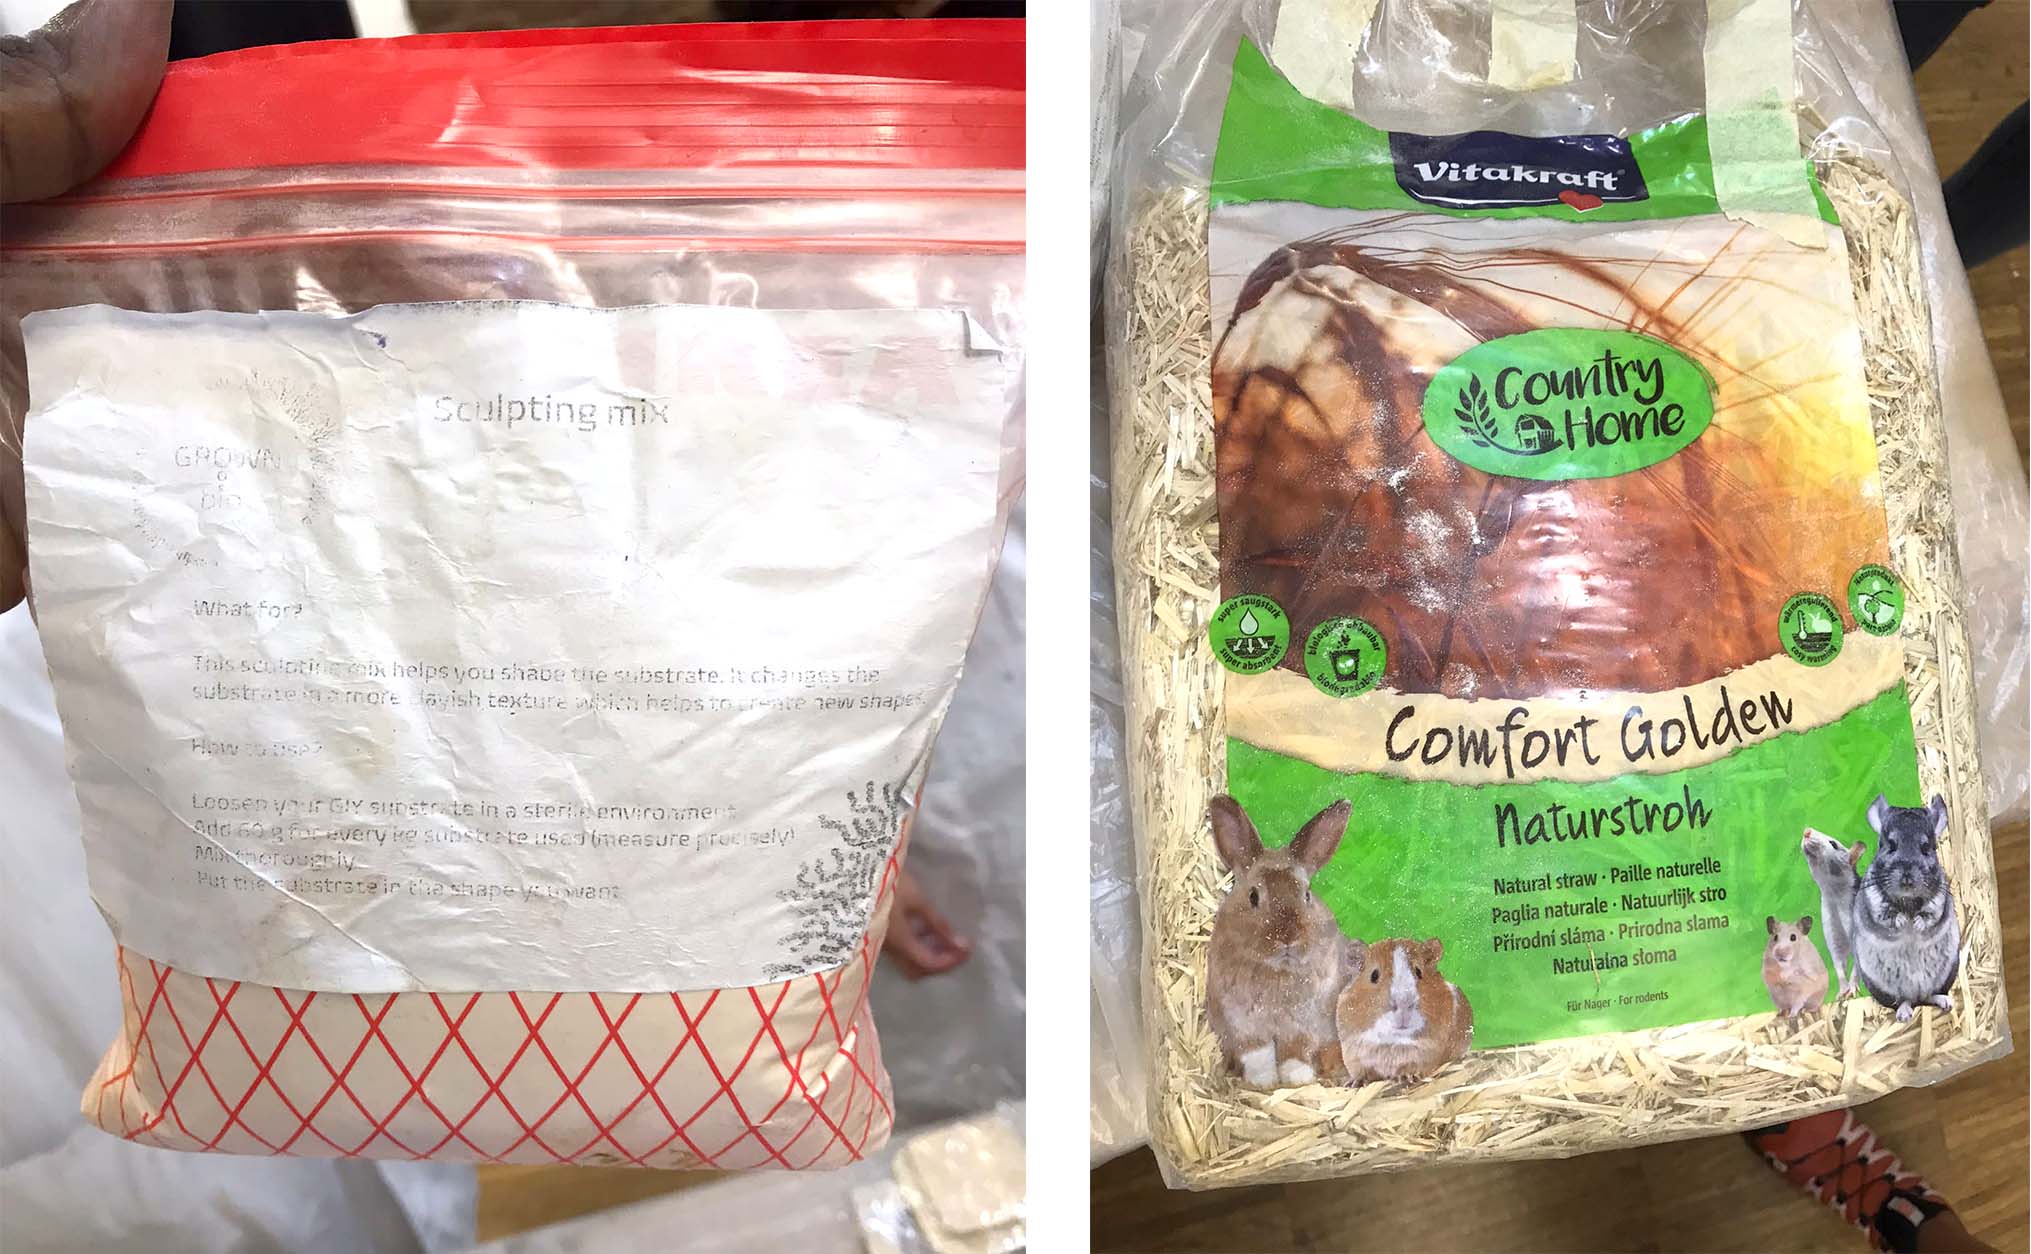
Recipe and tools
* 200 ml distilled water (could change the measure, add little by little)
* 4 g Agar
* 4g Malt extract syrup (sculpting mix) or Flour
* Some straw
* Gloves and mask
* Pressure cooker
* Stove
* Gaz burner
* Ethanol 70/98%
* Paper towel
* Container/ bowl
* Plastic film
* Oven
Process
Process de Emma
Steps:
-
Cover the wood molds and the lid with film and clean it with 98% ethanol.
-
Sterilized the area with the gas burner and ethanol.
-
Clean the bowl and add 30g of straw (you could cut the straw of the size you like) and 18g of Agar and mix it with your hand with globes already sterilized.
-
Add some distilled water to get the straw wet. Remember to clean your hand before mixing!
While you are mixing you will feel if there is enough water, look at the powder. The mixture has to get in one. -
Add Mycelium. Cut the external to get the mycelium of the inside (make a hole). Add some pieces of it, like 5 (1x1cm), to the bowl.
-
Then mince the Mycelium with your hand. Mixed all.
-
Put the Mycelium inside the mold, press, and put the lid. Have to be pressed.
-
Cover all the mold with the mixture inside and tape the name and the date.
-
Poke with a sterilized needle the top and below of the mold, the Mycelium needs oxygen to grow.
-
Let them in the room for 5-10 days at 23-28ºC. The time could change depending on the amount of straw.
-
When it looks good, the mycelium spread and is dense, remove the plastic film and dry the composite the material in the oven at 90-150ºC for several hours.
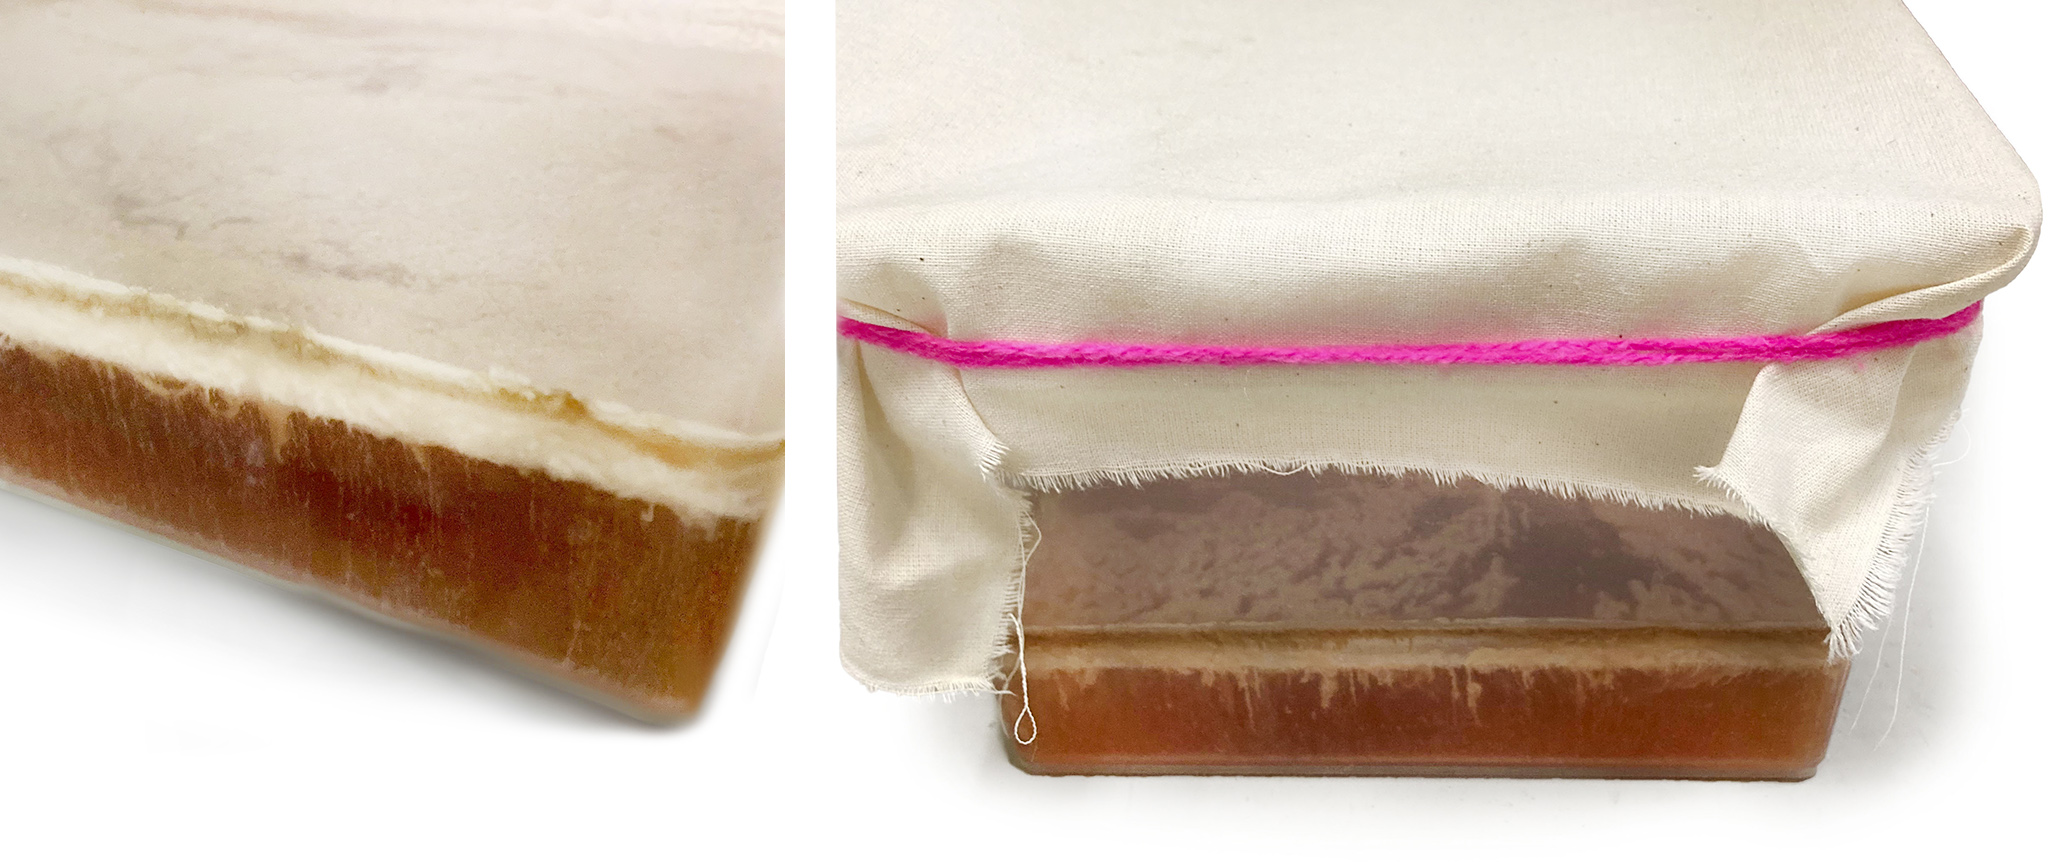
Result
After 10 days of growing:
More about Mycelium:
Mycelium leather with Maurizio Montali
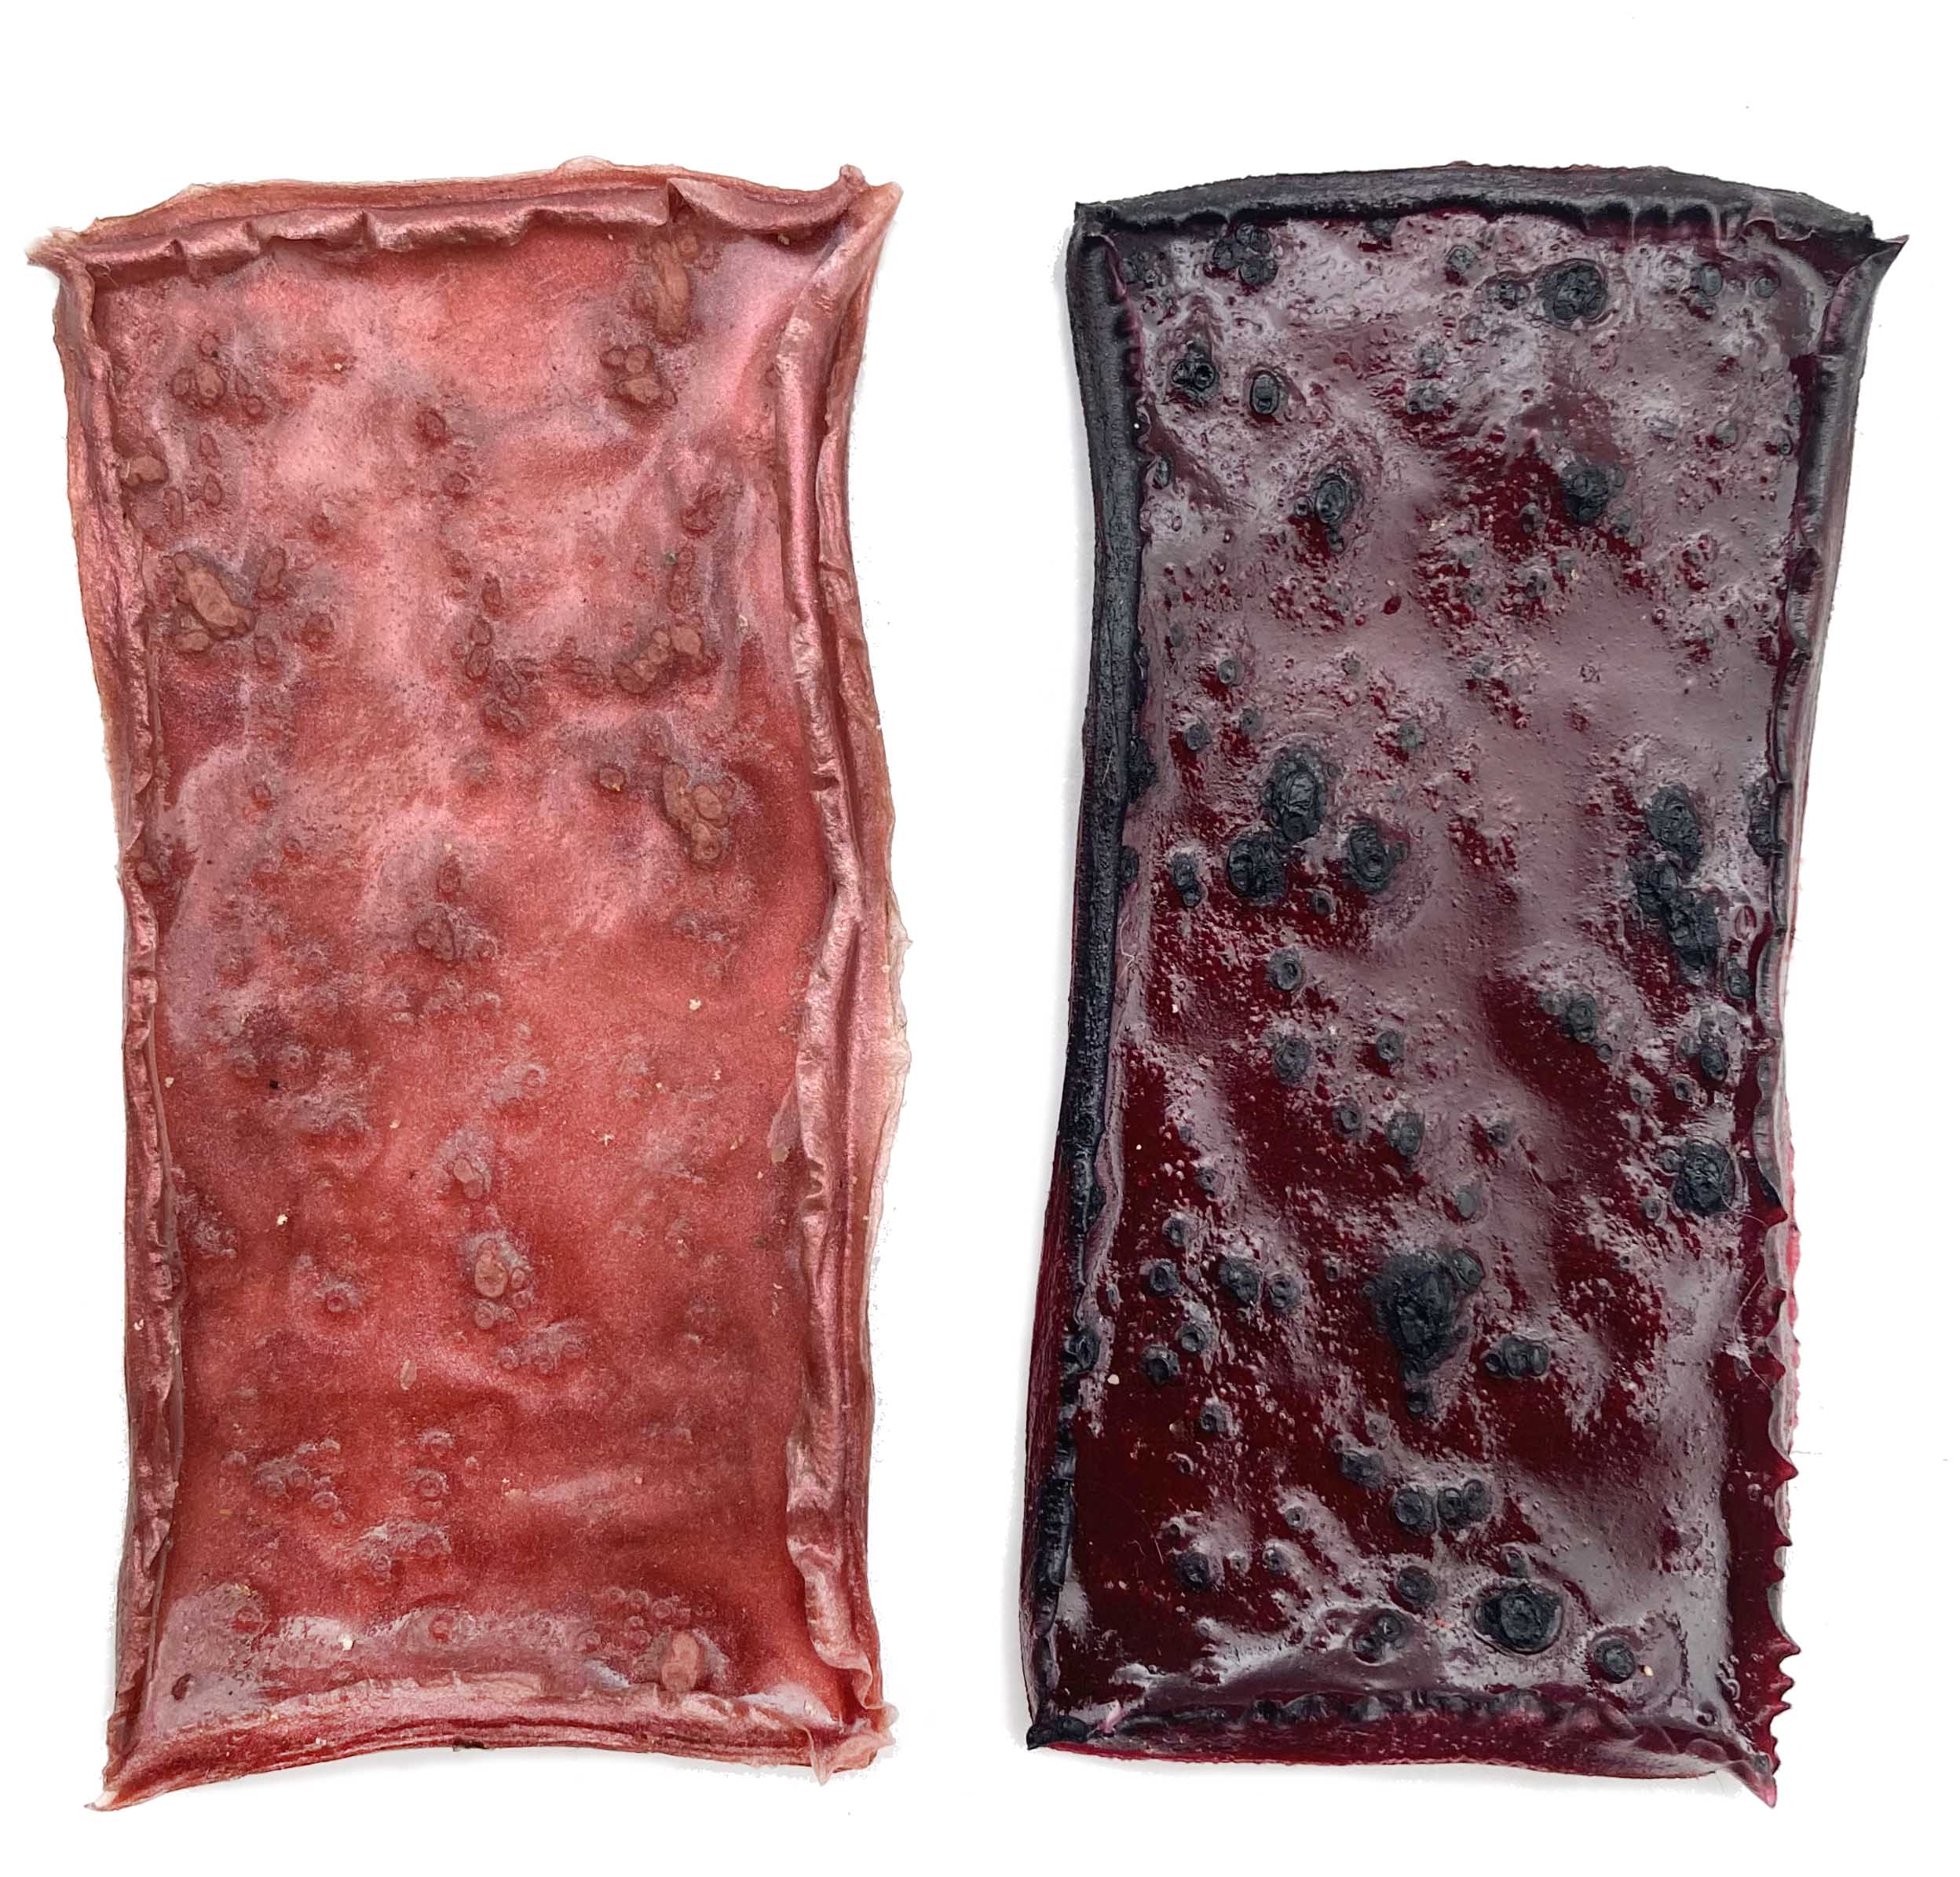
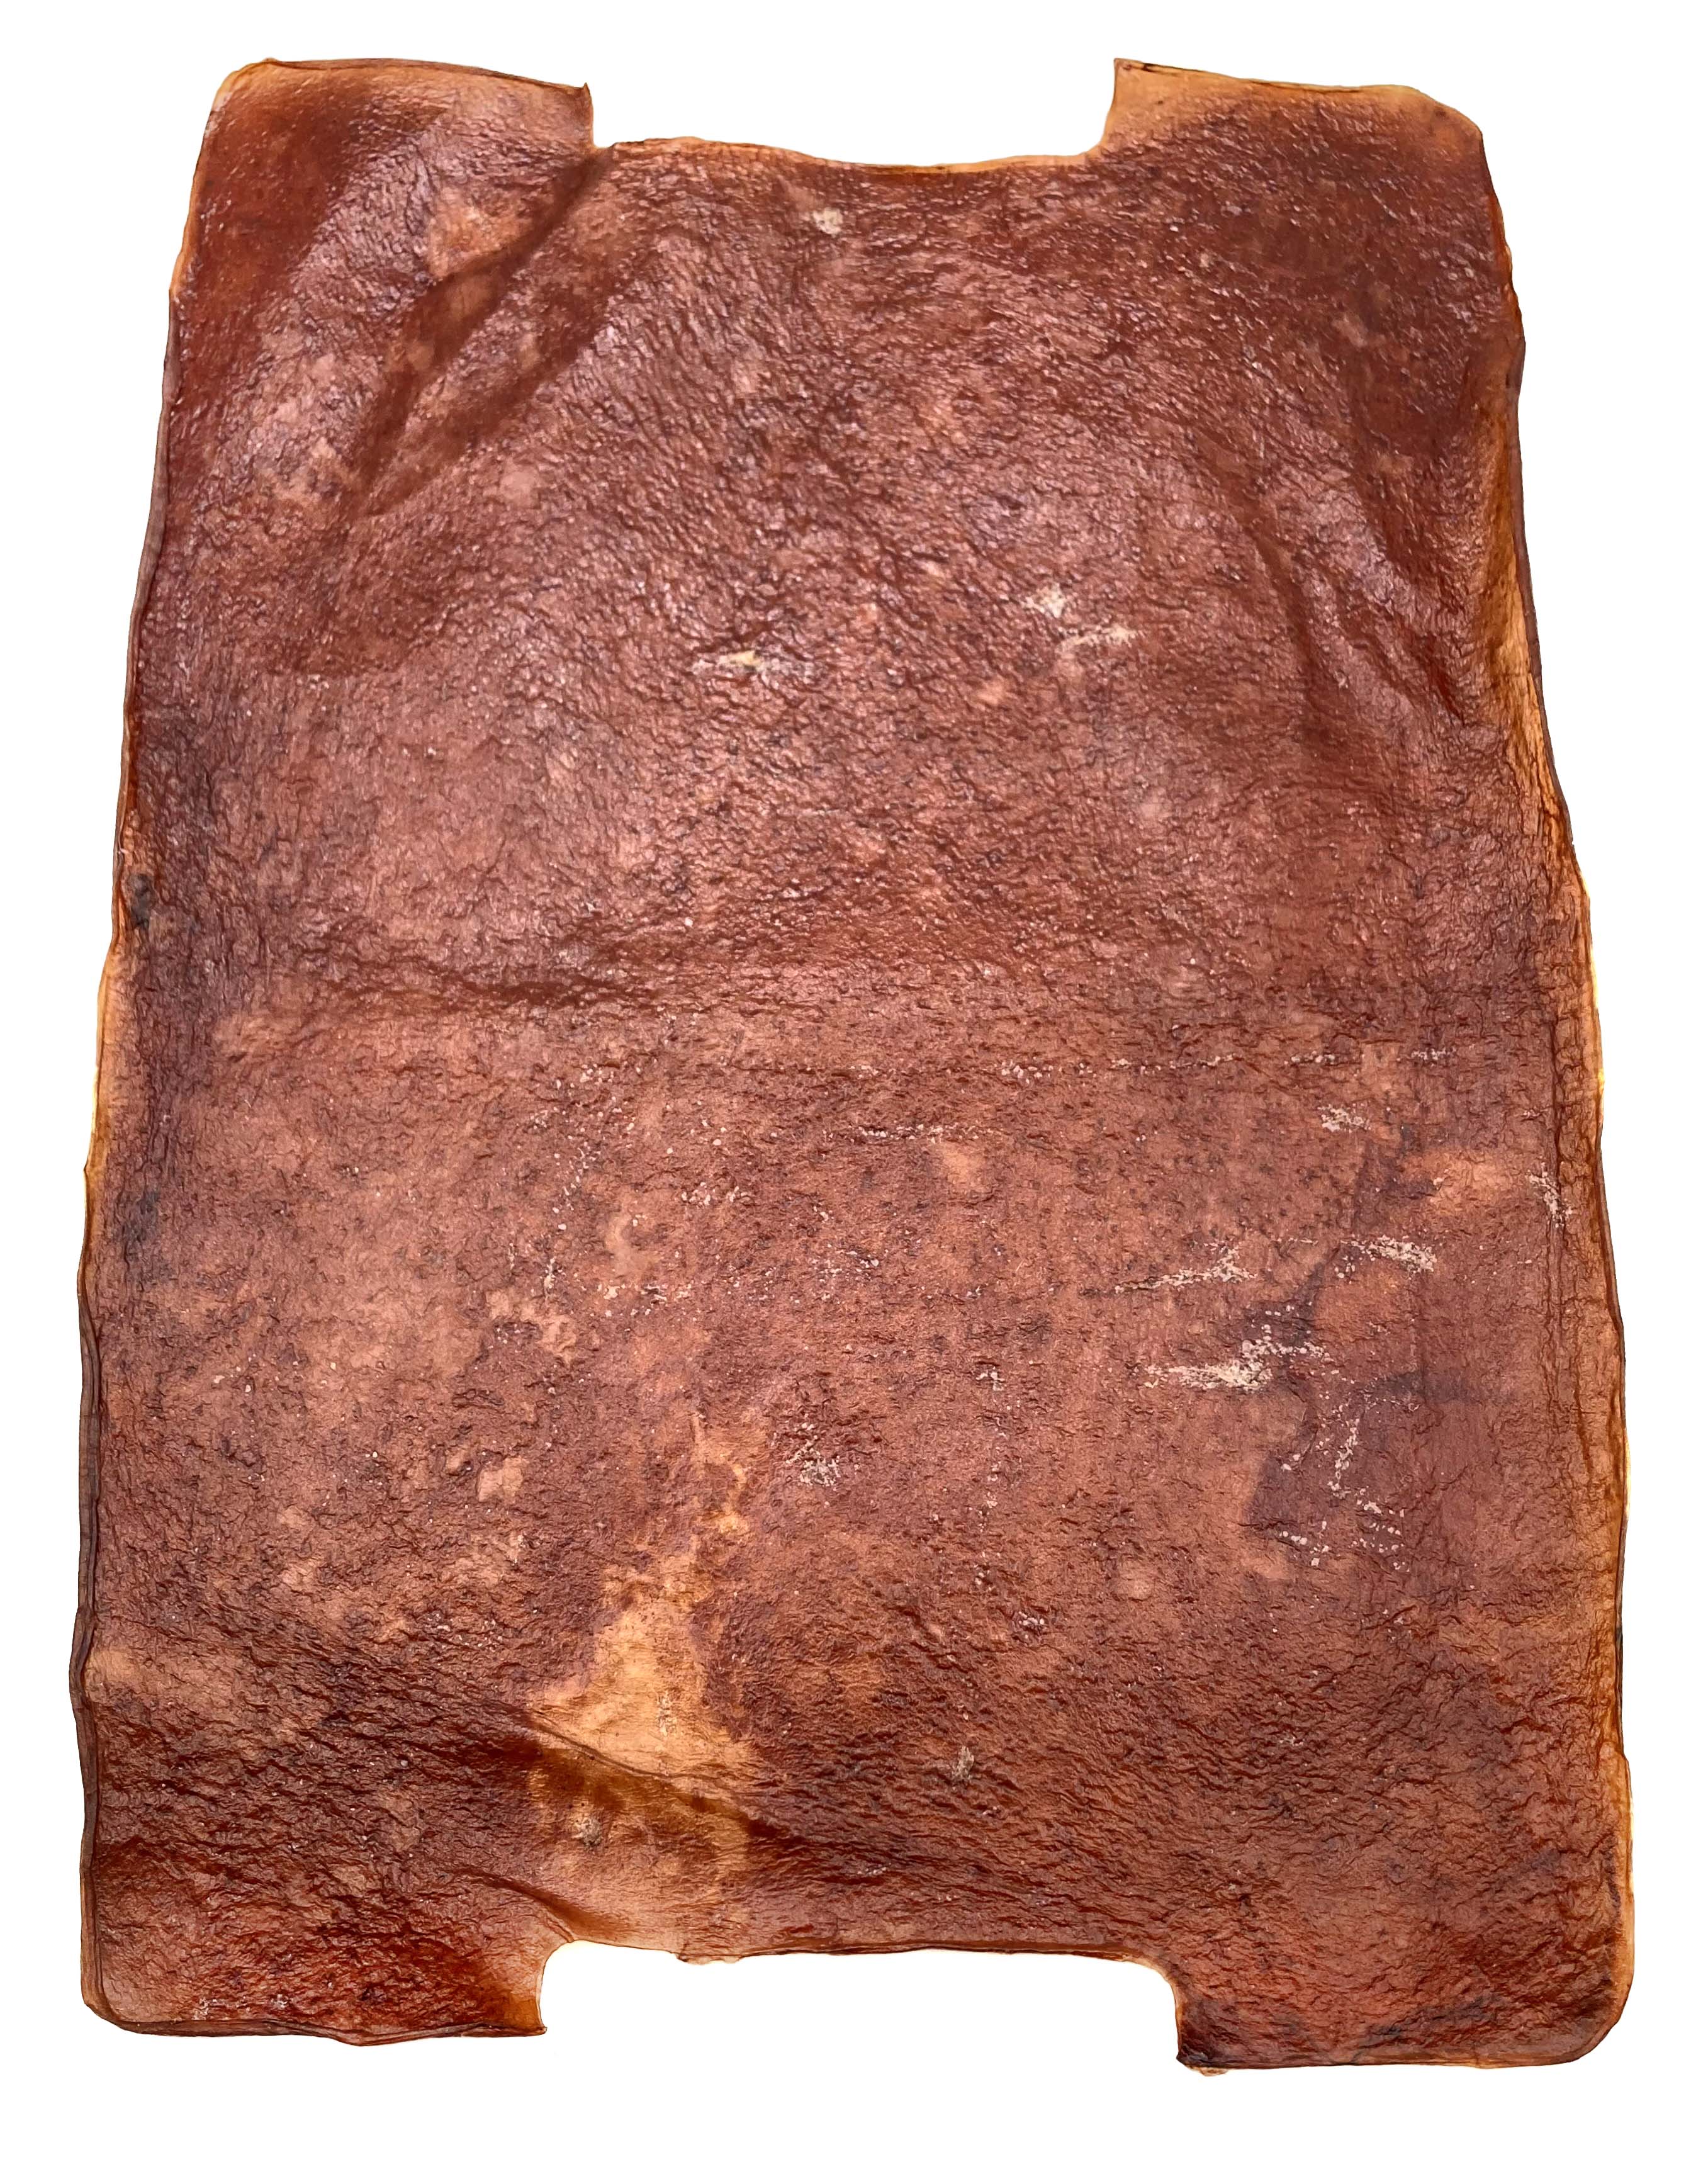
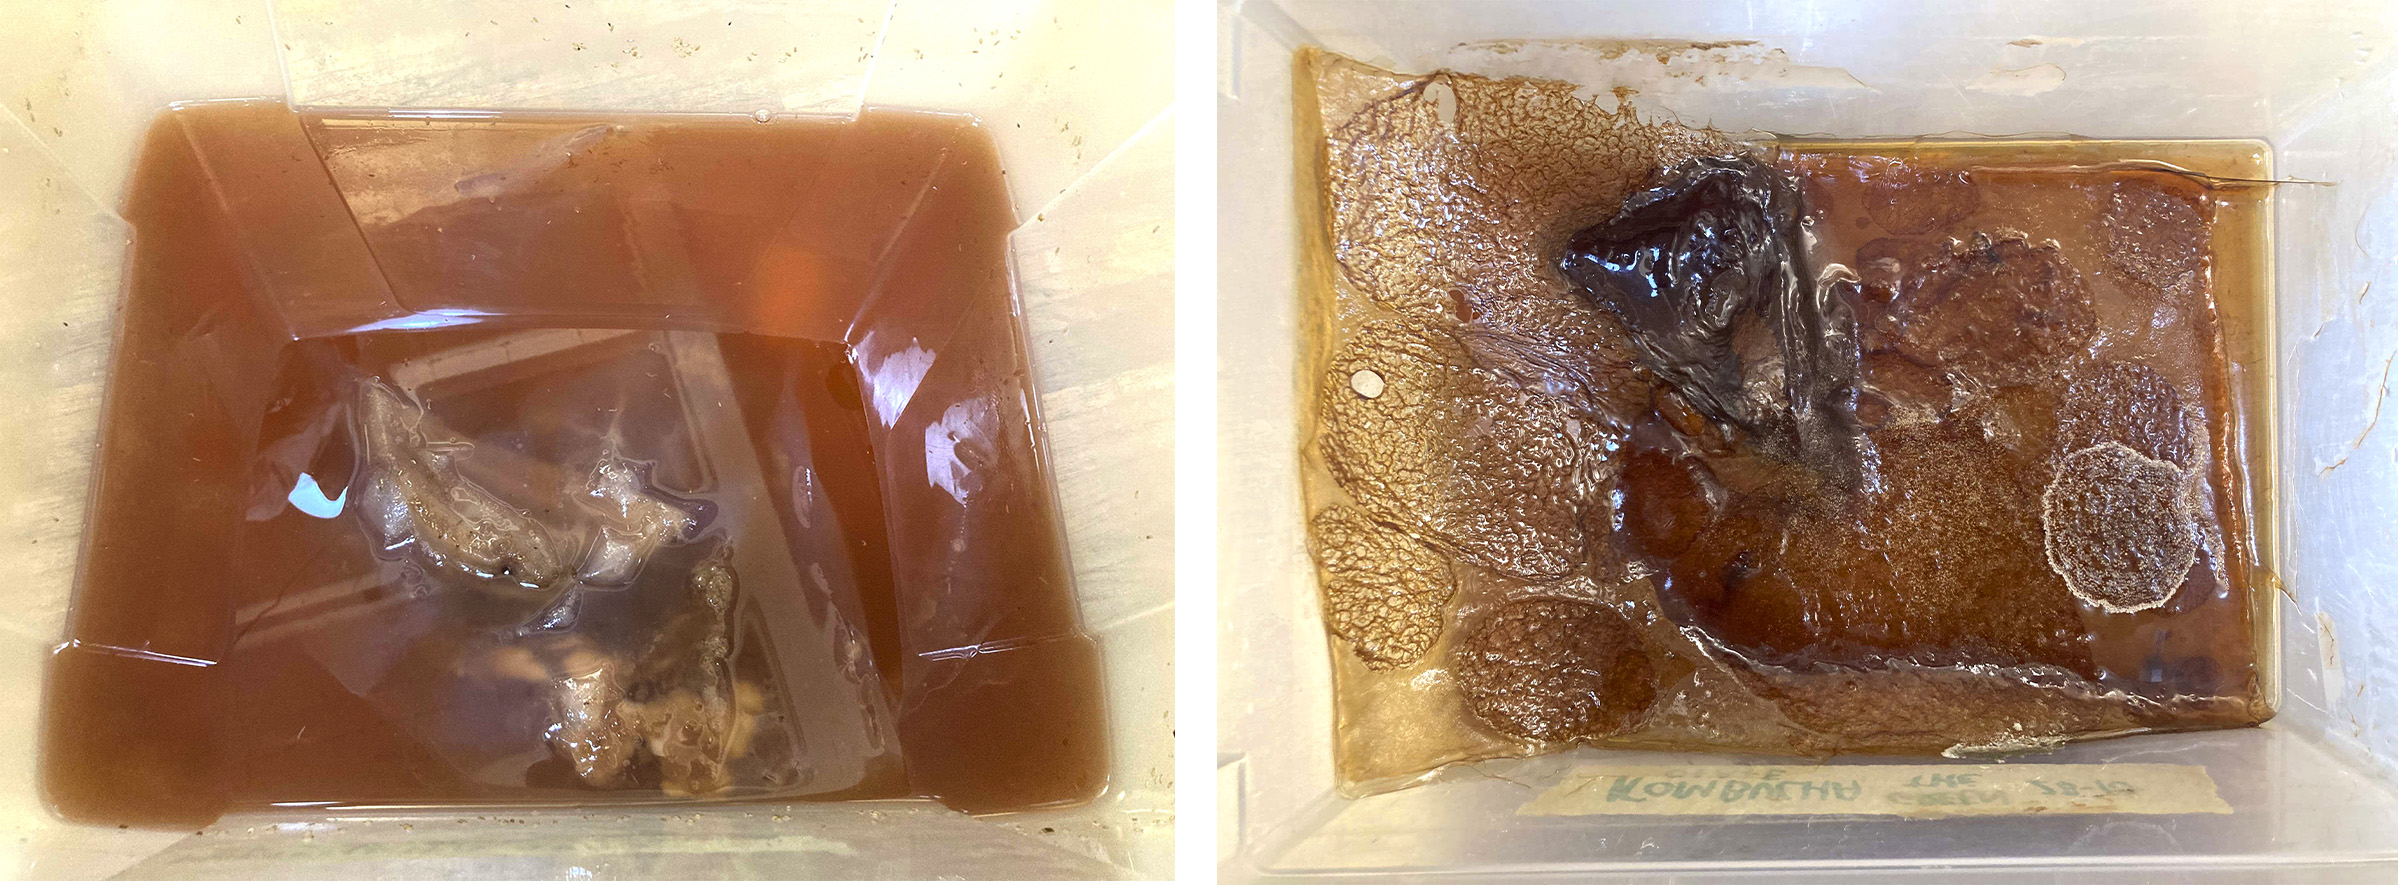
Kombutcha
Is bacterial cellulose used as an alternative to leather.
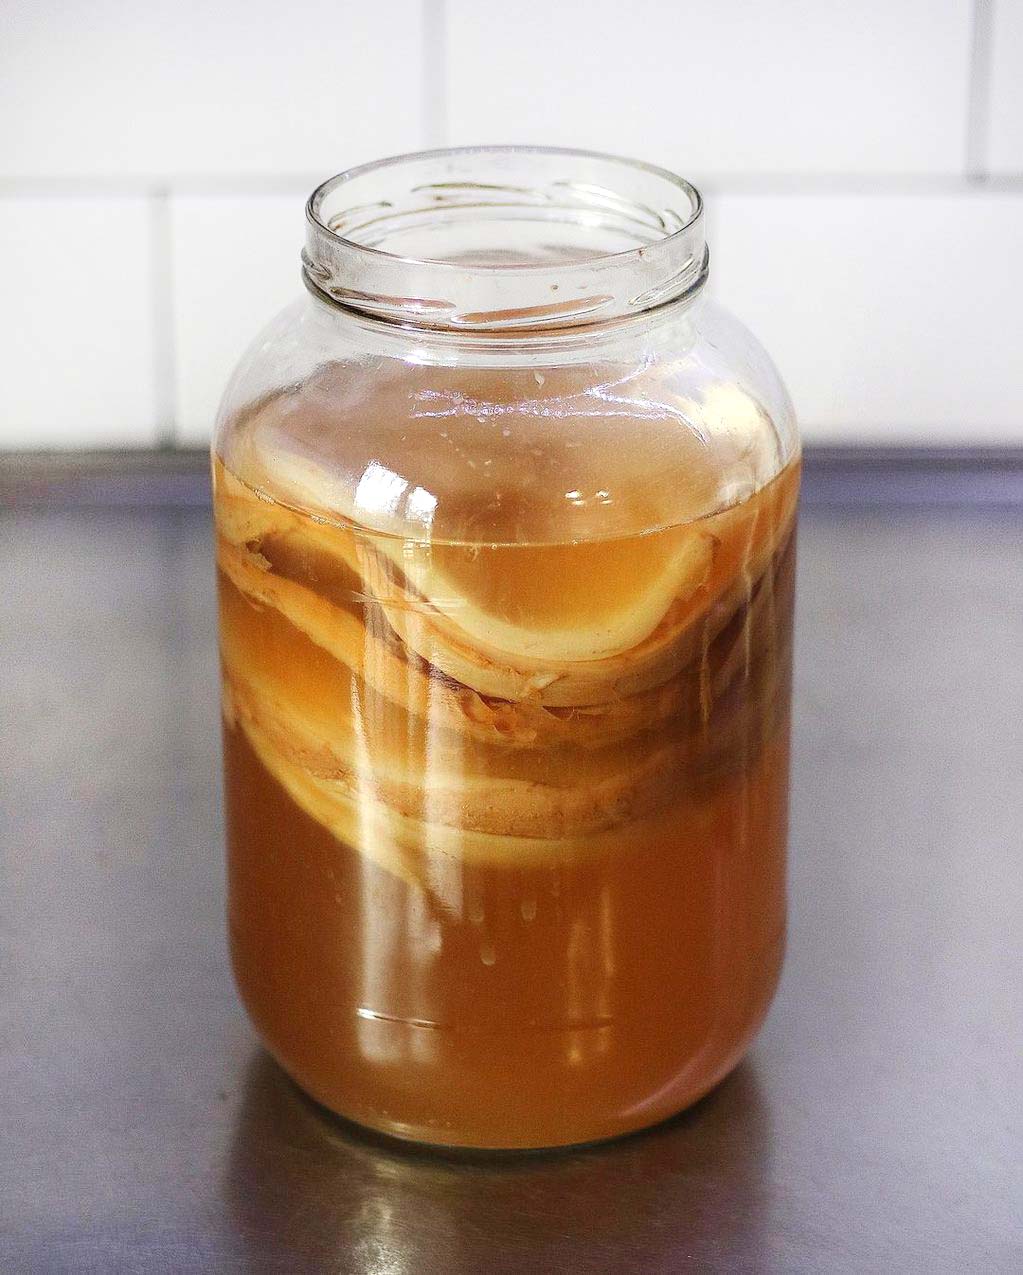
Recipe
Ingredients for Kombucha:
* Water 1l
* Sugar 100g
* Vinegar 100ml
* 5l Water
* 5 Green tea bags
* 500g Sugar
* 500ml Vinegar
* 10l Water
* 10 Tea bags
* 1kg Sugar
* 1l Vinegar
For the beer recipe follow Dinesh Kumar's documentation.
Process
During the process you must wear lab coat, gloves and mask.
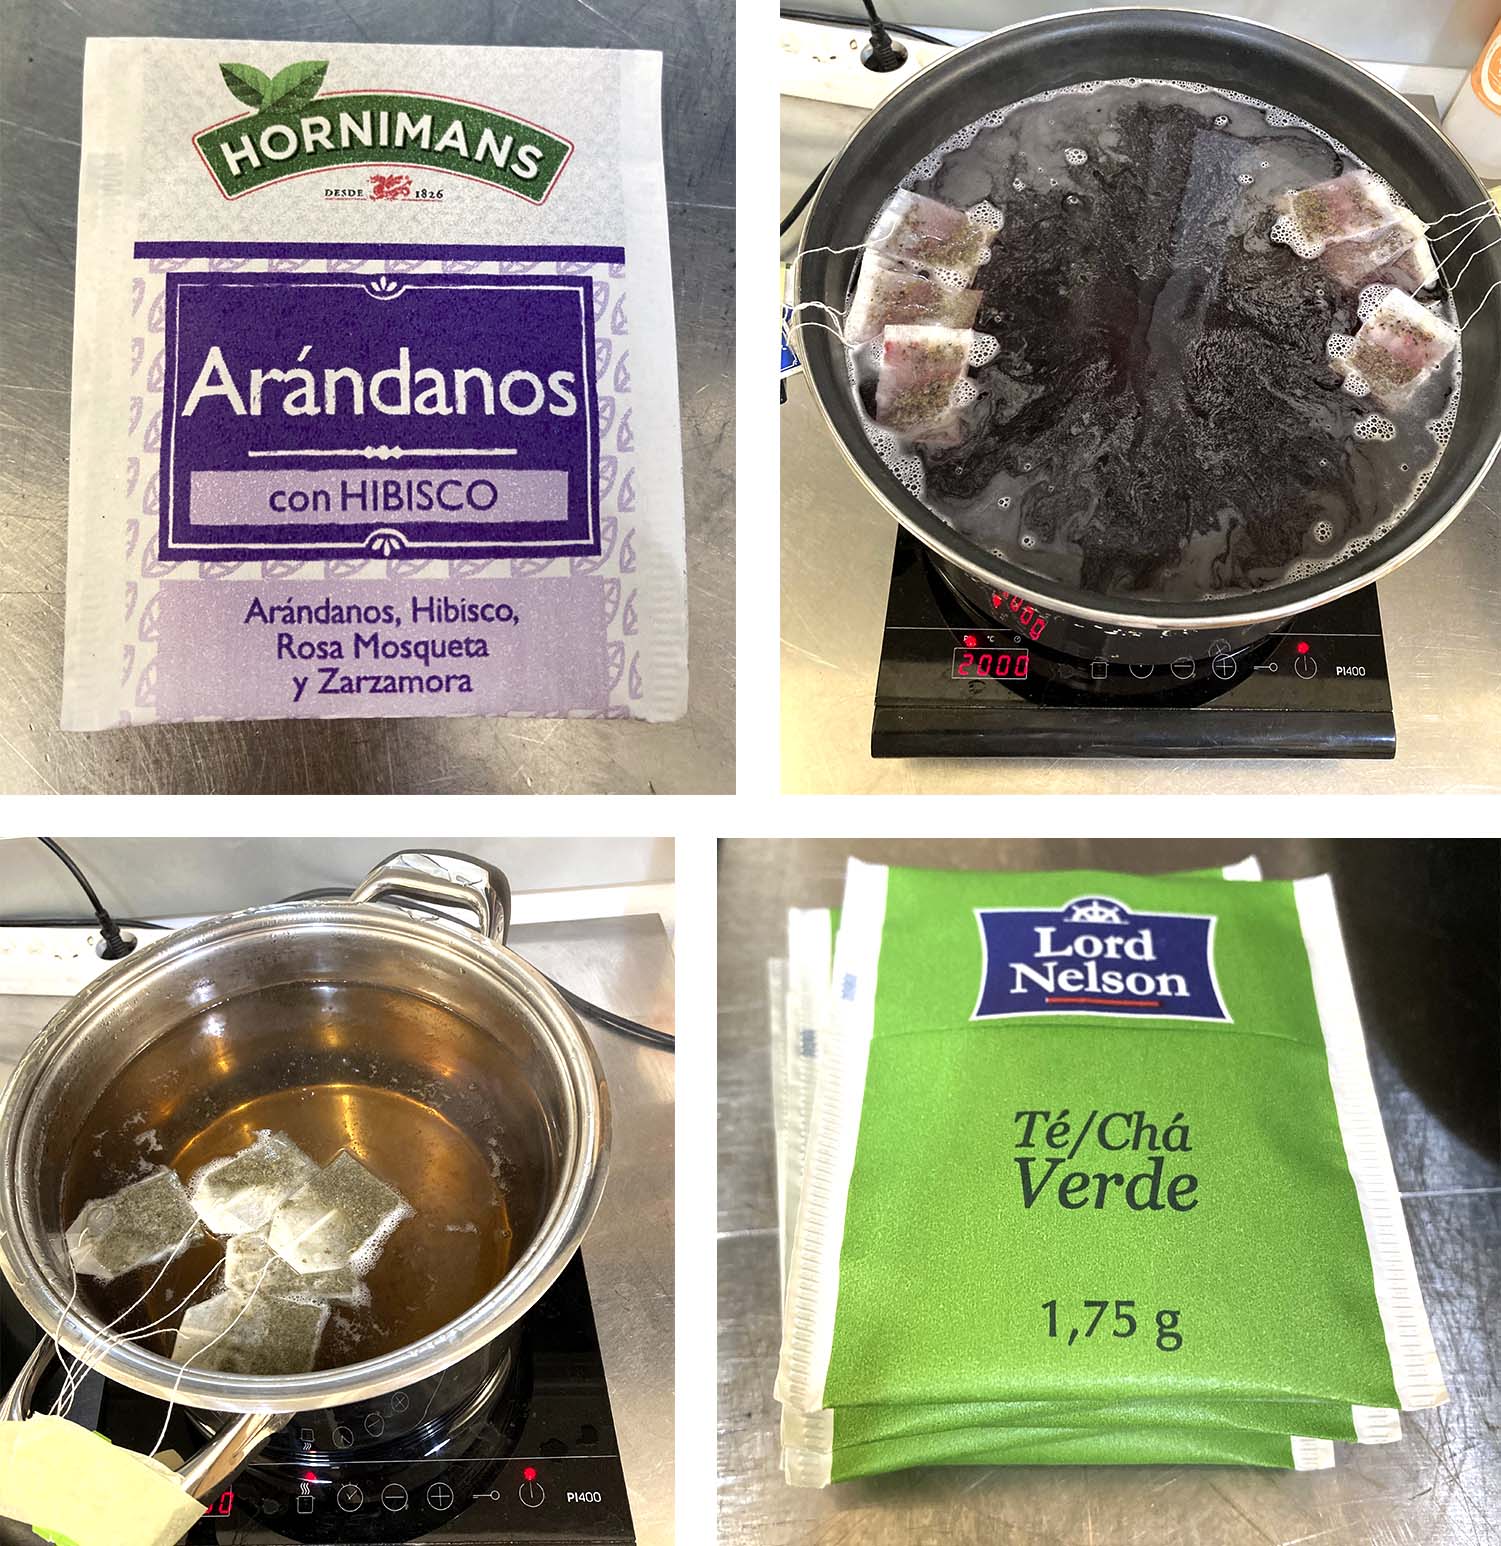
- Add in a pot the water and let it on a cooking stove. When it starts boiling add the tea bags. Let them since it gets colored (20').
- Remove the tea bags.
- At 90ºC get cold down the pot.

- Add the sugar and stir until it is dissolved.
- When it is 30ºC add the vinegar.
- Pour the mix into a plastic box and named it.
- Clean your hands and the scissors with ethanol.
- Add a proportion of Scoby mother in the bath.
- Cover the box with fabric and closed it with a cord.
- Let the Kombucha for 3 months to let it grow in a dark place and better to don't move the container until time goes.
Còpia de Process de Emma
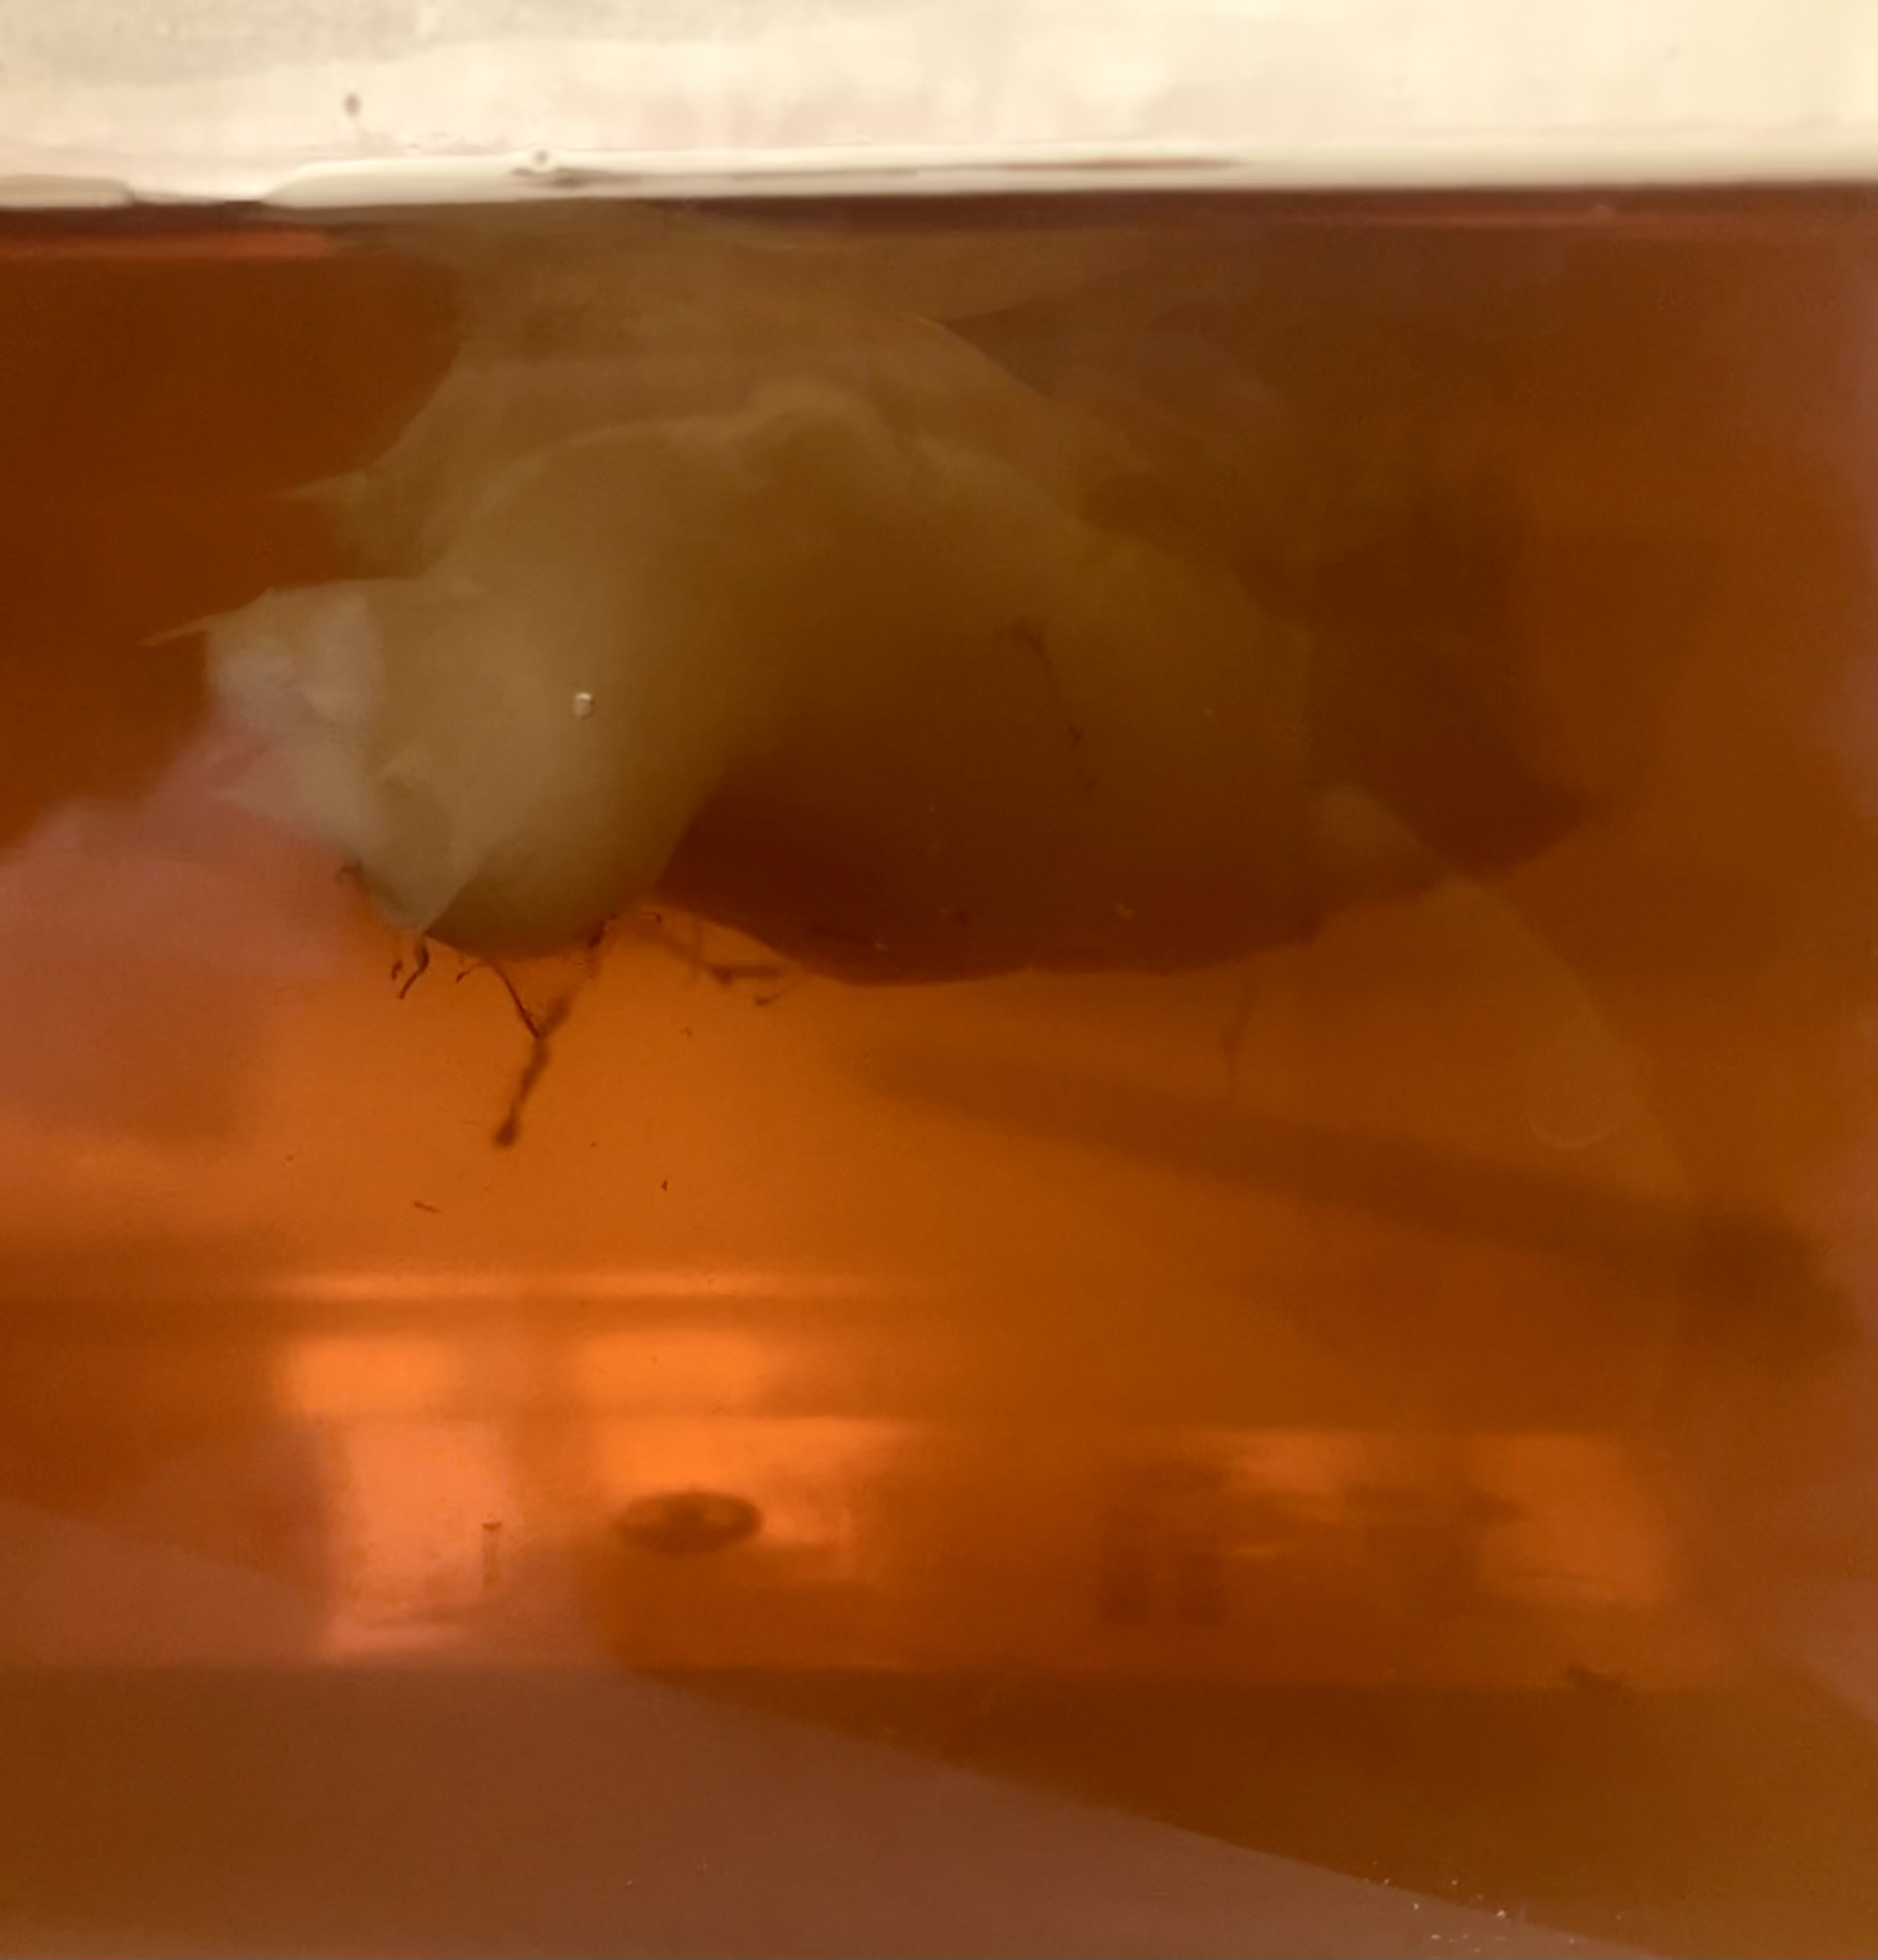
Let the Kombucha grow!
Result
The final result unfortunately didn't grow properly...
After an intense week of cooking different materials, I could say that I enjoyed creating from food waste or a piece of Mycelium or Kombucha a useful material. A little insane to think that it comes from 0 to 100. Truthfully, an amazing process that I need more time to experiment with even more, but a good start!
🍎🍋 See you the following week! 🥕🥑