3. Create a BioMaterial
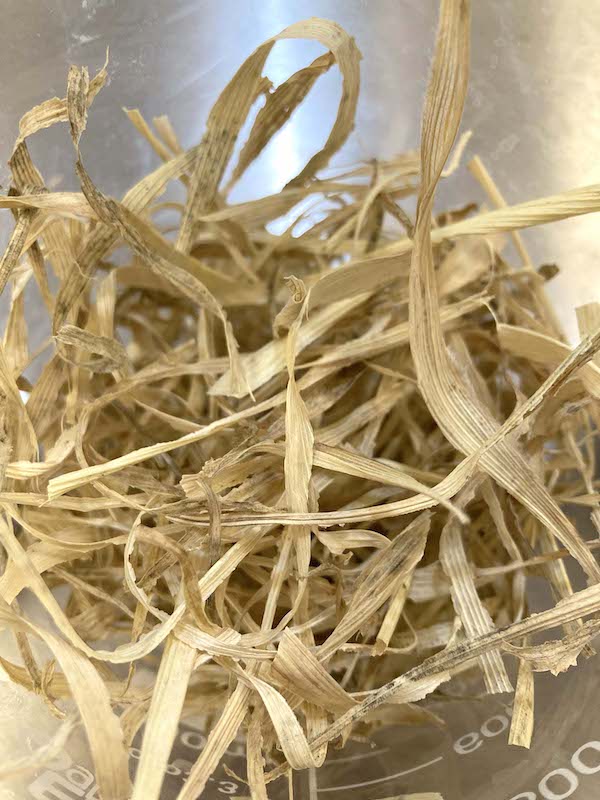
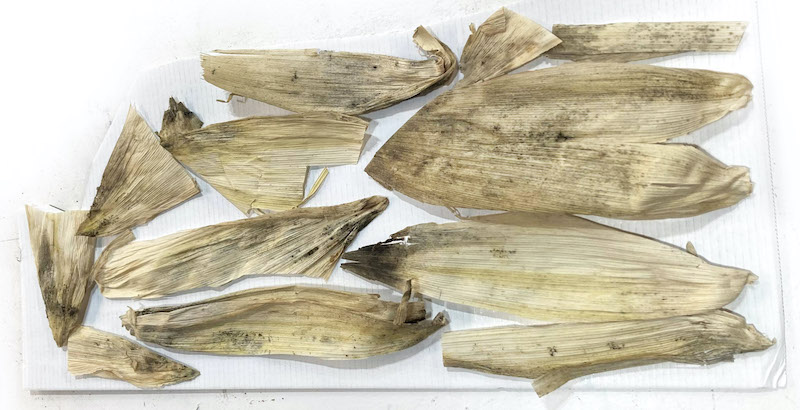
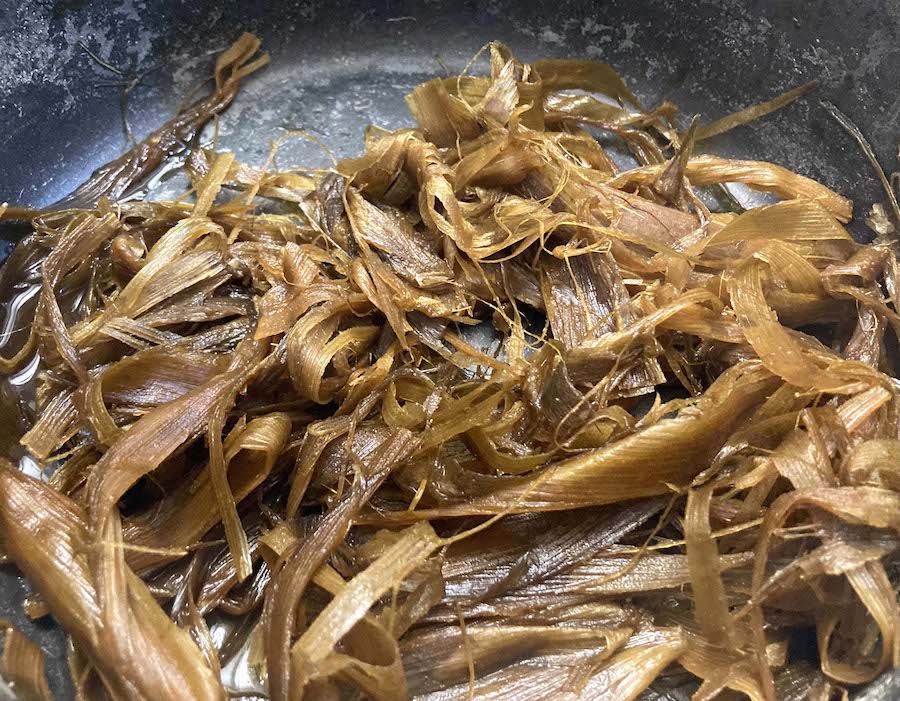
Preparate the cron corb husk
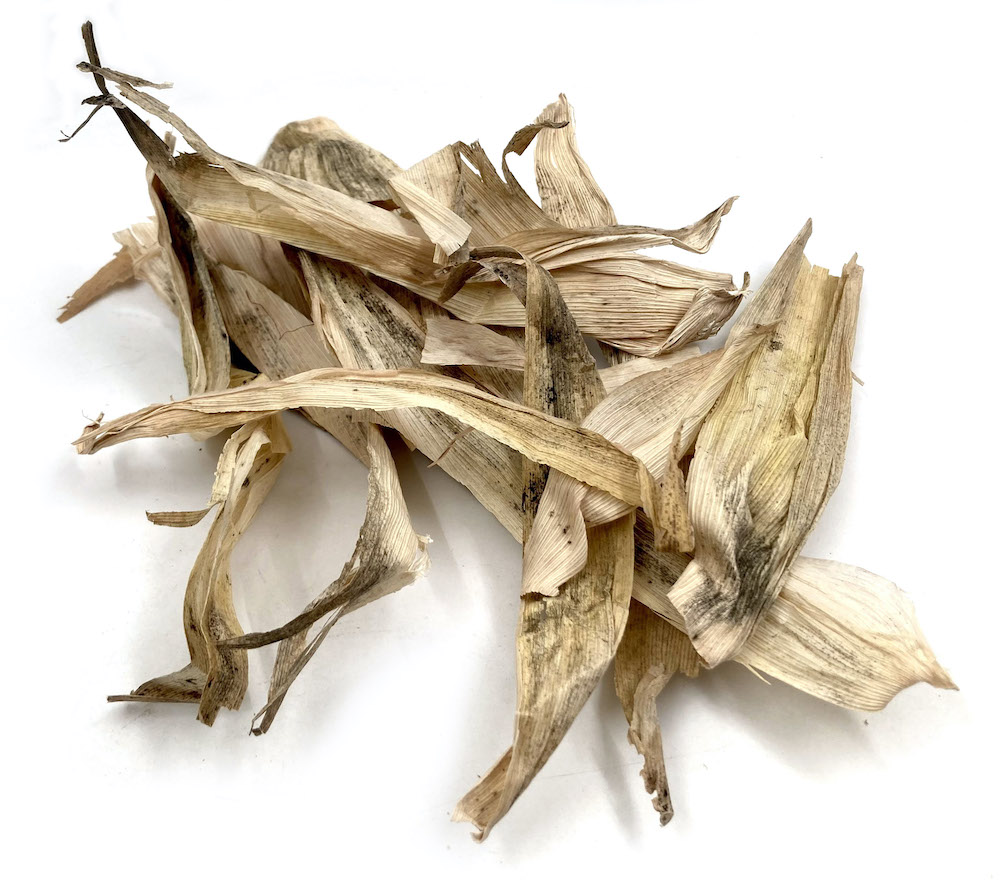
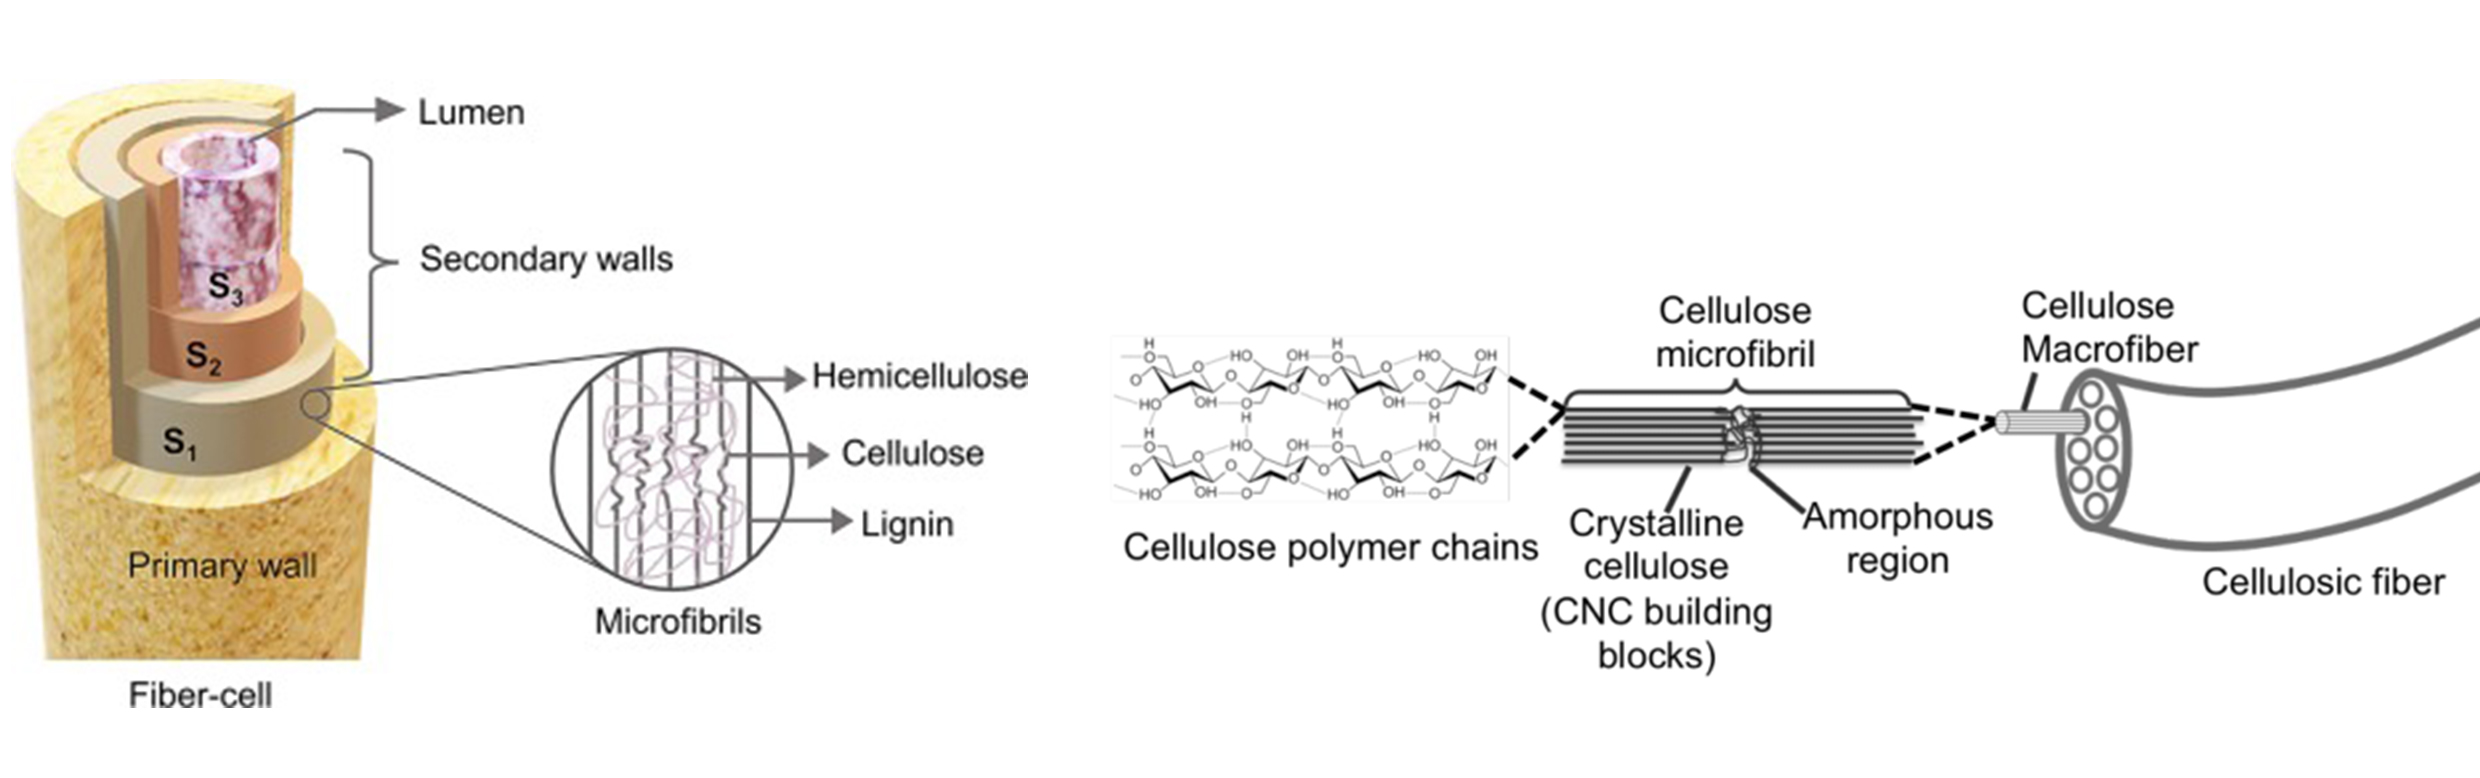
Before starting any recipe the Kernel needs to be more flexible and open the fibers to easily work with it.
So, I tried to soak the Kernel corncob in 3 different ways:
A. Soduim carbonate
With this recipe, we will break the fibers.
Cooking breaks down the fibers, and the alkali dissolves non-cellulose materials, like lignins and waxes, that can cause discoloration or prevent the fibers from freely separating.
* 2.600ml Water
* 70g Sodium carbonate
* 26g Dry husk corncob
* Digital scale
* Cooking stove
* Pot
* Spoon
* Electric oven
* Plate/mold to be available to put in the oven
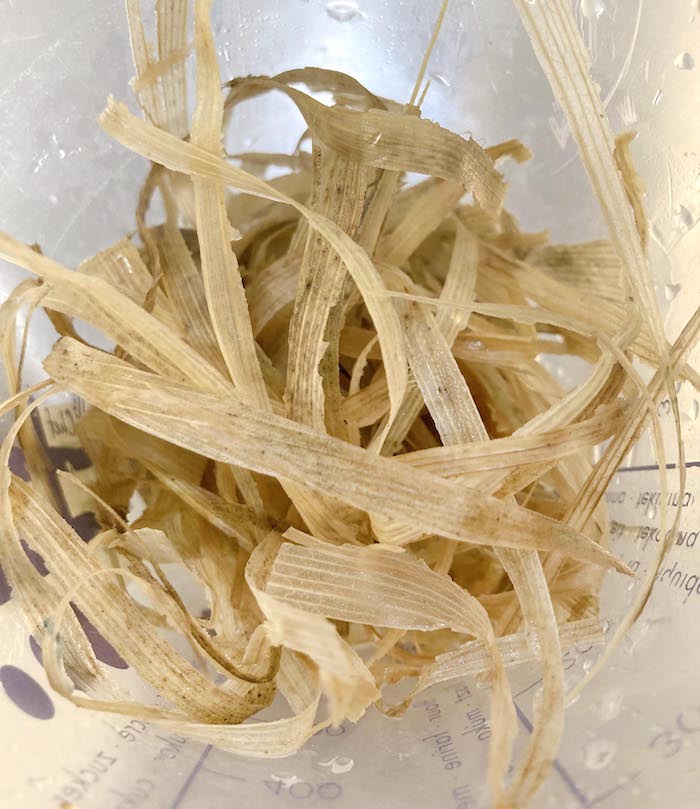
* Take out the strong parts of the husk.
* Measure the kernel corncob and calculate the rest of the ingredients you will need.
* Add the pot of the husks with water and heat it.
* When it starts boiling, add the Sodium Carbonate and mix it until it dissolves. The husks will change the pH so the color turns to orange.
* Let it with an slow boiling during **3 hours**. Cover the pot with lit.
* After 3 hours take out the husk and clean them in water to take out all the Sodium Carbonate.
* Then, the husks are ready to be blended or brush.
HOW TO GET SODIUM CARBONATE WITH BAKING SODA:
STEPS:
- Pour the Baking Soda into the oven plate. A thin layer.
- Let in the oven during 1 hour in 115ºC.
- Take it out of the oven. The texture change from powder to a kind of sand.
- Let the Soduim Carbonate cold down before you keep it in a pot.
IMPORTANT: Soda Ash has the same properties as Sodium Carbonate.
B. Acetone
* 800ml Water
* 100ml Acetone
* 6g Dry husks corncob
* Digital scale
* Pot
* Spoon
* Mortar and pestle
* Take out the strong parts of the husk.
* Measure the kernel corncob and calculate the rest of the ingredients you will need.
* Add in the pot the husks with water and the Acetone.
* Mix it and let it soak for 2 hours.
* Then take it out and beat it with the mortar.
* Let them soak for 1 hour more.
* Wash the husks with water to take out all the Acetone.
C. Soak in Mineral water
* 800ml Water (to cover the husks)
* 6g Dry husk corncob
* Digital scale
* Pot
* Spoon
* Take out the strong parts of the husk.
* Measure the kernel corncob and calculate the water we will need.
* Add the pot of the husks with water and let them for some days, the more time more flexible the fibers will be.
CONCLUSION:
After testing different ways to break the fibers and get them more flexible and easy to work, the best option was the Sodium Carbonate recipe related to the time (3h boiling)and the final result. Moreover, as I have been testing, the husk fibers are super strong so I need a solution for the alkali to have a change on them.
Get on with it!

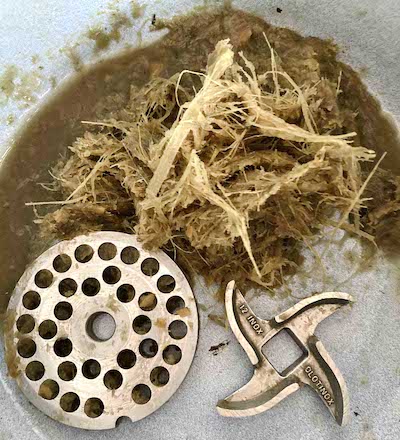
Cut the husk
My nightmare for some days was how to cut the husk in little pieces without wasting time in a super manual process as scissors...
| Image of the machine | Knife of the machine | Name | Result | Observations | Conclusion |
|---|---|---|---|---|---|
 |
- | Scissors | 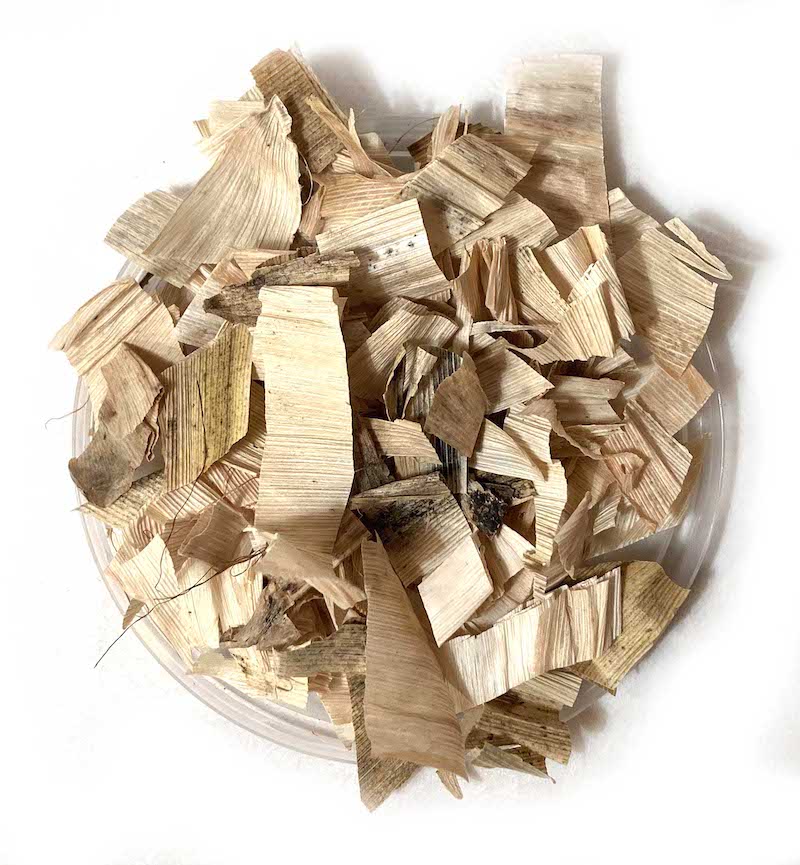 |
Take a lot of time | Not useful for big scale |
 |
 |
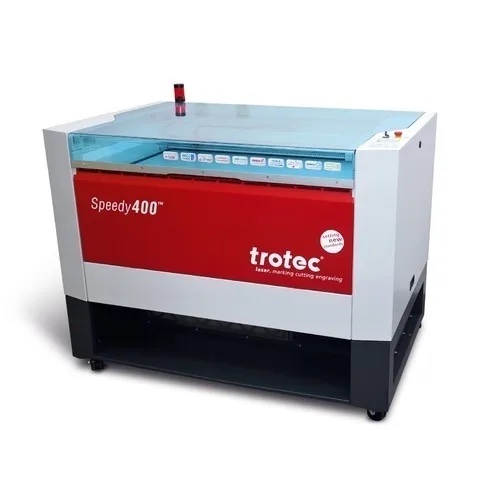
Laser cut from the FabLab | 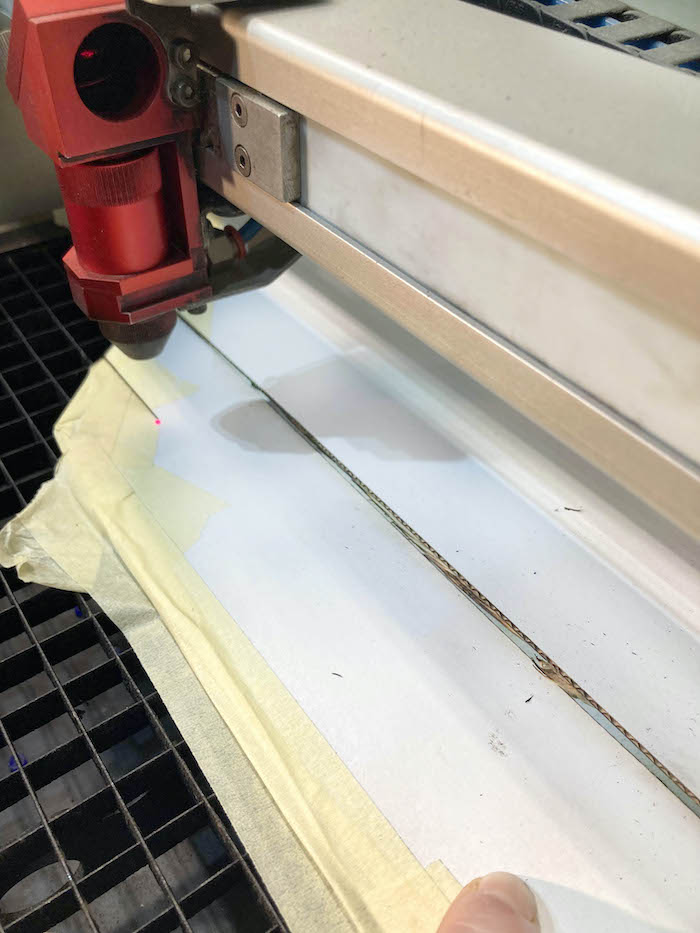 |
Sandwich with cardboard | Burn easily and while cutting the nose high change because of the irregular surface |
 |
 |
Weeding machine | 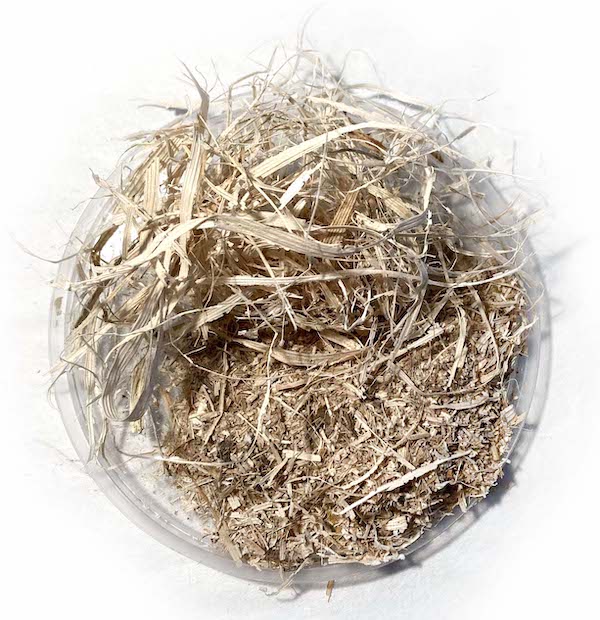 |
Not practical and required 2 person. | Not the safest method. |
 |
 |
Grinder from the FabLab | 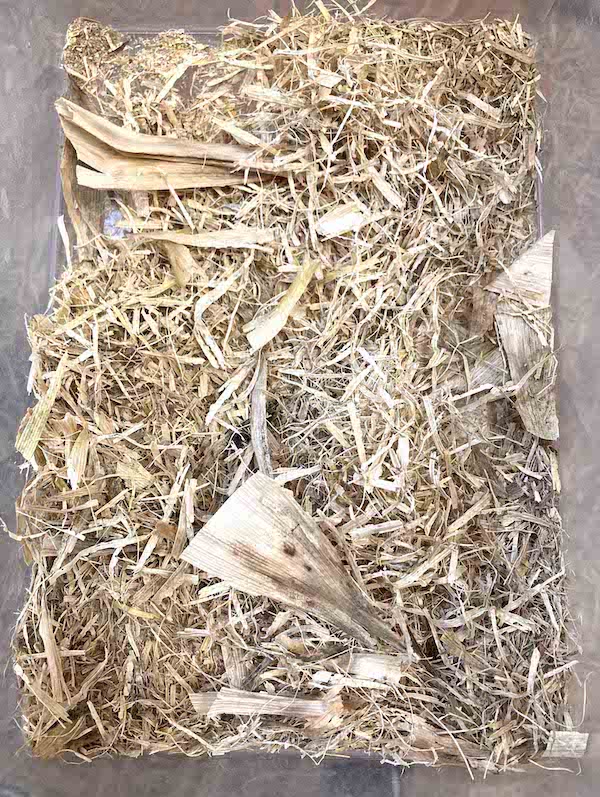 |
The husk is too light. | You need to open the machine every time to take out the fibers from the sides. Moreover, you couldn't pour a big scale in it because stop the motor |
 |
 |
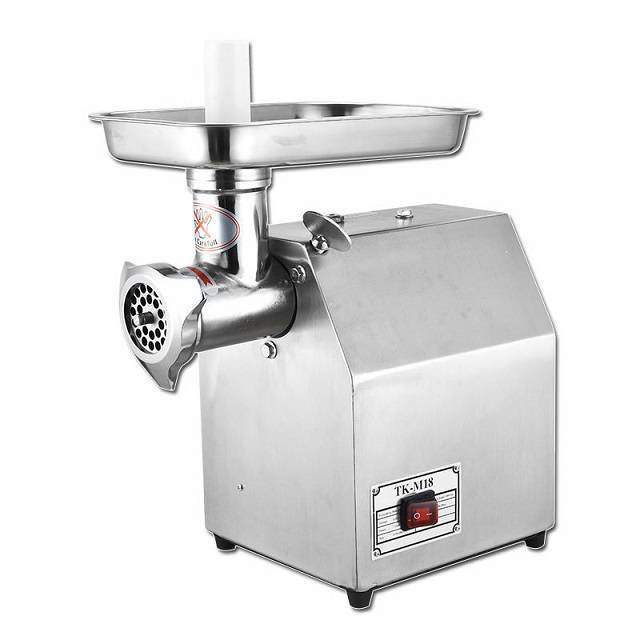
Electronic meat grinder | 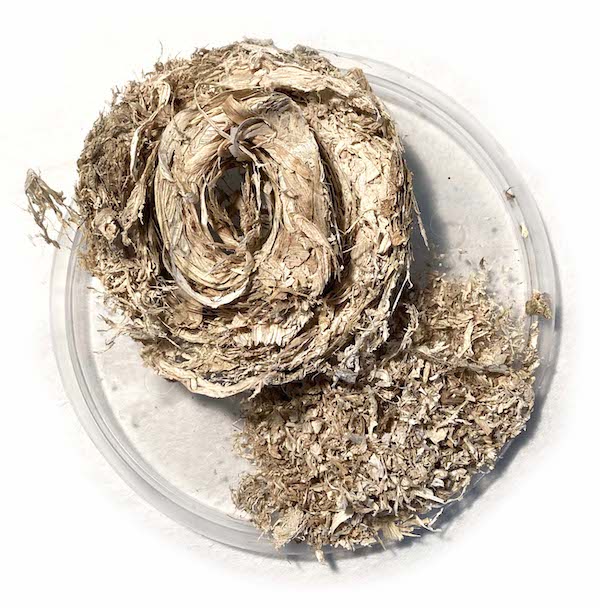 |
I try with dry husks but the fibers block the machine instead of being cut. | The speed of the star knife should go faster than the worm drive. |
|
 |
Electronic meat grinder | 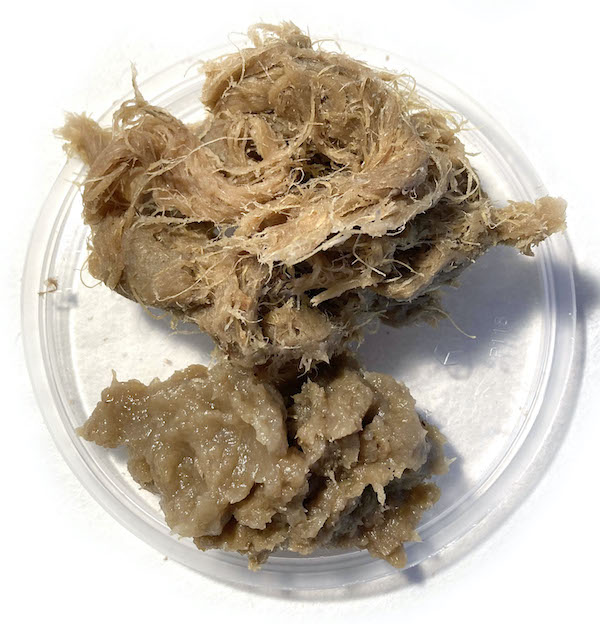 |
I also try with the husks boiled in Sodium Carbonate but the machine was blocked too. | The speed of the star knife should go faster than the worm drive. |
 |
 |
Cut master | 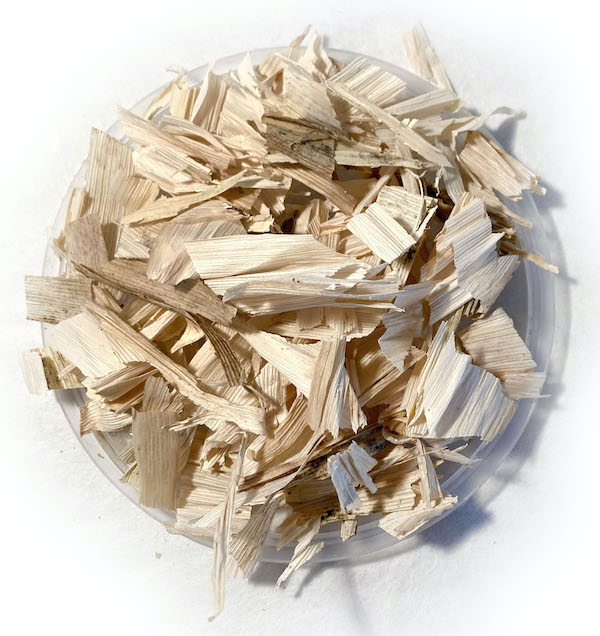 |
Need to do a lot of pressure near the cutter to not let the husk move. | Too much slow process, more than scissors |
 |
 |
Garden grinder | 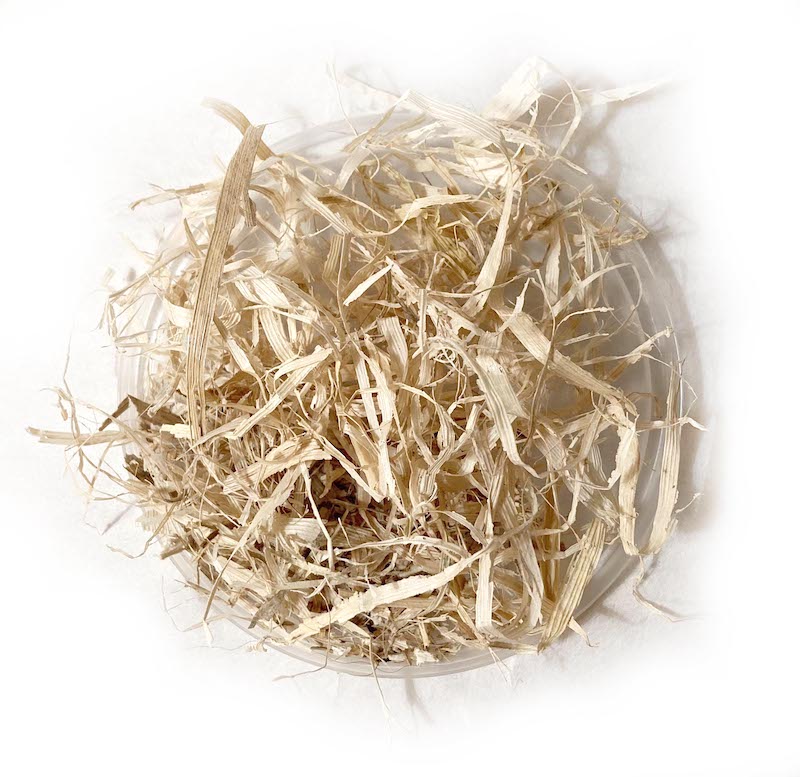 |
The result is similar as weeding machine | Not practical |
 |
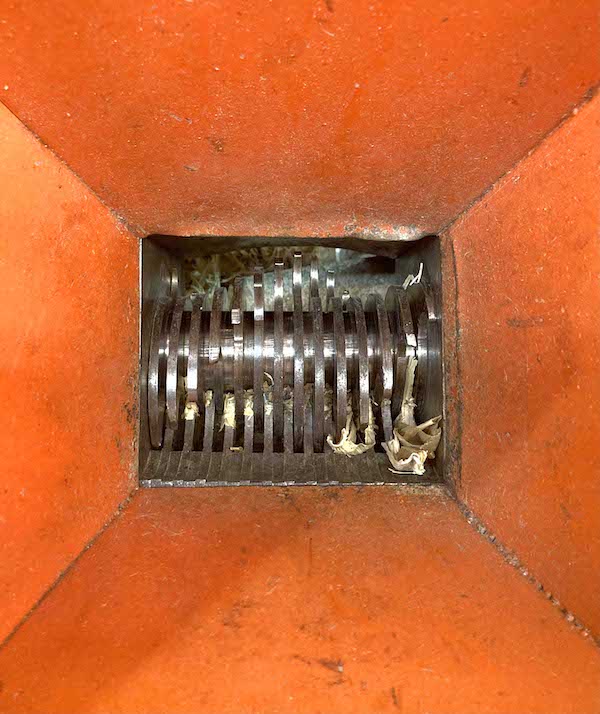 |
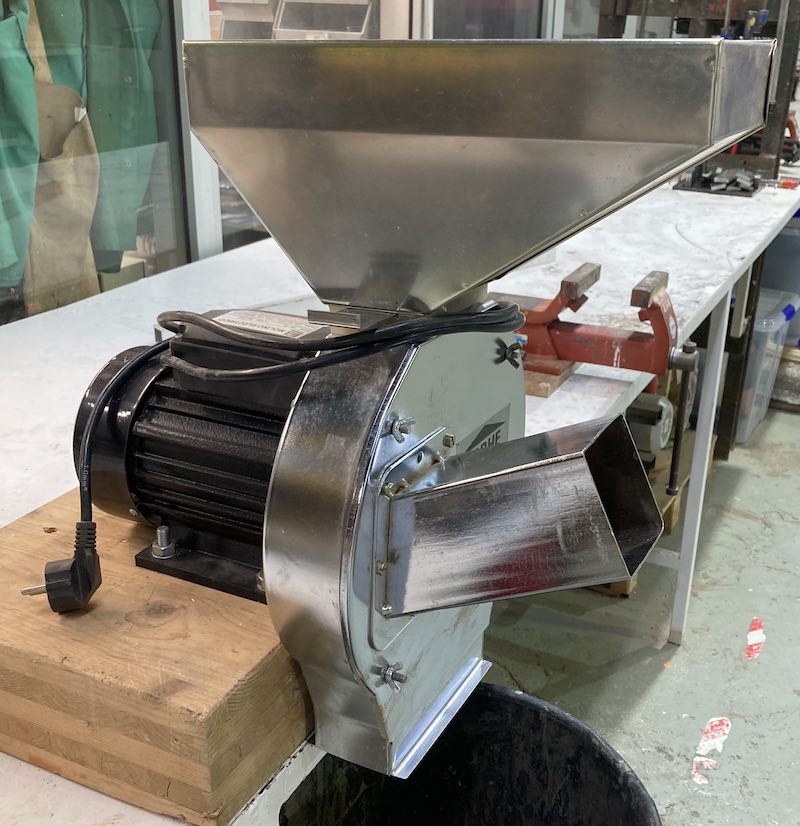
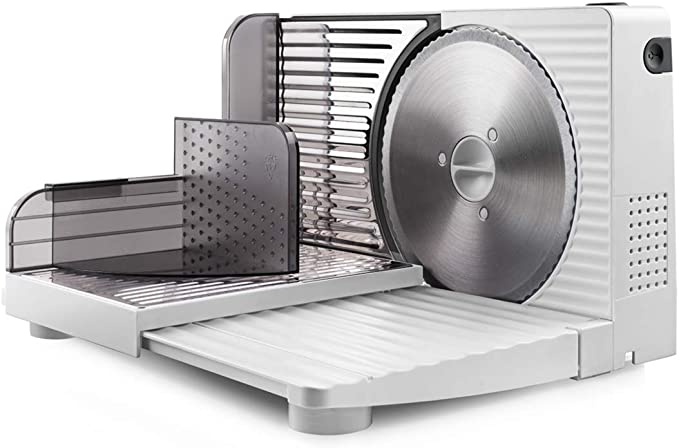
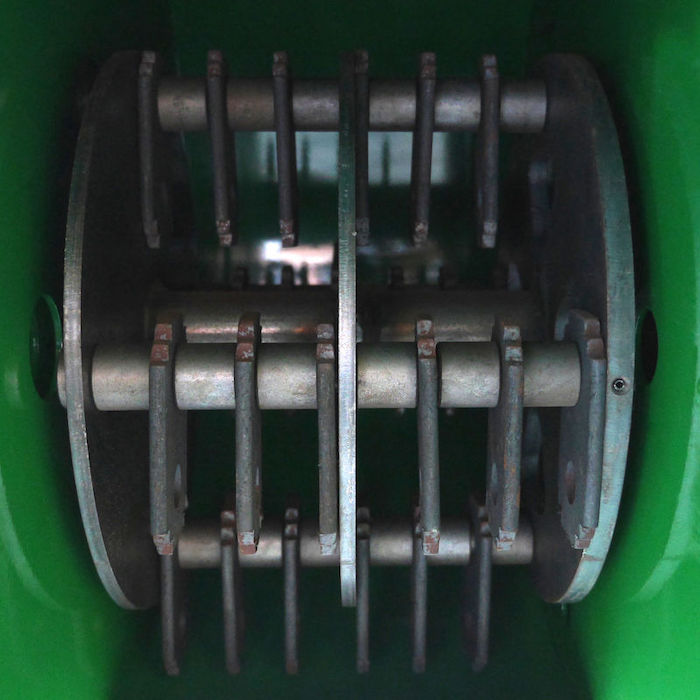
Grinder for plastics from the FabLab |  |
Easy and functional. The entrance is big enough to pour a good quantity of material | Better results if we pass two times through the machine. THE BEST OPTION! |
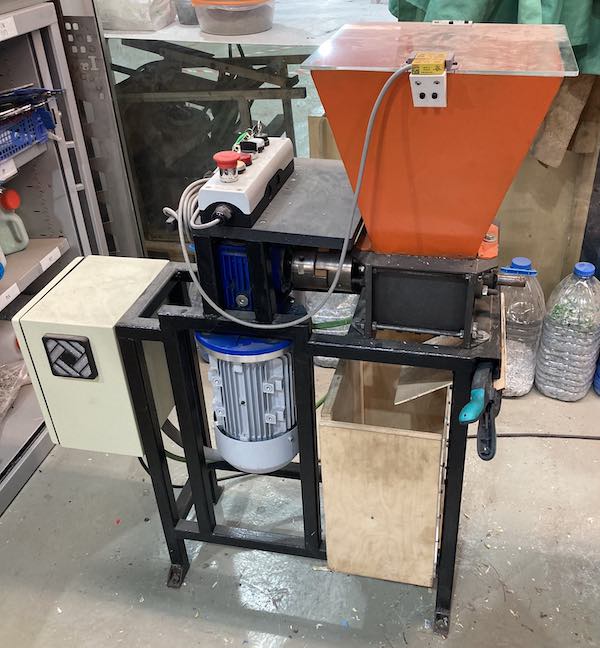
Defenitive method: THE PLASTIC GRINDER from the FabLab Barcelona.
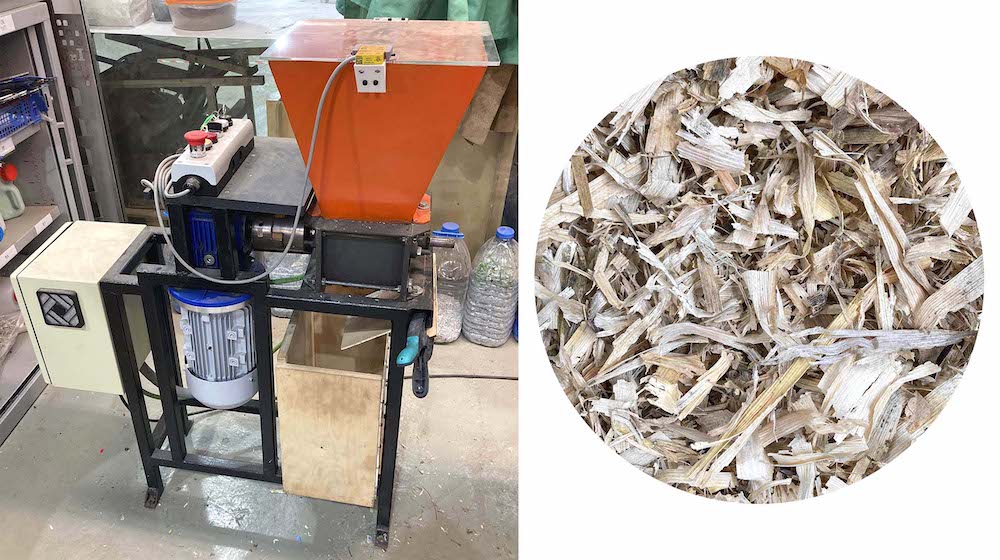
I need 1 hour in the grinder machine to cut 1 sack of dry husks. To get small pieces I repeat the grinder process two times.
1 SACK OF HUSKS TURNS IN TO A 5L CAPACITY RUBBISH BAG = 1.000g OF GRINDED HUSKS
In the following video you could see how the machine works:
Grinder FabLab de Emma
It's really helpful!!
A possible solution to cut is to create a machine with the same structure as a baler or try a specific machine for leaves.
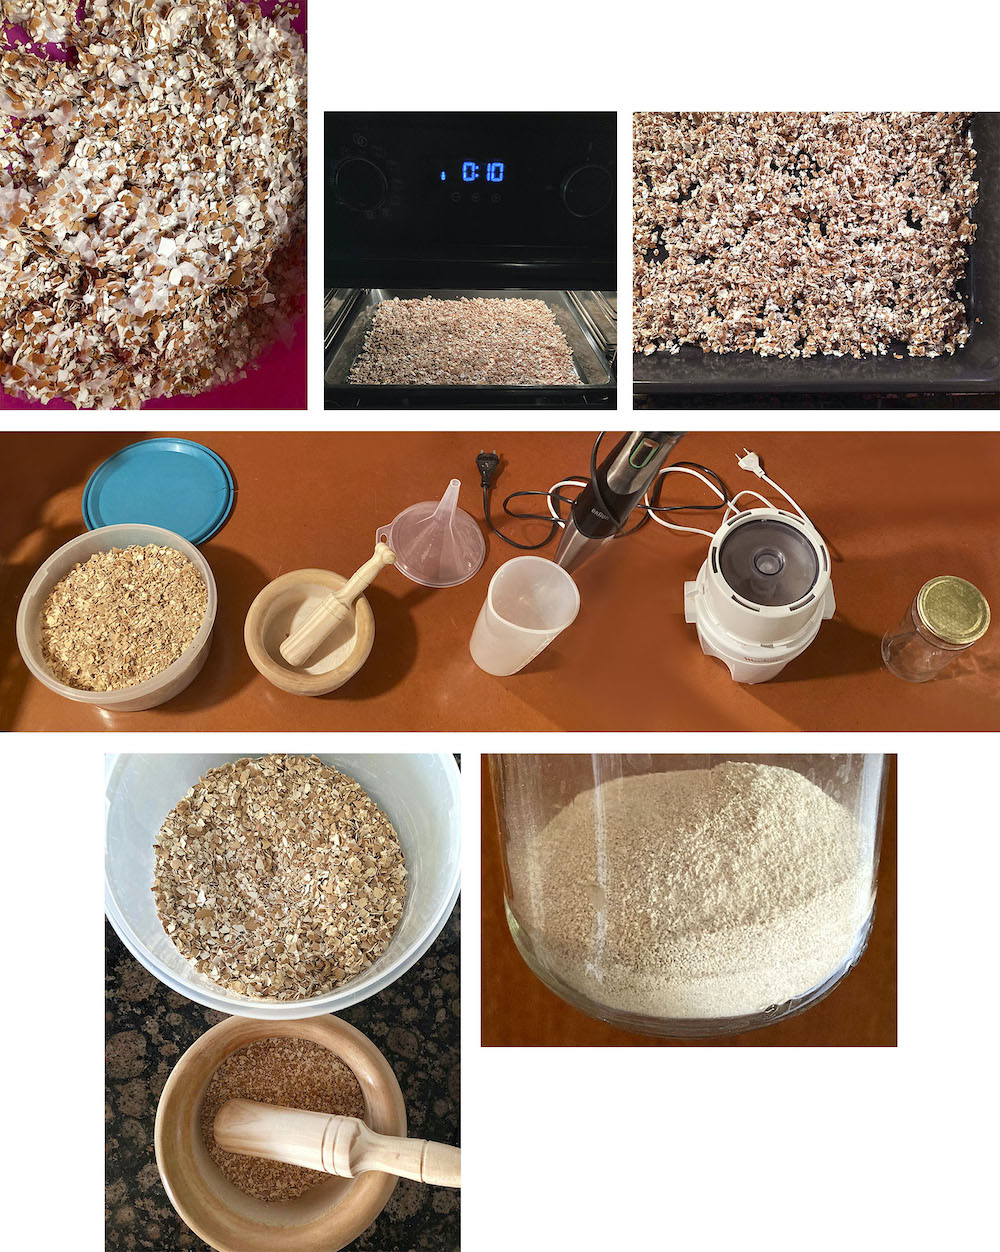
Process the husk
Which form the husks could get?
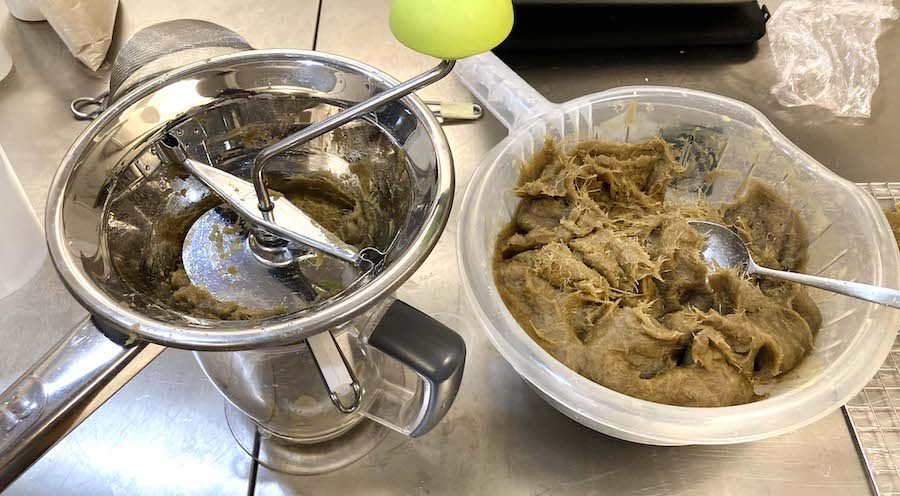
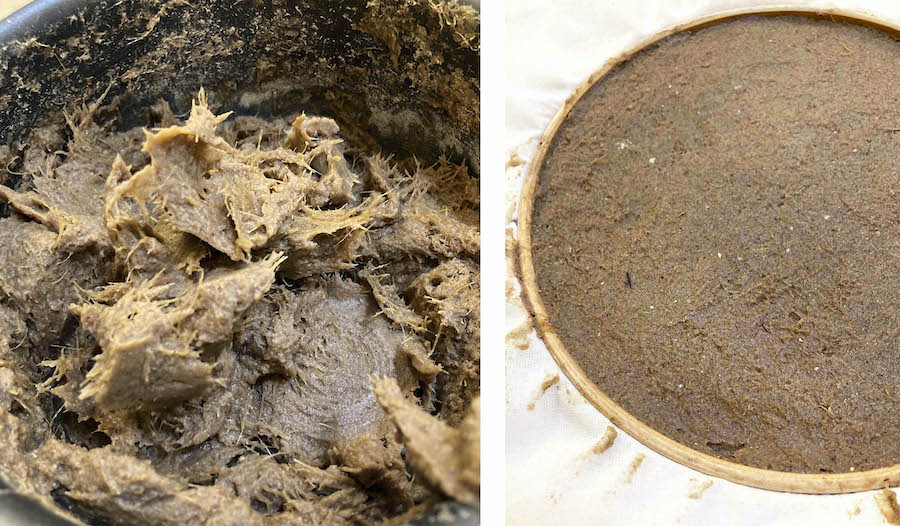
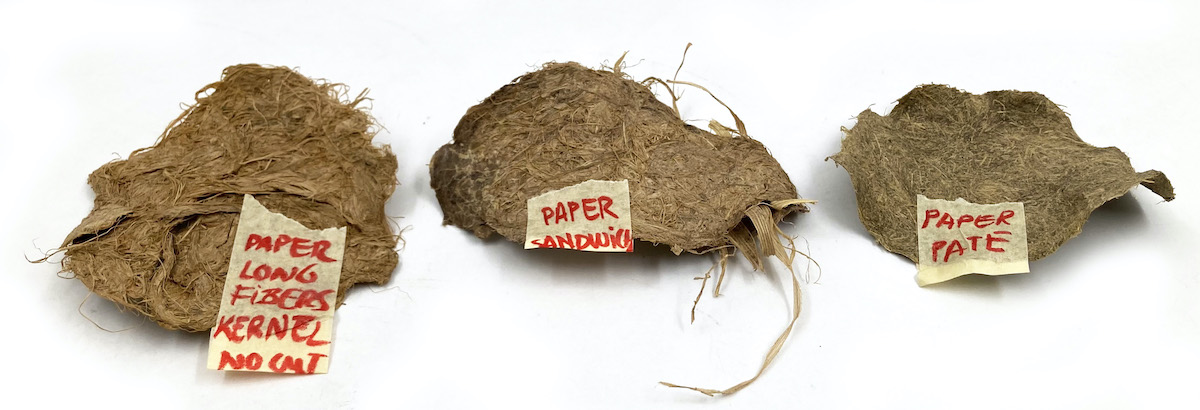
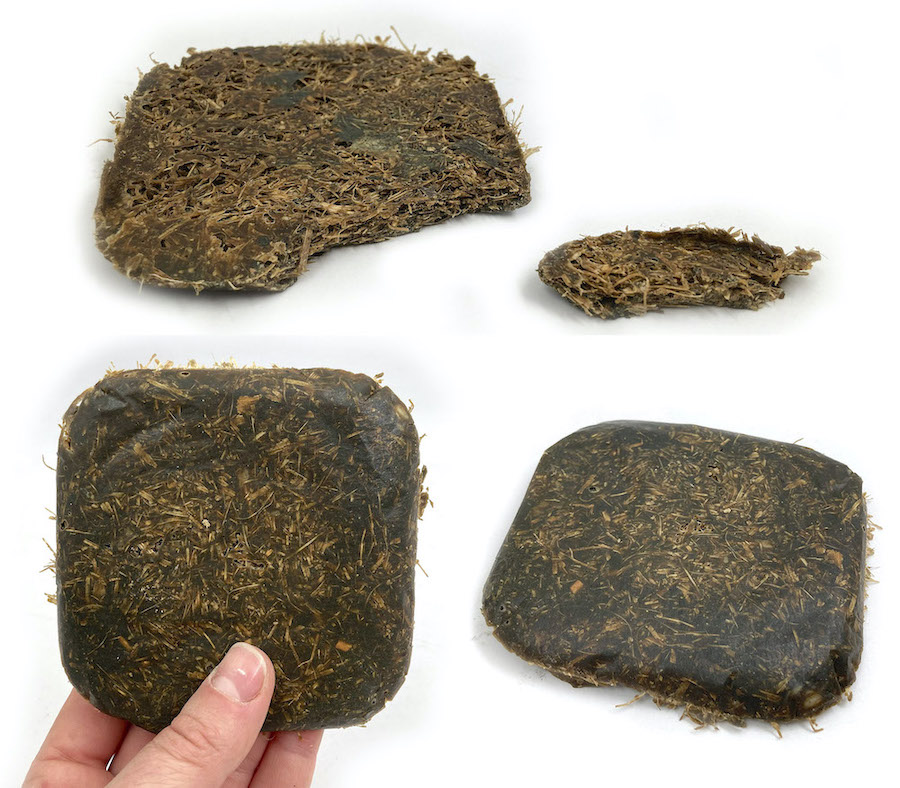
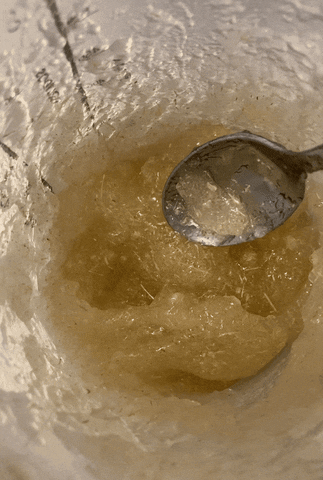
MFC
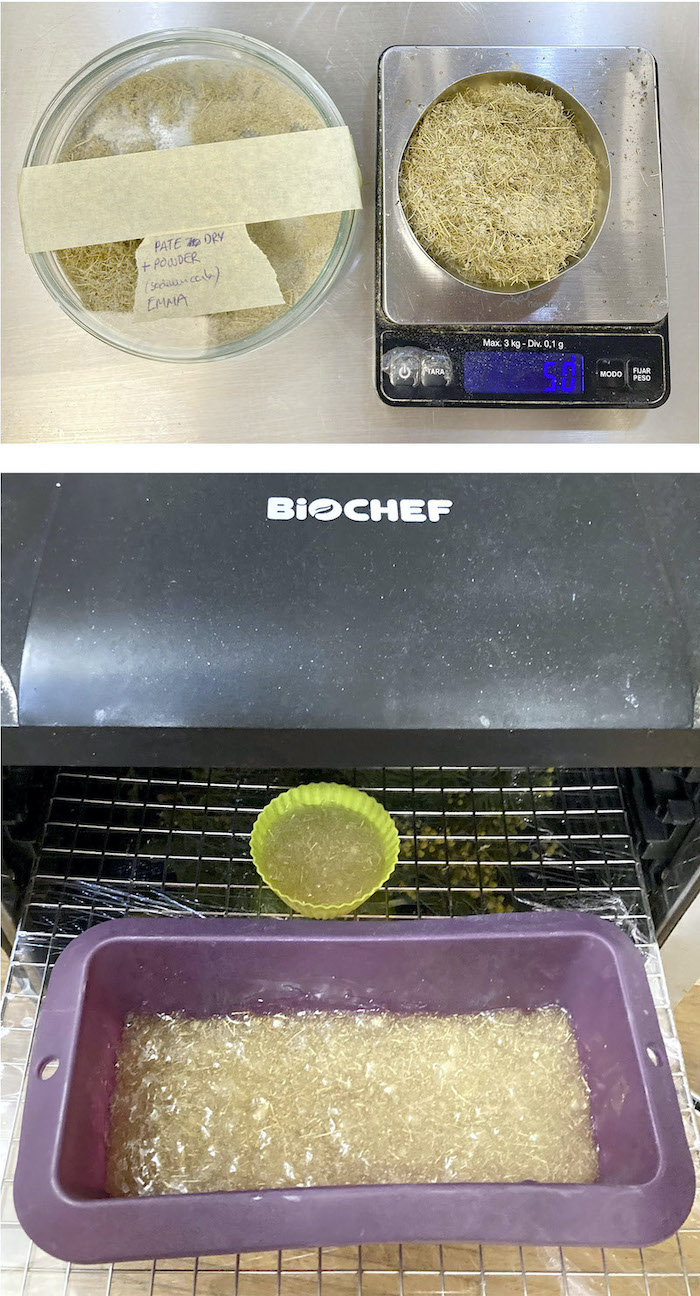
Definition: Microfibrilliar celulose or paté texture.
100g OF DRY HUSKS = 634g OF MFC.
TO GET 100g OF MFC REQUIRED 5’ OF BLENDER.
How to get it?
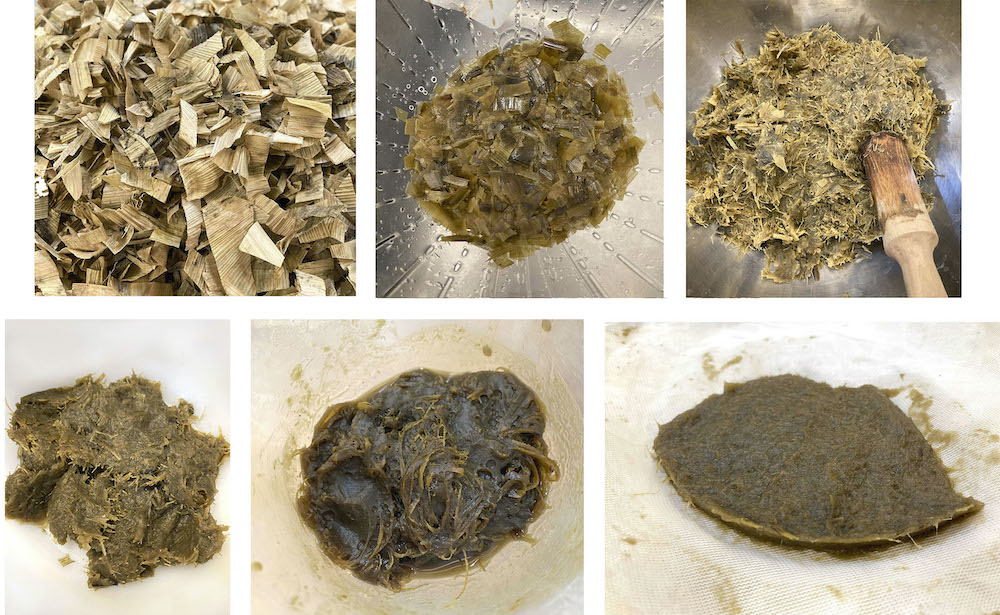
STEPS:
- Cut the dry husks in the grinder from the FabLab.
- Boil during 3h in a Sodium Carbonate solution.
- Strian the husks and clean with water to remove the Sodium Carbonate.
- Grinder with the morter the husks.
- Blend them until you get a kind of patée texture. The fibers of the husks are super strong, so it's hard for the blender to cut them and get a homogeneous mixture.
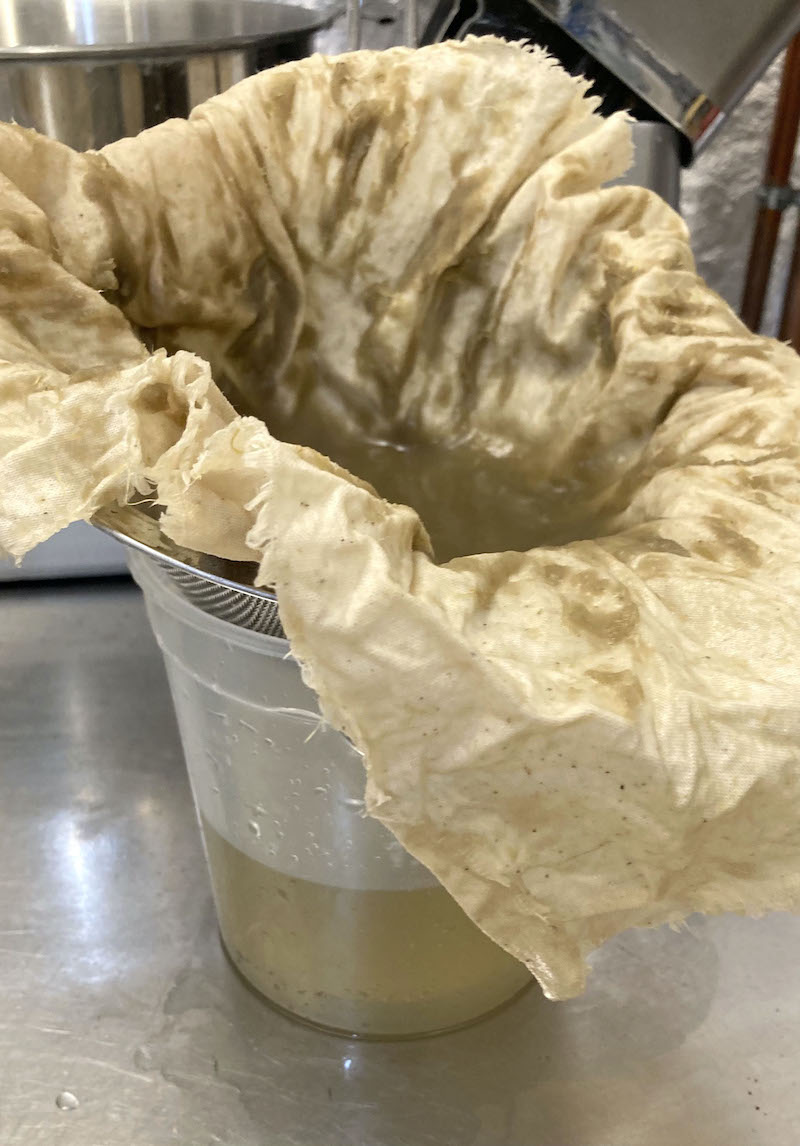
To try to take out the fibers to get a homogeneous material I continue the process by staining the patée mixture with fabric and pouring the patée in water to easily remove the fibers by hands or a drainer. It's a laborious process and it's not super precise.
Then we use a fabric filter to pour the liquid bath an comeback to a patée texture.
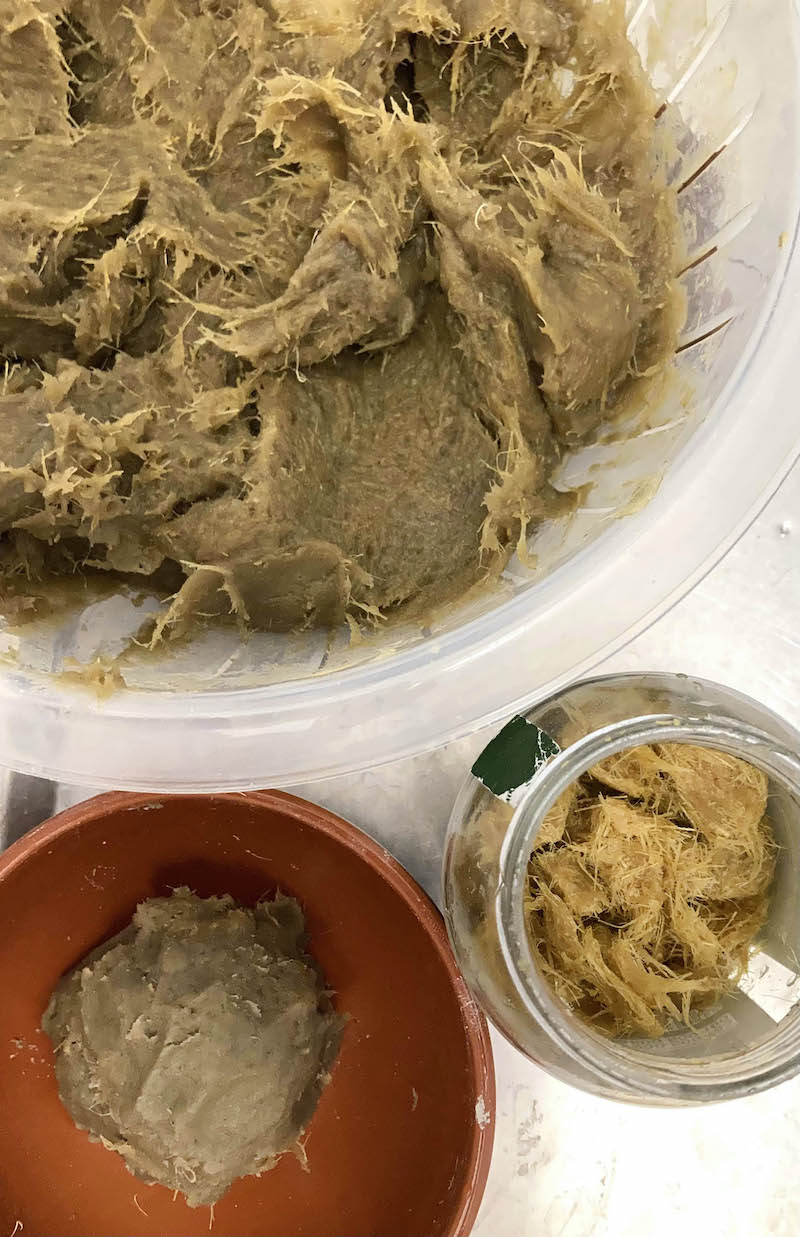
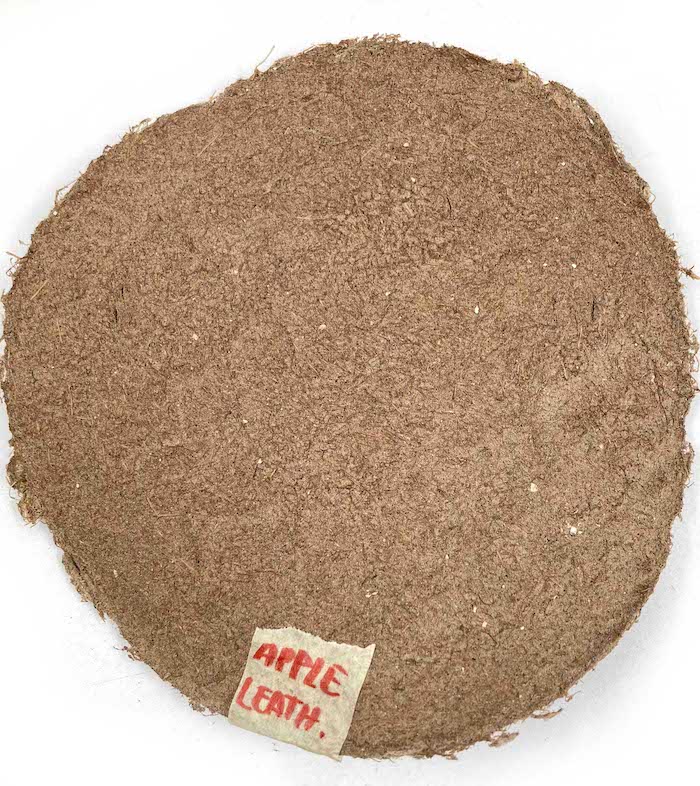
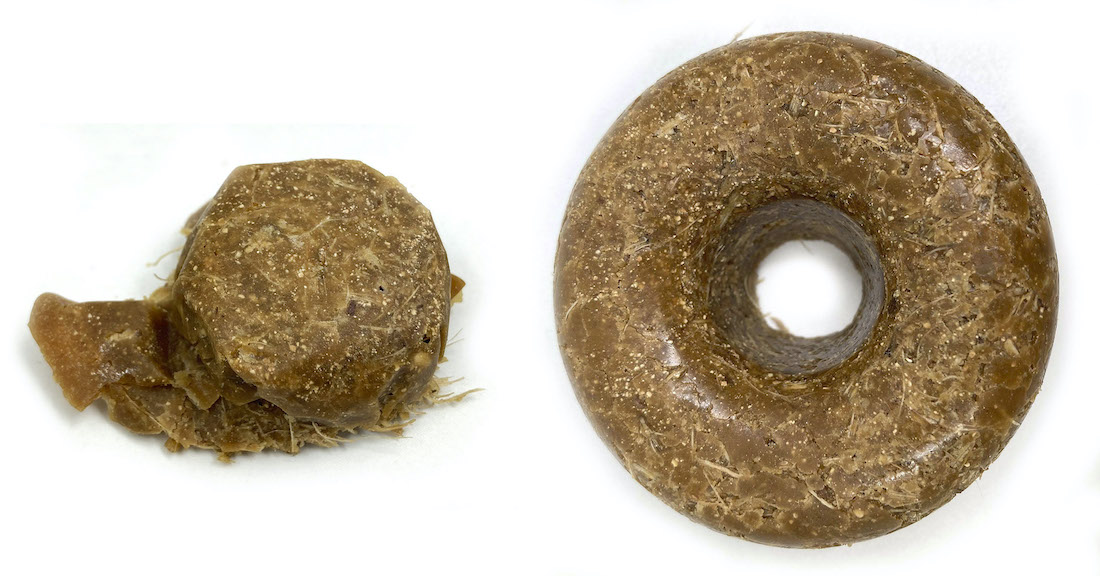
DMC
Definition: Bio-based material without water/ Dry material content. The weight of the material as a persantage of the original weight. Drying is carried out at 105ºC.
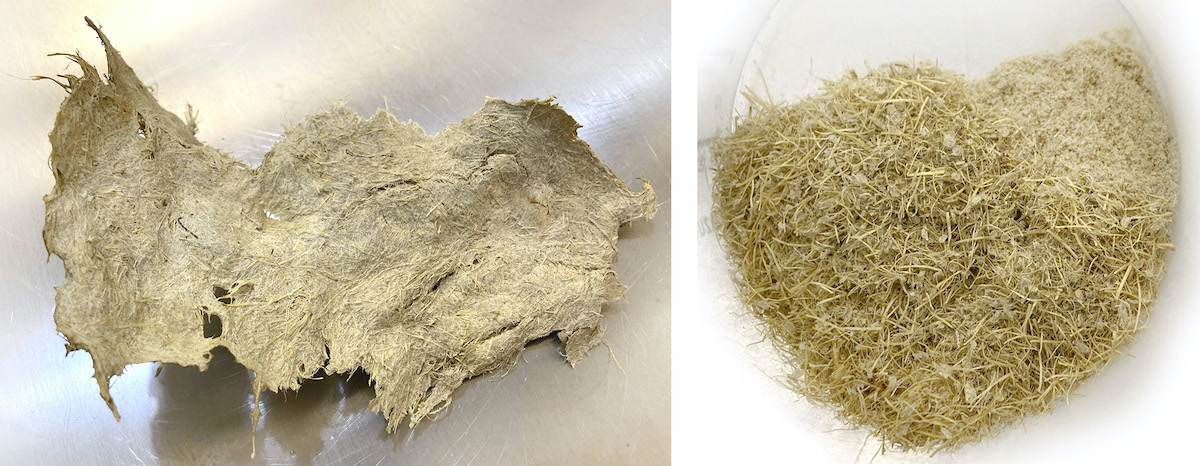
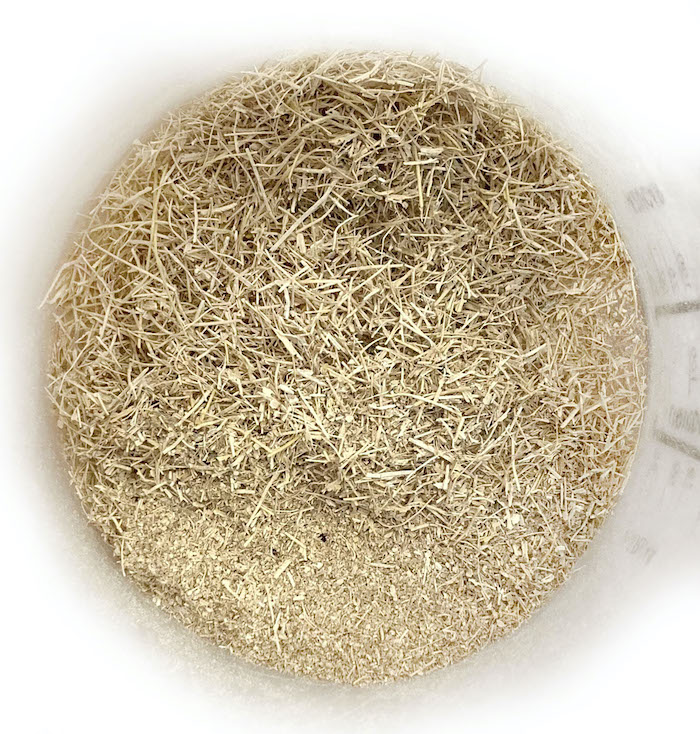
To get the DMC I put the MFC in the oven at 105ºC to evaporate the water. Then I blened first to get small pieces and finally to get the powder I used a micer ("picadora 1,2,3").
This process's also useful for the dry-cut husks to transform into a powder.
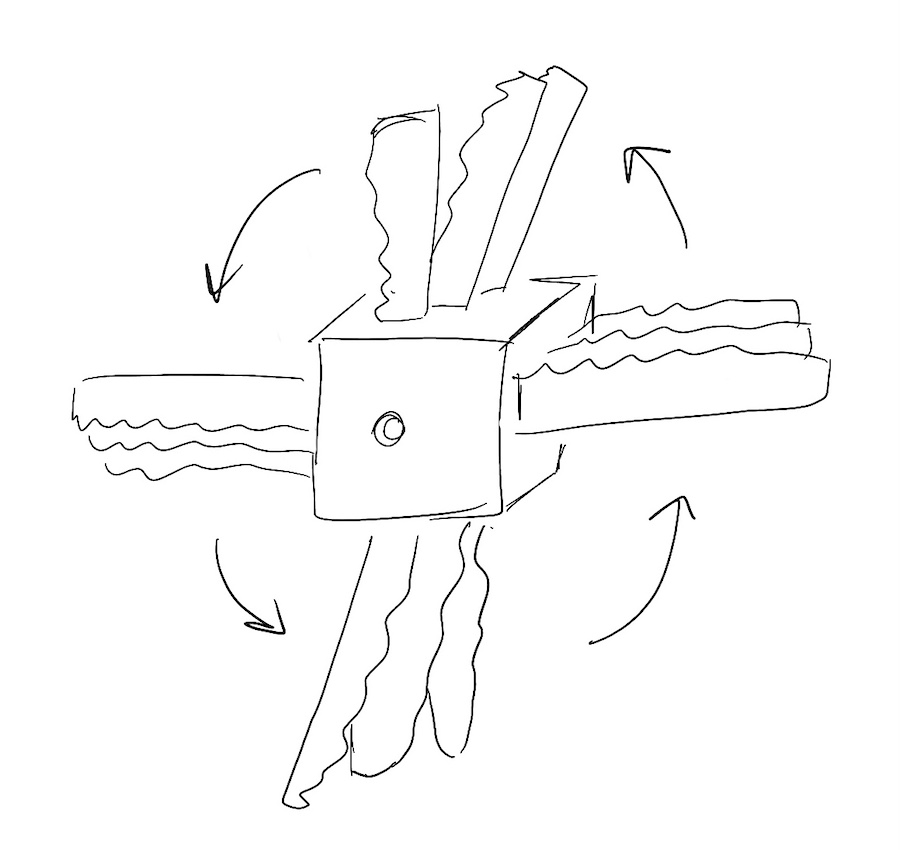
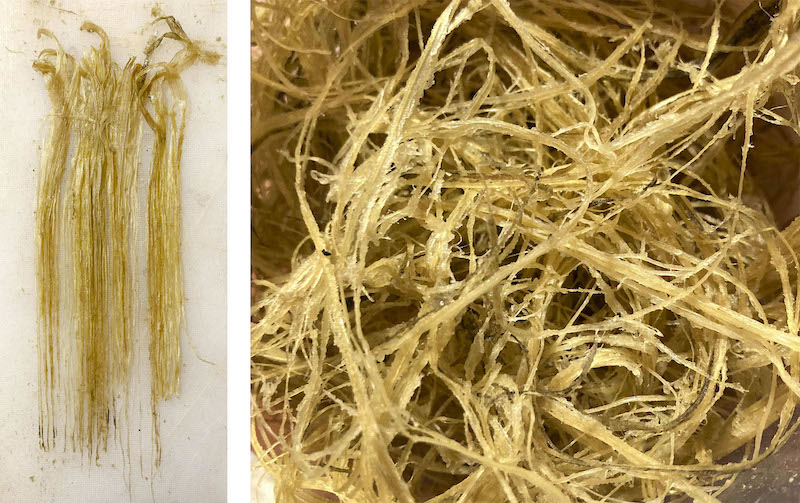
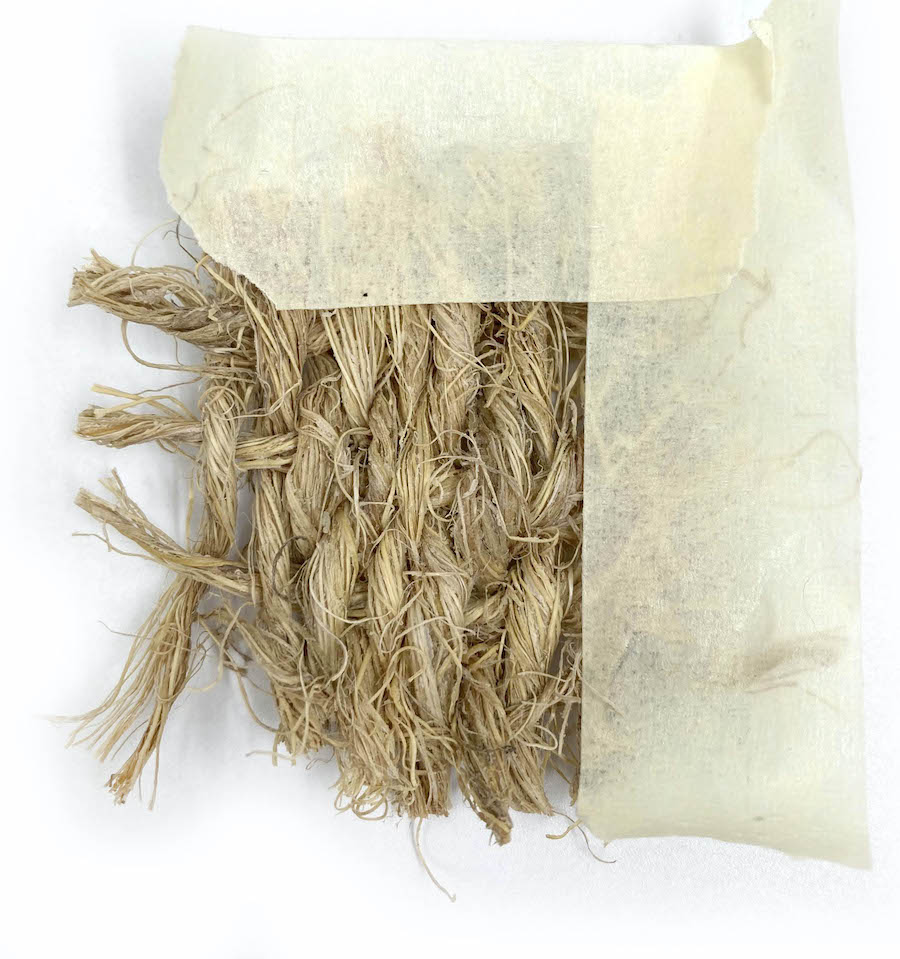
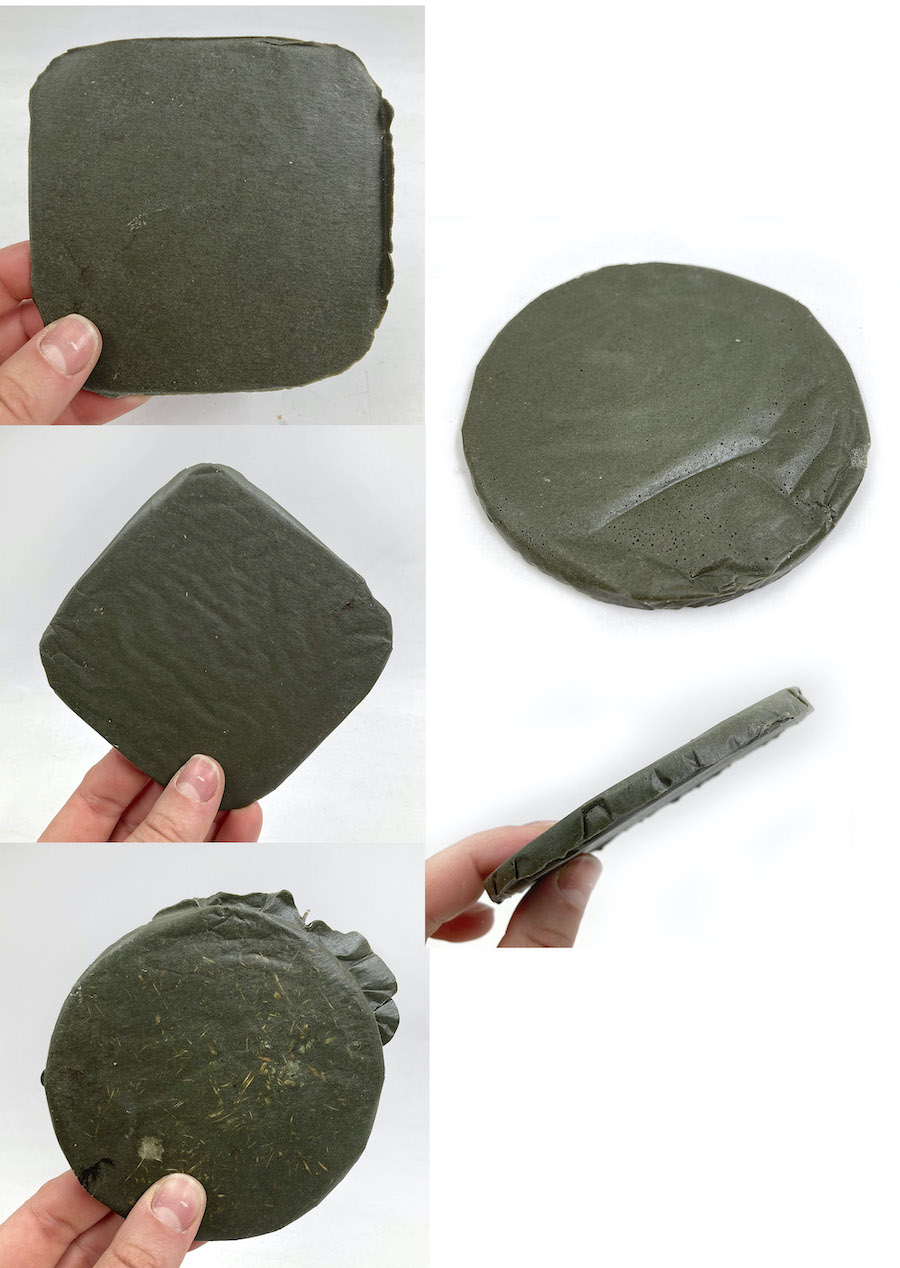
Take out long fibers
REFERENCES:
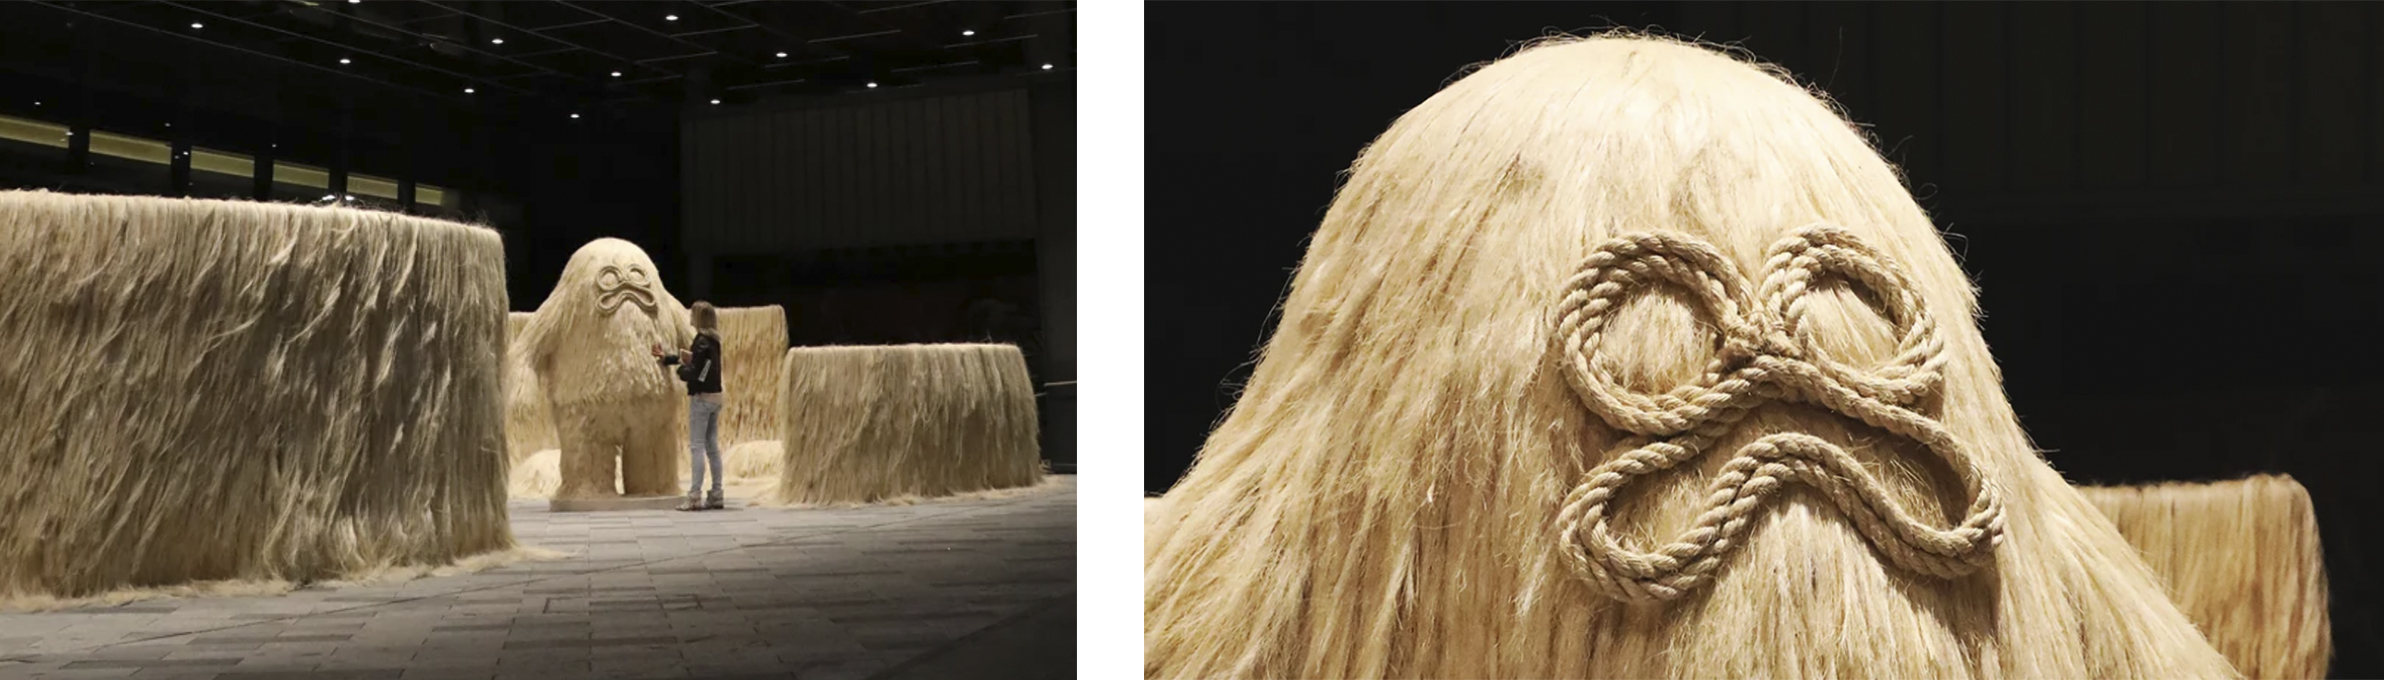
- Giant Hairy it's an artist that works with fibers creating textures and sculptures.
In that case, we don't need to cut the fibers. Just pour in the Sodium Carbonate for 3h with low heat to start the extraction process. After this process you could remove easily the pedicel by hand.
OPTION 1:
Brush the husk as it was wool.
So, time to brush the husks to just get the strong long fibers!
Meanwhile, I was working I ideate a sample tool to easily get the fibers in a faster way:
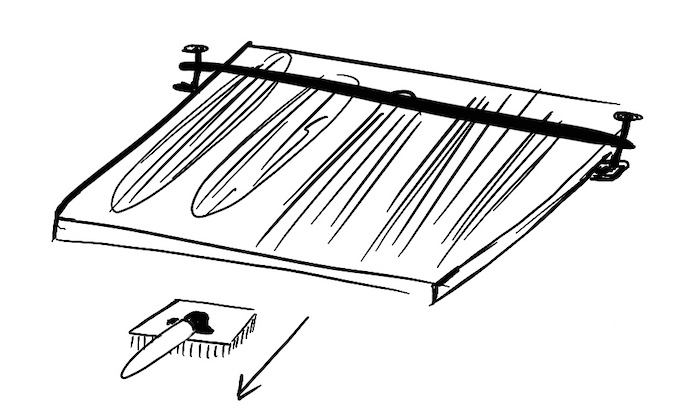
Workflow:
- Lay the husks on the wood table.
- Clip them with a horizontal piece of wood.
- Brush them.
- Unclipped.
- Remove the long fibers from the table to keep them.
- Clean the rest of the material from your brush.
- Repeat the process as much as you need to get enough fibers.
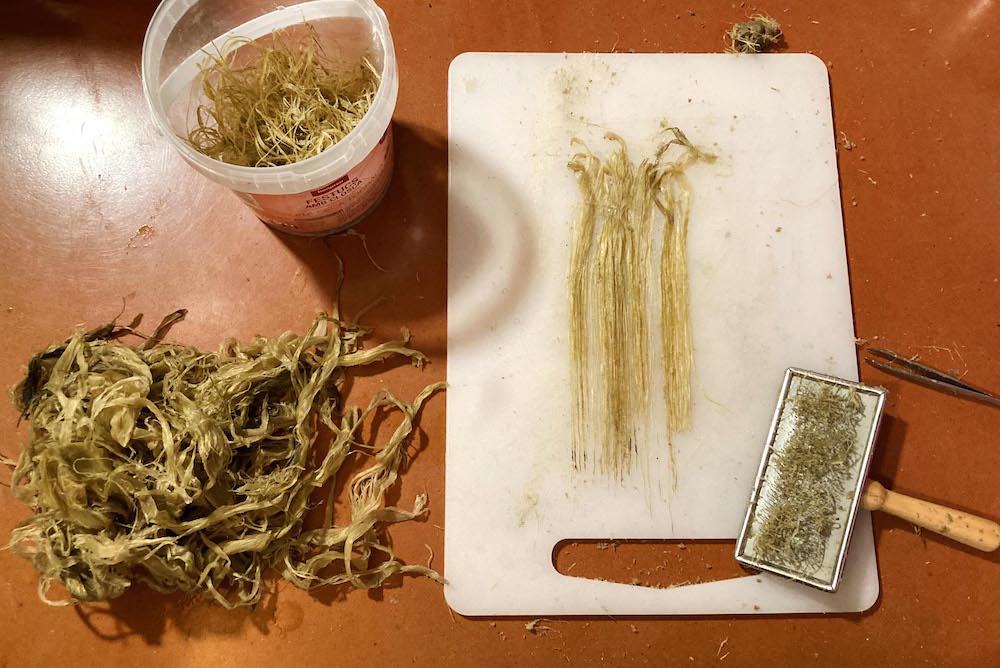
100g OF LONG FIBERS = 45g OF DRY HUSKS.
100g OF LONG FIBERS REQUIRED 30’ BRUSHING.
OPTION 2:
I also try to remove the fibers from the patée texture with the purée machine, but the fibers block the holes and I don't get any result... Completely a failure.
Make a Biomaterial
The propieties I am lookig for are:
- Waterproof.
- Similar texture/properties as leather.
- Get the shape of a mold
- Resistance
- Biobased
- Biocompostable
The most important:
- Use the proximately waste material: HUSKS
By recipes
Time to cook!👩🏻🍳
After I learn how can I process the husks to get an easy texture to work, I start some different recipes, proportions, and variations of them.
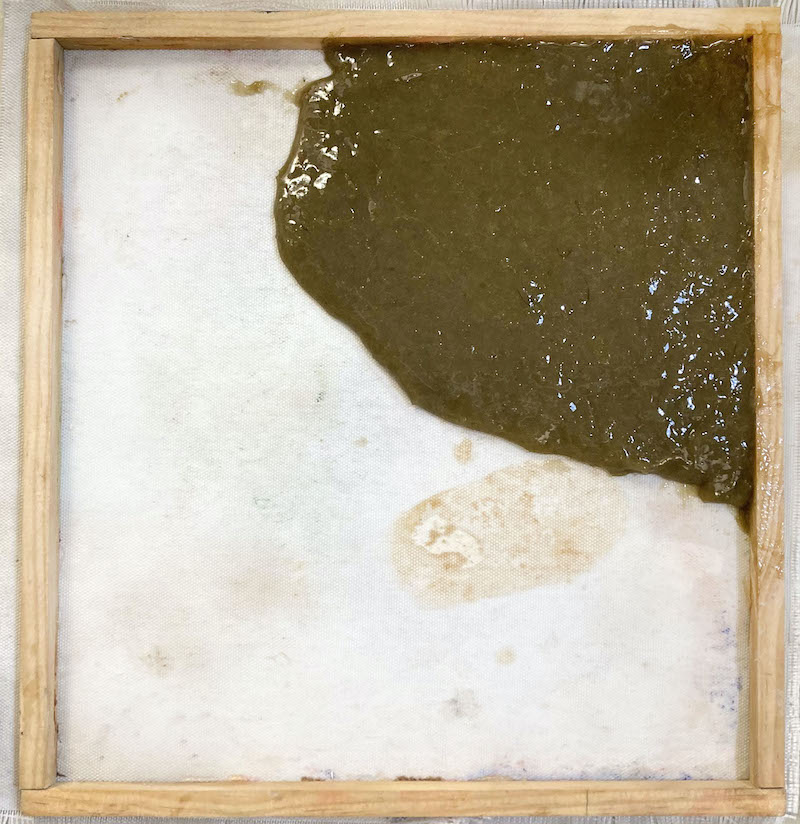
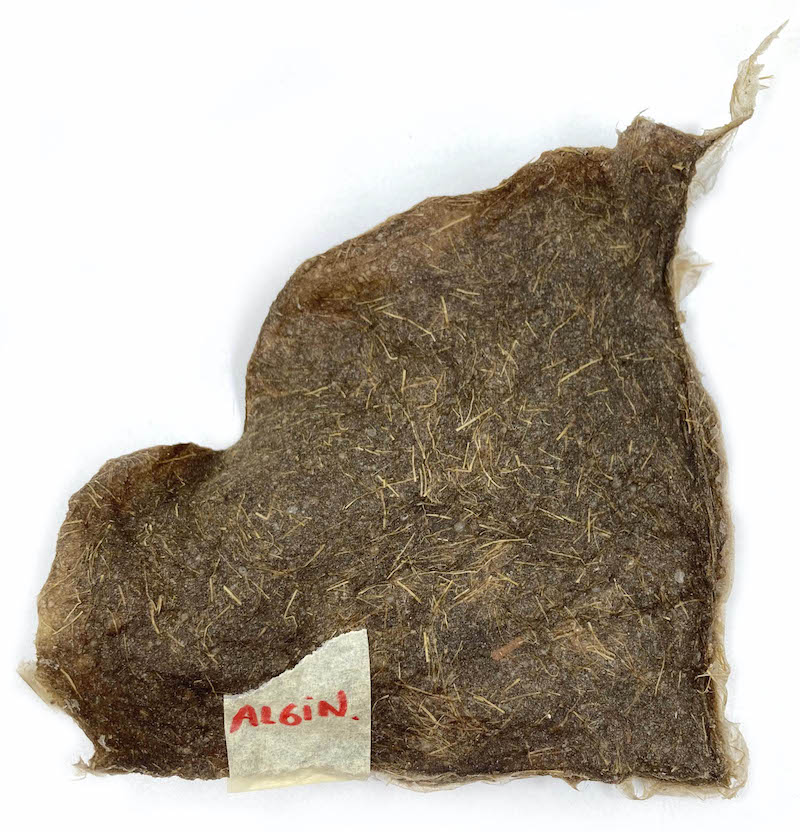
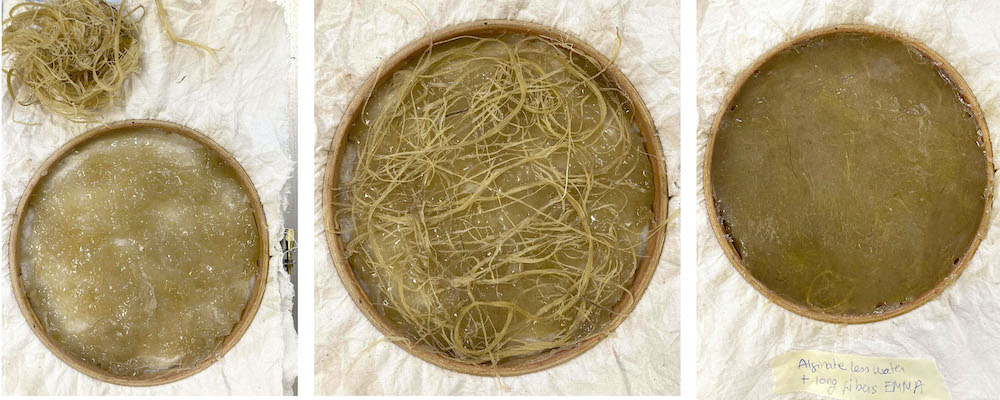
A. Alginate
REFERENCES:
- Artichoke leaves Bio-plastic Alginate
* 200 ml Mineral Water
* 4g Sodium Alginate
* 10 - 30g Glycerine (Will depends the flexibility)
* 30g Calcium chloride
* 300ml Water
* Measure the Sodium alginate and water and mix it.
* Measure the Calcium chloride and water. Mix and put in a spray bottle.
* Prepare the mold. For the Alginate recipe you should use a mold that the mass could breathe, such as a wood or fabric mold.
* Spray the mold surface with the solution in the spray bottle (prepared before)and clean it with towel paper.
* Put the Sodium alginate into your mold. Make a thickness layer cause it will shrink considerably.
* Spray above your material with CaCl2 solution and wait for it to dry.
* After a day, flip and spray the other side, repeat this process until it hardens. It could take some time... You also could use the dehydrated machine at a low temperature to dry faster.
VARIATIONS:
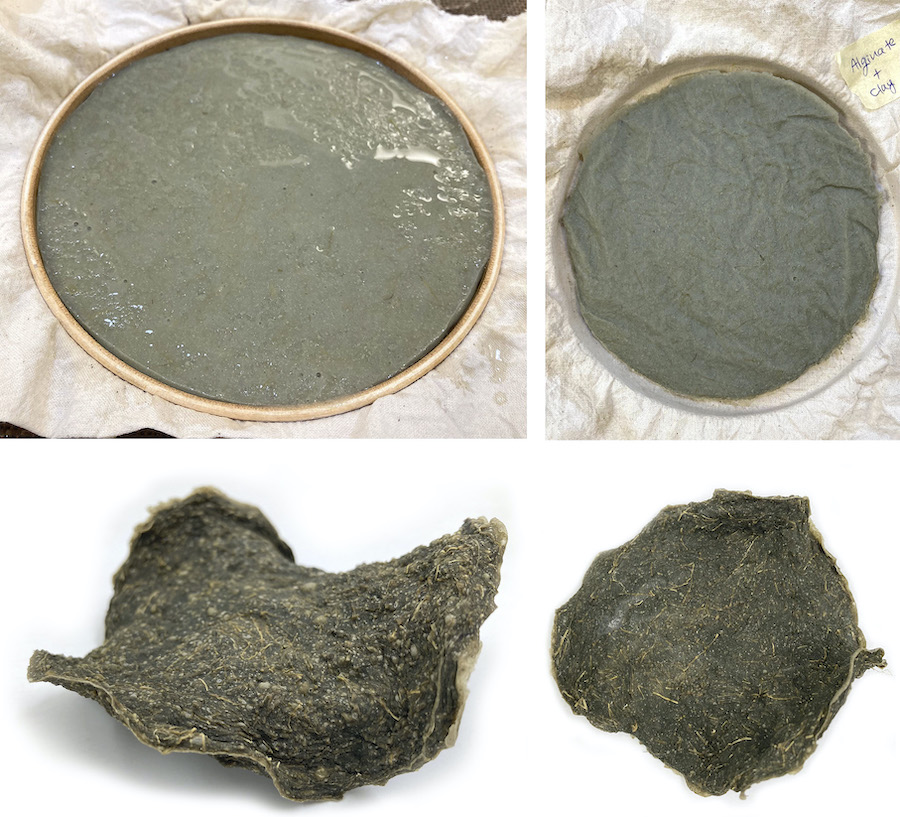
- Alginate + clay:
* 100ml Algiante mix
* 40g MDF (purée texture)
* 6g Green clay
- Alginate + oil olive:
* 108ml Algiante mix
* 30,6g MDF (purée texture)
* 3,3g Oil olive
- 0,2g Cinemonn
- Alginate with less water
One of the problems that the Algiante recipe has is that when it's drying the material shrinks a lot and you could control the final dimensions. So I try to reduce the water, so consequently, the sample will shrink less and accelerate the dry process.
* 400ml Water
* 30g Alginate
* 50ml Glycerin
For 100g of Alginate mixture I used 25g of husks patée.
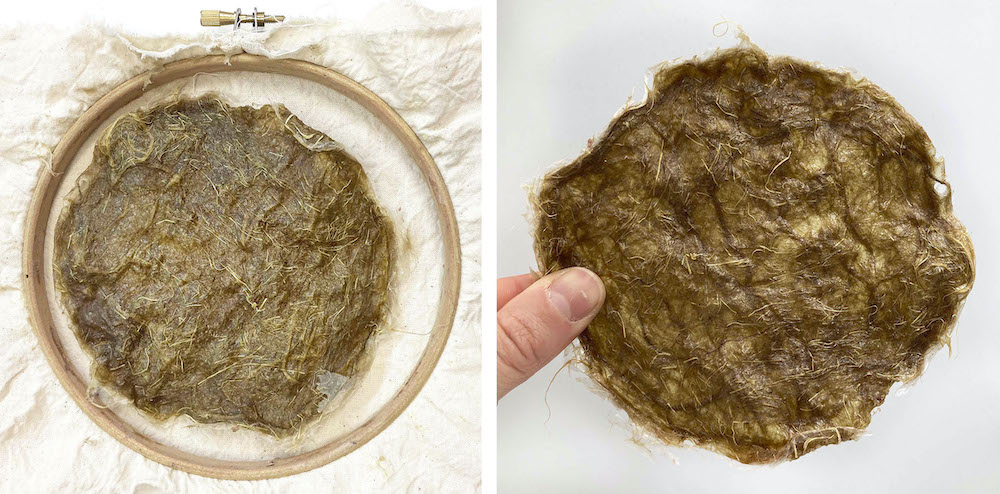
- Alginate + long fibers:
* 124g Alginate mix with less water
* 34g MDF
* 4g Long fibers
* Measure the ingredients and mix the Alginate and the MDF with the blender.
* Add the long fibers and mmix them with a spoon.
* Prepare the mold. For the Alginate recipe you should use a mold that the mass could breathe, such as a wood or fabric mold.
* Spray the mold surface with the solution in the spray bottle (prepared before)and clean it with towel paper.
* Pour the first layer into your mold. Add some long fibers and por the second layer of the Alginate mixture.
* Spray above your material with CaCl2 solution and wait for it to dry.
- Alginate + Casein:
The following formula it's a test to try to get a more rigid sample to get the shape and do not let shrink that much.
- ALGINATE MIX:
- 400ml Water
- 30g Alginate
- 50ml Glycerol
- CASEIN:
- 400ml Milk
- 100ml Vinegar
- 1g Cinemon
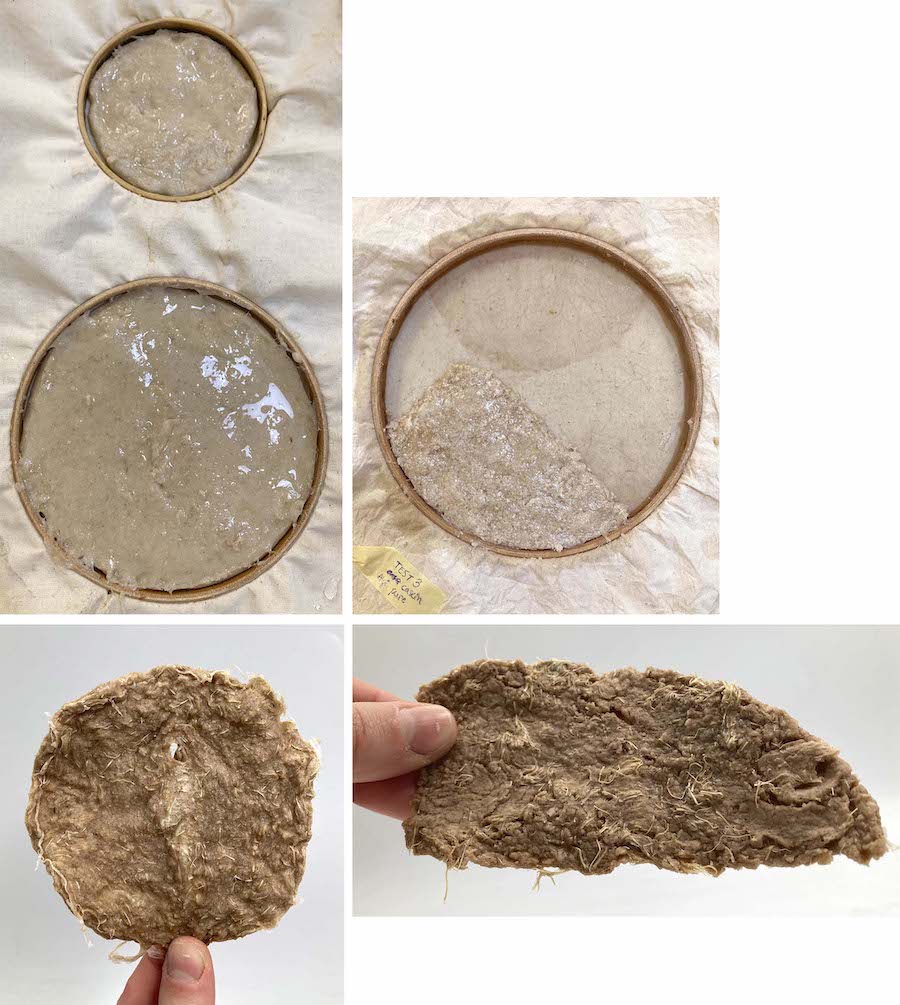
TEST 1:
Ingredients:
- 120g Alginate mix
- 25g Casein mix
- 30g Wet pulp
Observations:
It's a super rigid and fragile sample. Hard to pour in the mold because of the thick.
TEST 2:
Ingredients:
- 100g Alginate mix
- 5g Casein mix
- 10g Wet pulp
- Some long fibers to add on the top
Observations:
After I spray the thin layer sample with Calcium Clhoride I lay the sample on the top of the mold in order to get the shape.
Great result!
Check the result of the sample in the Molding section.
TEST 3:
Ingredients:
- 30g Alginate mix
- 29,2g Casein mix
- 20,5g Wet pulp
Observations:
It should be a super strong and waterproof sample, but it's super hard to dry it...
TEXTURES:
Alginate with pulp de Emma
Testing the water resistance of an Alginate sample:
After the test, the sample gets dry after some days, but it turns more rigid than it used to be.
- CONNECTIONS:
Unfortunately, the 2 Alginate pieces were when the connection dry separated and is super easy to remove the top layer.
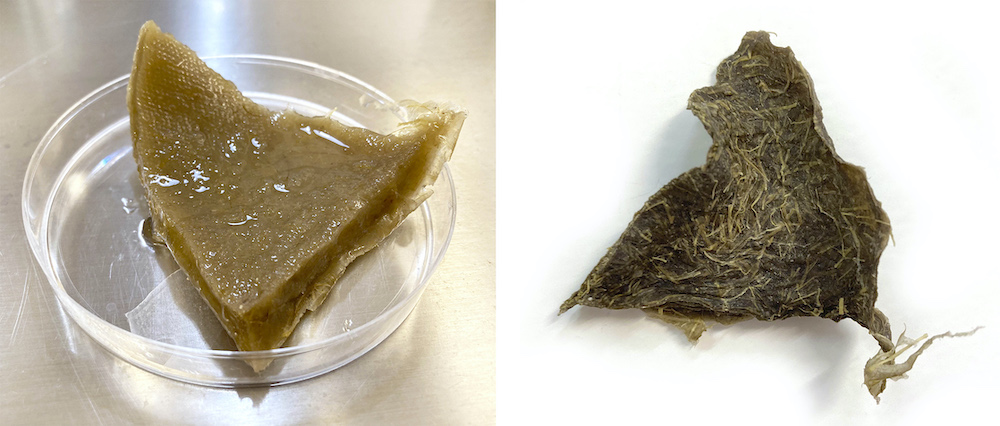
B. Bioleather
* 648g Apple skin
* 23g Carnauba wax
* 1 + 1/4 Lemons
* 1 + 1/4 Tea spoon of cinnamon
* Some water to get a pate mixture (optional)
* Digital scale
* Cooking stove
* Pot
* Mold with fabric
* Spoon
* Blender
* Oven 45ºC
* Take out the apple peels from the freeze.
* Measure the peel apple and calculate the rest of the ingredients you will need.
* Defrost the apples in a pot slowly.
* Add the cinnamon, the lemon juice and the carnauba wax.
* Simmer the mix during 20-30'. Do not let them boil. If it need it, you could add some water.
* Blend until it take a pate texture.
* Pour the mix in the mold.
* Smooth the surface with a spatula.
* Dry in the electric oven (45ºC) during 2 hours.
* Let it dry in the dehydrate machine (35ºC) for 6h to accelerate the process. Wait until it's dry, could take some time.
VARIATIONS:
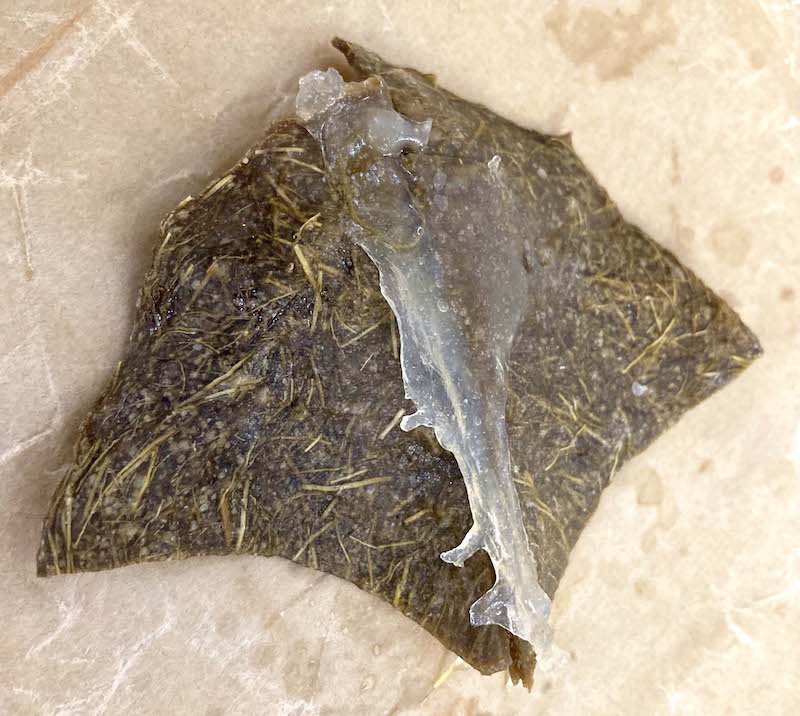
ALGINATE: * 300ml Water * 6g Sodium Alginate mix * 15g Glycerol SPRAY SOLUTION: * 30g Calcium Chloride * 300ml Water APPLE LEATHER: * 160g MFC * 5,6g Carnauba wax * 1/4 lemon juice * 1/3 spoon of cinnamon * 25ml Water
* Digital scale
* Pot
- Mold well-ventilated (could be fabric)
- Electric stove
- Blender
- Cook the Alginate recipe. Mix the ingredients with the blender and let some time to take out the bubbles.
- Meanwhile, prepare the apple leather recipe. Pour and mix all the ingredients (not the water) into the pot.
- Let the mixture heat up in the electric stove to melt the wax. If it’s required add some water
- Mesure the final weight of the apple leather recipe to calculate the amount of Alginate mix you need.
- Add 40% of the Alginate mix to the Apple leather mixture. Blend it.
- Prepare the mold. Spray with Calcium Chloride on the bottom.
- Pour the mix into the mold and spray the top of the sample.
- Let it dry.
- 200ml Water
- 4g CMC
- APPLE LEATHER:
- 150g MFC
- 5,3g Carnauba wax
- 1/4 Lemon juice
- 1/2 Cinnamon spoon
- 1g Alginate mixture
- Calcium Chloride mix to cast
* Digital scale
* Pot
- Mold well-ventilated (could be fabric)
- Electric stove
- Blender
- Mix the 200ml of water and the CMC with a blender.
- Let settle to take out the bubbles.
- Meanwhile, prepare the apple leather mix. It has to be a purée texture, so if it’s required add some water while it’s cooking.
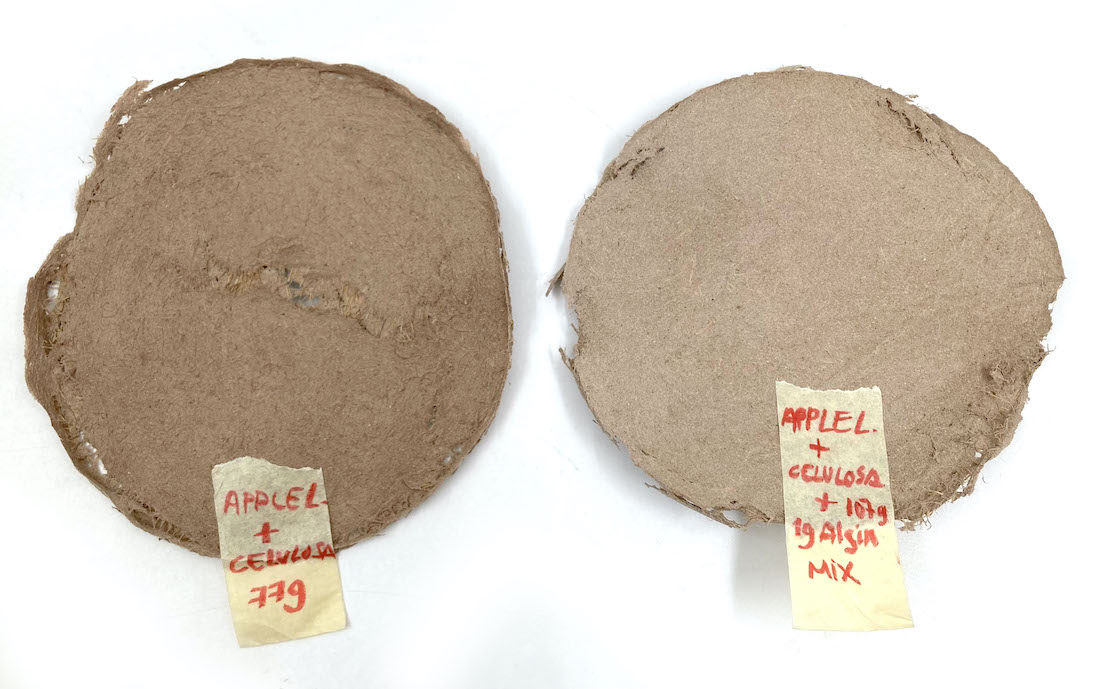
- Mix the apple leather (144g) mass and the CMC mixture (57g). Total 200g of Apple leather and cellulose.
- Pour some mix into the mold and let it dry. In my case, I pour 77g.
- Make the other sample with 1% of the Alginate mix.
- Pour in a pot 107g of Apple leather and cellulose mixture in and add 1g of Alginate. Blend it.
- Spray the mold with Calcium Chloride, pour the mass, and spray on top of the material.
- Let it dry.
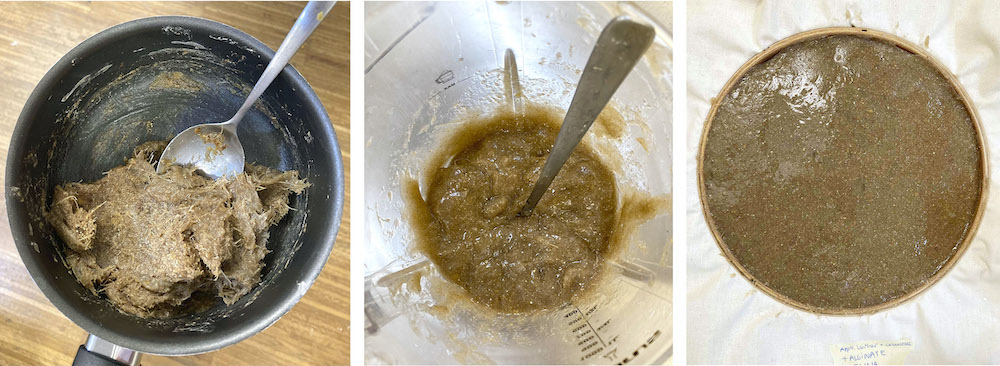
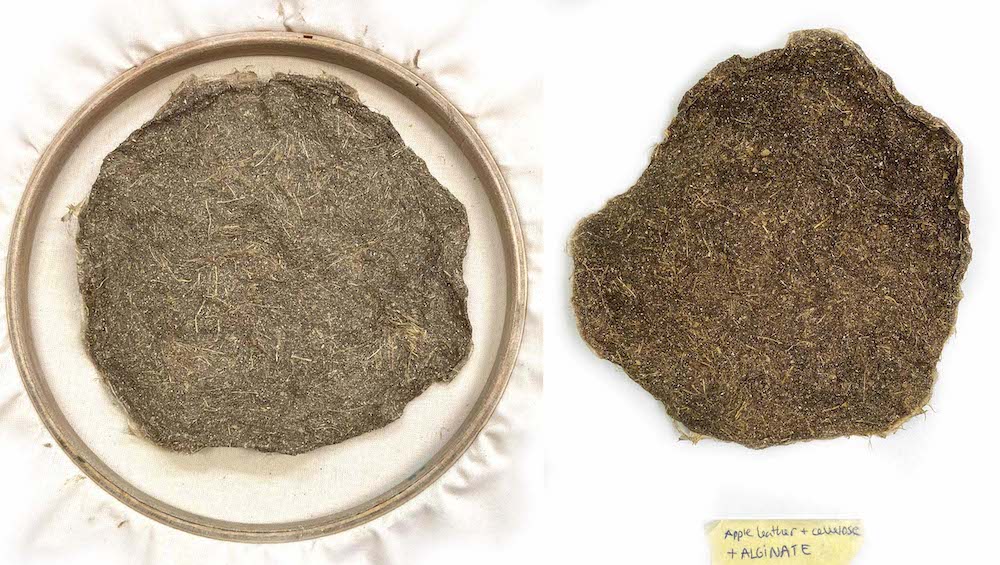
* Cellulouse mix
- Apple leather biolether mix
- Alginate mix with less water
* Prepare the celulosa mix: 100ml Water mixed with 2g of CMC solution (200ml water + 4gCMC made the day before).
* Prepare the Apple leather reciepe: 150g purée + 5,3g Carnaub wax + 1/4 juice lemon or one big spoon of vinegar + 1/2 spoon of Cinnamon.
* Mix 40% of cellulose mix in the apple leather mixture. In that case, we get 146g of Apple bio leather mix, so we pour 58,4g of cellulose mix.
* Add 16% Alginate with less water mix. In that case we have 204,4g of Apple and cellulouse so, we pour 133g of Alginate mix.
* Pour in to the mold with Calcium Cloride solution on the buttom and top layers. Let it dry.
Take a look to know more about the textures, flexibility, and resistance:
Bioleather with husk texture de Emma
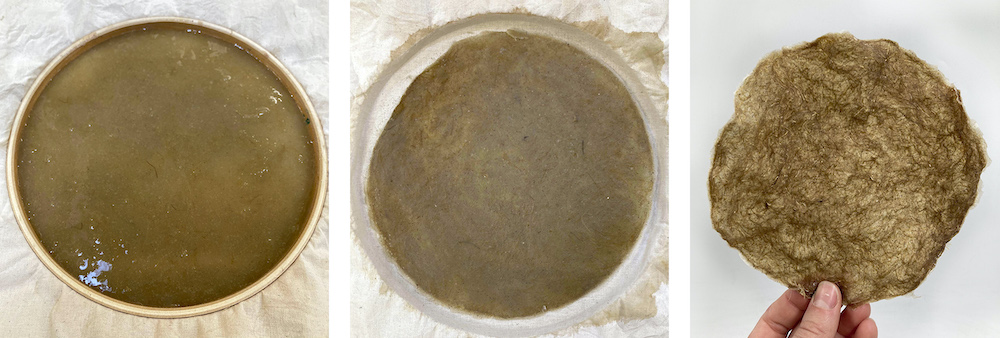
C. Paper methods
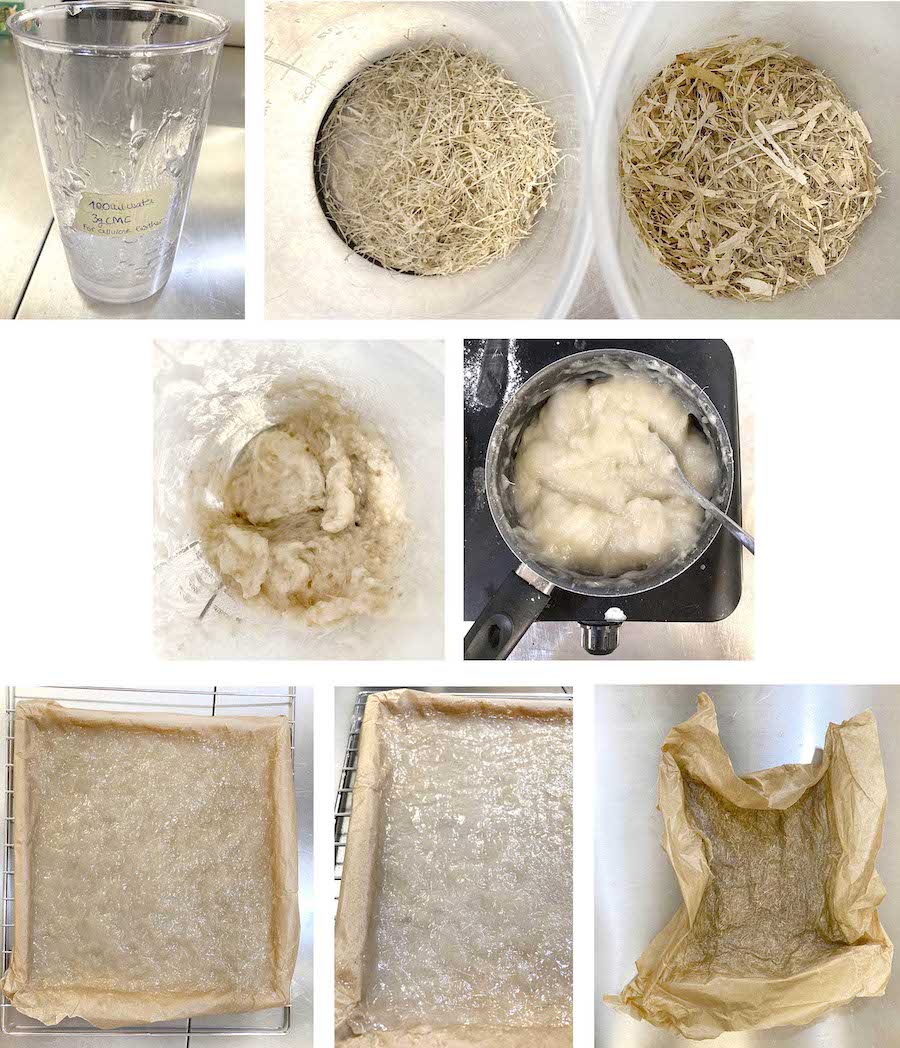
REFERENCES:
* 500g MFC (Patée texture)
* 5l Warm water
* Digital scale
* Big plastic box
* Frame with mesh
* 2 or more pieces of fabric to absorb water
* Pressure machine (The table dimensions of the FabLab are 39x39 cm)
* Take out the apple peels from the freeze.
- Measure the ingredients. Make sure the water you need for the deckle and the box is.
- Pour the water and the MFC into the plastic box. Mix with your hand.
- Place the deckle underwater and take it out.
- Drain the water. The MFC is molded in the frame. Press with your hand to help to remove the excess water.
- Flip the sample in the fabric and place another fabric on it to take out the water.
- Cover the sample with some fabric.
- Let it under the pressure machine at 450’ without temperature.
- Let it dry at an ambient temperature or with a fan (be careful not to let it blend while drying. You could repeat the machine pressure process).
- Optional: You could mix some long fibers. More long fibers more fragile.
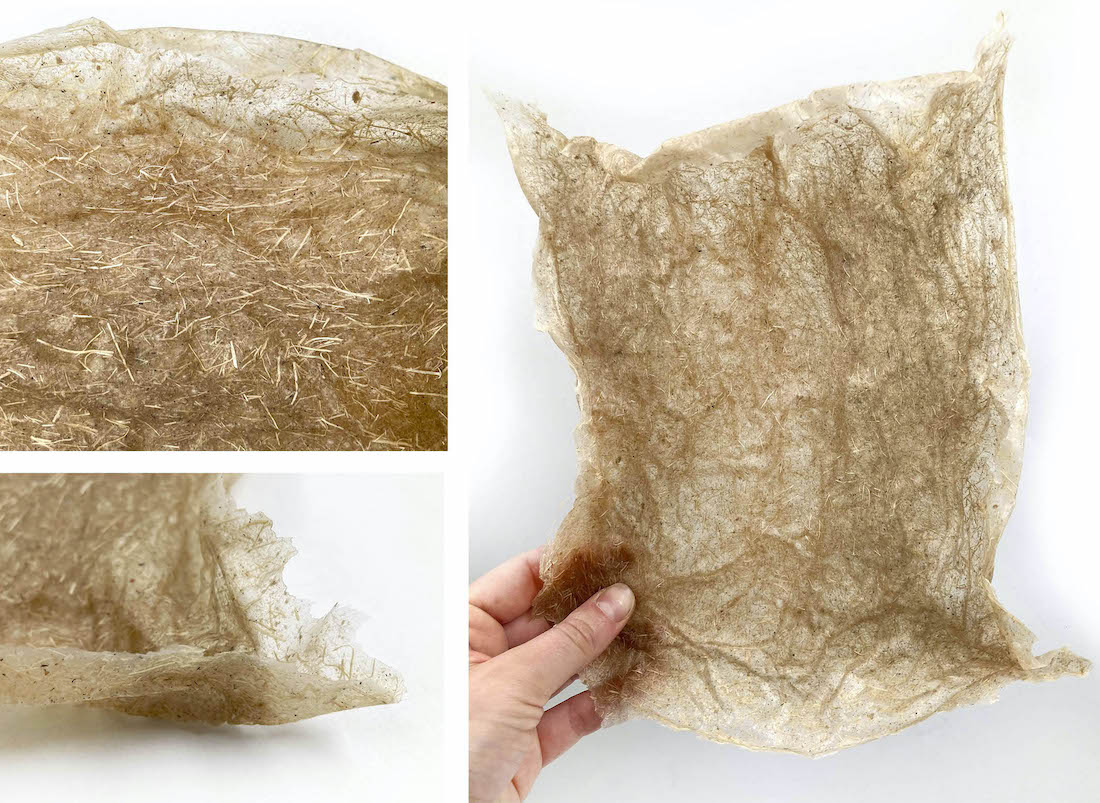
TEST 1:
The sandwich paper with some fibers between doesn't work cause when it's dry the samples detach.
TEST 2:
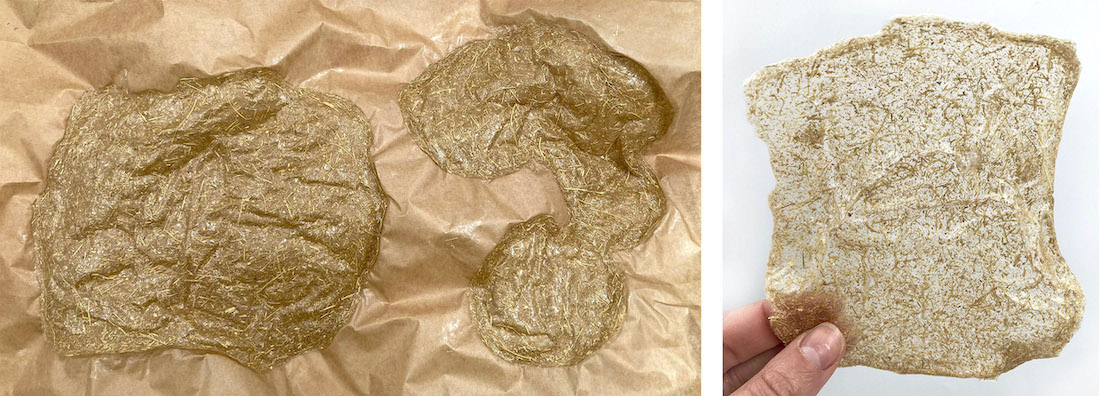
For the second tests I made a DIN A4 dimensions wood frame with fabric mesh.
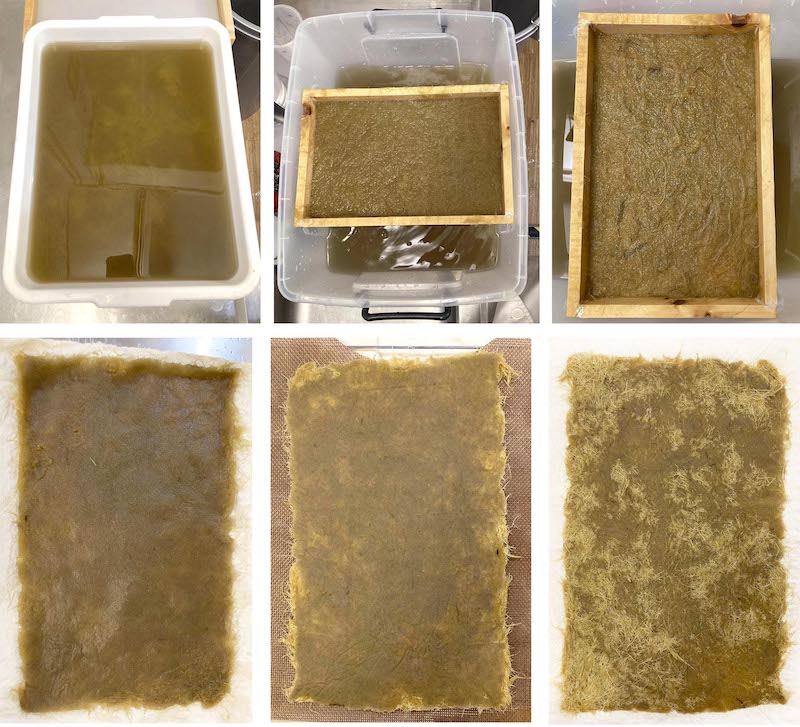
Comparison between wet and dry paper dimensions:
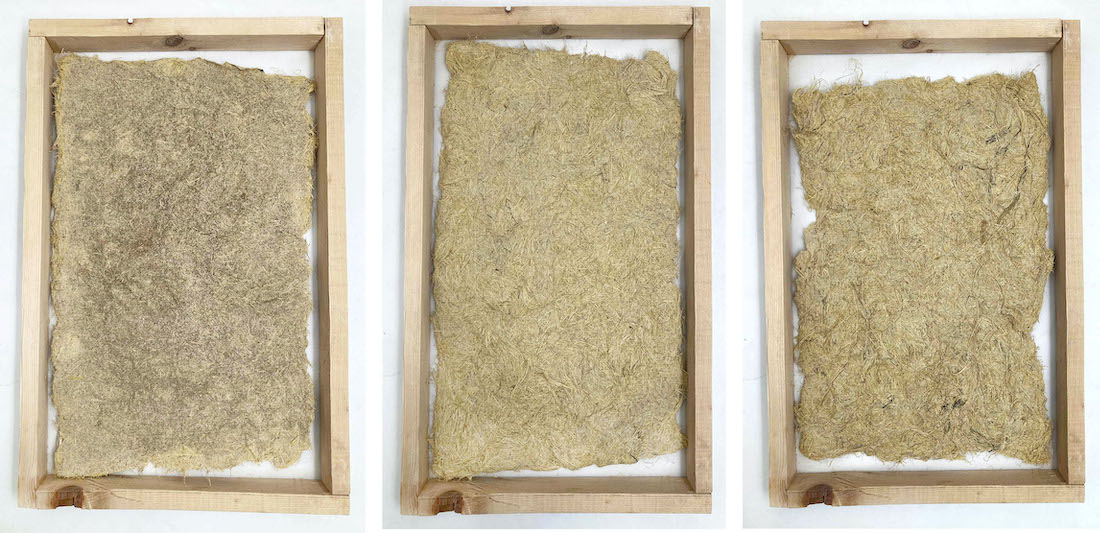
For these two samples of paper, I used 702g MFC mixed in the hot water.
Paper from pulp corn cob husk de Emma
- LASER CUT PAPER HUSKS:
| Settings | Engrave | Cut |
|---|---|---|
| Power | 80 | 10 |
| Speed | 80 | 1 |
| Hz | 1000 | 1000 |
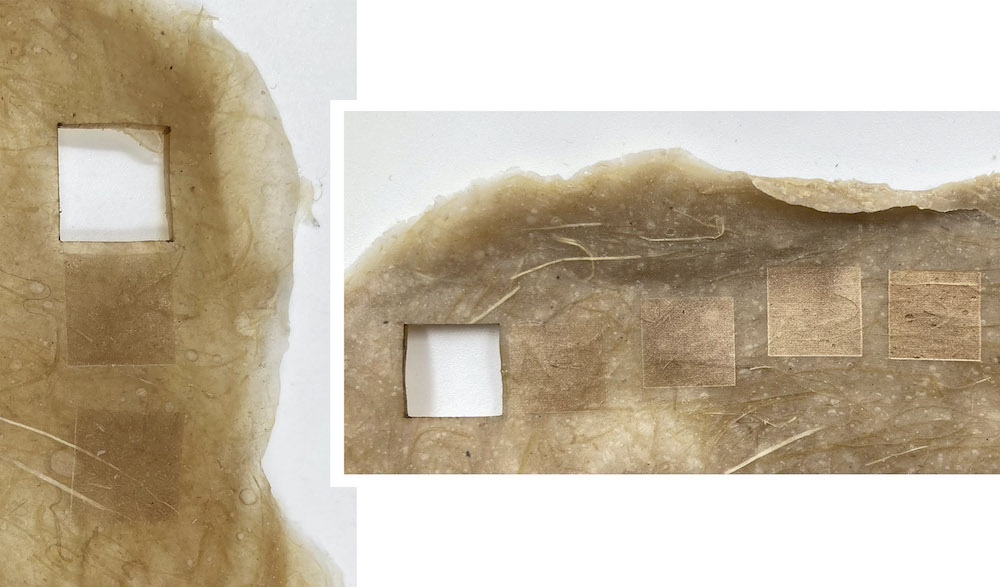
In the Rhino file we need to convert the lines of the logo to a path to be able to engrave the inside of the draw. So, we will use the heath cmd to fill the inside with color and let the laser machine read and engrave it.
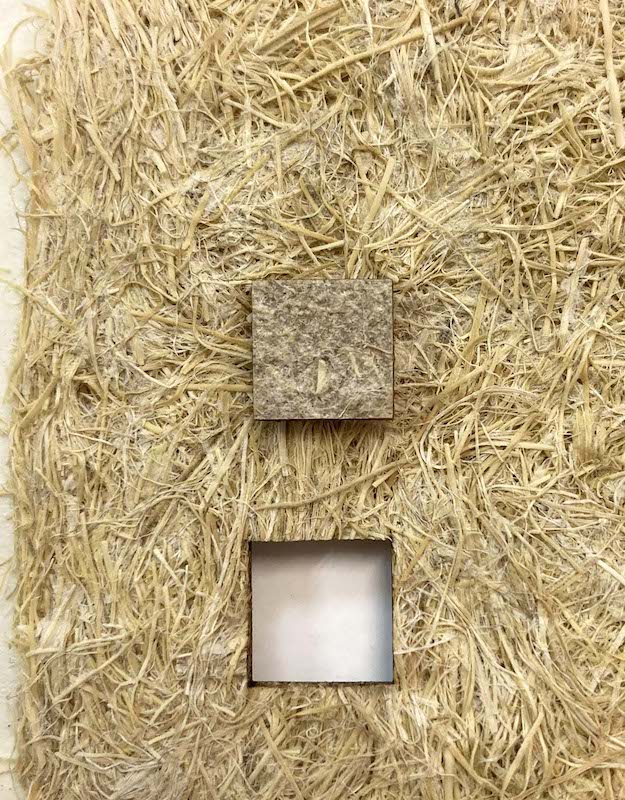
Process of engraving the logo on the top:
Laser cut paper husks de Emma
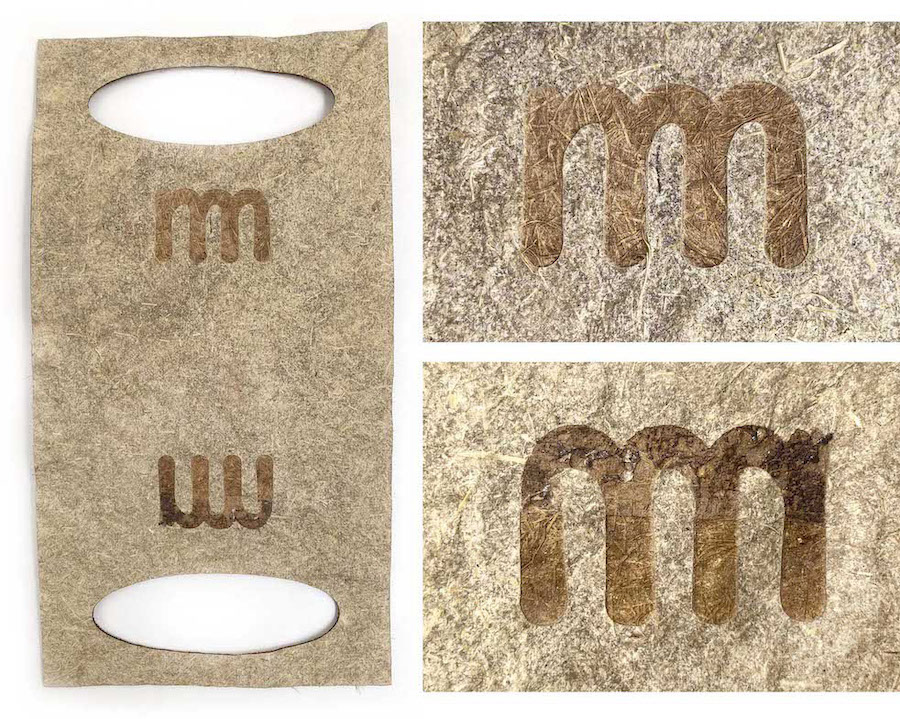
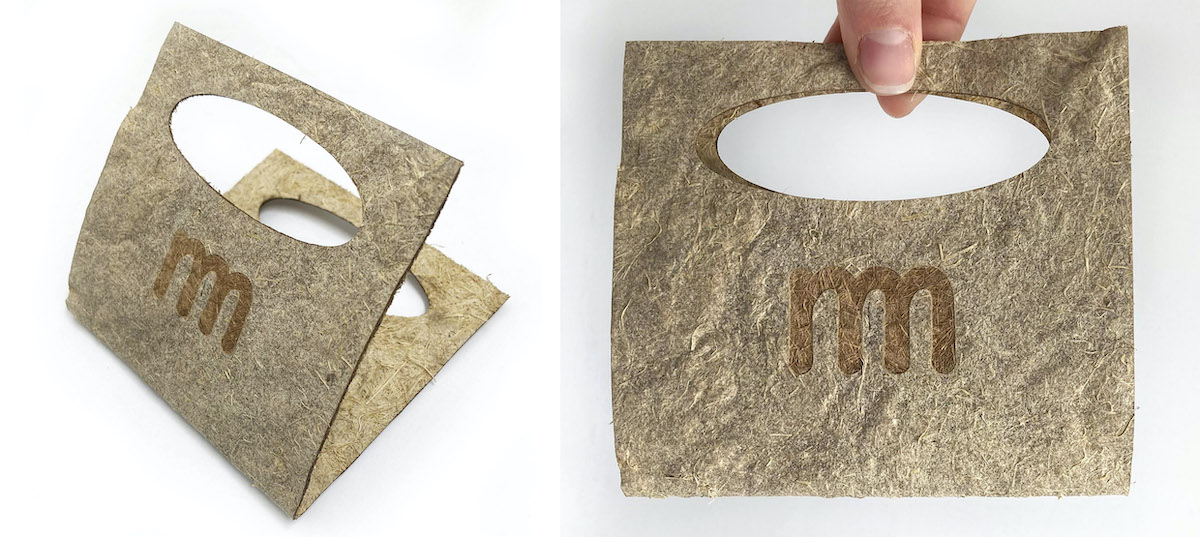
Possible uses:
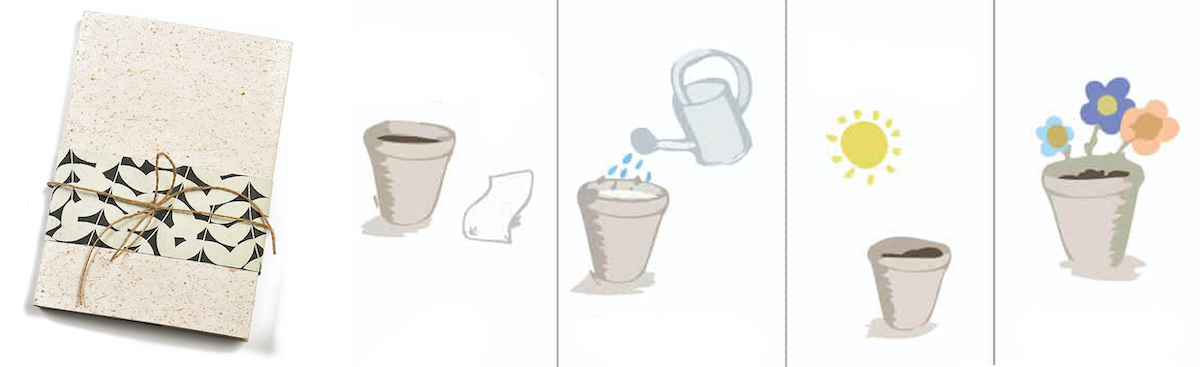
I could use the Paper husk with a waterproof coating for the inside part of the handbag and create some pockets and engrave the logo of the brand. Moreover, it has good properties for the final packaging of the bag.
D. Cellulose leather
REFERENCES:
- 564ml Water
- 5g Dry pulp
- 20g CMC
- 30ml CMC 3% Solved in water
- 35ml Glycerol (Glicerina)
- 20g Corn strach (Maizena)
- 5ml Vinegar
* Digital scale
* Pot
* Mold
* Spoon
* Blender
* Oven
- Baking paper
* Prepare 100ml water of 3% CMC:
-
ATTENTION: The day before you want to cast the mix you will need to prepare the CMC solution.
-
Add 3g CMC in 100 ml cold water.
- Mix with the bender.
- Let the mixture stand over the night. In the morning it has to be a viscose mix. For this recipe, we will use 30ml, so the rest we will store it.
- Measure the water in a bowl.
- Shred the dry pulp into small pieces and add to water. Let it a few minutes. Mix with the blender.
- Move the mixture to a pan.
- Add the CMC solution, glycerol, cornstarch a vinegar one by one while you are mixing with the blender, add the water slowly while you are mixing all of them. Make sure there are not any lumps.
- Heat slowly, stirring constantly until bubbles start to form. It’s a solid mass.
- Spread the solution as a 4-6mm layer in a mold or a tray, and cover with baking paper to remove when it’s dry.
- Dry in the oven at 50-60ºC overnight.
Observations:
You could color the mixture using liquid dyes by mixing the color with glycerol first. To be waterproof we will need a coating. I test with Carnauba wax and olive oil mix in the first test but it’s not working.
VARIATIONS:
TEST 2:
Mold size: 25,5 x 27,5cm
Final sample size: 18 x 25,5cm
The final sample it’s shrinking a little while it’s drying. It’s super thin as leather, resistant, flexible, and translucid.
The following reciepe that I tested is adding 5% Talco in order to create a more water resistance material:
* 100ml Water
* 76g Wet pulp
* 30ml CMC 3% solution in water
- 35ml Glycerin
- 20g Corn starch
- 5ml Vinegar
- 11,92g Talco
Observations:
After letting the sample for 7h in the oven (50ºC) I let it dry in a temperature room. The sample does not have waterproof resistance however, the Talco helps to balance the texture. As a consequence, I get a sample that has similar characteristics and texture to leather!!
Super happy with the result :)
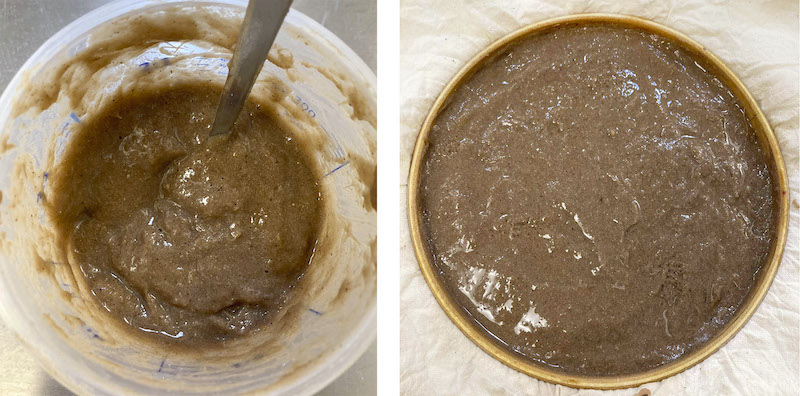
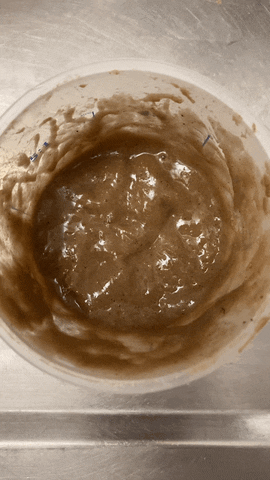
CELULOUSE LEATHER 50% WATER + 50% ALCOHOL
* 50ml Water
- 50ml Alcohol
- 76g Wet pulp
- 30ml CMC 3% solution in water
- 35ml Glycerin
- 20g Corn starch
- 5ml Vinegar
- 11,92g Talco
This formula is tested to get a faster dry process.
However, there isn't a huge difference in drying time, but the final sample is similar to the one we are using 100% of water. Additionally, the alcohol smell doesn't remain in it when it's completely dried.
The next formula is cooked to test the possible resistance of water, however, it was a failure because the wax doesn't mix properly with the rest of the mass.
* 50ml Water
- 50ml Alchol
- 50g Wet pulp
- 30ml CMC 3% solution in water
- 35ml Glycerin
- 20g Corn Strach
- 5ml Vinegar
- 5% Talco (11,26g)
- 10% Clay (22,53g)
- 10% Carnauba Wax (22,53g)
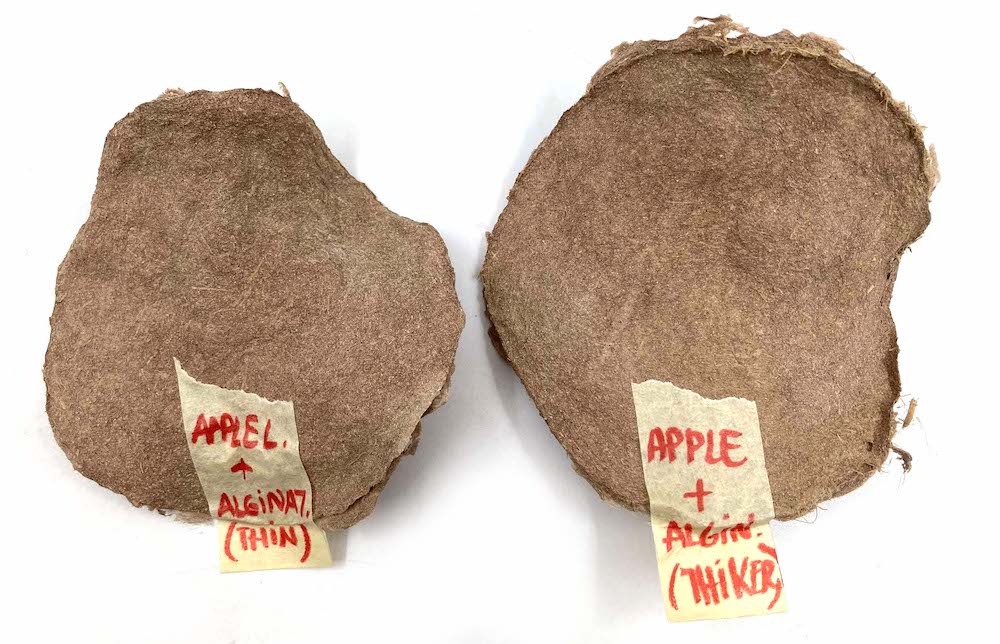
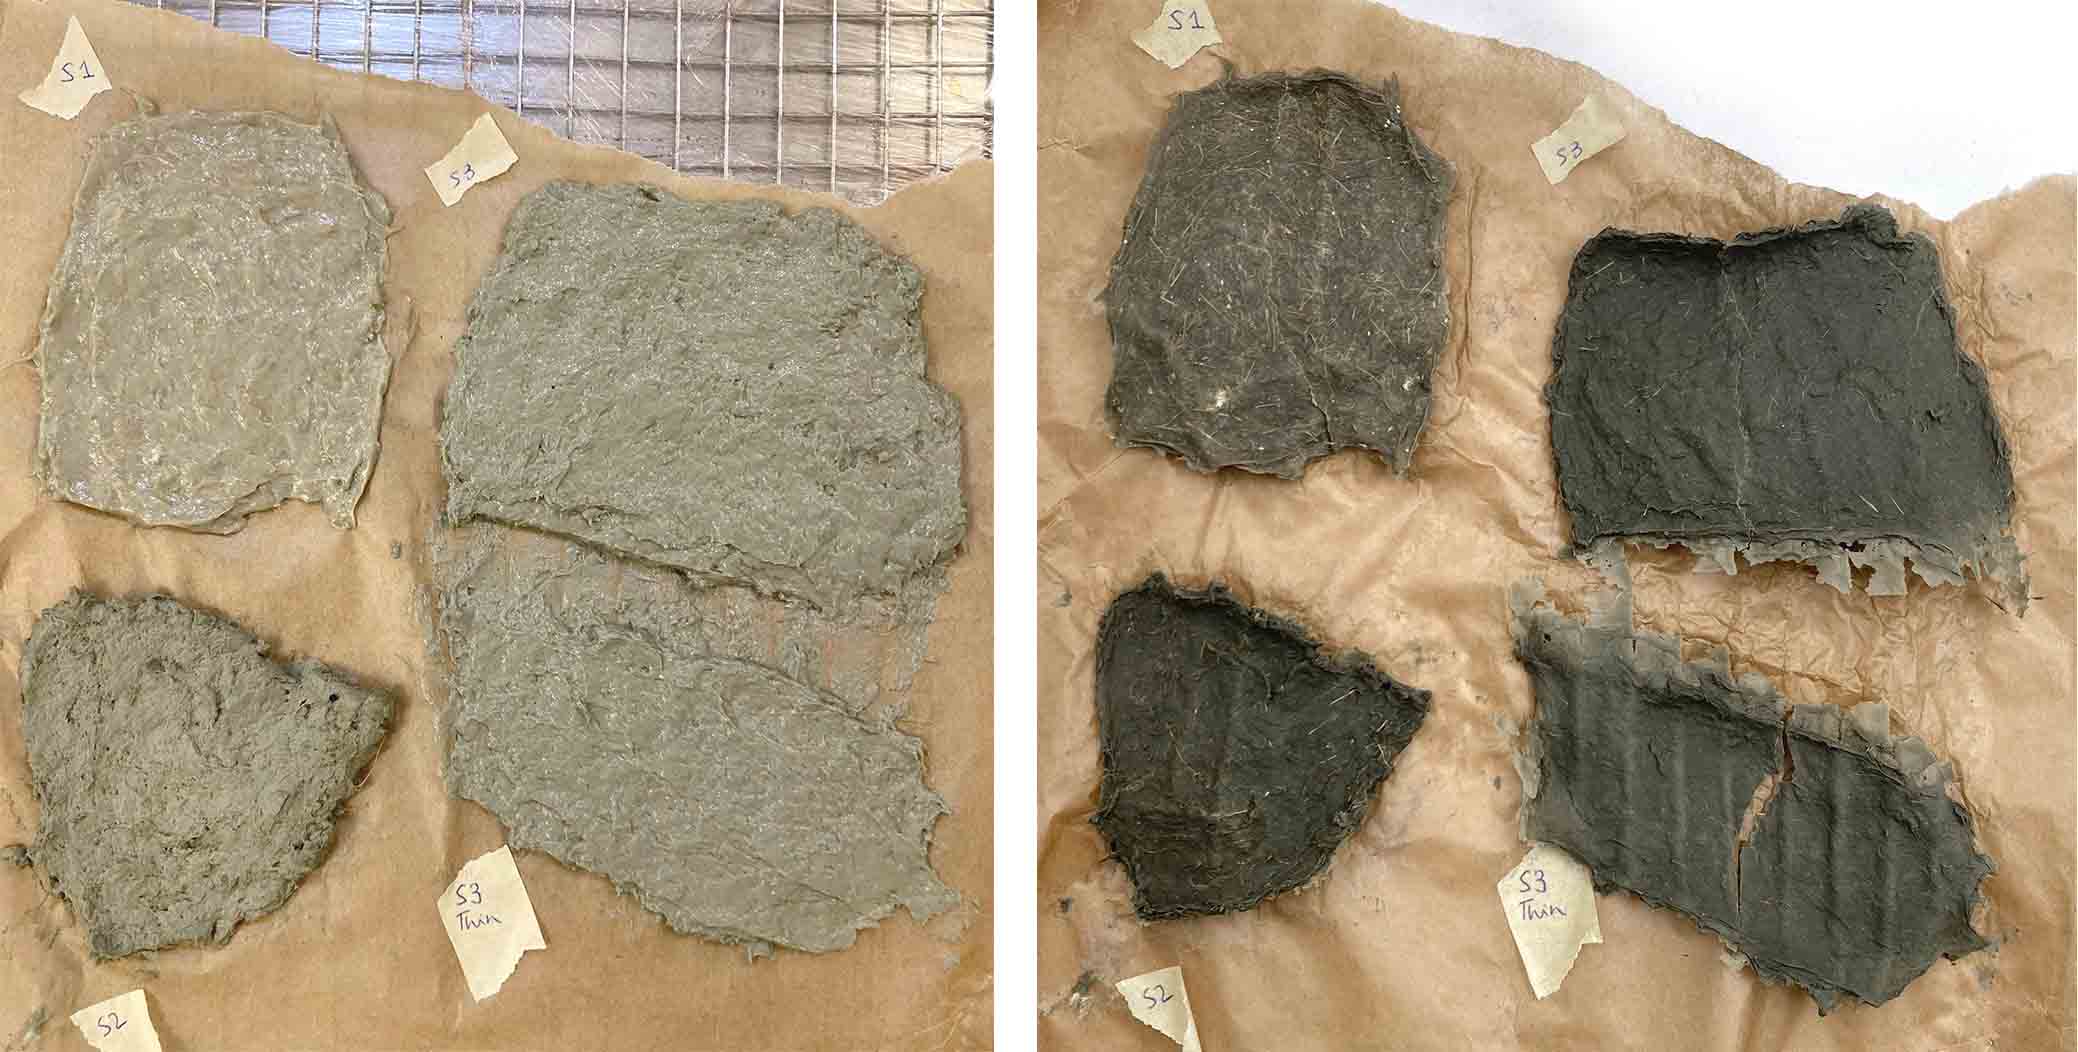
FINAL TESTS TO DECIDE PROPORTIONS TO USE FOR MOLDING:
* 200ml Water
* 100g Wet pulp
* 60ml CMC solution
- *35ml Glycerin
- 40g Corn starch
- 10ml Vinegar
- 5% Talco
- 5% Clay
TEST 1: Instead of 35ml of Glycerin I used 10g of Glycerin.
TEST 2: Instead of 5% of Clay I cook with 30%. The final sample are super rigid.
TEST 3: 30% of Clay + 43% water
TEST 4: Adding 21,5% more drained pulp on the fabric.
4.1: Thin sample
4.2: + long fibers
4.3: Thiker sample
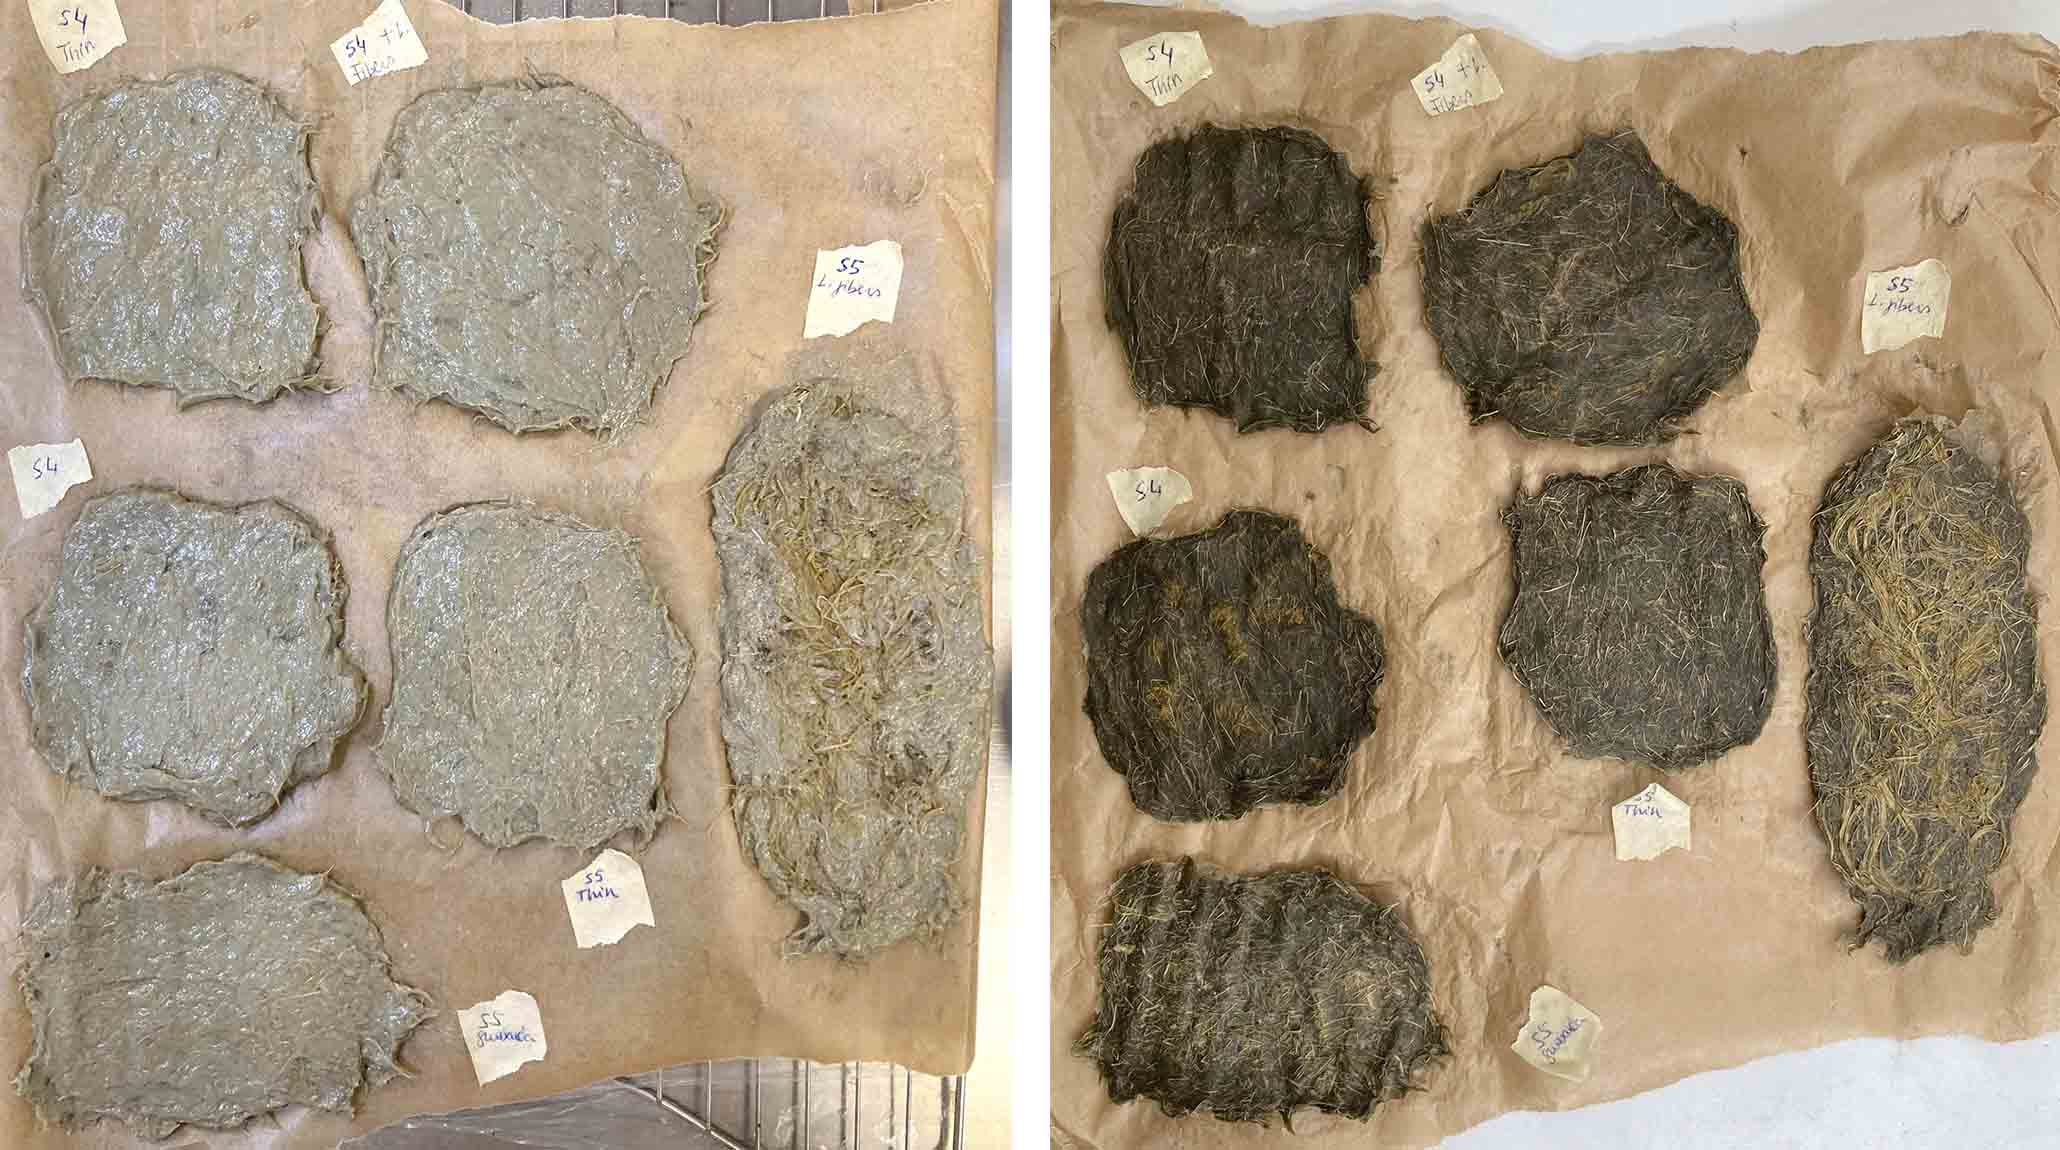
TEST 5:
Adding 2,6% of dry powder.
5.1: Thin sample
5.2: Thiker sample
5.3: + long fibers

TEST 6:
Adding 24,36% of wet pulp. Good texture to work.
6.1: Thin sample
6.2: Thiker sample
6.3: mixed with long fibers
TEXTURES:
Celulose leather de Emma
- LASER CUT CELLULOSE LEATHER:
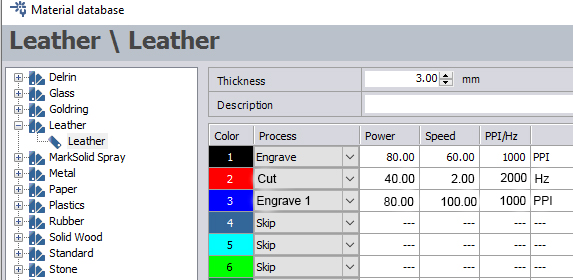
The engraving setting change in each sample because of the thickness. So, the more thickness is the sample less speed we need.
- CONNECTIONS:
Super useful and interesting propriety that Cellulose leather has is the capability to join them with more material as glue.
- CELLULOSE LEATHER AS GLUE:
-
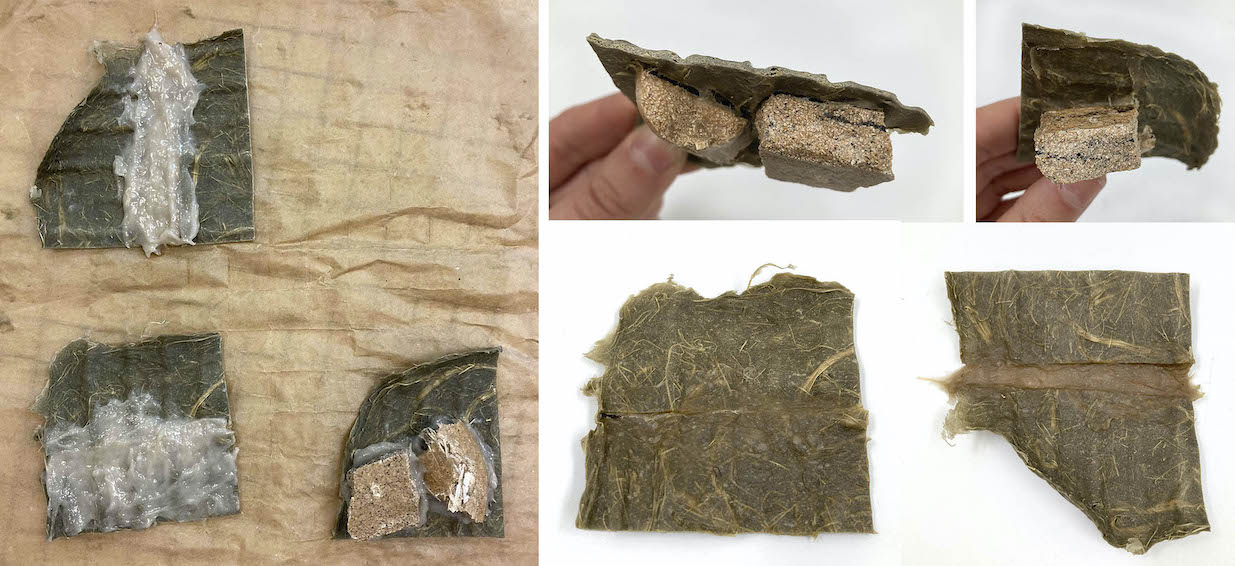
Sample 1: Strong cellulose leather with space between them to join with soft cellulose leather to get flexibility between the samples. As a book. Good result to get some parts of the bag with movement. We could reinforce with vertical fibers.
-
Sample 2: Strong cellulose leather without space between them to join with soft cellulose leather to get flexibility between the samples. In that case, is a failure, it breaks when you move it.
-
Sample 3: Pine resin composite + Cellulose leather. It's not resistance.
By technique
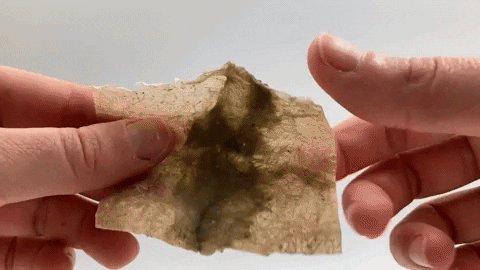
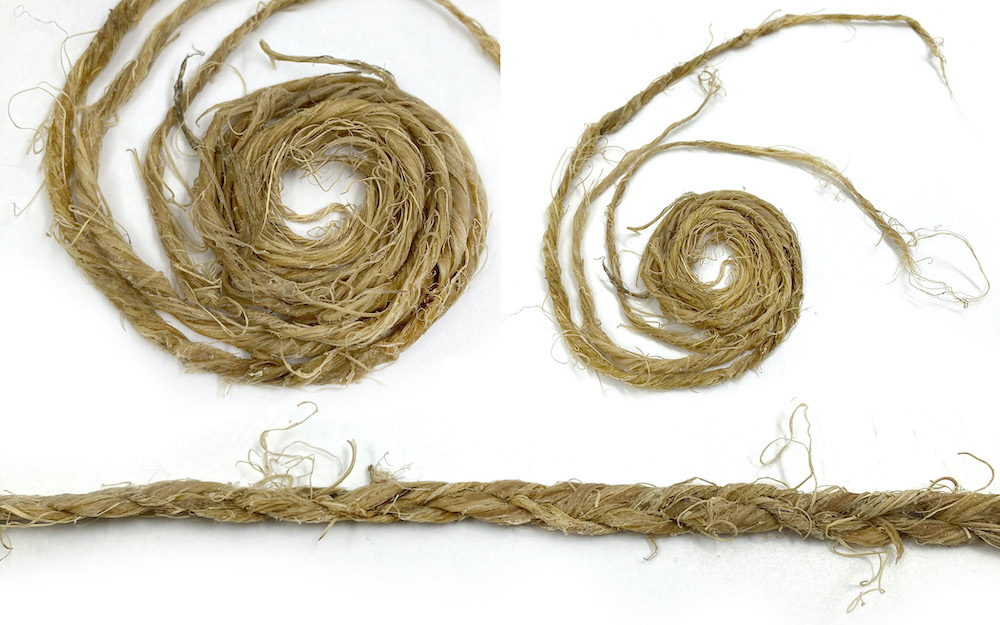
Meanwhile, I was cooking the long fibers of the kernel got out so easily after I boilt it for 3h in Sodium Carbonate.
For this reason, I start thinking about how can I use the fibers to create a material by technique.
Felting
- Needle felting (dry):
How this technique work and used for with wool:
I tried to felt in a dry method with the long fibers extracted from the entire husk boiled in Sodium Carbonate. As I expected, it doesn't work. I supose it's because the gap in the needle is too small so the fibers couldn't be felted.
Moreover the structure of the fibers between vegetal and animals are different.
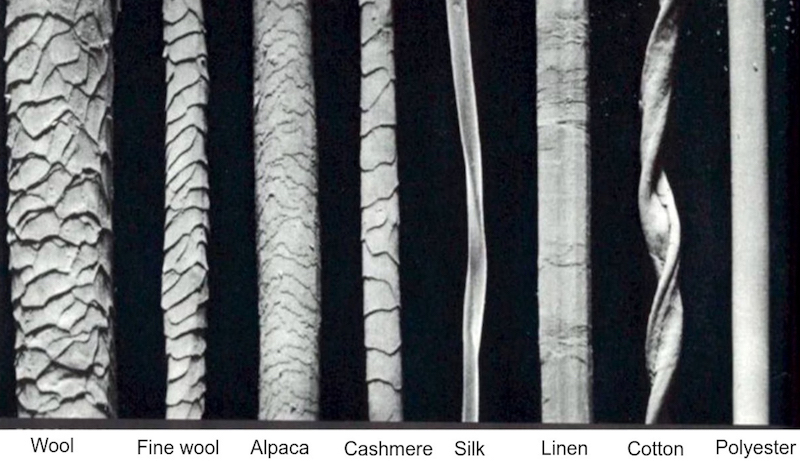
The animal ones have squames to easily attach to each other. However, the vegetal has a more smooth texture.
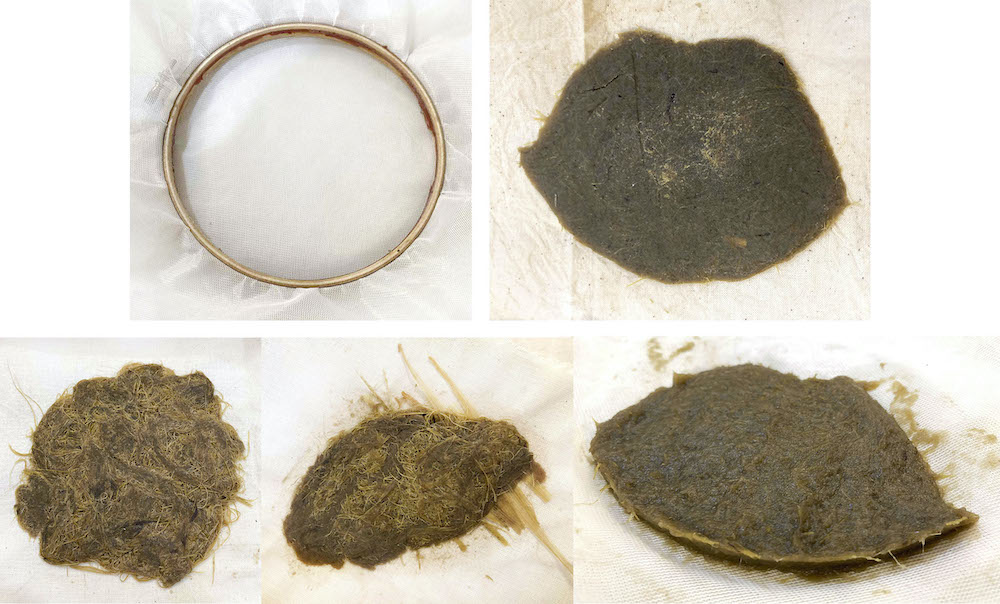
- Wet felting:
Tutorial to learn the technique of felting in wool for then be able to apply for the husk fibers.
Time to fit the process of felting the wool to be useful for the long fibers of the corncob husks. First of all, we don't need soap.
* Husks long fibers = Brush boiled in Sodium Carbonate entire husks
- Hot water
* Metalic brush
* Plastic buble paper
* Wood mat
* Towel
* Take out the strong parts of the husk.
* Lay the fibers on the plastic buble paper in a vertical position (layer 1).
* Then, lay the fibers on top but now in horitzonatal (layer 2). Repeat this process in orther to have 3 or more layers, depending on the stronger and thikness you need the final sample.
* Cober the layers with the platic buble paper and let the fibers a little wet.
- Massage with your fingers in circular movements.
- Check if the fibers do not stick to the paper. When this doesn't happen you could proceed with the following step.
- Roll with the bubble pack with the wood mat and the towel.
- Roll with some pressure the differences sides of the cylinder pack. 25 times on each side.
- Unroll and change the position of the fibers with the wood mat.
- Roll another time and repeat 25 times movements.
- Unroll. The felt sample is ready!
Observations:
You don’t need to cut the husks, just pour them into the pot to boil for 3h, and then by hand, you could remove the steam easily.
70g entire dry husks become 110g brush husk (long fibers)
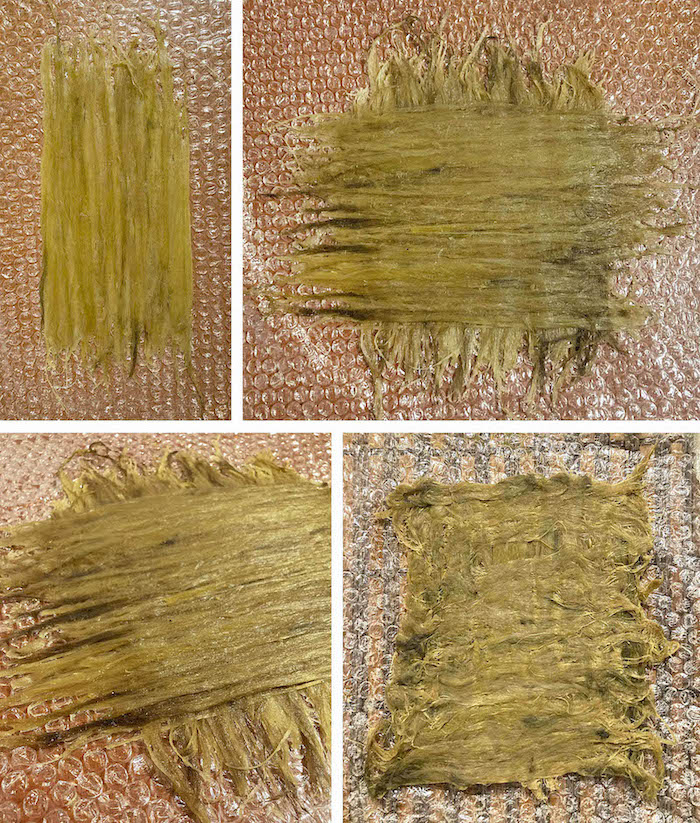
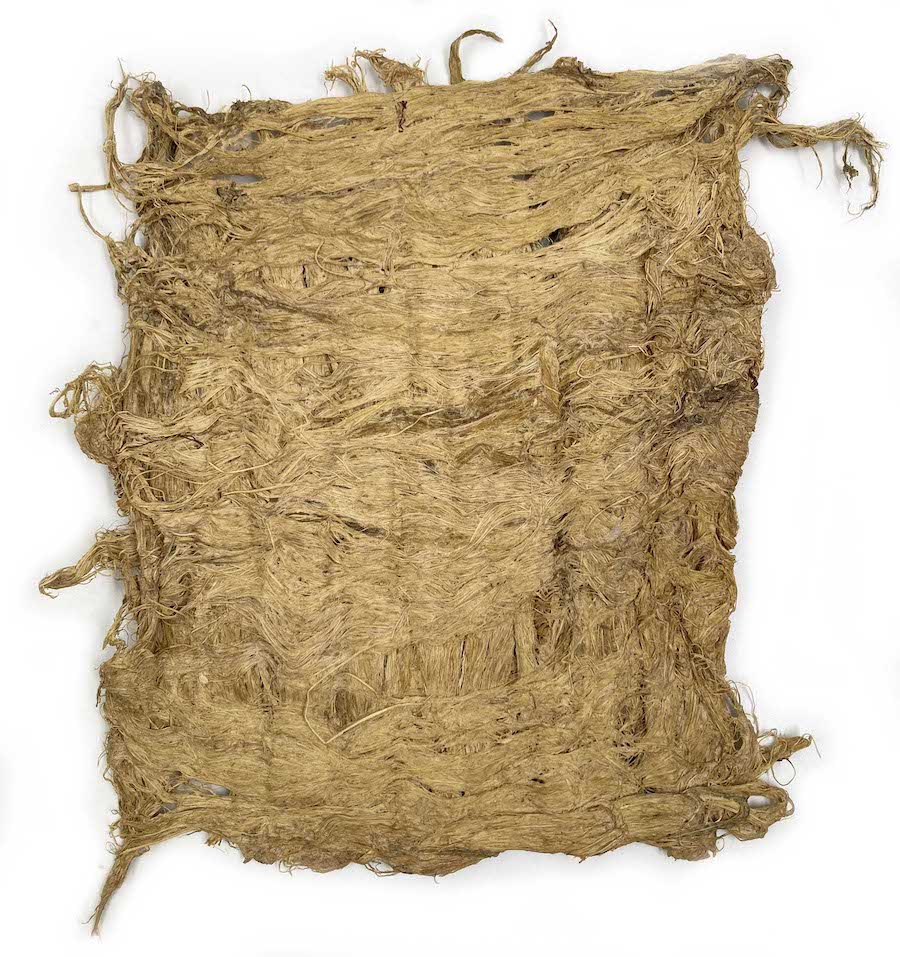
TEXTURE:
Felting husks de Emma
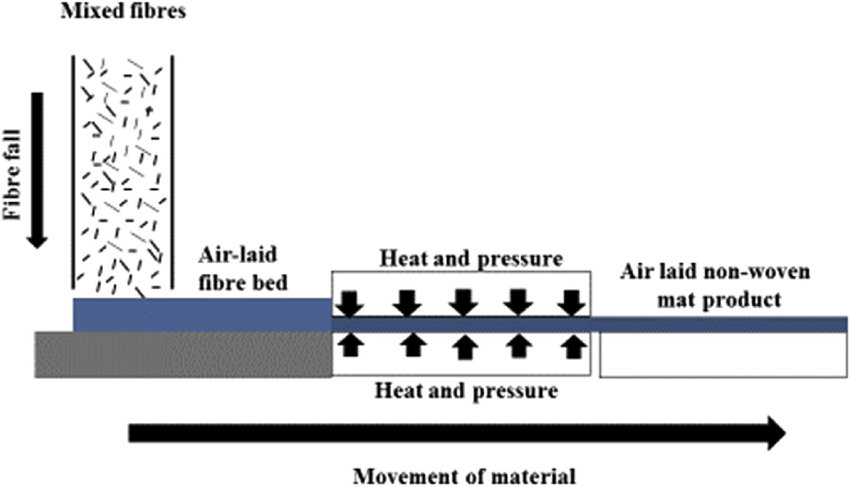
- Air laid method:
Air laying (air forming) is a method of forming a web by mixing fibers with air to form a uniform air-fiber mixture that is then deposited on a moving air-permeable belt or wire.
The term airlaid nonwoven refers to a manufacturing technology that produces a web from short fibers, most often softwood pulp.
This technique are used in the industrial companies to create big scale non-woven fabric.
Fiberglass
Another technique that I tried was fiberglass, using the dry long fibers and the pine resin as glue. The process was to create around 3/4 thin layers of fibers and pine resin on the top of a mold to get the shape. Unfortunately, this was a failure cause the pine resin solidification super fast and removed the fibers meanwhile you are trying to paste. Moreover, when the sample was dry it cracked.
Spin
Some inspiration to apply or how to work with threads:
More:
Còpia de Felting husks de Emma
Creating my own fabric with the husk thread:
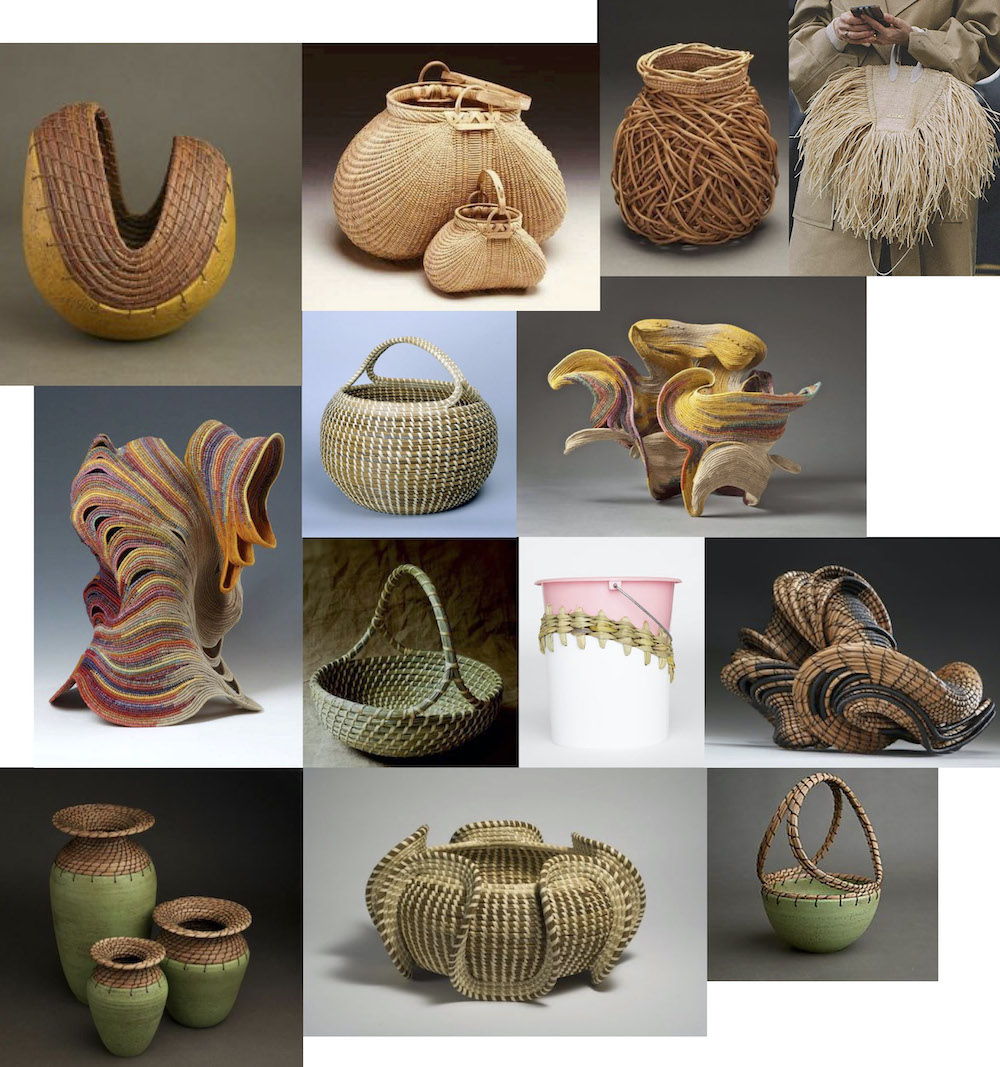
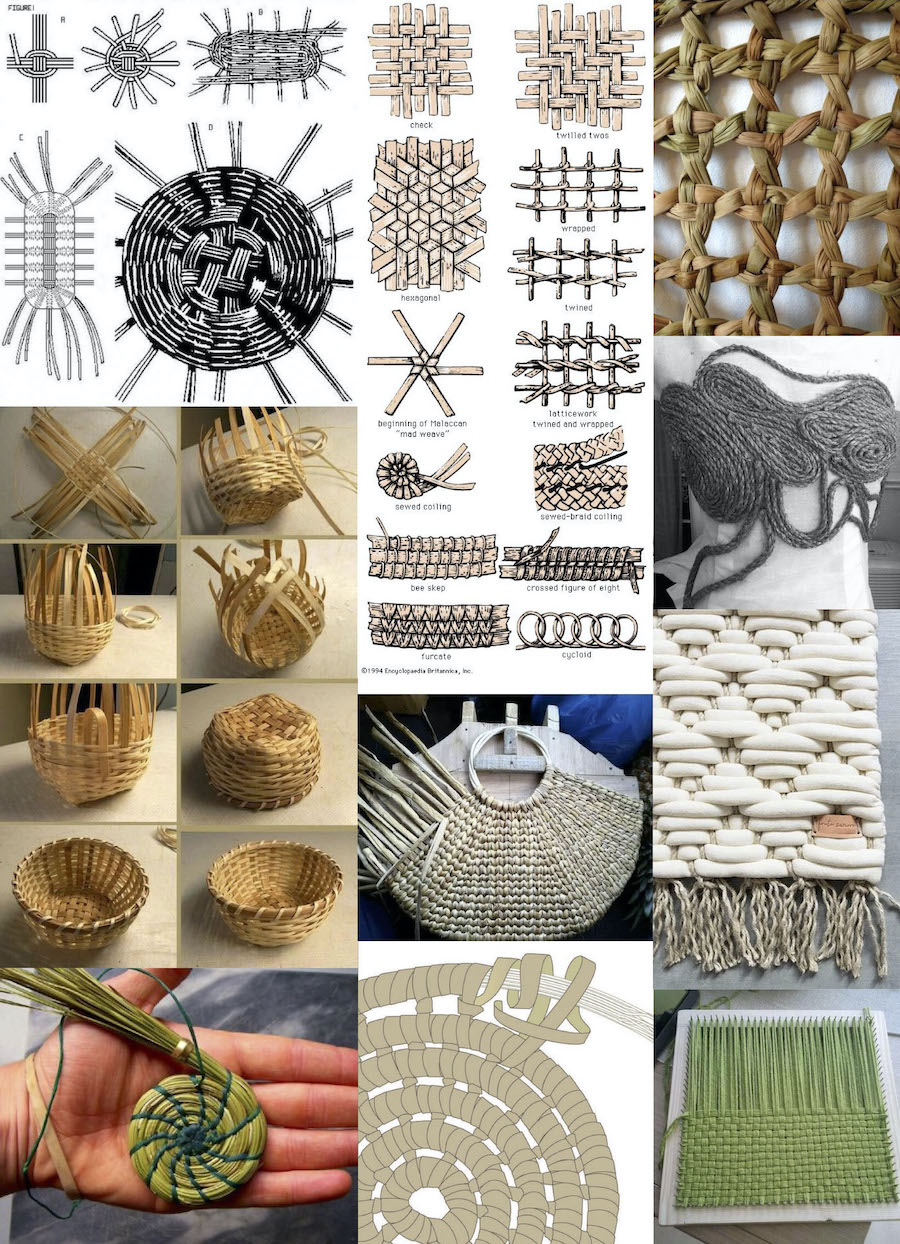
Basketmaking
REFERENCES:
I tried this technique but it was so hard to have a pretty result because you need to attach frequently the husks, because of the short length. So as a result the shape is full of knots... And these knots are not as resistant as they should be for a handbag. For now, I dismiss this technique.
Moreover, the dry husk does not have the same flexibility as the fresh ones, however, these are not waste materials cause it's animal food.
Bio composite for trimming and ornaments
To get hard materials.
Inspiration
Research
"Dry pine needle fibers can be used as a reinforcement material in polypropylene composites (Malkapuram et al. 2010). The filler known as treated pine needle fiber (TPNF) was processed prior to incorporation into the polymer matrix to give a cooked pine needle pulp. For this purpose, bundles of pine needles were fed into the hopper of the refiner to transform them into small fibers, and wet pine needle fibers were subjected to soda pulping in digesters to remove the lignin content. Thermal analysis of the obtained composites found that the thermal stability and melting temperature of polypropylene (PP) decreased with increased TPNF content (Malkapuram et al. 2010)."
"The fillers were initially dried at 70 °C for 12 h to remove moisture."
-
Resistance of Conifer Needle Polyolefin Composites (CNPCs) Against Biodecomposition Caused by Fungi
-
Cellulosic pine needles-based biorefinery for a circular bioeconomy
- Eggs shells composite with Alginate and vinegar
-
Cheer Project: From Earth, To Earth by Gaurav Wal
To know more about click here
Cheer Project: From Earth, To Earth from Gaurav on Vimeo.
Making eggs shells powder
Thanks to my friends from Fet de Farina, a bakery shop from Sant Fruitós de Bages where they are using Ous de l'Oriol eggs to cook the cupcakes, I could collect enough eggs shells to make powder for the hard materials tests.
To obtain the eggs shells powder:
-
Colect the eggs shells, we need a huge quantity. Clean in water and save in the freezer.
-
Put in a pot and let them boil during 40-60'. Remove the foam.
-
Let them dry in the oven for 60' approx.
-
Use the mortar to make the pieces more little and make it easy for the hand blender.
-
To get the powder to add the pieces little by little to the micer. Do not smell the dust cloud.
-
Done! Keep the egg powder in a pot.

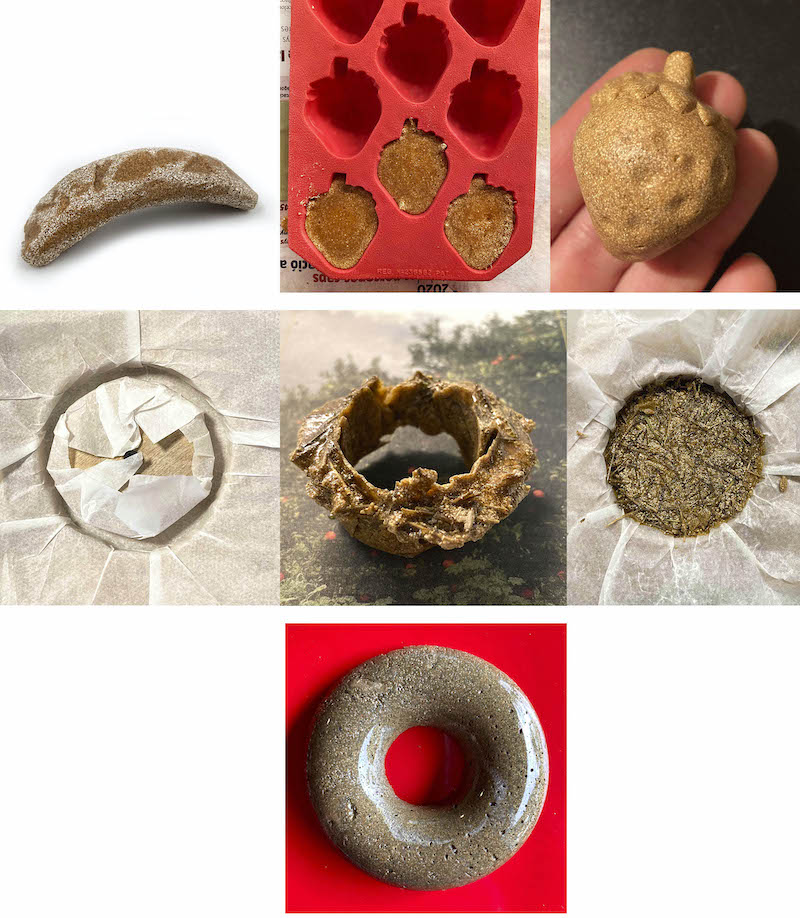
Pine resin
* 45g Pine resin
* 5g Carnauba wax
* 20 ml Alcochol
* 40g Filler (Eggs shells)
* Digital scale
* Electric stove
* Pot/Vessel
* Wood mold
* Spoon
* Silicon spatulas
* Scale
* Backing paper
* Towel to pick up hot pots
* Lab coat
* Prepepare the materials and ingredients
* Place baking paper on the buttom part of the mold. Press with the top part to fit the shape. Reserve a piece of baking paper for the top.
* Melt the pine resin.
* When the pine resie are melted, mix with the Carnauba wax. Melt them.
* Add the alchocol and mix. Do not breathe the vapours.
* Add the filler (waste material) and mixed.
* Take the mix and pour **quickly** into the mold using the spatula.
* Cover the top with baking paper.
* Press with your hands to distribute the mix. Then with the top mold. Compact down.
* Let the mix cold down. Approx. 15'.
* Remove the baking paper and the mold.

* 10g Pine resin
* 30g Carnauba wax
- 10.3g Glicerina
- 30,7 ml Alcochol
- 5g Dry mincer husks. Filler
* Digital scale
* Electric stove
* Pot/Vessel
* Wood mold and lid
* Spoon
* Scale
* Backing paper
* Towel to pick up hot pots
* Lab coat
* Prepepare the materials and ingredients
* Place baking paper on the buttom part of the mold. Press with the top part to fit the shape. Reserve a piece of baking paper for the top.
* Melt the pine resin in a pot, add carnauba wax, and let it melt.
- Add glycerin.
- Pour the alcohol and then mix with the filler.
- Cast the mass in the mold and pressure.
- Let it dry around 20-30’.
Observations:
TEST 1: Happy with the result and good finish. It’s one of the most resistant tests I cooked.
TEST 2: I add too much filler it’s cracked on the surface also I add 20g of Glycerin instead of 10g and it’s a little humidity when you touch it.
* 100g Pine resin
* 100g Green Clay
* Digital scale
* Electric stove
* Pot/Vessel
* Wood mold and lid
* Spoon
* Scale
* Backing paper
* Towel to pick up hot pots
* Lab coat
* Prepepare the materials and ingredients
* Place baking paper on the buttom part of the mold. Press with the top part to fit the shape. Reserve a piece of baking paper for the top.
* Melt the pine resin in a pot.
- Pour the clay powder and mix very well.
- Pour into the mold with the baking paper and press with the lid.
- Leave to dry.
Observations:
It’s a strong and super fragile material, it looks like a piece of ceramic. The parts that touch the air while it’s drying get a glaze finish. It's not waterproof, however, you could get easyly a shape.
* 15g Pine resin
* 45g Carnauba wax
* 45 ml Alcochol
* 60g Eggs shells powder
Observations:
It makes a lot of fumes meanwhile I was cooking and the mass get lum so easily so it’s hard to mix it. The final sample was super fragile. Not a good proportion...
* 29,57ml Cornstarch
- 118,29ml Water
- 29,57ml Glycerine
- 29,57ml Vinegar
- 50g Pine resin
* Digital scale
* Electric stove
* Pot/Vessel
* Sylicone mold
* Spoon
* Scale
* Towel to pick up hot pots
* Lab coat
* Prepepare the materials and ingredients.
- Add cornstarch into the bowl with water. Stir until it dissolved.
- Add glycerine and vinegar and mix it.
- Once you have the mixture, heat it over low heat. Stirring constantly.
- Do this process until you obtain a thick lump-free dough. Remove from the heat.
- Meanwhile, melt the pine resin in another casserole.
- As soon the bioplastic is condensed, mix it with the resin, and make sure it’s well mixed.
- Pour into the mold with backing paper.
- Leave to dry.
Observations:
I try this recipe to get a similar result as the pine resin but with some softness to be more resistant to blows. However, it’s not a proper option it’s more fragile and it takes a long time to dry.
TESTING PROPERTIES:
Testing hard materials de Emma
COULD BE GLUED? Melt the pine resin and join in a piece:
-
Sample 1: Cellulouse leather + pine resin
-
Sample 2: Pine resin/eggs shells powder + Pine resin/eggs shells powder
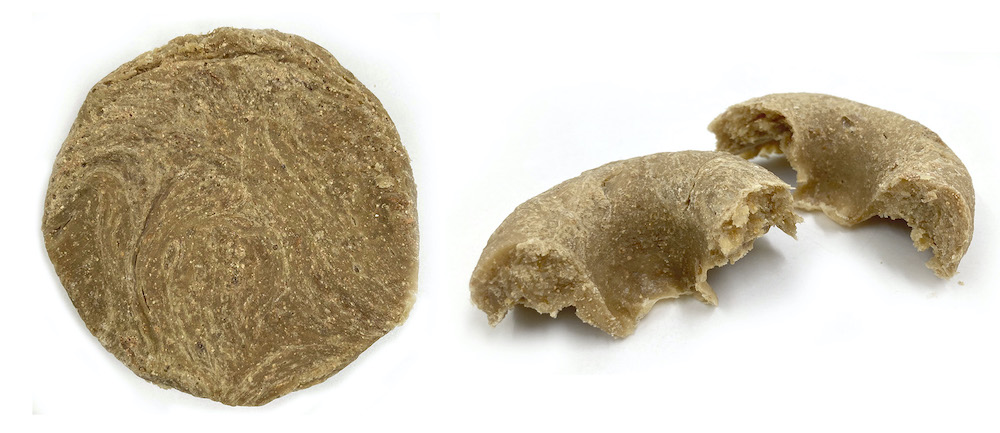
Casein
An other option to get hard material is with the casein, in this case, I extract it from the ecological cow milk farm next to my housetown.
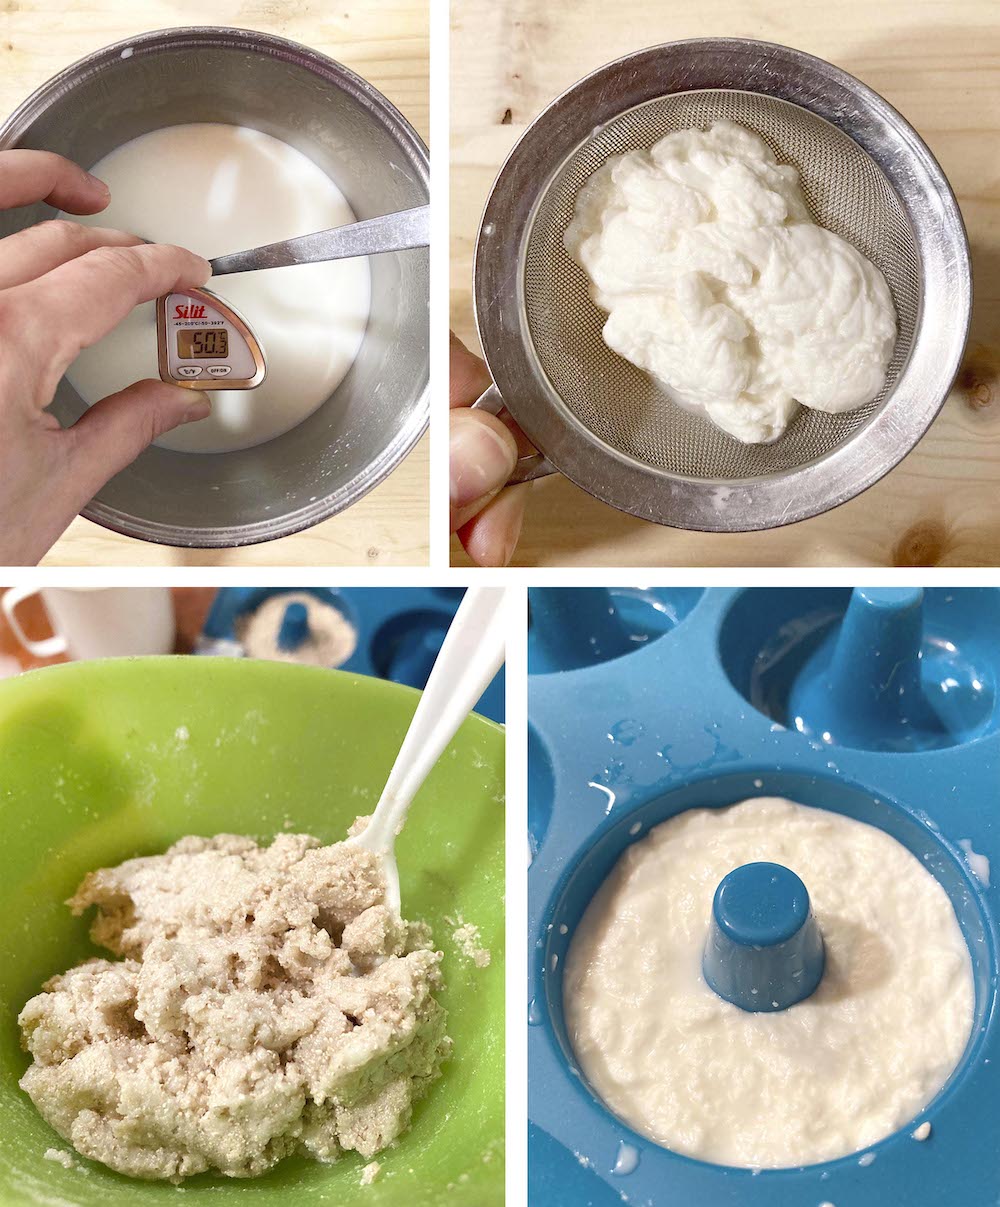
Recipe 1: MILK PROTEIN.
* 240ml Whole milk (to cover the husks)
* 60ml Vinegar
* Digital scale
* Cooking pot
* Spoon
- Mesh strainer
- Electric cooking stove
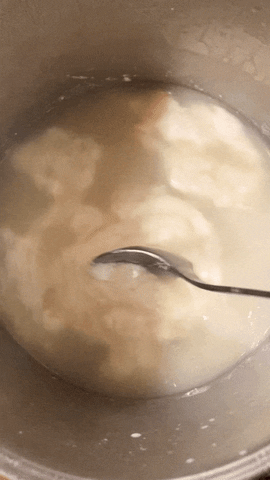
* Preheat the milk in a pot around 50'C stirring all the time. If the milk is not hot enough no reaction with the vinegar will appear.
- Put the hot milk aside and slowly add the vinegar. Stir it with a stirring spoon carefully, after you will see that the milk begins to coagulate.
- Use the mesh strainer to separate casein from water. Now you can use the casein which remains in your mesh strainer and put it into any silicone mold.
- Let it dry naturally for 48 hours. The mold should be well ventilated so meanwhile it's drying you could take it out from the mold to let it dry better. The drying time could change depending of the thikness.
- OBSERVATIONS: For this sample it's better to mix and pressure very well the casein in to the mold. I also try to mix with pine needles to get an stronger result but this one get moldy...
Recipe 2: CASEIN + EGGS SHELLS POWDER.
* 240ml Whole milk (to cover the husks)
* 60ml Vinegar
- 12g Eggs shells powder
* Digital scale
* Cooking pot
* Spoon
- Mesh strainer
- Electric cooking stove
* Preheat the milk in a pot around 50'C stirring all the time. If the milk is not hot enough no reaction with the vinegar will appear.
- Put the hot milk aside and slowly add the vinegar. Stir it with a stirring spoon carefully, after you will see that the milk begins to coagulate.
- Use the mesh strainer to separate casein from water. Now you can use the casein which remains in your mesh strainer and mix with the eggs shells powder.
- Pour the mixture into any silicone mold.
- Let it dry naturally for 48 hours. The mold should be well ventilated so meanwhile it's drying you could take it out from the mold to let it dry better. The drying time could change depending of the thikness.
Recipe 3: CASEIN + EGGS SHELLS POWDER + BAKING SODA.
* 240ml Whole milk (to cover the husks)
* 60ml Vinegar
- 20g Eggs shells powder
- 30g Baking Soda
* Digital scale
* Cooking pot
* Spoon
- Mesh strainer
- Electric cooking stove
* Preheat the milk in a pot around 50'C stirring all the time. If the milk is not hot enough no reaction with the vinegar will appear.
- Put the hot milk aside and slowly add the vinegar. Stir it with a stirring spoon carefully, after you will see that the milk begins to coagulate.
- Use the mesh strainer to separate casein from water. Now you can use the casein which remains in your mesh strainer and mix with the eggs shells powder and baking soda.
- Pour the mixture into any silicone mold.
- Let it dry naturally for 48 hours. The mold should be well ventilated so meanwhile it's drying you could take it out from the mold to let it dry better. The drying time could change depending of the thikness.
- OBSERVATIONS: Smooth texture, easy to cast.
Recipe 4: CASEIN + EGGS SHELLS POWDER + BORAX.
* 240ml Whole milk (to cover the husks)
* 60ml Vinegar
- 12g Eggs shells powder
- 5g Borax
* Digital scale
* Cooking pot
* Spoon
- Mesh strainer
- Electric cooking stove
* Preheat the milk in a pot around 50'C stirring all the time. If the milk is not hot enough no reaction with the vinegar will appear.
- Put the hot milk aside and slowly add the vinegar. Stir it with a stirring spoon carefully, after you will see that the milk begins to coagulate.
- Use the mesh strainer to separate casein from water. Now you can use the casein which remains in your mesh strainer and mix with the eggs shells powder and borax.
- Pour the mixture in the silicone mold.
- Let it dry naturally for 48 hours. The mold should be well ventilated so meanwhile it's drying you could take it out from the mold to let it dry better. The drying time could change depending of the thikness.
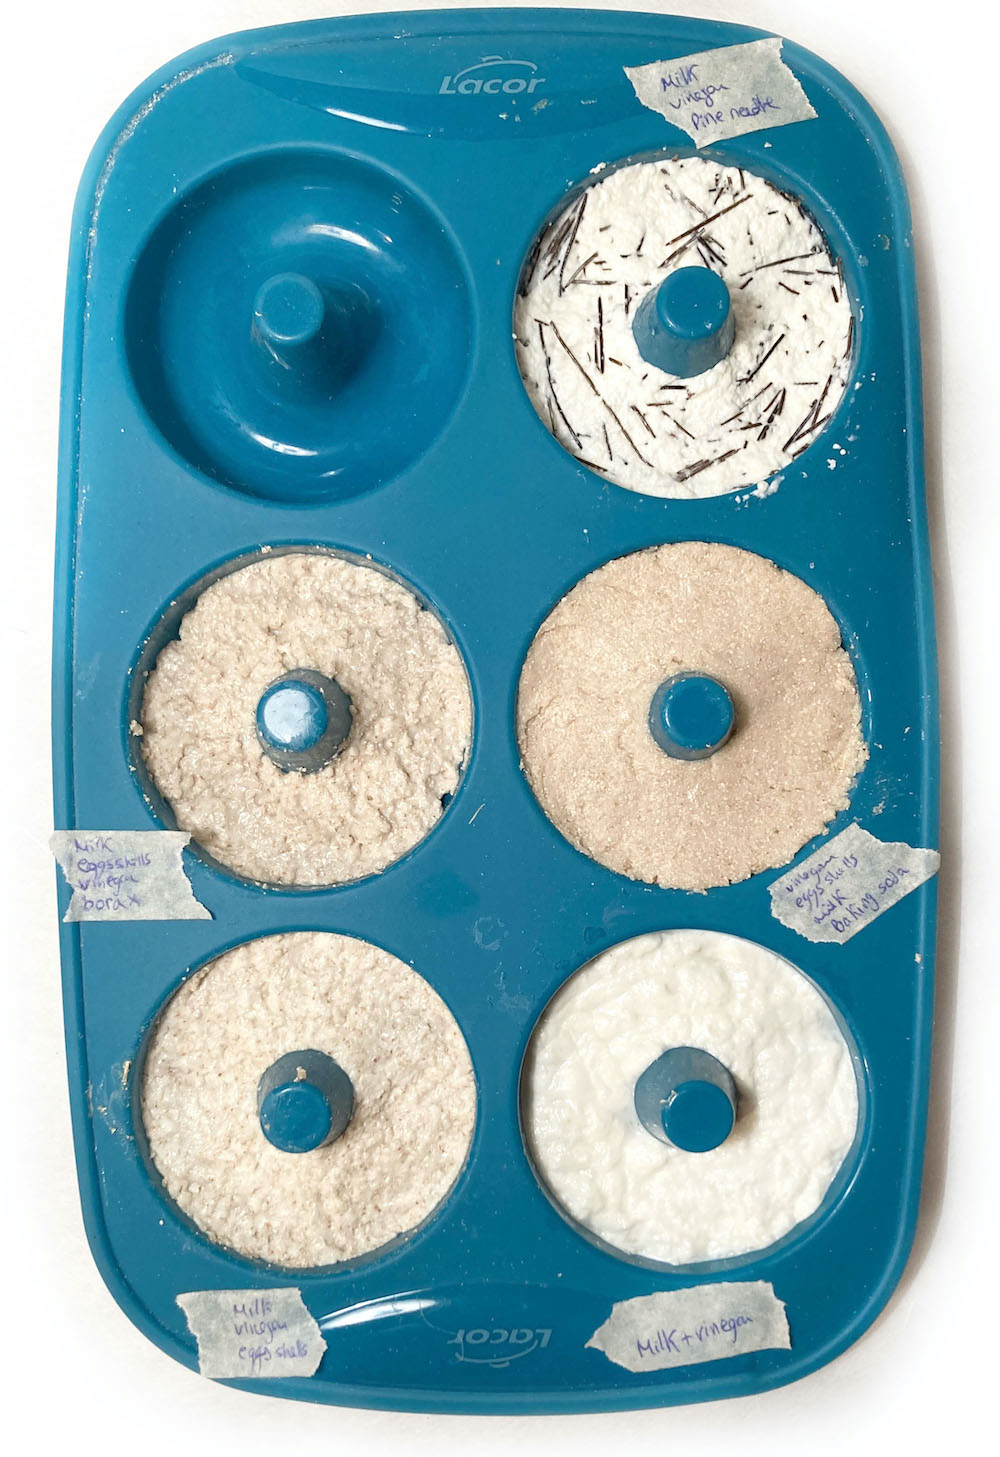
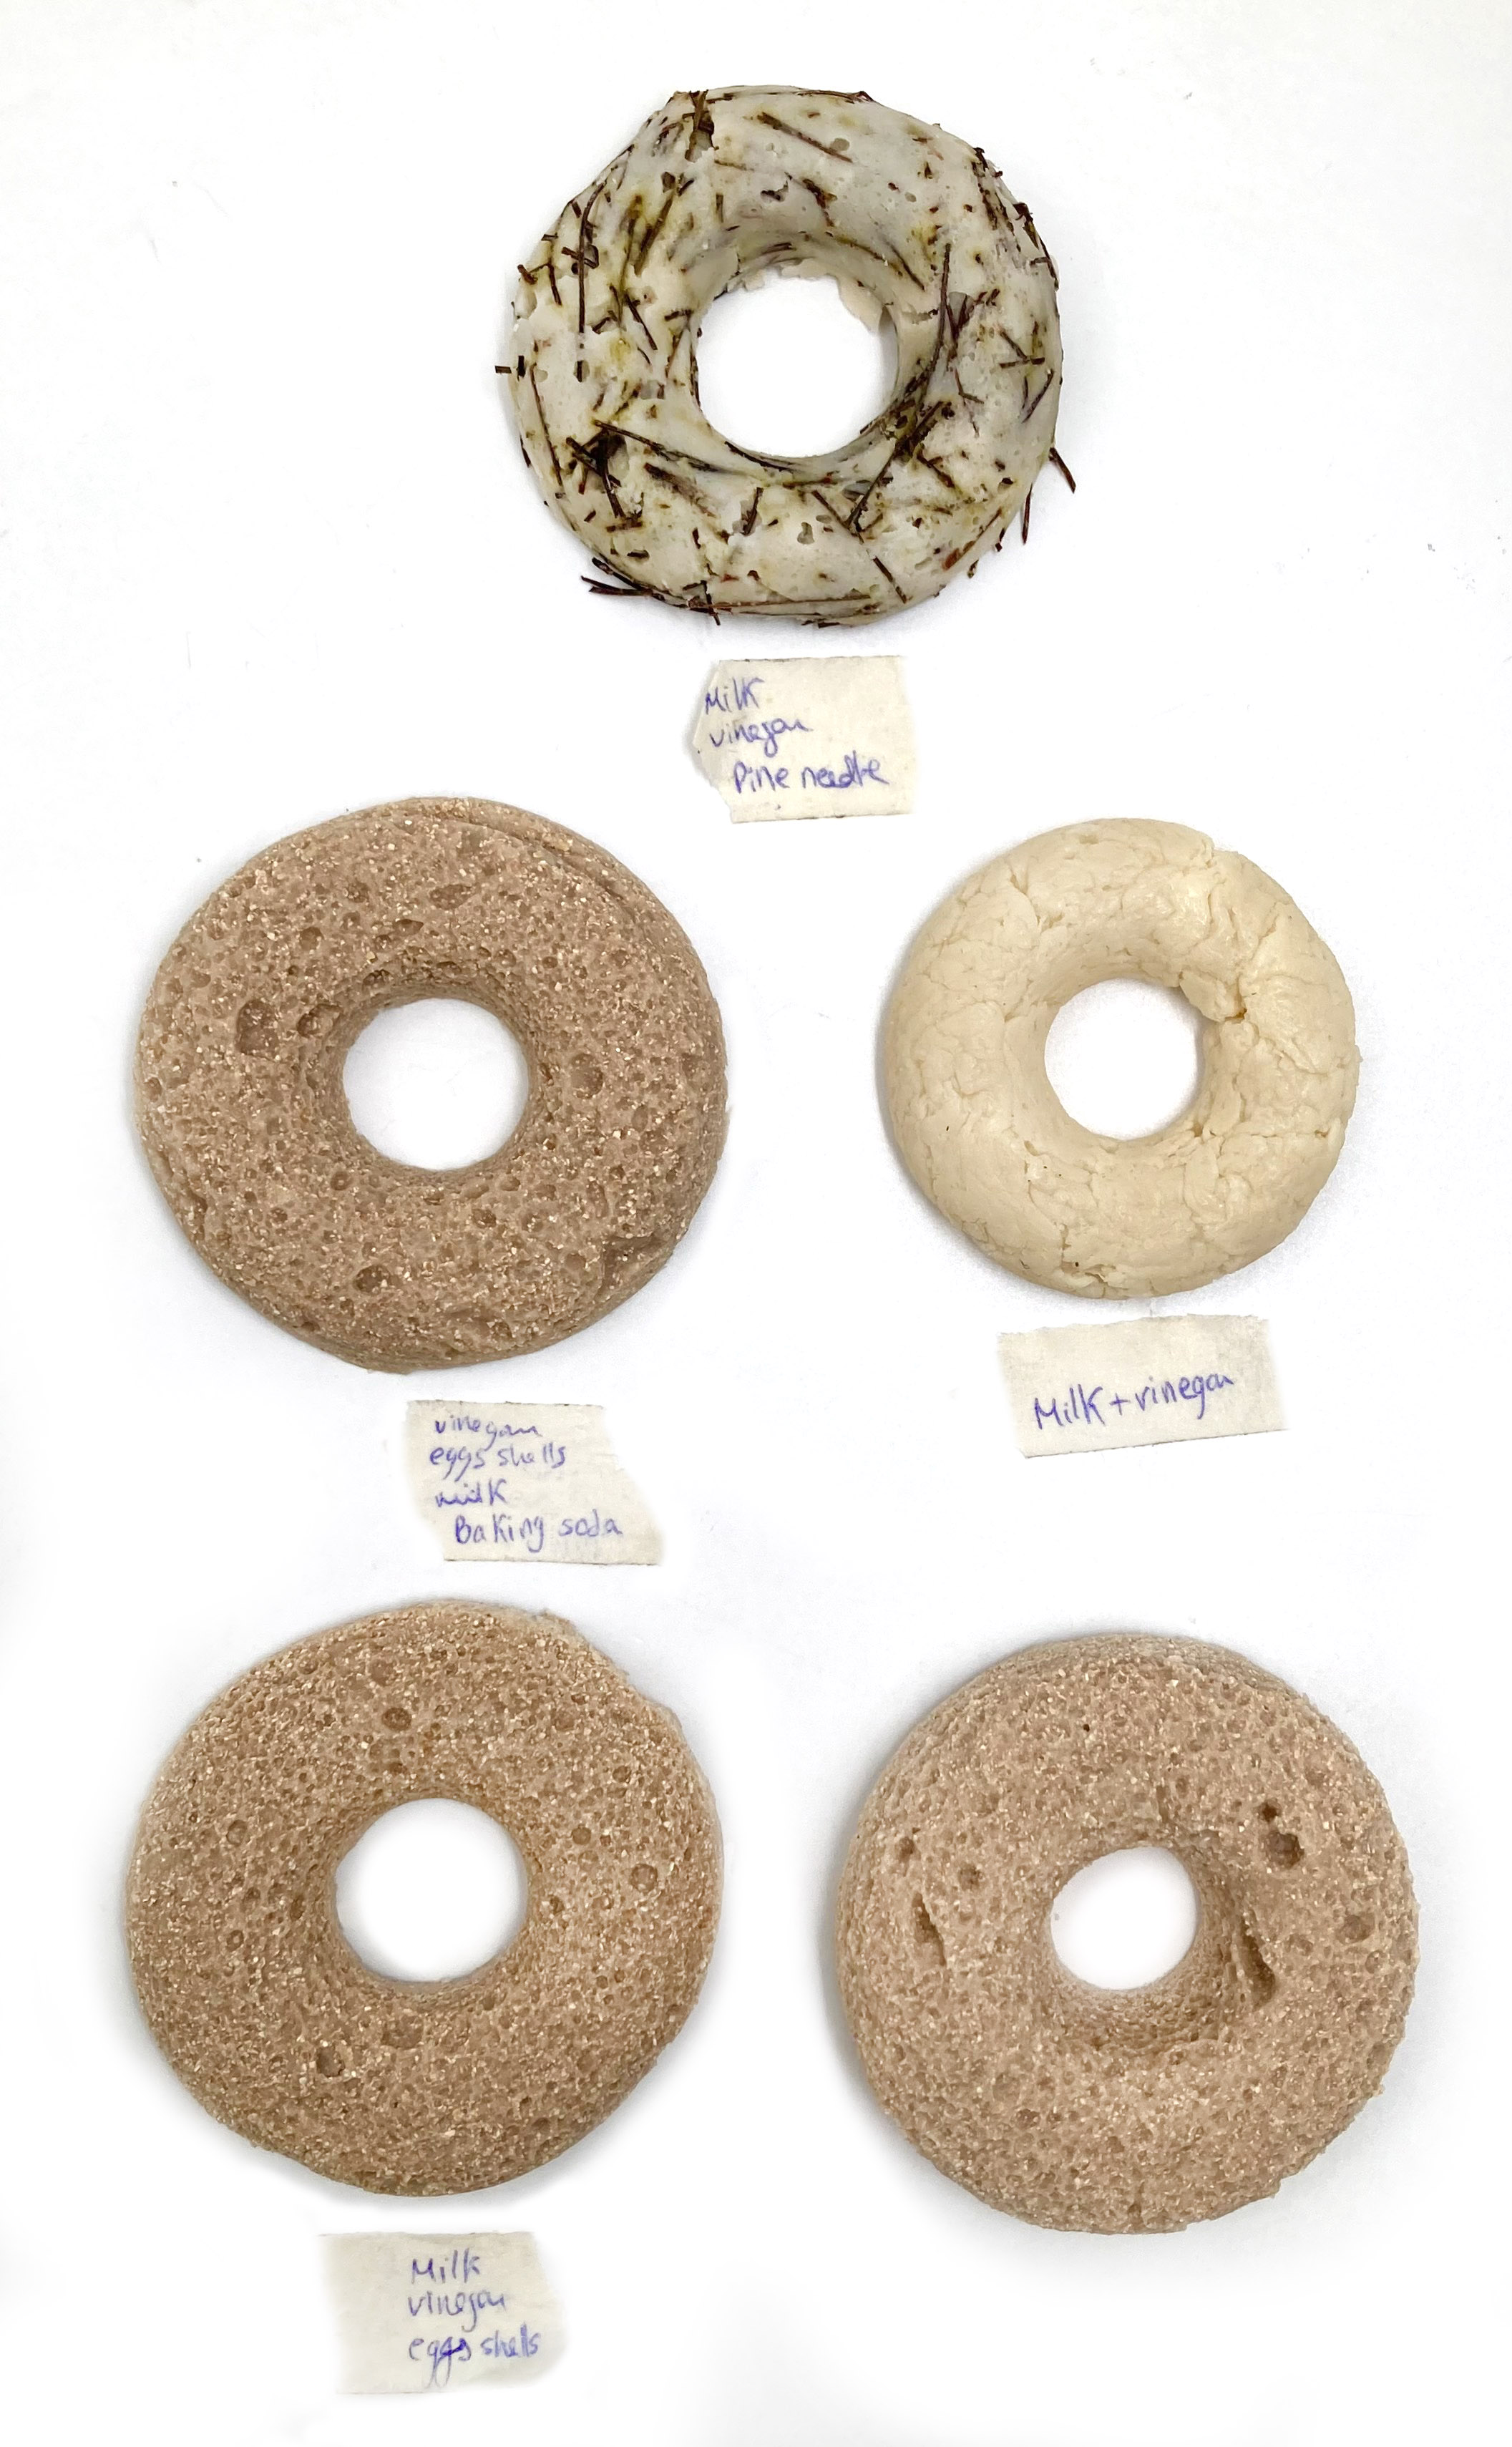
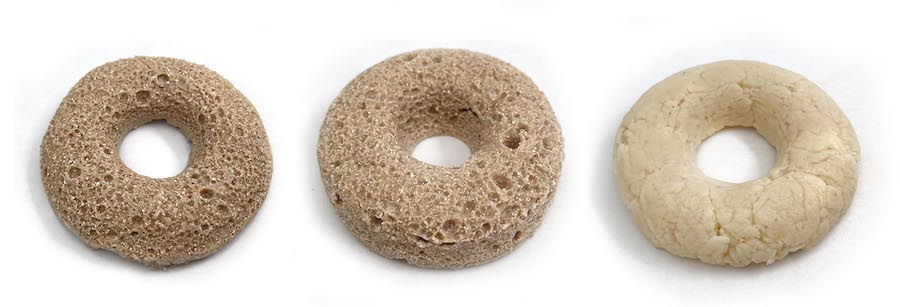
Observations:
400ml of whole milk = 61,5g of Casein
Shaping sawdust
- 20g CMC
- 2g Fine MDF powder
- 470ml Water approx. (until the CMC it’s dissolved)
* Digital scale
* Pot
- Blender
- Silicone mold
- Grinder
- Spoon
- Grind sawdust in fine powder.
- Measure the ingredients and mix them with the blender.
- Add the water slowly until you dissolve the CMC. You will get a compact texture.
- Fill the silicone mold with the mixture.
- Dry in the oven at 40-60ºC overnight or a room temperature.
- Observations: This sample’s super fragile, it’s not waterproof and when it’s completely dry it reduces a lot the volume. Not useful for the properties I am looking for.

The following sample is dried in the ambient temperature room:

Shaping sawdust texture de Emma
Calcium carbonate
REFERENCES:
Hard material conclusion:
I cook all these different recipes to try to get the hardest material in the most Bio way, so I tried to do not to use the Bio Resins of the market.
Concepts
-
CMC: Cellulose nanocrystals. In the Lab we use Carboximetil Celulosa E-466.
-
MCC: Microcrystalline cellulose.
-
MFC: Microfibrillar cellulose. Paté texture.
-
DMC: Bio-based material without water.
-
NFC: Nano fibrillar cellulose
-
HPC: Hydroxpypropyl cellulose.
-
CDA: Cellulose Diacetate.
-
Rosin: Pine Resin.
Links
Shops: