6. Sketches, designs & handbags
Inspiration
SHAPES
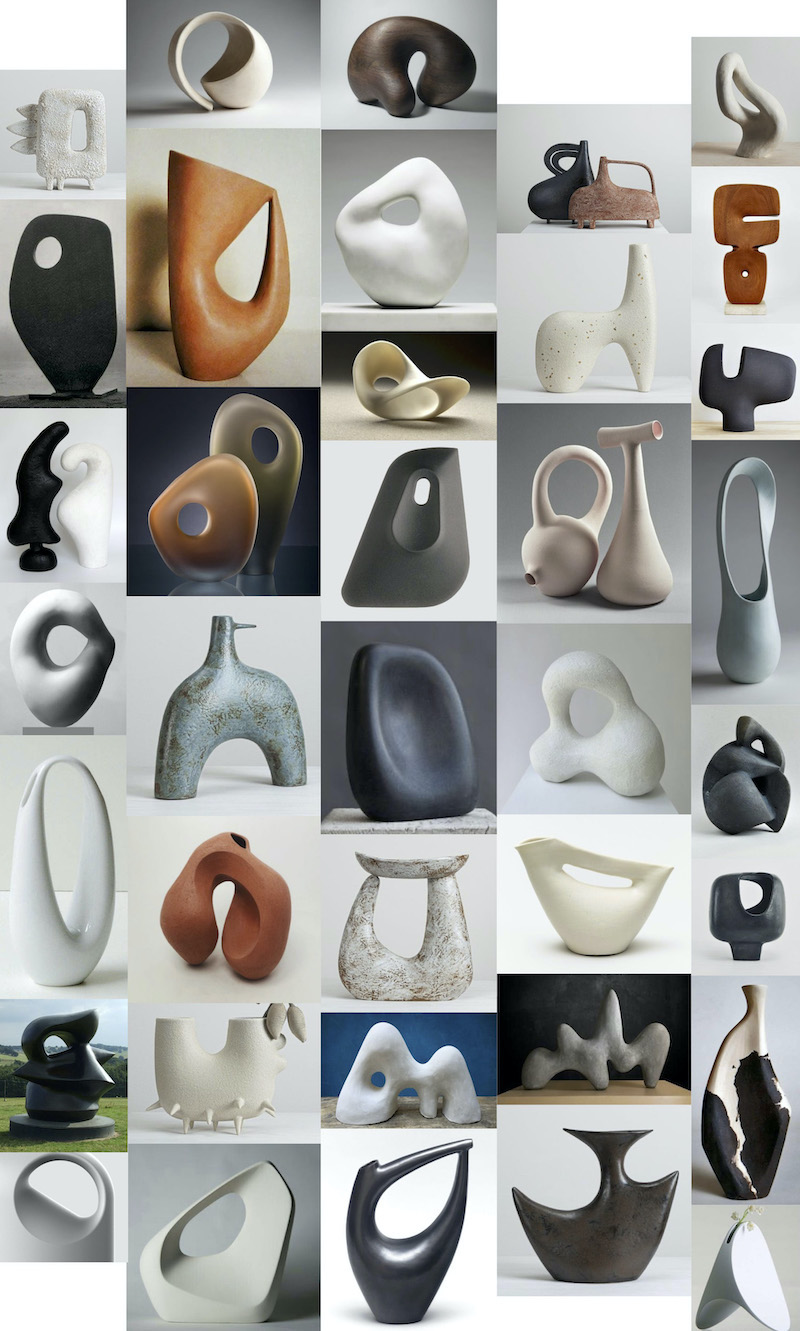
COLLECTION/ GROUP CONNECTIONS
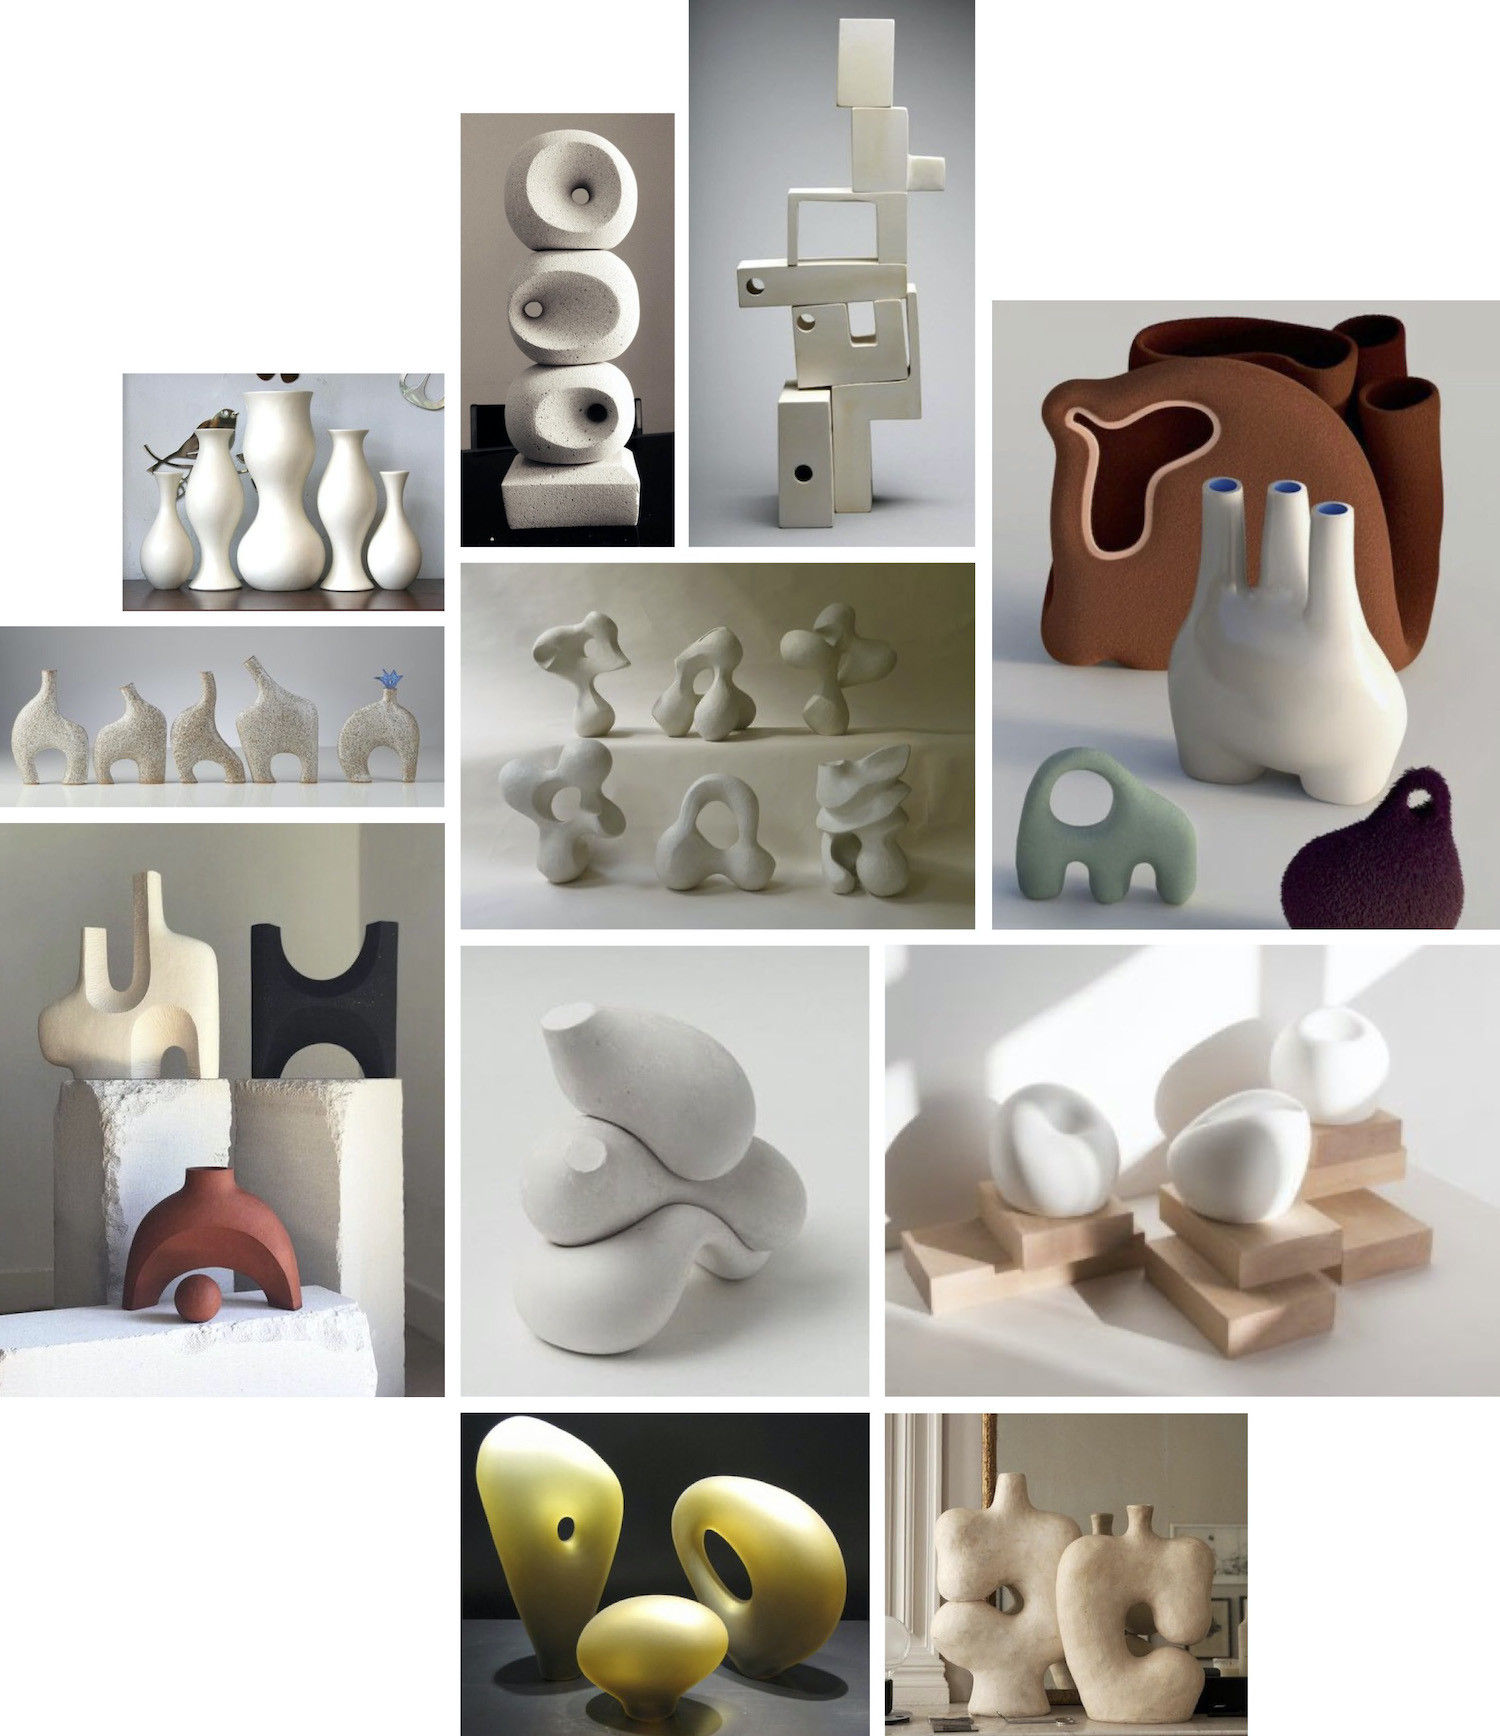
Combination of differents shapes to get an organic collection.
HANDBAGS
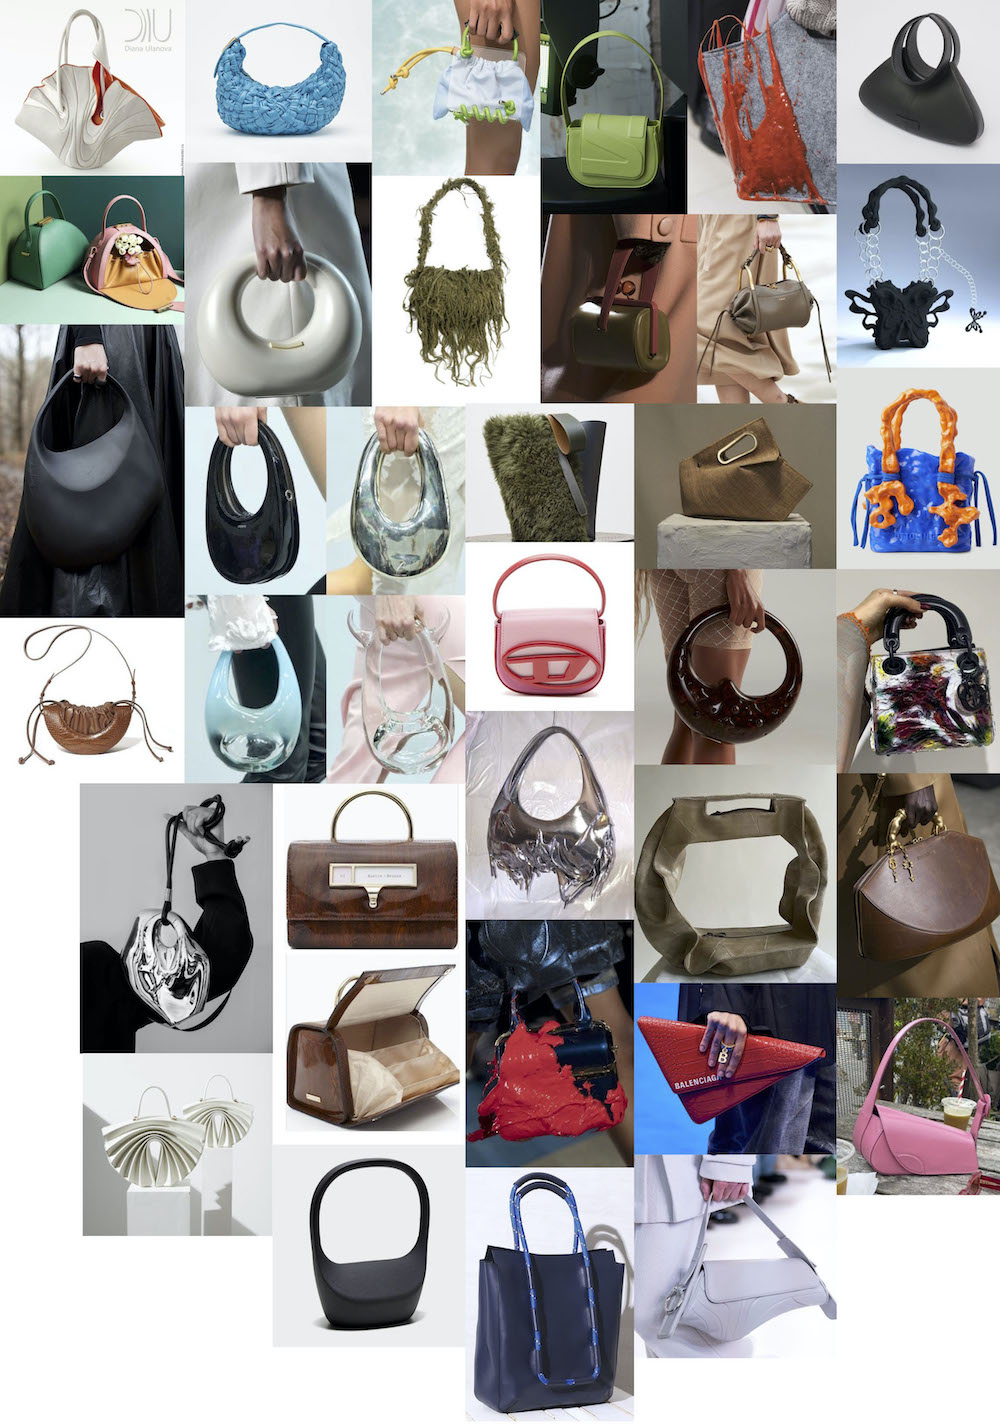
More:
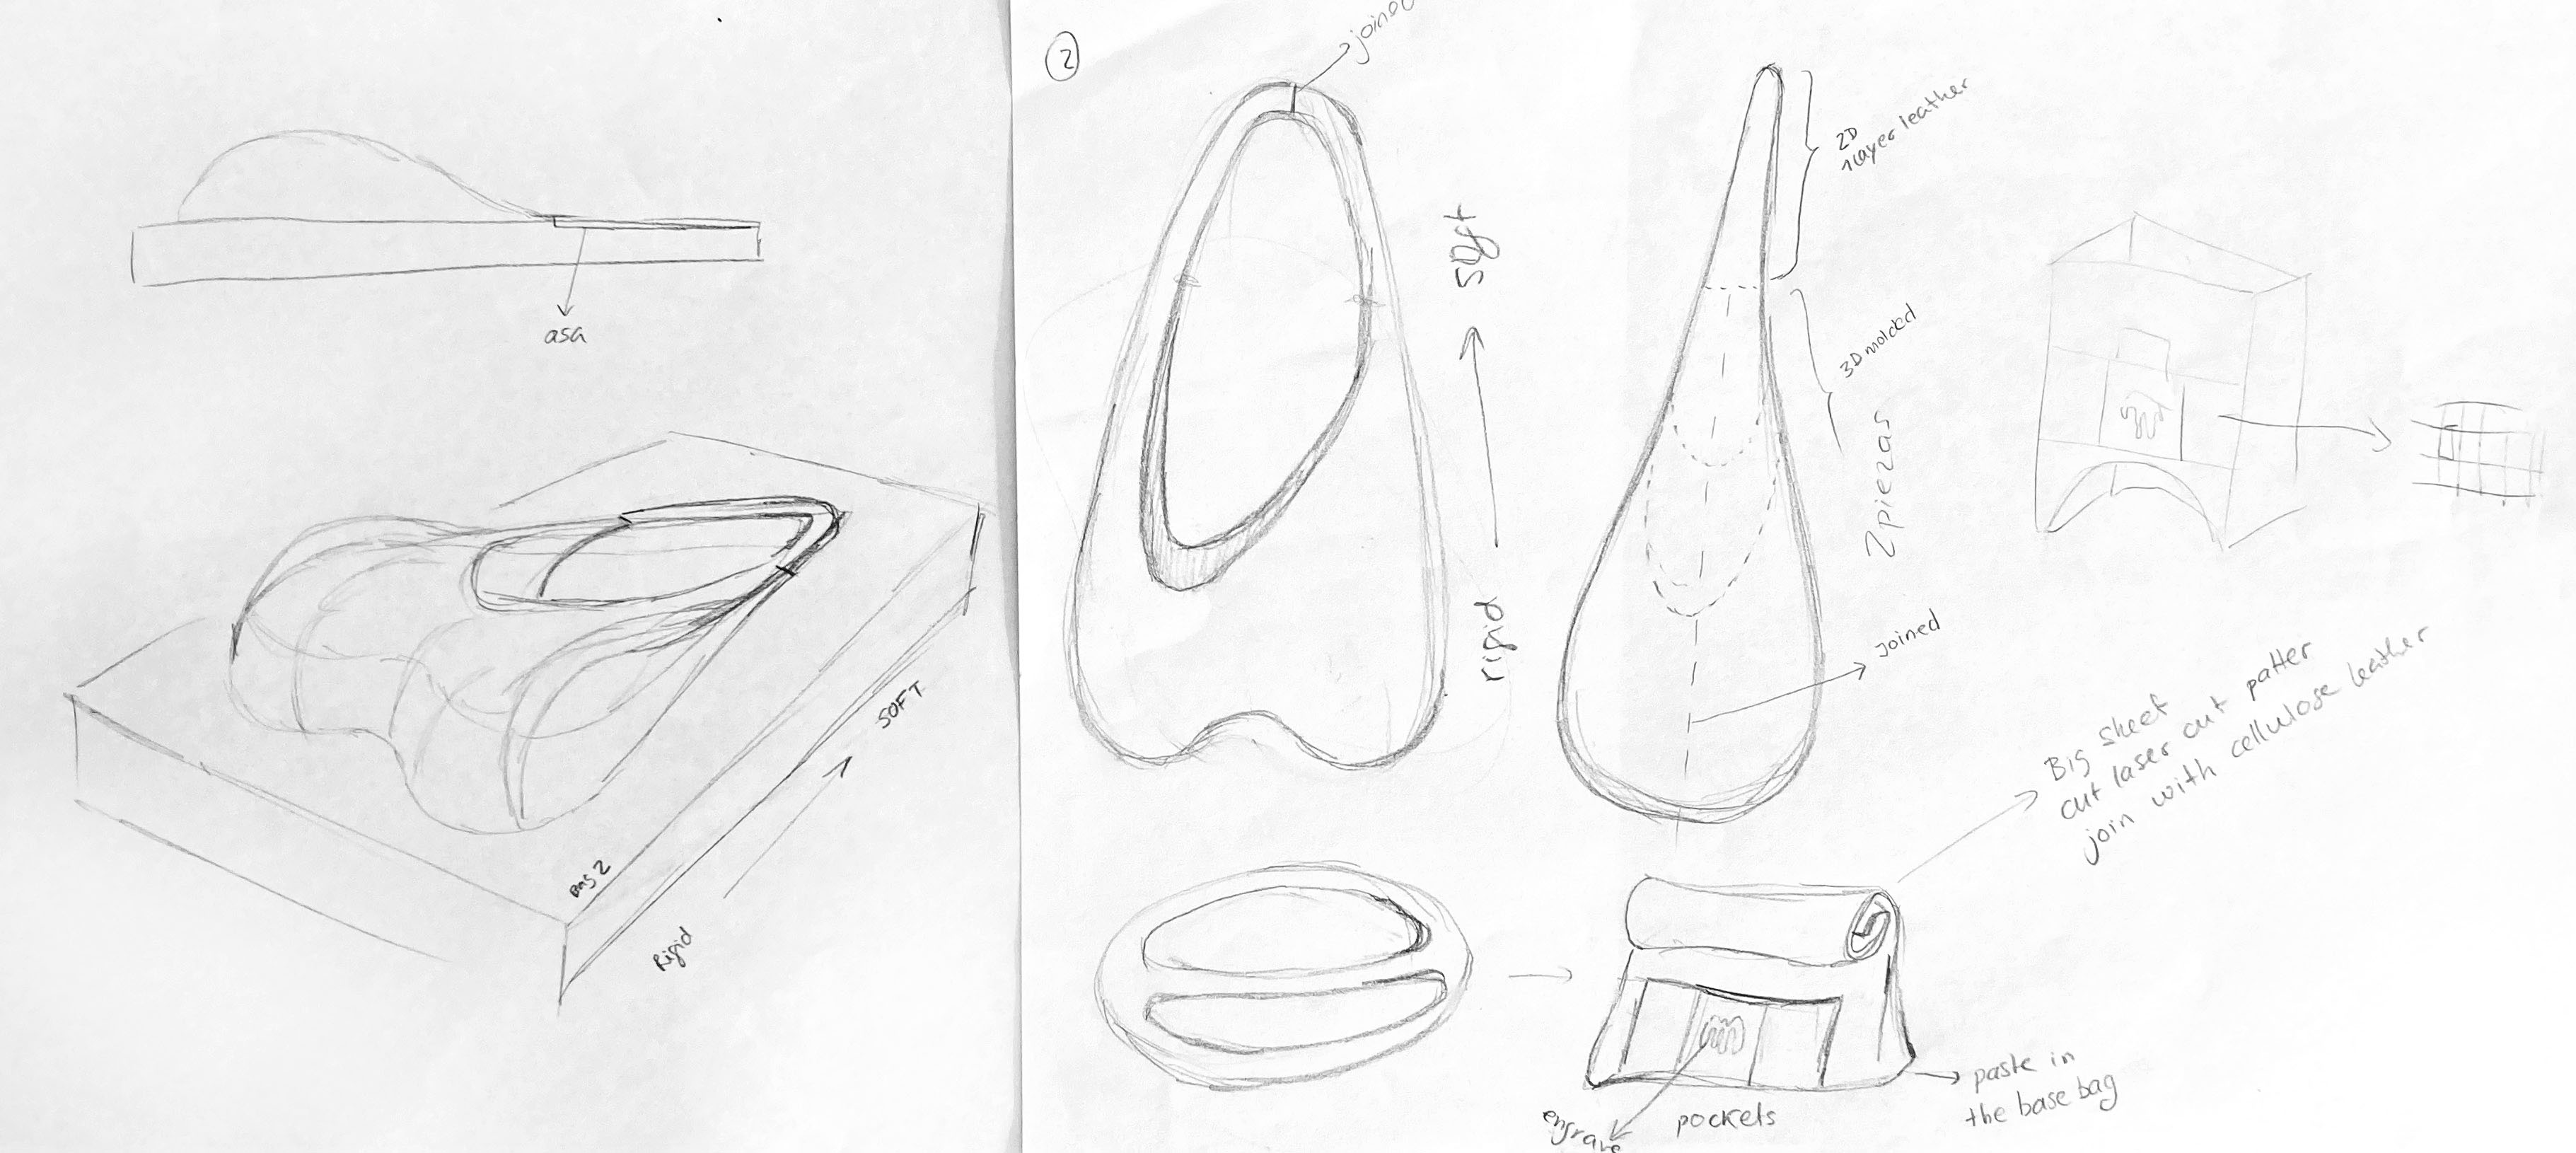
Playing with shapes
Time to draw!

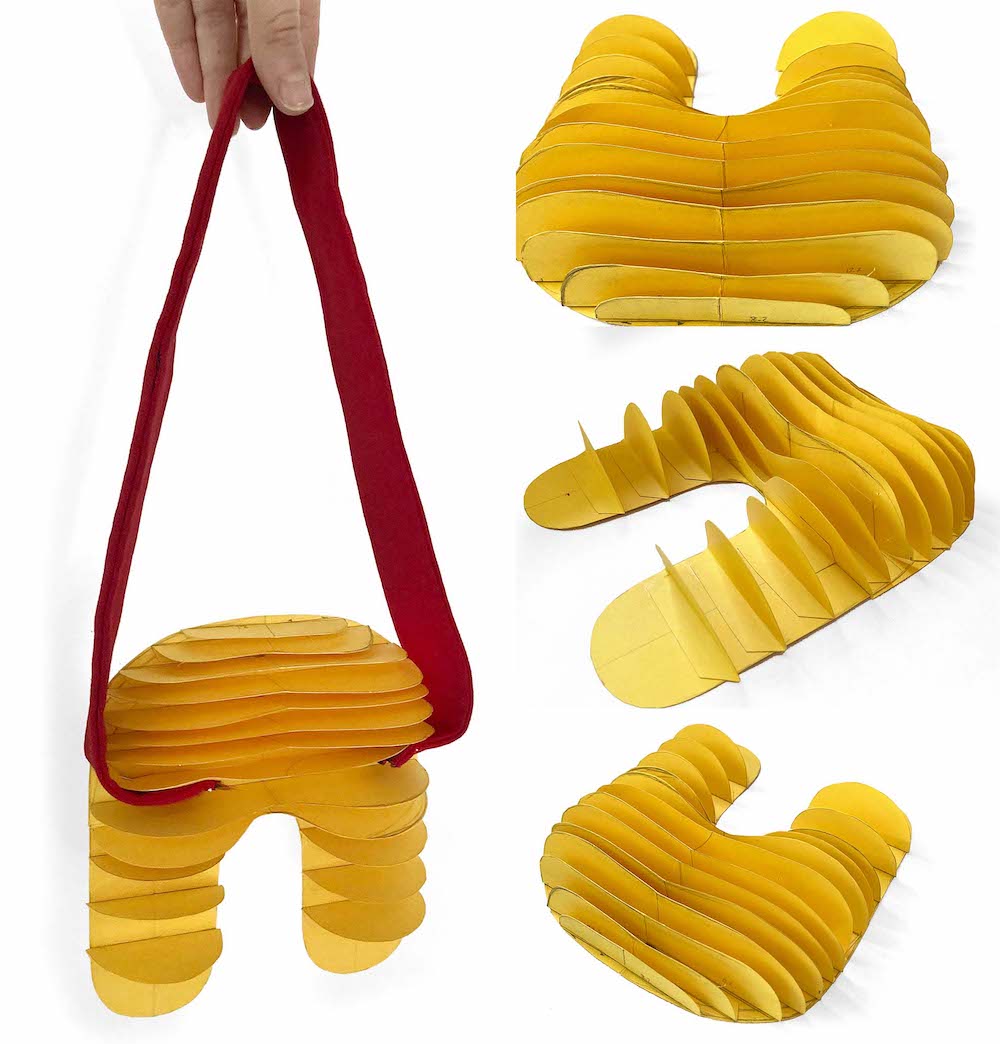
Prototypes
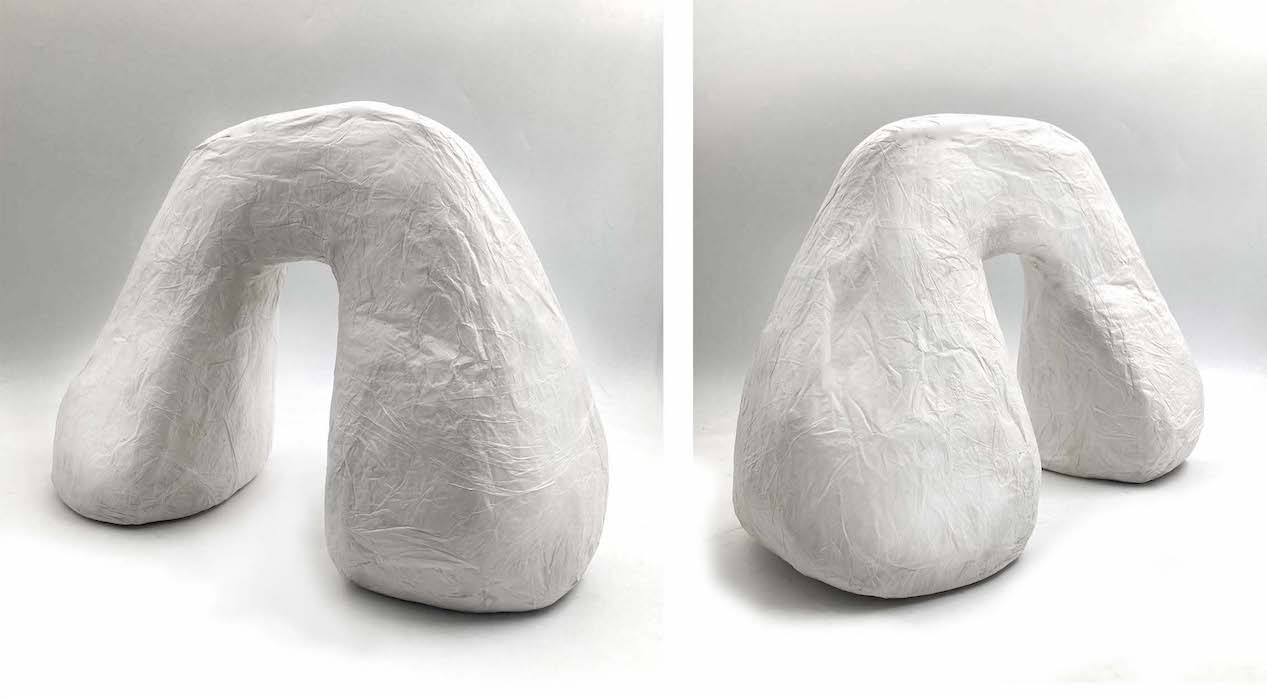
After some draws, I need to make some shapes in 3D to realize the ergonomics of the shape and the real dimensions that it could take.
- Clay
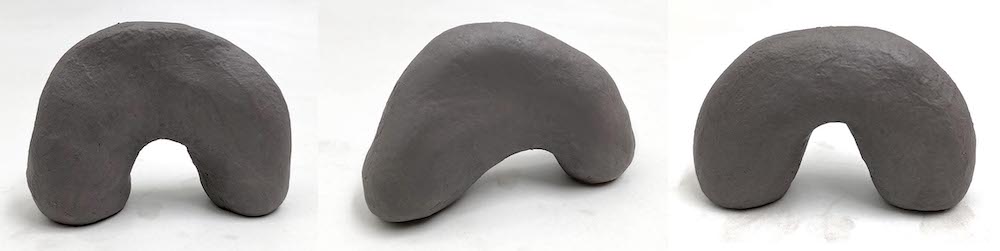
- Paper maché proto to play in real size
Final handbags
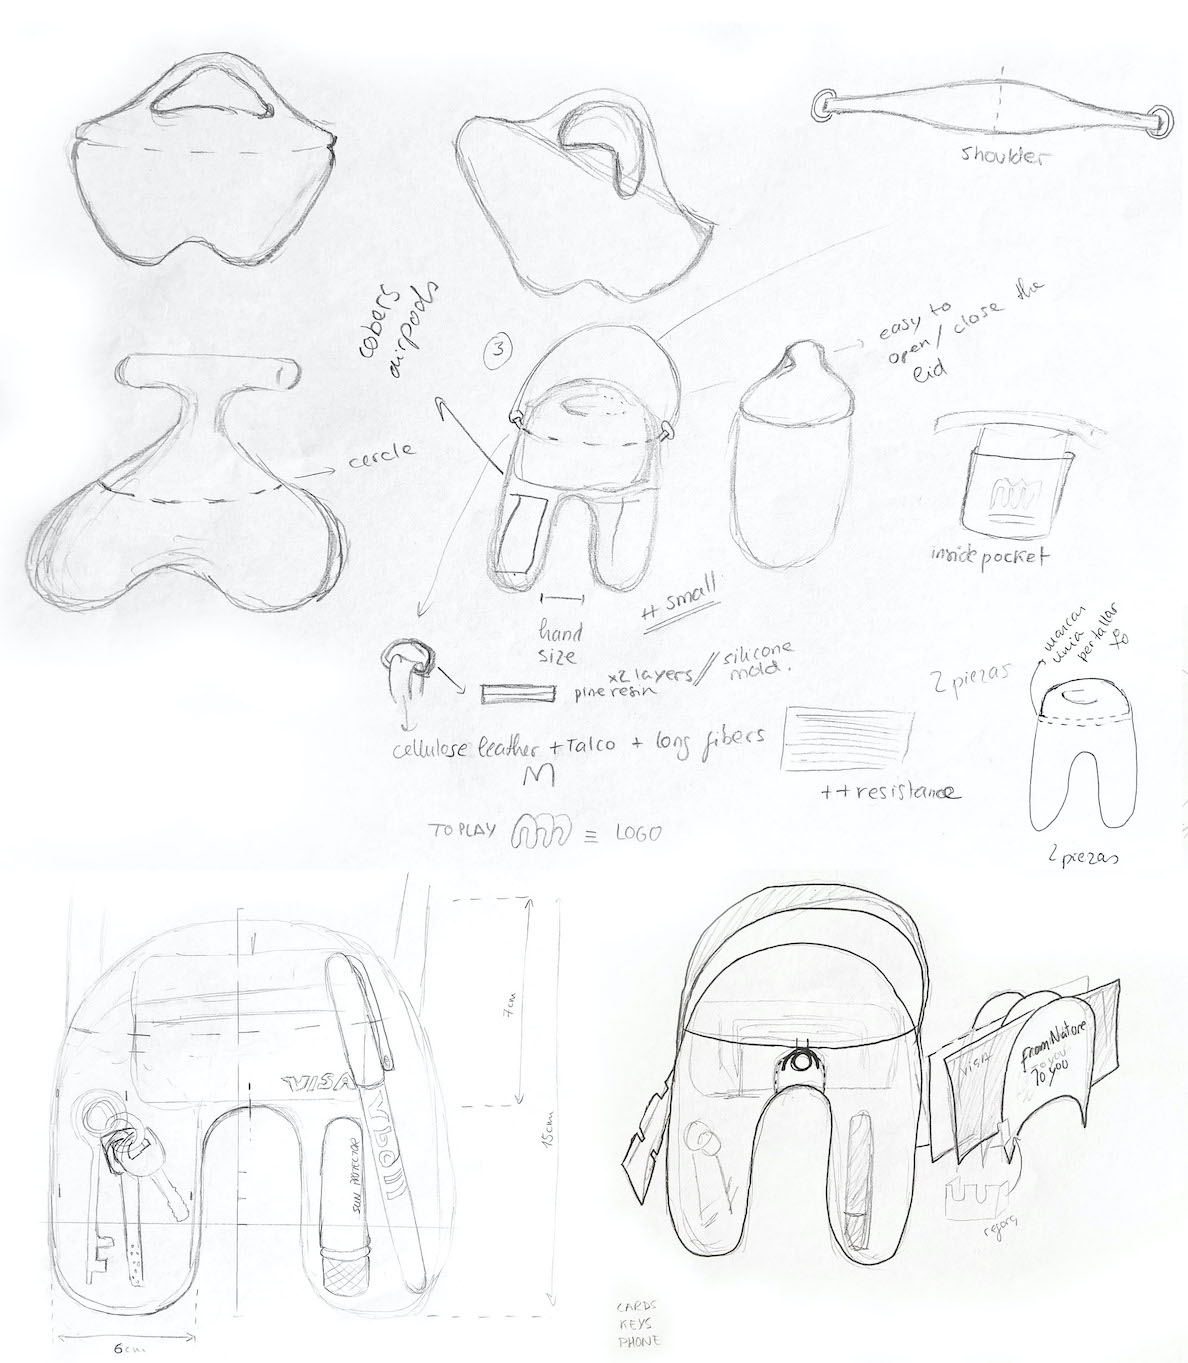
Sketches
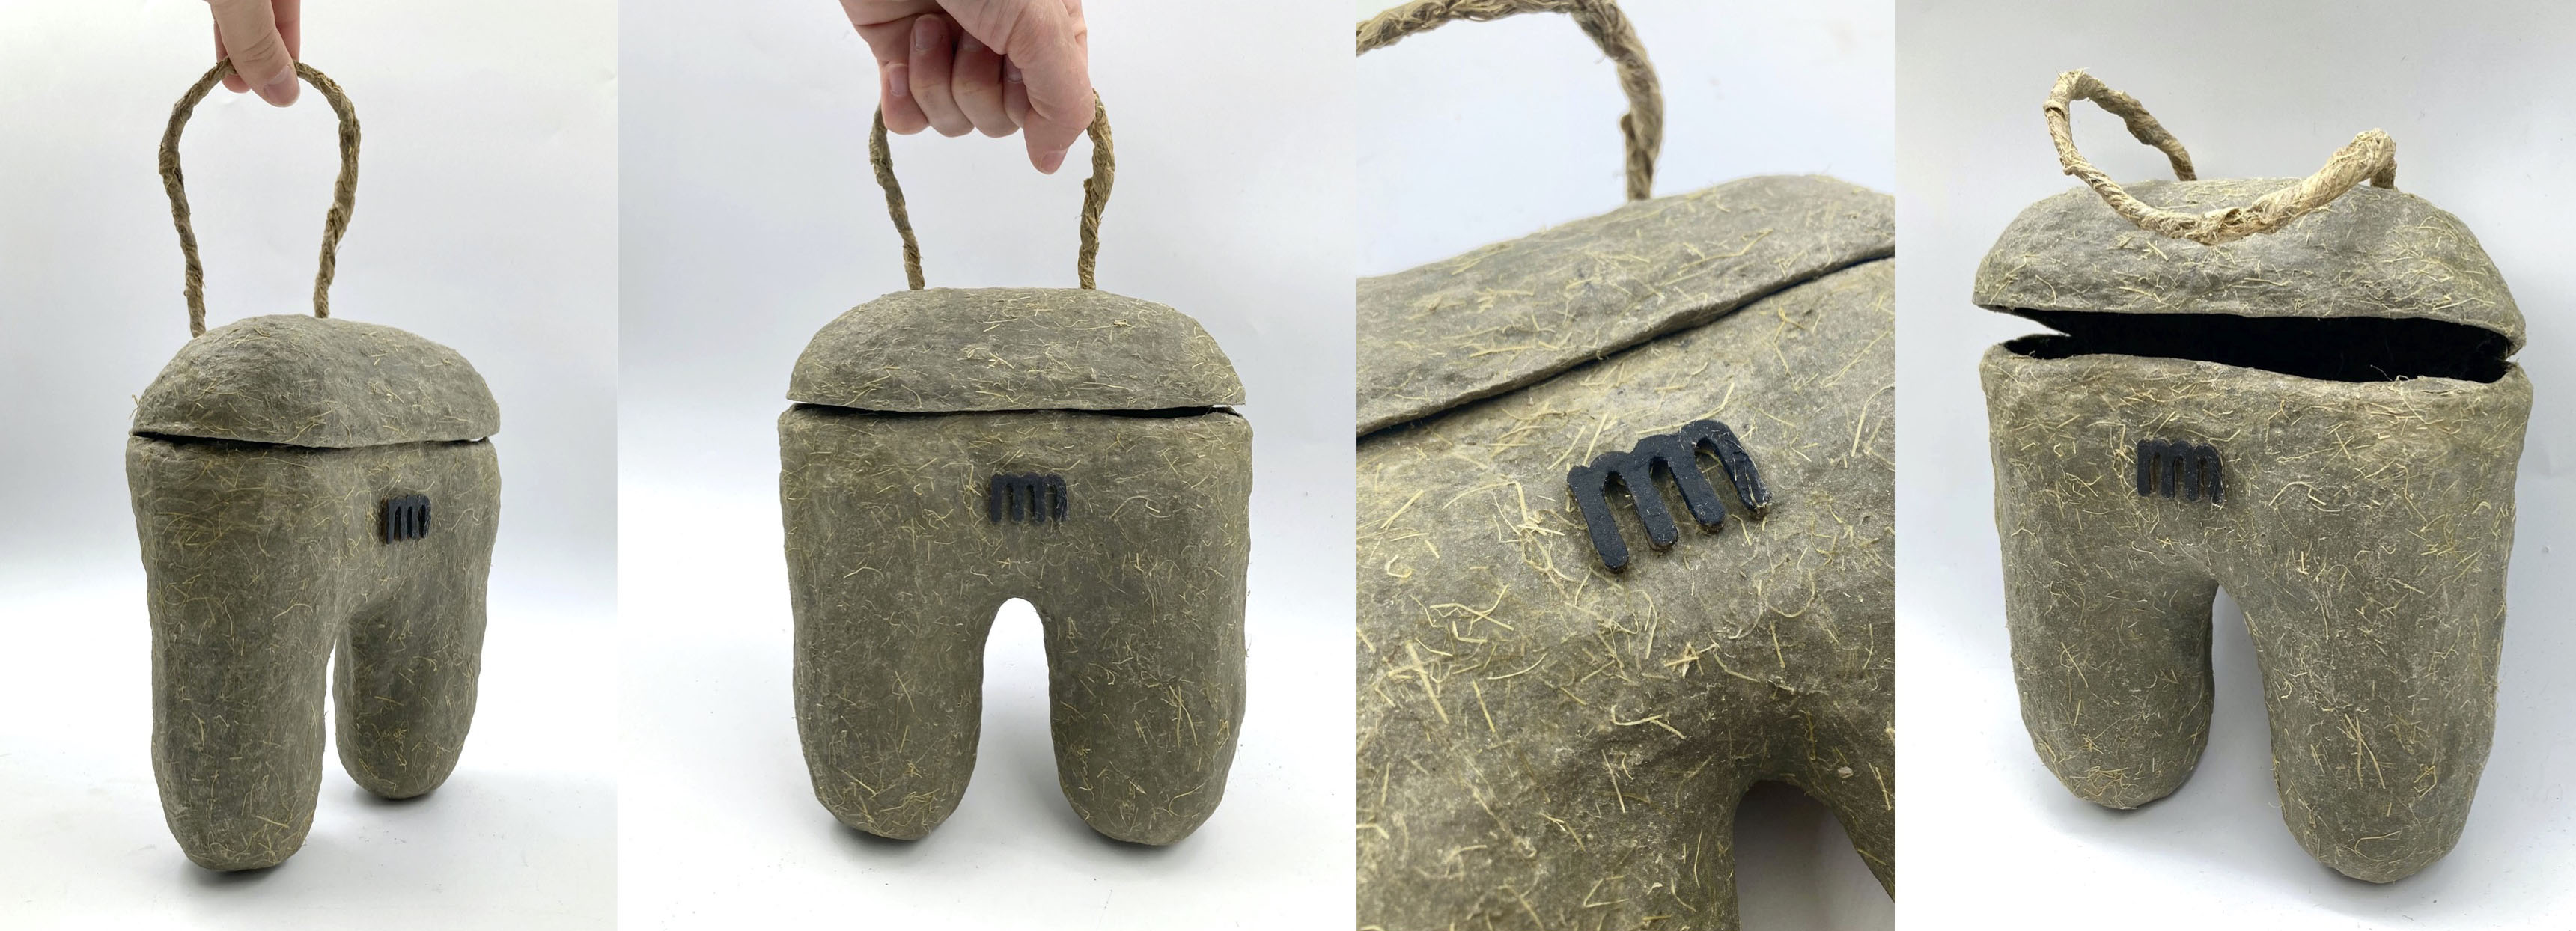
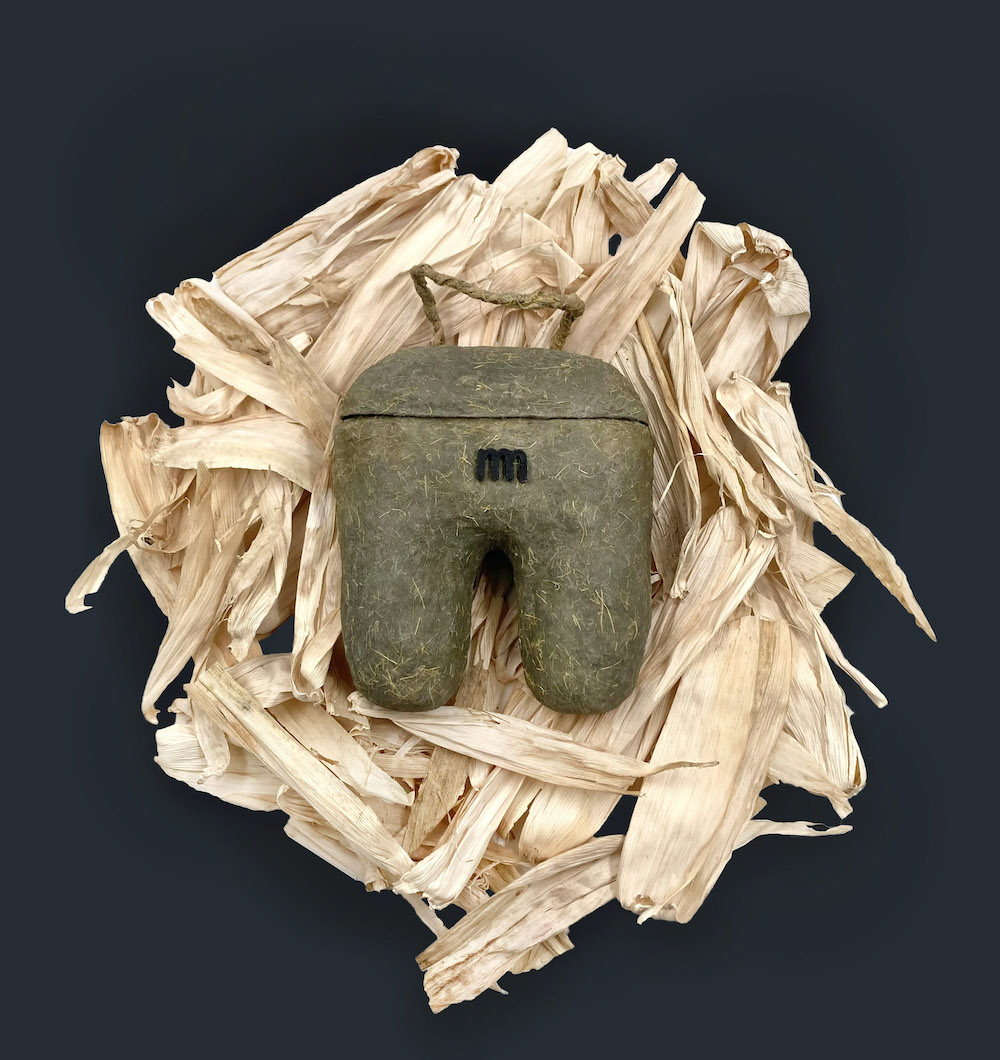
TWIG BAG:
2D to 3D:
Investigation for the opening of the bag to be functional and biodegradable:
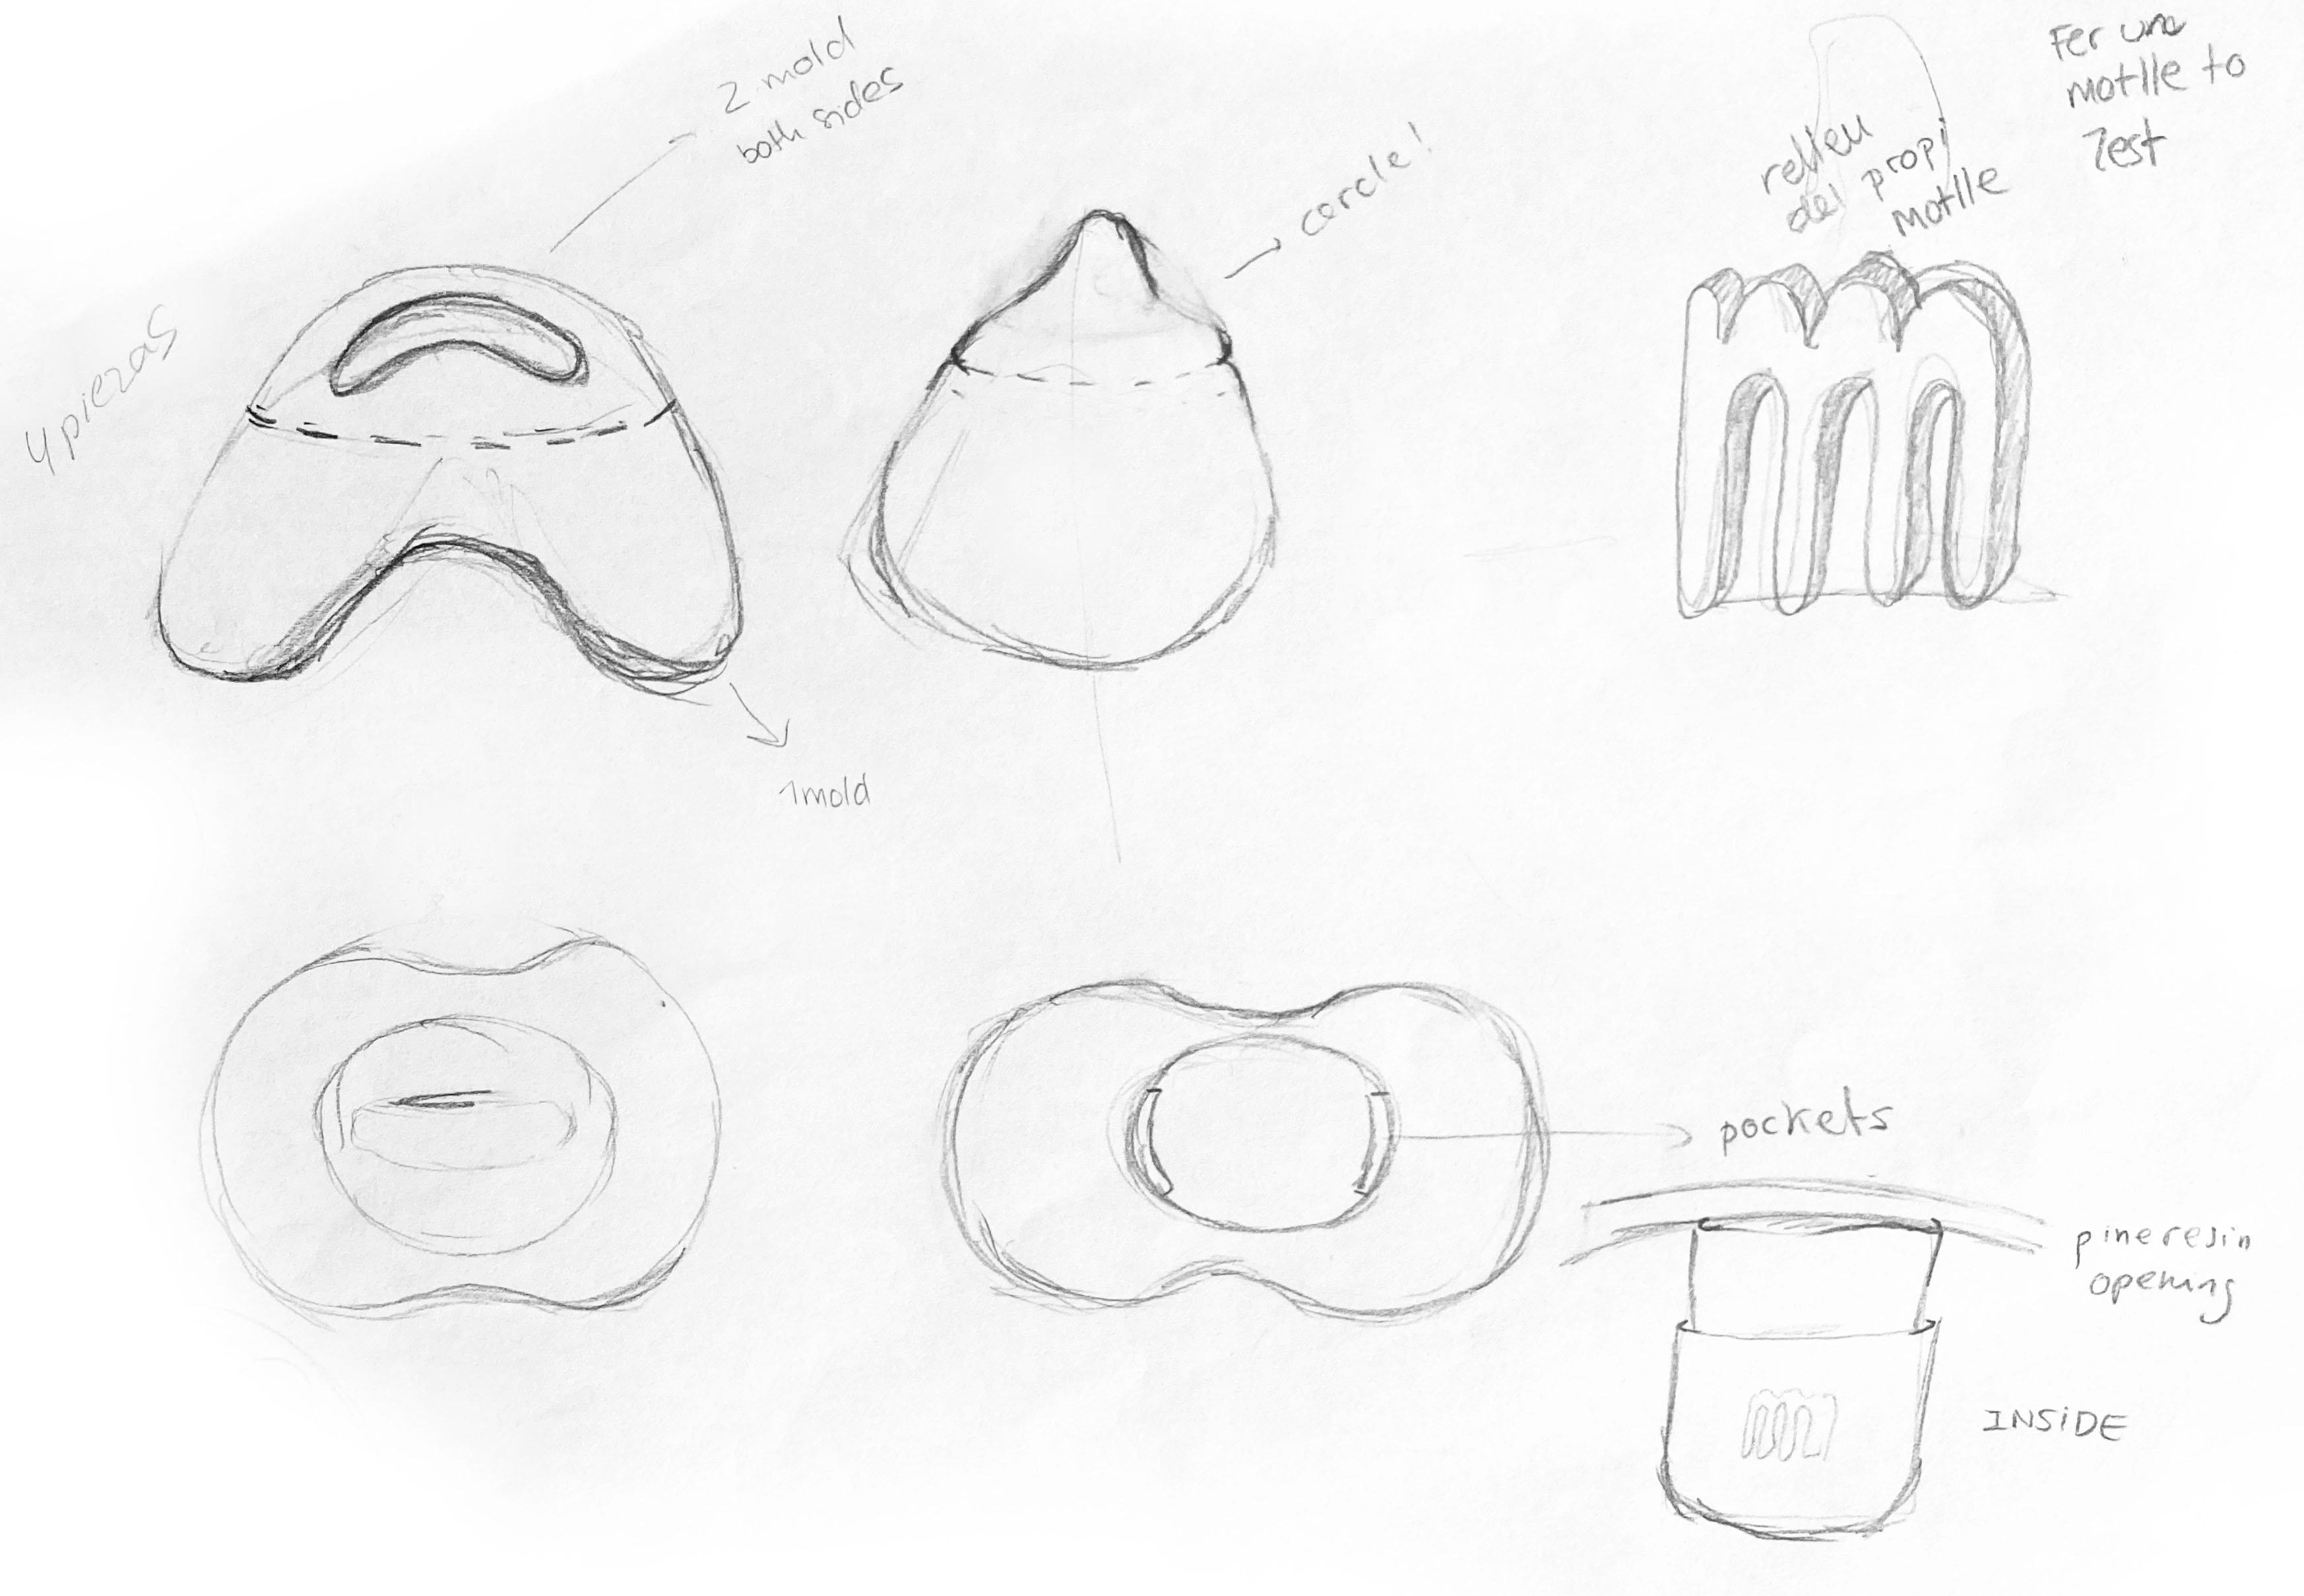
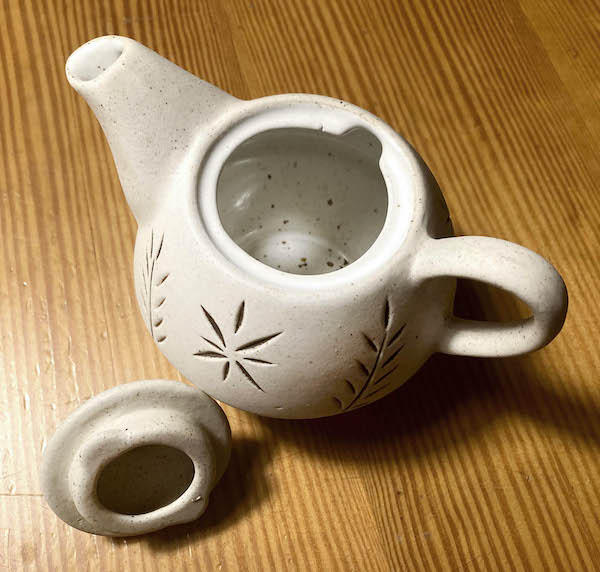
IDEA 1:
The first idea is to make the opening of a teapot with Pine resin composite.
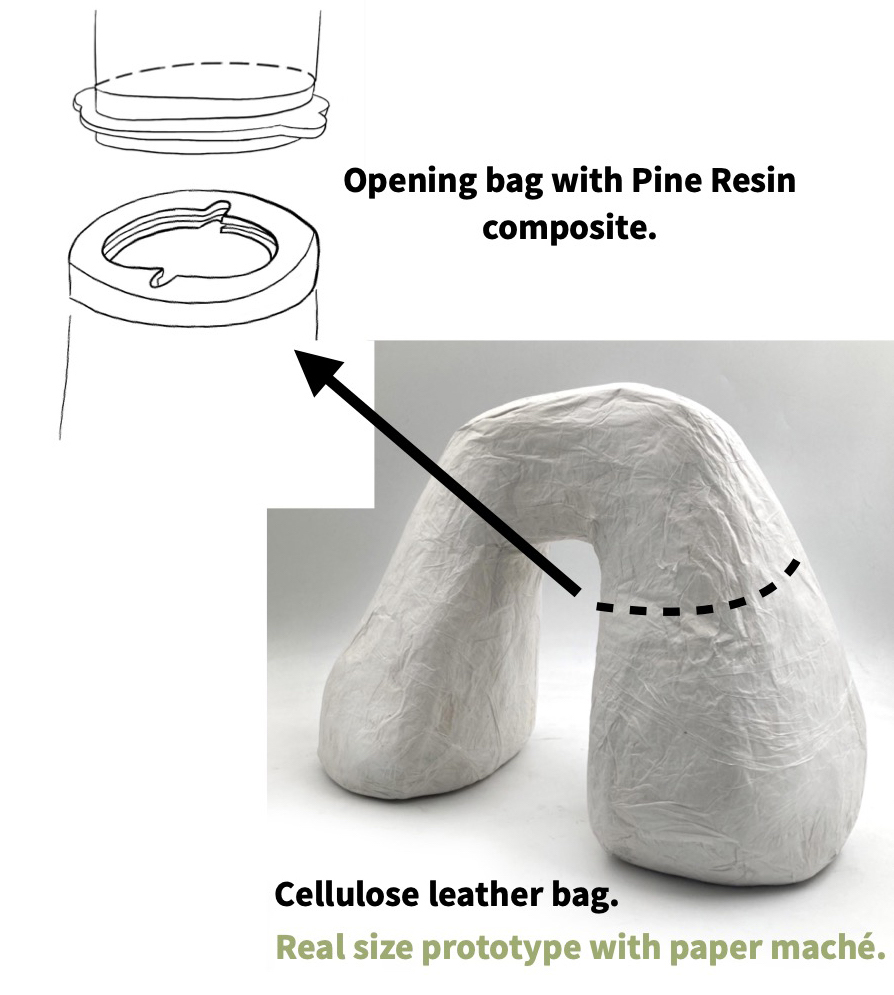
Drawing all the pieces that I will need to understand the functioning and the requirements.
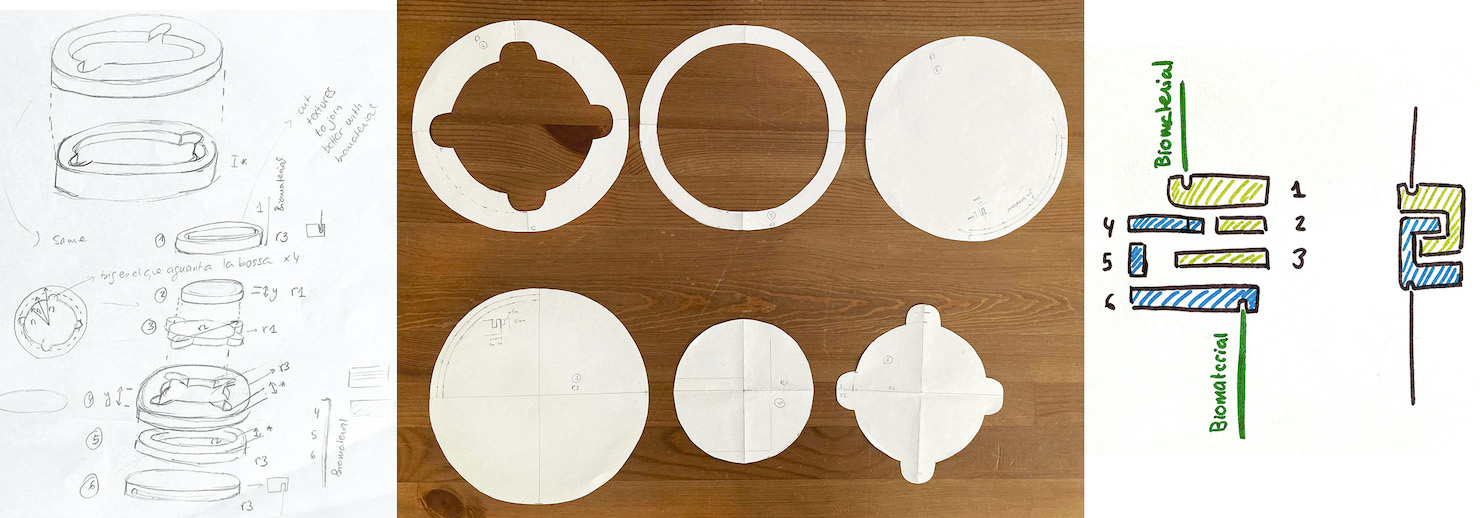
I am worried to get a heavy opening for a bag because I will need 6 layers, so it's going to be almost 6 cm of thickness, so it's unviable for accessories.
Another option it's to test the Pine resin thinner and mill in the CNC adding some fibers to the composite to get more resistance. But still too fragile and thick, moreover, the diameter of the circle to be practical to add and take out your staff from the handbag is not an orgonamic shape to carry around, to much volume!
IDEA 2:
After dismissing the Teapot opening for the material and also for the dimensions that the diameter of it required I redesign the shape of the bag:
So, I could get an easy way to the opening of the bag by mixing the soft and the strong Cellulose leather recepies to get the flexibility just where I need.
Easy solution!
Modify the paper prototype to scan and draw it in the Rhinoceros software.
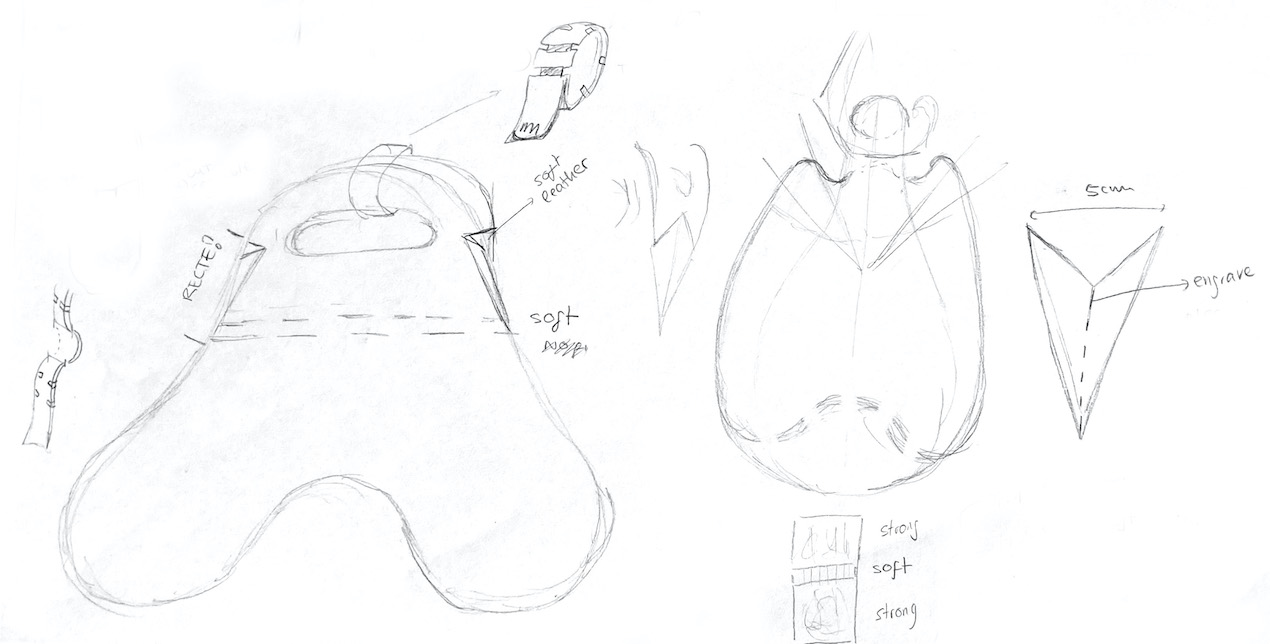
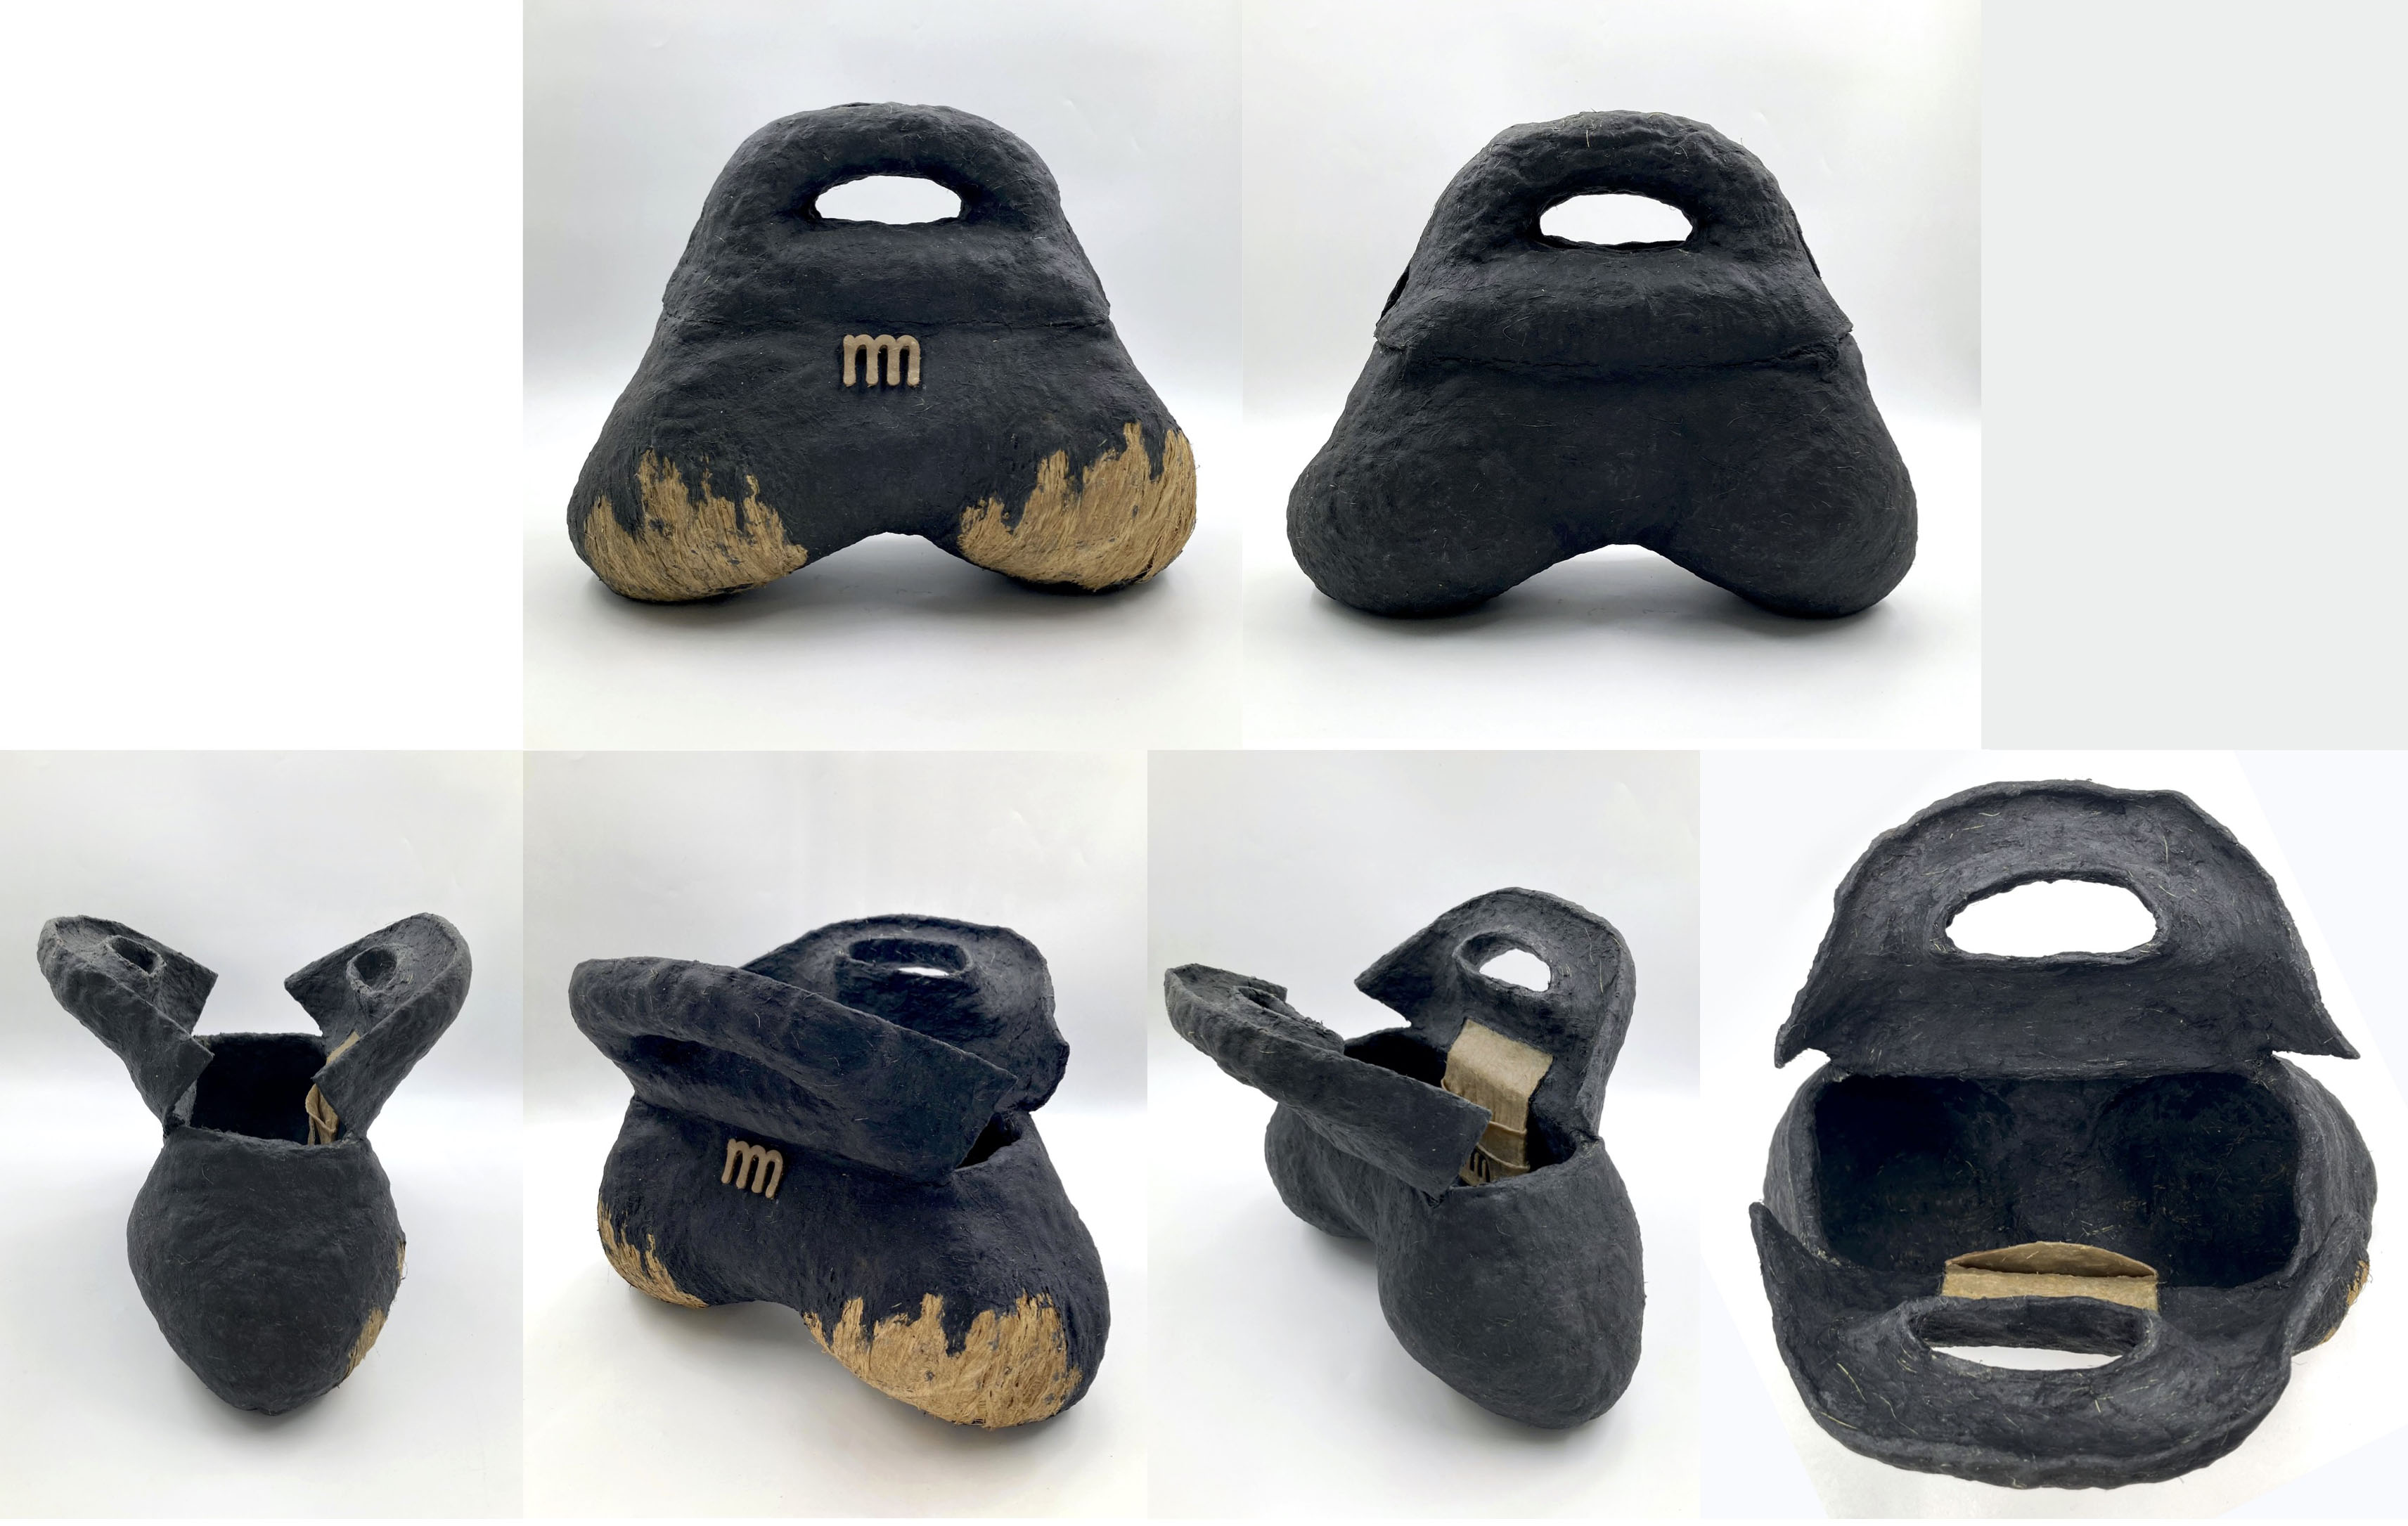
ROOT BAG:
Some sketches, ideas, shapes, and... What do I need to keep in this little bag?
Some draw ideas for the handle and the idea to be regulable to get a party bag to a bum bag in one.
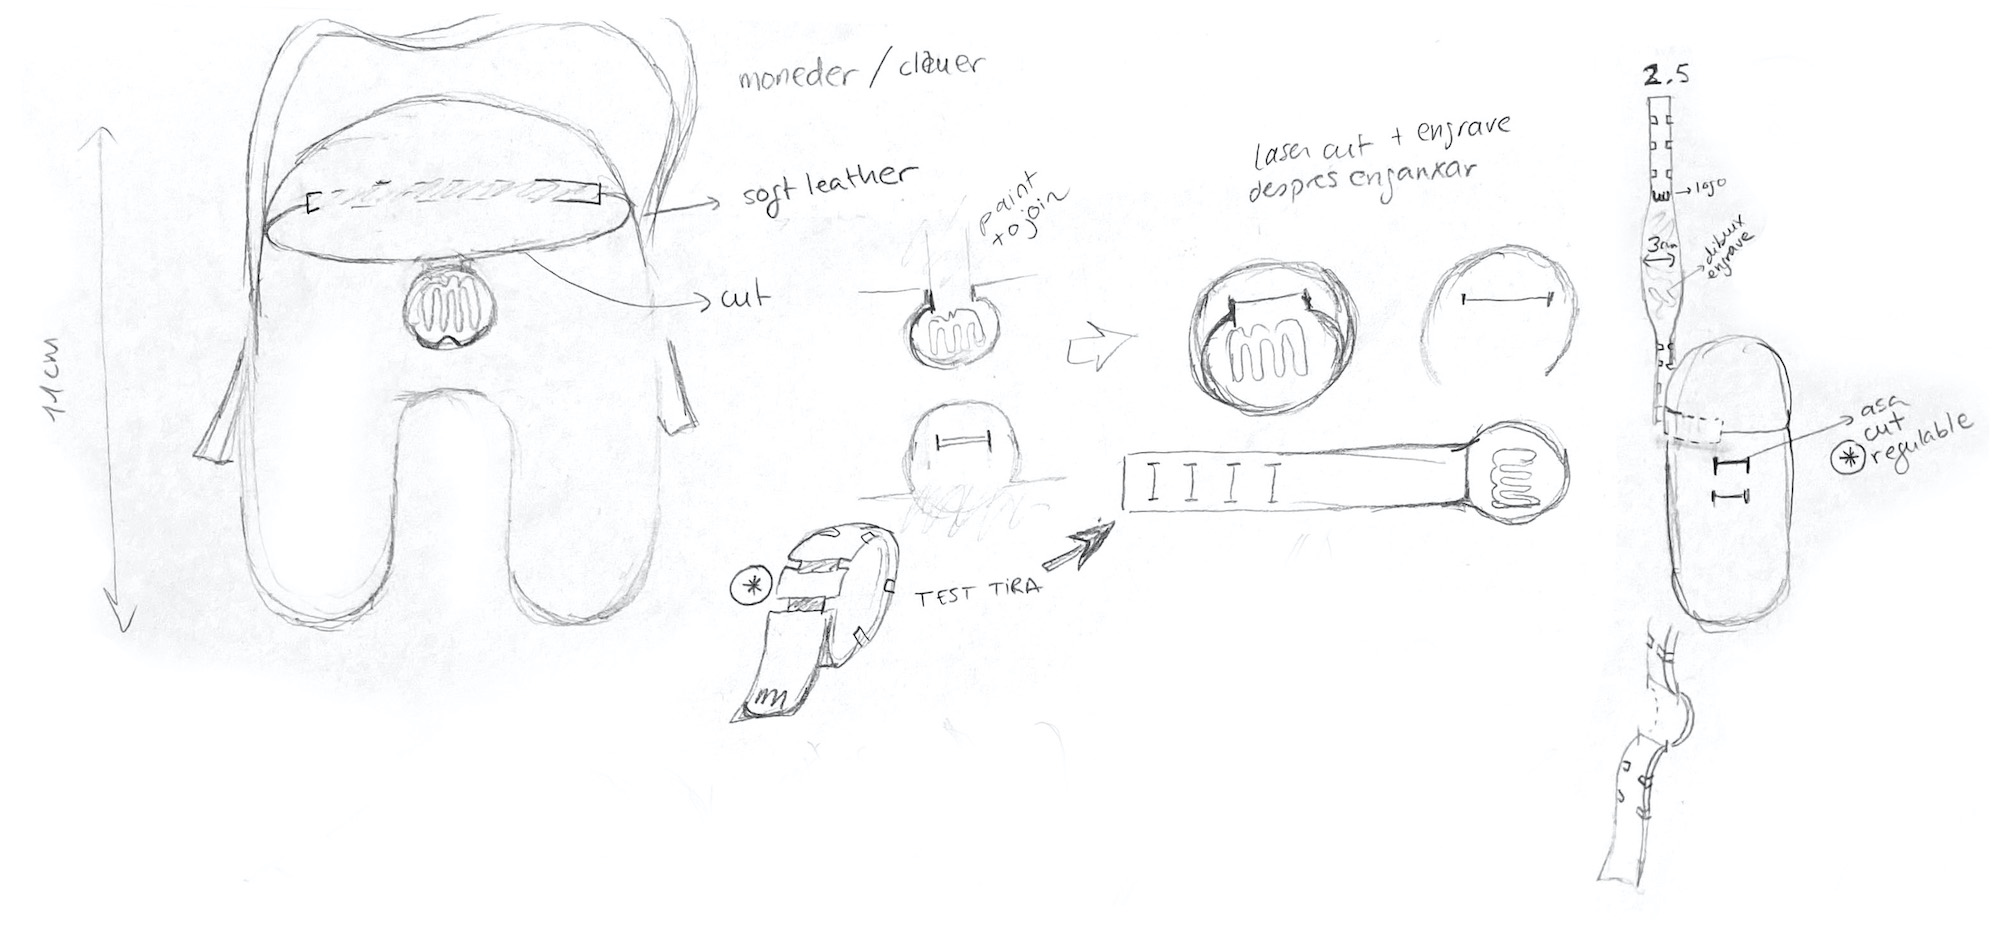
How to secure the opening?
Cut Cellulose leather sample the get the hook. Unfortunately, after some tests, the sample was enough strong so the hole gets bigger with the usage.
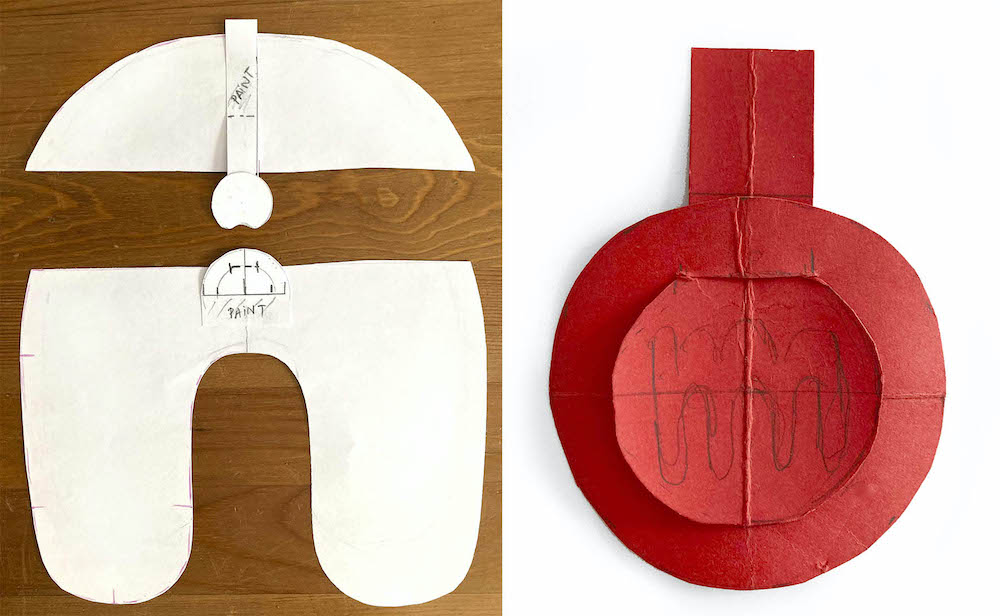
Why this shape?
This volume's basically to be able to play in the communication of the brand for the similarity of the "m" logo.
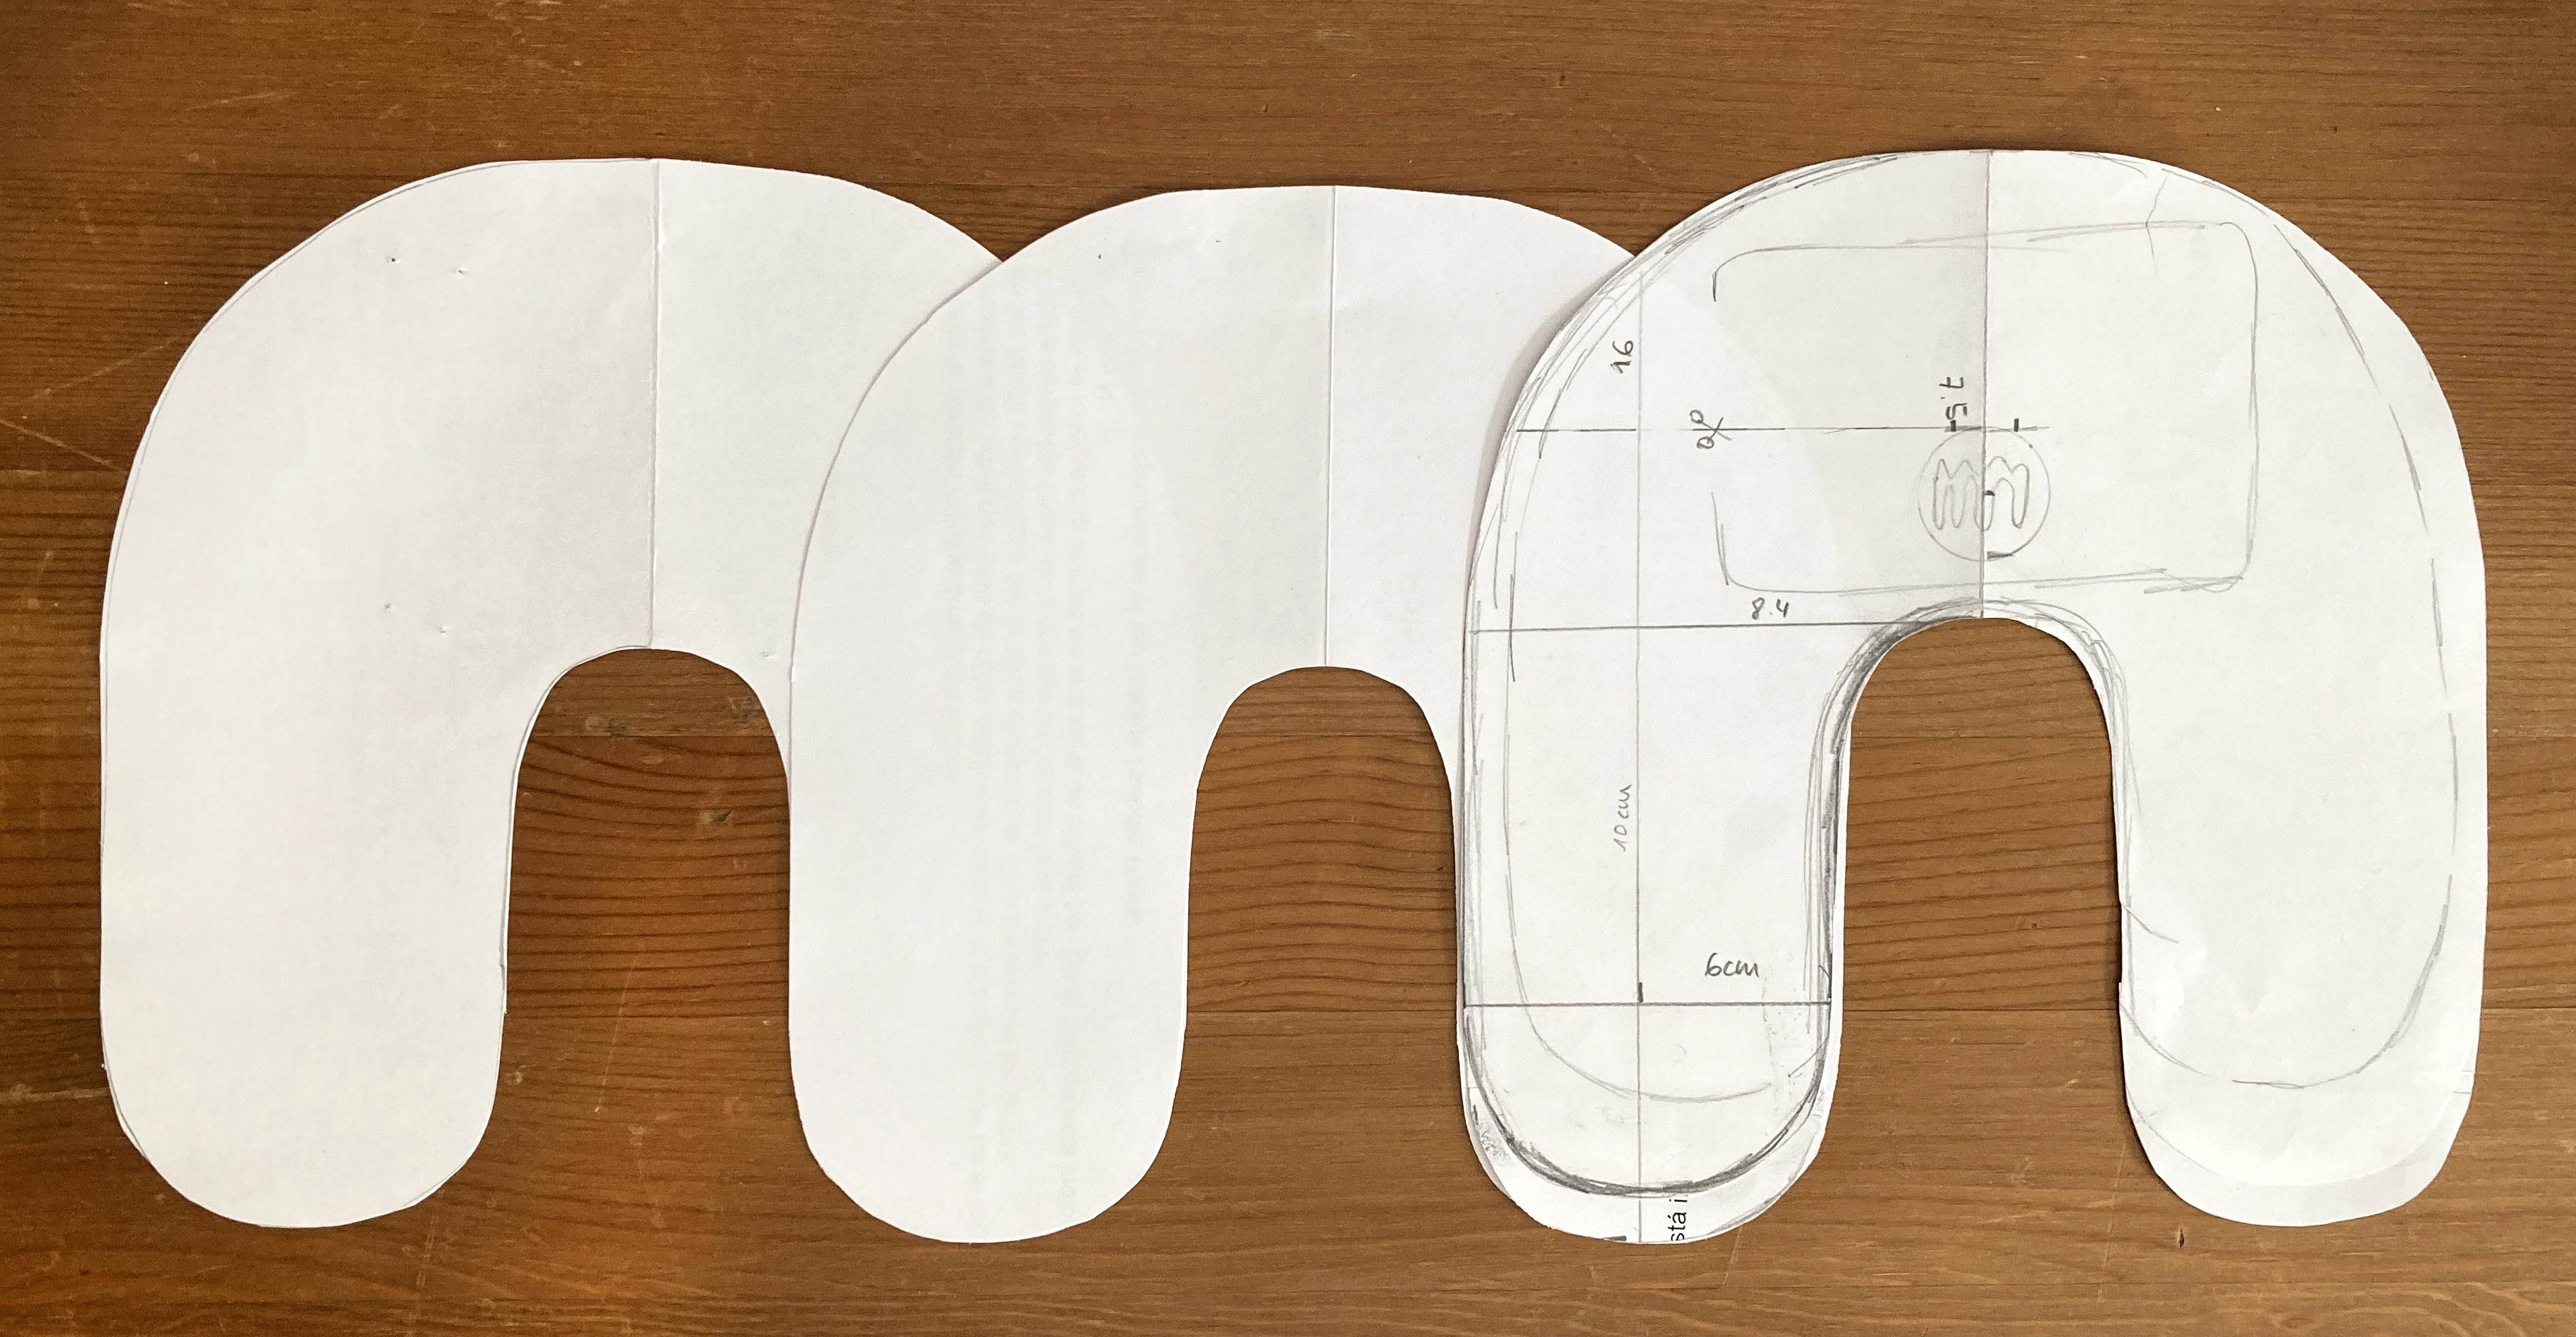
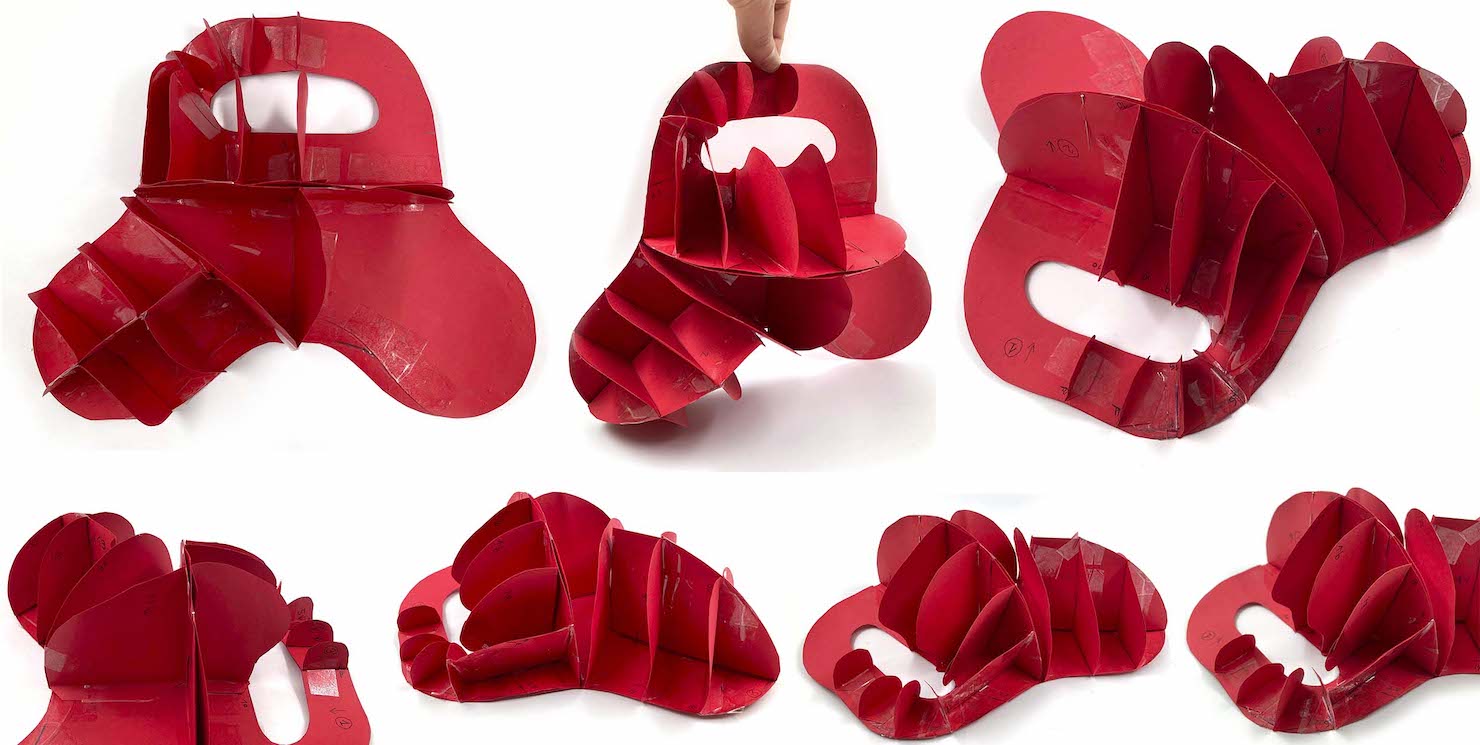
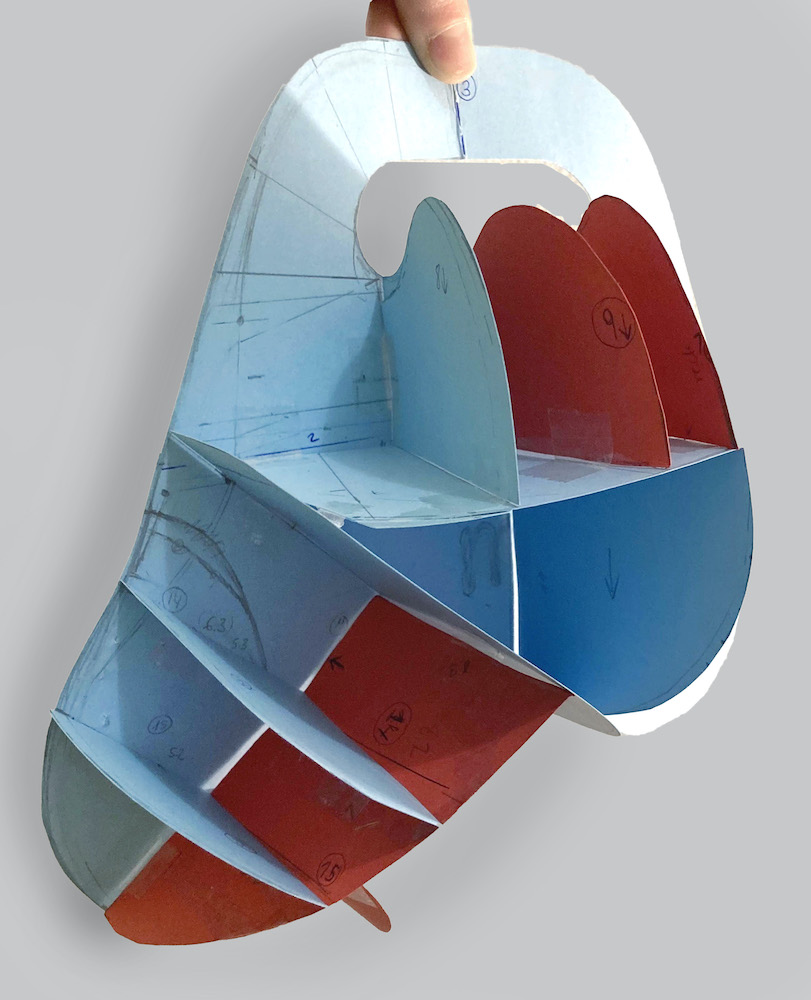
2D to 3D:
Testing the real size and the comfort for the hand with the prototype, after it, I could disassemble it to scan and draw each piece in the Rhinoceros.
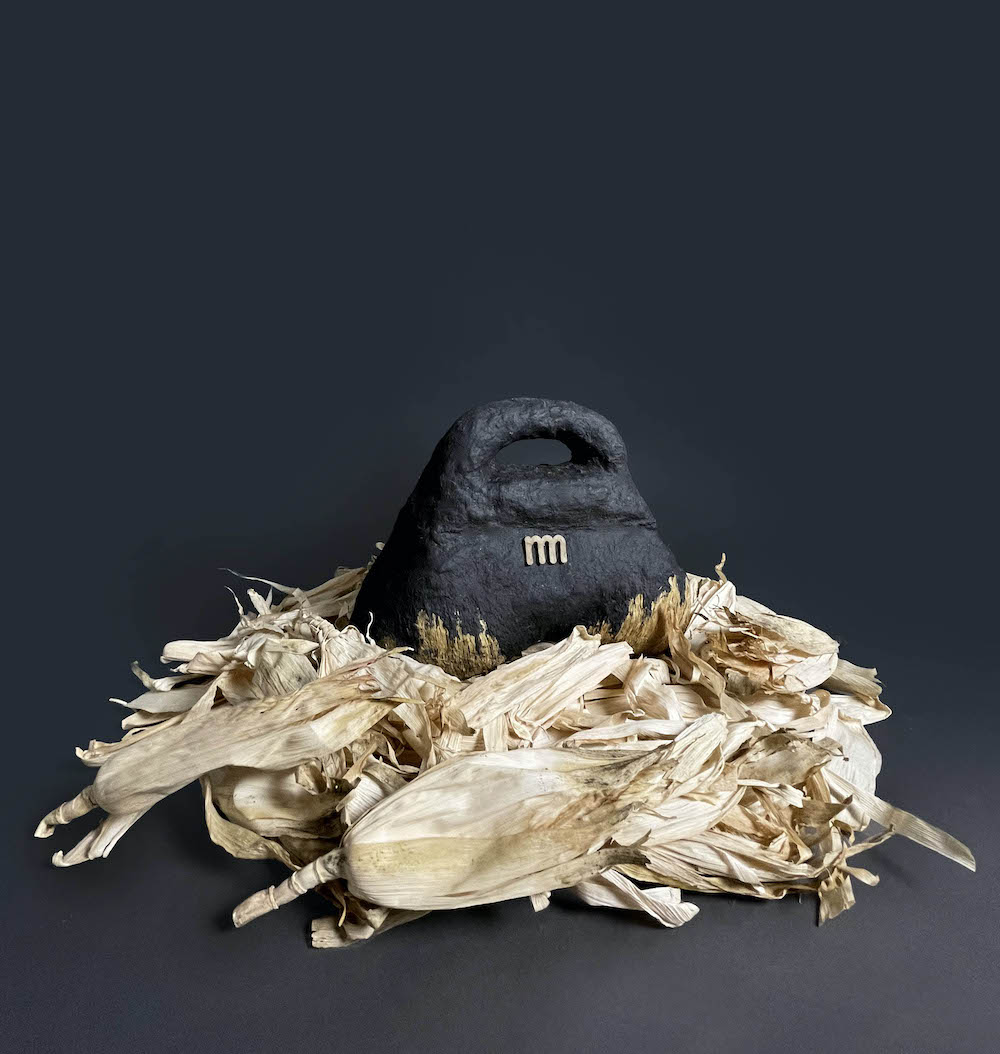
SHUCK BAG:
In that case, the purpose of this bag was to get a hobo bag with the bottom rigid and the handle soft.
Because the shape is more simple rather the other bags, I make a paper pattern and then I decided the height of some specific parts of the bag to easily draw in Rhino.

Product naming
Name of the collection:
BUD
n. Botanyany of the small parts on the end of a plant stem, from which leaves or flowers develop.
"The plants were showing a few buds by late April."
A meaning of growing, from nothing to a real shape with movement, life, and utility.
Final sketches in Procreate app with the final color combination and dimensions:
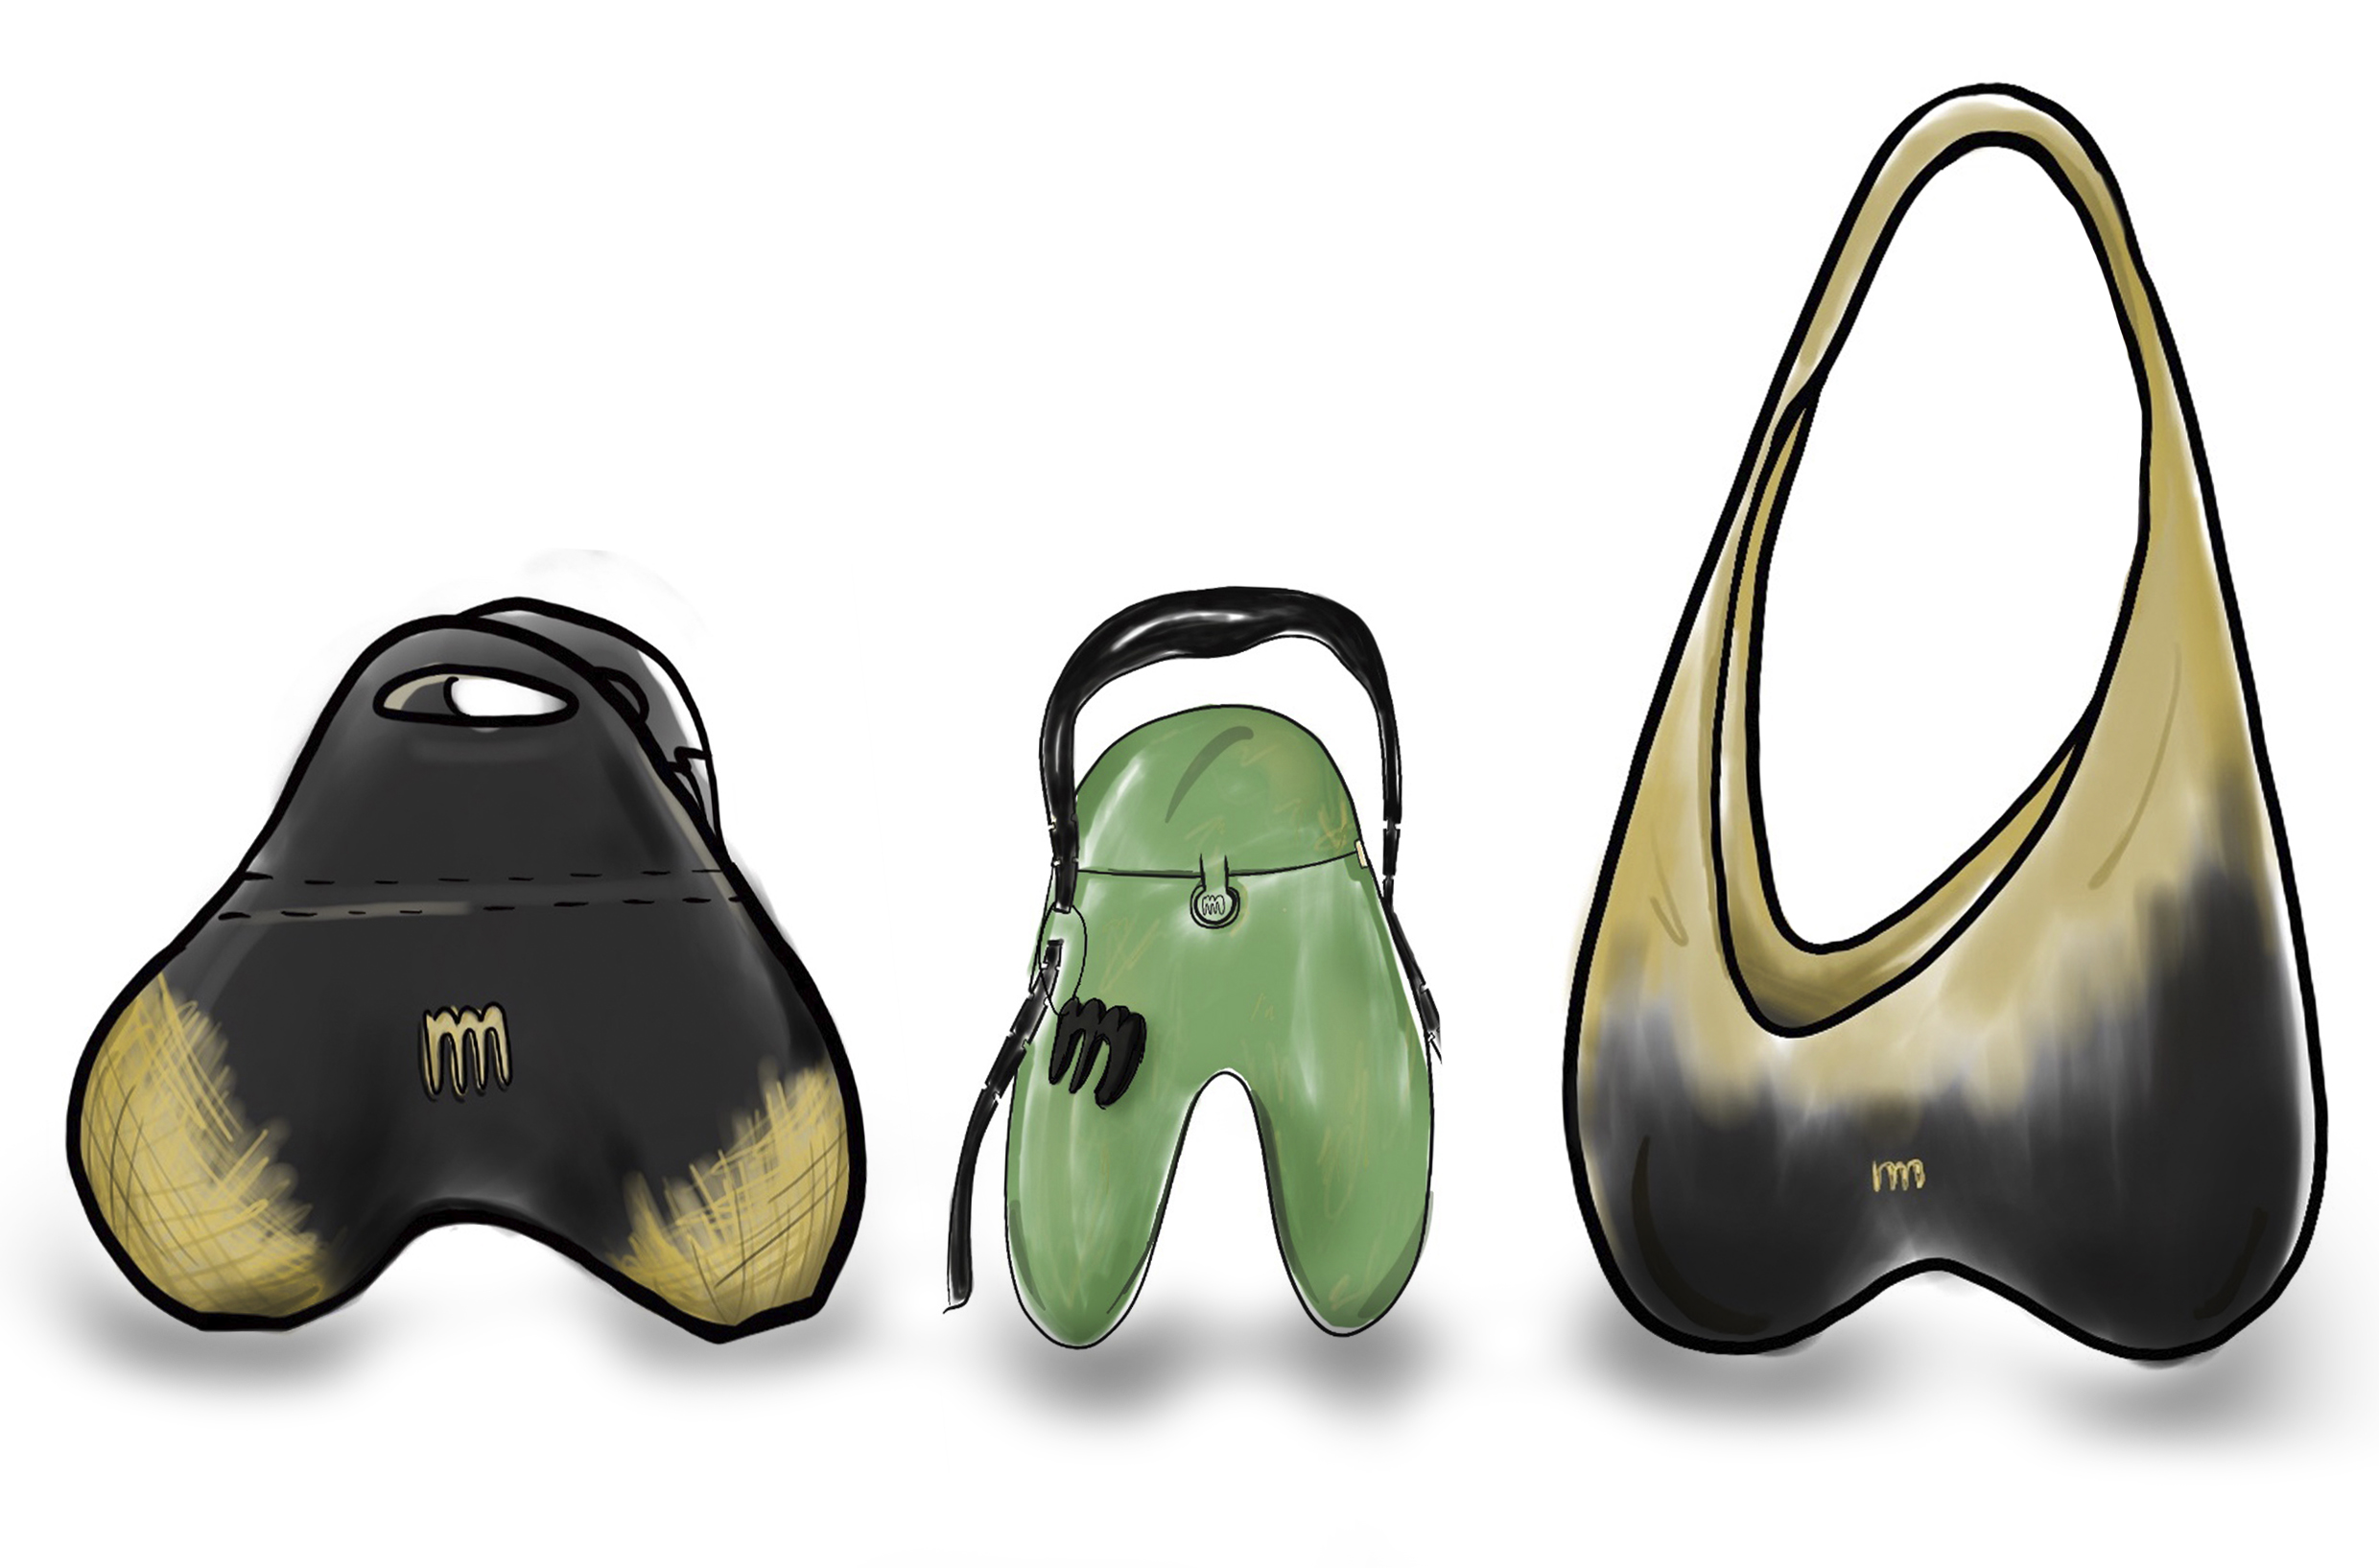
The name of each bag:
TWIG BAG:
/twɪg/ n.
Botanya slender shoot of a tree or other plant.
The name comes up because of the similitary of the felt part of the bag with a twig.
ROOT BAG:
/rut, rʊt/
n.
Botanya part of the body of a plant that develops downward into the soil.
In that case, the name comes from the shape of the bag cause it reminds the roots of a plant going to the grown, some kind of legs.
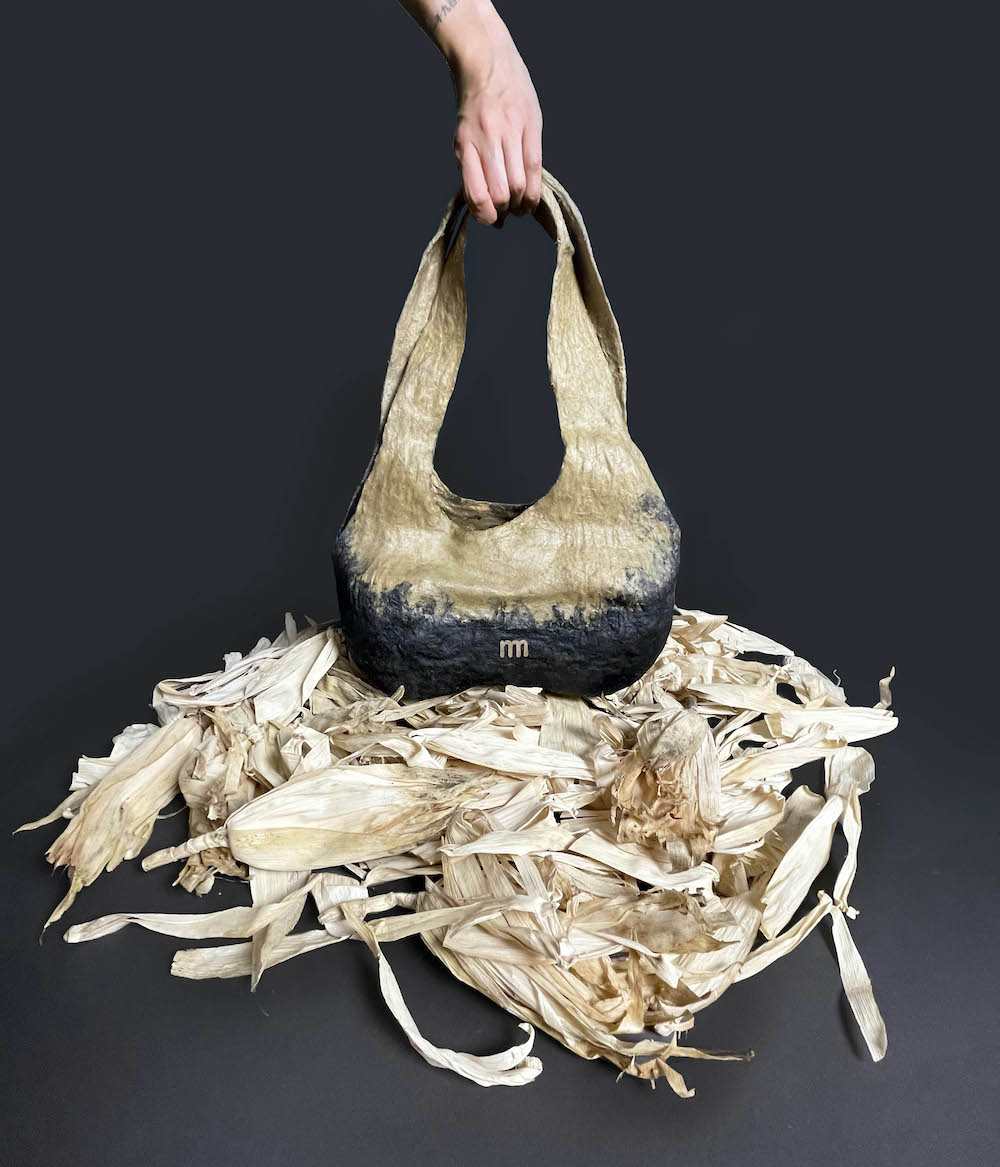
SHUCK BAG:
/ʃʌk/
n.
A husk or pod, such as the outer covering of corn.
Finally, the last bag's name comes from the similarity of the volume and also the functionality, cause the bag and the husks are covering/ protecting the corn and on the other side your staff.
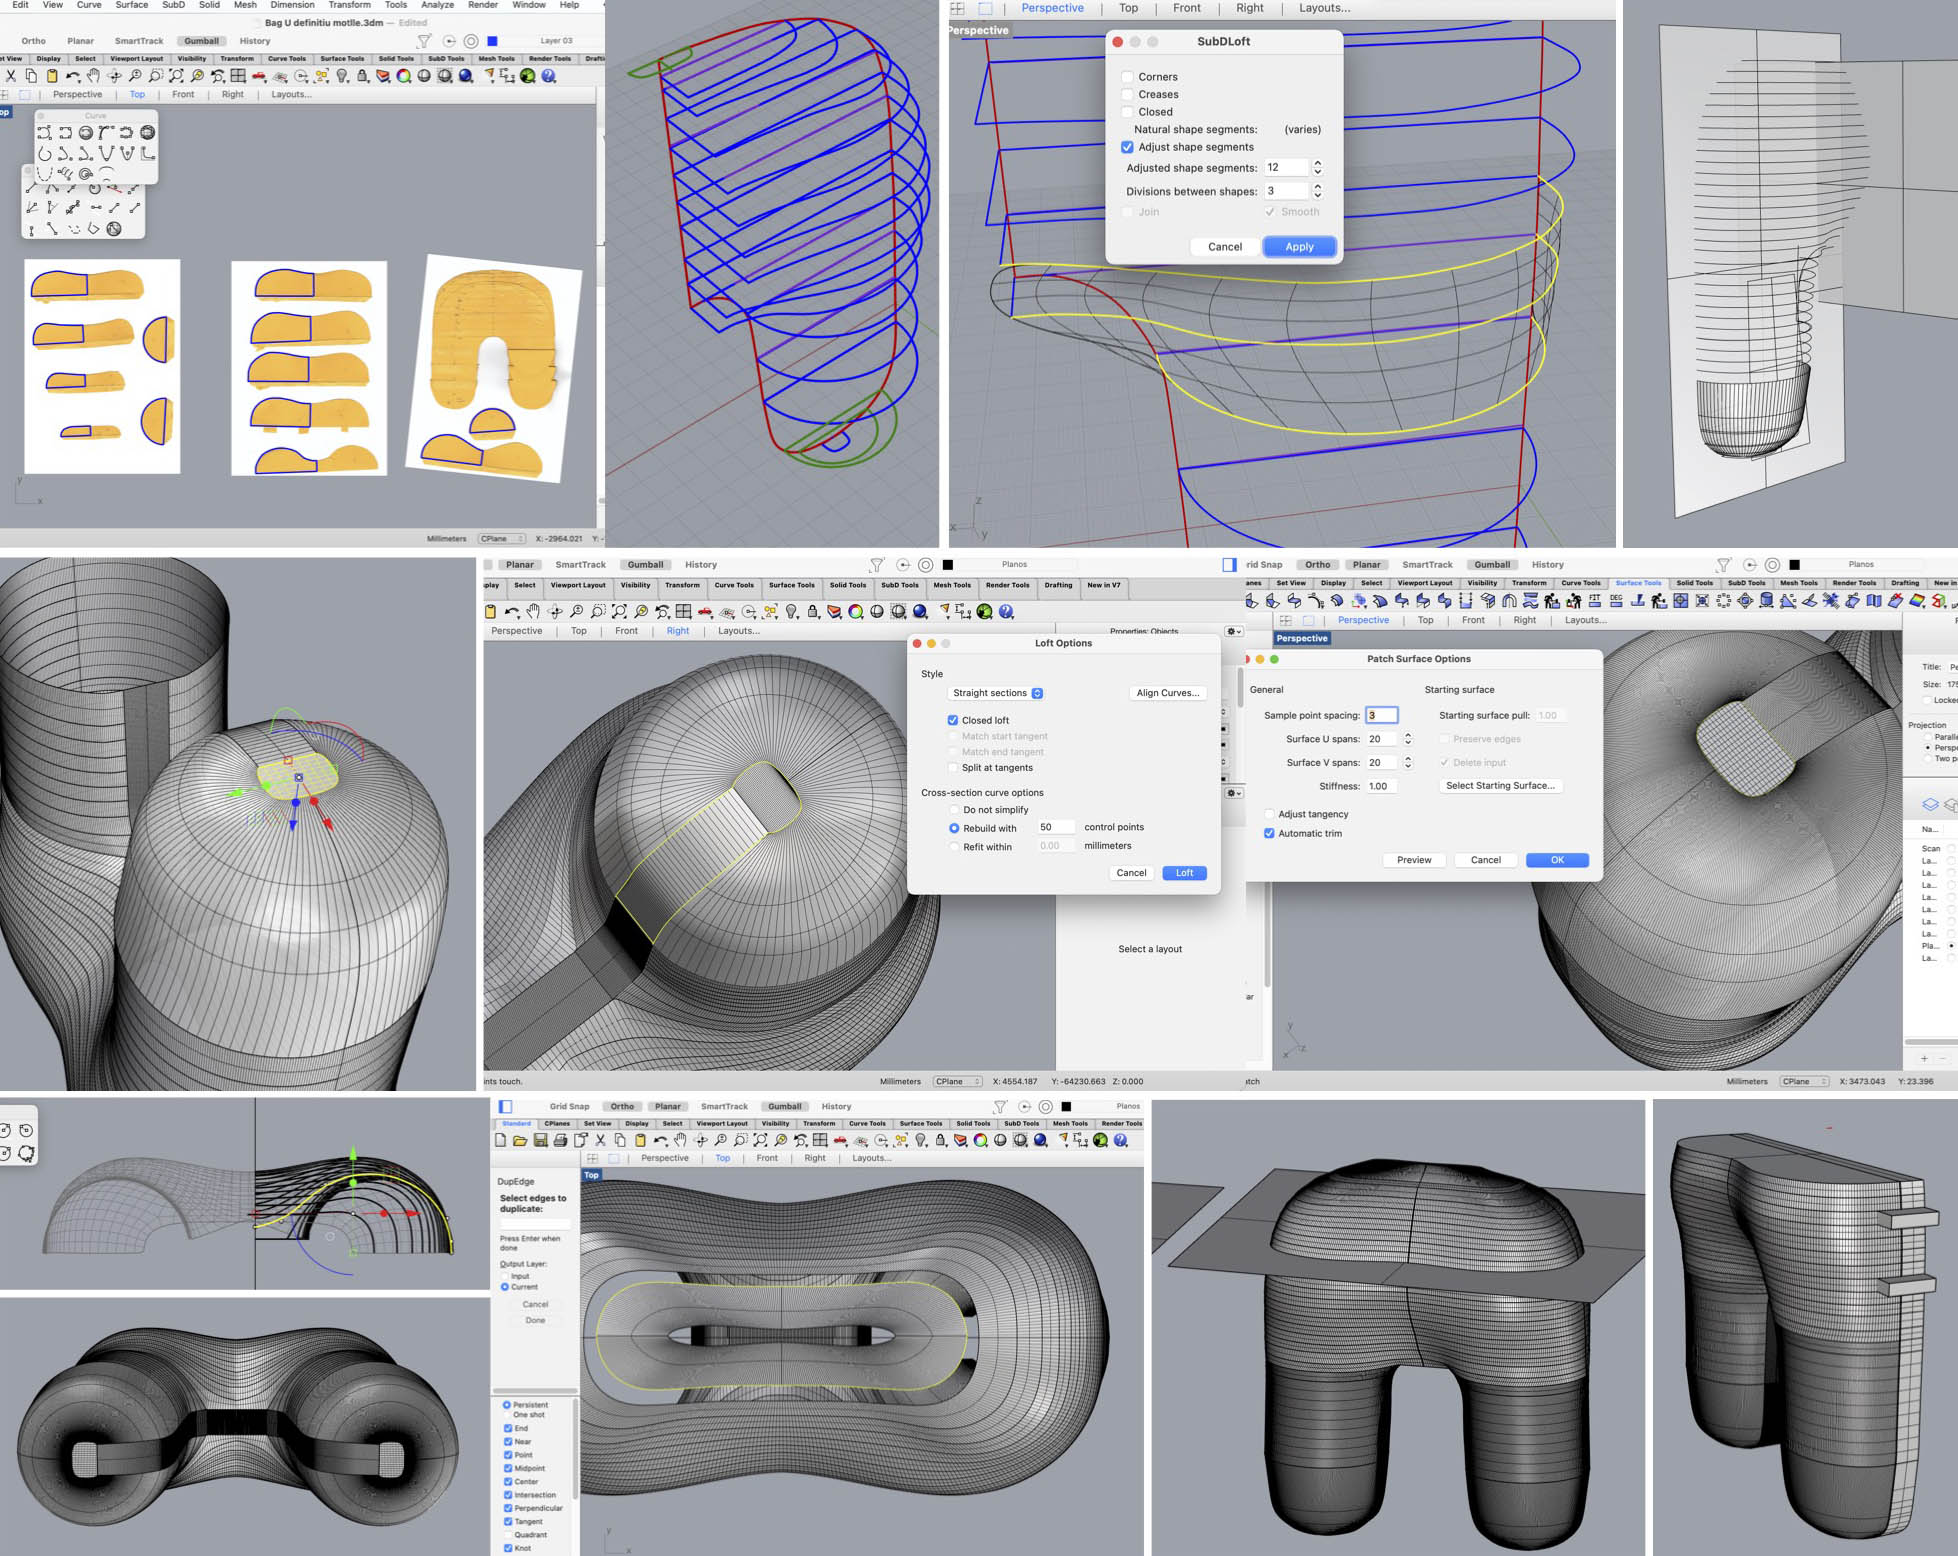
Rhinoceros
To 2D a 3D
Creating a file in Rhino of each mold bag to mill the mold in foam.
TWIG BAG:
I start copying each paper pattern from the prototype paper scan with a polyline, then I build the prototype with each piece. I need to divide the handbag shape to get a proper loft shape between the arches. In this case, I have the legs, the body, and the handle. After I get one side I mirrored it to get the final volume. To finish, I extrude the base of the mold because the Biomaterial when it's drying shrinks 1cm approximately.
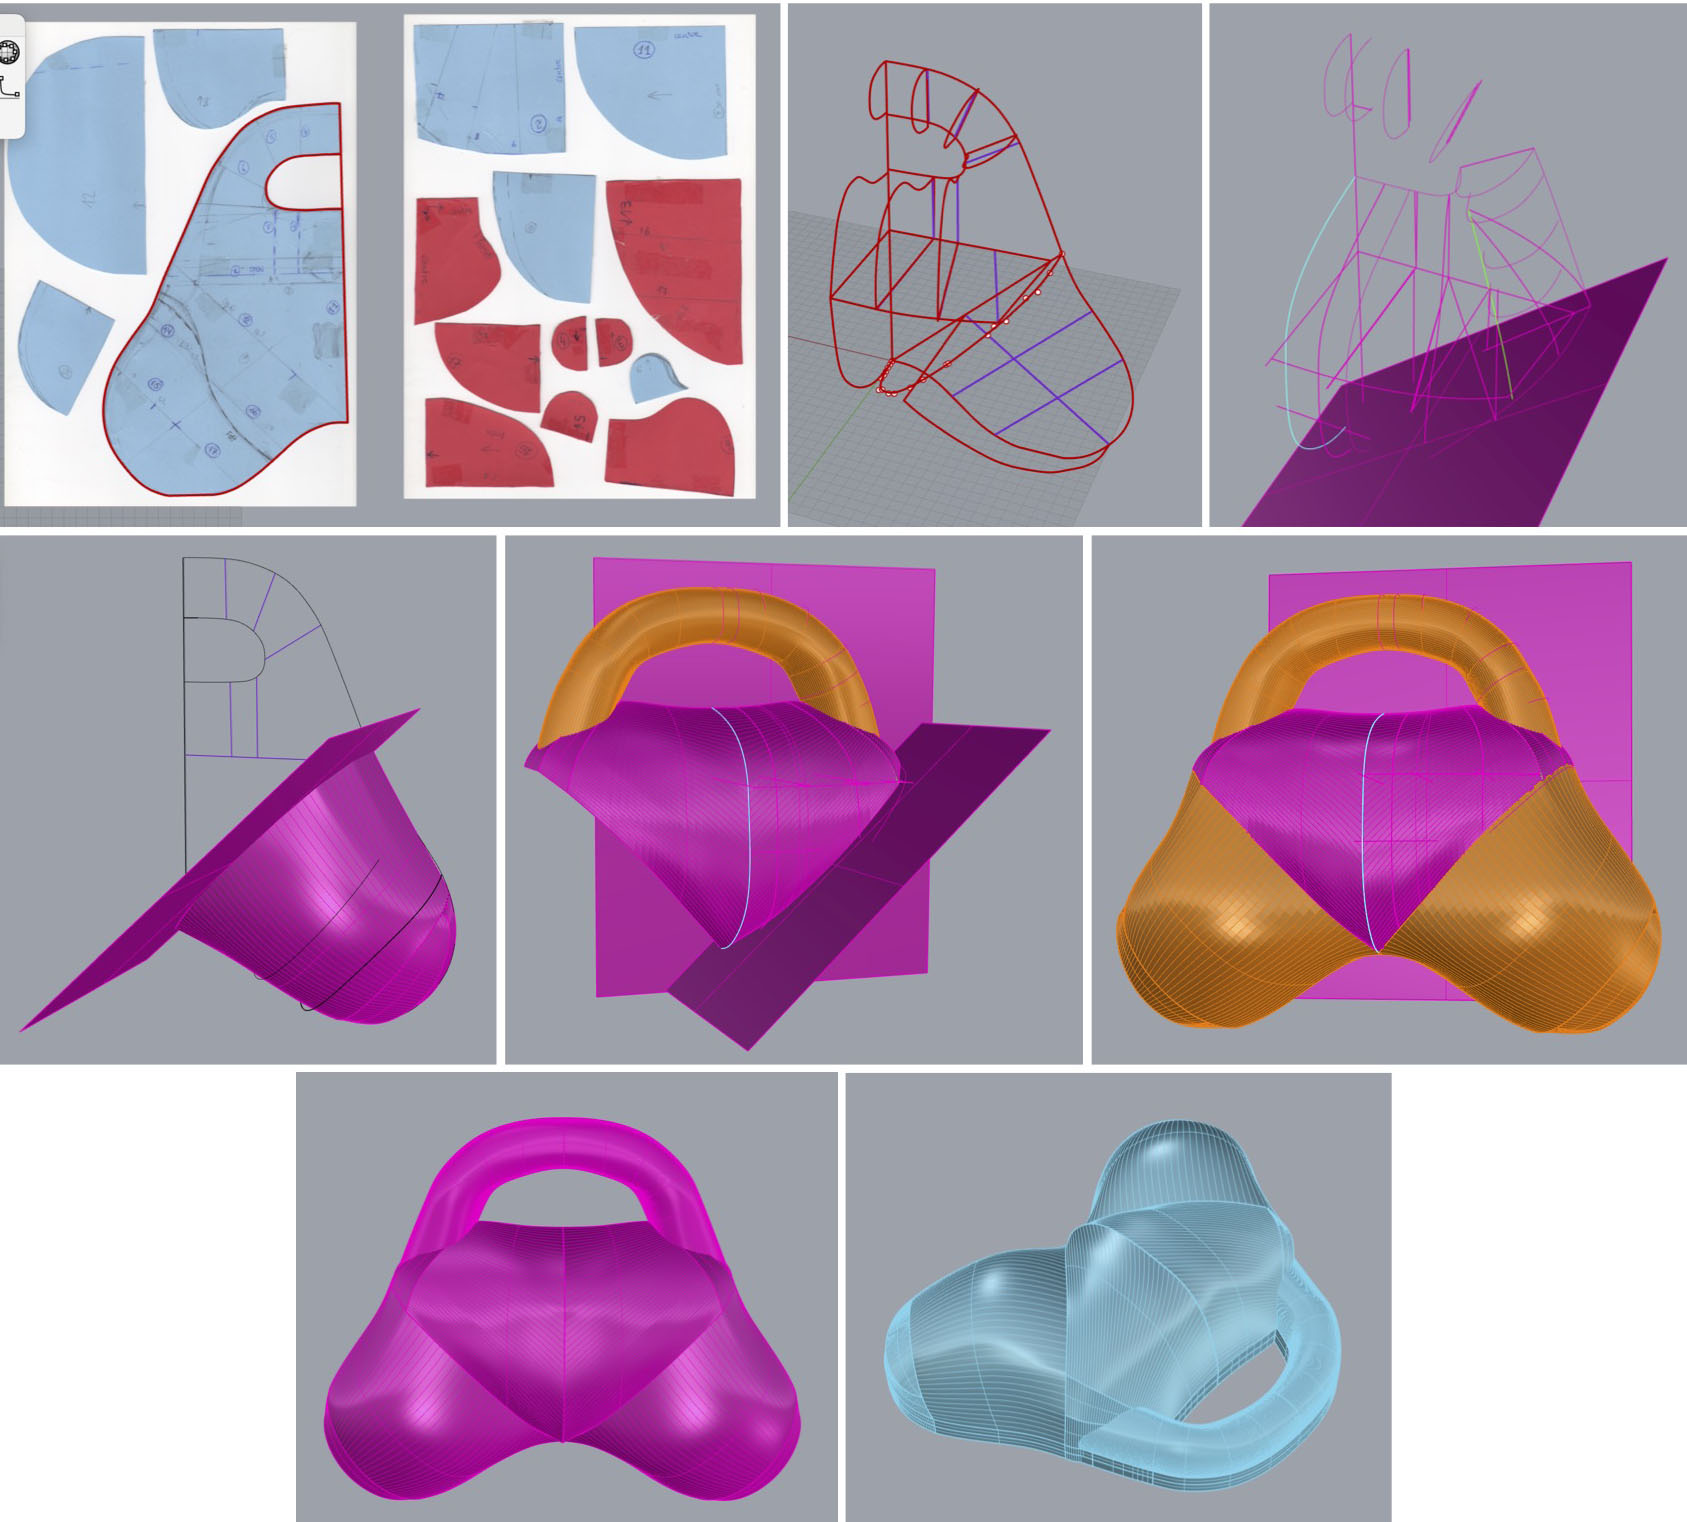
Total molds to mill: 2
ROOT BAG:
I start copying each paper pattern from the prototype paper scan with a polyline, then I build the U with each piece. I need to divide to get the loft between the arches. In this case, I have the legs, the top, and the bottom part of the legs. I also use the patch cmd to close some parts easily. After I get one side, I mirror it to get the final volume. To finish, I trim the shape, so I have the legs in two and the heat part with the hole to add there the flexible biomaterial. Moreover, I create another heat mold to place inside for the cooking time to pour the material into the opening hole and have a base. After I extrude the base of each mold because the Biomaterial when it's drying shrinks 1cm approximately.
Ready to go to the CNC!
Total molds to mill: 4
SHUCK BAG:
I start copying the paper pattern base with a polyline, when I have the base I draw the height with various arches to make the differents lofts. After I get the shape for the handbag I extrude the base of the mold because the Biomaterial when it's drying shrinks 1cm approximately.
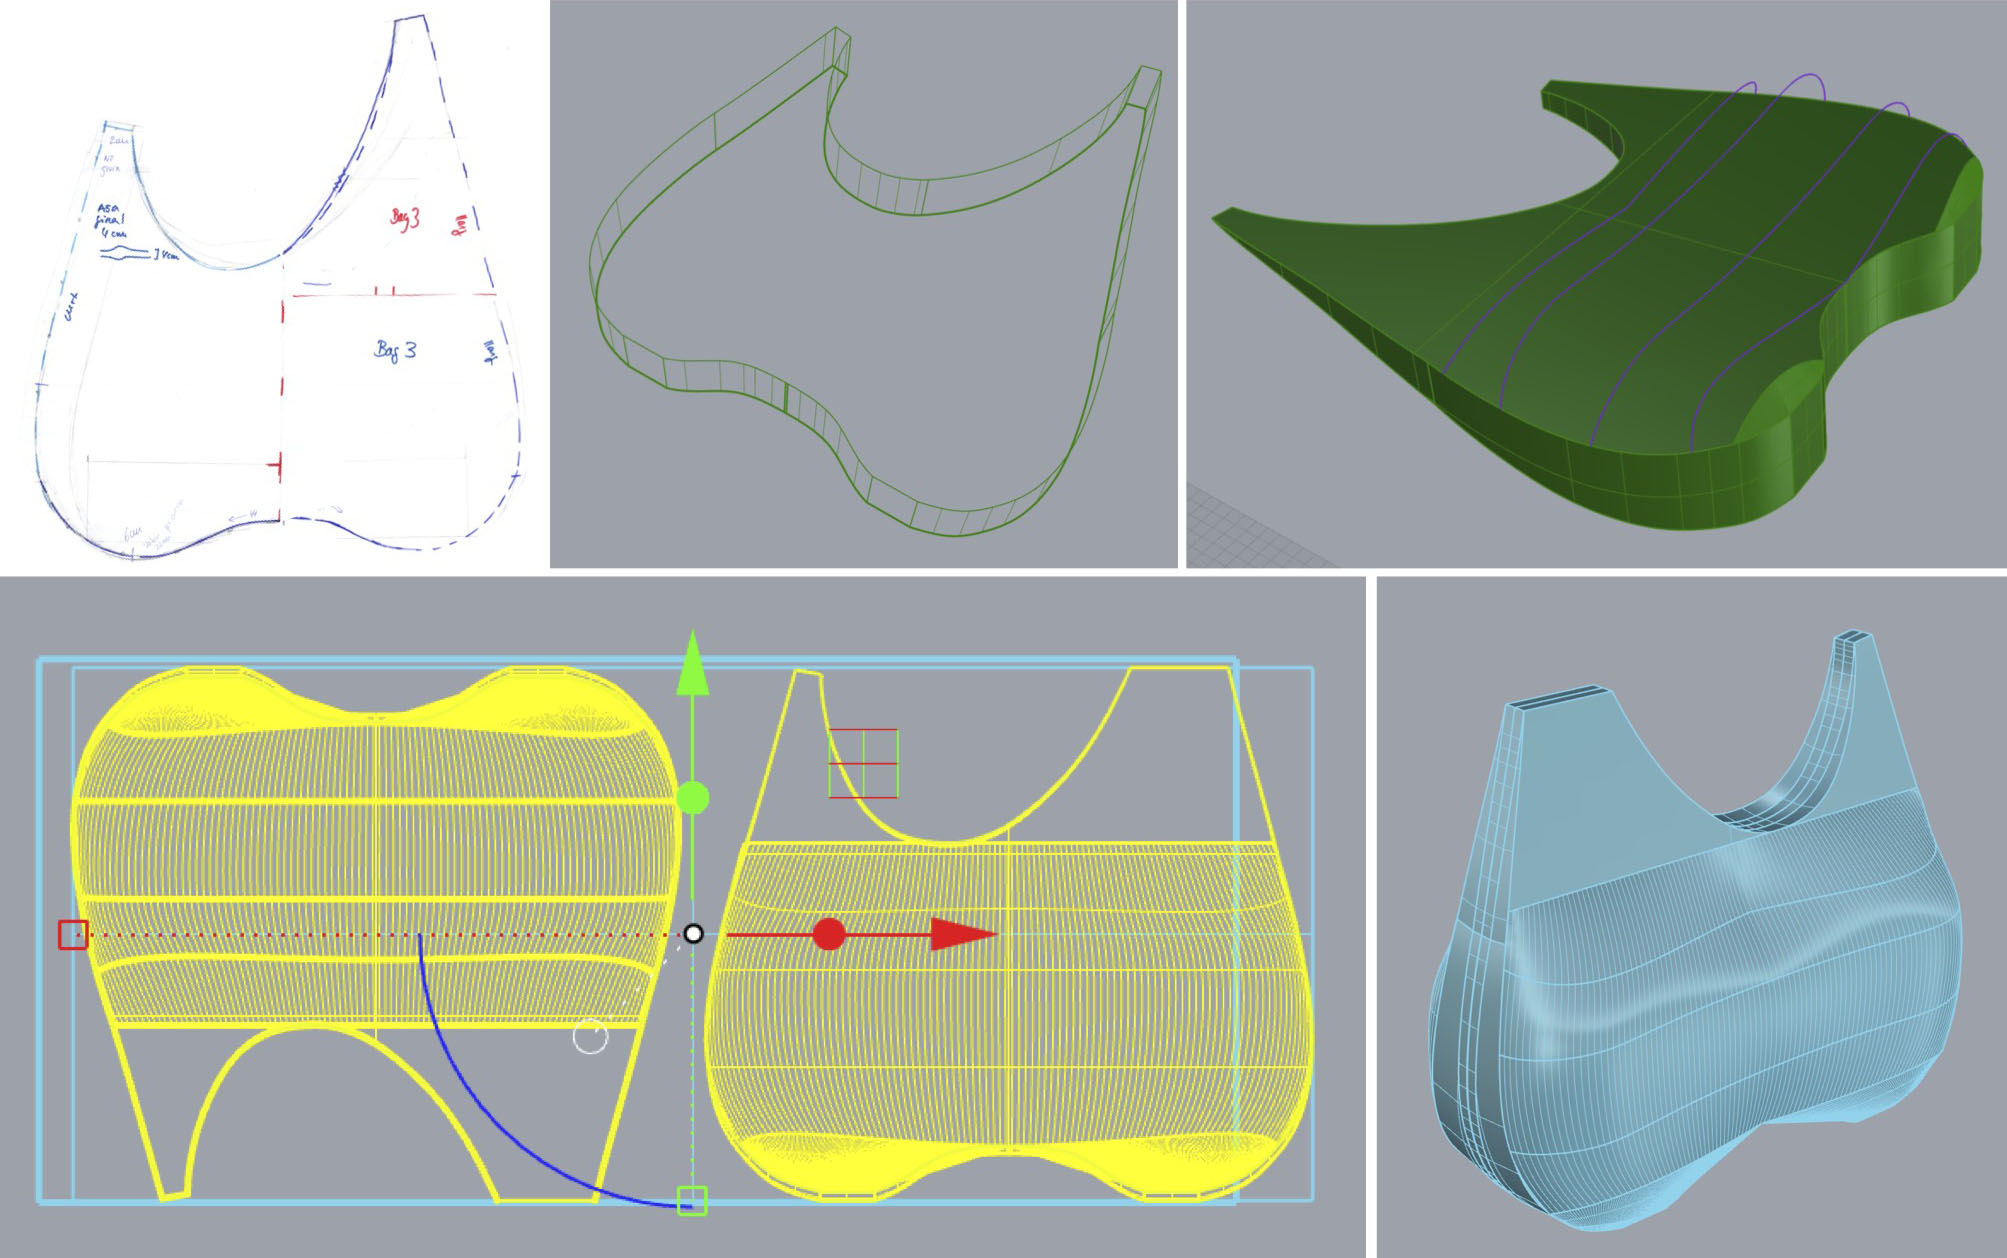
Total molds to mill: 2
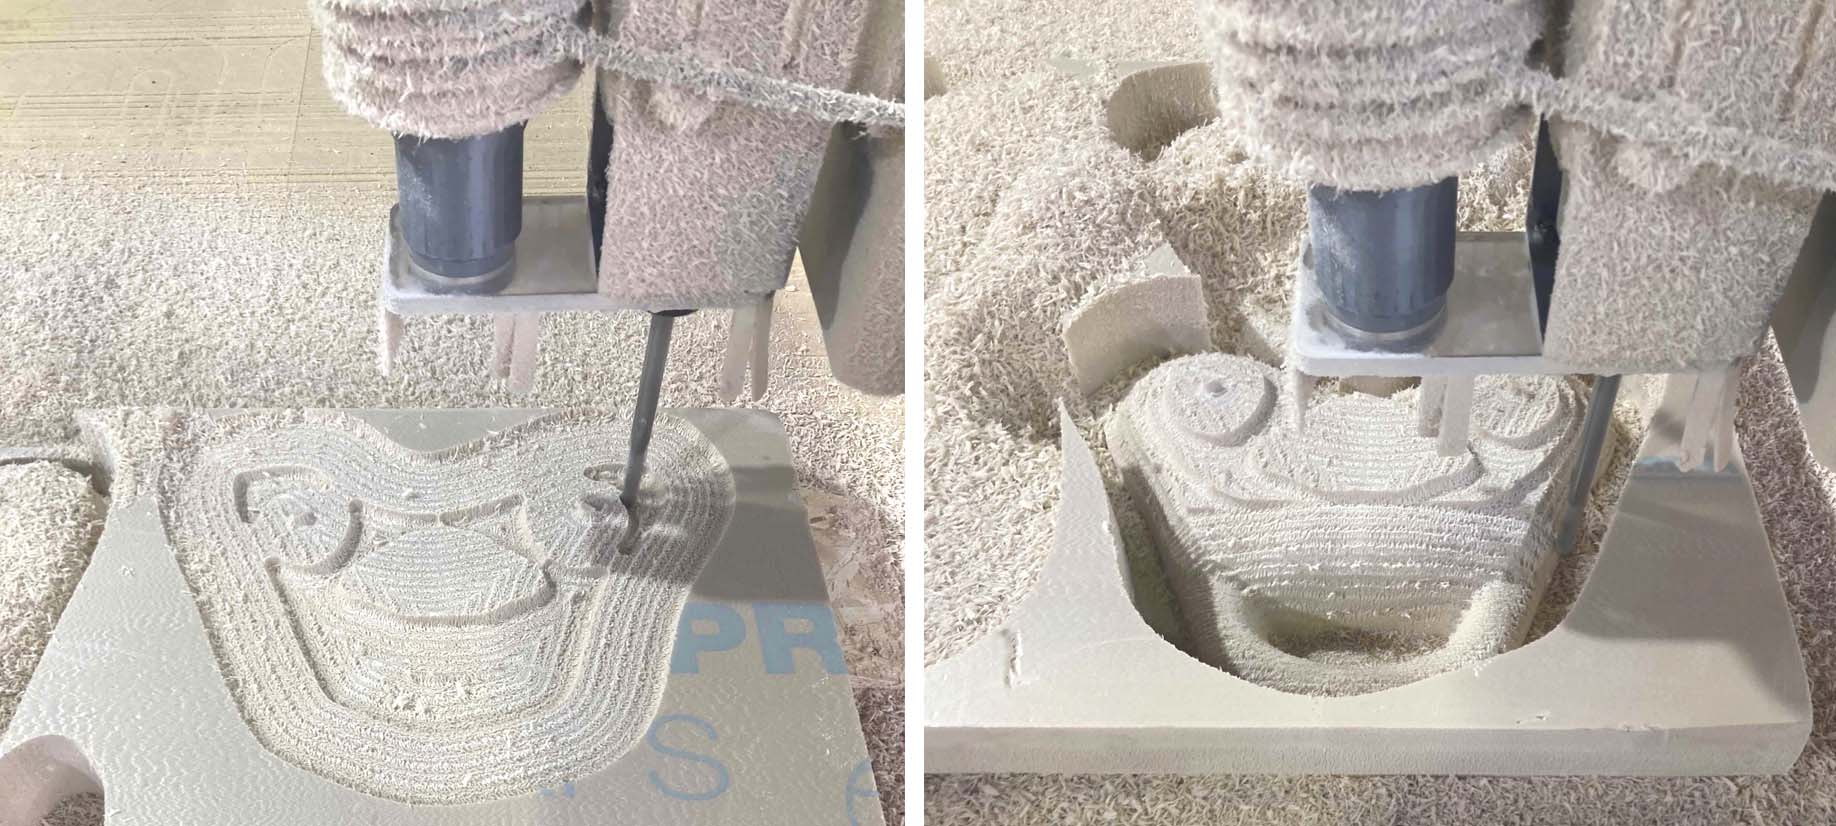
CNC
Time to mill the foam to get the molds of each handbag:
The foam called SOPRA-XPS has 60x120 cm and 10cm of thickness.
TWIG BAG:
Result: Two equal molds.
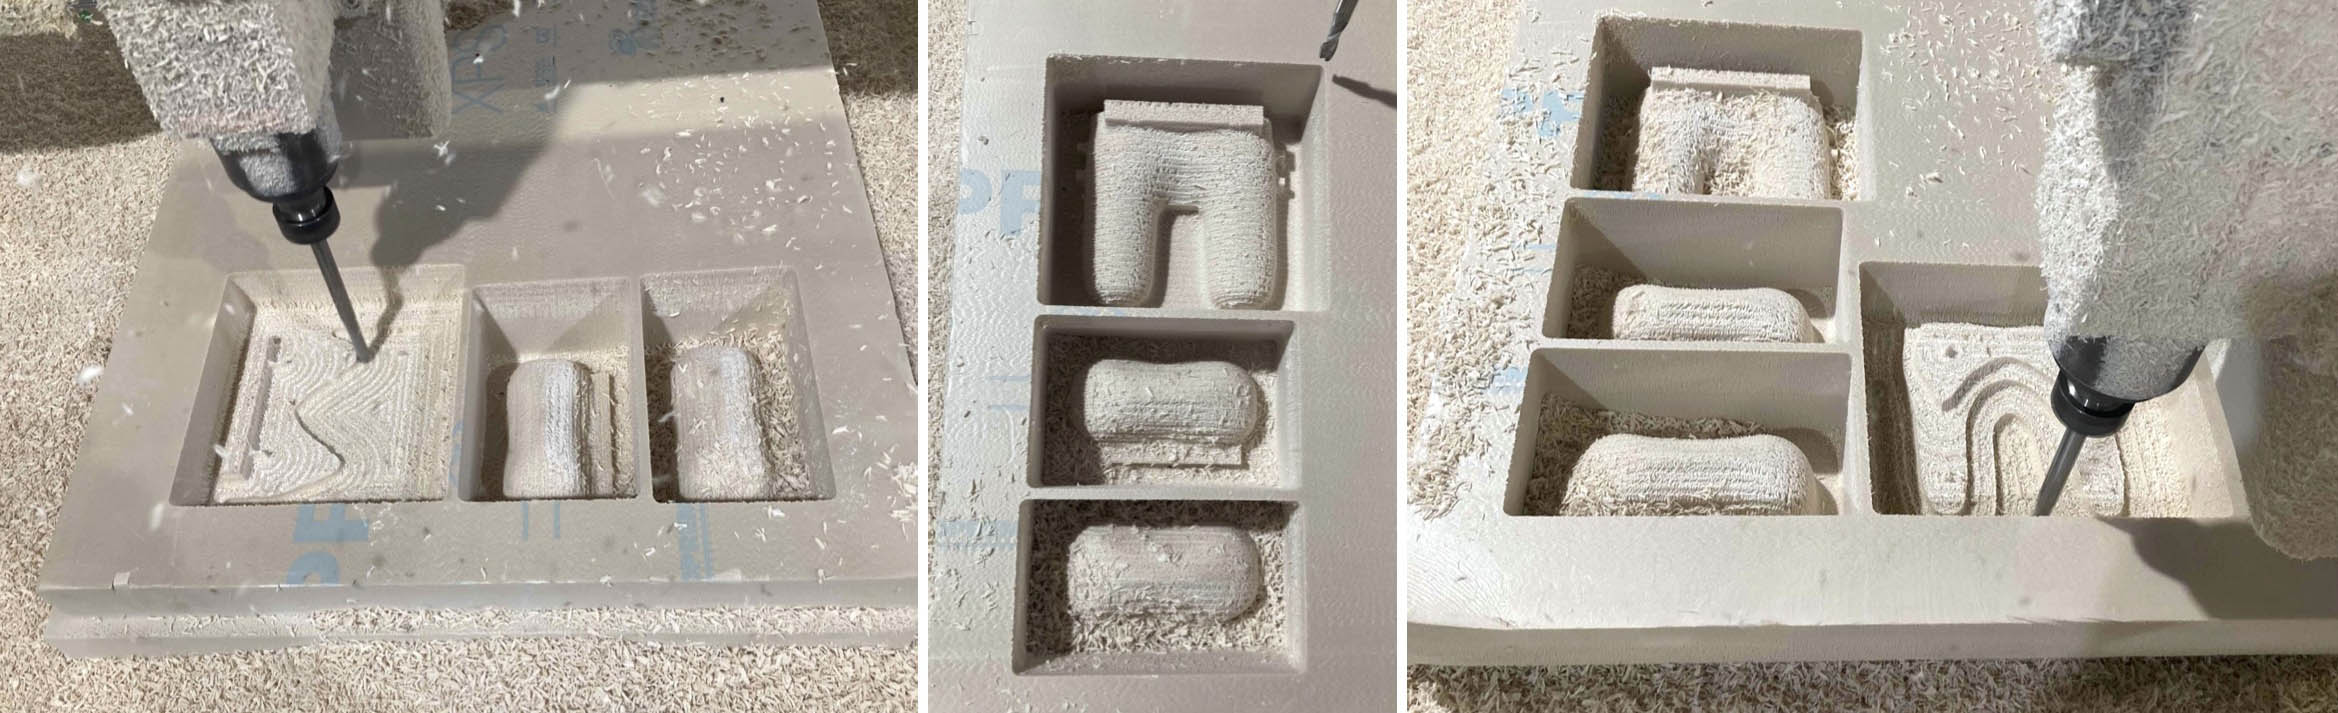
ROOT BAG:
Còpia de Tung oil de Emma Picanyol Illa
Result:
- One front legs
- One back legs with a hole to pour the soft material
- One heat with the hole for the soft material
- One heat to place inside the handbag meanwhile cooking.
SHUCK BAG:
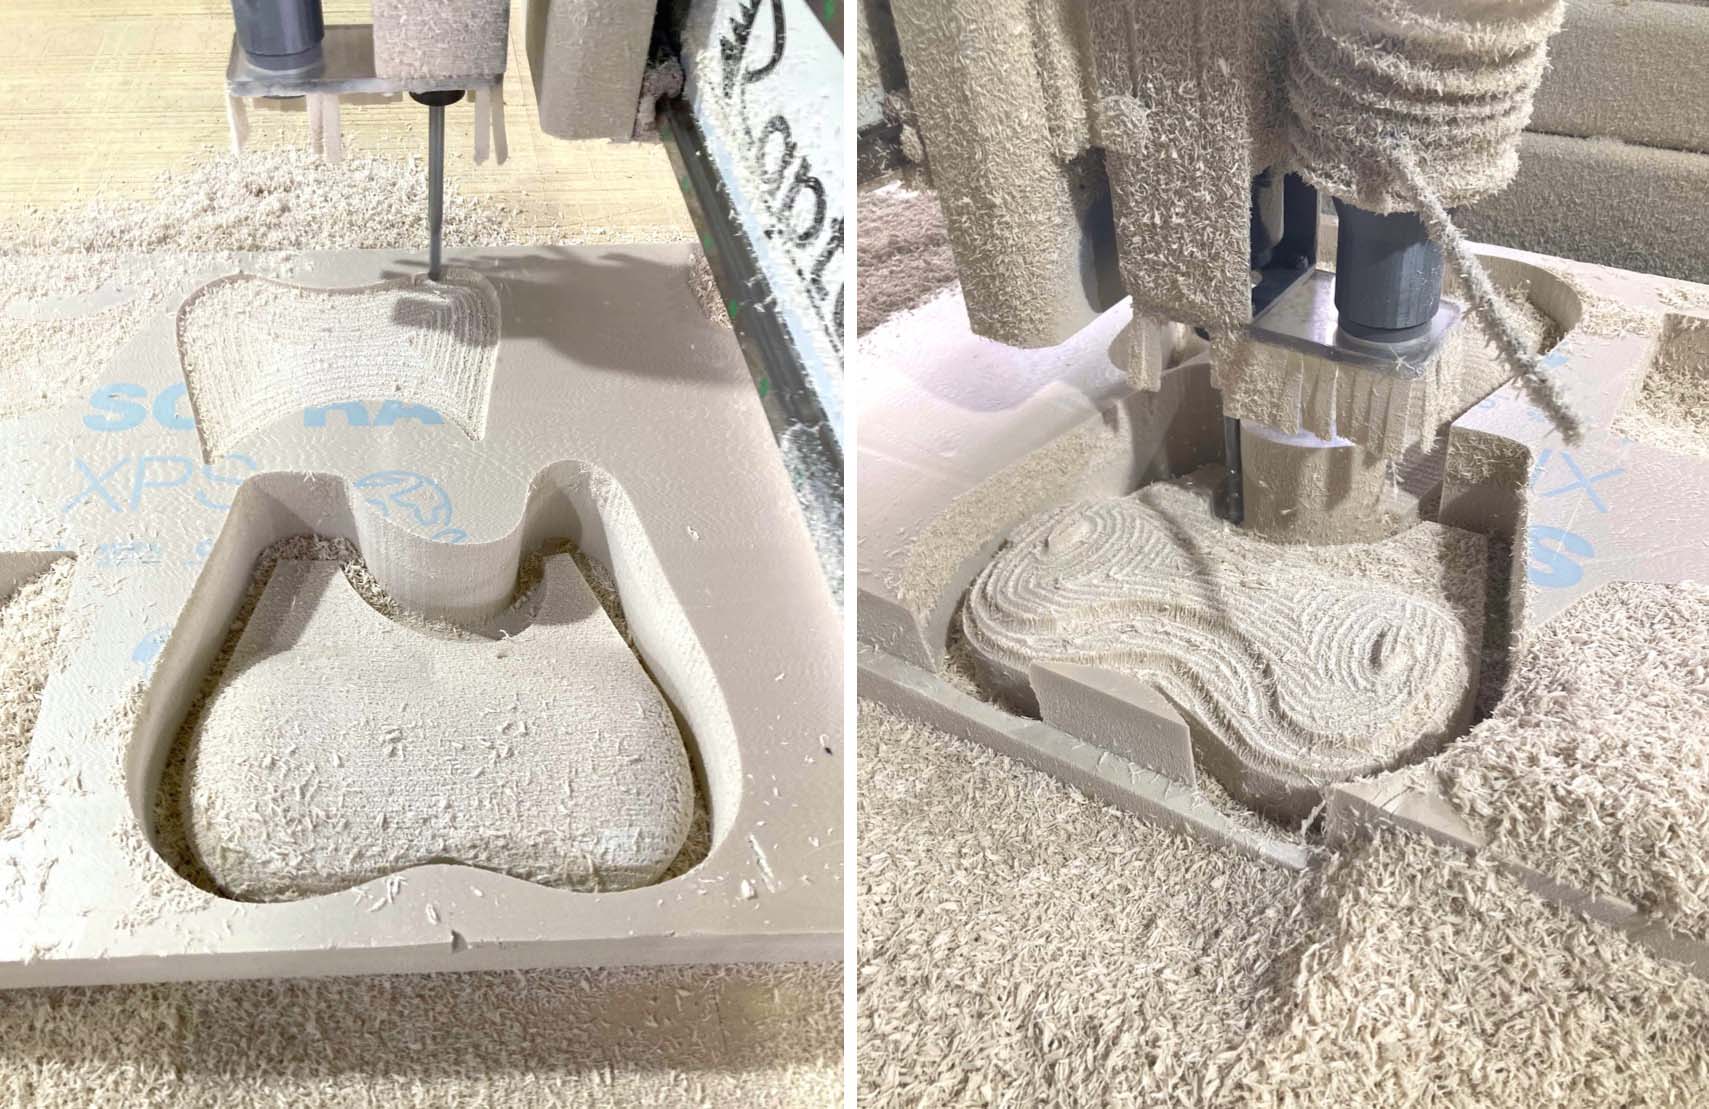
Result: Two molds mirrored.
I could get all my molds in one sheet!
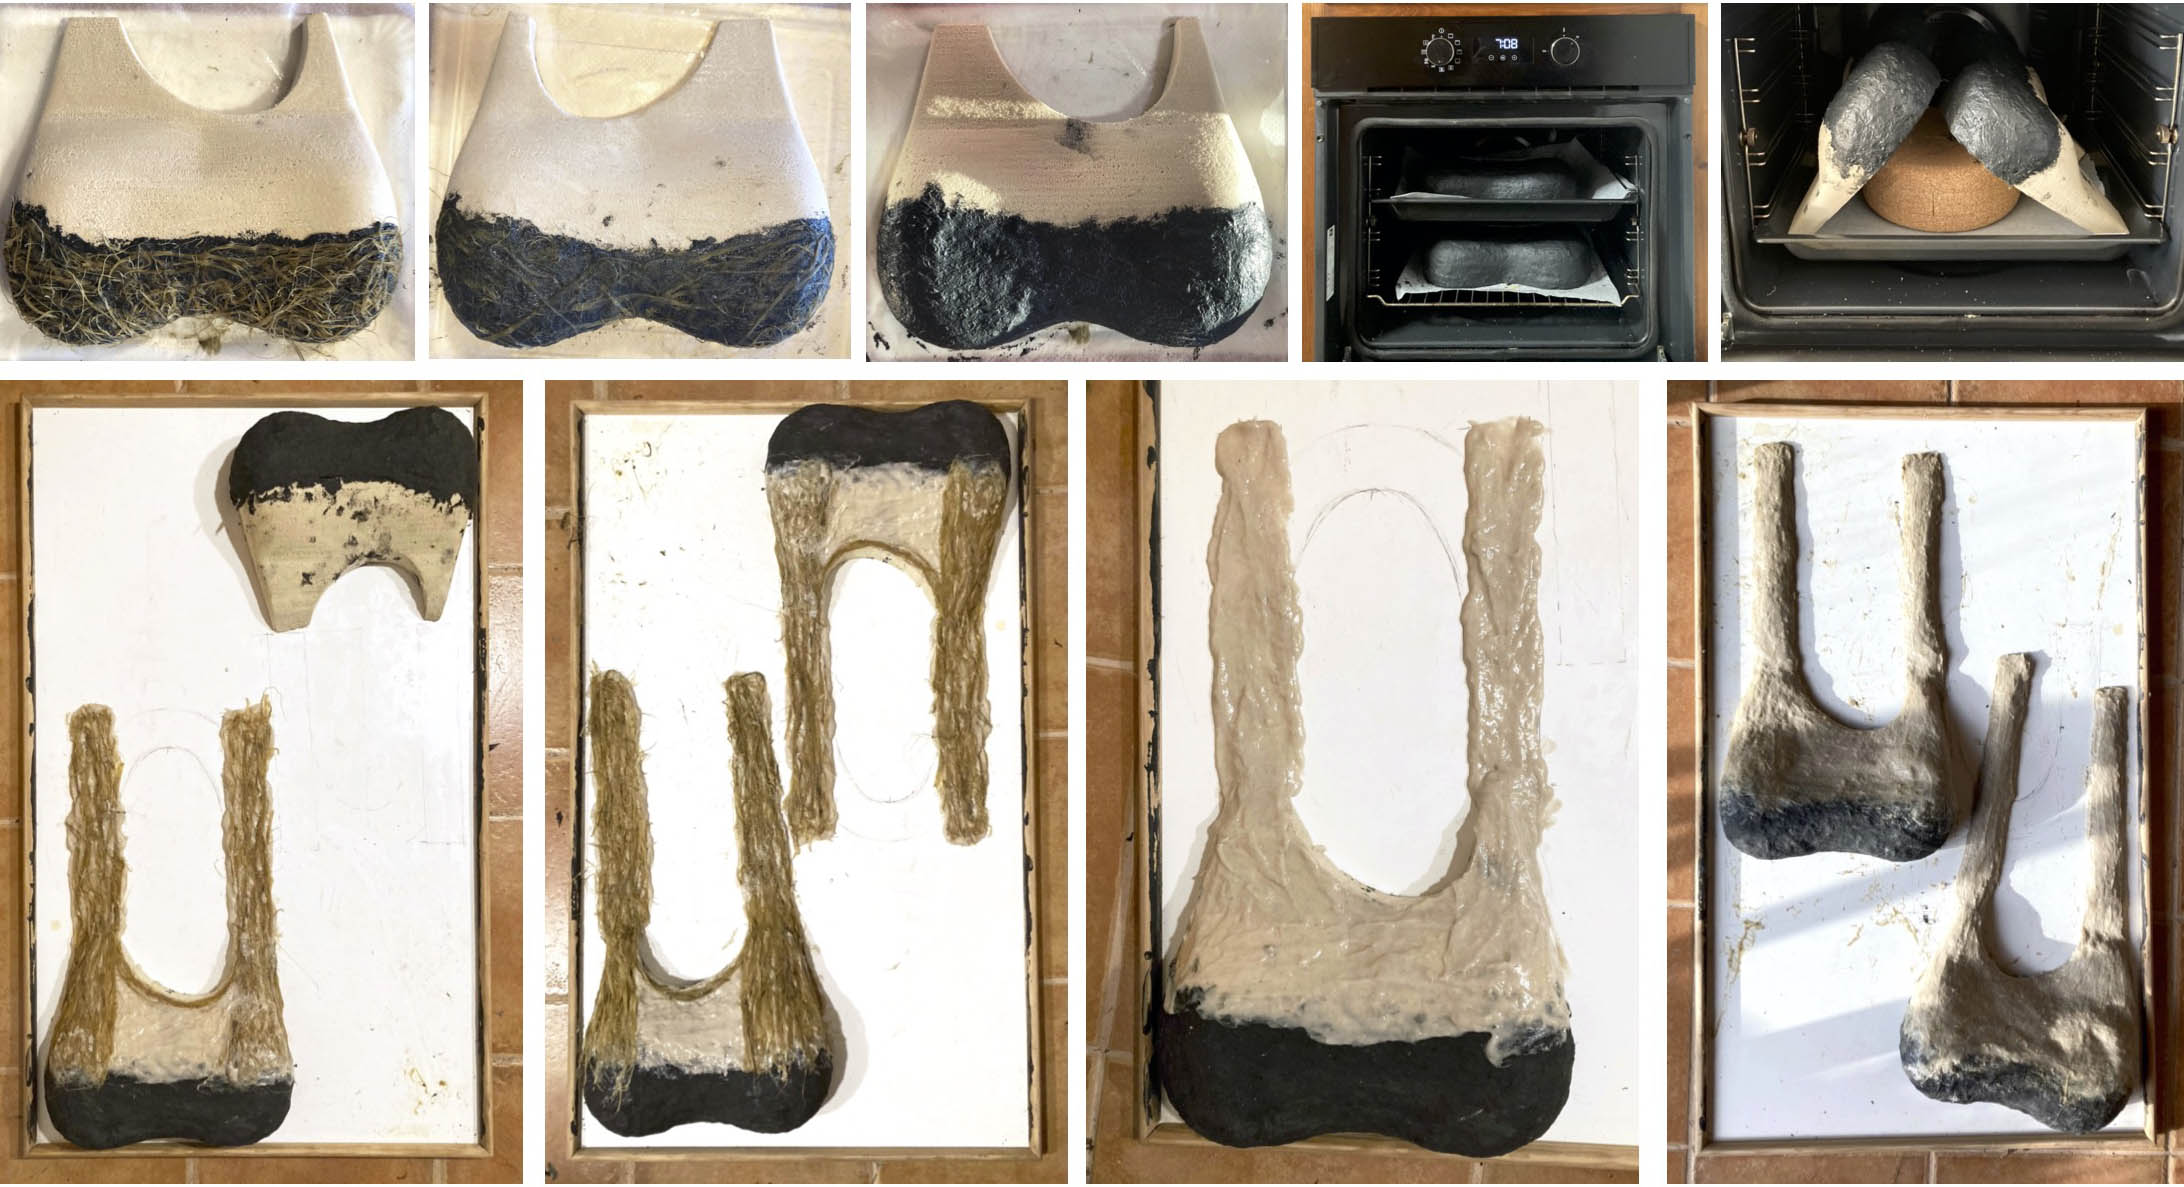
Cooking the final samples
To be more productive and do not lose the time I cook a big scale of each recepie of Celluouse leather for the 3 handbags:
- Strong CL
- Soft CL
- Strong CL in black
- Soft CL in black
With this methodology, I can just heat the mixture and add a new layer on top of the mold, and come back the handbag into the oven. So I could work with the three accessories at the same time.
ATTENTION: Before pouring the first layer of the biomaterial on the top of the mold spread it with Vaseline to be able to remove after.
TWIG BAG:
In that case, I need to boil more entire husks to have enough to create the felting sheets for the legs and for the opening. I start with the handle to be more rigid. After I place some husks fiber vertically to get more resistance for the opening method. Next, I felt the fibers and let the four sheets in each leg connect with the biomaterial. The next step is to add more layers before joining both sides.

To get the logo I cast a big sheet to laser cut the "m", I will need 2 for each logo to get volume. Moreover, this design has an inside pocket that is also laser cut.
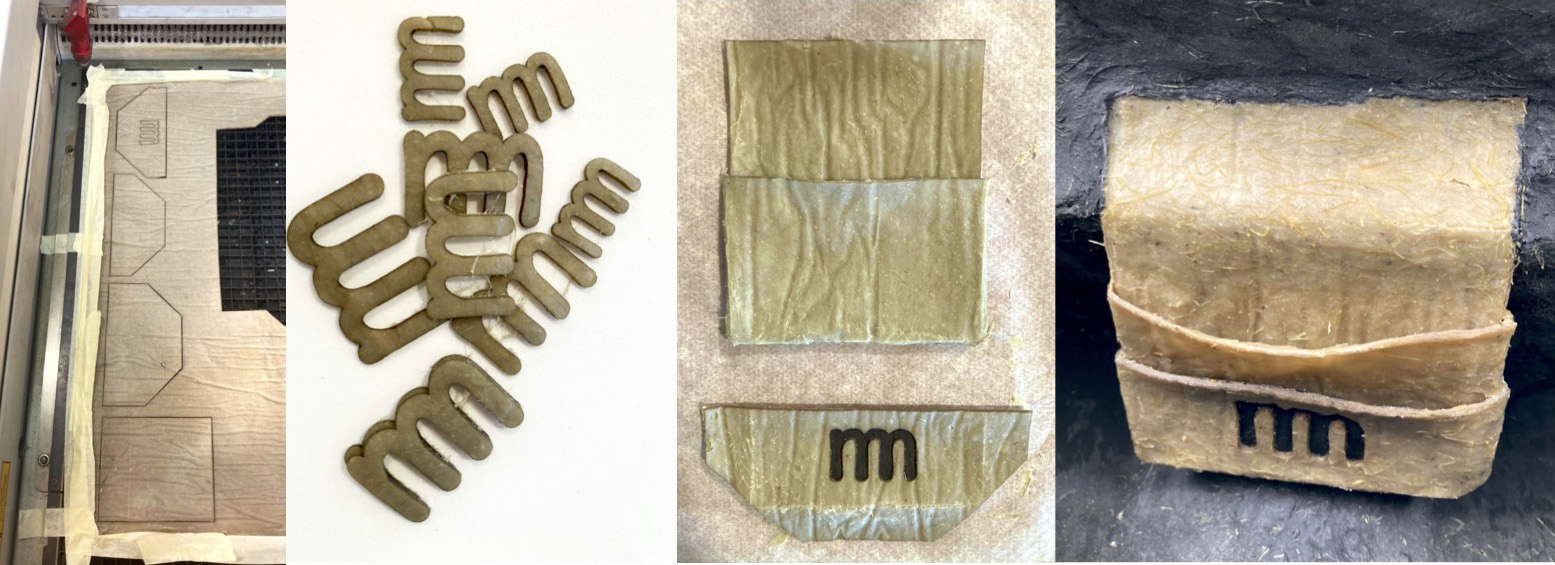
COMPONENTS:
- CL strong + Carbon (300g x 5 layers)
- CL soft + Carbon
- CL strong (initial parts)
- CL soft (Inside pocket)
- Felt fibers (600g of long fibers)
- 1 laser cut logo
COOKING TIME: 12h
FELTING: 8h
WATERPROOF 1 LAYER COATING TIME: 15h
DRYING TIME: 50h
ROOT BAG:
In this design meanwhile, while I was cooking and adding more layers I decided to eliminate the two holes from the side cause they are too fragile and it makes it more complicated when I join both sides. These holes were created for the handle and have the chance to regulate. Moreover, it was complicated to get a perfect fitting between the legs and the heat so I need to be very precise with the fibers and layers to don't deform while cooking or drying.
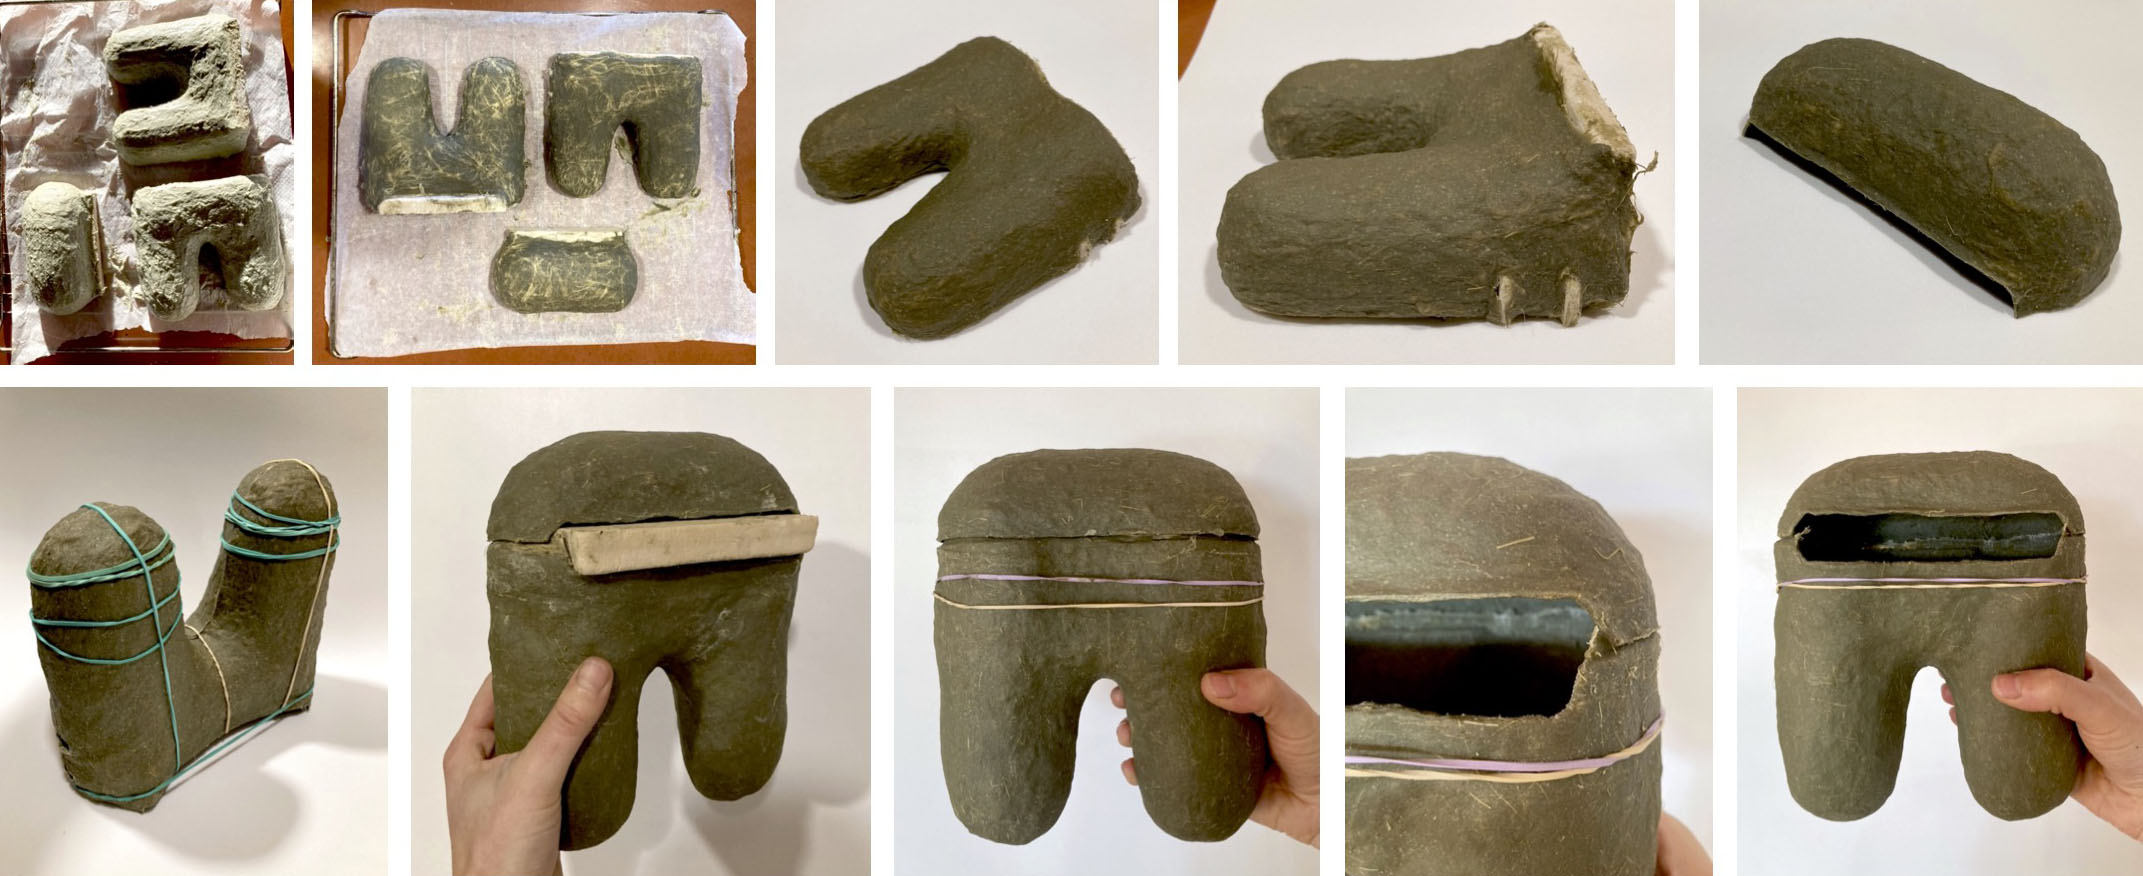
The handle of this bag became my nightmare for some days. I start cooking a big-scale cellulose leather to create a sandwich with 2 rectangles and fibers between them to reinforce. First I made a black sample with Carbon but it shrinks in the drying process because of the Carbon. After, I try to make the same sample without dye and after drying it add the last layer in black. However, this handle was too heavy for this little bag. So, my second idea was to use a paper handle. It's resistance and light, but the look and the comfort weren't what I want. Finally, I make a long thread to get a short handle to be able to wear the bag as a party bag and also to place it inside the packaging easily.

COMPONENTS:
- CL strong (200g x 4 layers) • CL strong + Carbon
- CL soft
- Husk cord for the handle
- 2 laser cut logos in black finished
COOKING TIME: 8h
WATERPROOF 1 LAYER COATING TIME: 15h
DRYING TIME: 35h
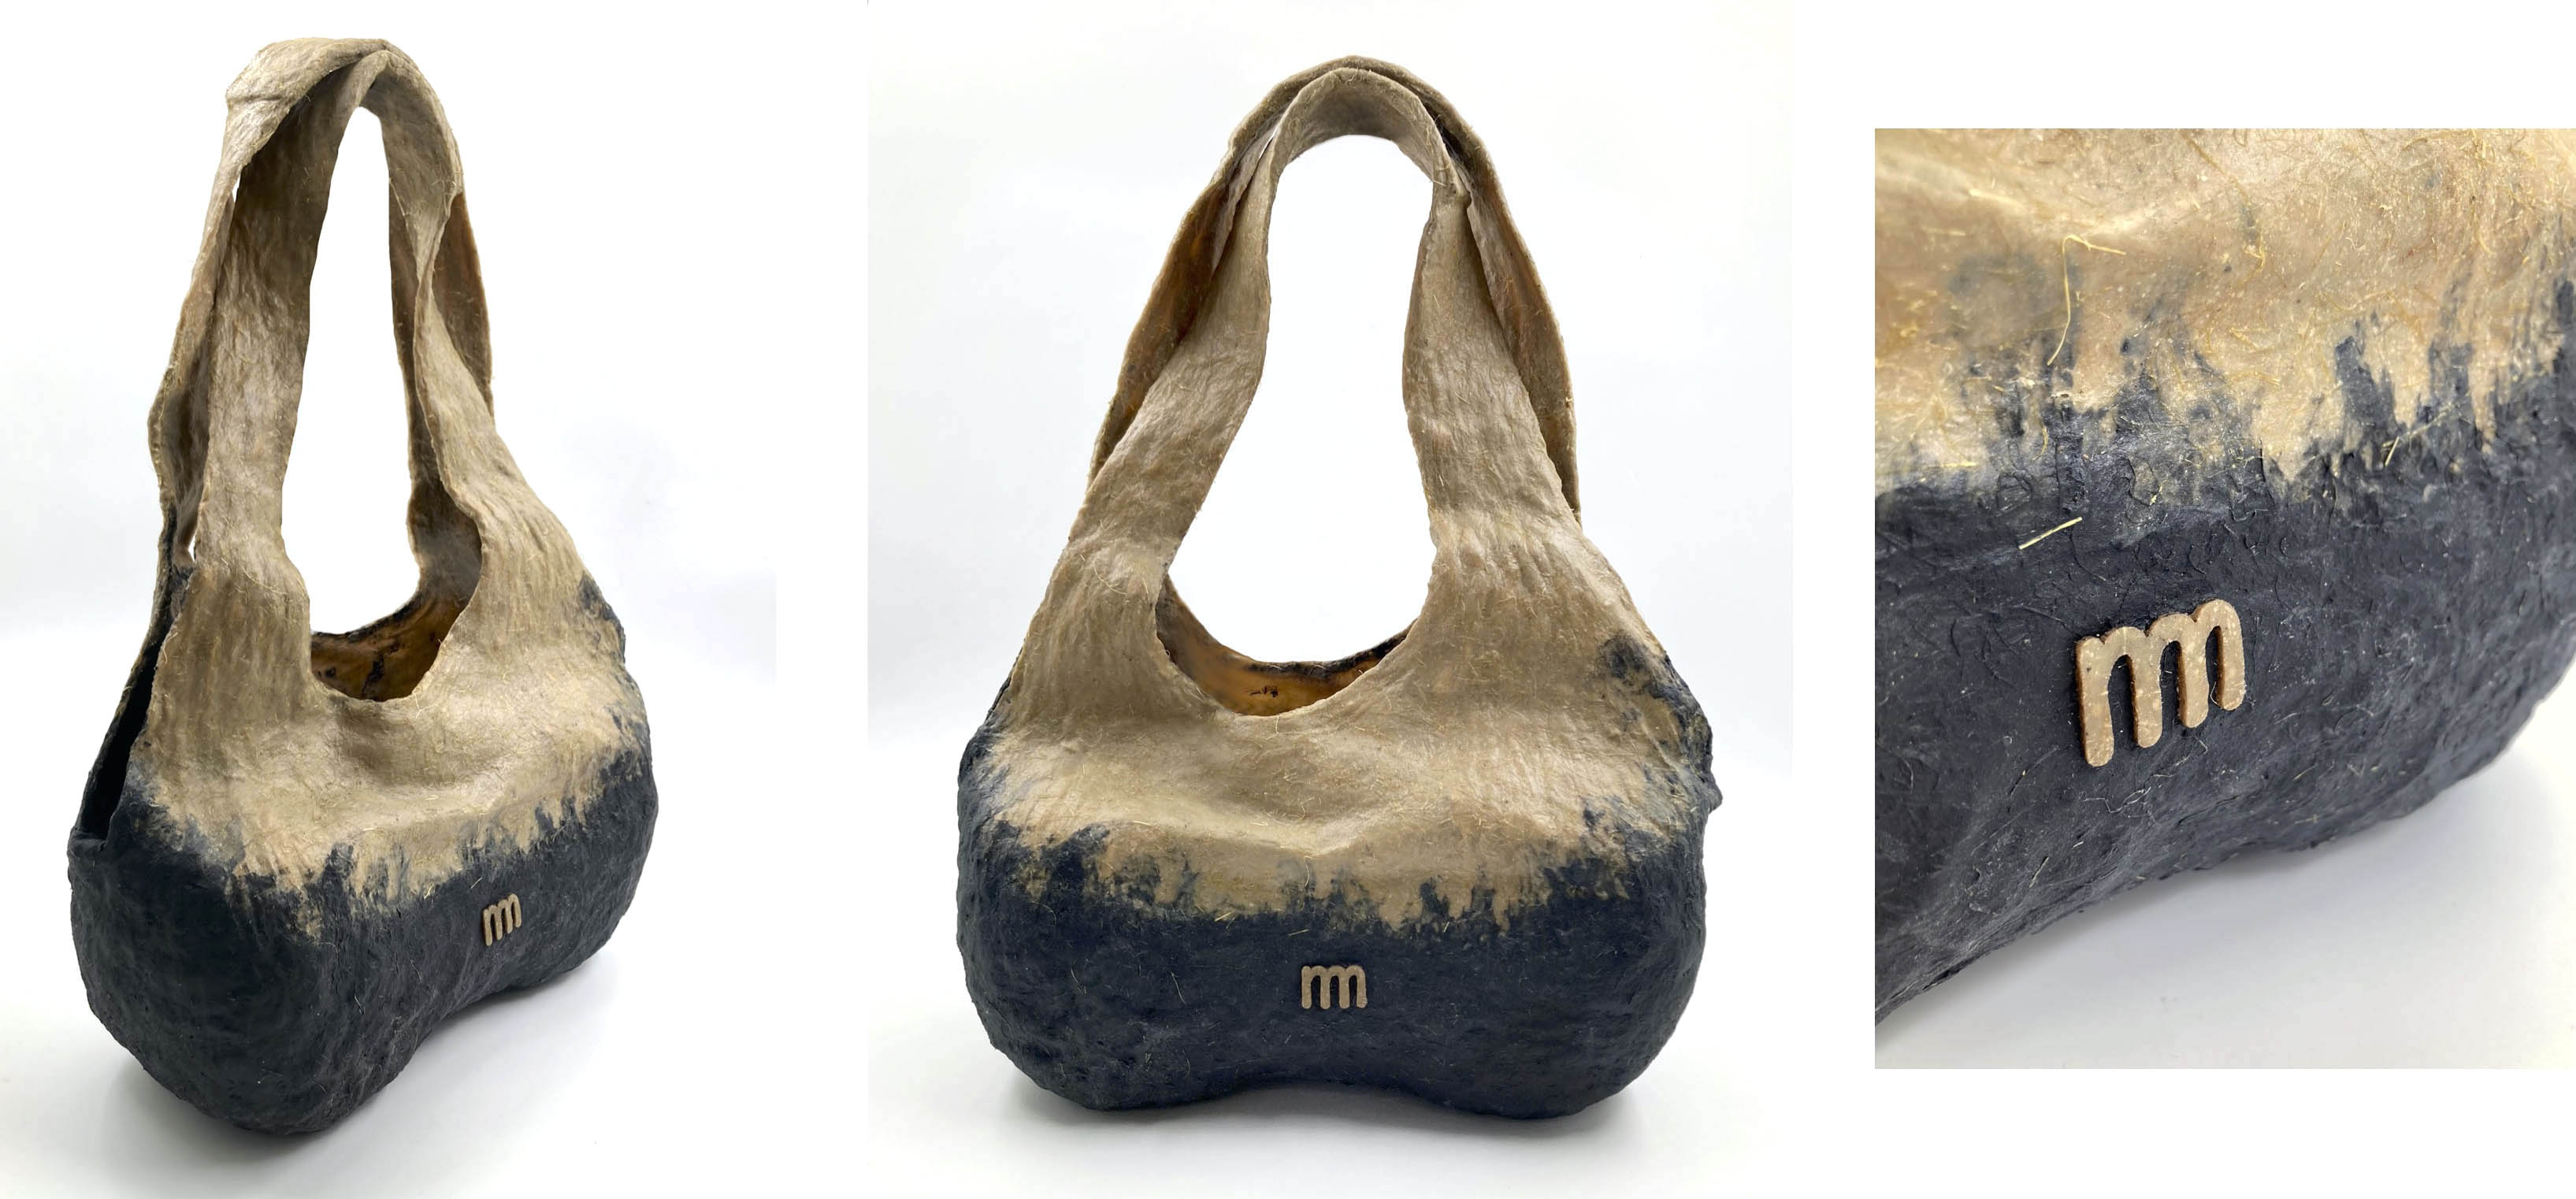
SHUCK BAG:
For this bag, I start cooking the bottom part because I need to be more rigid and then I continue with the rest of the bag and the handle with the soft recipe mixed with the fibers to get resistance where I need it. Unfortunately, it takes more time to dry because I couldn't let it in the oven for the big dimensions. After the soft part was thickness enough I could join both parts and add the last layers with the degradation of the colors. To finish I place the logo in black coating.
COMPONENTS:
- CL strong + Carbon (200g x 4 layers)
- CL soft + Carbon (200g x 2 final layers)
- CL soft (300g x 3 layers)
- 1 laser-cut logo
COOKING TIME: 12h
WATERPROOF 1 LAYER COATING TIME: 15h
DRYING TIME: 60h
In conclusion, while I was cooking the various handbags I realized that it will help me if I have an inside mold when I join both sides to not lose shape with the elastic bands and the new wet layers on the top.
Final bags result
In the end...
DONE!
TWIG BAG:
ROOT BAG:
SHUCK BAG:
A lot to improve but to be the first prototypes with these molds and recipes super proud of the result! Moreover, I spend two hard weeks preparing the ingredients and cooking to get them on time for the shooting and recording days.💨