10. Open Source Hardware - From Fibers to Fabric
This week it's about creating a machine to 0 - 100%. I was sure that I am going to do a Vacuum machine. The previous week I just try the technic and I found it useful.
During this week, we could work as a group, but in the class, no one was enthusiastic as me about the idea to create a Vacuum machine, so I will work on my own and with the FabLab instructor's aid.
So let's start!
Visit Kniterate¶¶
"We started Kniterate because we wanted to democratize clothing manufacturing."
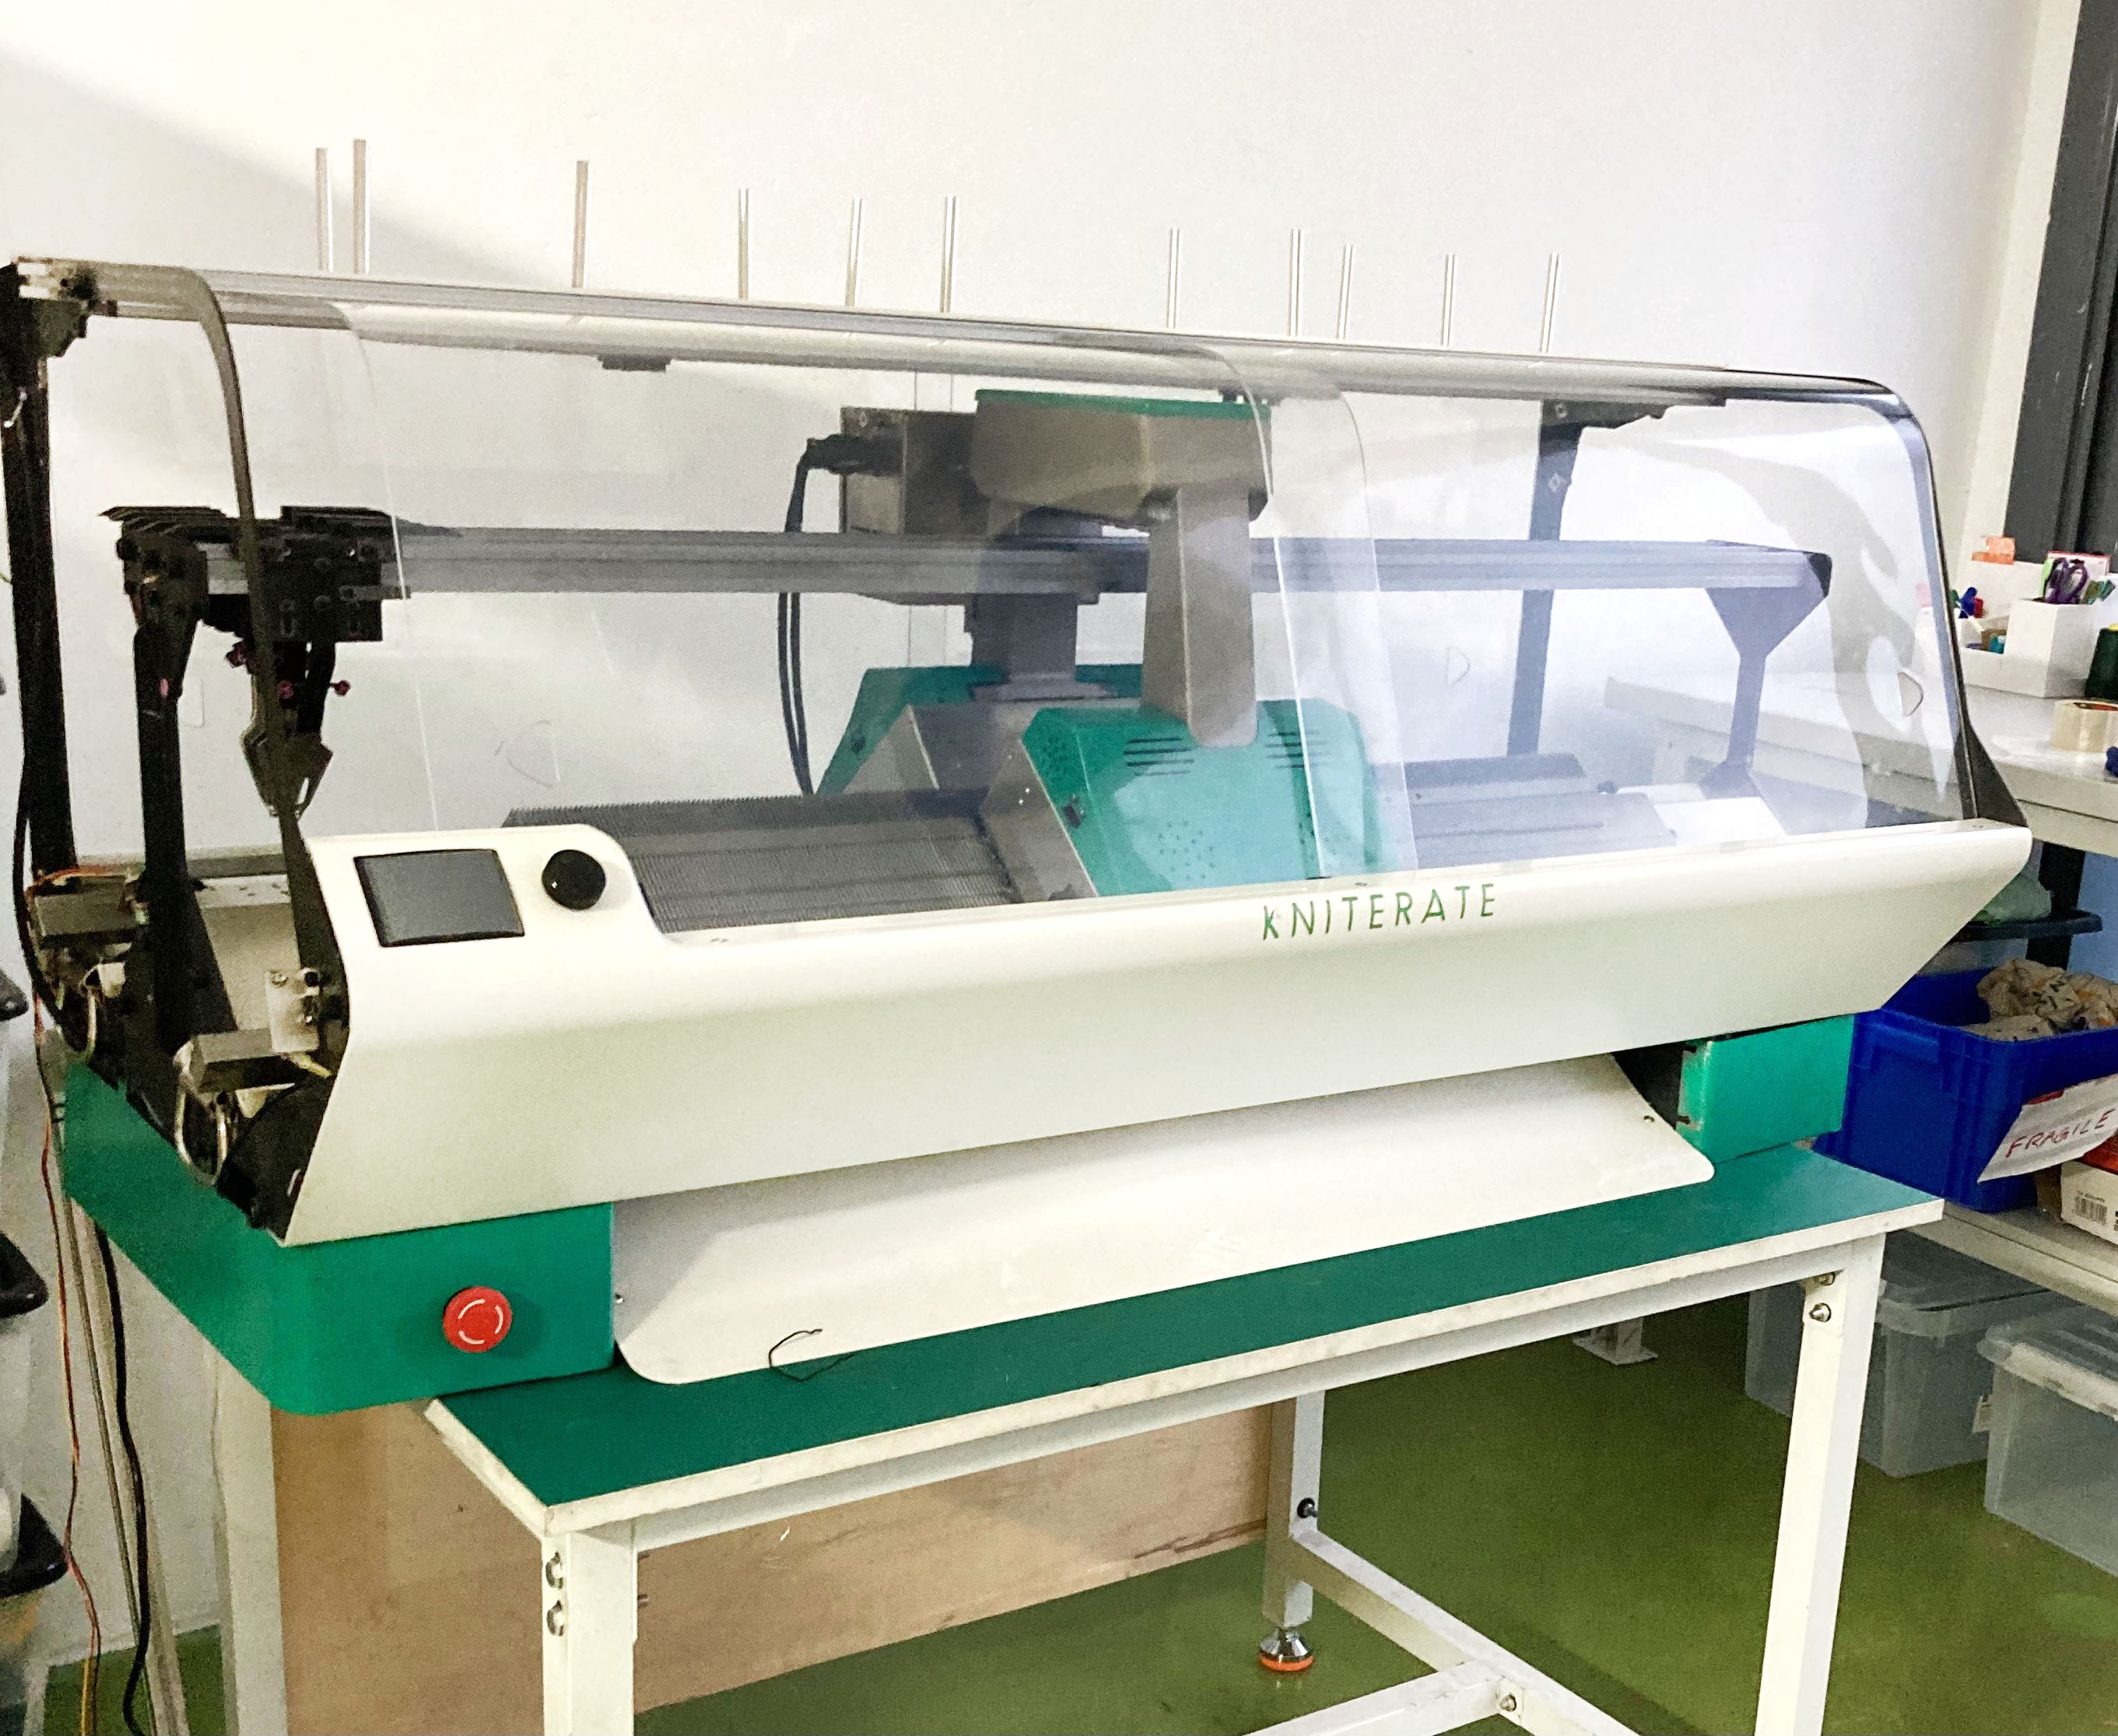
We start the assignment with an interesting stop in Kniterate factory in Barcelona. Gerard Rubio starts his open-source knitting machine to make this technique more accessible to small businesses for the price and the dimensions and easy to use for the designers, with less technology requirement.

Research
Before creating a design I start researching various prototypes/ machines that are already on the market:
- Peter Solomon homemade Vacuum former in wood:
This vacuum machine is used to create a mold with heat, so first in the right part he heats the material, and then when it starts melting, proceeds with the other machine to aspirate and get the shape.
WHAT'S INTERESTING ABOUT THIS MACHINE?
The good design to be able to move the top part to place the material with just a proper fitting with the other parts.
- Eduardo Chamorro Vacuum Table:
Eduardo is a professor at FabLab Barcelona and an expert in additive manufacturing, during his studies in Seoul he fabricated this open-source machine:
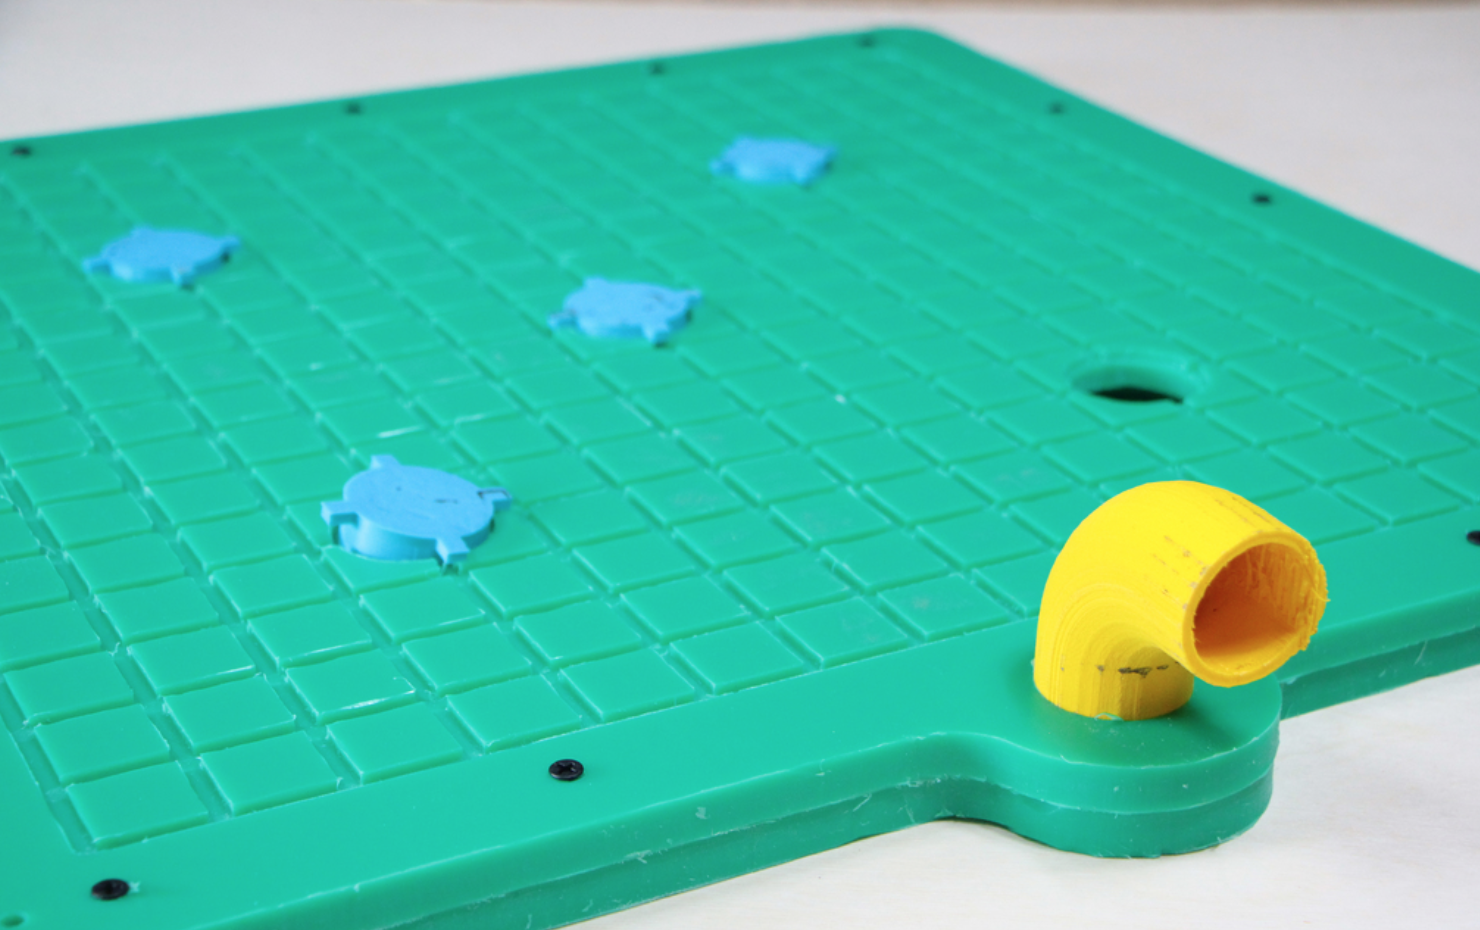
The Vaccum table is made in HDPE 12mm with a CNC. It has 4 suctions holes than can be closed with 3d printed plugs. The total size of the vacuum table is 560x 560mm. Round pipe corner adapter for using a standart vacuum cleaner (outer diameter 38mm).
Materials required:
- For the 3D printer plugs: PLA/ABS
- For the board: HDPE 12MM 1200X600
Follow the link to know more about the Vacuum Table for CNC by Eduardo Chamorro.
WHAT'S INTERESTING ABOUT THIS MACHINE?
The idea of using a thin thickness in the vacuum table, so we will require less material and less space to keep it. As well, as the entrance of the vacuum on the top and the 3D printer plugs to tap the holes.
- Gabriela Lotaif Vacuum machine:
BAG-UUM Working from Gabriela Lotaif on Vimeo.
For further information go to Fabricademy Gabriela's page.
WHAT'S INTERESTING ABOUT THIS MACHINE?
The goal with the handle to easily transport it and also the wingnuts to stick the material.
- Vacuum machines from the FabLab Barcelona
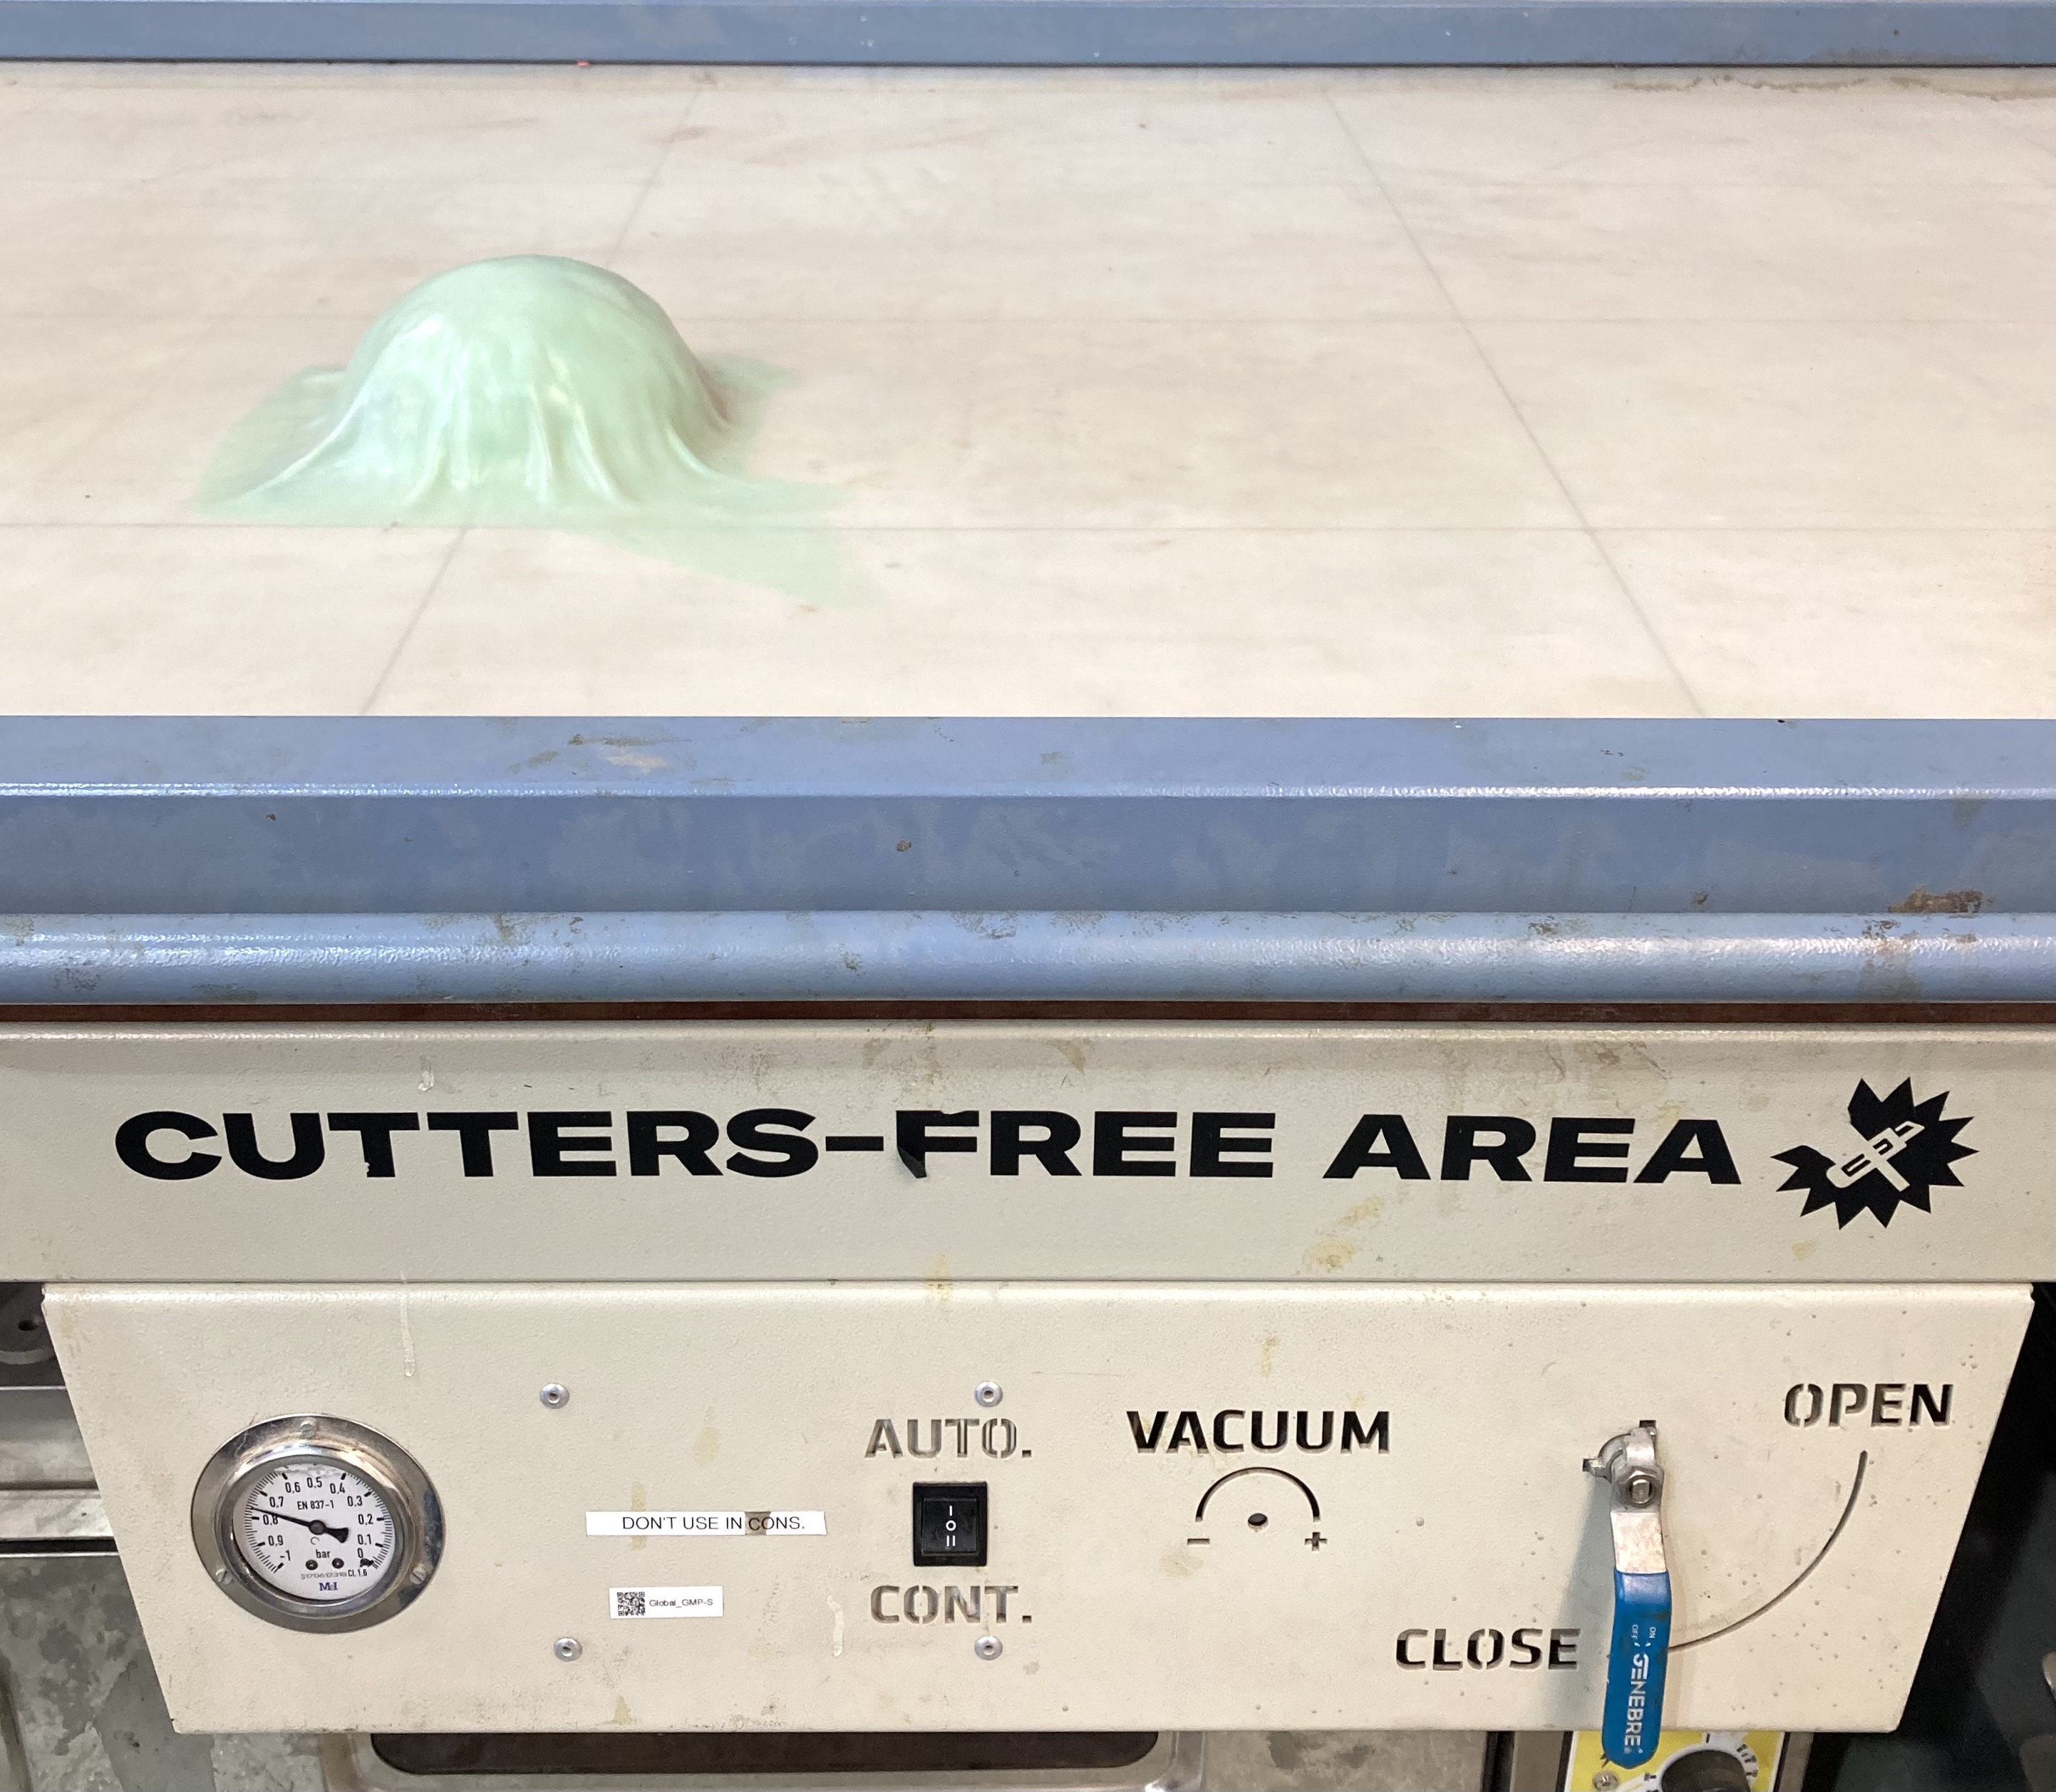
The wood Vacuum machine made in the lab has a hole to connect with the vacuum industrial cleaner and the top base with differents holes to let the material be molded. Additionally, the gadget has a second part to heat and allow the piece to be thermoforming.
WHAT'S INTERESTING ABOUT THIS MACHINE?
In that case, I keep in mind the distance of the holes grid, also the diameter of the entrance for the vacuum cleaner, and as a reference the scale of the machine that it's really useful and easy to keep.
This is the bigger Vacuum Machine at the Fab Lab, used for industrial design purposes, as the sandwich wood you make to create the deck of the skateboard. This one has a silicone sheet on the top that forces the pieces to be molded. Also, we used to create Biocomposite shapes for the Textile Scaffold week.
WHAT'S INTERESTING ABOUT THIS MACHINE?
In this case, I don't take any idea at all... It has a different propose rather my gadget need to be.
Ideation
WHAT WE ARE GOING TO IMPROVE?
- Useful dimensions of the machine.
- Easy to keep.
- Handle to easily transport.
- Wingnuts to regulate the stick of the material.
- Thin thickness for the vacuum table.
- 3D printer plugs to tap the holes instead of tape.
- Create a frame to place and transport easly the material to the vaccum.
- Use a waterproof material to be useful for leather.
- Easy to clean the inside of the machine.
Design
First sketches of the idea.
First of all I need to do an sketch to understand all the part of the vacuum machine needs:
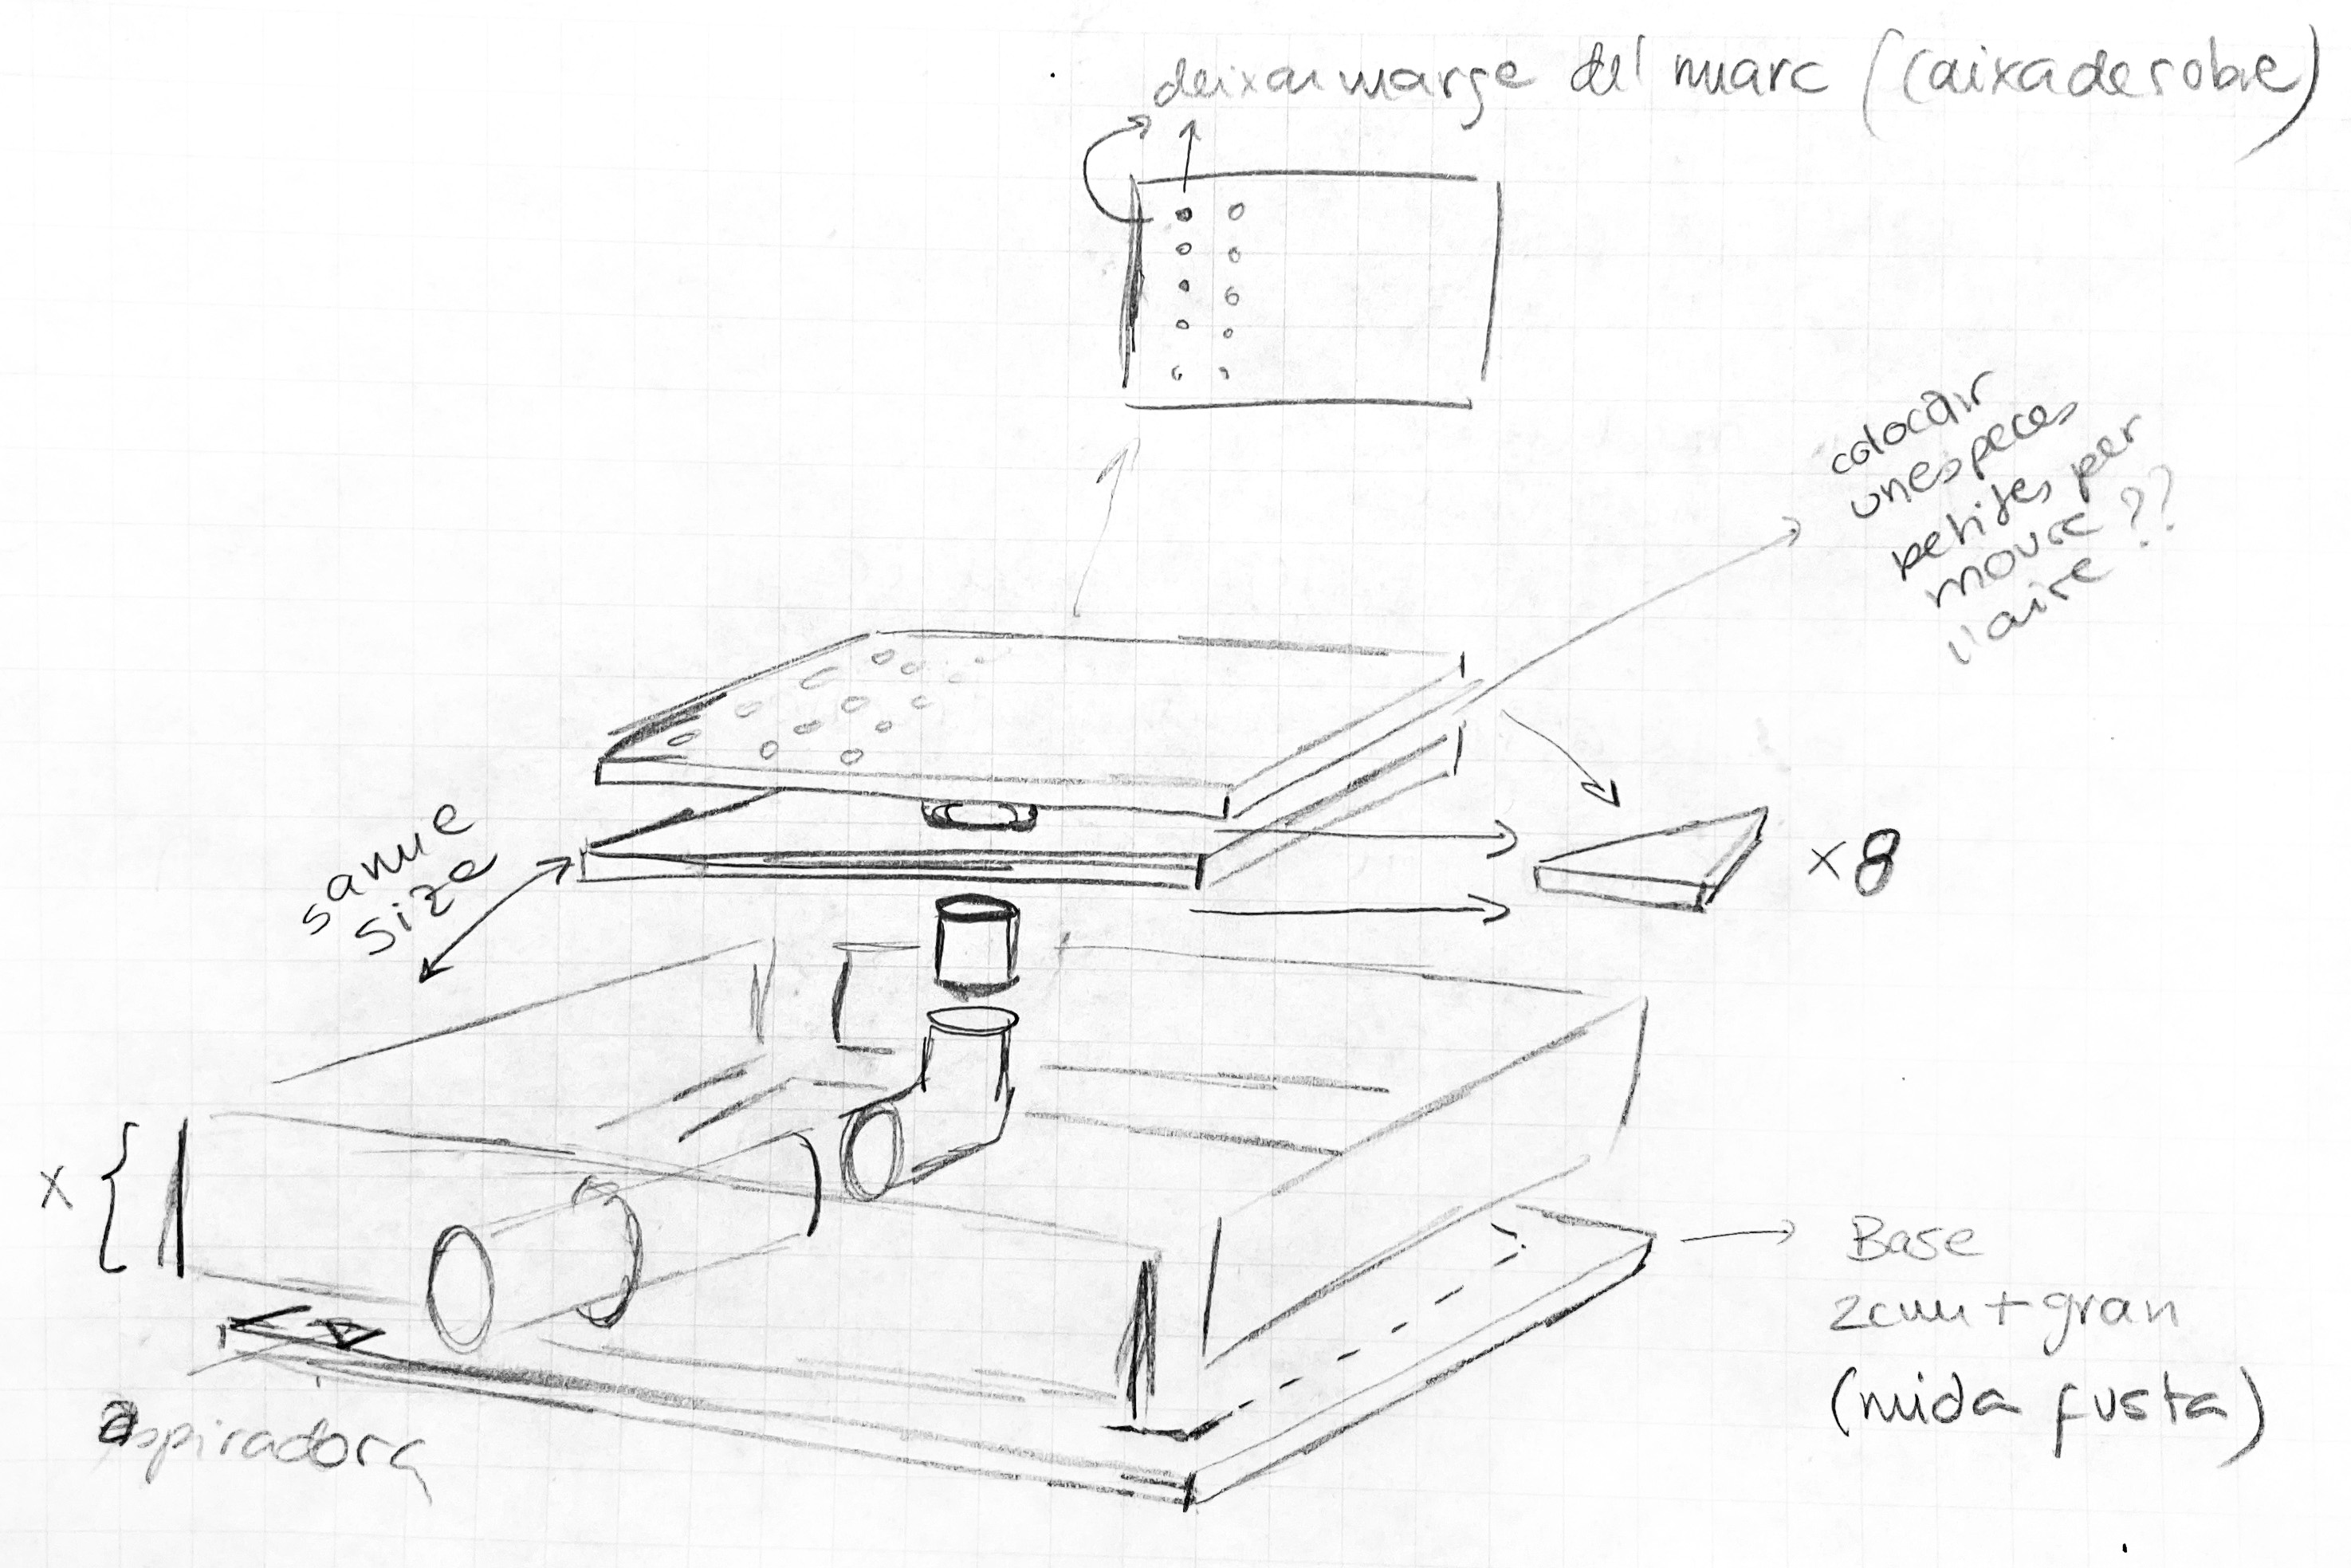
Then I could rethink how to implement the ideation list in my design to improve the actual ones.
On this note, I start thinking about the dimensions and all the different parts I will need for the Vacuum. It will be my handbook to follow.
At that point, we decided to use the HDPE material instead of wood to be more durable for the waterprof propieties. Also, the DIN A3 dimensions to be funcional and easy to keep. Finally, the parts that the design will have: the top to place the leather or the material to mold and the second part, the table to vacuum.
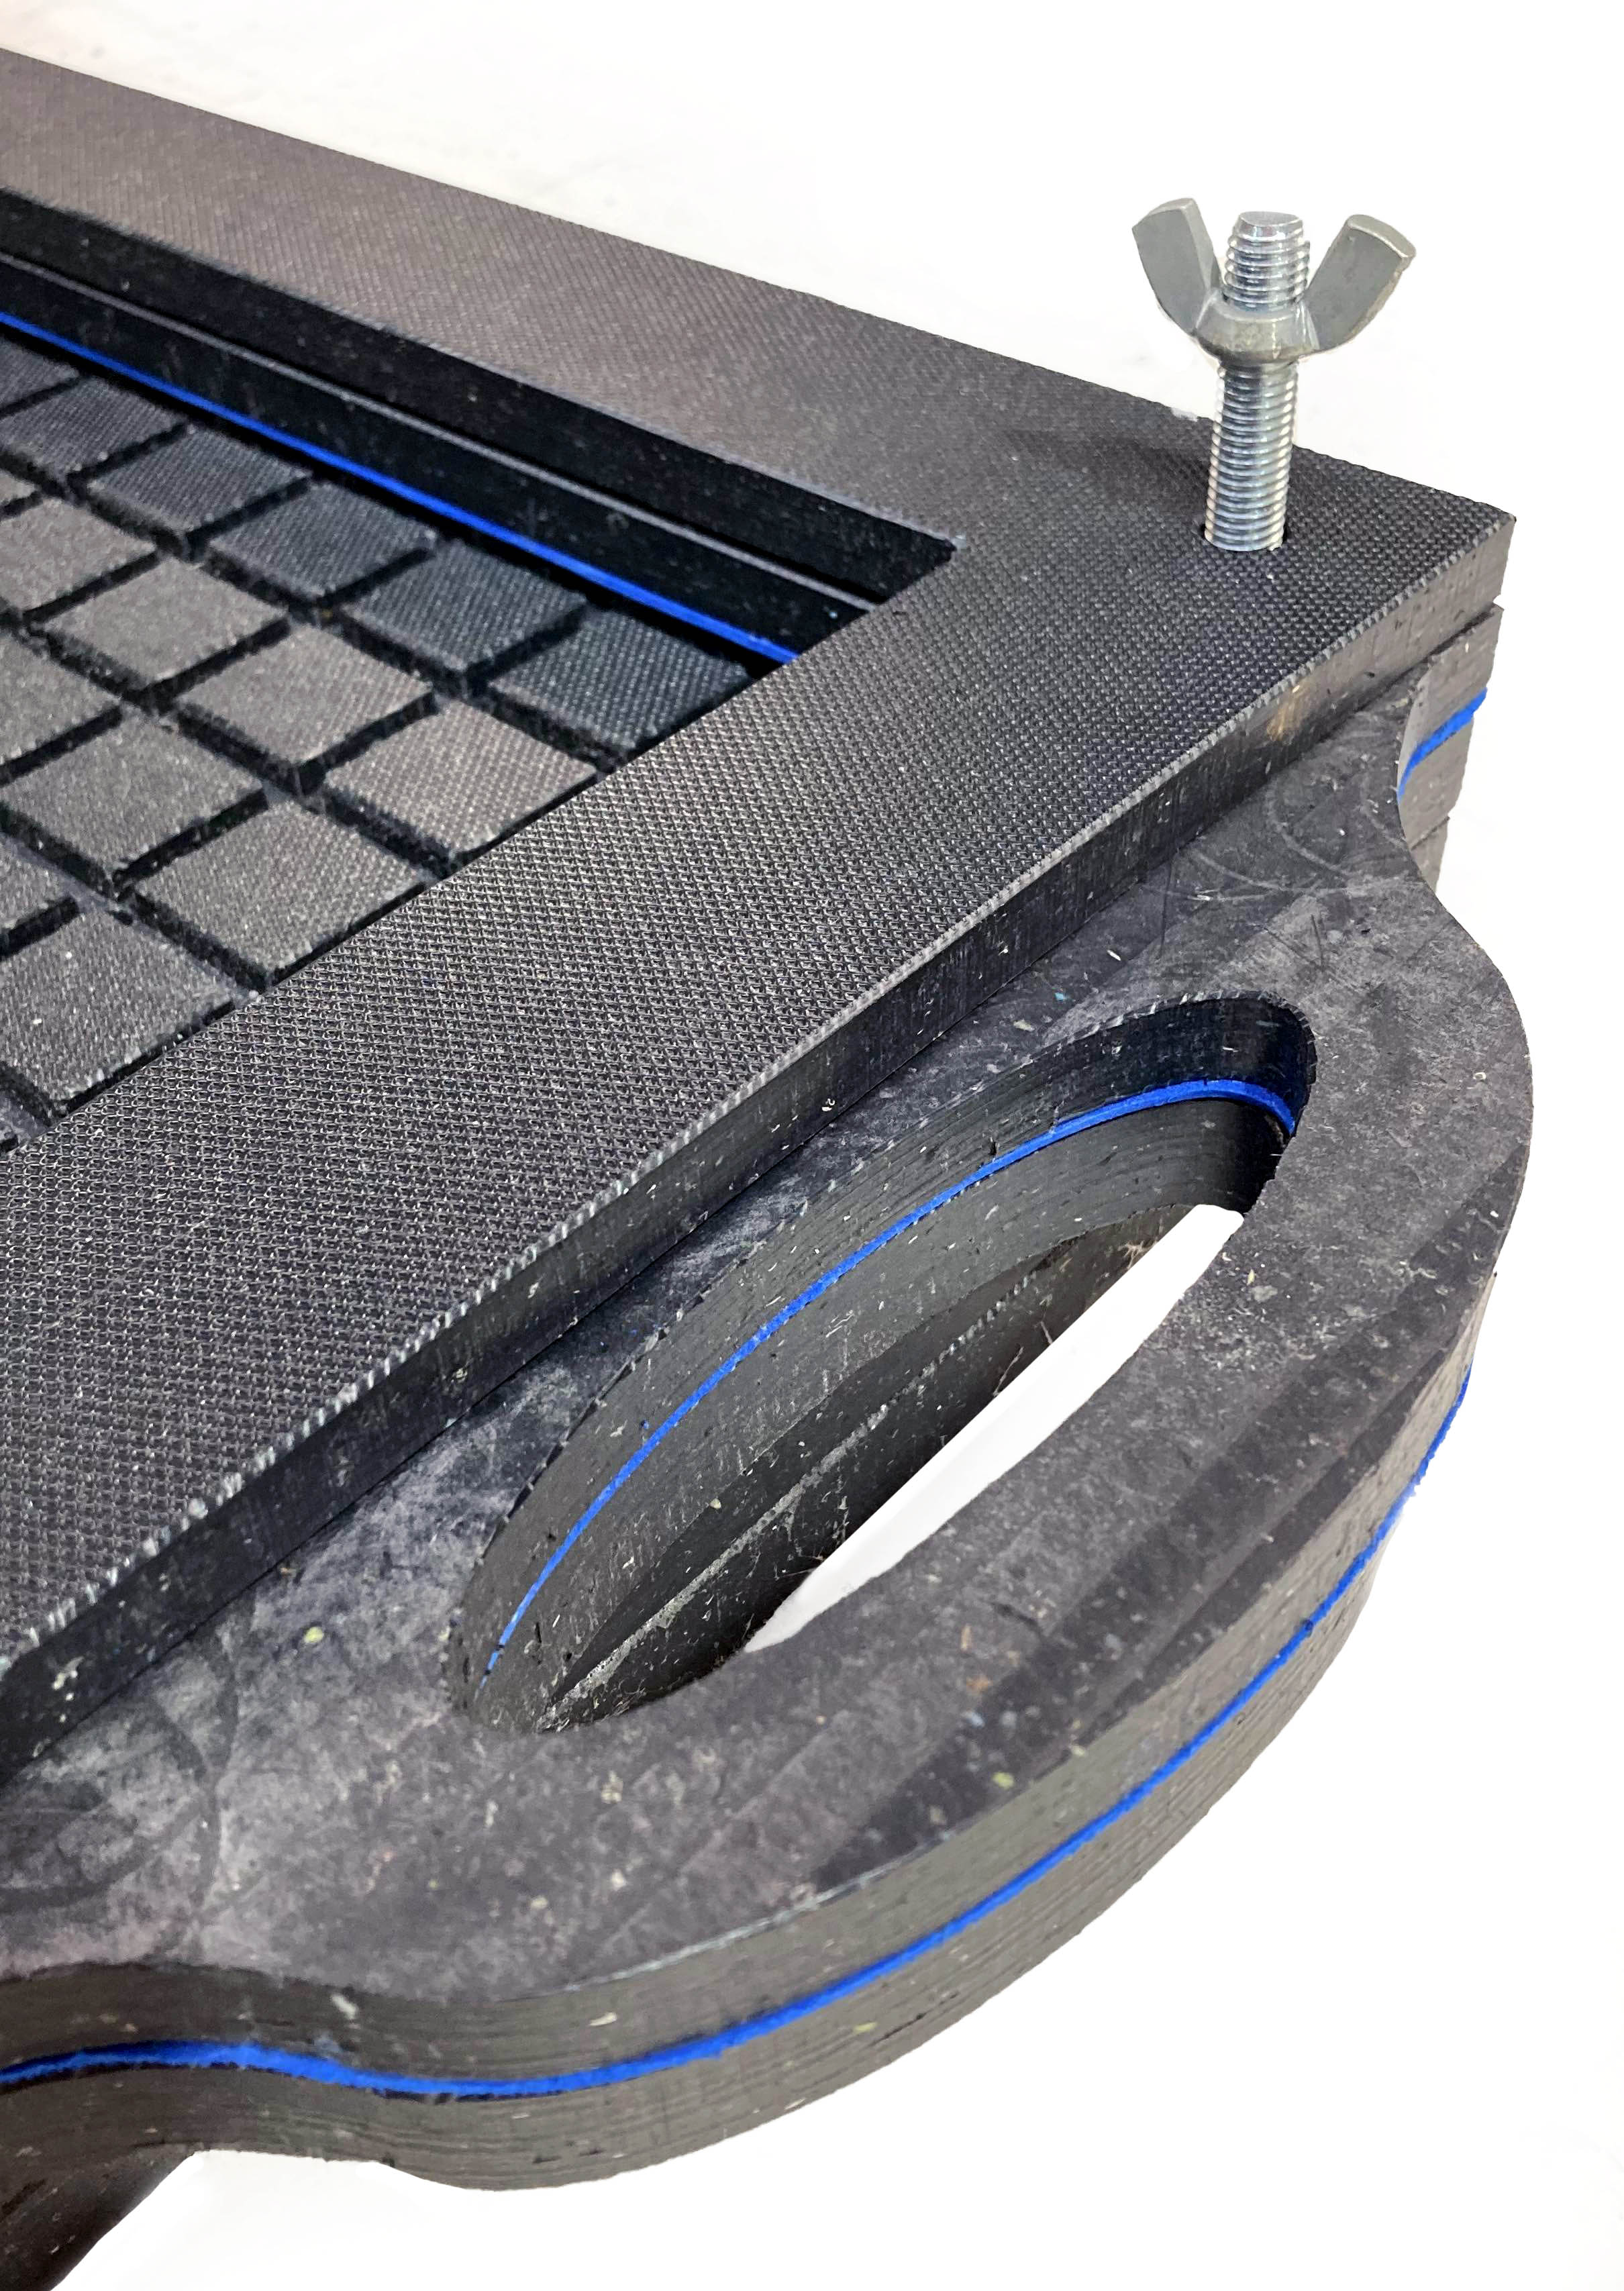
Additionally, we decided to use the industrial vacuum machine from the FabLab so we need to measure the hole to connect between them (6cm).
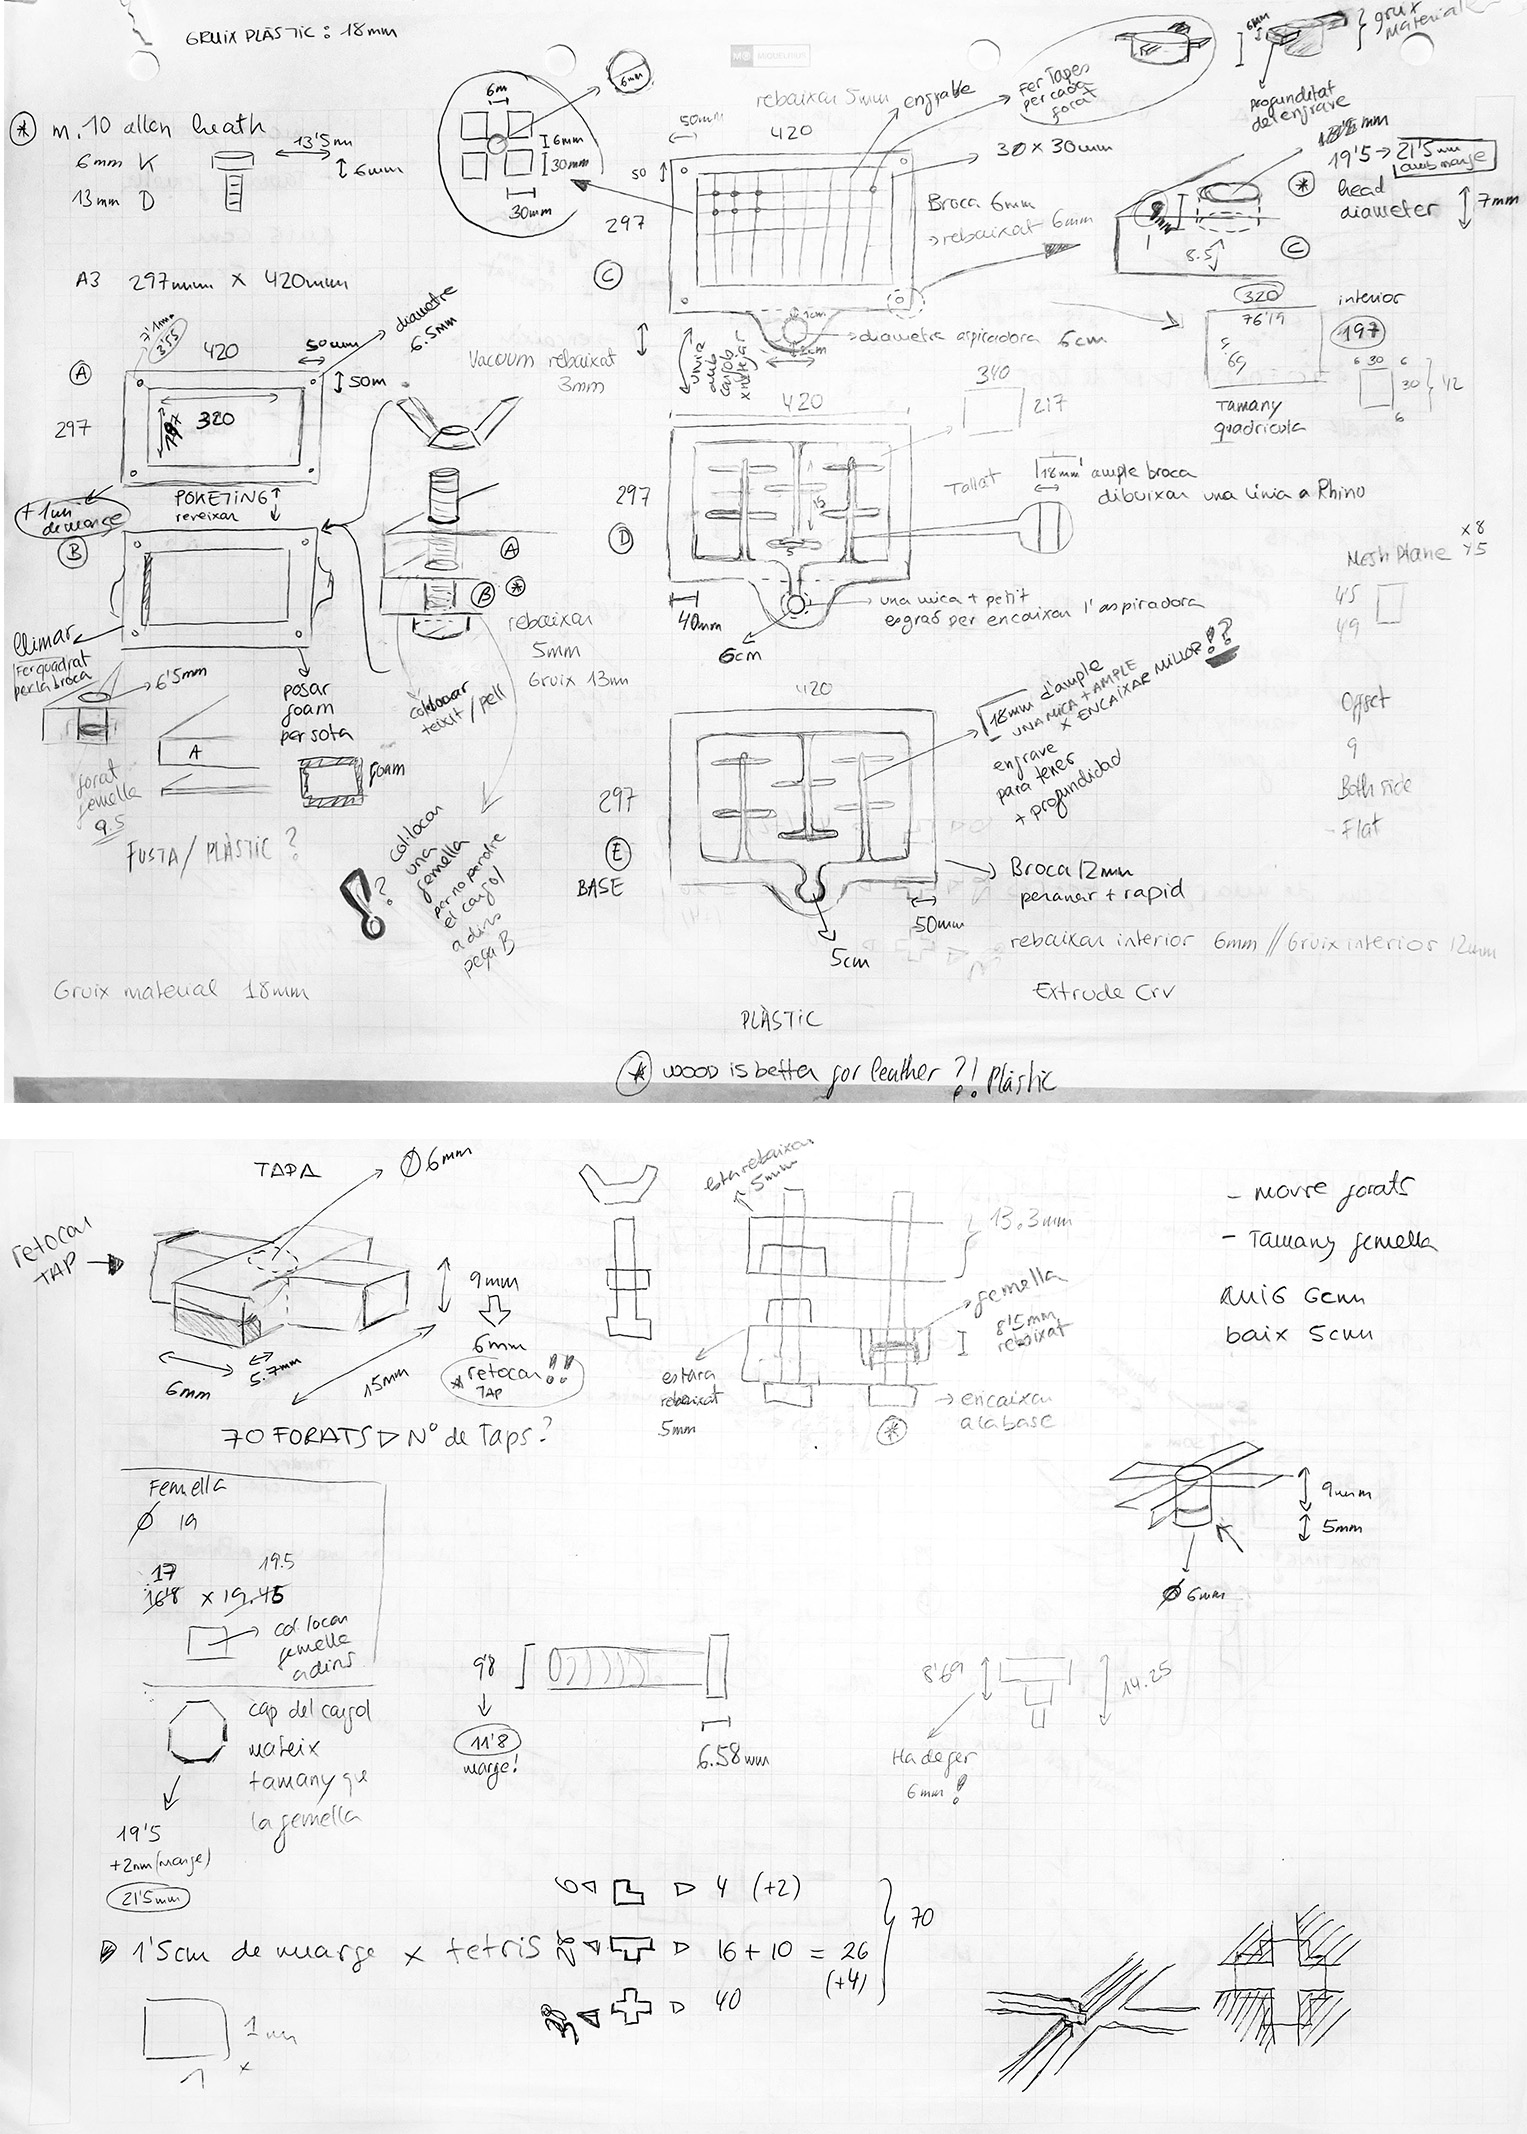
Rhino
As a personalized design, we plan the top sheet with the "vacuum" and an "m" as the logo brand, so we draw it in Illustrator and we save it in .SVG to be able to export the file in Rhino.
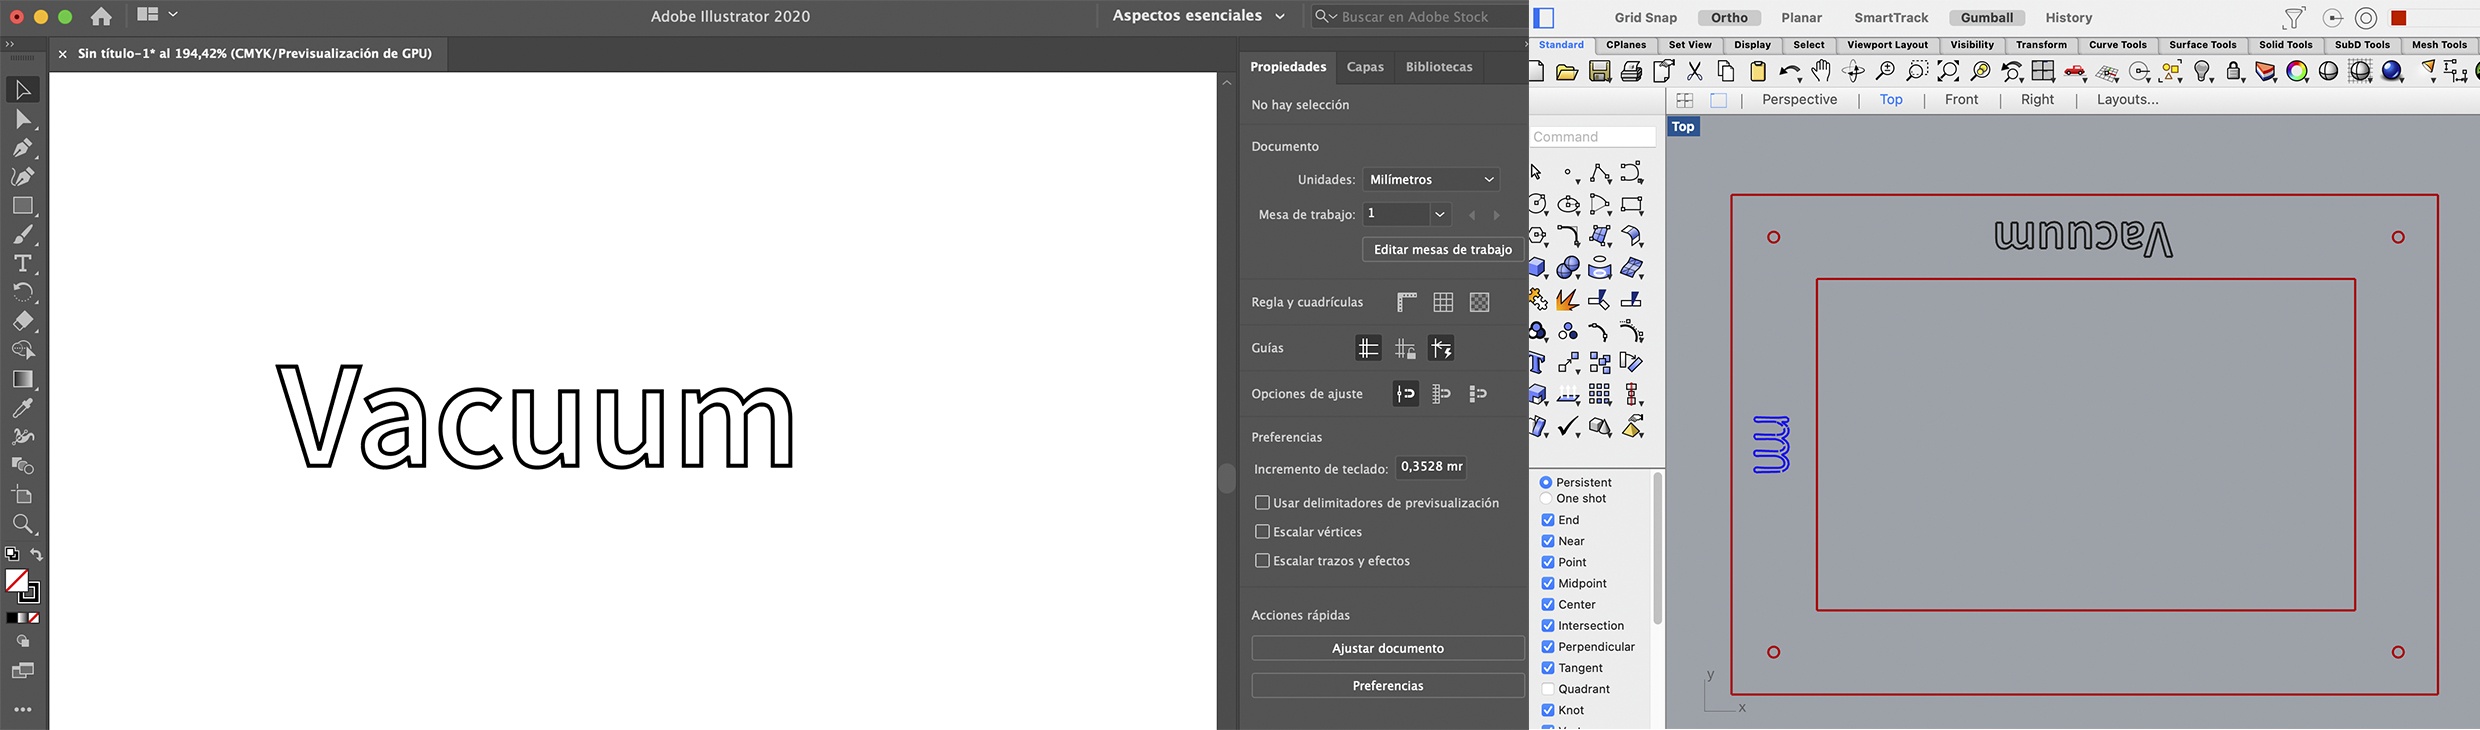
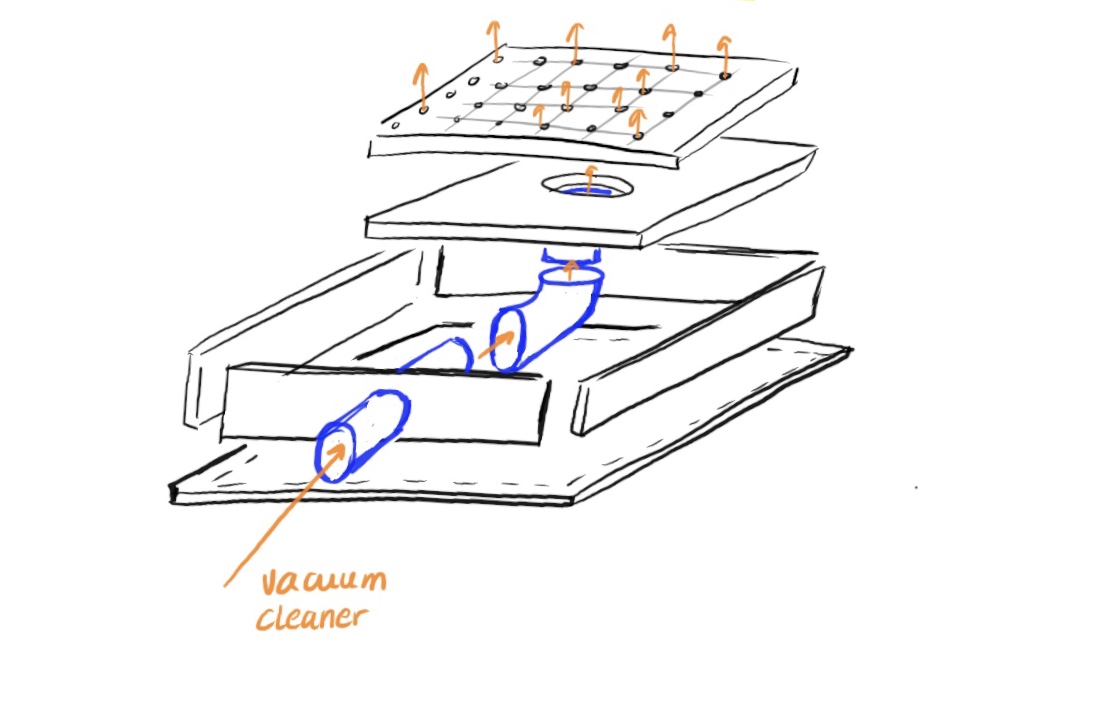
The next step is to import the sketches that I draw in my notebook to the Rhino with all the proper measurements:
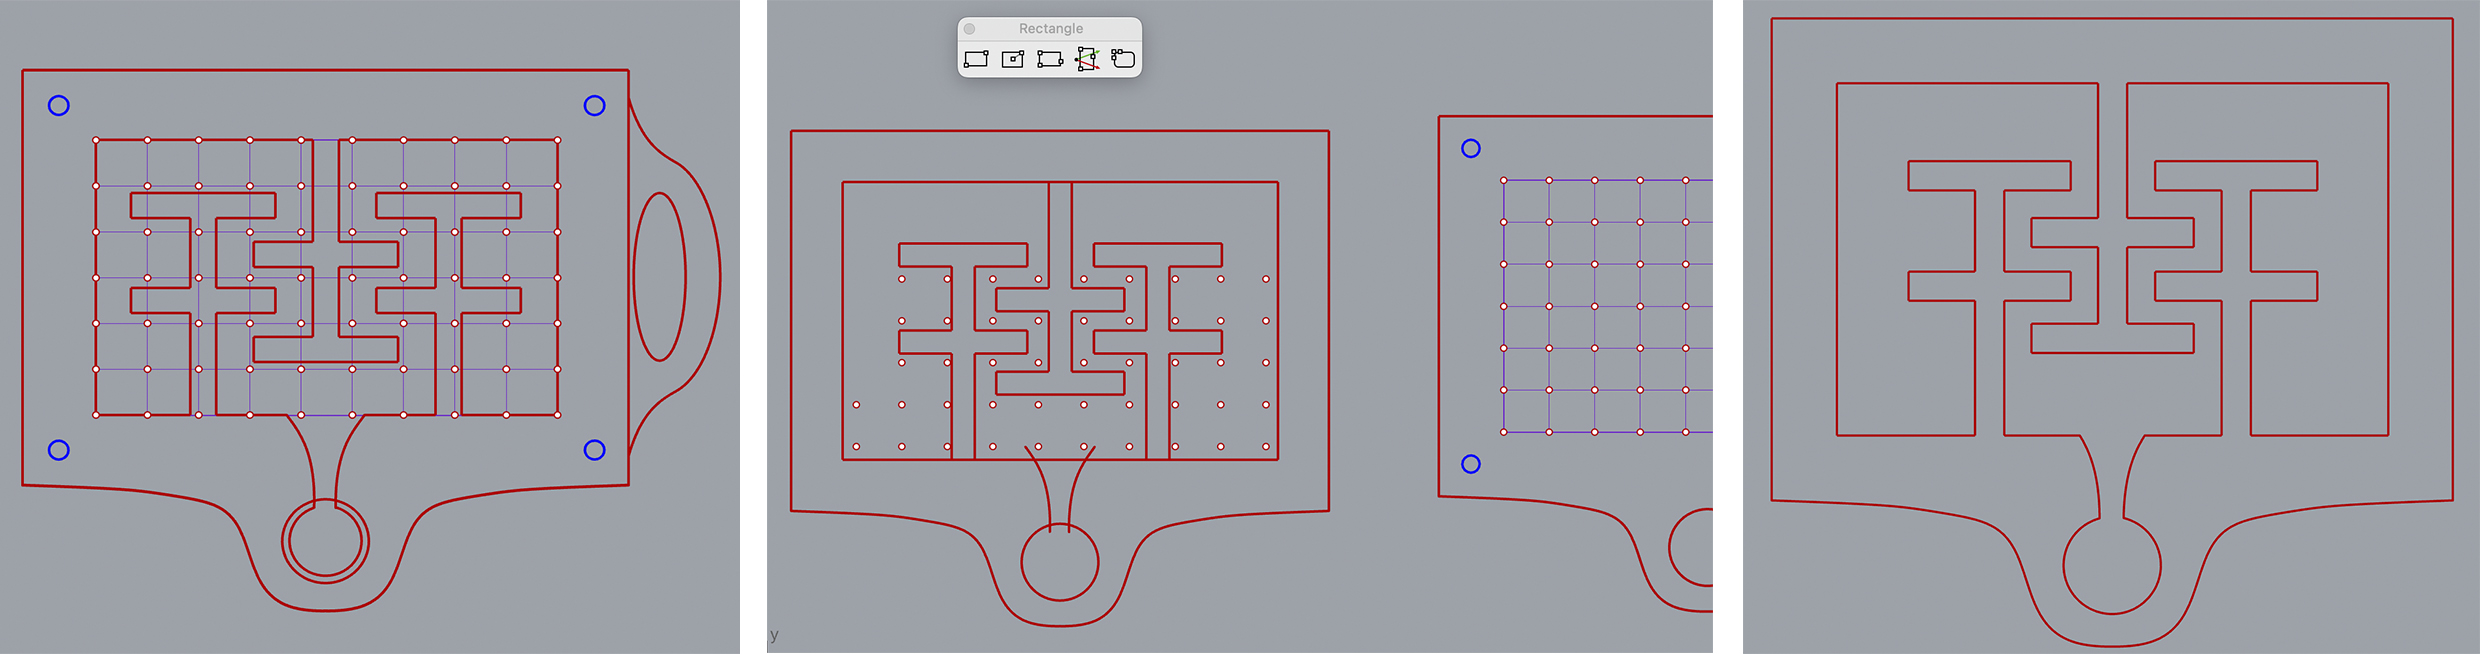
While I was creating the different parts of the machine to be abalible to assamble, I have some problems with the top holded sheet and the following one because some of them where block, so consequently it does not vacuum at certain points. So, I have to redesign the walls to not block anyone.
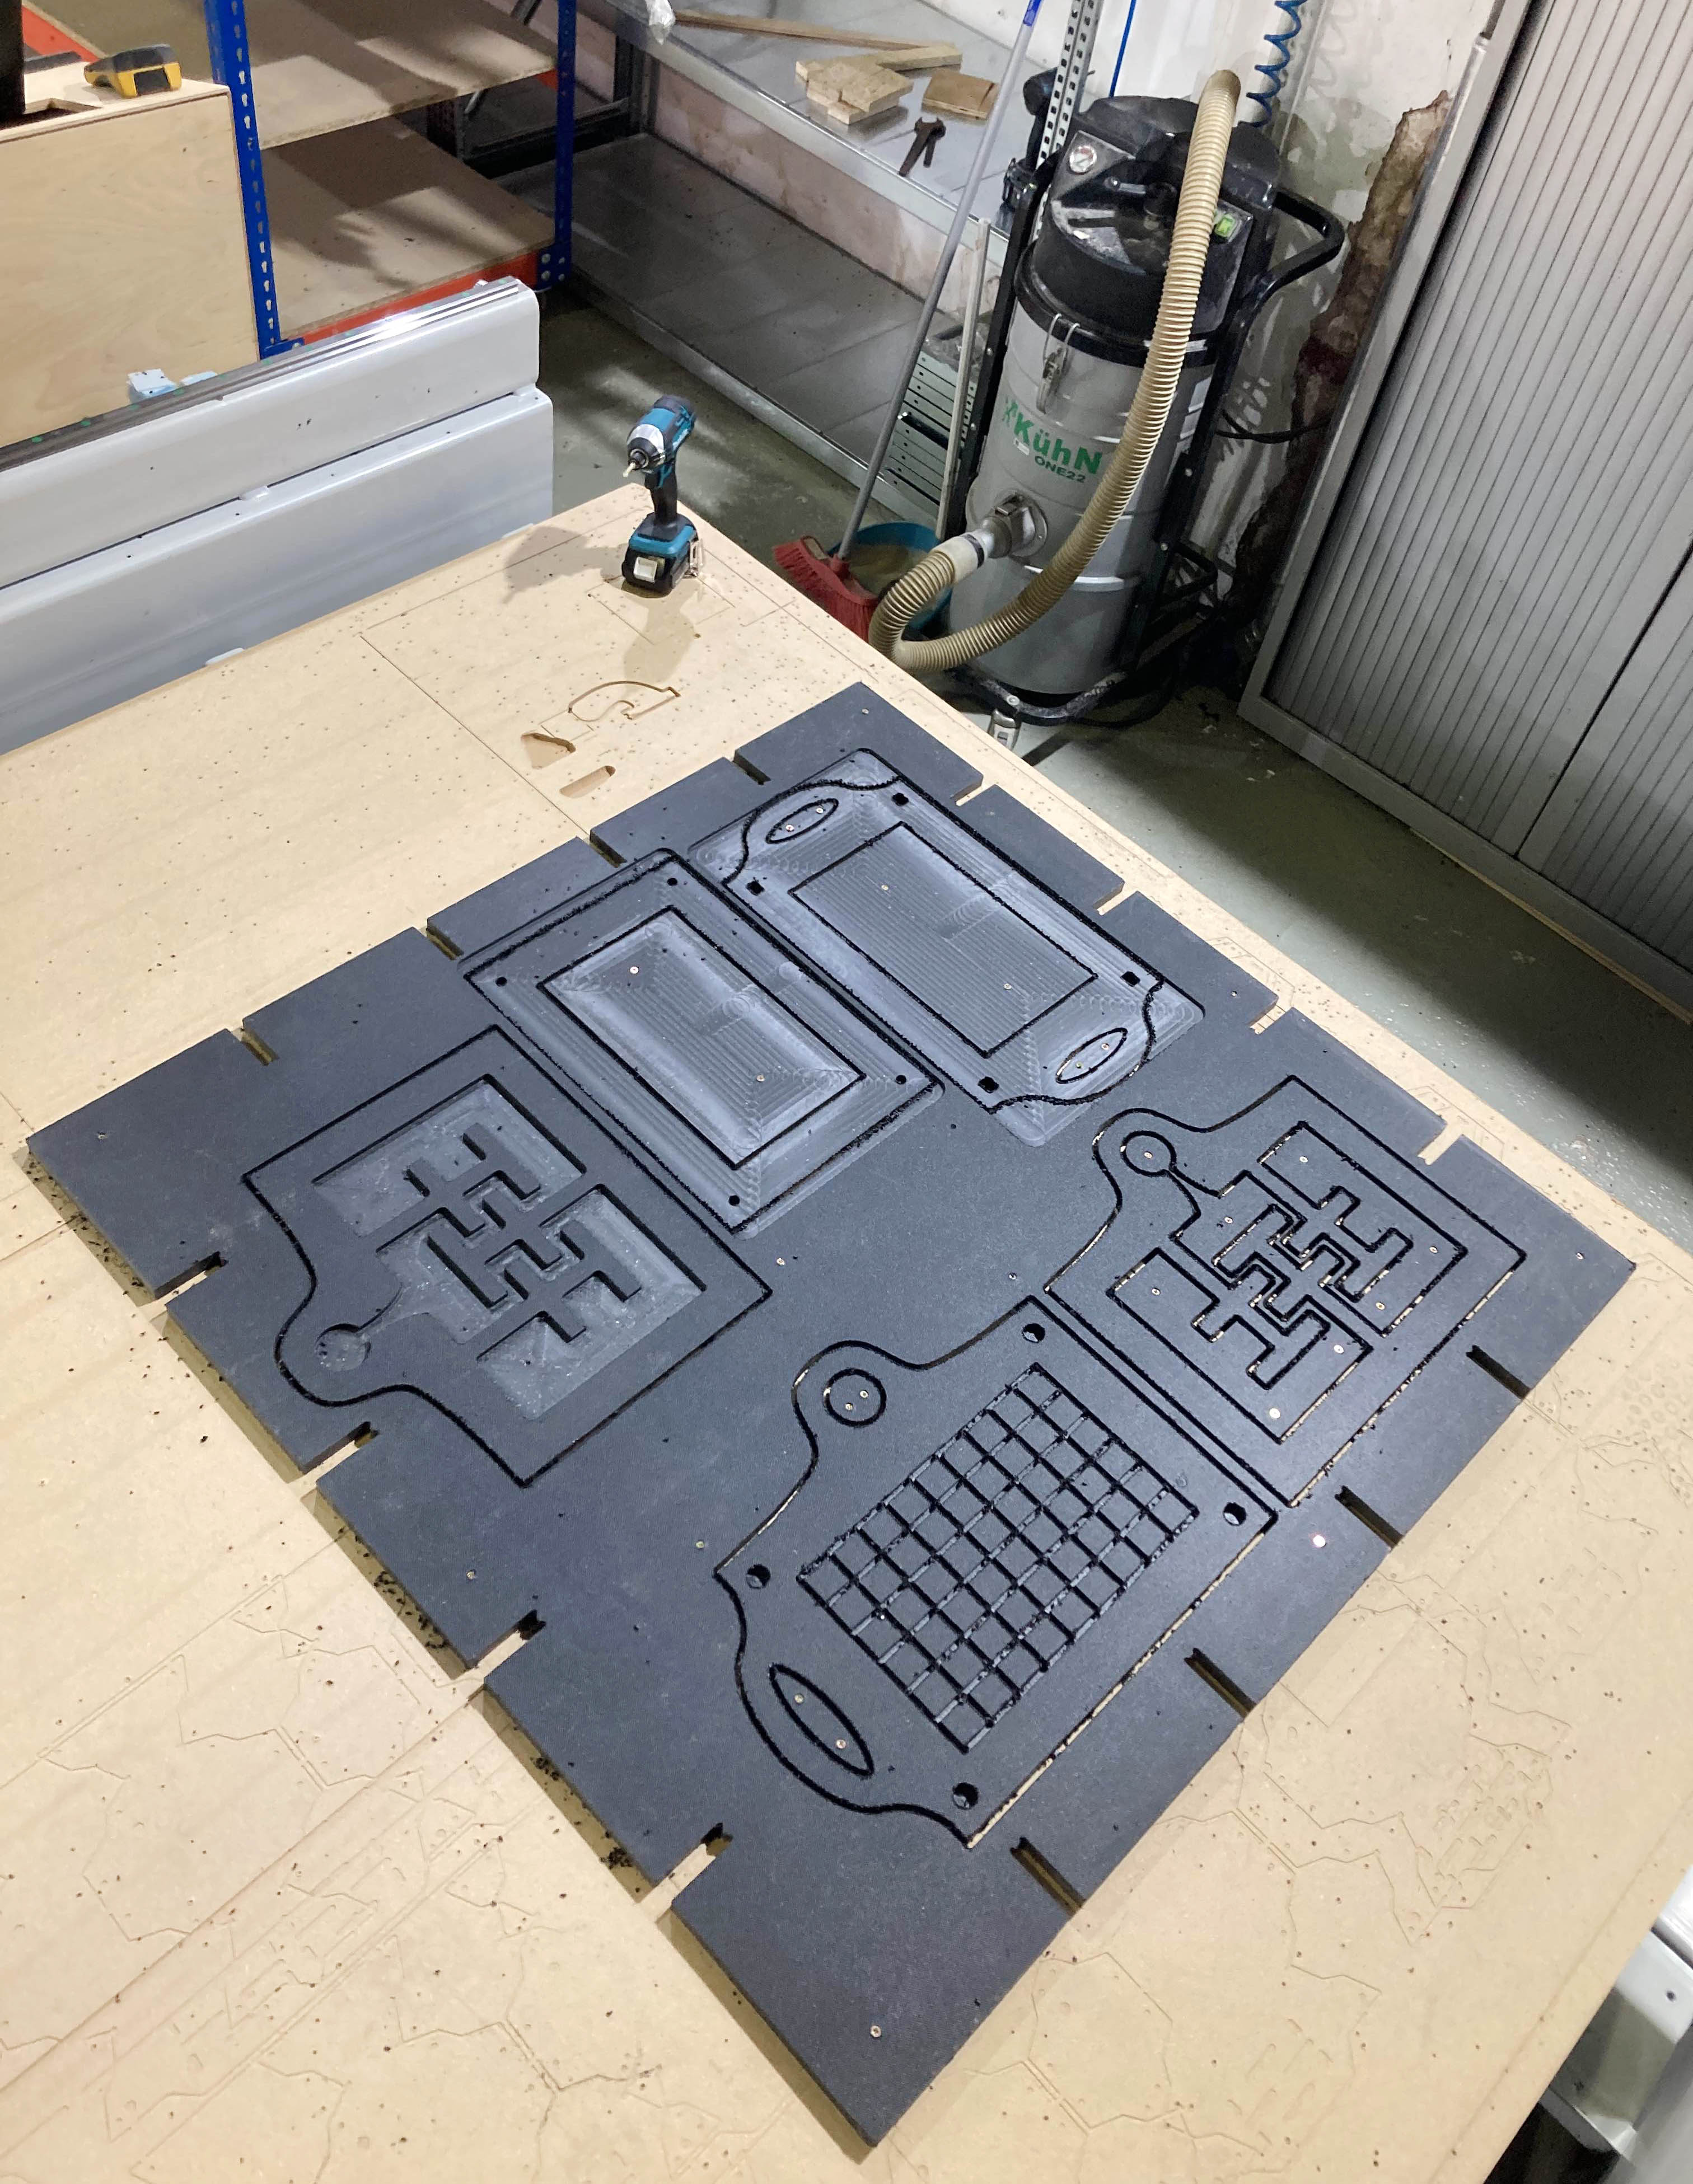
When I had all the parts drawn in the Rhino file as 2D we could extrude and create a 3D. However, with the 2D file, we have enough information to go into the CNC machine because we could define the settings in RhinoCAM. Even so, to have a proper plan result I created all the parts of the machine as a real view.
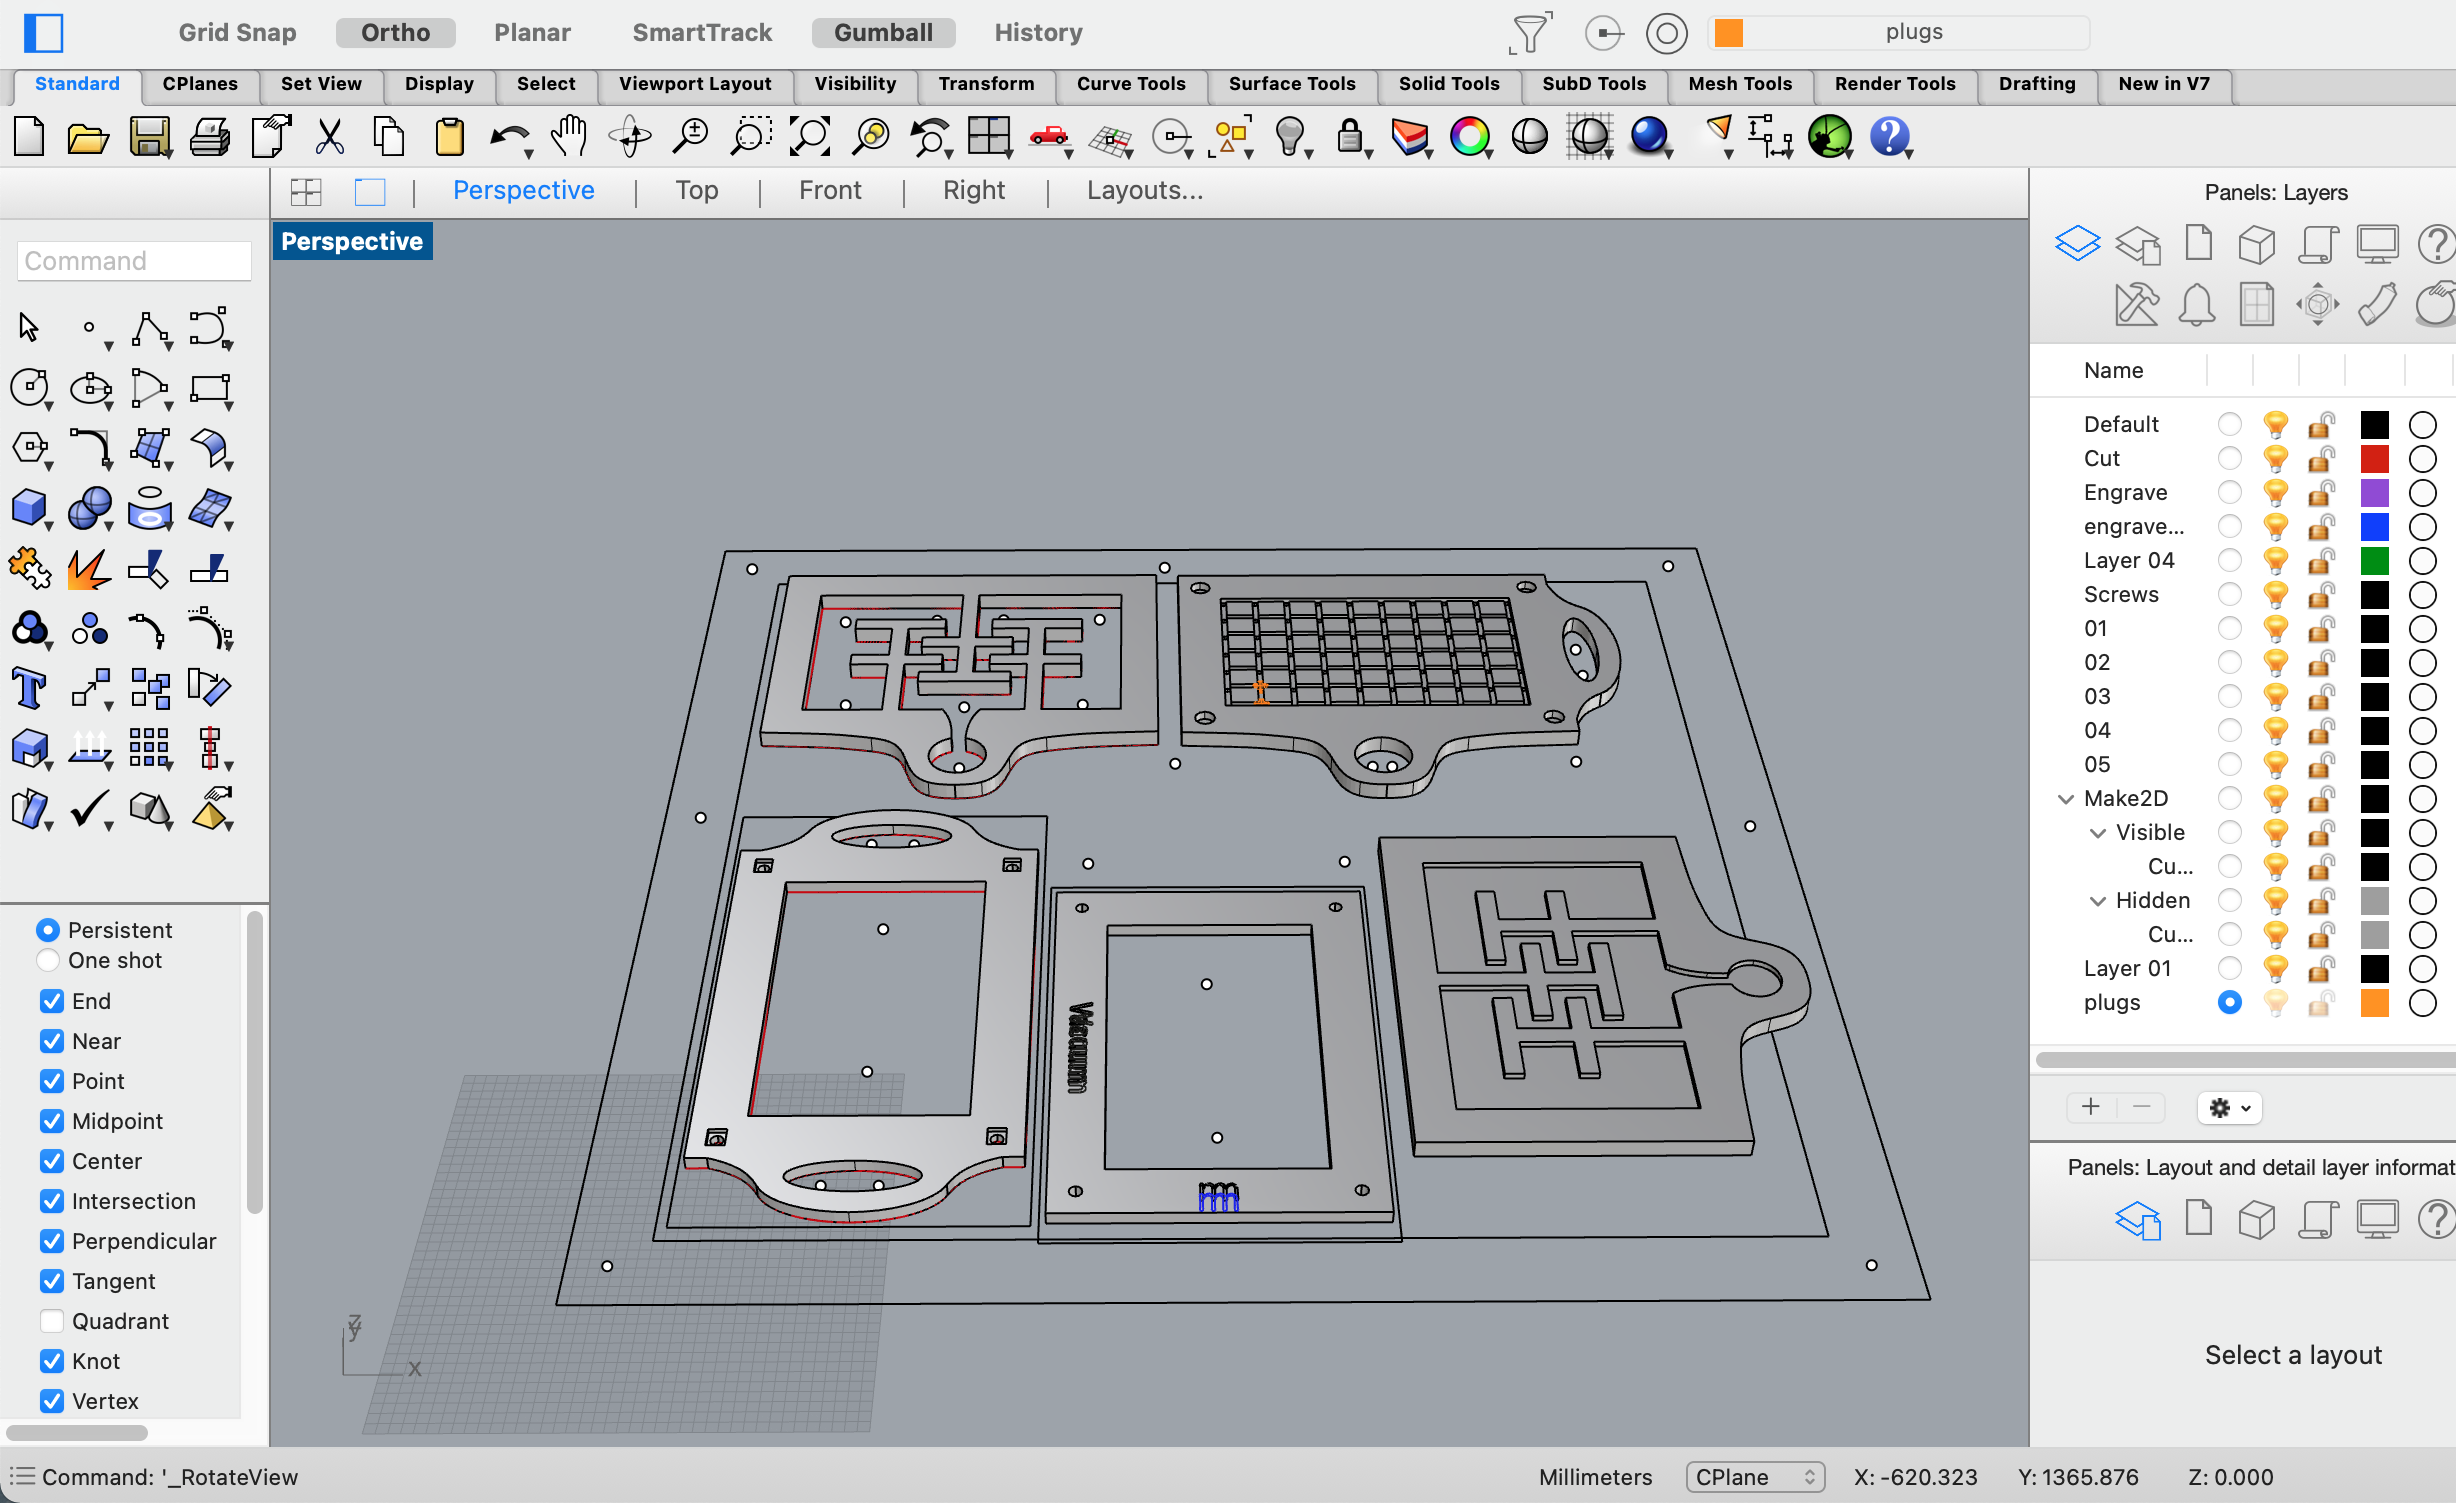
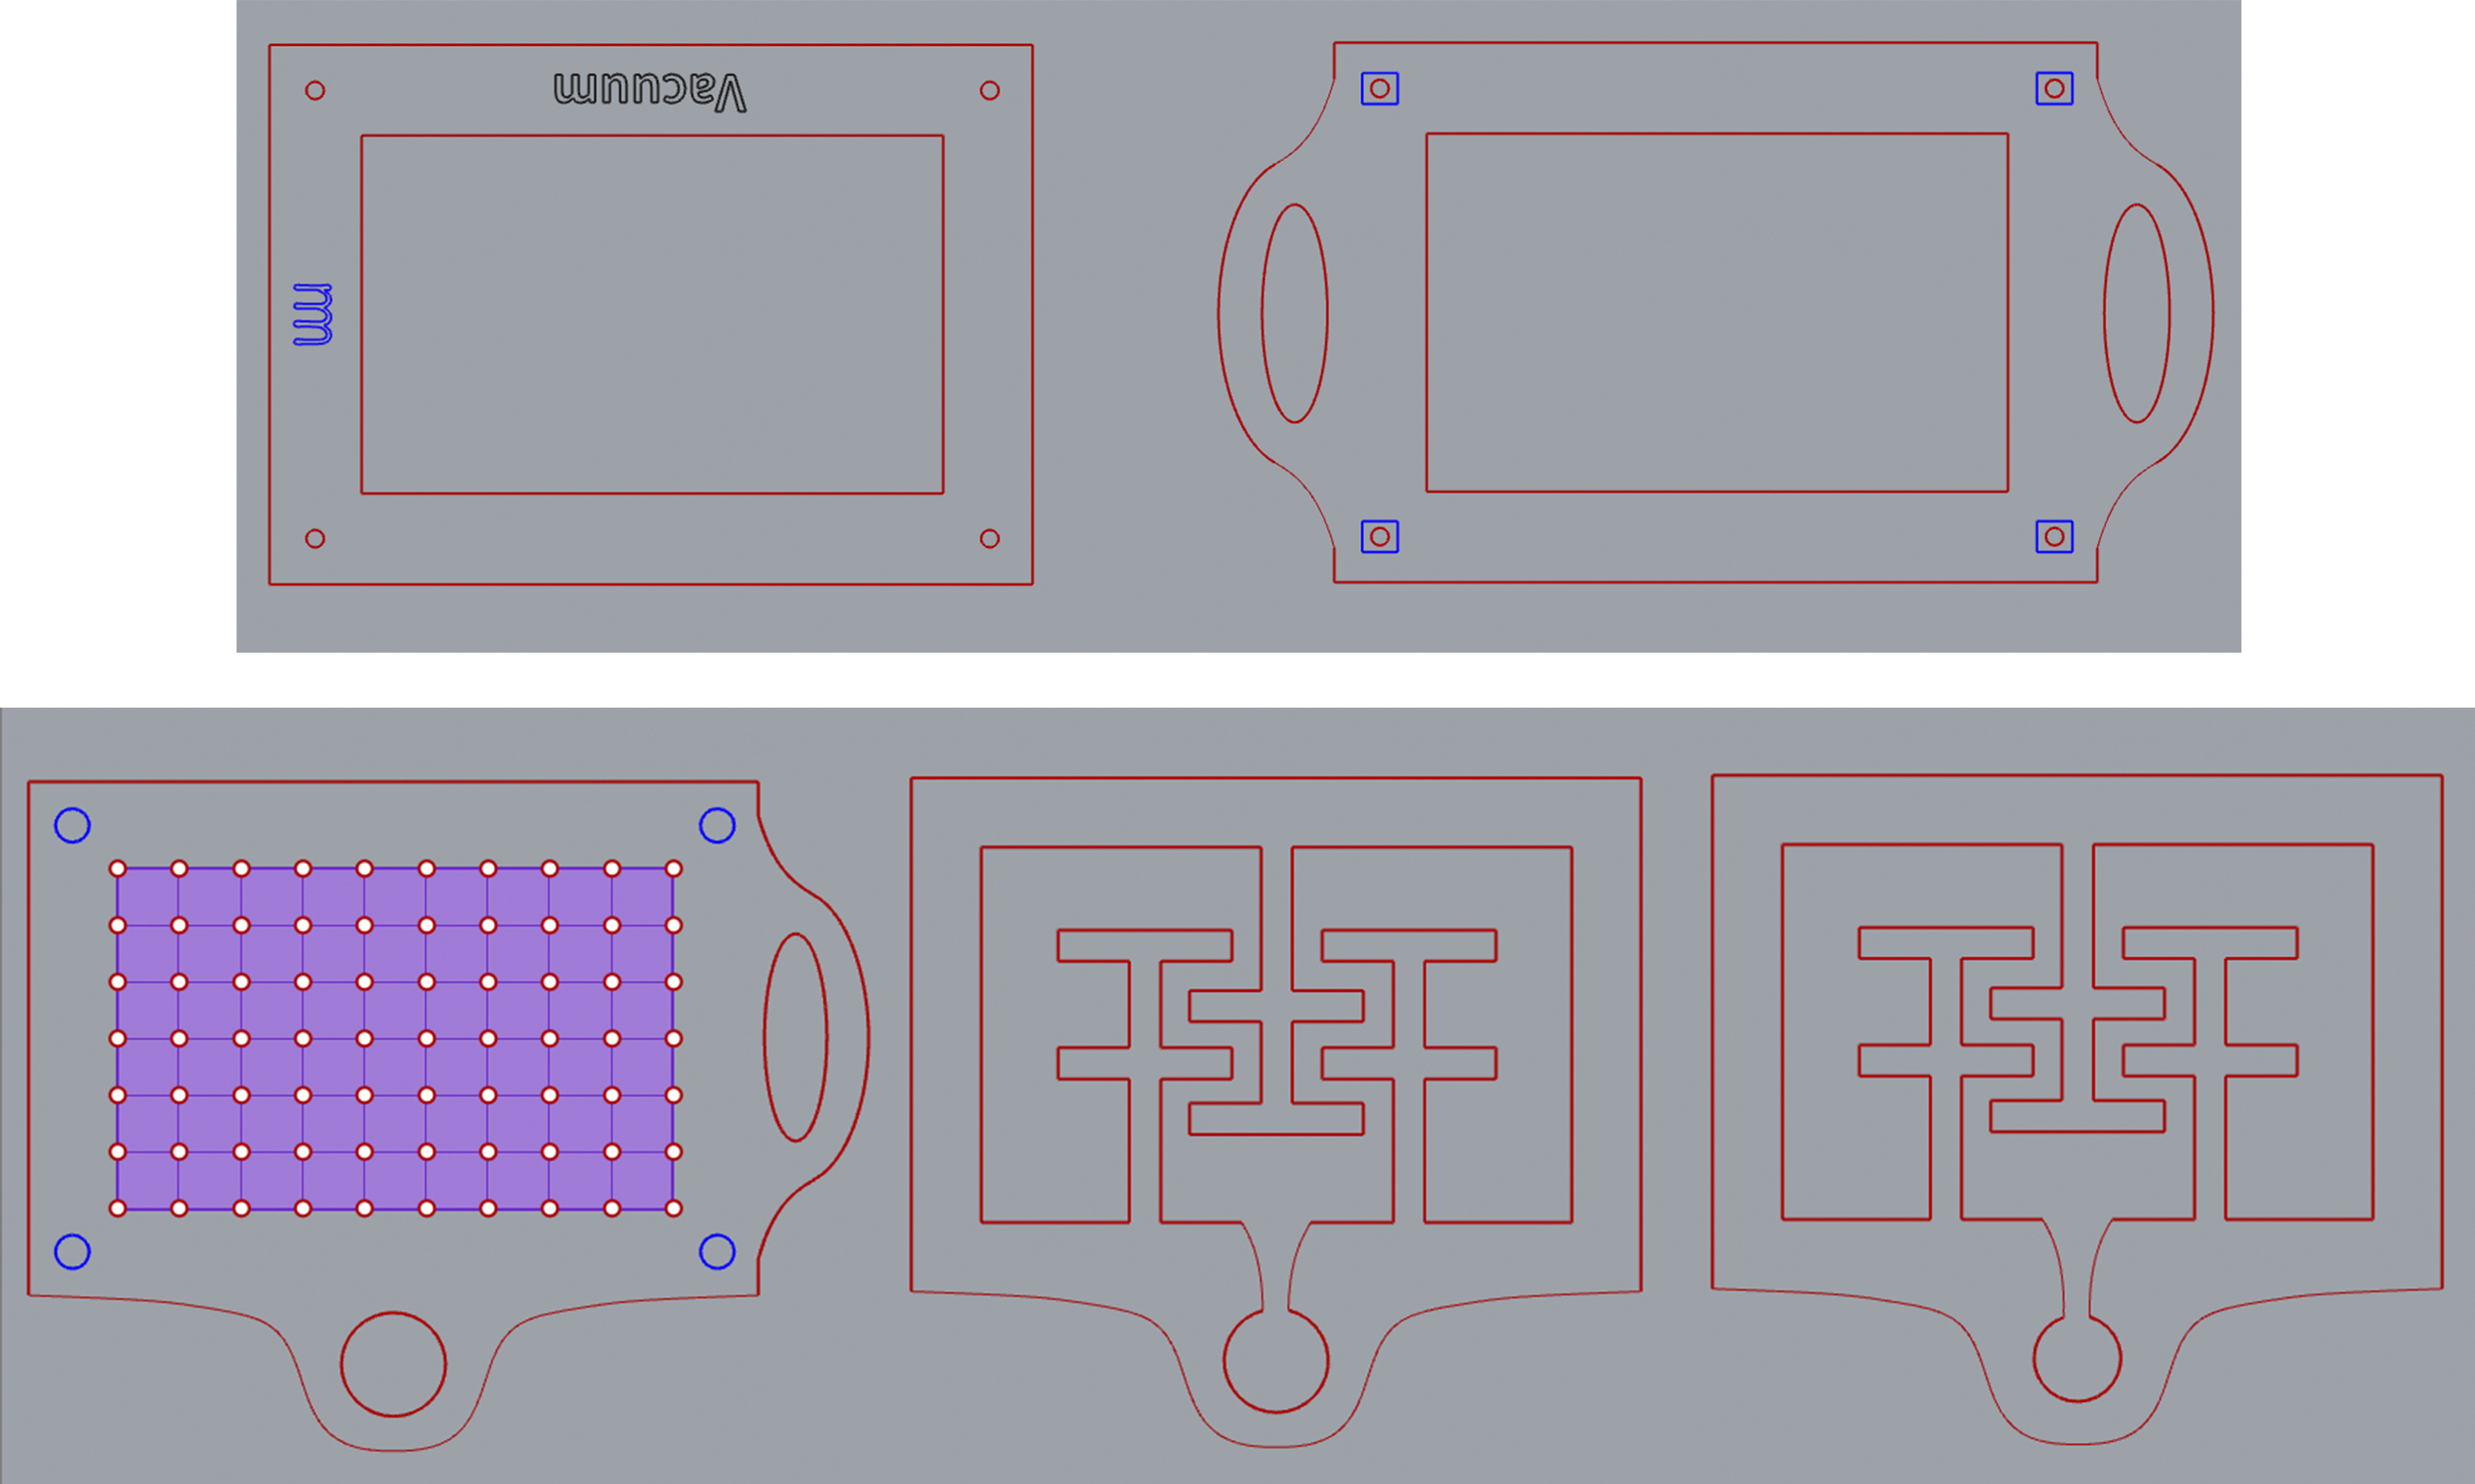
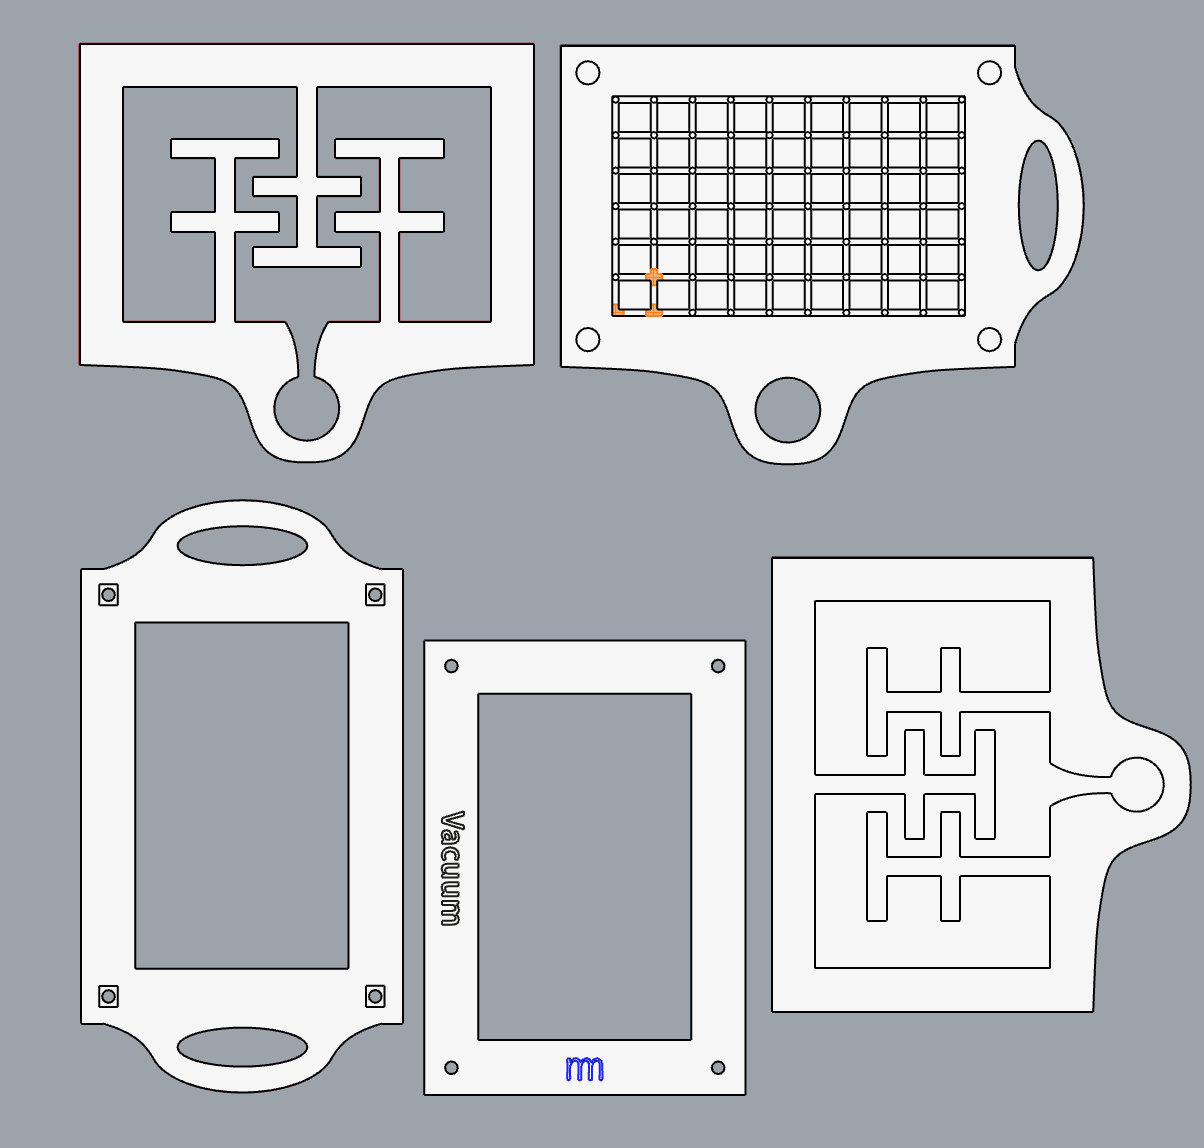
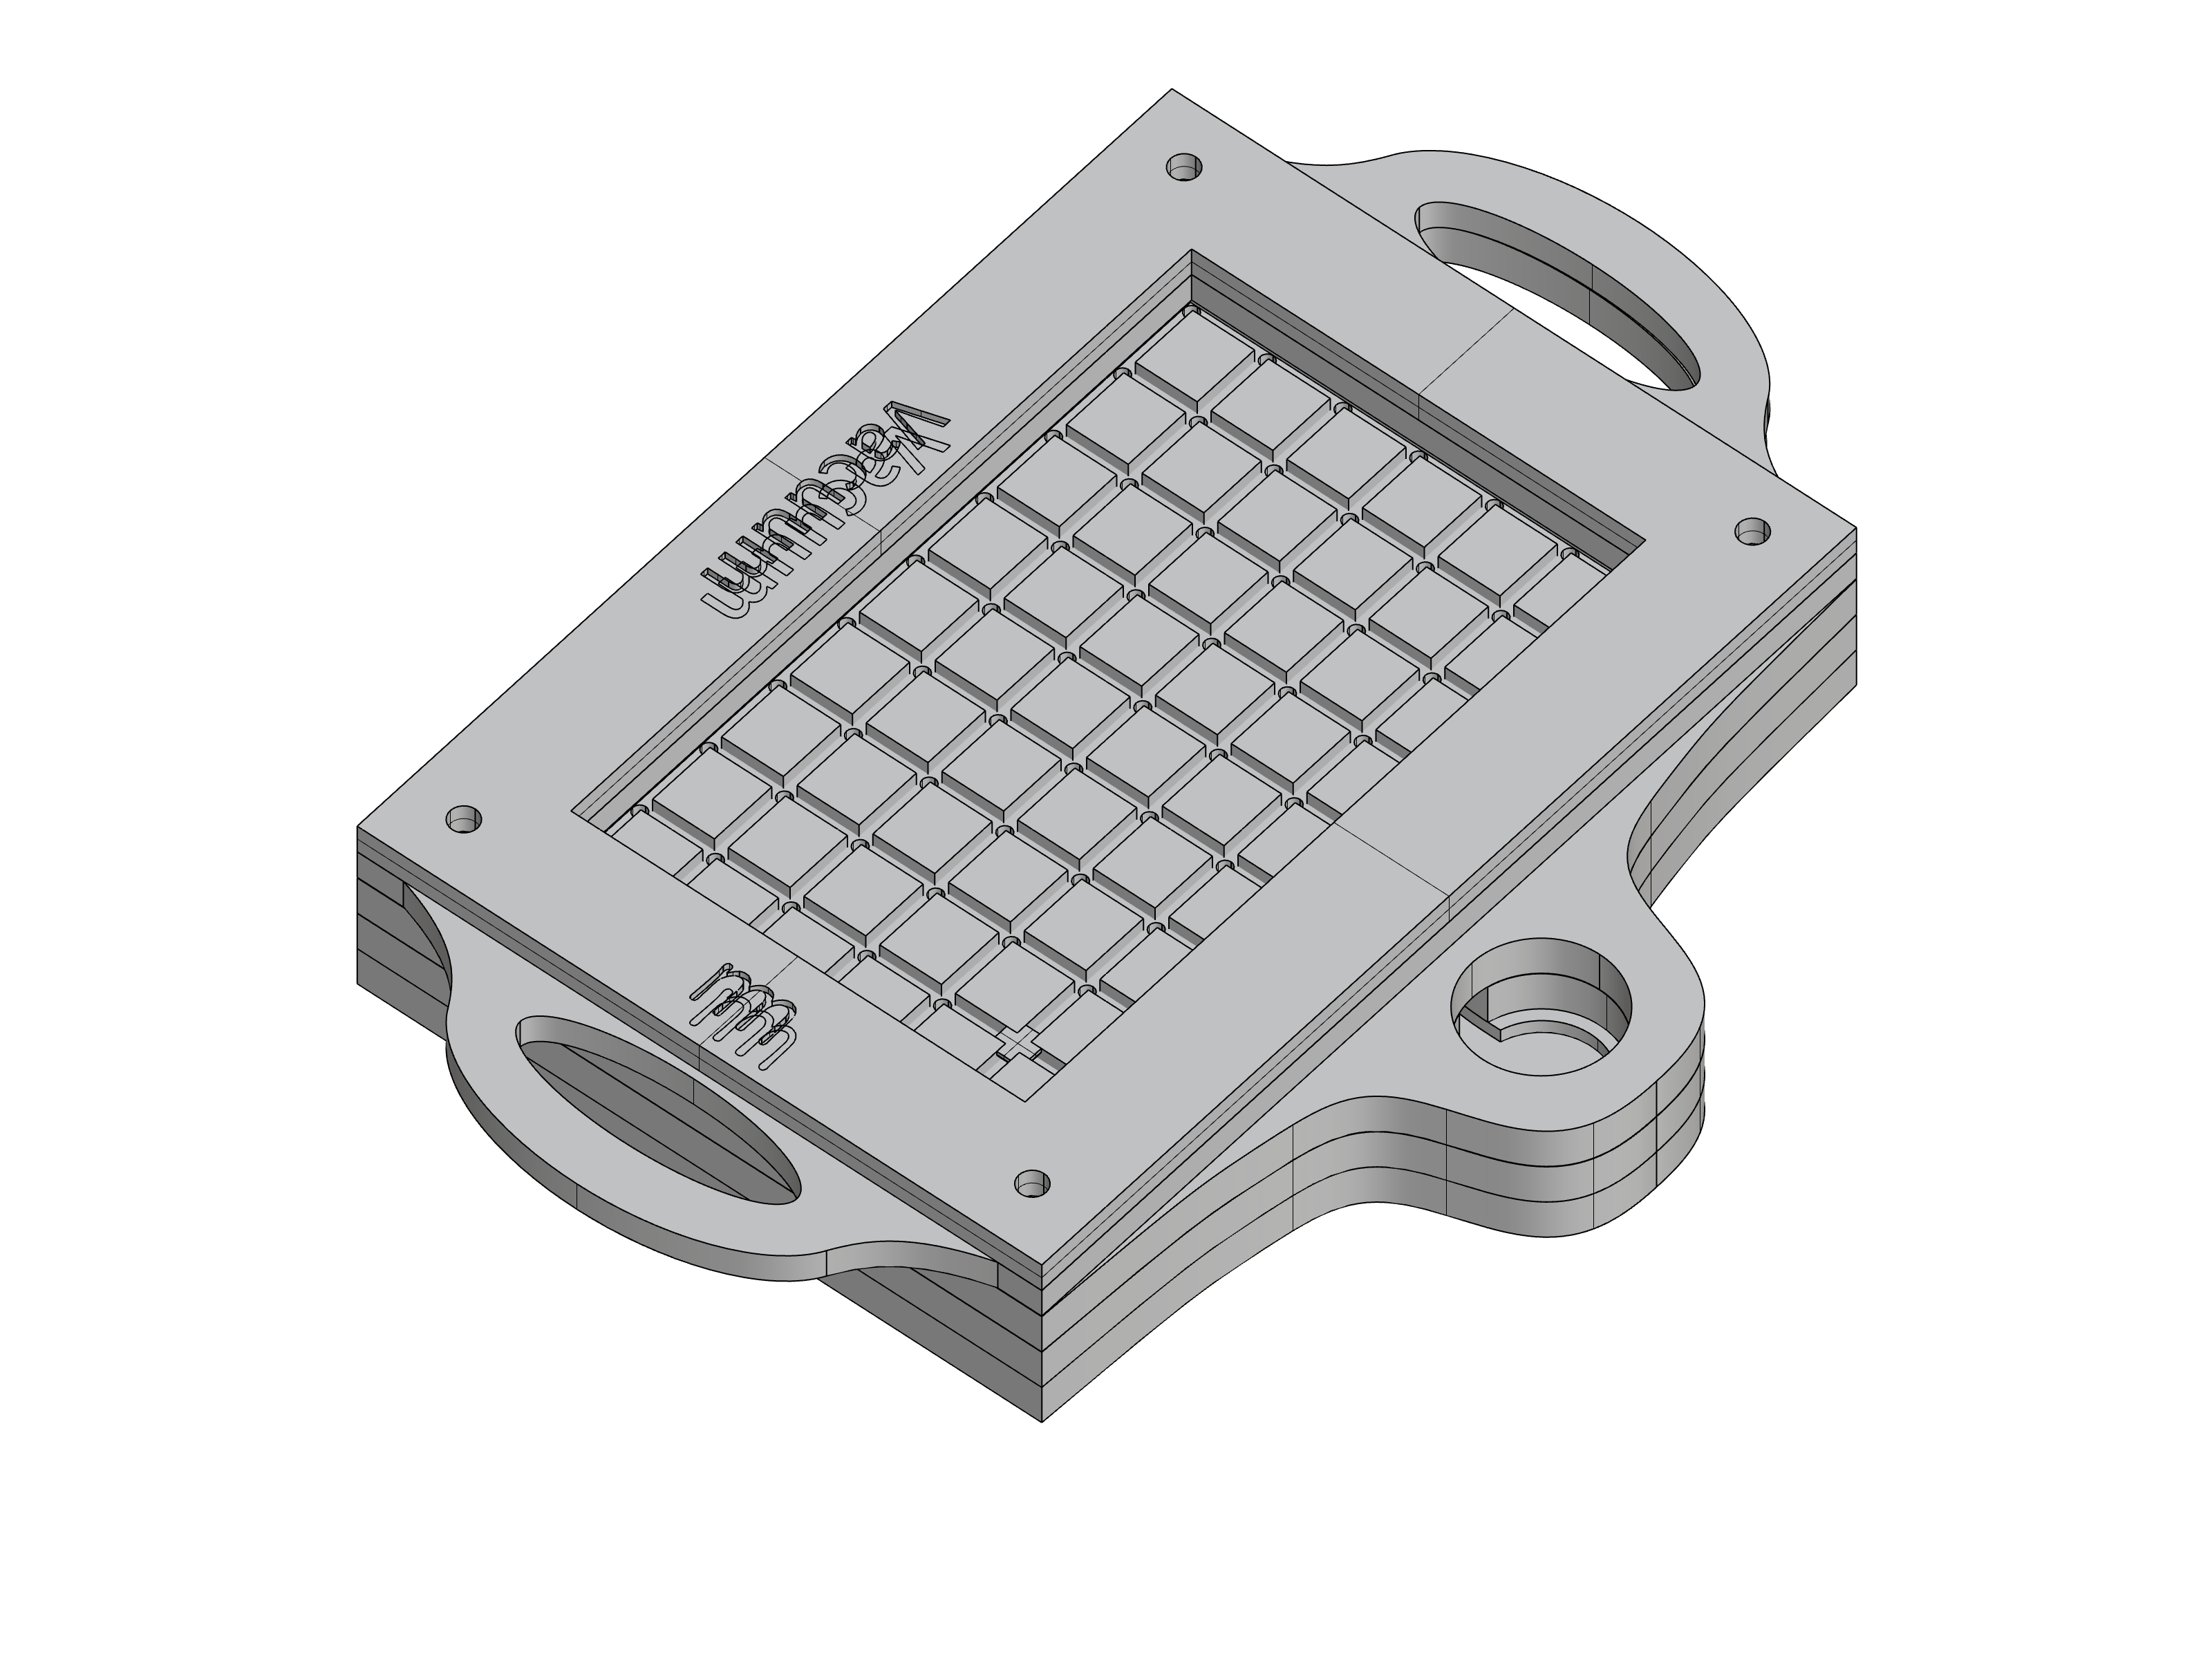
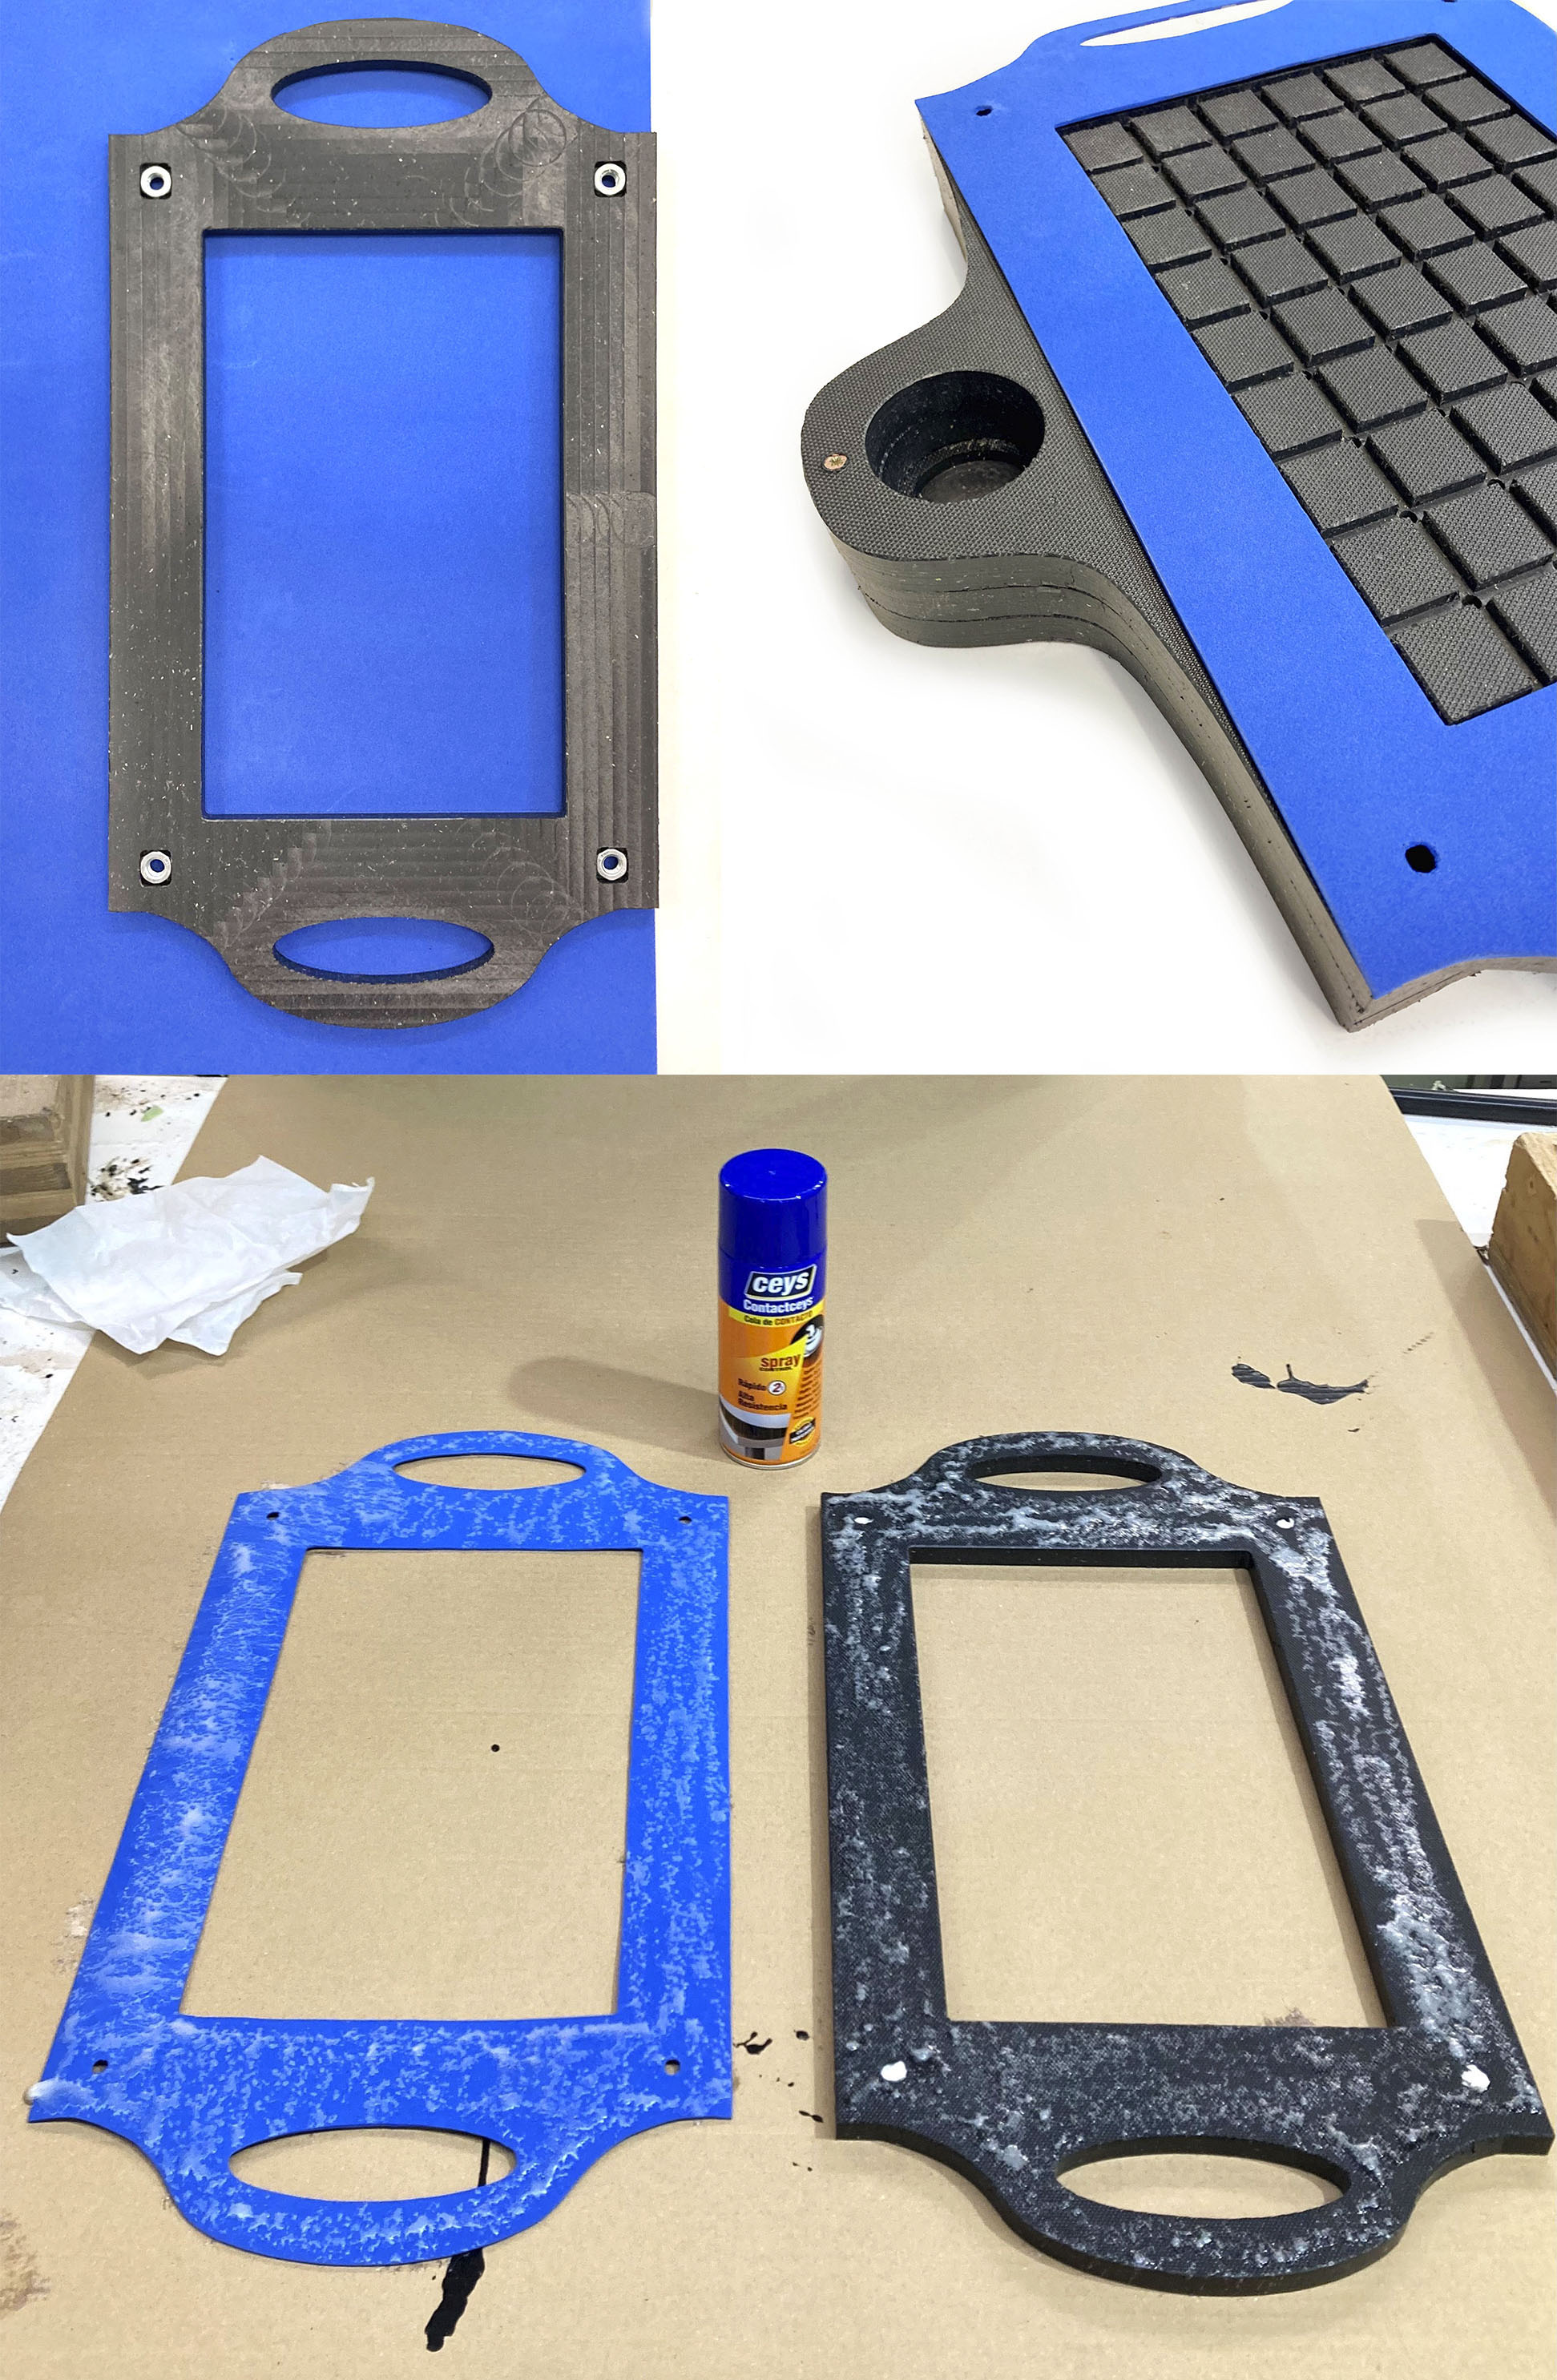
Final pieces in 2D:
How the vacuum machine will be assembled:
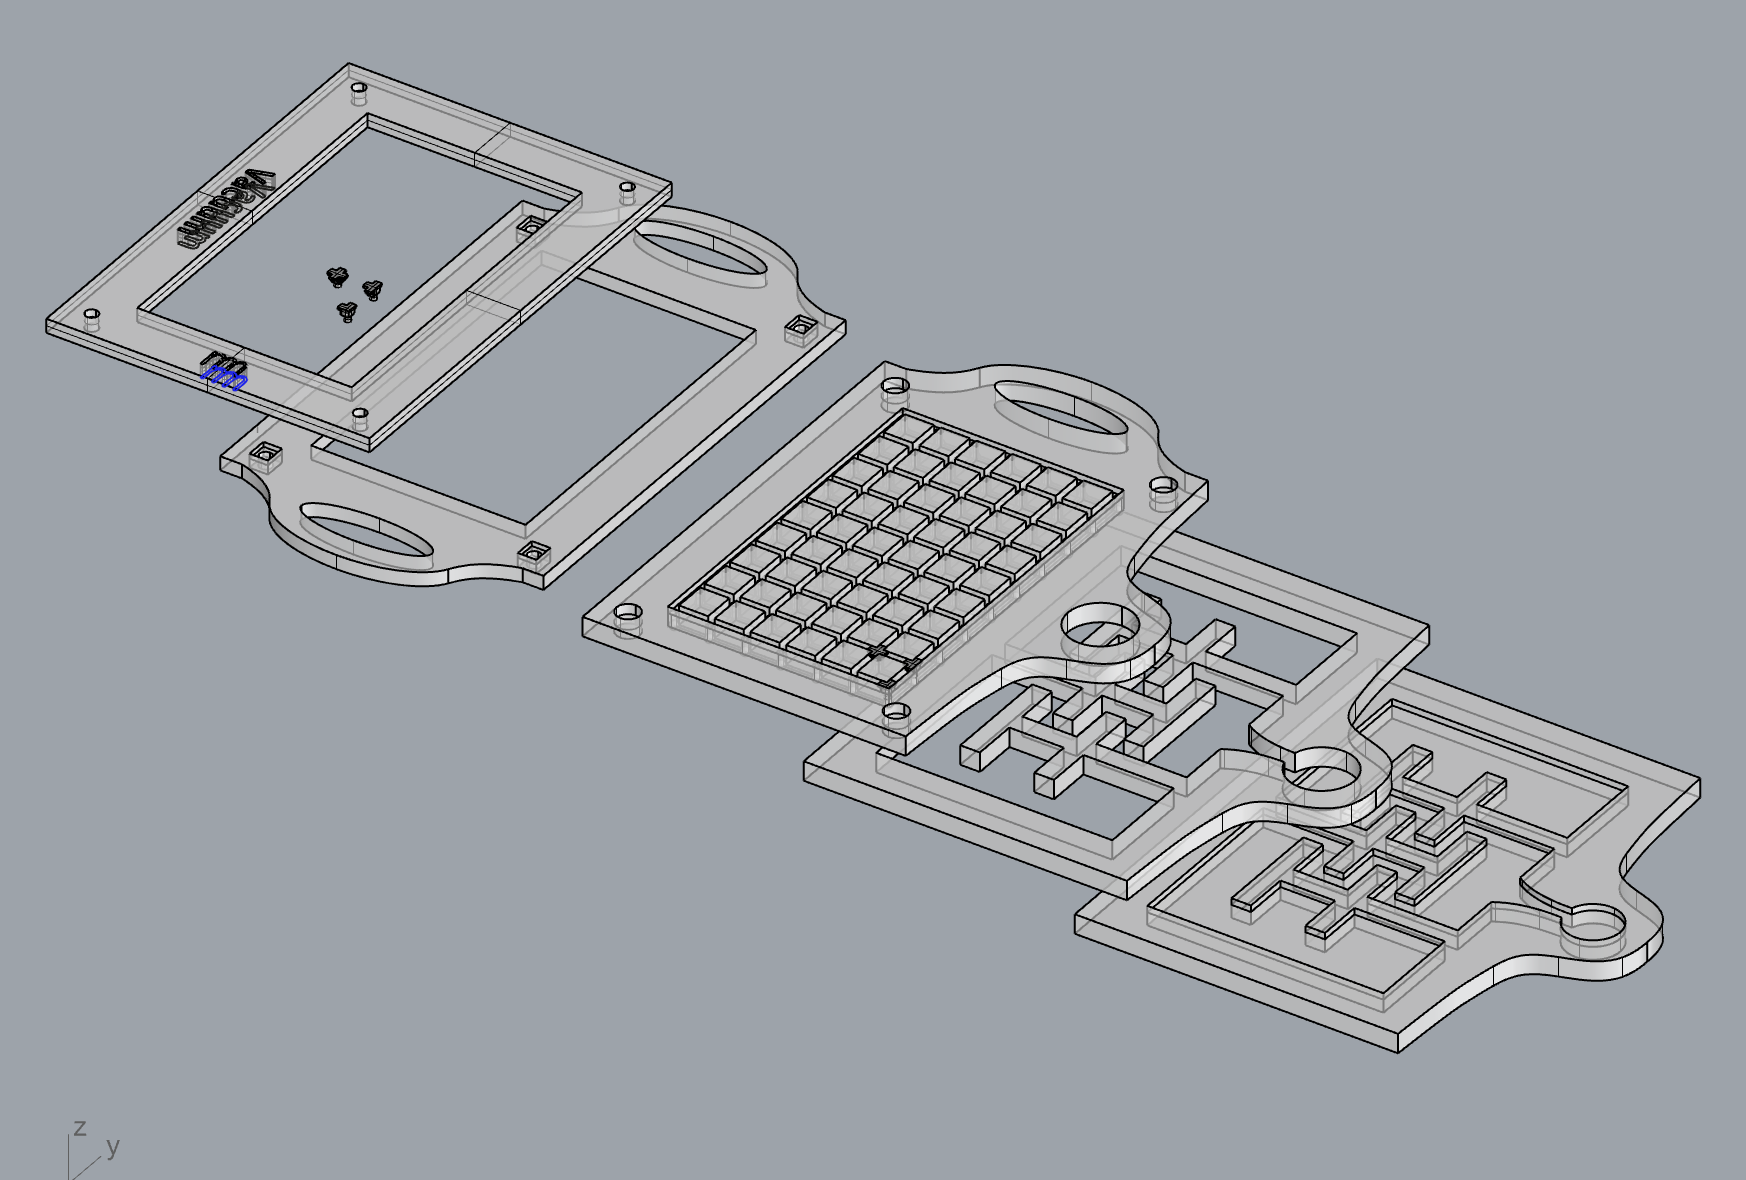
Final result:
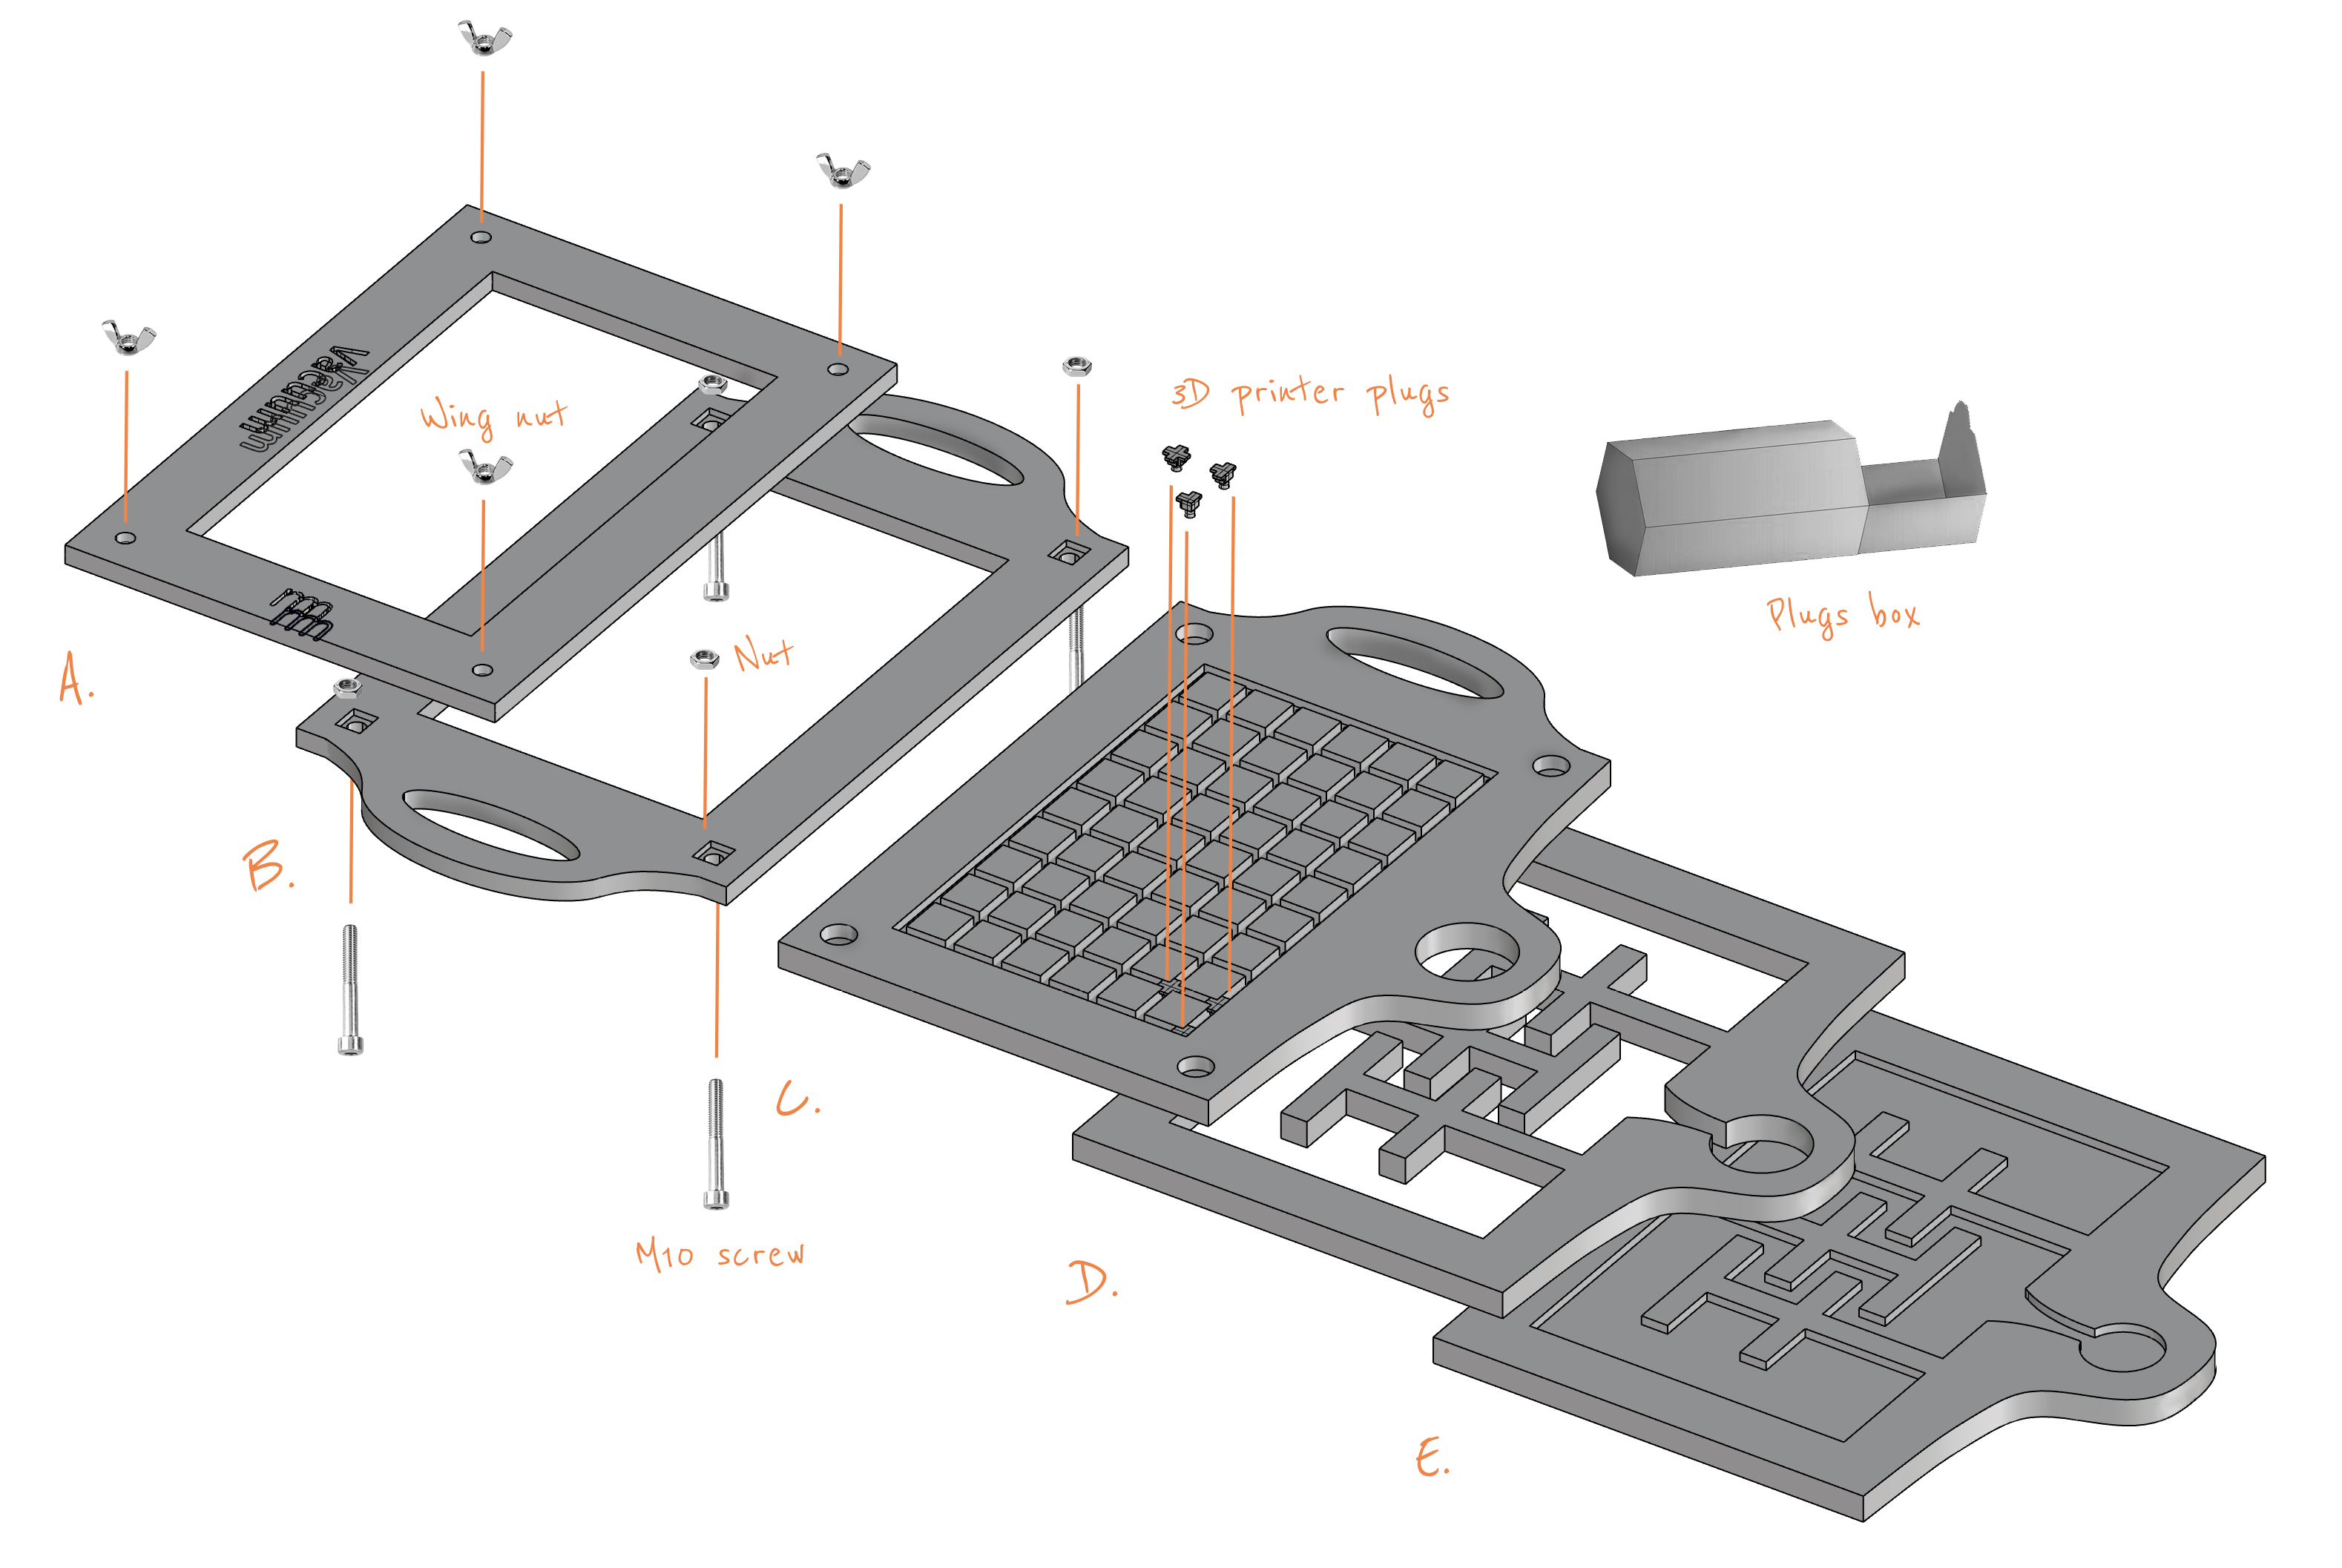
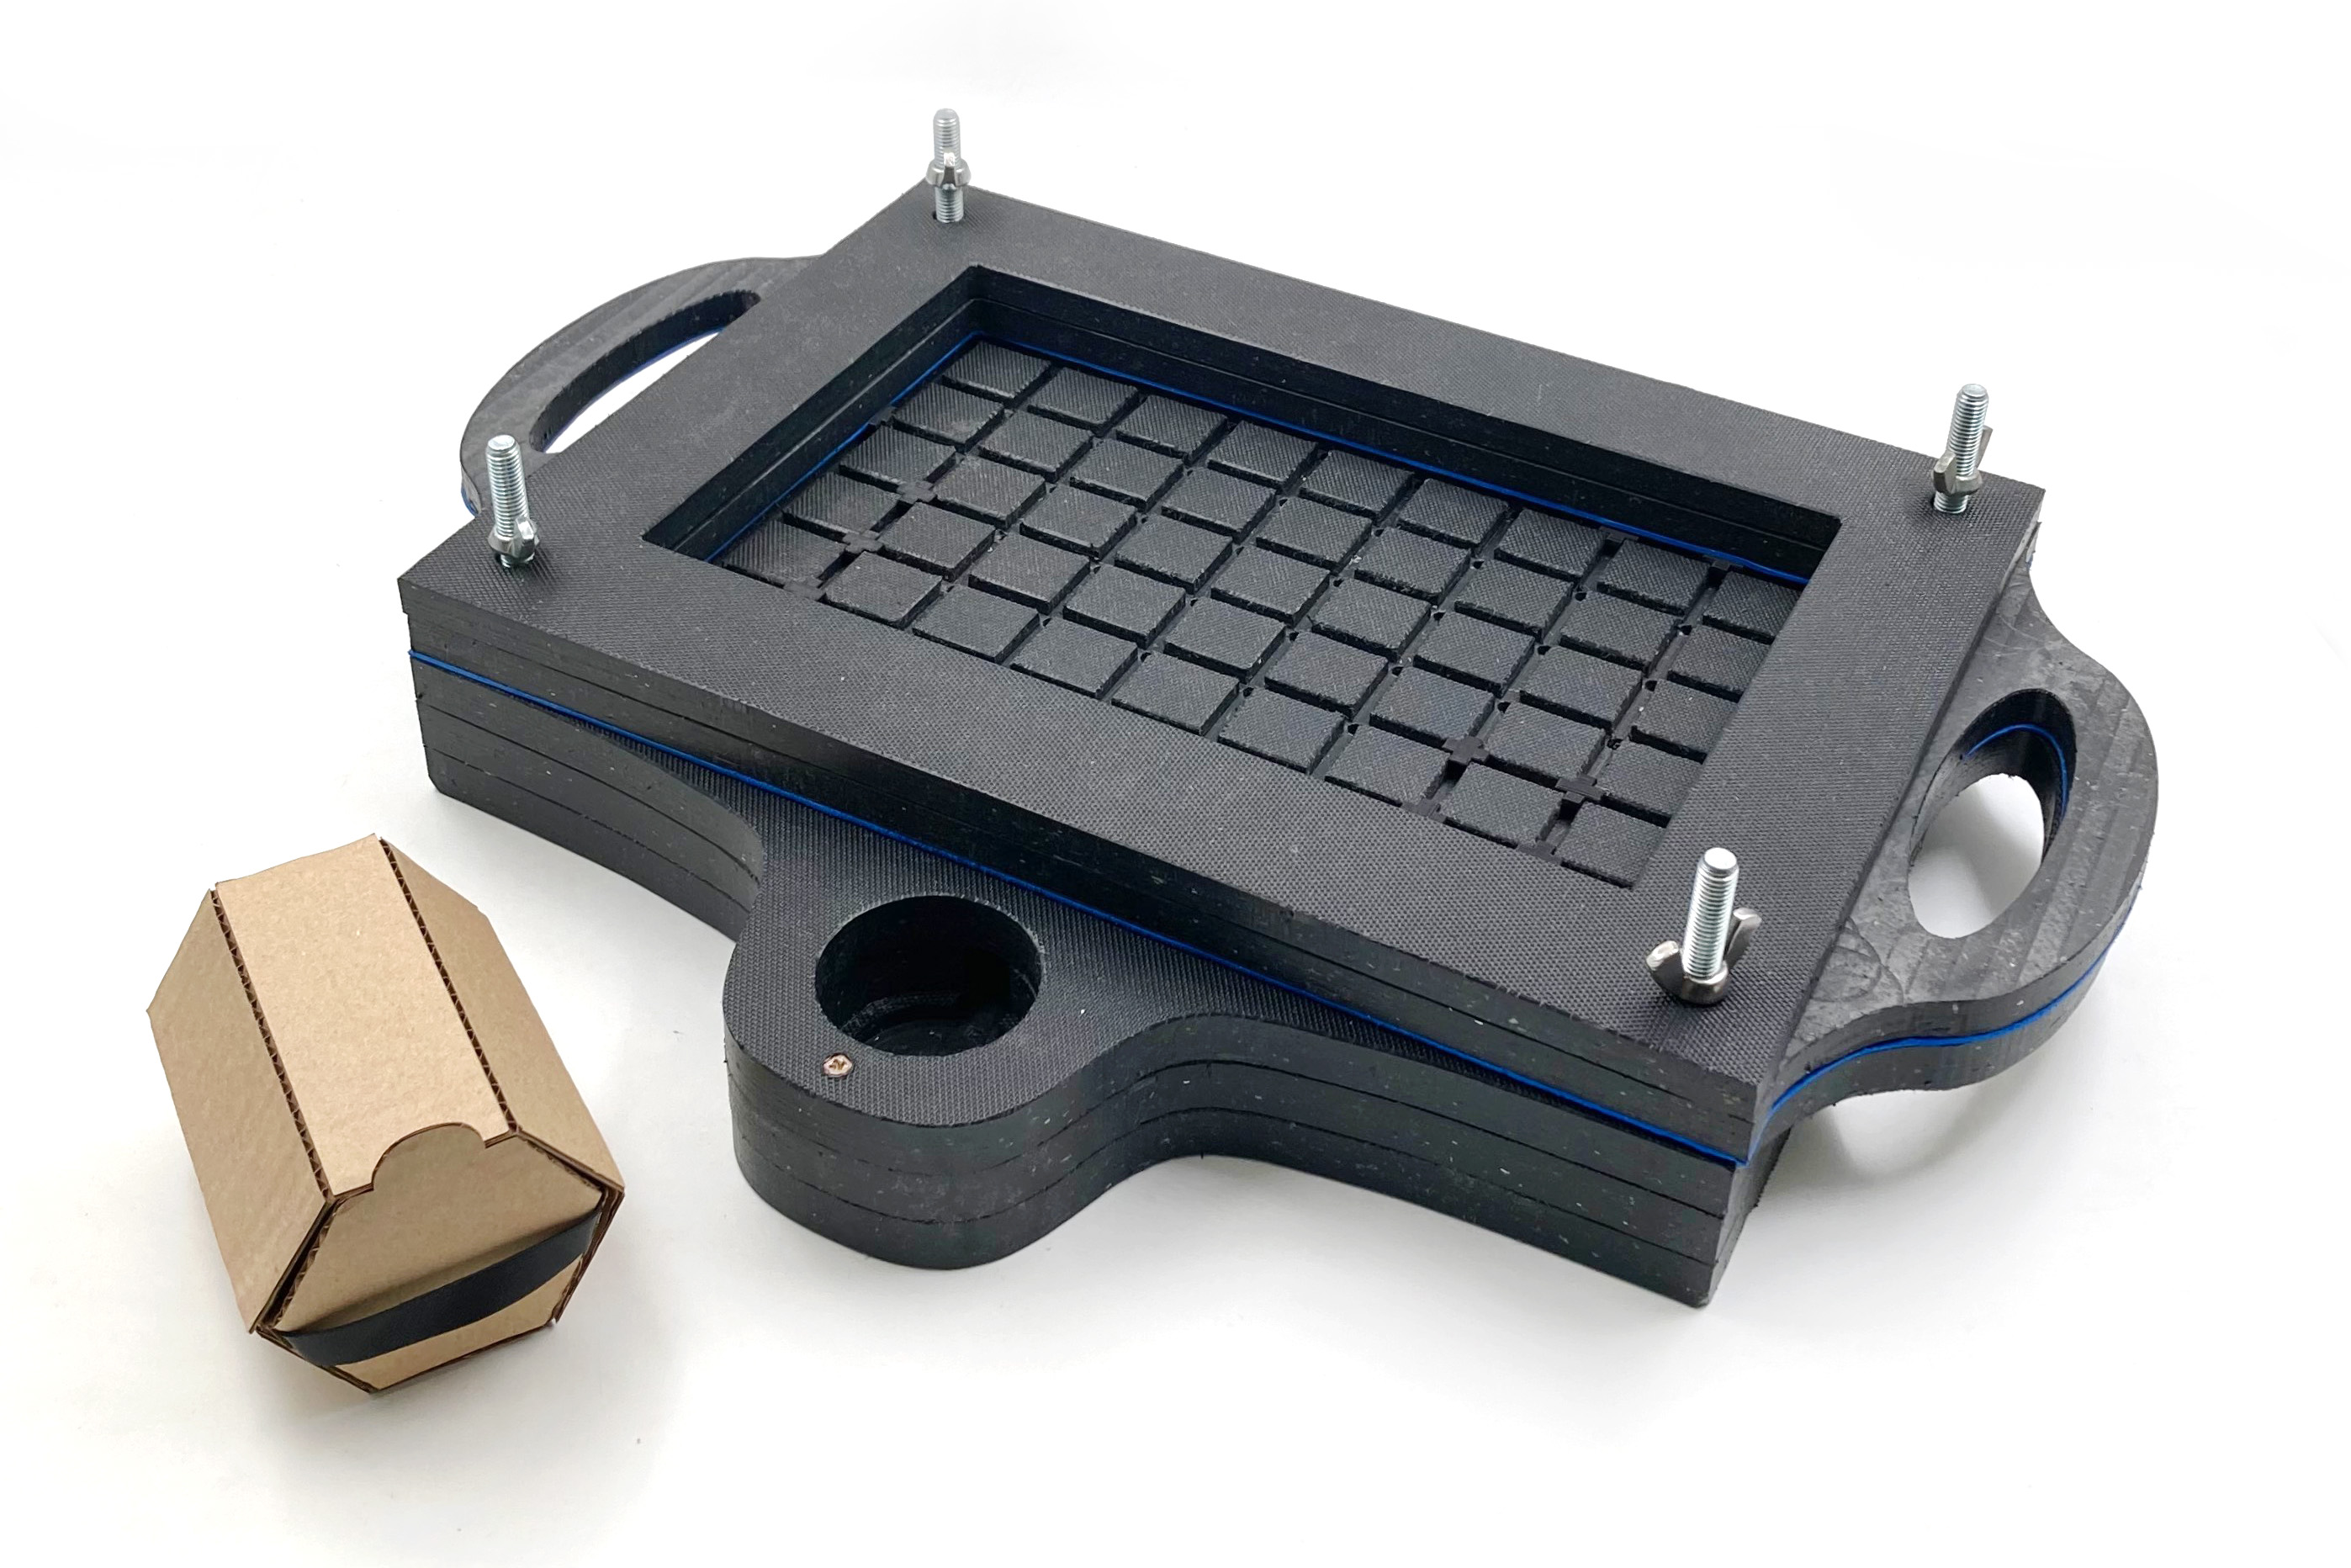
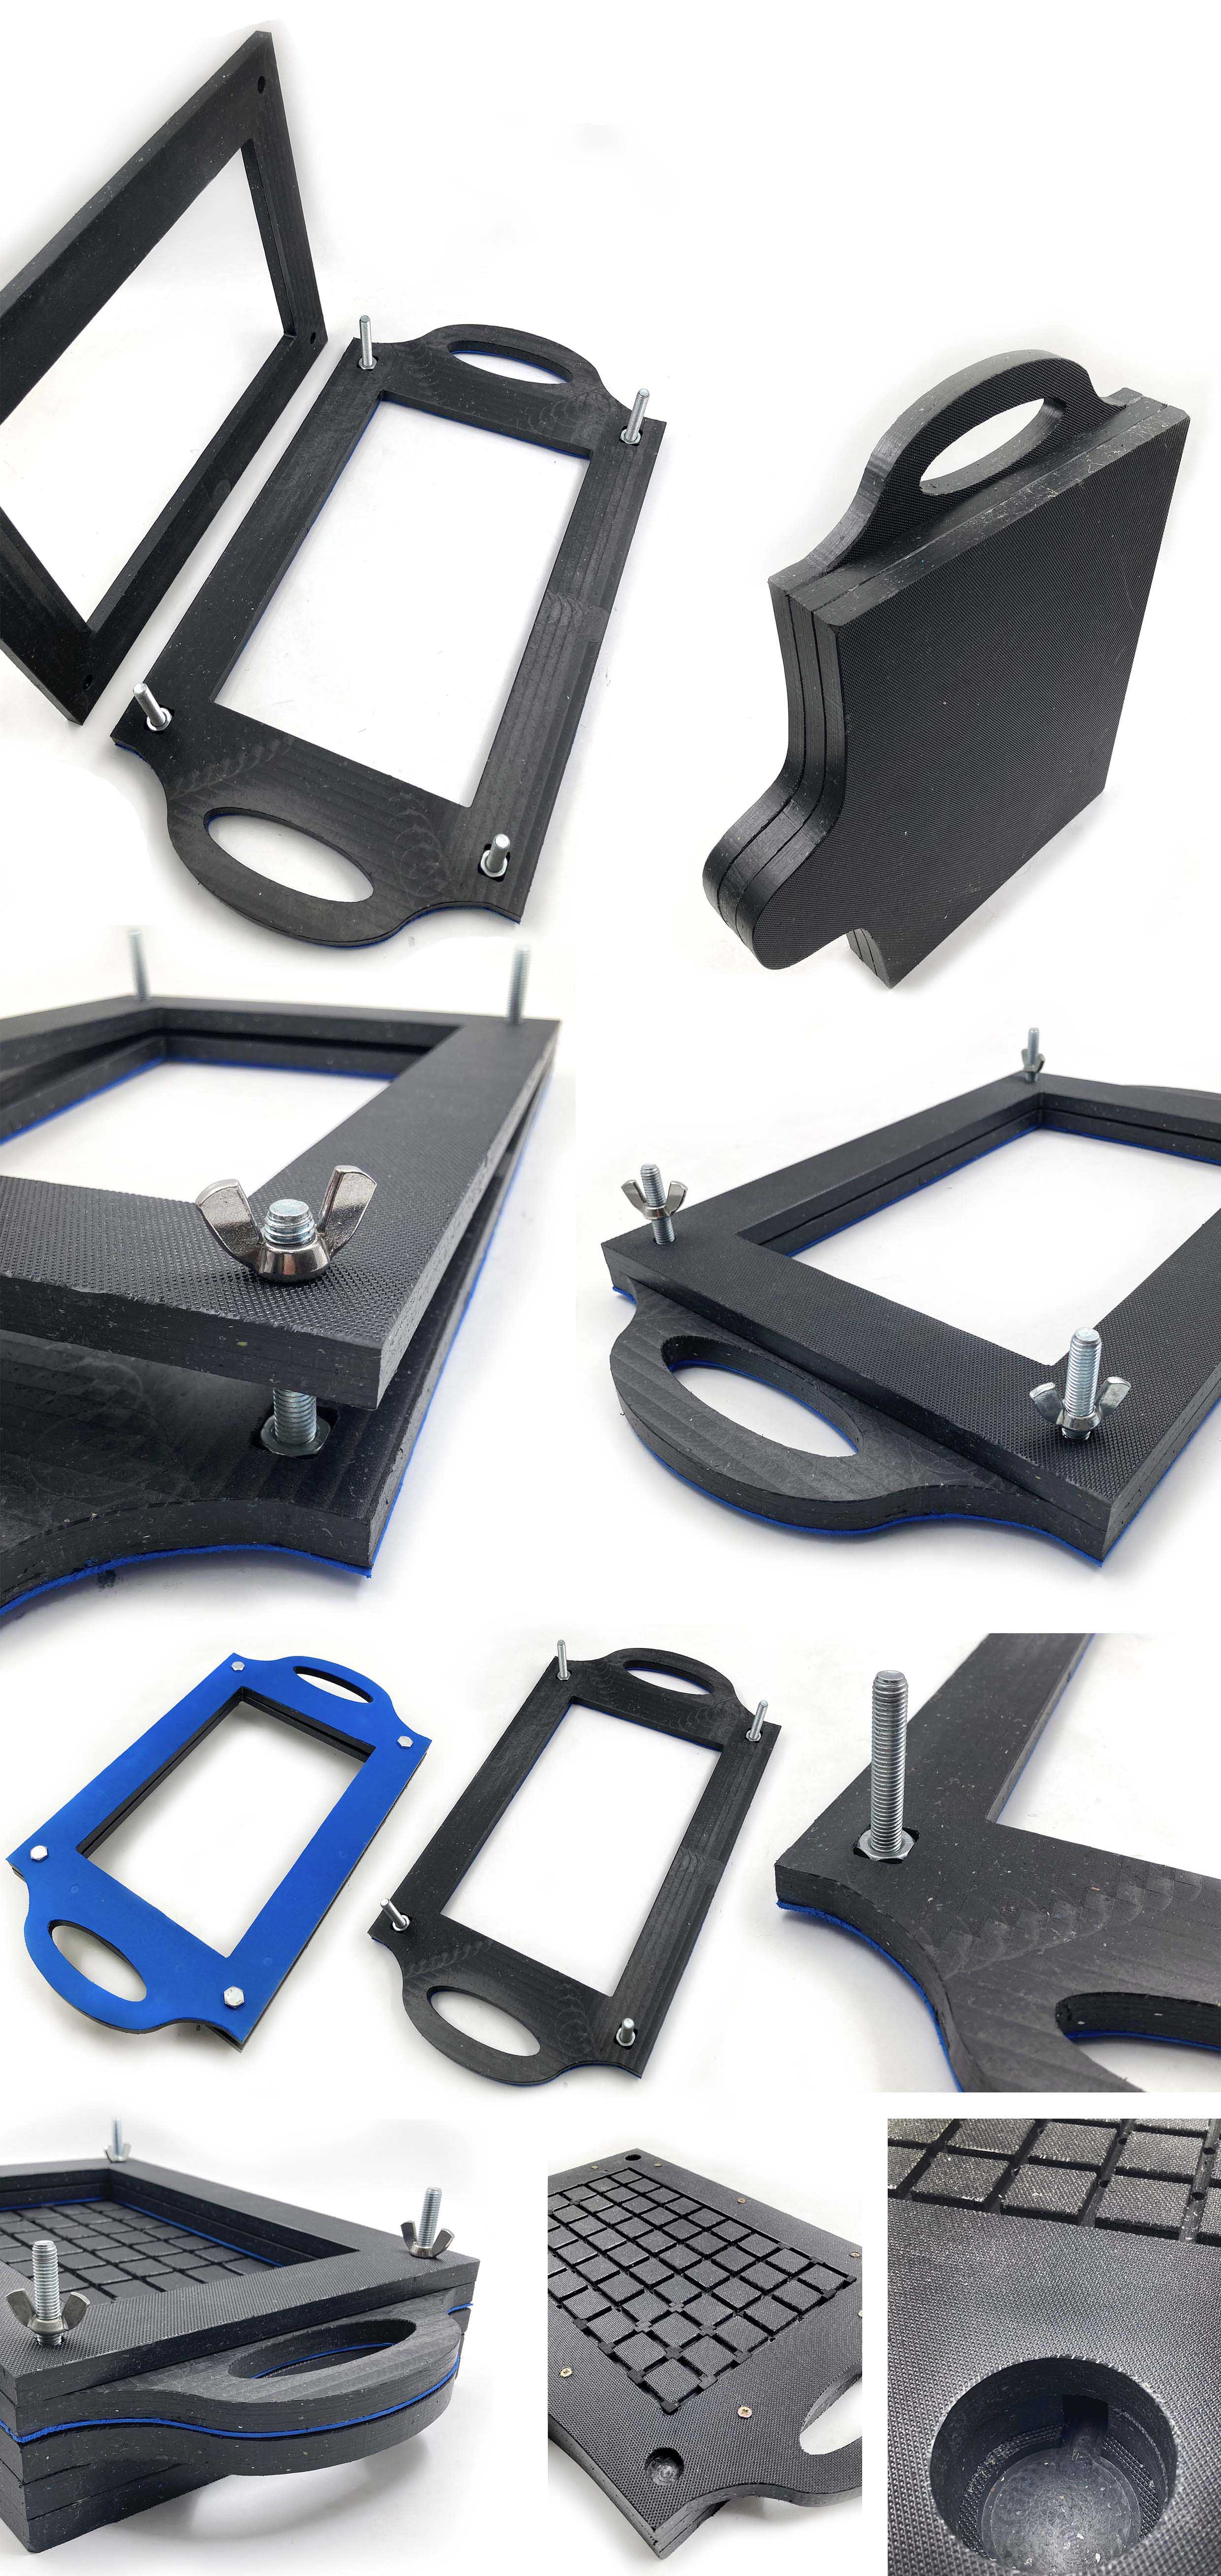
The plan and the required materials to construct the vacuum machine set, with the plugs and the box.
-
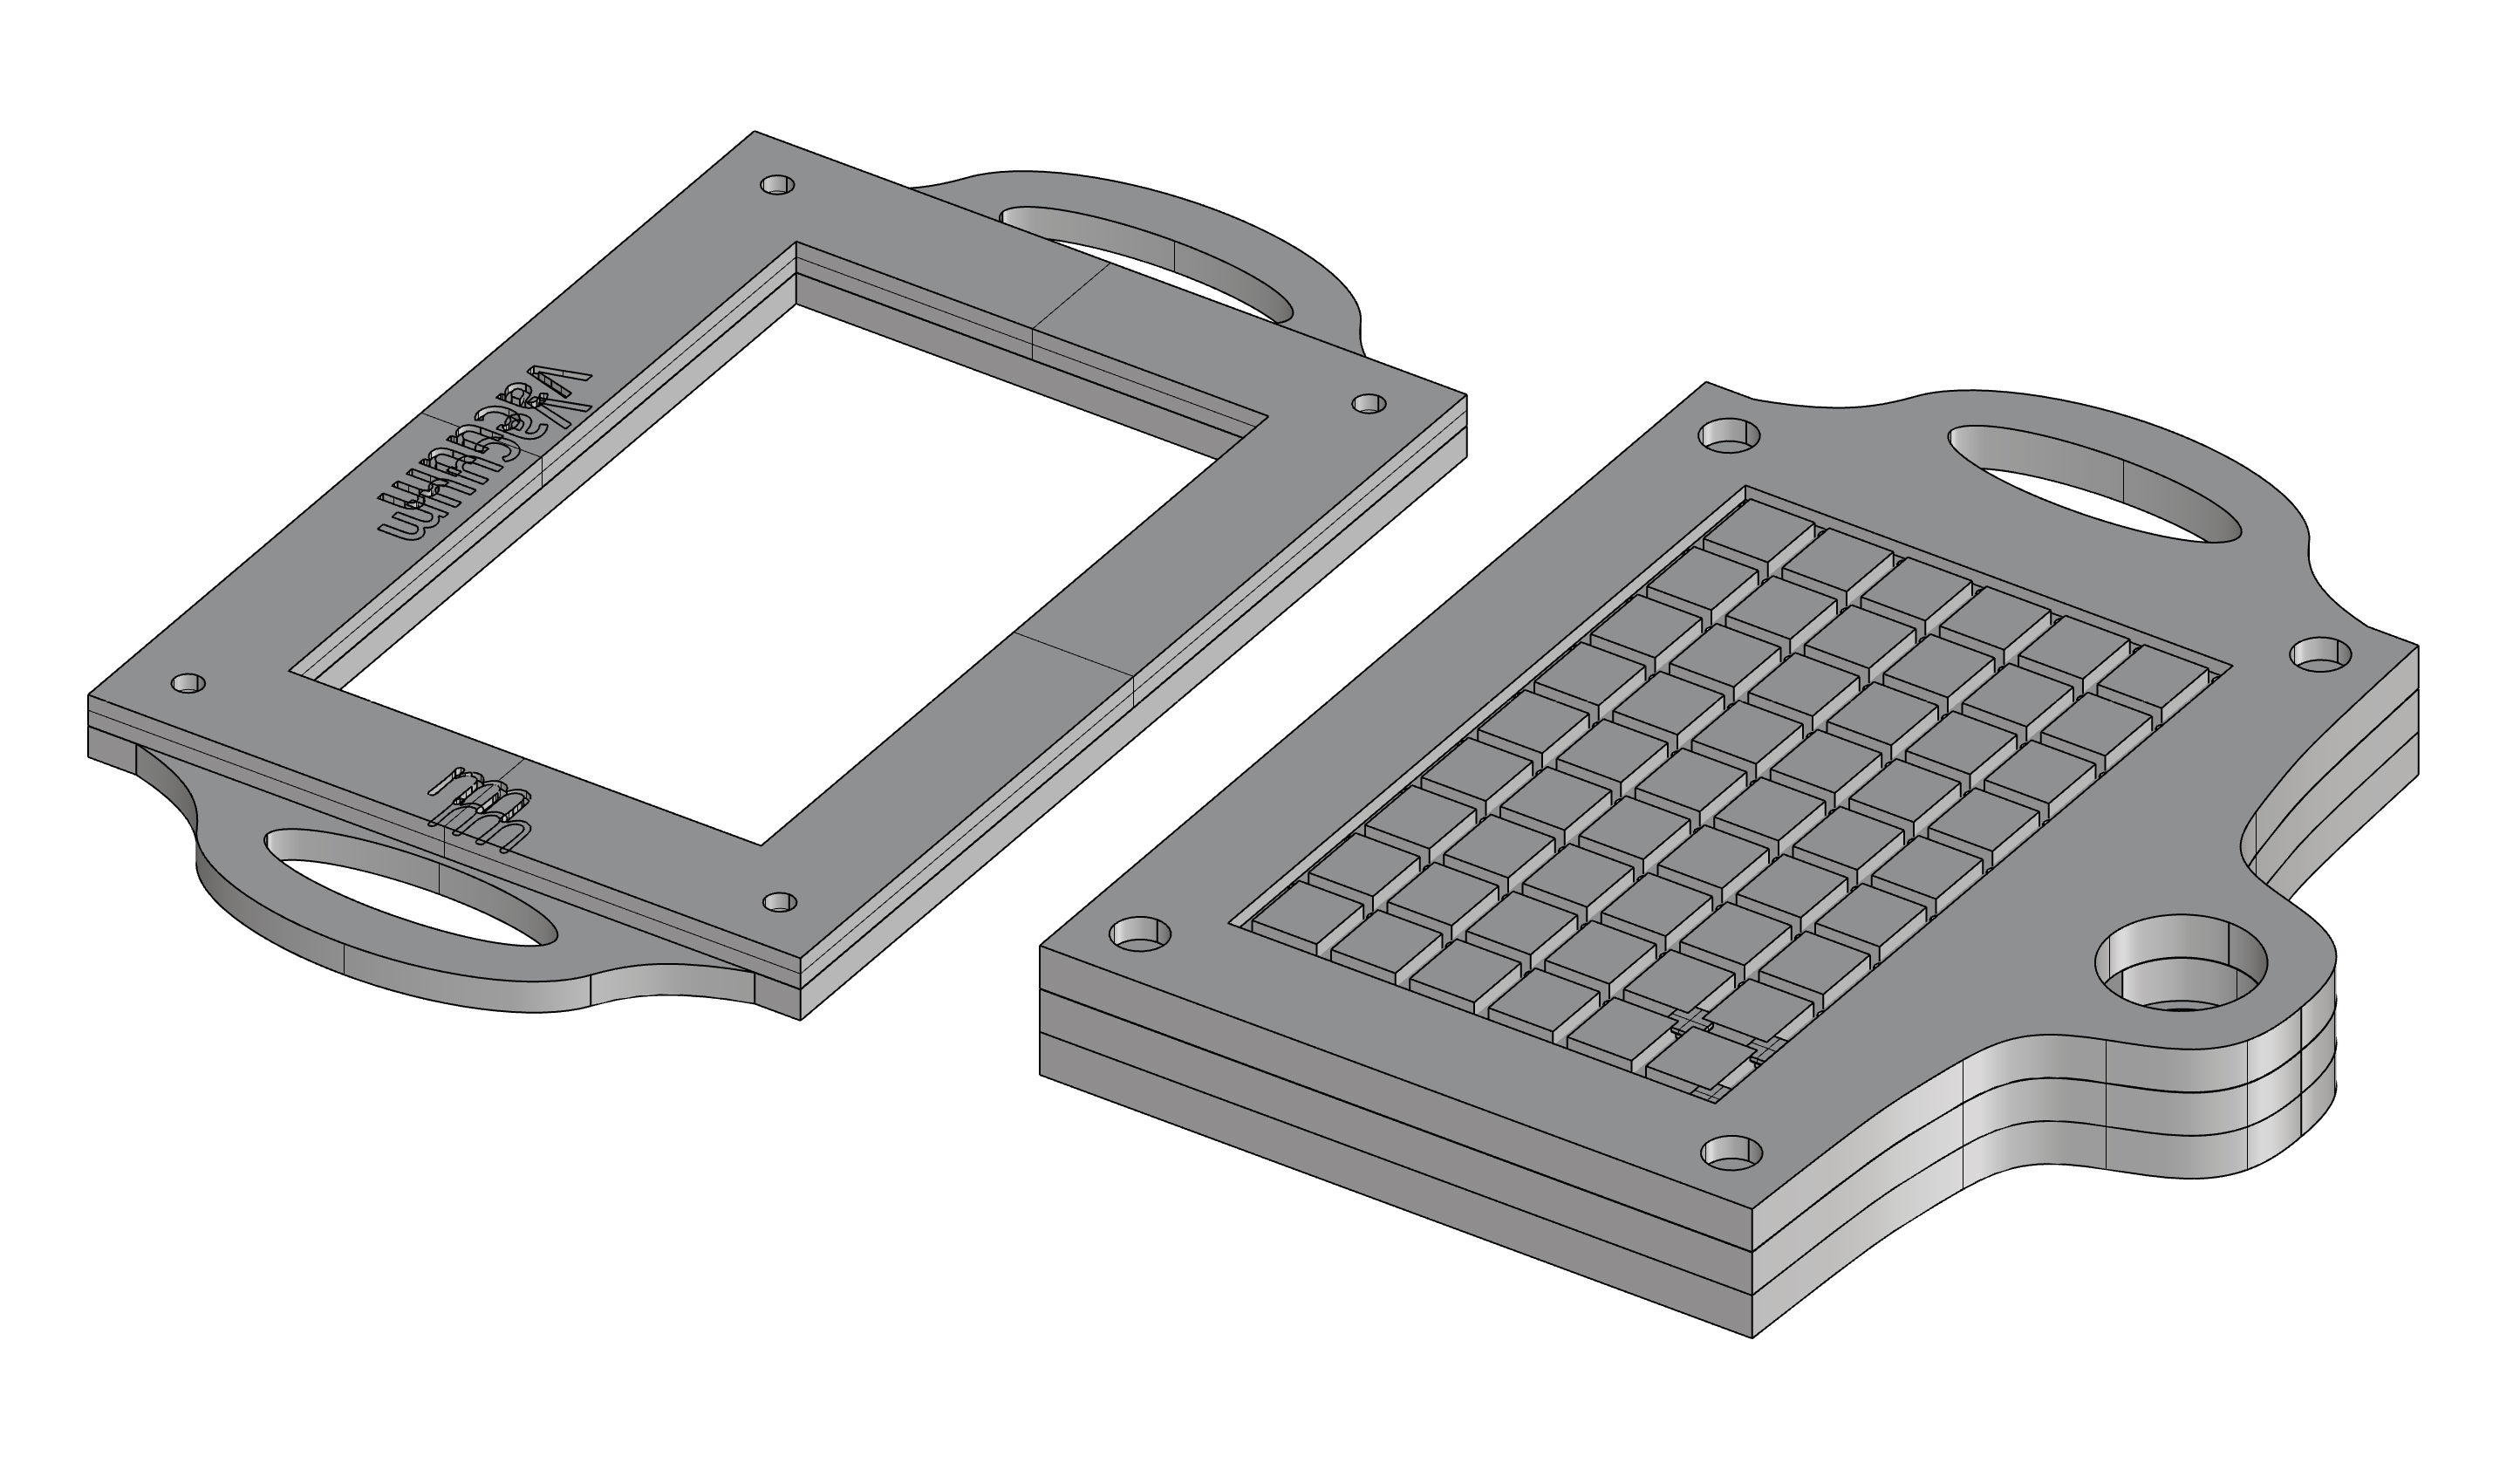
A. Top part with the "vacuum" and the "m" engraved.
-
B. Frame with handles to support with the A part the material to mold. We will add a Eva foam to protect the material and do not mark while we are working.
-
C. Top part to place the mold to vacuum with all the grid holes. The diameter of the holes will be 6mm, also to engrave the grid.
-
D. Middle part to circular the air between the industrial vacuum machine and the holes.
-
E. Buttom part to close the box, a little engraved to have more air capacity.
-
3D printer plugs PLA plugs block the holes.
-
Plugs box Cardboard box to keep the 3 types of plugs that we will need.
-
M10 screws x4 to regulate the material between A and B parts.
-
Wing nuts x4 to fix the material strength.
-
Nuts x4 to fix the M10 screws in the B part.
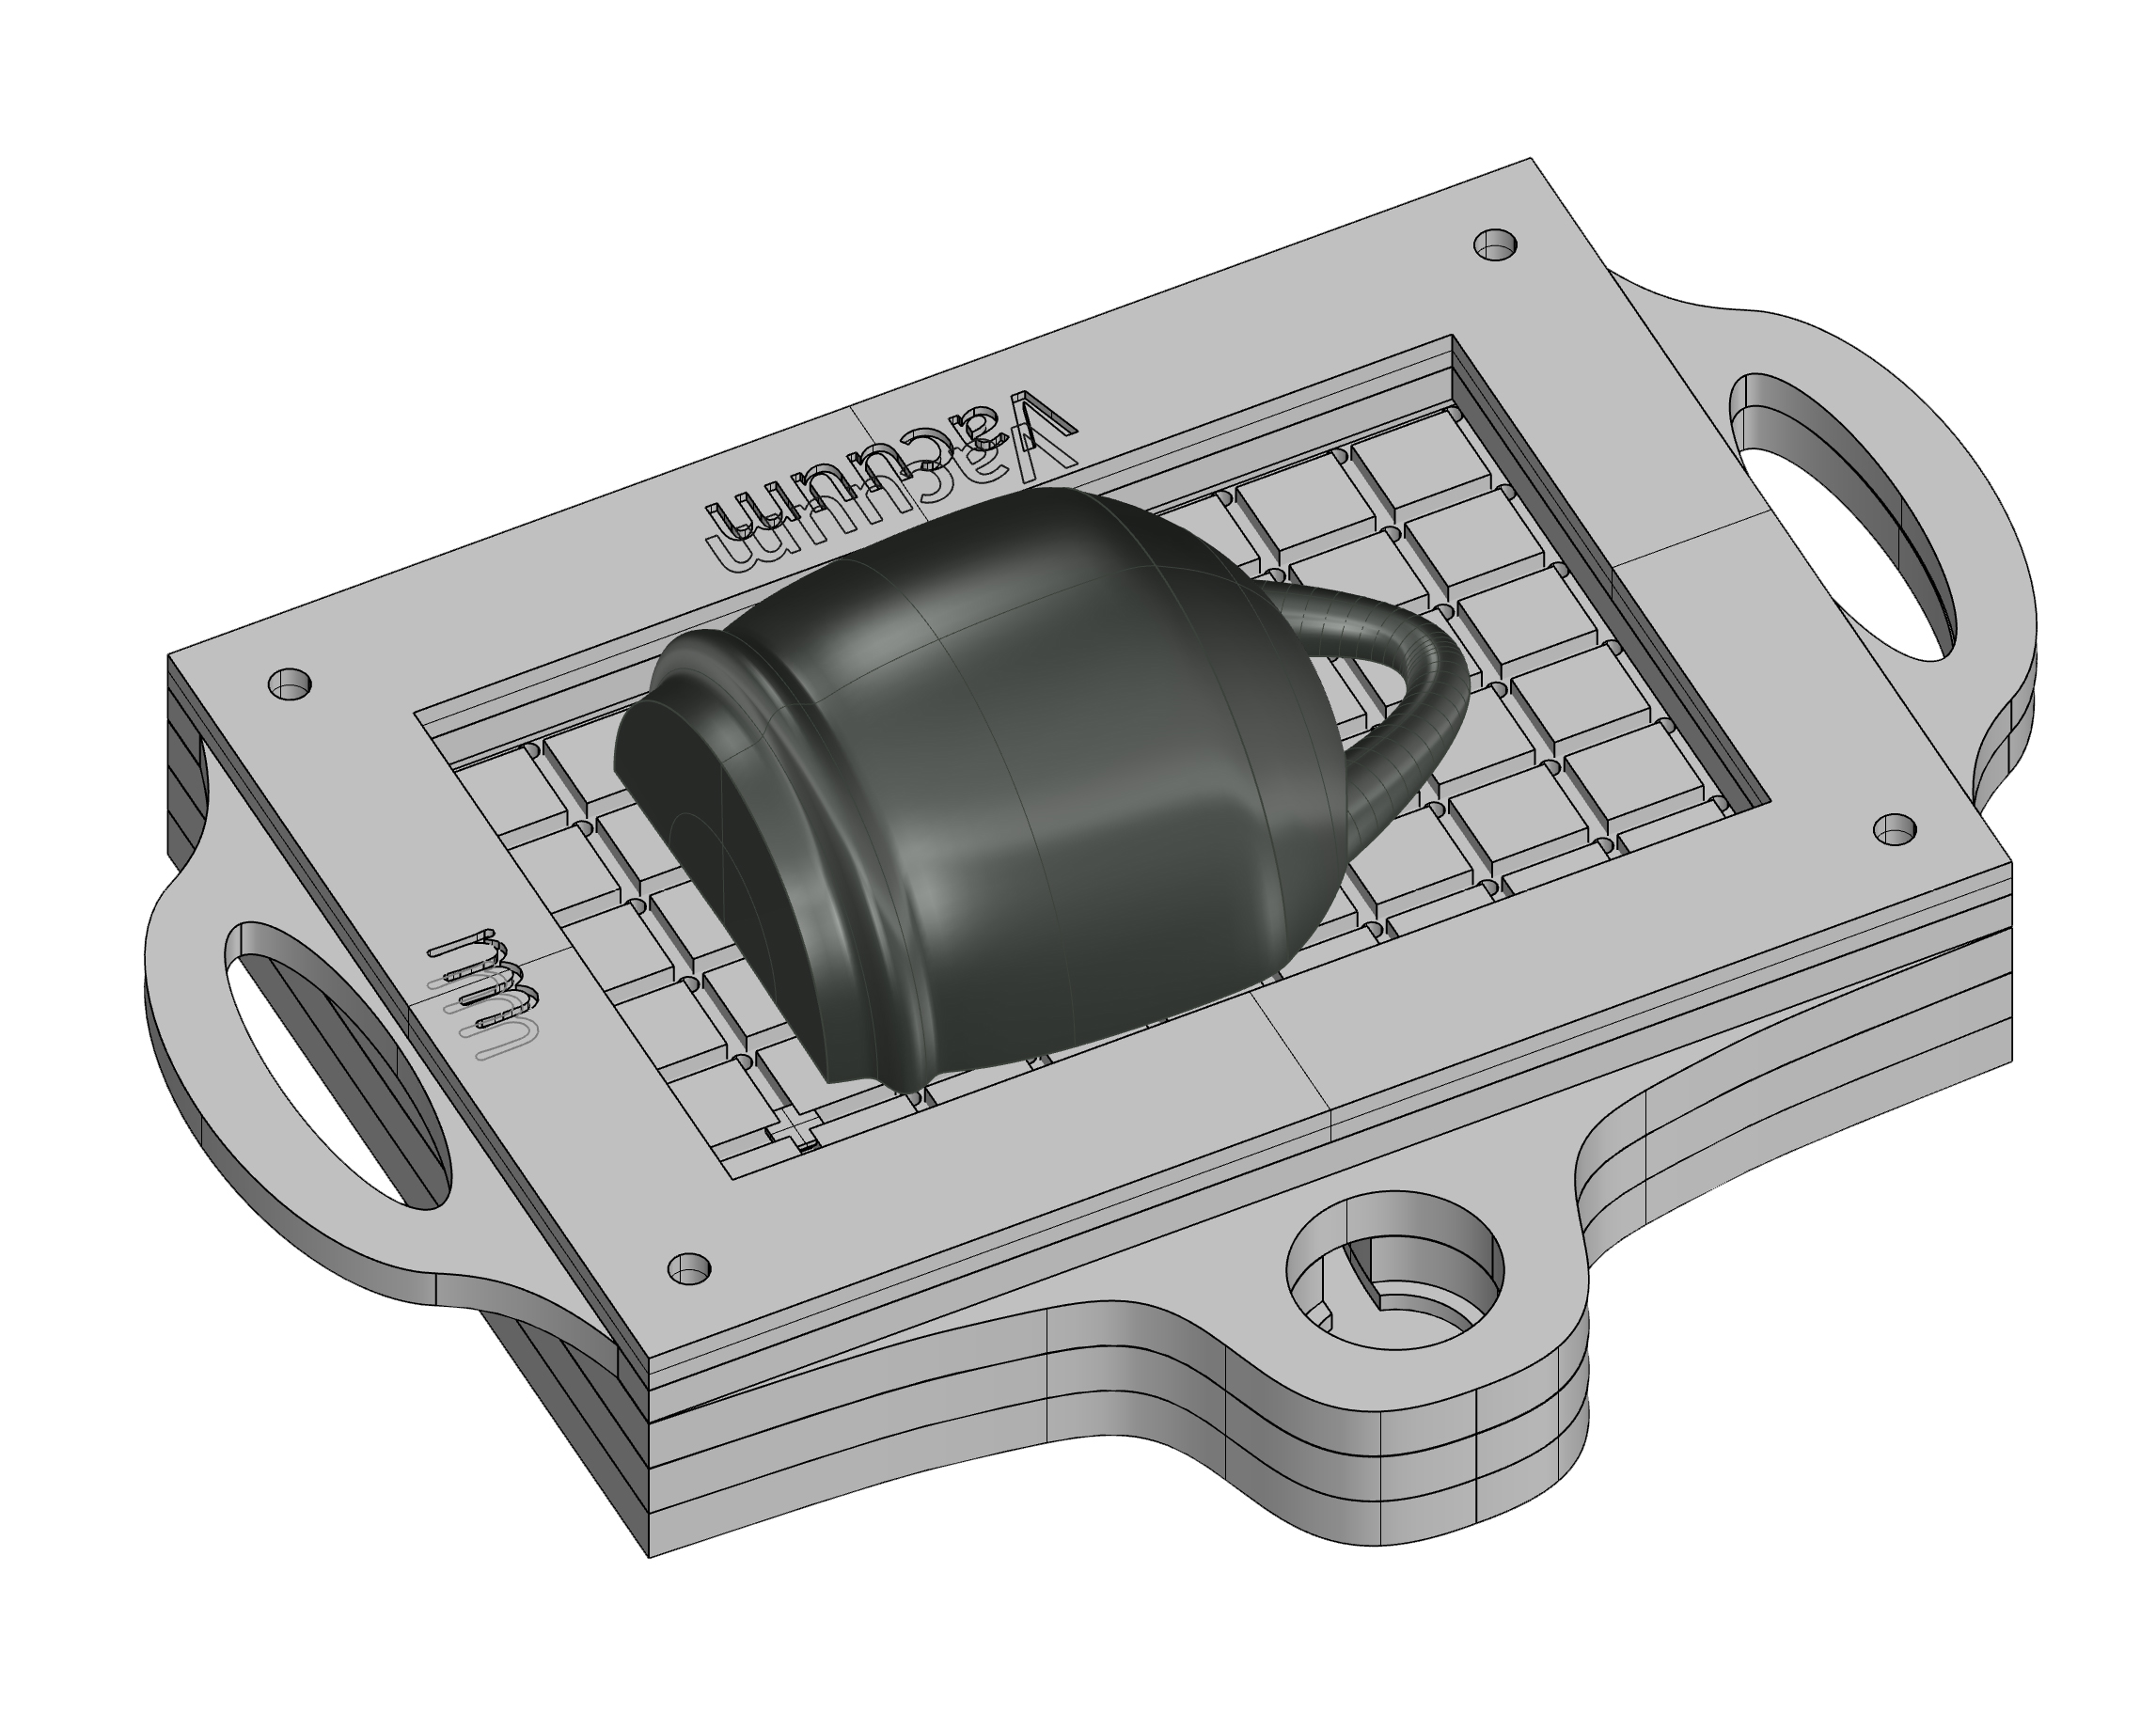
A simulation about how it will work with the vacuum machine and the mold I used last week to create a handbag:
You could download the Vacuum Rhino file here.
Tools
Which tools and machines we will need?
- Laser cut
- CNC miller
- Bits for the CNC
- Industrial vacuum cleaner
- Ear muffs
- Glasses
- Cutter
- Pliers
- Drilling machine
-
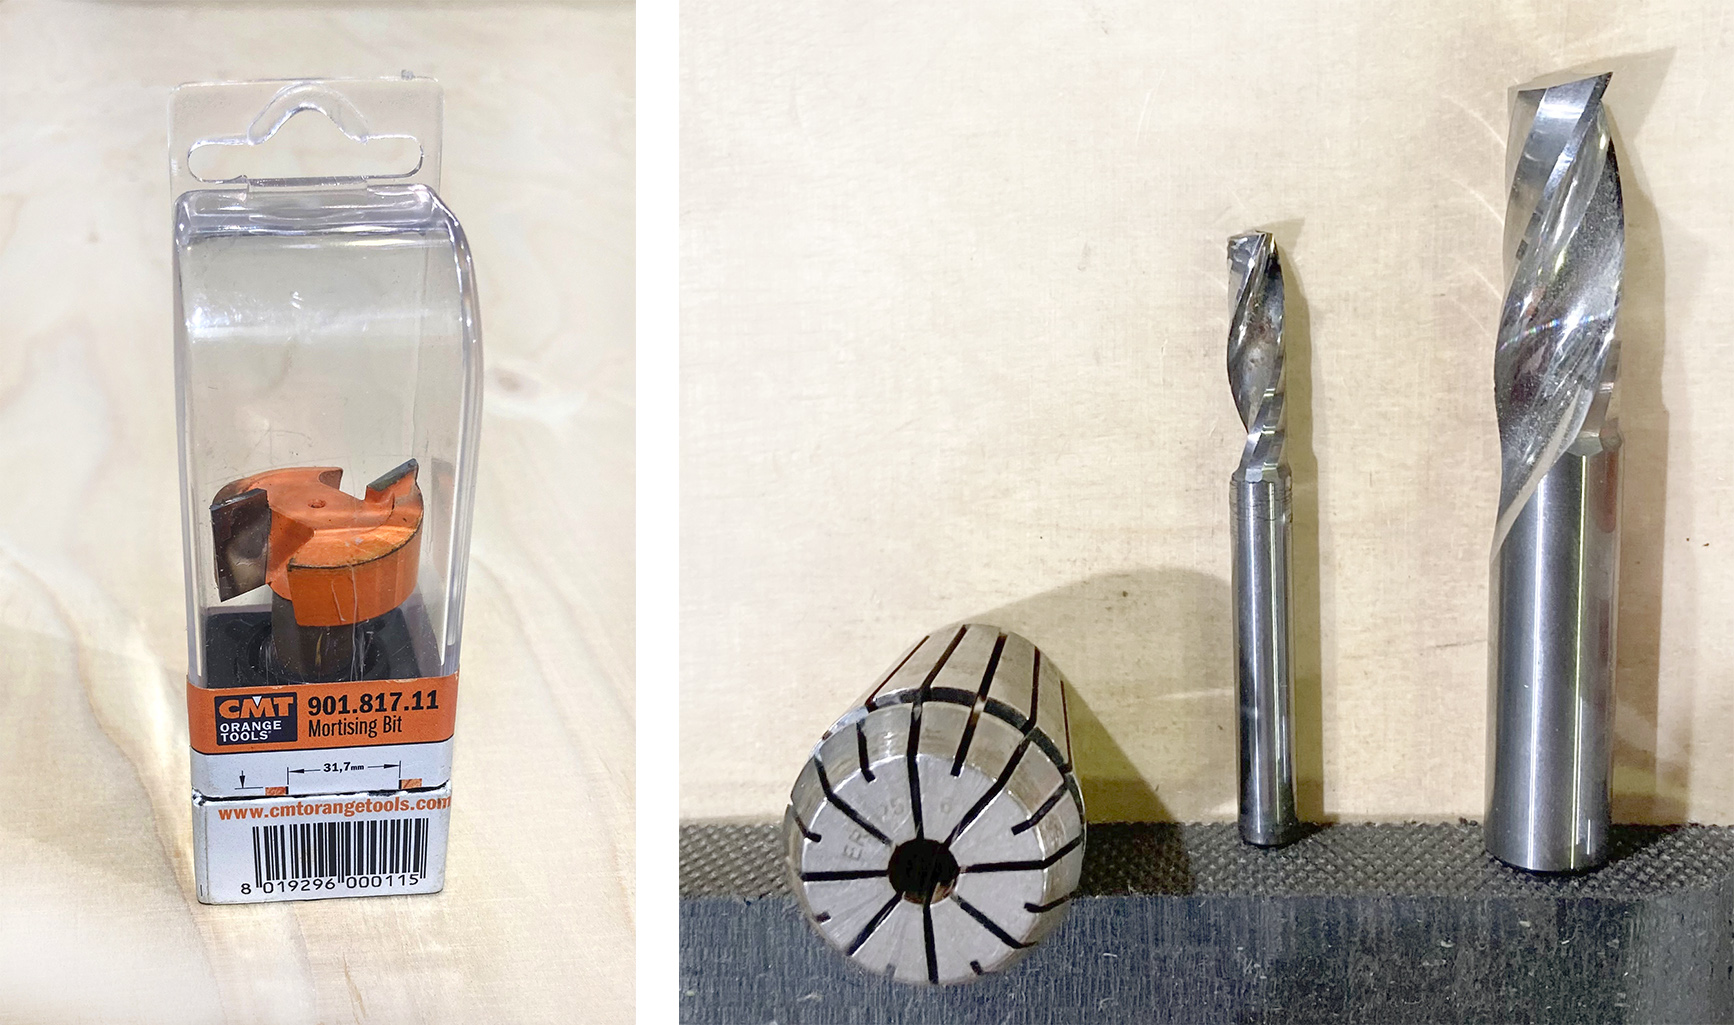
Mortising bit: to reduce the thickness of the material and take out the texture of the HDPE, pocketing.
-
Two sizes bits 6mm/12mm to drill the material. To know more about the propieties

To clean all the mess we will generate in the CNC machine and the most important part, to create vacuum in our final result.
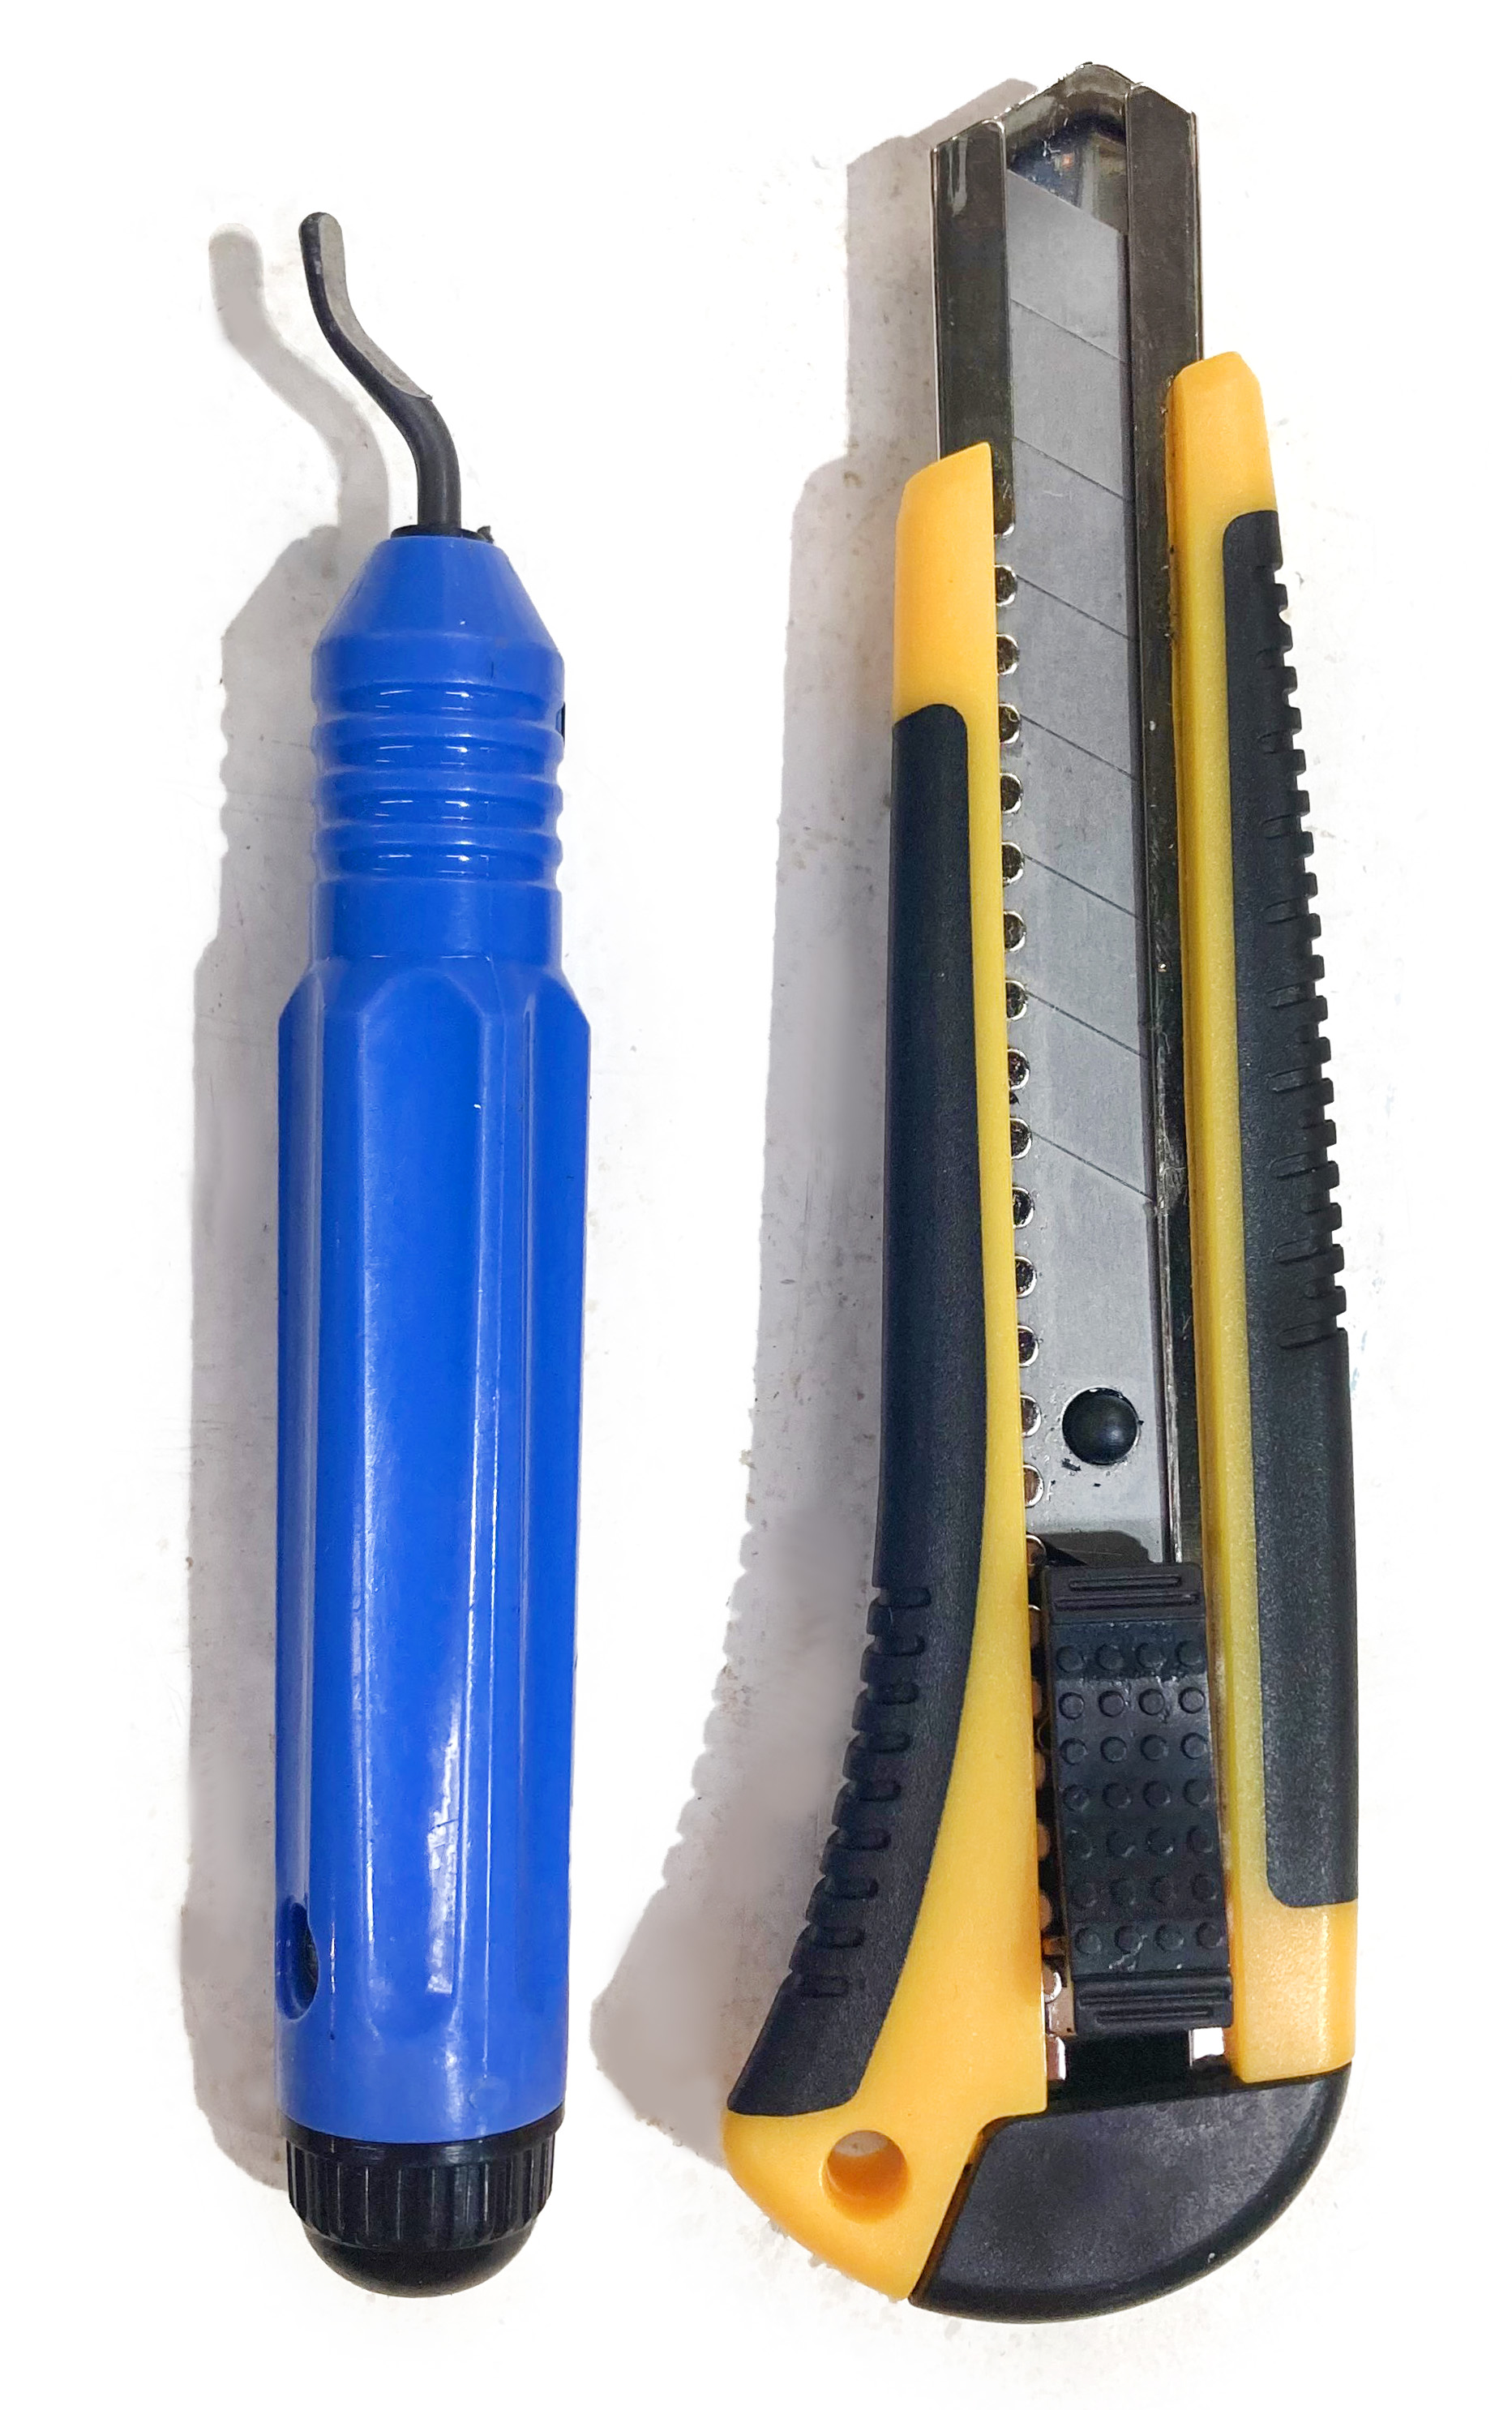
Both of them will be used for the finishes after the CNC cut all the components.
Materials
| Image | Name | Price | From | More about |
|---|---|---|---|---|
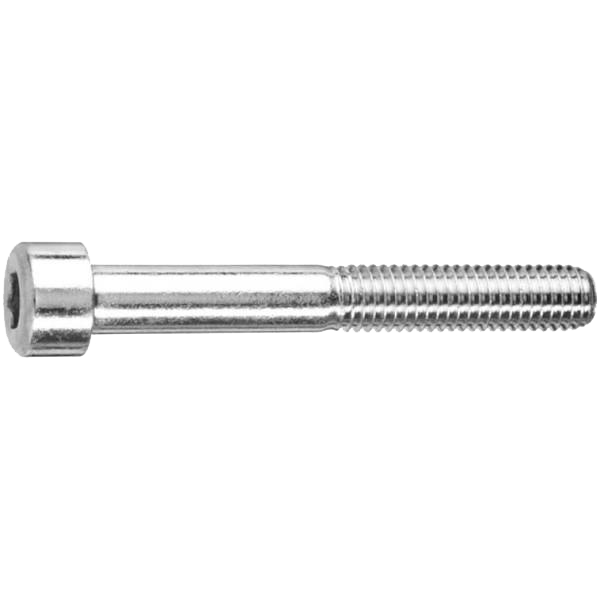 |
M10 screw (x4) | ≈ 0,90 €/unit | in IAAC | 6mm head thickness and 13mm diameter |
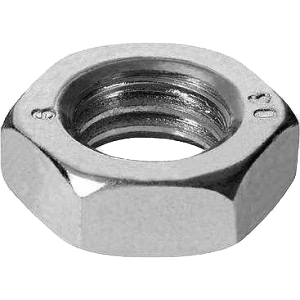 |
Nut (x4) | ≈ 0,30 €/unit | in IAAC | for the M10 screw |
 |
Screws (x10) | ≈ 0,03 €/unit | in IAAC | - |
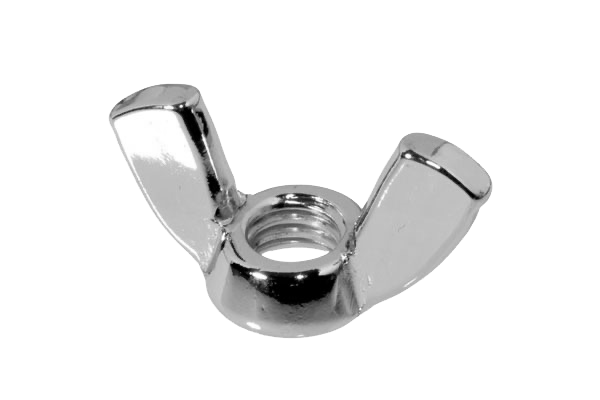 |
Wing Nut (x4) | ≈ 0,30 €/unit | in IAAC | for the M10 screw |
 |
Black PLA (x1) | ≈ 25 € | in IAAC | for the 3D printer. More about |
 |
Black HDPE (x1) | ≈ 18 €/m2 | in IAAC | Thikness 18mm, 1000x1000mm |
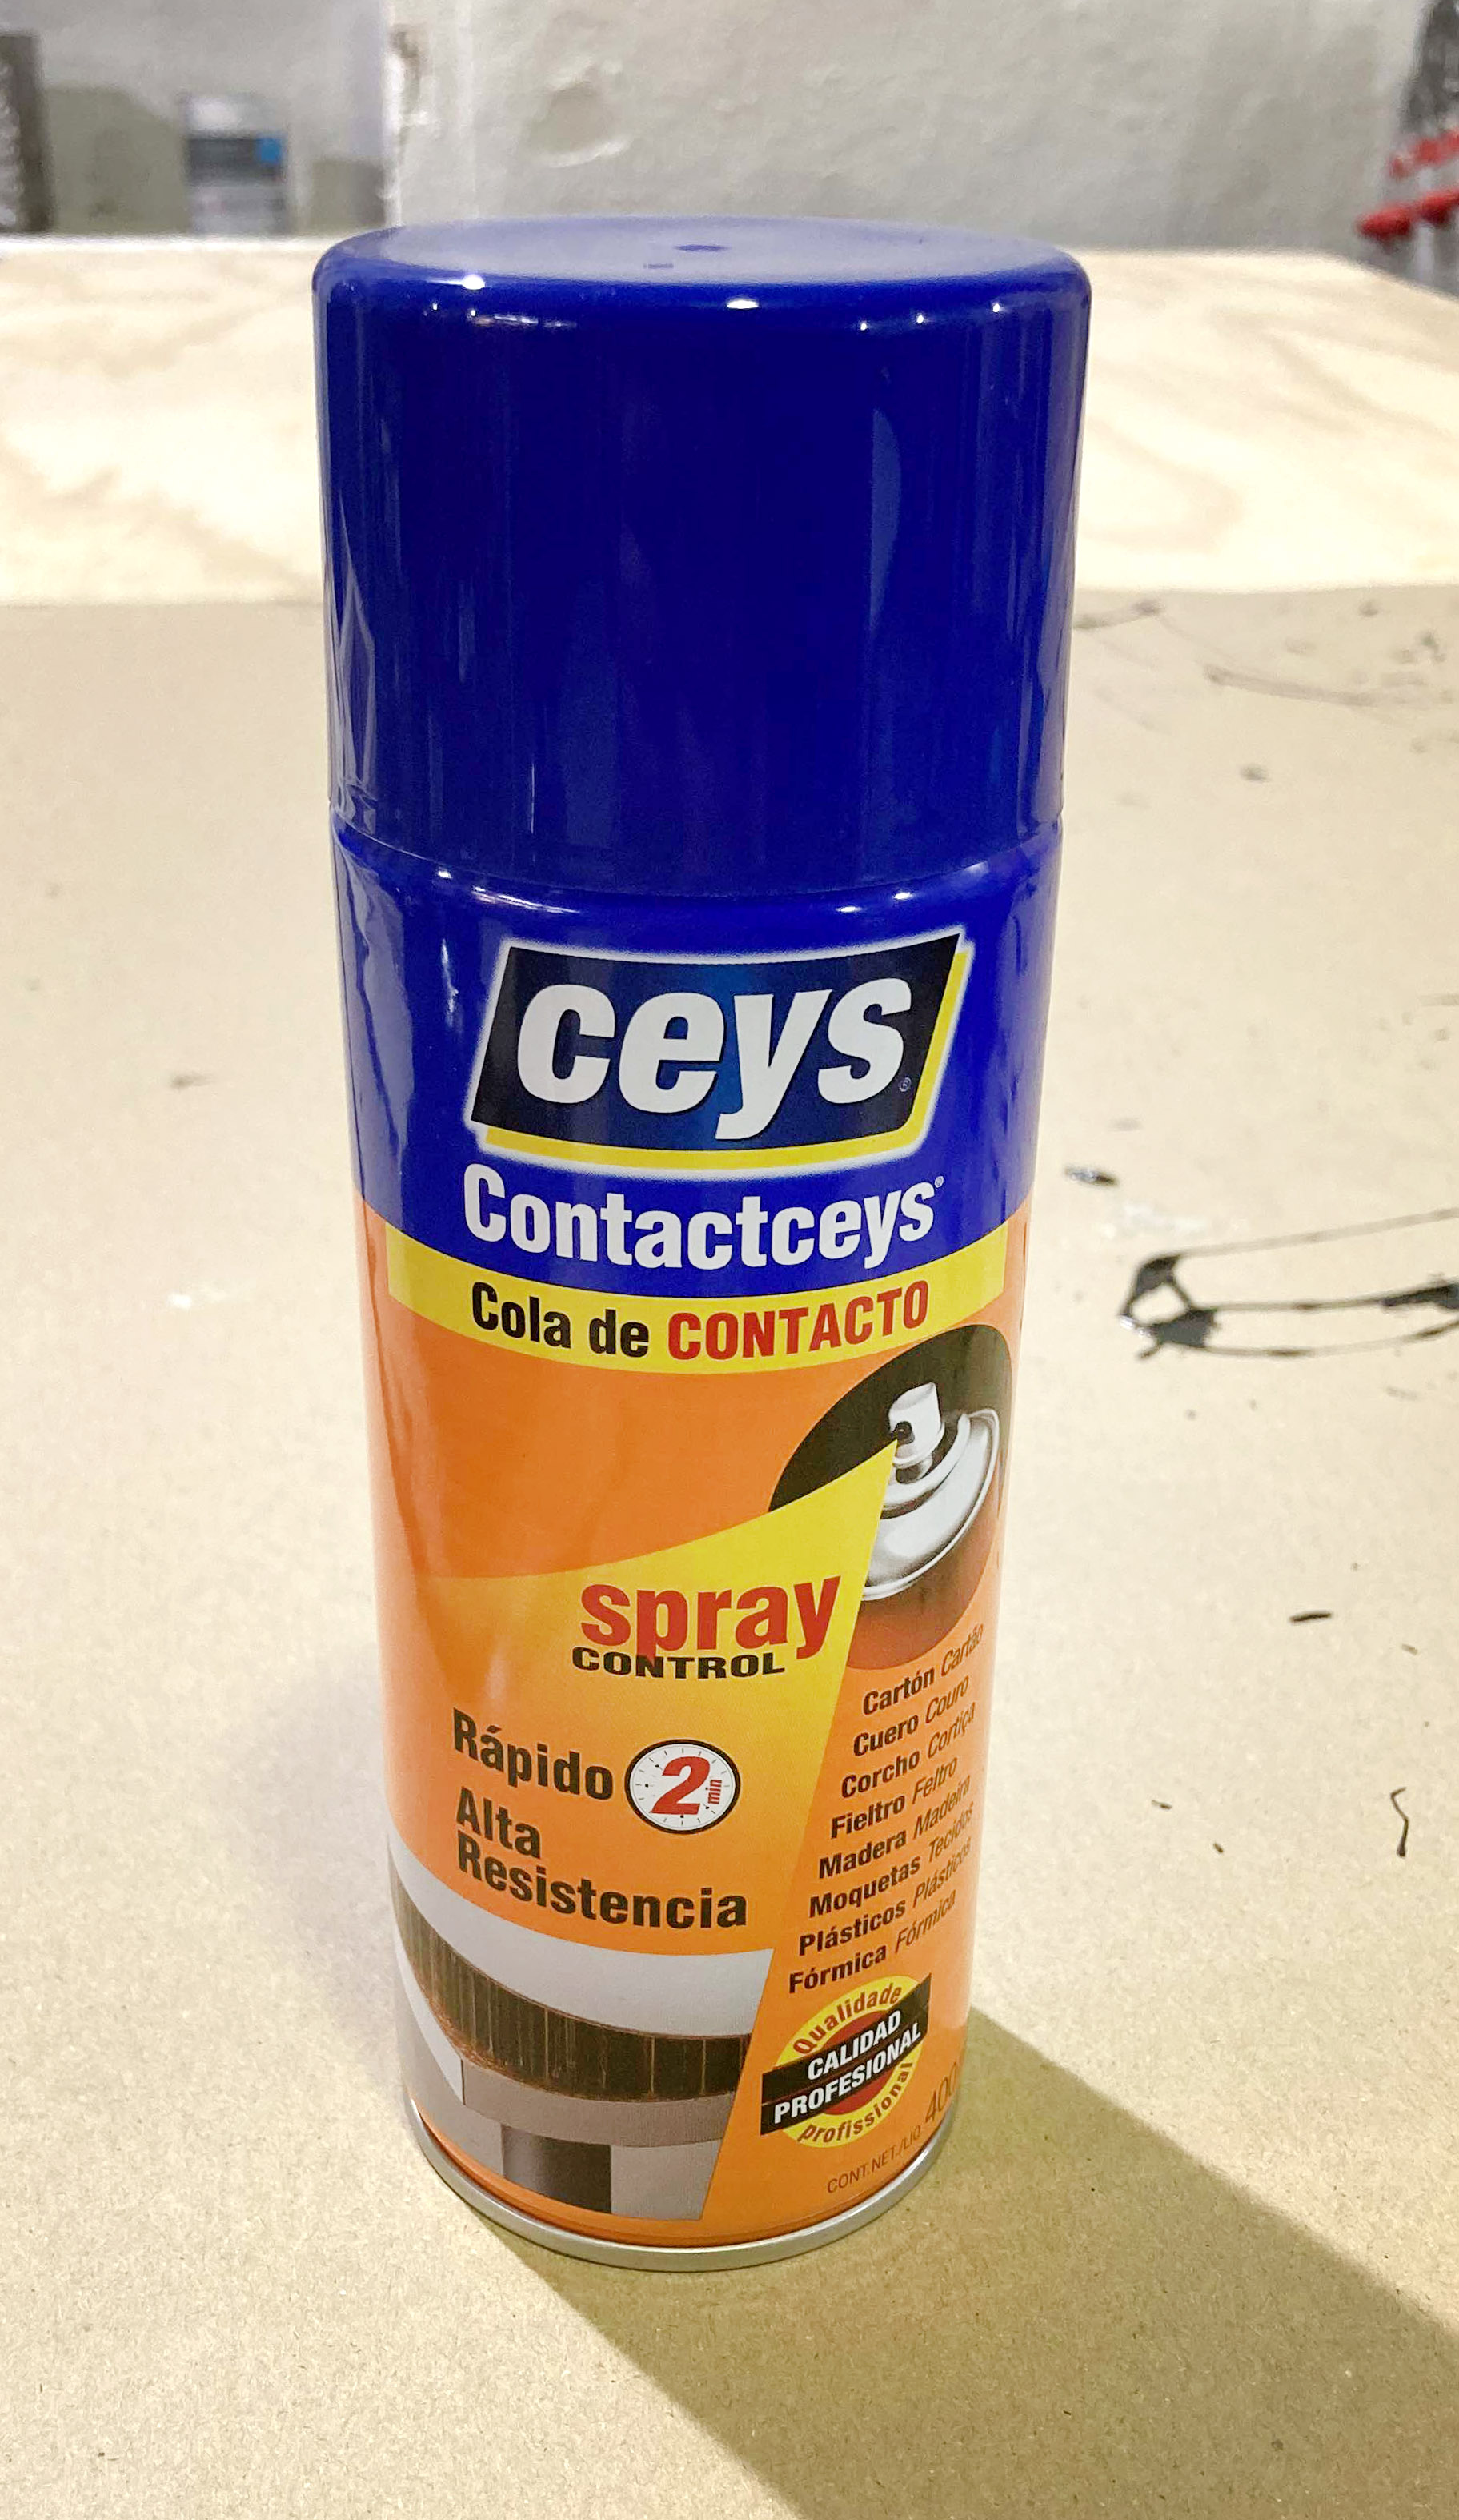 |
Spray contact glue (x1) | ≈ 12 € | in IAAC | - |
 |
Blue Eva foam (x1) | ≈ 2,35 € | in Abacus | Thikness 2mm, 47,5 x 70cm |
 |
Cardboard (x1) | ≈ 1,50 € | in IAAC | Thikness 4mm, 29,7 x 42cm |
More about the HDPE:
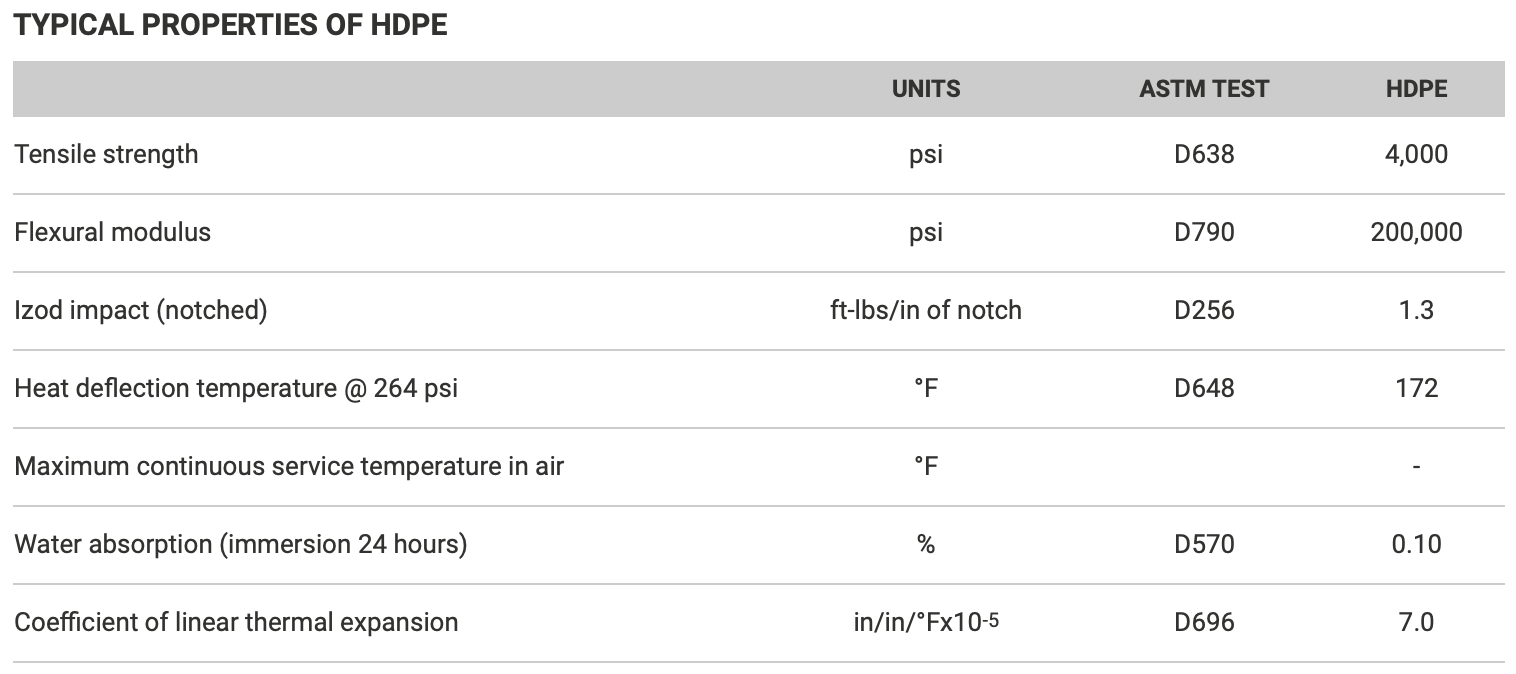
One of the thing I was worry about to use the HDPE material instead of wood was the resistance of high temperature, because for the leather mold techinique we use the heat gun do dry it faster.

Although it does not have a high resistance it's enough because it's more than the leather, so I will burn it first before I melt the HDPE.
Process
MAKE IT REAL!!
CNC Miller
Time to open our Rhino file in the RhinoCAM.
Setting for the CNC in Rhino CAM:
Vacuum CNC de Emma
Send the file to the CNC computer. Make sure that the dimensions of your design fit in the material sheet.
Before you turn on the machine you MUST wear ear muffs and glasses to protect.
Check the following video to see step by step the CNC process:
CNC Process de Emma
As you see, we generate a lot of black particles around the machine so do not forget to turn on the vacuum cleaner!
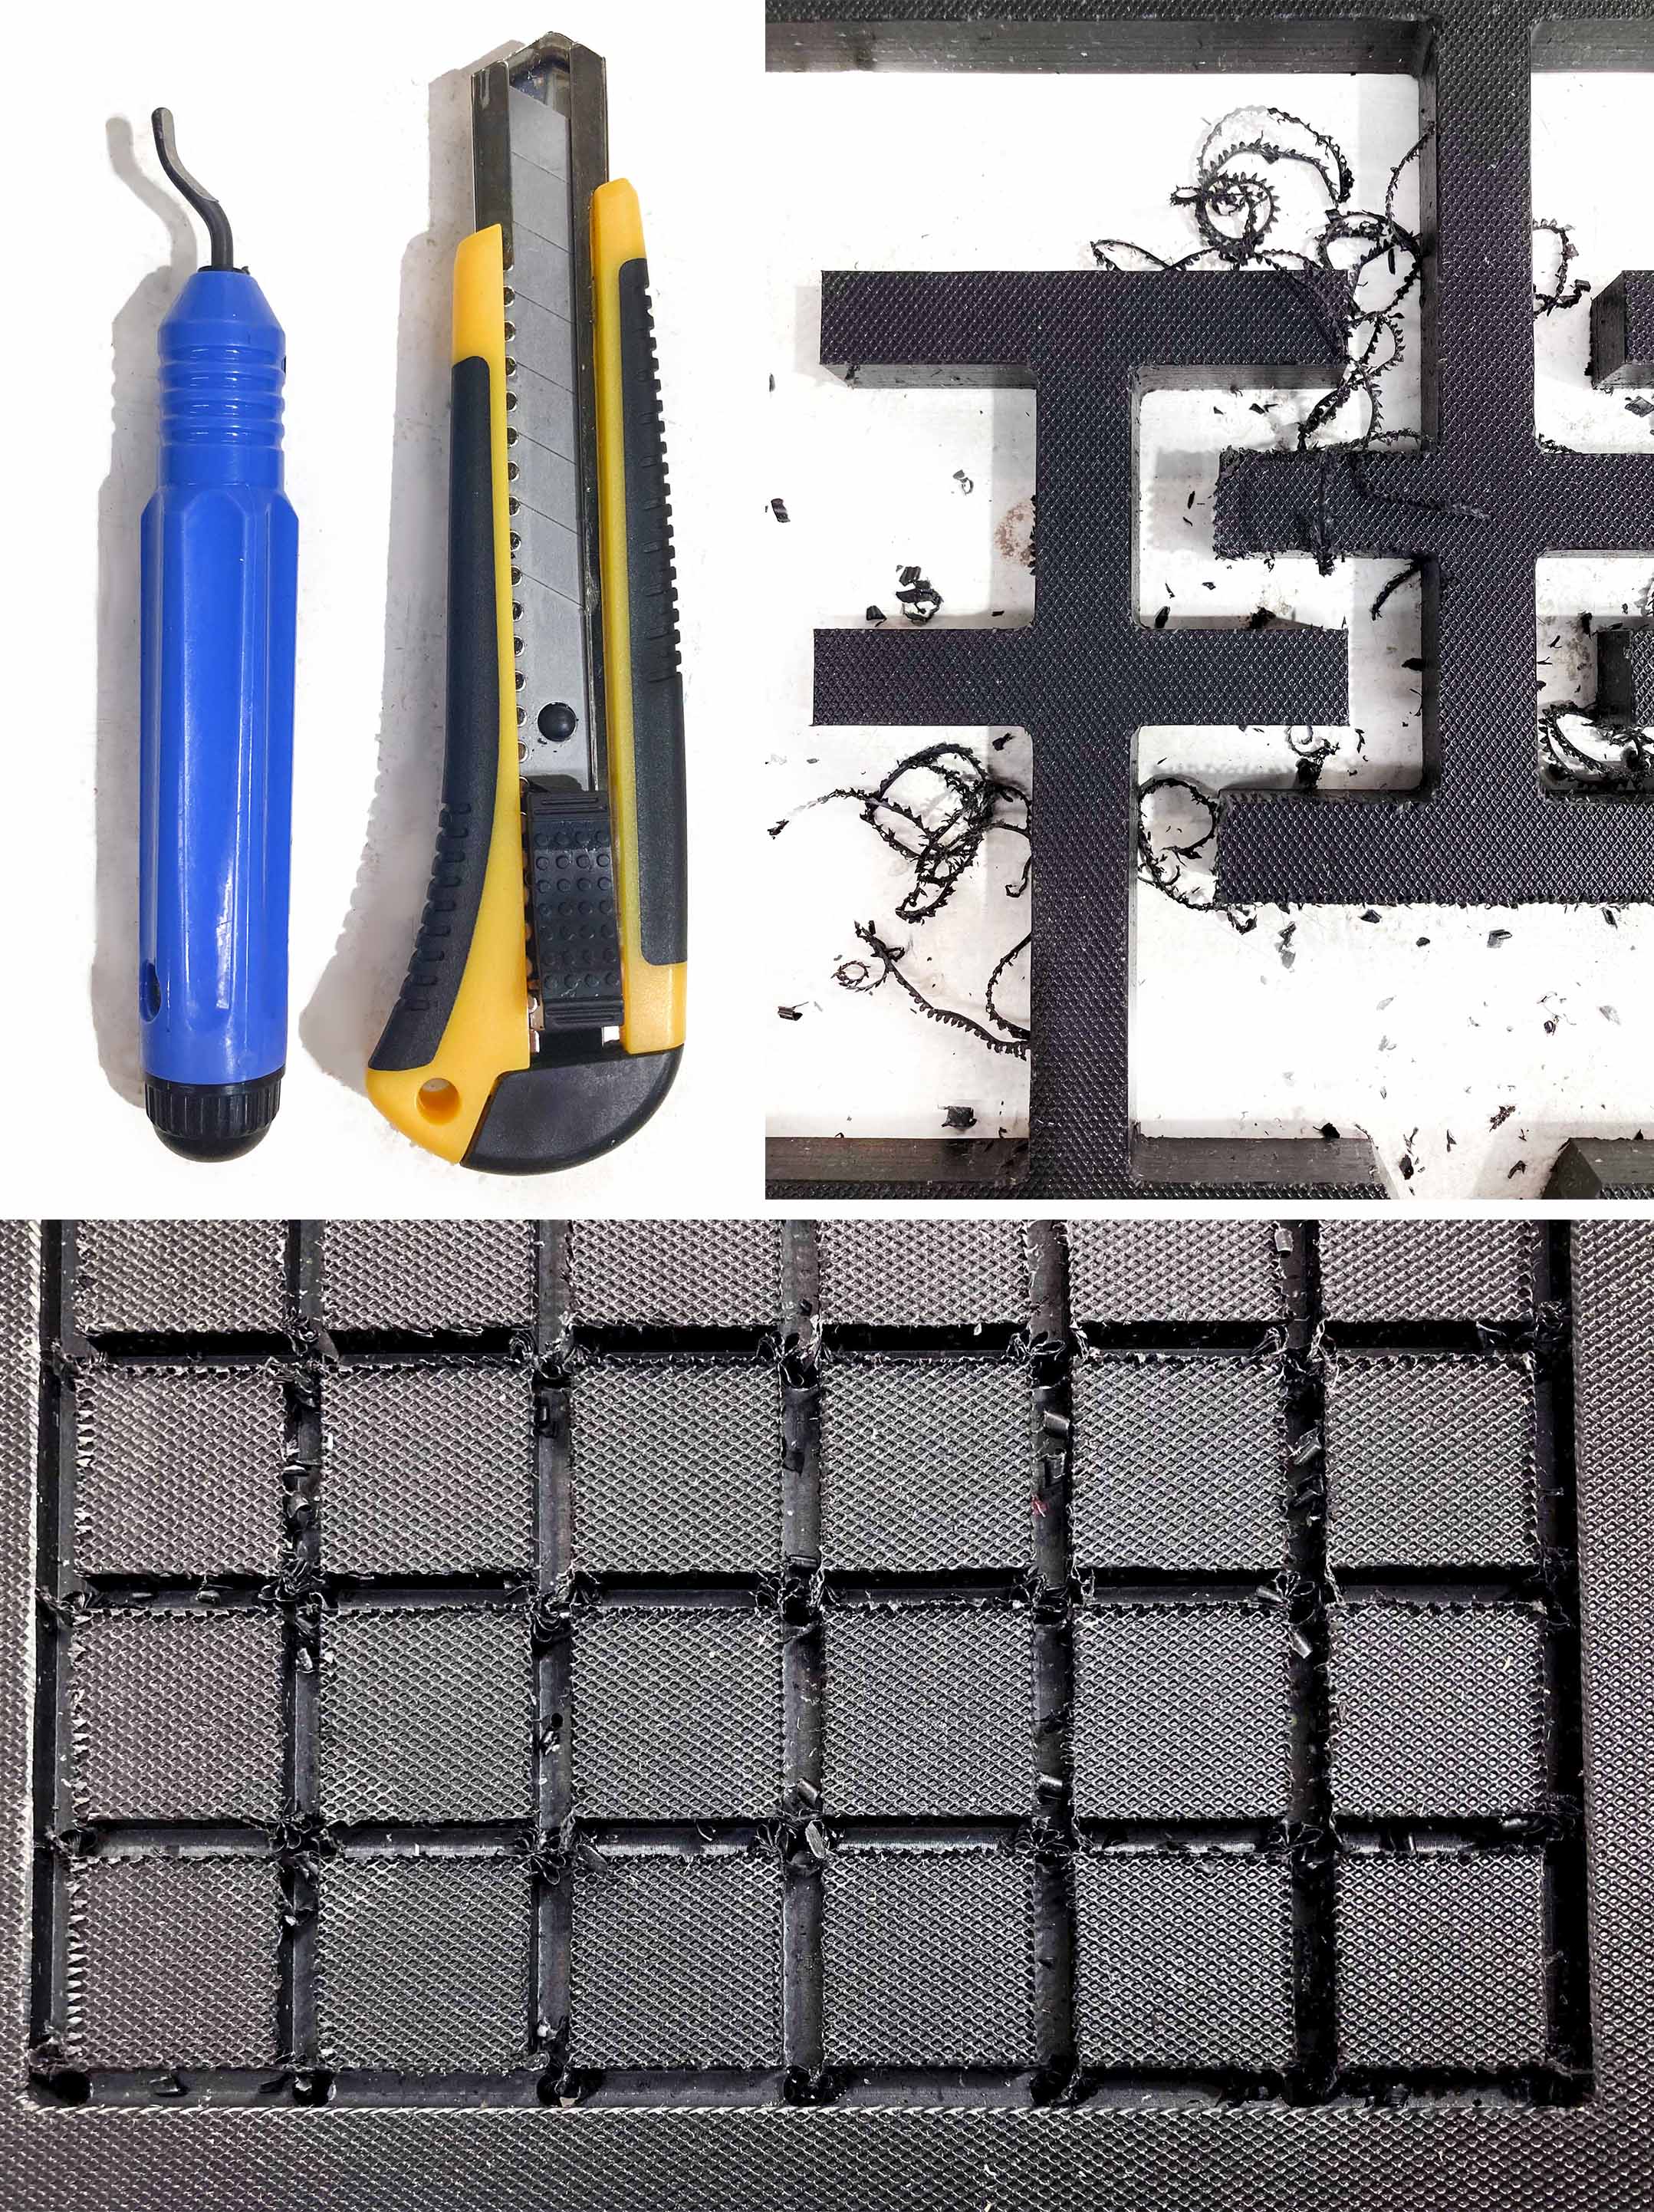
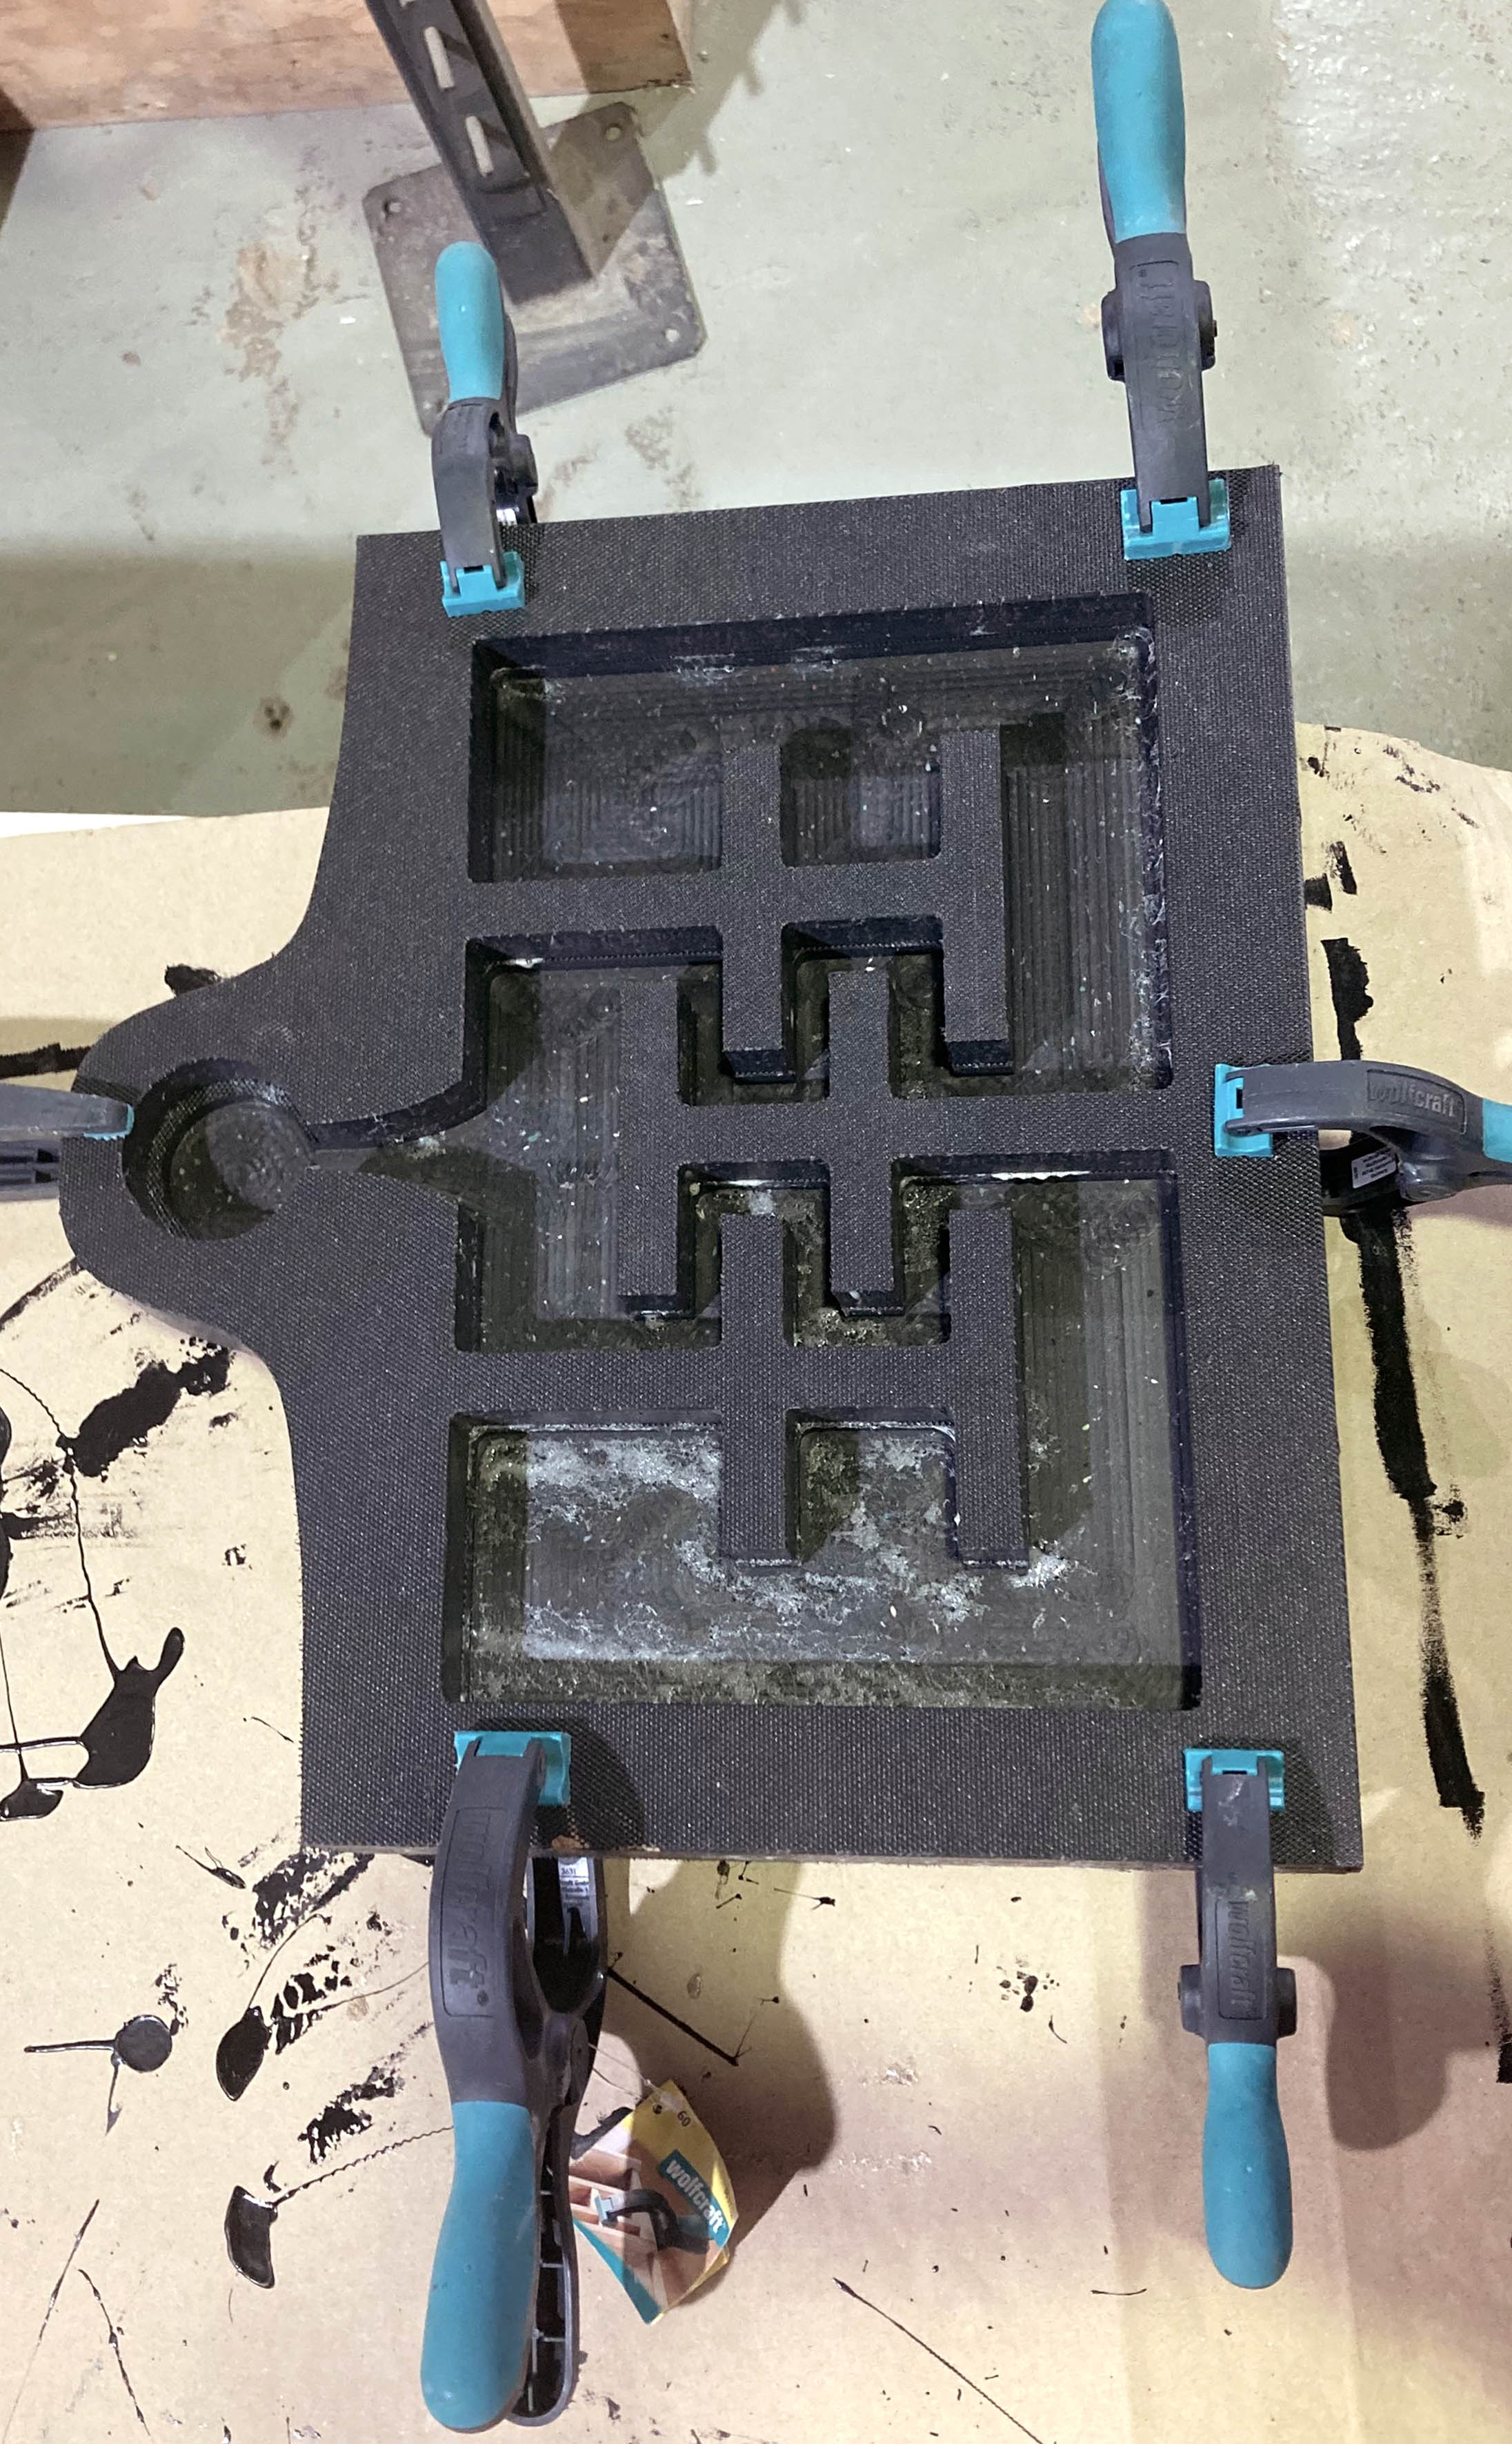
Finally, we can remove the screws and take out the different parts. Use a cutter to cut the little bridges we leave between the big sheet and the vacuum pieces.
Building the Vacuum
Time to polish the edges:
It's a laborious process to have a proper finish and remove all the little particles which are still stuck in the pieces.
After we get all the pieaces clean:
Let's assemble the parts!
Assemble the 2 bottom pieces with spray glue, fixed them with some pliers to get it dry.
Remember: Before using the glue, read carefully the instructions and place cardboard below the parts you will glue it to protect the table.
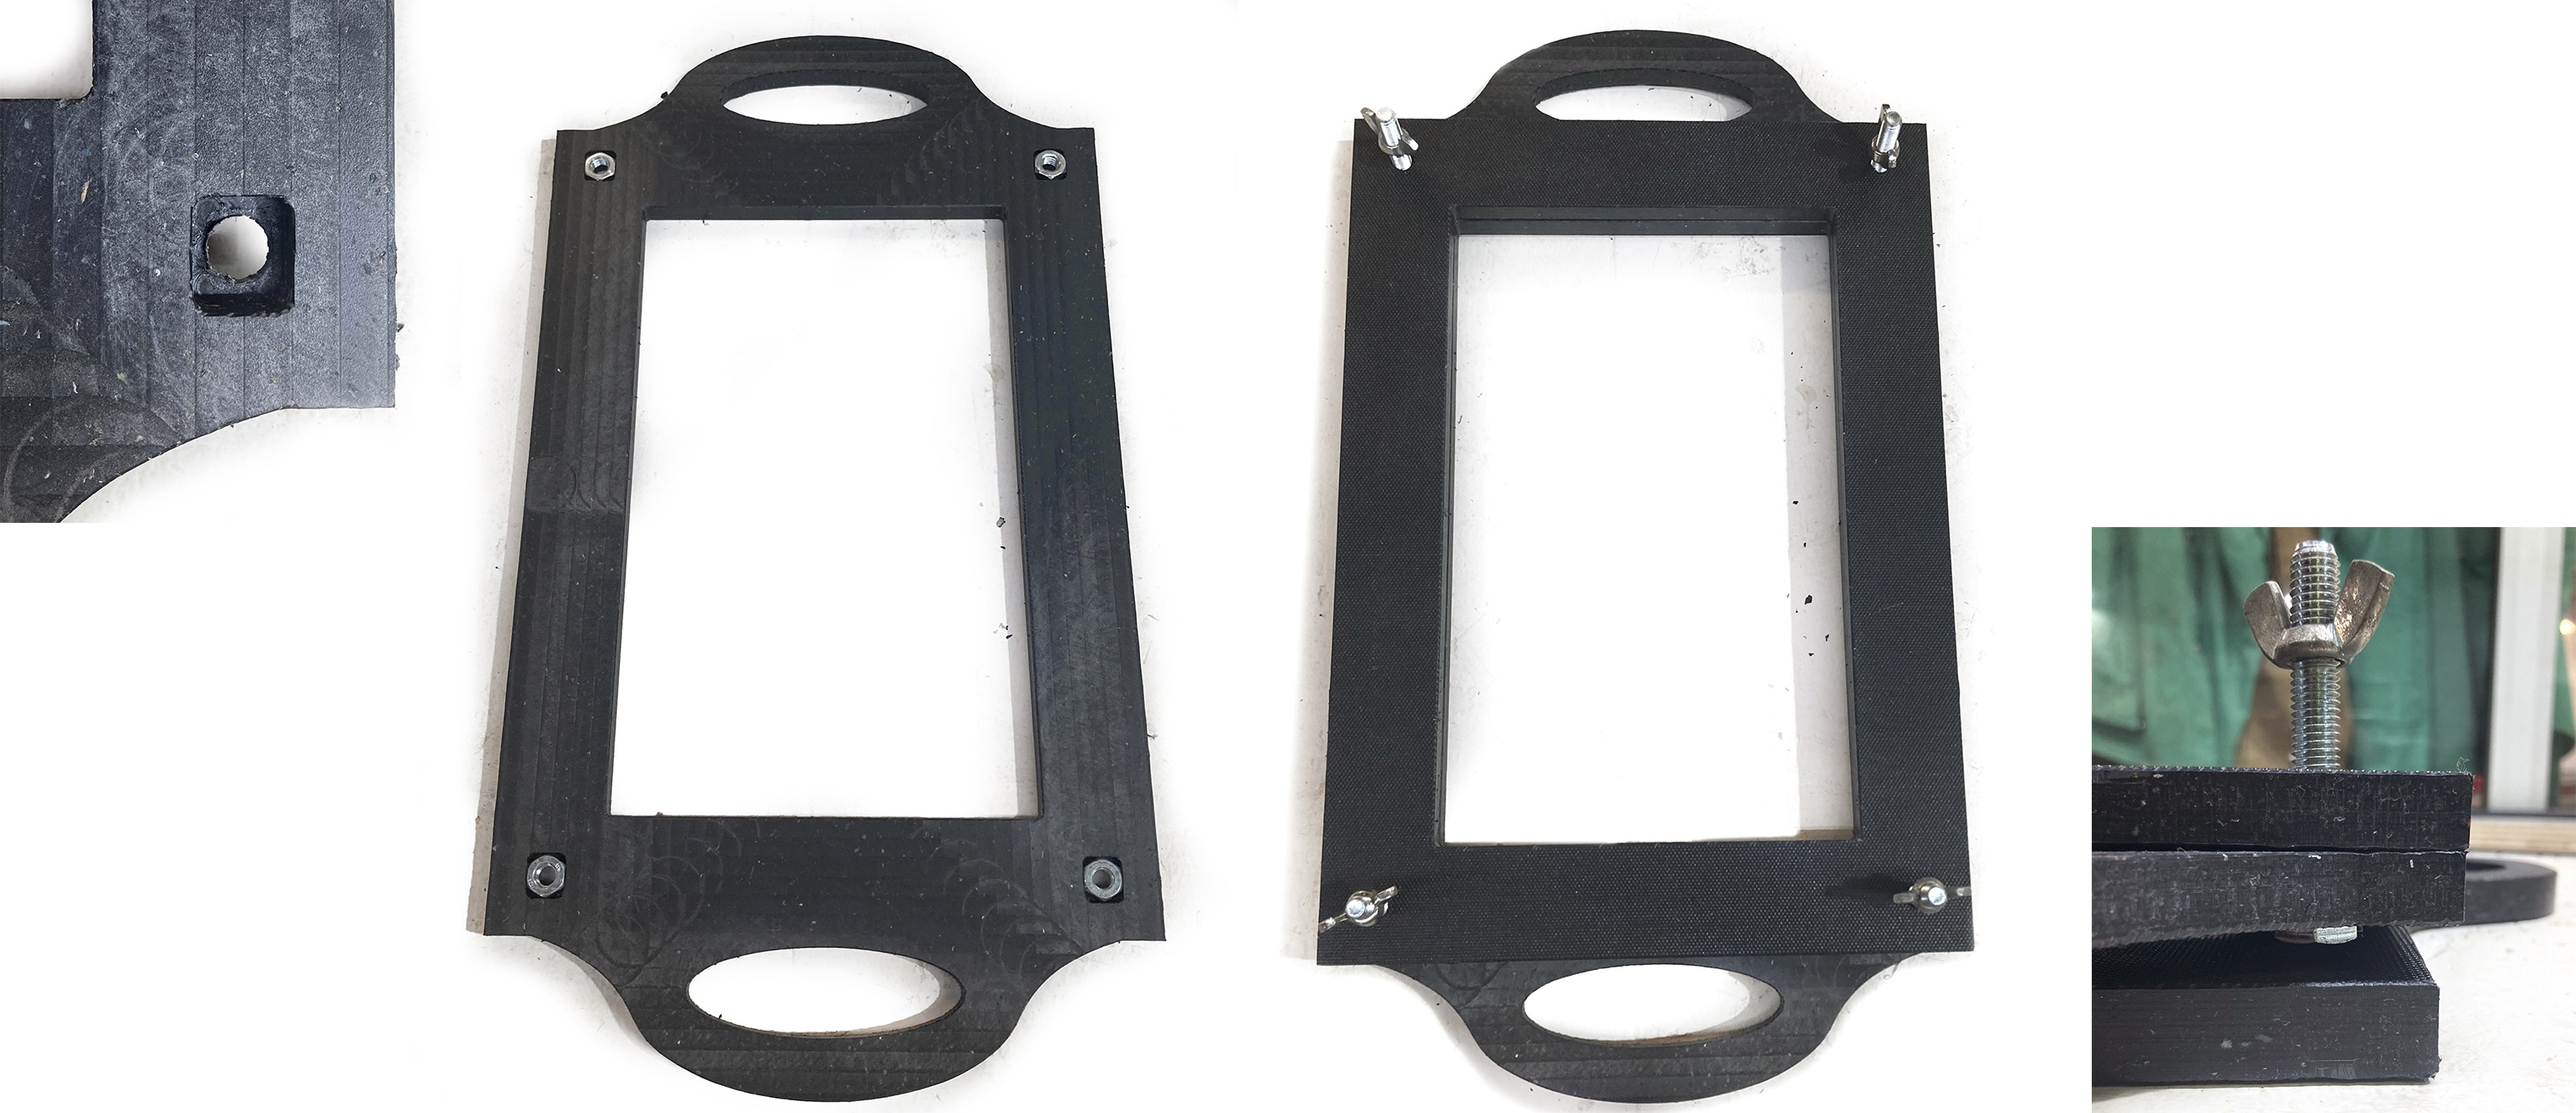
Marker the screws in place to join the top part with the base. In this case, we do not use glue to be able to clean in the future.
Use a drilling machine.
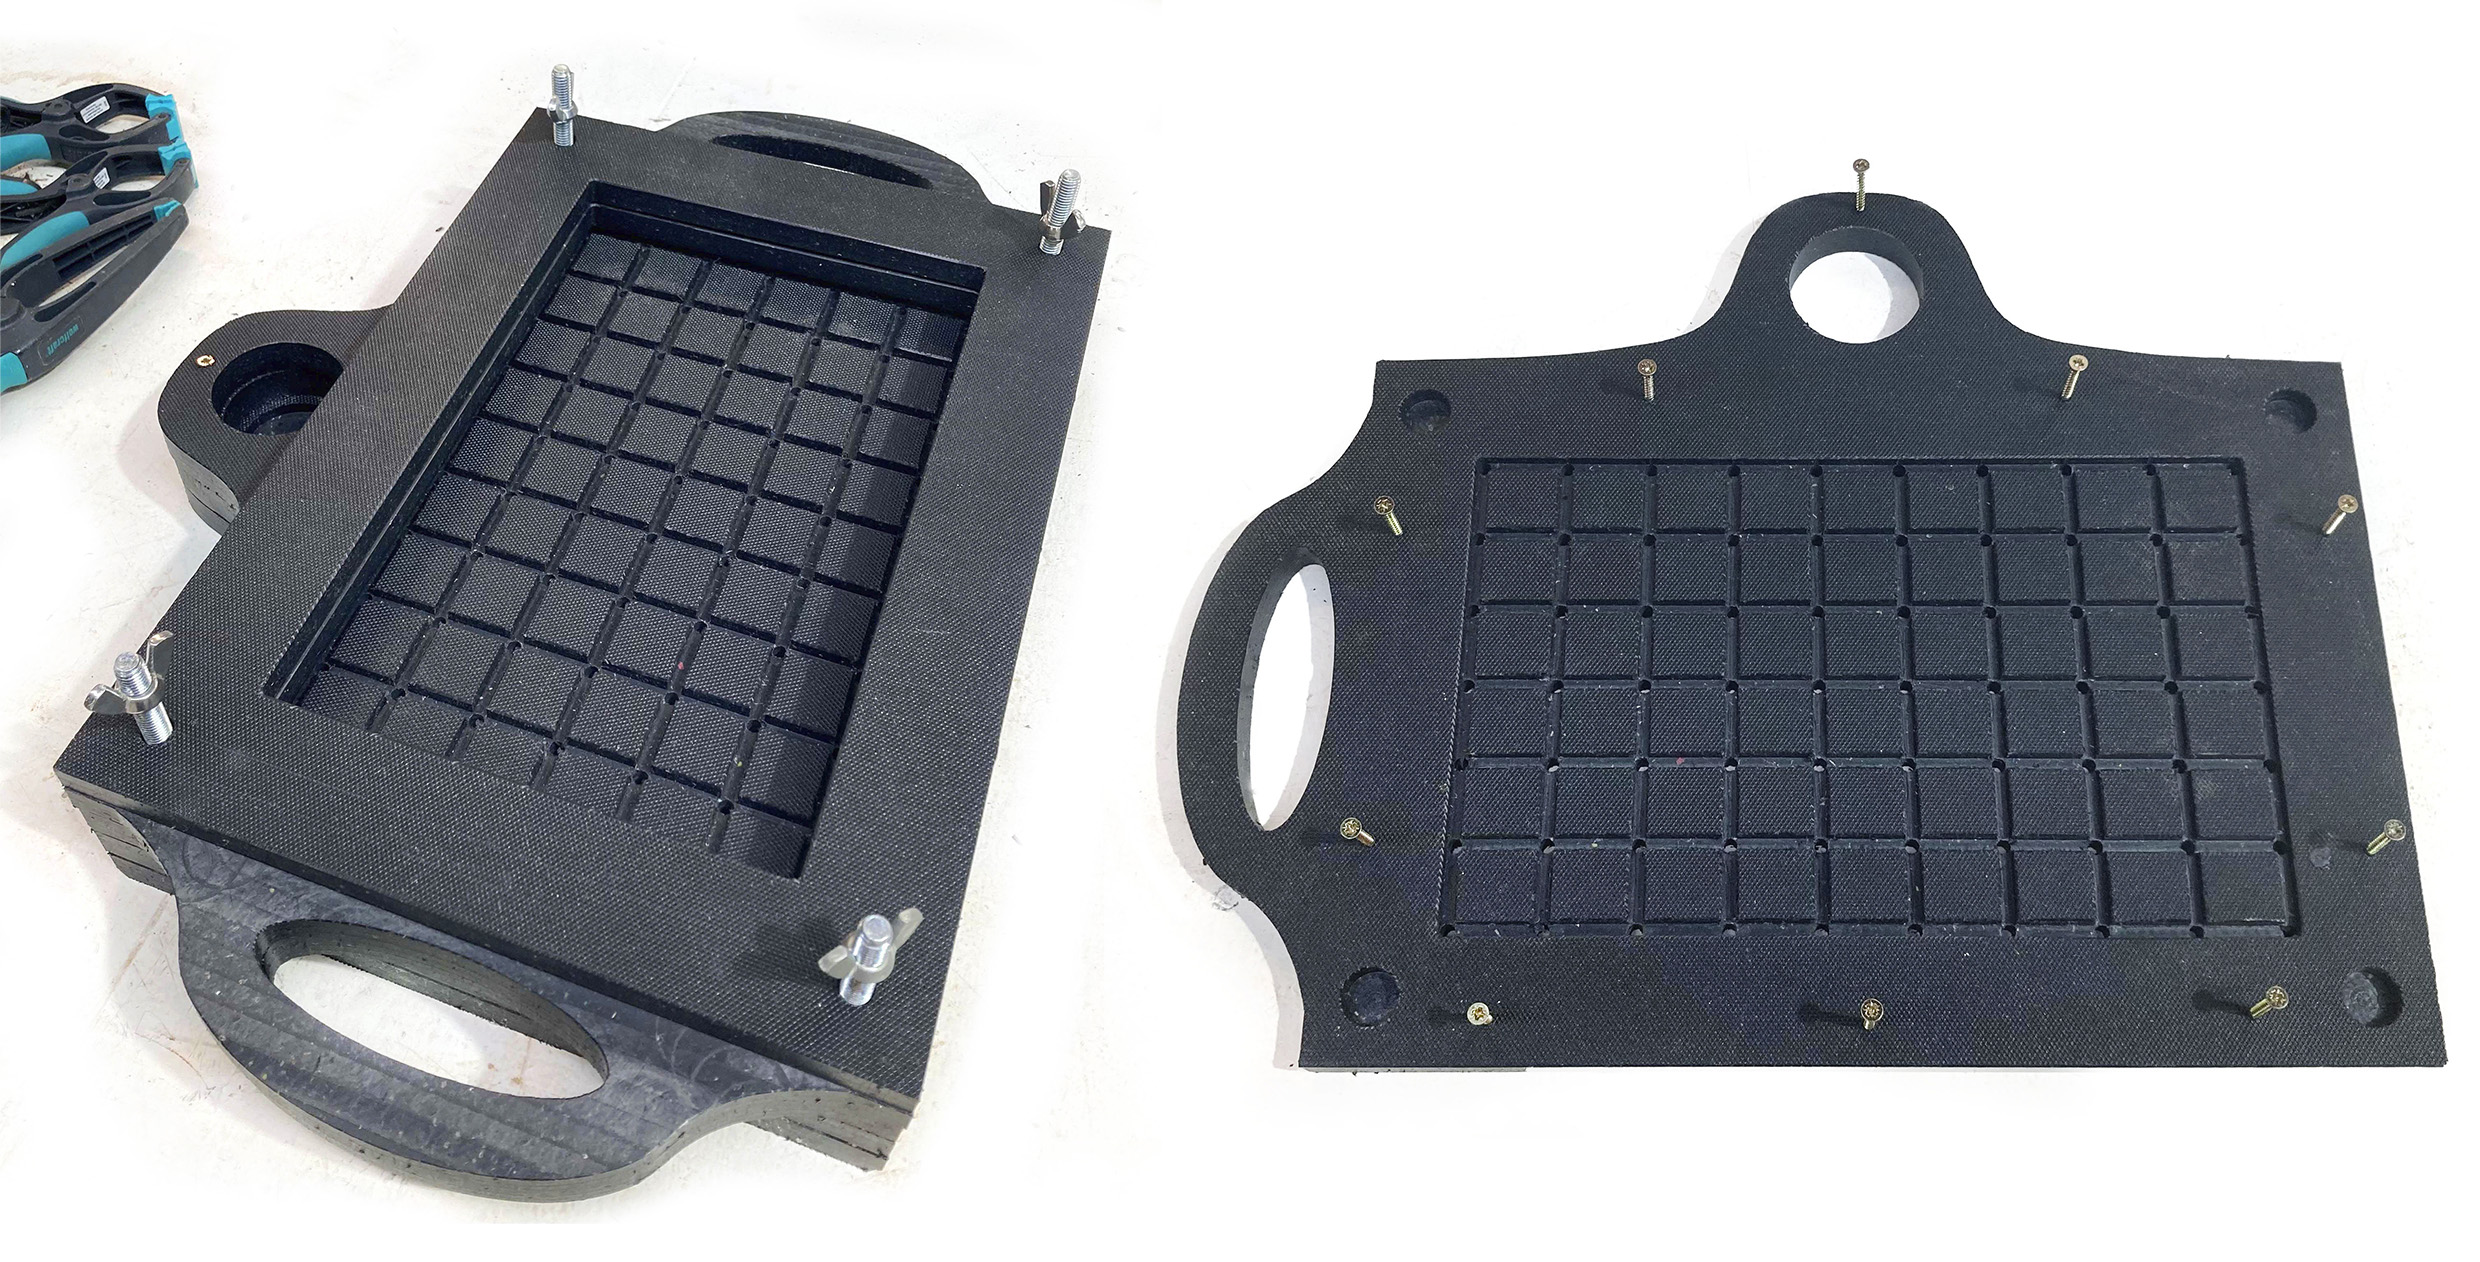
Check if the frame part fits with the vacuum part with the M10 screws heads.
Cut the Eva foam, in that case I use scissors, however, I recommended using the laser cutter to have a proper finish.
Vacuum machine: DONE
After we have the principal machine completed we could proceed with the accessories:
Plugs
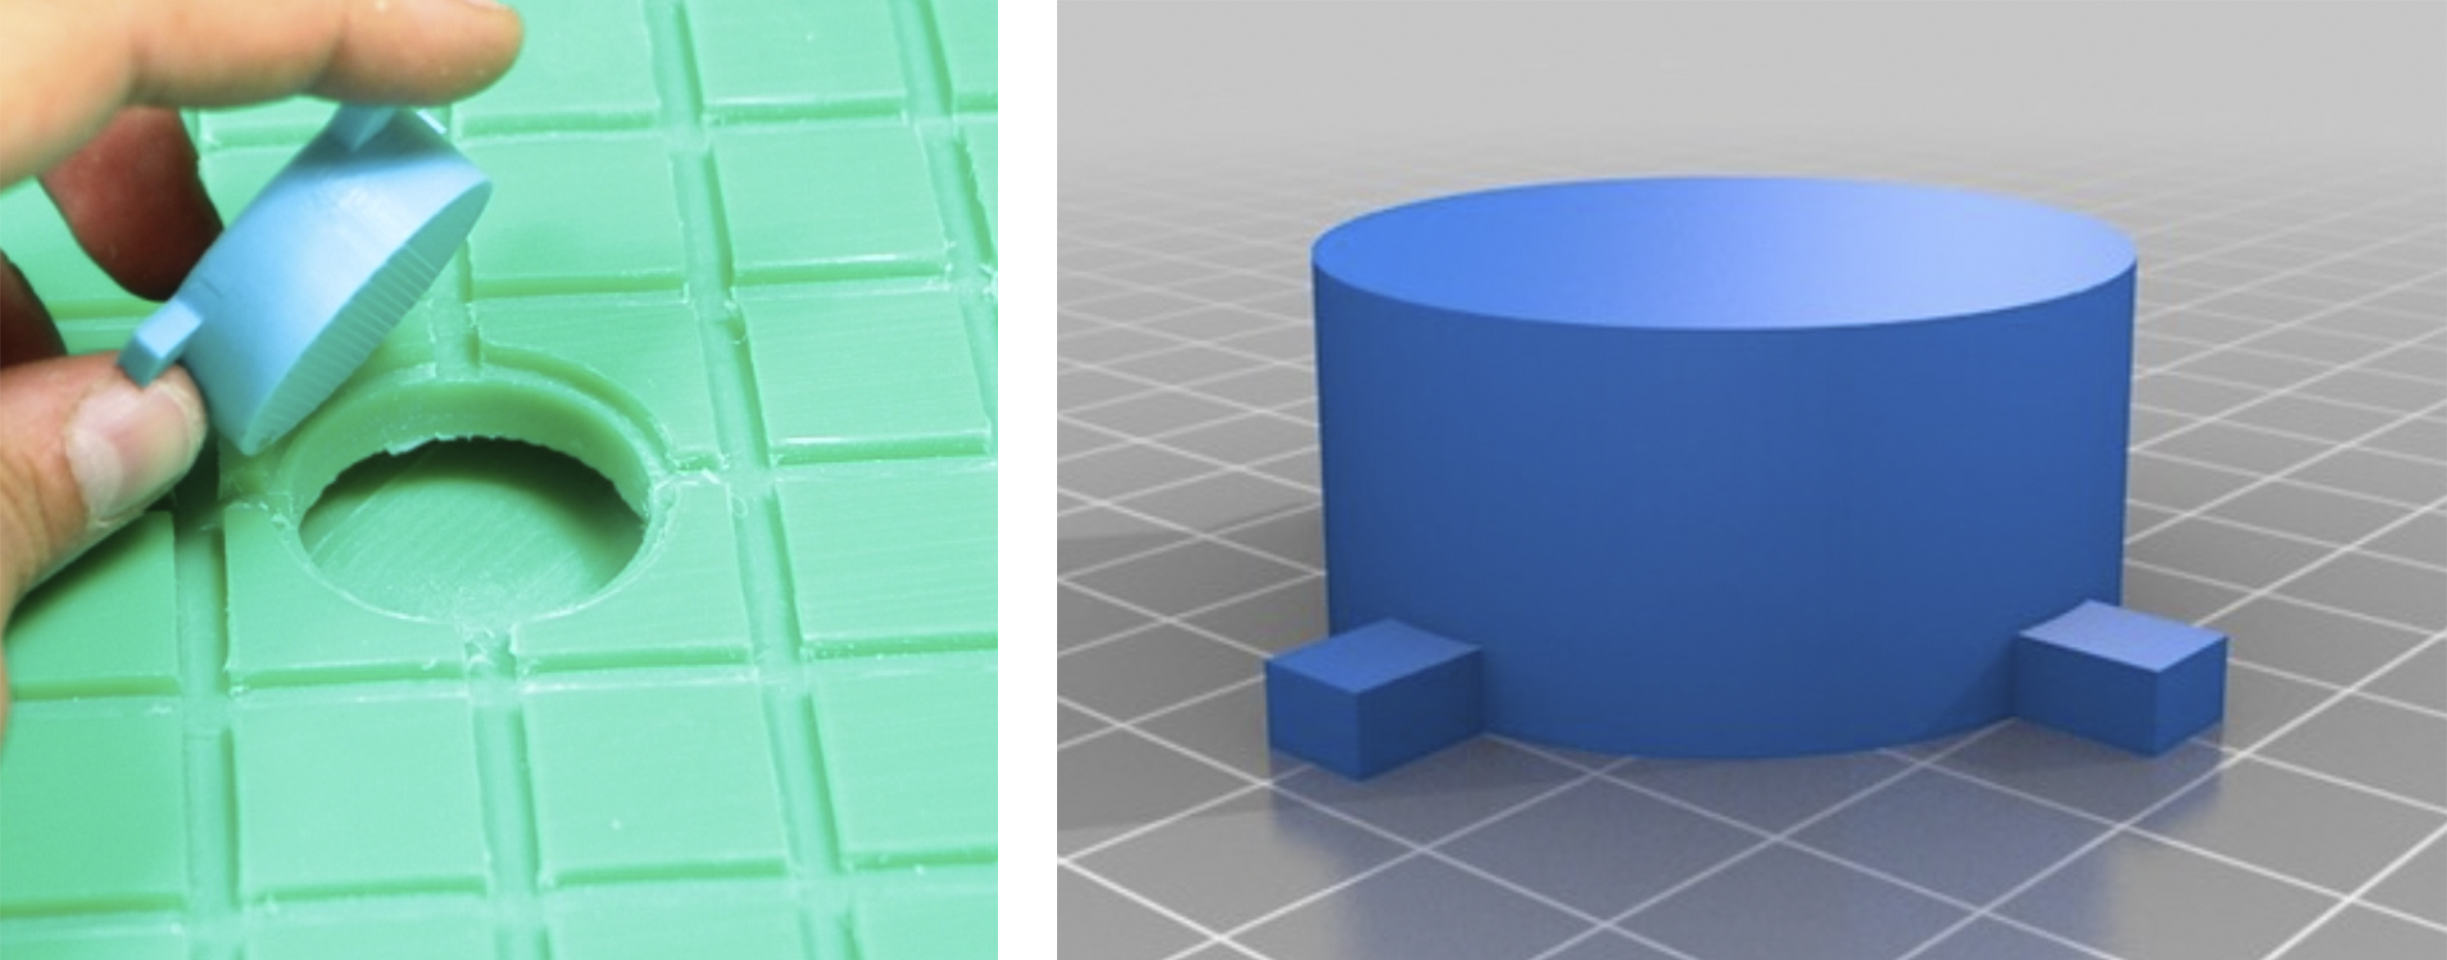
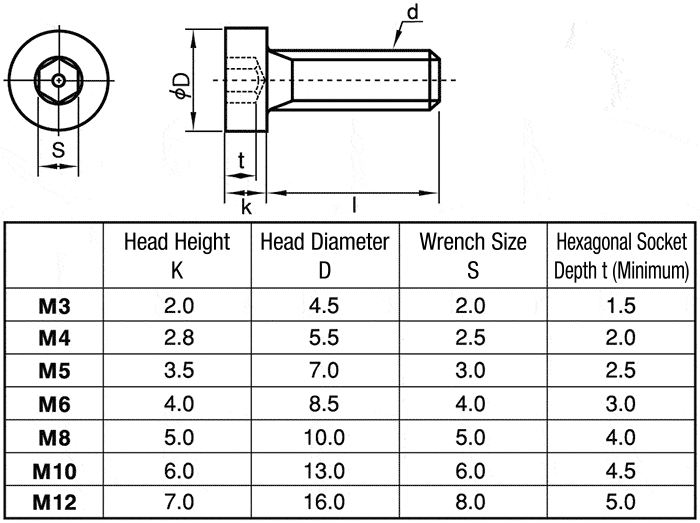
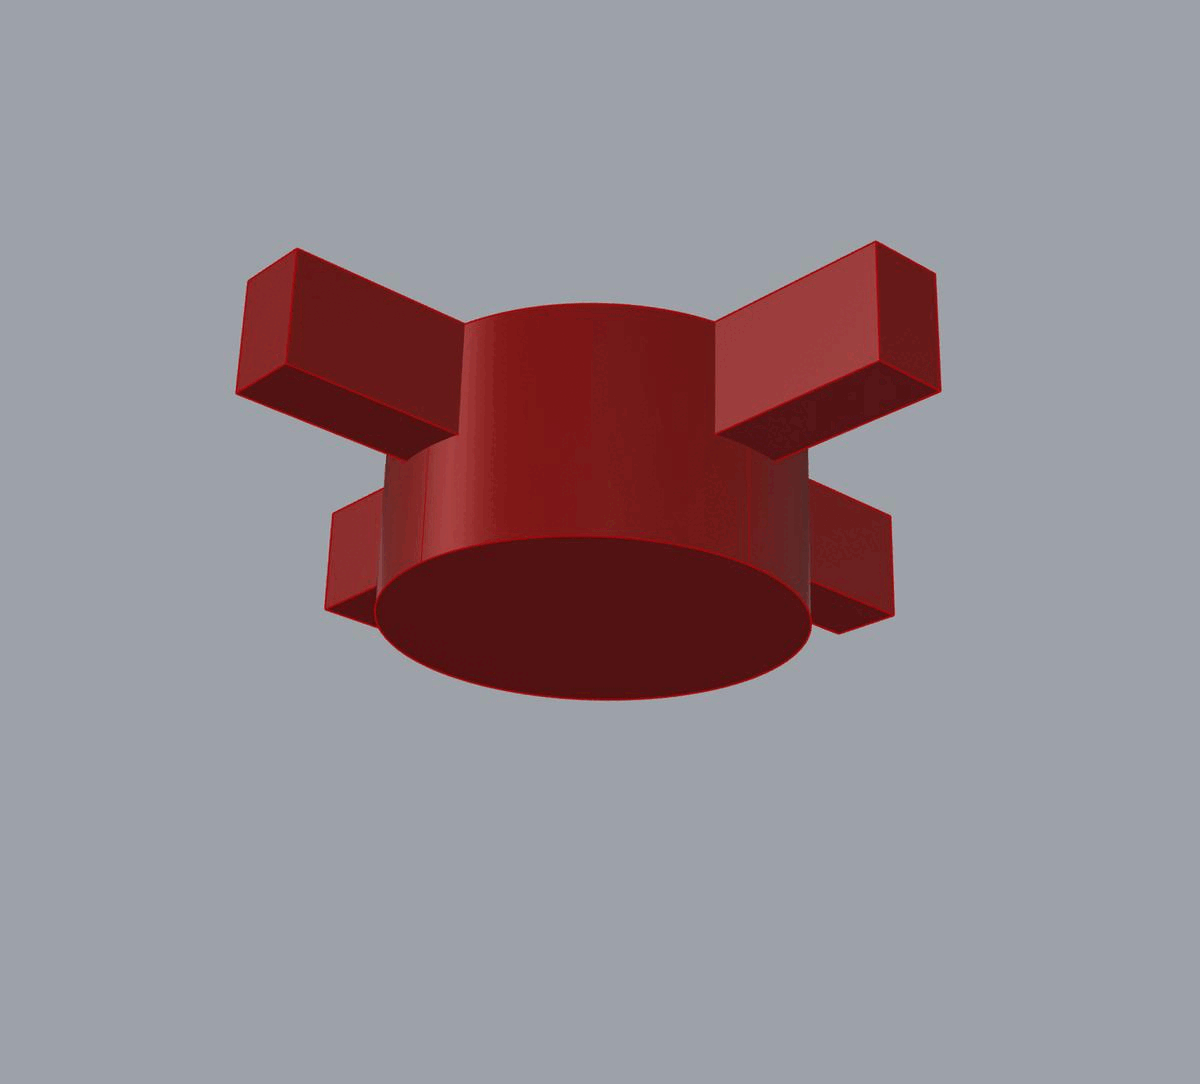
In other to not generate waste material and be more practical when we block the holes in the table we will use 3D-printed plugs instead of tape.
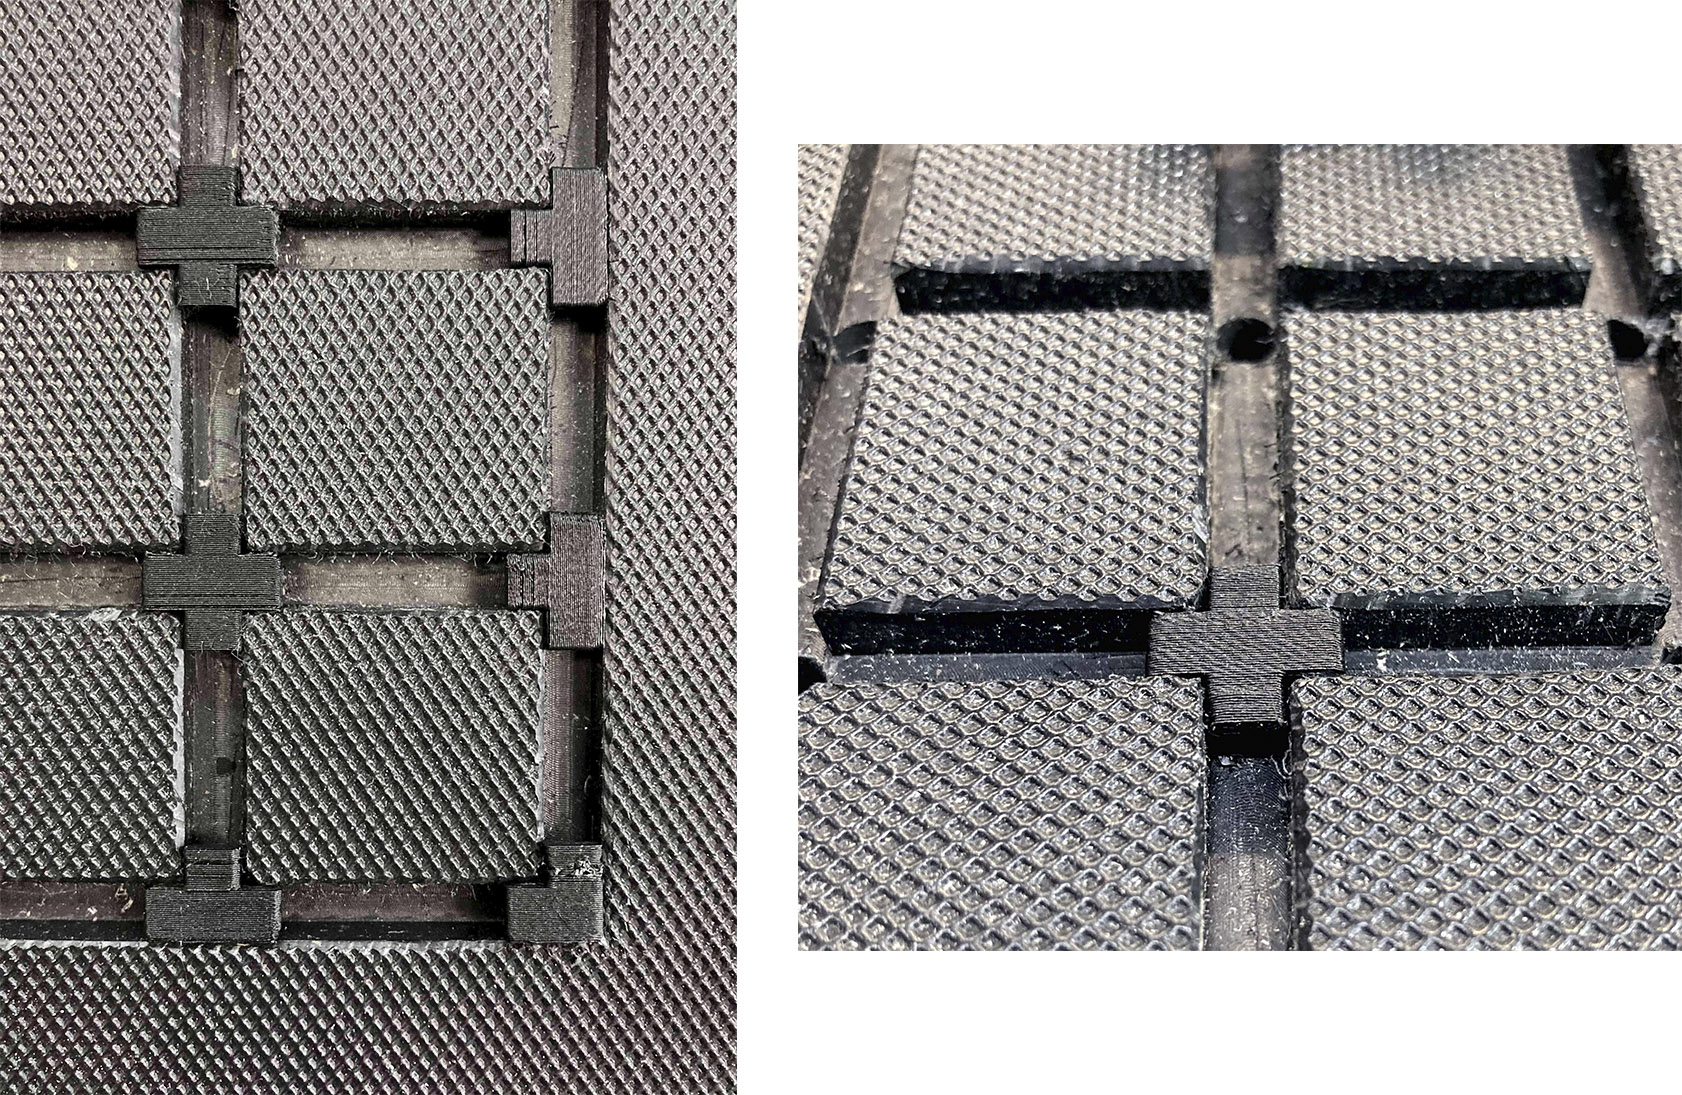
In my table, I design 70 holes, so I will need 4 for the corners, 26 for the borders, and 40 for the center, however, in this case, I never will be used with all of them blocked, so I will print a little bit less. So, to conclude, I will print 6 corners, 28 borders, and 38 pieces for the center holes to have some reserved if some of them lose or broke.
Create the plug in Rhino. We have to be very precise with the measurements!
The diameter of the holes and the grid are 6mm.
As you see in the previous image, while I was designing the plugs and testing I have to improve the design, so I started the tests with the center plug, and then when the dimensions fit properly on the hole I create the types for the corners in Rhino.
The progression with the 3D printed plugs:

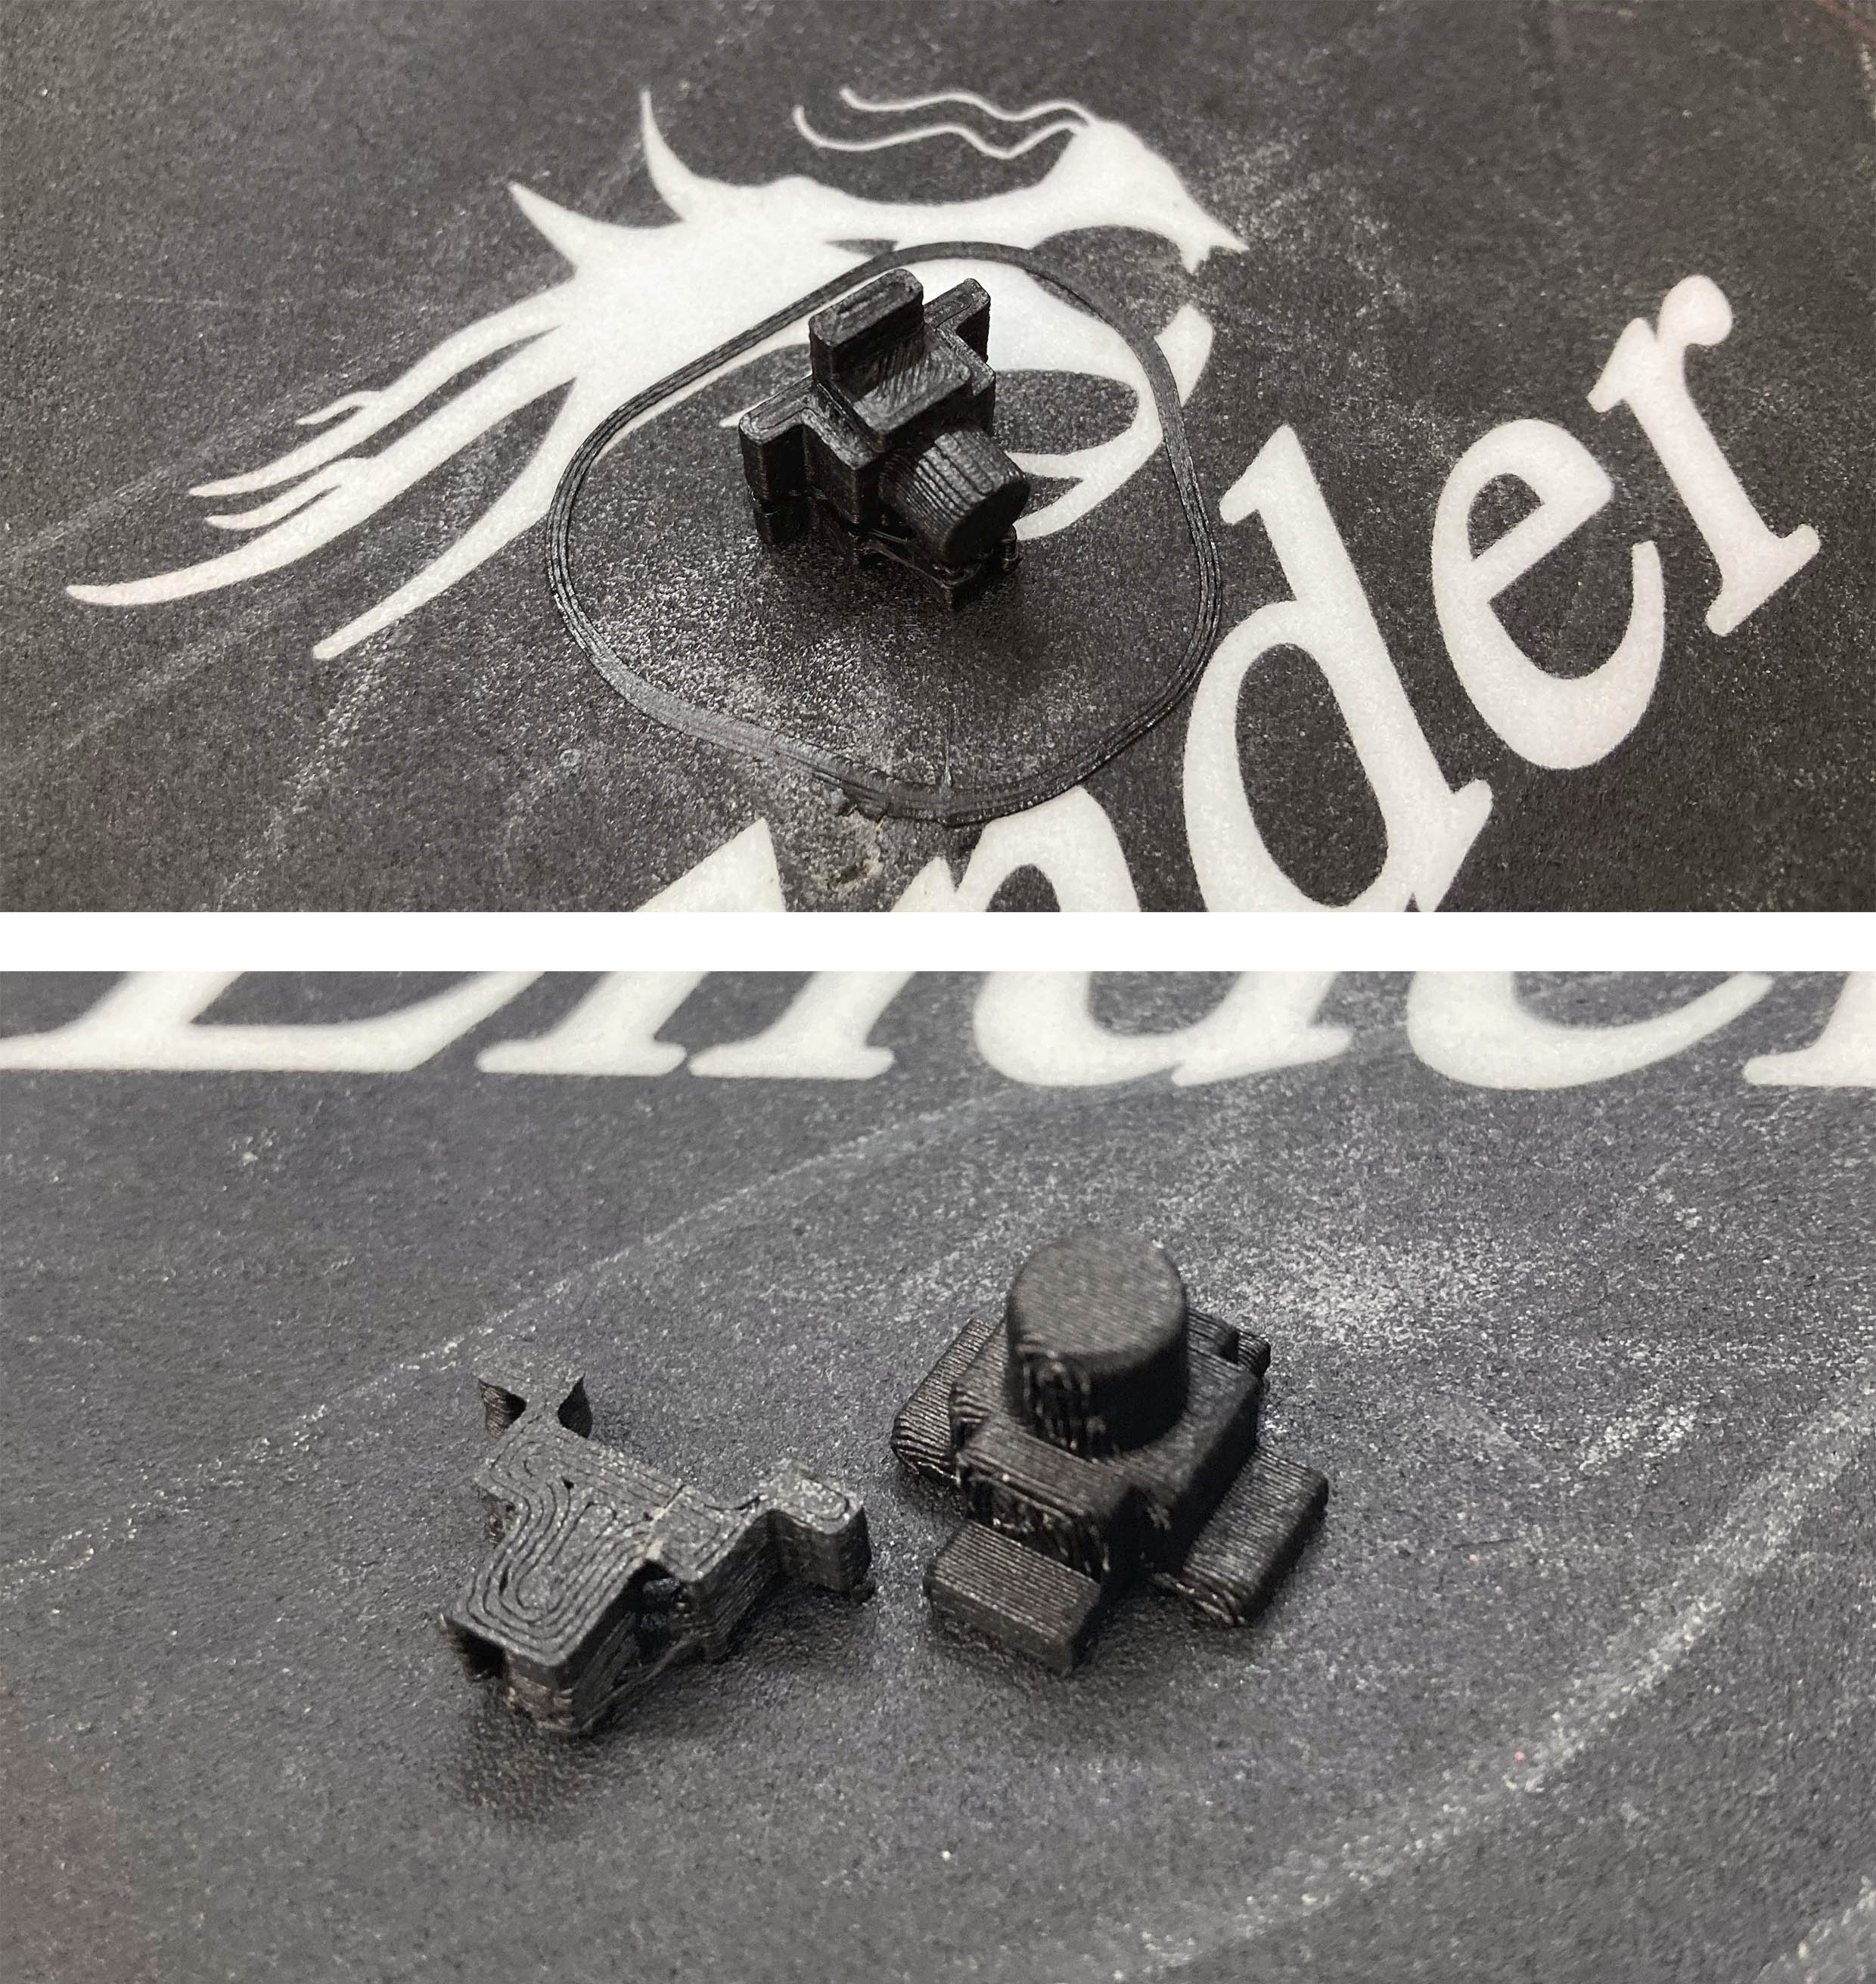
The first tests don't fit in the grid and while you are trying to remove it breaks because of the direction of the printer, so I have to turn 90º and build bridges in the plug to increase the resistance.
IT WORK!
When the blockage fits I could draw the corners pieces:
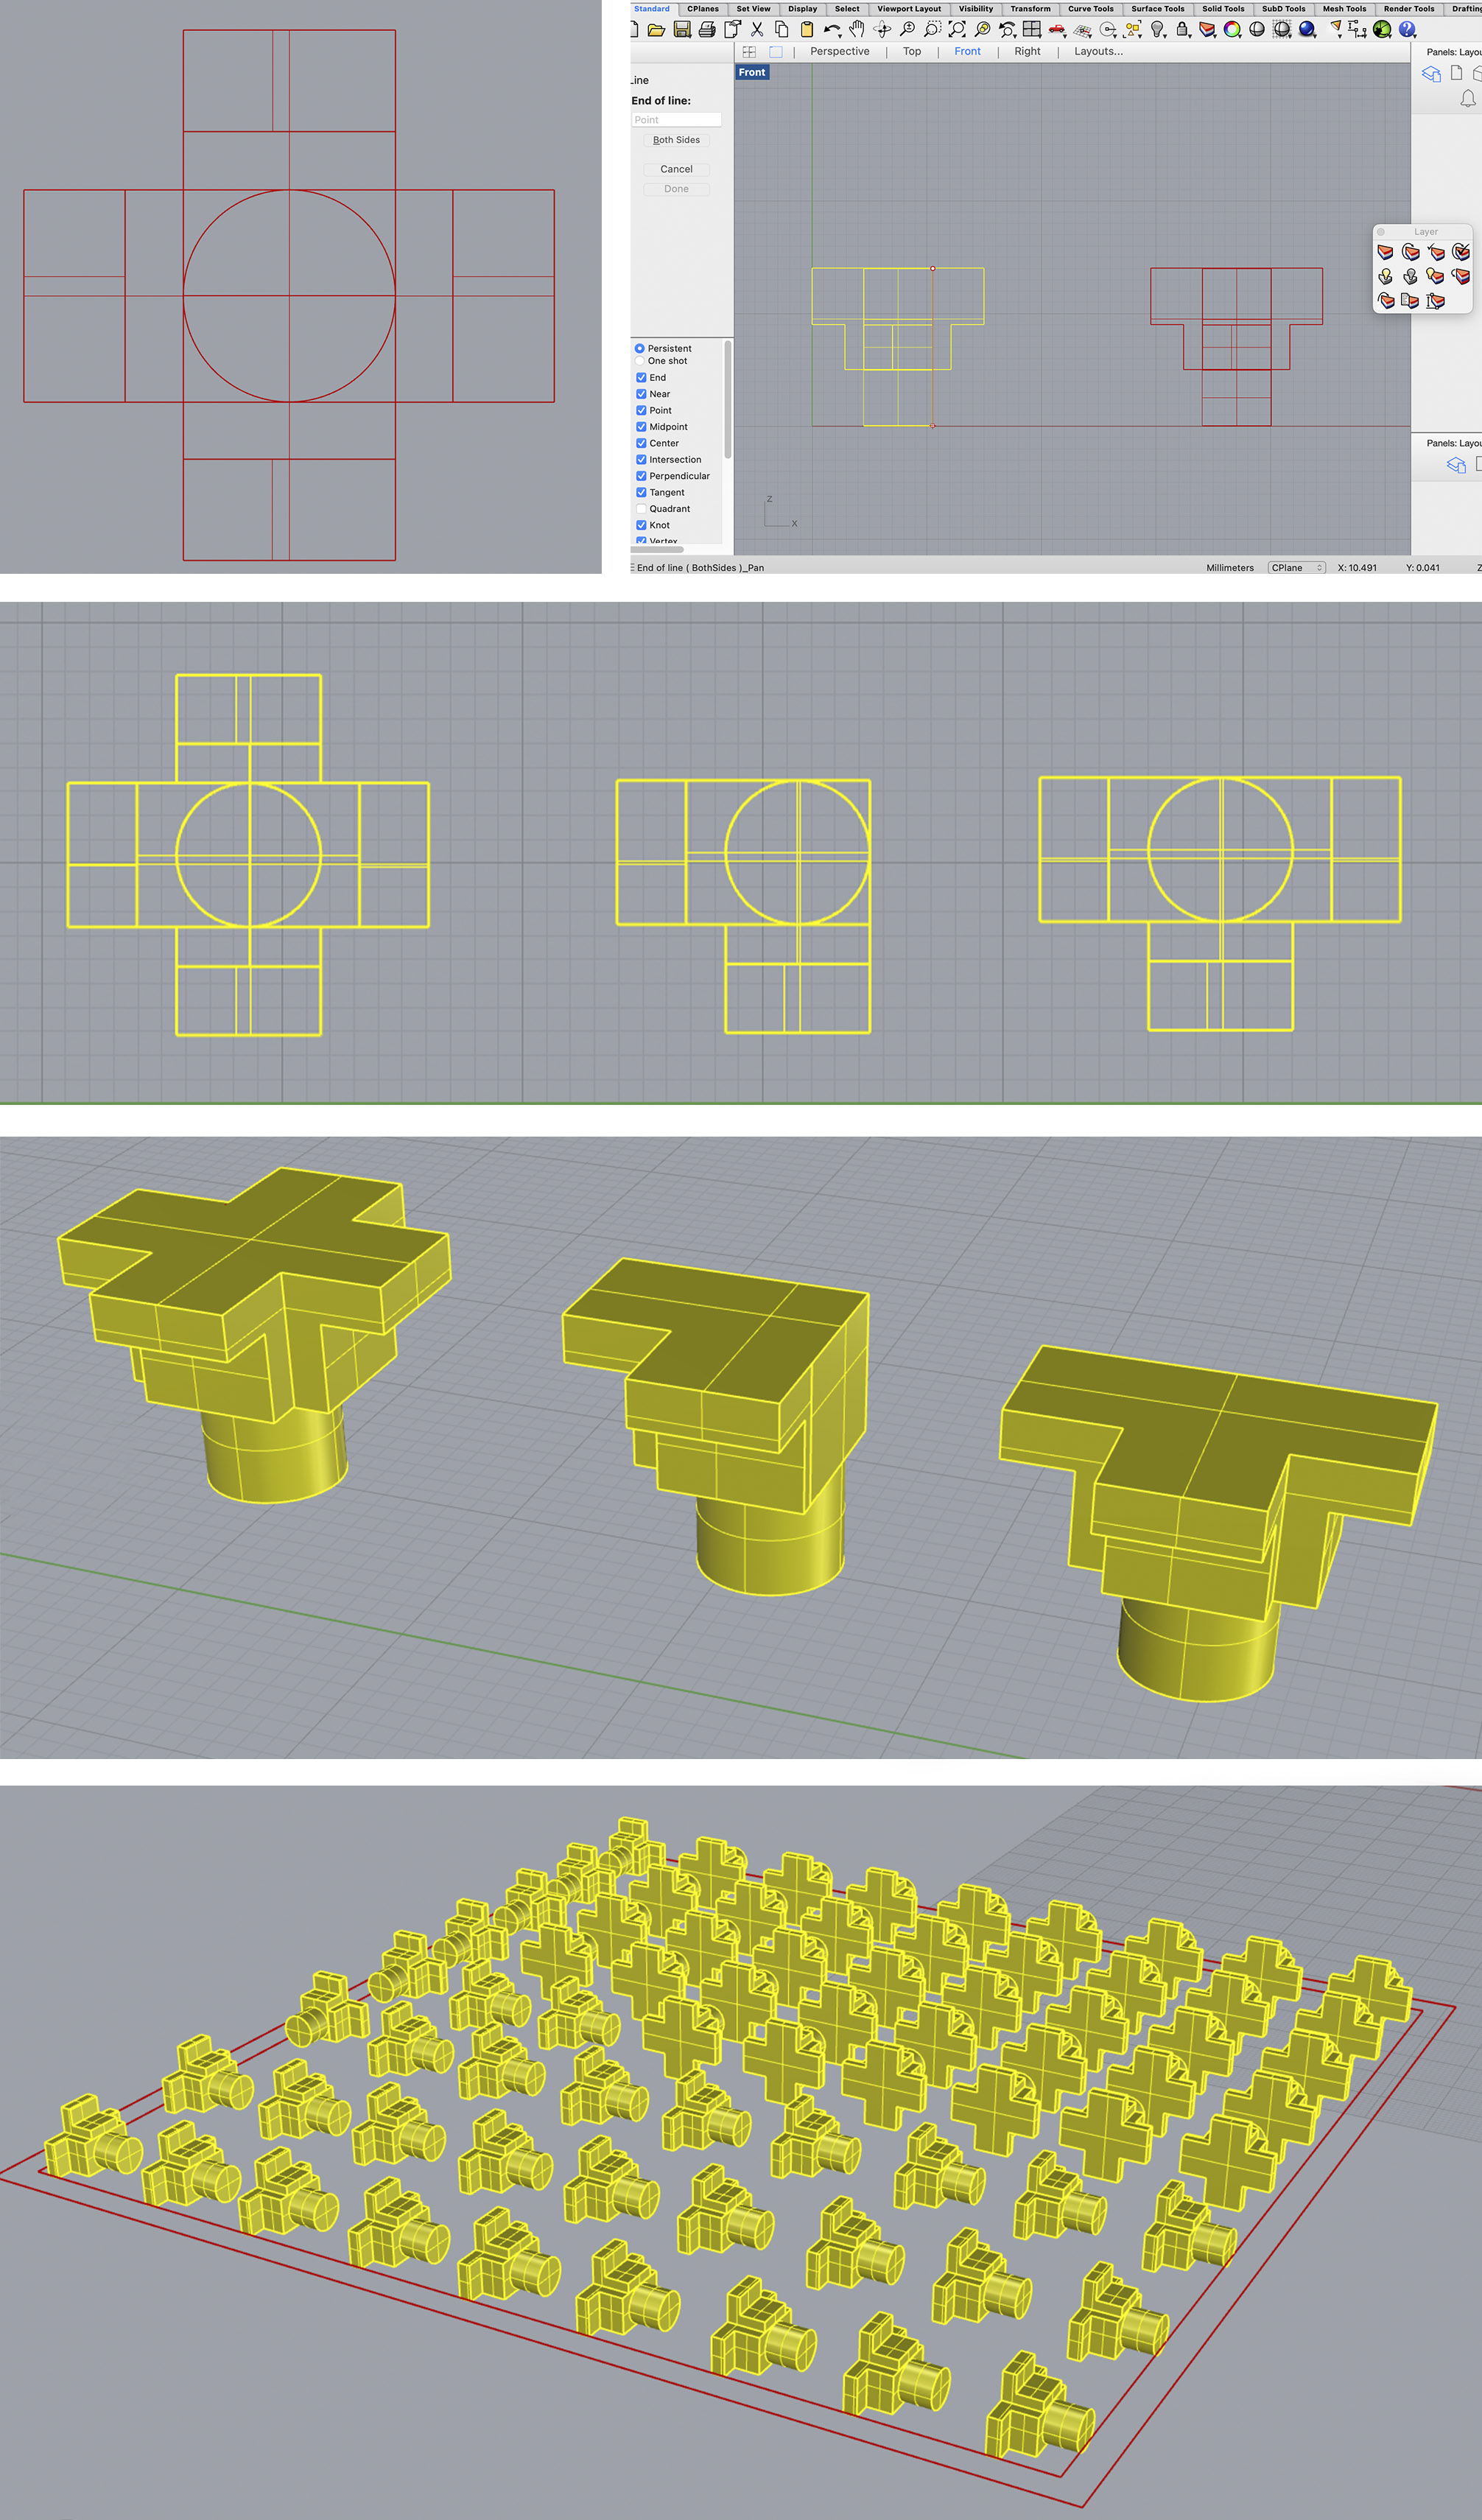
Then, I multiplicated all the little pieces in Rhino to print all that is required in one print.
Download the Rhino file to print.
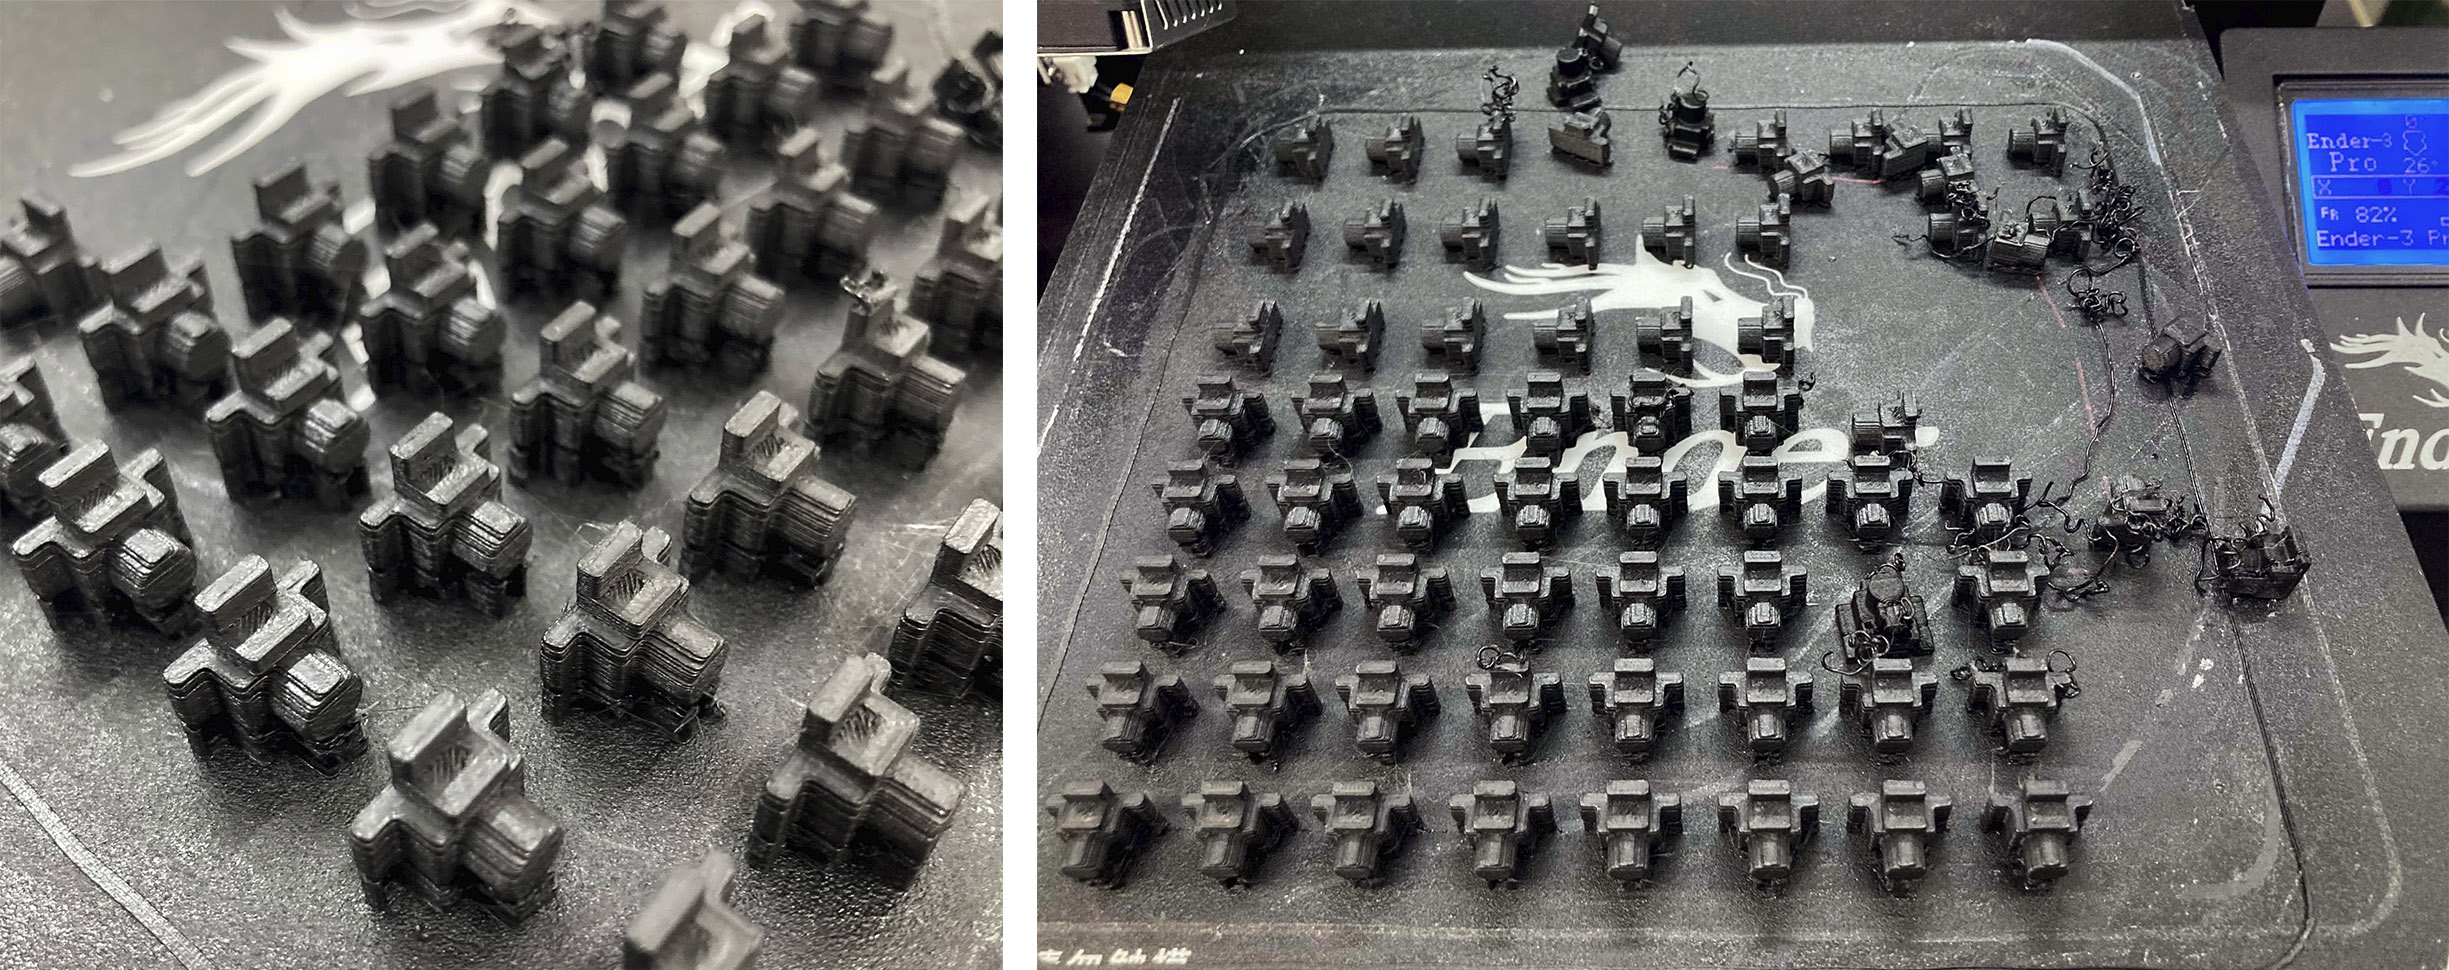
Time to print the 70 plugs!
We are going to use a black PLA.
Settings for the 3D Printer:
Vacuum CURA for taps de Emma
Now we could send the file with all the pieces to print at one time:
3D printer plugs de Emma
We let the 3D printer work the whole night.
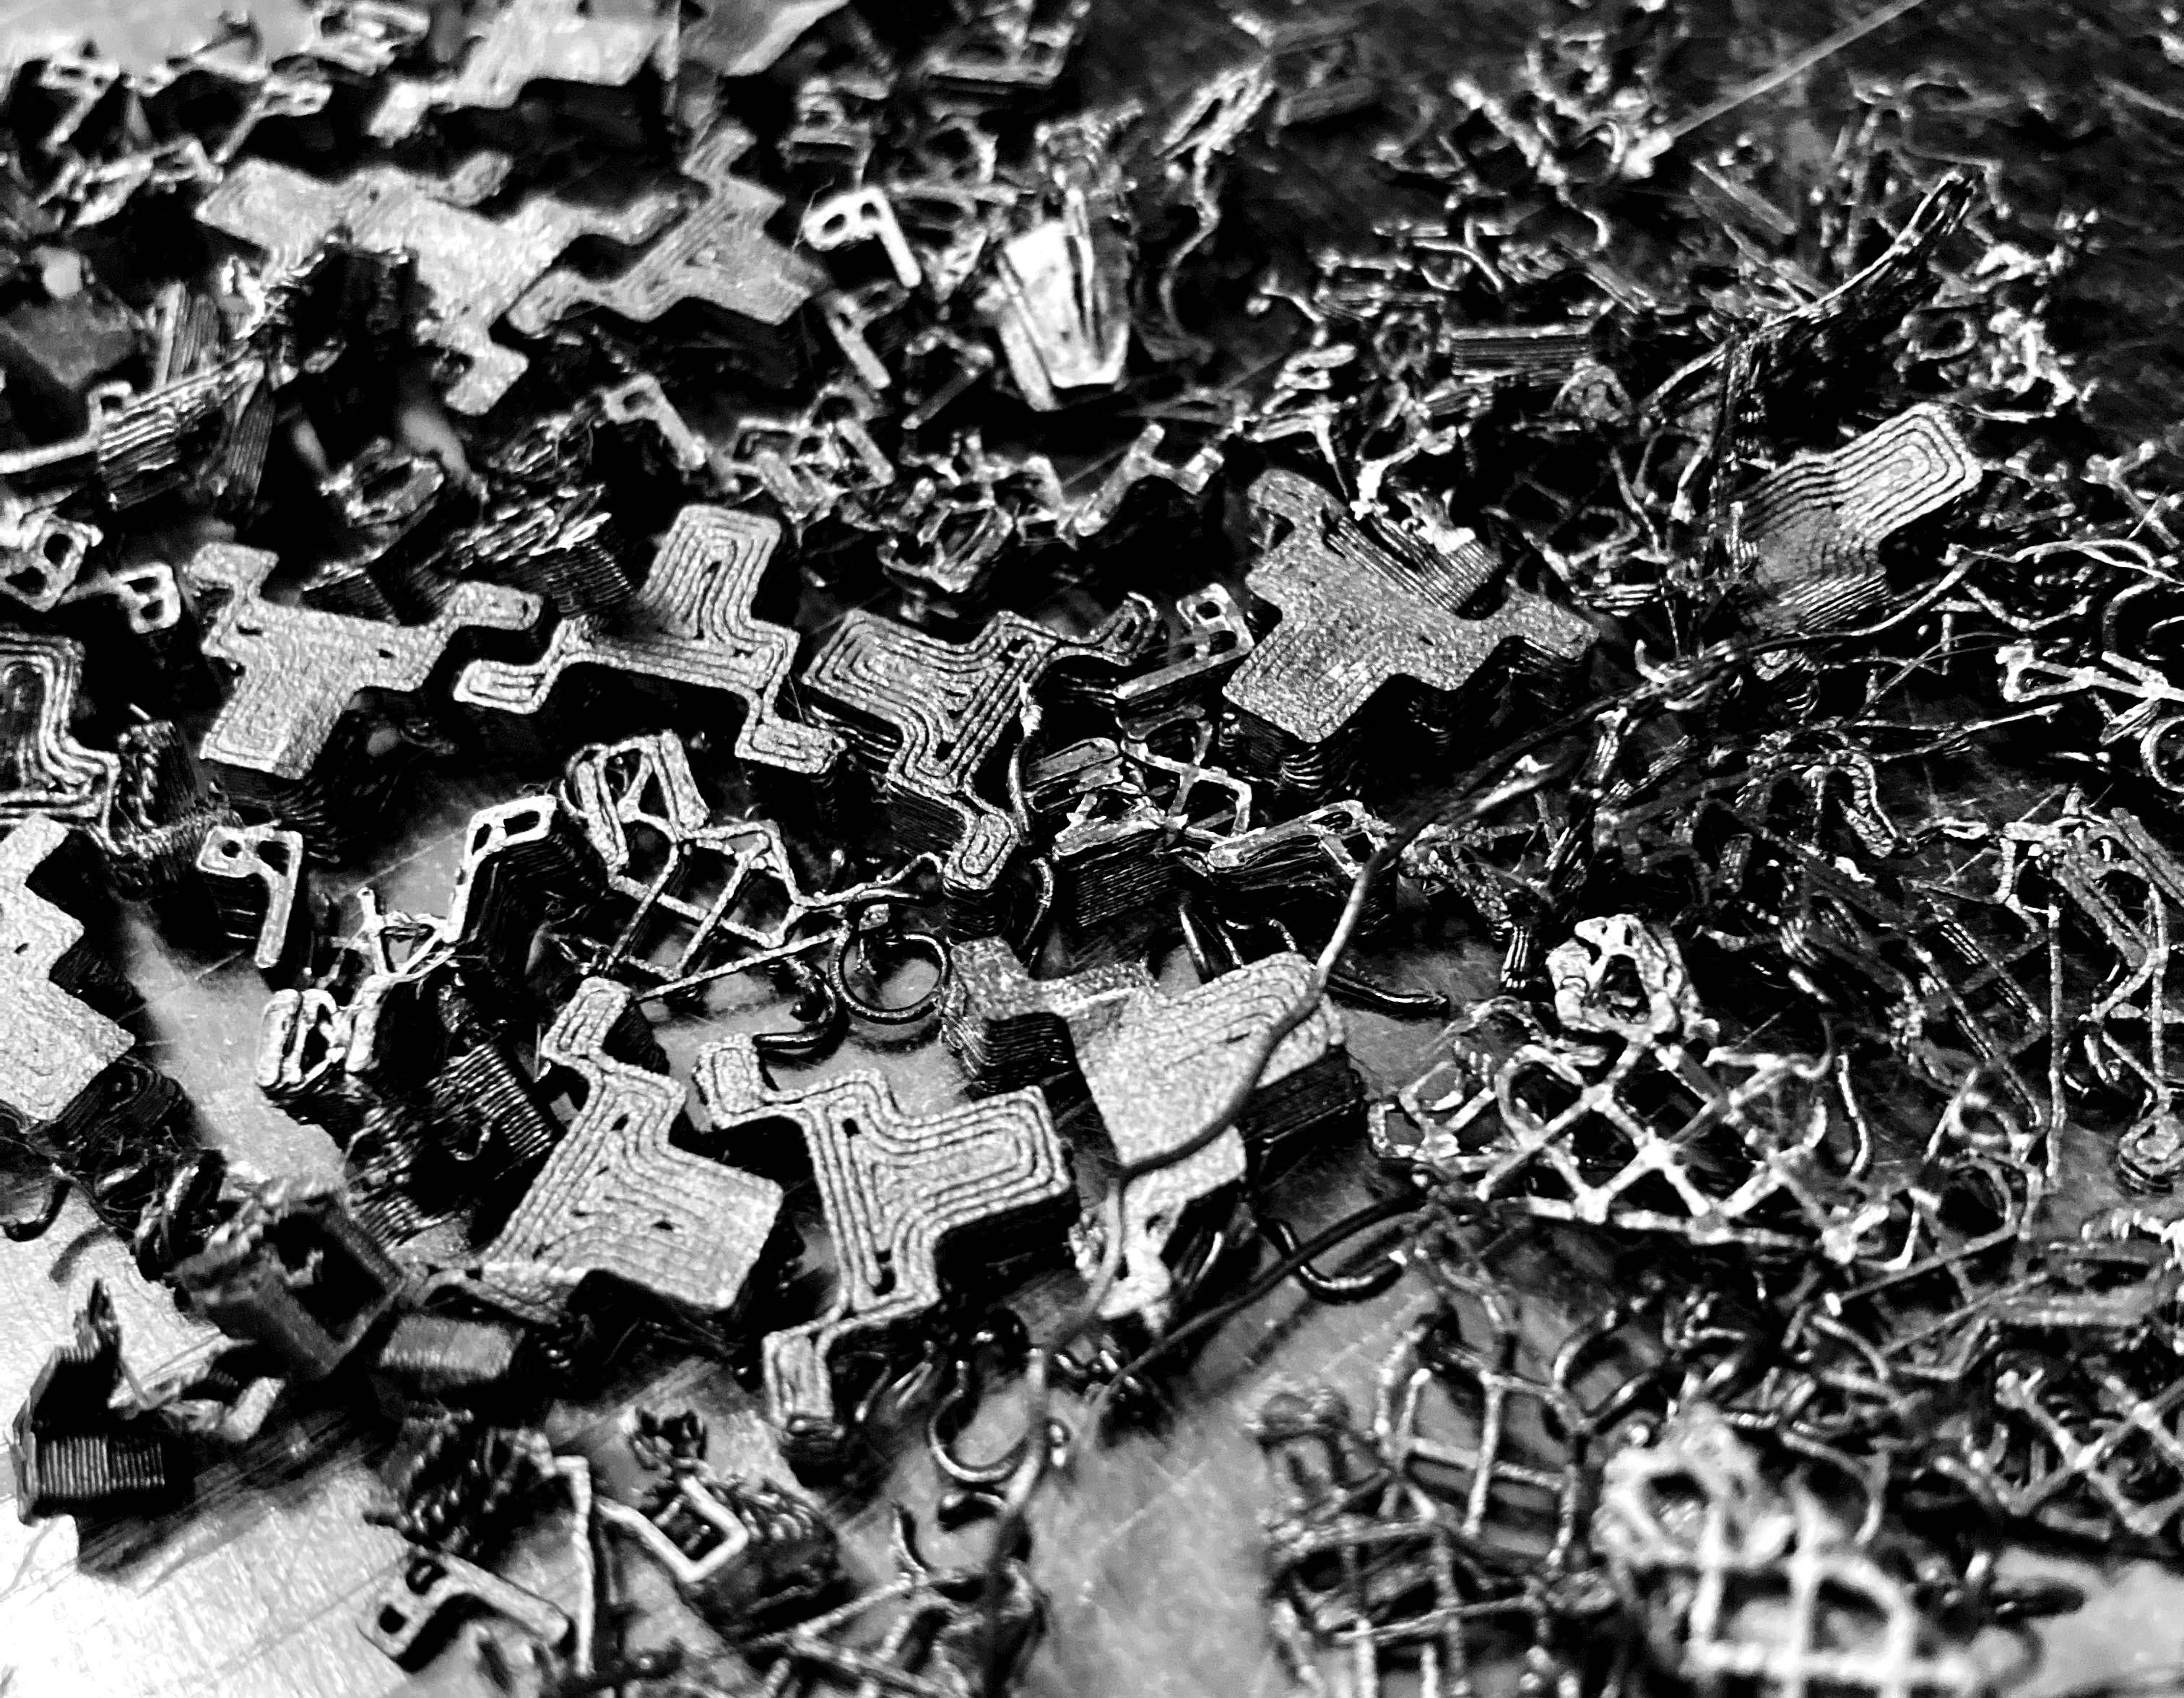
Unfortunately, while it was working some filament or plug moved on the bed, so I have some of them that the printer doesn't finish all the layers...
Despite the problem during printing, I do not require to print more pieces because most of them work correctly, so I could block the holes and vacuum.
One of the consequences to flip the blockage is the necessity of the bridges to support the plug, so it increases the printing time and the waste material.
Finally, all of them fit and could remove easily without breaking them!
Box
We create a cardboard box to keep all the little plugs in it.
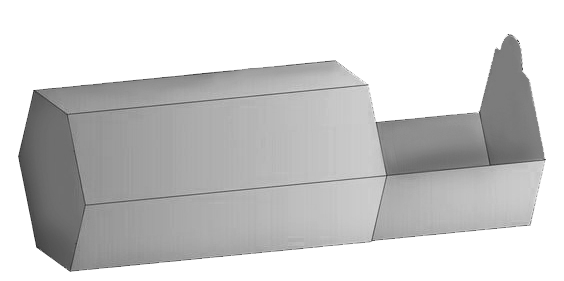
Created the box in Rhino, keep in mind to make the inside part of the box a little smaller to pass easly the drawer.
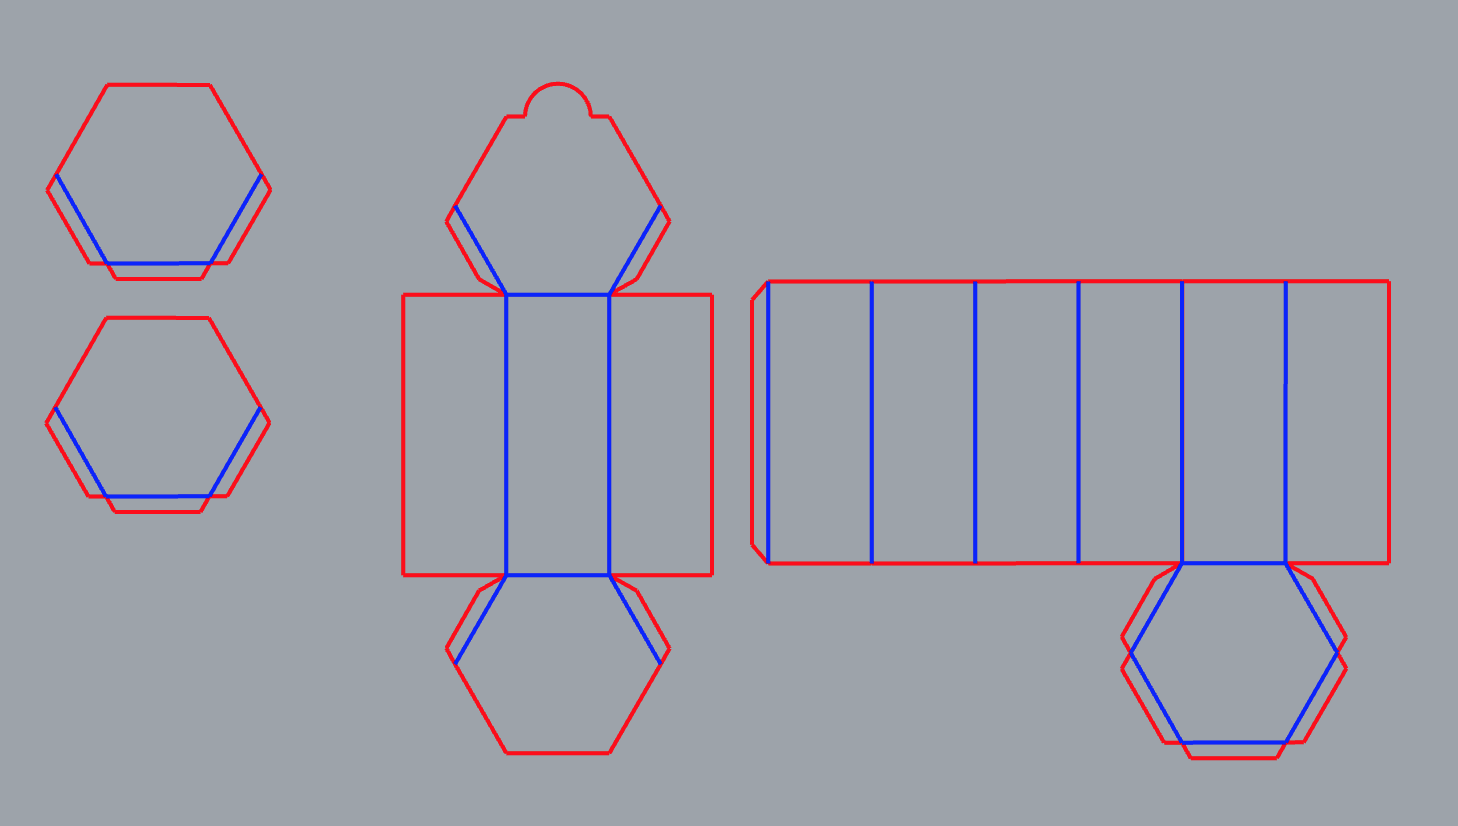
Remember, we will need two steps in the cutter machine, first the inside lines to engrave (blue) and finally the outside ones to cut (red). So, select different layers/colors for each one.
Download the Rhino file box here.
Time to cut!
The settings for the cardboard 4mm:
To ENGRAVE:
- Power: 80
- Speed: 100
- PPI/Hz: 10000
To CUT:
- Power: 40
- Speed: 1
- PPI/Hz: 10000

Let's construct the little box!
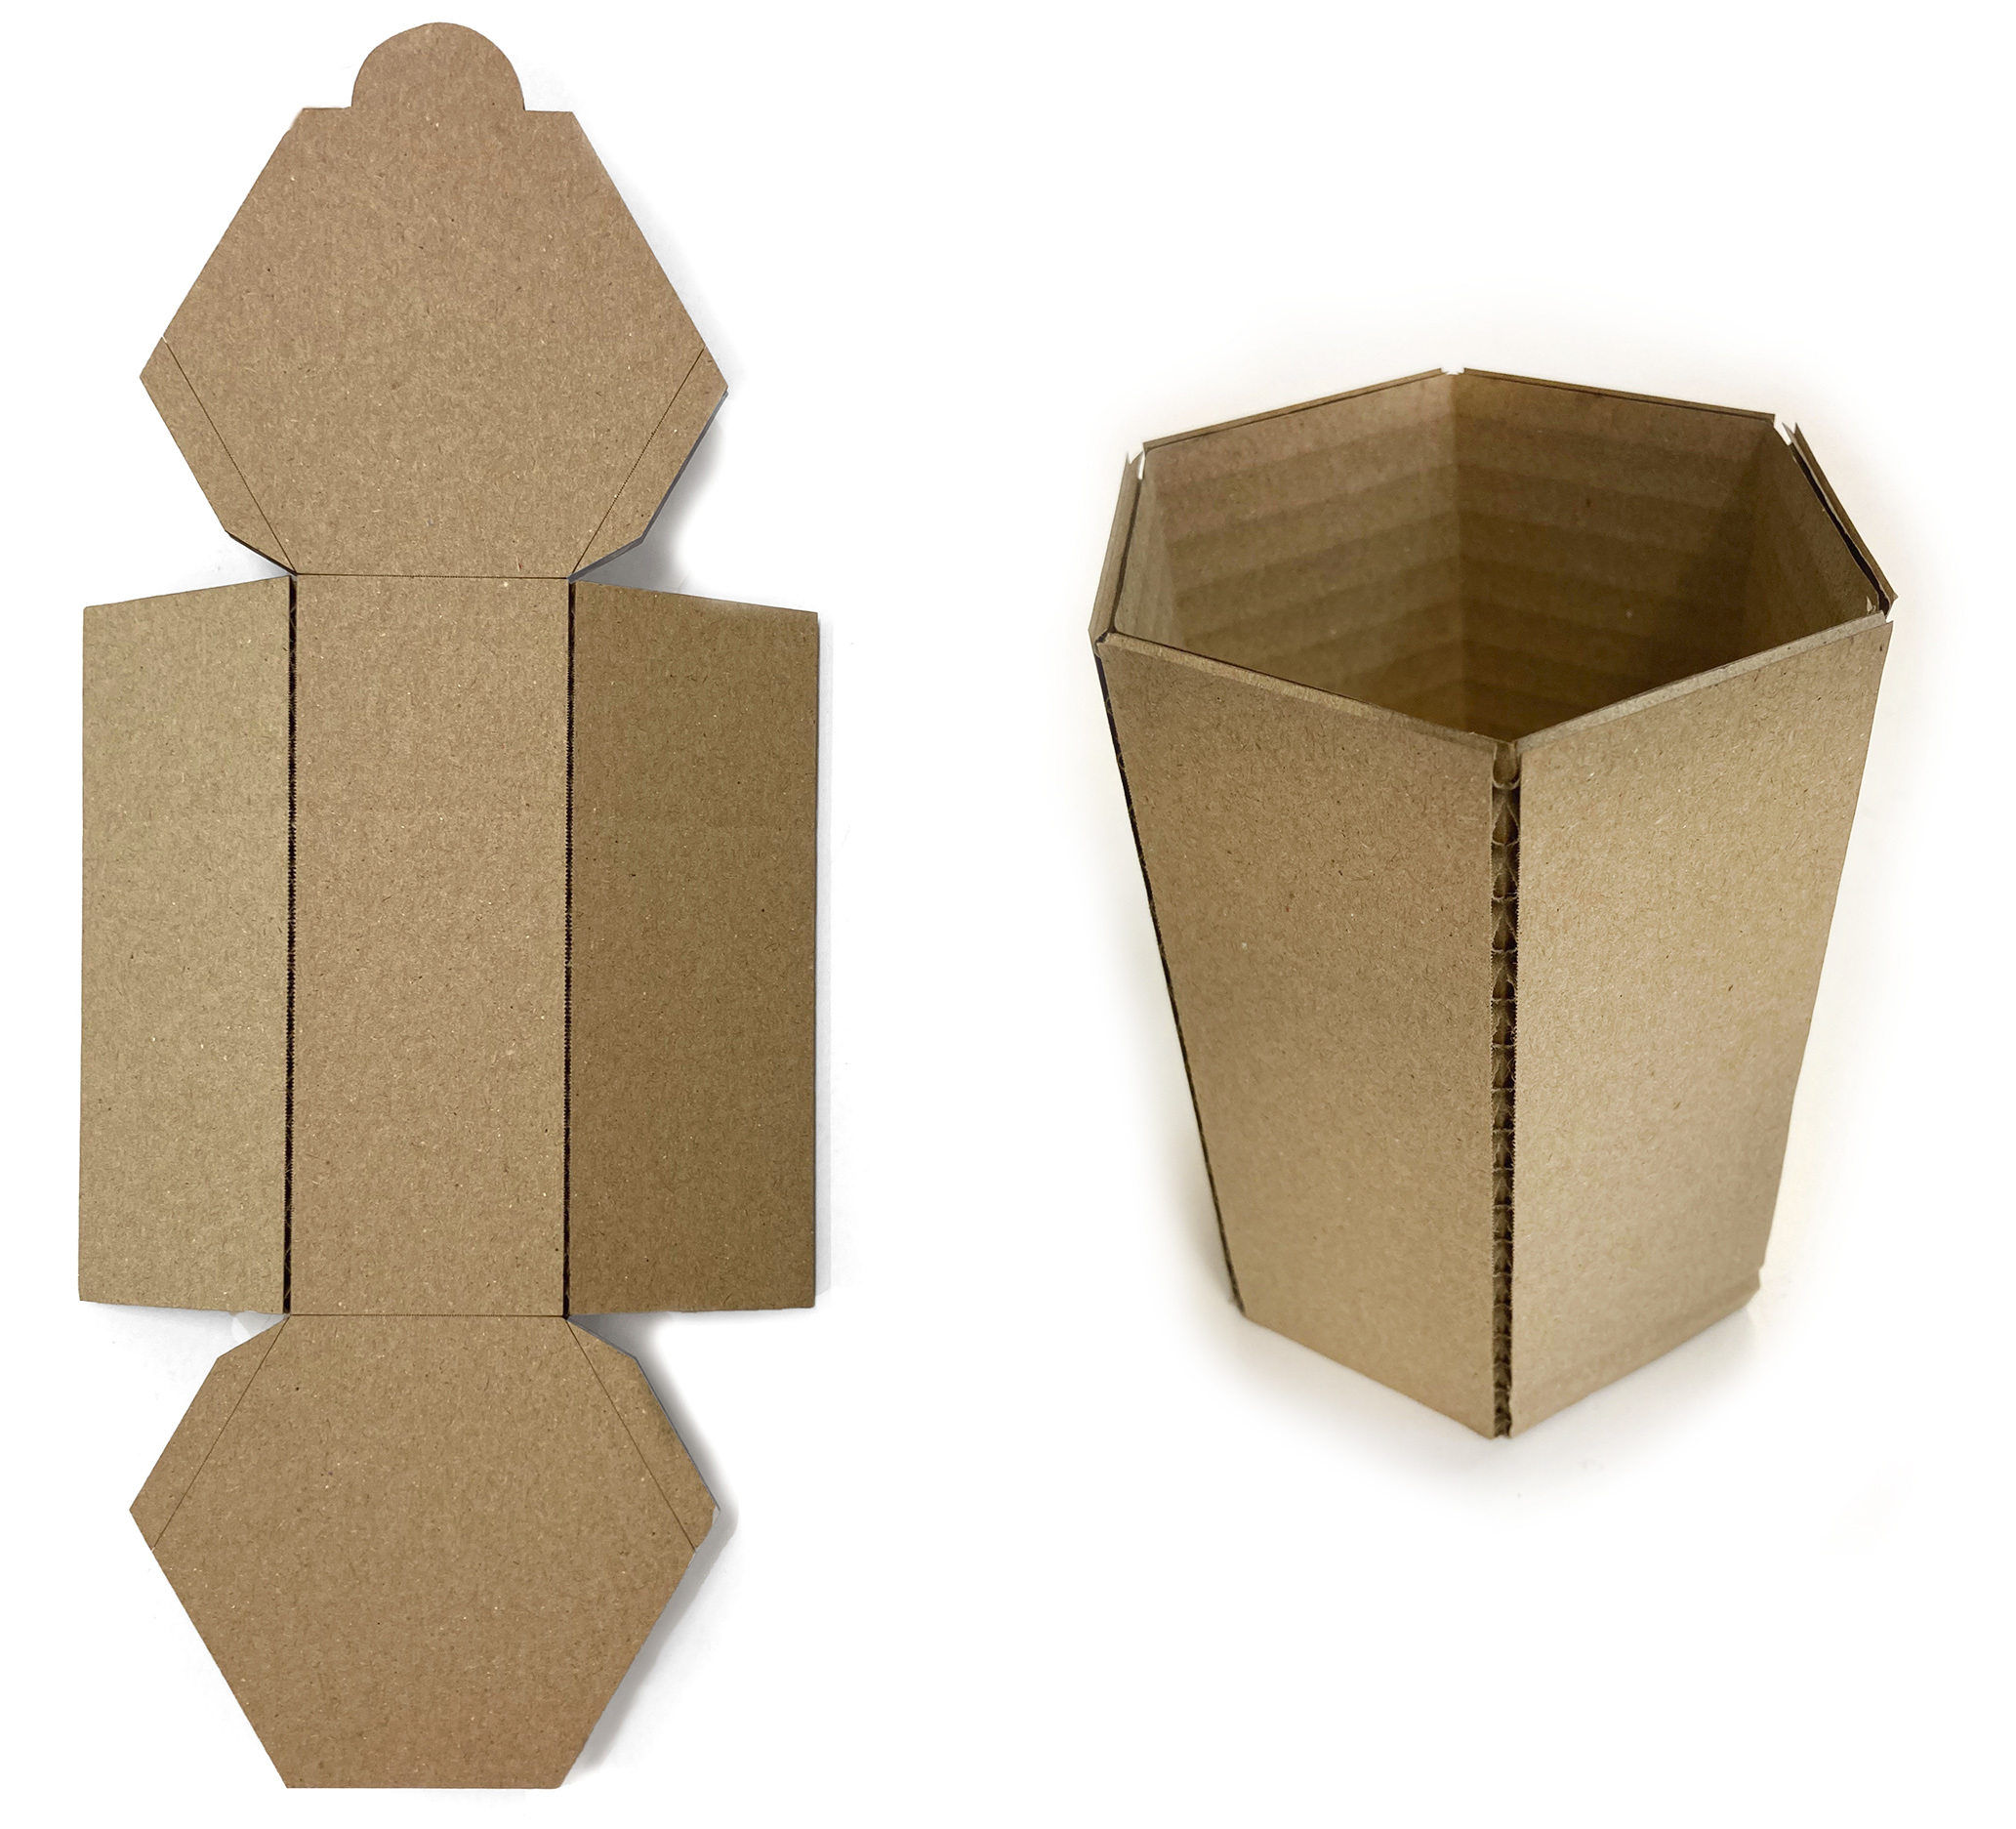
To join the pieces I use contact glue.
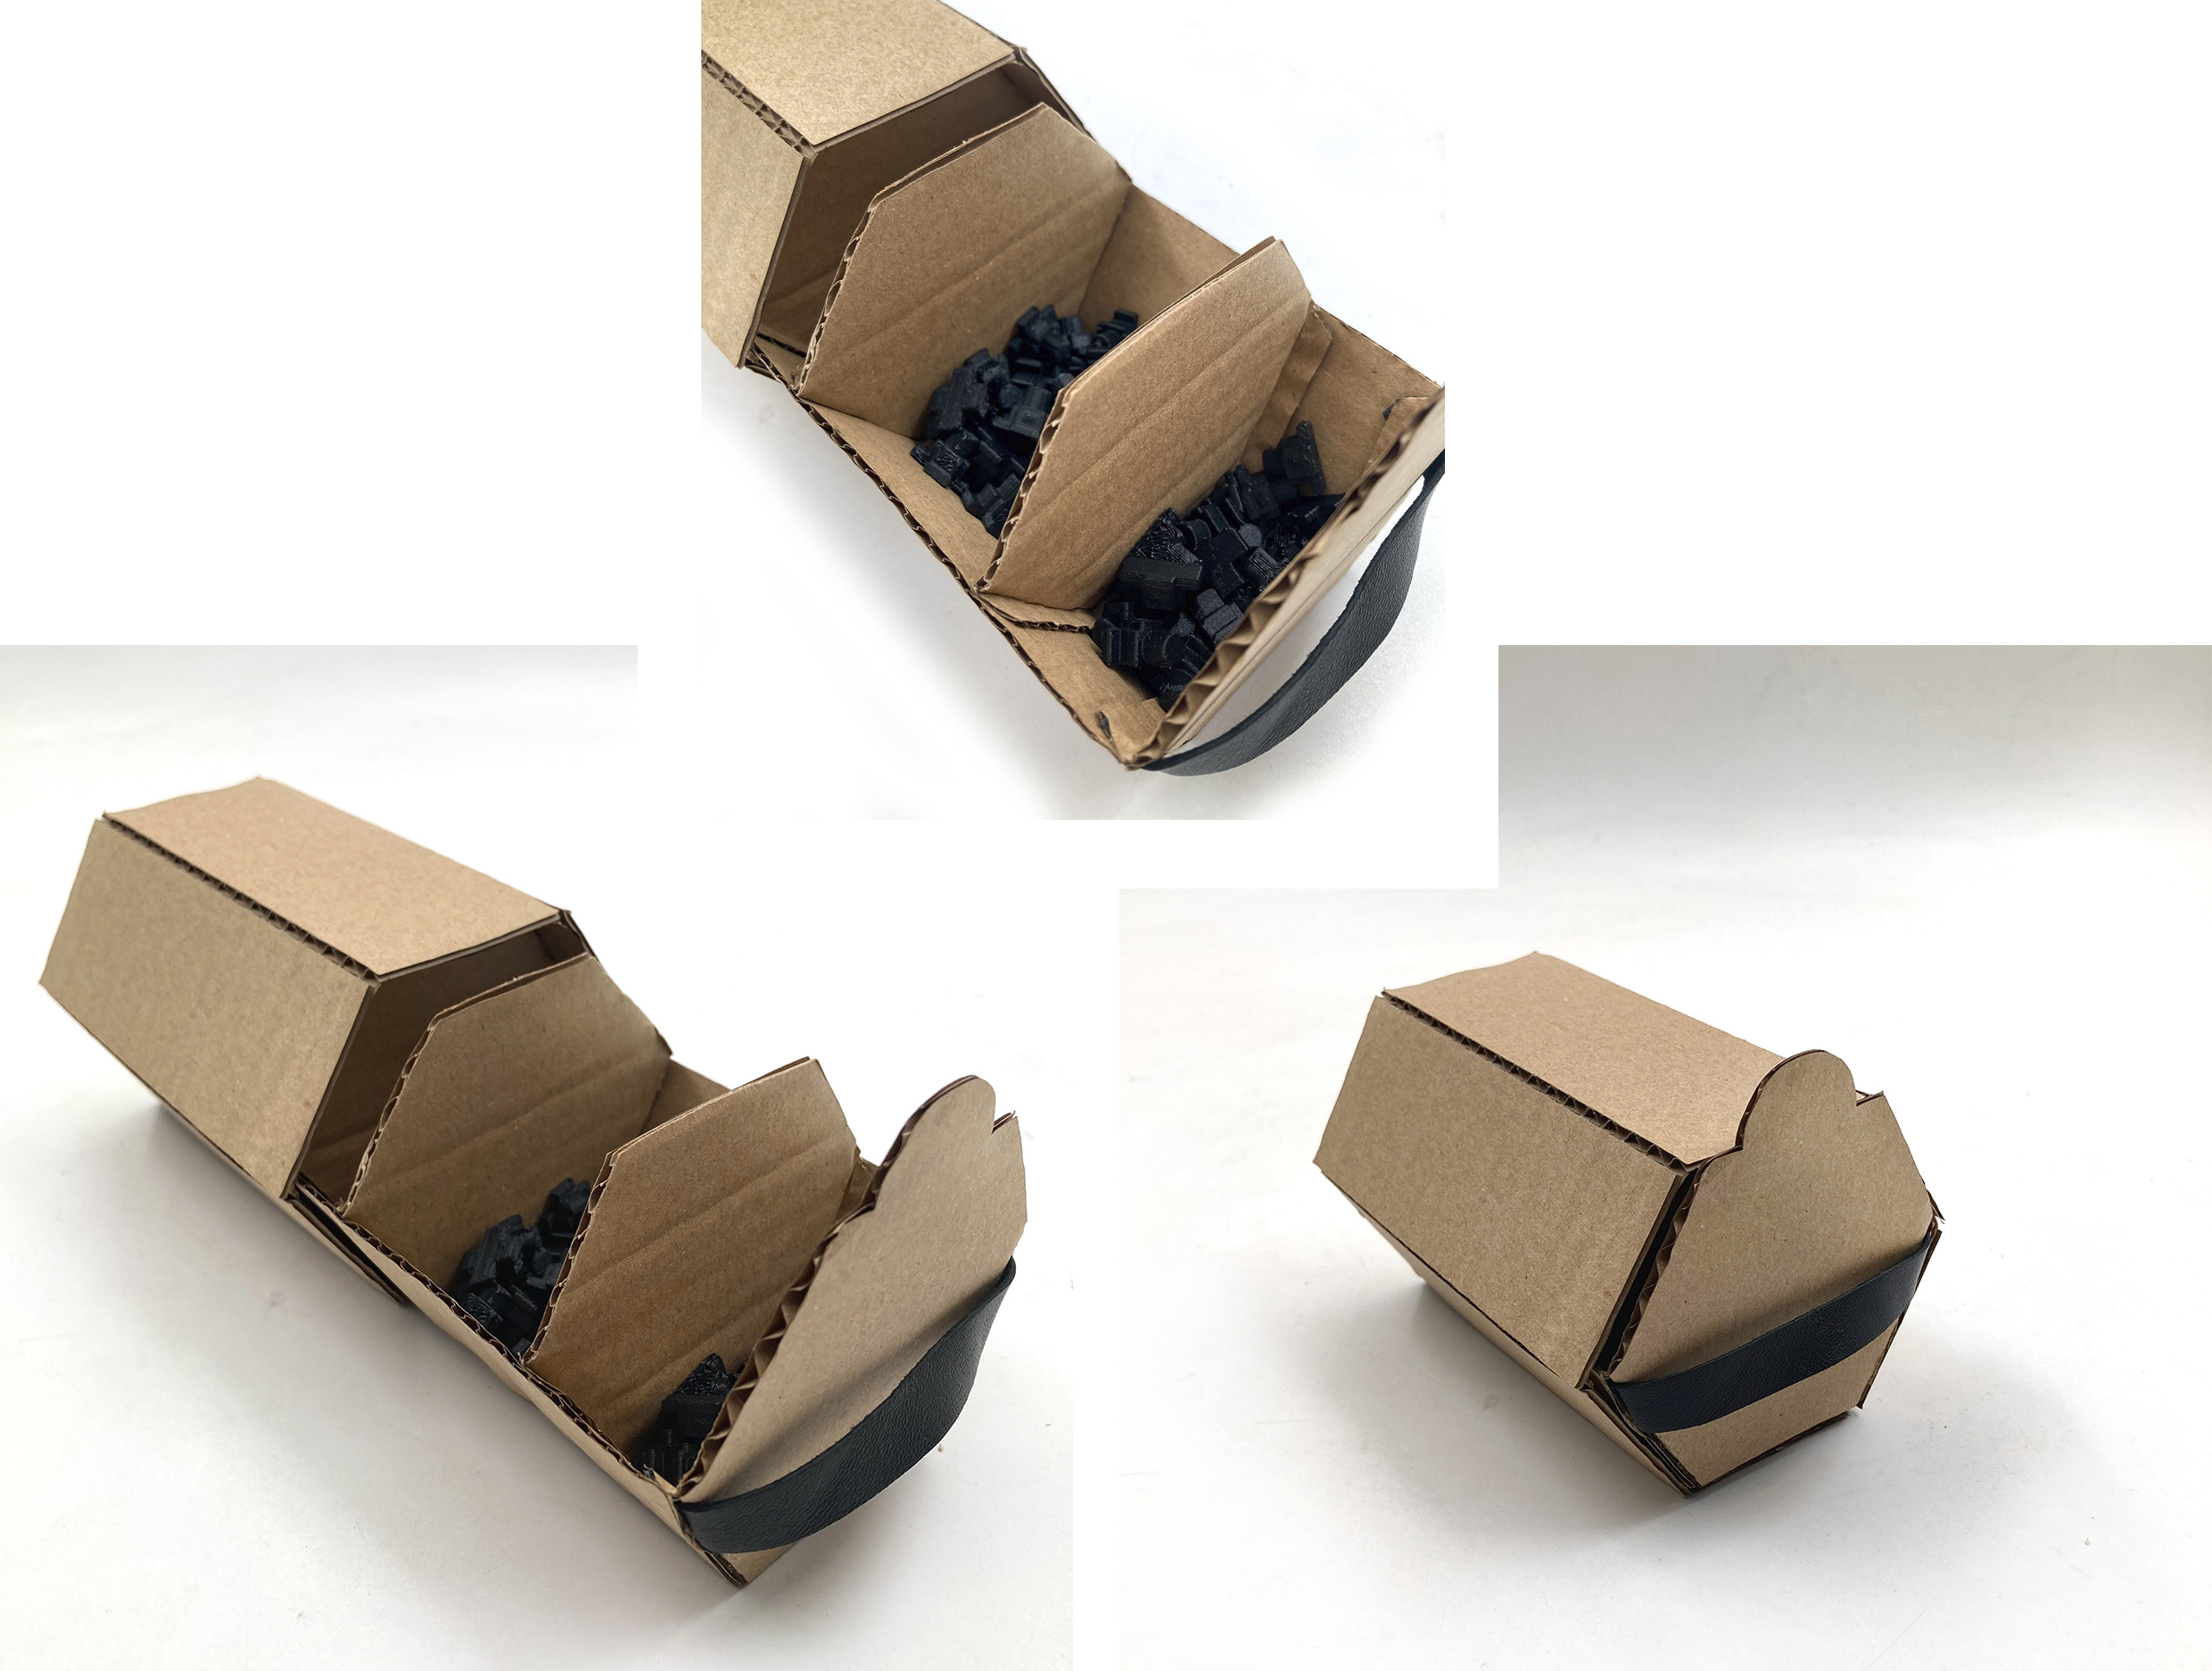
To be easier to open the drawer and not damage the cardboard after a few times of usage, I add a black leather strip as a handle.
Result
THE VACUUM MACHINE
Let's test the vacuum machine with a mold and a piece of leather:
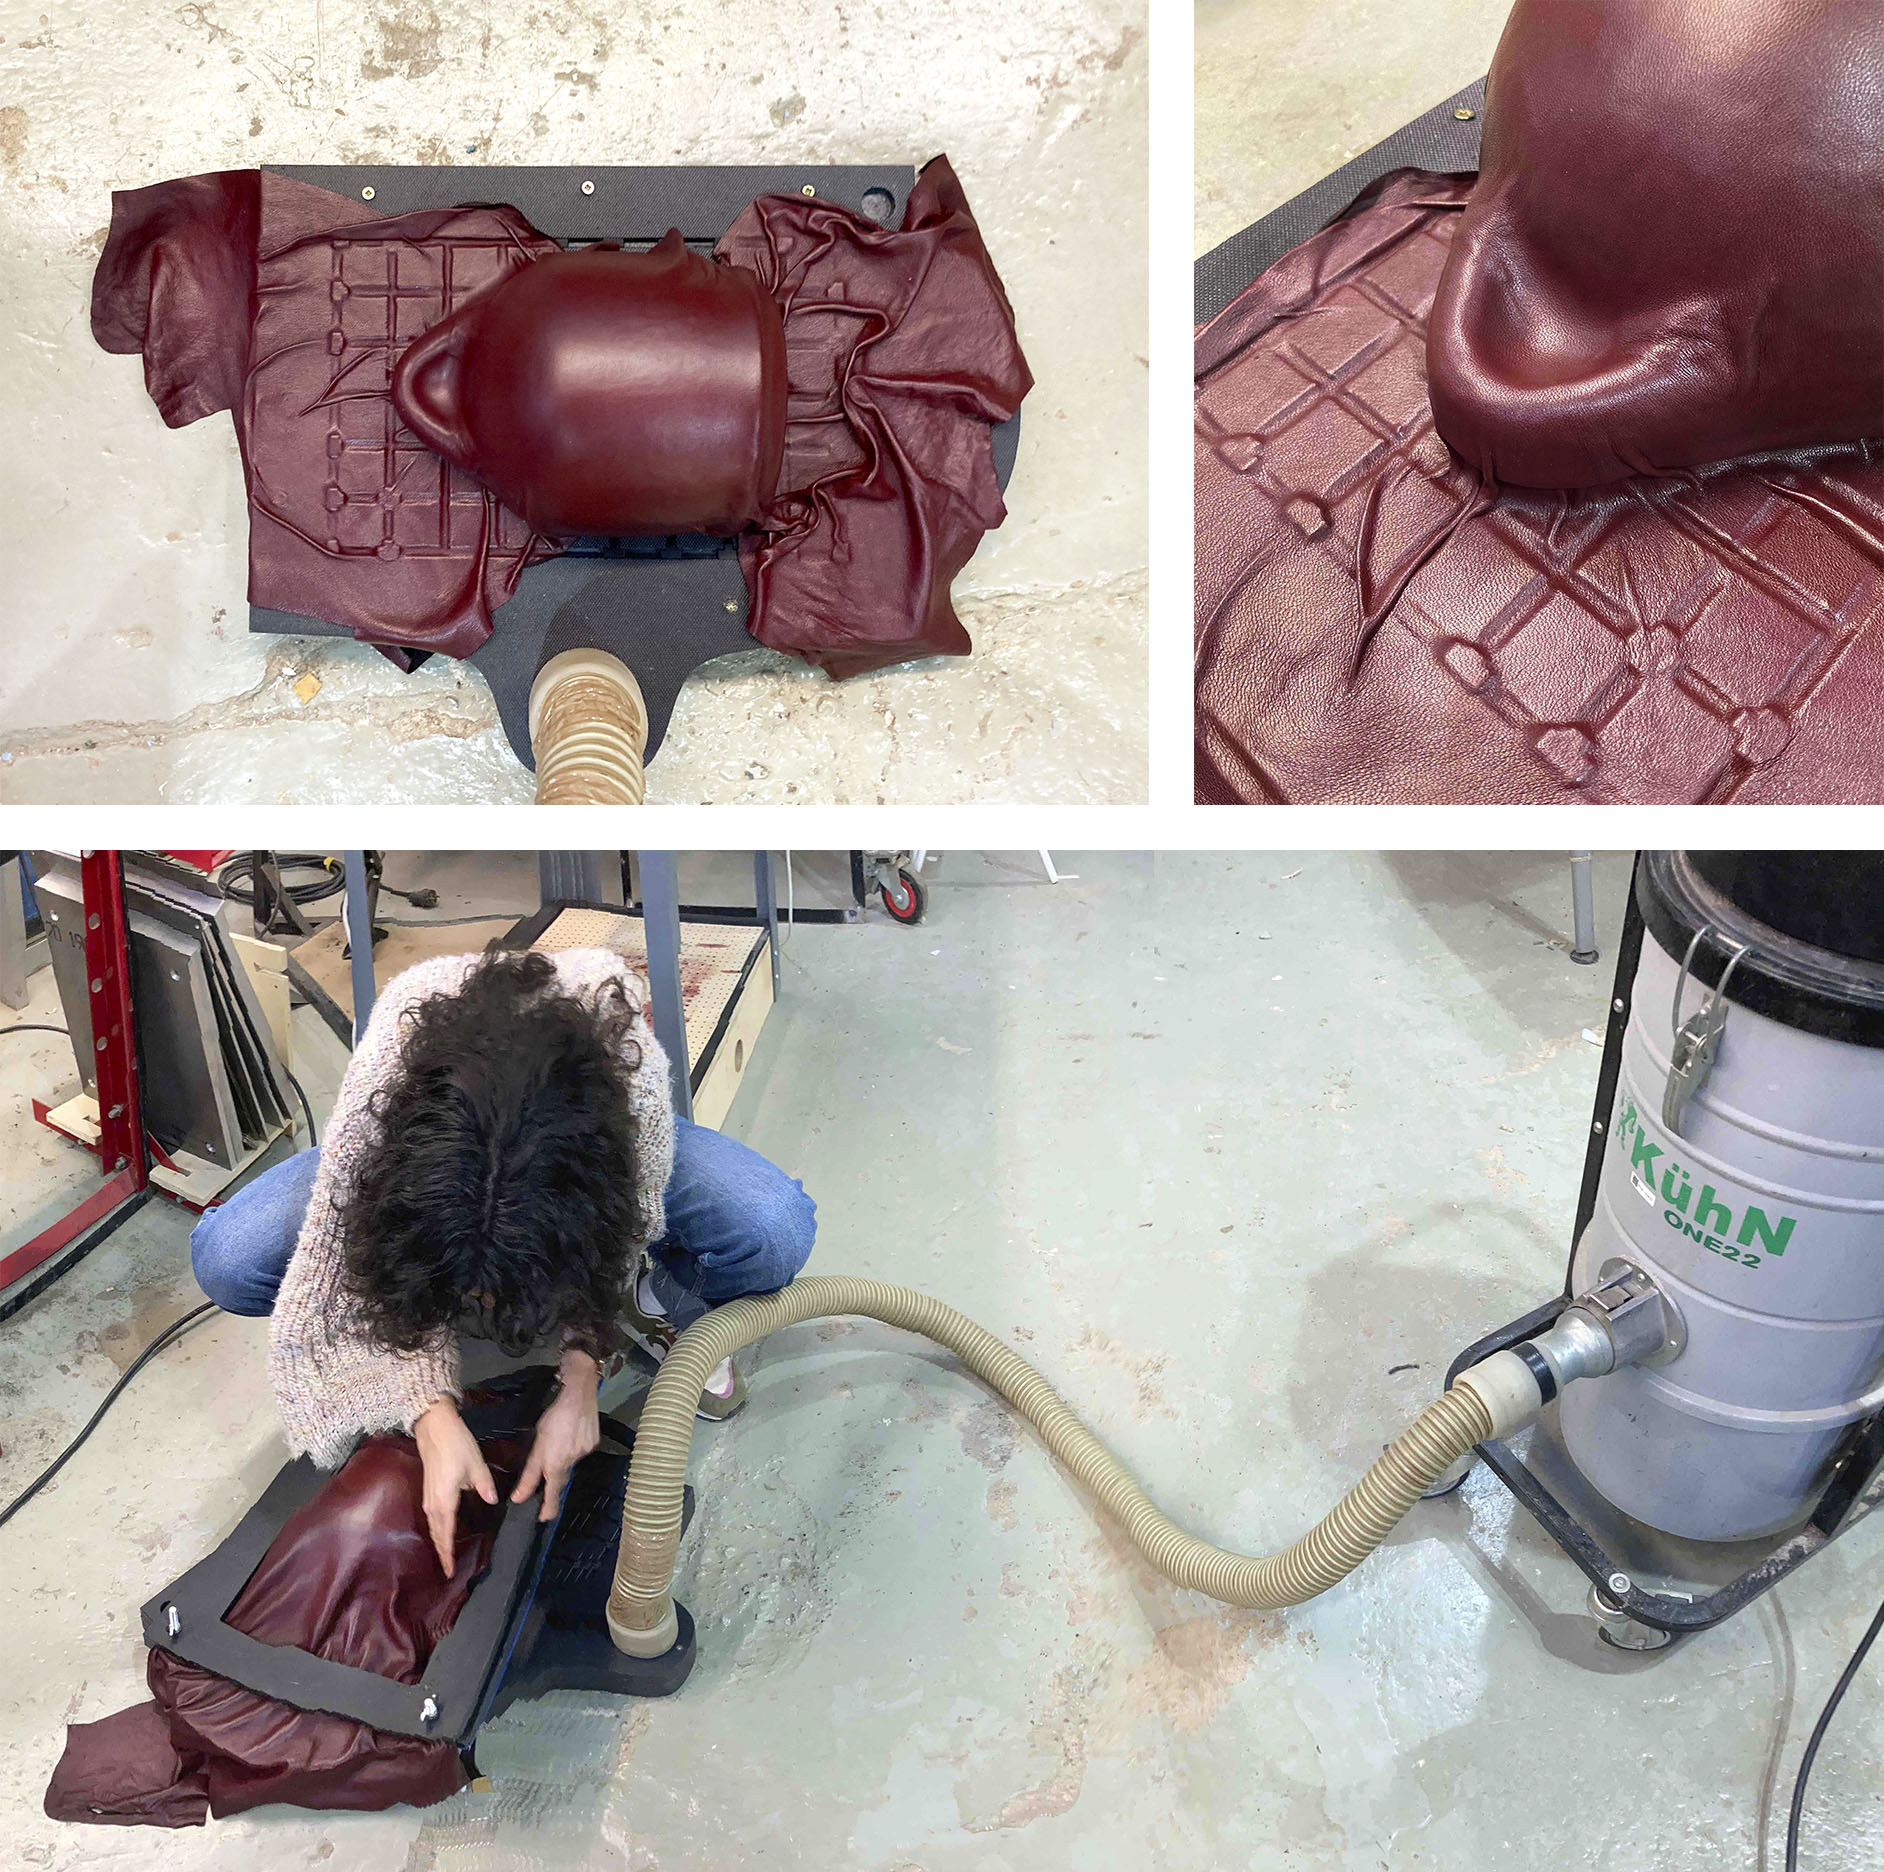
Take a look at the following video to see the final test:
Final test Vacuum de Emma
The machine functions ideally!!
To conclude,
I am happy to learn how to build the vacuum machine "on my own", however at some point, it would be easy to share some work as the documentation process, and the designs in Rhino... to accelerate the process.
Somehow I feel that I need more hands but I only have two hands...
Additionally, this week I am super grateful to Josep, Eduardo, and Petra for aiding during the construction of the machine.
👜🕳 See you the following week!!🌪👞