5. E-textiles
I never used to have an interest in wearables E-textile because instead, it is for a particular custom/sculpture I do not find a useful application for day-to-day. Also, the technic knowledge for manage with electricity it's seems insane to me, a new language!
Inspiration
Some investigation...
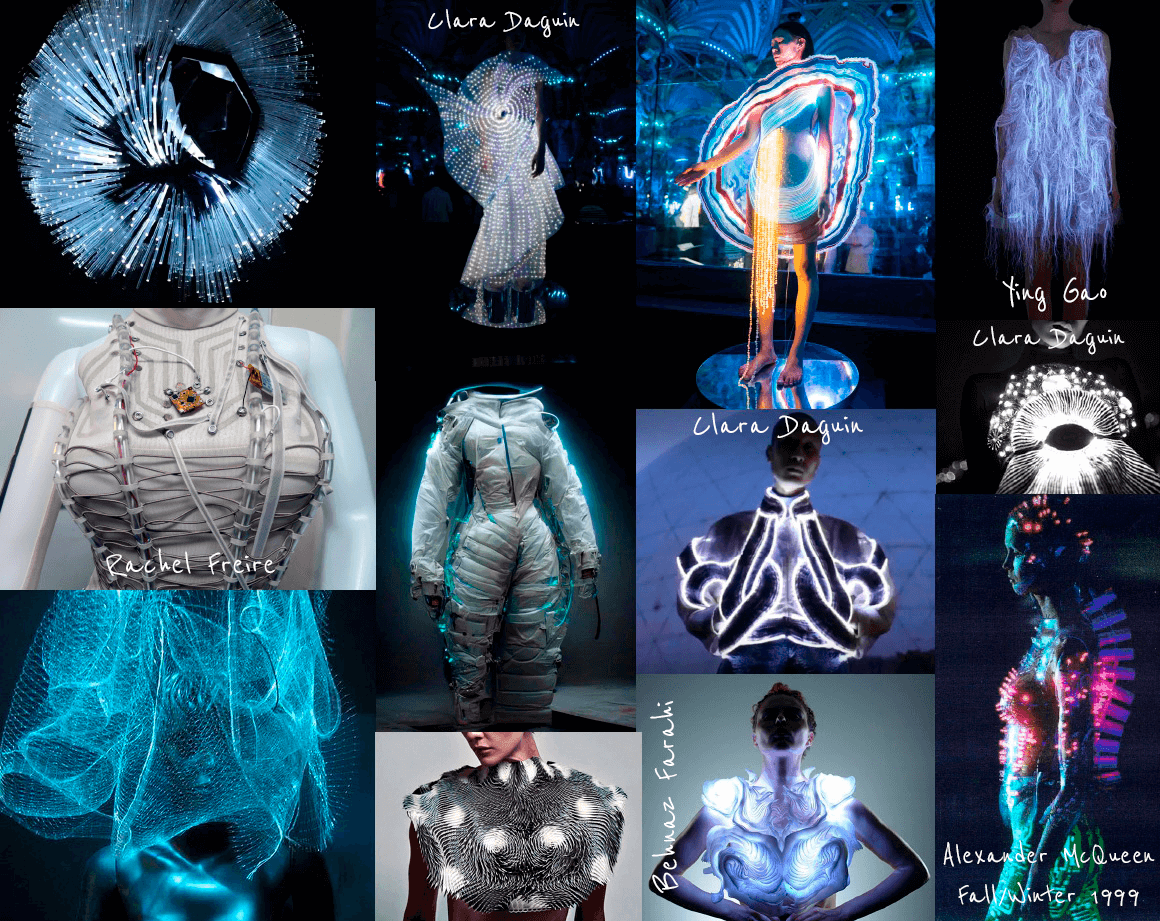
Reference artists
- Audrey Briot
- Irene Posch
- Jessica Stanley
- Lara Grant
- Rachel Freire
- Jessica Marsh
- Irene Posh and Ebru Kurbak
- PolySense
- Clara Daquin
- Behnaz Farahi
E-textiles introduction
Concepts
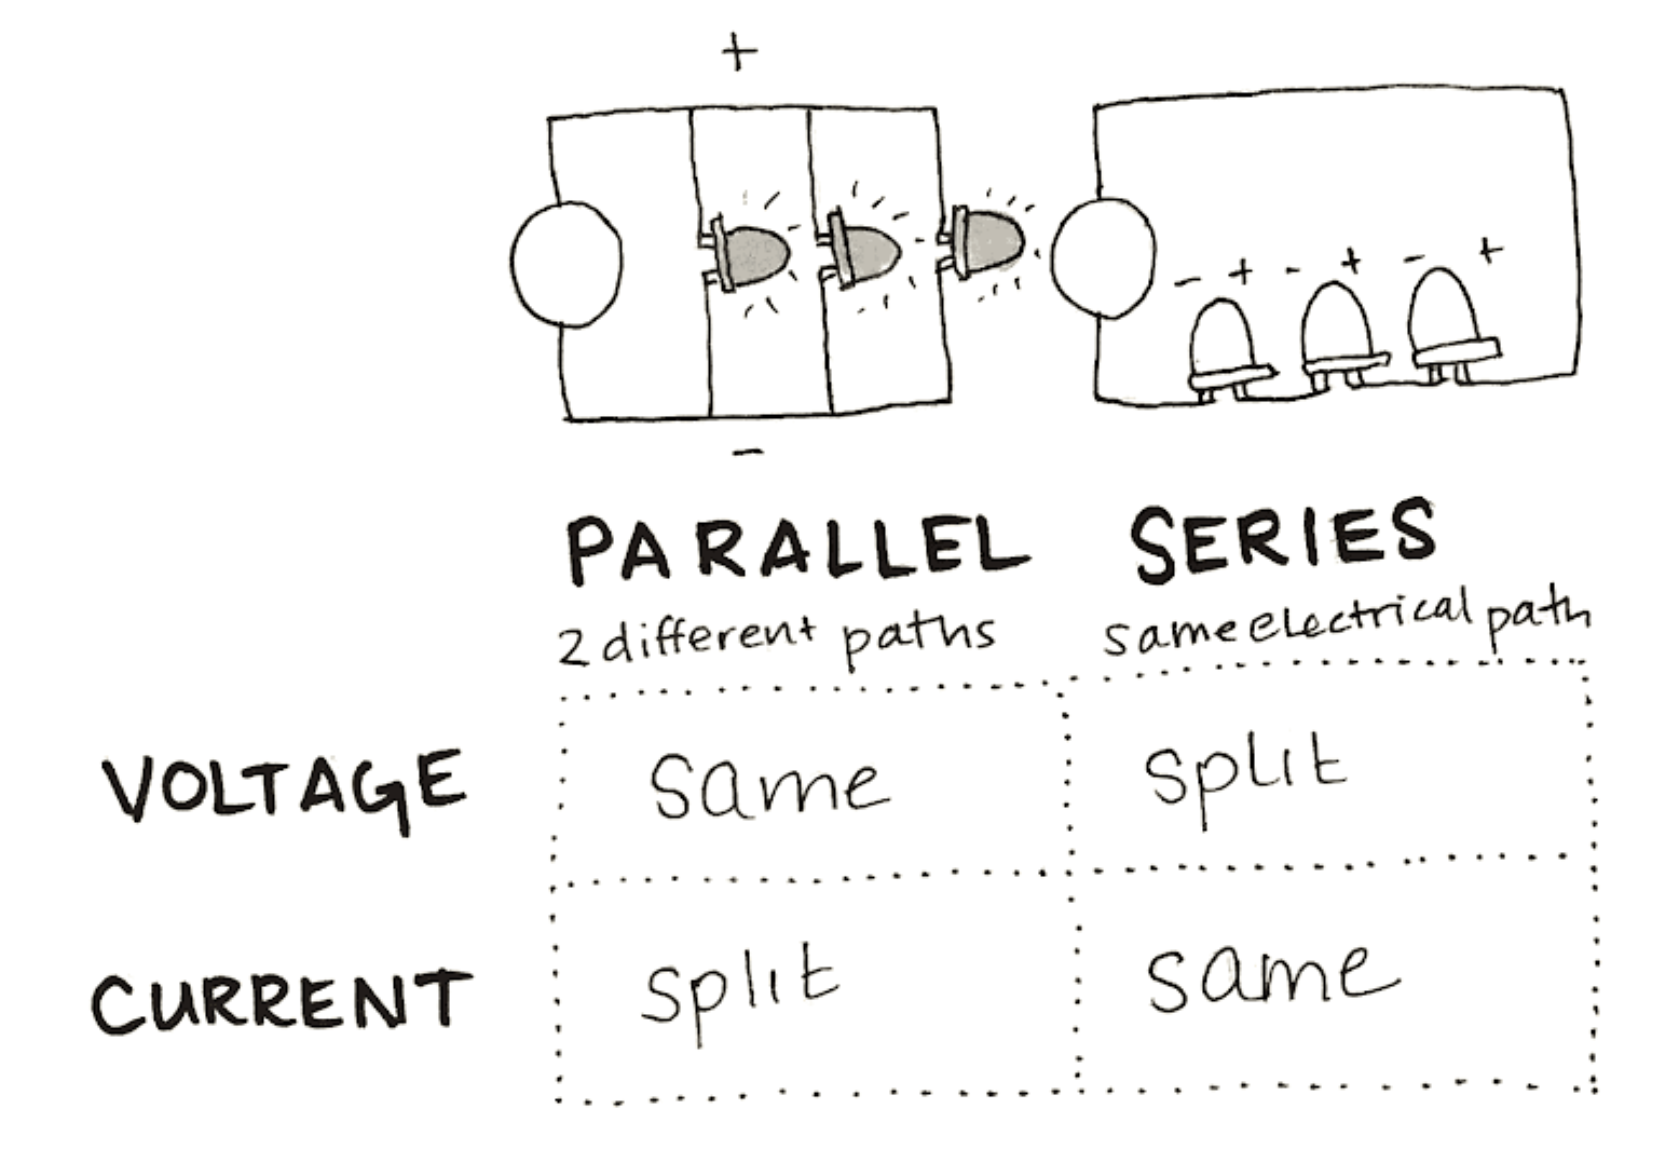
- Circuit: Is a path for electricity (moving electrons) to flow
- Electricity direction: Counterclockwise, to the positive LED power and return to the negative battery side.
- Traces: Path of conductive material that electricity moves along the circuit.
- Sensors: An INPUT which the information or data that enters a system, like a button press. Use resistence to get a broader range of values. Example: more or less light depending of the current flow. There are 2 types the Digital switches On/Off and the Analog sensors that gets a range of values.
- Switches: Is a break in a circuit.
- Arduino: An open-source electronics prototyping platform. Is a hardware and software.
- Input: Button
- Output: LED, speakers…
- Pin: How inputs or outputs communicate with Arduino.
- Breadboards: To prototype our first circuit.
- Resistors: Limits the amount of electricity that can flow through a certain point. You could put before or after a LED, will be the same. Example: We have 5V in the circuit, and two LEDs of 2,2V each one, so 2,2V + 2,2V = 4,4V 5V - 4,4V = 0,6V We need the resitor to equilivrate the difference.
- IDE: An integrated development environment is a software application that helps programmers develop software code efficiently. It increases developer productivity by combining capabilities such as software editing, building, testing, and packaging in an easy-to-use application.
- AC: Alternating current, a type of electrical current in which the current repeatedly changes direction. At home we have AC.
- DC: Direct current, electrical current that always flows in one direction.
- LILYPAD: Was the first Arduino for wearables (2006).
- GND: Grown, (-) we use the black color.
- VCC: (+), V+ or +V
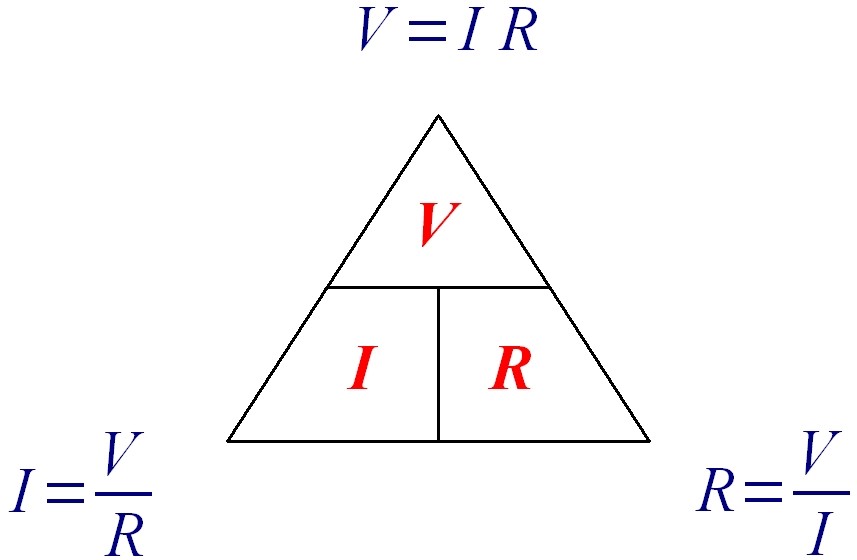
Ohm’s law
-
Volt: Mesure in Vols (V). Is the electrical pressure between two points. The power of the electricity we will have. One LED needs 2,2V.
-
Resistance: Measured in Ohms R : the amount of material that resists the flow of current.
-
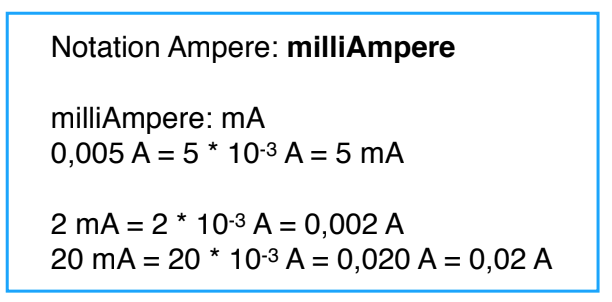
Current: Mesure in Amps (I): Rate at which electrical charge flows. How much quantity.
Remember:
Higher is the resistance, lower is the current. Lower the resistance, the higher the current.
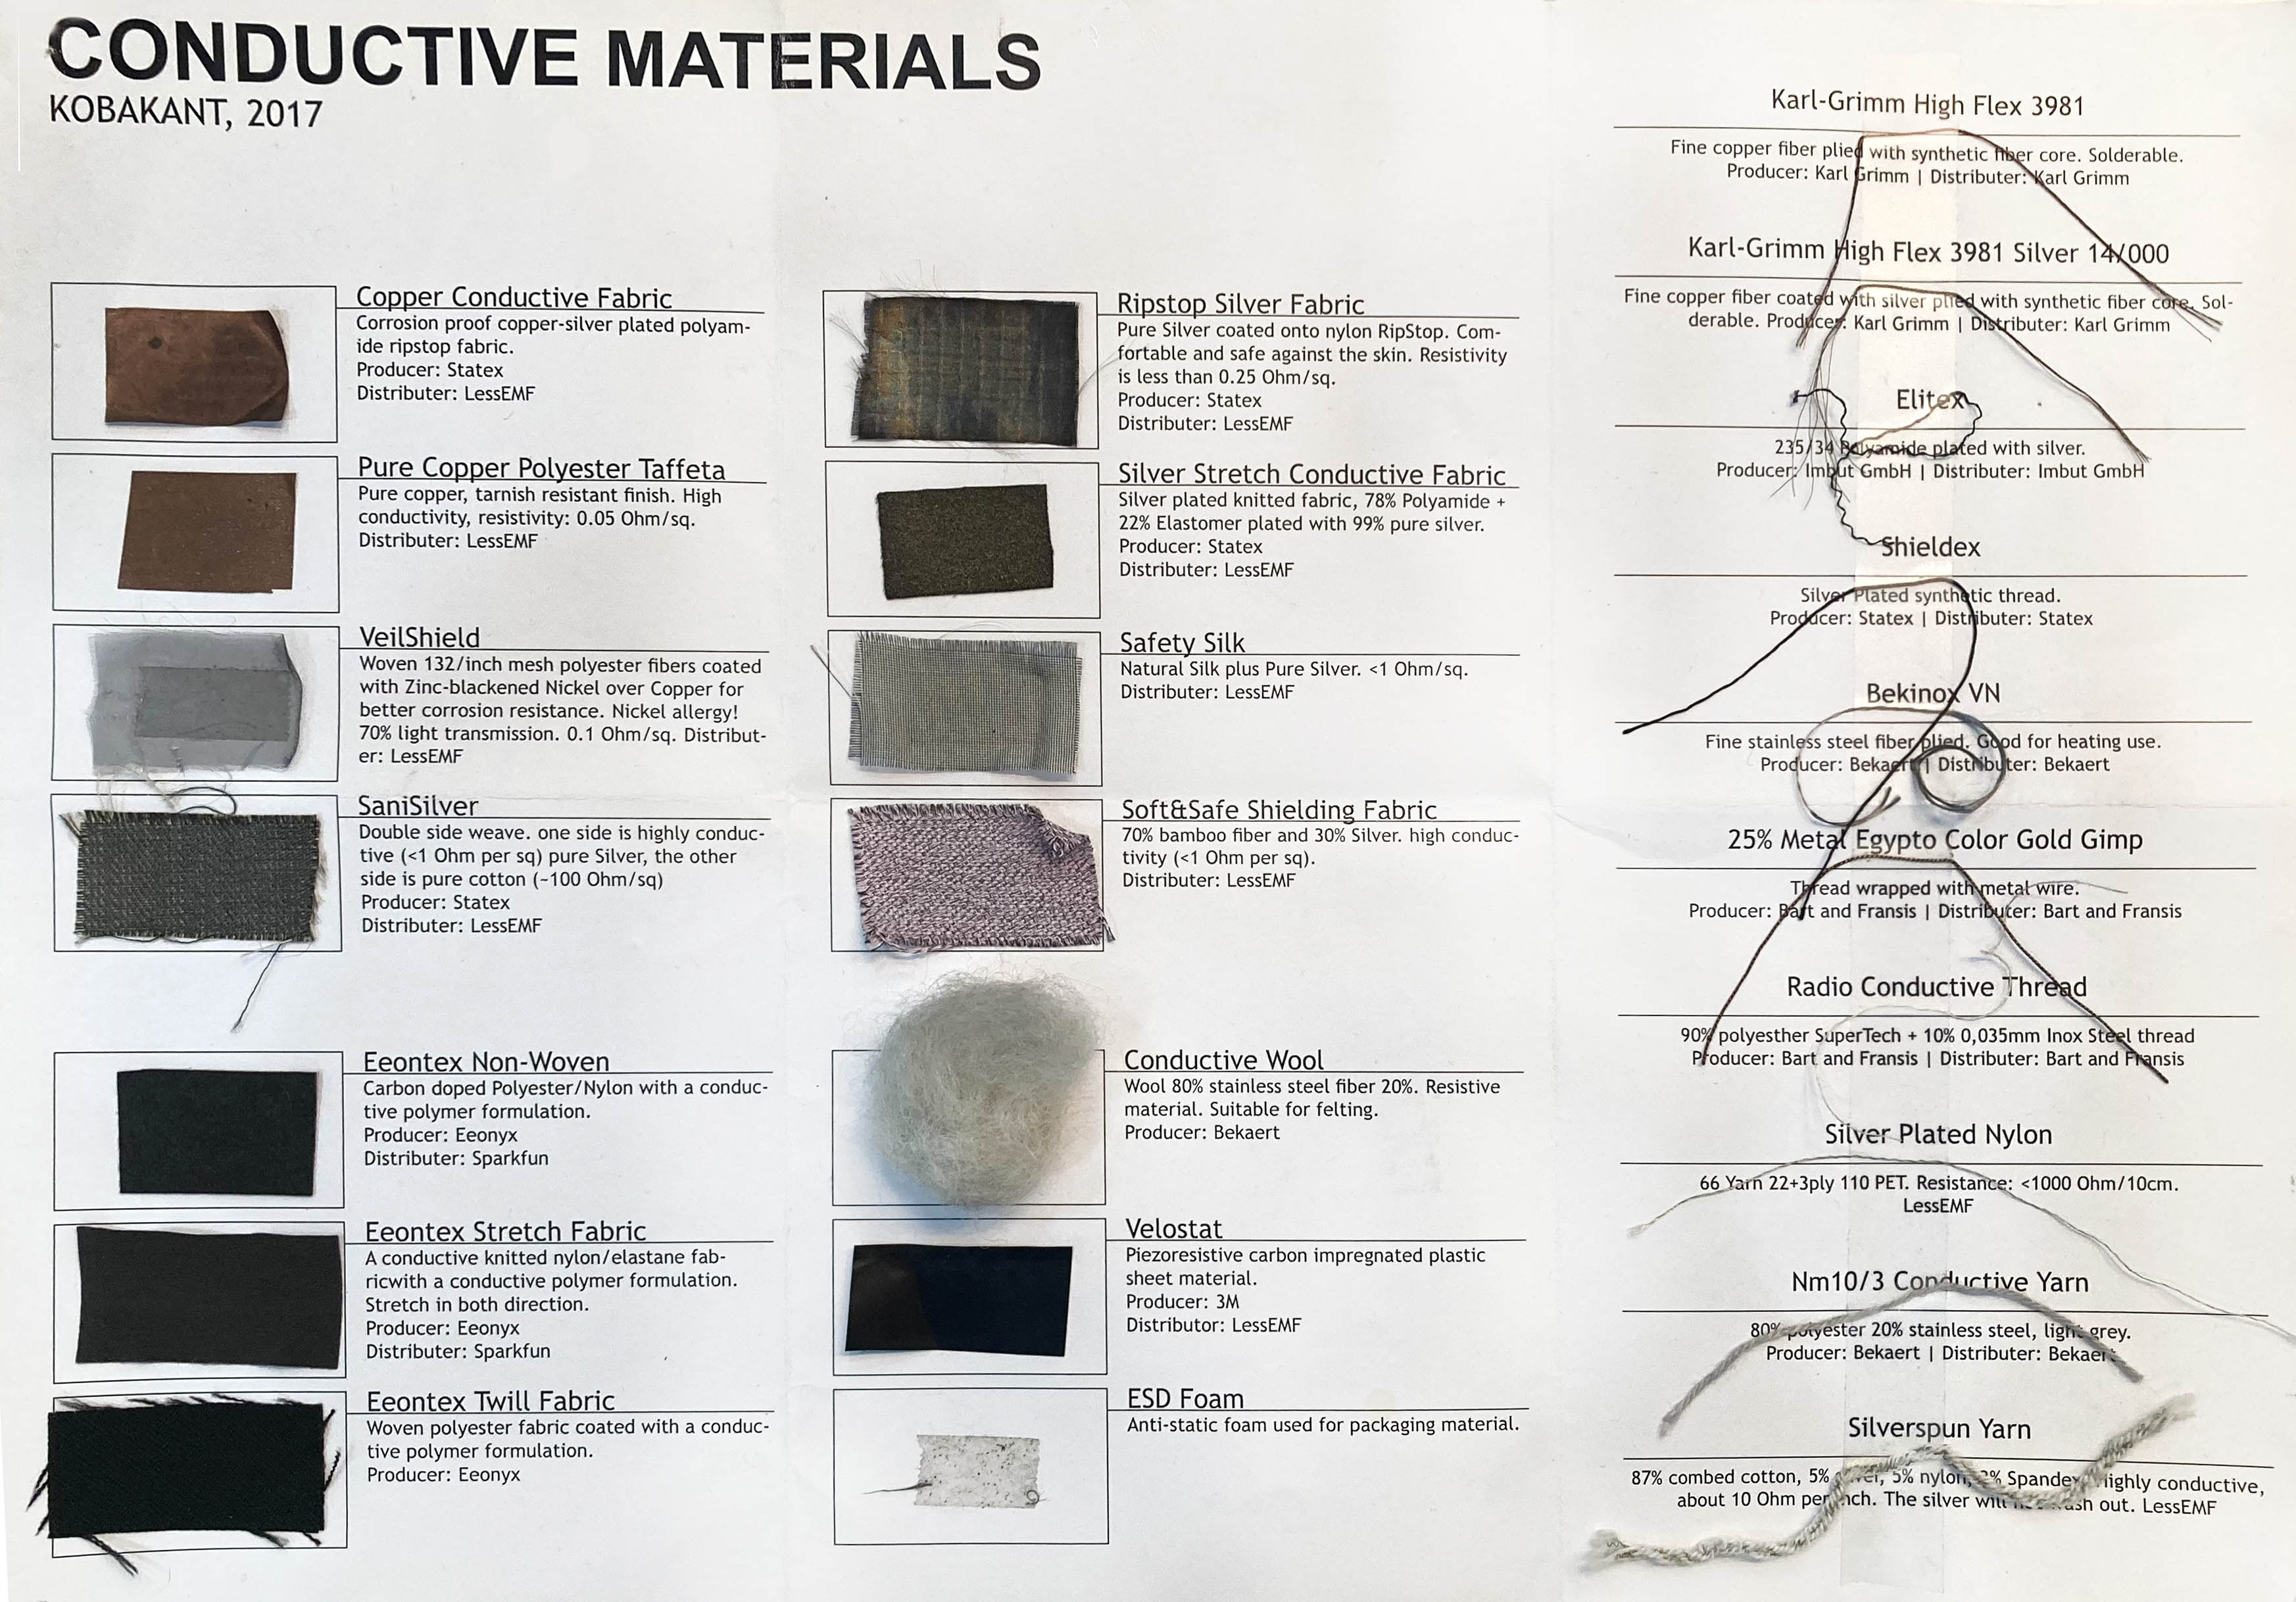
Conductive materials
-
Fabrics: Copper, eeontex conductive fabric, ESD foam...
-
Threads and yarns: Elitex, Karl Grimm, Bekinox, Adafruit Stainless Steel, Silverspun yarn...
-
Inks and tapes: CuPro- Cote by Less EMF, copper tape, bare conductive, copper foil sheet, conductive fabric tape, circuit scribe...
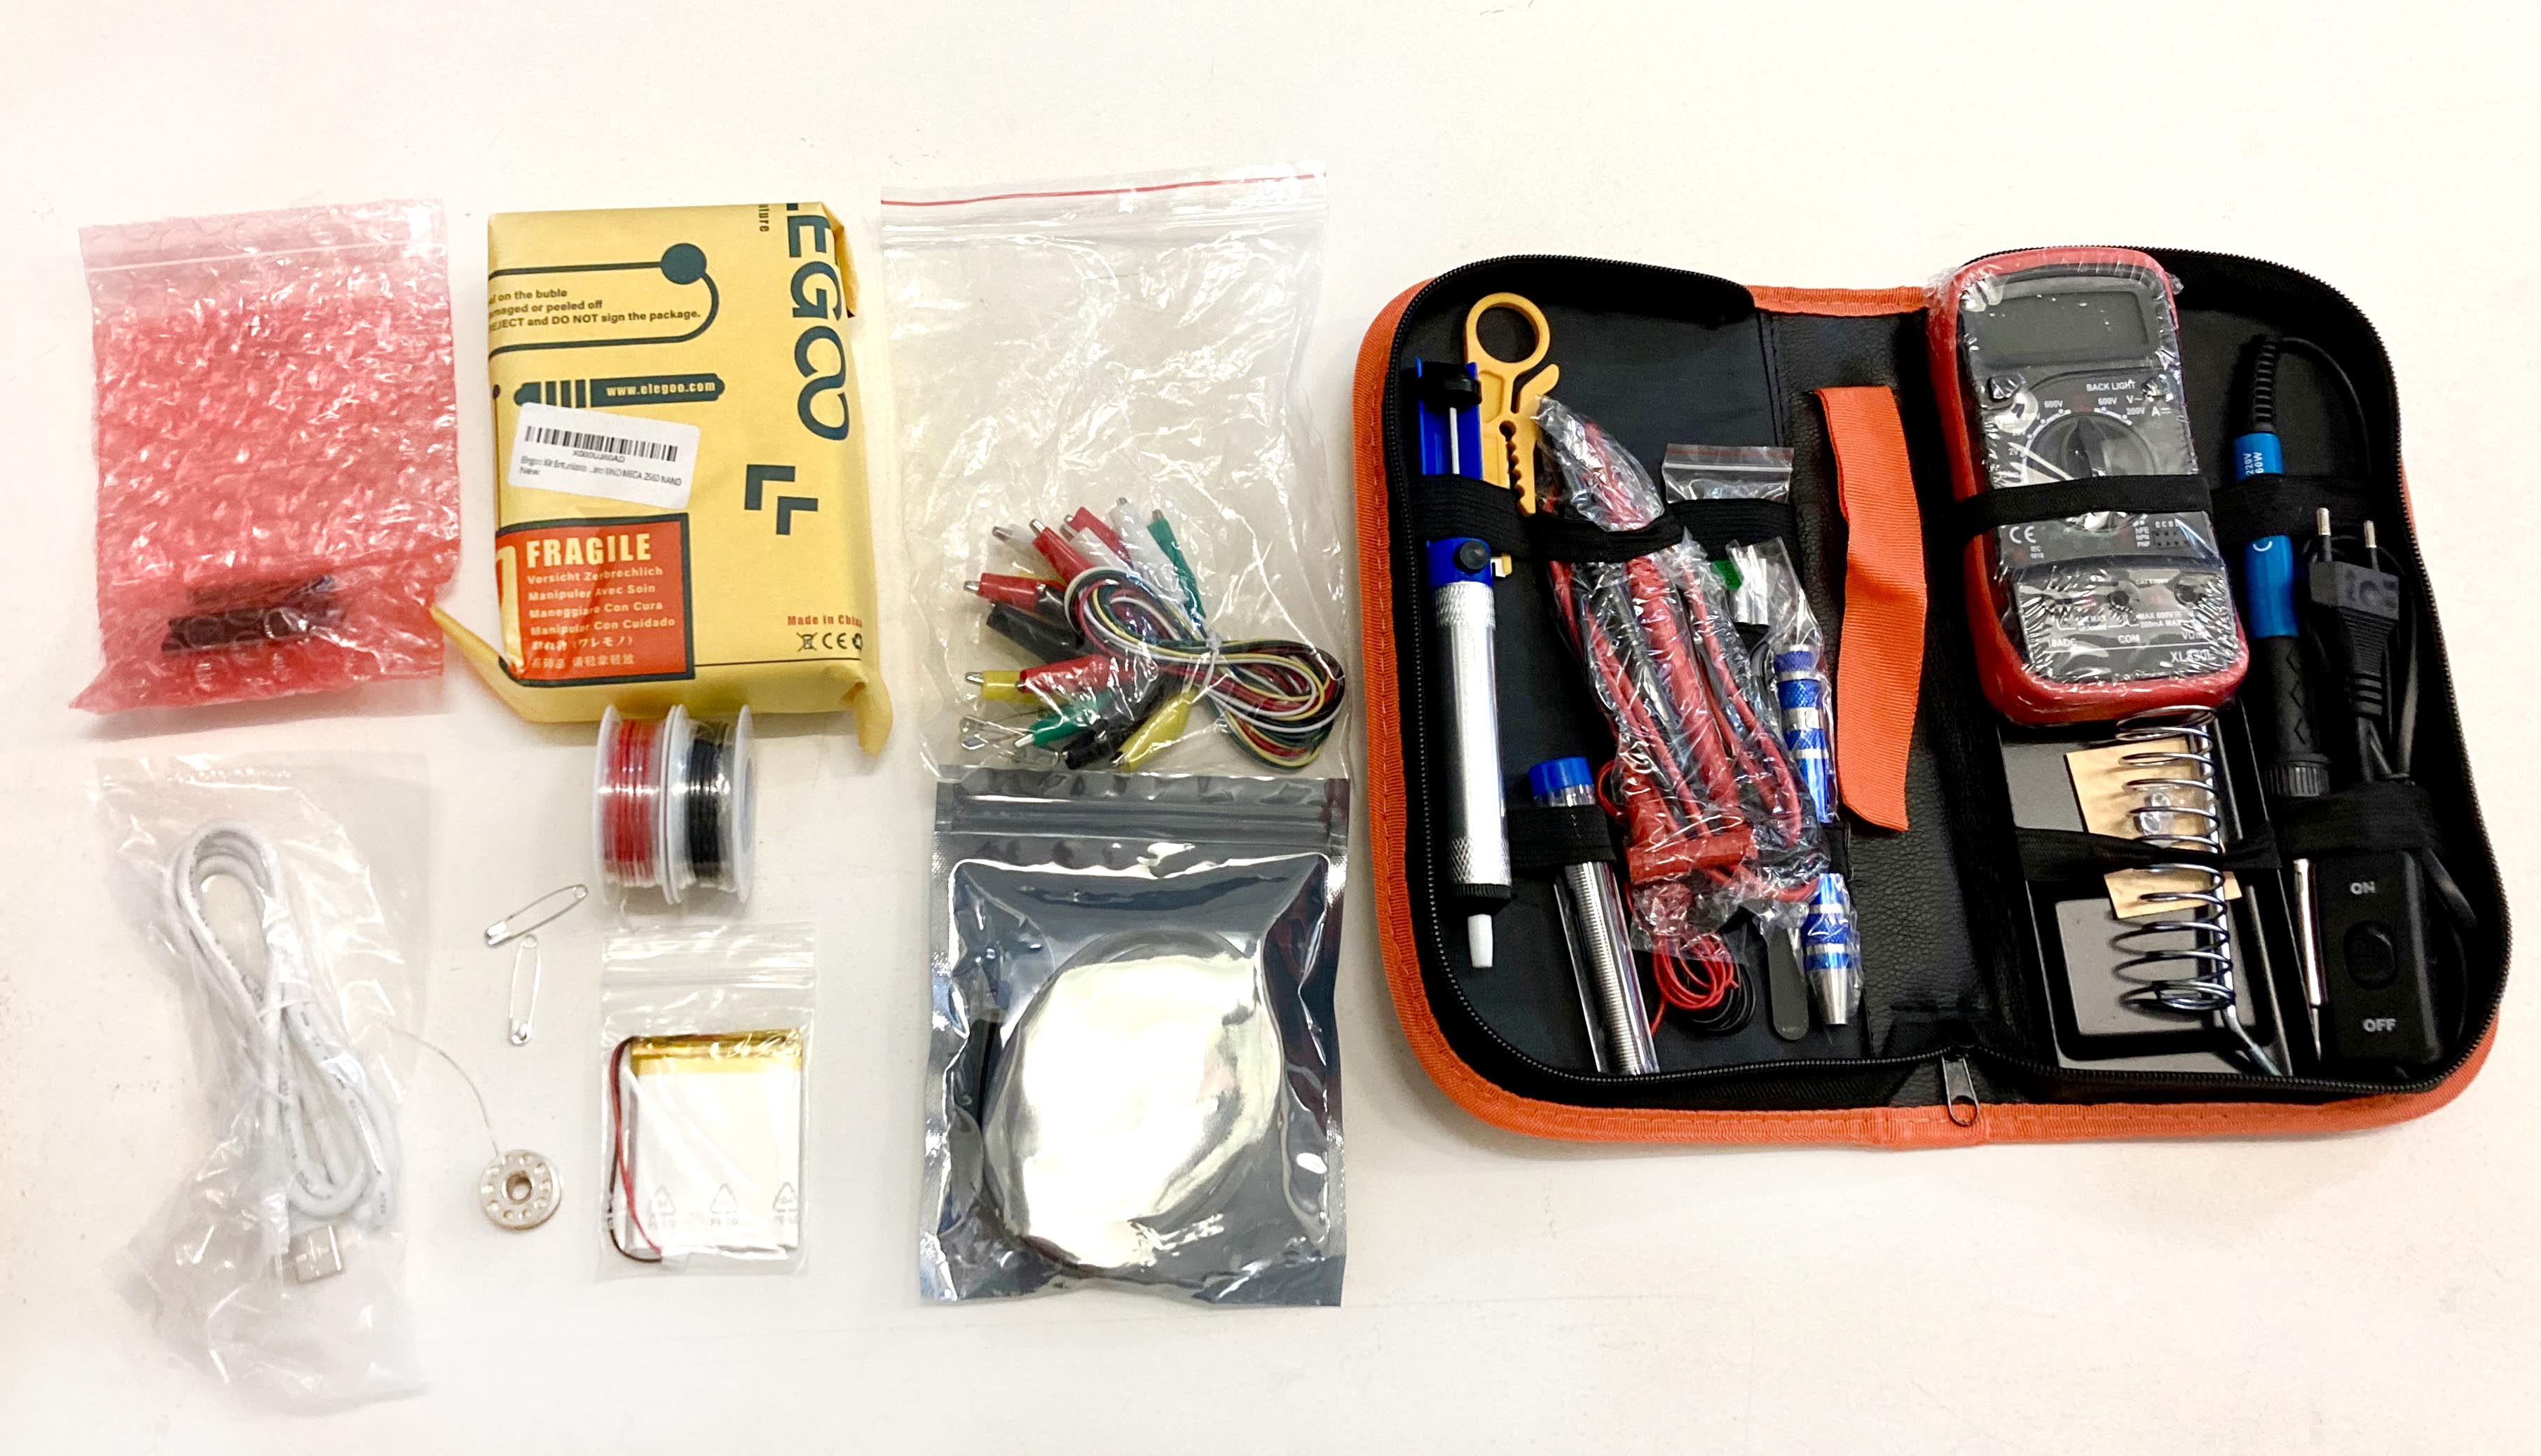
Tools
All the tools and material that we are going to use during this week.
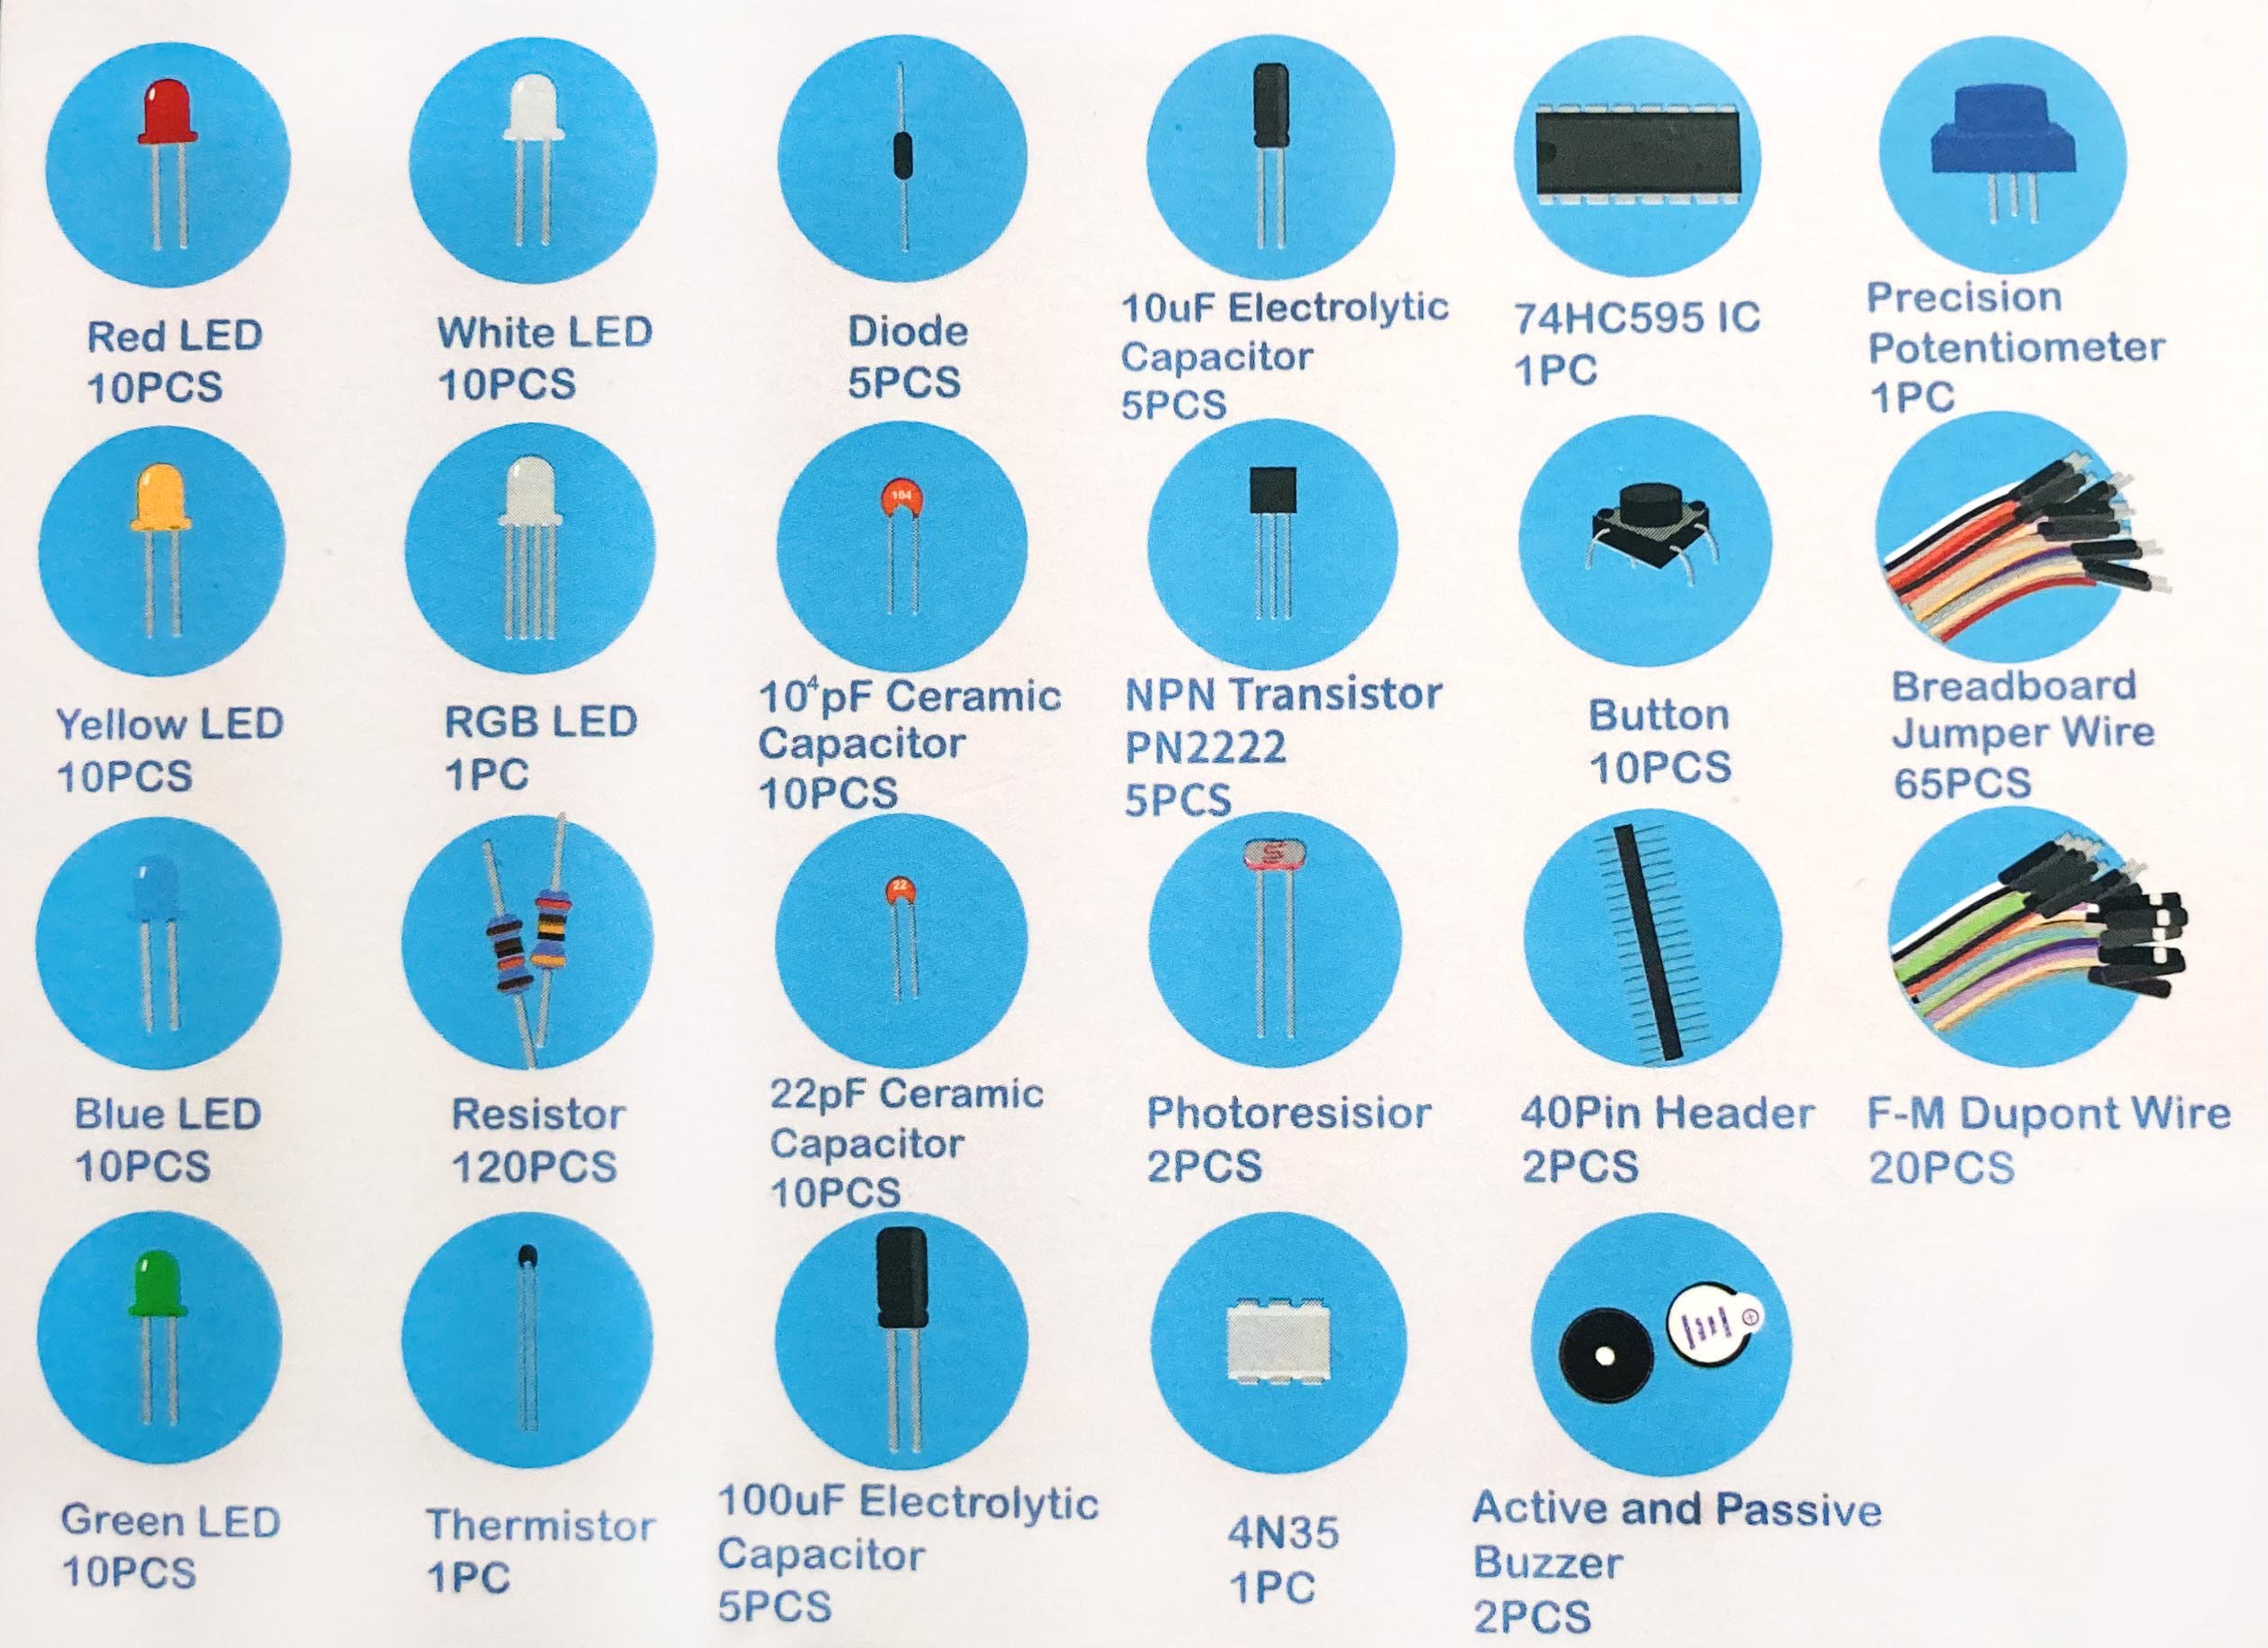
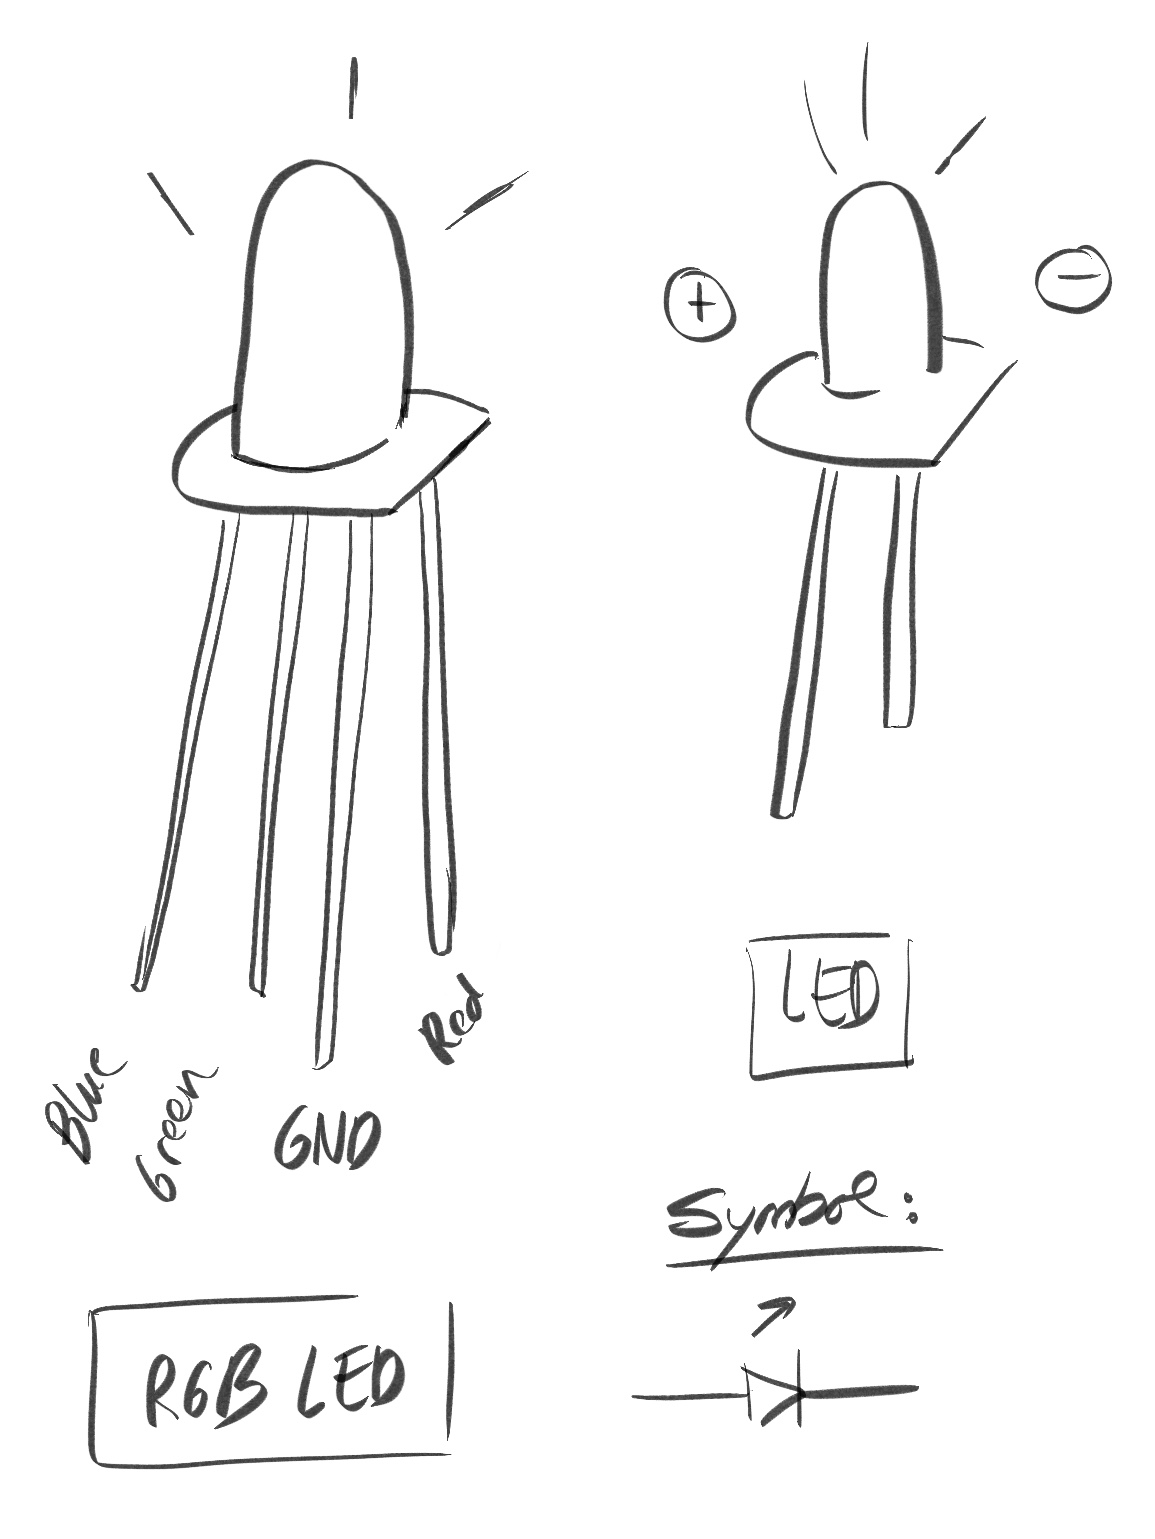
- LED
- RGB LED (a LED with 3 differents colors. Blue, red and green)
- Button *
- Breadboard
- Jumper Wire
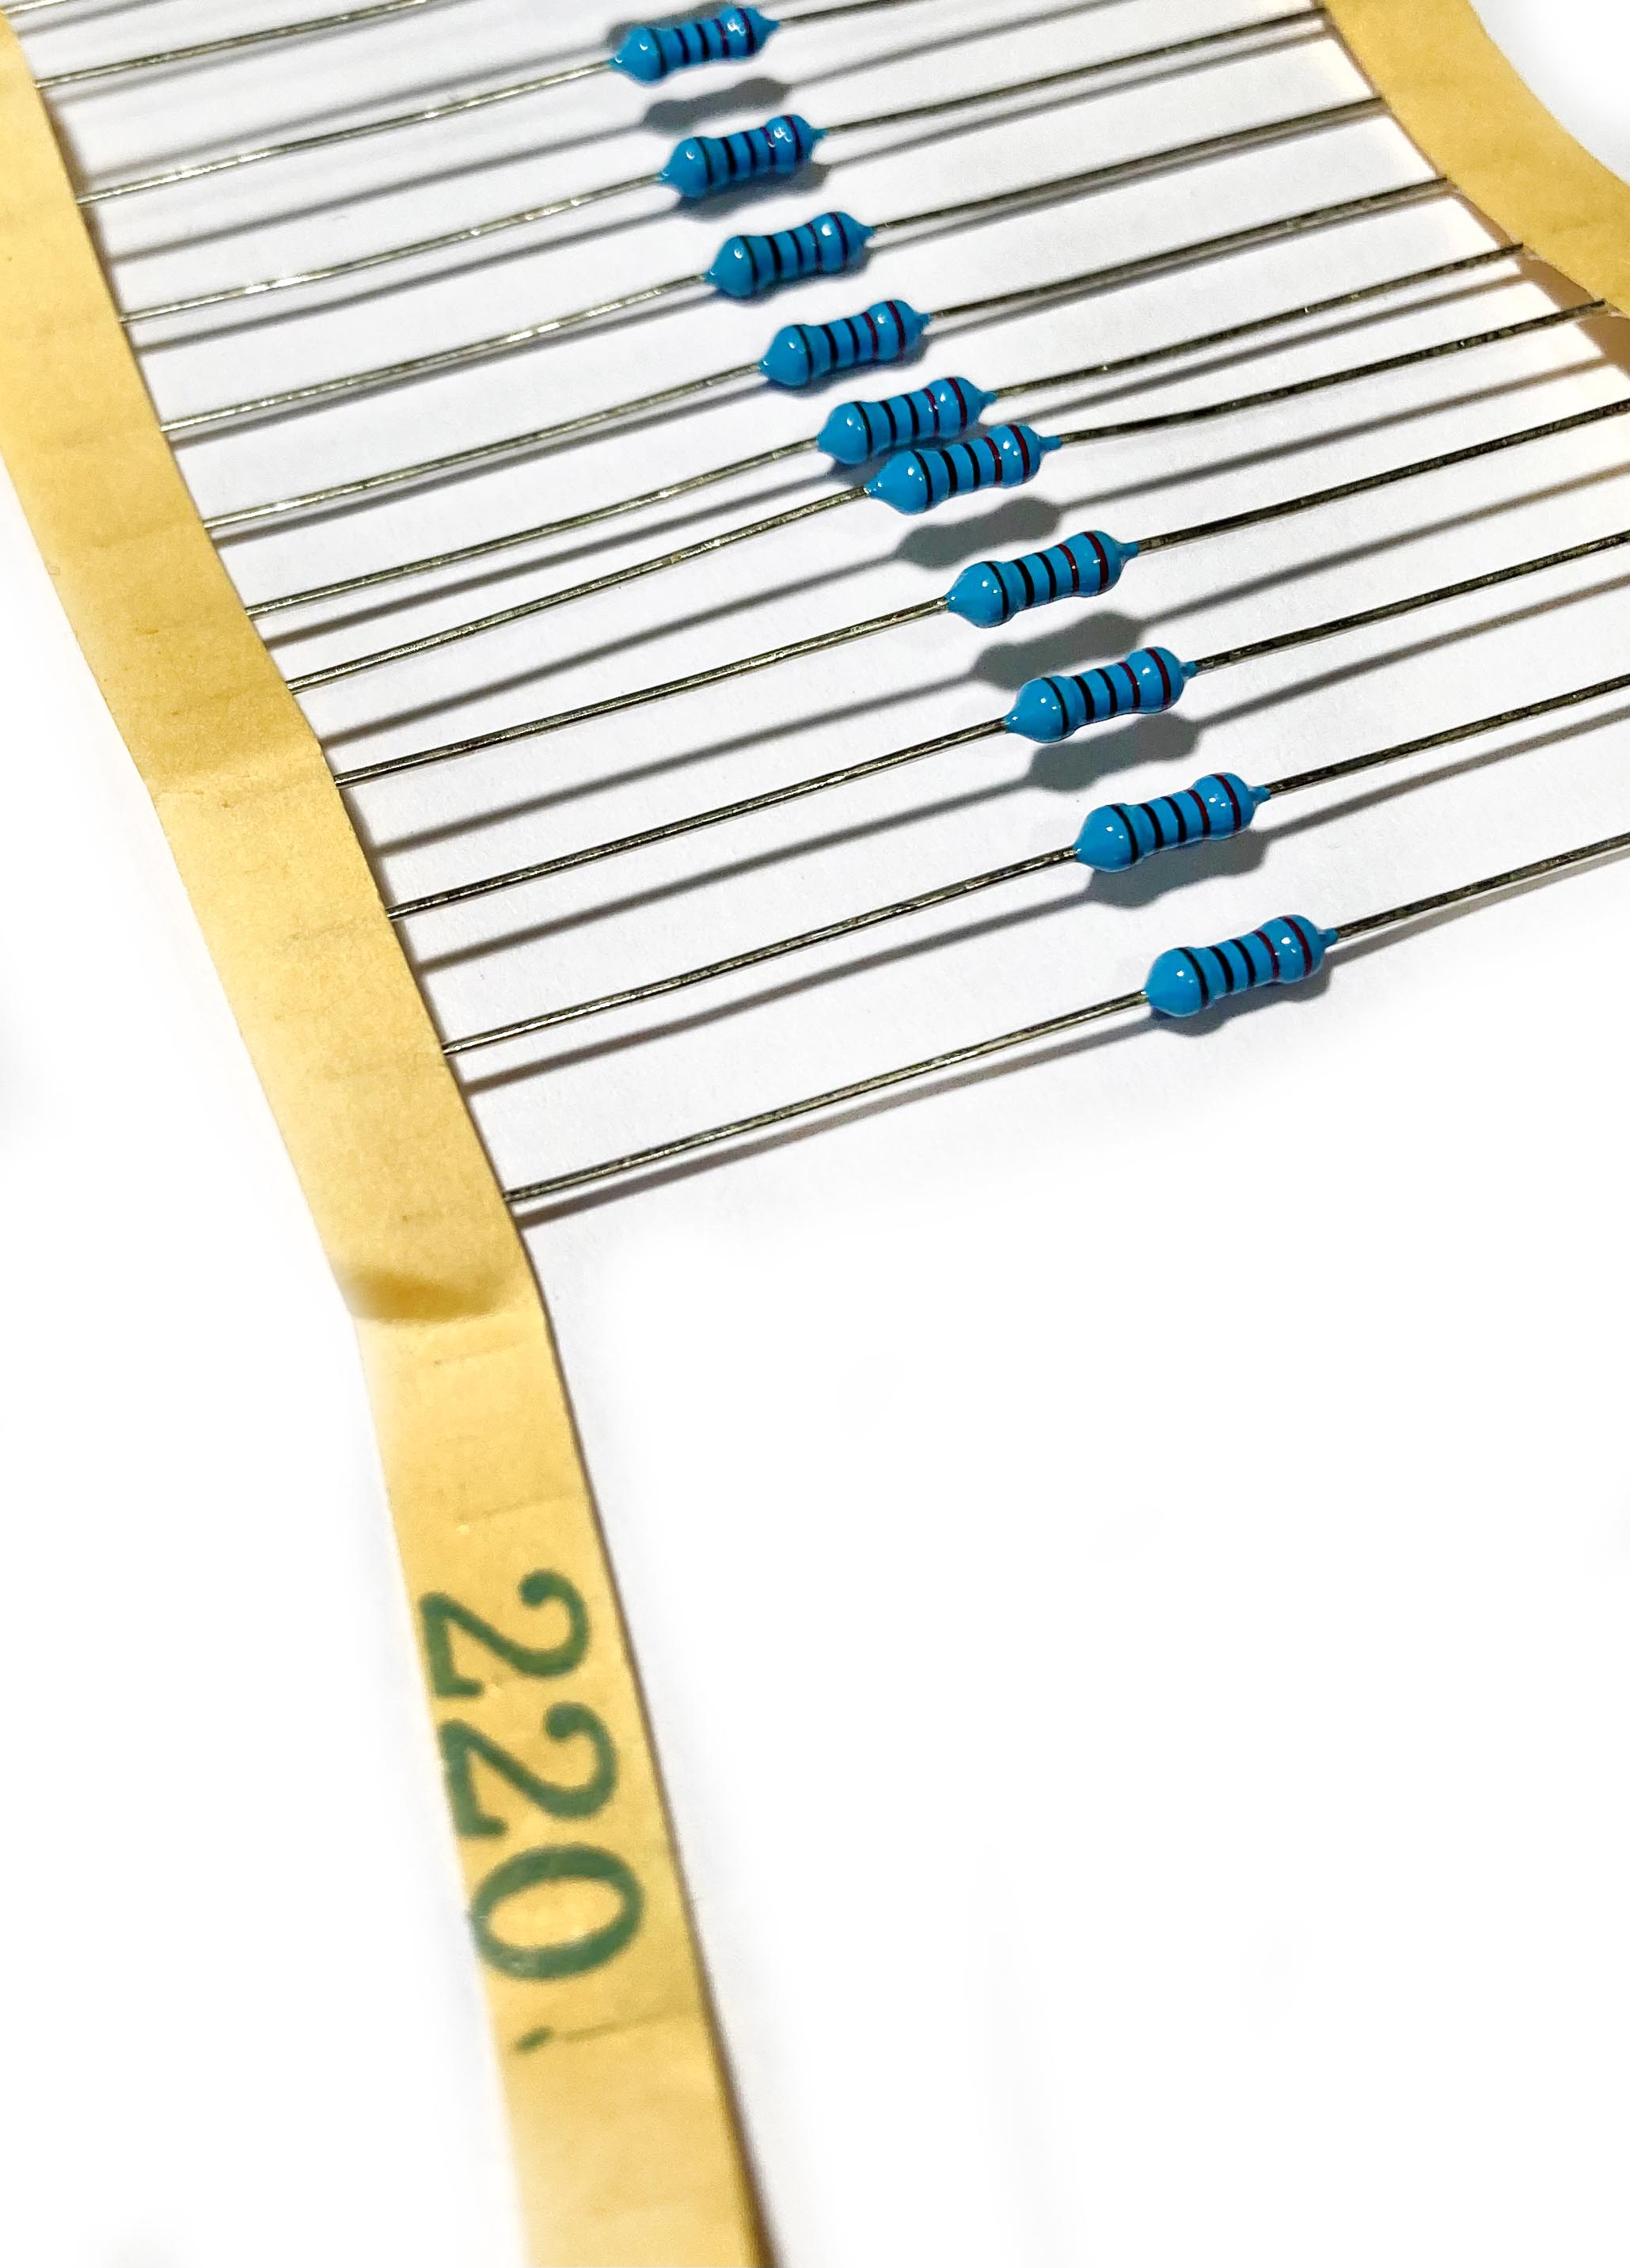
- Resistors
- Photoresistor
- Potenciometer (to have por or less resistence)
- Dupont Wire
- Battery
- Adafruit Feather ESP 32 (3.3V) (Instead of Arduino microcontroller 5V)
- Punch needle (embroidery)
- Snaps
- Plier
- Needles
- Scissors
- Iron
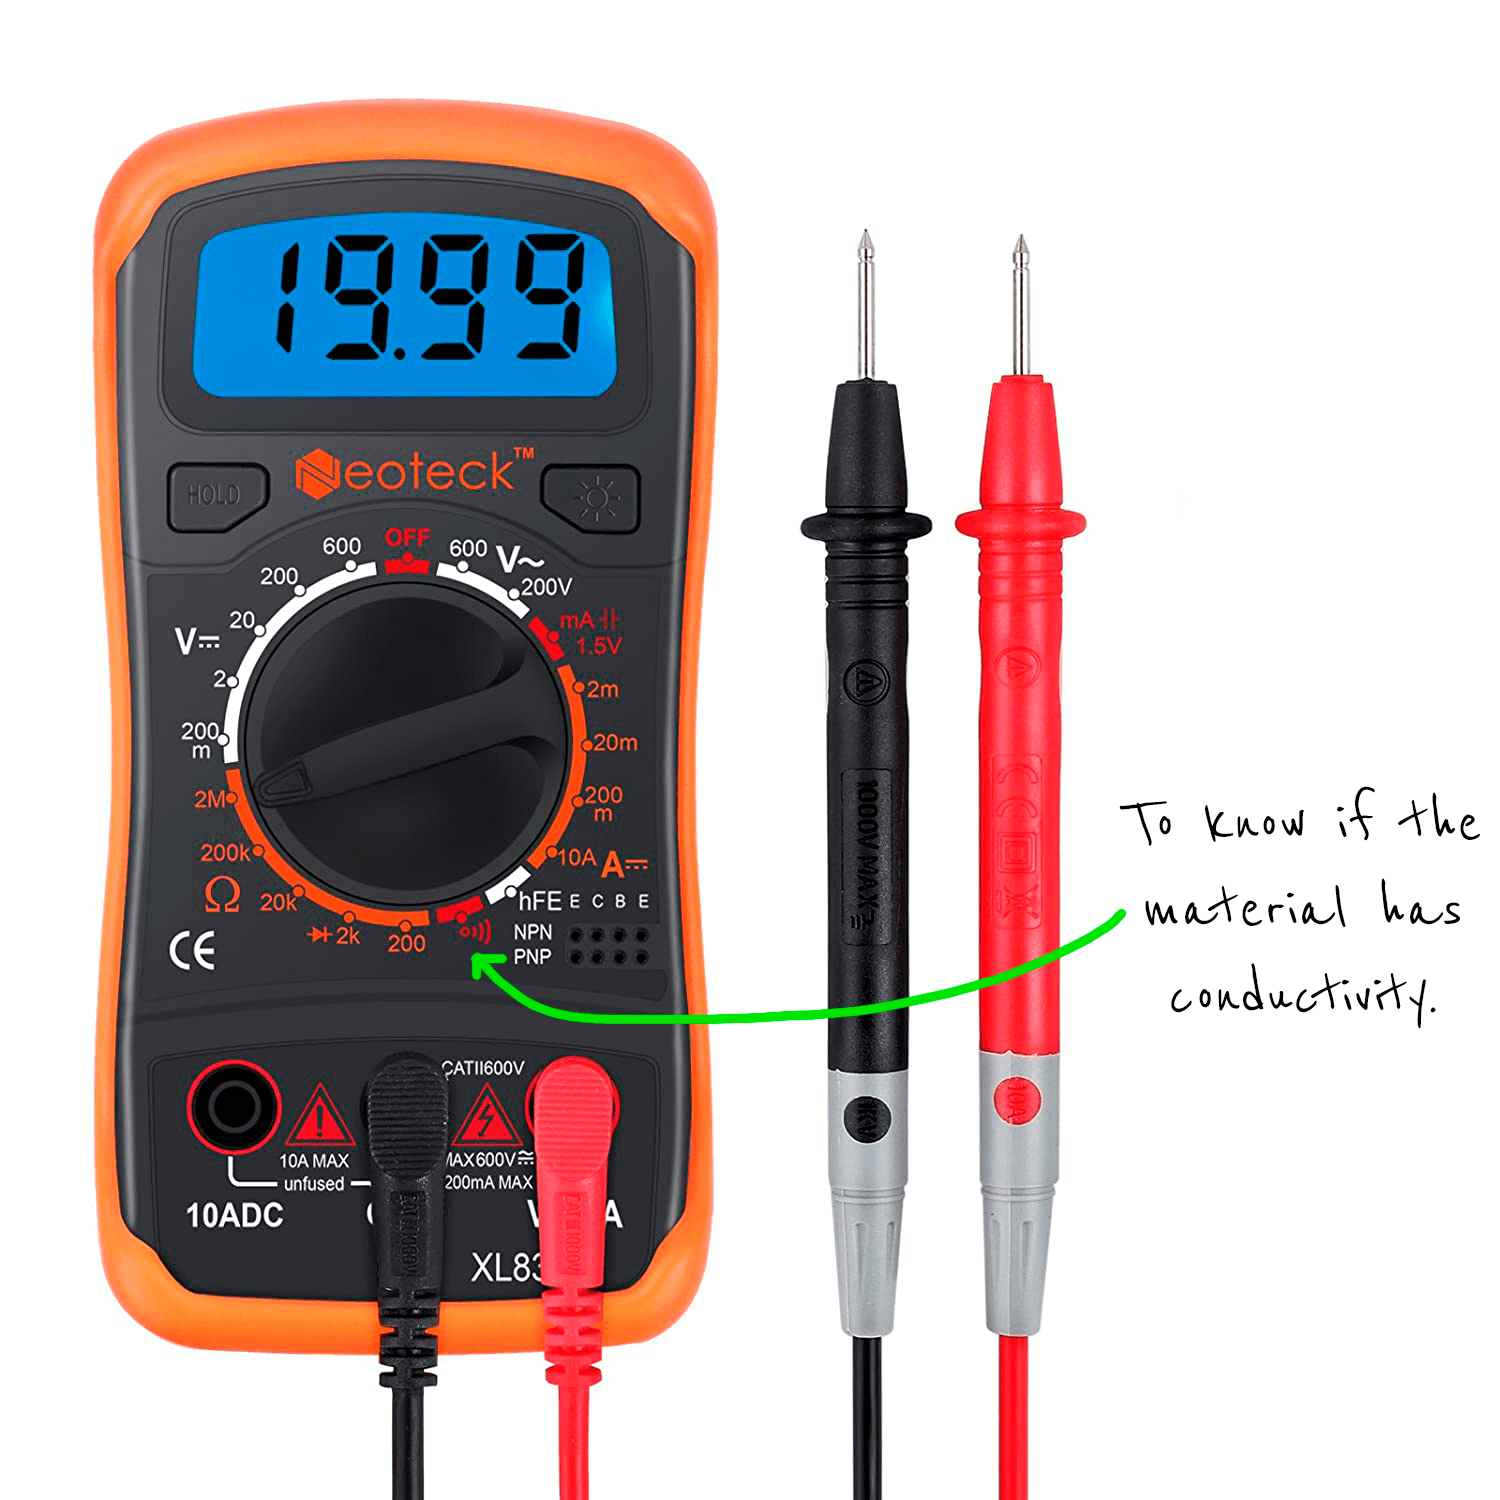
- Multimeter (OL when I have selected a higher position than you have been measuring)
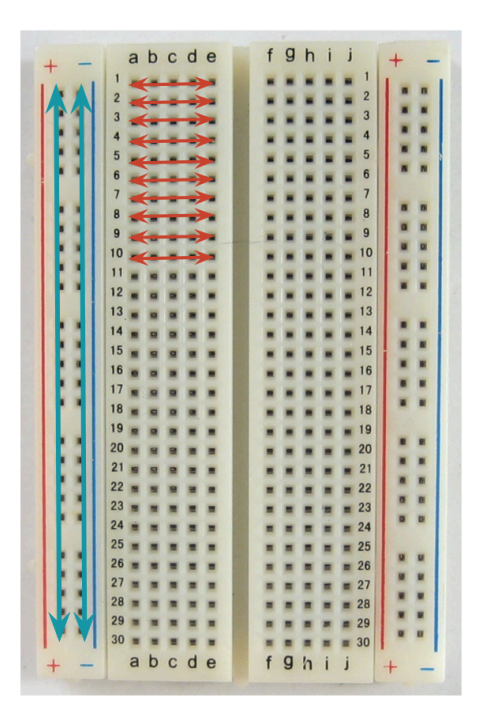
The blue vertical lines are connected and the red horizontal lines are too.
The breadboard is useful to create the prototype of a circuit.
Connections
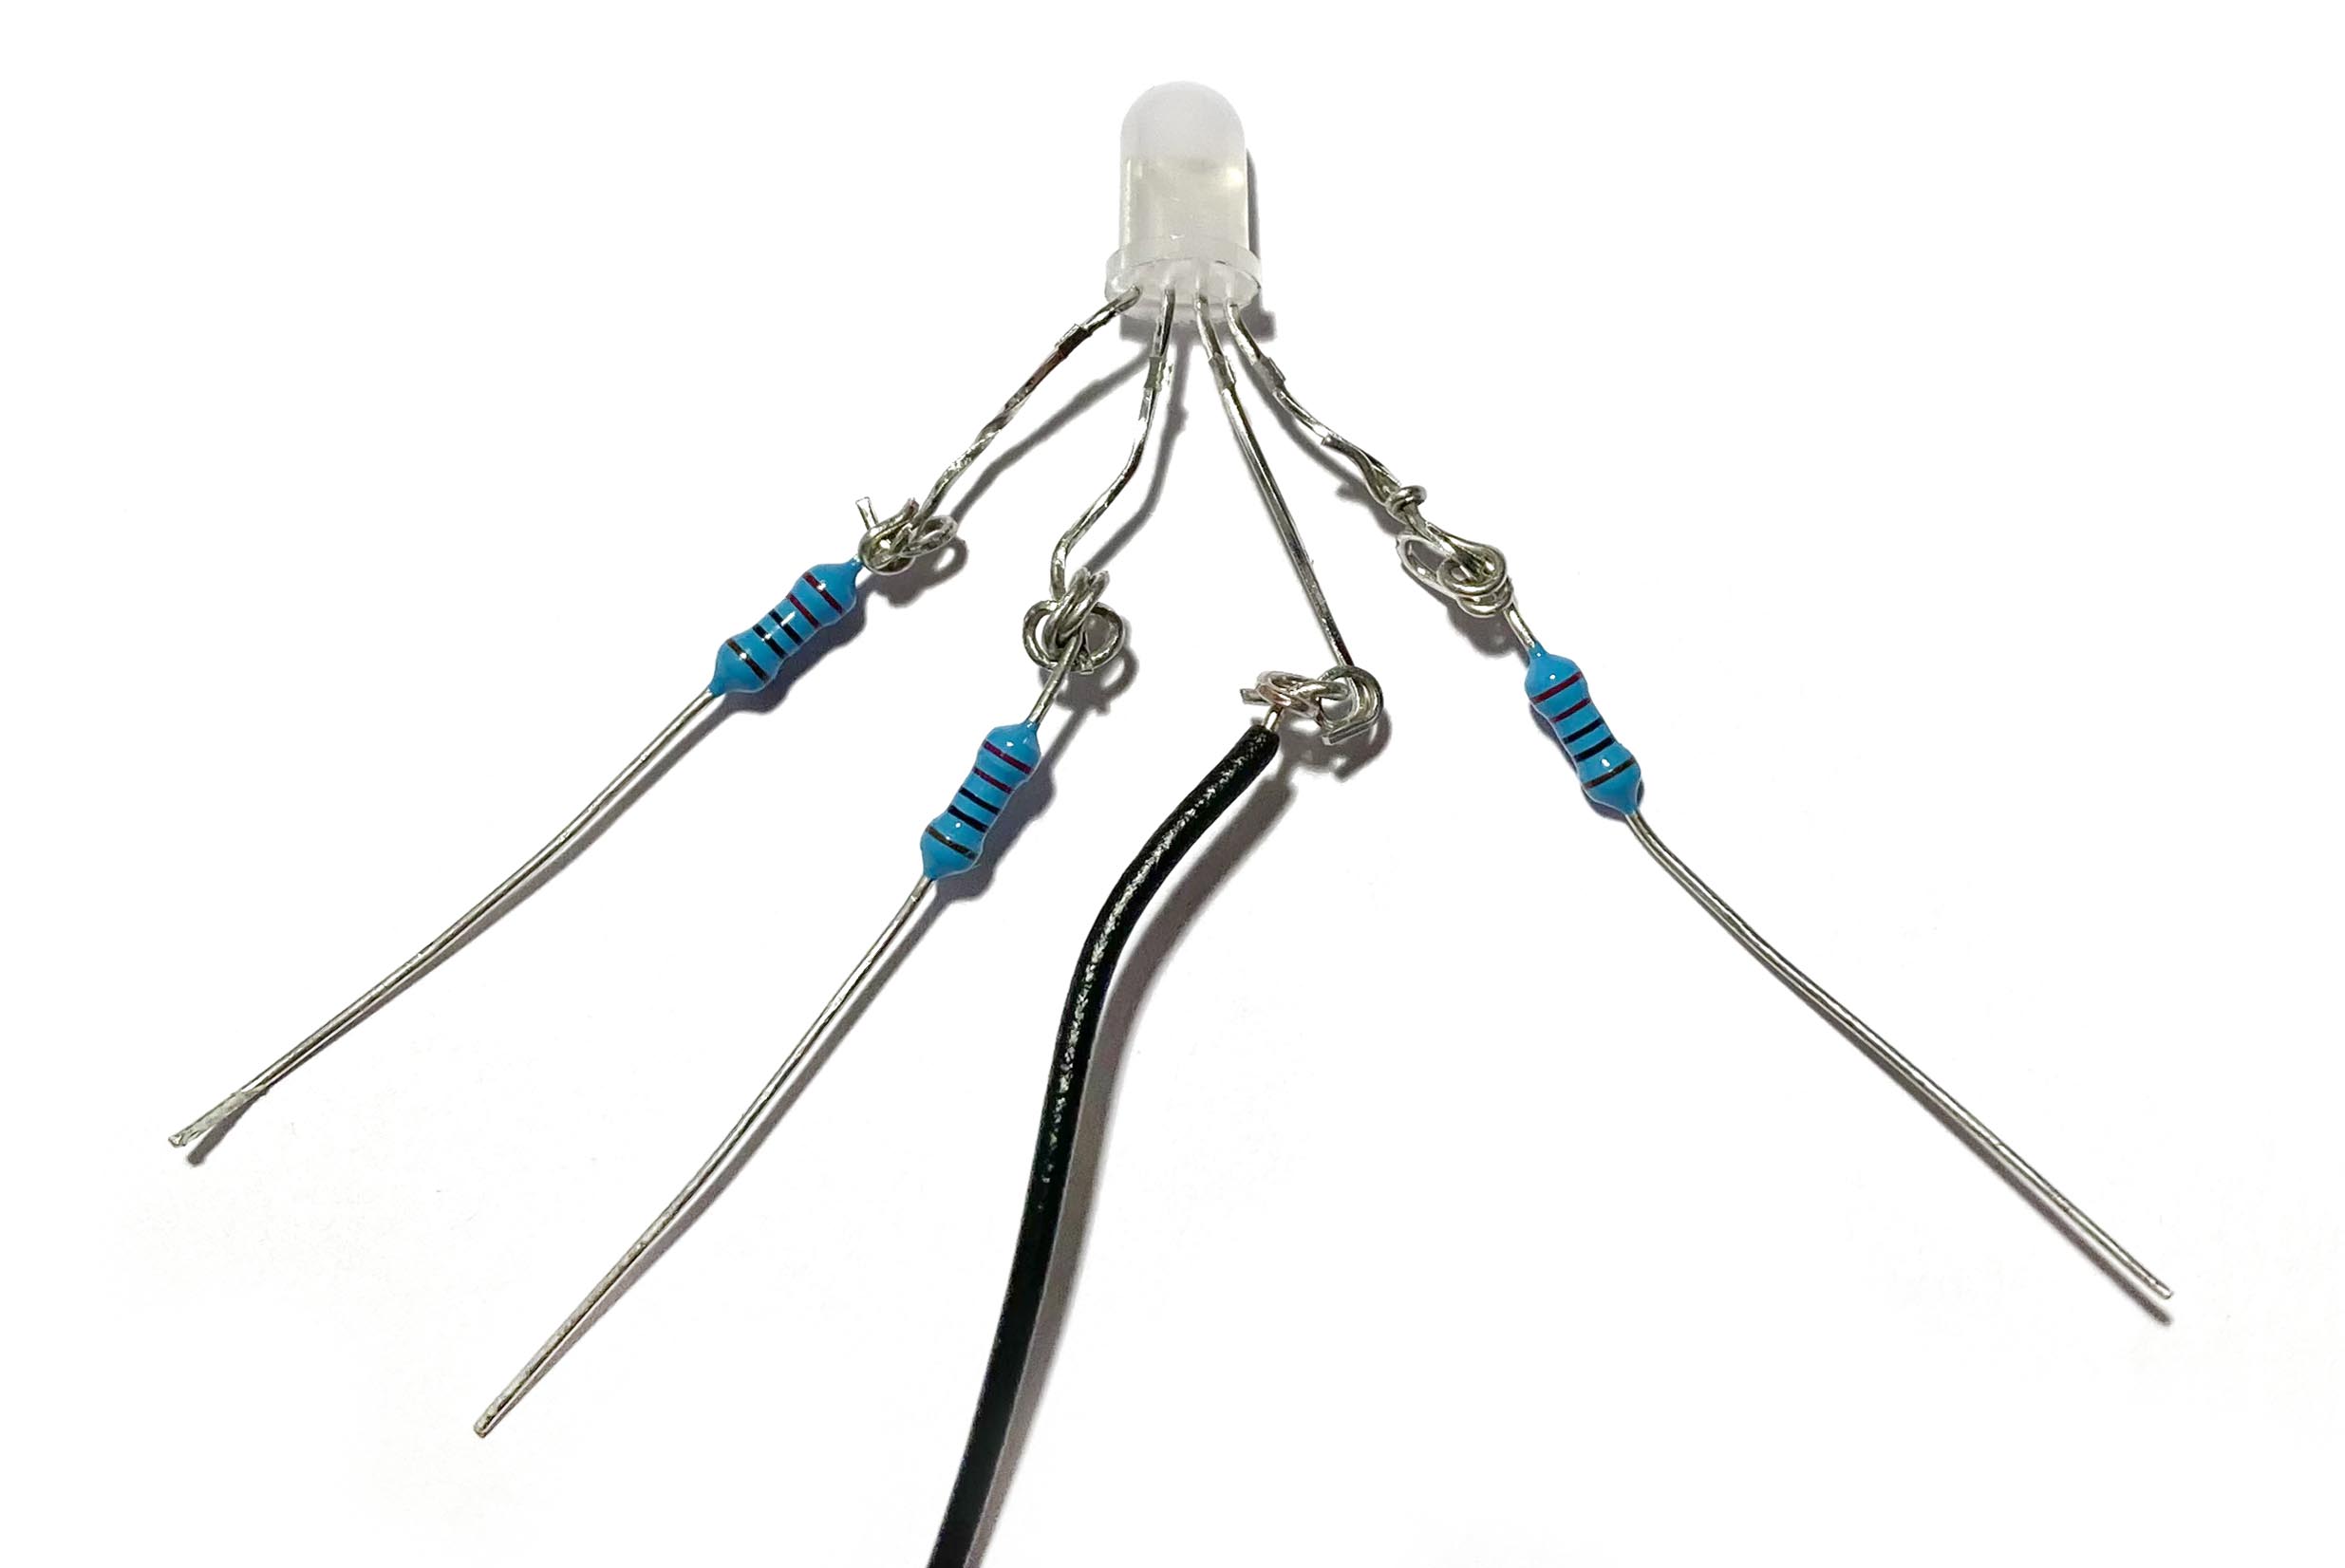
Curl the legs LED and sew it in the circuit. (If you can is preferable to solder)
Remember: Cover knots with hot glue.
To don’t crose the trace connection use the following materials to put it between: Fabric, breads, embroider, paracord tape sew under.
First connect the GND and then the Battery.
Make sure you have strong connections and secure loose threads ( glue knots to prevent them from fraying)
Switches
Types of Switches:
- Momentary
- Toggle: Snaps, zipper
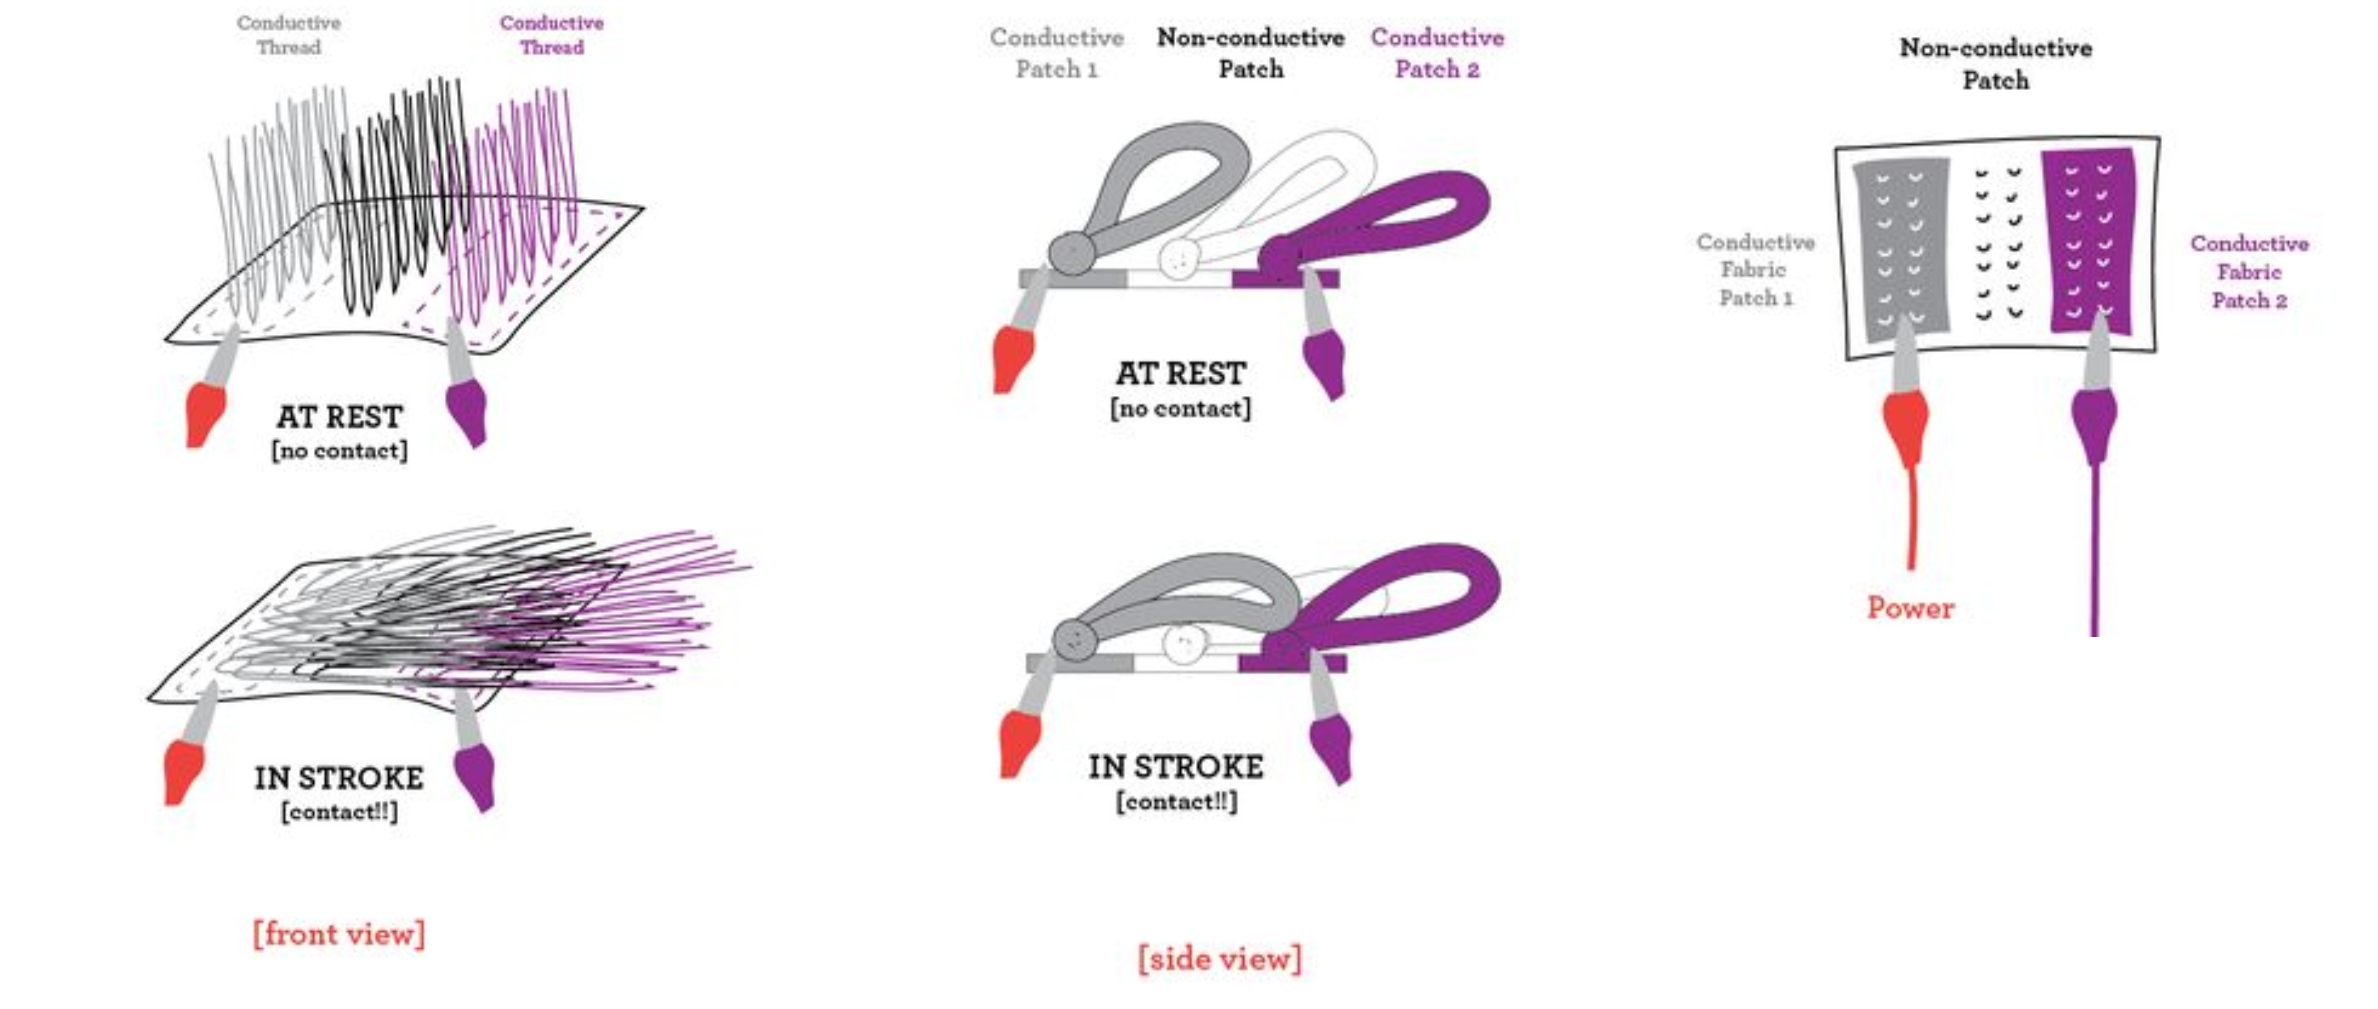
- Stroke
- Tilt
Sensors
There are 3 ways to change the resistance:
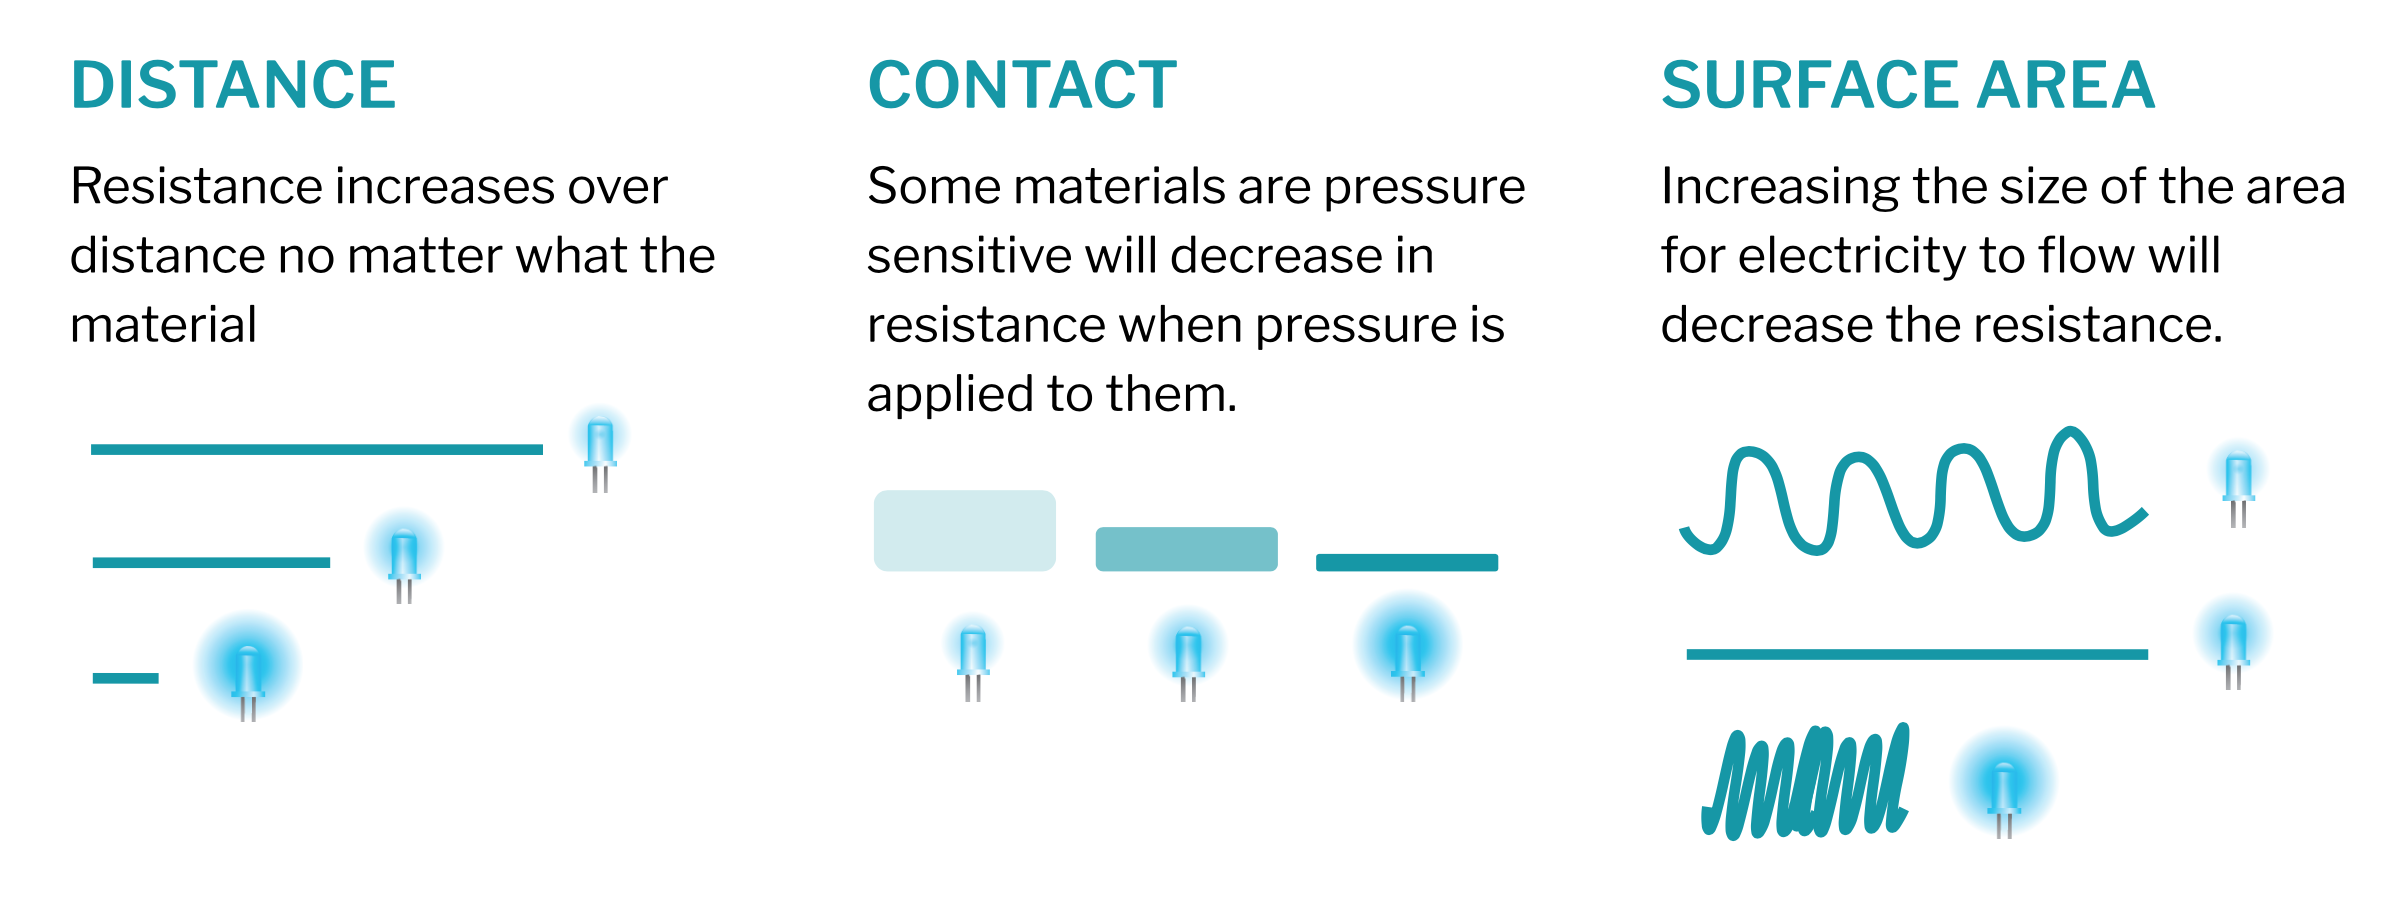
Types:
Conductive yarn, Velostat, Polysense, Pressure, Bend, Potentiometer (Adjust resistance by connecting conductive and resistive material through a wiper at different points in the circuit), Stretch...
- Velostat: Presure and bend sensor. The resistance decreases across distance and changes under pressire. Made with carbon-impregnated black polyethylene film. Conductivity is not affected by humidity or aging.
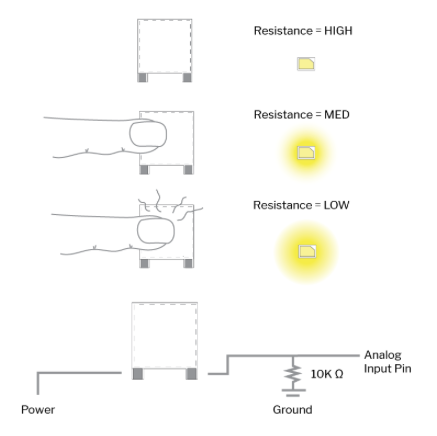
Resistors color code
The meaning of the resistor lines:
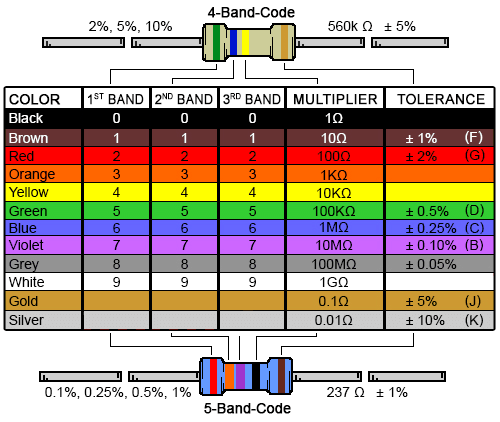
If we have fewer lines the third line will be 0.
Arduino
Tools
- int Definition
- bolean 0/1 true/false
- stn Text (Asil Table)
- void setup What the circuit will do when you turn it on.
- void loop The function while the circuit is connected.
- pineMode Define the pin (1, 2, 3...) and the function (INPUT/ OUTPUT)
- Serial.begin Communication between the Arduino and the circuit.
- Serial.print Information that will show on your screen. Serial.println It shows as a column.
- cmd T To put the paragraph correctly.
Remember: After a code, you must write ;
int LED = 12;
int S = 27;

// the setup function runs once when you press reset or power the board
void setup() {
  // initialize digital pin LED_BUILTIN as an output.
  pinMode(LED, OUTPUT);
  pinMode(S, INPUT);
}

// the loop function runs over and over again forever
void loop() {
  bool State = digitalRead (S) ;
  if (State == LOW) {
    digitalWrite (LED, HIGH);
  }
  else {
    digitalWrite (LED, LOW);
  }
}
Additionally, you could go to the Fabricademy E-textile page and follow more links.
My project

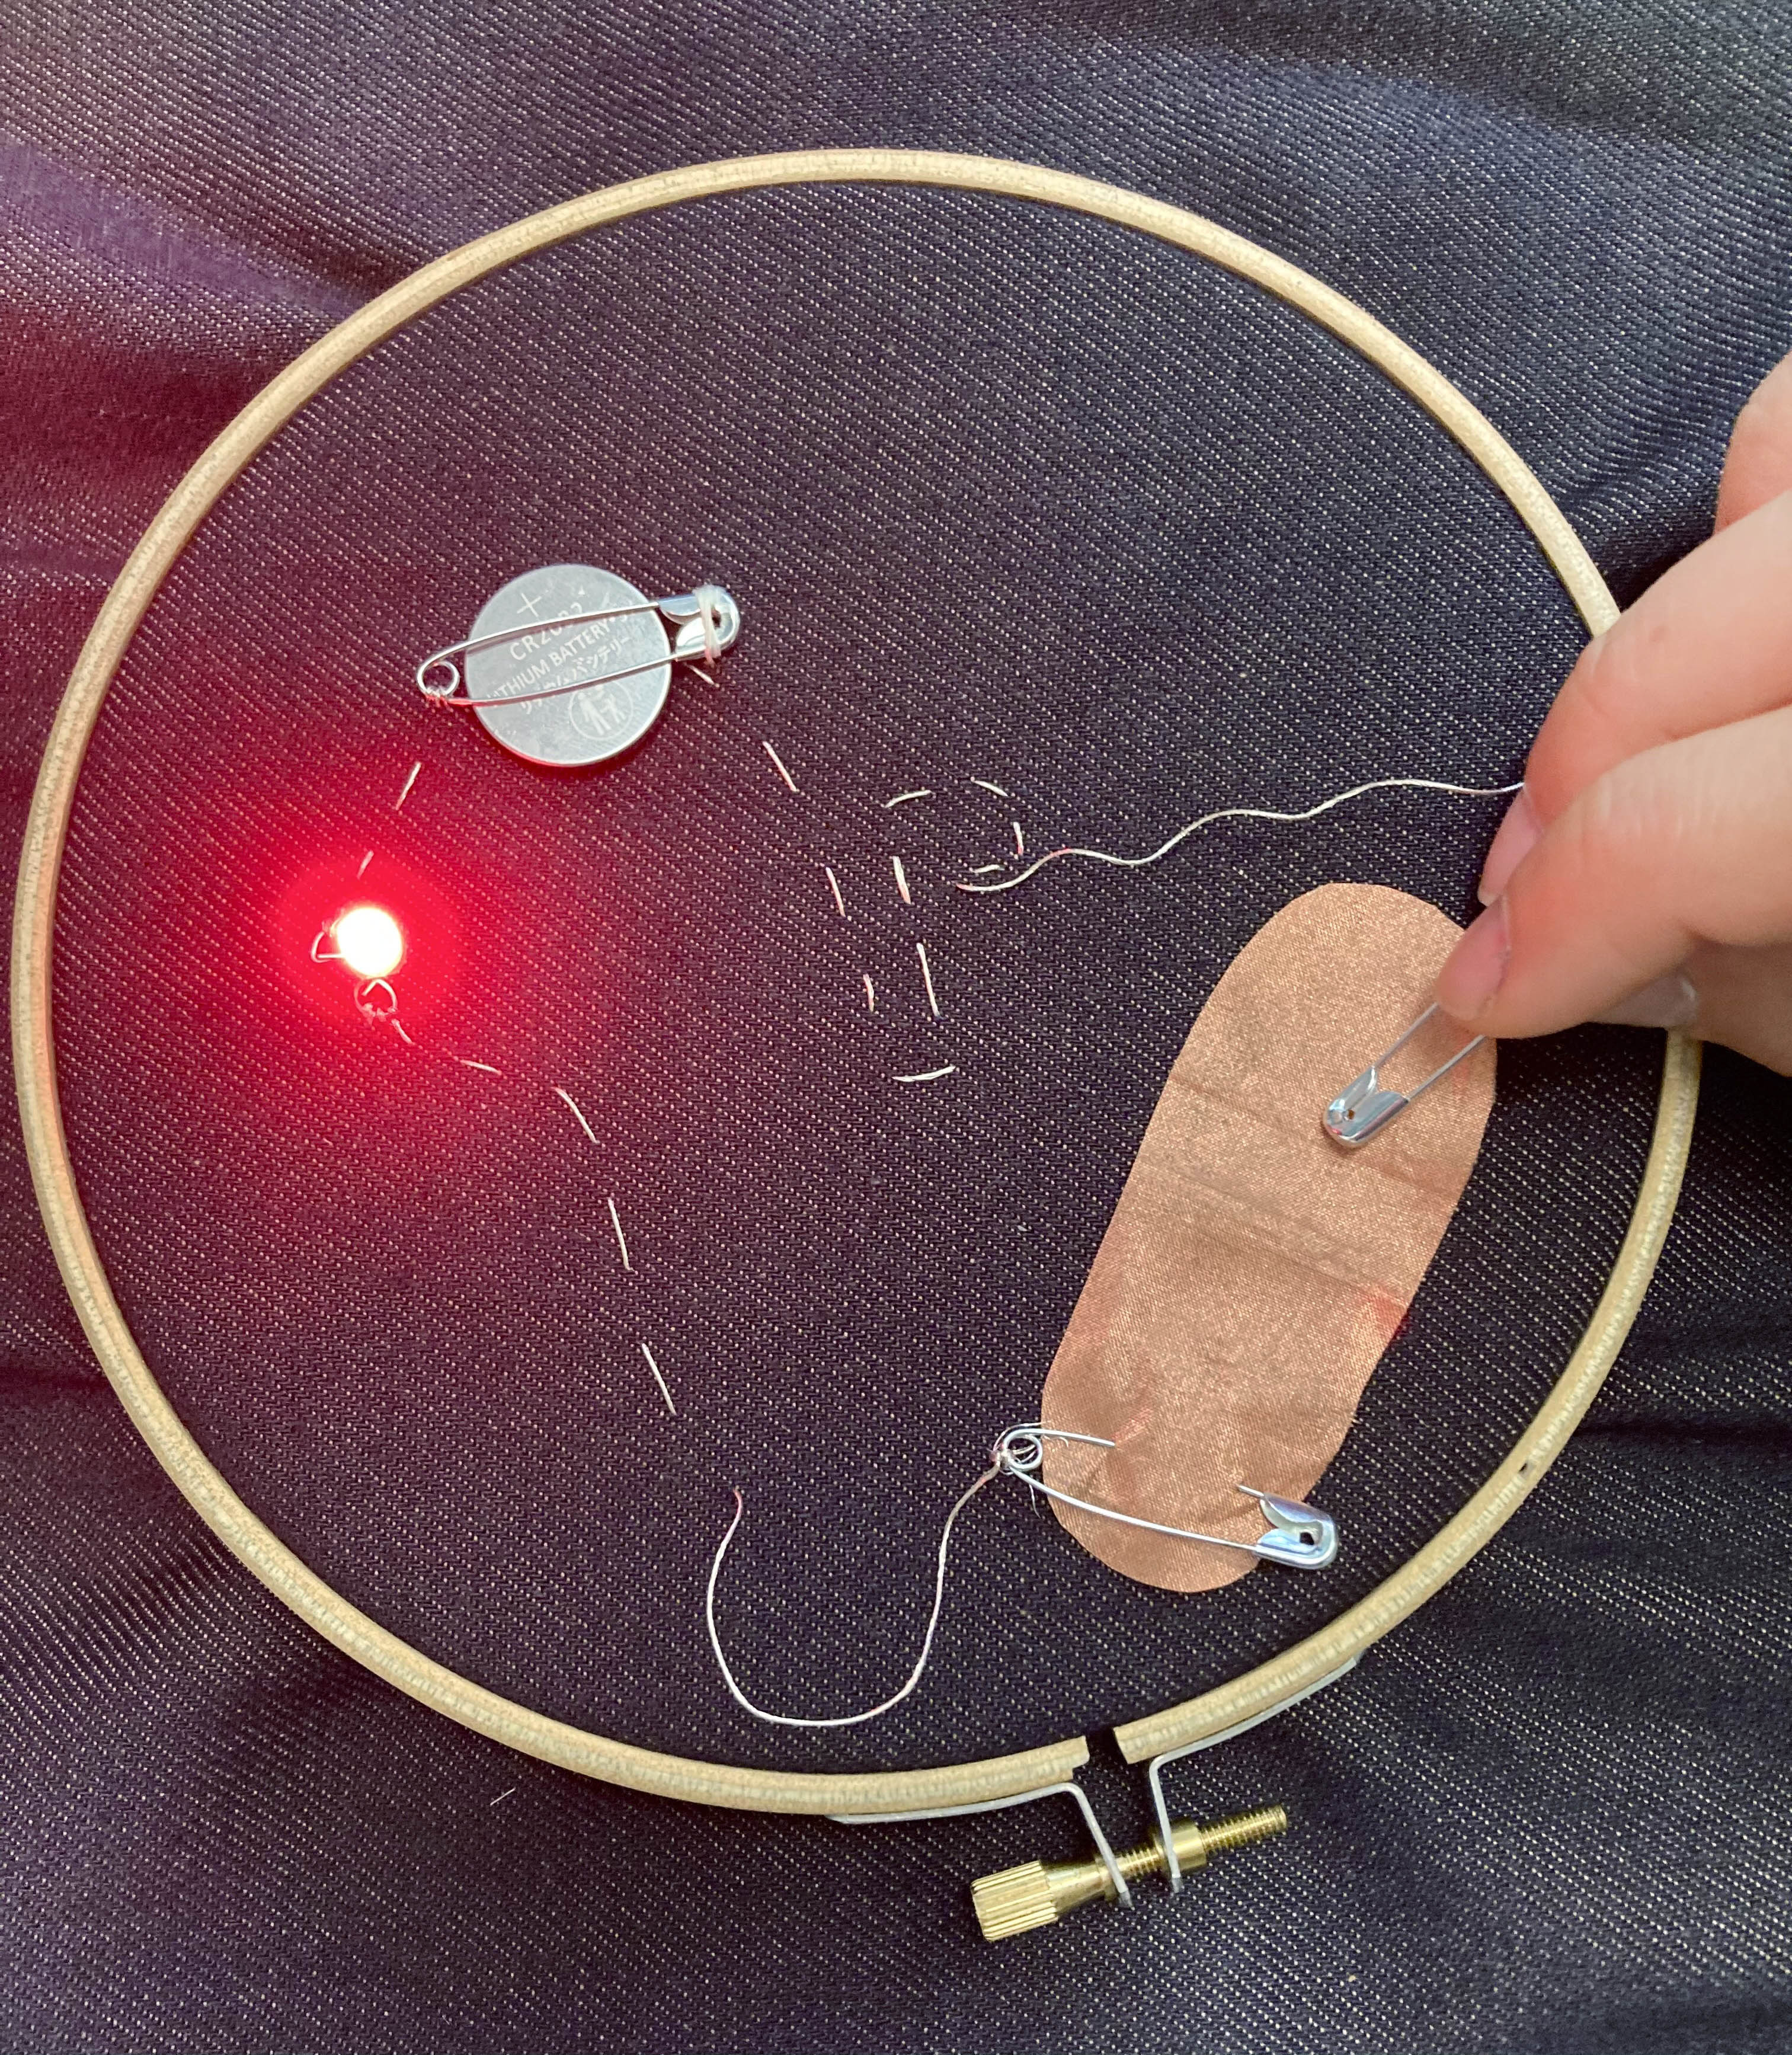
I will use one RGB LED to have in the same circuit 3 types of switches/sensors.
- Option 1: Stroke switch. Use a conductive thread with the punch needle technic, so when you pass the hand for the top will close the circuit by pressing the thread and the LED will be on or off.
- Option 2: Sensor by contact. Use the Velostat fabric to change the brighter of the LED depending on the strength press.
- Option 3: Toggle switch. Botton with a snap.
Steps
You could use Smart Draw software to draw circuits
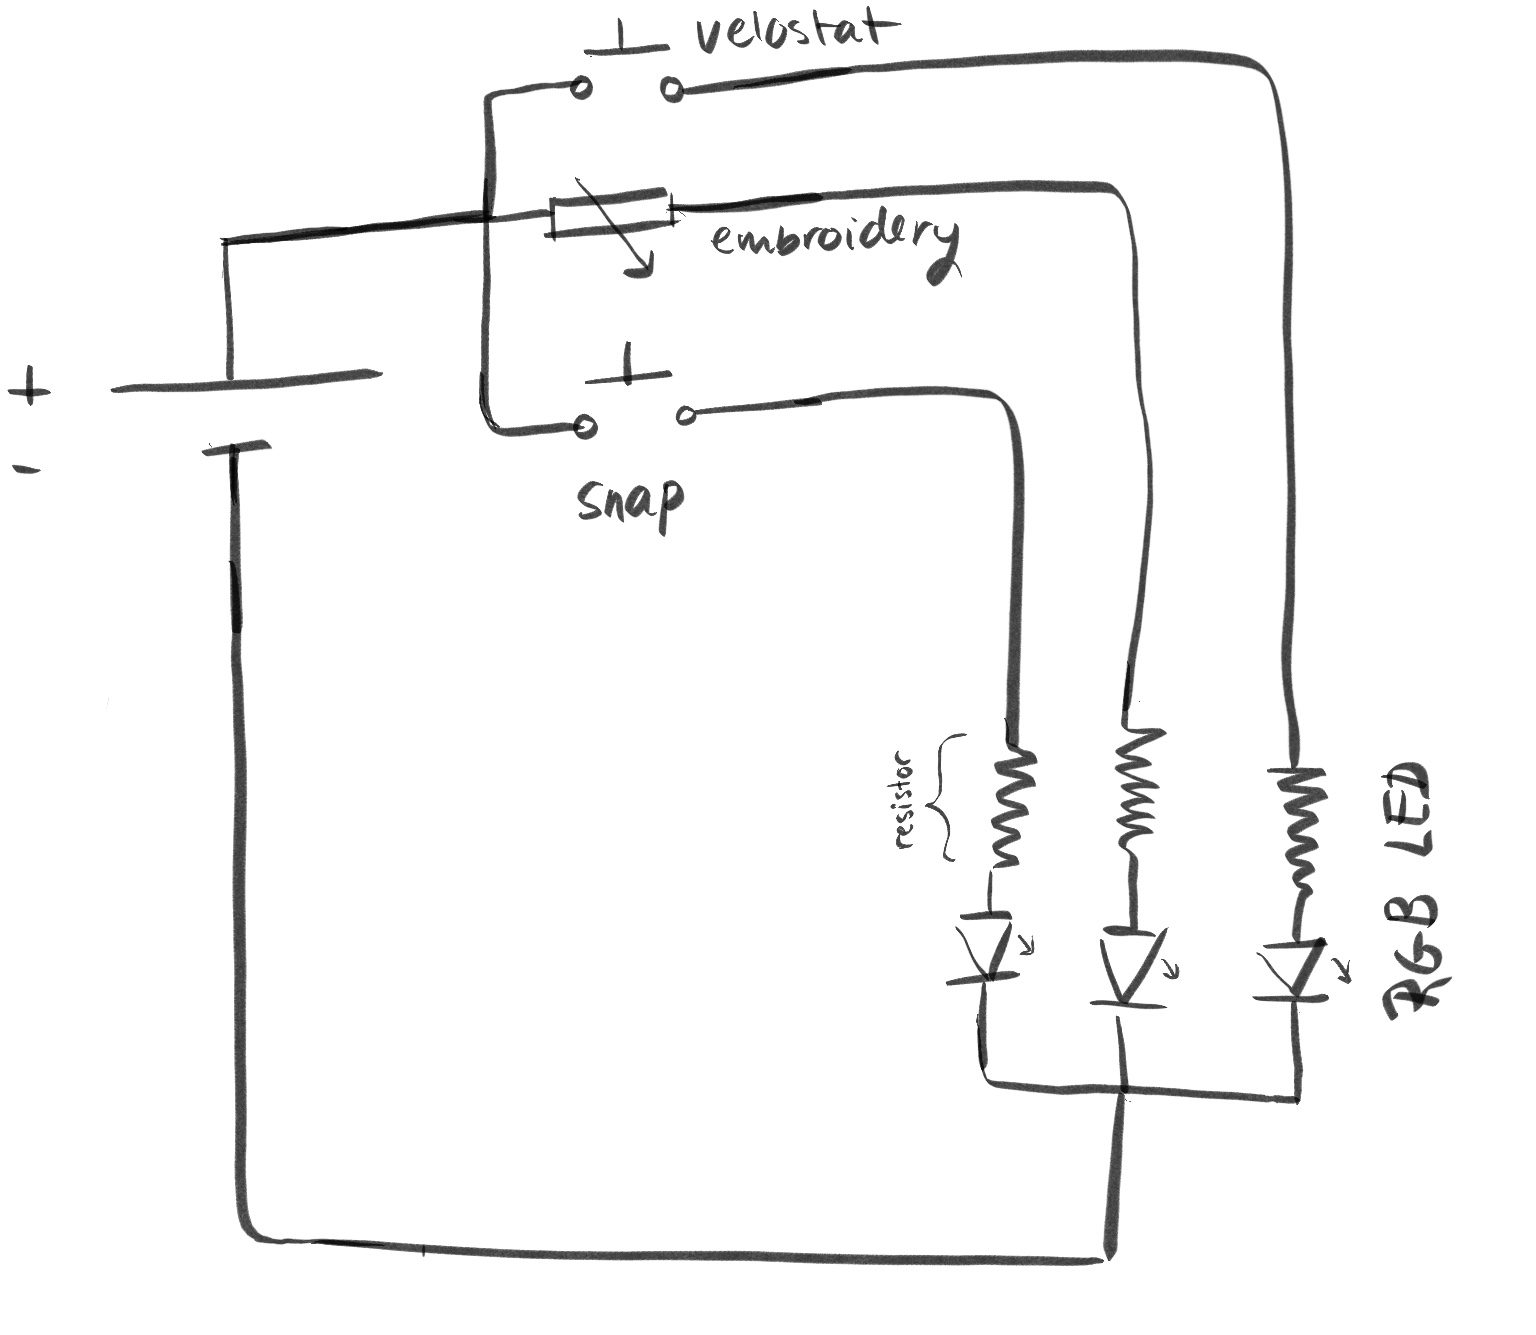
After I have decided which switches and sensors I am going to do, I try to figure out have my circuit will work. This first sketch of the circuit will perfectly work with a battery.
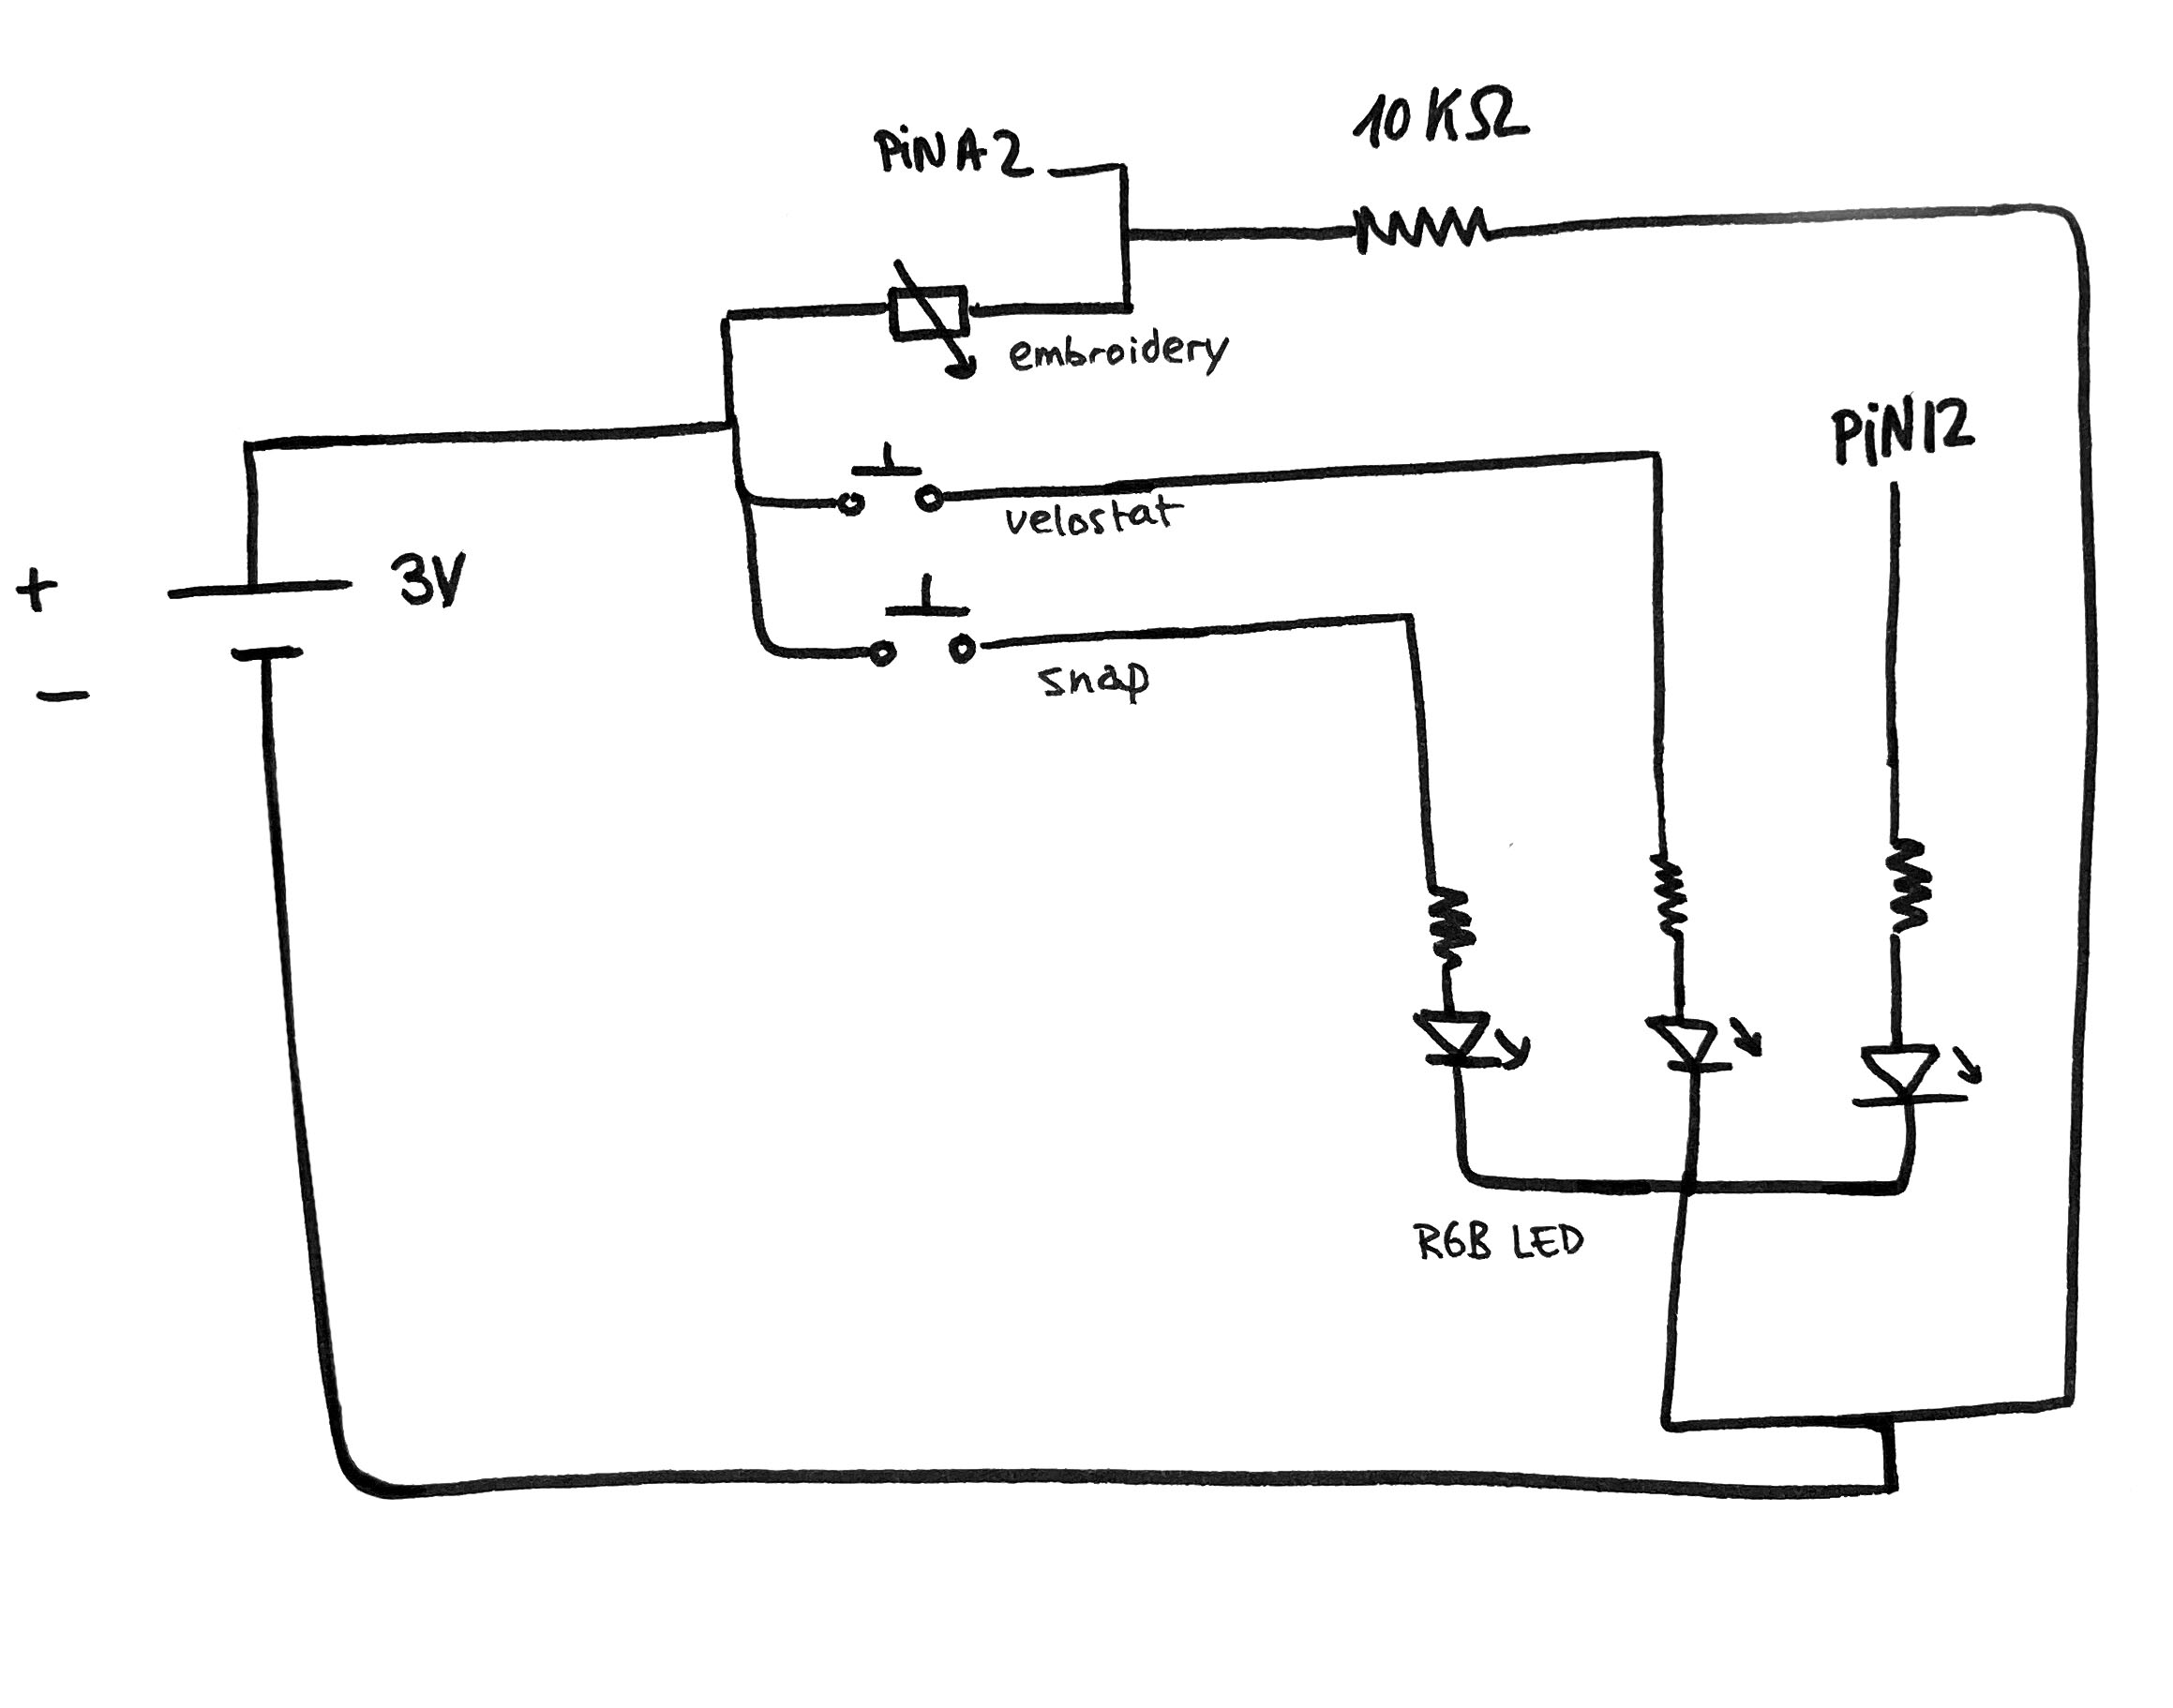
However, I need my circuit to ajust the parameters in the Arduino so I have to change some parts to be able to connect in the software and study the values and change them, I need to add PINS!
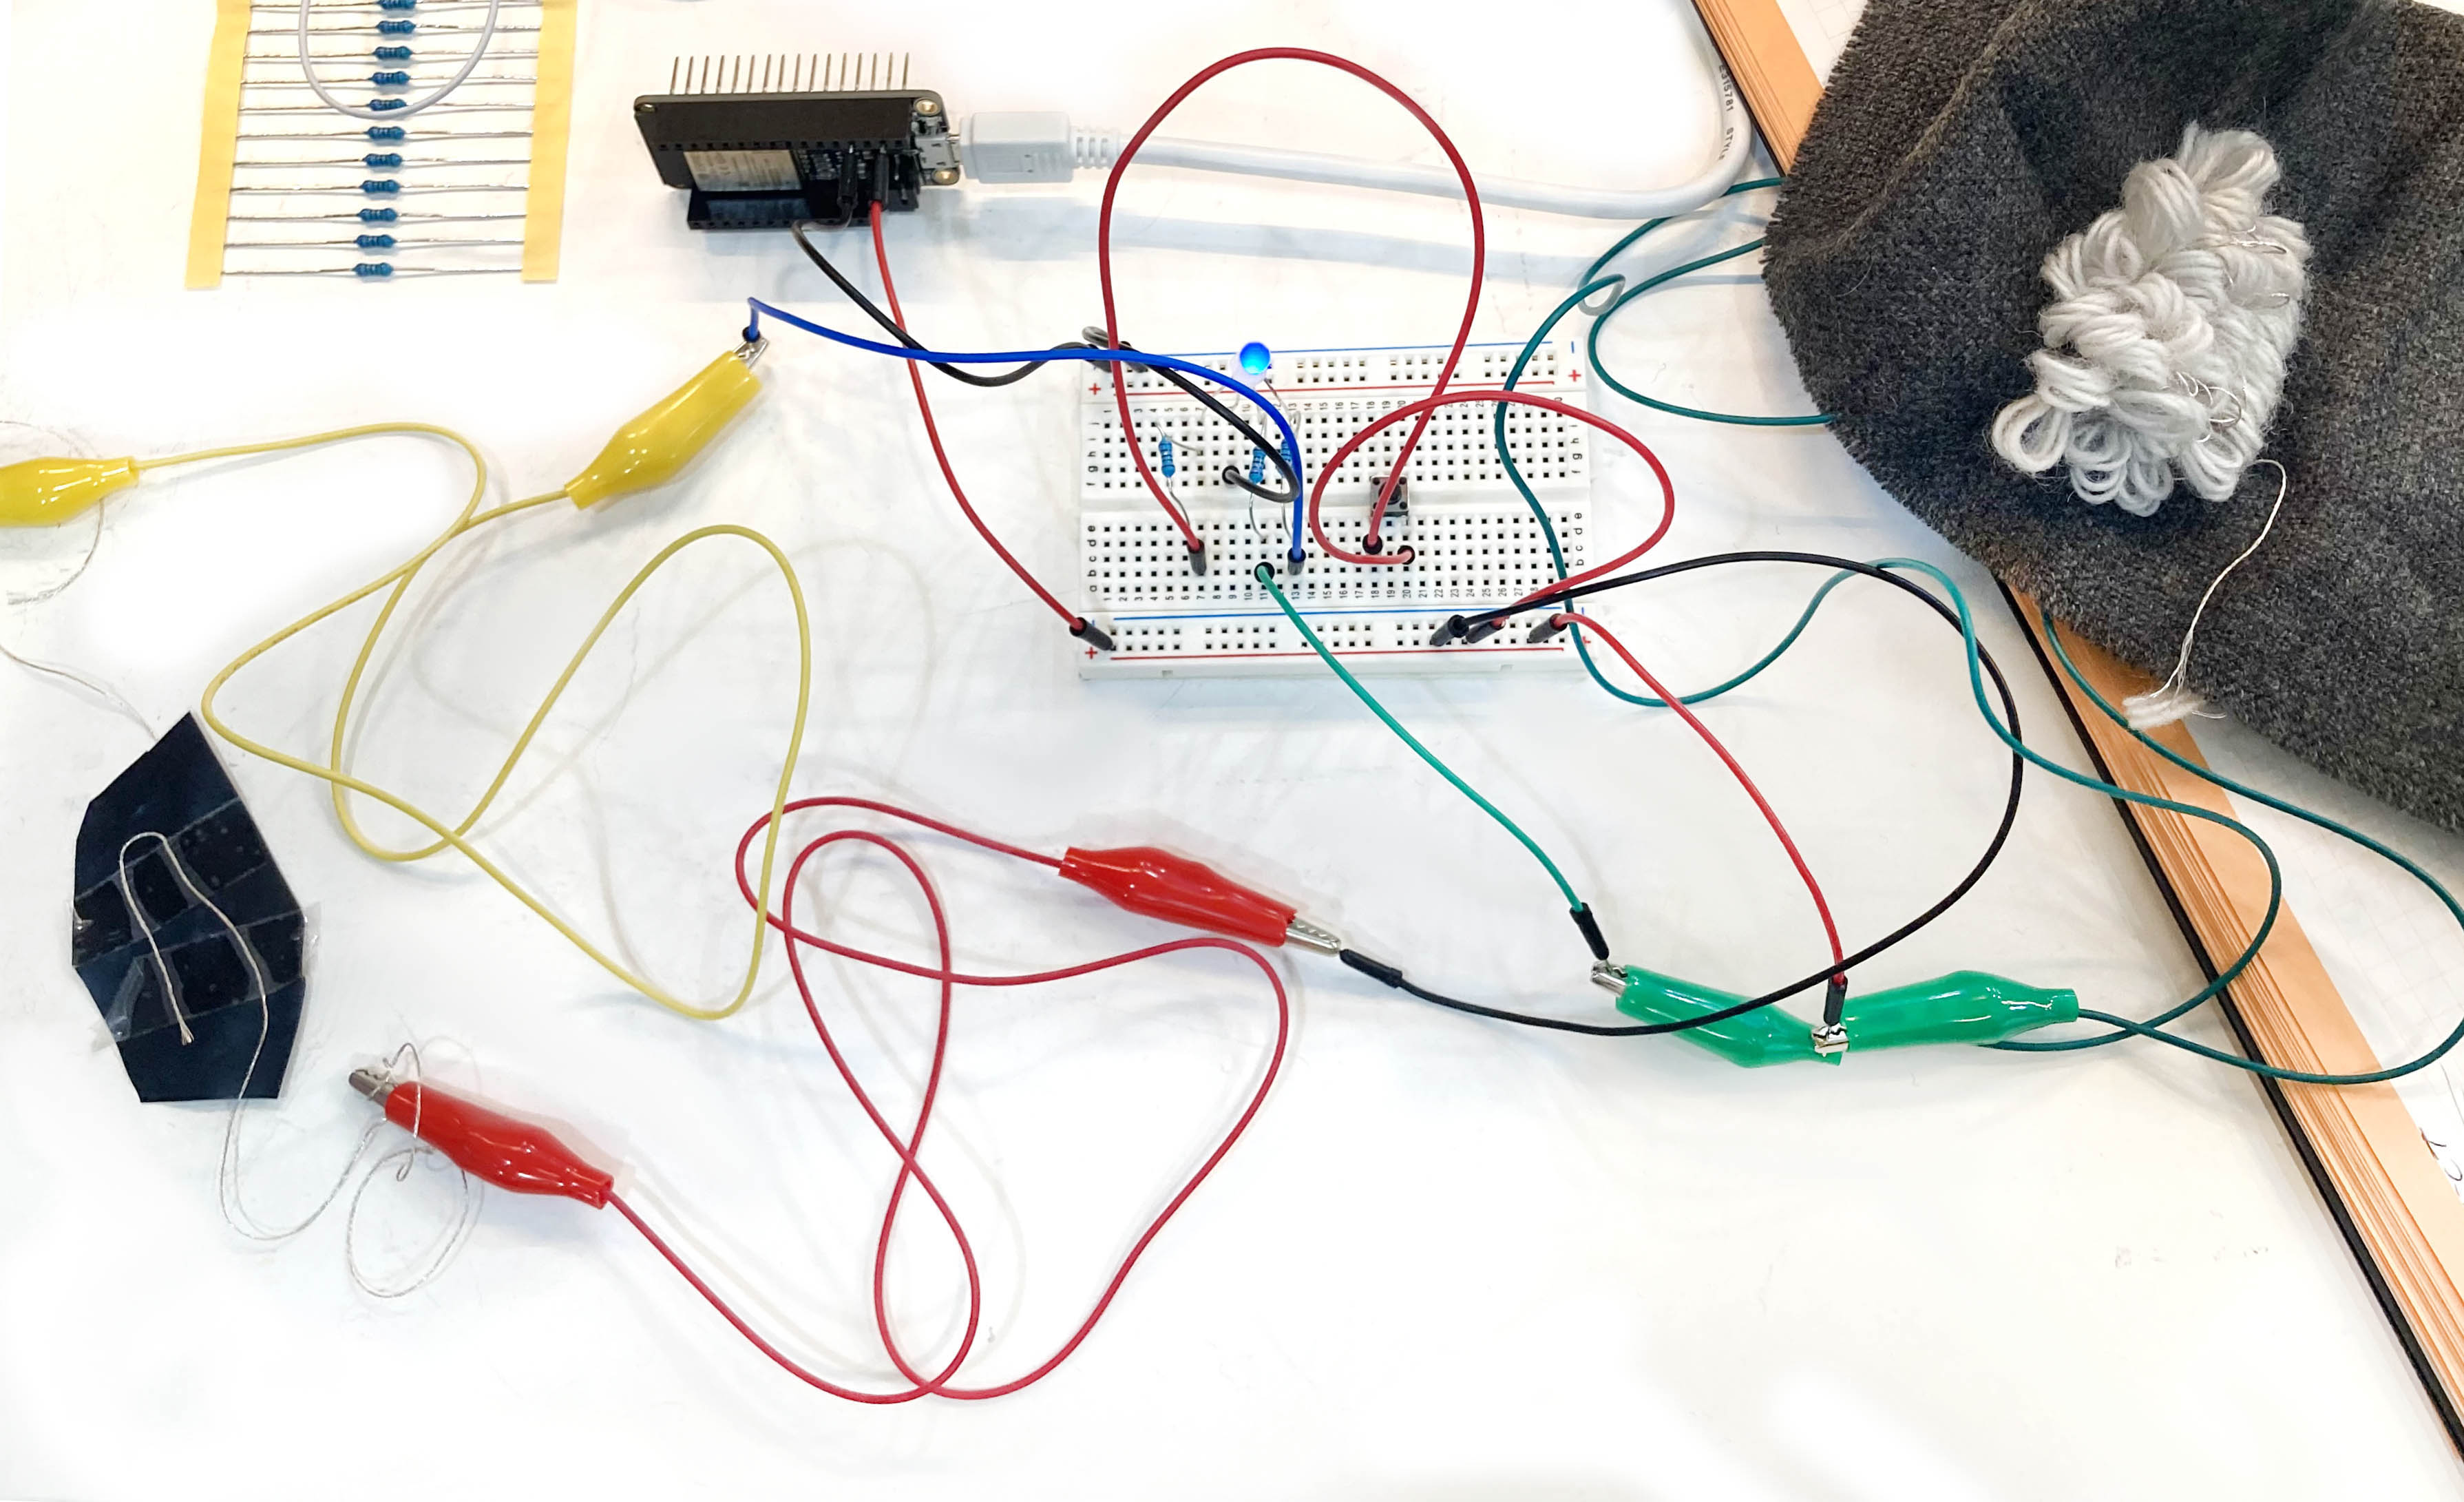
Before I start with the final sample I make a prototype of the circuit to make sure that everything it's working.
How my prototype will work.
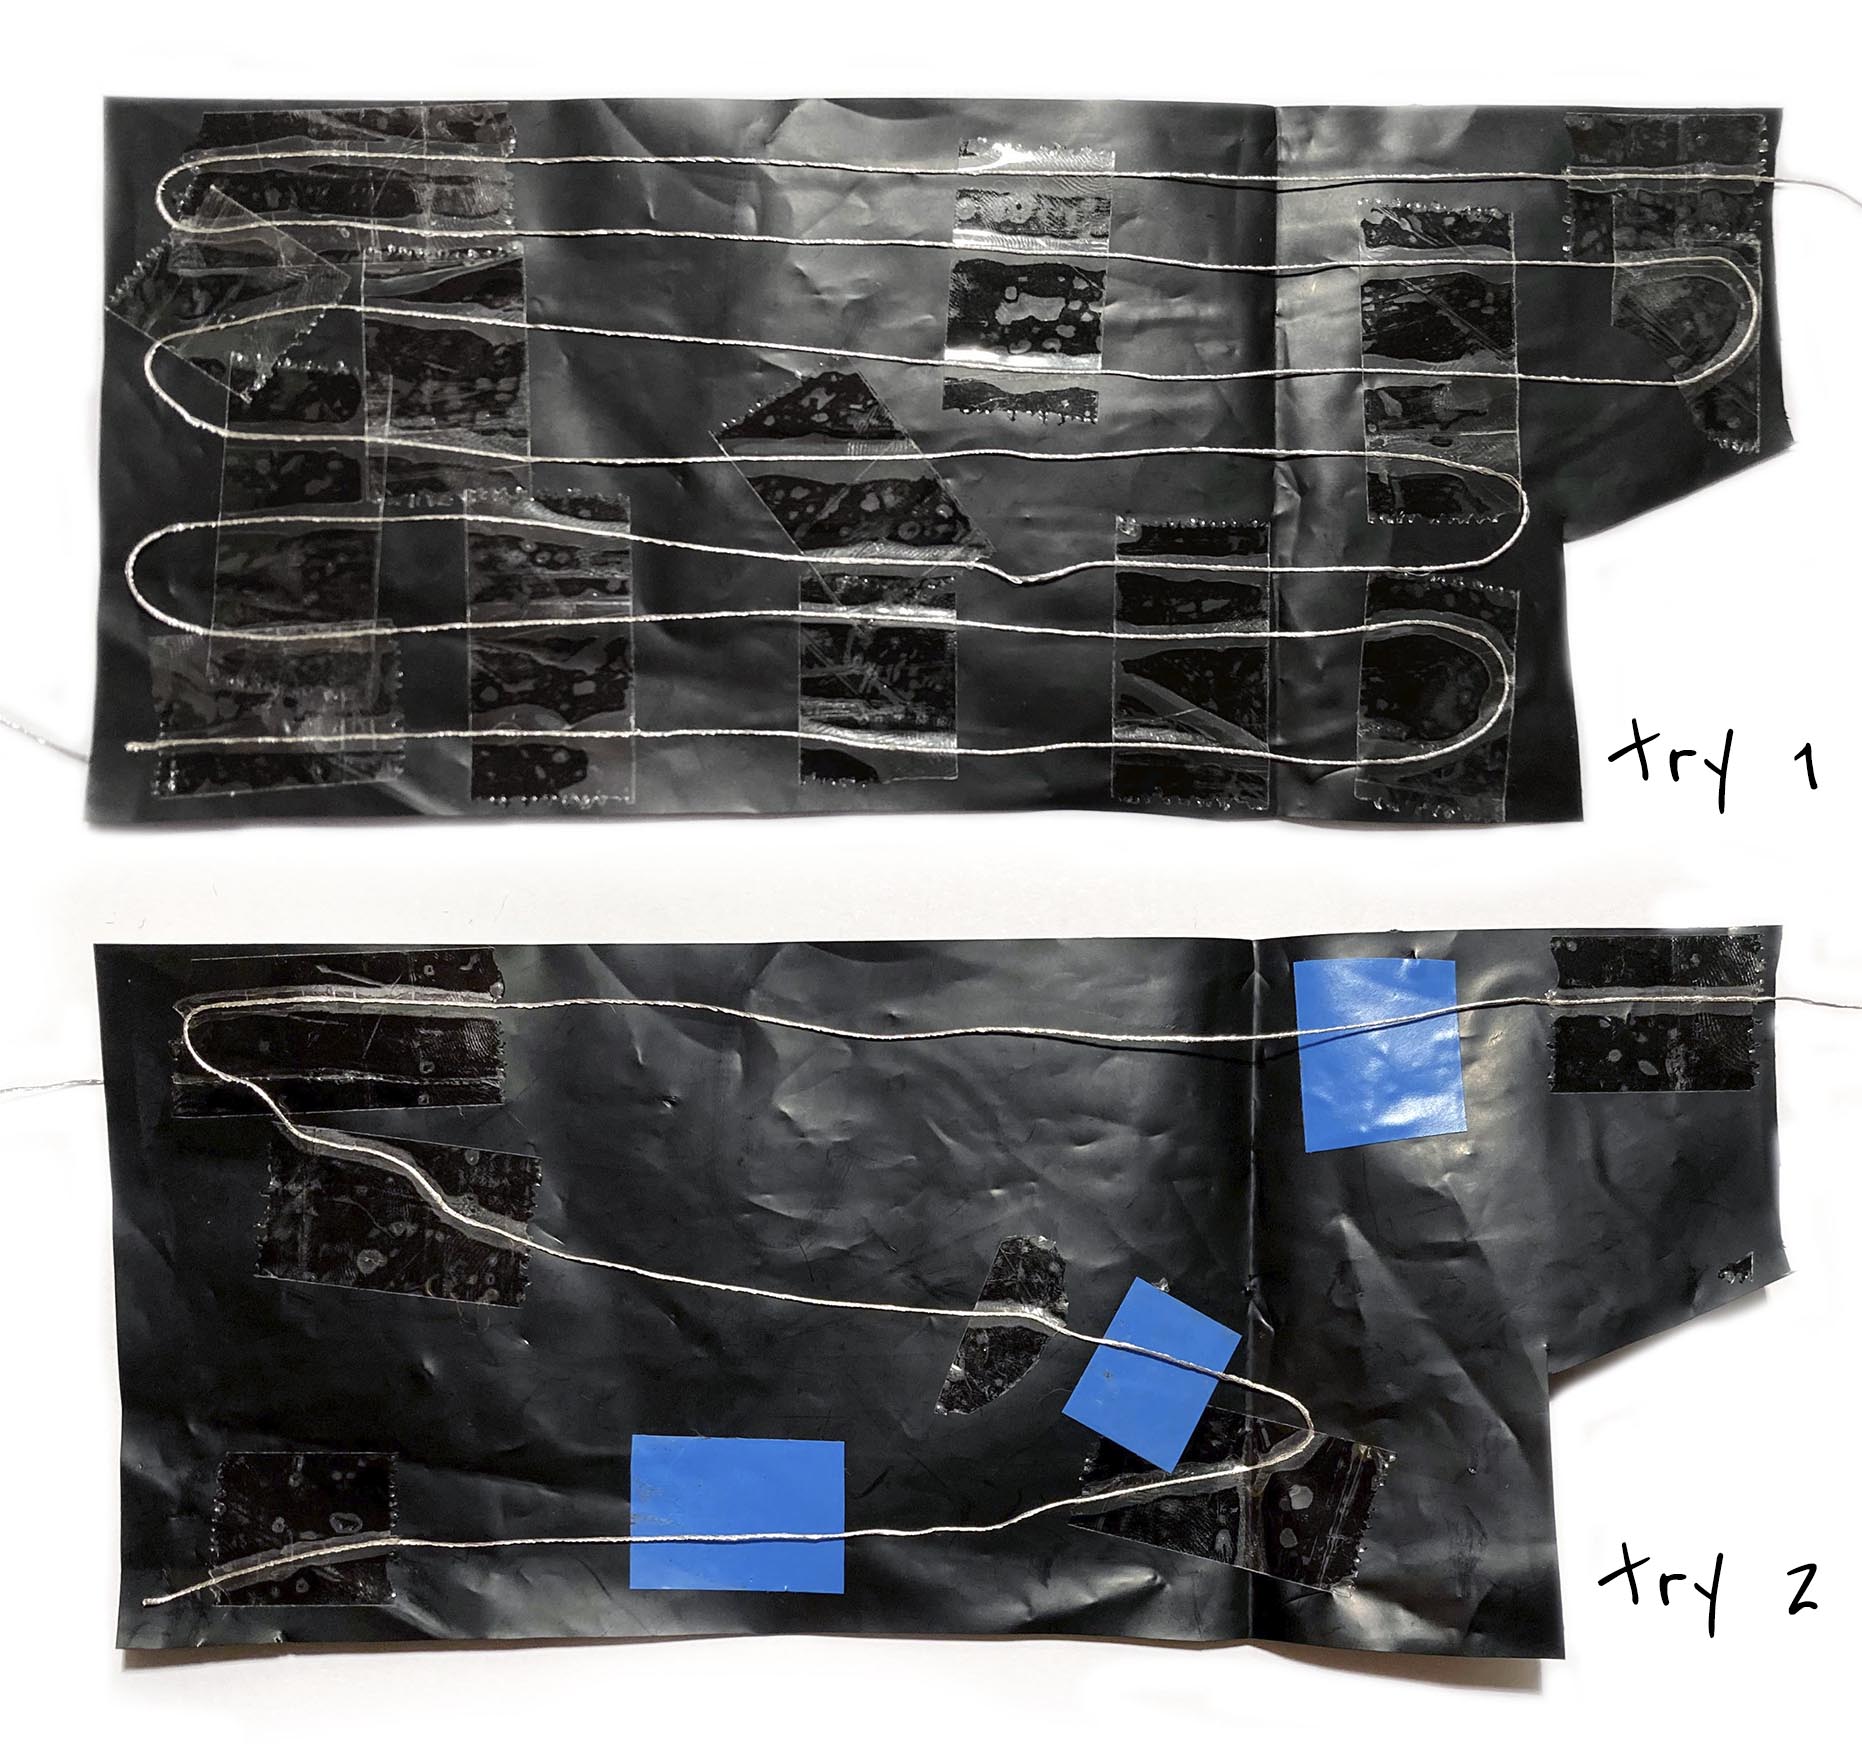
When I was doing the final sample the Velostat size was pretty different compared to the prototype so I need to readjust how much thread it was necessary to have contact. It takes me some time to understand how it works the best.

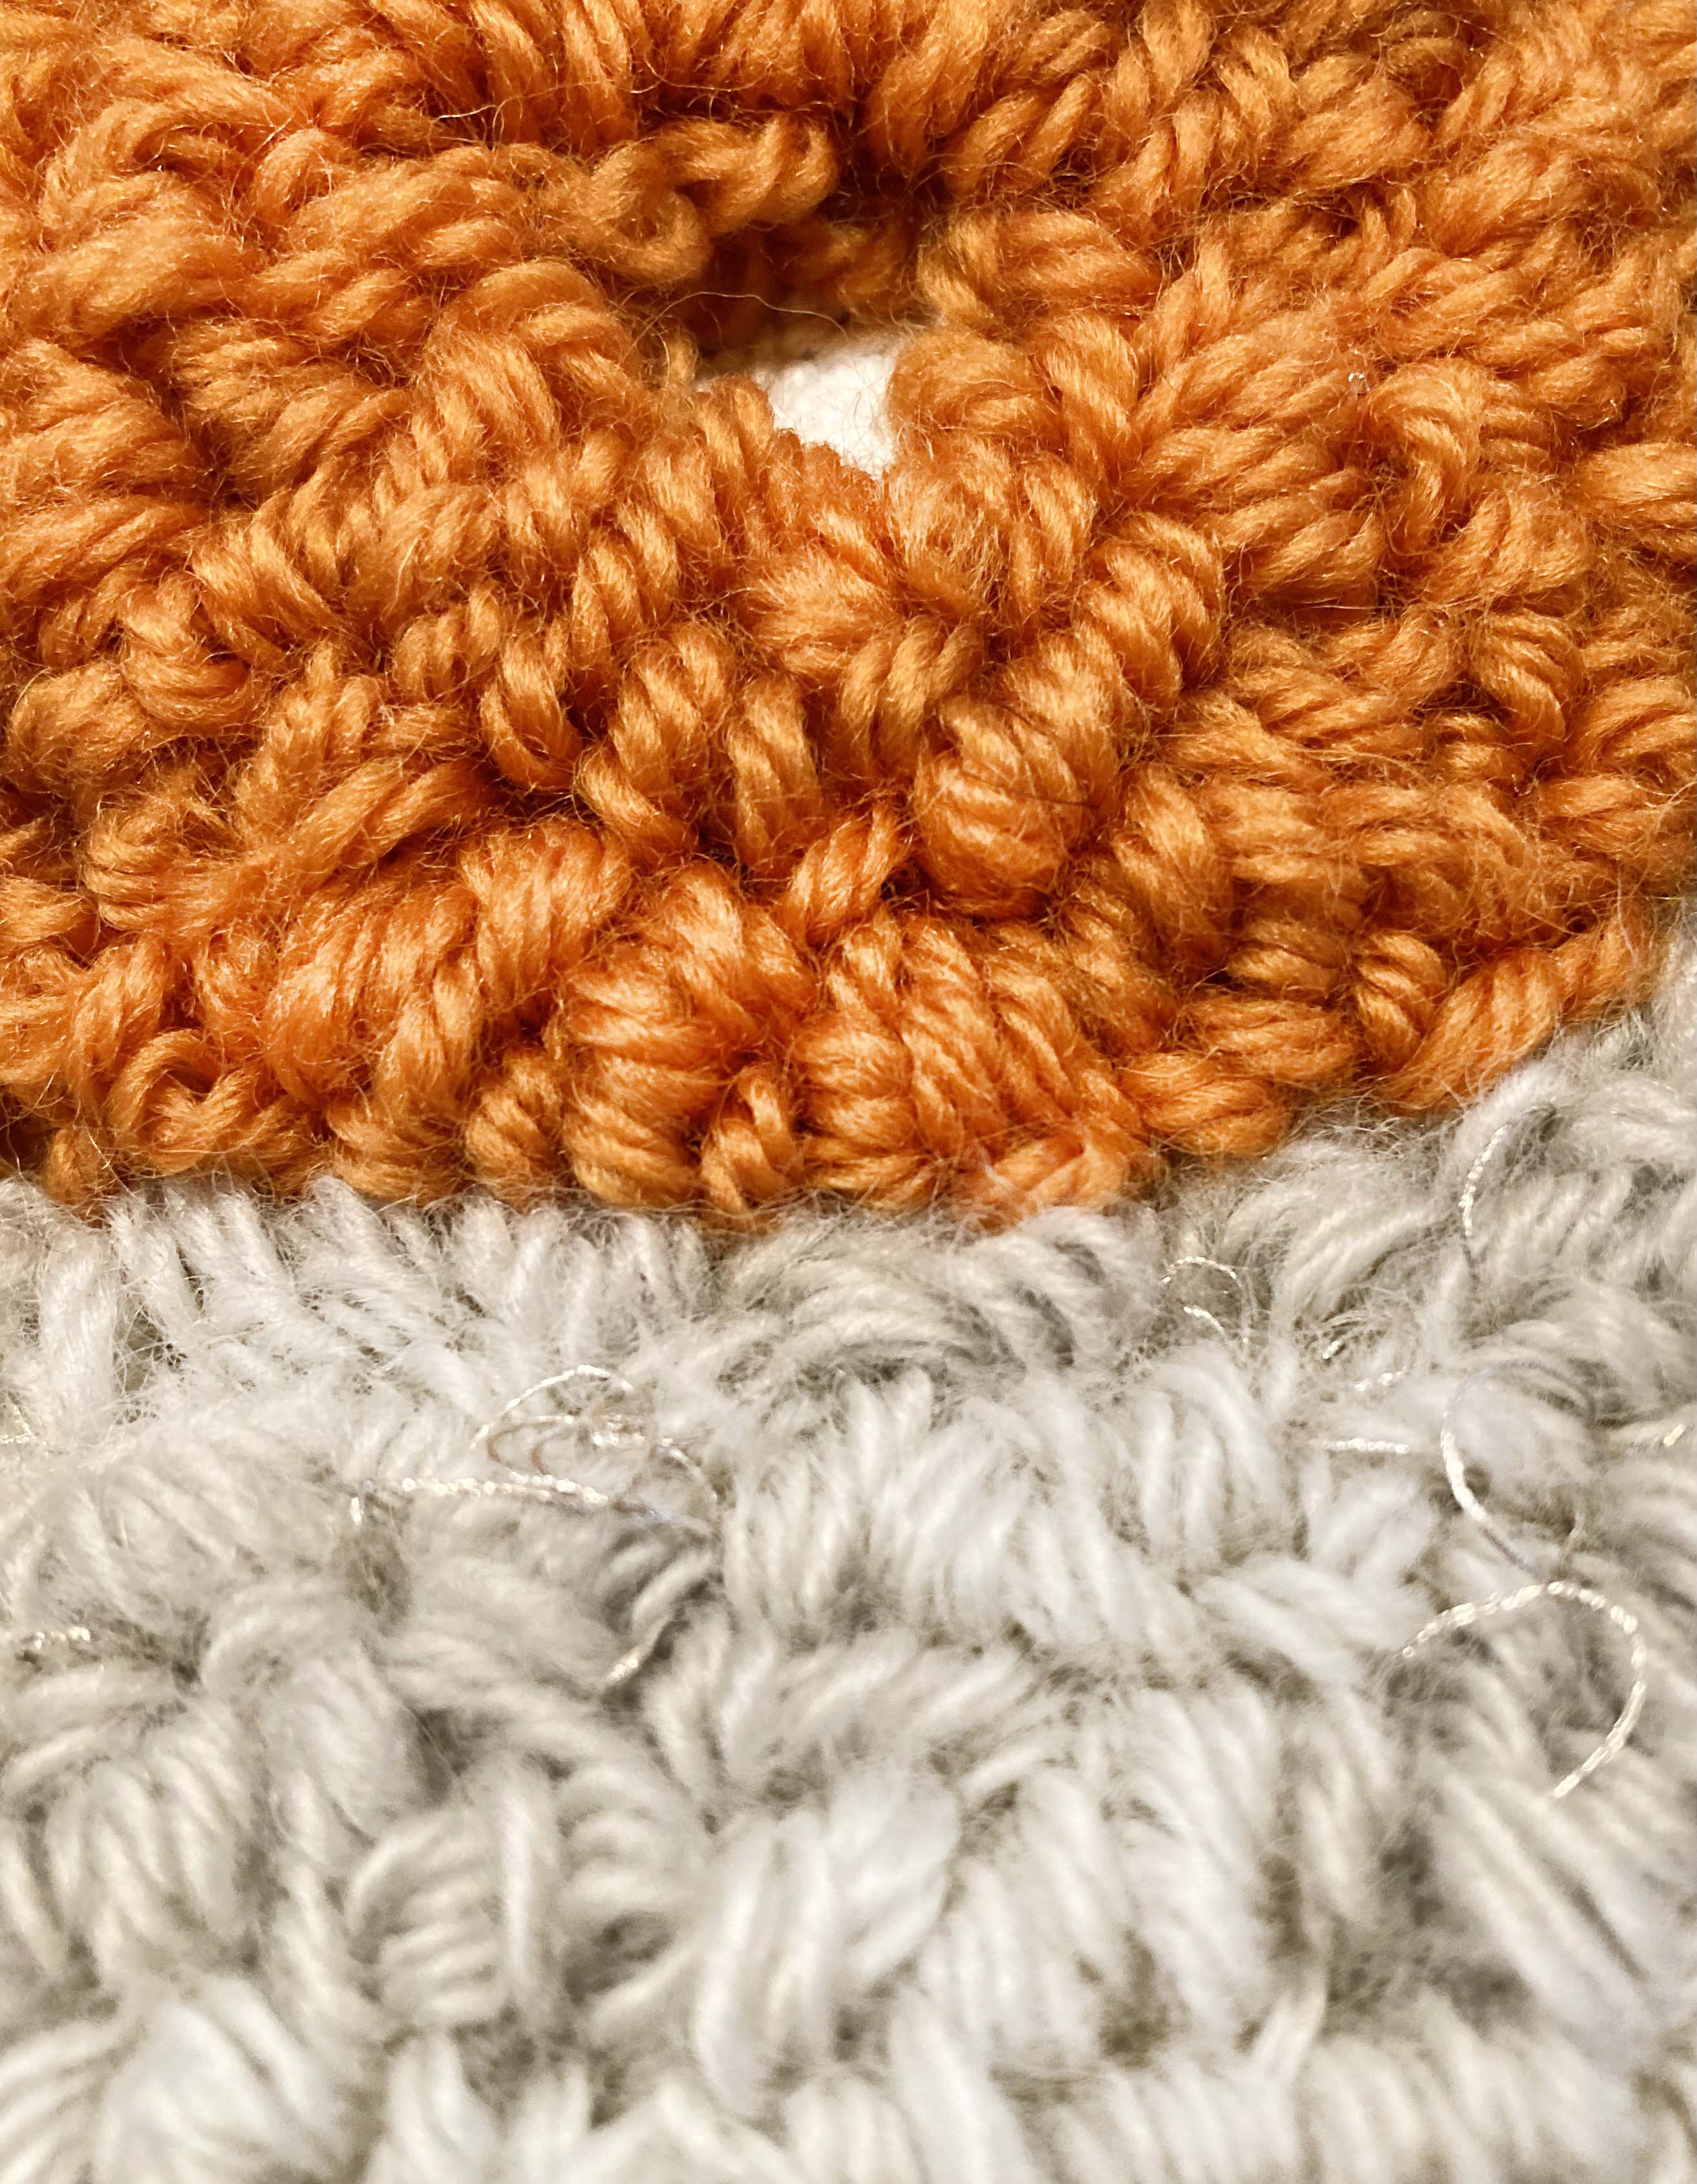
The punch needle will be my partner for a while to create the stuffed toy.

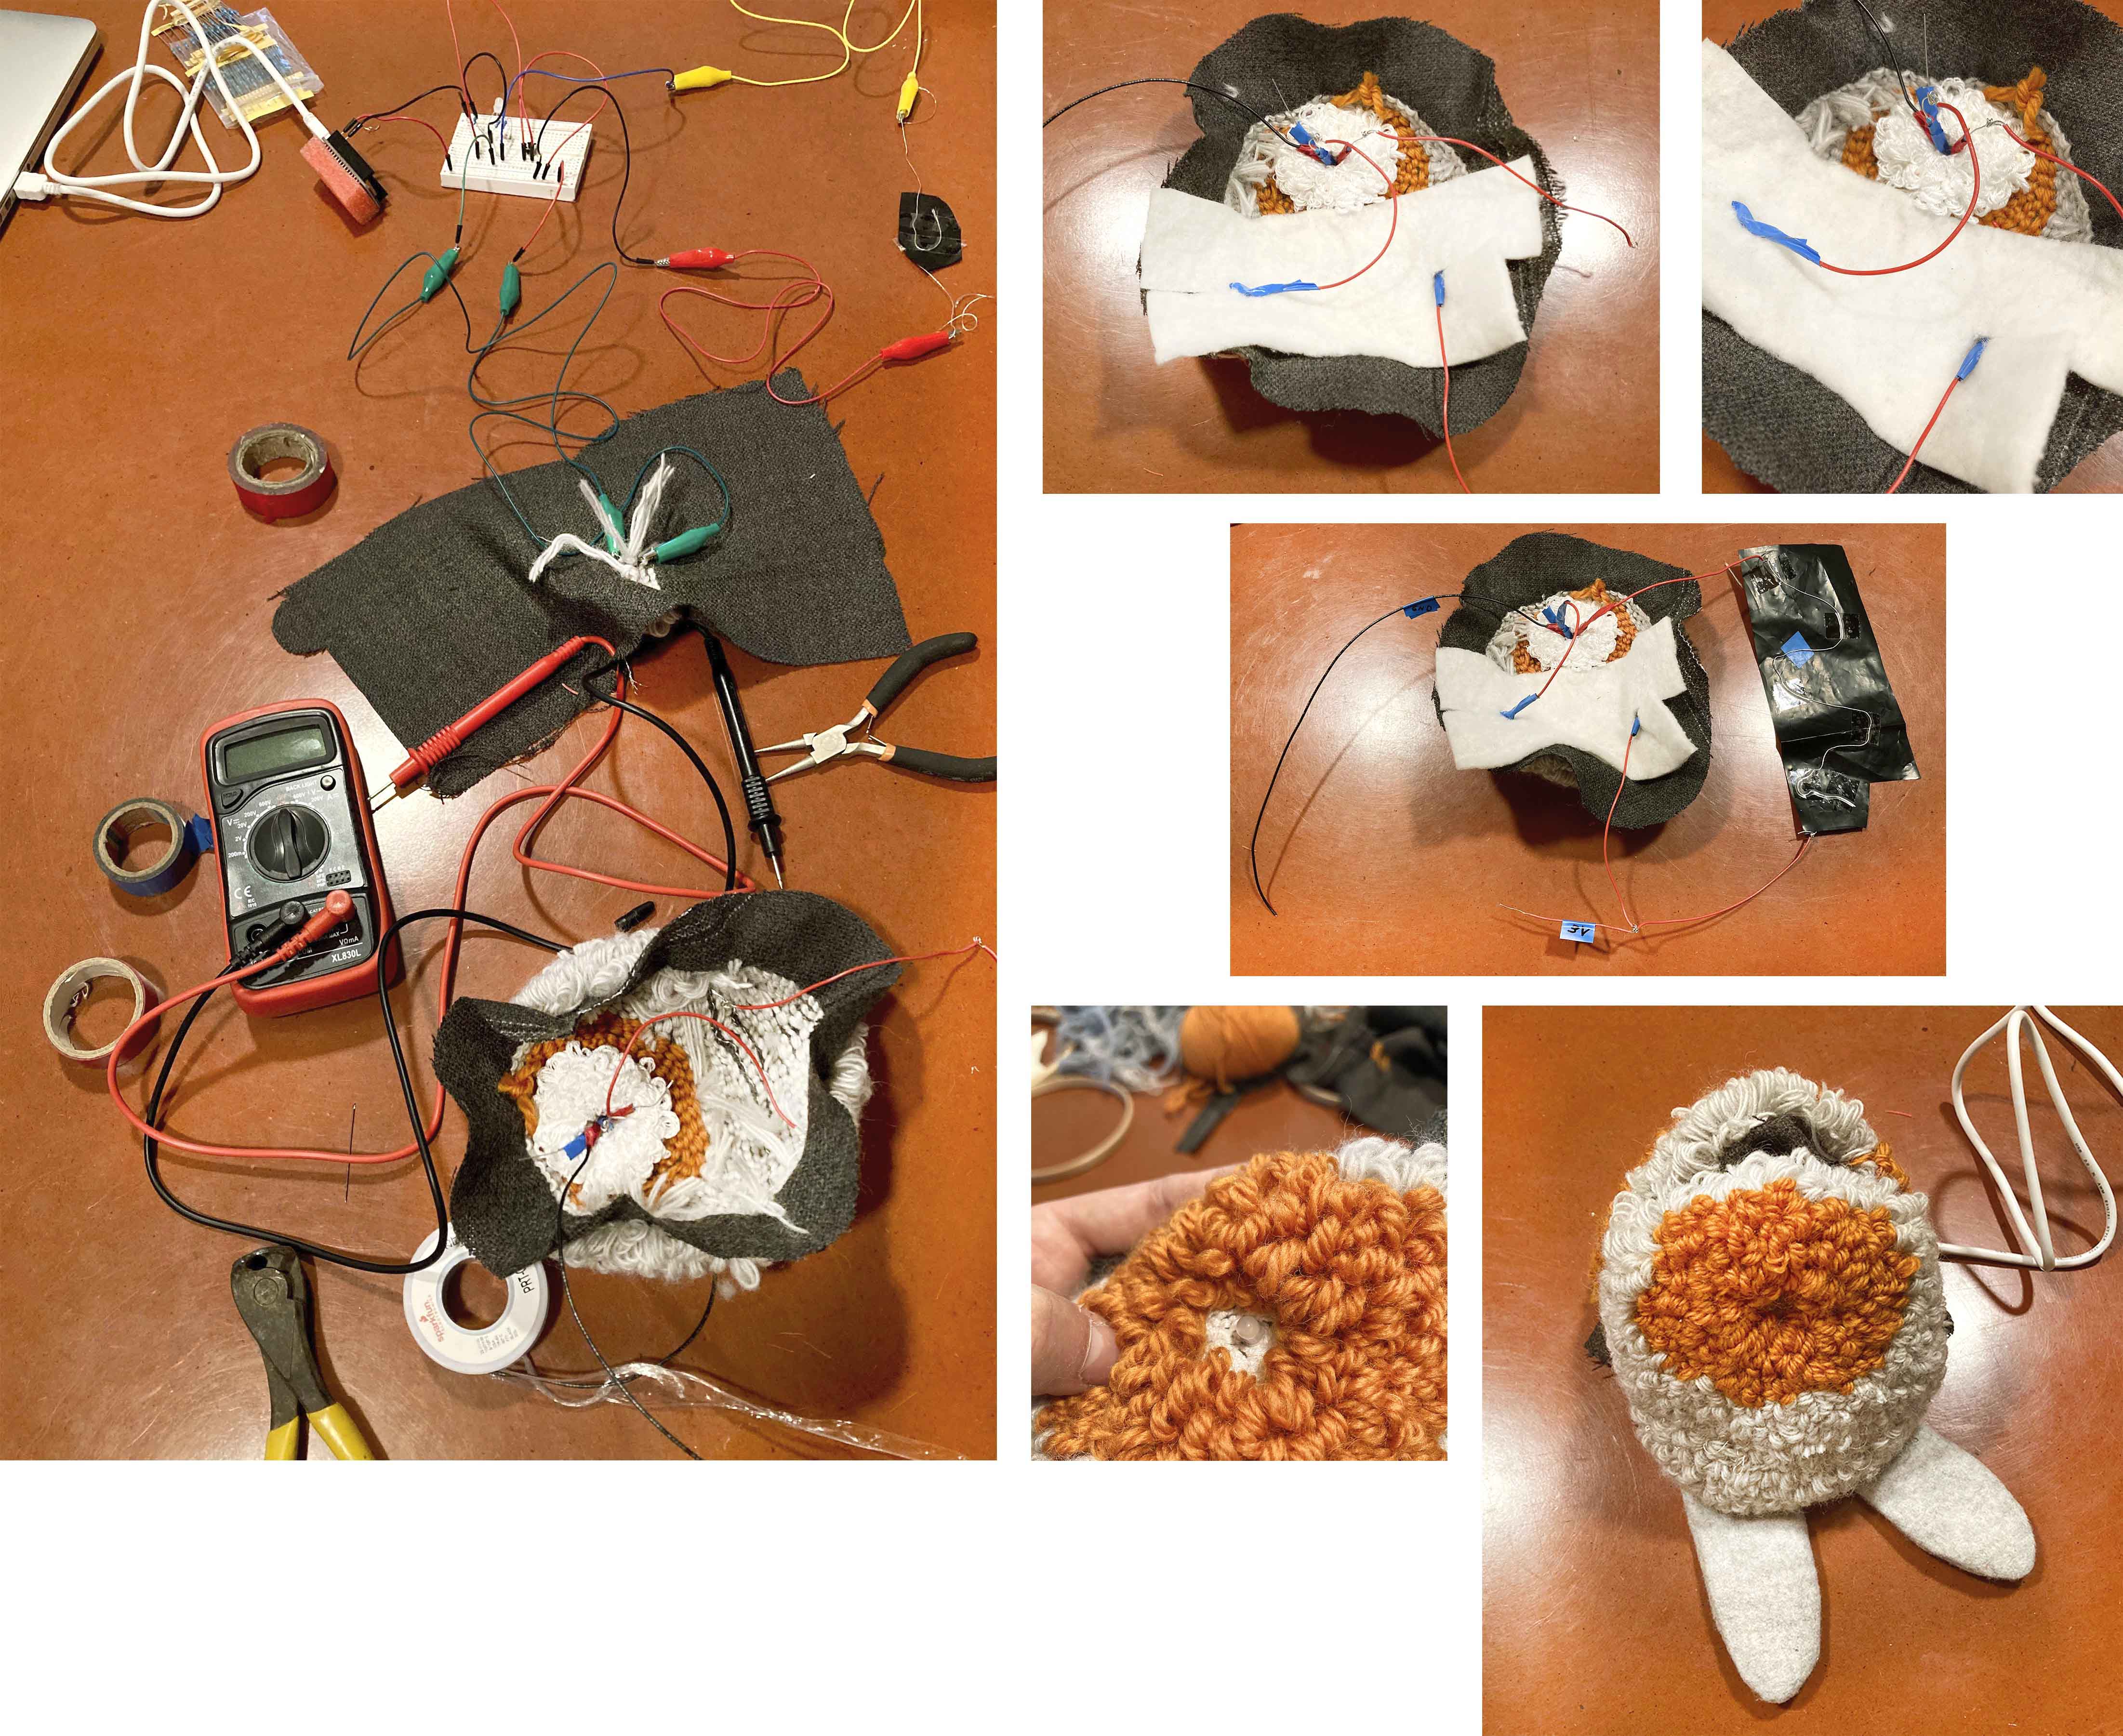
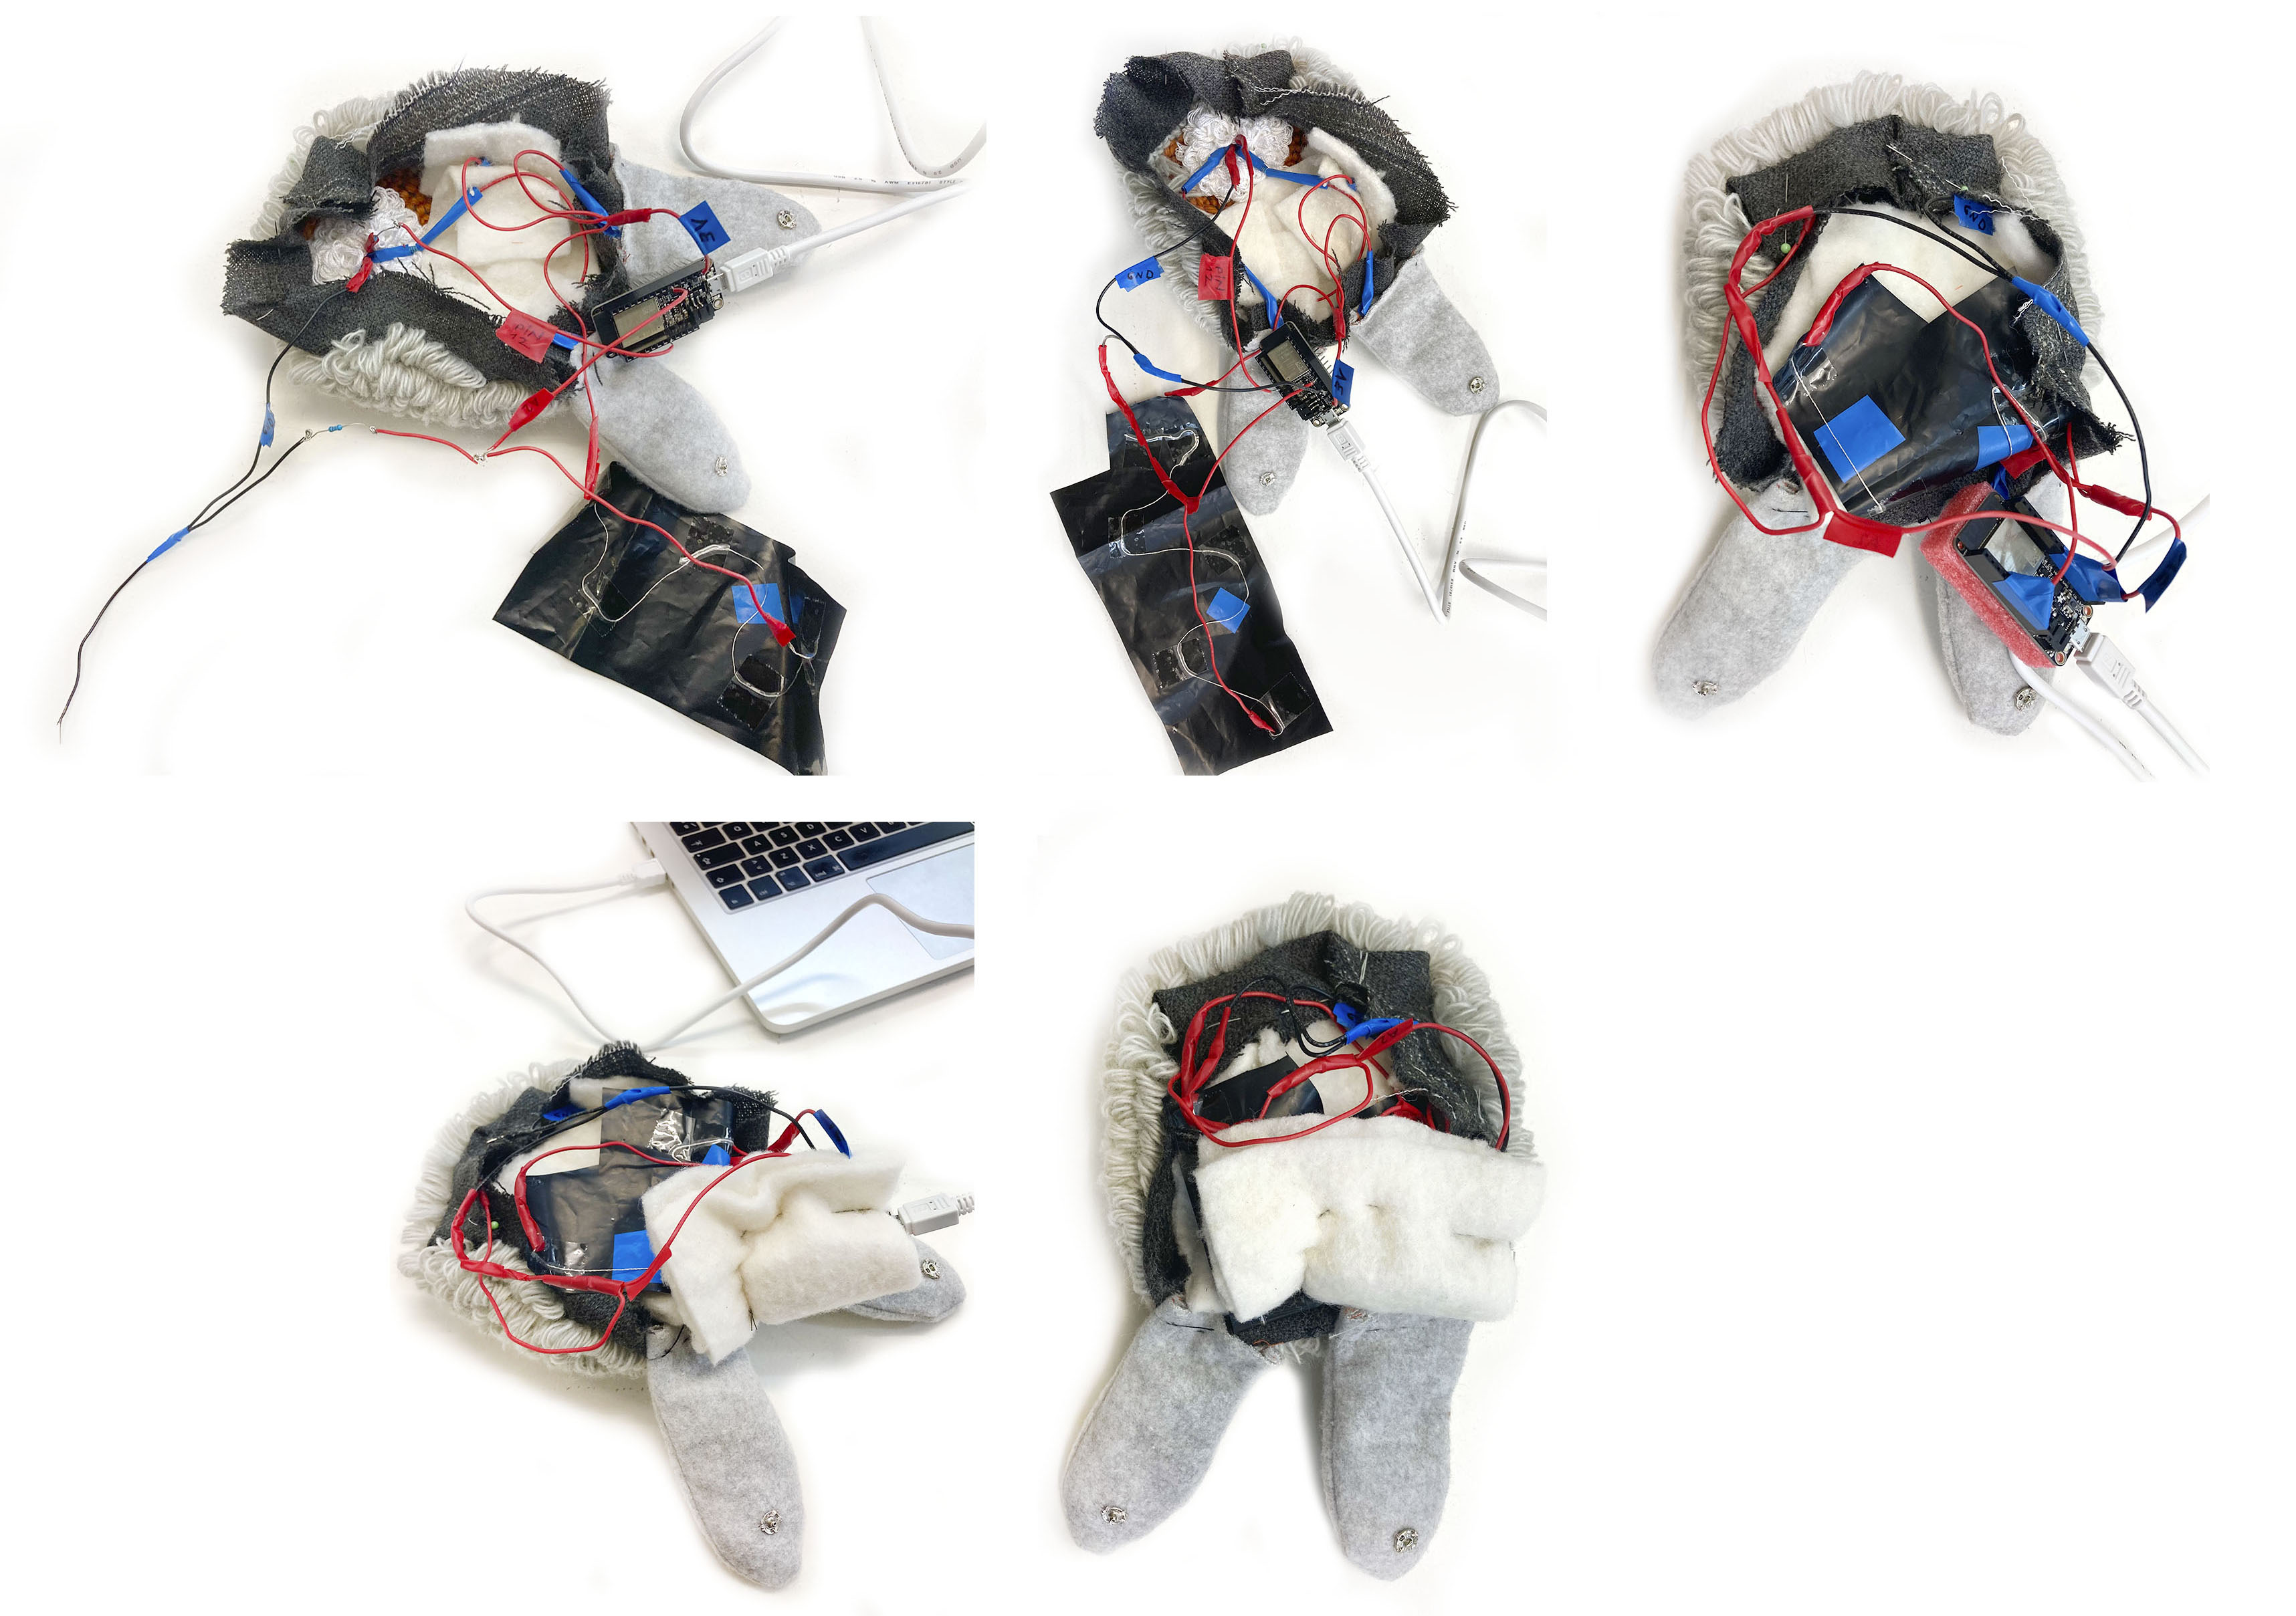
I have to make strong connections to make sure that when I join the toy there is not a short circuit and make sure to isolate them adequately. Additionally, I add a fabric felt to isolate the various layers and the Adafruit Feather ESP 32.
Arduino Code
For the Velostat sensor, I have some problems because when I have all the plush sewed and closed the LED was ON although I wasn't pressing it. So I have to change the values in Arduino to get the ON when I press the toy and OFF when no one interacts with it. Also, change the brighter of the LED depending on the strength press you do.
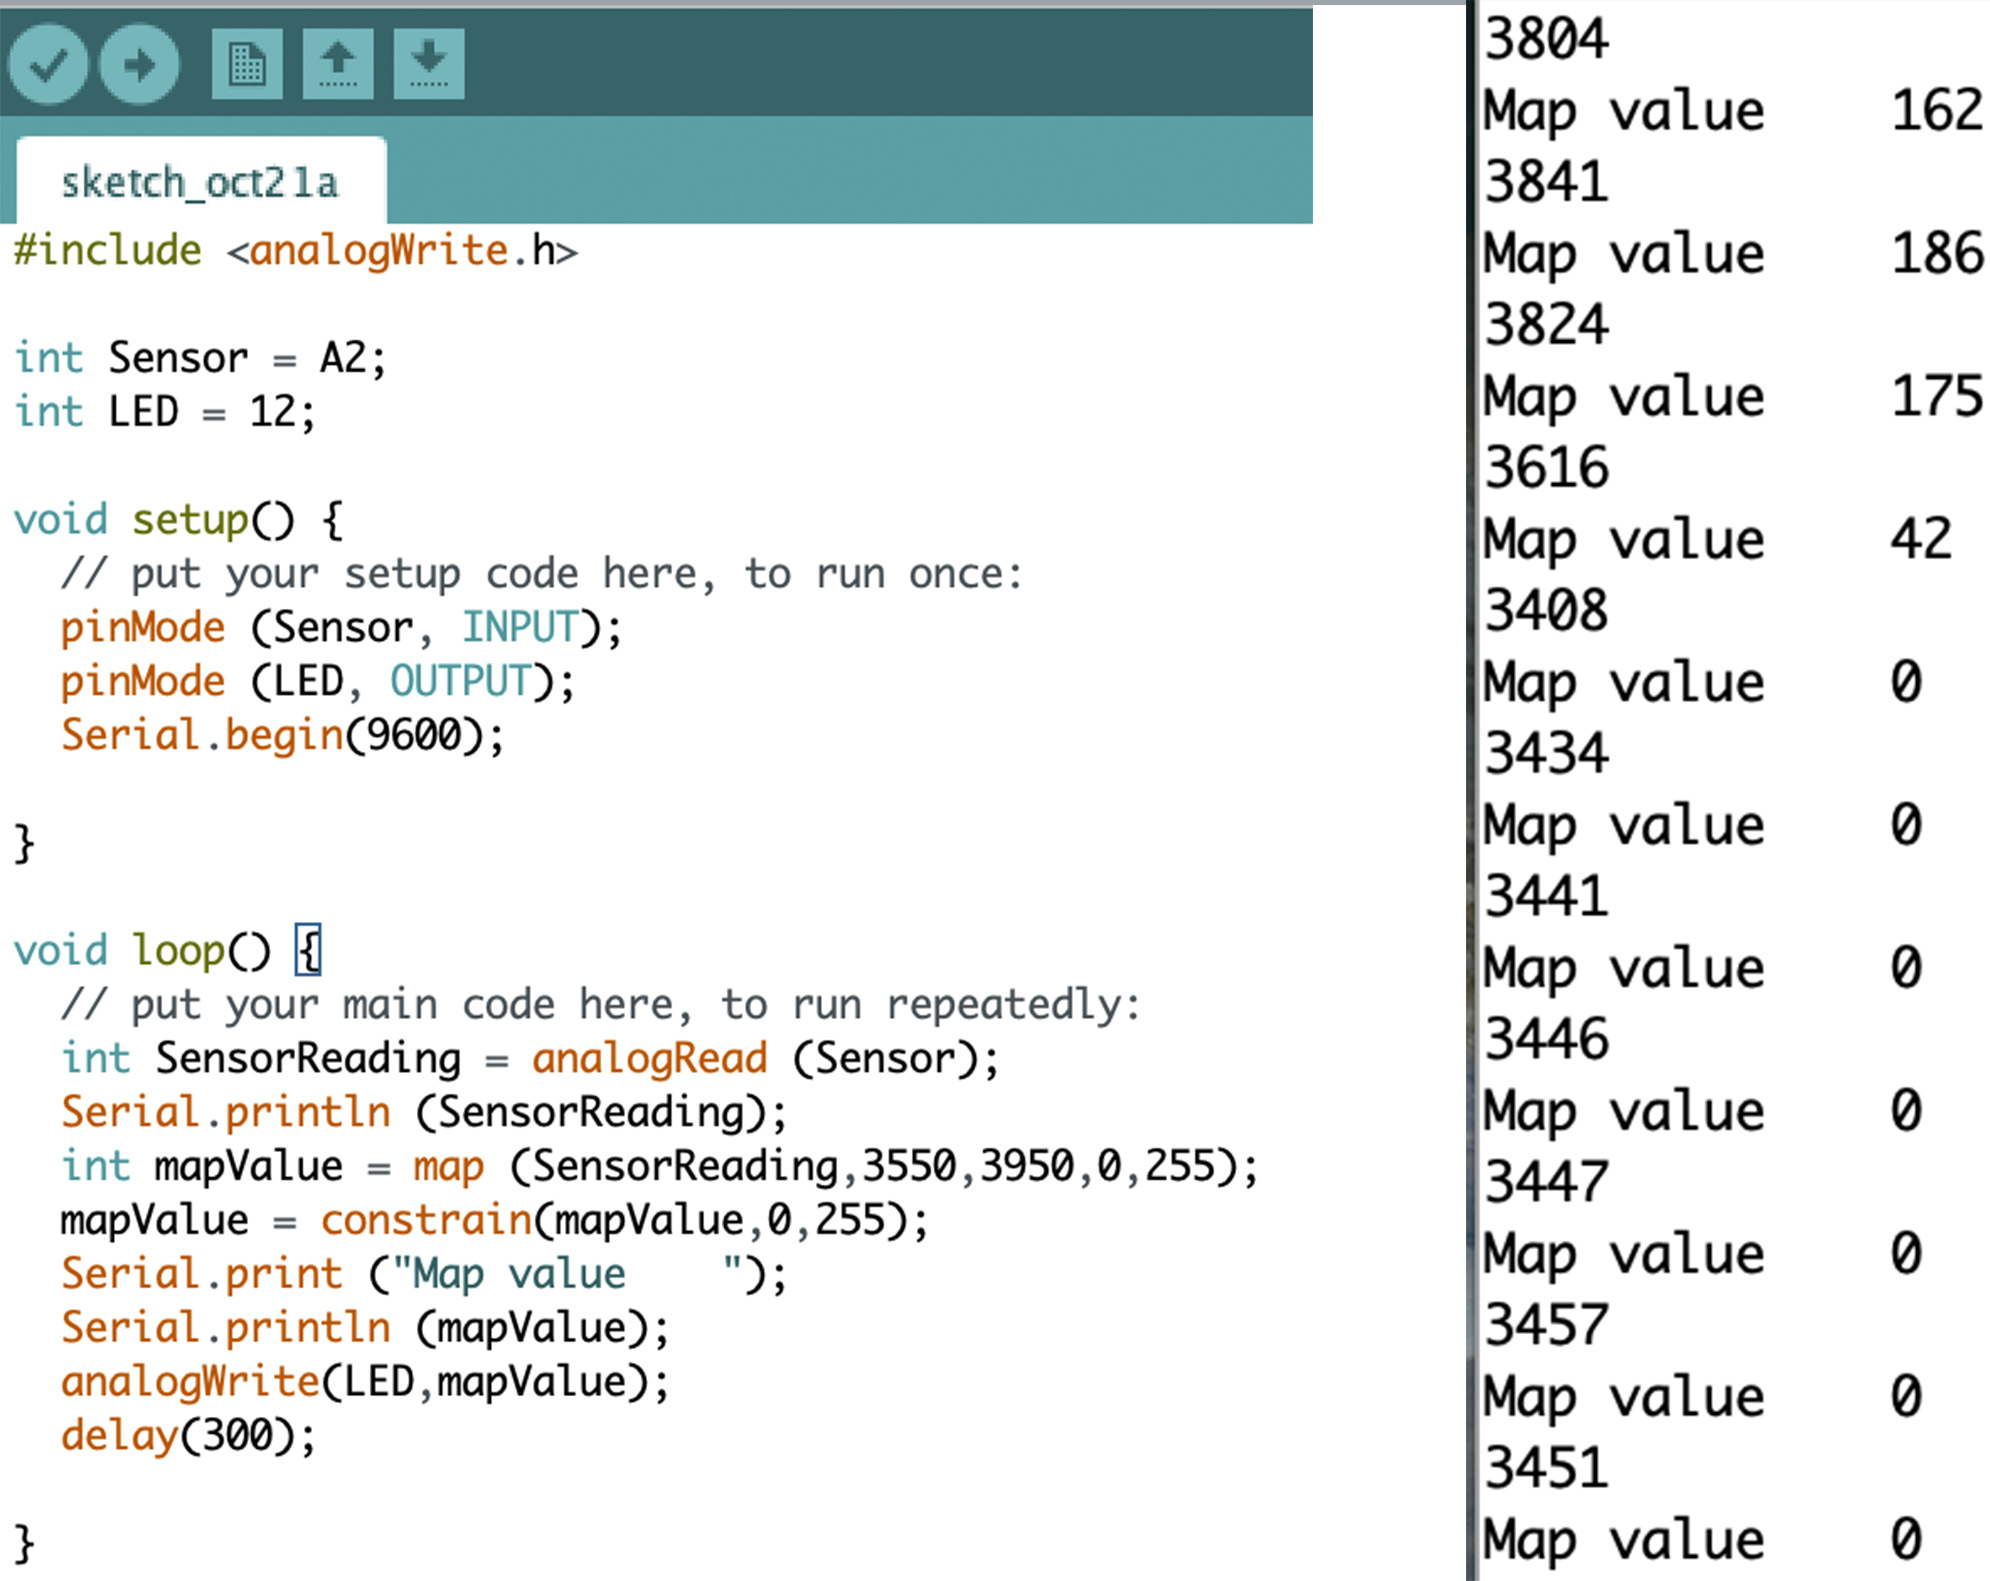
#include <analogWrite.h>

int Sensor = A2;
int LED = 12;

void setup() {
  // put your setup code here, to run once:
  pinMode (Sensor, INPUT);
  pinMode (LED, OUTPUT);
  Serial.begin(9600);

}

void loop() {
  // put your main code here, to run repeatedly:
  int SensorReading = analogRead (Sensor);
  Serial.println (SensorReading);
  int mapValue = map (SensorReading,3550,3950,0,255);
  mapValue = constrain(mapValue,0,255);
  Serial.print ("Map value    ");
  Serial.println (mapValue);
  analogWrite(LED,mapValue);
  delay(300);

}
Result
In the following video, you could see the 3 functions of the fluffy toy.
Disseny de Emma
After starting the week being unsure about how capable I will be to develop an E-textile I finally could say that it's not that bad. I start finding some useful and interesting ways to apply it. It is fun to play with new tools and methods to create an interactive gadget. So satisfied with my improvement!
See you the following week⚡